WEEK 4 - Electronics Production
Checklist
- Make and test a microcontroller development board.
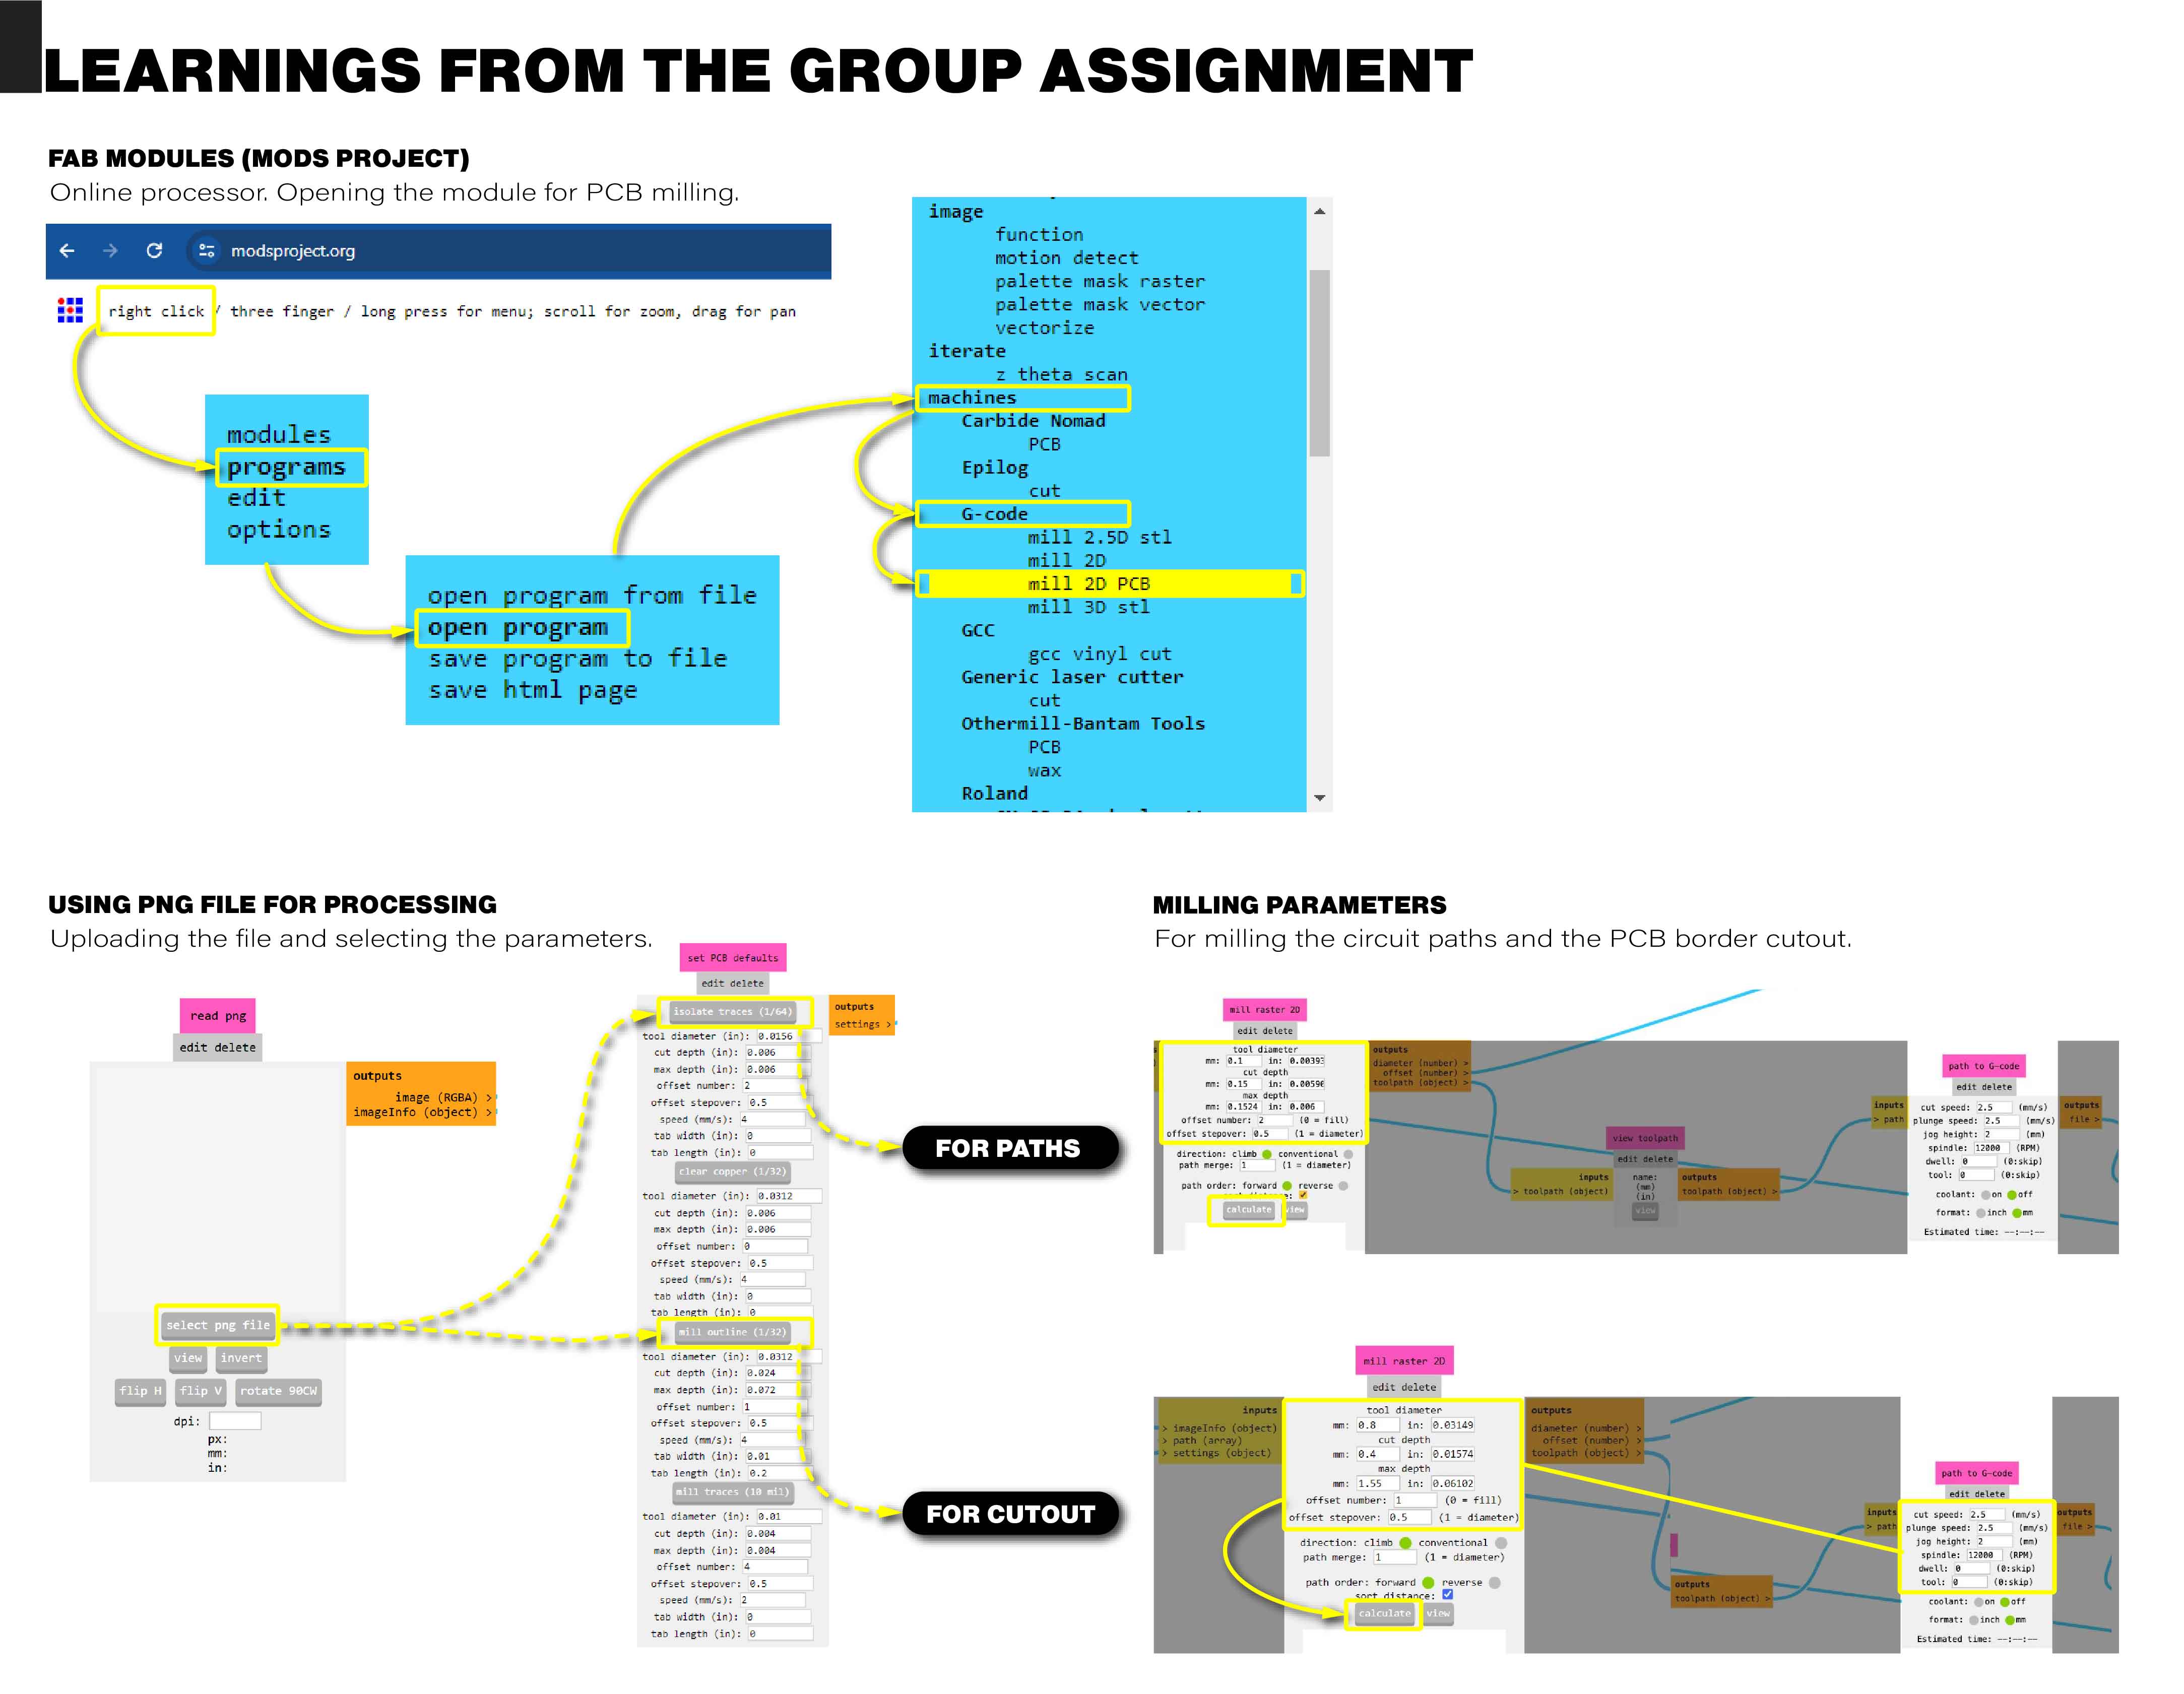
Learnings from the group assignment
The group work involved machining tests with different end mills, and we decided to each work with a different software to compare the advantages and disadvantages of working with open-source and paid software. I chose to work with Aspire because I had previous experience with the software, and also because it allows me to perform a pocket machining process, which greatly facilitates the soldering process of components on the PCB.
Machine parameters
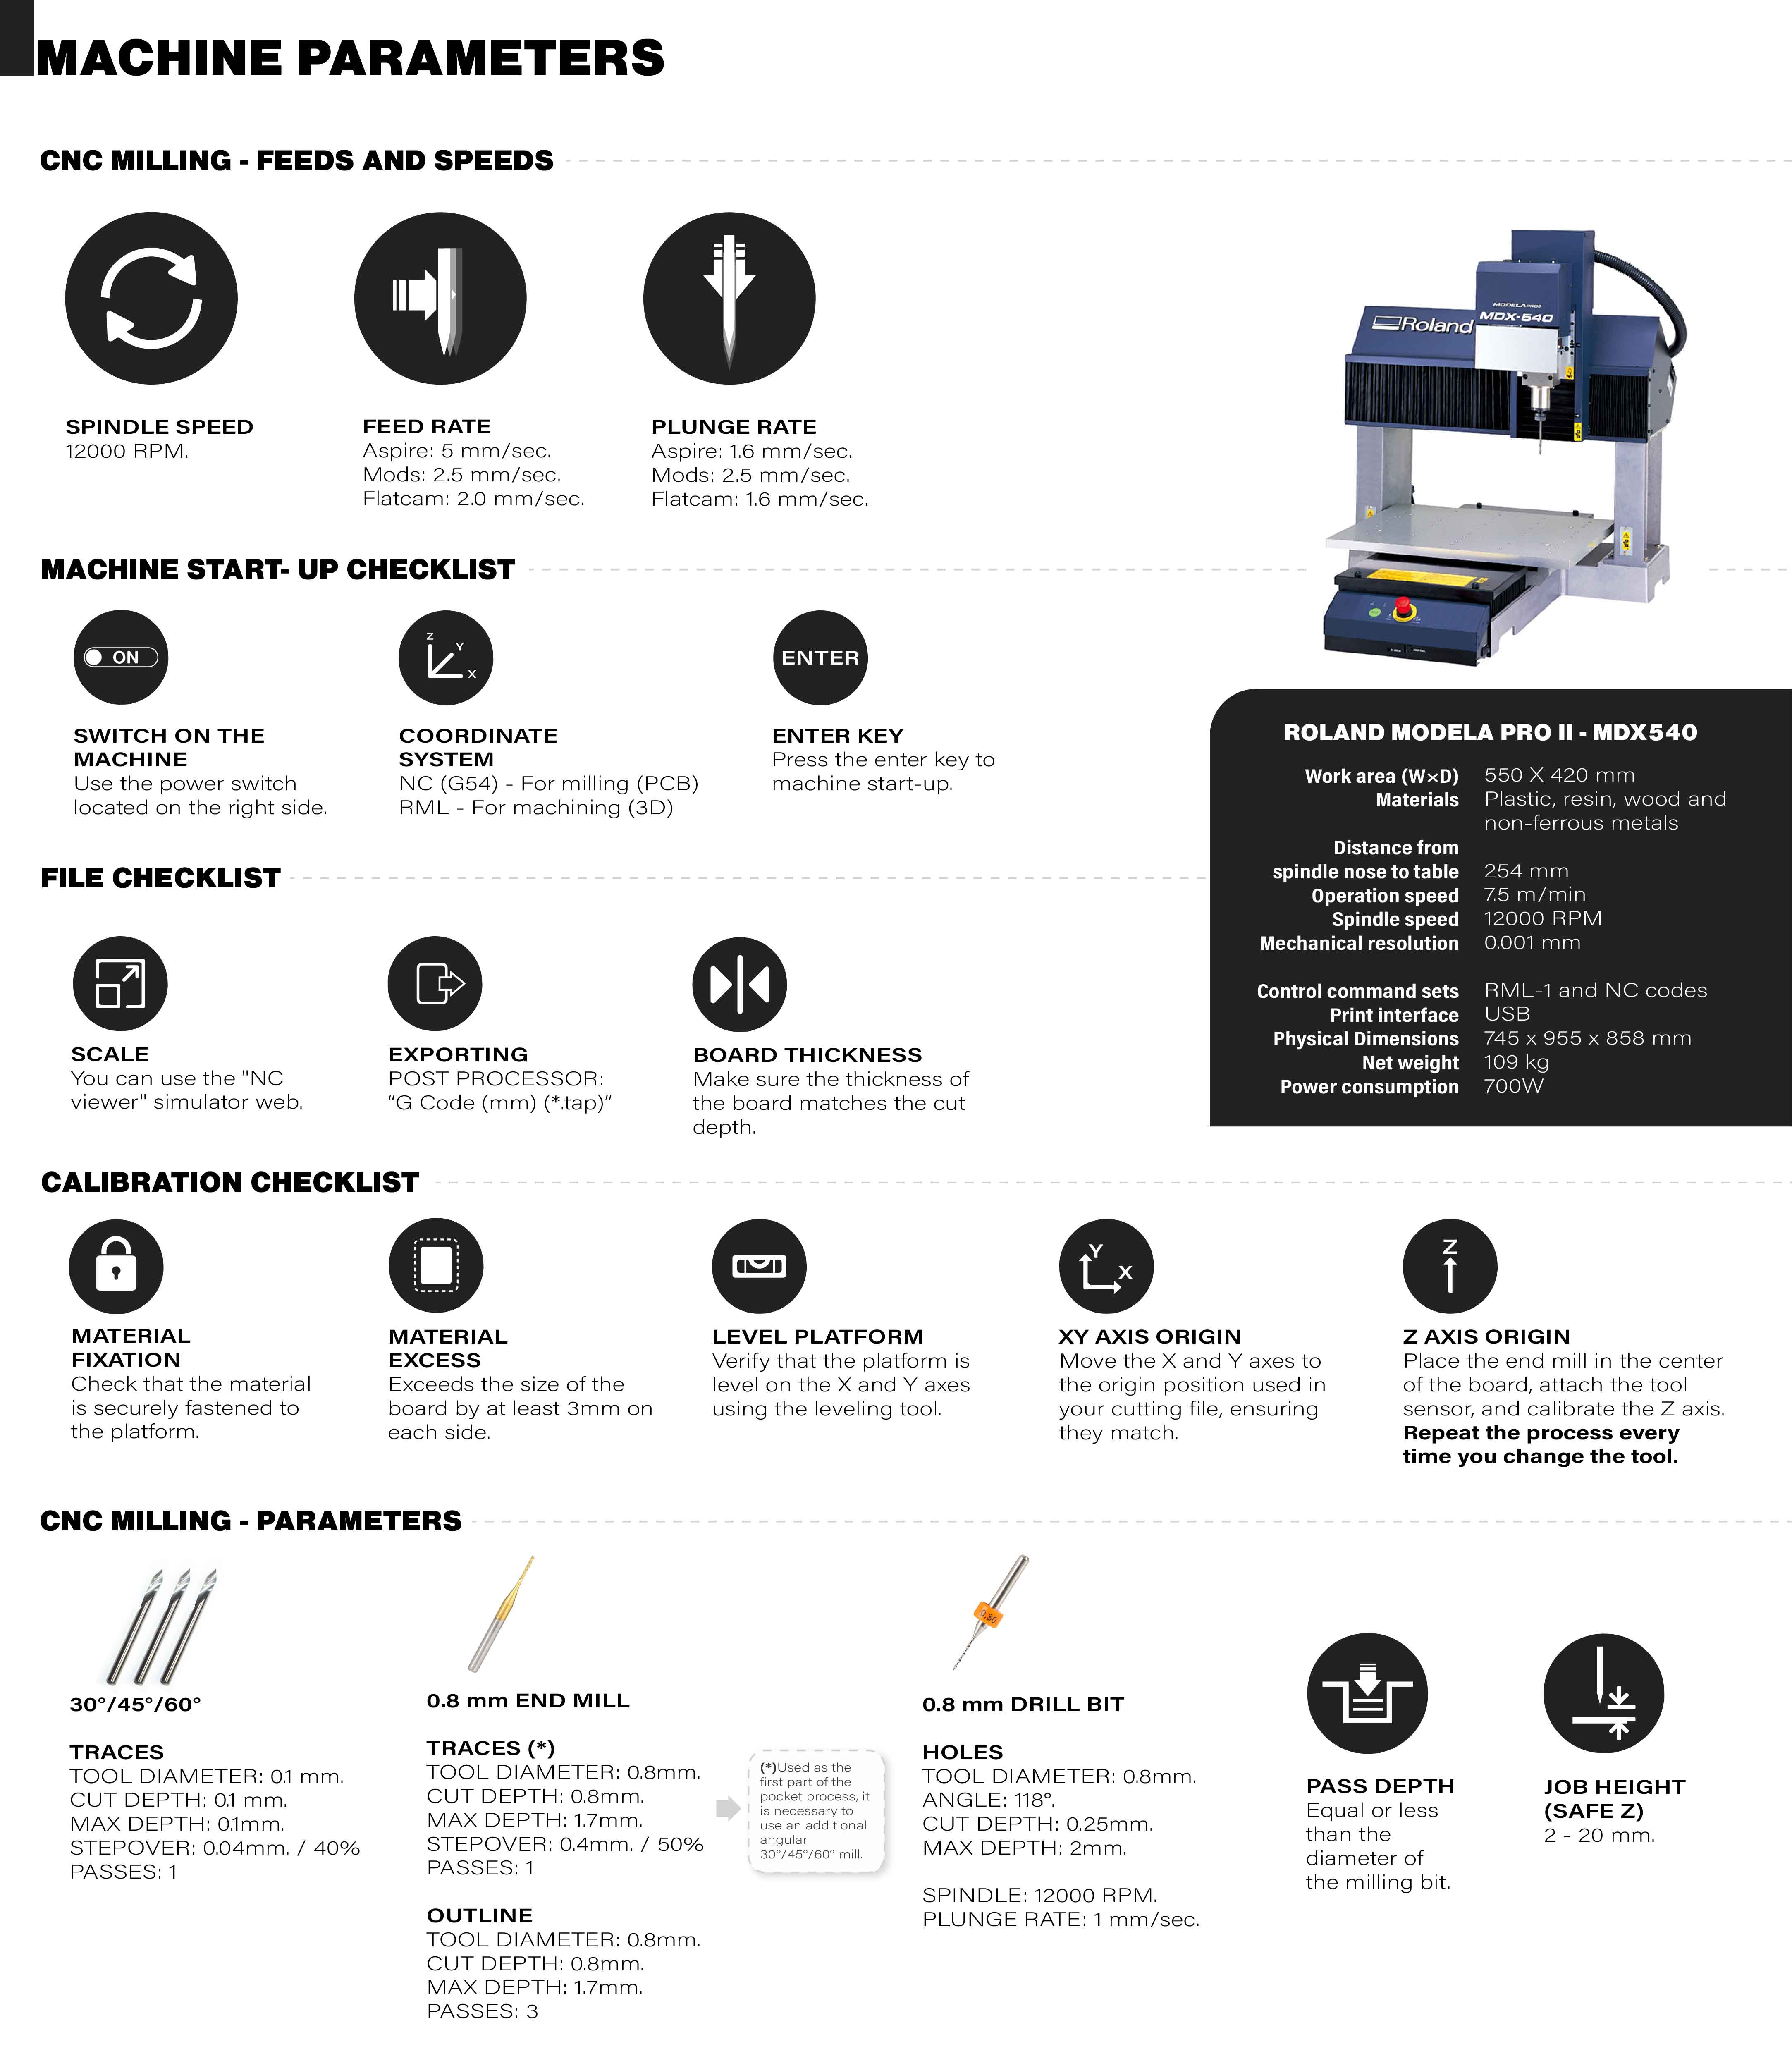
G-Code generation
For the board, we used the model provided by our instructor, the "Queentorres" board, created by Quentin Bolsée and Adrián Torres.
Check files
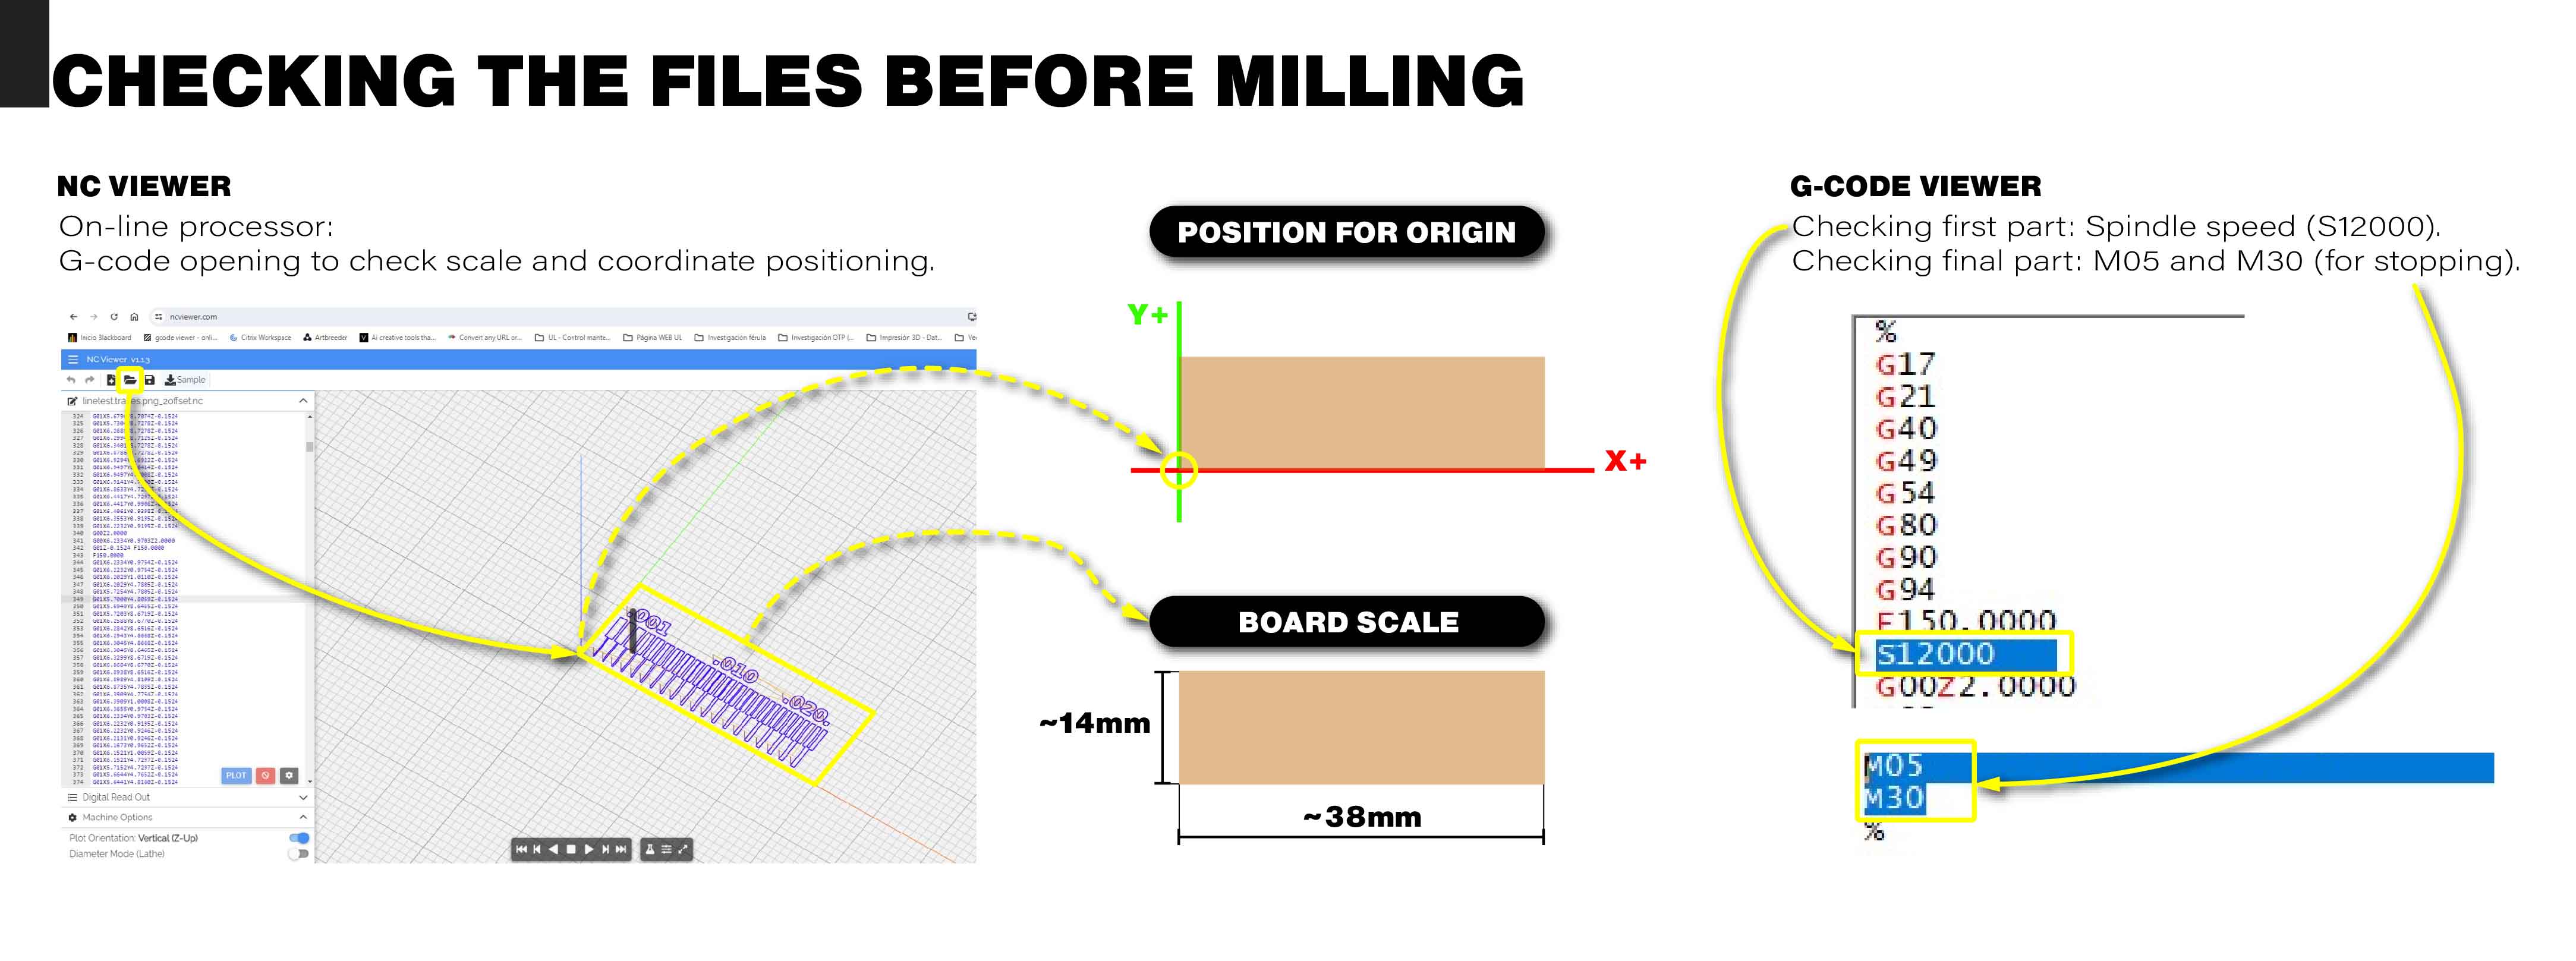
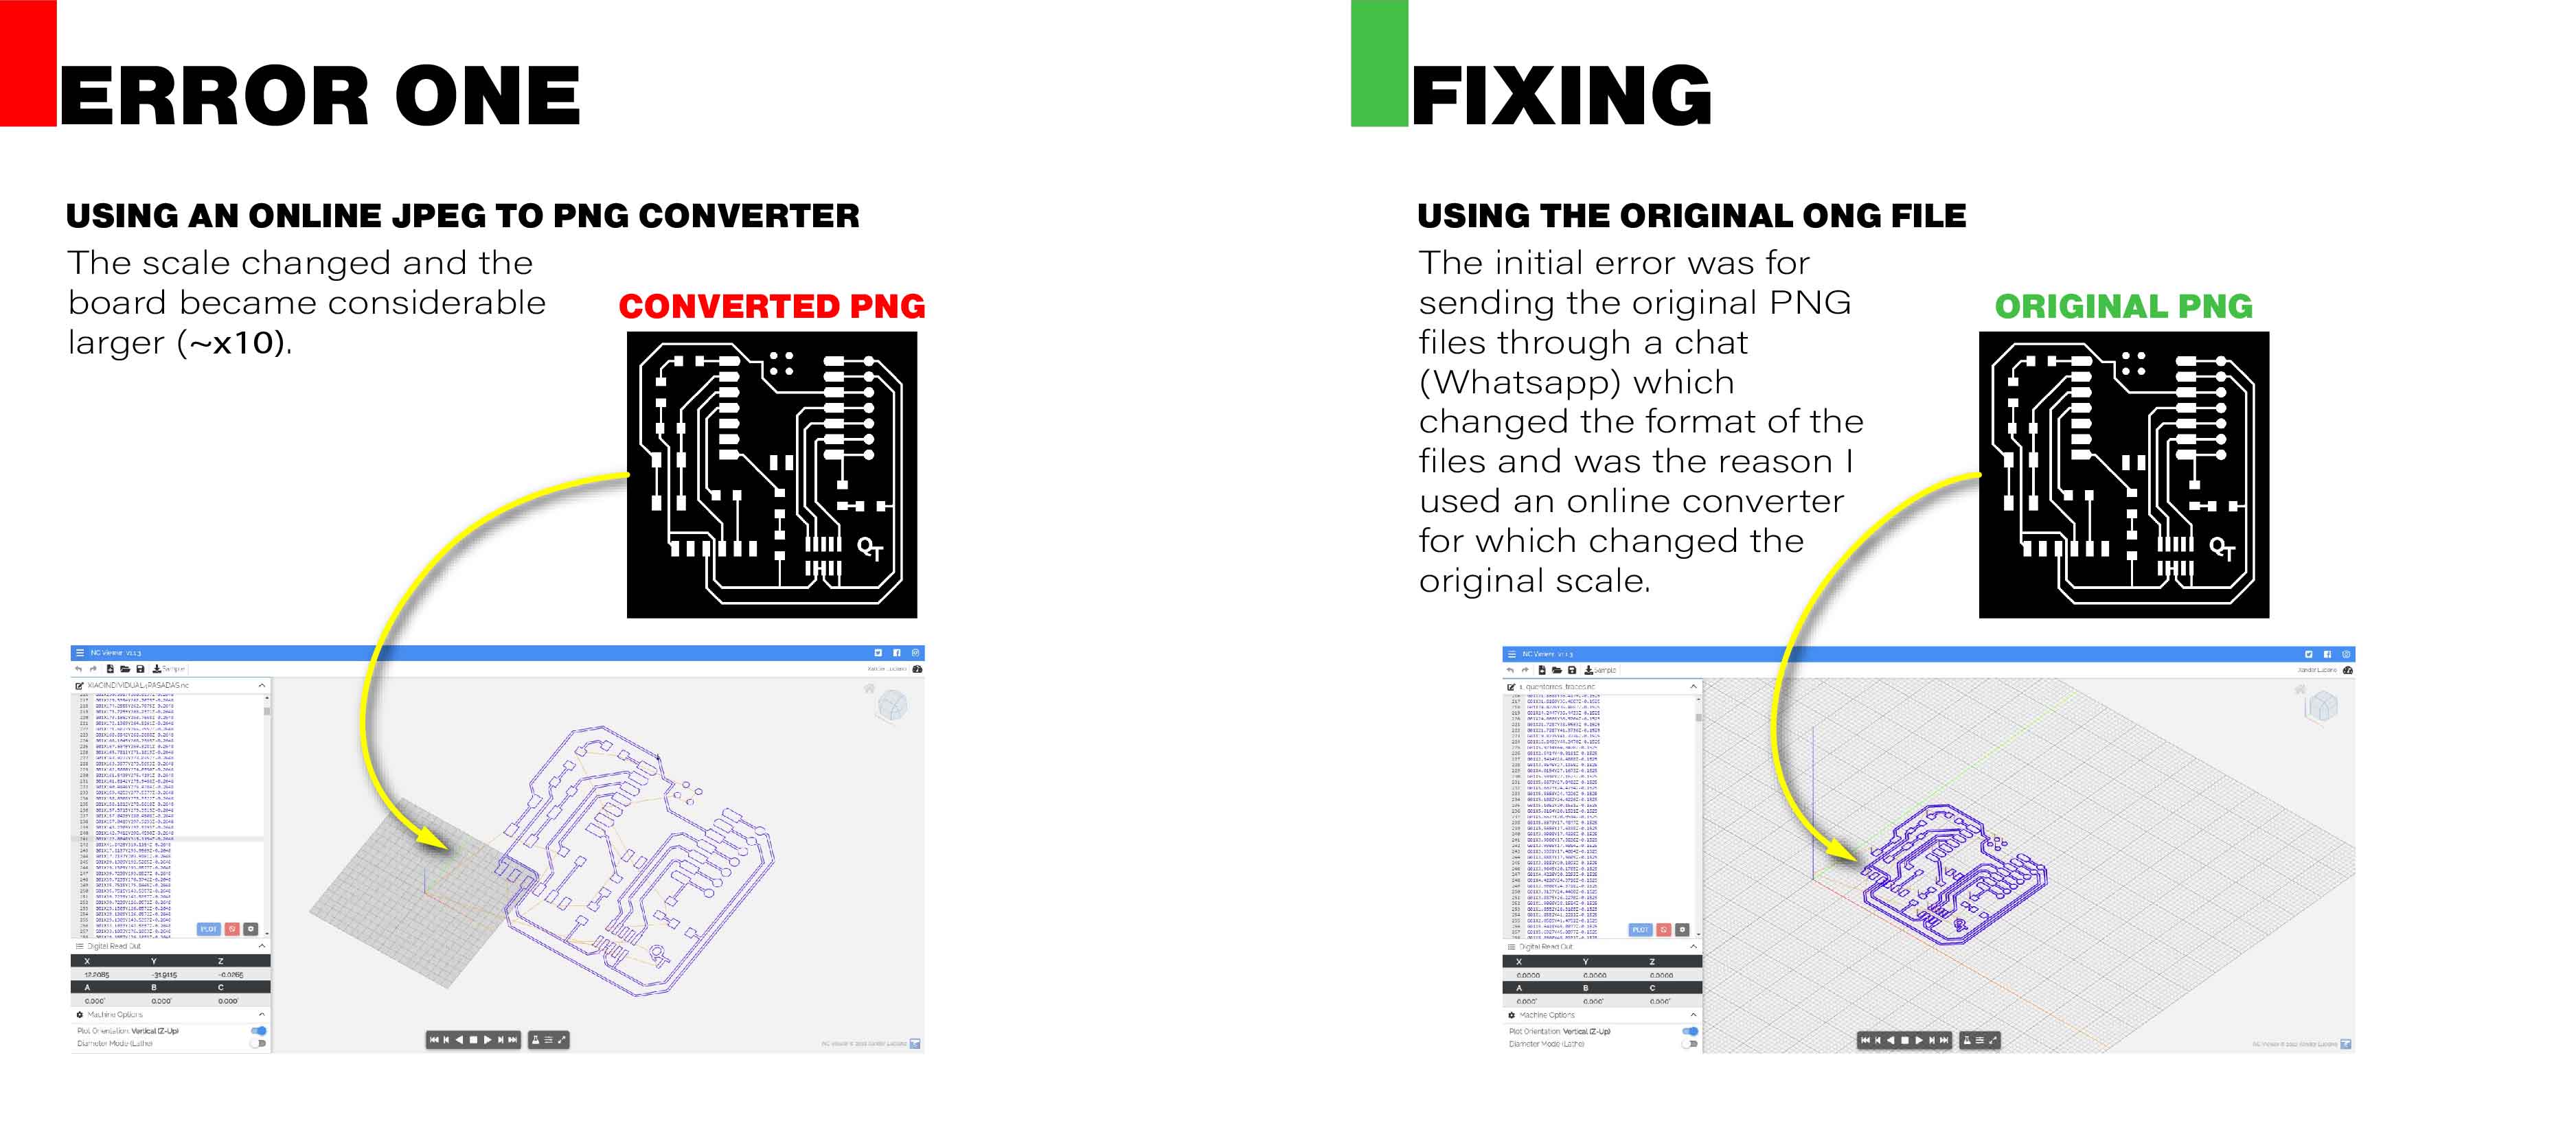
Errors and solutions

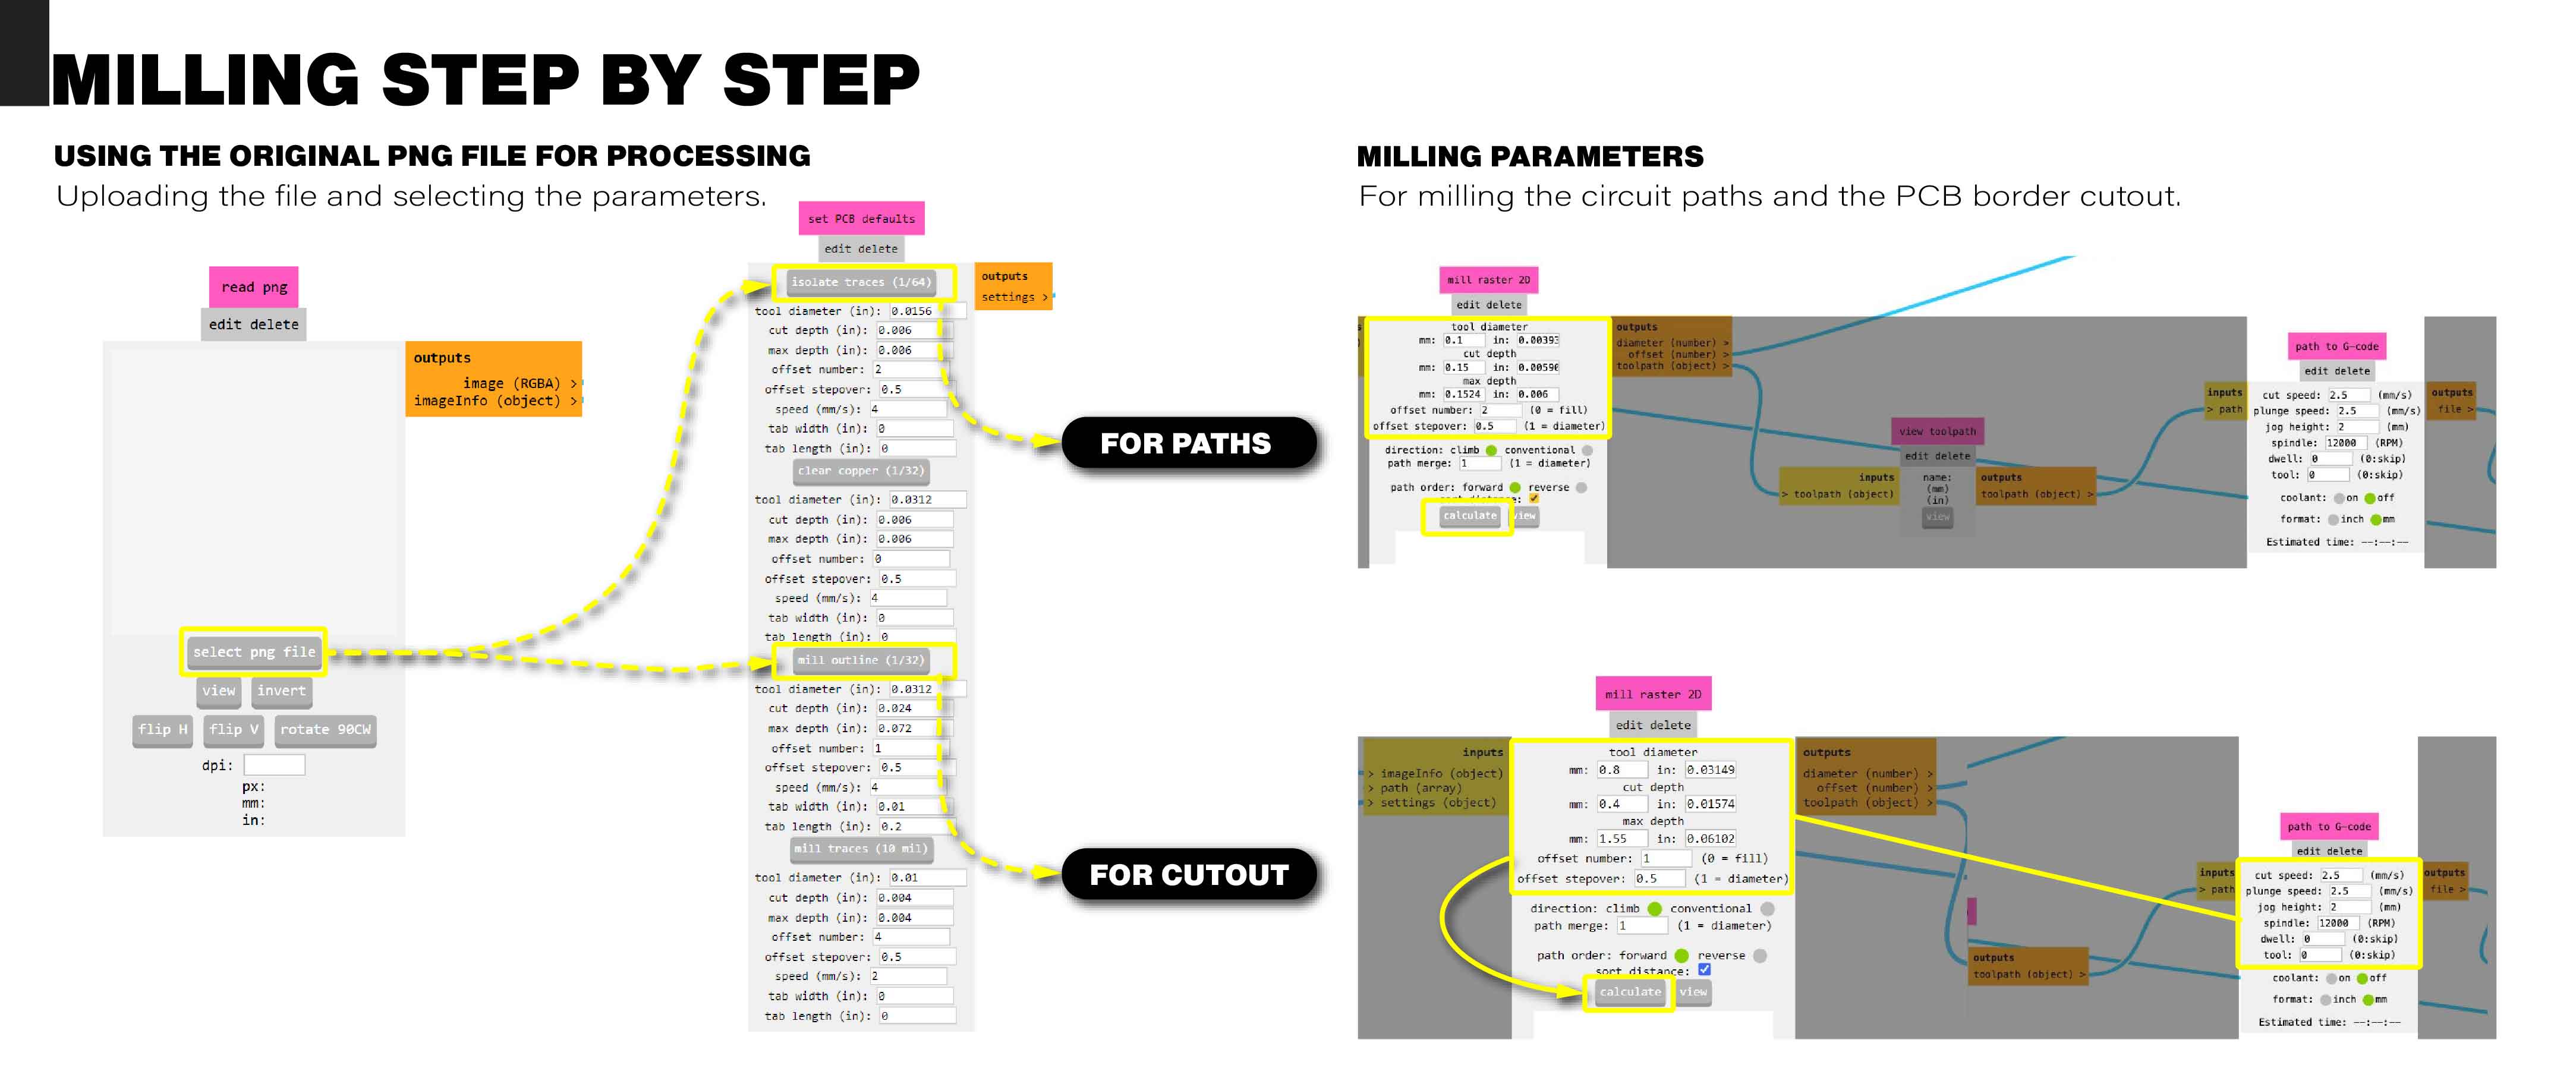
Milling parameters
Step-by-step
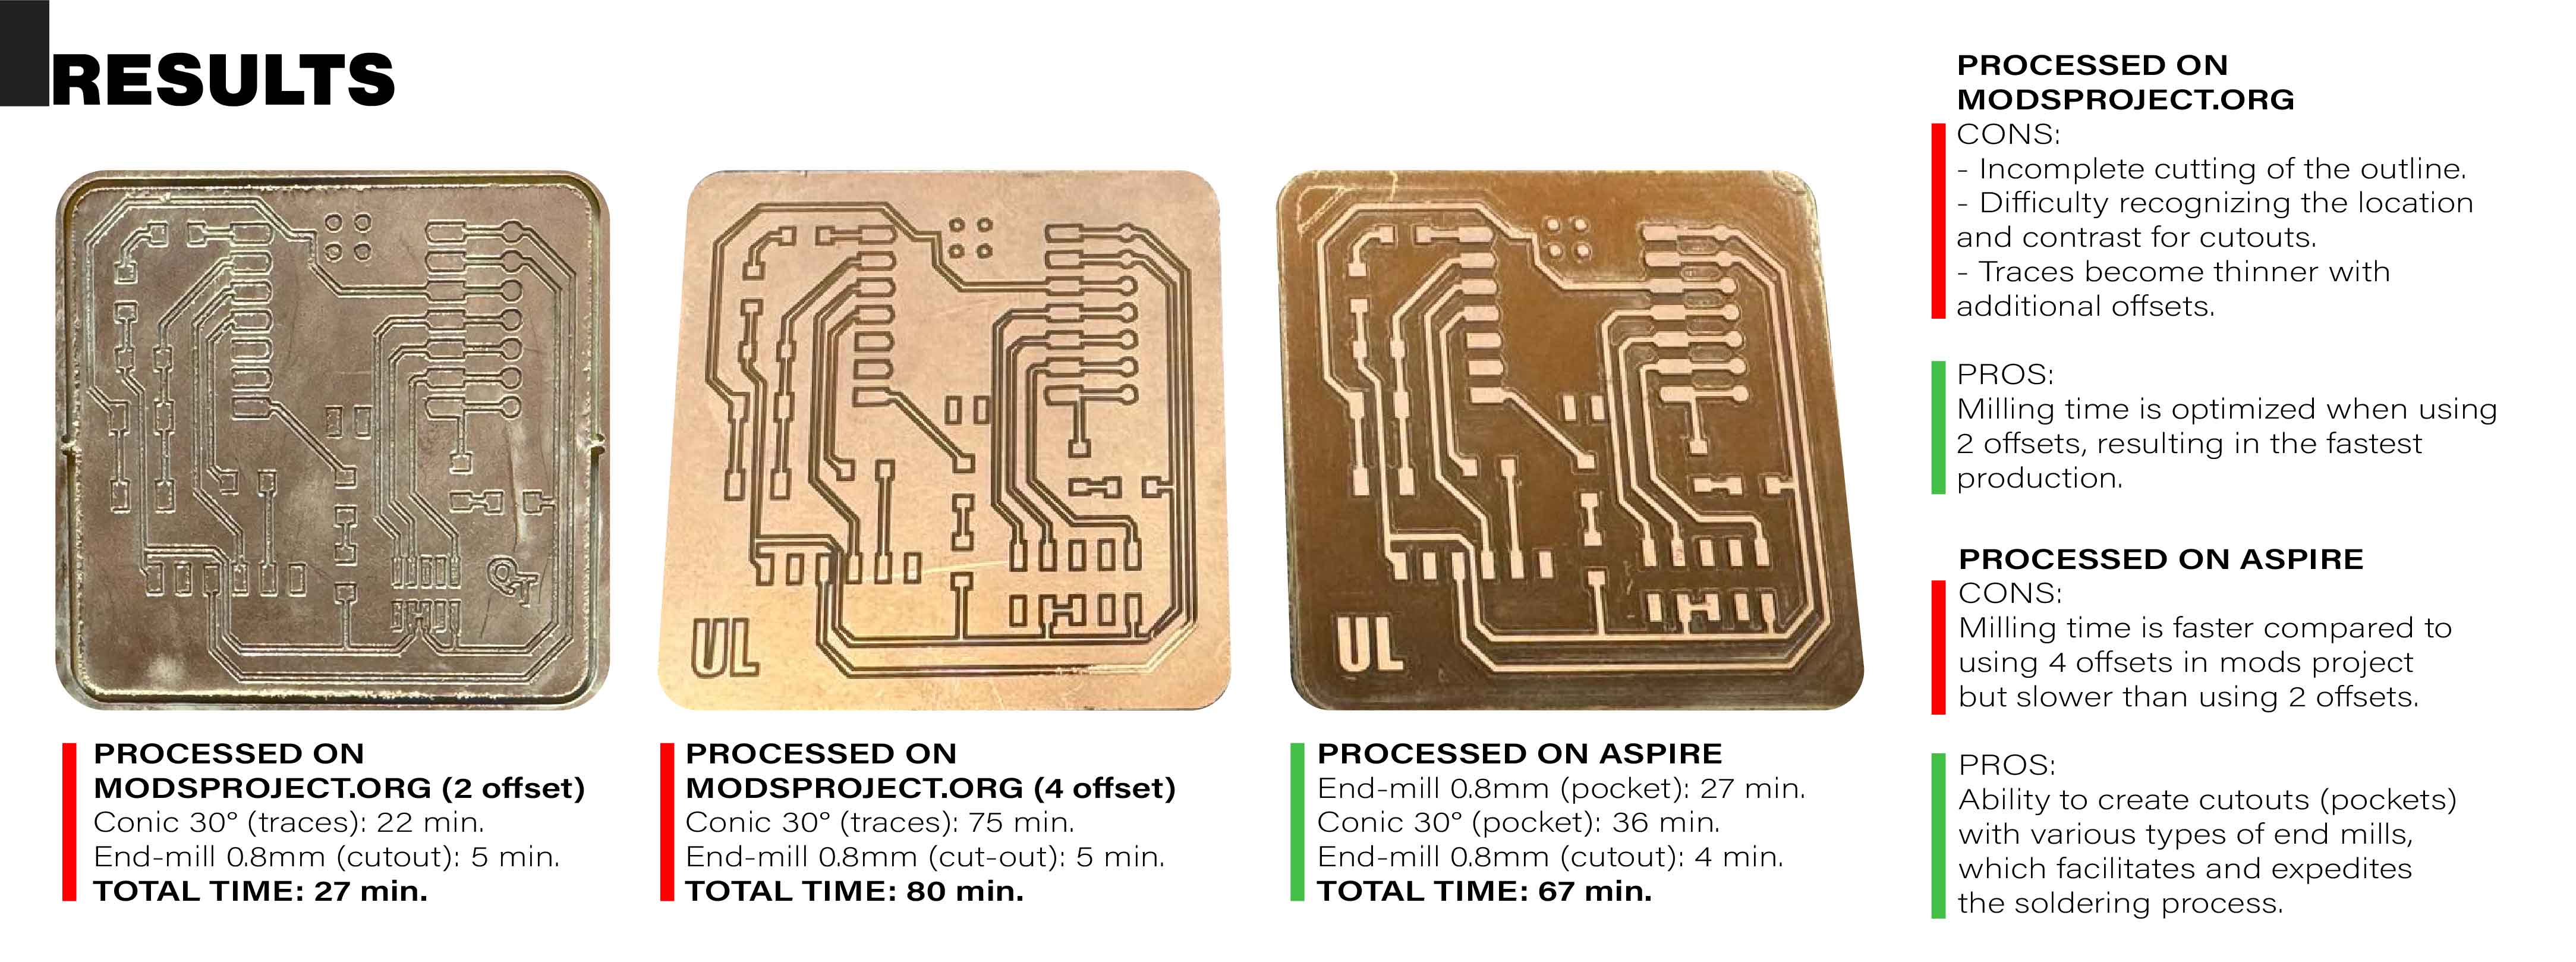
Fabrication and Results
Processor and parameters comparison
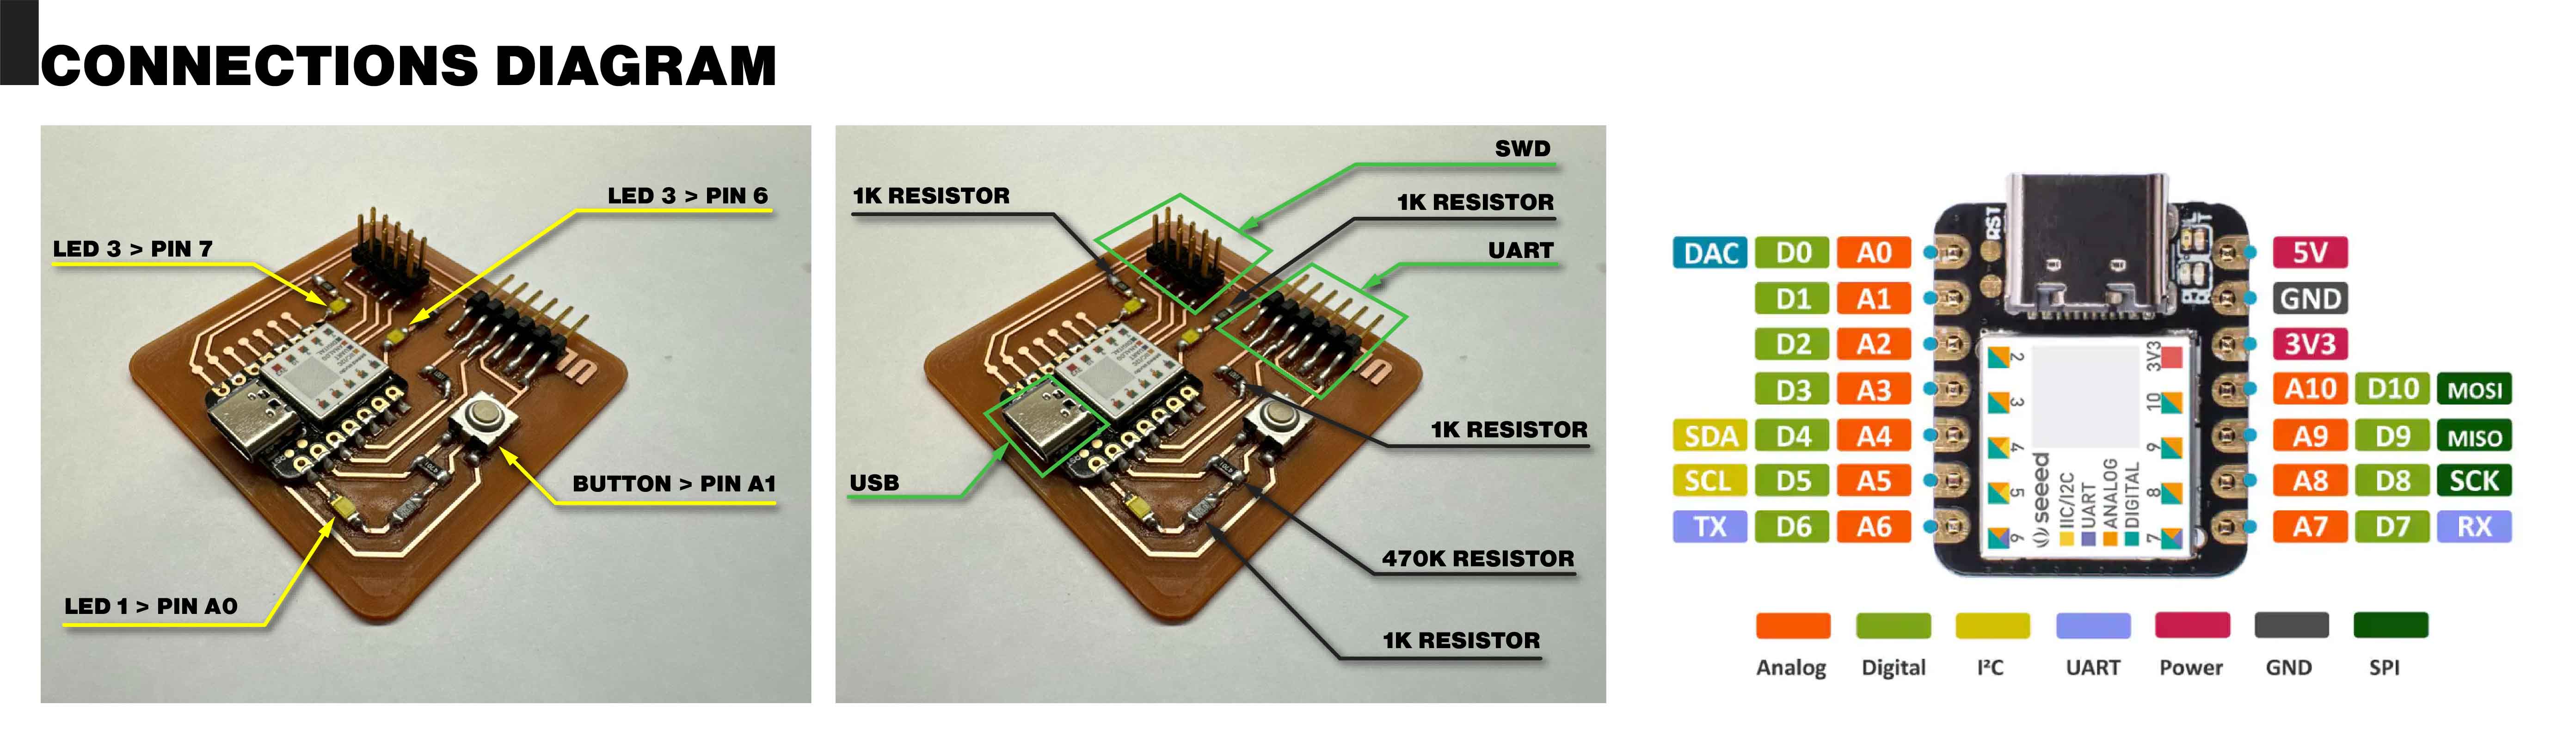
Connections diagram
Basic concepts and soldering tools
Programming
Results
Learnings
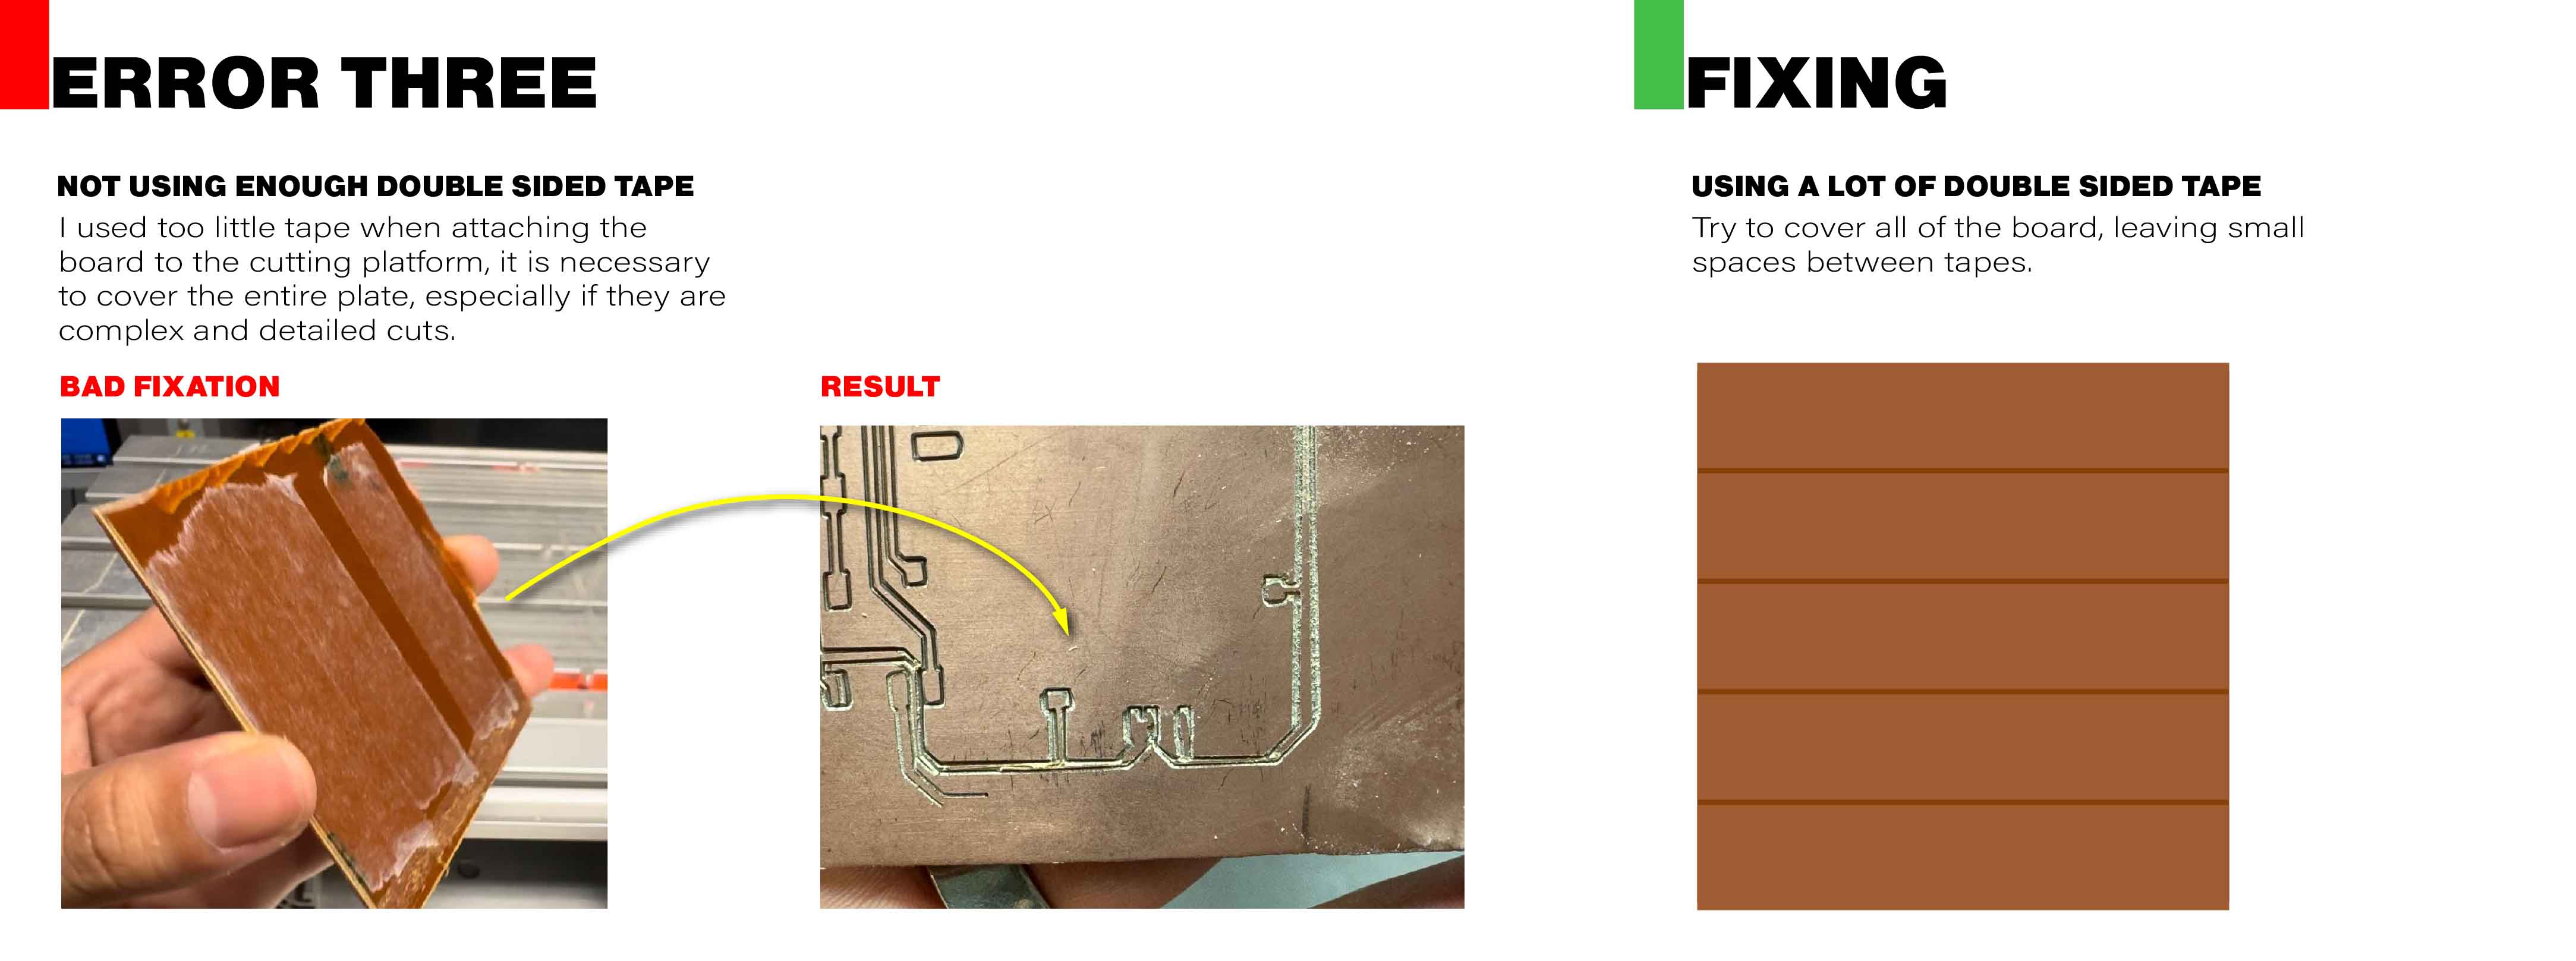
- Use a level tool for checking the board nivelation.
- Apply double-sided tape to the ENTIRE surface of the board.
- Use the regular surfaces of the tool calibrator when calibrating the Z-axis.
- Calibrate the Z-axis every time you change the tool.
Download resources
G-Codes resources
- Queentorres 2 and 4 offset
- G-Code files using 2 and 4 offset on the traces, it also includes the outline cut using a 0.8mm end-mill.
- Queentorres PNGs
- Original PNGs of the Queentorres PCB design: traces, outline and drilling.
CAD: Adobe Illustrator
- Queentorres Improved Traces Width
- Modification of the trace width on the original design of the Queentorres PCB.
Aspire: Editable file
- Aspire editable file
Editable file of Seeeduino traces and outline parameters using Aspire.
Final G-Codes
- Final G-Code - Mods project
G-Code processed on Mods project web.
- Final G-Code - Aspire
G-Code processed on Aspire 10.
Codes examples
- Button and 2 LEDs
- Arduino sketch for testing the board using the push button and the LEDs.
- Button and random LEDs
- Arduino sketch for testing the board and push button, which turns on the LEDs in a random pattern.