Week 6: Embedded Programming
This week, I learned about microcontroller programming with an Arduino-type board. Additionally, I learned how to successfully load a basic program onto it by setting up the Arduino IDE for the specific microcontroller and utilizing a simplified version of C++ known as the "Arduino Language".
The Seeeduino XIAO features a 256 KB Flash Memory for both the bootloader and the user's code, along with a 32 KB SRAM for storing variables and data. The Flash Memory typically consists of two partitions: one for the bootloader (approximately 2% of the total storage, or around 5 KB), and the remainder for the user's program code. The Seeeduino XIAO utilizes the ATSAMD21G18A-MU microcontroller (DataSheet), which is known for its low-power capabilities and cost-effectiveness, making it suitable for a wide range of low-budget projects.
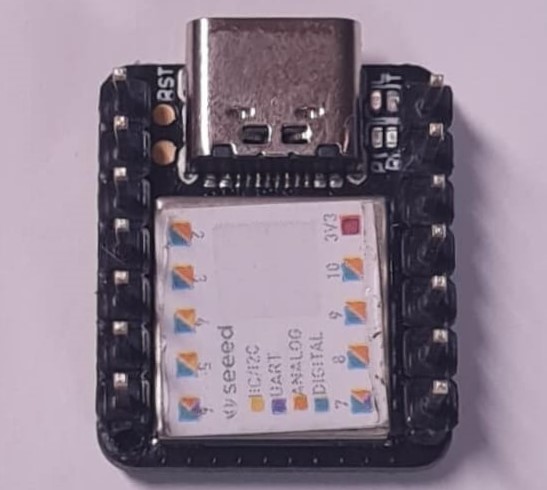
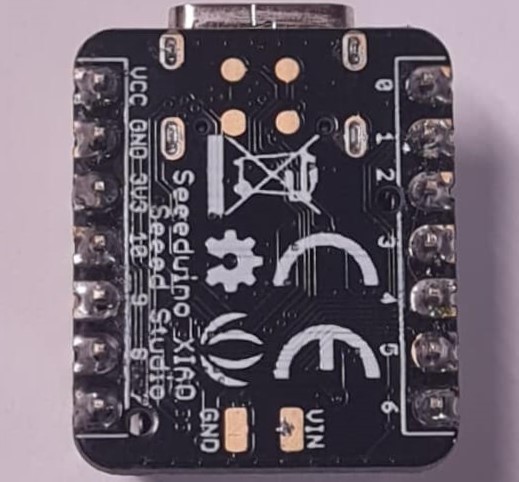
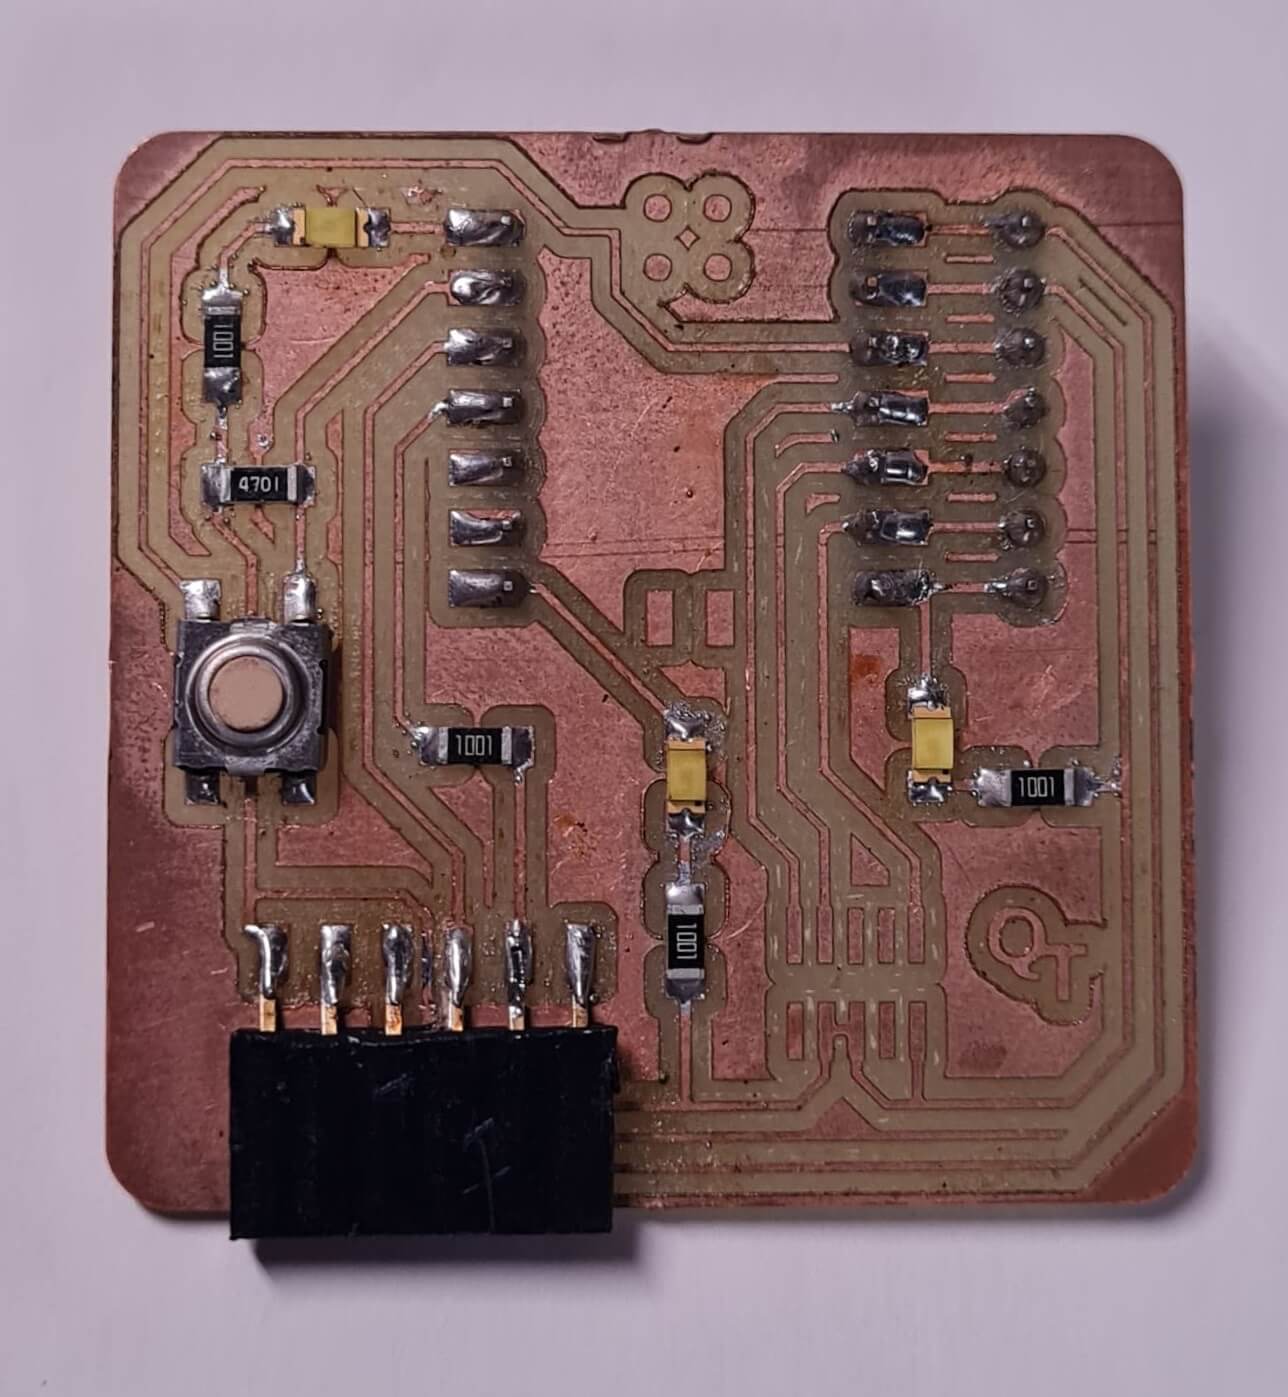
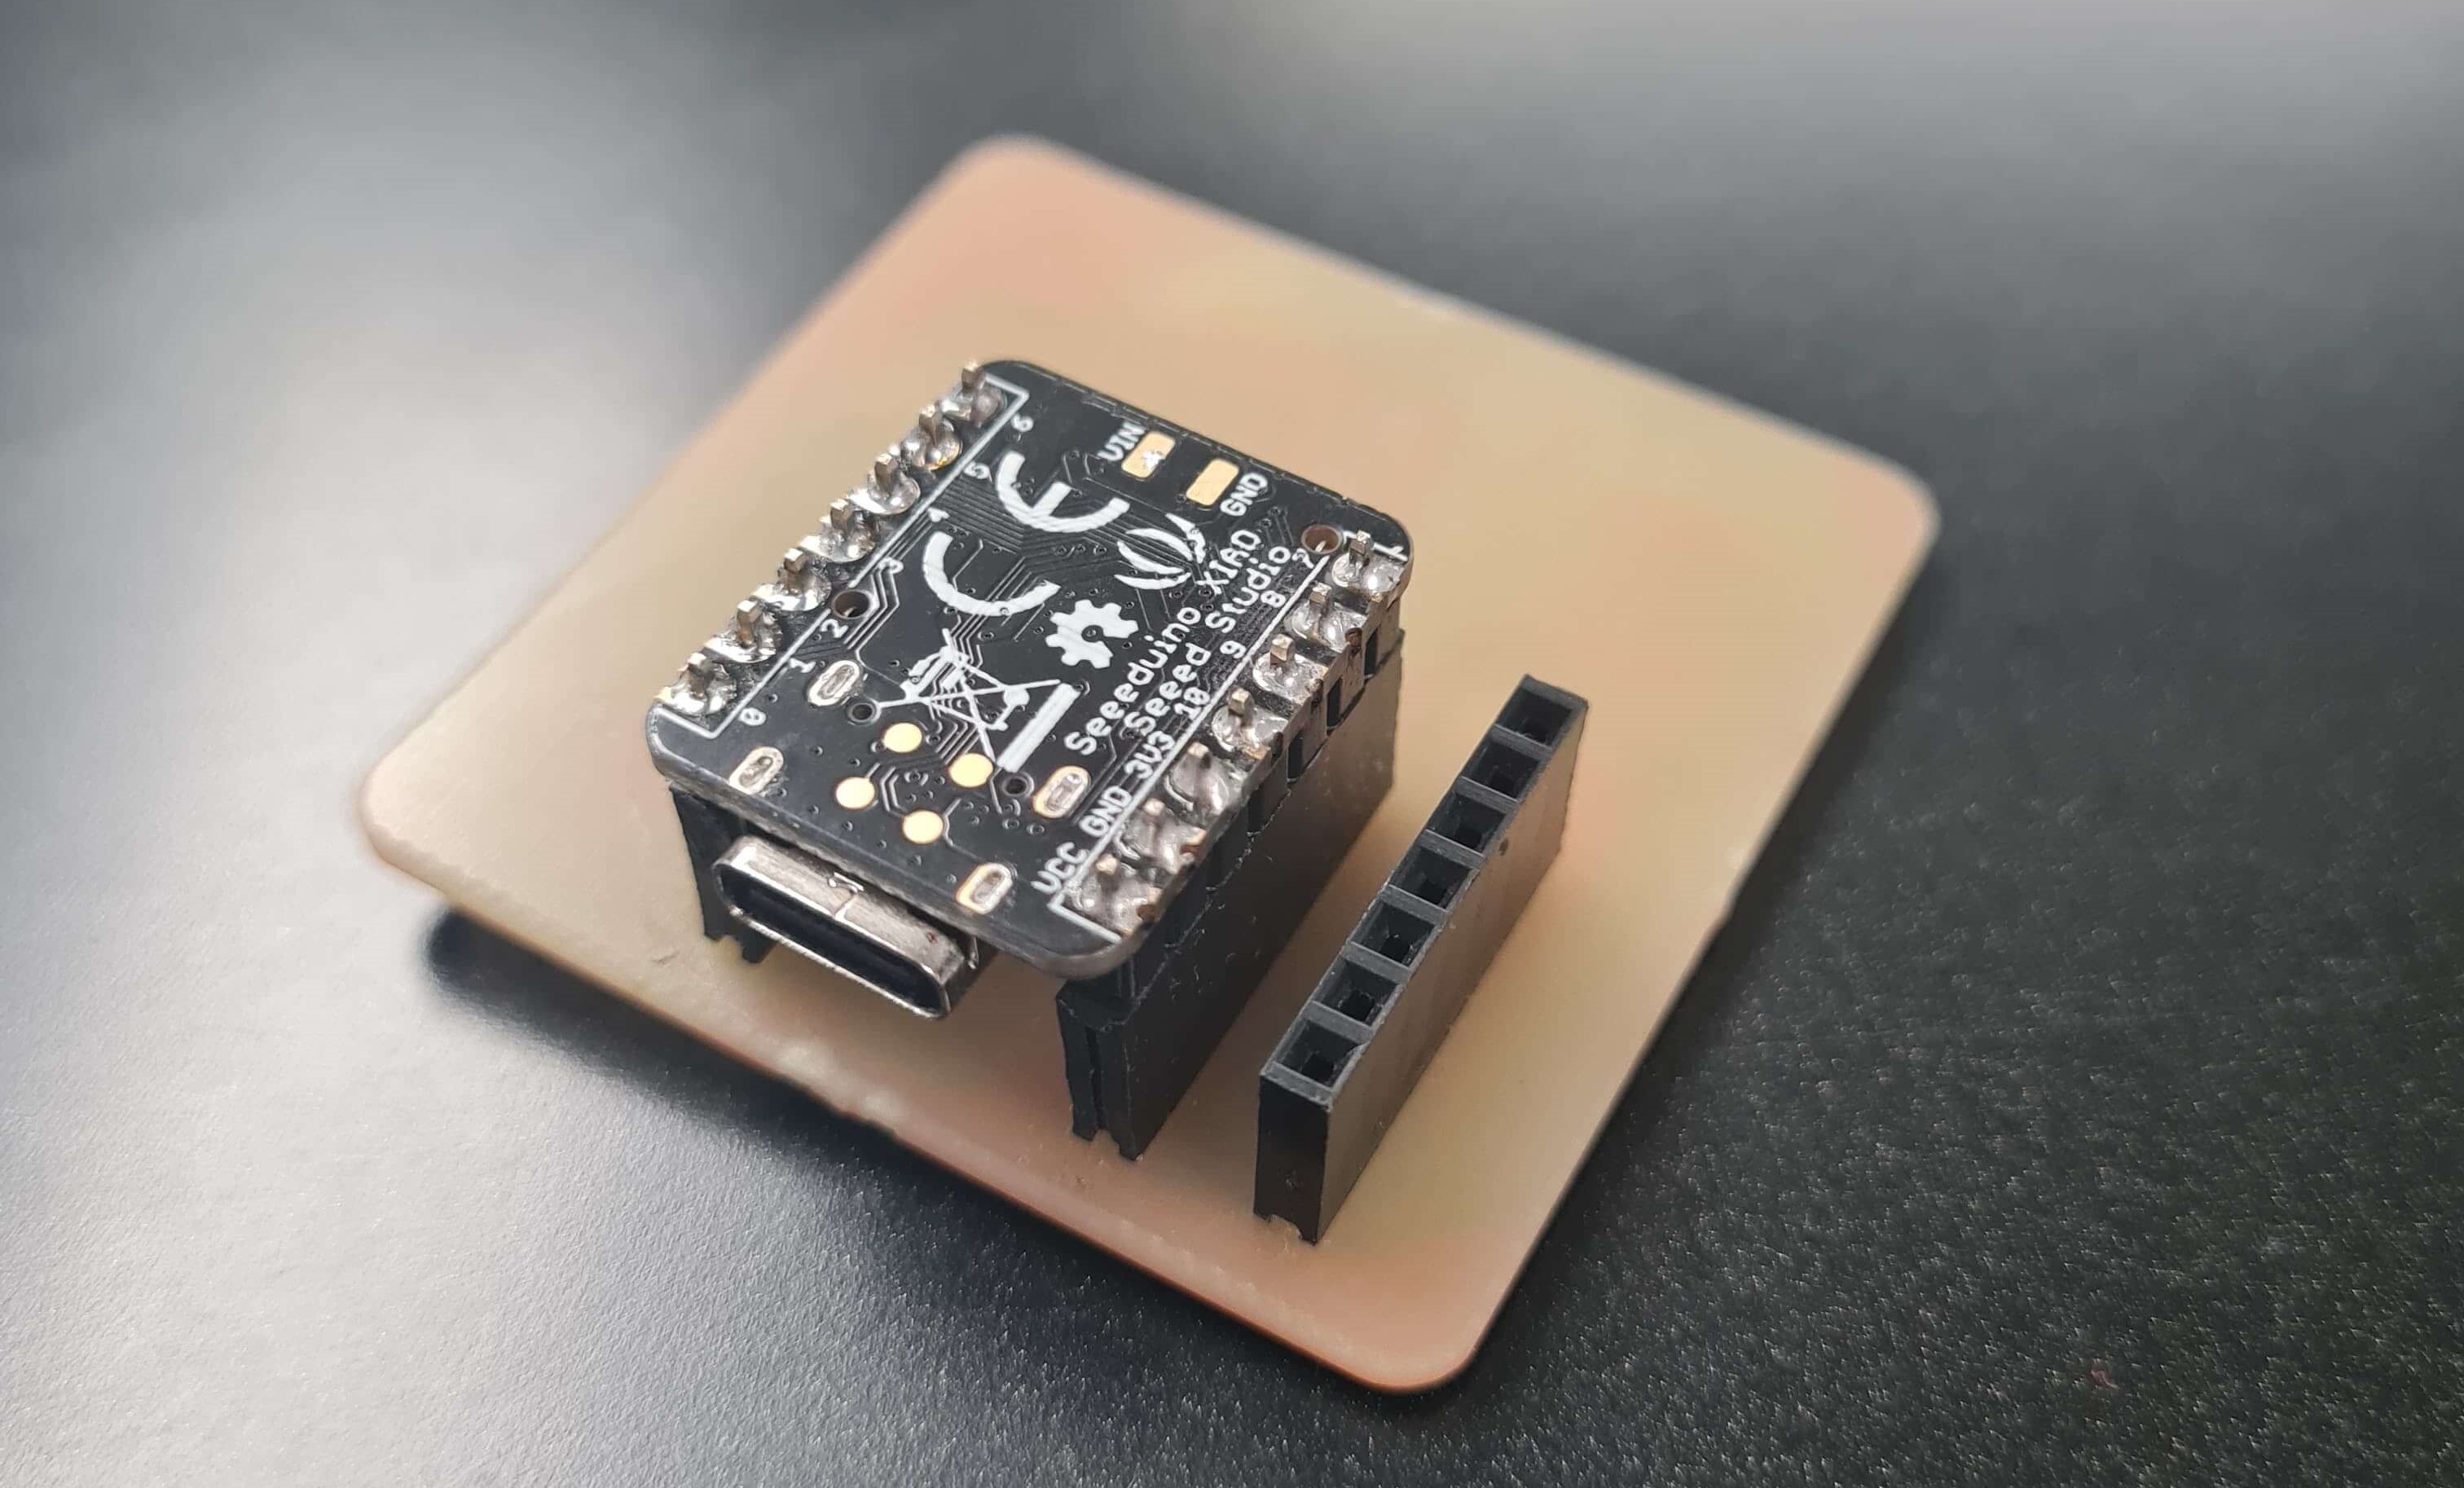
The PCB board for this assignment is the Quentorres SWD+UART Adapter+Hello Board initially created by Quentin Bolsée and later redesigned by Adrián Torres from FAB LAB León
Performance: Arduino provides direct access to hardware through C/C++, maximizing performance.
Development Workflow: Arduino IDE offers a streamlined environment with extensive libraries and community support.
Performance: Runs at a higher level compared to C/C++, with some overhead due to interpretation.
Development Workflow: Provides an interactive and dynamically typed environment for rapid prototyping.
Performance: Similar to MicroPython, optimized for ease of use rather than raw performance.
Development Workflow: Simplifies development with automatic USB serial communication and a beginner-friendly approach.
The Arduino IDE is a software application used for writing, compiling, and uploading code to Arduino microcontroller boards. This software provides a user-friendly interface for learning the basics of microcontroller programming. Seeeduino boards resemble Arduino boards but offer additional features and variations. They are compatible with the Arduino IDE but require additional packages to be fully functional.
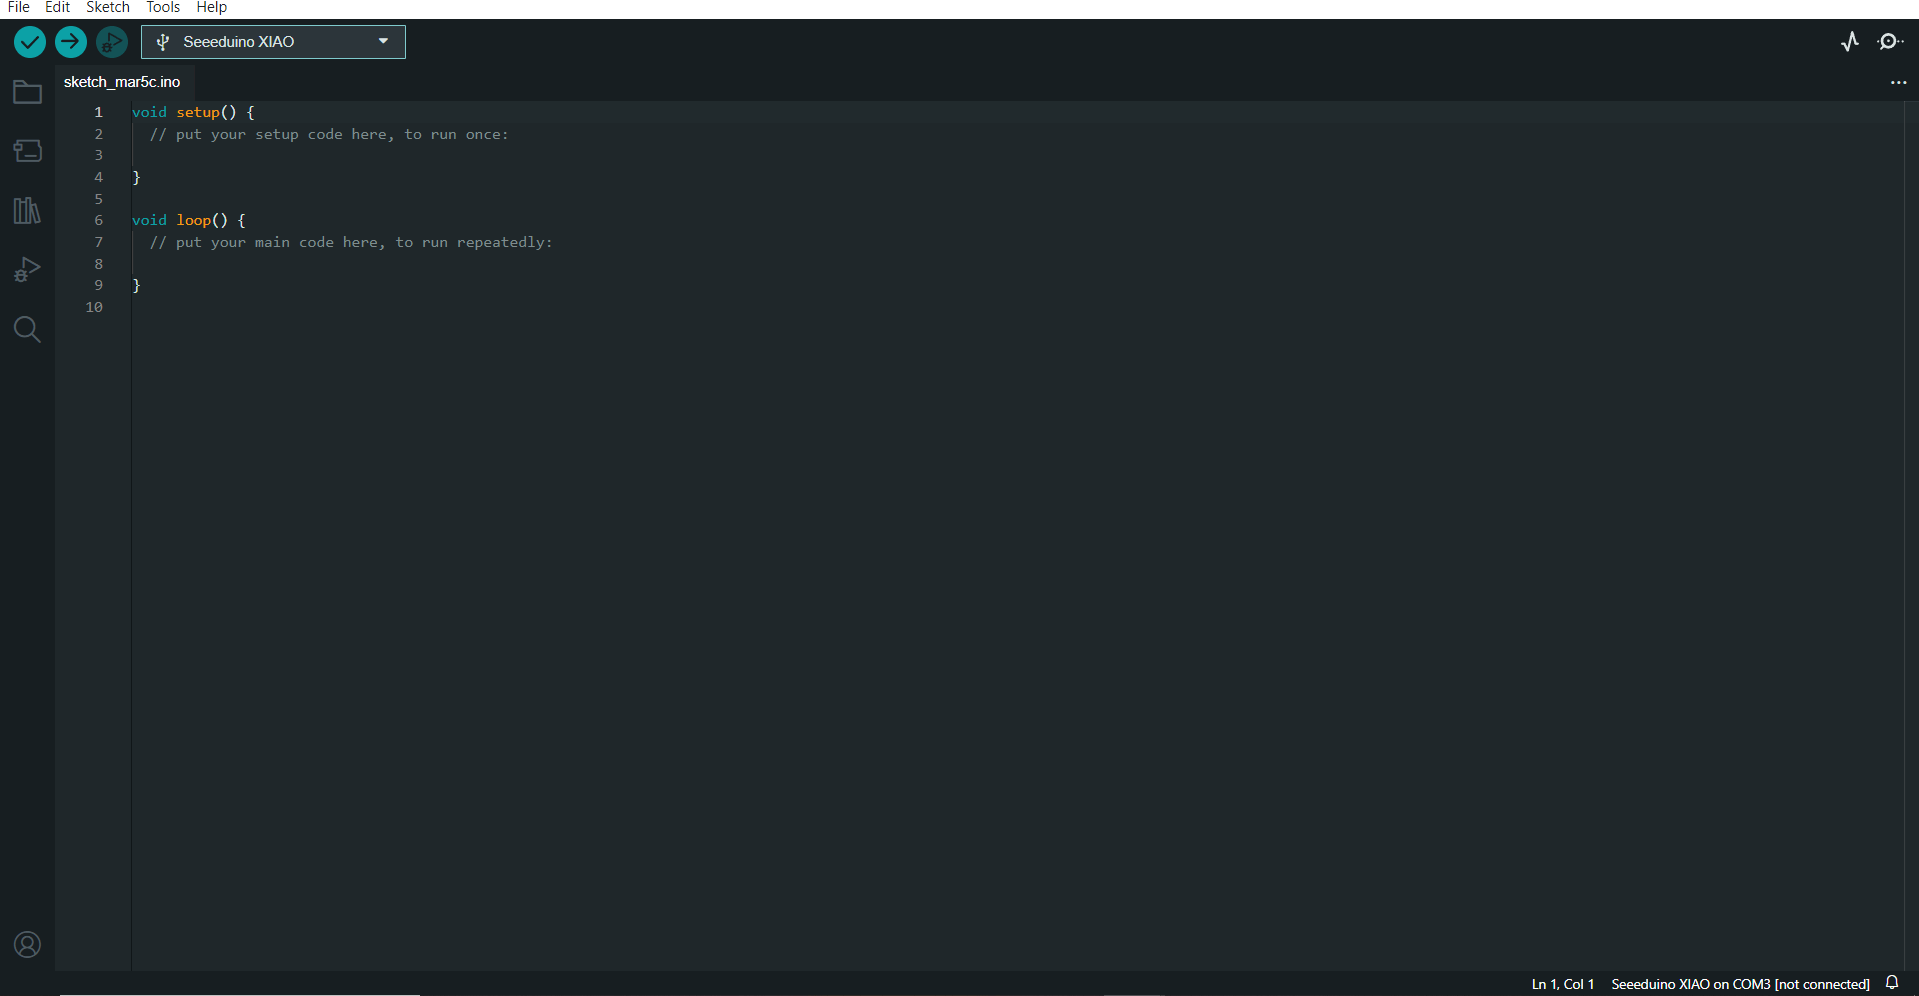
The initial step in connecting the microcontroller board is to review the manufacturer's documentation. In this case, Seeed Studio offers a Wiki page containing valuable information on setting up the Seeeduino Xiao and identifying the necessary packages for proper functionality.
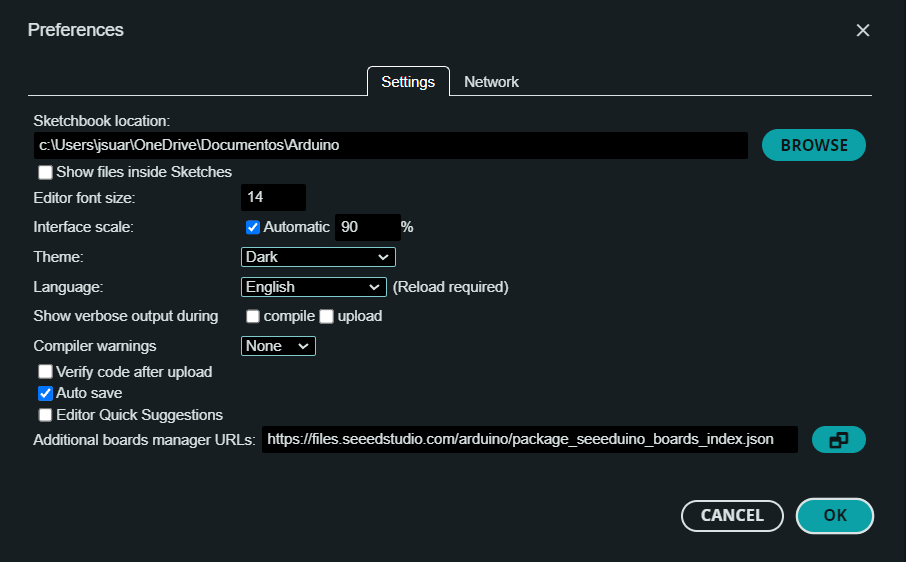
The first step is to click on File > Preference and fill Aditional Boards Manager URLs
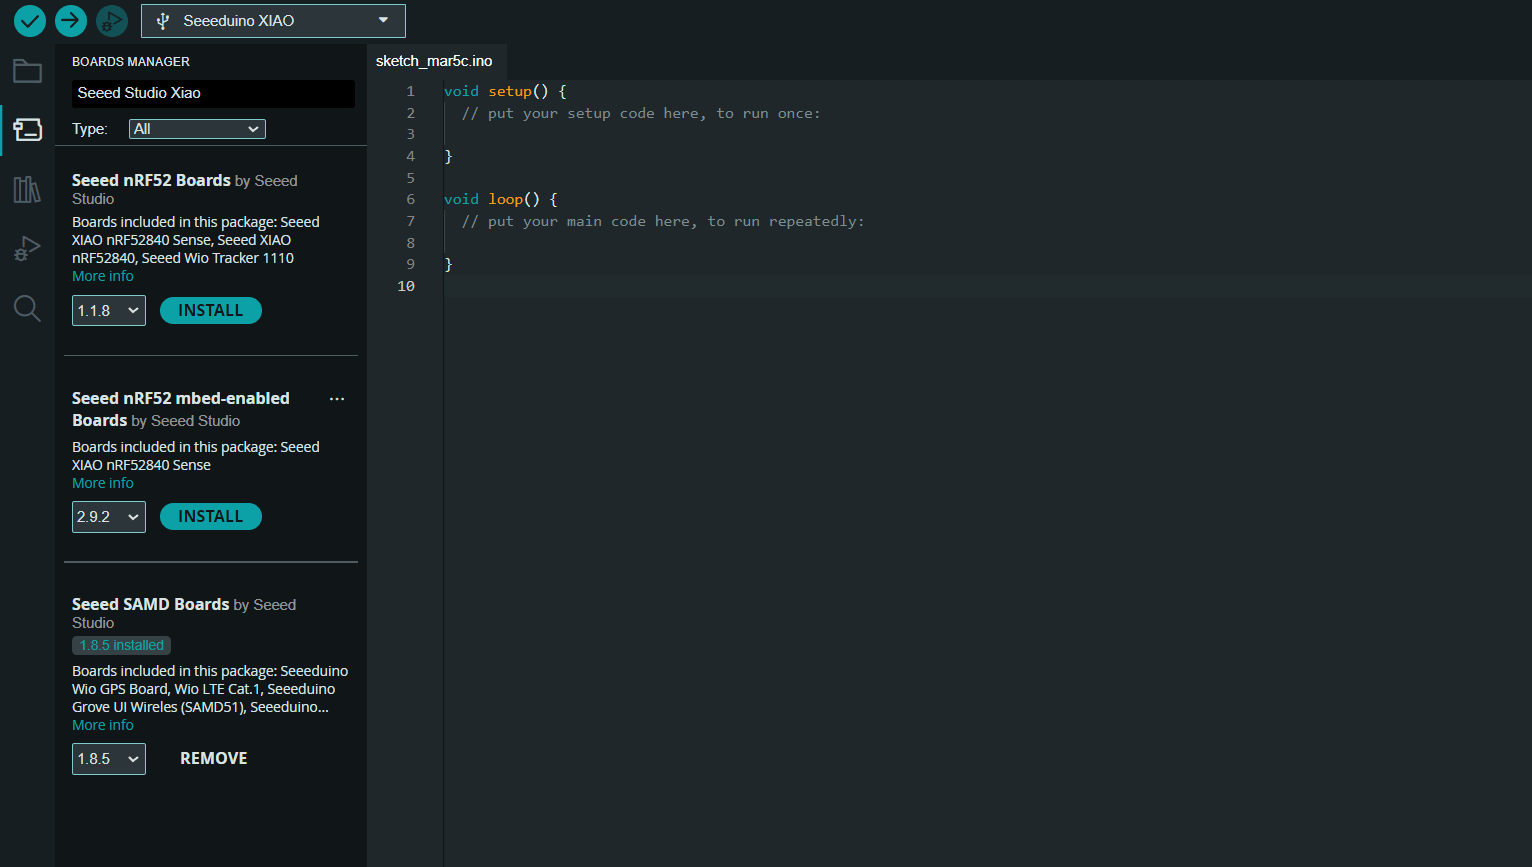
The next step is to download and install the packages. Go to Tools > Board > Boards Manager and install Seeed SAMD Boards
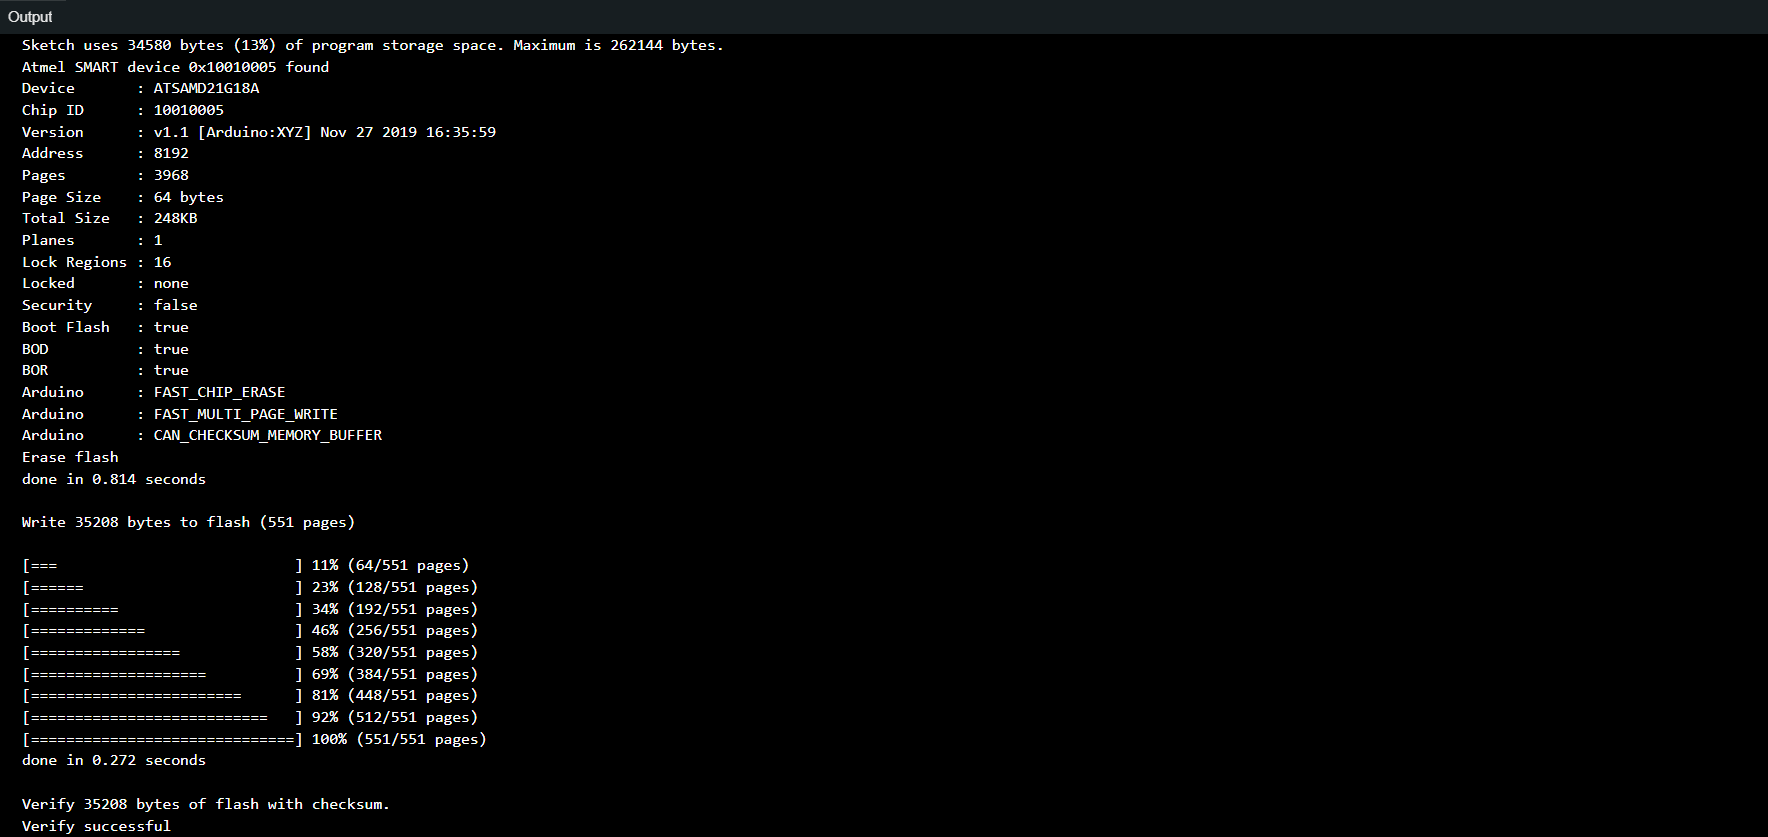
Now you can upload an empty program code to verify that everything works correctly. The OUTPUT tab must display the information above.
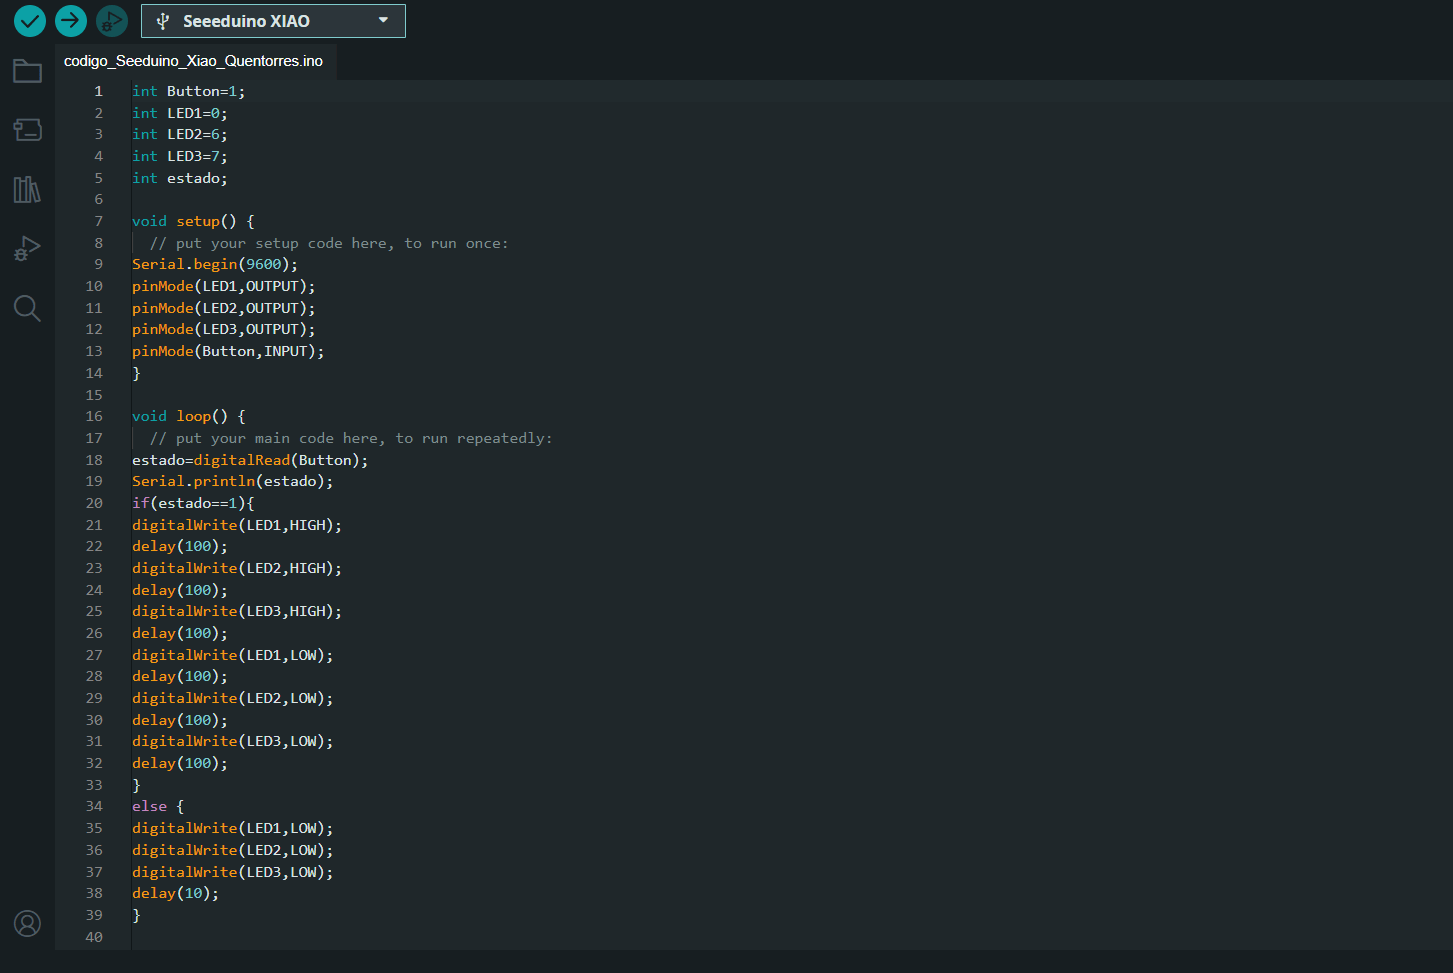
    // Program Code: Sequential LED Blinking with Button //

    // Written by: Jorge Suarez de Freitas //

    // Define pin numbers for components
    int Button = 1;   // Button pin
    int LED1 = 0;     // First LED pin
    int LED2 = 6;     // Second LED pin
    int LED3 = 7;     // Third LED pin
    int estate;       // Variable to store button state


     // Setup function: runs once when the program starts
    void setup() {


        // Serial communication setup
        Serial.begin(9600);

        // Set pin modes (Input or Output)
        pinMode(LED1, OUTPUT);
        pinMode(LED2, OUTPUT);
        pinMode(LED3, OUTPUT);
        pinMode(Button, INPUT);
    }

    void loop() {
        // Loop function: runs repeatedly as the program executes

        // Read the state of the button
        estate = digitalRead(Button);

        // Print button state to serial monitor
        Serial.println(estate);

        // If button is pressed (state == 1)...
        if (estate == 1) {
            // Sequentially turn LEDs on and off with delays
            digitalWrite(LED1, HIGH);
            delay(100);
            digitalWrite(LED2, HIGH);
            delay(100);
            digitalWrite(LED3, HIGH);
            delay(100);
            digitalWrite(LED1, LOW);
            delay(100);
            digitalWrite(LED2, LOW);
            delay(100);
            digitalWrite(LED3, LOW);
            delay(100);
        }

        // If button is NOT pressed (state != 1)...
        else {
            // Turn off all LEDs
            digitalWrite(LED1, LOW);
            digitalWrite(LED2, LOW);
            digitalWrite(LED3, LOW);
            delay(10); // Short delay to debounce
        }
    }
For our group project, I took on the task of researching the ATtiny44 microcontroller datasheet to identify its key features, advantages, and disadvantages. By diving into the details, I aimed to provide us with a clear understanding of what the ATtiny44 can and can't do, which will help us make informed decisions for our project.

| Feature | ATtiny44 | ATmega328 | Seeeduino XIAO (SAMD21) |
|---|---|---|---|
| Core Architecture | AVR | AVR | ARM Cortex-M0+ |
| Clock Speed | Up to 20 MHz | 16 MHz | 48 MHz |
| Flash Memory | 4 KB | 32 KB | 256 KB |
| SRAM | 256 bytes | 2 KB | 32 KB |
| EEPROM | 256 bytes | 1 KB | None (emulated in flash) |
| Power Consumption | Low | Moderate | Low |
| Operating Voltage | 1.8V - 5.5V | 1.8V - 5.5V | 3.3V |
| Package Type | SOIC, QFN, PDIP | TQFP, PDIP, QFN | SMD |
| Pin Count | 14 | 28 | 14 |
| Feature | ATtiny44 | ATmega328 | Seeeduino XIAO (SAMD21) |
|---|---|---|---|
| I/O Pins | 12 | 23 | 11 |
| ADC | 10-bit, 8 channels | 10-bit, 6 channels | 12-bit, 11 channels |
| UART | 1 | 1 | 1 |
| I2C | 1 | 1 | 1 |
| SPI | 1 | 1 | 1 |
| Timers and Counters | 2 (8-bit, 16-bit) | 3 (2x 8-bit, 1x 16-bit) | 4 (4x 16-bit) |
| PWM Channels | 4 | 6 | 11 |
| Feature | ATtiny44 | ATmega328 | Seeeduino XIAO (SAMD21) |
|---|---|---|---|
| Development Boards | Custom, Digispark | Arduino Uno, Nano | Seeeduino XIAO |
| IDEs | Arduino IDE, AVR Studio | Arduino IDE, AVR Studio | Arduino IDE, PlatformIO |
| Libraries | Limited AVR libraries | Extensive Arduino libraries | Extensive Arduino libraries |
| Community Support | Moderate | Very High | Growing |