Week 6 assignment: Embedded programming
Summary
This week I had the goal of programming the electronic board that was created in week 4. The programming was done in Arduino IDE and it was relatively easy to download the board packages.
Process
The board used was the Seeed Studio XIAO SAMD21, providede by my instructor. It uses a ATSAMD21G18A-MU microcontroller that consume less power and has good performance. It is suitable for small projects.
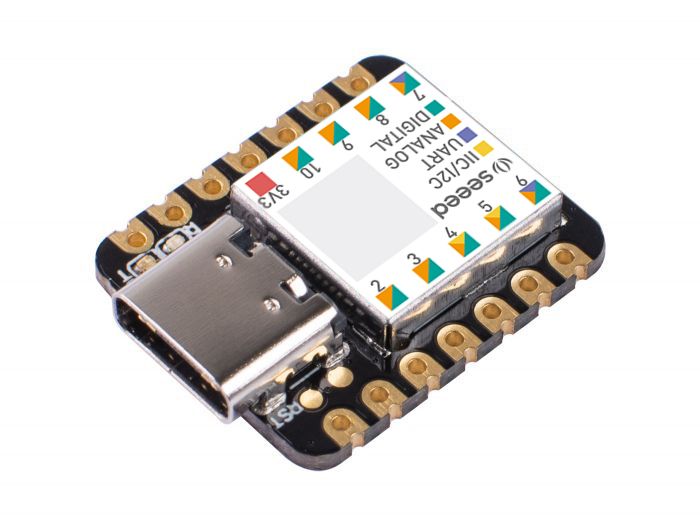
The following image shows the possible connections we can make. It has multiple development interfaces: 11 digital/analog pins, 10 PWM Pins, 1 DAC output, 1 SWD Bonding pad interface, 1 I2C interface, 1 UART interface, 1 SPI interface.

Programming using Arduino IDE
The first thing we have to do is download the program and run it. Then, in the preferences option we have to add this board as it is has not been installed when downloading the program. We need to copy the url into this part.
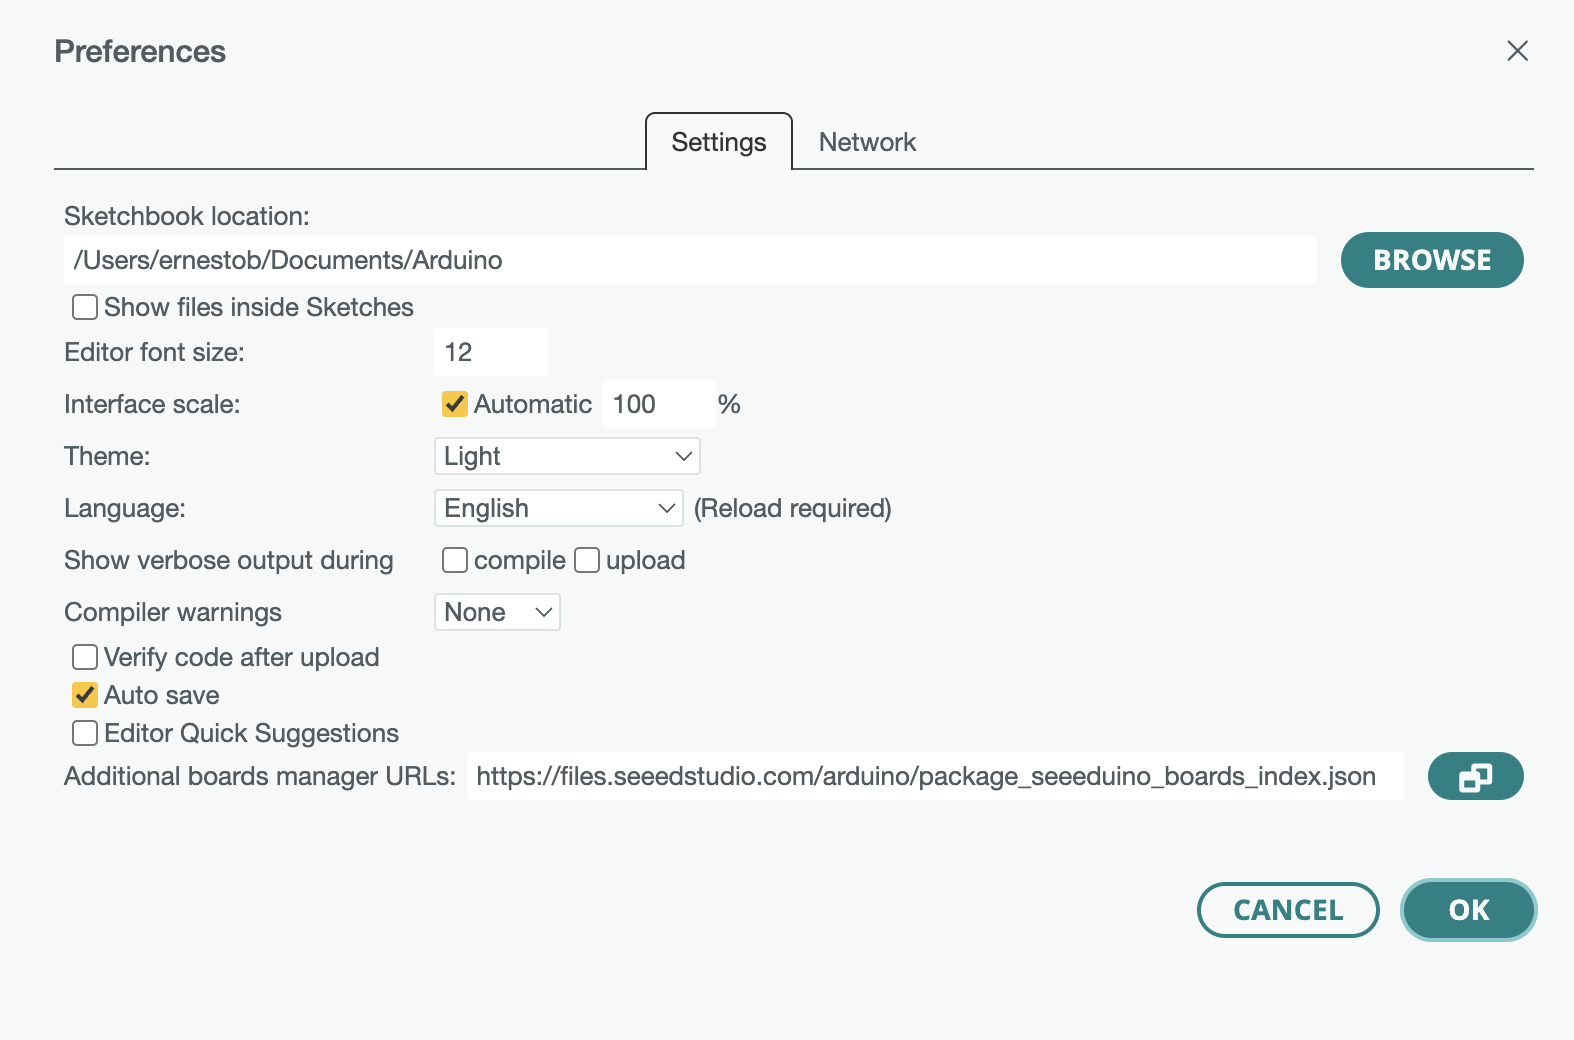
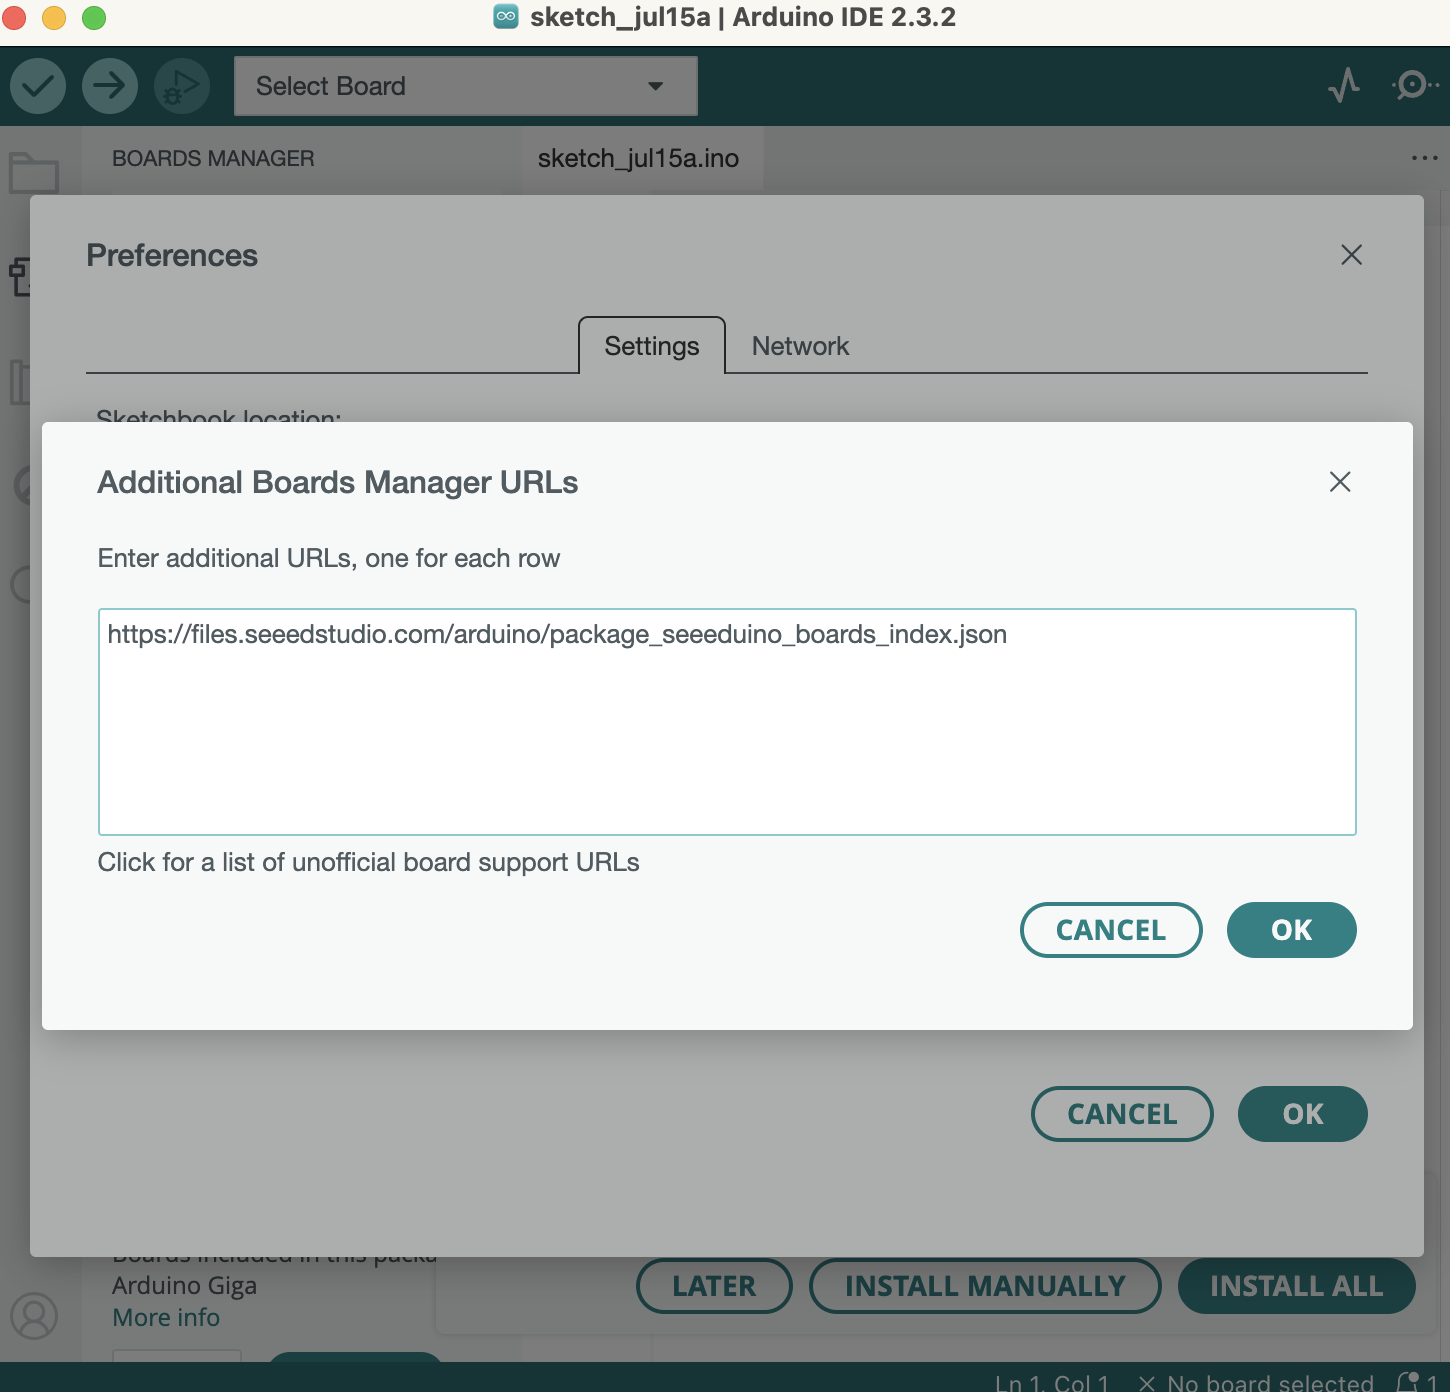
For this, we have to go to arduinoIDE at the top, then go to preferences, and then click on the "Additionals board manager URLs" button, and in this part copy the following text:
https://files.seeedstudio.com/arduino/package_seeeduino_boards_index.json
After this, we have to install the name of the board: Seeed SAMD Boards (in the photo it it already installed). We have to go to: Tools, Boards manager, and look for:Seeed SAMD Boards by Seeed Studio.
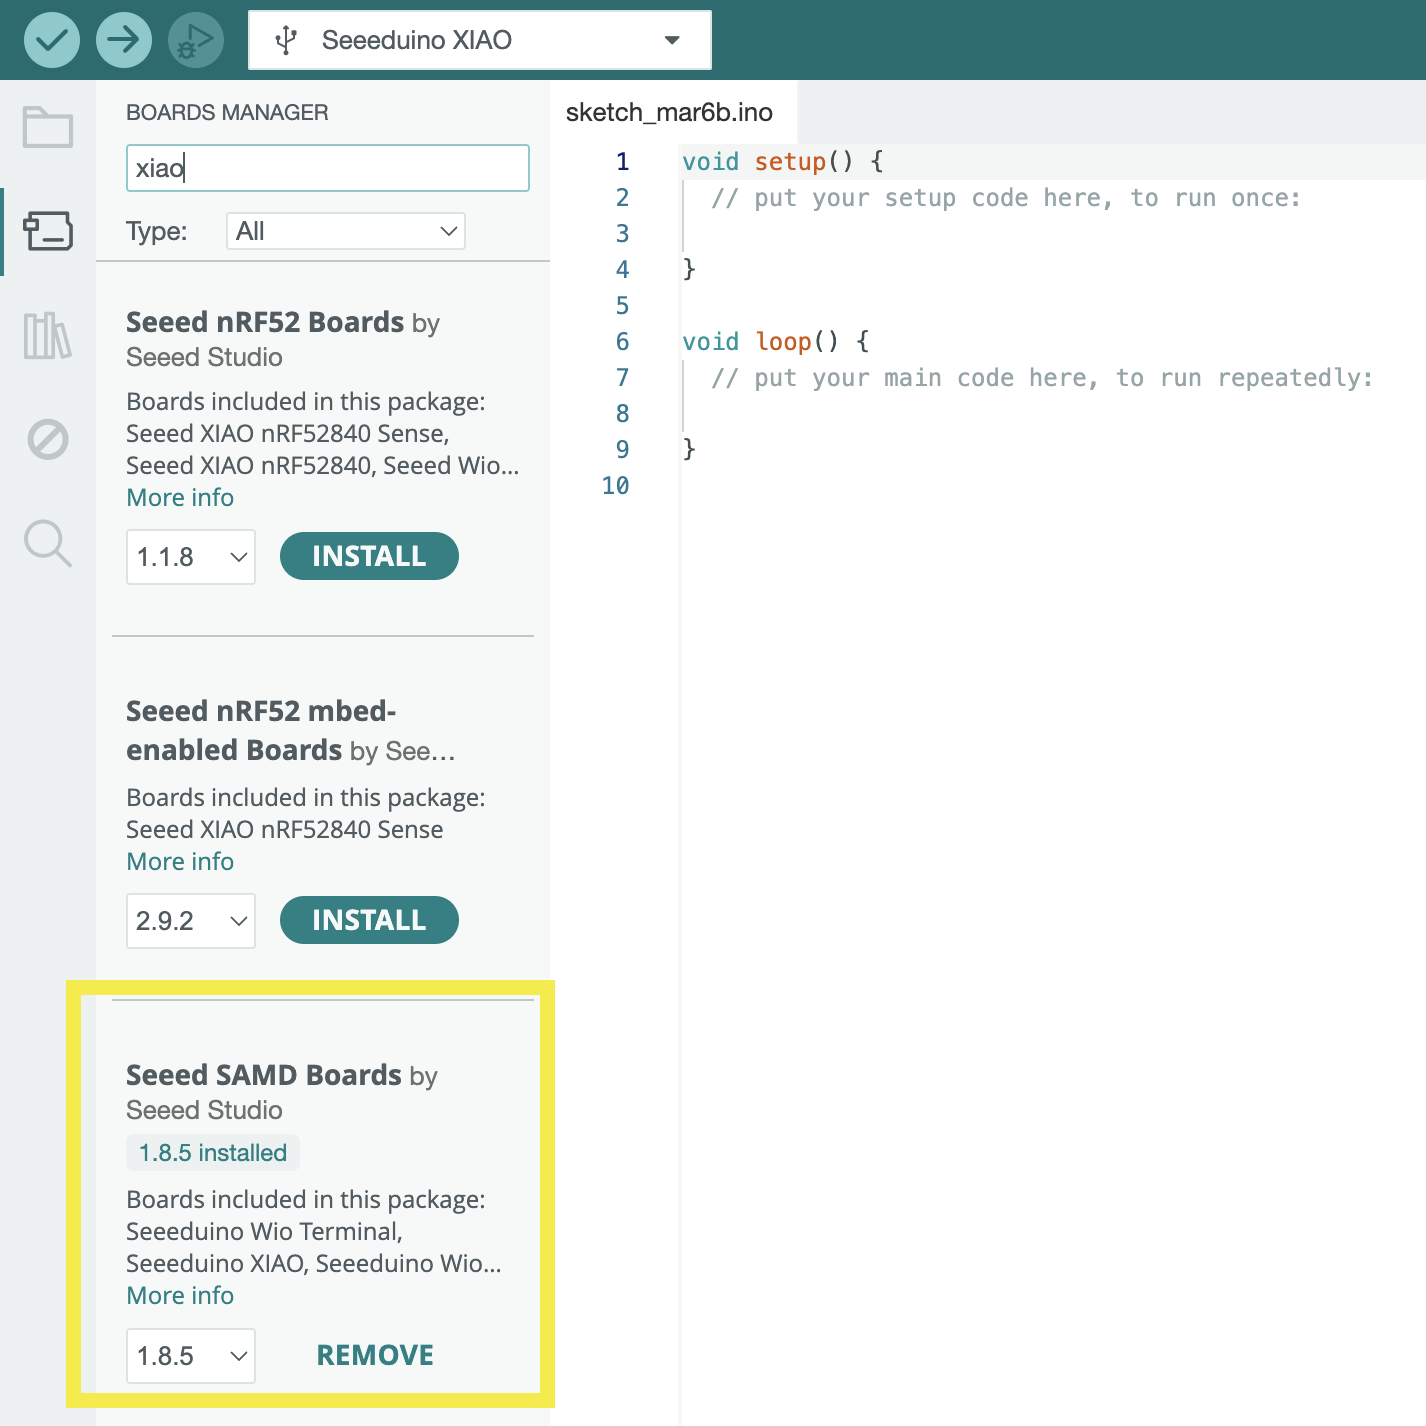
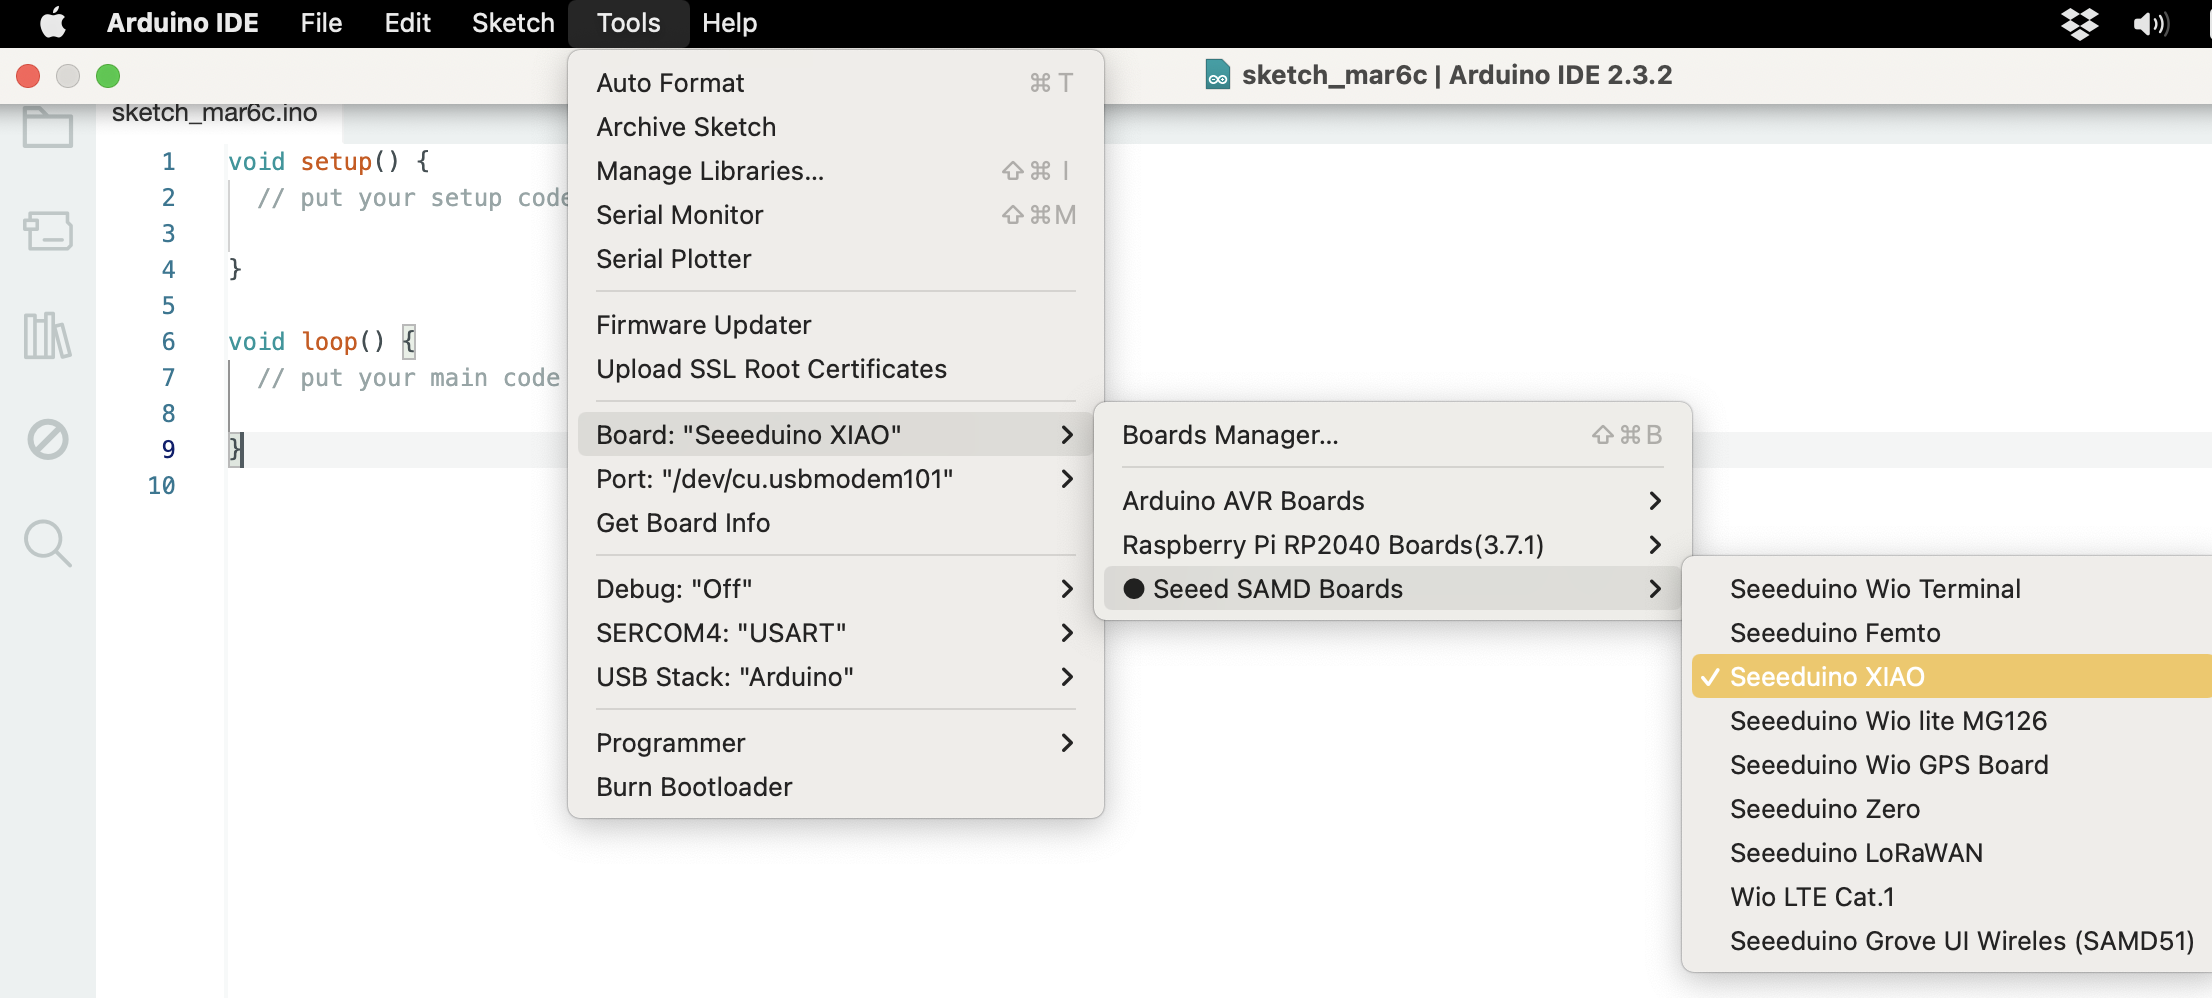
Finally, we have to choose the installed board for programming on it. For this we go to Tools -> board ->Seeed SAMD Boards -> Seeeduino XIAO.
The check corresponds to compiling the program to verify errors, and the arrow pointing to the right corresponds to loading the program on the XIAO board.

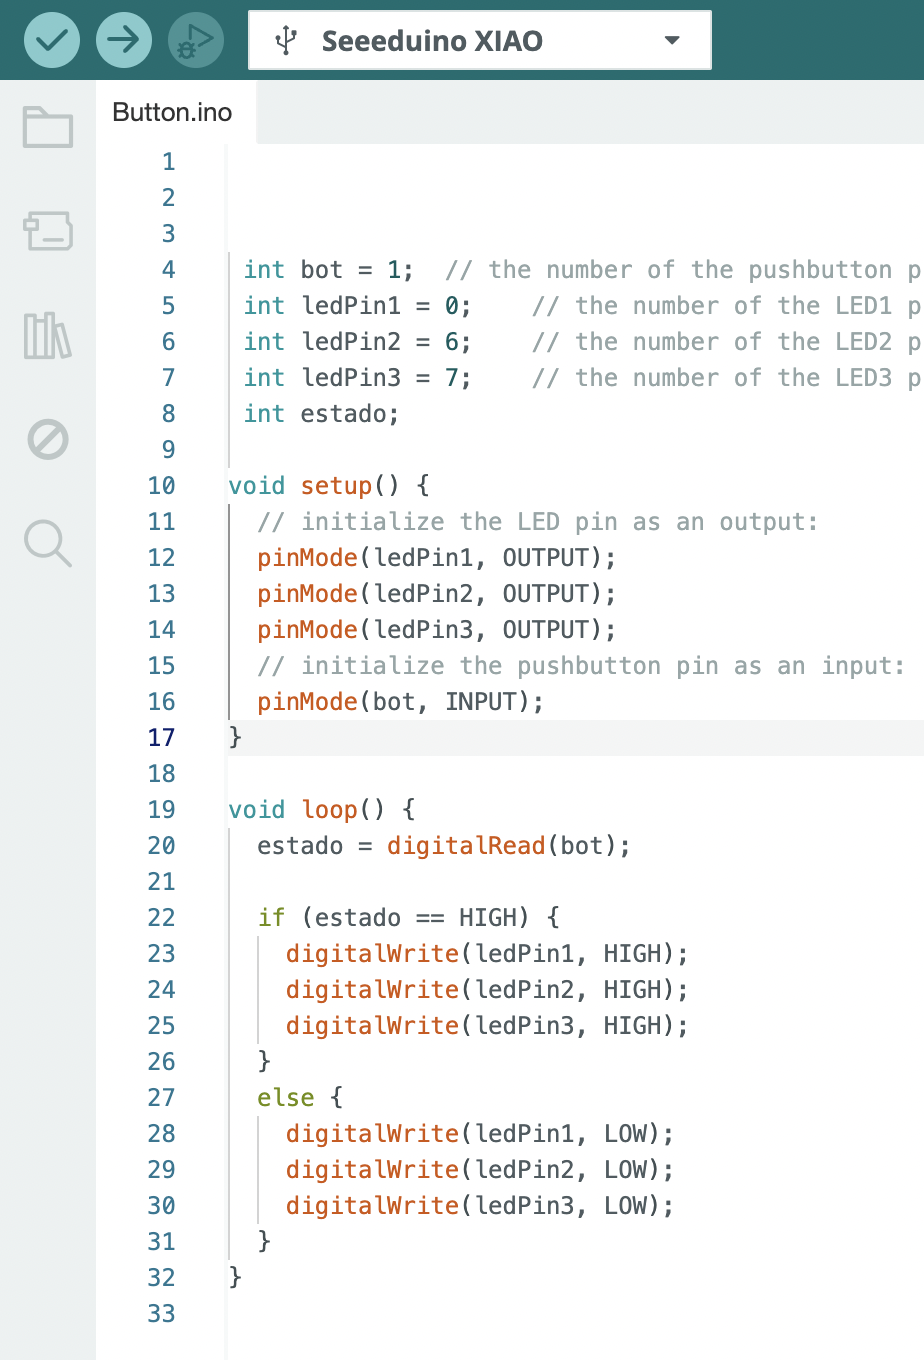
Now we are ready to enter our first code to the board. This code corresponds to the 3 LEDs turning on when the button is pressed, if not, the leds will turn off. It is important to always place the semicolon at the end of each sentence, if not an error message will appear when compiling the program.
Leds are connected to ports 0,6 and 7 and are configured as outputs, while the button is connected to the port 1 and is configured as input.
Group assignment
What I learned from this group experience was how to read and understand the pin configurations, functions, and special features of the microcontroller seeeduino samd21, working with 3.3V/5V DC. I didn´t know that this seeeduino exists, and I found it very interesting for development of others projects. Also, I learned how to Enter Bootloader Mode because sometimes the Seeed Studio XIAO SAMD21 port may disappear when user programming process fails.
My contribution to the group work was to browse through the datasheet of the seeeduino xiao SAMD21 and compared it to the atiny44 and the atmega328P-AU. This also helped me learn about other types of microcontrollers and know how many types of connections I could have with them.
Working with these small microcontrollers and SMD soldering opens the doors to being able to design tiny boards and incorporate them into any small design that we want to make in the future. Until now, I had only worked with thru hole components.
Here is the link to the group assignments:
Files: