
Welcome to Week 3
Computer-Controlled Cutting
Hello! this time, let’s learn about Computer-Controlled Cutting, for this week we have the following group and individual assignments:
- Group assignment:
- Individual assignment:
o Characterize your lasercutter's focus, power, speed, rate, kerf, joint clearance and types. - ✅ Done
o Document your work to the group work page and reflect on your individual page what you learned. - ✅ Done
o Design, lasercut, and document a parametric construction kit, accounting for the lasercutter kerf, which can be assembled in multiple ways. - ✅ Done
o Cut something on the vinyl cutter - ✅ Done
GROUP ASSIGNMENT
Laser cutting is a technique that is used to cut pieces with a laser beam that focuses on a point, this point moves to carry out the cutting process by thermal separation generated by the tubes it has, on this occasion we will work with a GCC MG380 Hybrid laser cutter.
This is the link to the supplier of the machine: MG380Hybrid
In this link are its specifications: Download
Let's go learn more about this machine.
GCC MG380 Hybrid laser cutter:
STEP 1: First let's get to know and identify the equipment.
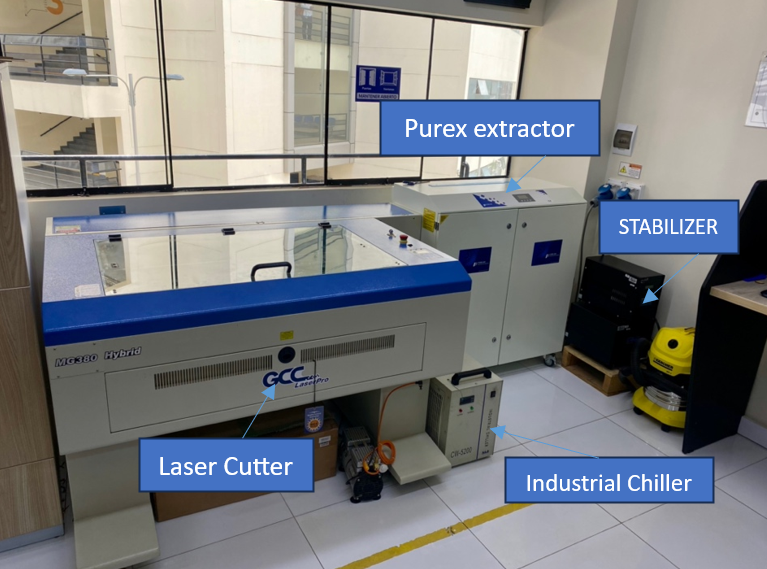
STEP 2: Before starting work, we must identify the following elements: fire extinguisher and first aid kit, as well as safety protocols. Remember, our safety comes first.
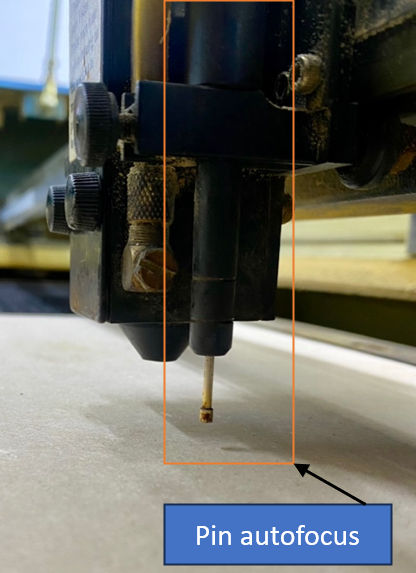
The focal length is very important for the performance of the equipment, it is necessary to correct it in each job through the autofocus pin.
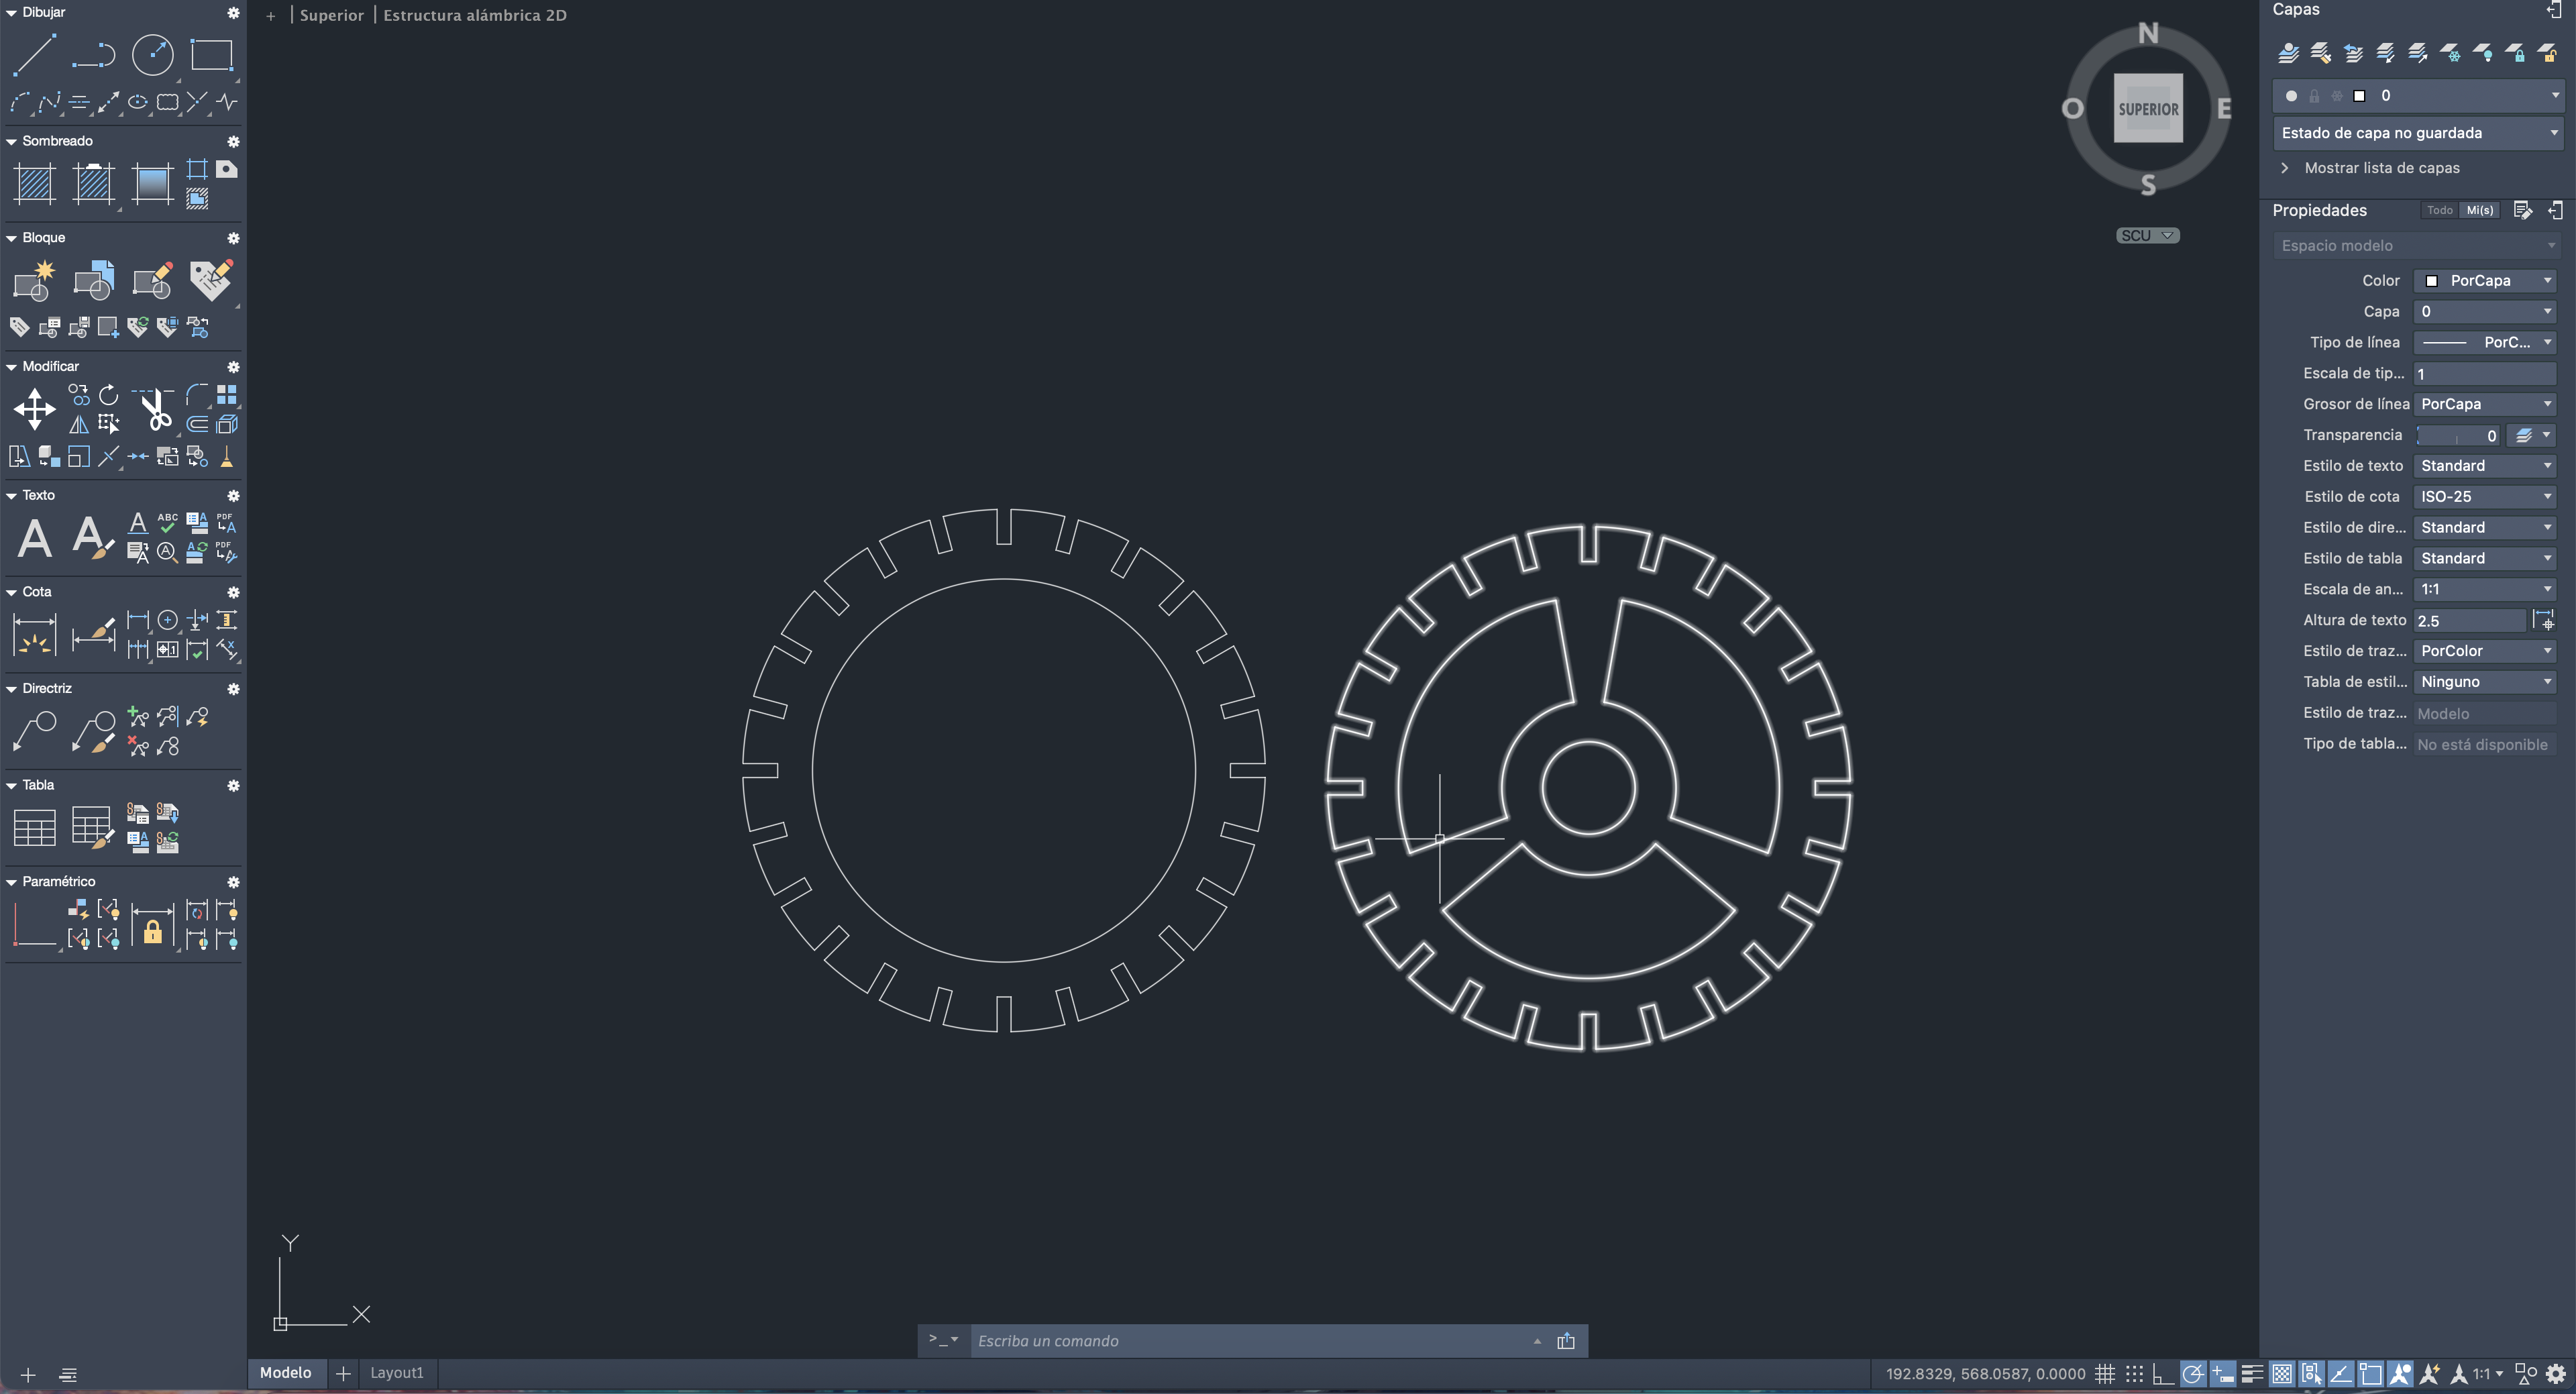
We will estimate the notches, for this we will design a square, rectangle and a 15 mm circle, and we will cut them out of 3 mm MDF, but with different cutting parameters.
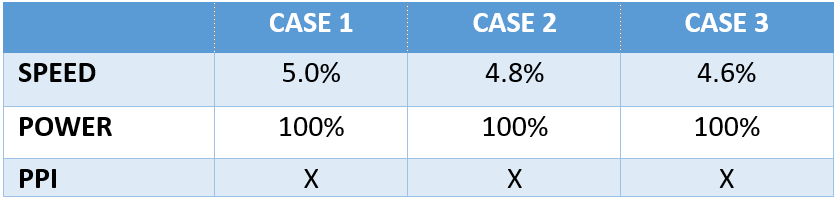
In the first case, the laser did not cut the rectangle or the circle, but it was able to cut the square, in the second case it was able to cut both figures except the circle and in the third case all the figures were cut.
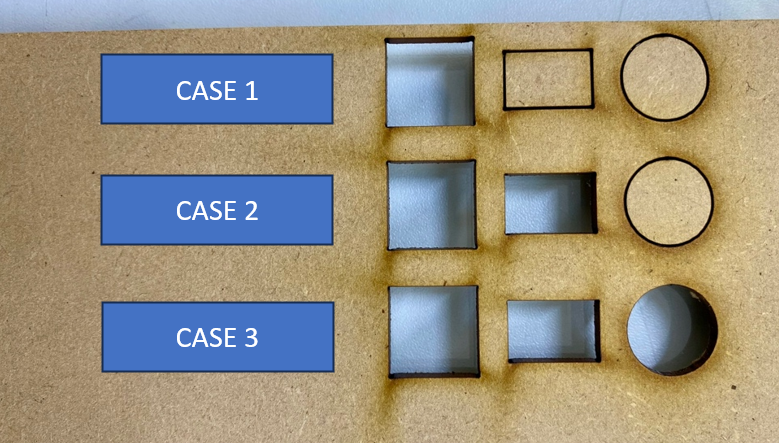
We write down and save the cutting parameters of the third case as a cutting reference for 3mm MDF. Then we measure with a vernier, the square and the hole.

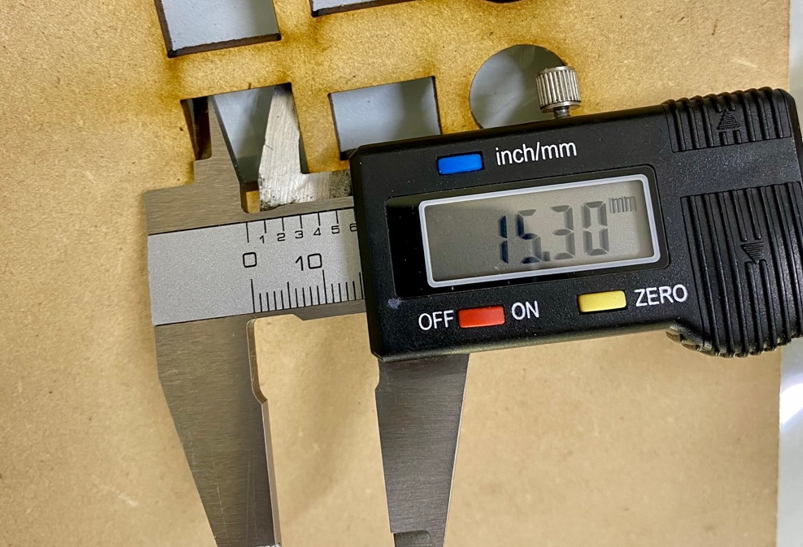
Subtract and divide by two, in my case it’s: (15.30-14.75)/2 = 0.275mm, I used these measurements to draw the estimate for the notches.
Press fit notch:
Now we have to design our joint test. Corel Draw was used to make the design, for several reasons, first, to handle text and numbering, second, it is more practical to handle parametric figures and third, the cutter works with this software.

We used two colors, the red color to cut and the black to rasterize.

The marked speed value was a value already worked on previously, later we will see how it affects the speed.
Well!, now I explain to me how is the whole process of laser cutting.
STEP 1: First, we select our design, and press ctrl + P or look for the print option, then, we go to the preferences section.
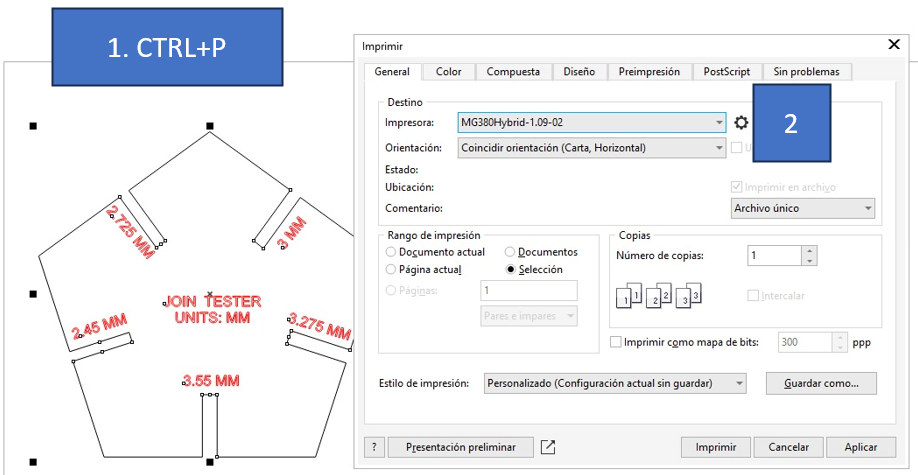
Then, we look for the PEN option, and according to the colors we use in the design, we enter the parameters, remember red is for marked and black for cut.

If we check the panel of the laser cutter, we’ll see that there is a document and it shows some data such as: File name, speed and power.

Remember to place the material straight and position the cutter head on the material at its origin, (top left of the material). If everything is fine, we give start, and the equipment will start working, it’s important to turn on the purex extractor, remember that the process generates gases.
Video: Corte del pin tester
We have to make 2 pieces to verify that everything is fine.


This measurement of 2,725mm will be very important in the future, when we manufacture our pieces for the final project, we’ll need the joints to fit perfectly.
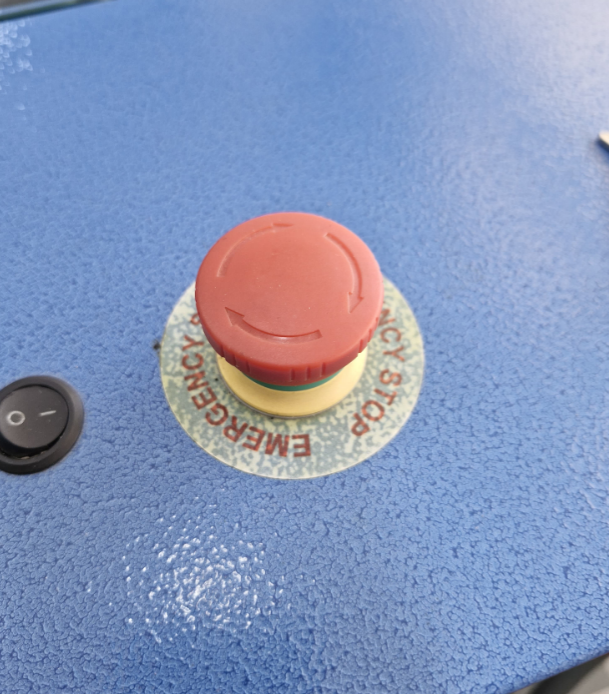
It is a crucial component in the safety of industrial machines and mechanical equipment. This button is designed to immediately stop the operation of a machine in case of emergency, protecting both operators and machinery from possible damage.
INDIVIDUAL ASSIGNMENT
Parametric Desing:
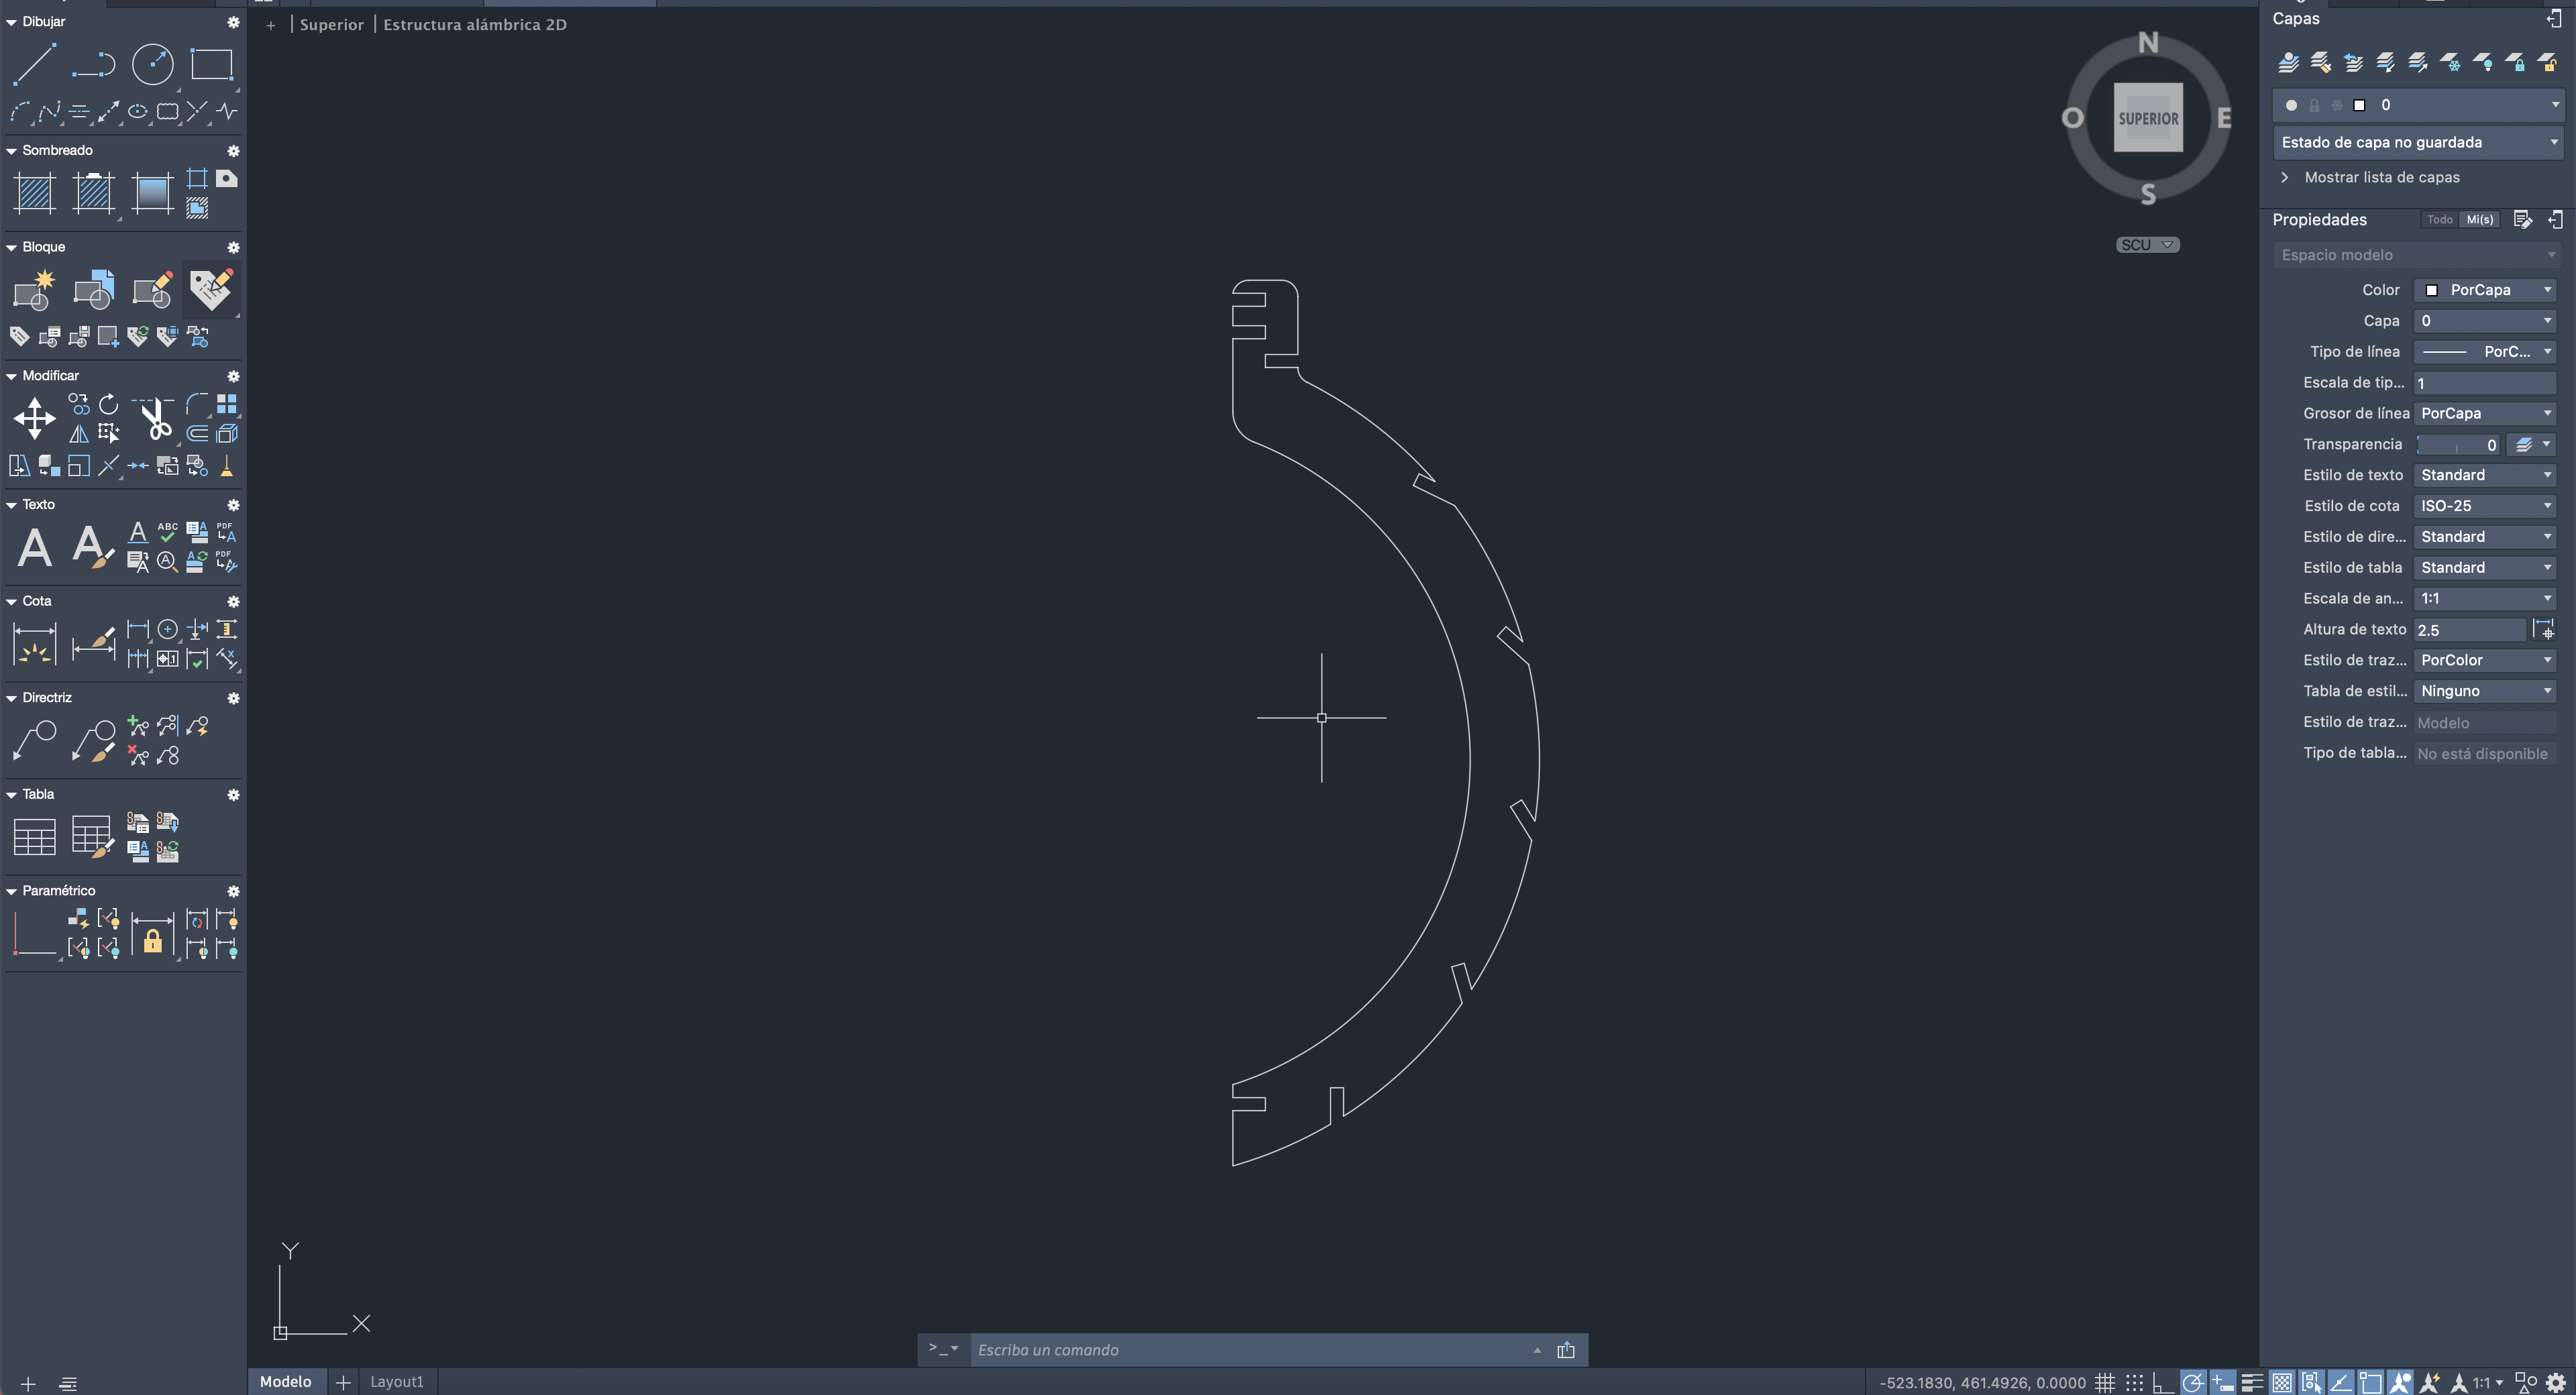
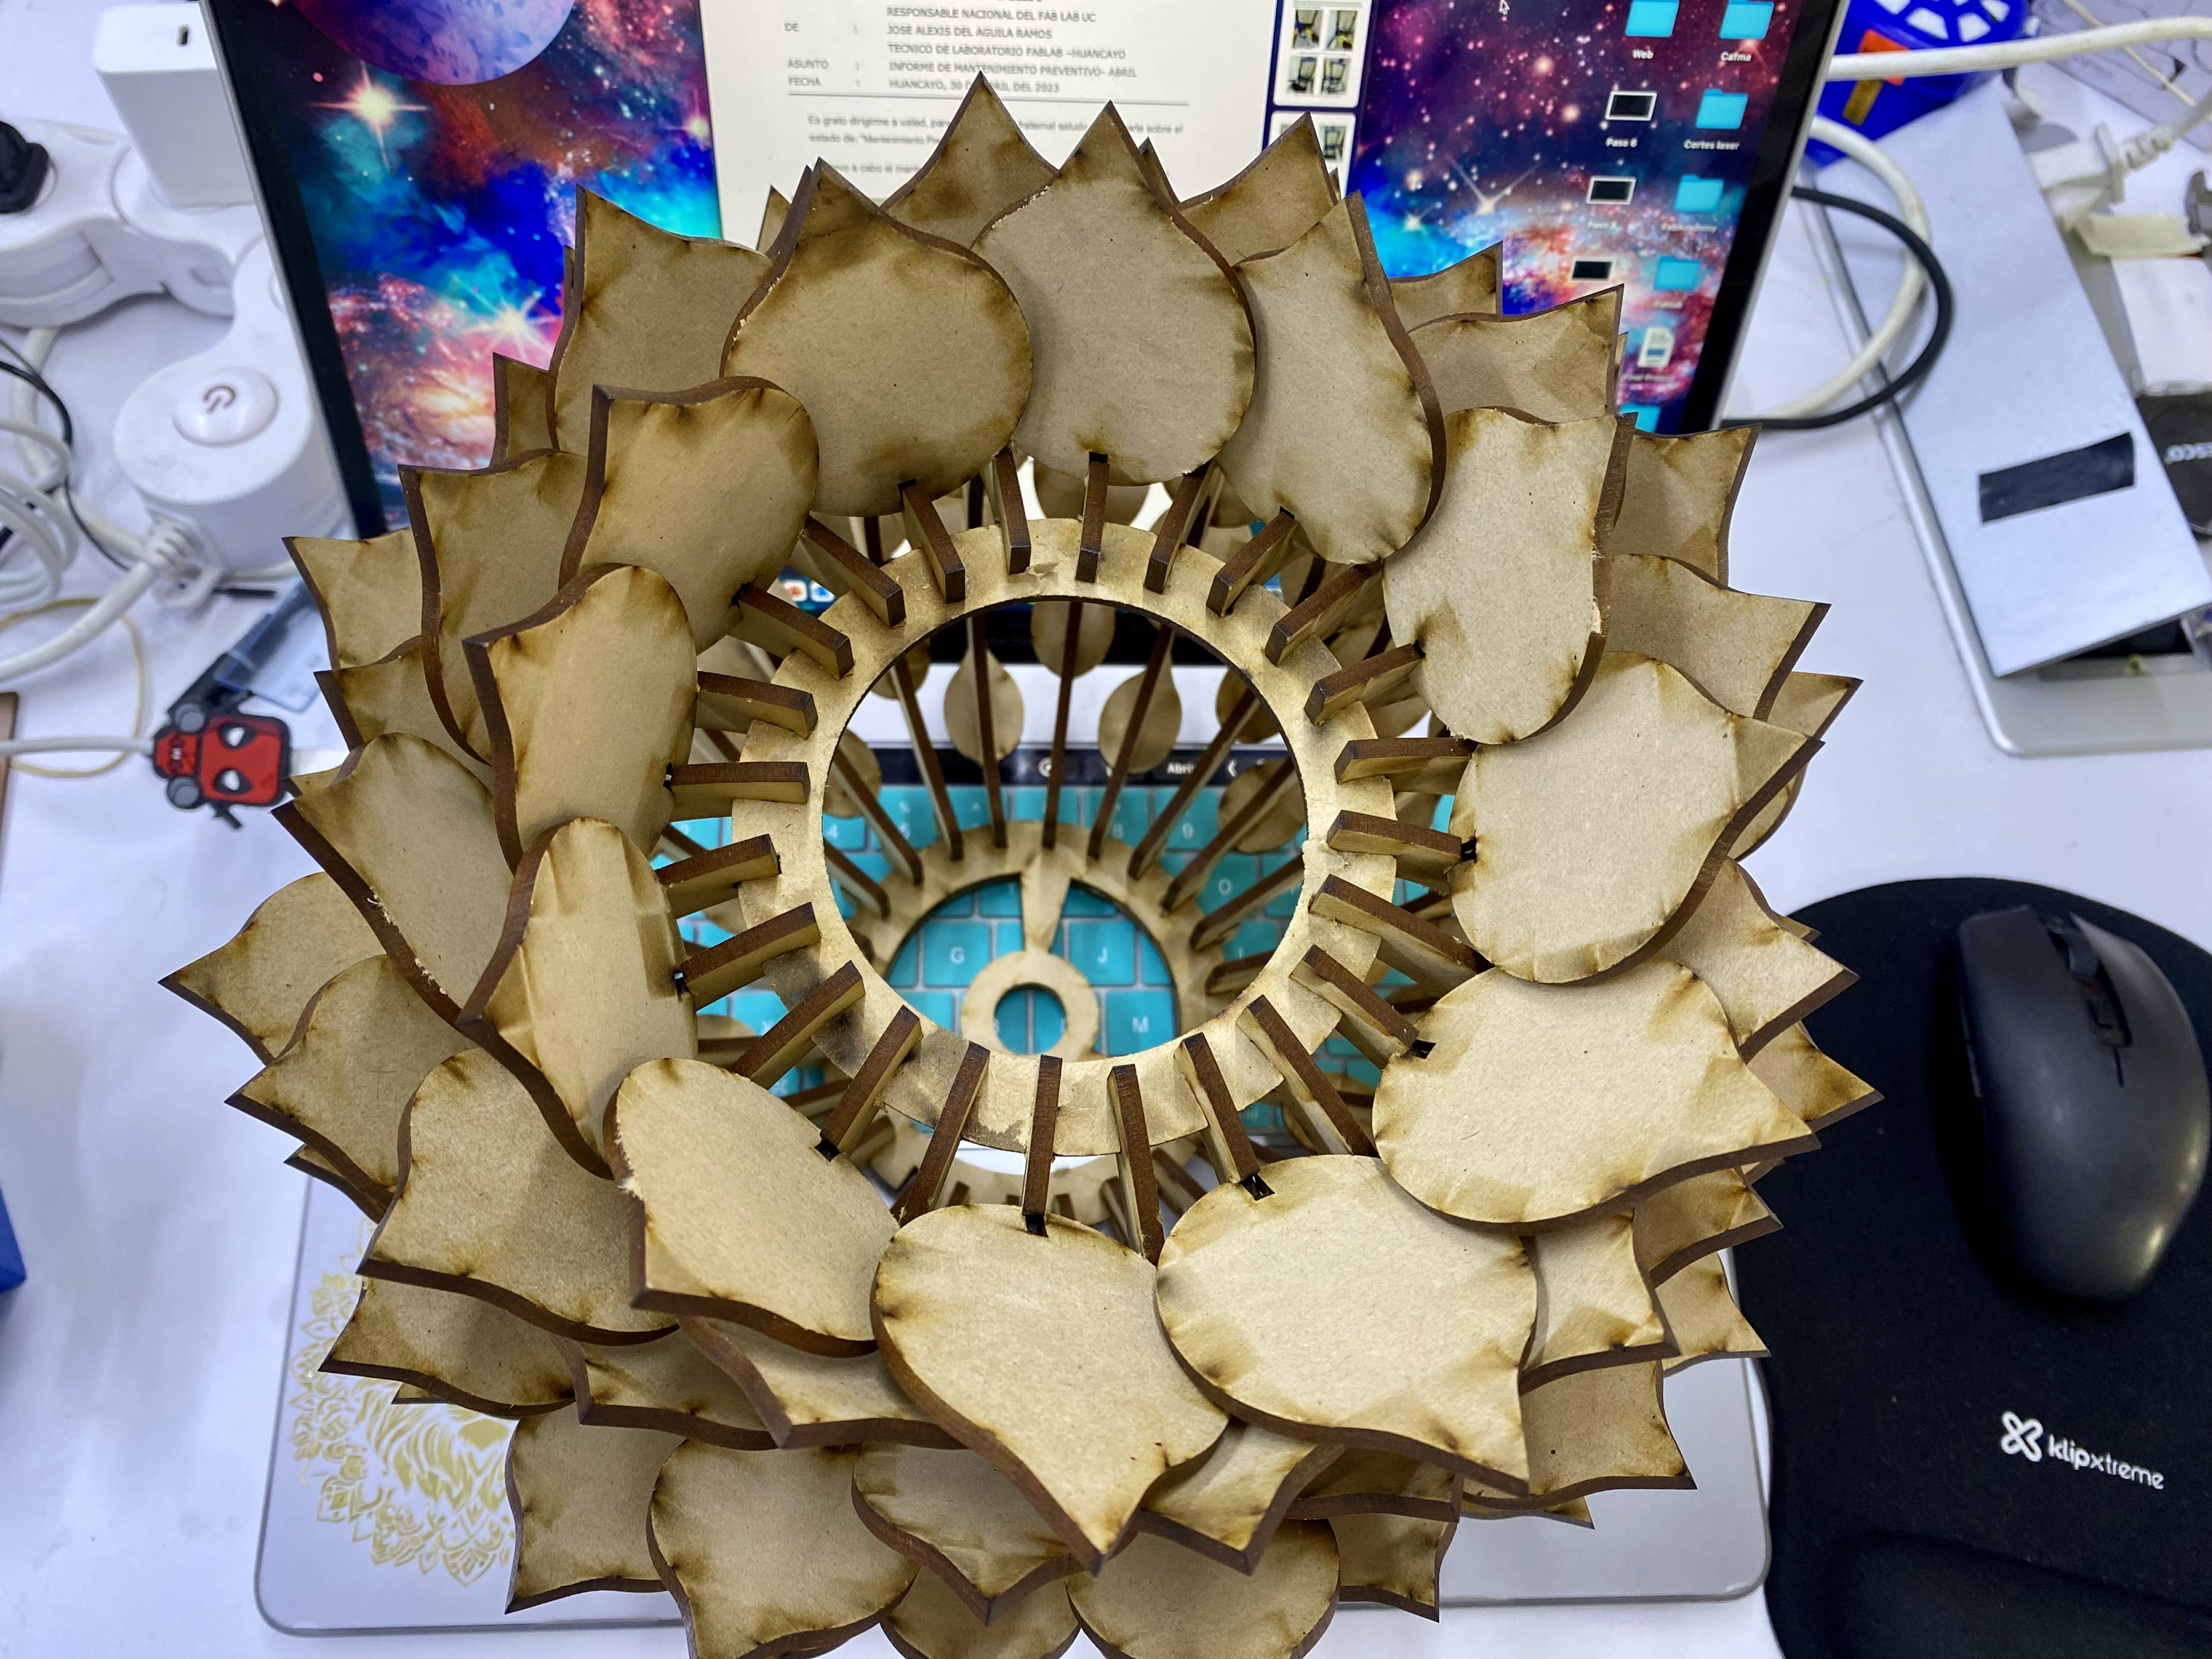
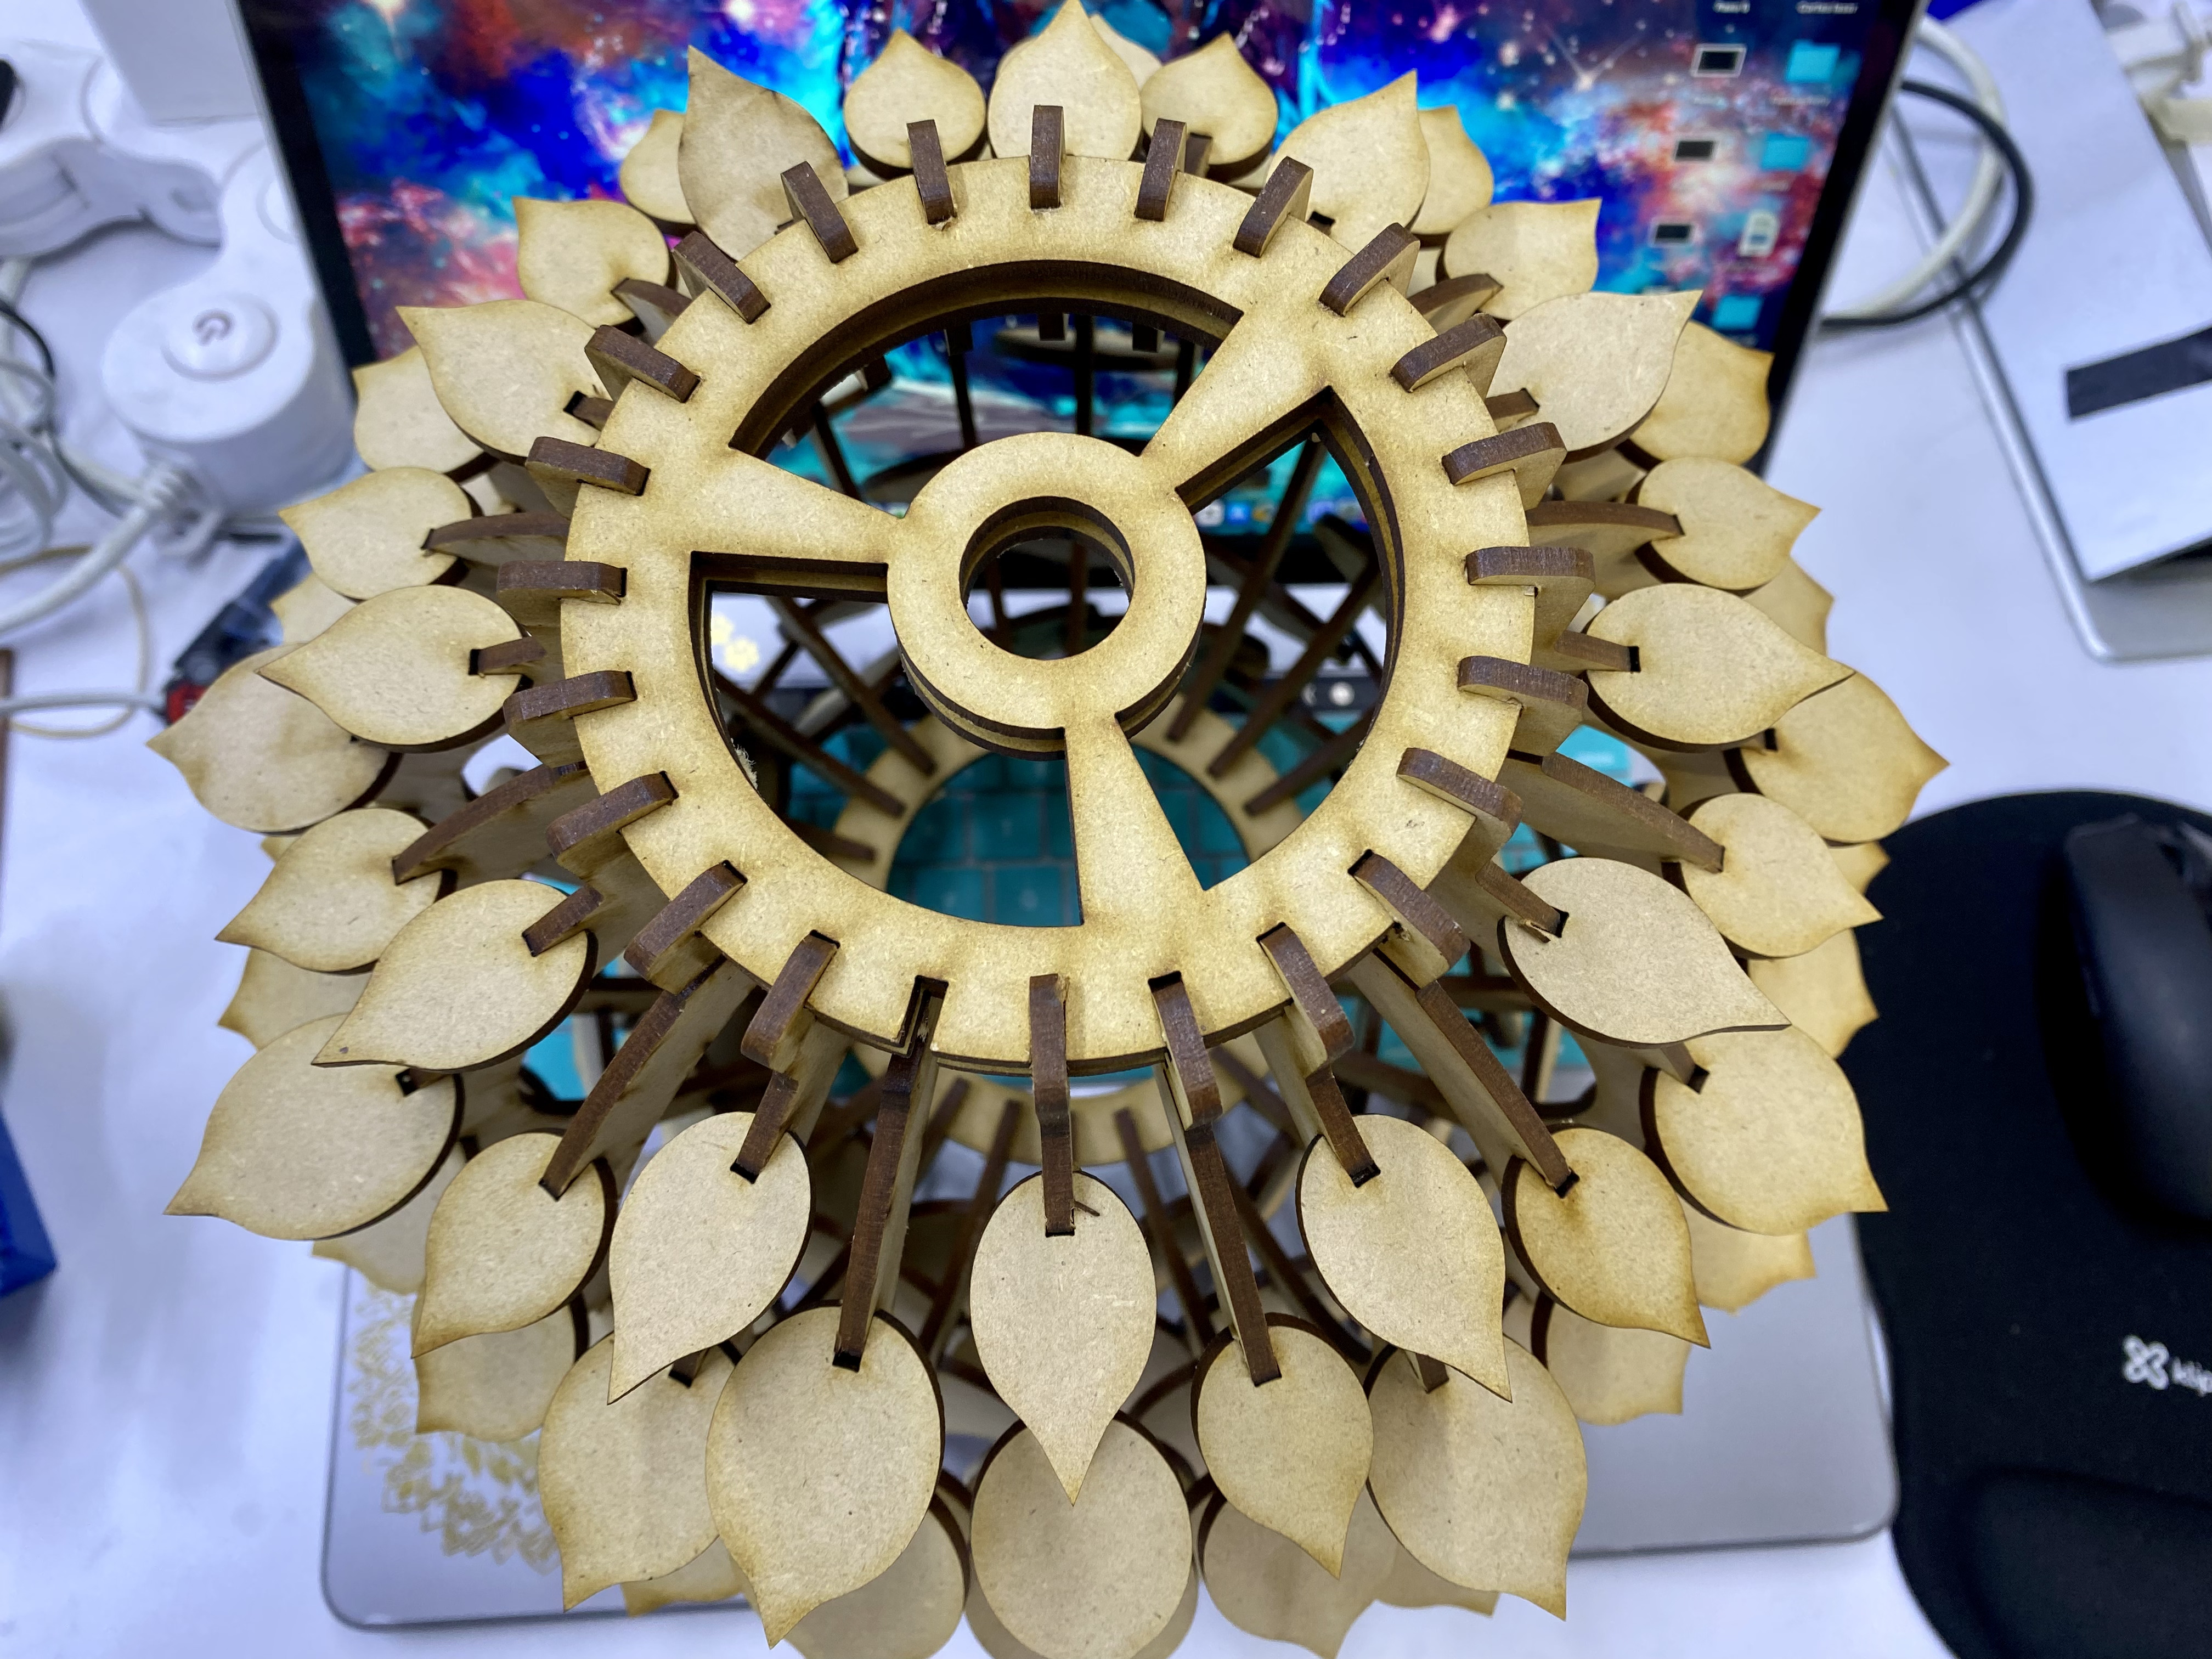
Well now knowing the appropriate cutting parameters and tolerances we will make a parametric kit, while I was thinking about what to do, they brought me a sweet fruit, the pineapple, after observing it I was able to visualize that it has a very interesting shape, it is geometric segments placed one sequentially from the other

After watching for a while while I rambled, I have the idea ready, I will make like a parametric lamp in the shape of a pineapple.
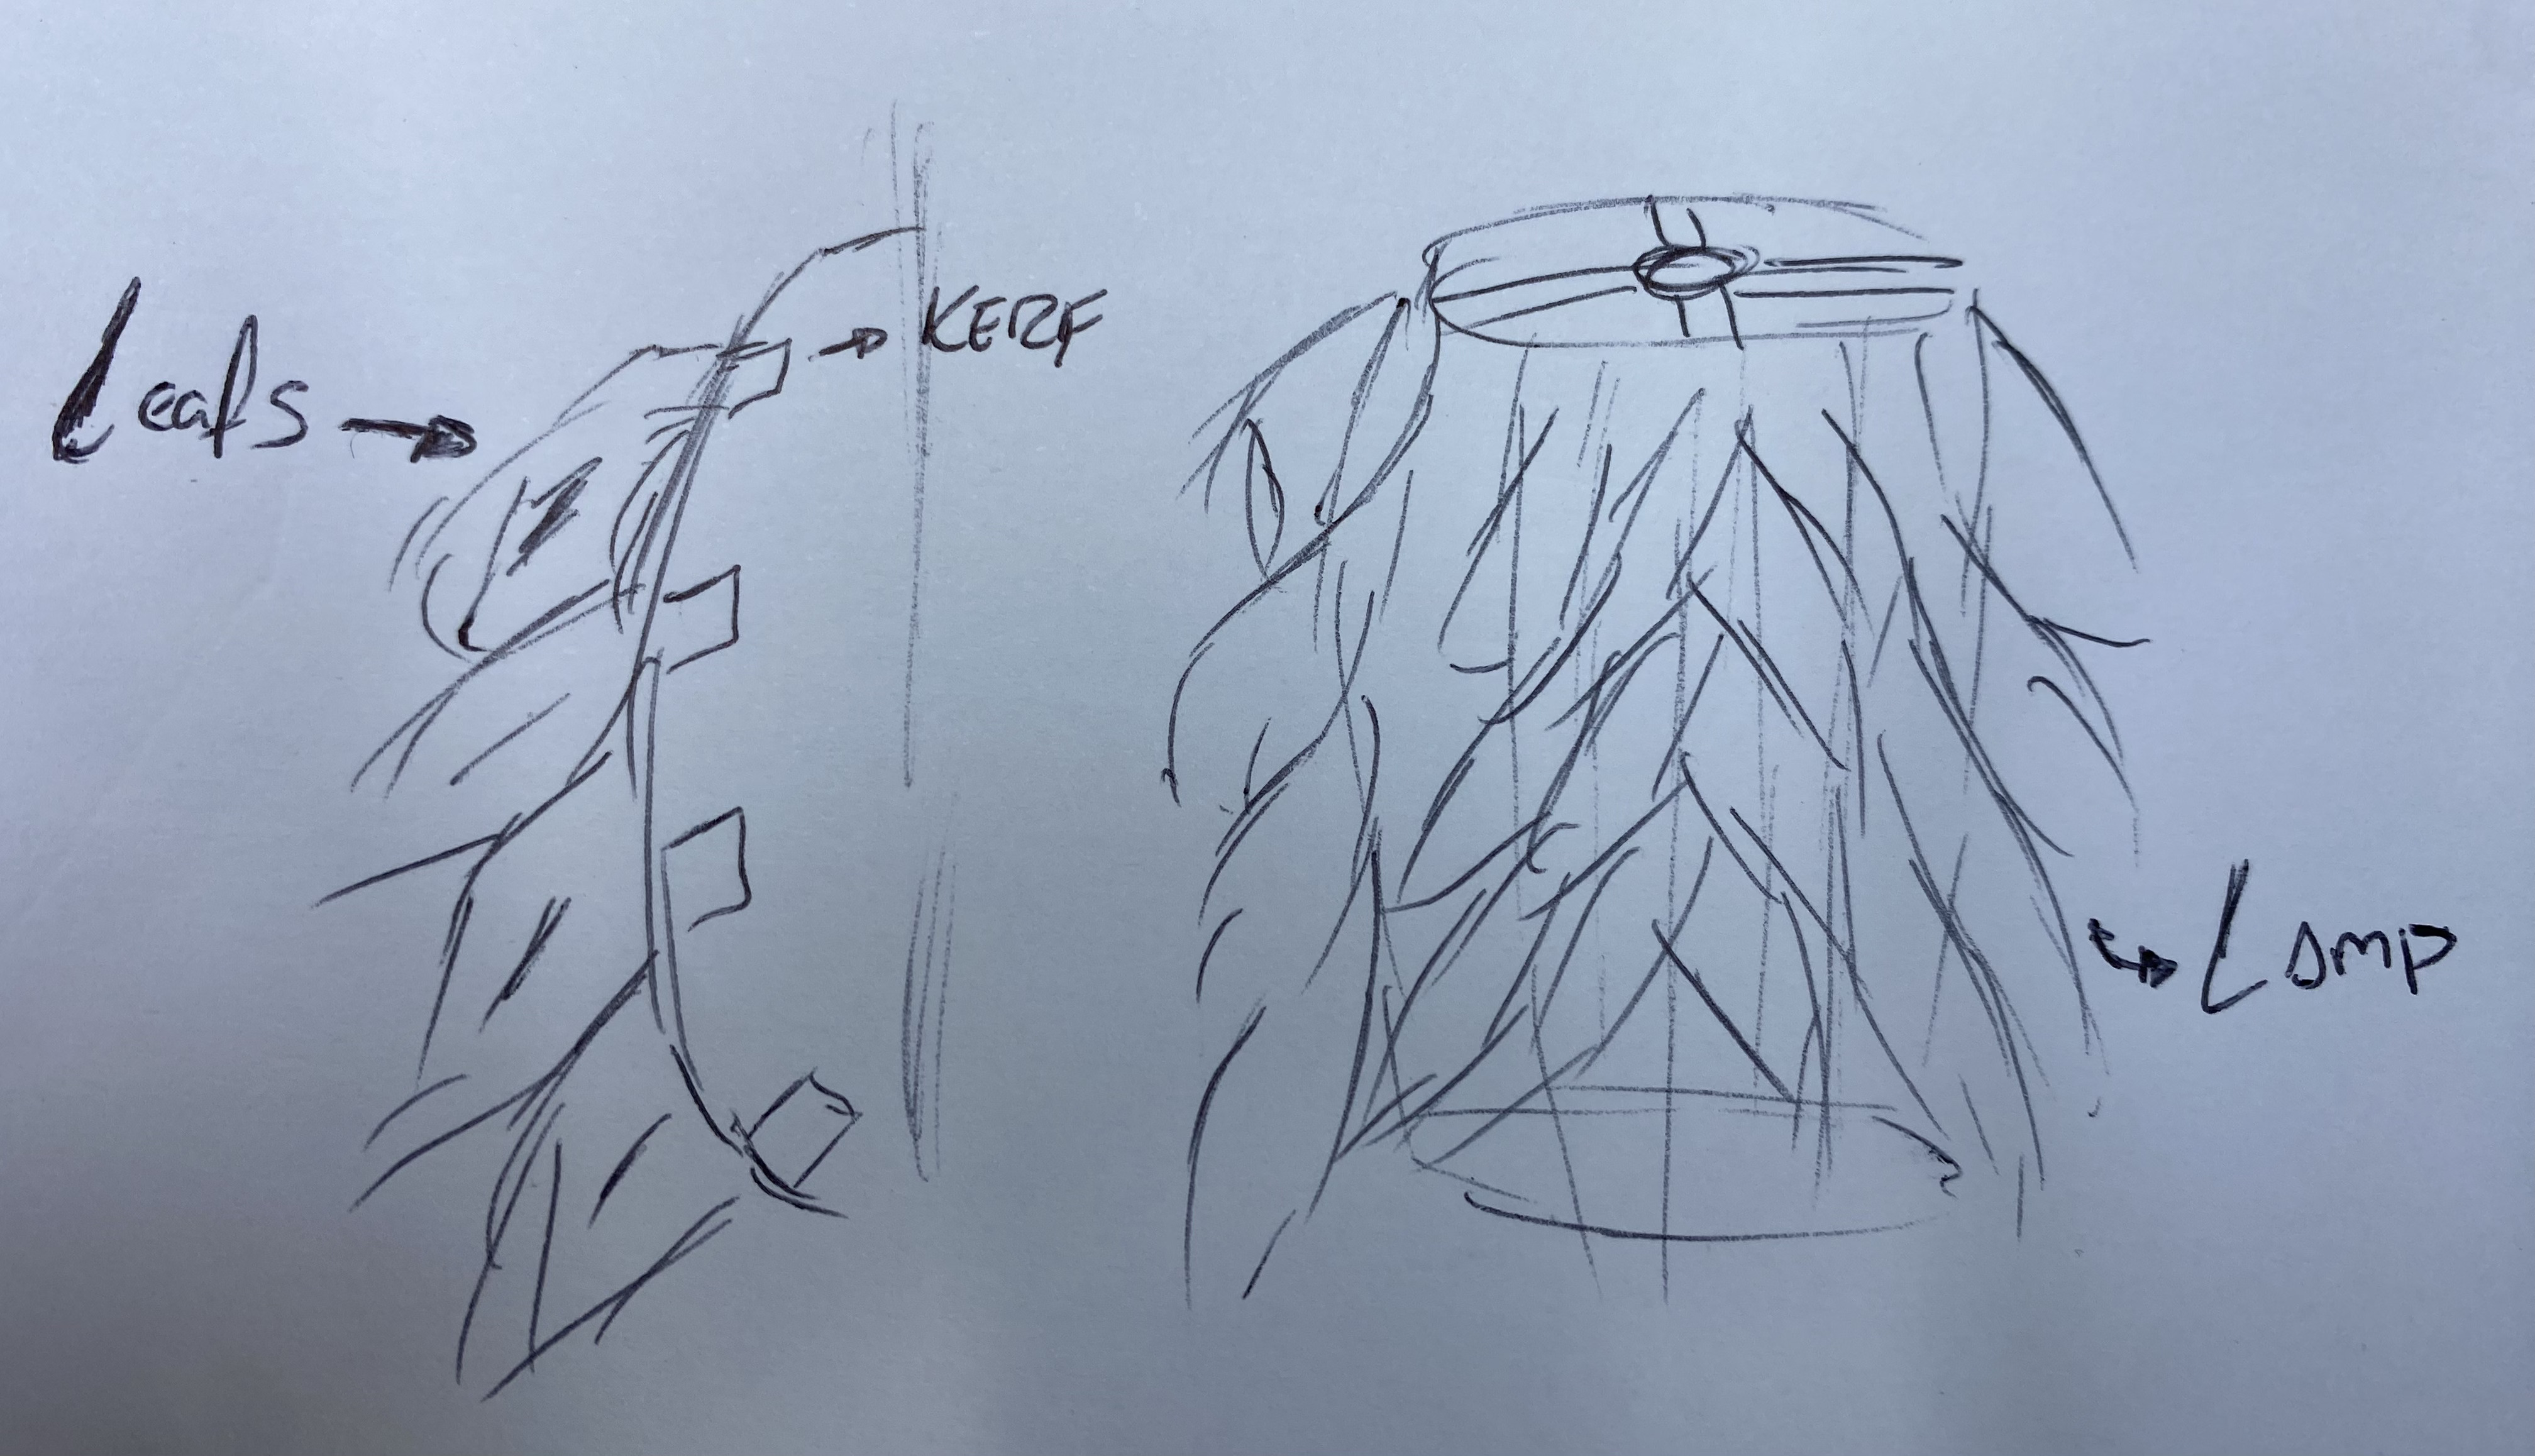
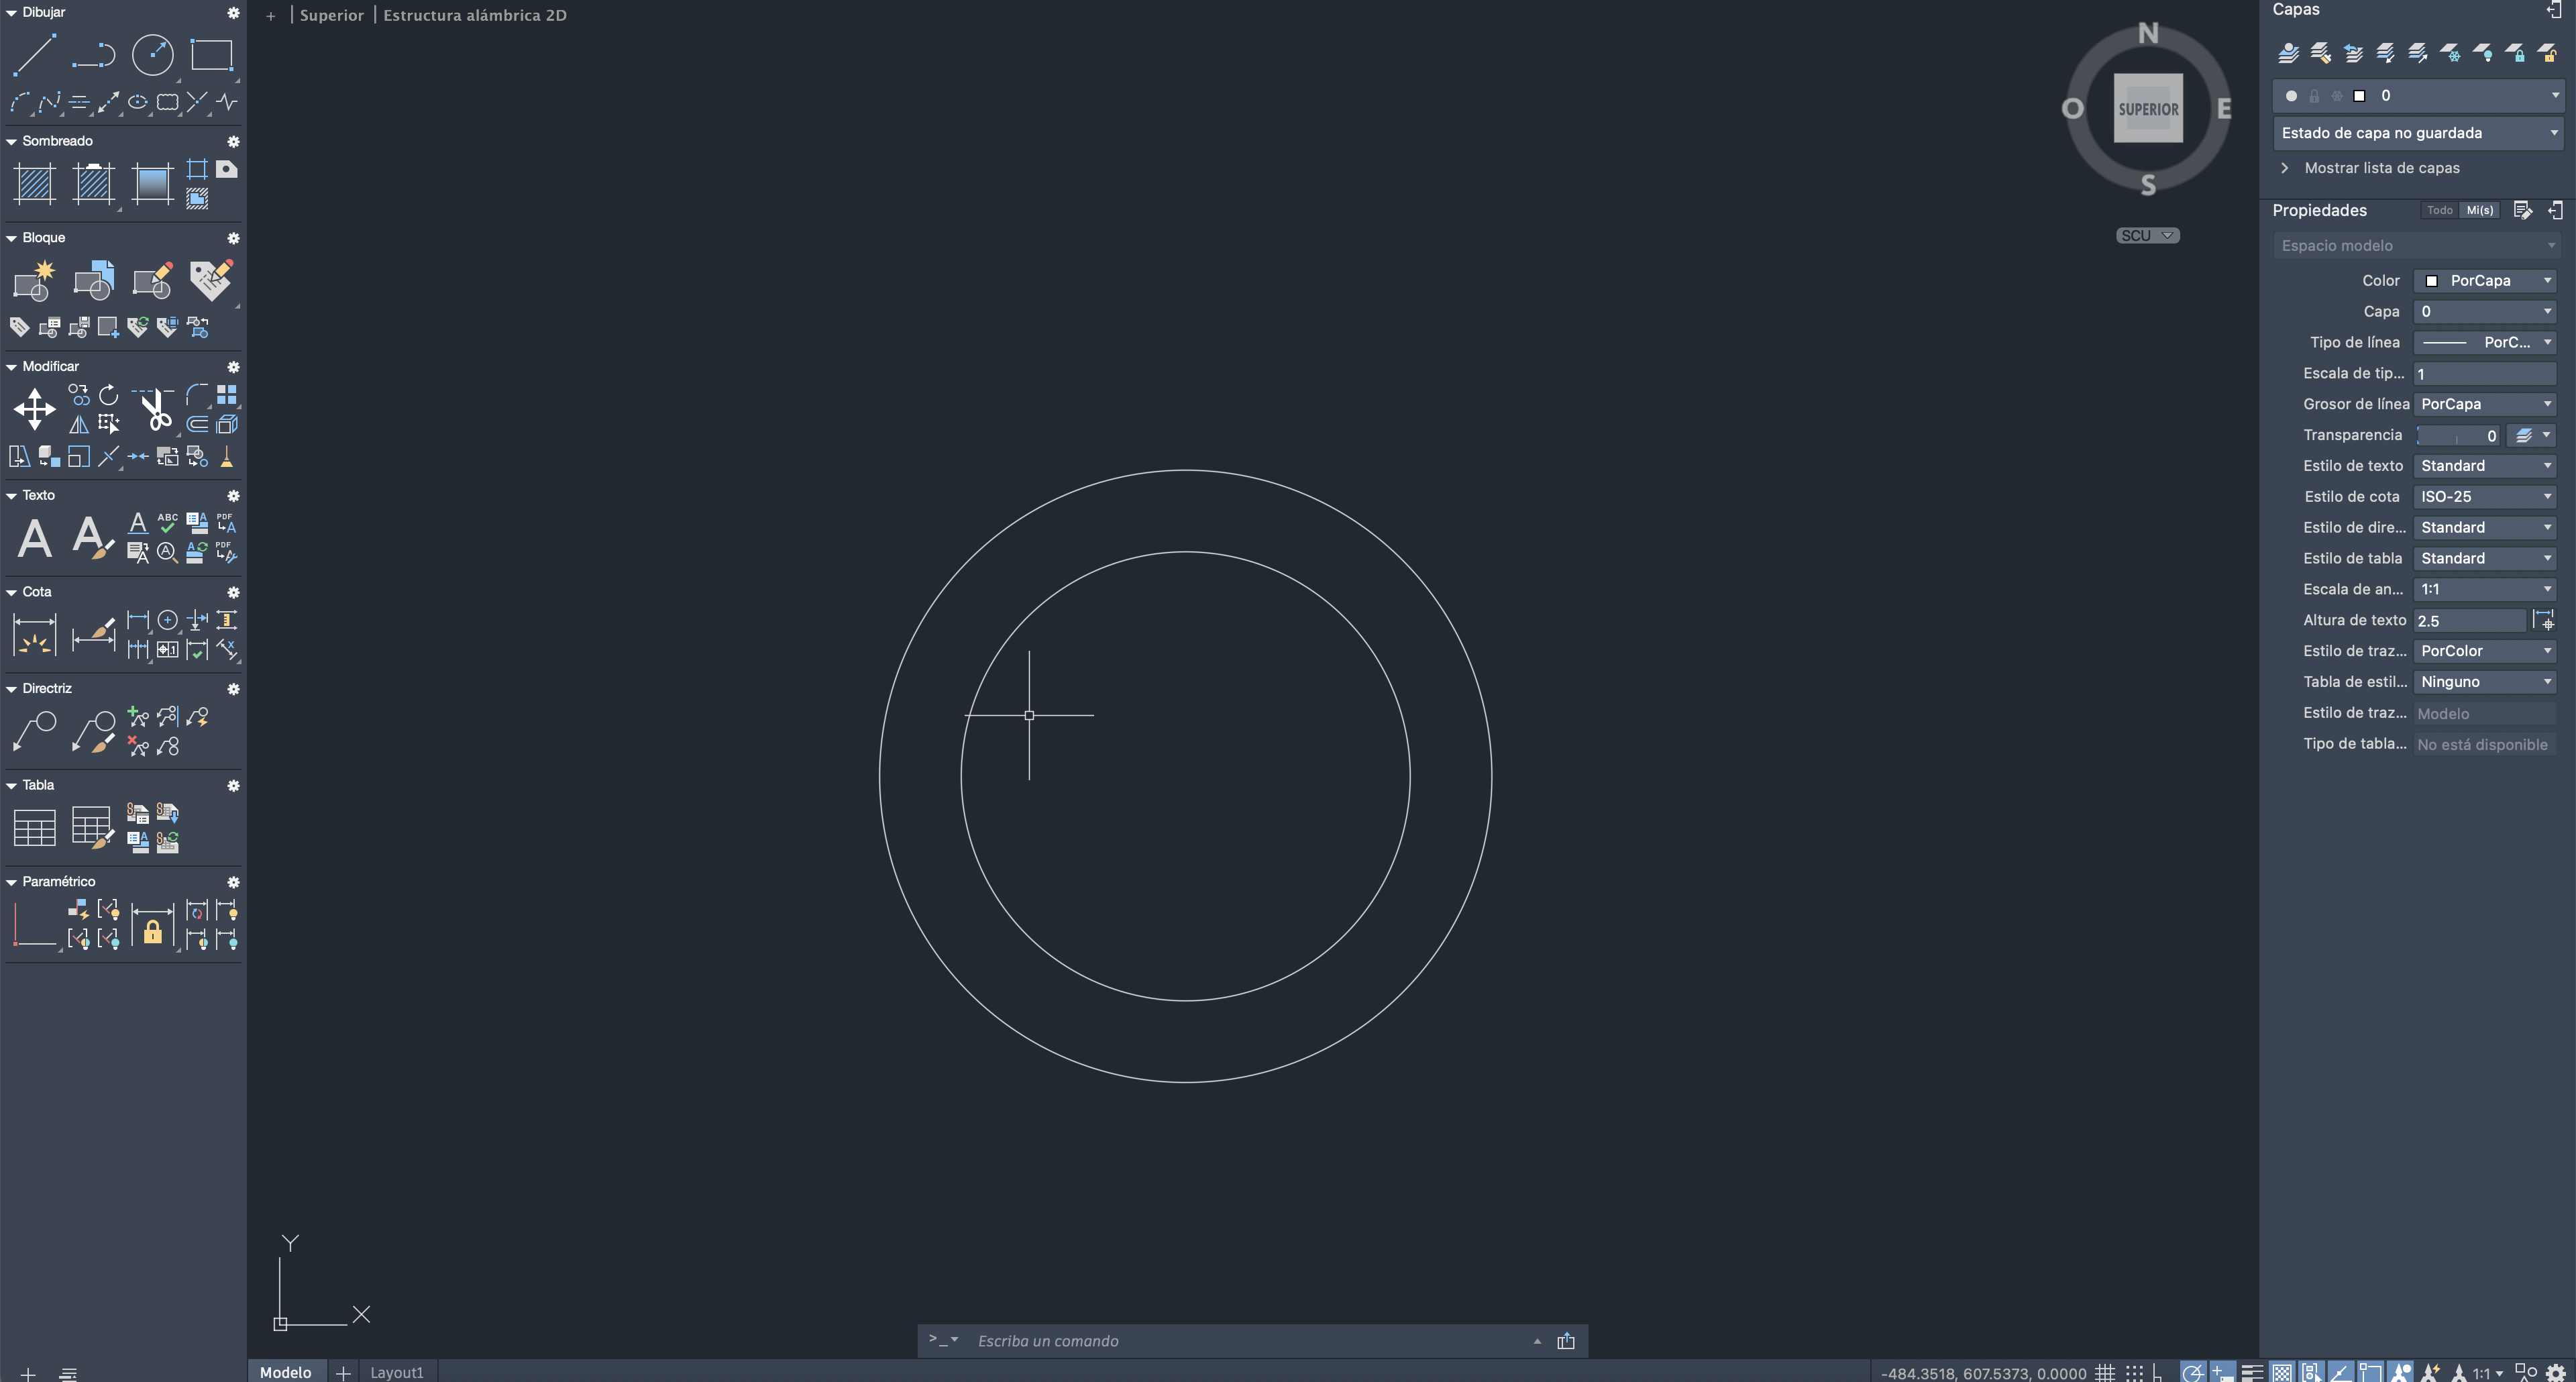
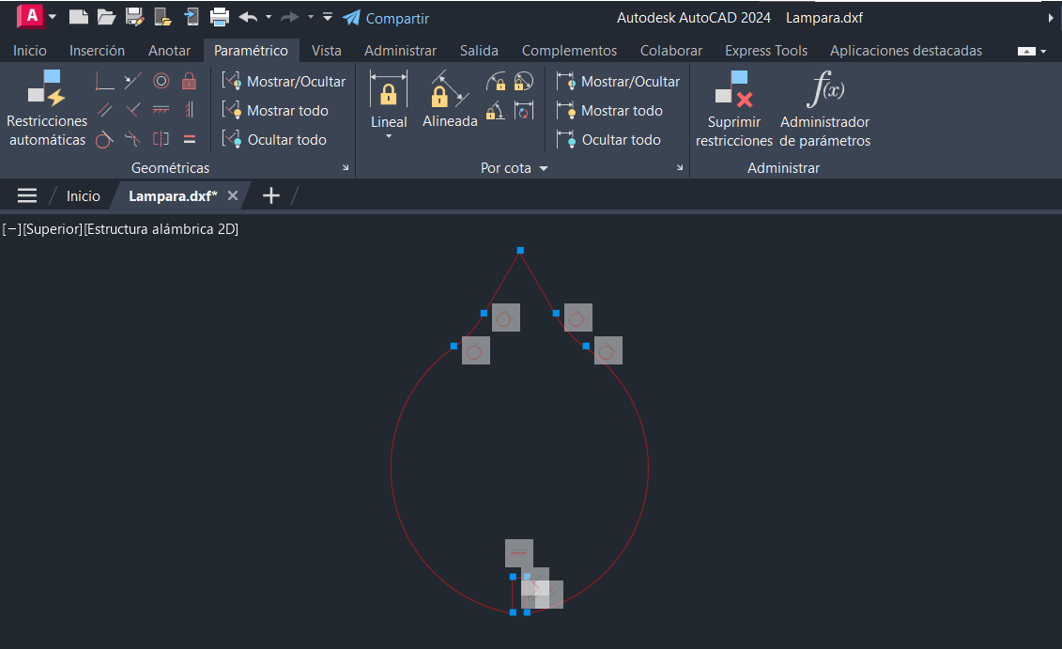
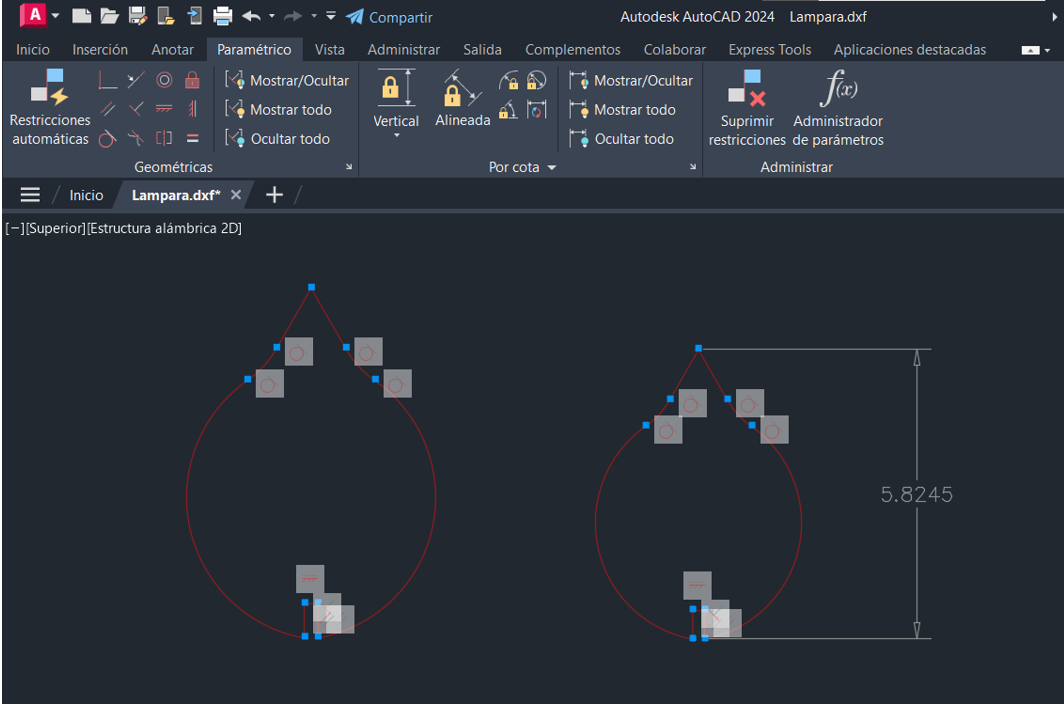
I will place the inserts for the leaves and make a structure with the MDF, for this part I will use 3MM material and we will start with the design of this kit on the autocad platform, We will place two circles, one as the internal diameter and the other as the external diameter to support the lamp. We will make two of this, for the upper and lower part.
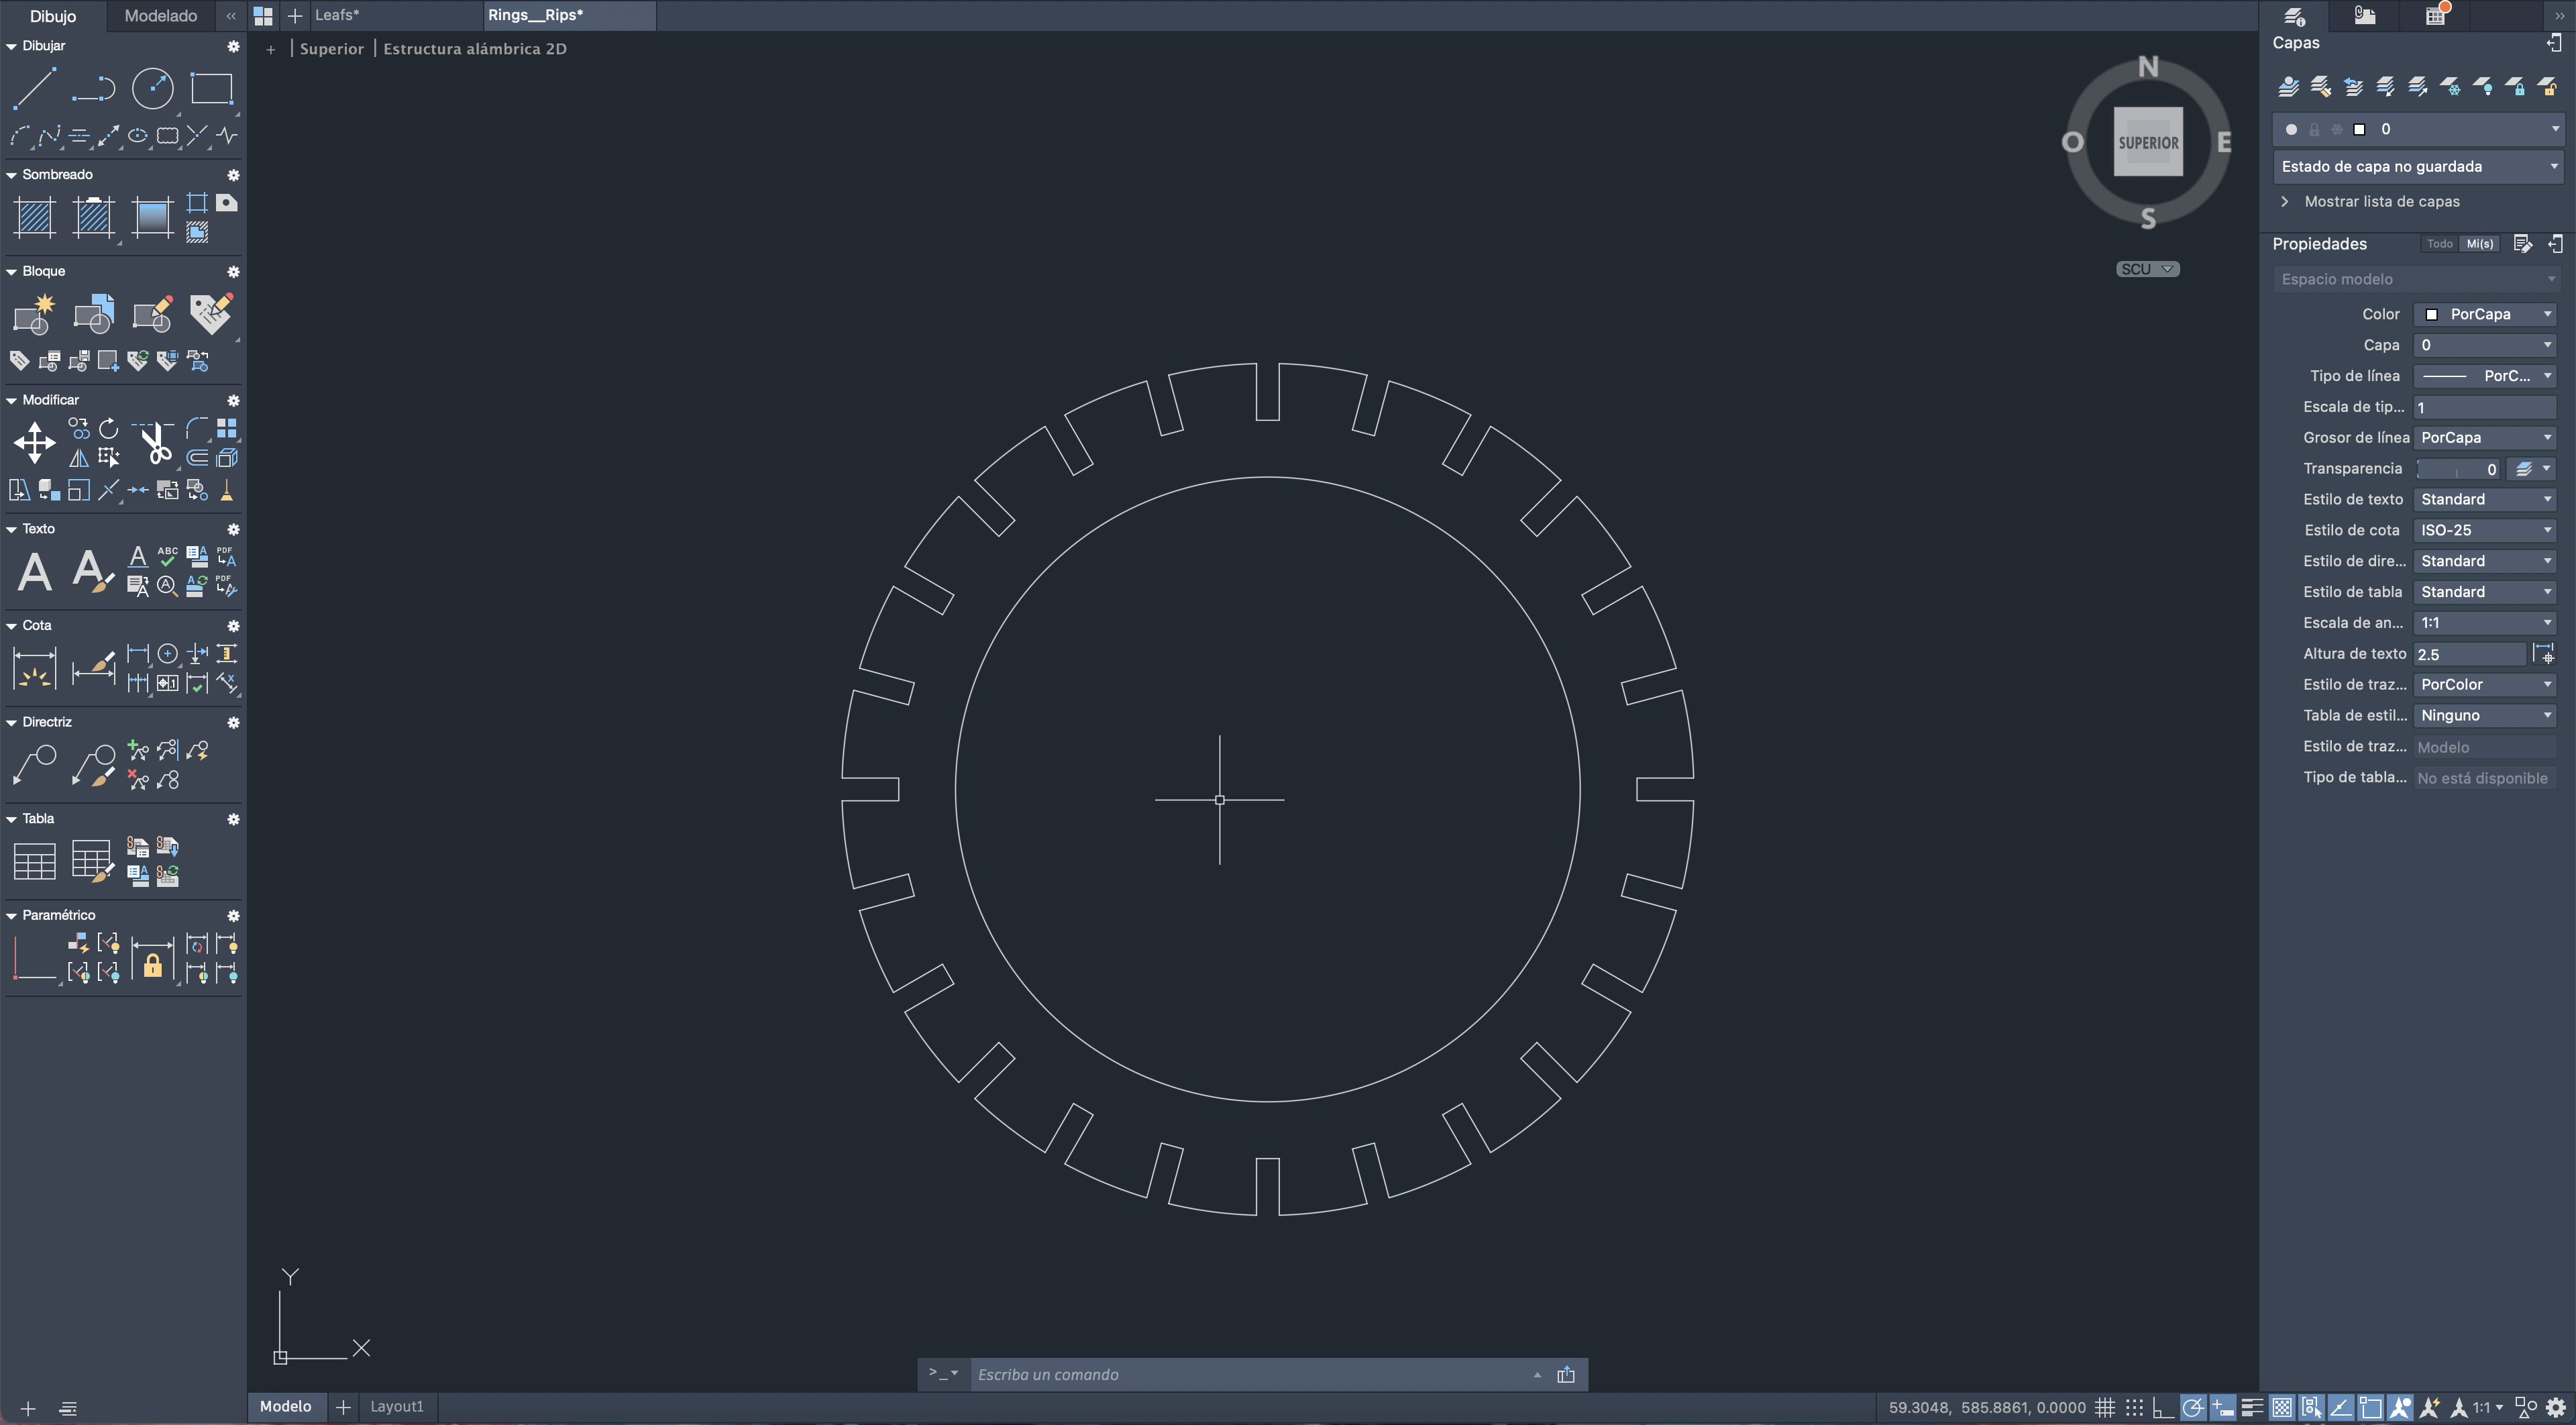
Let's continue placing a socket and then use a multipolation command and thus have several and the structure can be correctly supported
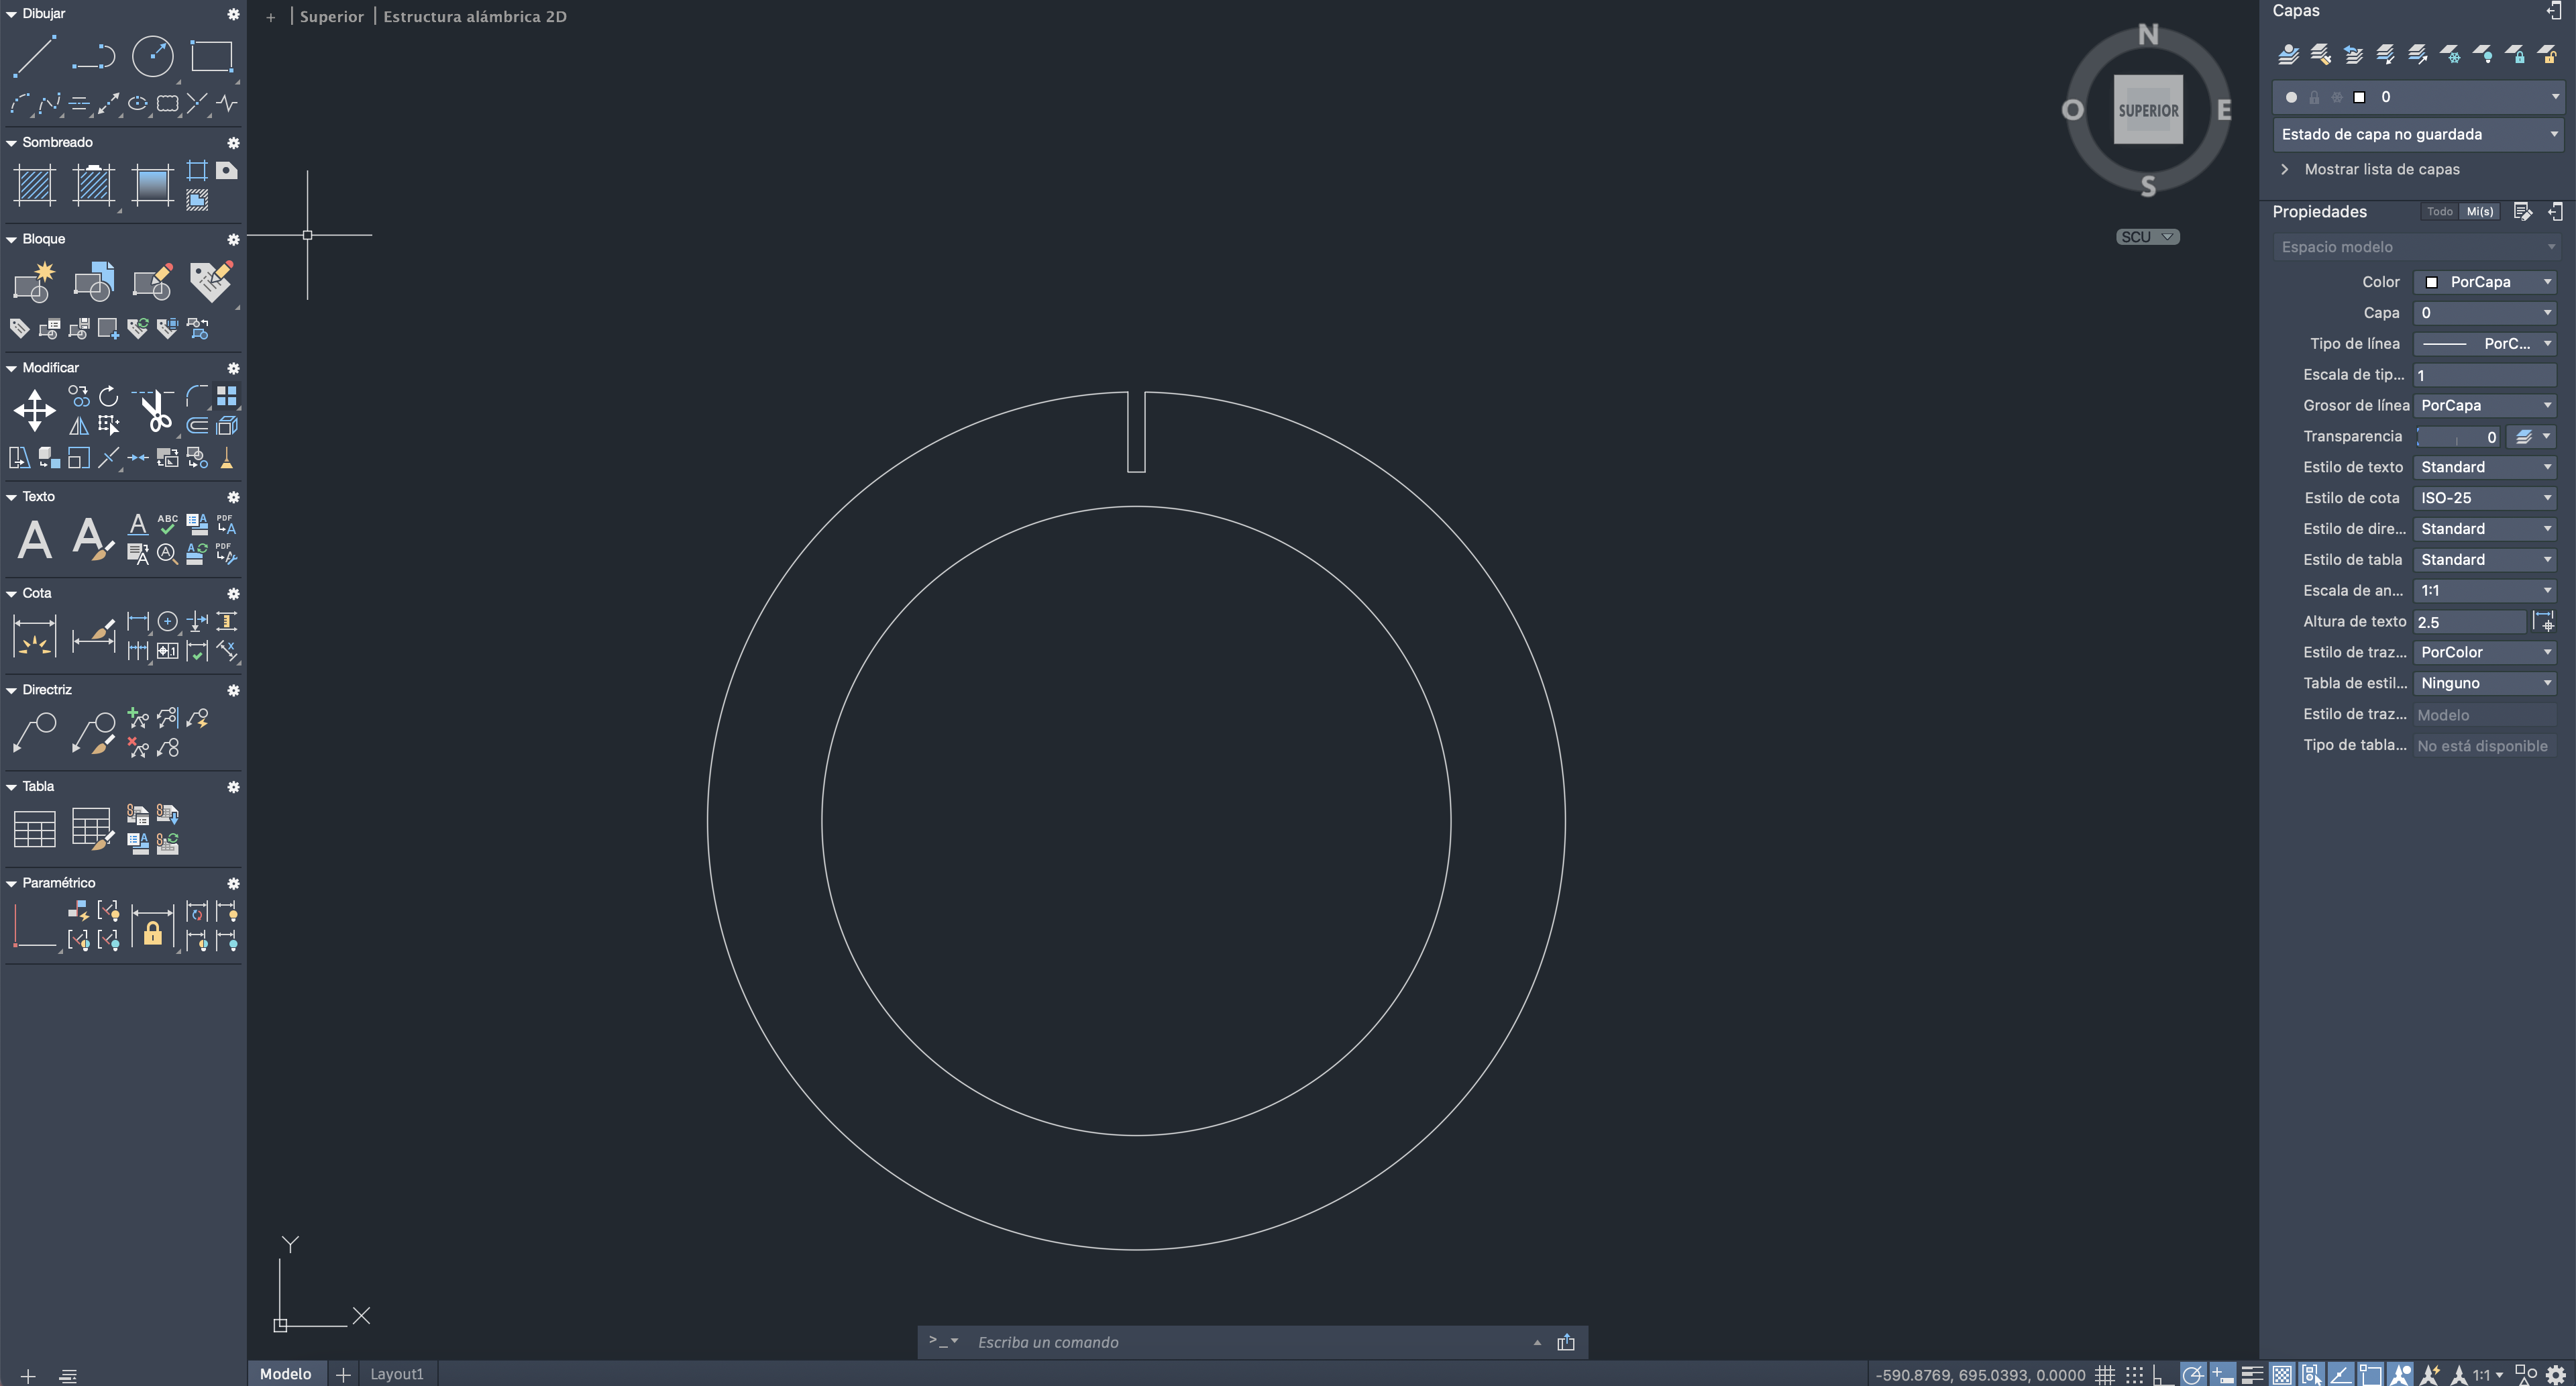
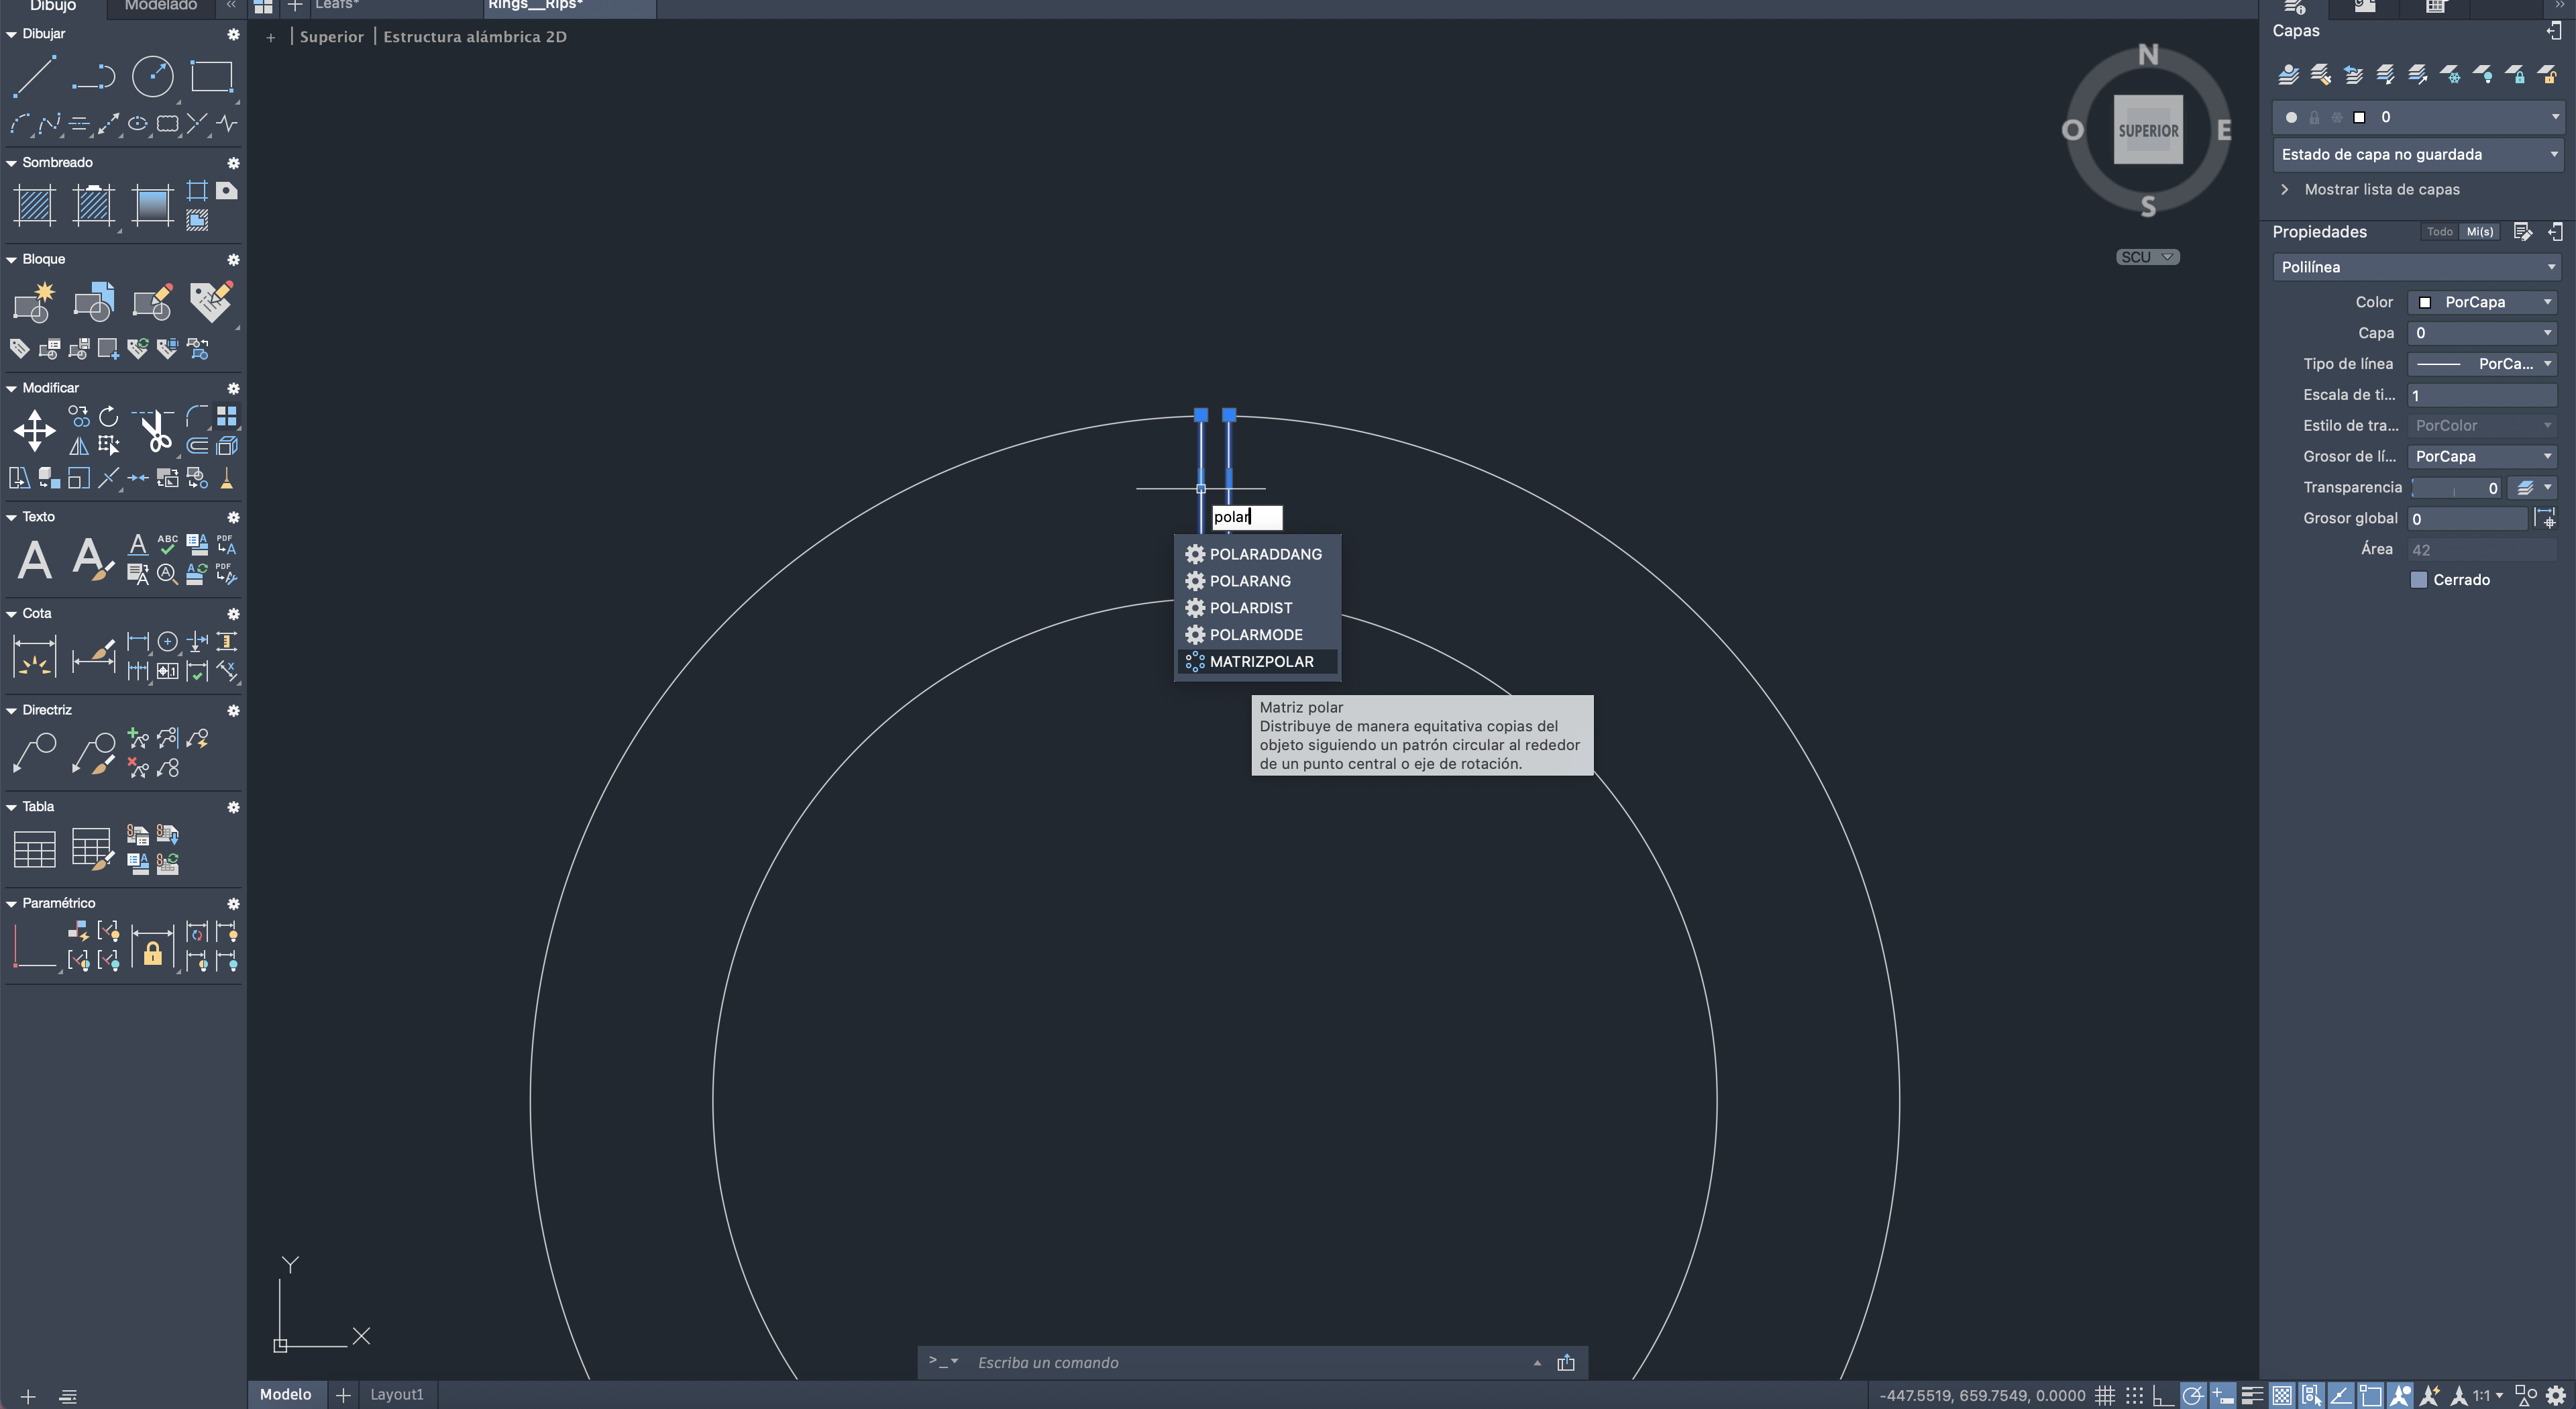

We place the amount of lace and we already have our base
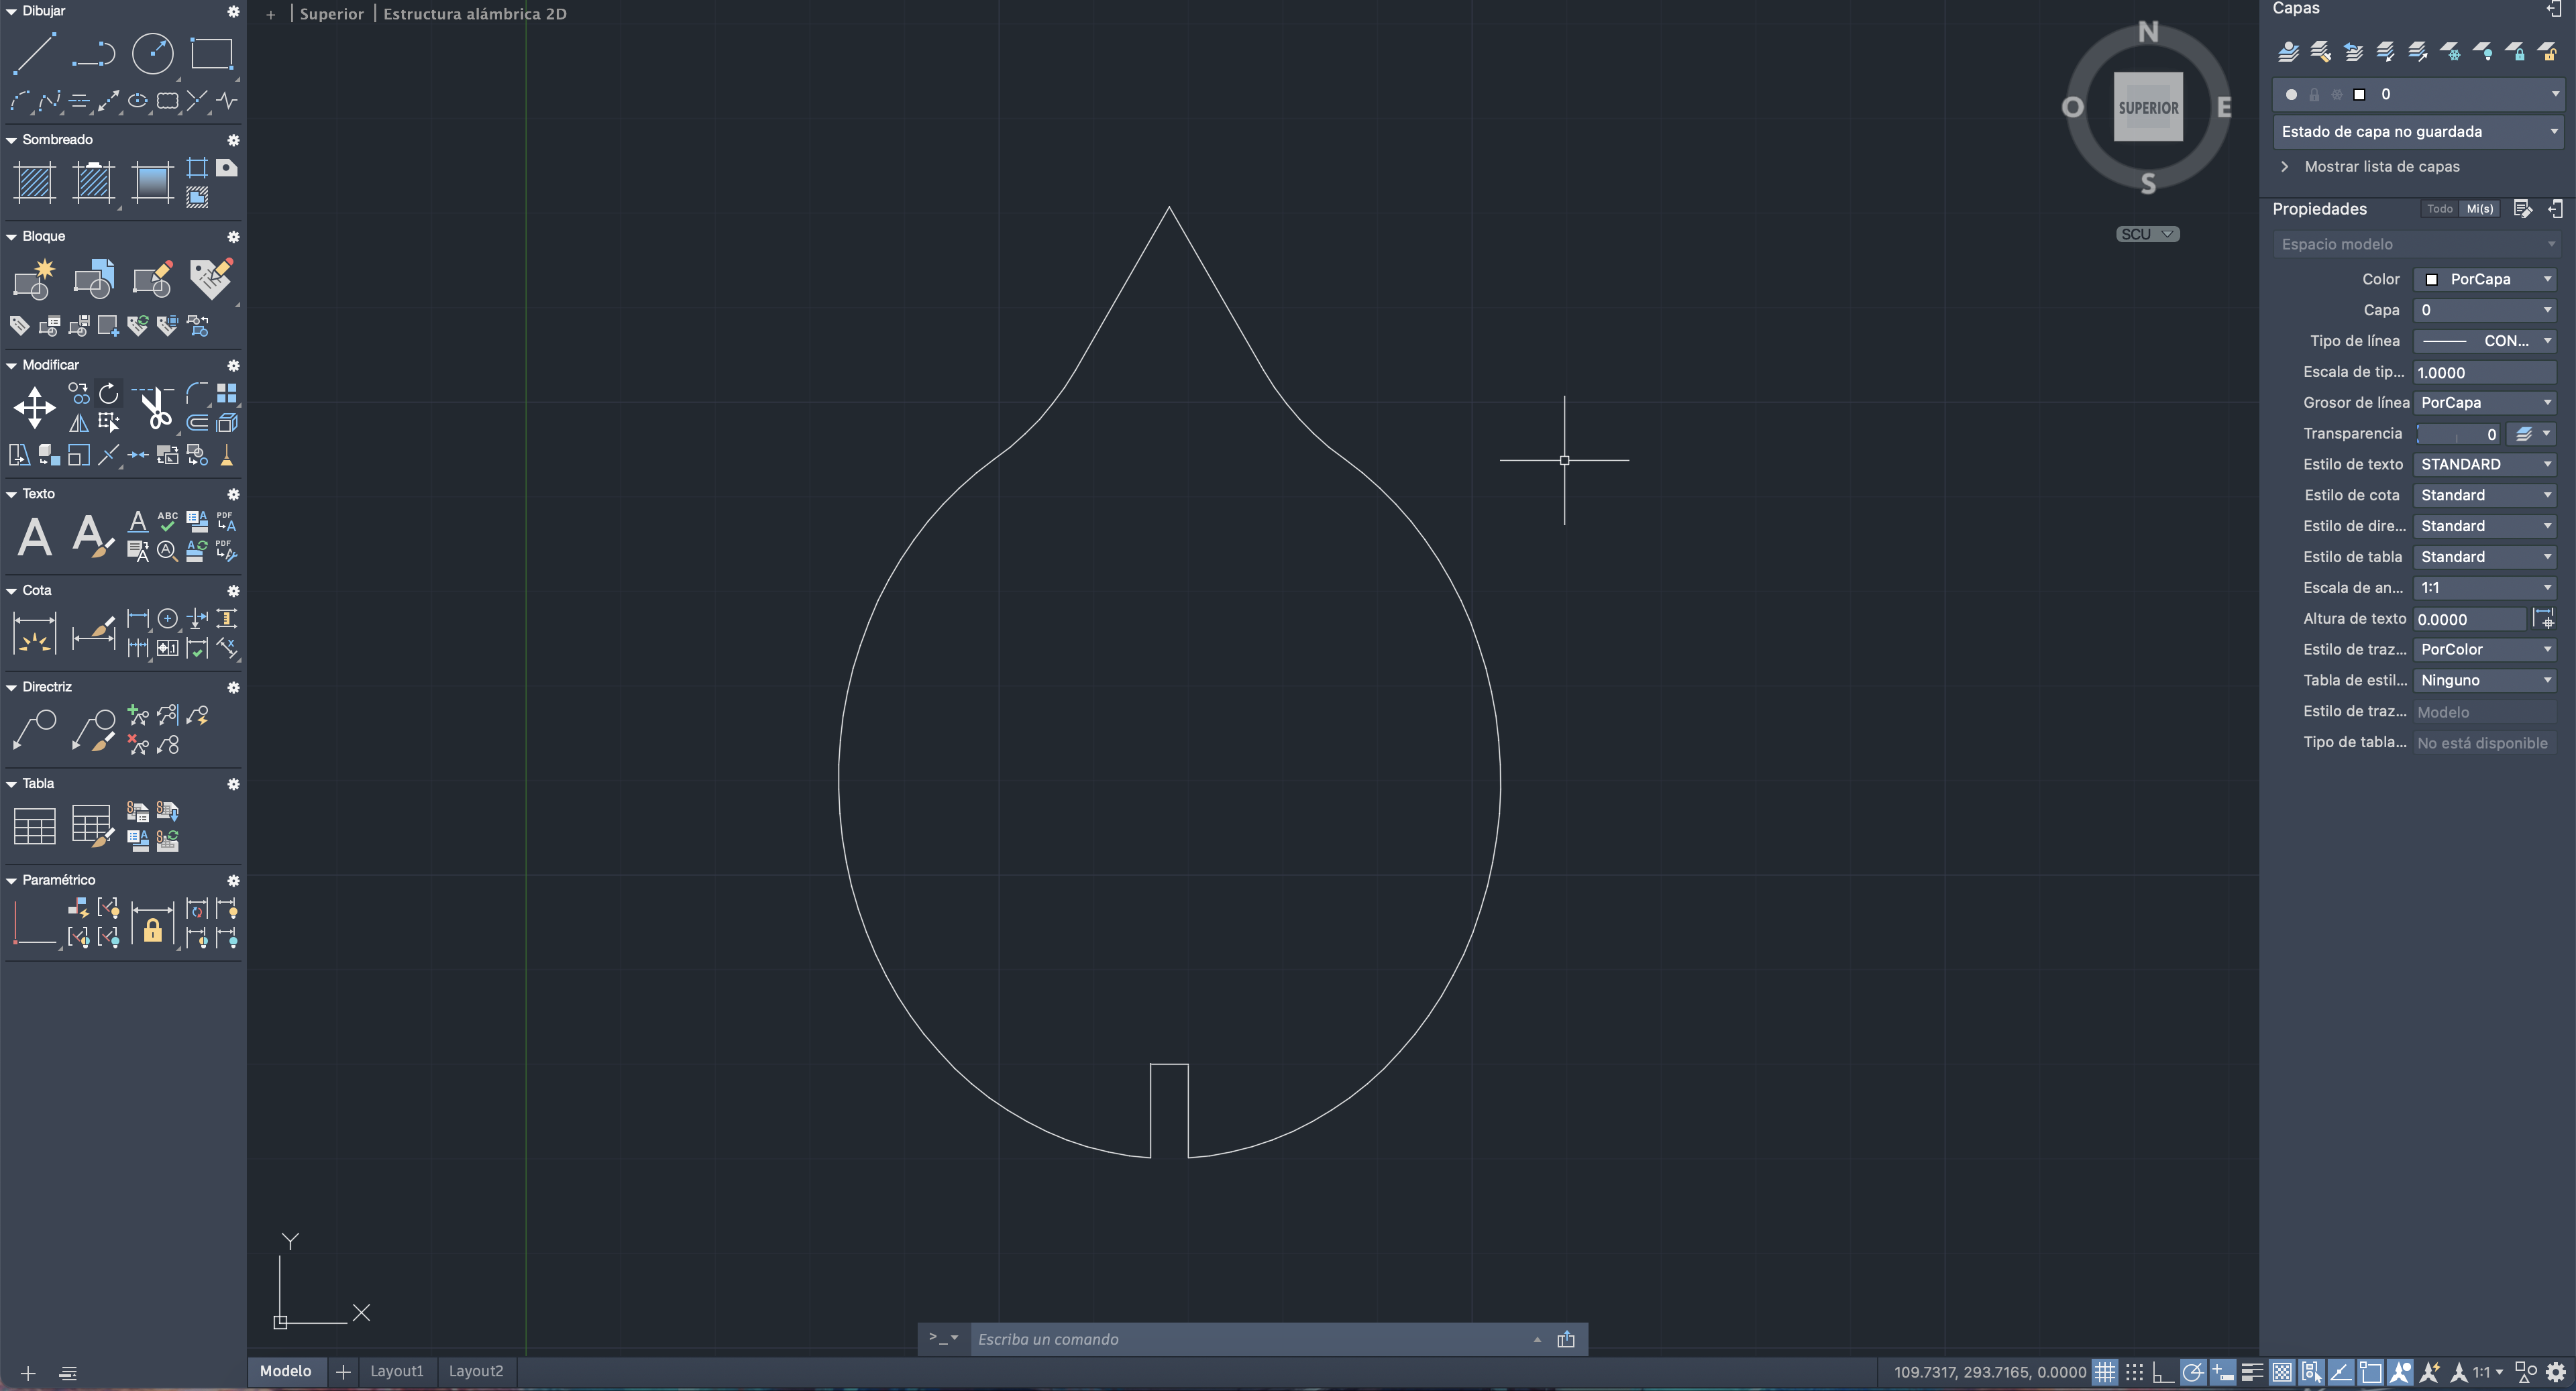
We repeat this process but this time we will place a more internal circle to place a spotlight so it can illuminate
Now we design the connections between the base, leaves and top, in the upper area we will place two covers since if we hang it it will have greater weight support
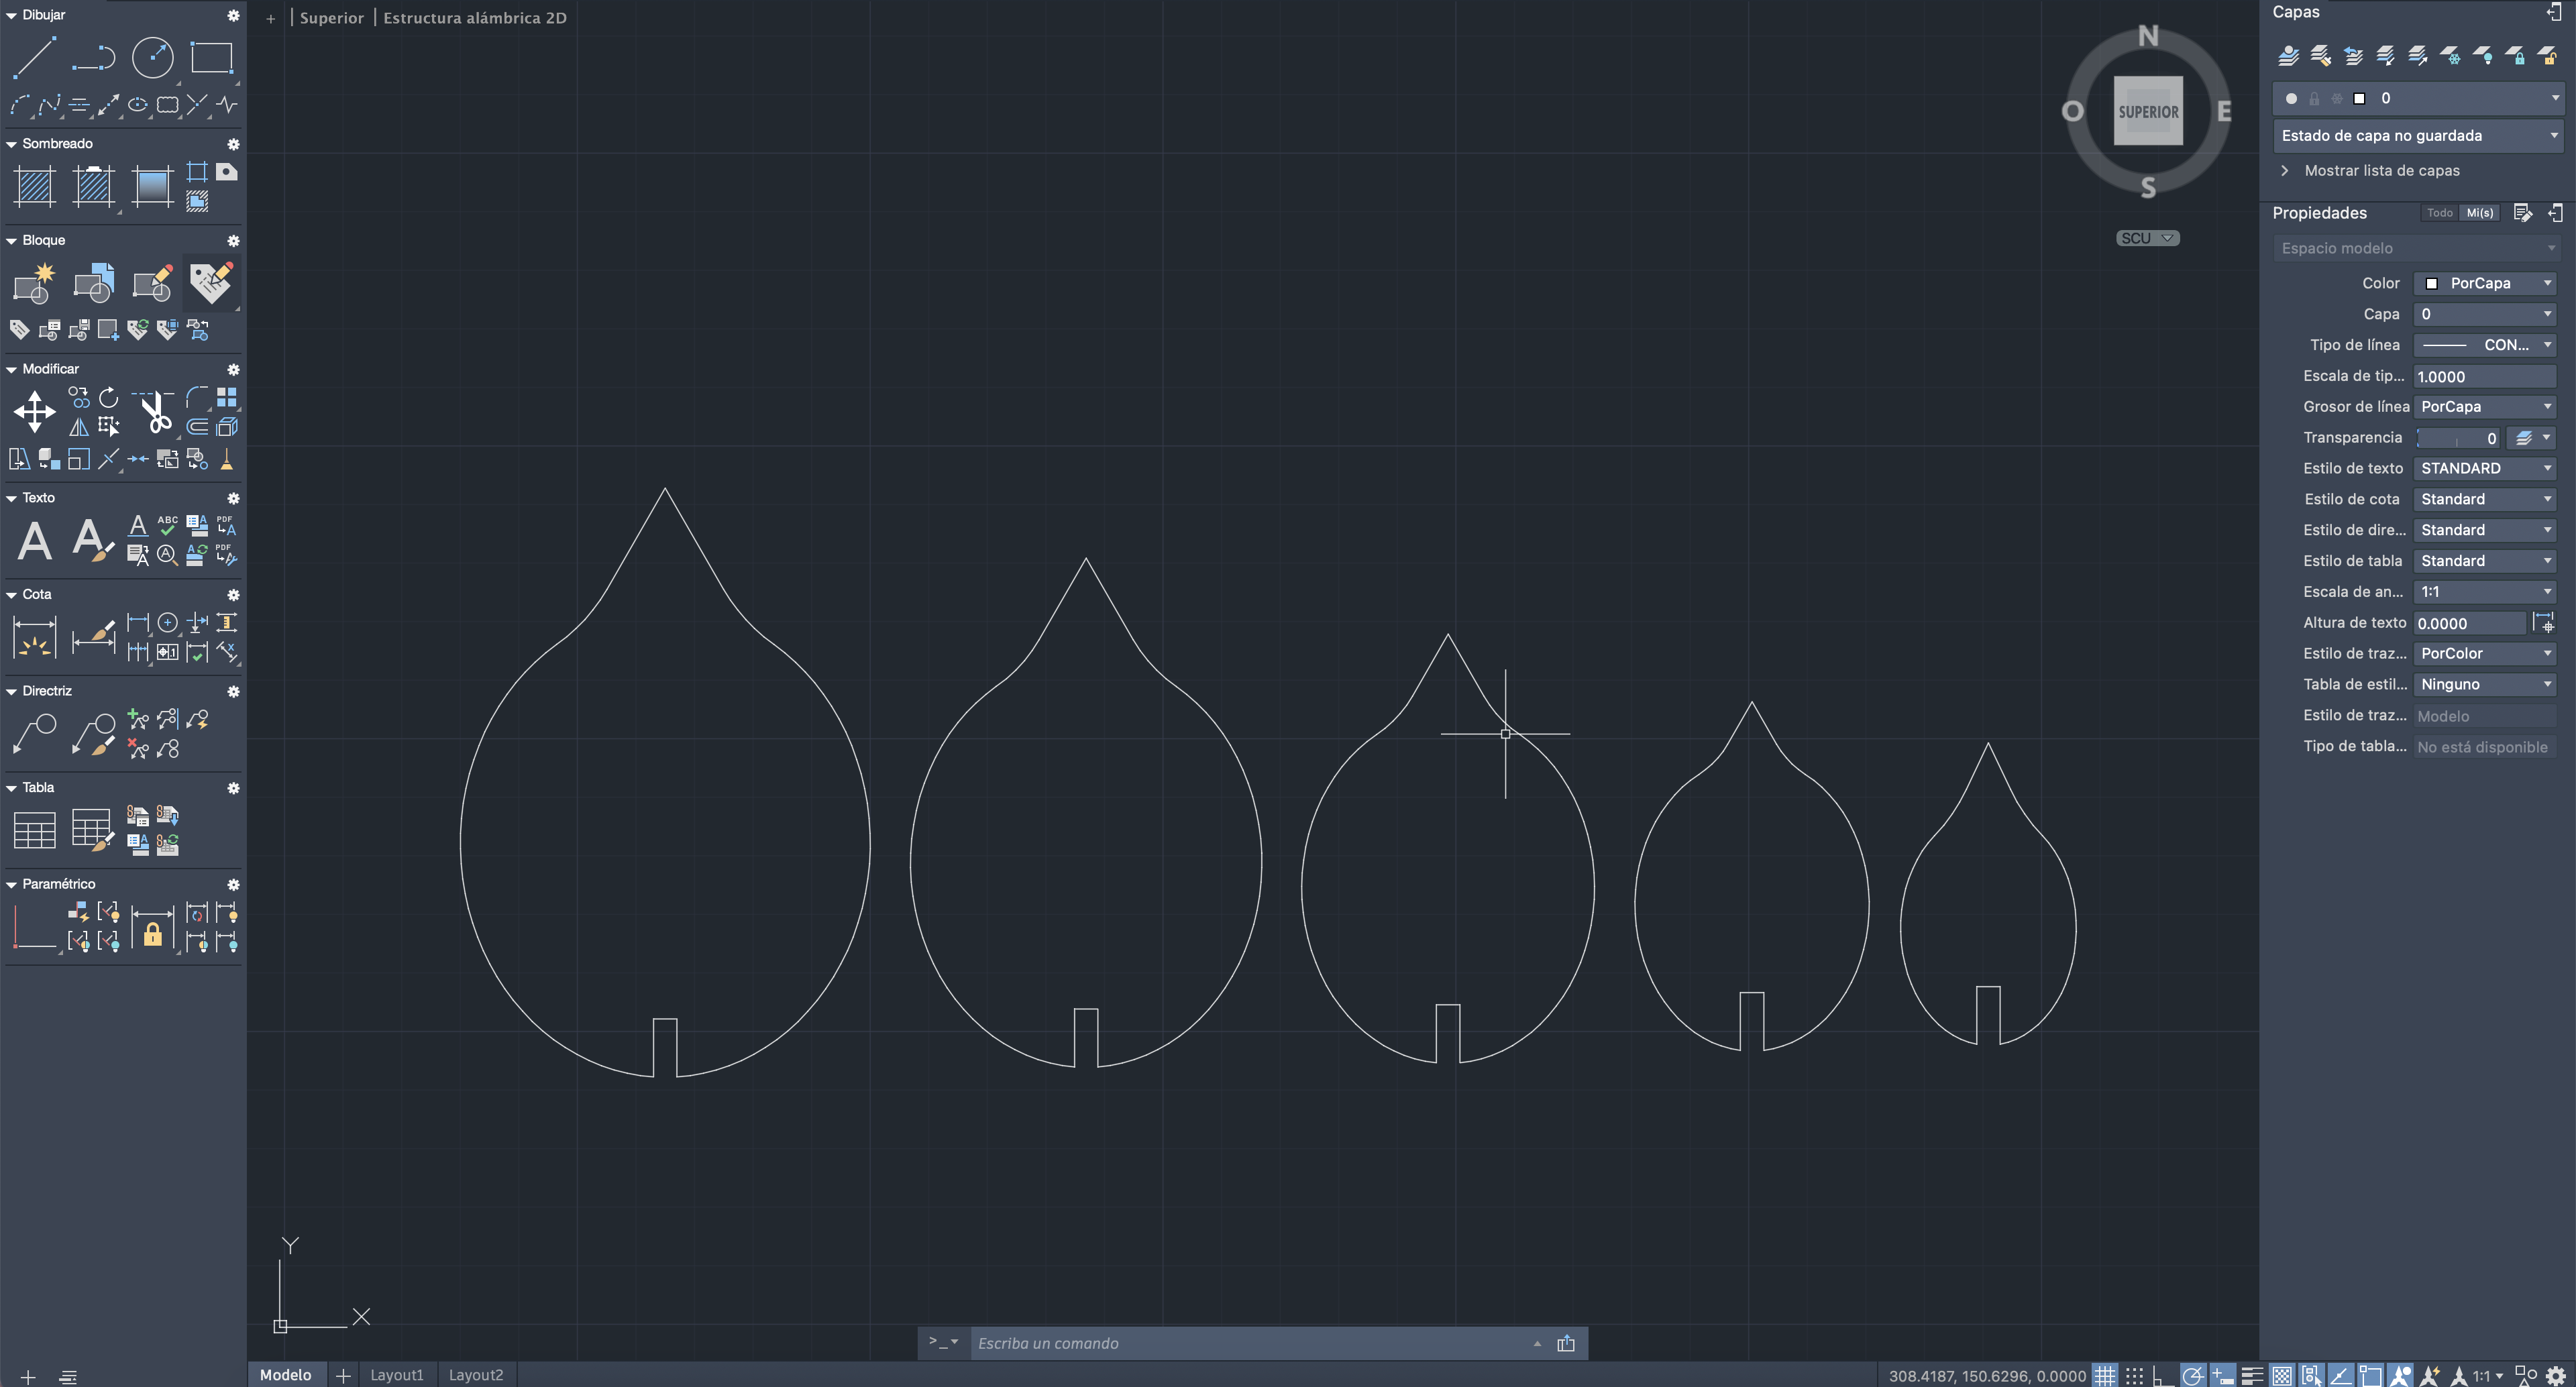
Well, from this design we replicate the amount that we placed on the base and now we will design the leaves which, as in the idea, will have different sizes, but we will only design one and the rest will be scalar.
To make the parametric design we will use autoCAD
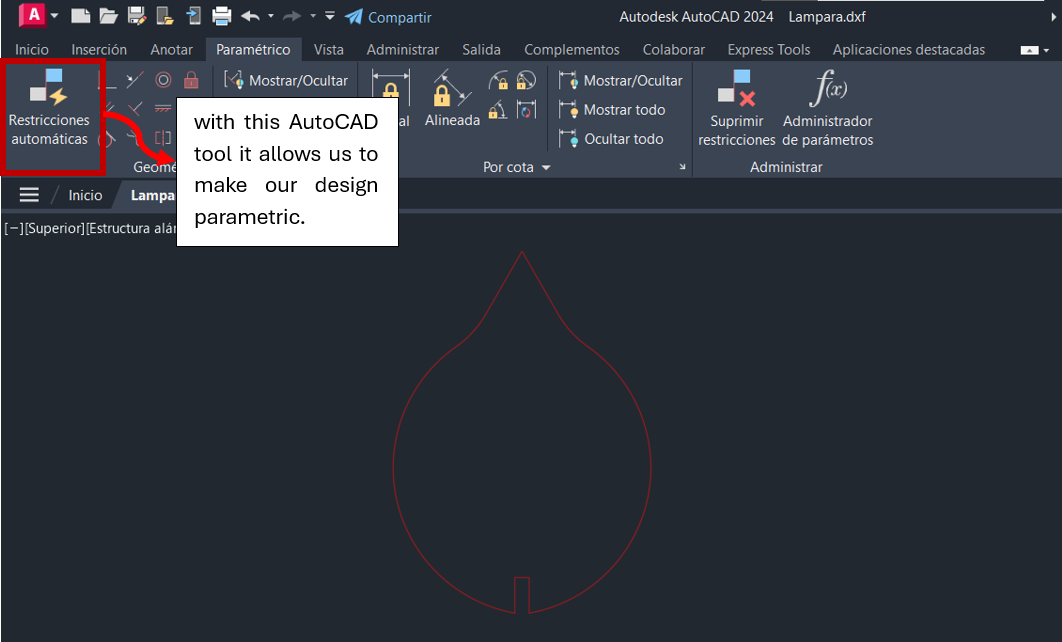
Once our design is parametric, we can modify any size we want and the complete design will be adapted to this size.
Mainly the bleed or width of the material, and if you change this parameter, the design will change this distance.
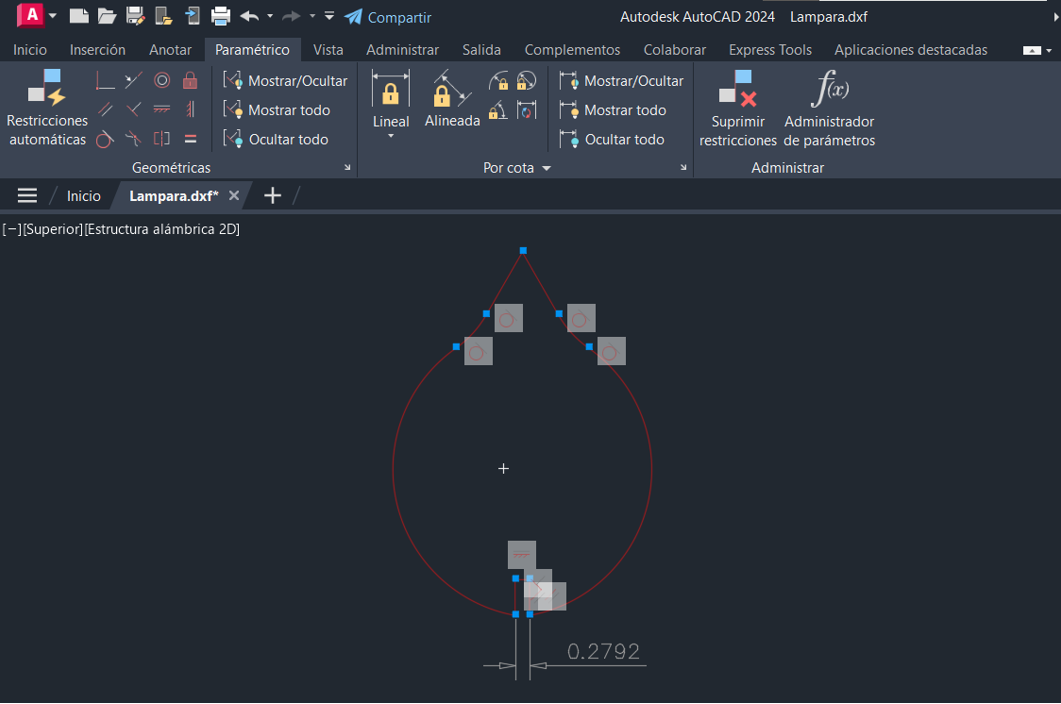
As we can see, if we change the size of the indent, the whole design adapts to this new size.
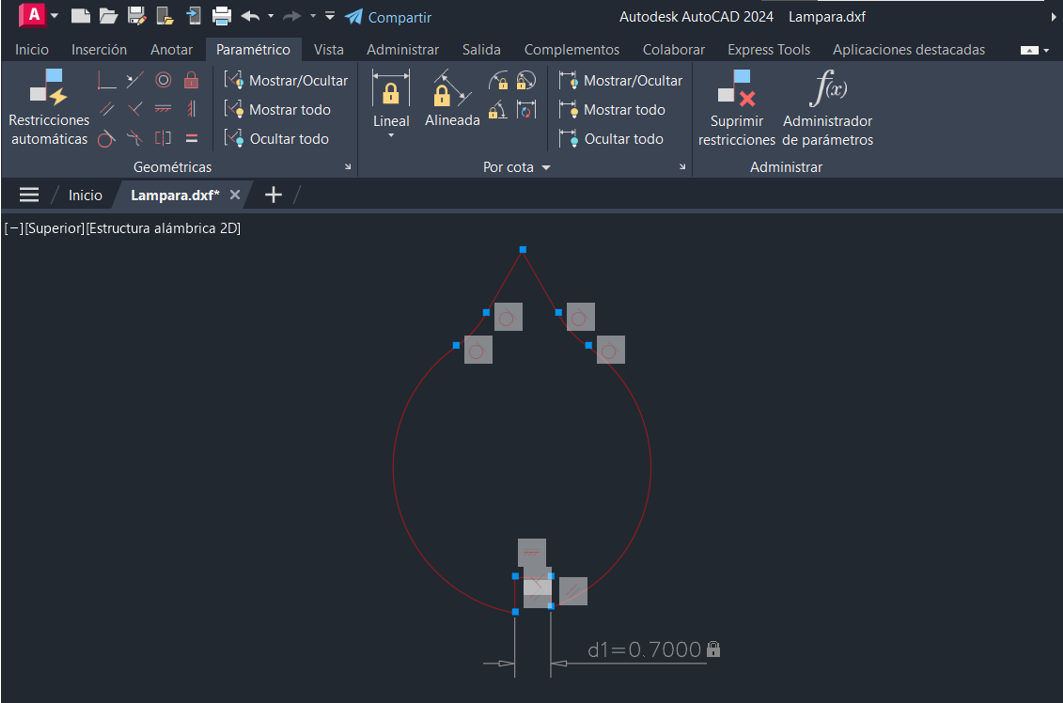
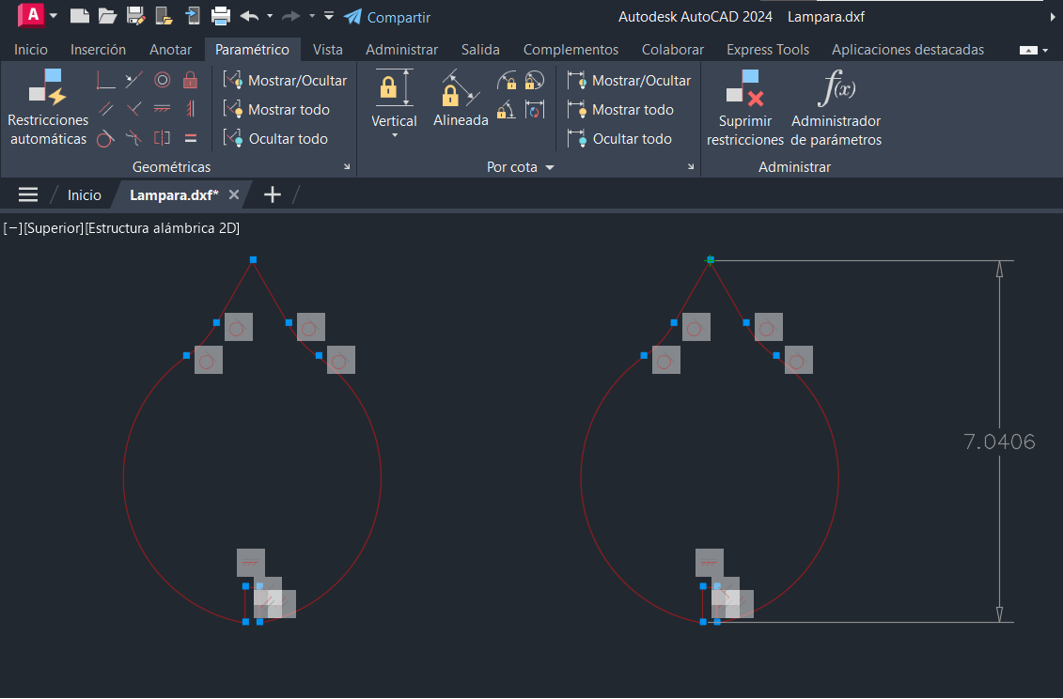
We can also modify other parameters of the design such as the height to make the other parts.
Great now let's move on to the cut, for the cutting process, use the following cutting parameters:

Before cutting, we have to activate the Purex Extractor. This is in order to absorb the gases emitted by the mdf wood when it is being cut.
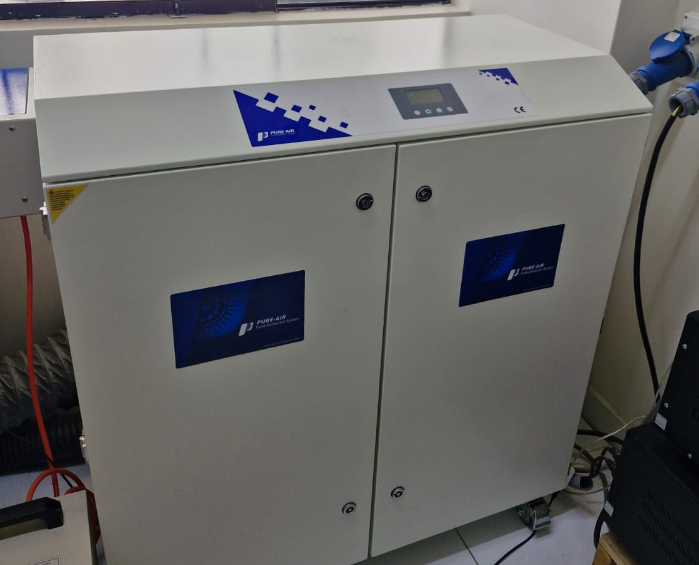
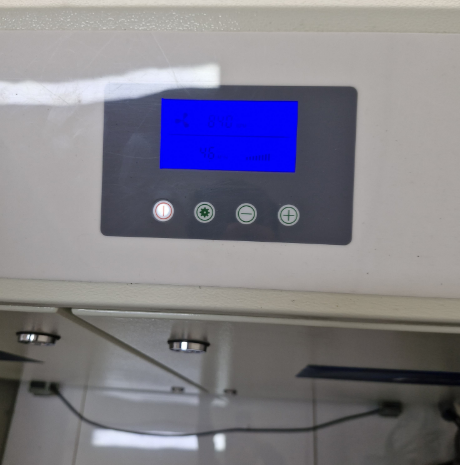
We have to activate the power button and we will see that the screen will turn blue, giving us to understand the operation of the extractor.
Well with these cutting parameters we proceed to run the machine to obtain the pieces
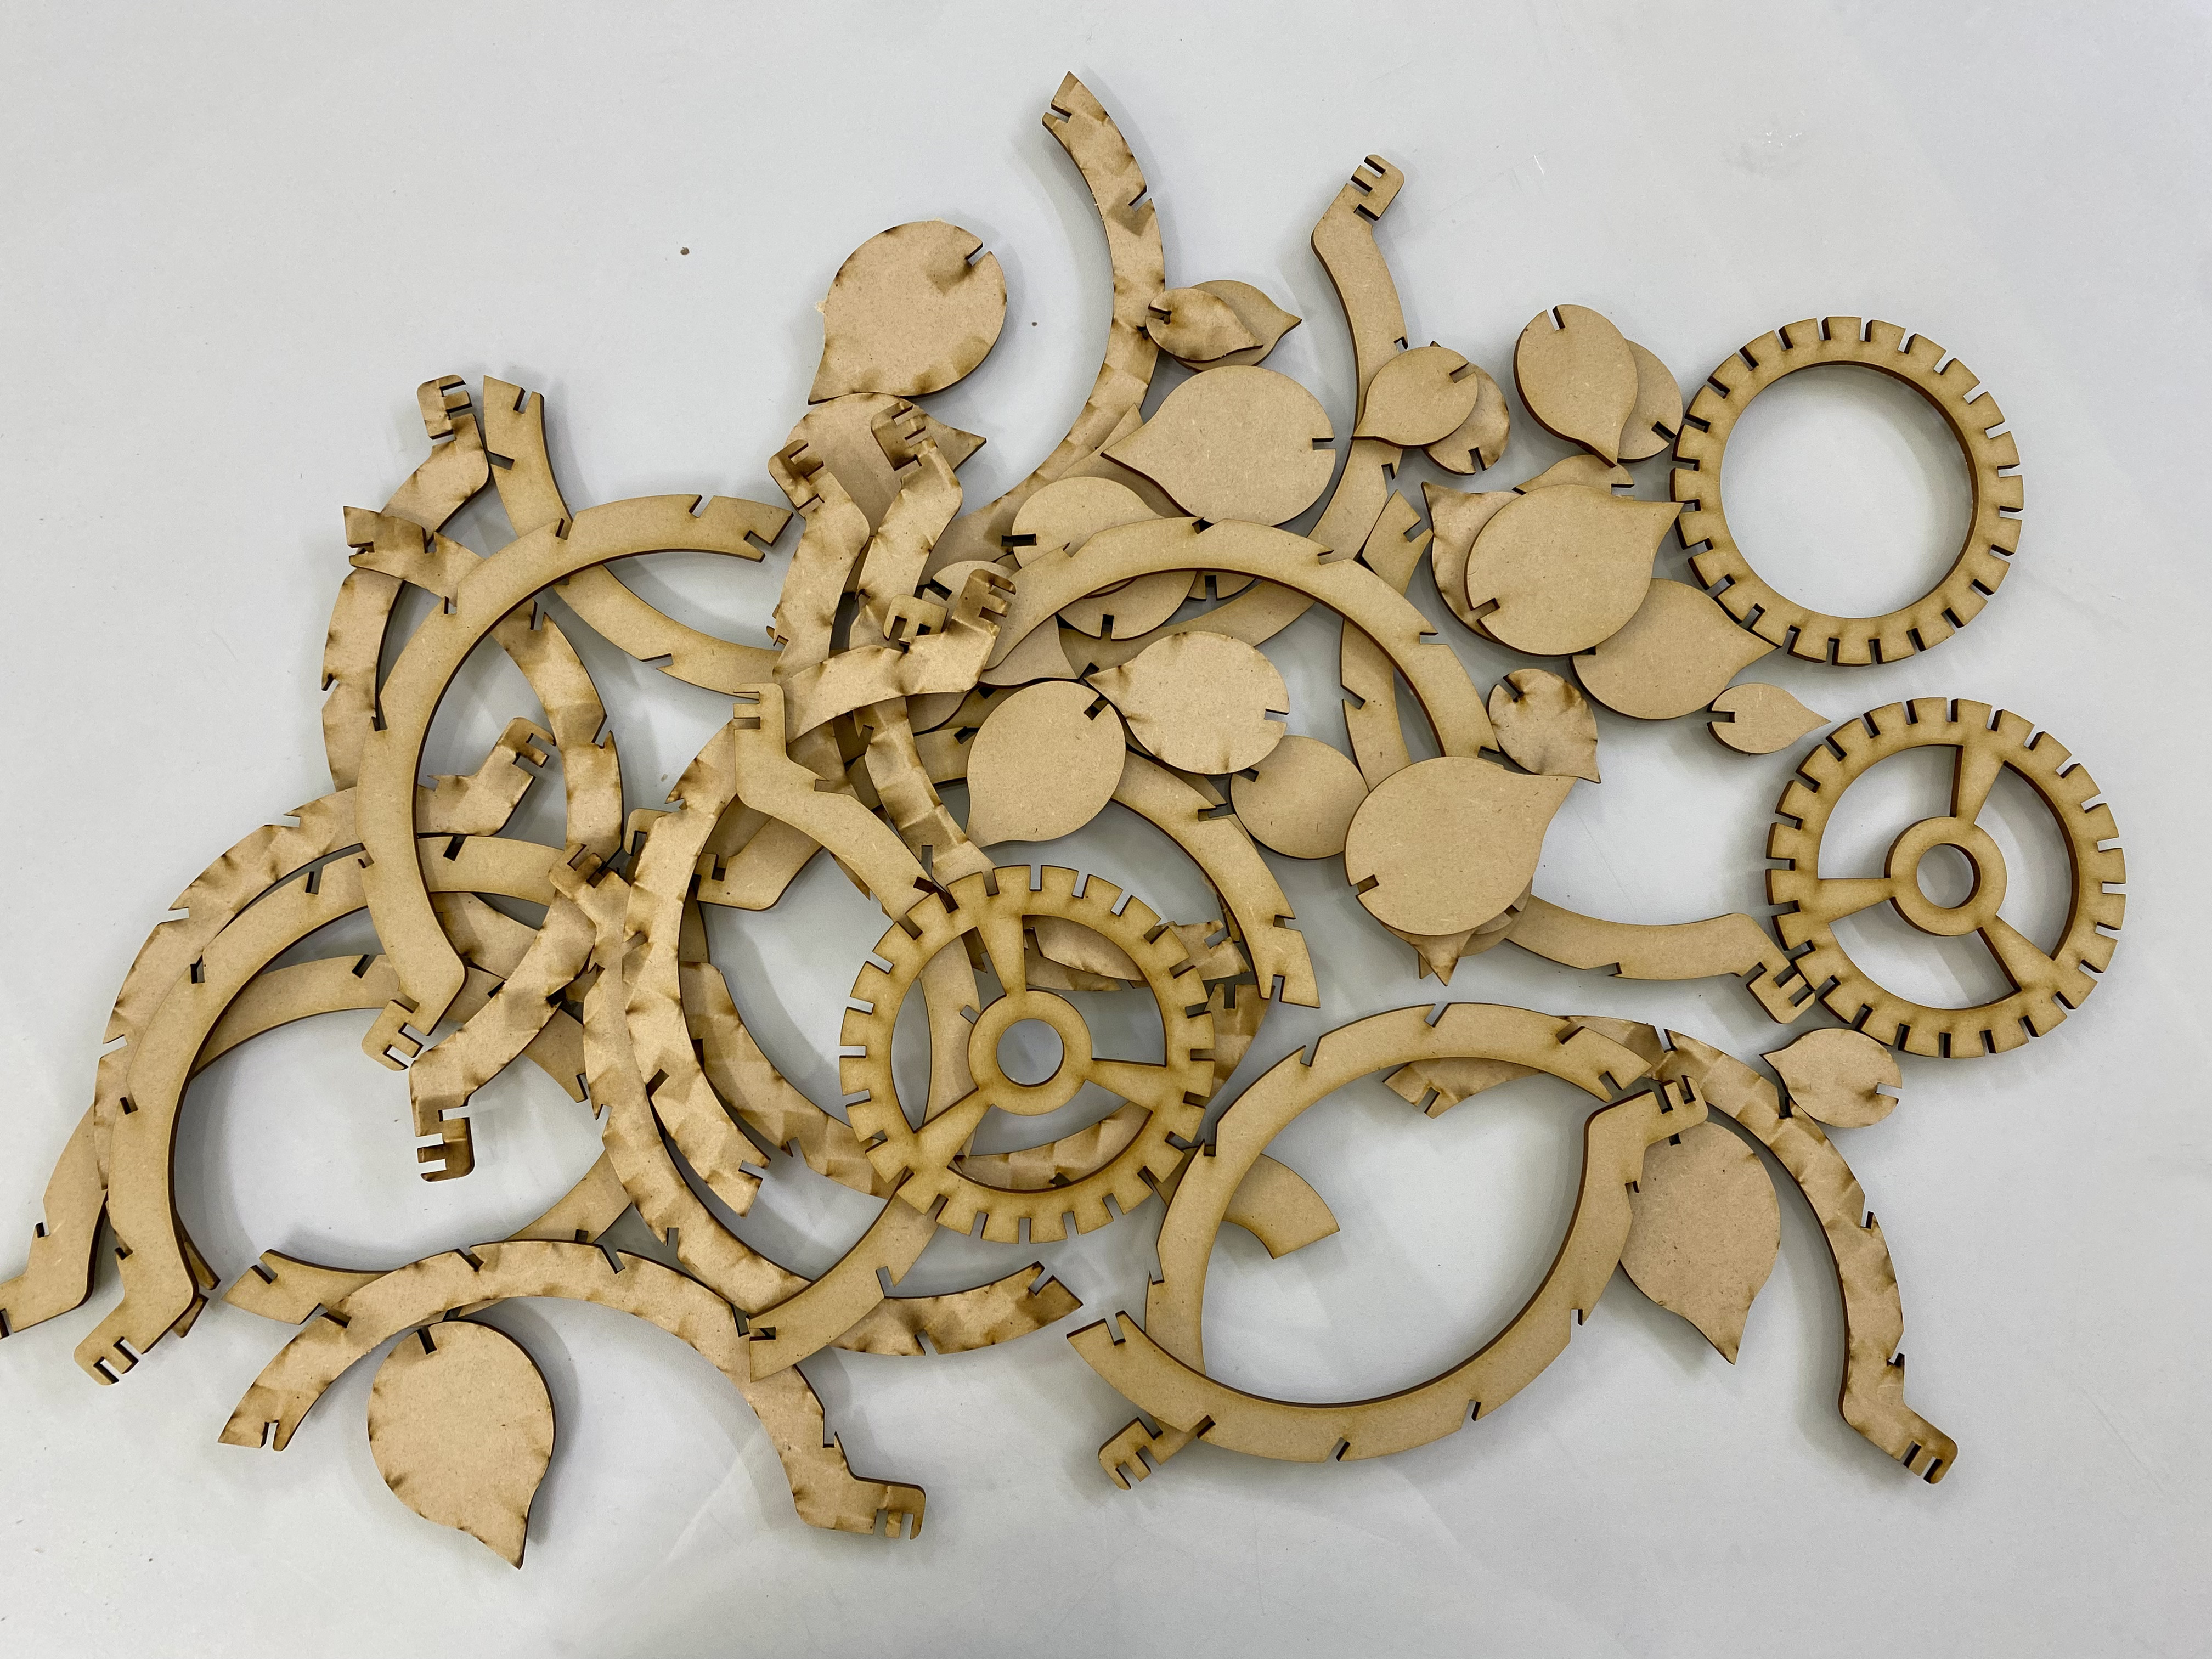
We have all the pieces and we begin the assembly! This can be assembled in various ways from the largest to the smallest and also vice versa and even mix sheet sizes

Vinylcutter - Vinylcutter GCC Expert II
Now, let's learn about vinyl cutting, at Continental University we have the Expert ll - 52LX, we will see some specifications of this machine.
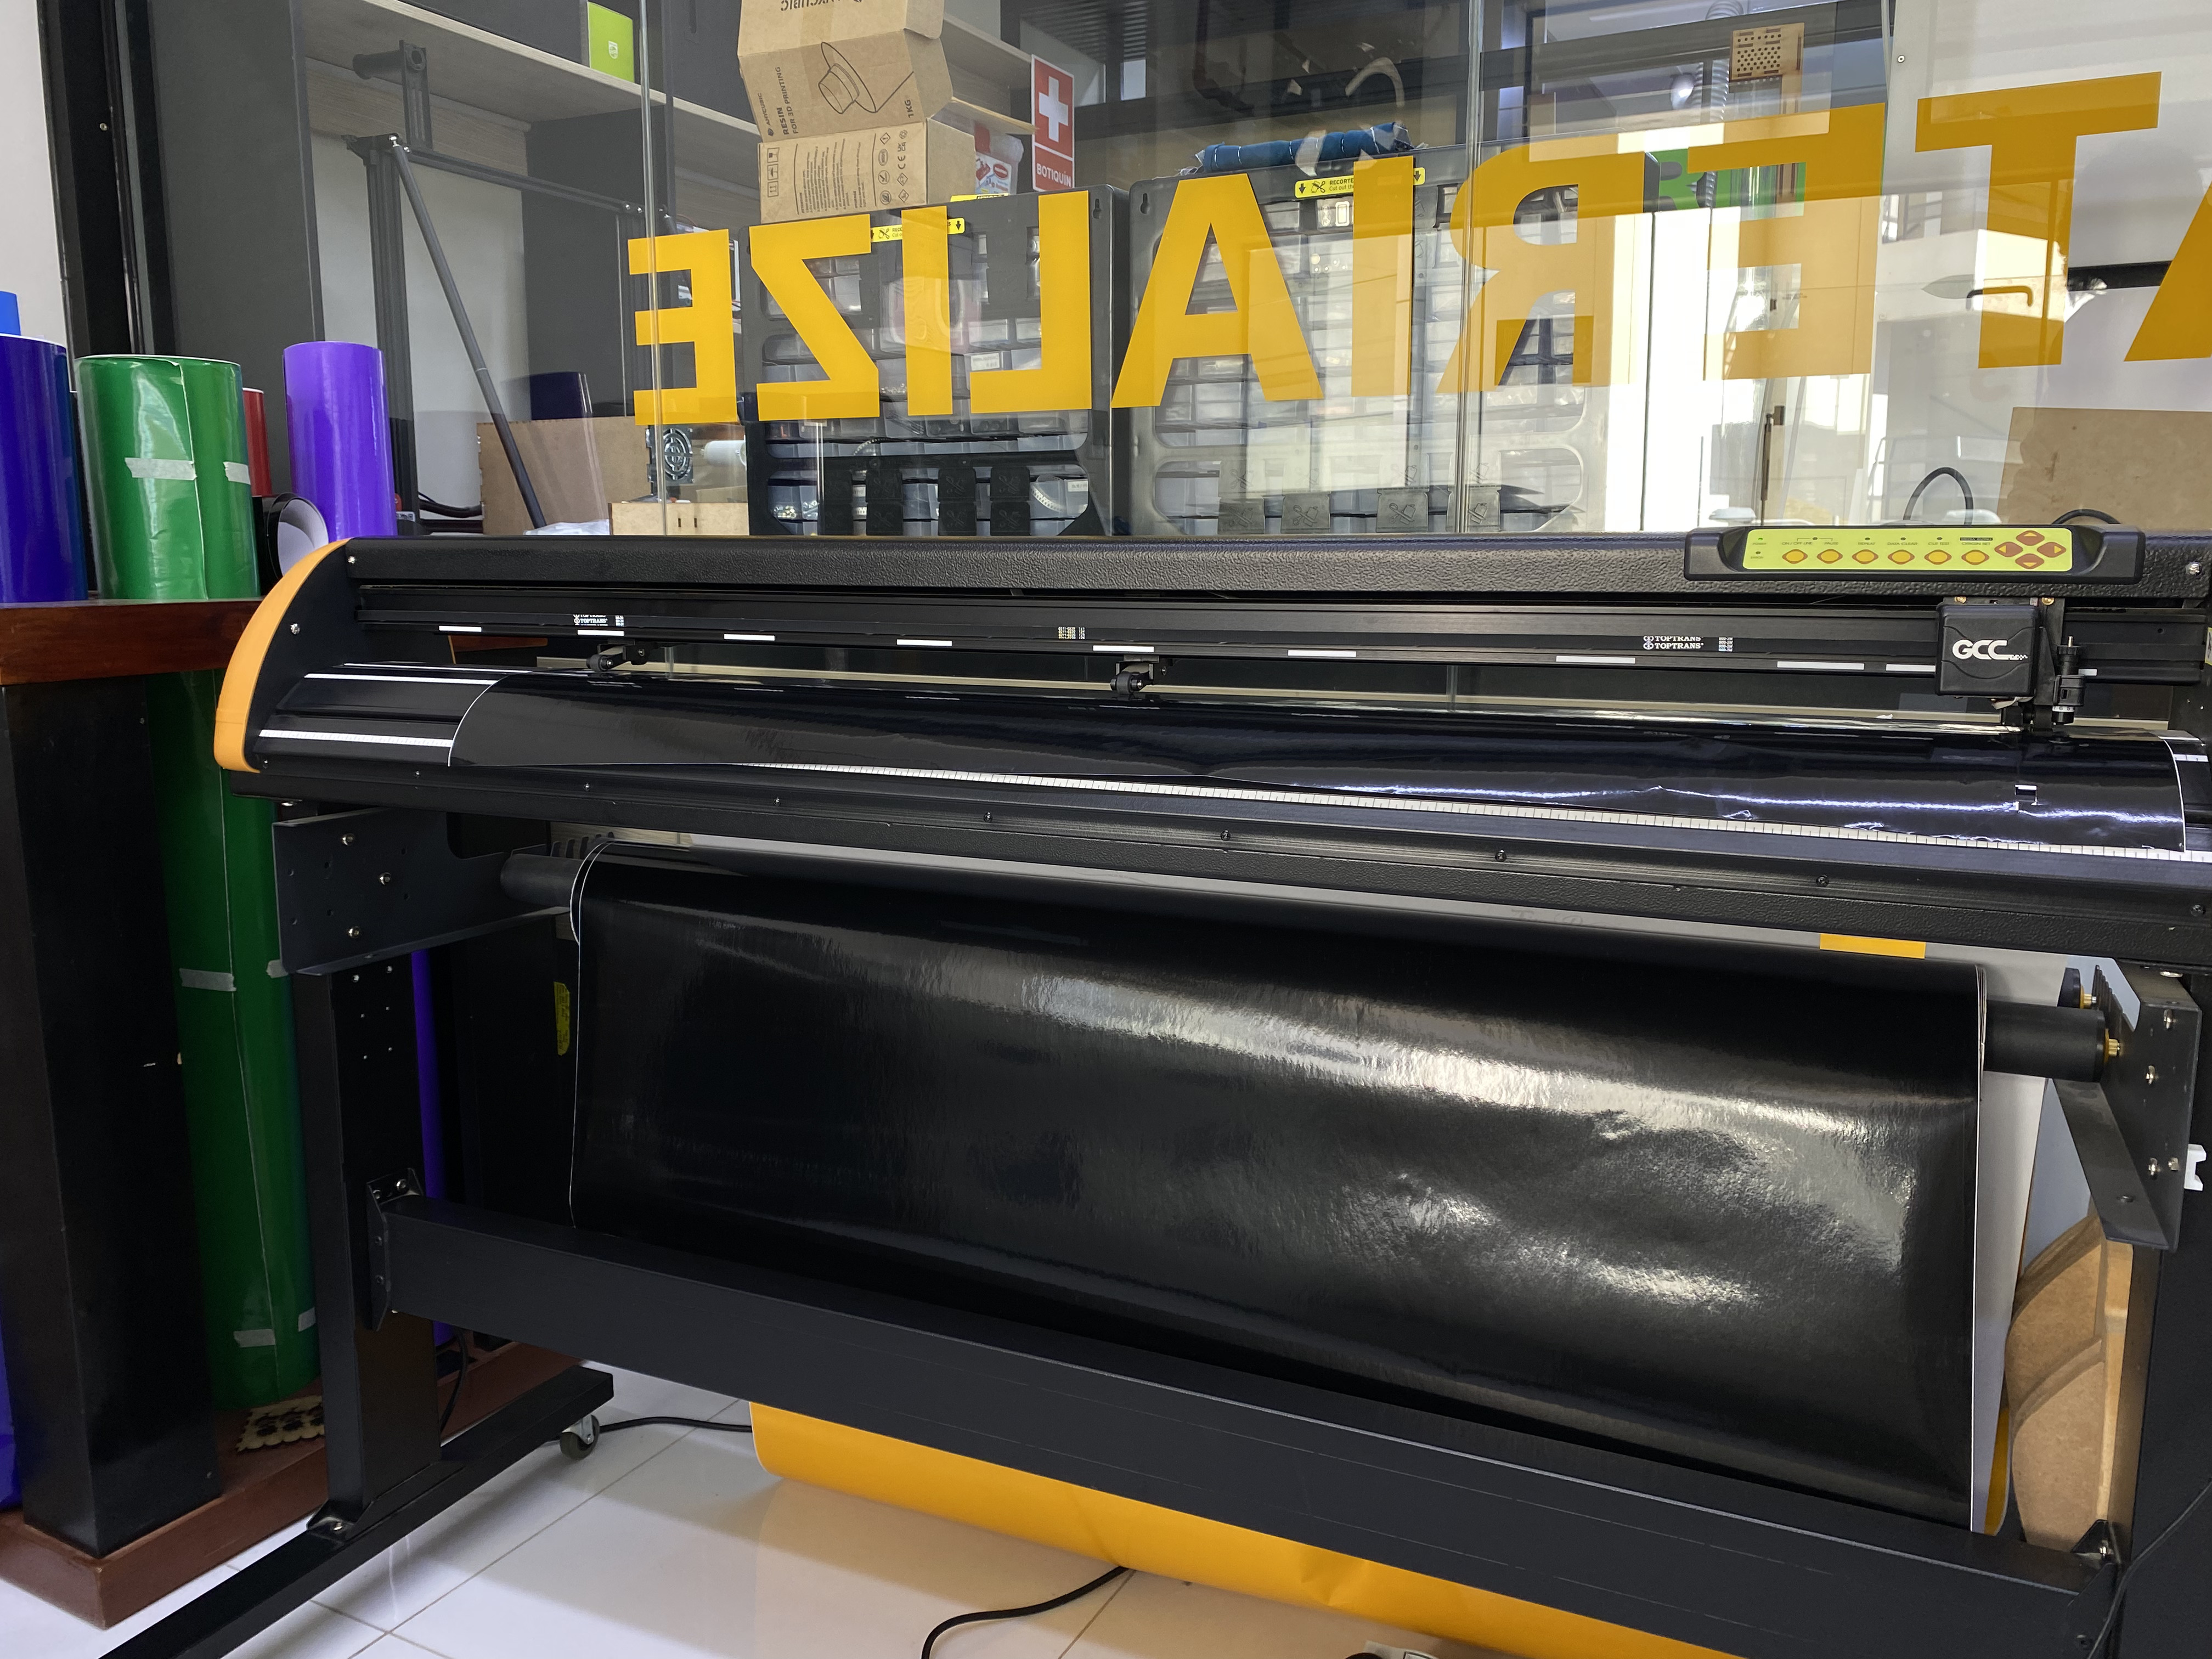
Here are the specifications for the GCC Expert II 52LX vinyl cutter:
- Cutting Area: The GCC Expert II 52LX has a cutting area of 52 inches wide, making it suitable for medium to large-sized projects.
- Cutting Type: It utilizes a drag knife cutting system, which is common in vinyl cutters. This means the blade drags across the material rather than rotating around a fixed point.
- Cutting Resolution: The cutting resolution is typically high, allowing for precise cuts even in fine details. The GCC Expert II 52LX likely has a cutting resolution of at least 0.001 inches.
- Cutting Speed: The cutting speed may vary depending on the material and settings, but cutters like this are capable of cutting at fairly rapid speeds, making them efficient for mass production.
- Material Compatibility: In addition to vinyl, these cutters are usually compatible with a variety of materials such as adhesive-backed paper, cardstock, transfer films, among others.
- Control Software: Typically, these cutters come with dedicated control software that allows for designing and sending cutting jobs to the machine. This software is often user-friendly and may support various file formats.
- Connectivity: It may be equipped with different connectivity options such as USB or wireless connection for sending designs from the computer to the cutter.
- Physical Dimensions and Weight: The dimensions and weight can vary, but generally, these cutters are sturdy and take up a considerable amount of space due to their cutting area.
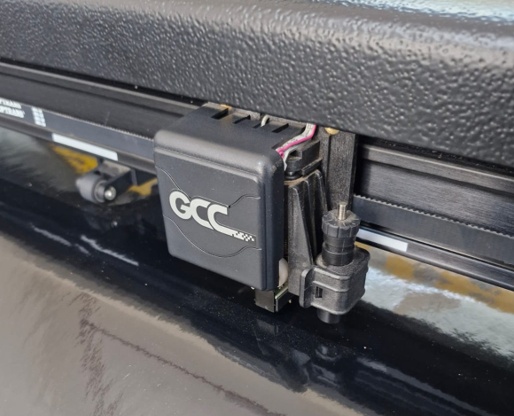
These are the locks that the vinyl cutting machine has, that help us to verify the cutting limit since these locks have a sensor.
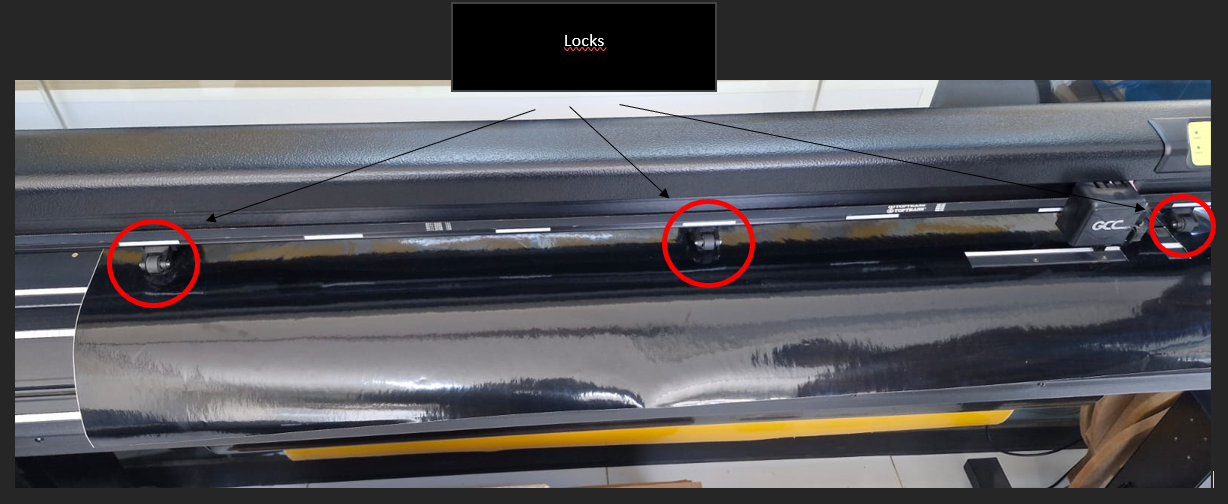
The movement of the latch will depend on the limit at which the cut is set. Since the right latch is responsible for the X Y configuration. You can also see white lines, these lines are the locations where the latches should be.
But of course, for the positioning of these axes a manual operation is necessary, which will be explained below:
Well now we know more about the cutter. We will cut vinyl, with the design of the Huanca blanket, from the city where I live.

First, vectorize the image and for this test we are going to take only a section of the model.

We will test the model with some default parameters and reduce the cutting speed due to the amount of details it has.

and the result was…

I leave you a small video of how it works.
I cut the area of the vinyl that was useful to me with scissors, and removed the excess, and on this piece I glued some transfer paper.

Now cut the surplus of the transfer paper, this paper allows you to remove the vinyl from its surface maintaining the distribution and shape, and it looks like a sticker.
Finally, we transfer our work to the destination surface, once pasted, we carefully remove the transfer paper, as if it were a sticker.

Learning
Well we finished the assignment and we definitely did not take away important learnings:
o Take into account the cutting parameters to obtain a quality and, above all, exact result.
o The vinyl cutter helps us a lot to give a more visual quality finish to the projects.
That`s All my friends,here I leave the files so you can experiment, See you next Week.