
Welcome to Week 15
Wildcard Week
Hey! This week we have a different theme, it is a wild card week, let's see what things we should take into account:
o Design and produce something with a digital process not covered in another assignment, documenting the requirements that your assignment meets, and including everything necessary to reproduce it.
For this assignment, we have the freedom to experiment with a digital manufacturing process. In my case, I will be utilizing a laser cutter with three axes.
The laser cutter typically operates in two primary processes: cutting and marking. Cutting involves creating lines or edges on the material, usually to separate or shape specific parts. Marking, on the other hand, involves engraving an image or design onto the surface by moving the laser back and forth in a pattern, similar to how an inkjet printer works.
Ordinarily, a laser cutter functions with two axes (X and Y), which allows it to move horizontally and vertically across the material. However, for this project, we will incorporate a third axis (Z axis), enabling us to rasterize a new object by adding depth to our work. This addition allows for more complex and detailed designs, as the laser cutter can now move in three dimensions, providing greater flexibility and precision in our manufacturing process.
We will be using the Mg380 laser cutter, which is equipped with this third axis, to carry out and document the work throughout this assignment.
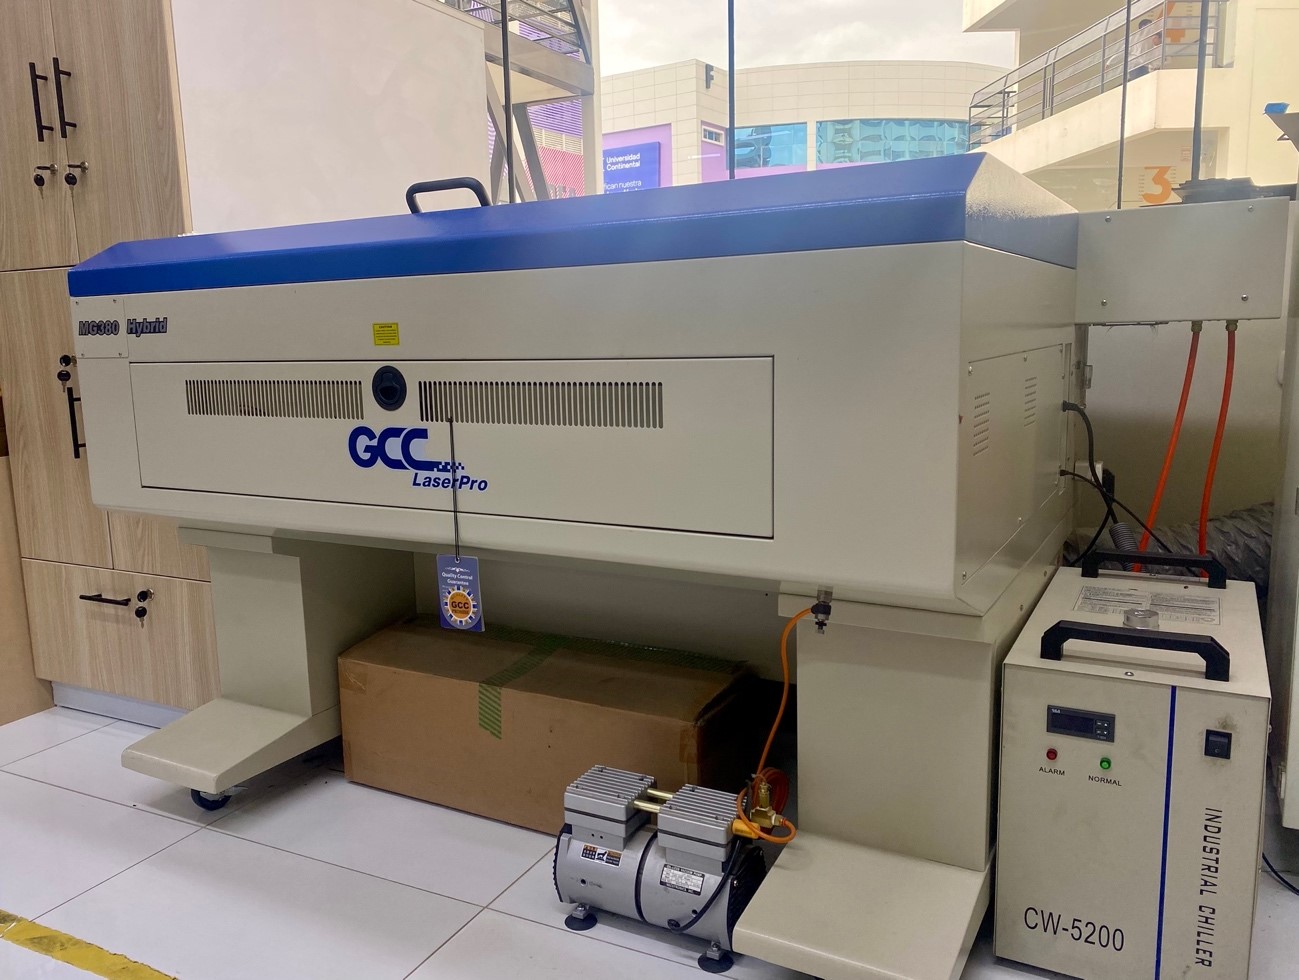
Although it is true that this cutter is Cartesian through a 3 axis, it can do raterization work on cylindrical surfaces, Which we have here :
Well, before starting the process of joining the 3 axis to the laser, I will explain to you what crazy things I will do this week…..
In the city where I live, Huancayo is a land of artisans who express their art, culture and history in various ways, one of them is burilated mates, which are pumpkins that, through a process of cleaning and drawing on the surface, are created. life to this beautiful art!

There are various methods of manufacturing this cultural representation, one of them is to draw and compose scenes using pencil or fine burin, hence the name burilado, at the end the finishes are given with a black background or also painted, this artisanal process is what we will carry out but with the help of digital manufacturing technology.
Let's start by soaking up a little about the graphics which are reflected within the mattes, according to various literatures the illustrations represent typical scenes of daily life or legends of Peruvian folklore. Each mate tells a particular story and preserves part of the local culture

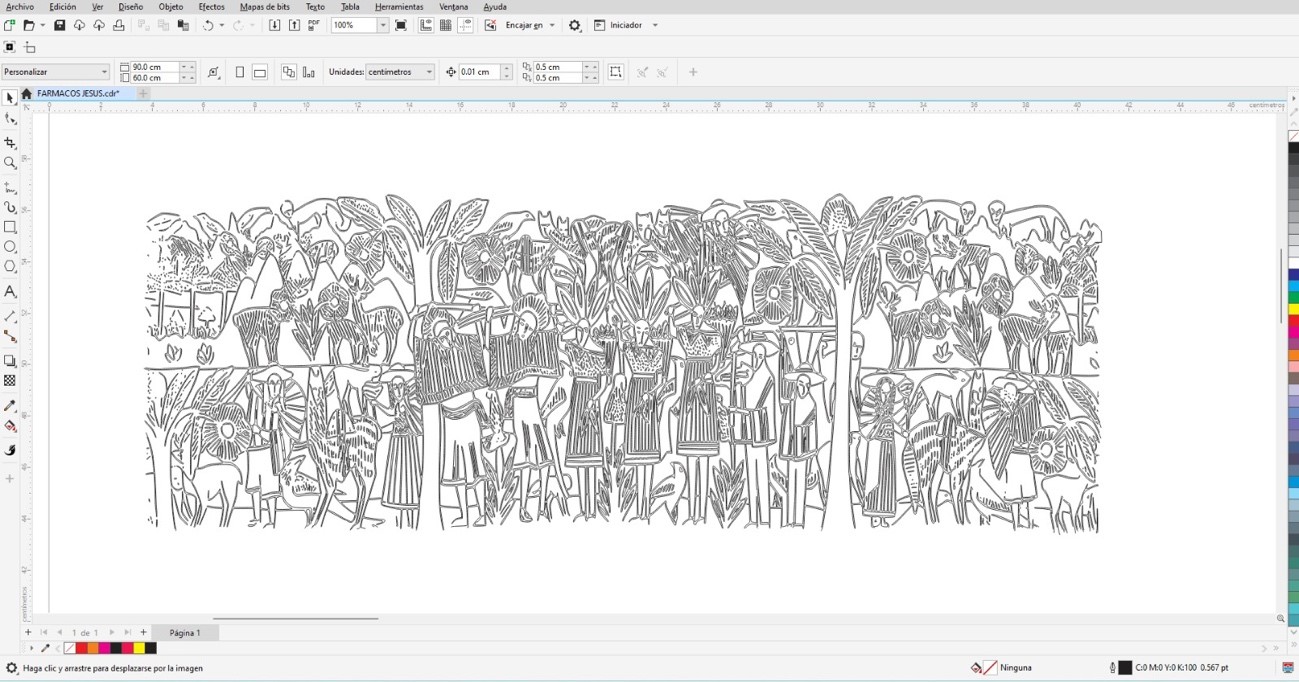
For the mate that we are going to make we will use the following image that symbolizes the harvesting process in the field
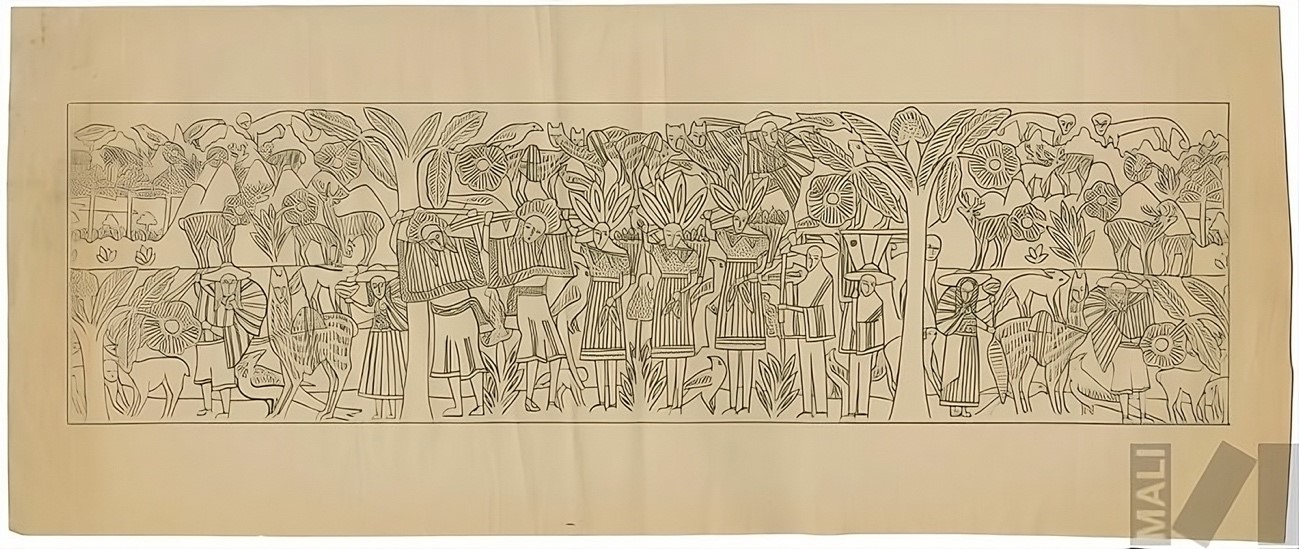
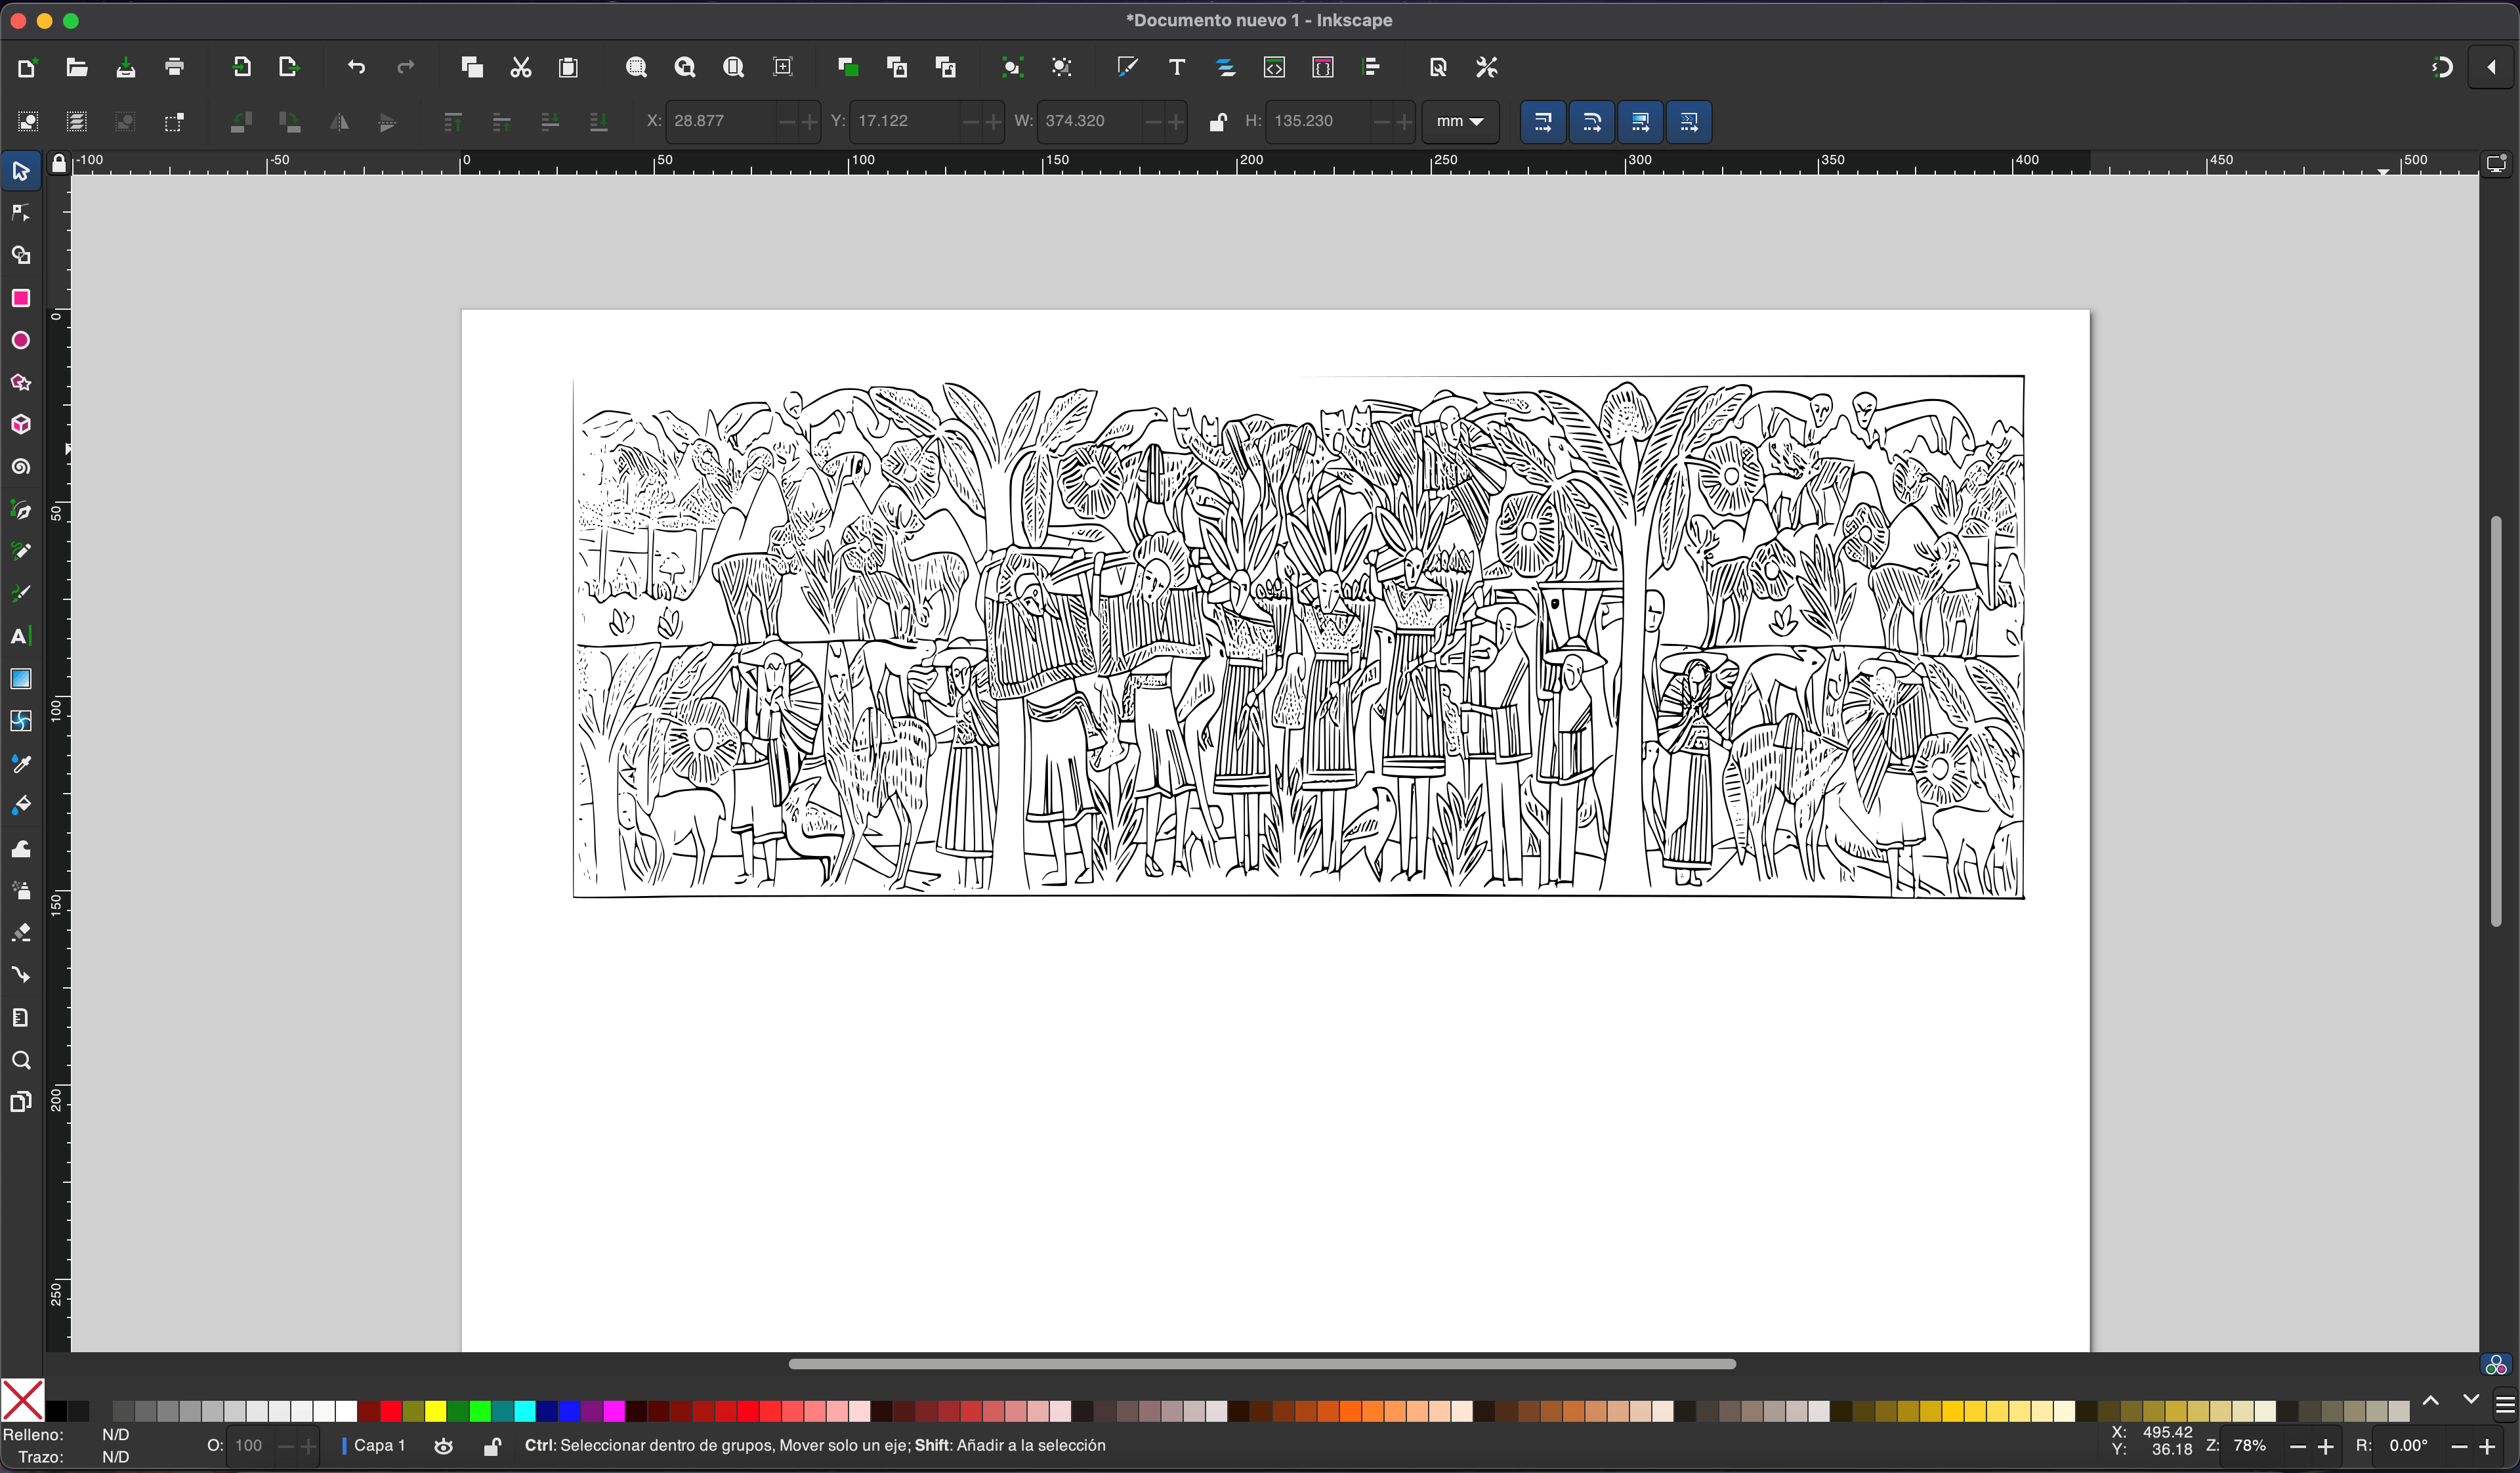
We proceed to vectorize the image to be able to have it in an editable form and thus be able to carry out the rasterization process on the matte.
For this process we will apply what we learned in assignment 2 and do a vectorization with inkscape

We import the image and generate the vectorization

After that we just don't have the vectorized image and we remove extras that we don't want to appear in our matte
Well, we now have the image to be rasterized and the tool, let's start the process.
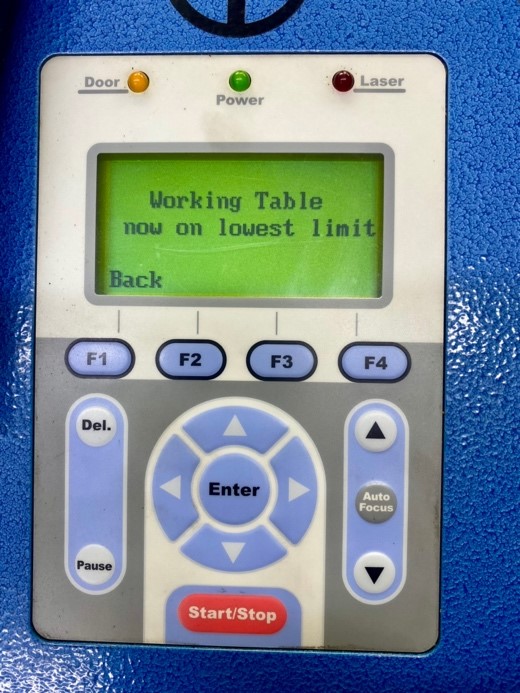
First, we lower the cutting platform to the end:
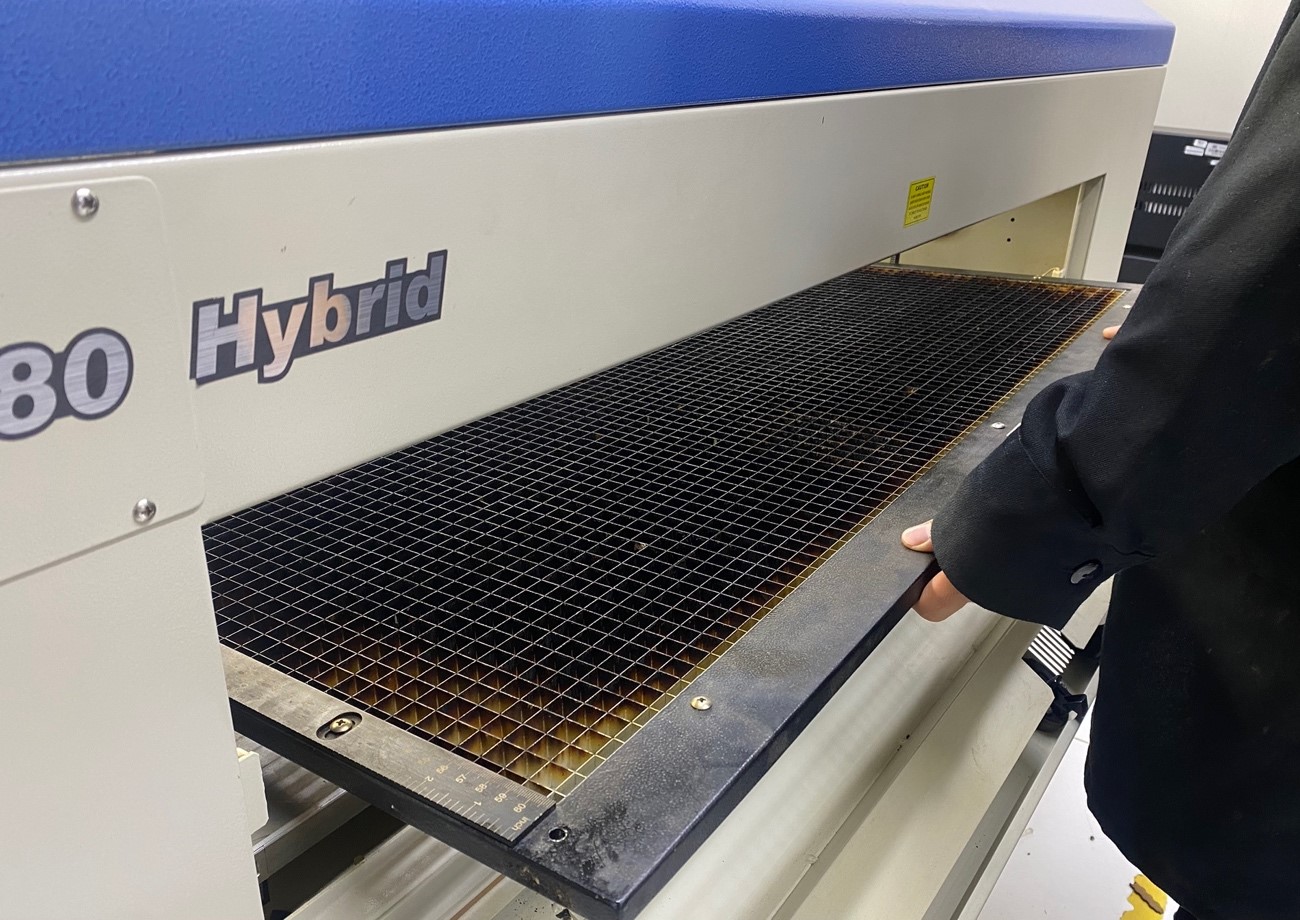
After that we remove the sacrifice platform:
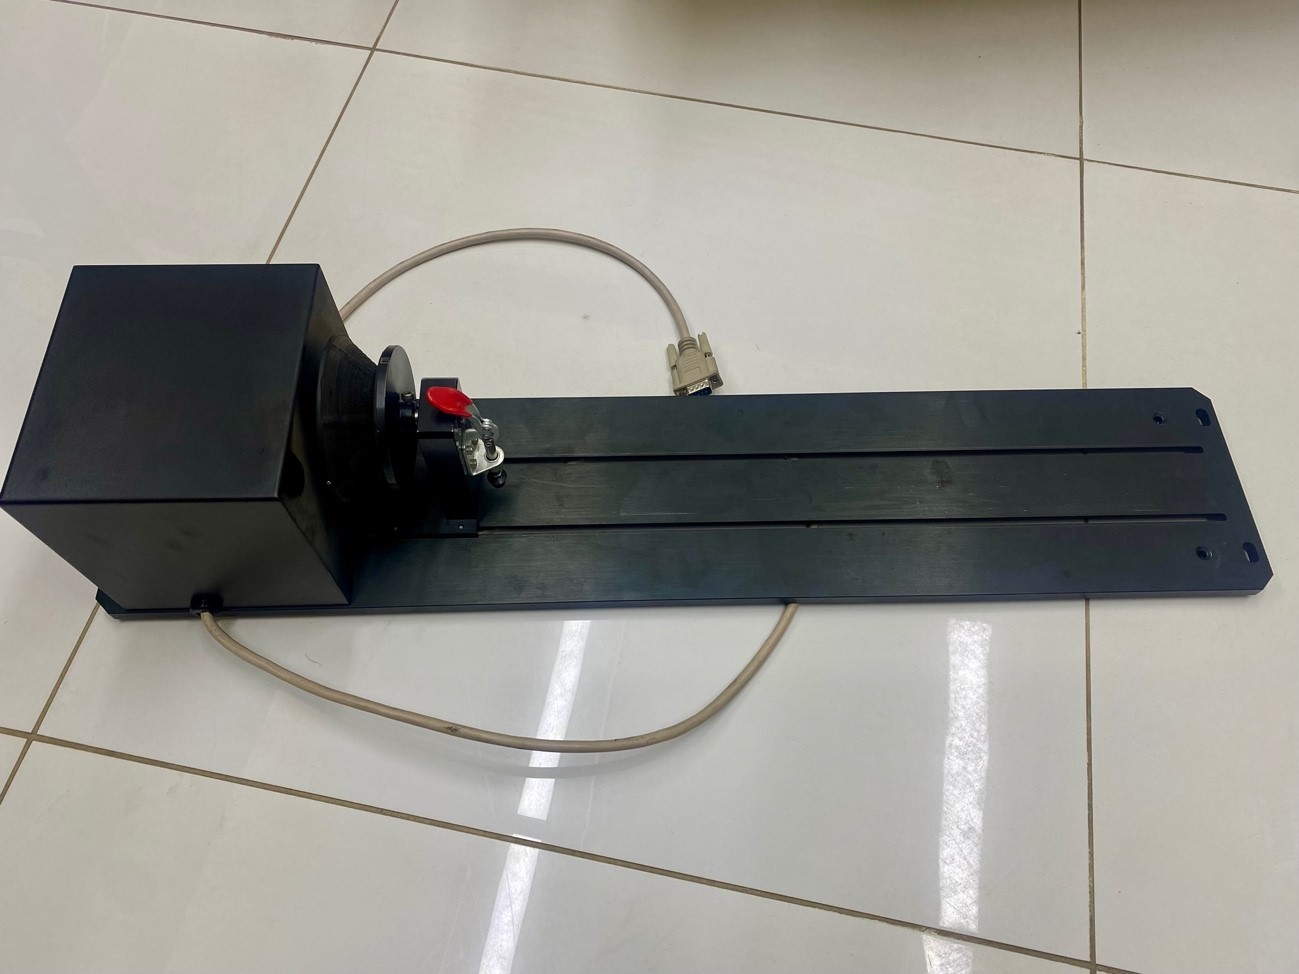
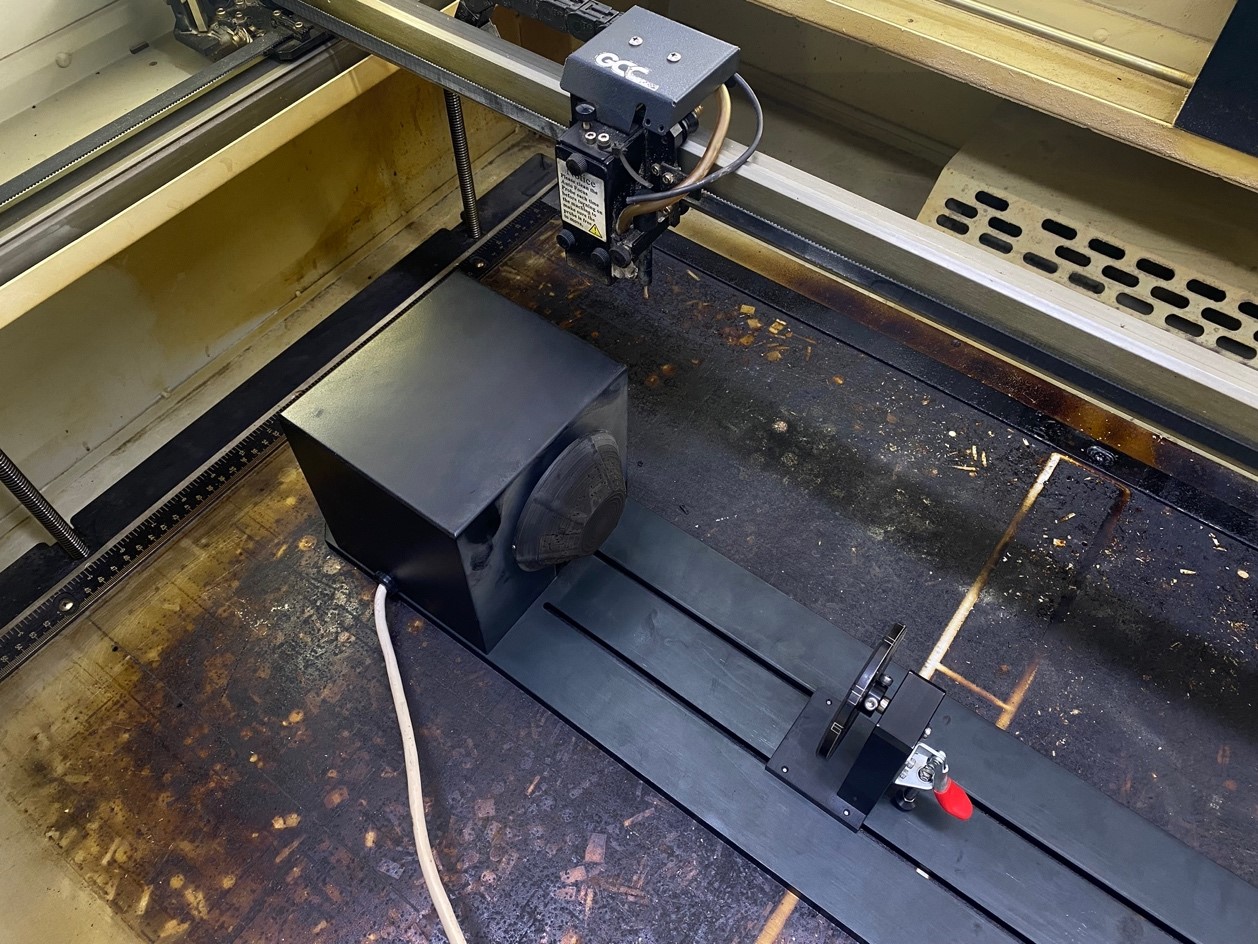
And we have the cutter ready to place the 3 axis

well now we place our 3 axis on the sacrificial bed and align it according to the two bolts at the bottom
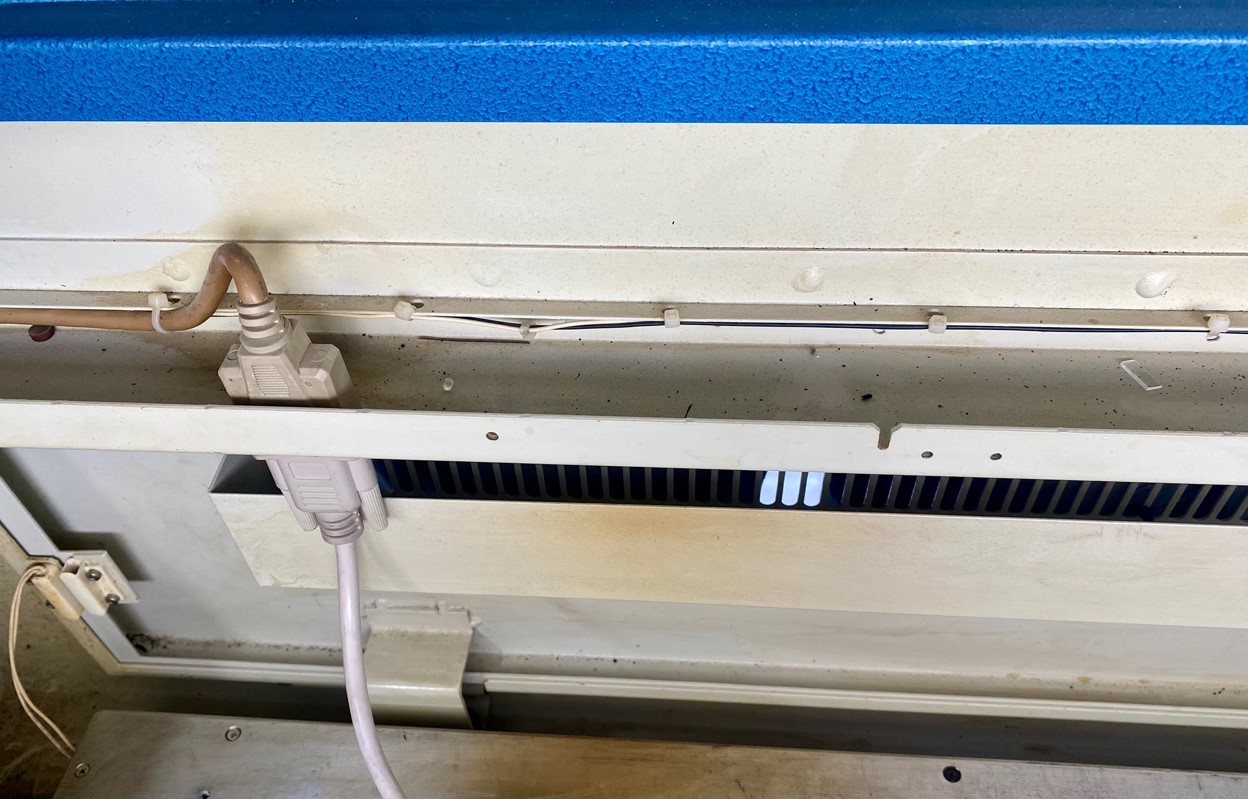
We proceed to connect the data communication cable to the VGA port of the laser.
Ready, now we restart the laser so we can start the connection with the rotating base, here is the video of how it starts:
Perfect, we now have the base installed and started, now let's move on to the configuration, for the laser the Corel Draw program is used, so we will import the image to be rasterized, in this case the previously vectorized one.
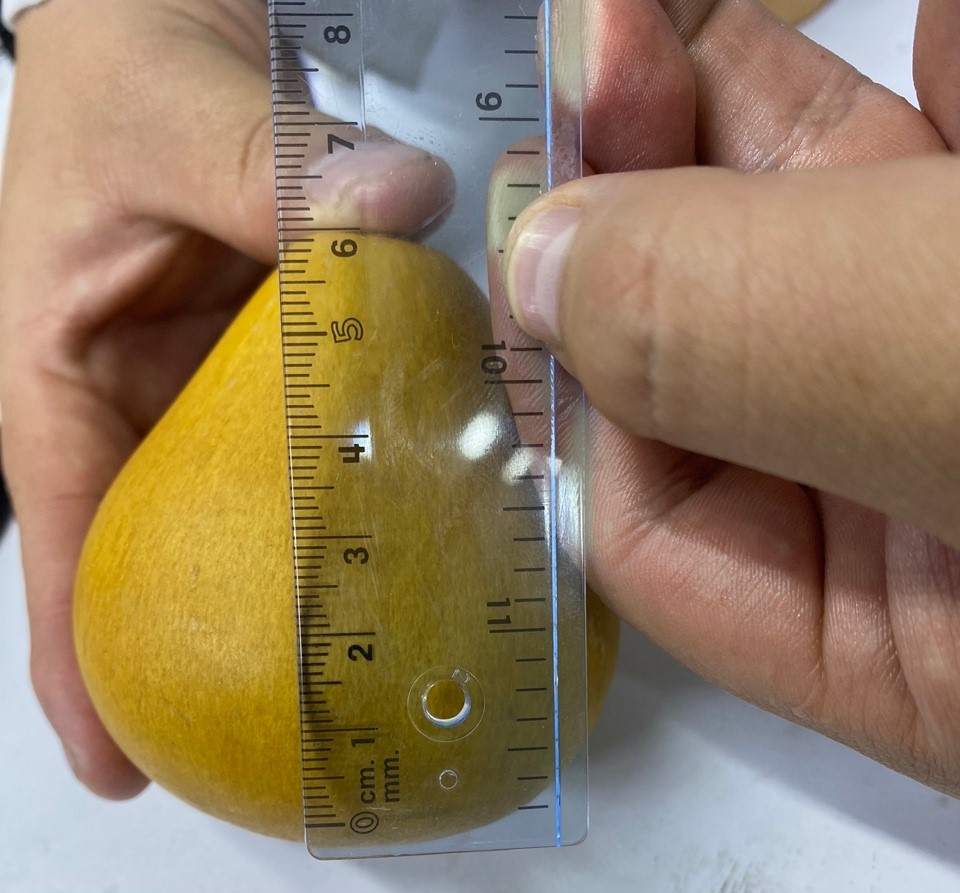
We measure the height of the matte we have so we can scale the image
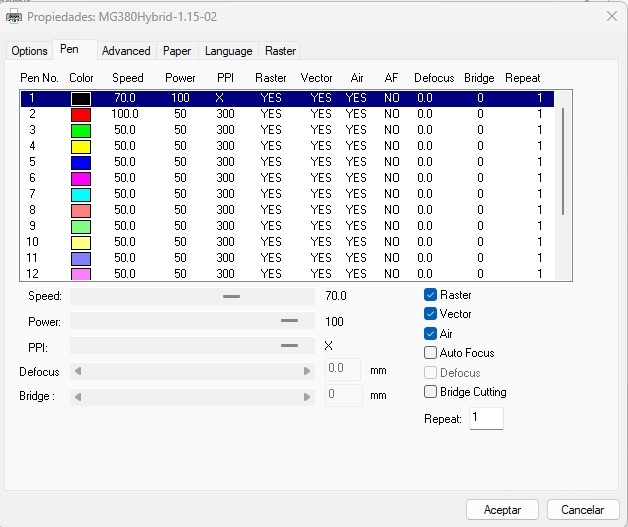
Well now we proceed to configure the raster parameters, we select the mg380 laser:

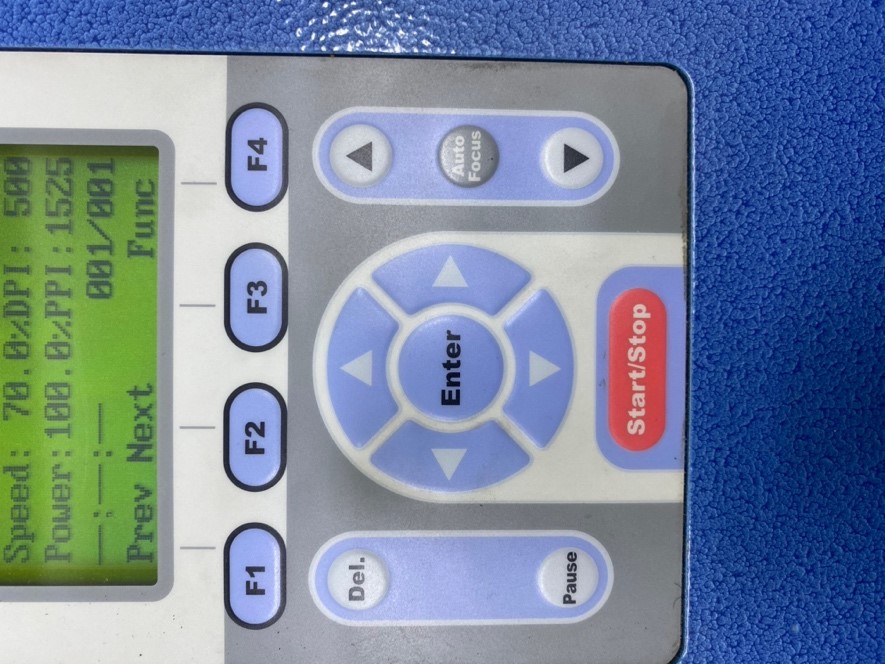
Then we configure the laser power, we learned this in cutting assignment 3, for raster we take a value, speed: 70%, power: 100% , PPI: X.
Well now we go to the paper tab to configure the input of the rotating base
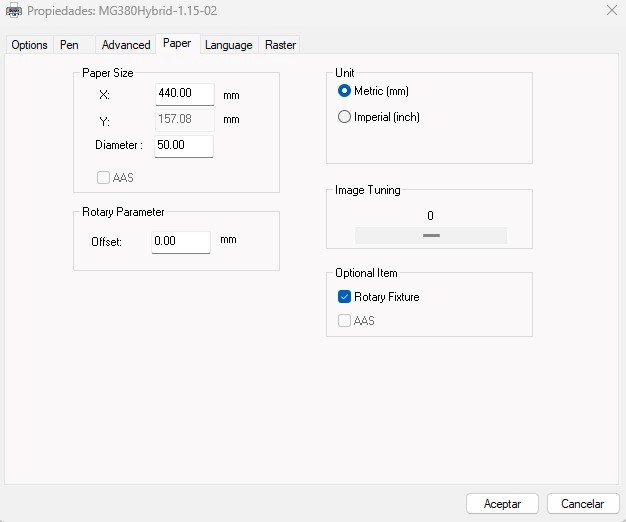
Here we go to the lower right corner and in the optional item we activate rotary fixture, the option to place the diameter of the solid to be rasterized will be enabled.

Once measured, we place the diameter where requested

We proceed to place our mate on the platform
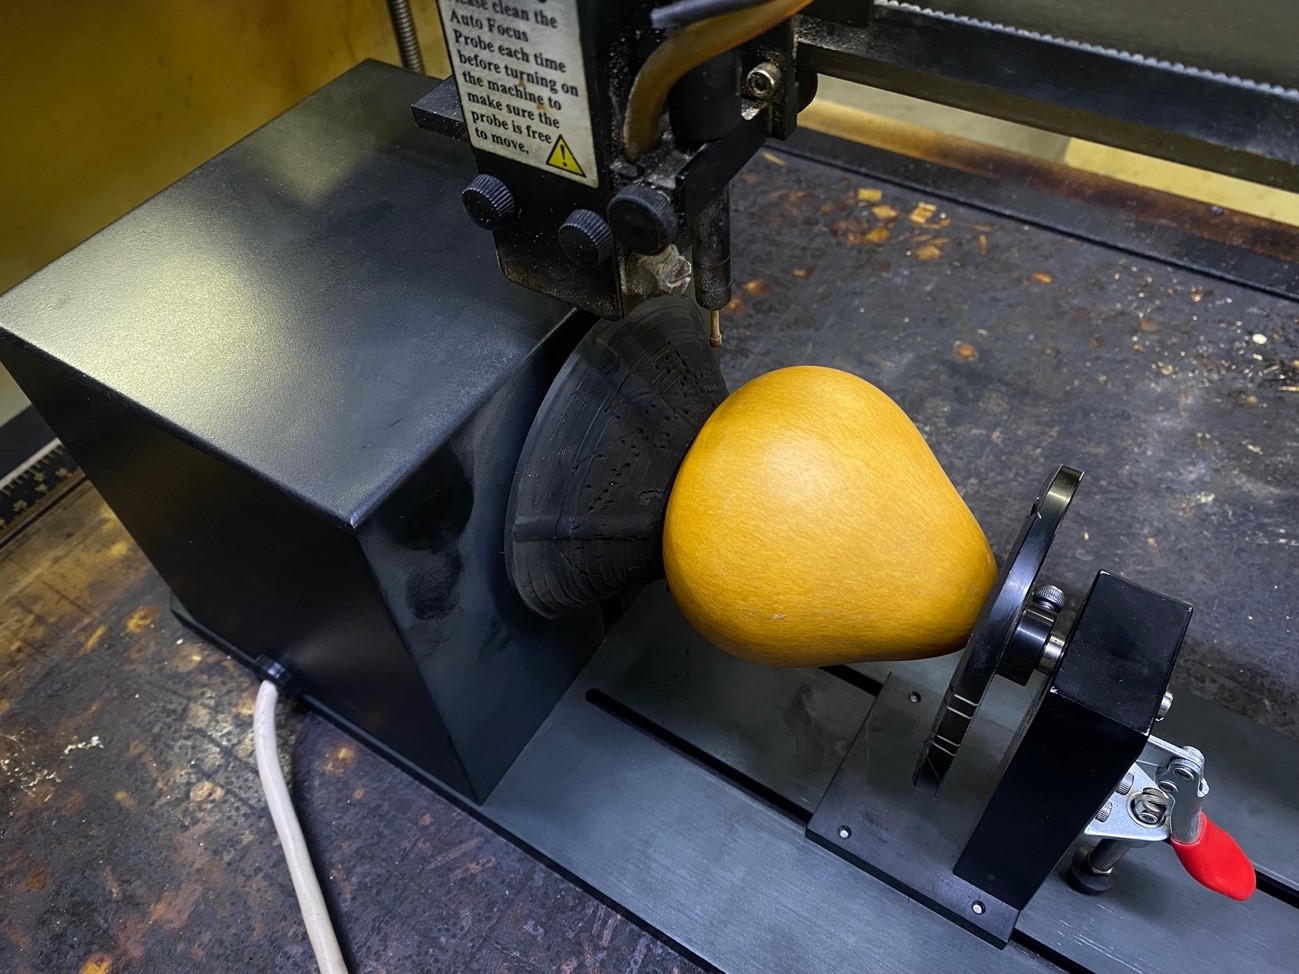
and on the control panel we place autofocus in order to calculate the separation height between the matte and the laser
Well now we start it and we will have the machine working, here I leave you a small video of the process
Now let's see the final result!
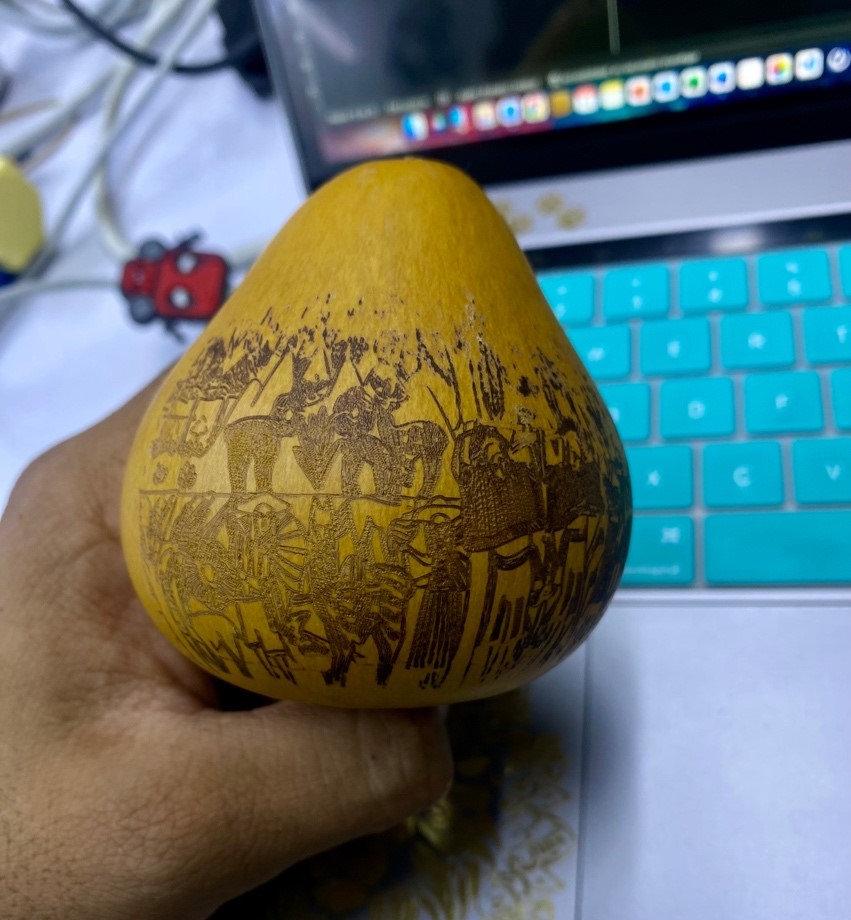
It turned out great, in addition to developing the assignment, this process allowed me to show the culture of my land, I hope you like this madness, I leave the files here so you can make a honed mate, with laser cutting, See you next week.
Learning:
- The laser has the property of being multifunctional, this time we learned about one more function thanks to the third axis.
- This assignment helped me experiment and learn a little more about the culture of my region, opening enormous possibilities to automate the math industry, saving time and resources.