
Welcome to Week 14
Interface and application programming
Hello! this time, let’s learn about Interface and application programming, for this week we have the following group and individual assignments:
- Group assignment:
- Individual assignment:
o Compare as many tool options as possible. - ✅ Done
o Document your work on the group work page and reflect on your individual page what you learned. - ✅ Done
o Write an application that interfaces a user with an input and/or output device(s) on a board that you made. - ✅ Done
GROUP ASSIGNMENT
Interface and application programming is a crucial aspect of software development that focuses on how users interact with software applications and how different software components communicate with each other. Here’s an overview and summary of the key concepts:
Comparing Python-Arduino and HTML-Arduino Interfaces for Real-Time Data Updates
In this project, we aim to compare two different interfaces for interacting with an Arduino microcontroller in real time. The two interfaces we will compare are:
- Python-Arduino Interface: Using a Python script to communicate with the Arduino via serial communication.
- HTML-Arduino Interface: Using a web-based interface (HTML with JavaScript) to interact with the Arduino.
The goal is to determine which interface responds better to real-time changes in input device values, such as sensor readings.
Python-Arduino Interface
Setup:
- Language and Tools: Python with libraries such as pyserial for serial communication.
- Development Environment: Any Python IDE or text editor.
- Communication: Serial communication via USB.
Advantages:
- Ease of Use: Python is a high-level language with extensive libraries, making it easy to write and debug code.
- Powerful Data Processing: Python's libraries, like NumPy and pandas, facilitate advanced data processing and analysis.
- Quick Prototyping: Rapid development and testing with simple scripts.
Example:
STEP 1: We need to program in arduino the input device and scale the potentiometer value between Ov and 5v and load this code in arduino.

We proceed to close the Arduino program so that it does not use the COM22 port on which our board is connected and the Python program can read the data.
Now we move on to the explanation of the Python code:
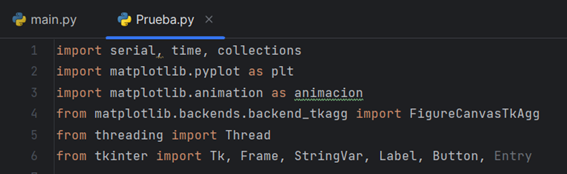
Several libraries needed to handle serial communication (serial), time management (time), graphics creation (matplotlib), animation (animacion), threading and GUI creation (tkinter) are imported.
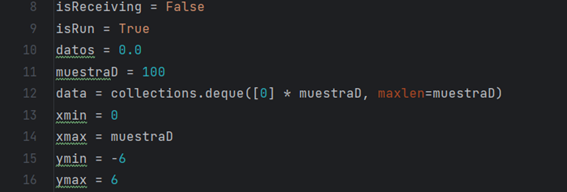
isReceiving and isRun are flags that control the program status. The current value read from the serial port is stored in data. The number of samples to display in the graph is determined by sampleD. The samples for the graph are stored in a queue called data. The limits of the axes of the graph are defined by xmin, xmax, ymin and ymax.
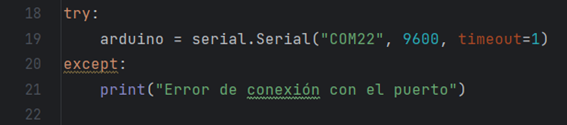
An attempt is made to open the COM22 serial port at 9600 baud rate. If there is an error, a message is printed.
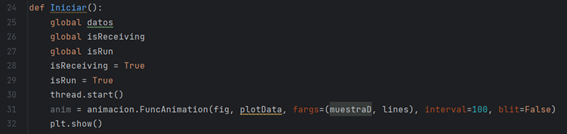
First, the isReceiving and isRun flags are set to True to indicate that the program is active and receiving data. Then, a thread is started to continuously read data from the serial port. At the same time, the animation of the graph is started using FuncAnimation, which dynamically updates the data displayed on the graph in real time. This configuration allows the data to be displayed and processed while being received from the serial port concurrently.
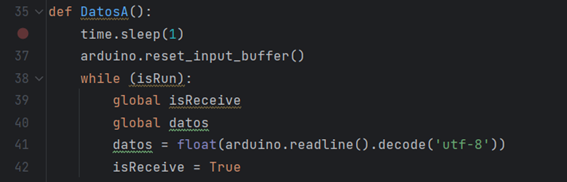
Waits 1 second and resets the serial port input buffer. In a loop as long as isRun is True, it reads data from the serial port, decodes it and stores it in data.
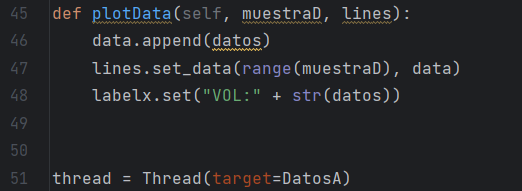
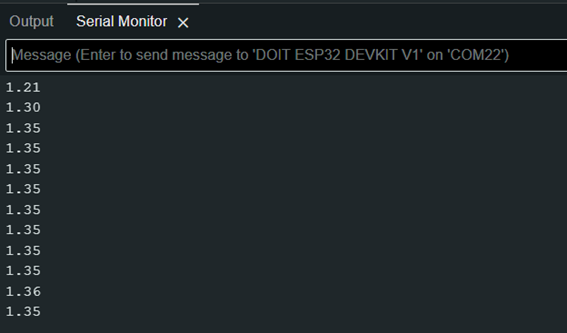
Updates the data queue with the last value read (data). Updates the graph with the new data. Updates the labelx label with the current value.
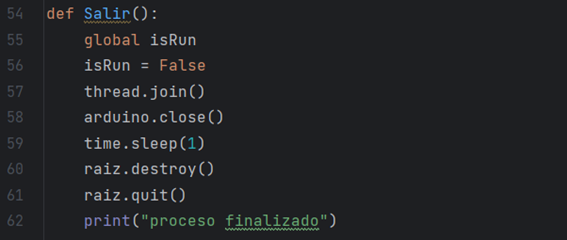
Mark isRun as False to stop reading data.
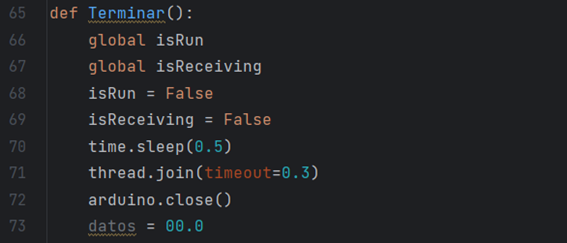
Mark isRun as False to stop reading data.
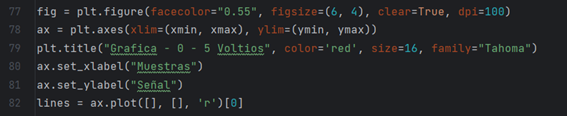
Configures the appearance of the chart and its axes.lines is used to update the data in the chart.
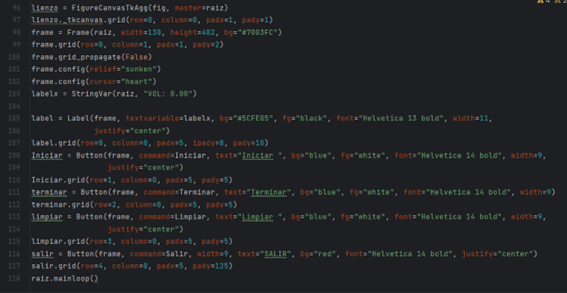
Configures the main window of the graphical interface (root). Adds the graphic to the window (canvas). Create a Frame to contain the buttons and labels.
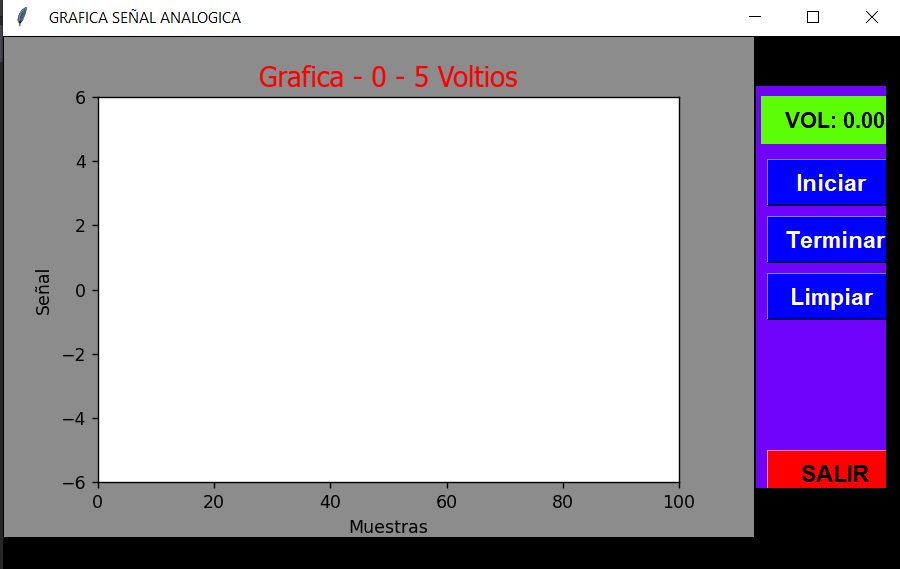
Result:
HTML-Arduino Interface
Setup:
- Language and Tools: HTML, CSS, JavaScript, and WebSockets for real-time communication.
- Development Environment: Any text editor or web development IDE.
- Communication: WebSockets or Serial communication via a backend server (e.g., using Flask or Node.js).
Advantages:
- Cross-Platform: Runs in any web browser, making it platform-independent.
- User-Friendly Interface: Easy to create interactive and visually appealing interfaces using HTML and CSS.
- Remote Access: Can be accessed from any device with a web browser, facilitating remote monitoring and control.
Example:
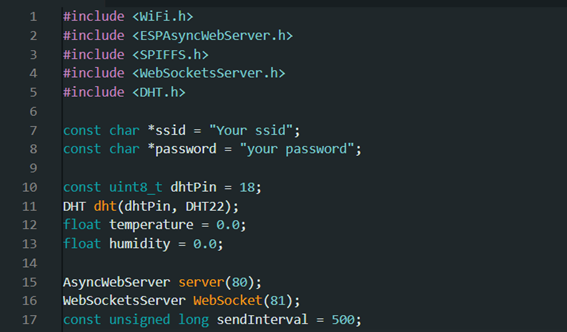
First we declare the libraries that we will use as well as we declare as global constants our wifi network and its password, then we declare the values and the pin of our sensor, finally we declare the port of our server which would be the "80" while the port of our websocket would be "81"
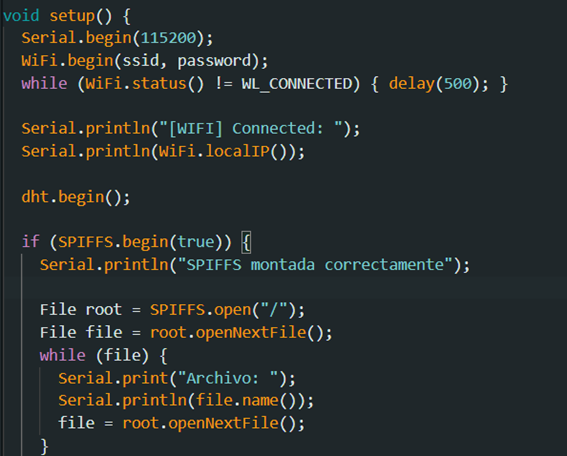
In the first part of our void setup we configure the baud rate which would be 115200 and tell our microcontroller to connect to the wifi network previously declared and then show us the IP with which it will connect to it eh will initialize the web page once the IP is displayed it will give us a list of the files hosted in our microcontroller's flash memory.
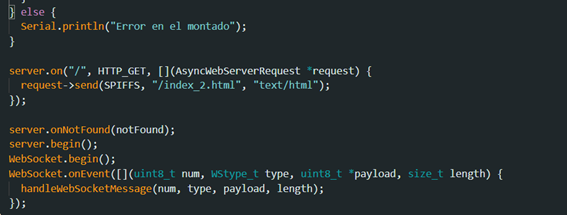
In the second part of the setup code we generate a conditioner to show us if our SPIFFS started correctly, if so it will proceed to show us the web page that we previously programmed, we also add a function that is displayed in case the ip that we enter is incorrect
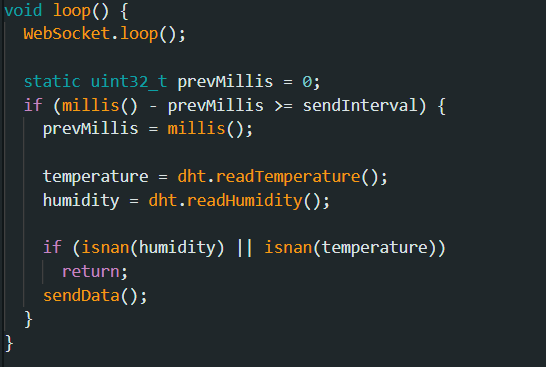
In our Loop function we call our websocket so that it is in a constant loop and can read the information from the sensors that we declare later as shown in the code, the connection allows us to read the sensor values and upload them to the web each time they give us a data.

In our function to send data we store the sensor data in a string to later upload it to the web.
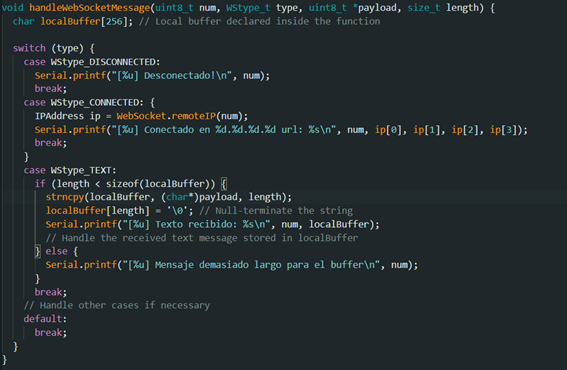
The handleWebSocketMessage function handles various WebSocket events such as connections, disconnections and message reception. It uses a local buffer for temporarily store text messages received via WebSocket, avoiding overwriting of data in other parts of the memory.

And finally we have our notFound function that sends us a plain text when the ip we enter is incorrect. Once we have the complete code we load it in the microcontroller, at the beginning it shows us the IP in which the server is hosted and later it shows us the sensor data.
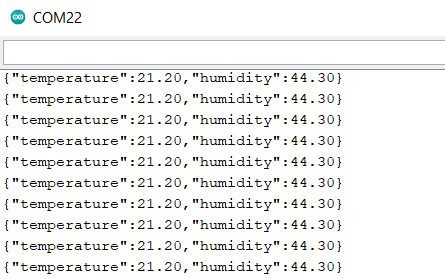
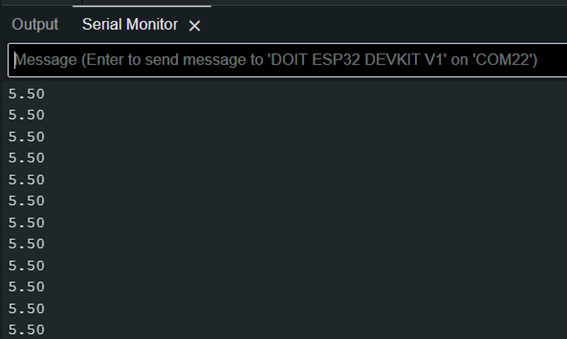
When we see this data we can check if it is displayed on the web
We can see that the data shown as both the serial port and the web are the same. Now we move on to the programming of the website
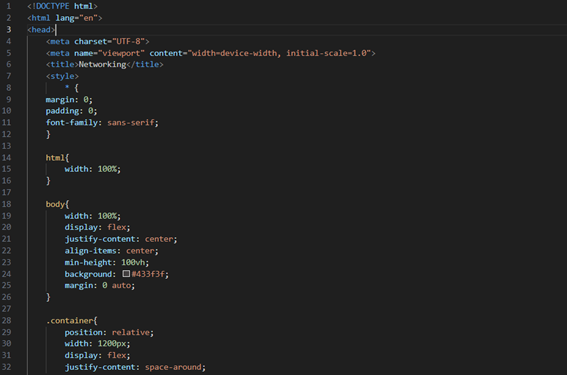
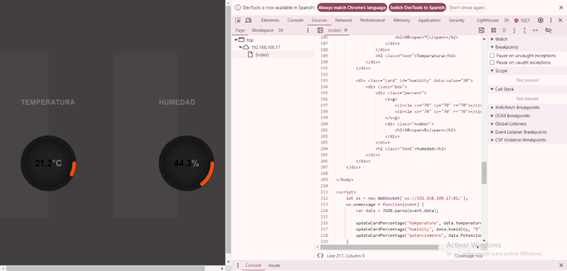
First we declare the name of the page and generate a section for the css code or style of the page we place everything in the same html code to consume less memory inside the flash memory of the microcomputer.
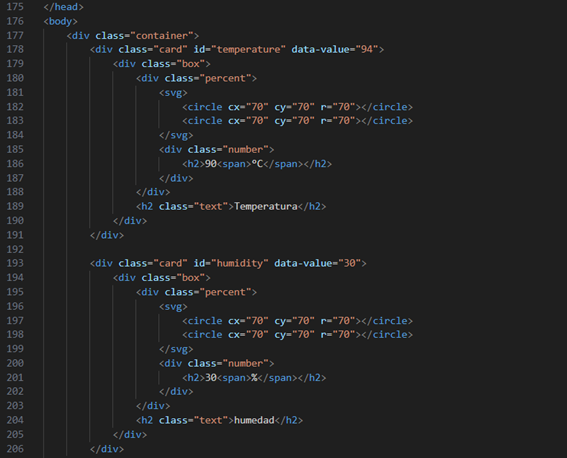
We move on to the content of the page for which we will generate a division of the container name which will contain our "cards" or divisions of each object from which we will receive data in this case the temperature and humidity.
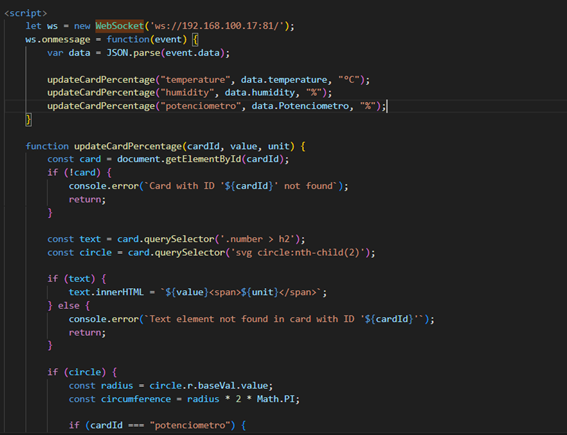
We move on to the script with which we can vary the percentage of the value shown in each graph in which we can see that the code receives the temperature and humidity variables and updates them based on the websocket we decared before with the server IP and the port we declared.
Obstacles
As the first obstacle we have an incompatibility in script for our microcontroller, since to be able to load files to the flash memory of this we have to add the ESP32FS script.
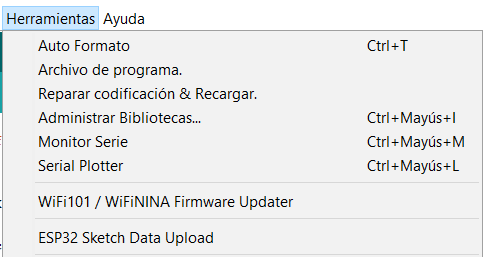
Adding this plugin unlocks the "ESP32 Sketch data upload" function that allows us to use the flash memory of the microcontroller, which is not compatible with updated versions of Arduino IDE being functional in past versions of this as Arduino 1.18 version in which we could upload the files to the flash memory.
Once we have generated a folder in the flash memory we can store our web page inside so that the microcontroller can load it. When loading the main code, another error occurred.
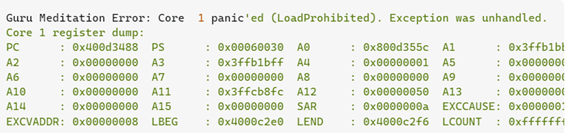
Which did not allow us to read the files we sent because as the error mentions it indicates that the ESP32 firmware has encountered a serious error due to a forbidden memory access, such as dereferencing a null pointer. This is usually due to trying to access memory that is not allocated or is invalid. To solve this error, the client was declared as a global variable and the main code was loaded from the Arduino IDE, since it contains the libraries updated and most of the errors solved, recapitulating to load the data to the flash memory we used Arduino 1.18 and to load the main code the Arduino IDE 2.12 when loading in this way the error is displayed.
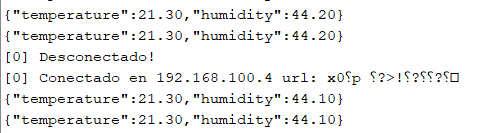
Likewise, we can see in the serial port each time a client connects and disconnects, encrypting the direct connection url but keeping the IP with which the client connects. we start the server.
Result:
Radar-Arduino Interface
Setup:
- Arduino board (e.g., Arduino Uno, Mega, etc.)
- A ultrasonic sensor HC-SR05 to function as our radar.
- Connecting wires
Advantages:
- Ease of Use: Arduino is user-friendly, with a large community and extensive documentation. This makes setting up and troubleshooting easier, even for beginners.
- Flexibility: Arduino is highly adaptable and can interface with various sensors and modules. This allows for customization and expansion of projects.
- Real-Time Processing: Arduino can process radar data in real-time, making it suitable for applications requiring immediate feedback, such as security systems and robotics.
Example:

- ESP32Servo.h: This library allows you to control servos using the ESP32.
- trigPin and echoPin: Define the pins used for the ultrasonic sensor.

- duration: Stores the time it takes for the pulse to return to the sensor.
- distance: Stores the distance calculated from the pulse duration.
- myServo: Creates an instance of the Servo class to manage the servo motor.
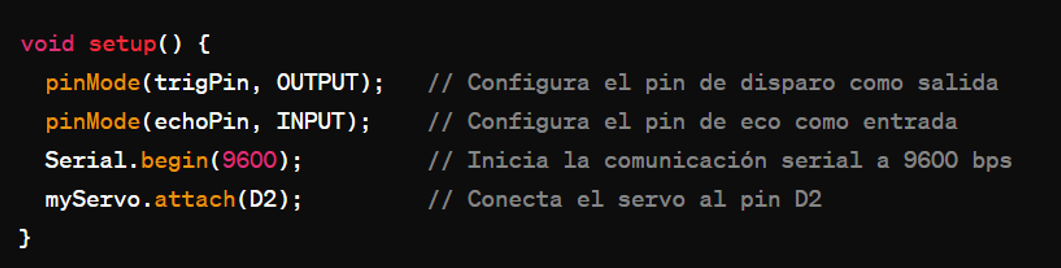
- pinMode: Configures the trigPin and echoPin pins as output and input respectively
- Serial.begin(9600): Starts serial communication at 9600 baud
- myServo.attach(D2): Attaches the servo motor to pin D2 (although generally a PWM pin is used for the servo, this could be an error and should be checked).
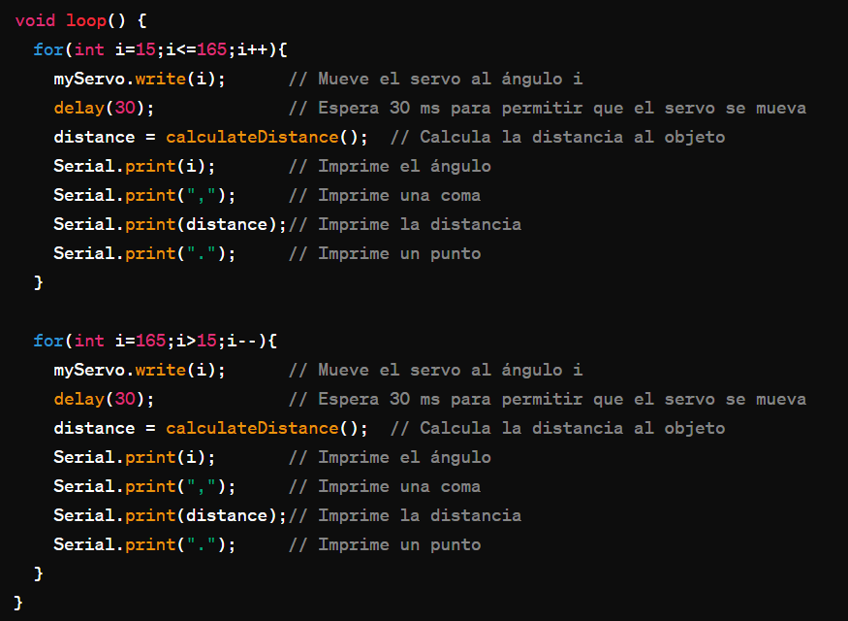
- for loops: The servo moves from 15° to 165° and then back to 15°, making measurements at each angle.
- myServo.write(i): Sets the servo motor angle.
- delay(30): Waits 30 milliseconds to allow the servo to move
- distance = calculateDistance(): Calculates the distance to the object.
- Serial.print(): Sends the angle and distance over the serial port.
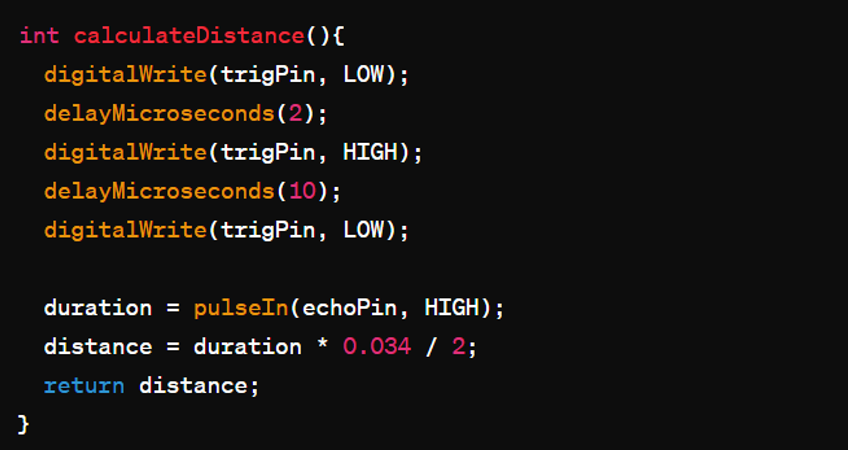
- digitalWrite(trigPin, LOW): Sets the trigPin pin low
- delayMicroseconds(2): Wait for 2 microseconds.
- digitalWrite(trigPin, HIGH): Sends a 10 microsecond high pulse to initiate the measurement.
- duration = pulseIn(echoPin, HIGH): Measures the duration of the echo pulse
- distance = duration * 0.034 / 2: Calculates the distance in centimeters based on the pulse duration (the factor 0.034 converts time to distance in air).
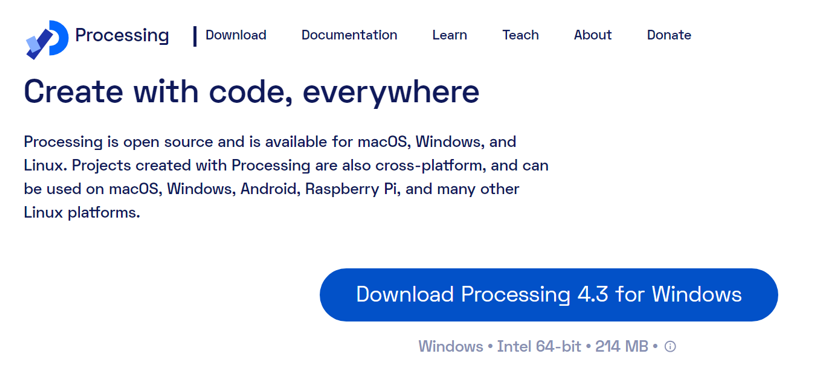
Once we have the microcontroller code we upload it to the microcontroller to test its operation and to be able to pass to the interface to receive data, for this project we will use Processing.org is the official website of Processing, a flexible and open source software platform designed for people who want to program images, animations and sounds. Processing was originally developed to teach programming fundamentals in a visual context and has grown to serve as a professional production tool. To do so, we download the application from its WebSite.
Once downloaded and installed we can see that it has a very similar theme to that of Arduino.

In which we must program the interface of our radar
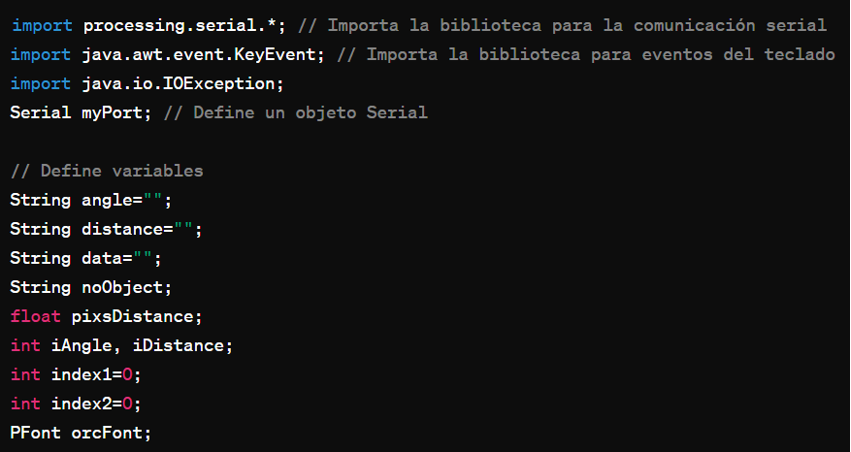
- processing.serial.*: Enables serial communication between Processing and other devices.
- java.awt.event.KeyEvent: Allows handling keyboard events (not used in this code).
- java.io.IOException: Input/output exception handling (not used in this code).
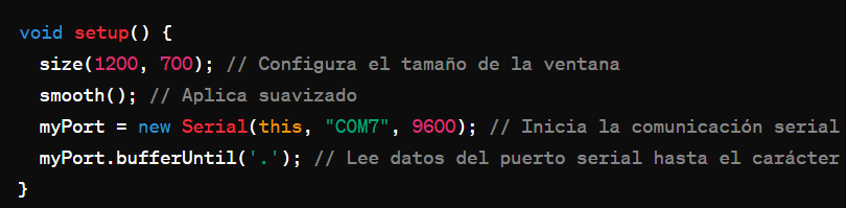
- size(1200, 700): Sets the size of the display window.
- smooth(): Applies smoothing to graphics.
- myPort: Initializes serial communication on COM7 port at 9600 baud.
- myPort.bufferUntil('.'): Configures the buffer to read data up to the character .
It is important to note that here we must place the port in which our microcontroller is connected
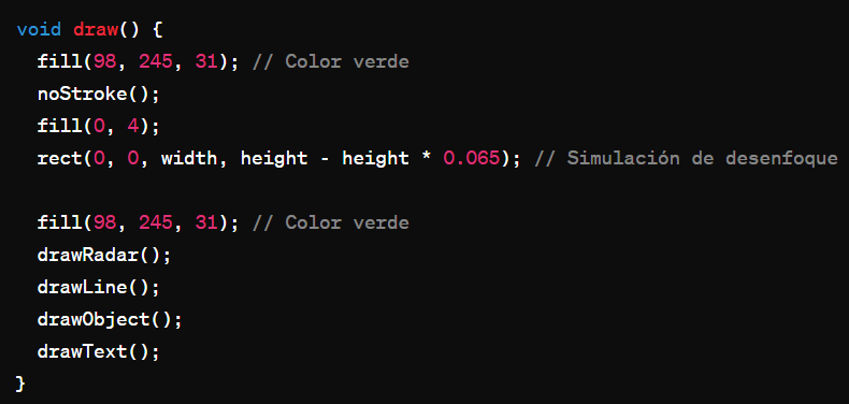
- fill(98, 245, 31): Sets the fill color (green).
- noStroke(): Disables object outlines
- rect(0, 0, width, height - height * 0.065): Draws a semi-transparent black rectangle to create a fading effect.

- data = myPort.readStringUntil('.'): Reads data from the serial port up to character.
- data.substring(0, data.length() - 1): Removes the character .
- index1 = data.indexOf(","): Find the position of the comma.
- angle = data.substring(0, index1): Extracts the angle.
- distance = data.substring(index1 + 1, data.length()): Extracts the distance
- iAngle, iDistance: Converts strings to integers.
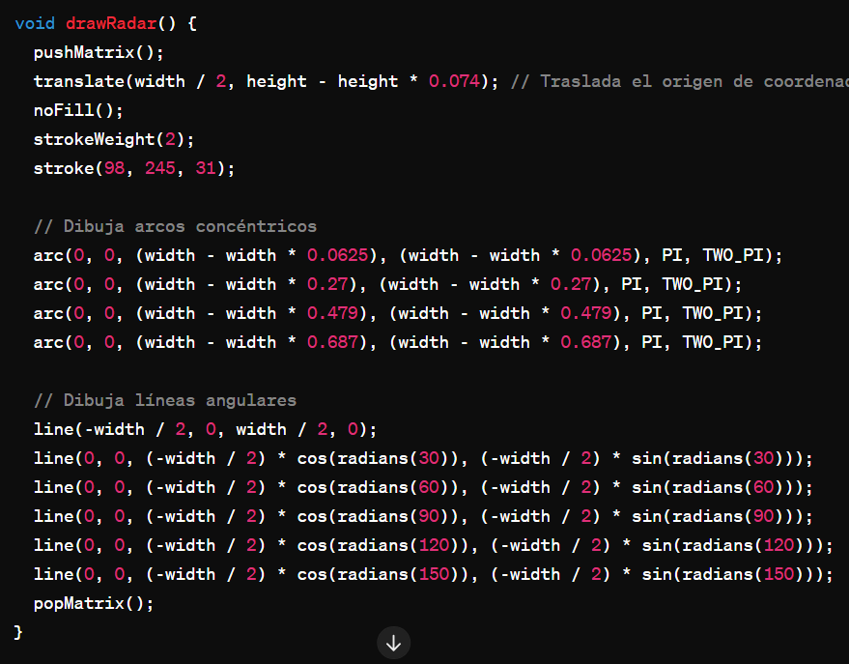
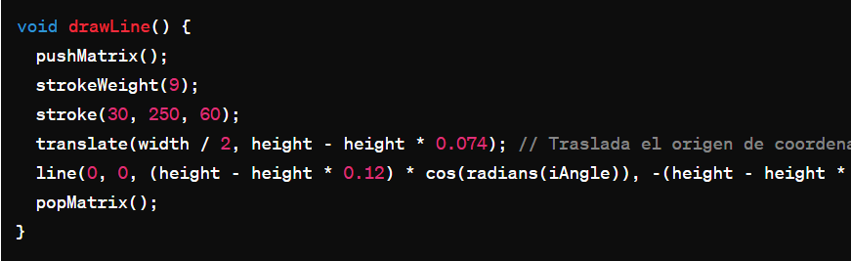
- pushMatrix(), popMatrix(): Save and restore the state of thetransformation matrix.
- translate(width / 2, height - height * 0.074): Moves the origin of coordinates.
- noFill(): Disables the fill.
- strokeWeight(2), stroke(98, 245, 31): Sets the thickness and color of the stroke.
- arc(...): Draw concentric arcs.
- line(...): Draws lines from the origin at different angles.
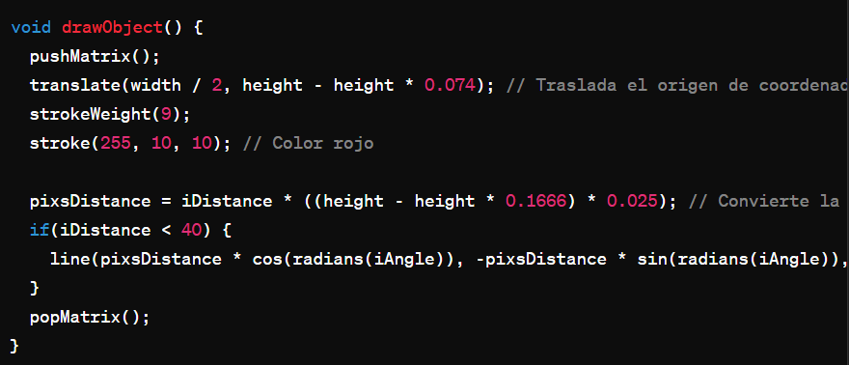
- pixsDistance = iDistance * ((height - height * 0.1666) * 0.025): Converts the distance in centimeters to pixels.
- line(...): Draws a red line from the origin to the object position if the distanceis less than 40 cm
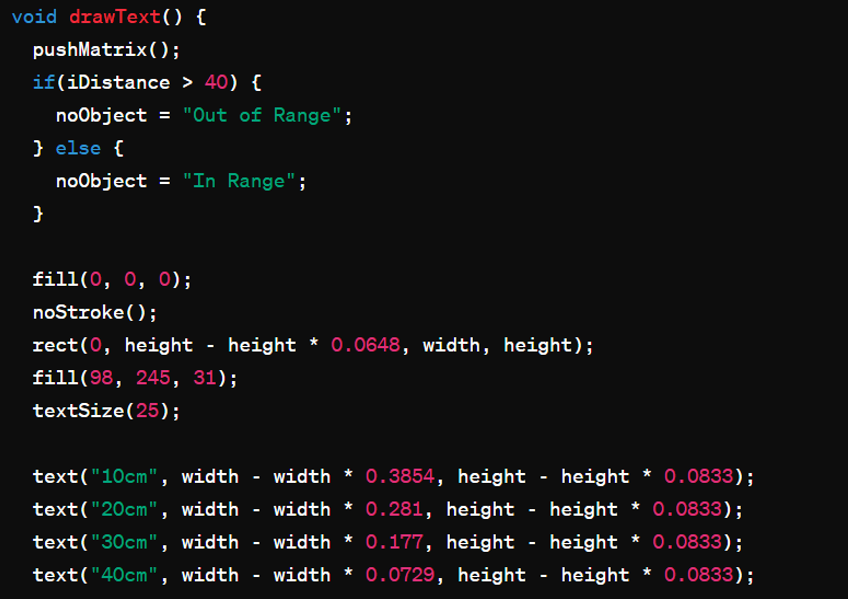
- Condition if(iDistance > 40): Shows whether the object is out of range or in range.
- text(...): Draws text on the screen with radar information, including angle and distance.
Result:
Here are all the files used
Python-Arduino Interface
Download Here The codeHTML-Arduino Interface
Download Here The codeLibraries
- You can find the library Wifi.h Here.
- You can find the library ESPAsyncWebServer.h Here.
- You can find the library SPIFFS.h Here.
- You can find the library WebSocketsServer.h Here.
Radar-Arduino Interface
Download Here The code- You can find the library Servo.h Here.