
Welcome to Week 11
Input devices
Hey! now we will learn about Input Devices, for this week we have the following group and individual assignments:
- Group assignment:
- Individual assignment:
o Probe an input device(s)’s analog level and digital signals - ✅ Done
o Document your work on the group work page and reflect on your individual page what you learned - ✅ Done
o Measure something: add a sensor to a microcontroller board that you have designed and read it - ✅ Done
GROUP ASSIGNMENT
First, we will work with the ultrasound to see the behavior of the analog level and then we will try with a switch that turns on an LED as a digital signal. For this assignment we will use an oscilloscope which will help us visualize the behavioral waves.
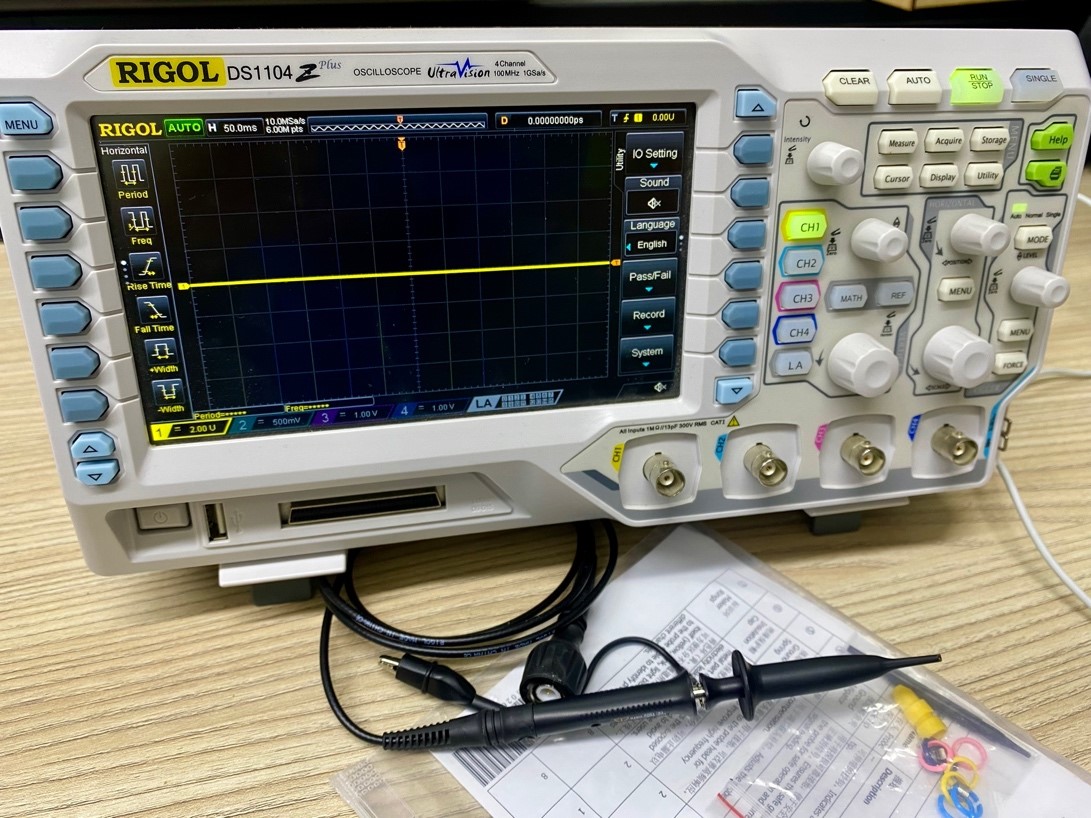
Ready, now let's start with the ultrasound sensor, let's see the readings that the oscilloscope shows us and how it generates a wave of the various values that it reads.

Here I leave you a small video where you can better visualize the waves when they read different values.
Well, we have already observed how analog signals behave, it is our turn to show digital signals, come on!
For this part, we will use a pushbutton that is part of our shield, which will test for us the behavior of the digital signals.

Now let's observe the change when the pushbutton is activated.

The change was notable. This behavior occurs in digital readings where only values of 1 and 0 are given. I'll leave you with a video where this explanation can be better visualized.
INDIVIDUAL ASSIGNMENT
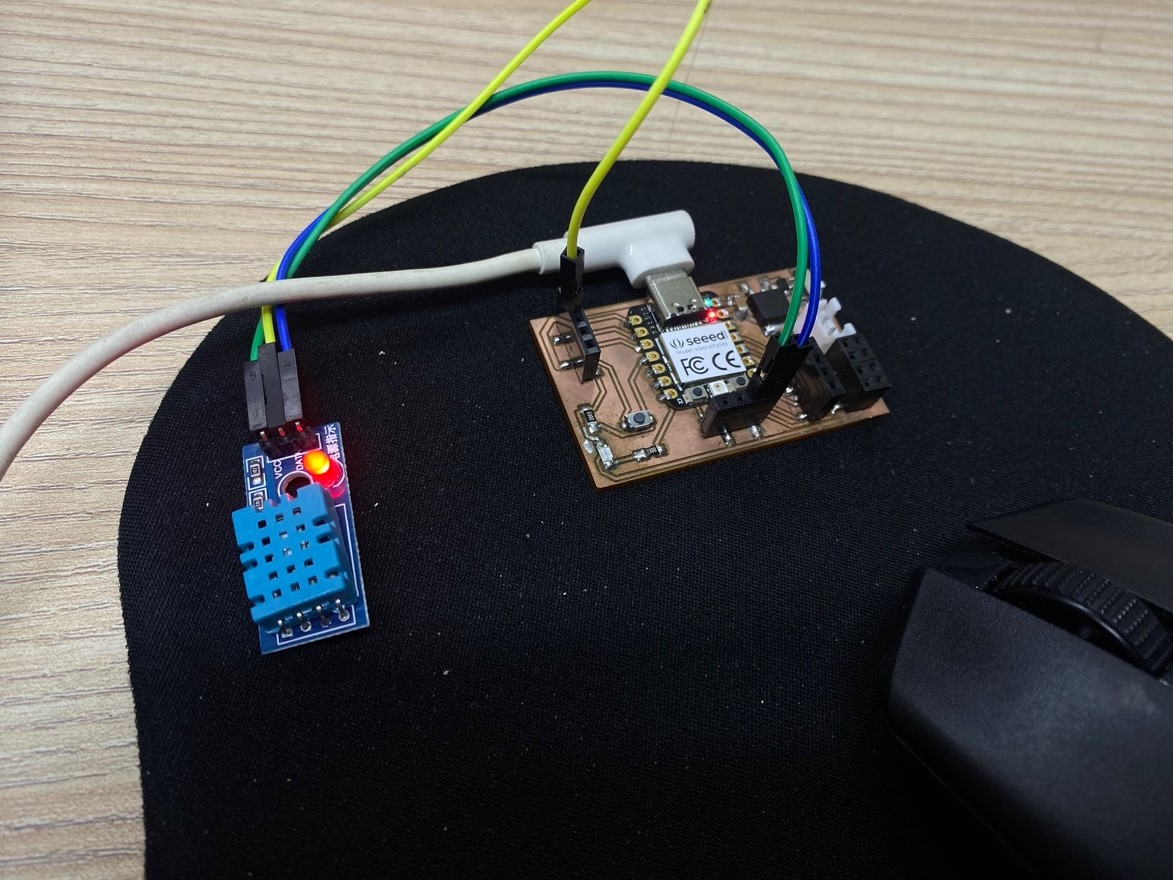
Well now let's experiment a little this time with two widely used sensors, the DHT11 which is a humidity sensor and a PIR sensor, let's get started!
Here I leave you the programming so you can experience it too.
  1 // Incluimos librería
  2 #include <DHT.h>
  3
  4 // Definimos el pin digital donde se conecta el sensor
  5 #define DHTPIN 2
  6 // Dependiendo del tipo de sensor
  7 #define DHTTYPE DHT11
  8
  9 // Inicializamos el sensor DHT11
  10 DHT dht(DHTPIN, DHTTYPE);
  11
  12 void setup() {
  13   // Inicializamos comunicación serie
  14   Serial.begin(9600  );
  15
  16   // Comenzamos el sensor DHT
  17   dht.begin();
  18 }
  19
  20 void loop() {
  21     // Esperamos 5 segundos entre medidas
  22   delay(5000  );
  23
  24   // Leemos la humedad relativa
  25   float h = dht.readHumidity();
  26   // Leemos la temperatura en grados centígrados (por defecto)
  27   float t = dht.readTemperature();
  28   // Leemos la temperatura en grados Fahrenheit
  29   float f = dht.readTemperature(true);
  30
  31   // Comprobamos si ha habido algún error en la lectura
  32   if (isnan(h) || isnan(t) || isnan(f)) {
  33     Serial.println("Error obteniendo los datos del sensor DHT11");
  34     return;
  35   }
  36
  36
  37   // Calcular el índice de calor en Fahrenheit
  38   float hif = dht.computeHeatIndex(f, h);
  39   // Calcular el índice de calor en grados centígrados
  40   float hic = dht.computeHeatIndex(t, h, false);
  41
  42   Serial.print("Humedad: ");
  43   Serial.print(h);
  44   Serial.print(" %\t");
  45   Serial.print("Temperatura: ");
  46   Serial.print(t);
  47   Serial.print(" *C ");
  48   Serial.print(f);
  49   Serial.print(" *F\t");
  50   Serial.print("Índice de calor: ");
  51   Serial.print(hic);
  52   Serial.print(" *C ");
  53   Serial.print(hif);
  54   Serial.println(" *F");
  55
  56 }
Here is a small video where we observe the data acquisition on our serial monitor
Looks good, now let's start with the PIR sensor

Here I leave you the programming so you can experience it too.
1 #define PIR_SENSOR_PIN D2
2
3 void setup(){
4   Serial.begin(9600  );
5   pinMode(PIR_SENSOR_PIN, INPUT);
6 }
7
8 void loop(){
9   int pirSensorValue = digitalRead(PIR_SENSOR_PIN);
10   Serial.print("Valor del sensor PIR: ");
11   Serial.print(pirSensorValue);
12   delay(1000  );
13 }
Here is a small video where we observe the data acquisition on our serial monitor.
Well, we experimented with two sensors, one analog dht11 and one digital PIR, having a clear difference in terms of purposes while one offers us several values, another gives us values 0 and 1, I hope you enjoy analyzing the sensors and their readings.
Learning
Well we finished the assignment and we definitely did not take away important learnings:
o There are various sensors which we can use digitally or analogically depending on the readings required.
o Digital signals do not provide binary values and states, while analog signals do not provide a broader spectrum of values.
That was all for today's task, here I leave the files so you can experiment, See you next Week.