This week, I'm going to build a application for my output devices board that i have designed, using the app I will going to display the temperature and the humidity on the mobile phone using MIT App Inventor.
A network in electrical engineering and electronics is a collection of interconnected components. Networking and communication involve analyzing, designing, implementing, and using local, wide-area, and mobile networks to link computers together. The Internet is a vast network enabling communication between almost all computers worldwide. Networks consist of two or more devices linked to share resources (like printers and CDs), exchange files, or allow electronic communications. These devices can be connected through cables, telephone lines, radio waves, satellites, or infrared light beams.
Network Definition: A group of devices connected to share data and resources.
Communication: The act of connecting and sharing information between devices.
Devices in a Network: Can include circuit breakers, sensors, Ethernet switches, controllers like computers, or PLCs (Programmable Logic Controllers).
Data Communications: The transmission of digital data between computers.
Physical Connections: Established using cable media (wires) or wireless media (radio waves, etc.).
A communication protocol is a system of rules allowing entities in a communication system to transmit information. It defines the rules, syntax, semantics, synchronization of communication, and error recovery methods. Protocols can be implemented in hardware, software, or a combination of both. They ensure devices in a network can communicate effectively and follow well-defined formats, often as formal Technical Standards.
Data Communication is defined as exchange of data between two devices via some form of transmission media such as a cable, wire or it can be air or vacuum also. For occurrence of data communication, communicating devices must be a part of communication system made up of a combination of hardware or software devices and programs.
Message: The information or data that is being communicated. It can be text, audio, video, or any other form of data.
Sender: The device or entity that sends the message. This could be a computer, smartphone, or any other transmitting device.
Receiver: The device or entity that receives the message. It could be another computer, smartphone, or any device capable of receiving data.
Transmission Medium: The physical path through which the message travels from sender to receiver. Examples include cables, fiber optics, and wireless signals.
Set of Rules (Protocol): The agreed-upon rules and conventions for communication. Protocols ensure that devices interpret and respond to messages correctly, managing aspects like data format, error handling, and synchronization.
1. Group assignment:
send a message between two projects
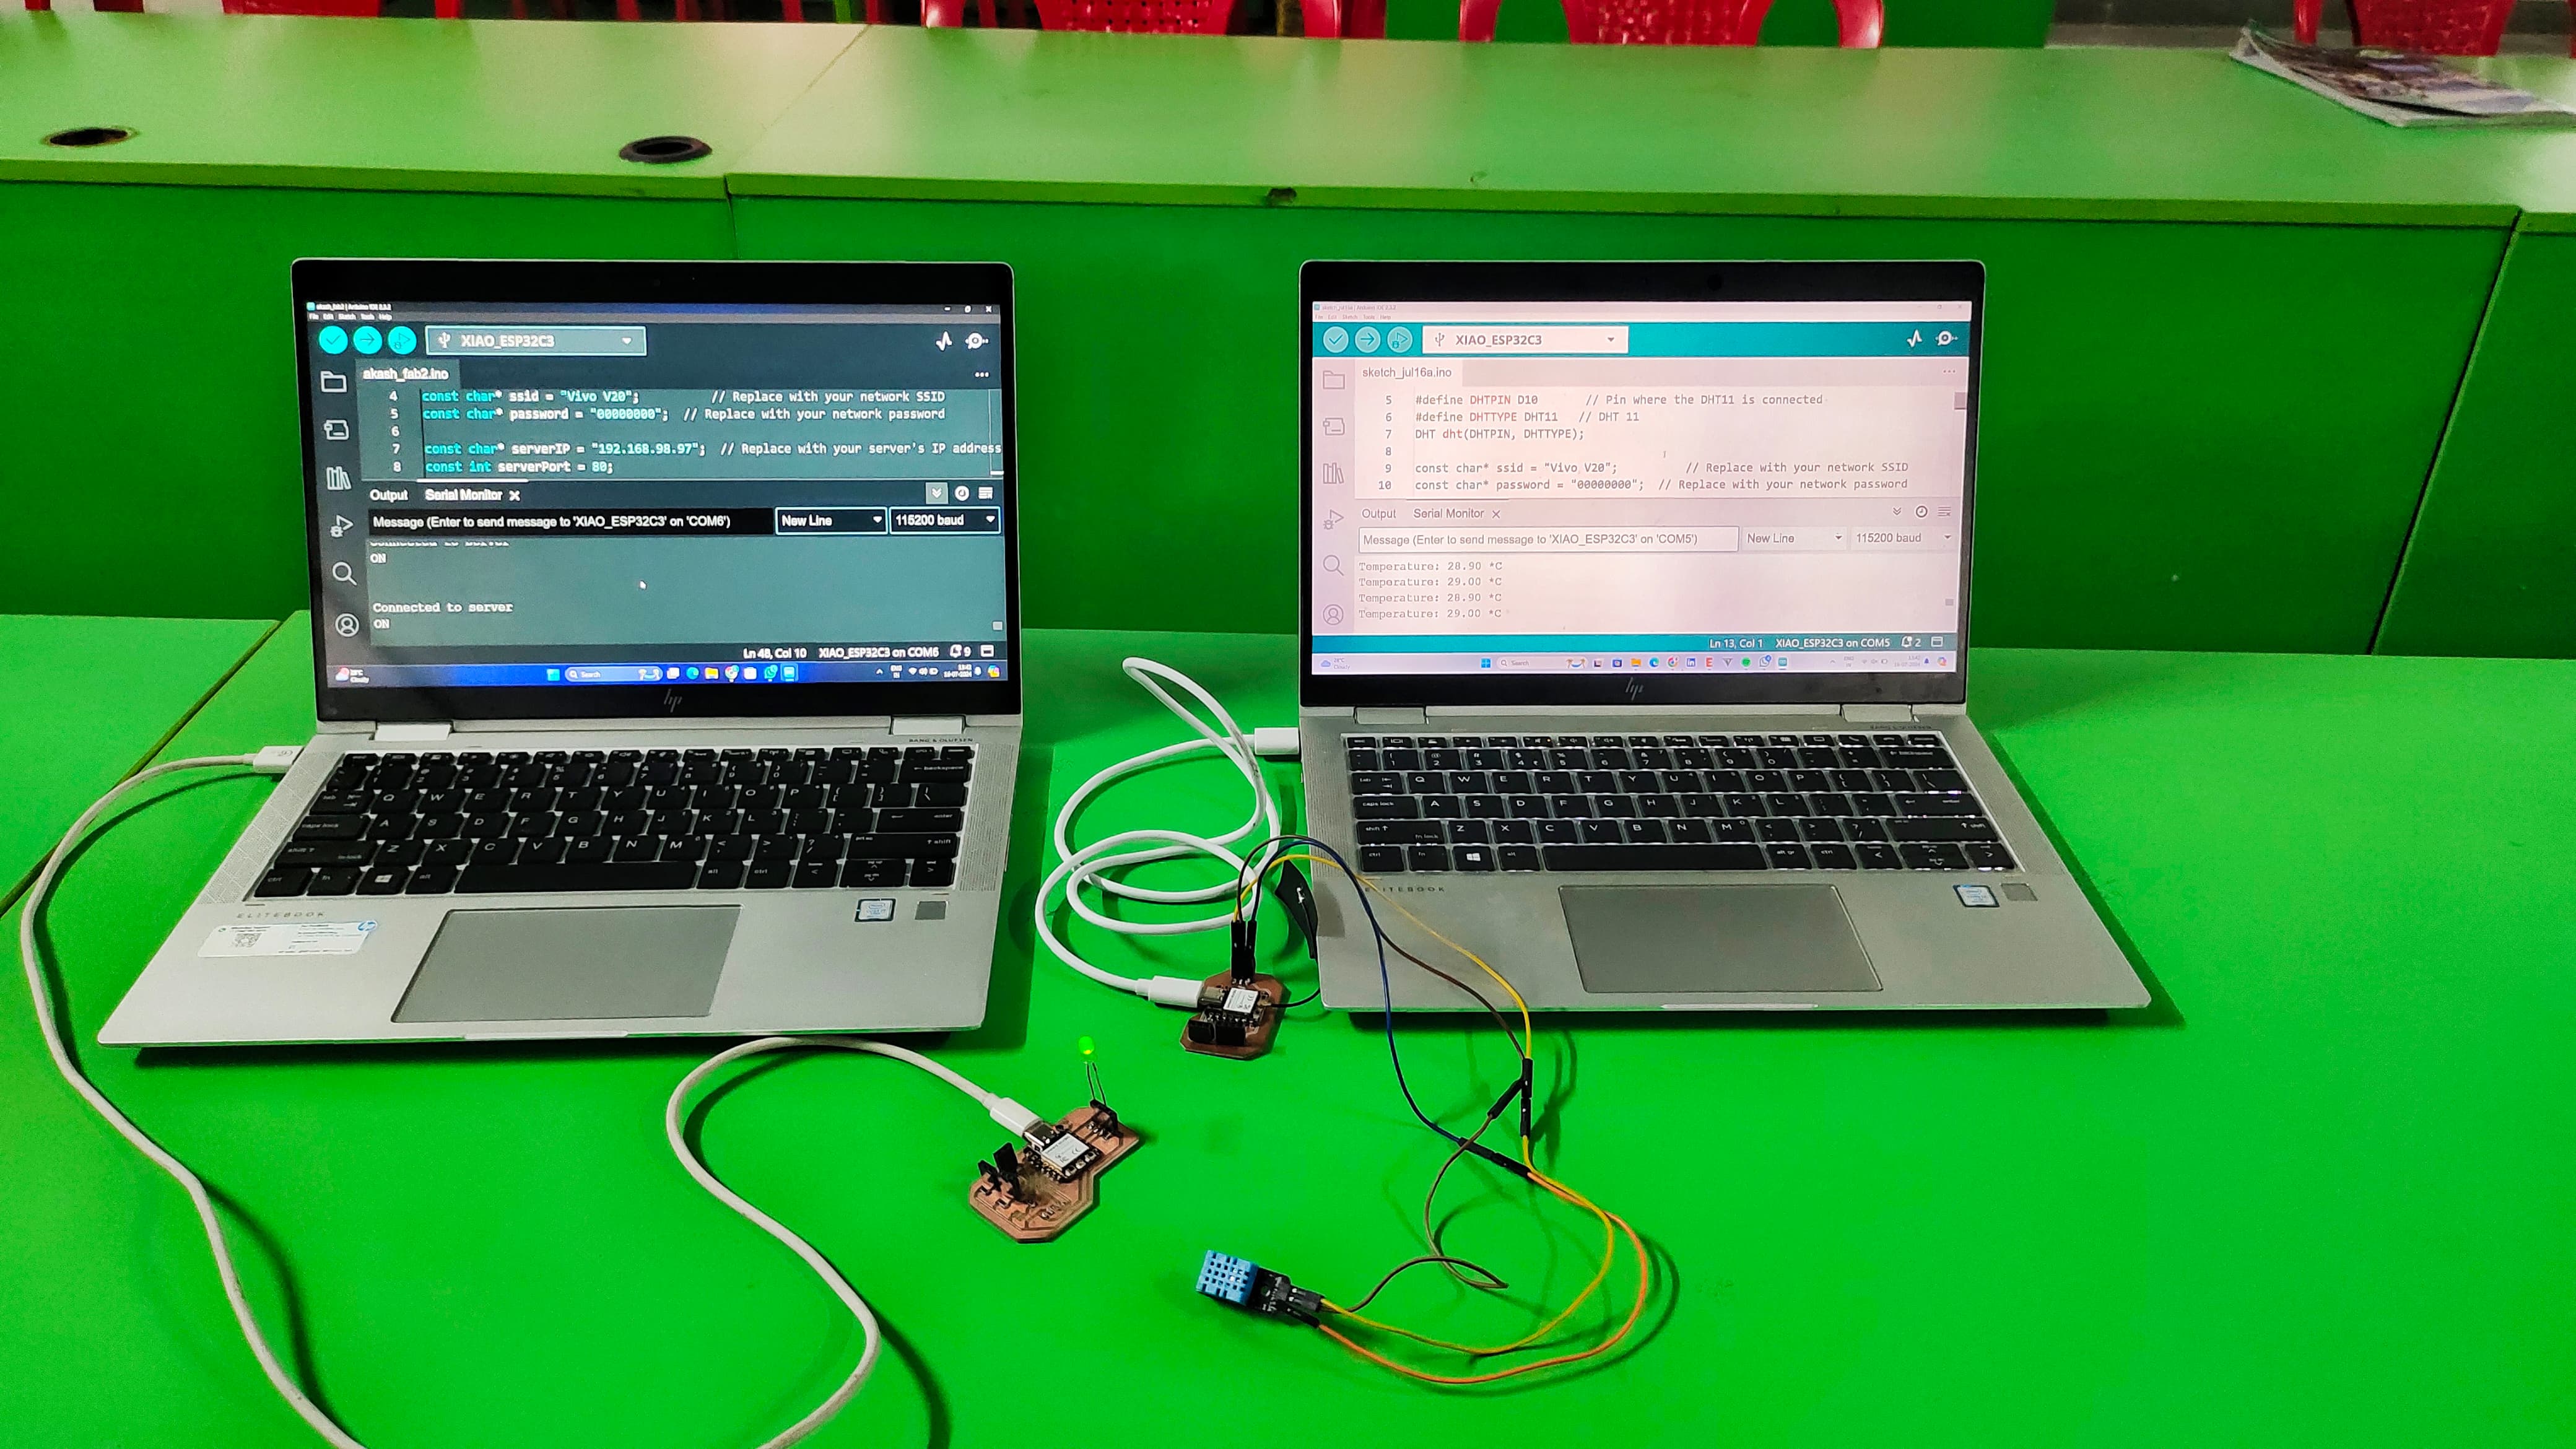
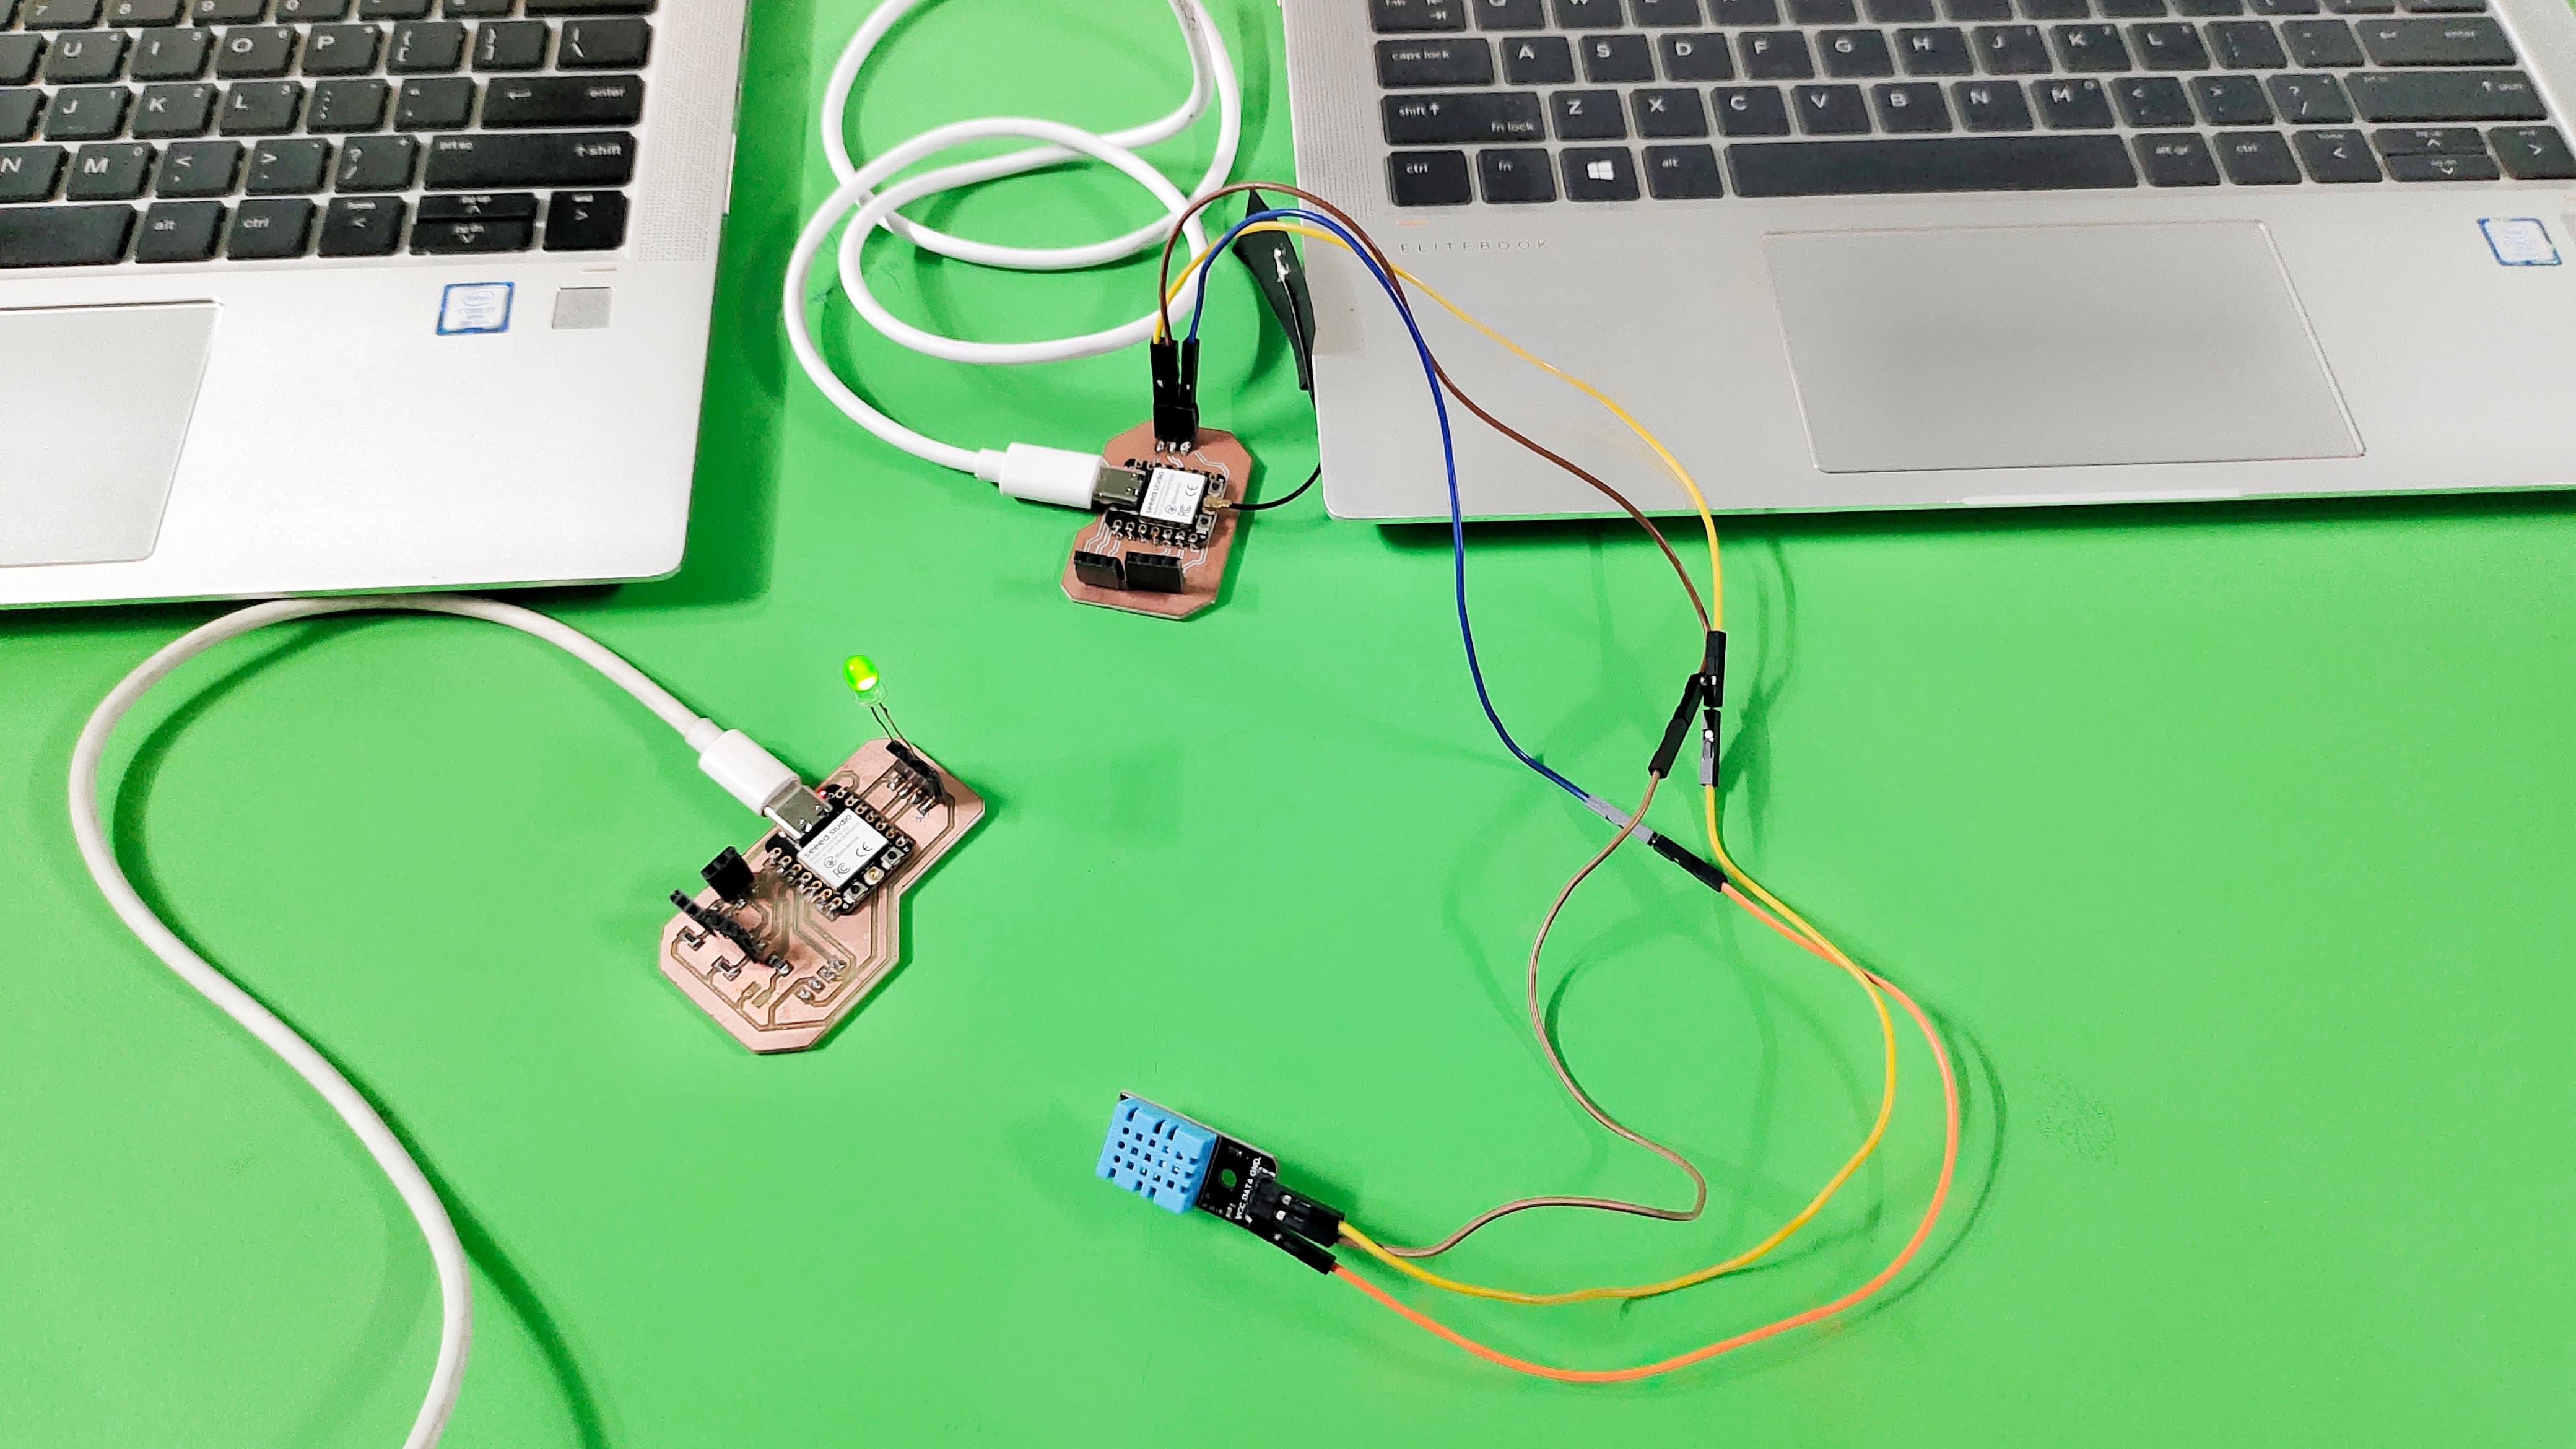
For this week's group assignmet I used two boards of Xiao's Esp32 C3. and I made wifi communication between these two boards.
1. Input Devices Board - Akash Mhais
2. Final Project Board - Siddhi Bodhe
I used my board as a server board and connected to DHT11 sensor. The Second board is used as Client Board connected to the LED.
When the Temperature is goes above the 28 degree celcius then the led connected to the second board will turn on.
I used my Input Devices Board as a Server board, which is connected to the DHT11 Sensor.
Server Code (Reading DHT11 Sensor and Sending Data)
This code runs on the first Xiao ESP32 C3, which reads the temperature from the DHT11 sensor and sends a signal to the client if the temperature exceeds 28 degrees Celsius.
            #include < WiFi.h>

              #include < WiFiClient.h>

              #include < DHT.h>


              #define DHTPIN D10       // Pin where the DHT11 is connected

              #define DHTTYPE DHT11   // DHT 11

              DHT dht(DHTPIN, DHTTYPE);


              const char* ssid = "Vivo V20";          // Replace with your network SSID

              const char* password = "00000000";  // Replace with your network password


              WiFiServer server(80);


              void setup() {

                Serial.begin(115200);

                dht.begin();


                // Connect to Wi-Fi network

                WiFi.begin(ssid, password);

                while (WiFi.status() != WL_CONNECTED) {

                  delay(1000);

                  Serial.println("Connecting to WiFi...");

                }

                Serial.println("Connected to WiFi");

              // Print the IP address

                Serial.print("IP Address: ");

                Serial.println(WiFi.localIP());

                // Start the server

                server.begin();

              }


              void loop() {

                // Read temperature

                float temperature = dht.readTemperature();


                // Check if reading was successful

                if (isnan(temperature)) {

                  Serial.println("Failed to read from DHT sensor!");

                  return;

                }


                // Print temperature to Serial Monitor

                Serial.print("Temperature: ");

                Serial.print(temperature);

                Serial.println(" *C");


                // If temperature exceeds 28 degrees, send signal to client

                if (temperature > 28.0) {

                  WiFiClient client = server.available();

                  if (client) {

                    client.println("ON");

                    delay(1000);

                    client.stop();

                  }

                }


                delay(2000);  // Wait a bit before reading again

              }
#_Code_Explanation_:)
Includes and Definitions:
WiFi.h: Handles Wi-Fi communication.
WiFiClient.h: Allows the device to create a client for Wi-Fi communication.
DHT.h: Manages the DHT11 sensor.
DHTPIN: Defines the GPIO pin connected to the DHT11 sensor.
DHTTYPE: Defines the type of DHT sensor (DHT11 in this case).
DHT dht(DHTPIN, DHTTYPE): Initializes the DHT sensor.
Wi-Fi and Server Setup:
ssid and password: Wi-Fi credentials.
WiFiServer server(80): Creates a server on port 80 (HTTP).
Setup Function:
Serial.begin(115200): Initializes serial communication for debugging.
dht.begin(): Initializes the DHT sensor.
WiFi.begin(ssid, password): Connects to the specified Wi-Fi network.
WiFi.status() != WL_CONNECTED: Waits until the board is connected to Wi-Fi.
WiFi.localIP(): Prints the IP address of the board.
server.begin(): Starts the server.
Loop Function:
Reads the temperature from the DHT11 sensor.
Checks if the reading is valid.
Prints the temperature to the Serial Monitor.
If the temperature exceeds 28°C, it sends an "ON" signal to any connected client.
#_Server_Output_:)
I used my Siddhi's Board as a Client board, which is connected to the LED.
This code connects to the server and turns on an LED when it receives an "ON" signal.
                    #include < WiFi.h>

                      #include < WiFiClient.h>


                      const char* ssid = "Vivo V20";          // Replace with your network SSID

                      const char* password = "00000000";  // Replace with your network password


                      const char* serverIP = "192.168.98.97";  // Replace with your server's IP address

                      const int serverPort = 80;


                      const int ledPin = 2;  // Pin where the LED is connected


                      void setup() {

                        Serial.begin(115200);

                        pinMode(ledPin, OUTPUT);

                        digitalWrite(ledPin, LOW);  // Make sure LED is off initially


                        // Connect to Wi-Fi network

                        WiFi.begin(ssid, password);

                        while (WiFi.status() != WL_CONNECTED) {

                          delay(1000);

                          Serial.println("Connecting to WiFi...");

                        }

                        Serial.println("Connected to WiFi");

                      }


                      void loop() {

                        WiFiClient client;

                        if (client.connect(serverIP, serverPort)) {

                          Serial.println("Connected to server");


                          while (client.connected()) {

                            if (client.available()) {

                              String line = client.readStringUntil('\r');

                              Serial.println(line);


                              if (line == "ON") {

                                digitalWrite(ledPin, HIGH);  // Turn on the LED

                              } else {

                                digitalWrite(ledPin, LOW);   // Turn off the LED

                              }

                            }

                          }

                          client.stop();

                        } else {

                          Serial.println("Failed to connect to server");

                        }


                        delay(500);  // Wait a bit before trying again

                      }
#_Code_Explanation_:)
Libraries:
WiFi.h and WiFiClient.h for Wi-Fi functionalities.
Wi-Fi Credentials and Server Information:
ssid and password store the Wi-Fi network credentials.
serverIP stores the IP address of the server.
serverPort specifies the port number (80).
LED Pin:
ledPin specifies the GPIO pin connected to the LED.
Setup Function:
Initializes serial communication.
Sets up the LED pin as an output and ensures the LED is off initially.
Connects to the Wi-Fi network.
Loop Function:
Attempts to connect to the server using the specified IP address and port.
If connected, reads the data sent by the server.
If it reads "ON", it turns on the LED; otherwise, it turns off the LED.
If the connection to the server fails, it prints a message and retries after a delay.
#_Client_Output_:)
#_Final_Output_1:)
#_Final_Output_2:)

Click here to get more about the assignment.
2. Individual assignment:
design, build, and connect wired or wireless node(s)
with network or bus addresses and local input &/or
output device(s)
For this Assignment I will going to use Xiao Esp32C3 and DHT11 sensor.

I Used Arduino IDE For Programming the Board,firstly we have to add the board from preferances then additional boards url and put the following url for getting the board.

In Boards Manager Search for Esp then install it.

After that go to tools then board and select XIAO ESP32 C3

Connection of Xiao ESP32C3 with LED

Connection of Xiao ESP32C3 with DHT11 sensor

Programming Xiao Esp32 C3
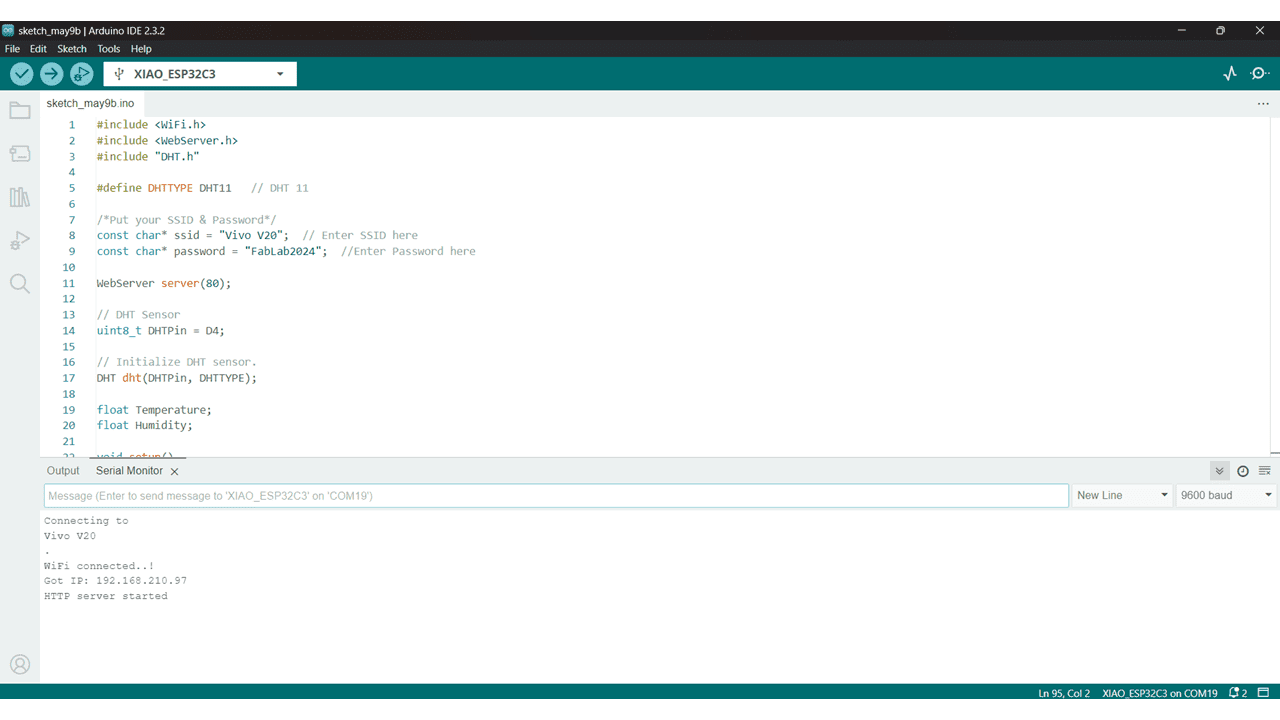
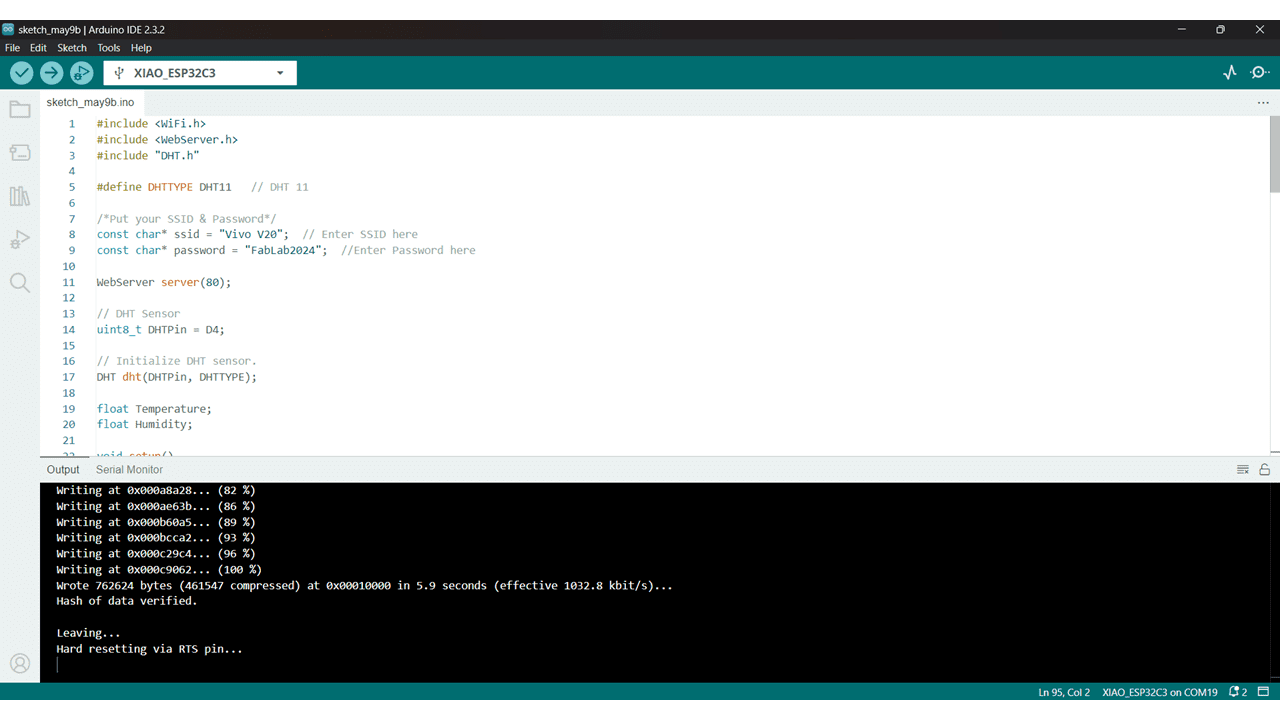
After done Uploading go to serial monitor and copy the IP and paste it on browser.
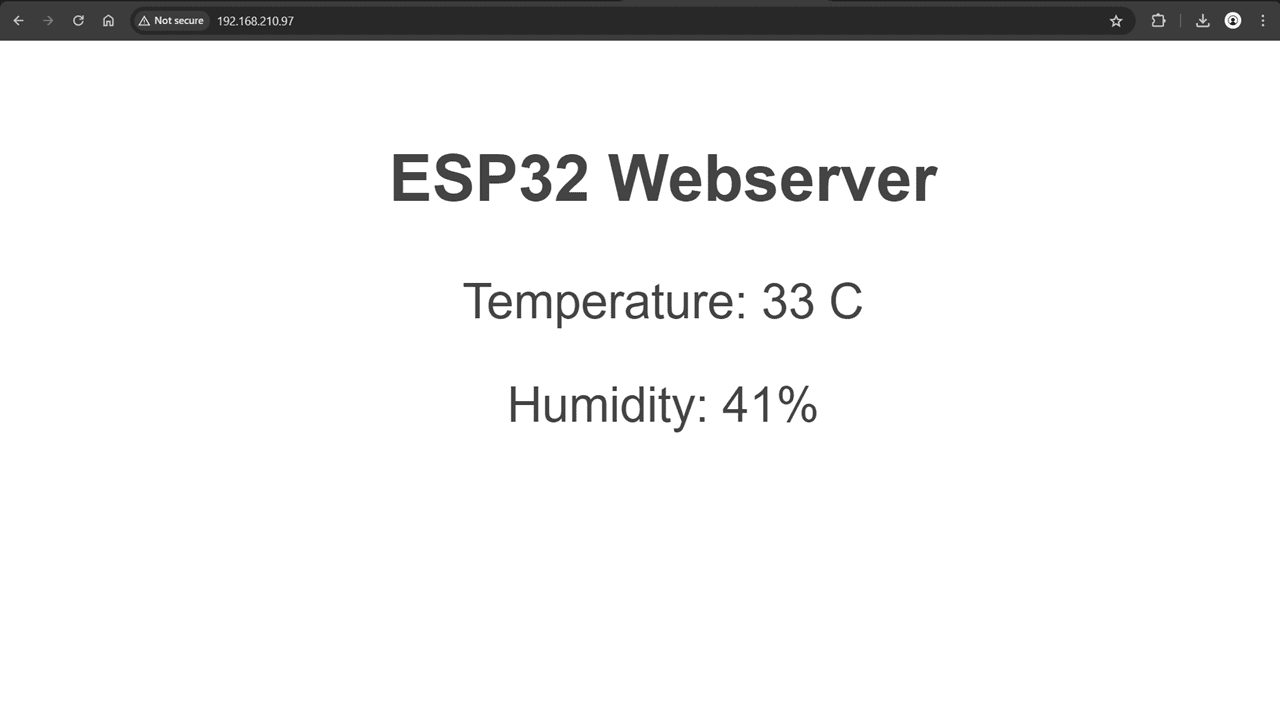
This is the Output I got from DHT11 Sensor

#_Code_for_DHT11_:)
        #include < WiFi.h >

        #include < WebServer.h >

        #include "DHT.h"


        #define DHTTYPE DHT11   // DHT 11


        /*Put your SSID & Password*/

        const char* ssid = "Vivo V20";  // Enter SSID here

        const char* password = "FabLab2024";  //Enter Password here


        WebServer server(80);


        // DHT Sensor

        uint8_t DHTPin = D4;


        // Initialize DHT sensor.

        DHT dht(DHTPin, DHTTYPE);


        float Temperature;

        float Humidity;


        void setup()

        {

          Serial.begin(115200);

          delay(100);


          pinMode(DHTPin, INPUT);


          dht.begin();


          Serial.println("Connecting to ");

          Serial.println(ssid);


          //connect to your local wi-fi network

          WiFi.begin(ssid, password);


          //check wi-fi is connected to wi-fi network

          while (WiFi.status() != WL_CONNECTED) {

          delay(1000);

          Serial.print(".");

          }

          Serial.println("");

          Serial.println("WiFi connected..!");

          Serial.print("Got IP: ");  Serial.println(WiFi.localIP());


          server.on("/", handle_OnConnect);

          server.onNotFound(handle_NotFound);


          server.begin();

          Serial.println("HTTP server started");


        }

        void loop() {


          server.handleClient();


        }


        void handle_OnConnect() {


         Temperature = dht.readTemperature(); // Gets the values of the temperature

          Humidity = dht.readHumidity(); // Gets the values of the humidity

          server.send(200, "text/html", SendHTML(Temperature,Humidity));

        }


        void handle_NotFound(){

          server.send(404, "text/plain", "Not found");

        }


        String SendHTML(float Temperaturestat,float Humiditystat)

        {

          String ptr = "< !DOCTYPE html > < html >\n";

          ptr +="< head > < meta name=\"viewport\" content=\"width=device-width, initial-scale=1.0, user-scalable=no\">\n";

          ptr +="< title>ESP32 Webserver< /title>\n";

          ptr +="< style>html { font-family: Helvetica; display: inline-block; margin: 0px auto; text-align: center;}\n";

          ptr +="body{margin-top: 50px;} h1 {color: #444444;margin: 50px auto 30px;}\n";

          ptr +="p {font-size: 24px;color: #444444;margin-bottom: 10px;}\n";

          ptr +="< /style>\n";

          ptr +="< /head>\n";

          ptr +="< body>\n";

          ptr +="< div id=\"webpage\">\n";

          ptr +="< h1>ESP32 Webserver< /h1>\n";


          ptr +="< p>Temperature: ";

          ptr +=(int)Temperaturestat;

          ptr +=" C< /p>";

          ptr +="< p>Humidity: ";

          ptr +=(int)Humiditystat;

          ptr +="%< /p >";


          ptr +="< /div >\n";

          ptr +="< /body >\n";

          ptr +="< /html >\n";

          return ptr;

        }
#_Output... :)