This week, I'm going to explore molding and casting. I'll design the Avengers logo in Solidworks and create its mold cavity. First, I'll make a negative mold of it. Then, I'll 3D print the mold cavity. After that, I'll prepare the material for pouring into the cavity and create a positive mold using the negative mold.
1. Group assignment:
review the safety data sheets for each of your molding and casting materials,
then make and compare test casts with each of them
compare printing vs machining molds
2. Individual assignment:
design a mold around the process you'll be using,
produce it with a smooth surface finish,
and use it to cast parts
extra credit: use more then two mold parts
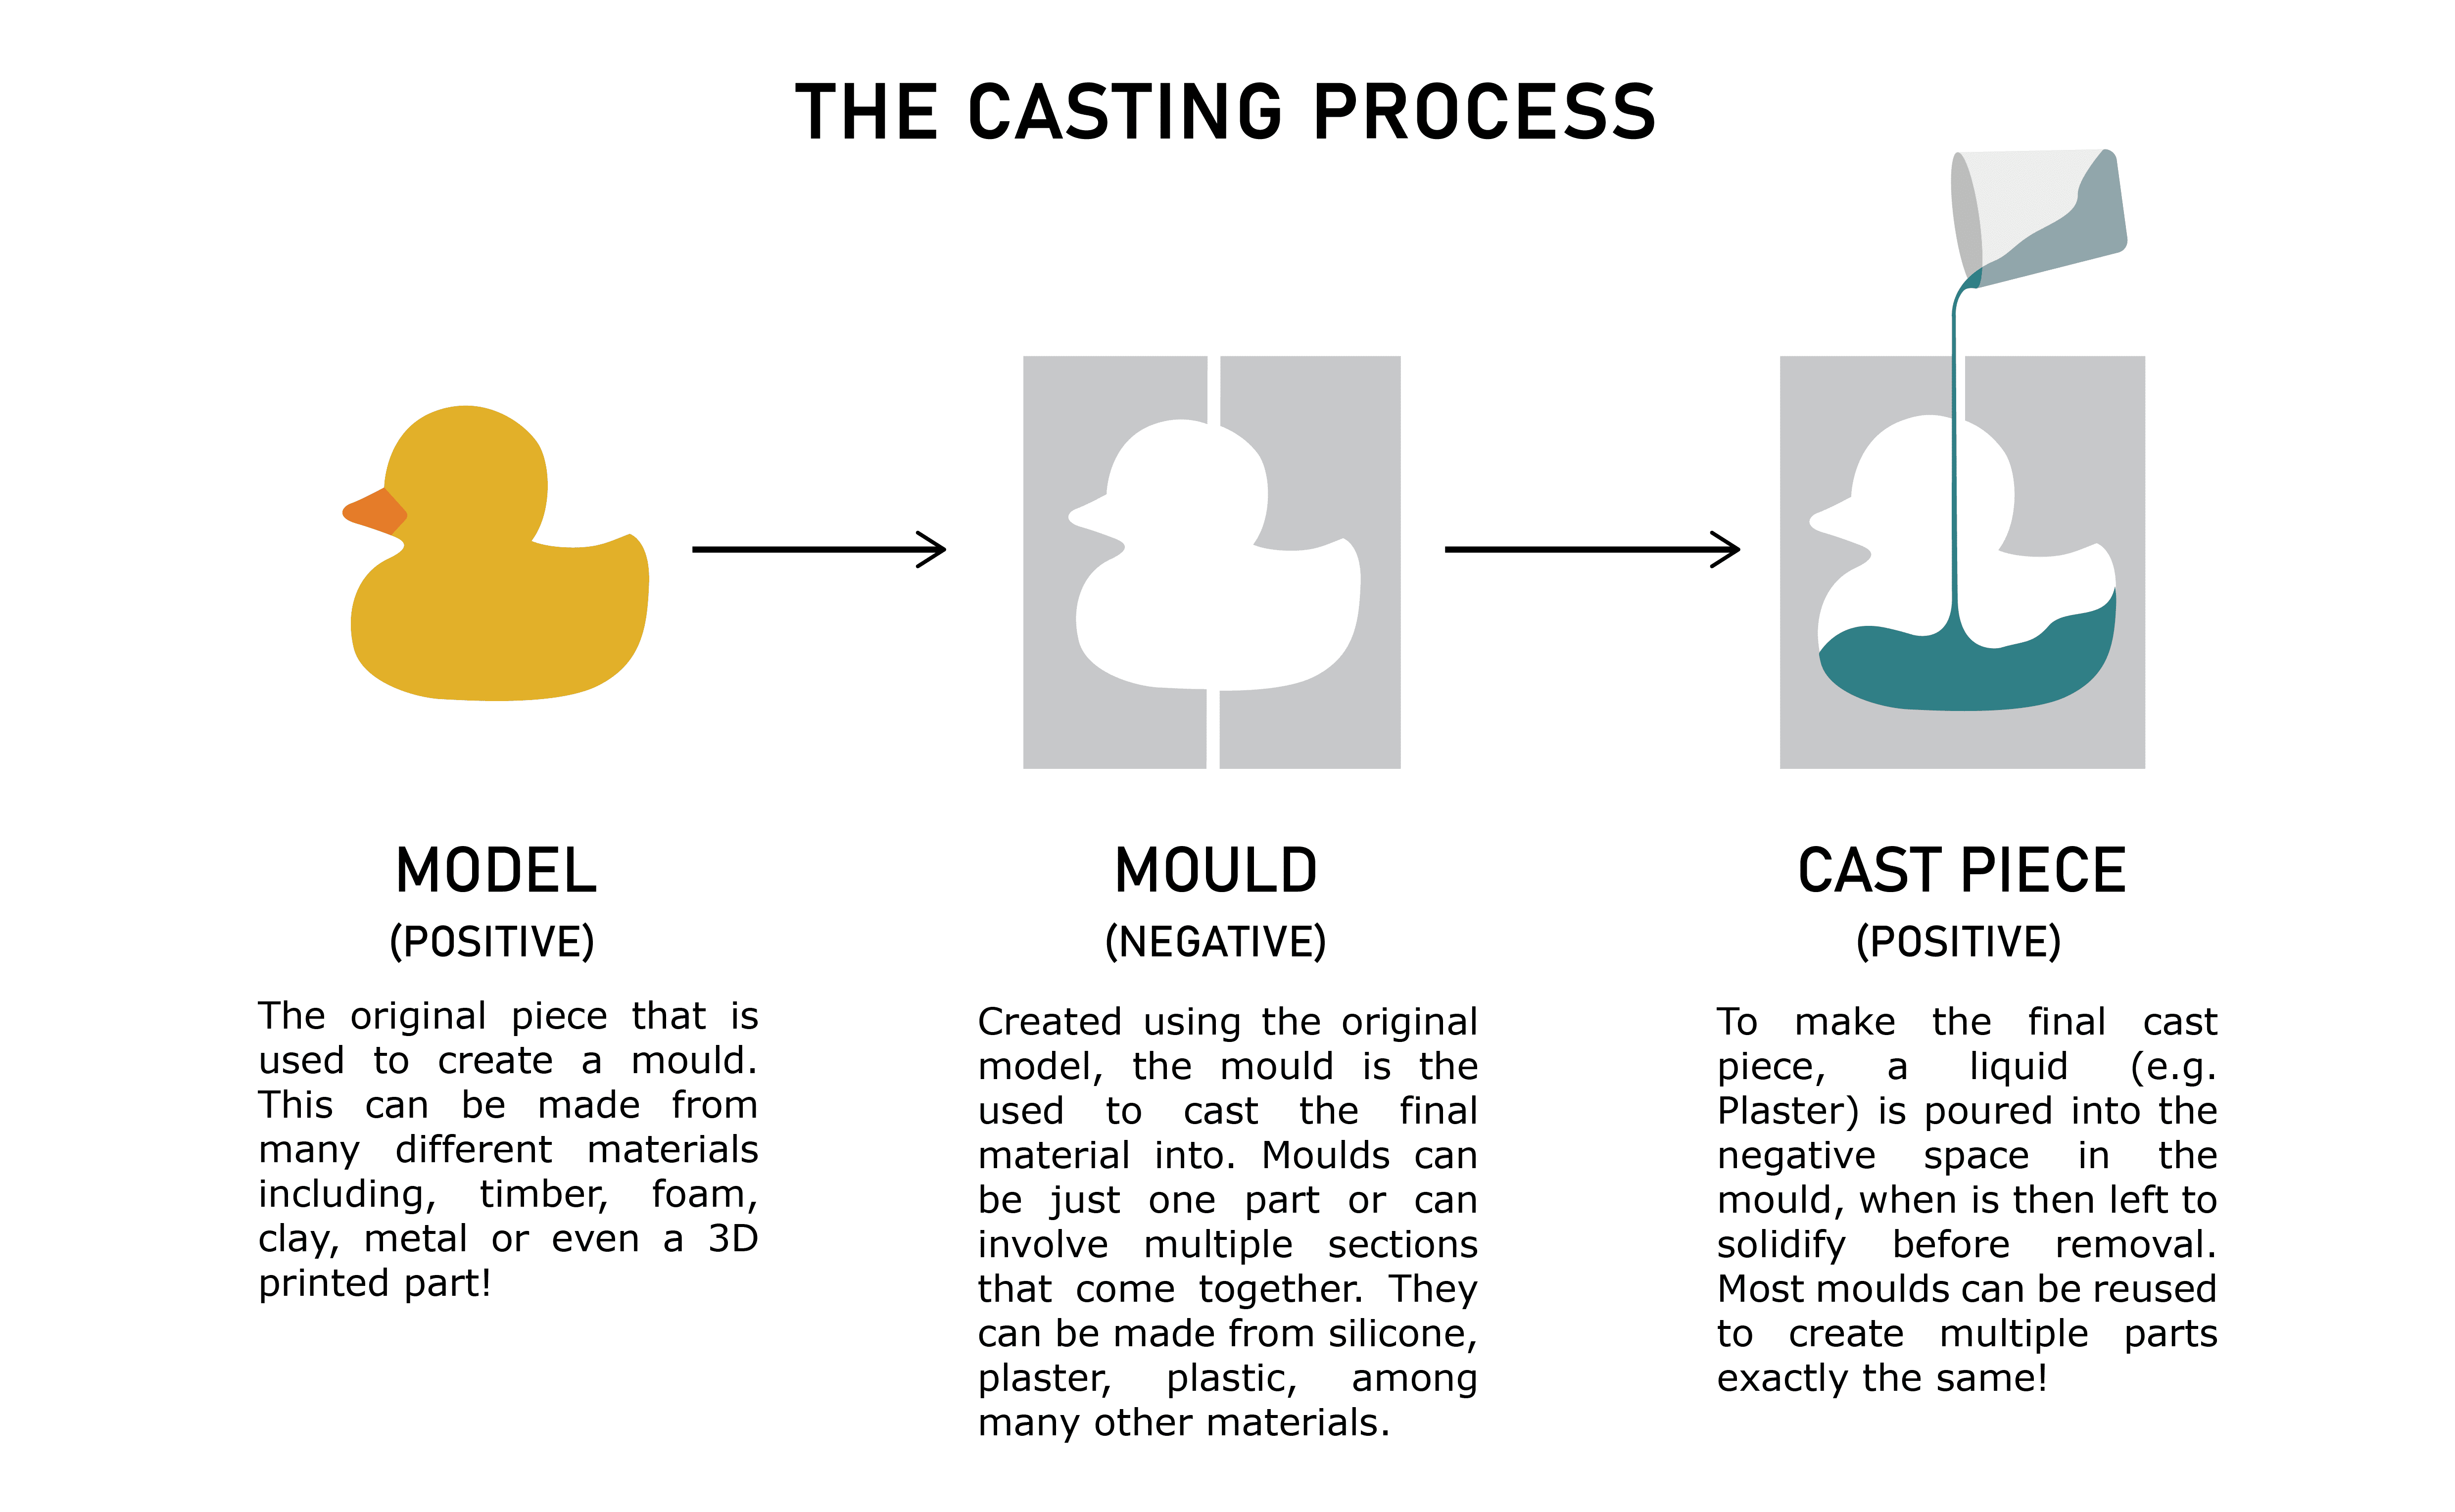
Molding or Moldmaking: is the act of creating the cavity / form that carries a negative or reverse impression of an original model. Molds can be made of a rigid material, such as plaster or plastic resin or more commonly, a flexible material such as rubber. The material to use should be chosen considering the material of the model, the material to be used to make castings, and whether there are any undercuts.
Casting: is the act of pouring liquid material into the cavity of a mold. After a period of time, this liquid will cure via chemical reaction or cooling. The solidified part is also known as a casting, which is ejected or broken out of the mold to complete the process. Casting materials are usually metals or various cold setting materials that cure after mixing two or more components together; examples are epoxy, concrete, plaster and clay.
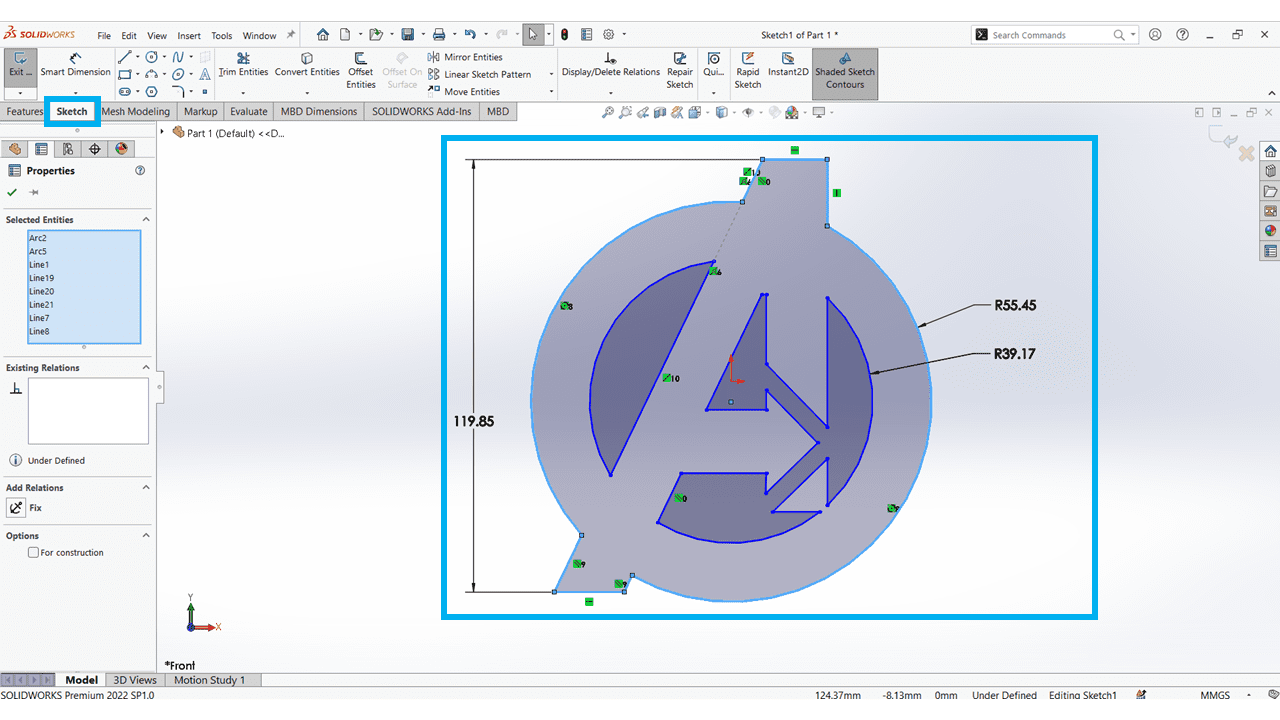
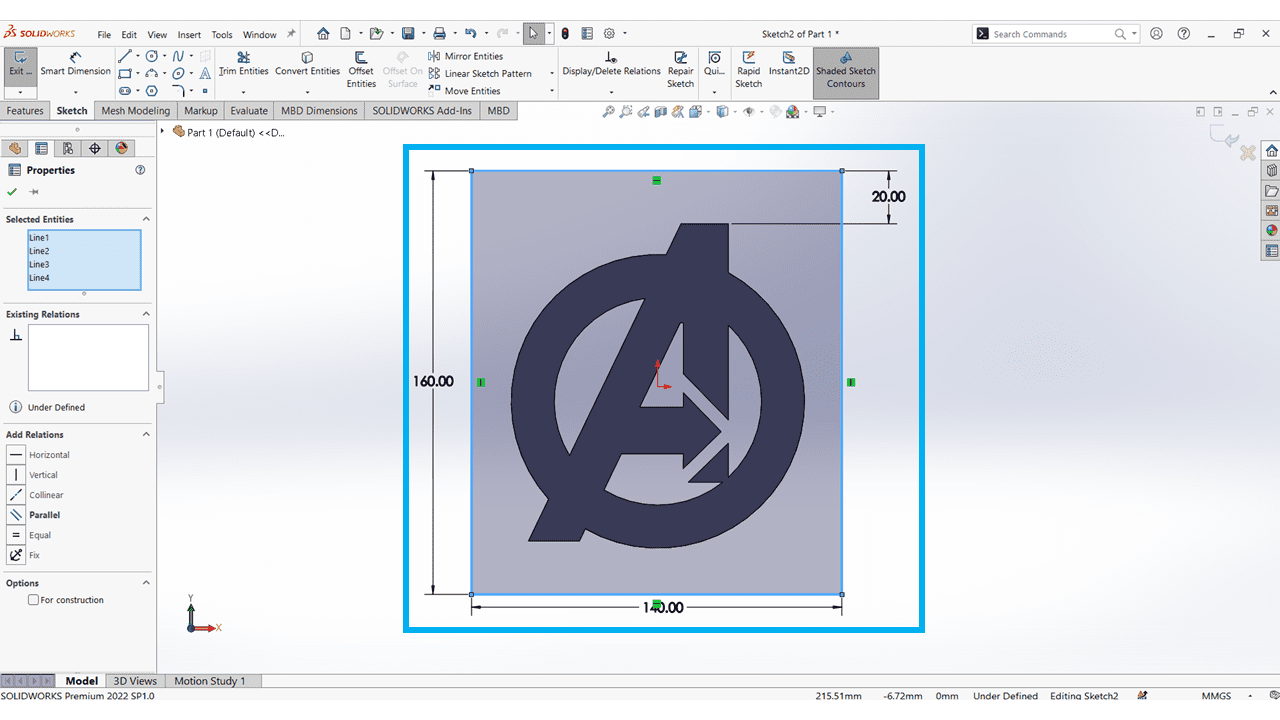
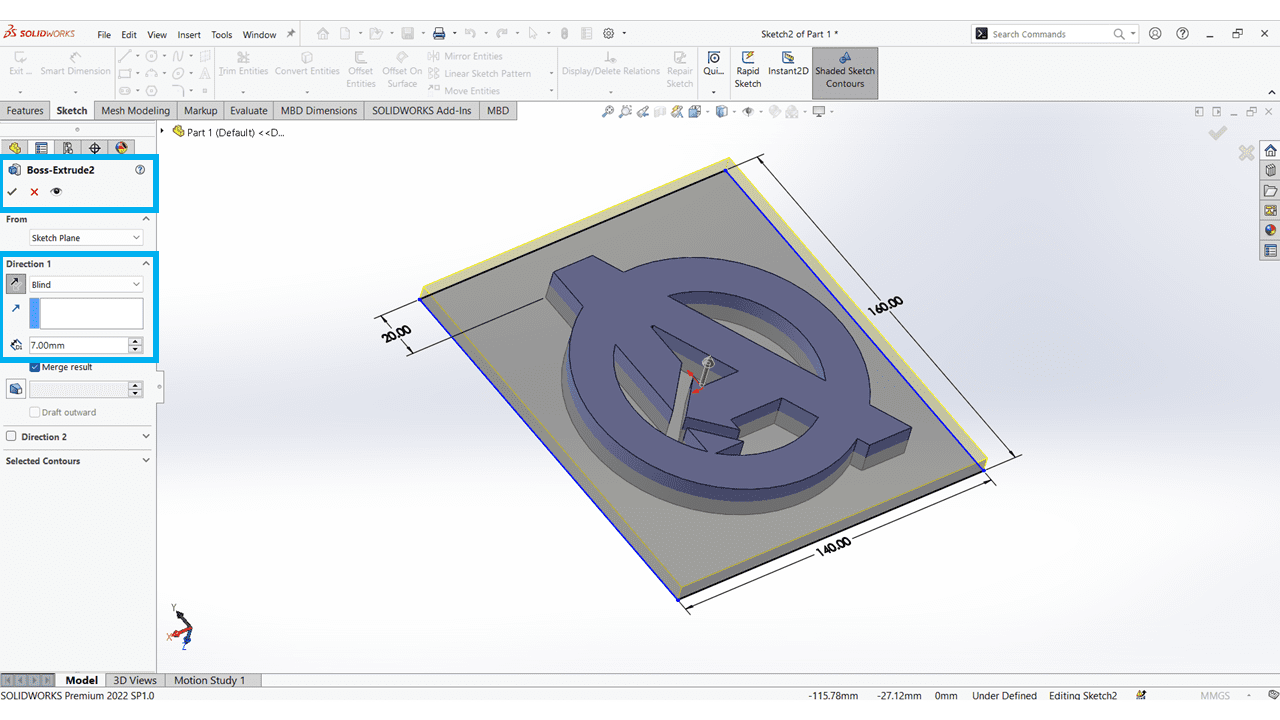
I took the reference from GrabCAD to make this model. Here's the initial sketch of the mold cavity.
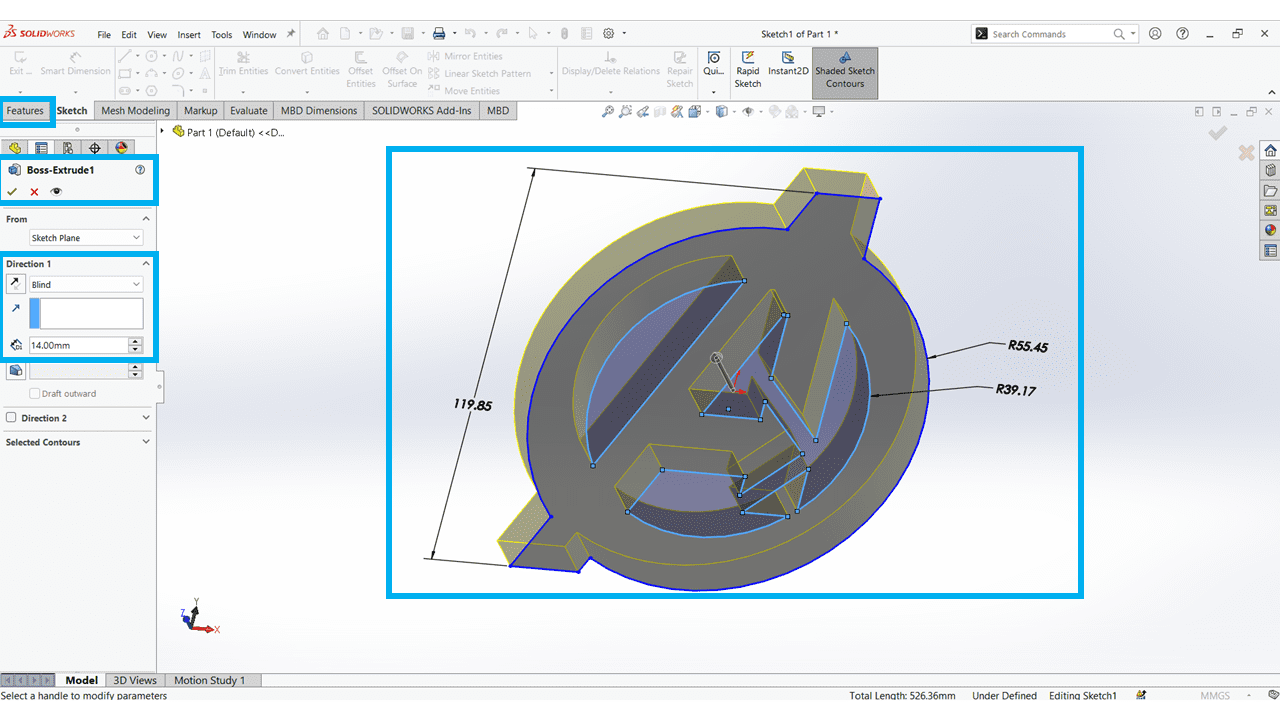
After that I Extruded the Sketch By 14mm.
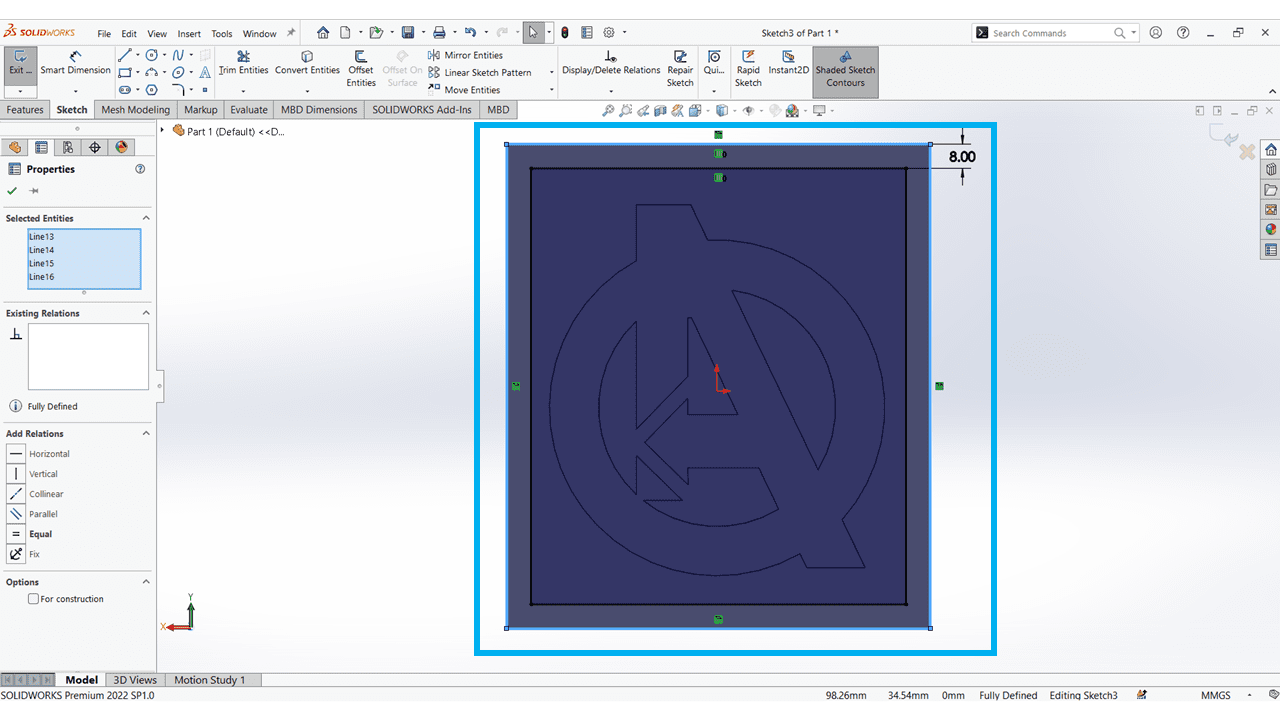
I made an outer box to it.
I extruded the box by 7mm
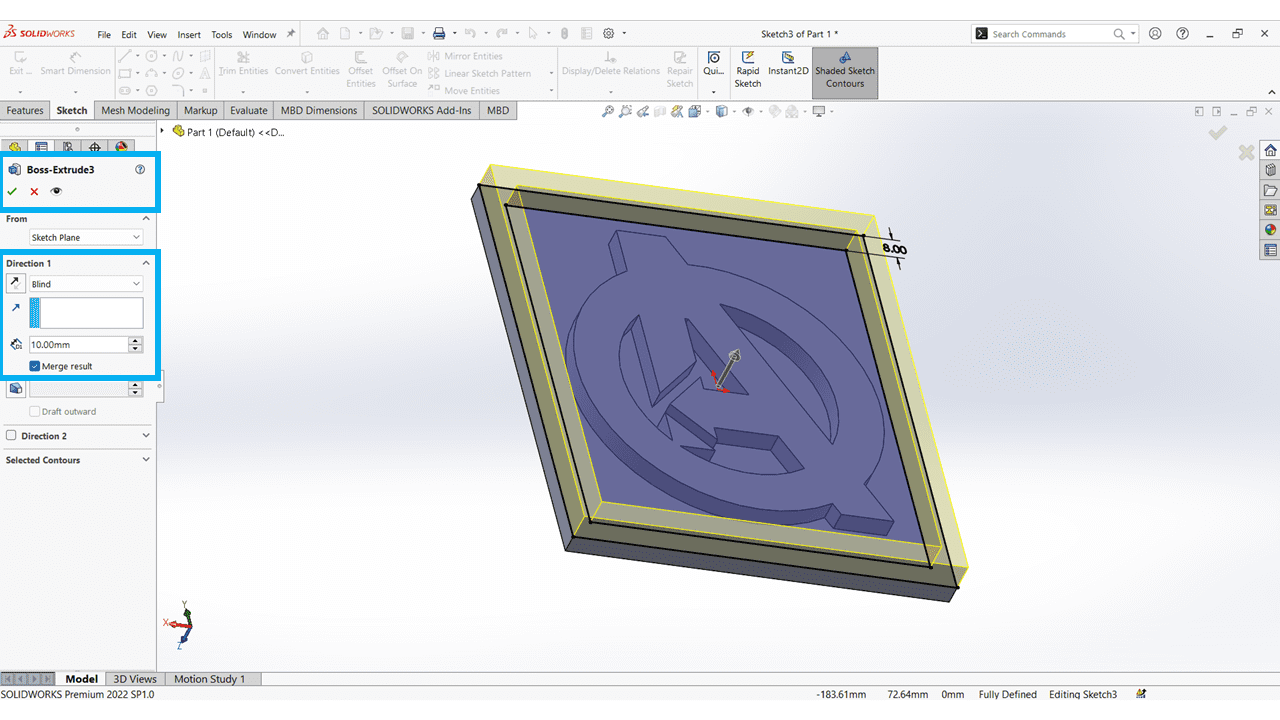
On that surface, I drew another rectangle by offsetting the first one by 8mm.
I Extruded it by 10mm height.
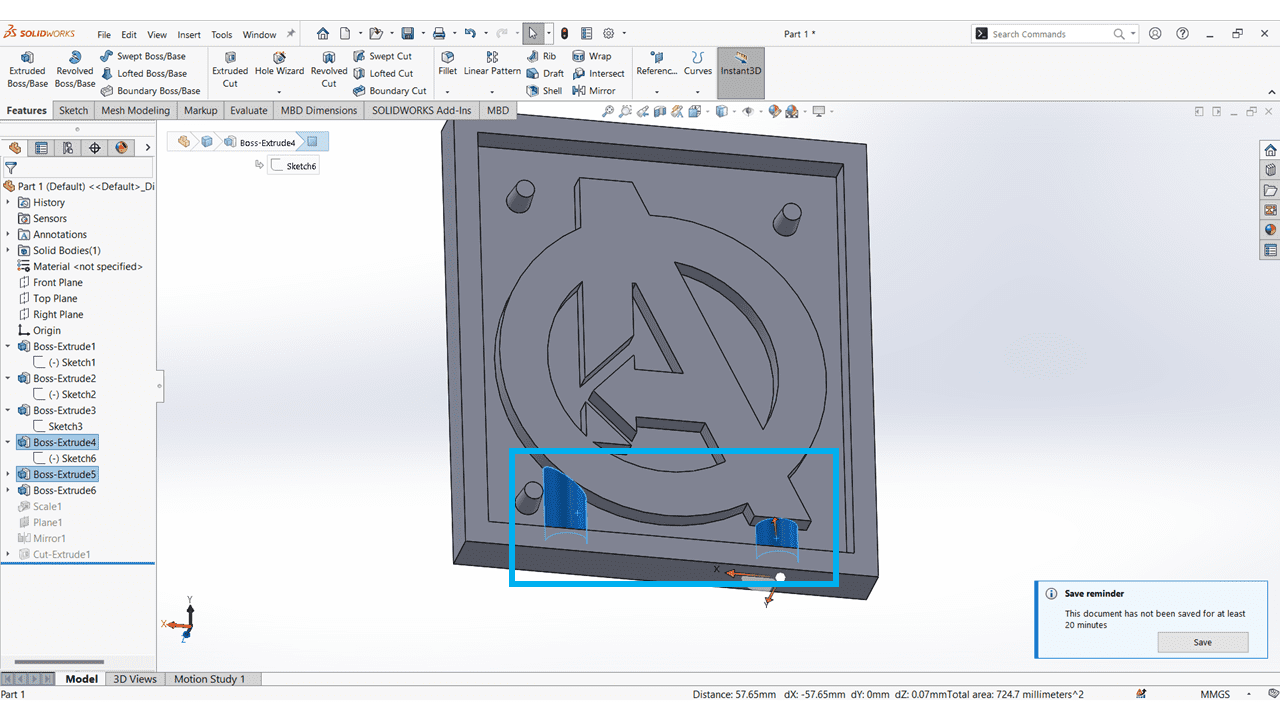
Then I made three circles on the given face and extruded them up to the top surface. I also applied a taper angle of 5 degrees for easy removal and insertion of the two parts.
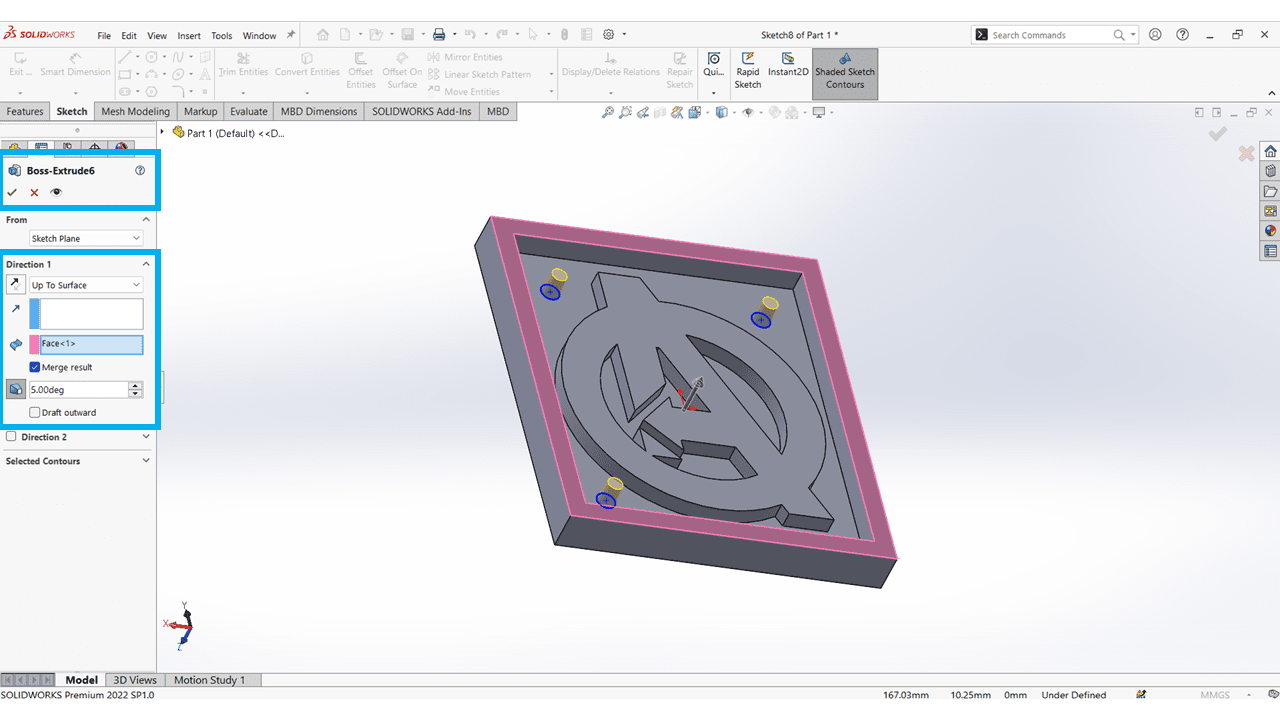
I made this for Pouring of material.
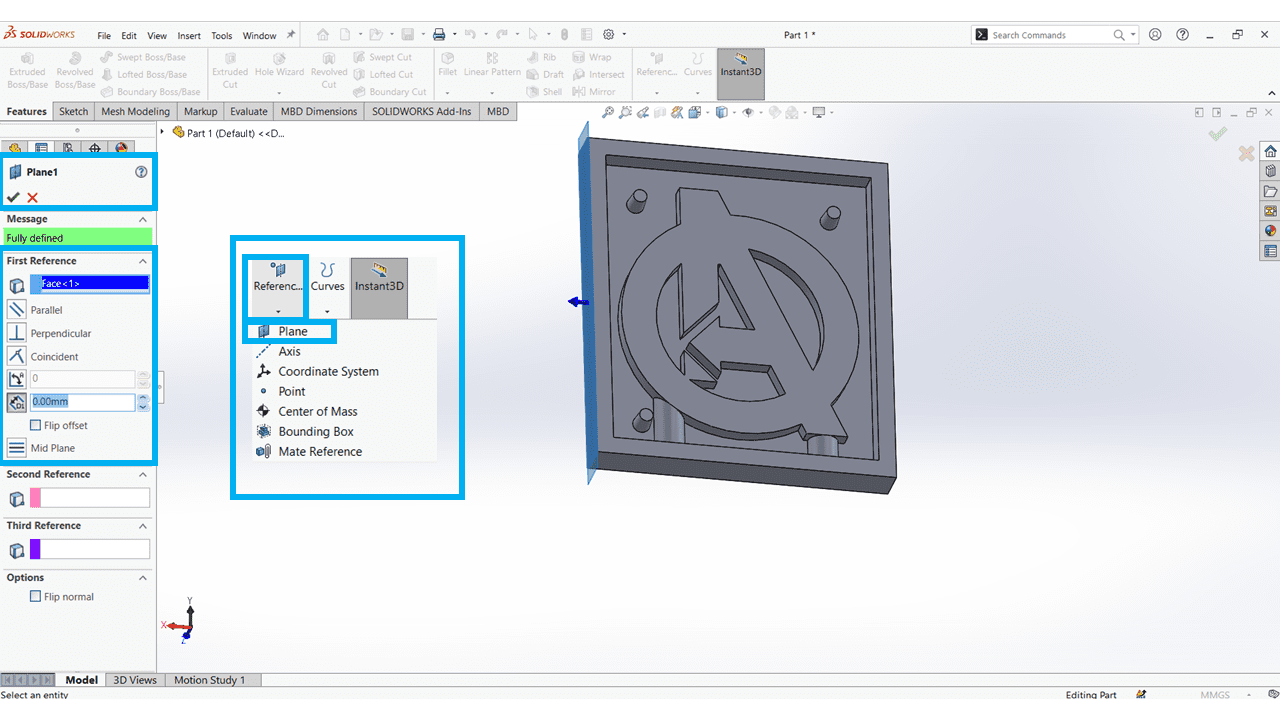
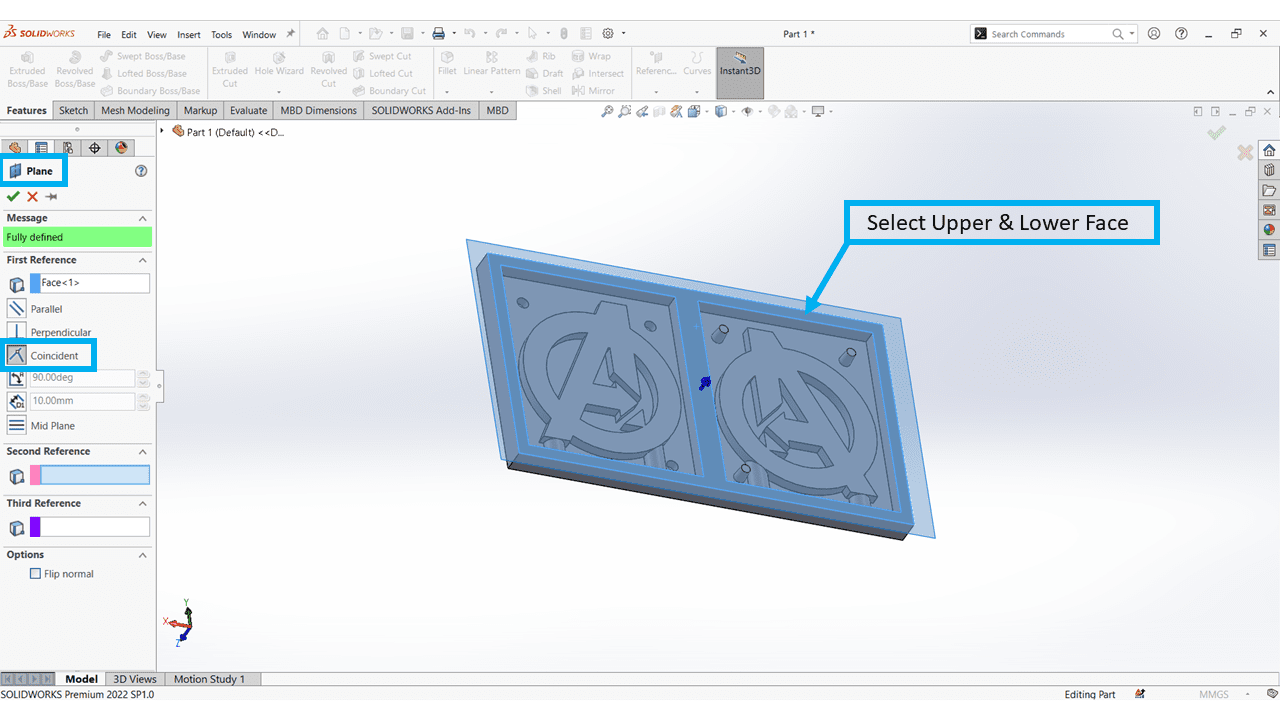
Then I created a plane by selecting reference > plane > selecting the surface or side > coinciding with that.
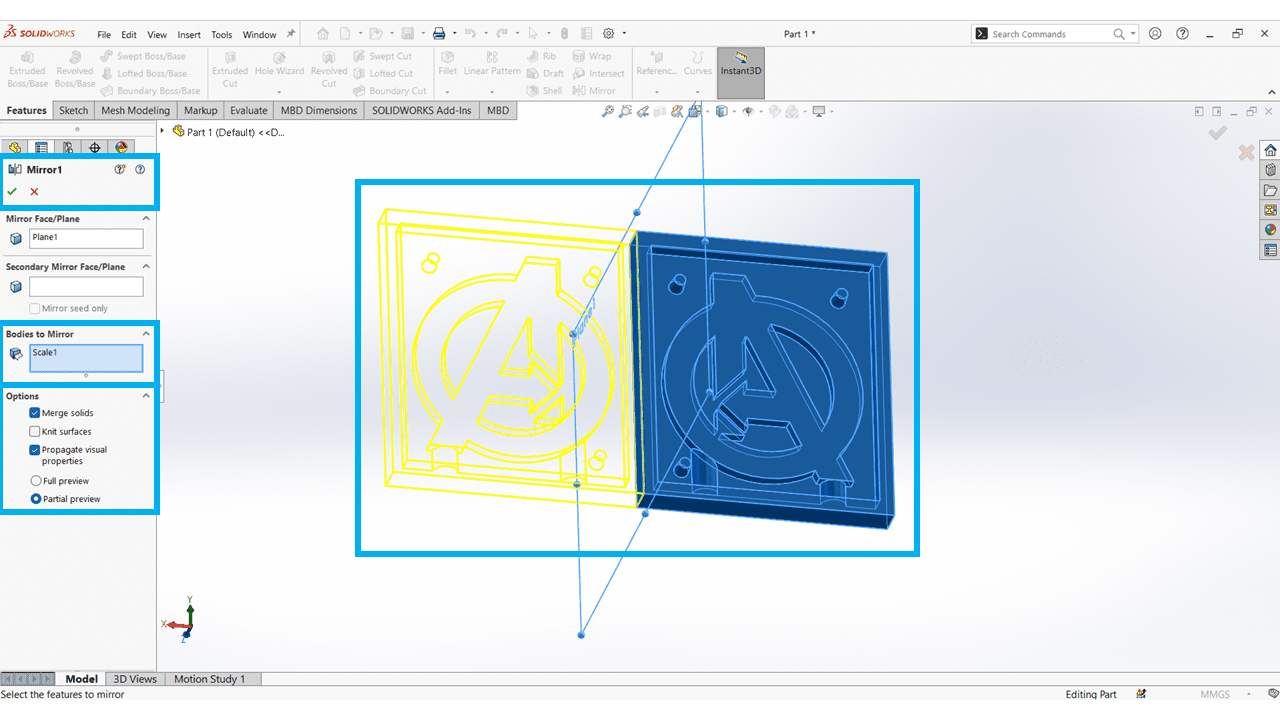
I used Mirror command to mirror the Bodies using above reference plane.
Then I created the holes on the mirrored side and also applied a taper angle of 5 degrees.
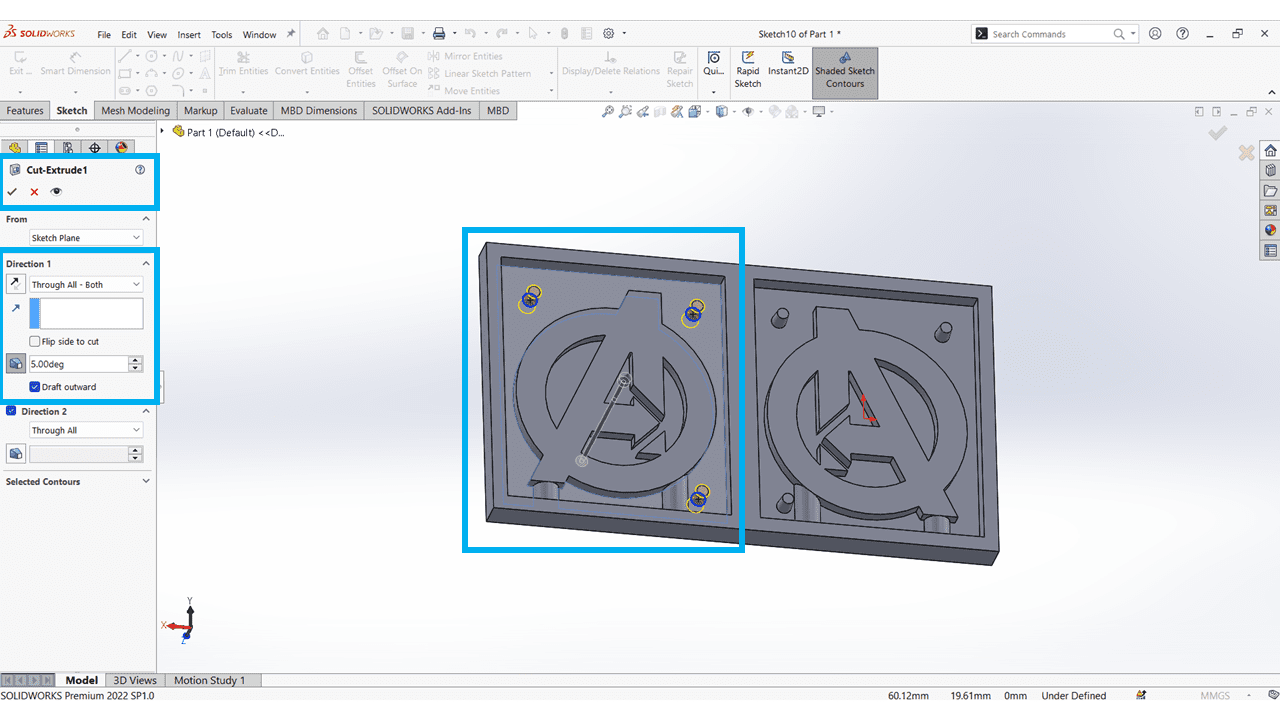
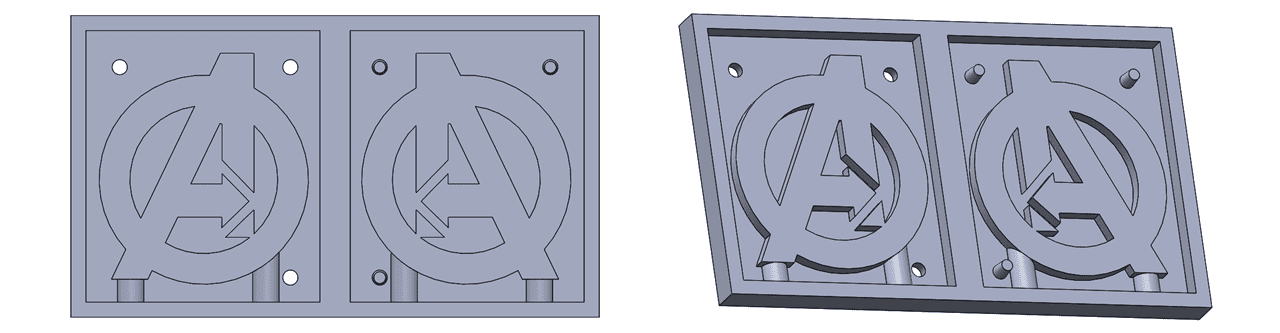
This is my final output of Negative Mould
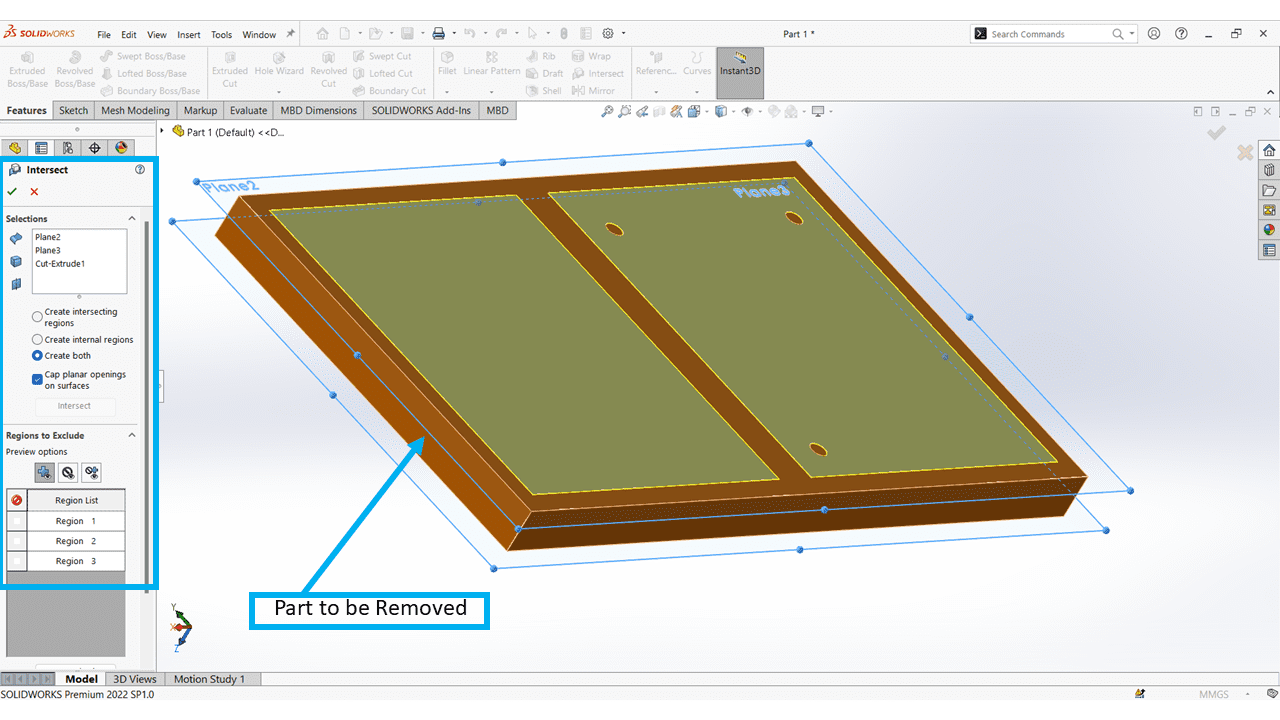
For calculating the mass of the material that we're going to pour into it, I used the intersect option in SolidWorks. I made two planes to cover all the body.
Click on Insert > Features > Intersect
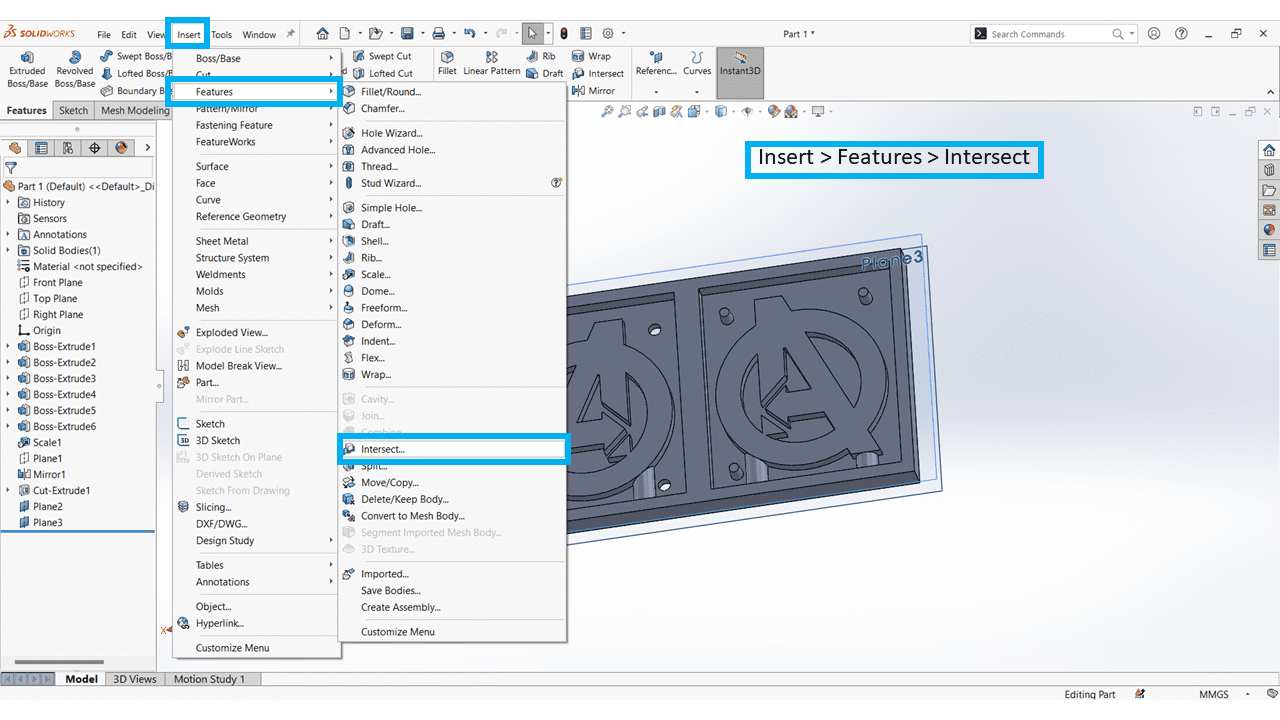
By selecting two planes and that body just click on Intersect option.
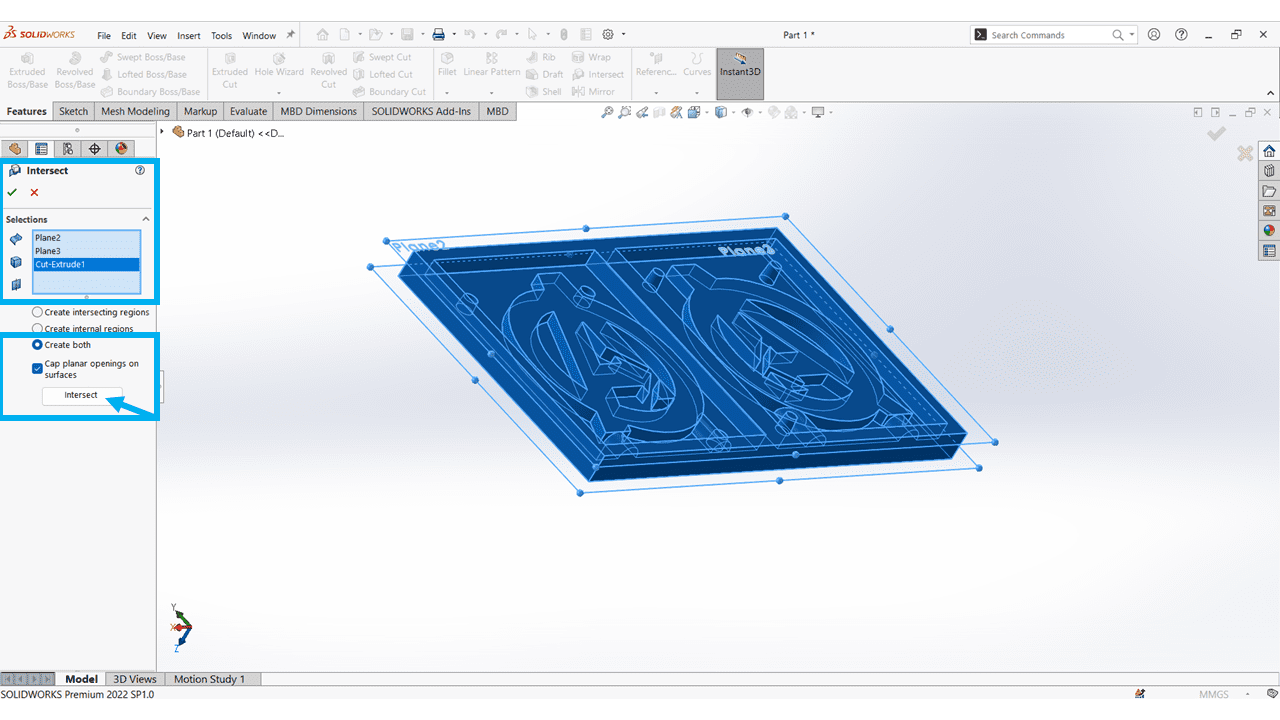
Then I selected unwanted part from the model, to calculate the mass.
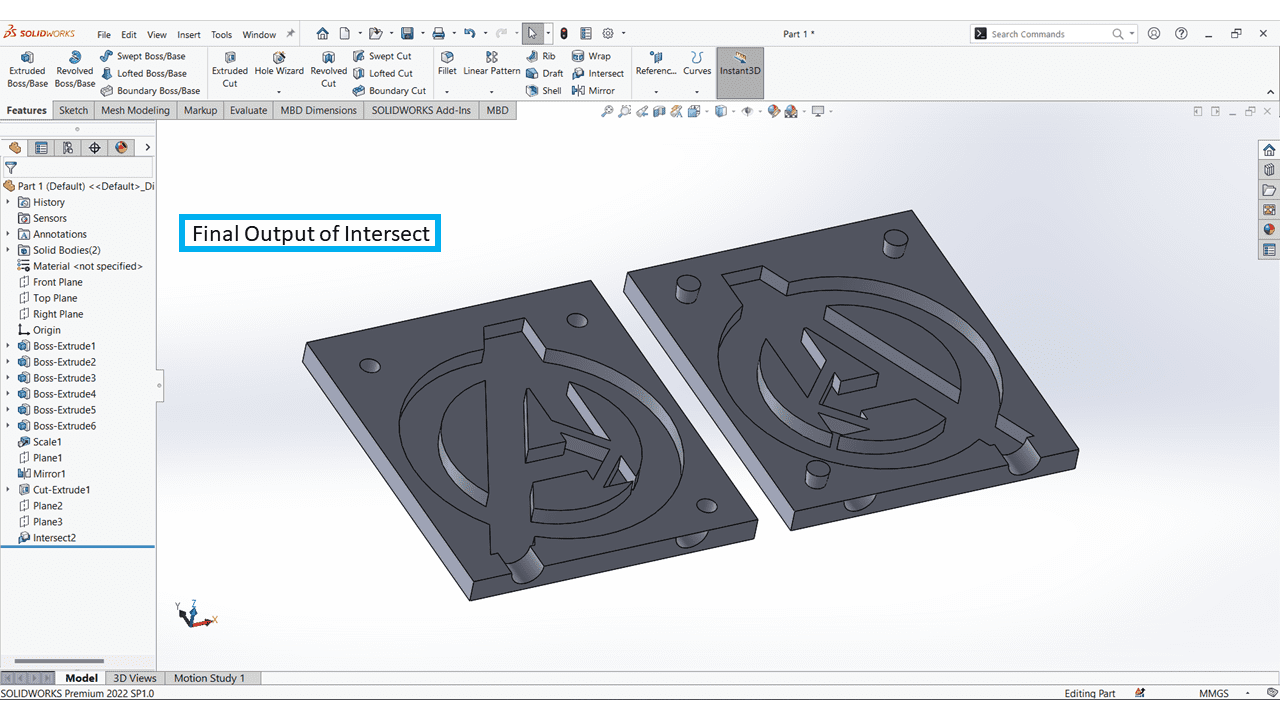
this output I got by using the intersect command.
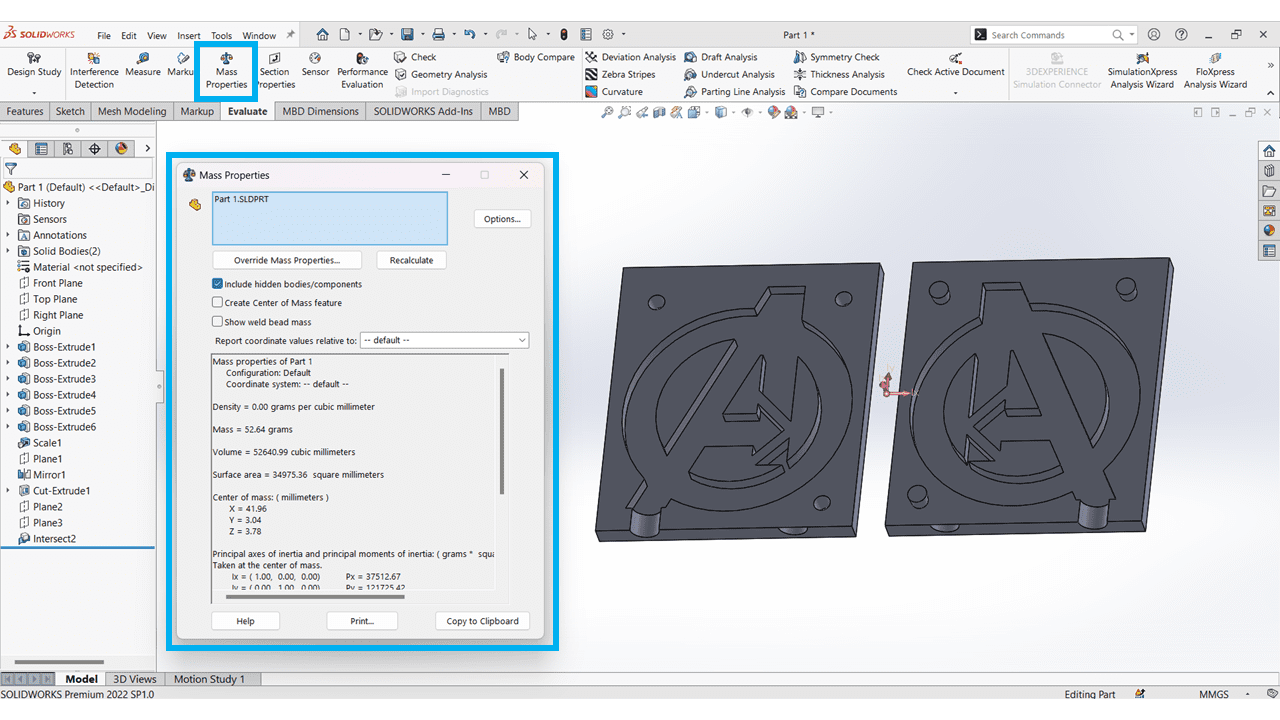
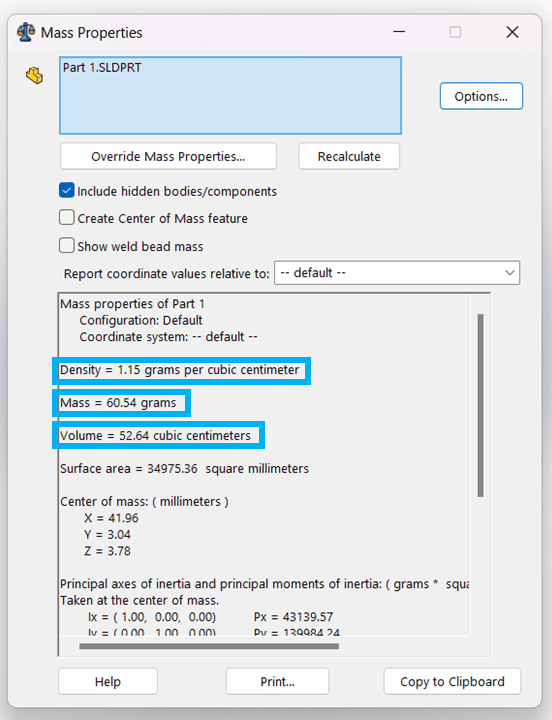
Navigate to Evaluate > Mass Properties For calculating the mass of that part.
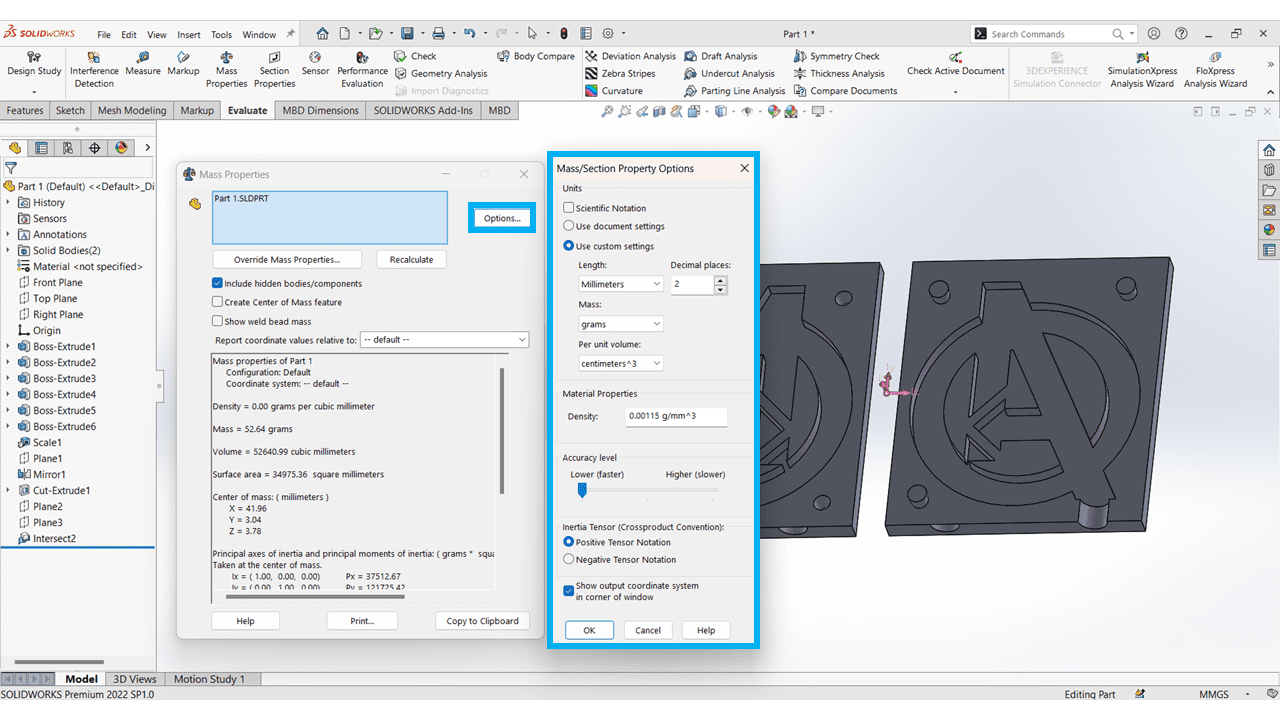
Click on Options > Use Custom Settings > enter the Density of substance that i want to pour into the Mould Cavity.
From This I calculated the Mass : 60.54 grams and the Volume : 52.64 cc.
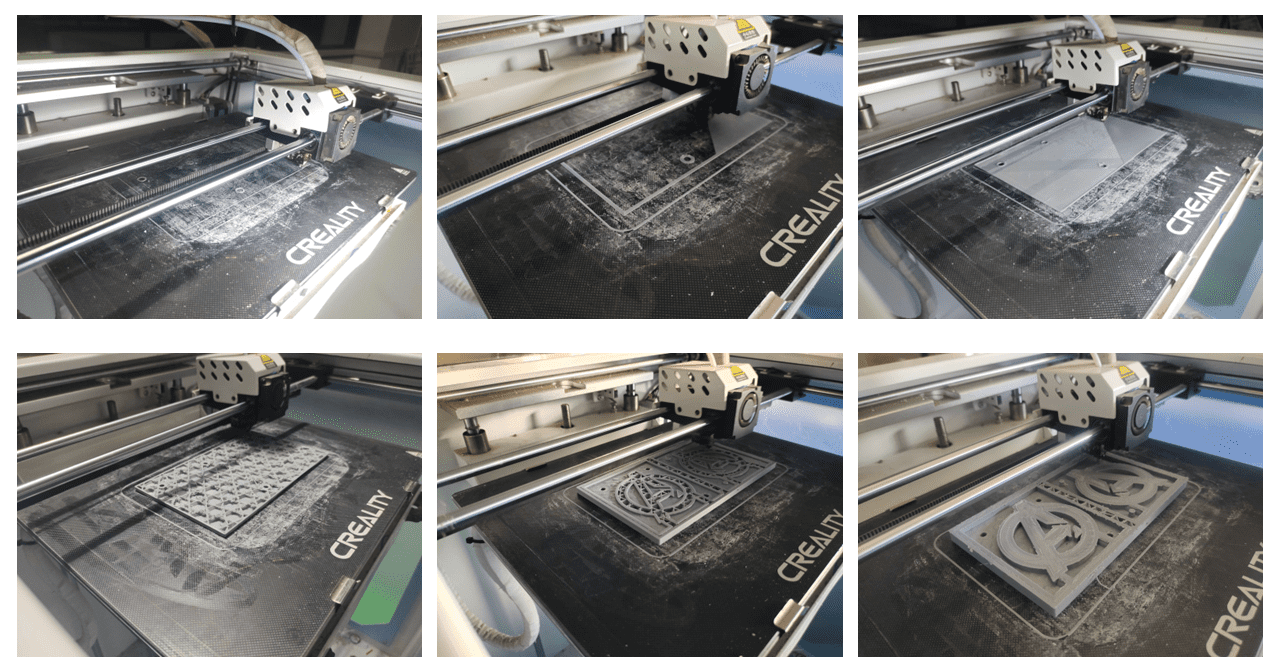
After that I 3d printed the mould, for that I used the Creality Slicer, I imported the STL file of the model into the software.
Then I clicked on Slice to make G-code. and 3d printed the mould cavity.

These are some photos I taken while 3D Printing, I used the PLA material for this Mould
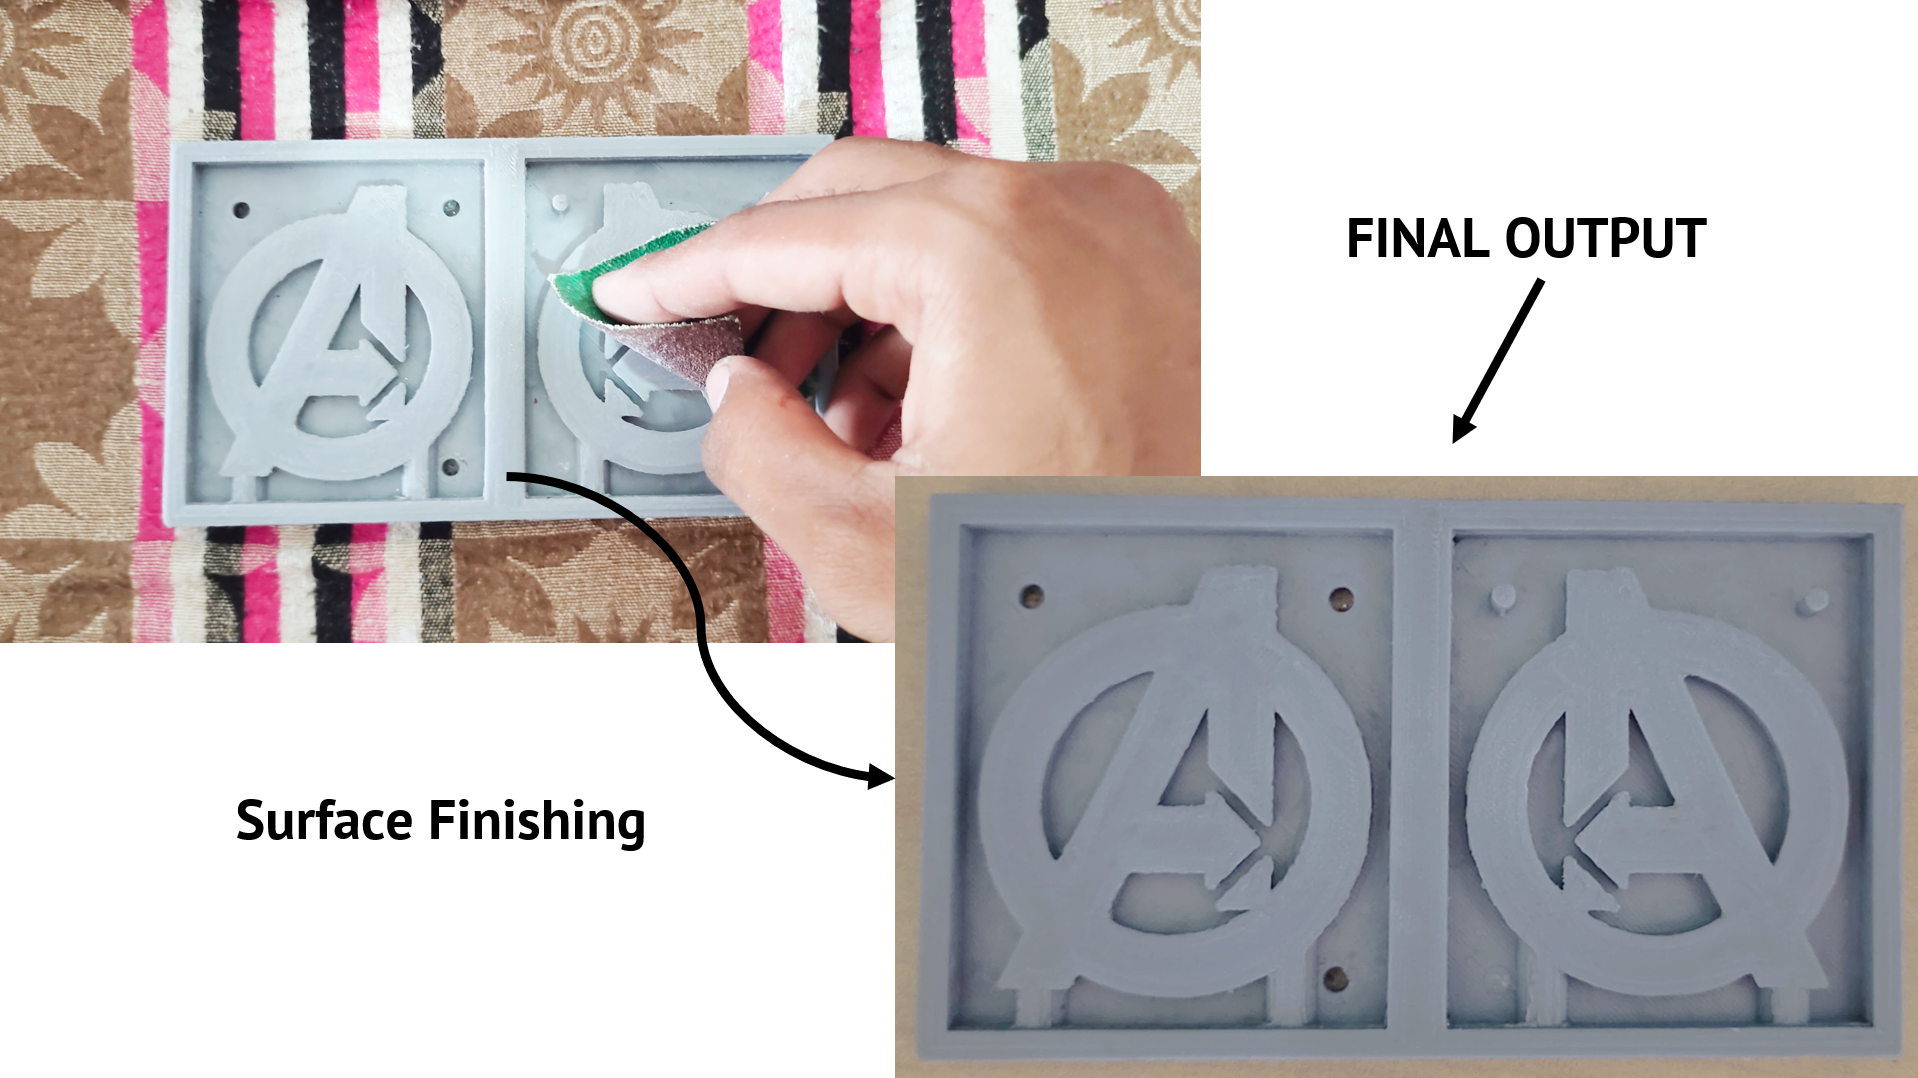
This is the Final output I got from the 3D Printing.
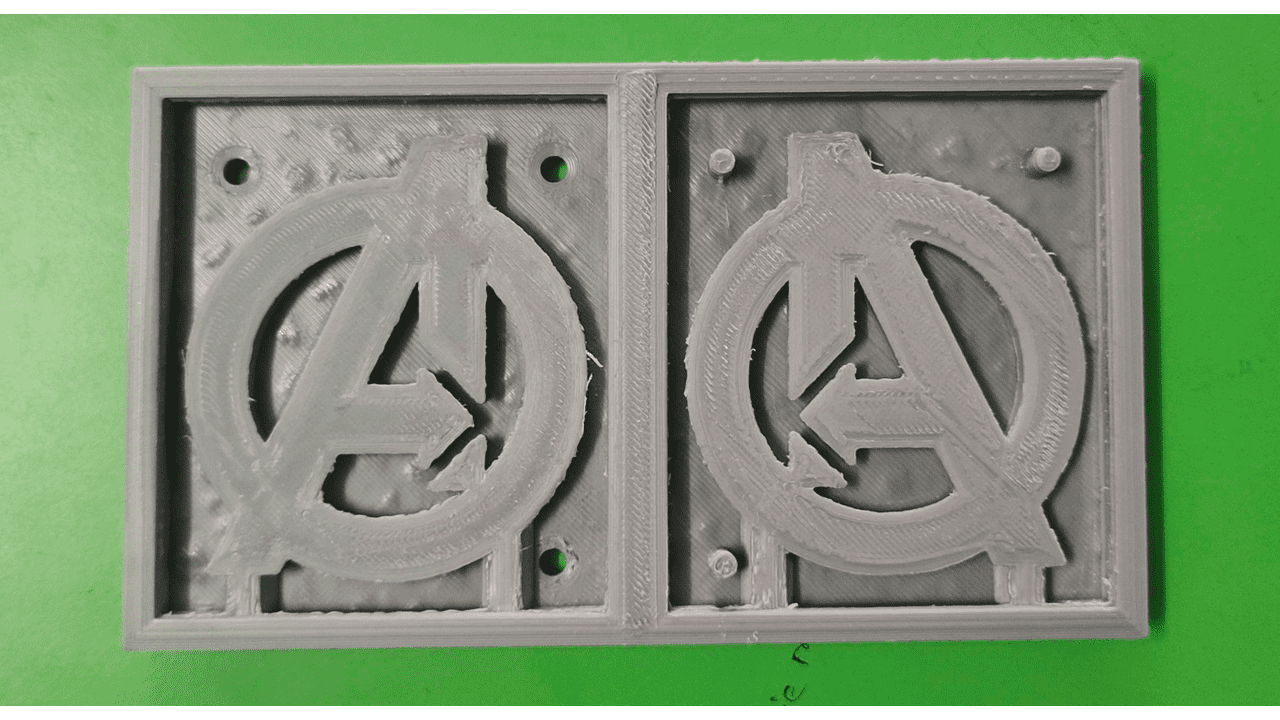
I polished it using sandpaper for the better surface finish.
After that I mixed the both silicon rubber chemicals for that I mixed that i 1:20 ratio(for 1gm of catalyst 20gm silicon rubber)
I divided 60.54 grams(Calculated in Solidworks) into a 1:20 ratio. Below is the breakdown:
Catalyst : Weight 1: 2.88 grams
Silicon Rubber : Weight 2: 57.66 grams

Then i mixed it very finely, after that i poured that into the 3d printed part
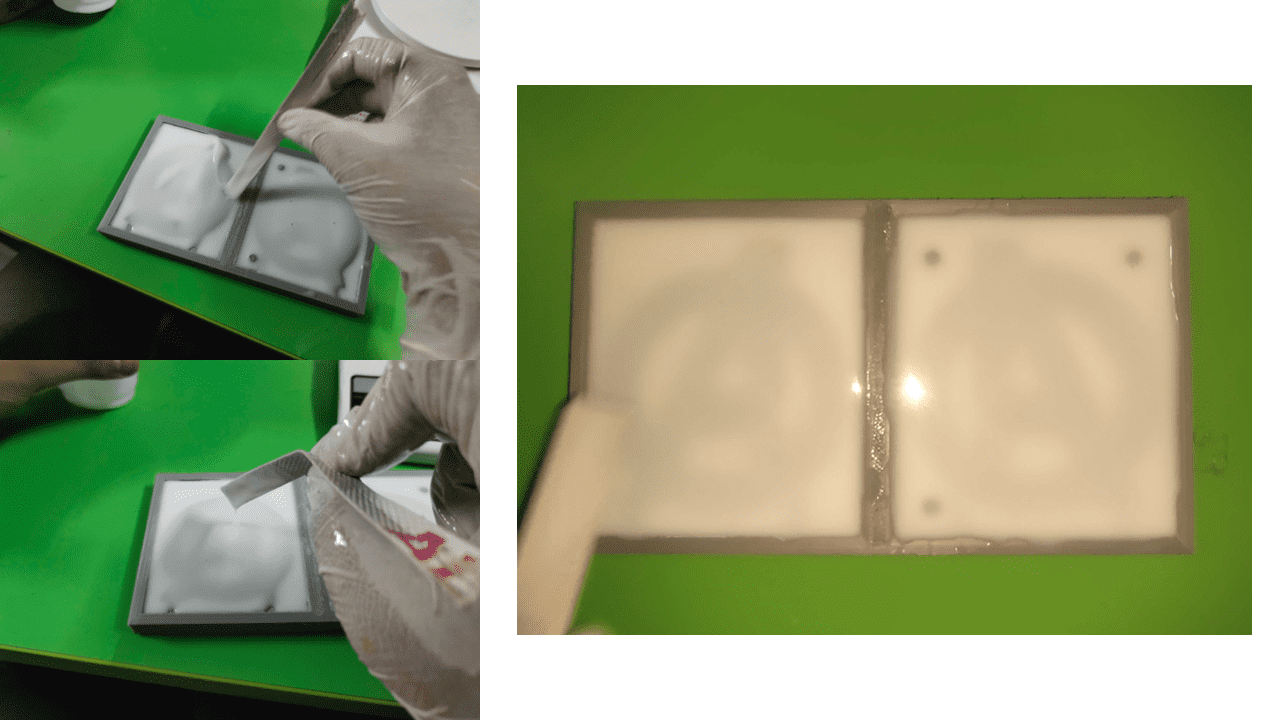
I removed all the bubbles from the mixture for the good quality of the mould, then after curing it for 24 hrs.

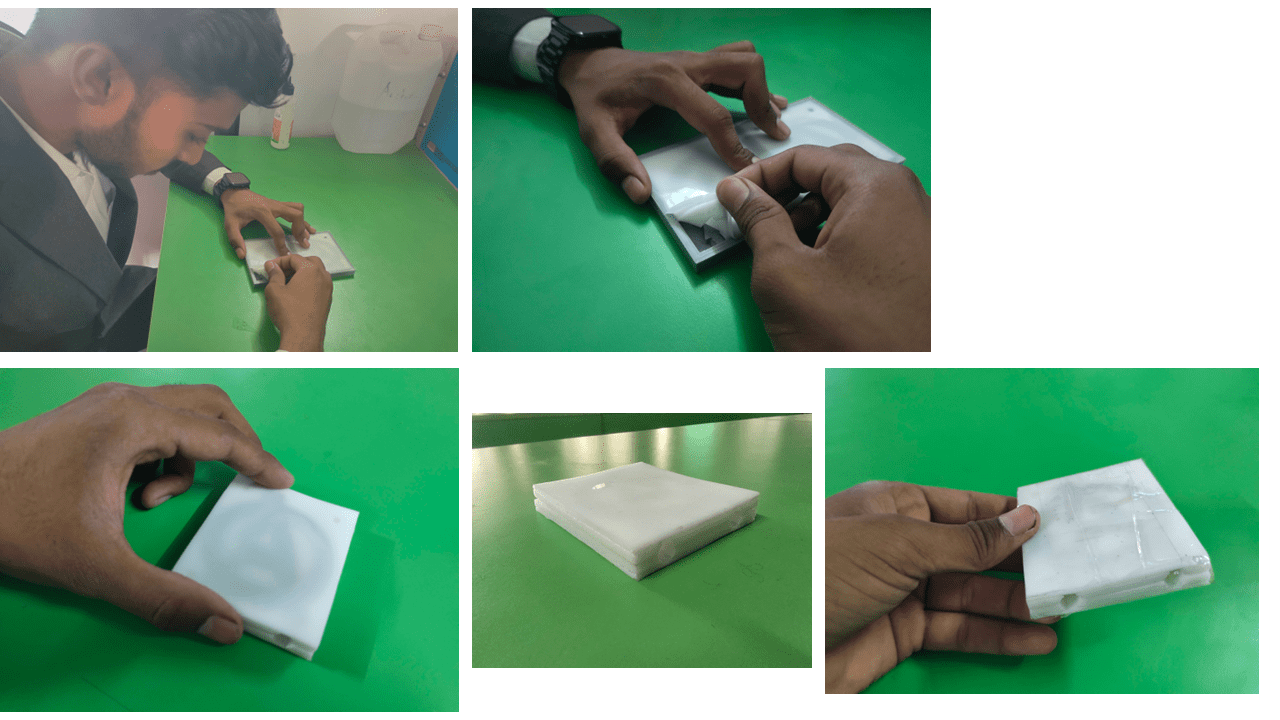
After that I removed the mould cavity from the 3d printed part, I got this output
Then i used the Epoxy resin for my final output, i mixed it in 1:2 ratio, I covered the mould cavity using transperent tape and poured the epoxy resin into it also i added some shiny dust into it for glow.
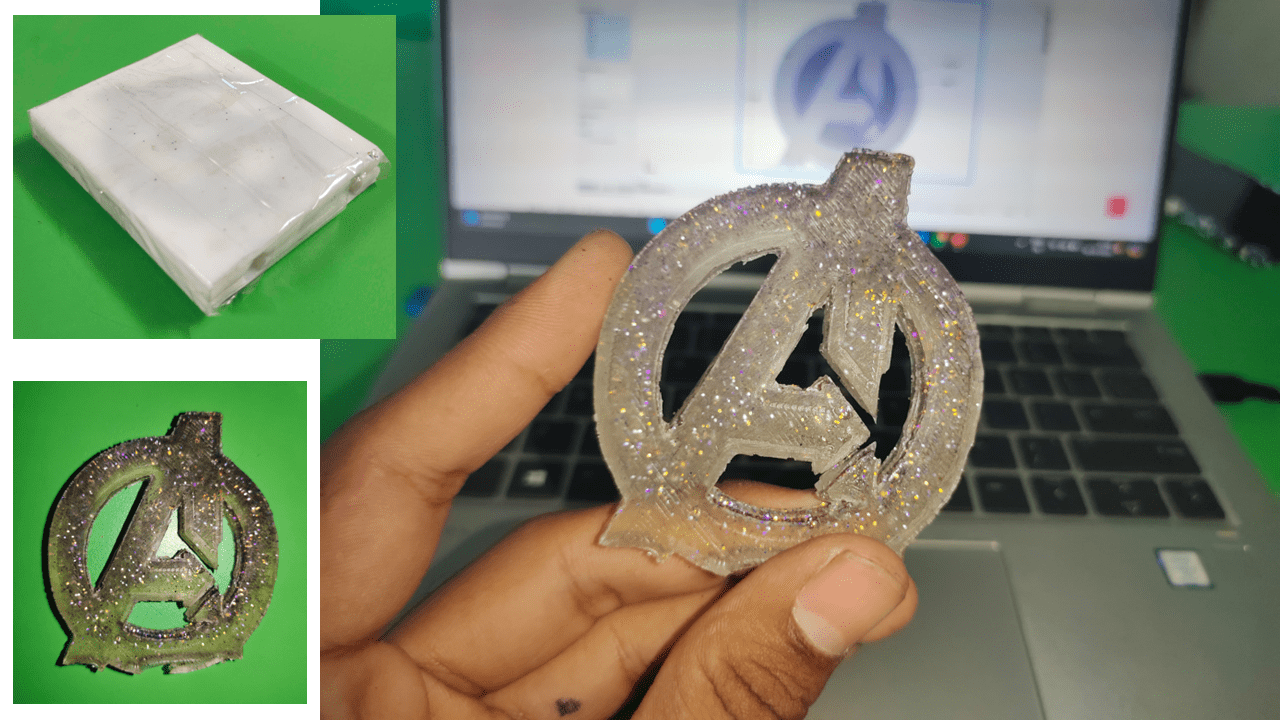
This is the Final Output I got, This week i learned about Mould making in SolidWorks, how the volume and the mass of the object can be calculated, which safety precautions has to be taken while mixing the chemicals. I enjoyed this week.
Avengers Logo 3D model of Mould..