WEEK 11: INPUT DEVICES
The goal for this week is to probe the analog levels and digital signals of an input device(s) as a group. We will document our work on the group work page and reflect on what we learned on our individual pages. For the individual assignment, the goal is to measure something by adding a sensor to a microcontroller board that you have designed and then reading the sensor data.
What are input devices?
Input devices are components or peripherals that allow the system to receive data or signals from the external environment
These devices are crucial to interact with the world around them. Some common input devices used include sensors, switch, touchscreens and many others.
Group Work
This week, our group focused on probing the analog levels and digital signals of input devices. For digital signals, we used an oscilloscope to observe the behavior of a push button when pressed and released. For analog levels, we employed a capacitive moisture sensor to read and monitor its values in different environments, such as outside and in wet soil. This exercise provided us with practical insights into the behavior of digital and analog signals in various conditions. Our detailed documentation and reflections can be found on our group work page here.
Personal experience
- This project helped me understand the practical aspects of interfacing sensors with microcontrollers.
- Debugging and verifying the connections were crucial steps.
- I feel more confident in working with both digital and analog input devices.
Personal Work
In my weekly assignment, I decided to work with different sensors, including an ultrasonic sensor and a moisture sensor. The ultrasonic sensor will be used to measure distances, while the moisture sensor will be used to detect the moisture level in the soil. This work will allow me to gain practical experience in working with sensors and learn how to interface them with a microcontroller.
A. Working With Moisture sensor and thingspeak platform
A moisture sensor is a device used to measure the moisture content in a substance, typically soil in applications related to agriculture or gardening. These sensors can help determine when to water plants by providing real-time data on the soil's moisture level.
ThingSpeak is an Internet of Things (IoT) platform that allows you to collect, analyze, and visualize data from IoT devices. It provides APIs for sending data to the platform and accessing it for analysis and visualization. ThingSpeak is often used in projects involving sensor data, as it provides an easy way to store and manage the data, as well as create visualizations such as charts and graphs.
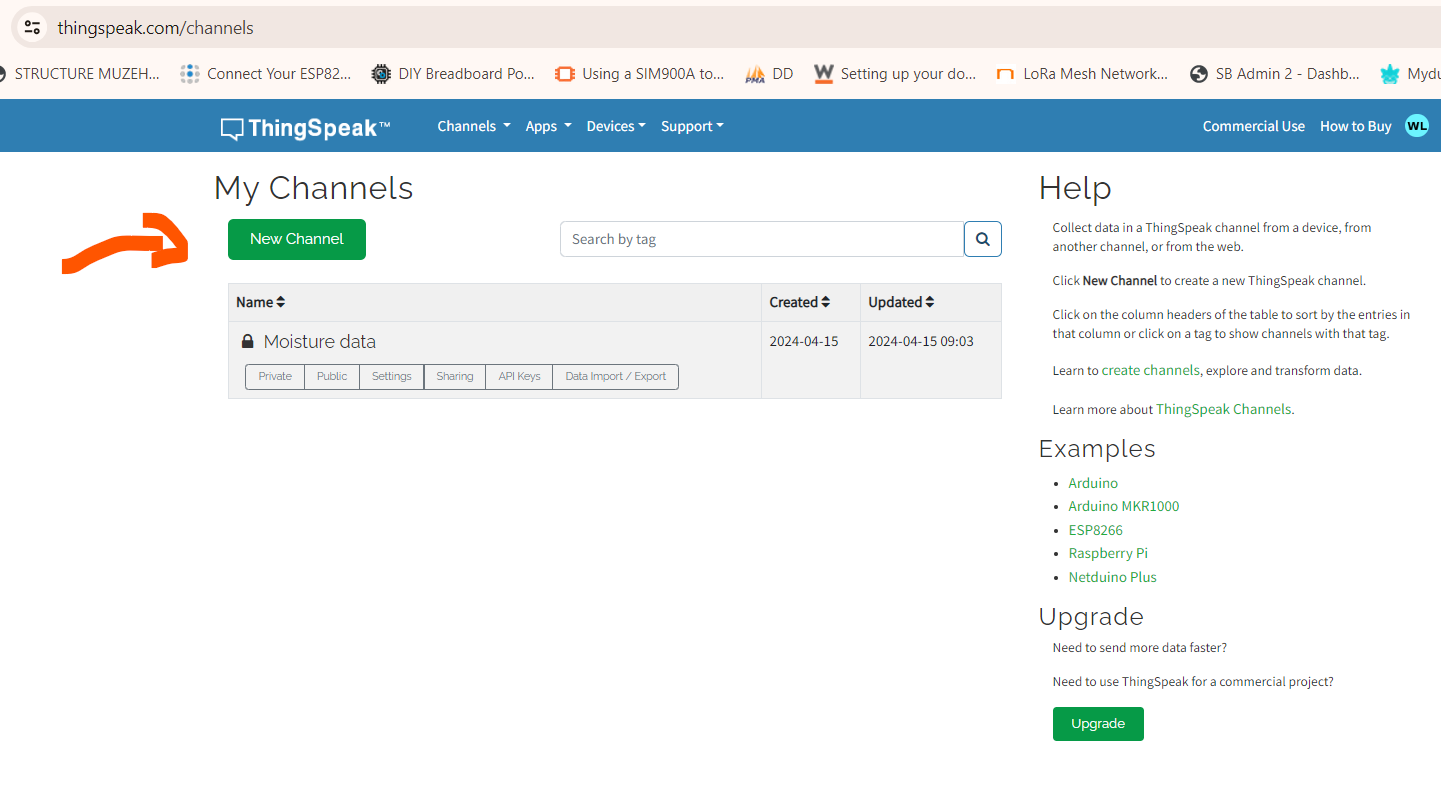
Creating an account on ThingSpeak
To use this platform you have to create an account on mathworks.
https://thingspeak.com/login?skipSSOCheck=true
After creating account then we create a channel by clicking on the button below, then fill the project name and field lable. There are 8fields but in my case I used field one only because I am only reading moisture data.
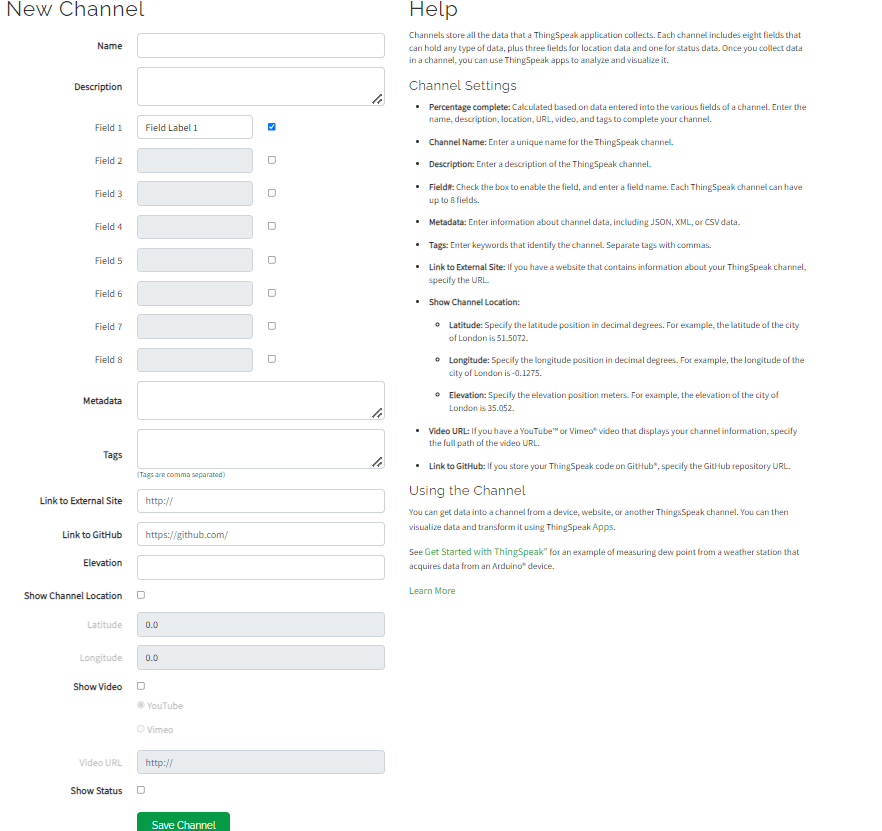
The chart widget comes automatically when creating a channel.
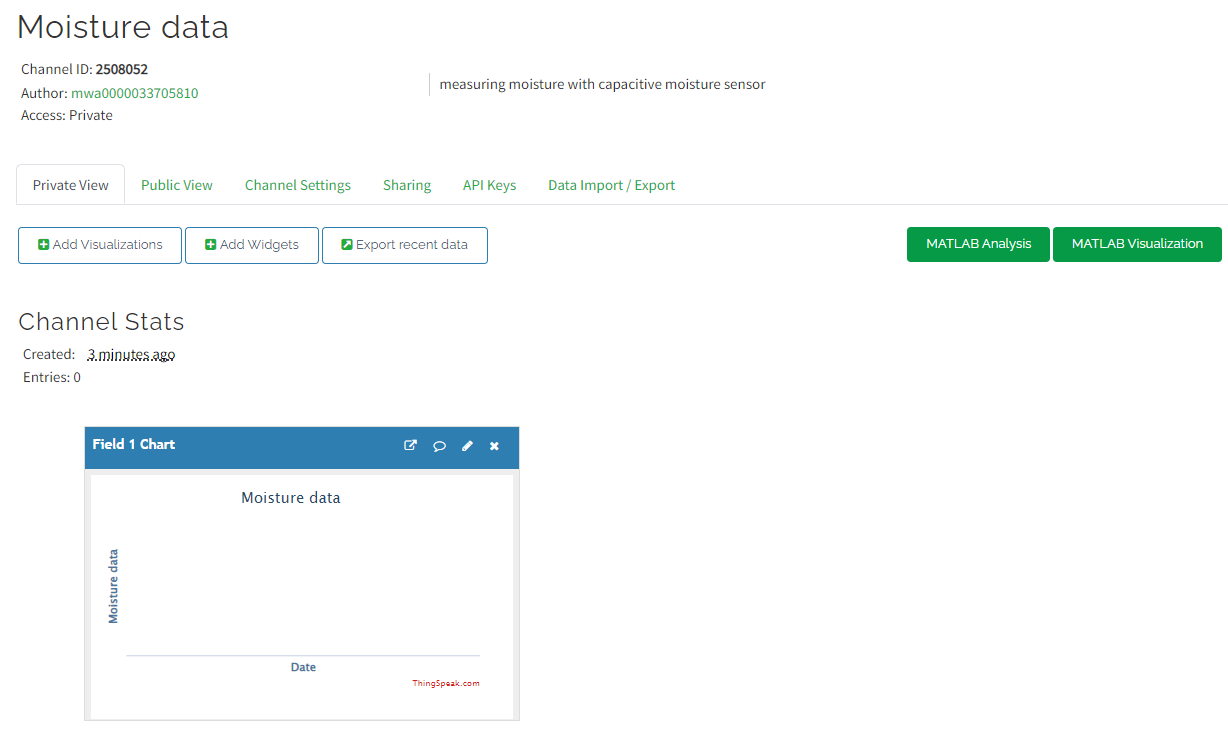
To use ThingSpeak, we need to utilize the Channel ID and API Key.
In our code, we also require the Wi-Fi username and password to establish a connection with the ThingSpeak platform.
I. Sending moisture data on thingspeak with WiFi Module
Connect the setup with WiFi Module
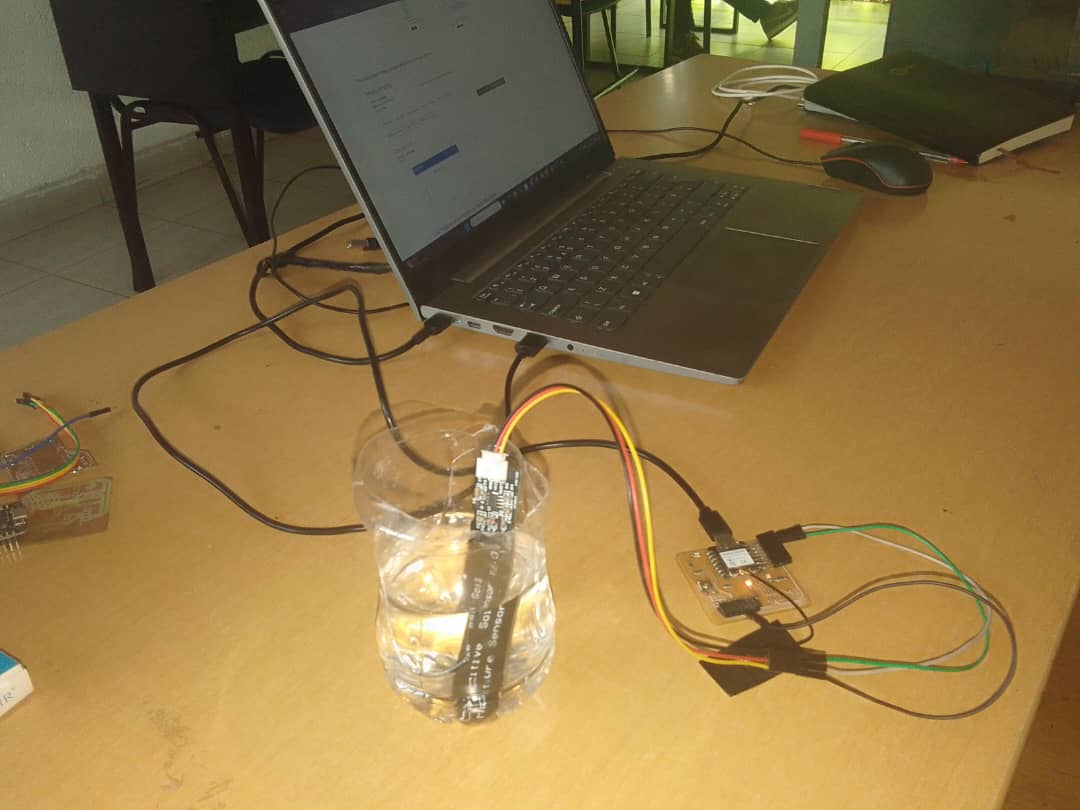
The developed code below
By default, ESP32 ADC reads values from 0 to 4095, which represents a 12-bit resolution.
          #include <WiFi.h>

          #include <WiFiClient.h>

          #include <ThingSpeak.h>

          const char* ssid = "xxxxxxxxx"; // Replace x's with Your Network SSID
          const char* password = "xxxxxxxx"; // Replace Your Network Password Here

          WiFiClient client;
          unsigned long myChannelNumber = xxxxxxxxxx; // Your Channel Number
          const char* myWriteAPIKey = "xxxxxxxxxxxxxxxxxxx"; // Your Write API Key

          void setup() {
            Serial.begin(9600);
            delay(10);

            // Connect to WiFi network
            WiFi.begin(ssid, password);
            Serial.print("Connecting to WiFi...");

            // Wait for connection
            while (WiFi.status() != WL_CONNECTED) {
              delay(500);
              Serial.print(".");
            }
            Serial.println("\nWiFi connected");

            // Initialize ThingSpeak
            ThingSpeak.begin(client);
          }

          void loop() {
            int val = analogRead(A2); // Read Analog values and Store in val
            float Moisture = map(val, 0, 4095, 100, 0); // Map data to range of 0 to 100
            Serial.print("Moisture = ");
            Serial.println(Moisture); // Print on Serial Monitor

            // Send data to ThingSpeak
            int httpCode = ThingSpeak.writeField(myChannelNumber, 1, Moisture, myWriteAPIKey);
            if (httpCode == 200) {
              Serial.println("Data sent to ThingSpeak successfully");
            } else {
              Serial.print("Error sending data to ThingSpeak. HTTP Code: ");
              Serial.println(httpCode);
            }

            delay(10000); // Wait 10 seconds before next loop
          }
The output on ThingSpeak platform can be seen on below image.

Details of the output on My pcb can be seen in the video below;
II. Ultrasonic Sensor with microcontroller
Ultrasonic Sensor is a device that uses ultrasonic sound waves to measure distance to an object. It typically consists of a transmitter that emits ultrasonic waves and a receiver that detects the waves after they bounce off an object.By measuring the time it takes for the ultrasonic waves to travel to the object and back, the sensor can calculate the distance to the object using the speed of sound in air.
Ultrasonic sensors are commonly used in robotics, automation, and other applications where non-contact distance measurement is required. They are often used to detect the presence or absence of objects, measure the level of liquid in a tank, or assist in navigation and collision avoidance for autonomous vehicles.
                  const int trigPin = D10; // Trigger
                  const int echoPin = D9; // Echo
                  const int LED = D7;
                  long duration, cm;

                  void setup() {
                  //Serial Port begin
                  Serial.begin (9600);
                  //Define inputs and outputs
                  pinMode(trigPin, OUTPUT);
                  pinMode(echoPin, INPUT);
                  pinMode(LED,OUTPUT);

                  }

                  void loop() {
                  // The sensor is triggered by a HIGH pulse of 10 or more microseconds.
                  // Give a short LOW pulse beforehand to ensure a clean HIGH pulse:
                  digitalWrite(trigPin, LOW);
                  delayMicroseconds(5);
                  digitalWrite(trigPin, HIGH);
                  delayMicroseconds(10);
                  digitalWrite(trigPin, LOW);


                  // Read the signal from the sensor: a HIGH pulse whose
                  // duration is the time (in microseconds) from the sending
                  // of the ping to the reception of its echo off of an object.
                  pinMode(echoPin, INPUT);
                  duration = pulseIn(echoPin, HIGH);

                  // Convert the time into a distance
                  cm = (duration/2) / 29.1; // Divide by 29.1 or multiply by 0.0343
                  //inches = (duration/2) / 74; // Divide by 74 or multiply by 0.0135

                  Serial.print("Distance: ");
                  //Serial.print(inches);
                  //Serial.print(" inches\t");
                  Serial.print(cm);
                  Serial.print("cm");
                  Serial.println();
                  delay(250);

                  if(cm<10)
                  {
                    digitalWrite(LED,HIGH);
                    delay (200);
                  }else{
                    digitalWrite(LED,LOW);
                    delay (200);
                    }
                  }
The code is designed to activate an LED actuator on my pcb connected to pin D7 when an obstacle approaches the ultrasonic sensor to a distance less than 10cm. The LED turns on when the distance is below 10cm and turns off when the distance is greater than or equal to 10cm.