System Integration
"Show how the design and operations of your Final Project are cleanly integrated together."
To know in detail about my final project click on the iamge below.
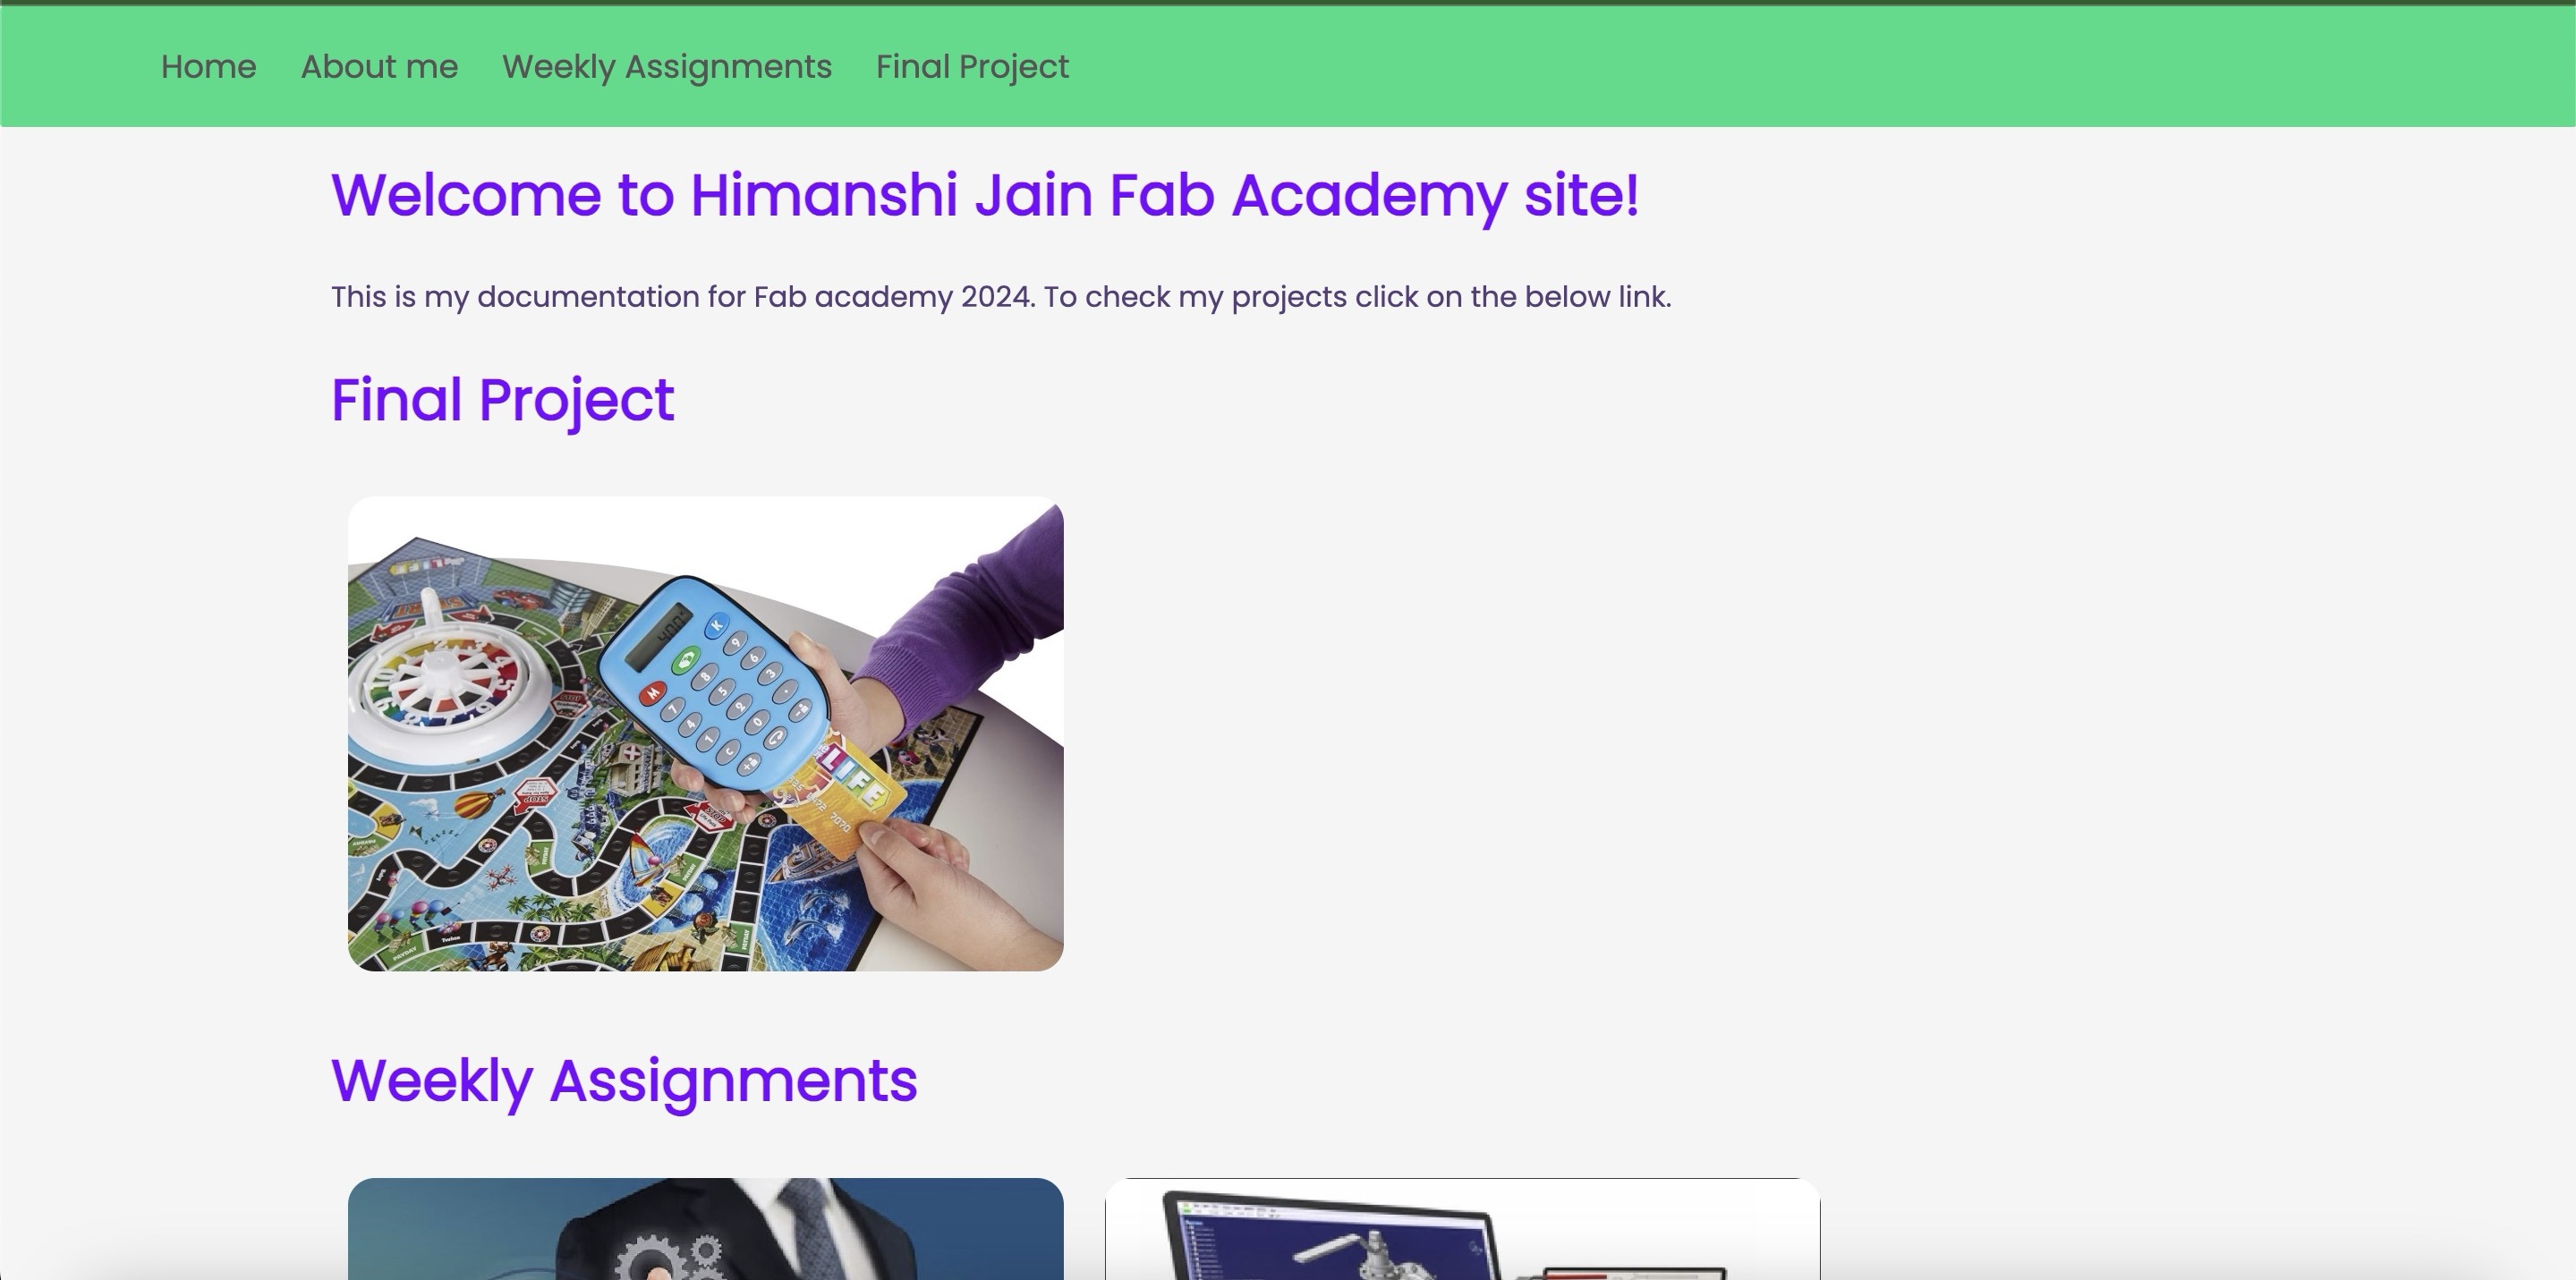
Features of The Jungle Puzzle Quest
The Jungle Puzzle Quest is an inclusive electronic card game designed to introduce children to various animals, their sounds, and characteristics through engaging auditory and tactile experiences. Here are its features:
Embossed Animal Cards:
Each card in the first deck features an embossed image of an animal, allowing players to engage their tactile senses and learn about different animals by feeling the cards.
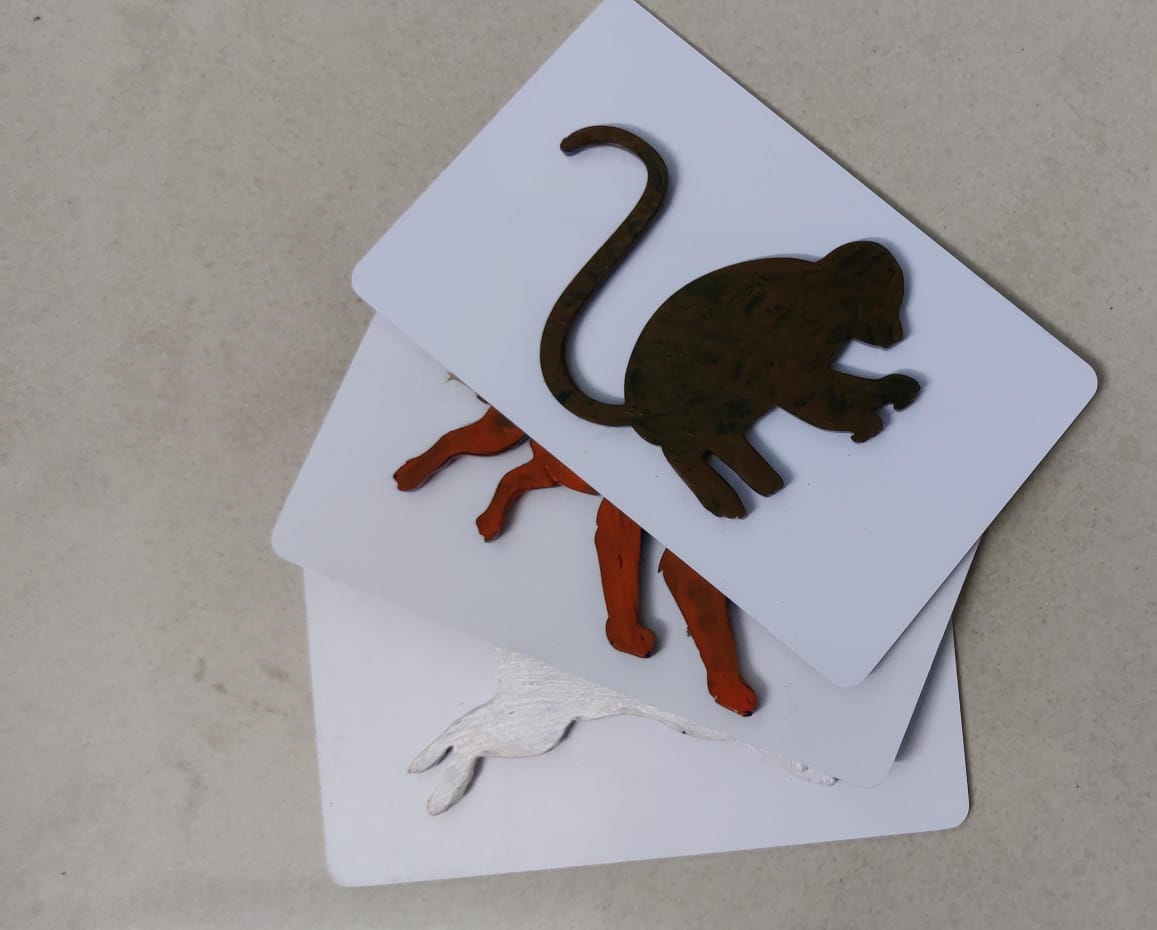
RFID Technology:
The cards are equipped with RFID tags. Players can scan the cards using the RFID reader on the top of the box to trigger auditory descriptions and sounds of the animals.
Auditory Learning:
When an animal card is scanned, the game emits a sound that describes the animal's features, unique traits, and the sound it makes, enhancing learning through auditory experiences.
Two Game Modes:
Mode 1 (Learning Mode): Players select an embossed animal card, scan it, and listen to the description and sound of the animal, promoting tactile and auditory learning.
Mode 2 (Puzzle Mode): Players use their knowledge from Mode 1 to solve jigsaw puzzles. They identify the correct animal puzzle pieces by referring to the rule book's symbols and assemble the puzzle. Correct assembly unlocks the next level.
Engaging Storyline:
The game features a captivating storyline where a curious child named Alex explores the jungle, meets various animals, and learns about their unique traits. The narrative keeps children engaged and motivated to progress through the game.
Inclusive Design:
The game is designed for both partially sighted and sighted players, ensuring an inclusive experience that fosters interaction with animals in a fun and educational manner.
Interactive Feedback:
When players correctly solve a puzzle or scan a card, they receive encouraging feedback through sounds and lights, similar to popular games like Candy Crush, to keep them motivated.
Adjustable Settings:
The game includes adjustable settings to customize the difficulty and progression based on individual preferences and learning needs. This feature allows for a tailored gaming experience for different age groups and abilities.
Comfortable and Durable Components:
The game components, including the cards and box, are designed for durability and comfort, ensuring they can withstand daily use and provide a pleasant experience for players.
Integration with Mobile Devices:
Future updates may include integration with mobile devices via Bluetooth or Wi-Fi, allowing players to receive notifications, track progress, and access additional educational content on their phones.
System Integration
Work Flowchart:
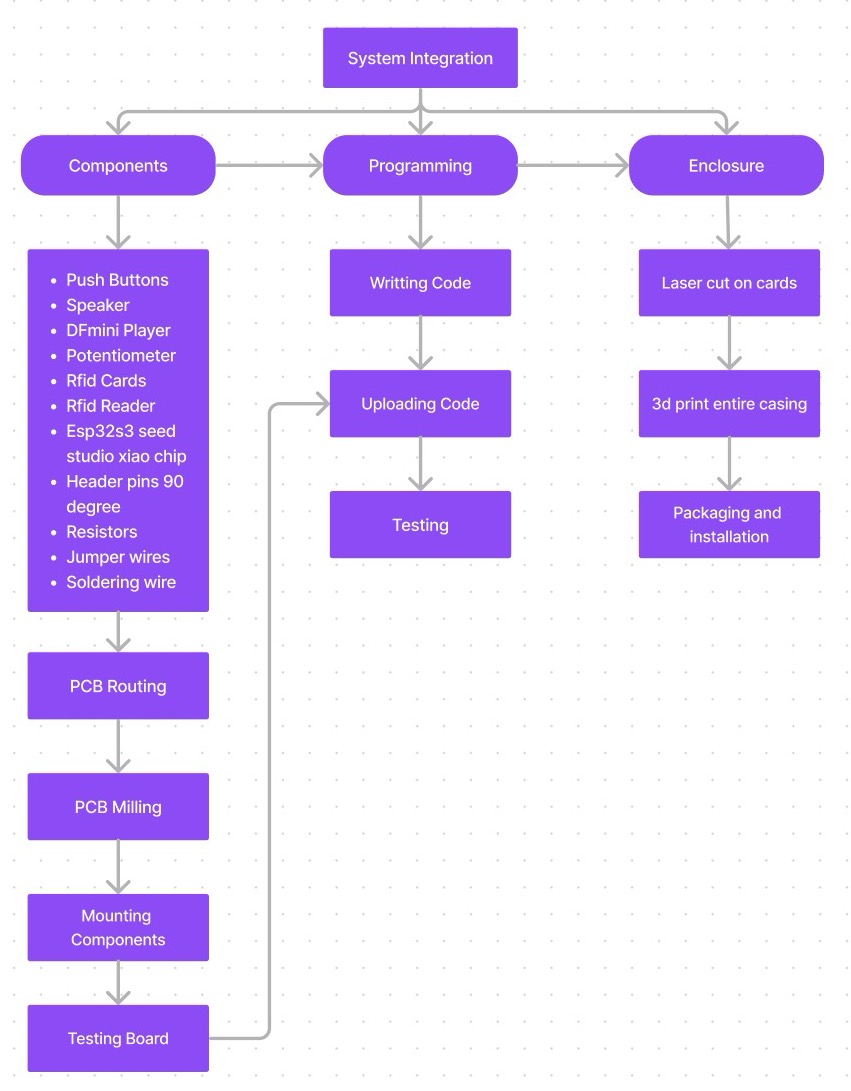
Bill of Materials
Below are the detailed list of materials which I used in the entire project

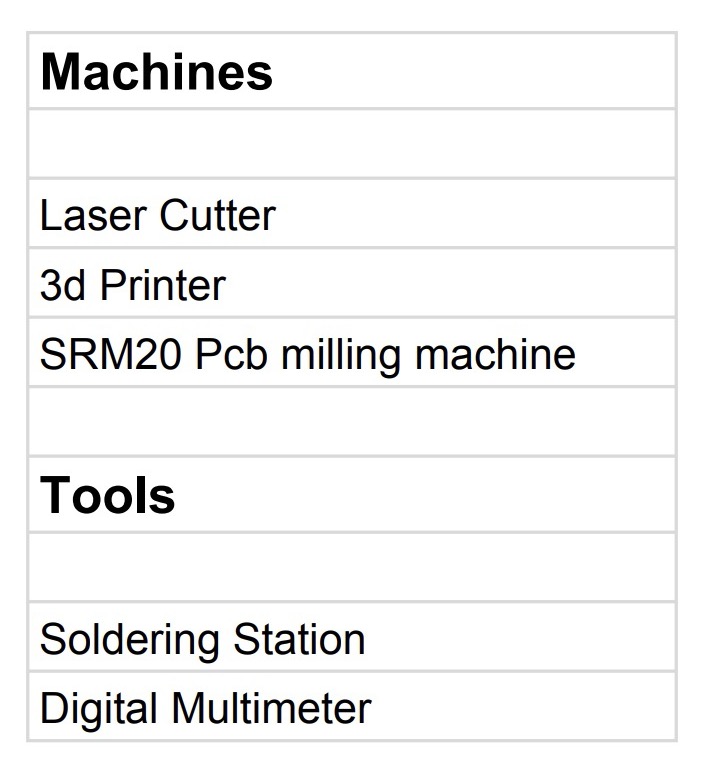
List of Machines and tools used
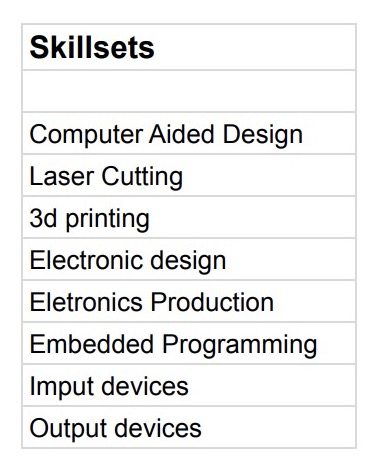
Skillsets
Below are the skillsets which I used to make the entire project.
Part 1: Electronics
In electronics I started with knowing more about rfid card, testing rfid card with the help of arduino, checking the thickness till which distance rfid reader is able to read, coding, testing components on breadboard, pcb design, pcb milling, soldering, multimeter testing an finally a working video of everything together.
Electronics from start to end is esplained on Final Project Page.
Production methods
Electronic Circuit and PCB Production:
Design: Draw the schematic and design the PCB in EasyEDA.
Manufacture: Mill the PCB board and solder the components.
Program: Test the board and program it to react with rfid scanner and play the audio when the cards are scanned.
Components:
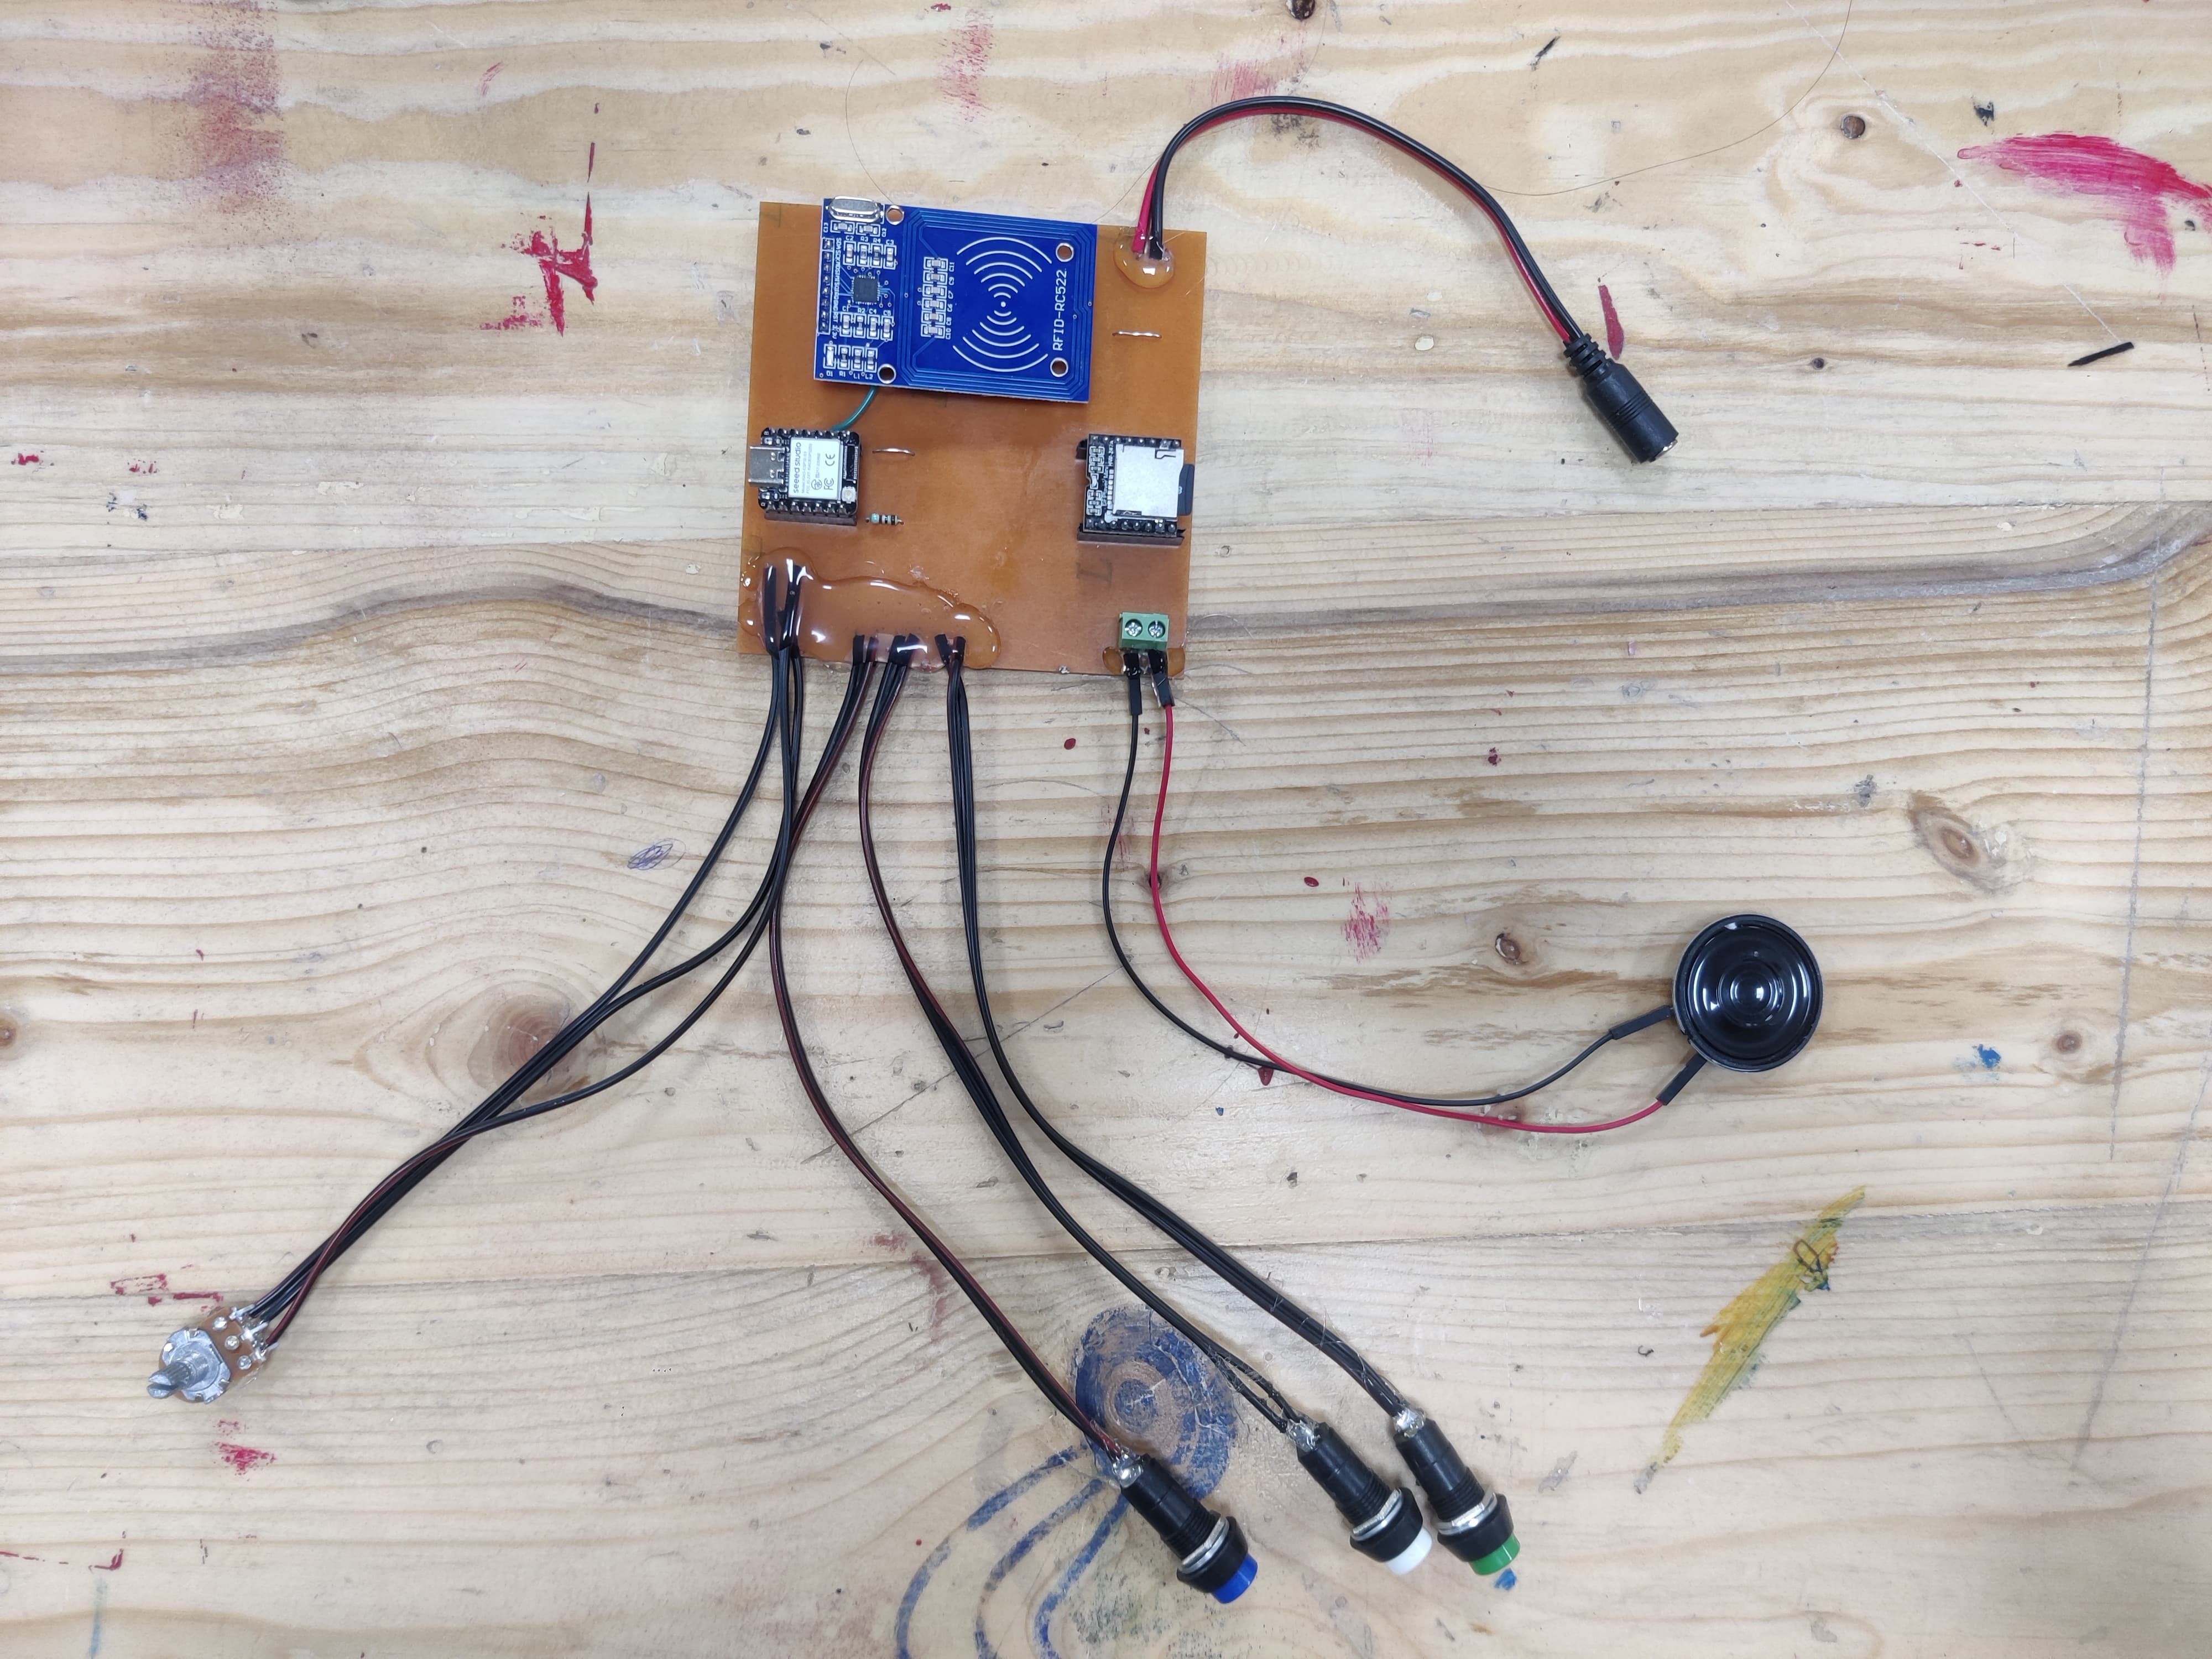
Push Buttons: I integrated push buttons into the final product to allow user interaction, such as starting the game or selecting options.
Speaker: I connected the speaker to the DFmini Player and controlled it via the ESP32s3 to provide auditory feedback and play animal sounds when RFID cards are scanned.
DFmini Player: I used this module to store and play the audio files corresponding to each animal card. It is connected to the ESP32s3 for control.
Potentiometer: I included a potentiometer to adjust the speaker volume, ensuring the sound level is comfortable for users.
RFID Cards and Reader: I ensured the RFID reader detects the RFID cards and sends the data to the ESP32s3 to trigger the corresponding audio files.
ESP32s3 Seed Studio XIAO Chip: I used this as the main microcontroller to handle the logic and control for the game.
Header Pins, Resistors, Jumper Wires, and Soldering Wire: I used these to connect all the components together on the PCB.
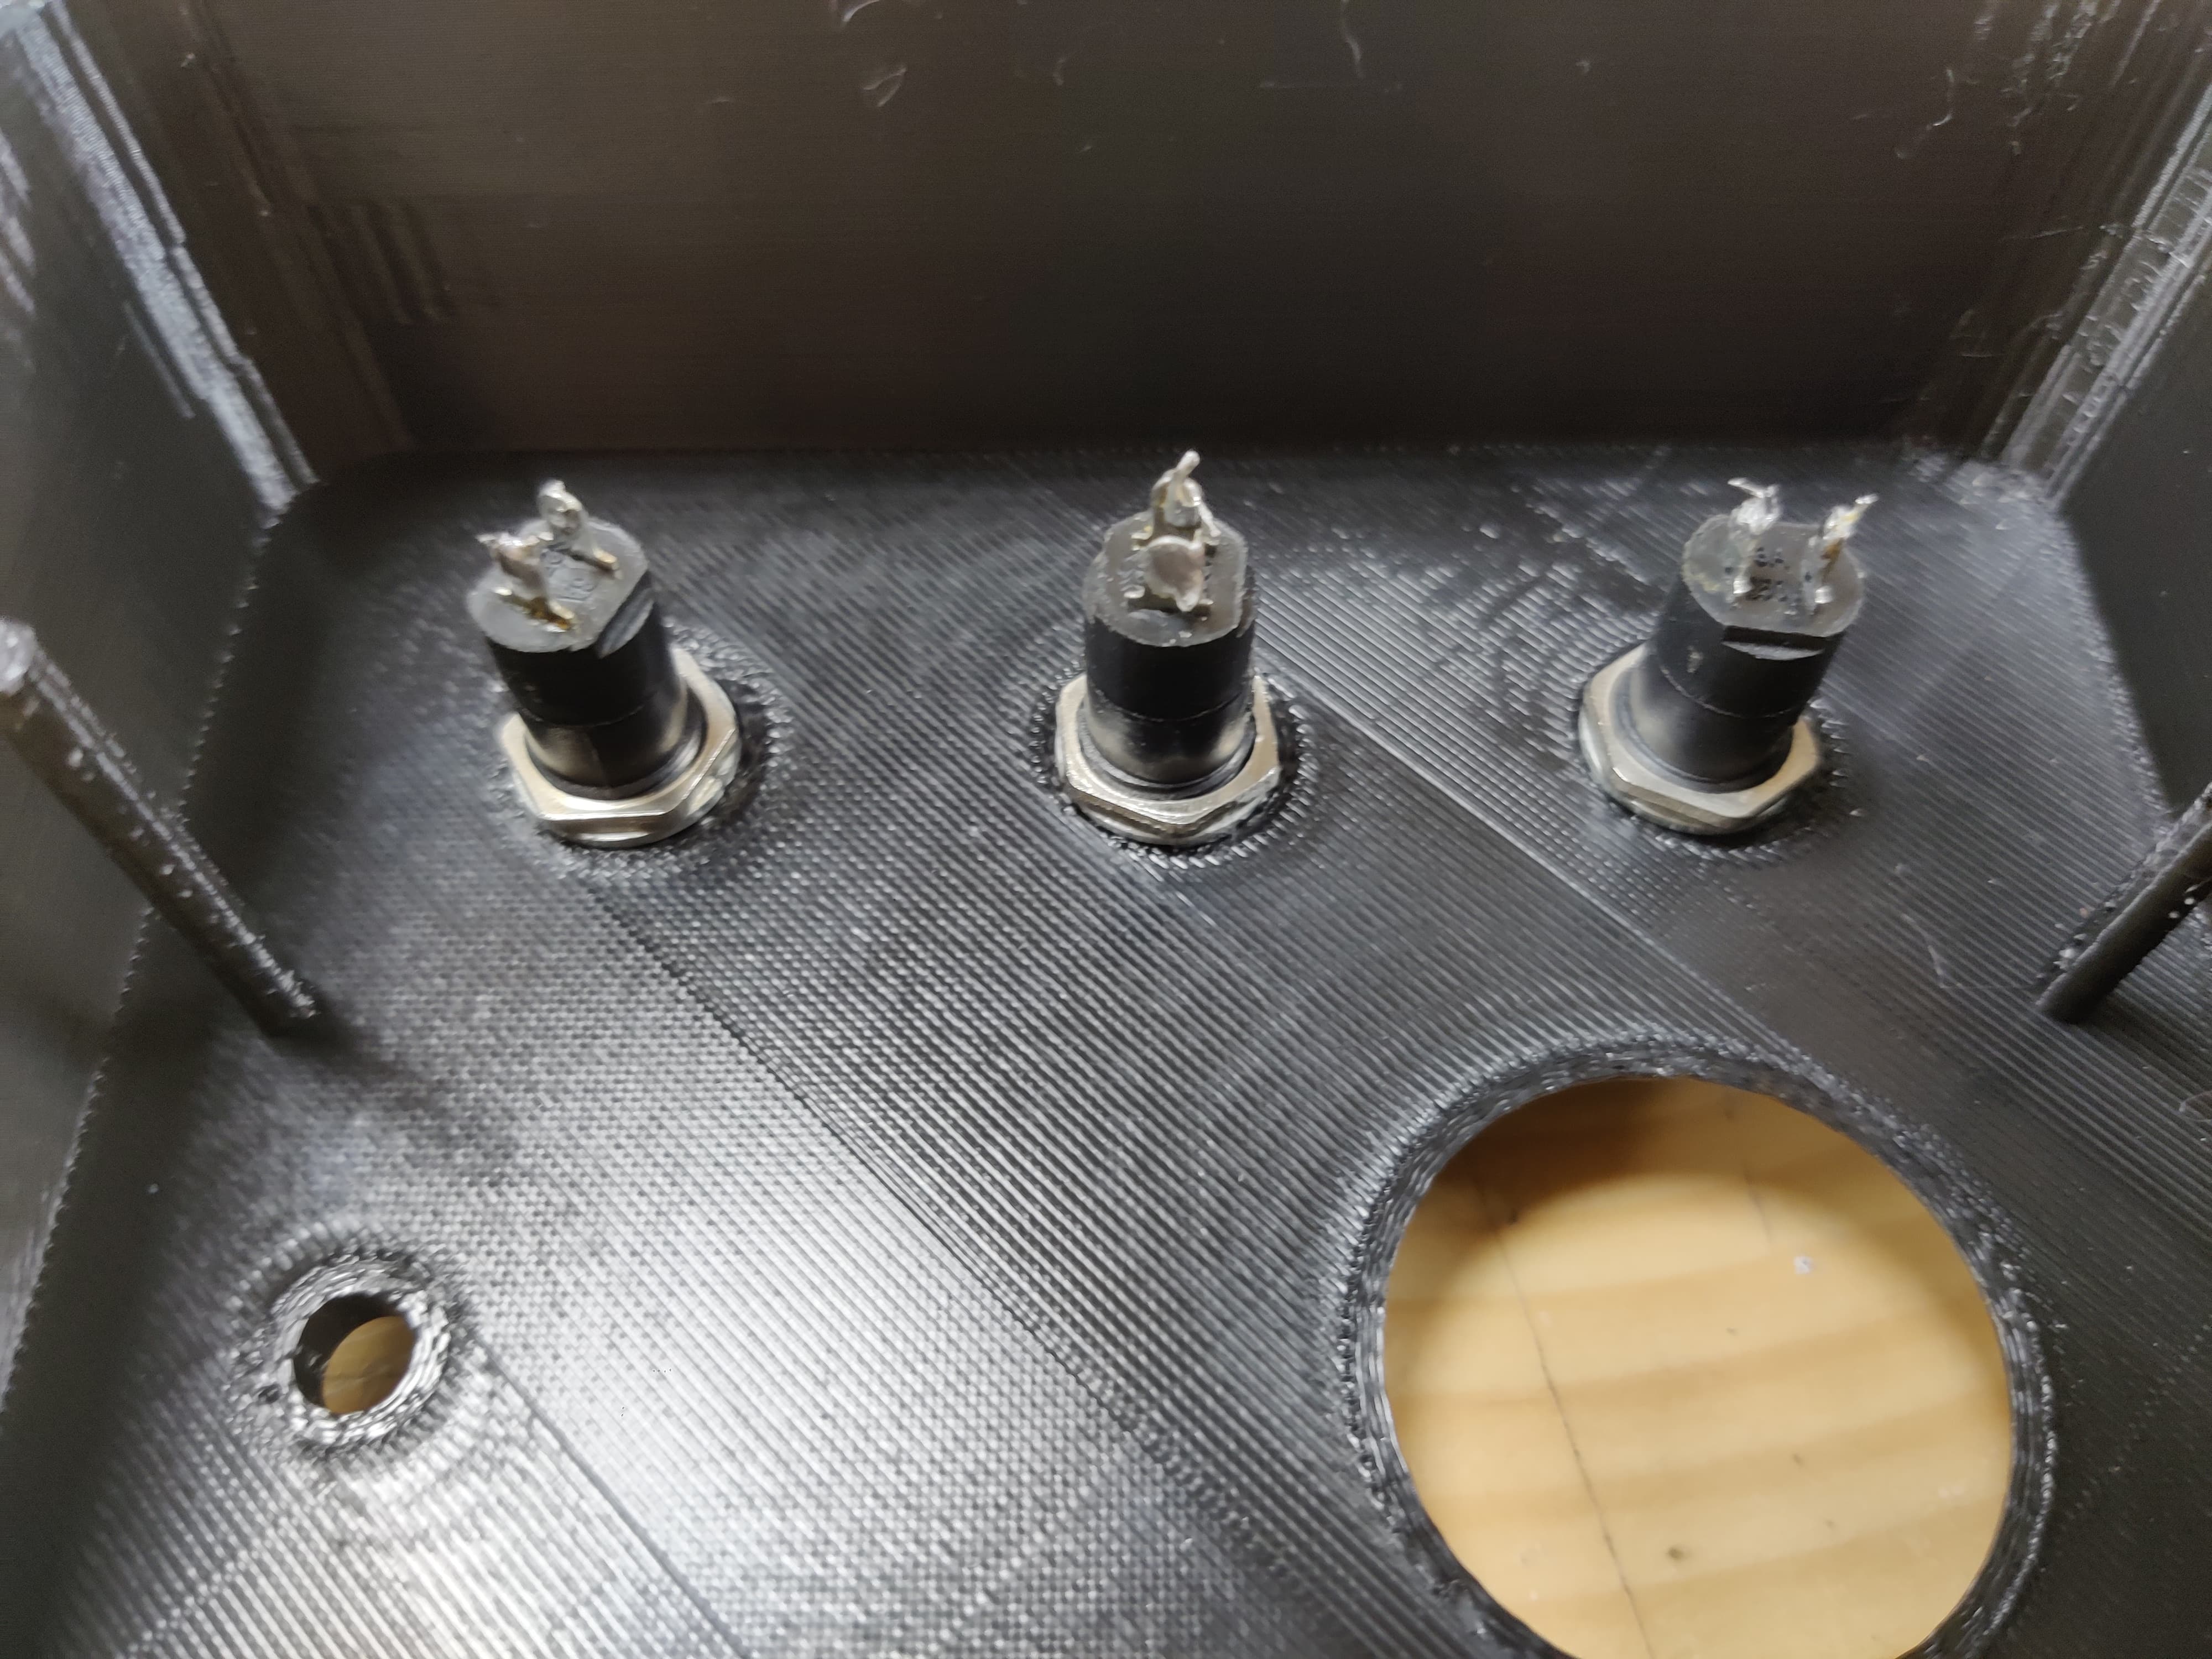
All the above mentioned components were integrated like this:
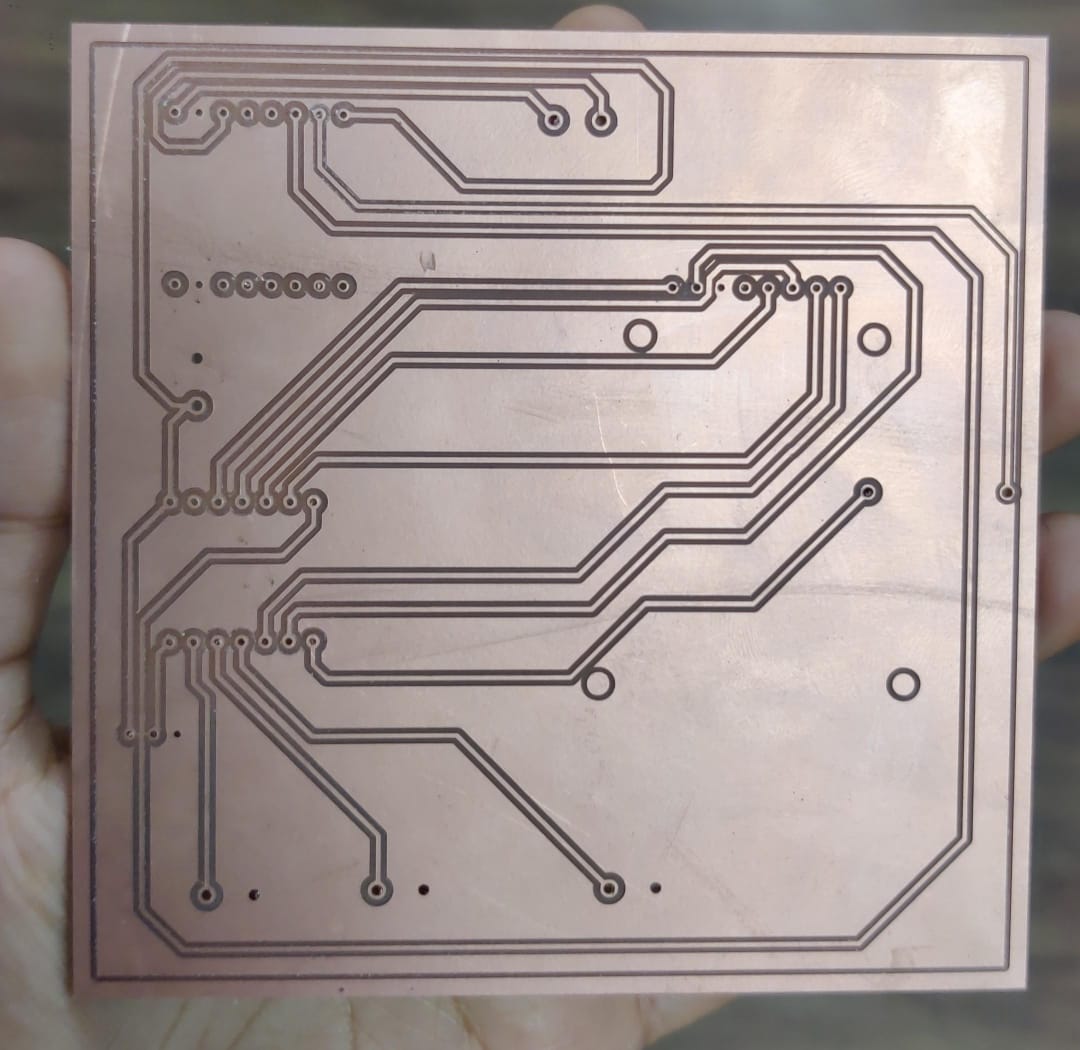
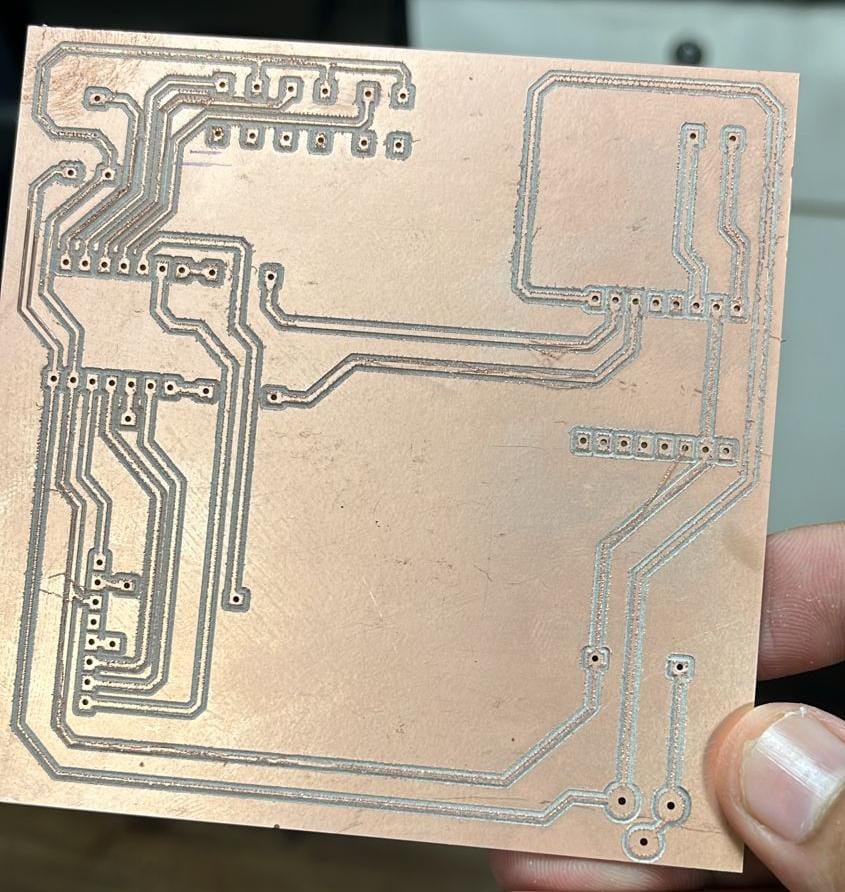
PCB Routing and Milling:
PCB Routing and milling is explained in detail from start to end in Final Project Page.
PCB Routing: I designed the PCB layout to fit all the components, ensuring efficient space utilization and connectivity.
PCB Milling: I created the physical PCB using a milling machine and mounted all components onto the board.
Programming:
Writing Code: I developed the code for the ESP32s3 to handle RFID card reading, playing audio, and user interactions.
Uploading Code: I loaded the code onto the ESP32s3 and tested the functionality to ensure everything worked as expected.
Testing: I conducted thorough testing to debug and fix any issues, ensuring reliable performance of the final product.
What does this code do?
This Arduino code integrates an RFID reader and a DFPlayer Mini MP3 player to create an interactive audio playback system. It uses the MFRC522 RFID module to detect RFID cards and the DFRobotDFPlayerMini library to control the MP3 player. The code initializes the RFID reader and sets up pins for three buttons: start, stop, and pause. When an RFID card is detected, its UID is compared against predefined UIDs stored in an array. If a match is found, the corresponding audio file is played from the MP3 player. The code also reads a potentiometer value to dynamically adjust the volume. Additionally, pressing the start button plays a default audio file, the stop button stops the playback, and the pause button pauses the playback. Debug messages are printed to the serial monitor for monitoring the system's status.
         #include
           #include
           #include

           // RFID RC522 pins
           #define SS_PIN 6
           #define RST_PIN 5

           // Button pins
           #define START_BUTTON_PIN 2
           #define STOP_BUTTON_PIN 3
           #define PAUSE_BUTTON_PIN 4

           MFRC522 mfrc522(SS_PIN, RST_PIN);
           DFRobotDFPlayerMini myDFPlayer;

           // Map RFID card UIDs to sound file numbers
           const byte cardUIDs[10][4] = {
             { 0xE0, 0x14, 0xC6, 0x3B },
             { 0x50, 0x5A, 0x77, 0x59 },
             { 0x43, 0x85, 0x12, 0x50 },
             { 0x93, 0xDB, 0x02, 0xE4 },
             { 0x24, 0xAE, 0xD0, 0x09 },
             { 0xD3, 0xA0, 0x67, 0x1A },
             { 0xD3, 0xA0, 0x67, 0x1A },
             { 0xE3, 0x2B, 0xA2, 0xE4 },
             { 0x43, 0x75, 0xAD, 0xE4 },
             { 0xC3, 0x80, 0x50, 0x1D }
           };

           void setup() {
             Serial.begin(9600);  // Initialize hardware serial for DFPlayer Mini at 9600 baud
             Serial1.begin(9600, SERIAL_8N1, 44, 43);
             SPI.begin();         // Init SPI bus
             mfrc522.PCD_Init();  // Init MFRC522

             pinMode(START_BUTTON_PIN, INPUT_PULLUP);
             pinMode(STOP_BUTTON_PIN, INPUT_PULLUP);
             pinMode(PAUSE_BUTTON_PIN, INPUT_PULLUP);
             pinMode(1,INPUT_PULLUP);
             if (!myDFPlayer.begin(Serial1)) {
               Serial.println(F("Unable to begin:"));
               Serial.println(F("1.Please recheck the connection!"));
               Serial.println(F("2.Please insert the SD card!"));
               while (true)
                 ;
             }
             myDFPlayer.volume(30);  // Set volume value (0~30).

             Serial.println(F("Place your RFID card near the reader..."));
           }

           void loop() {
             int potValue = analogRead(1);

             int vol = map(potValue, 0, 4096, 0, 30);
             vol = constrain(vol,0,30);
             myDFPlayer.volume(vol);
             Serial.println("Volume: "+String(vol));
             Serial.println("Button Start: " + String(digitalRead(START_BUTTON_PIN)));
             Serial.println("Button Stop: " + String(digitalRead(STOP_BUTTON_PIN)));
             Serial.println("Button Pause: " + String(digitalRead(PAUSE_BUTTON_PIN)));
             // Check for button presses
             if (digitalRead(START_BUTTON_PIN) == LOW) {
               myDFPlayer.play(1);  // Play a default audio file (e.g., 0001.mp3)
               Serial.println("Start button pressed, playing default audio.");
               delay(300);  // Debounce delay
             }

             if (digitalRead(STOP_BUTTON_PIN) == LOW) {
               myDFPlayer.stop();
               Serial.println("Stop button pressed, stopping audio.");
               delay(300);  // Debounce delay
             }

             if (digitalRead(PAUSE_BUTTON_PIN) == LOW) {
               myDFPlayer.pause();
               Serial.println("Pause button pressed, pausing audio.");
               delay(300);  // Debounce delay
             }

             // RFID code
             if (mfrc522.PICC_IsNewCardPresent() && mfrc522.PICC_ReadCardSerial()) {
               // Print Card UID in the desired format
               Serial.print("{");
               for (byte i = 0; i < mfrc522.uid.size; i++) {
                 Serial.print("0x");
                 Serial.print(mfrc522.uid.uidByte[i], HEX);
                 if (i < mfrc522.uid.size - 1) {
                   Serial.print(", ");
                 }
               }
               Serial.println("}");

               // Compare the read UID with the predefined UIDs
               for (int i = 0; i < 10; i++) {
                 if (memcmp(mfrc522.uid.uidByte, cardUIDs[i], 4) == 0) {
                   Serial.print("Playing sound for card ");
                   Serial.println(i + 1);
                   myDFPlayer.play(i + 1);  // Play the corresponding MP3 file (files should be named 0001.mp3, 0002.mp3, etc.)
                   break;
                 }
               }

               delay(1000);
             }
             delay(100);
           }
Enclosure:
Laser Cut
All the details right from design to laser cutting the parts is explained on Final Project Page.
Embossed shape of animals will be laser cut and a cover which will be above and below RFID cards that will have puzzle like structure will also be laser cut.

All the details right from start to end is explained on Final Project Page.
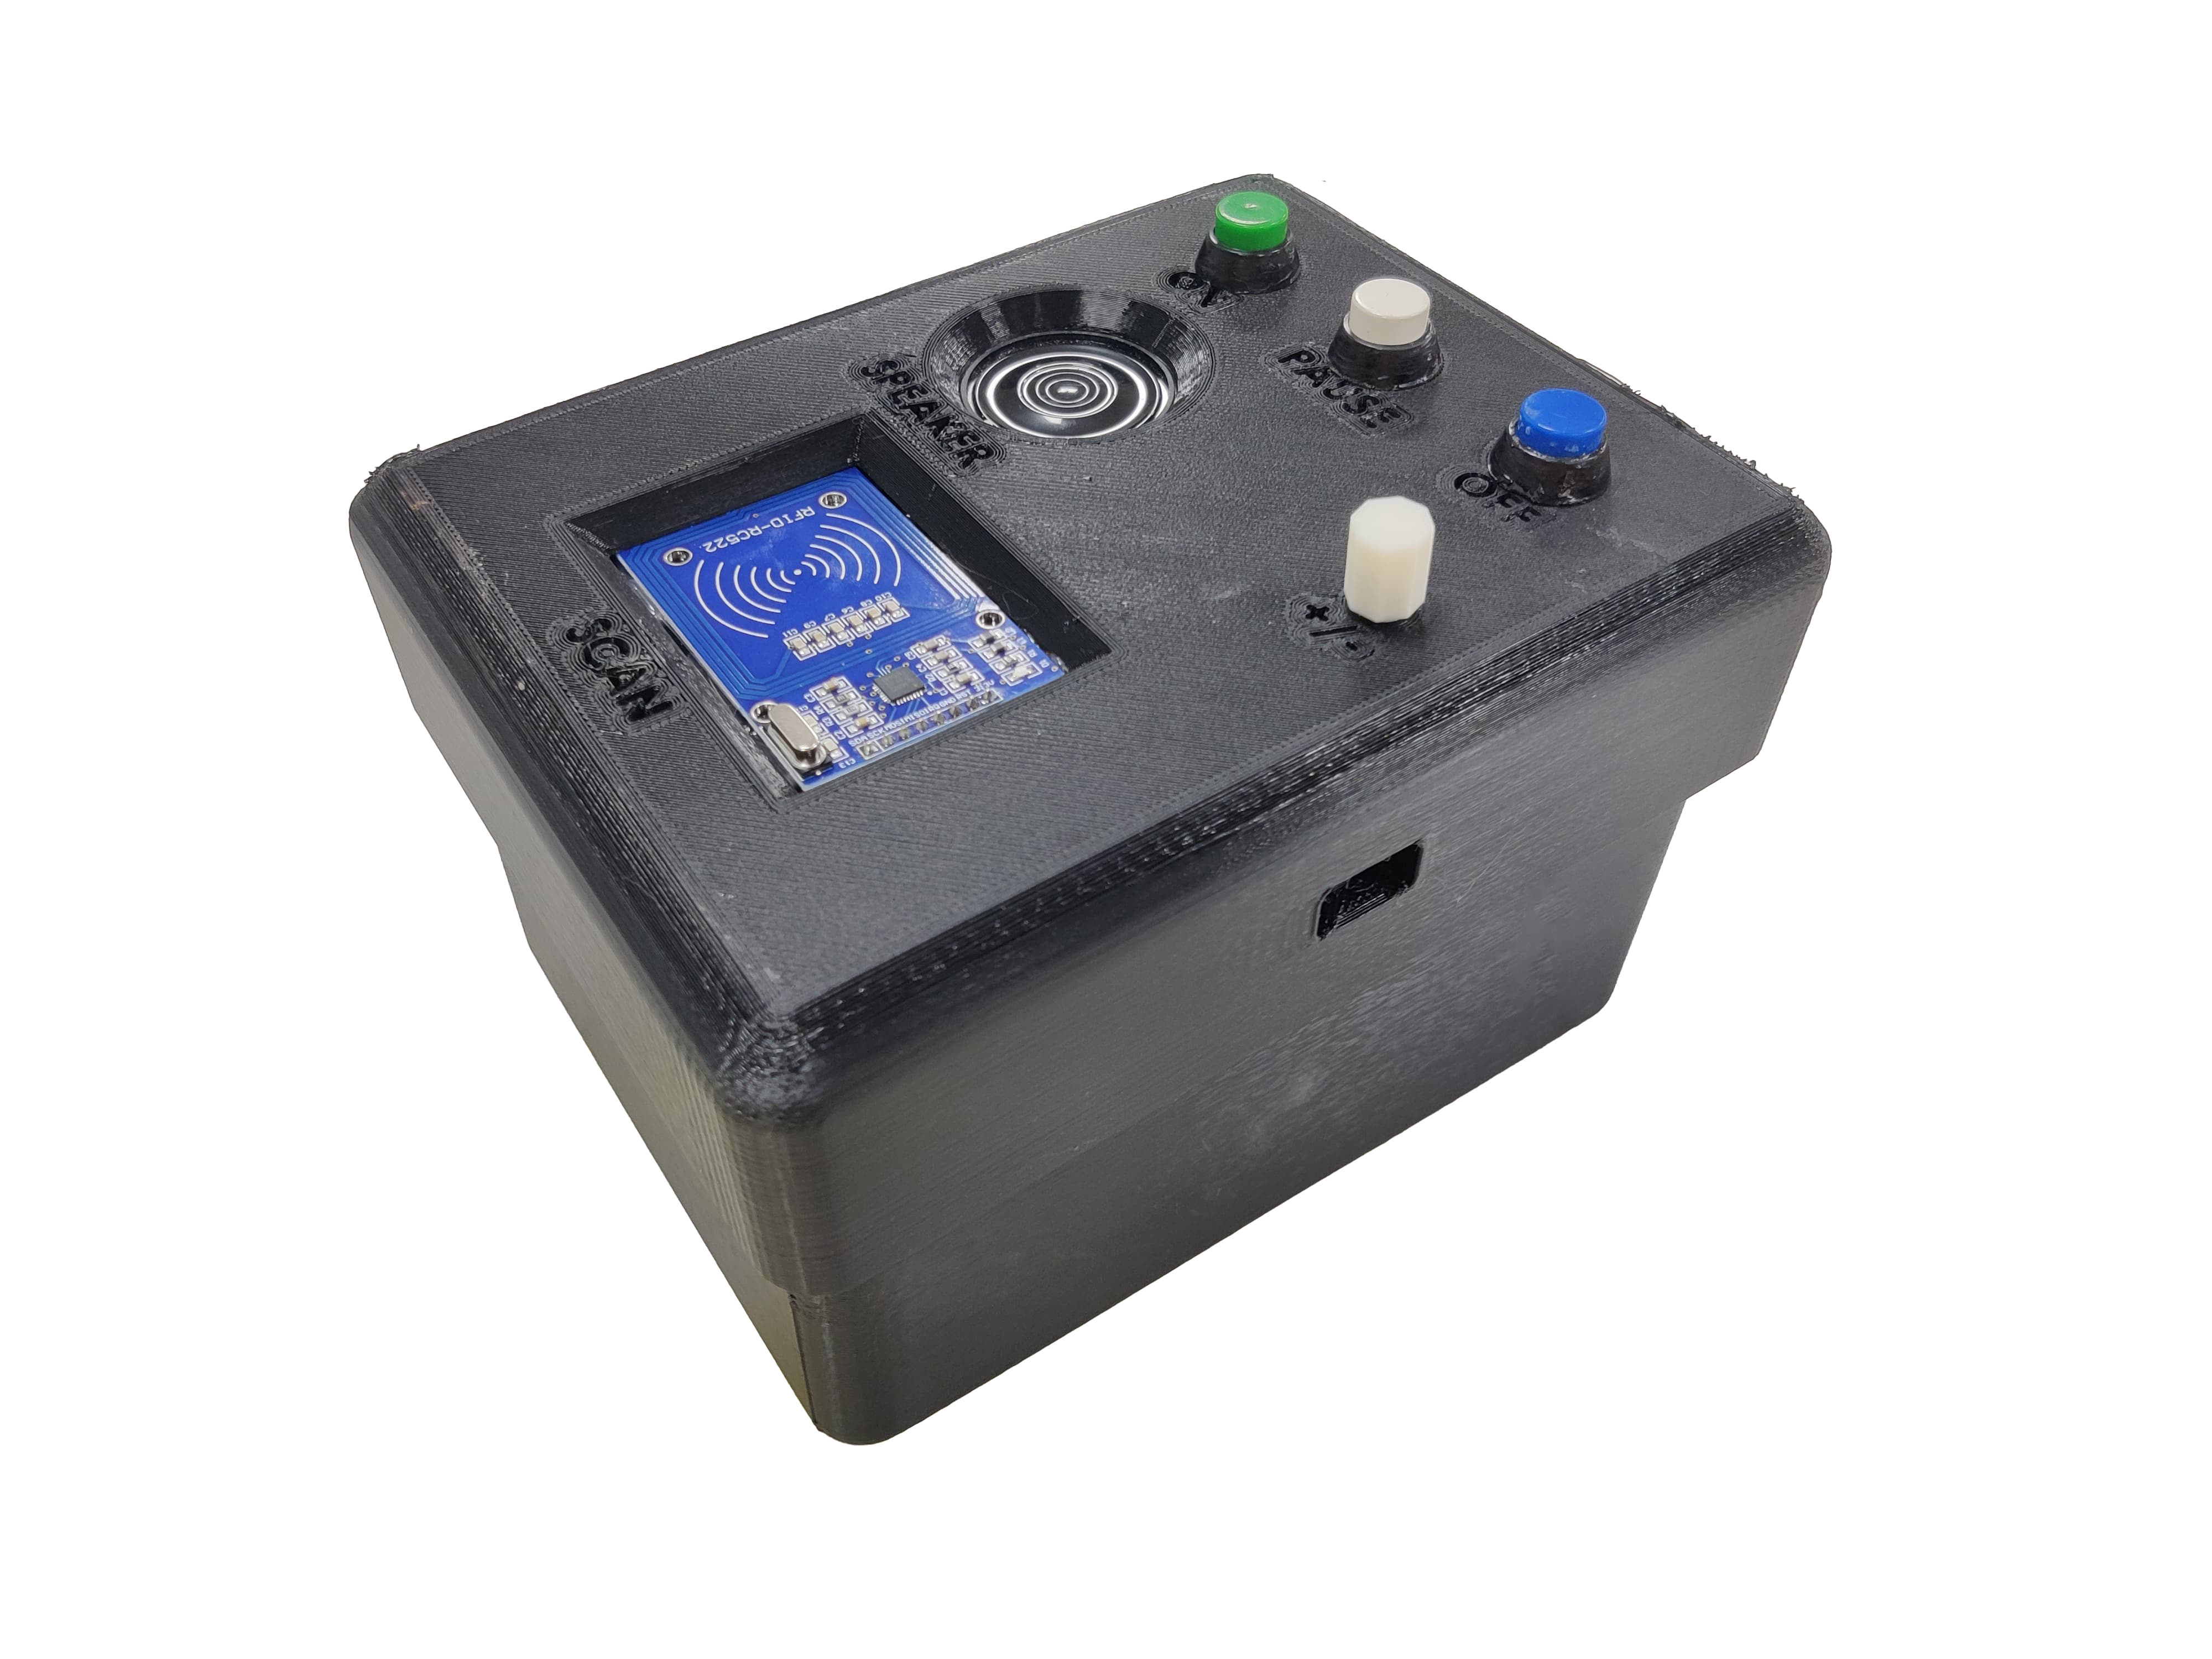
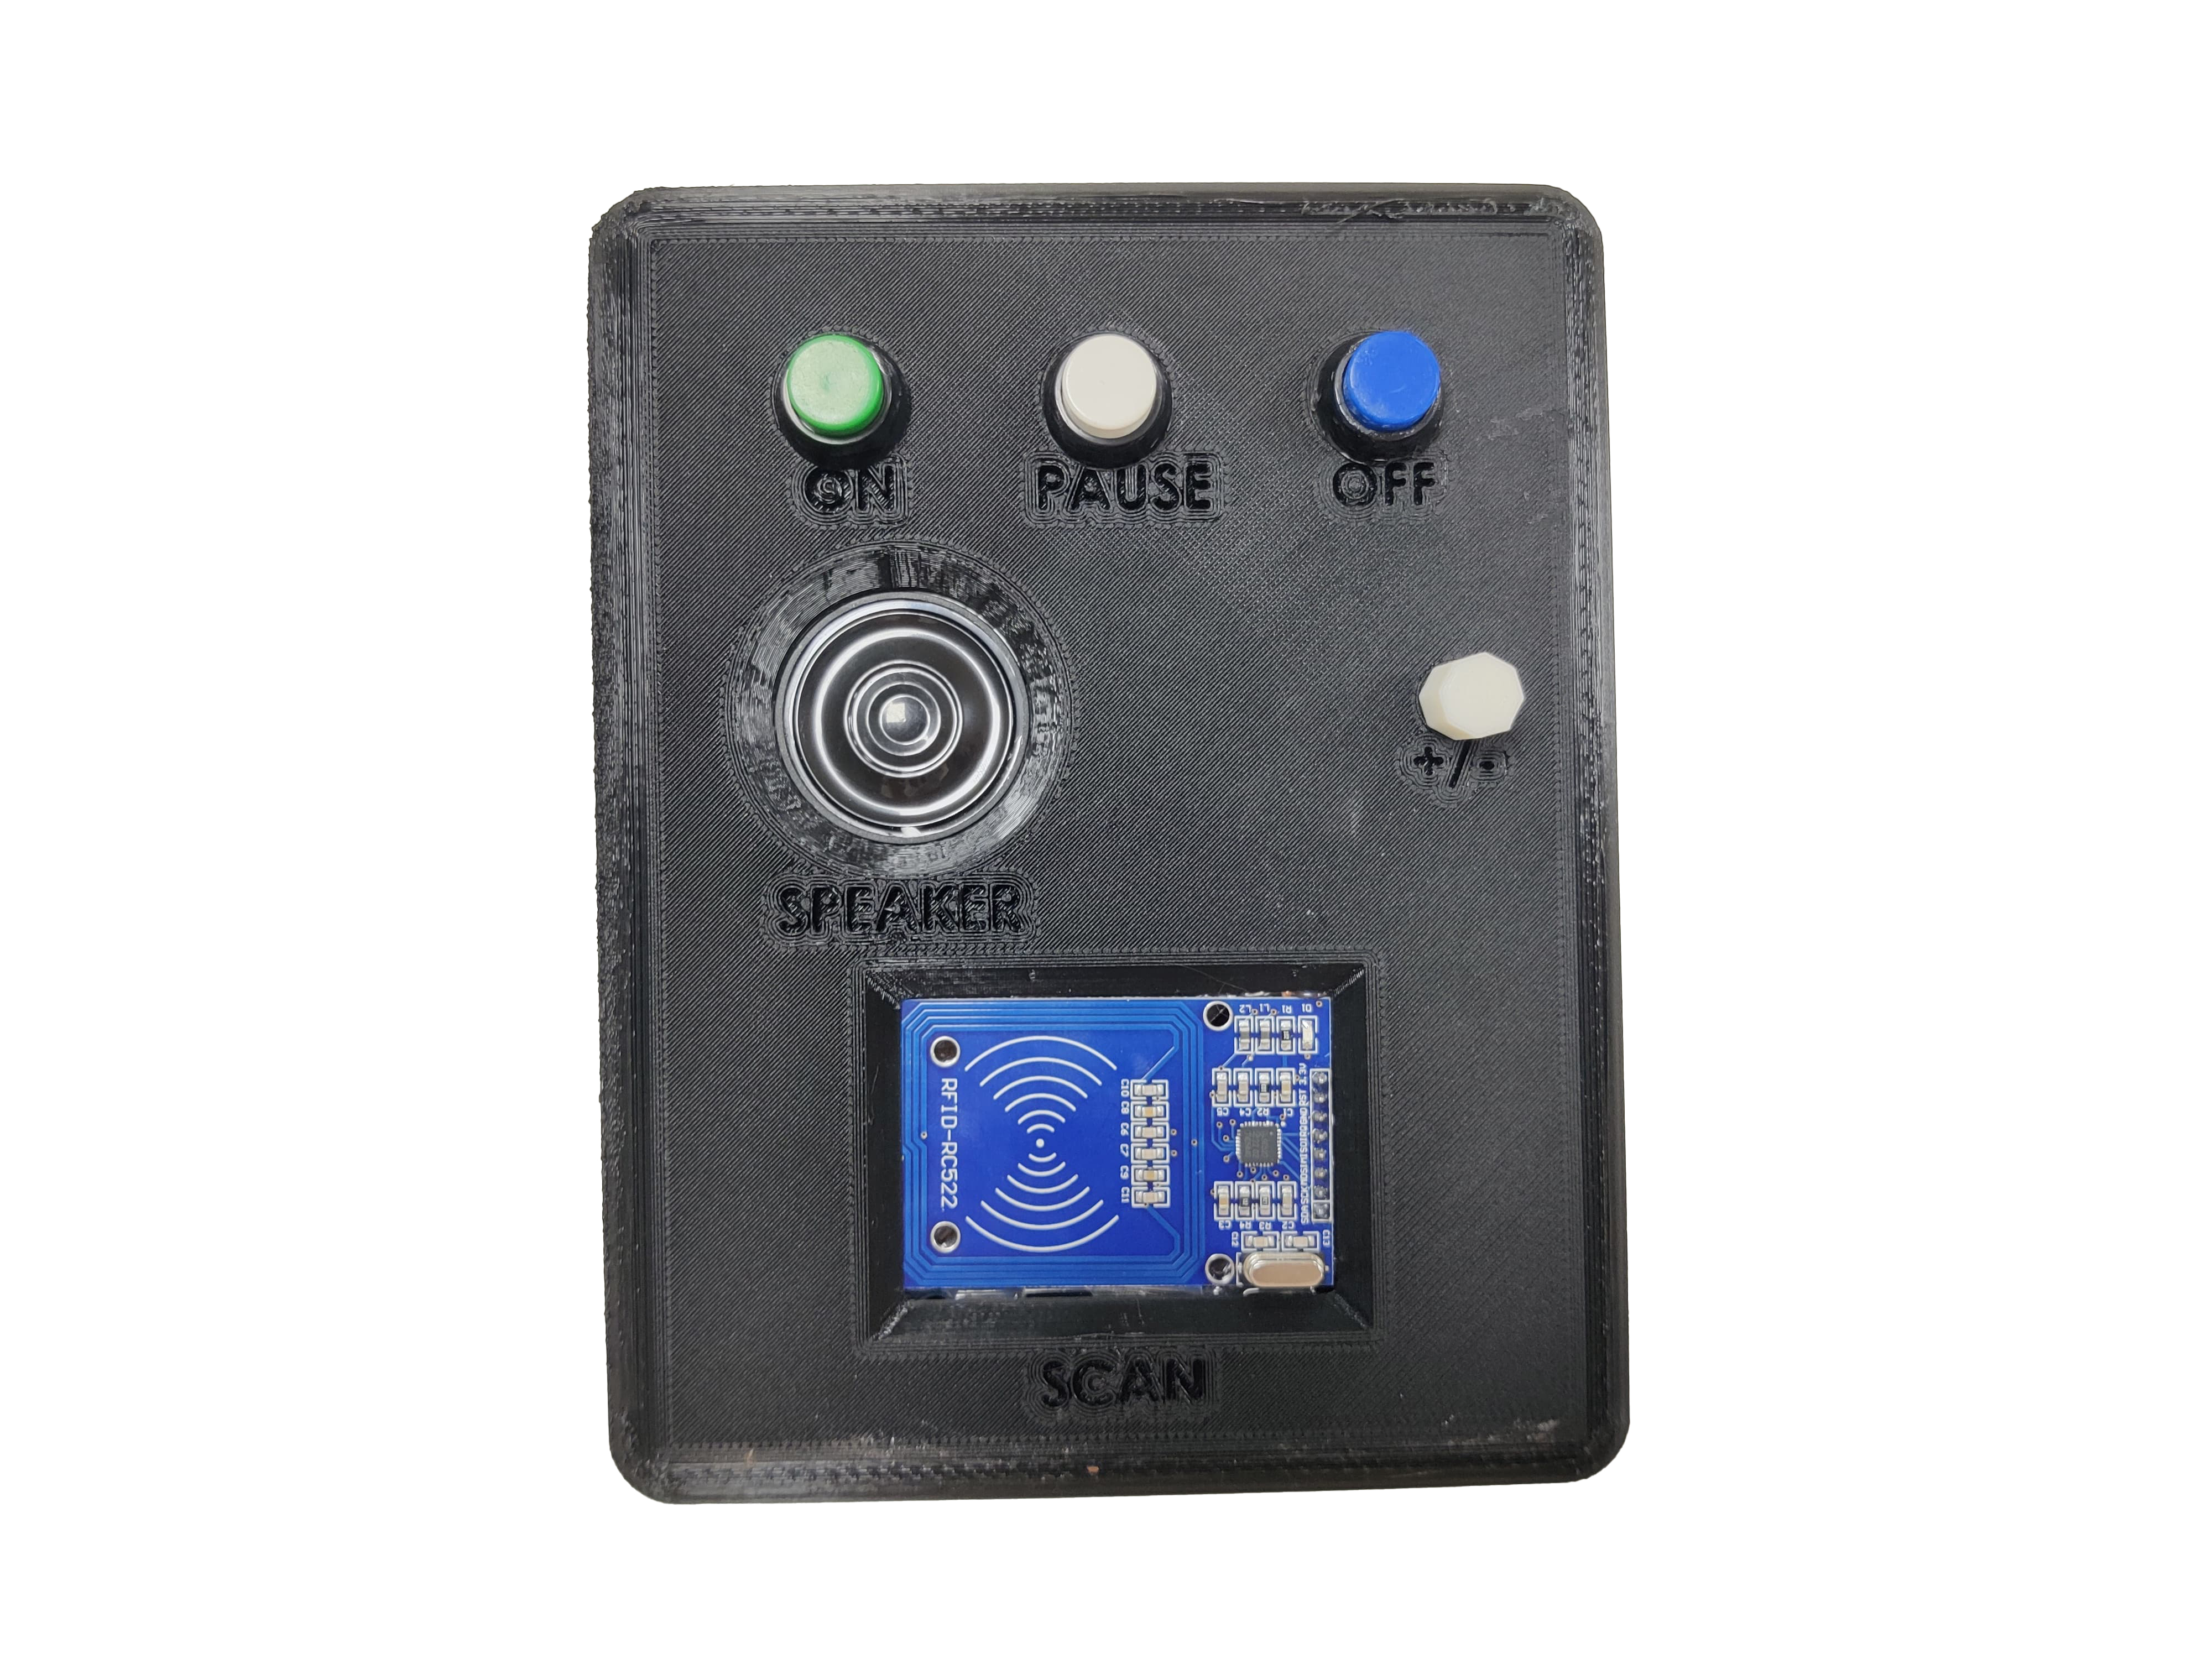
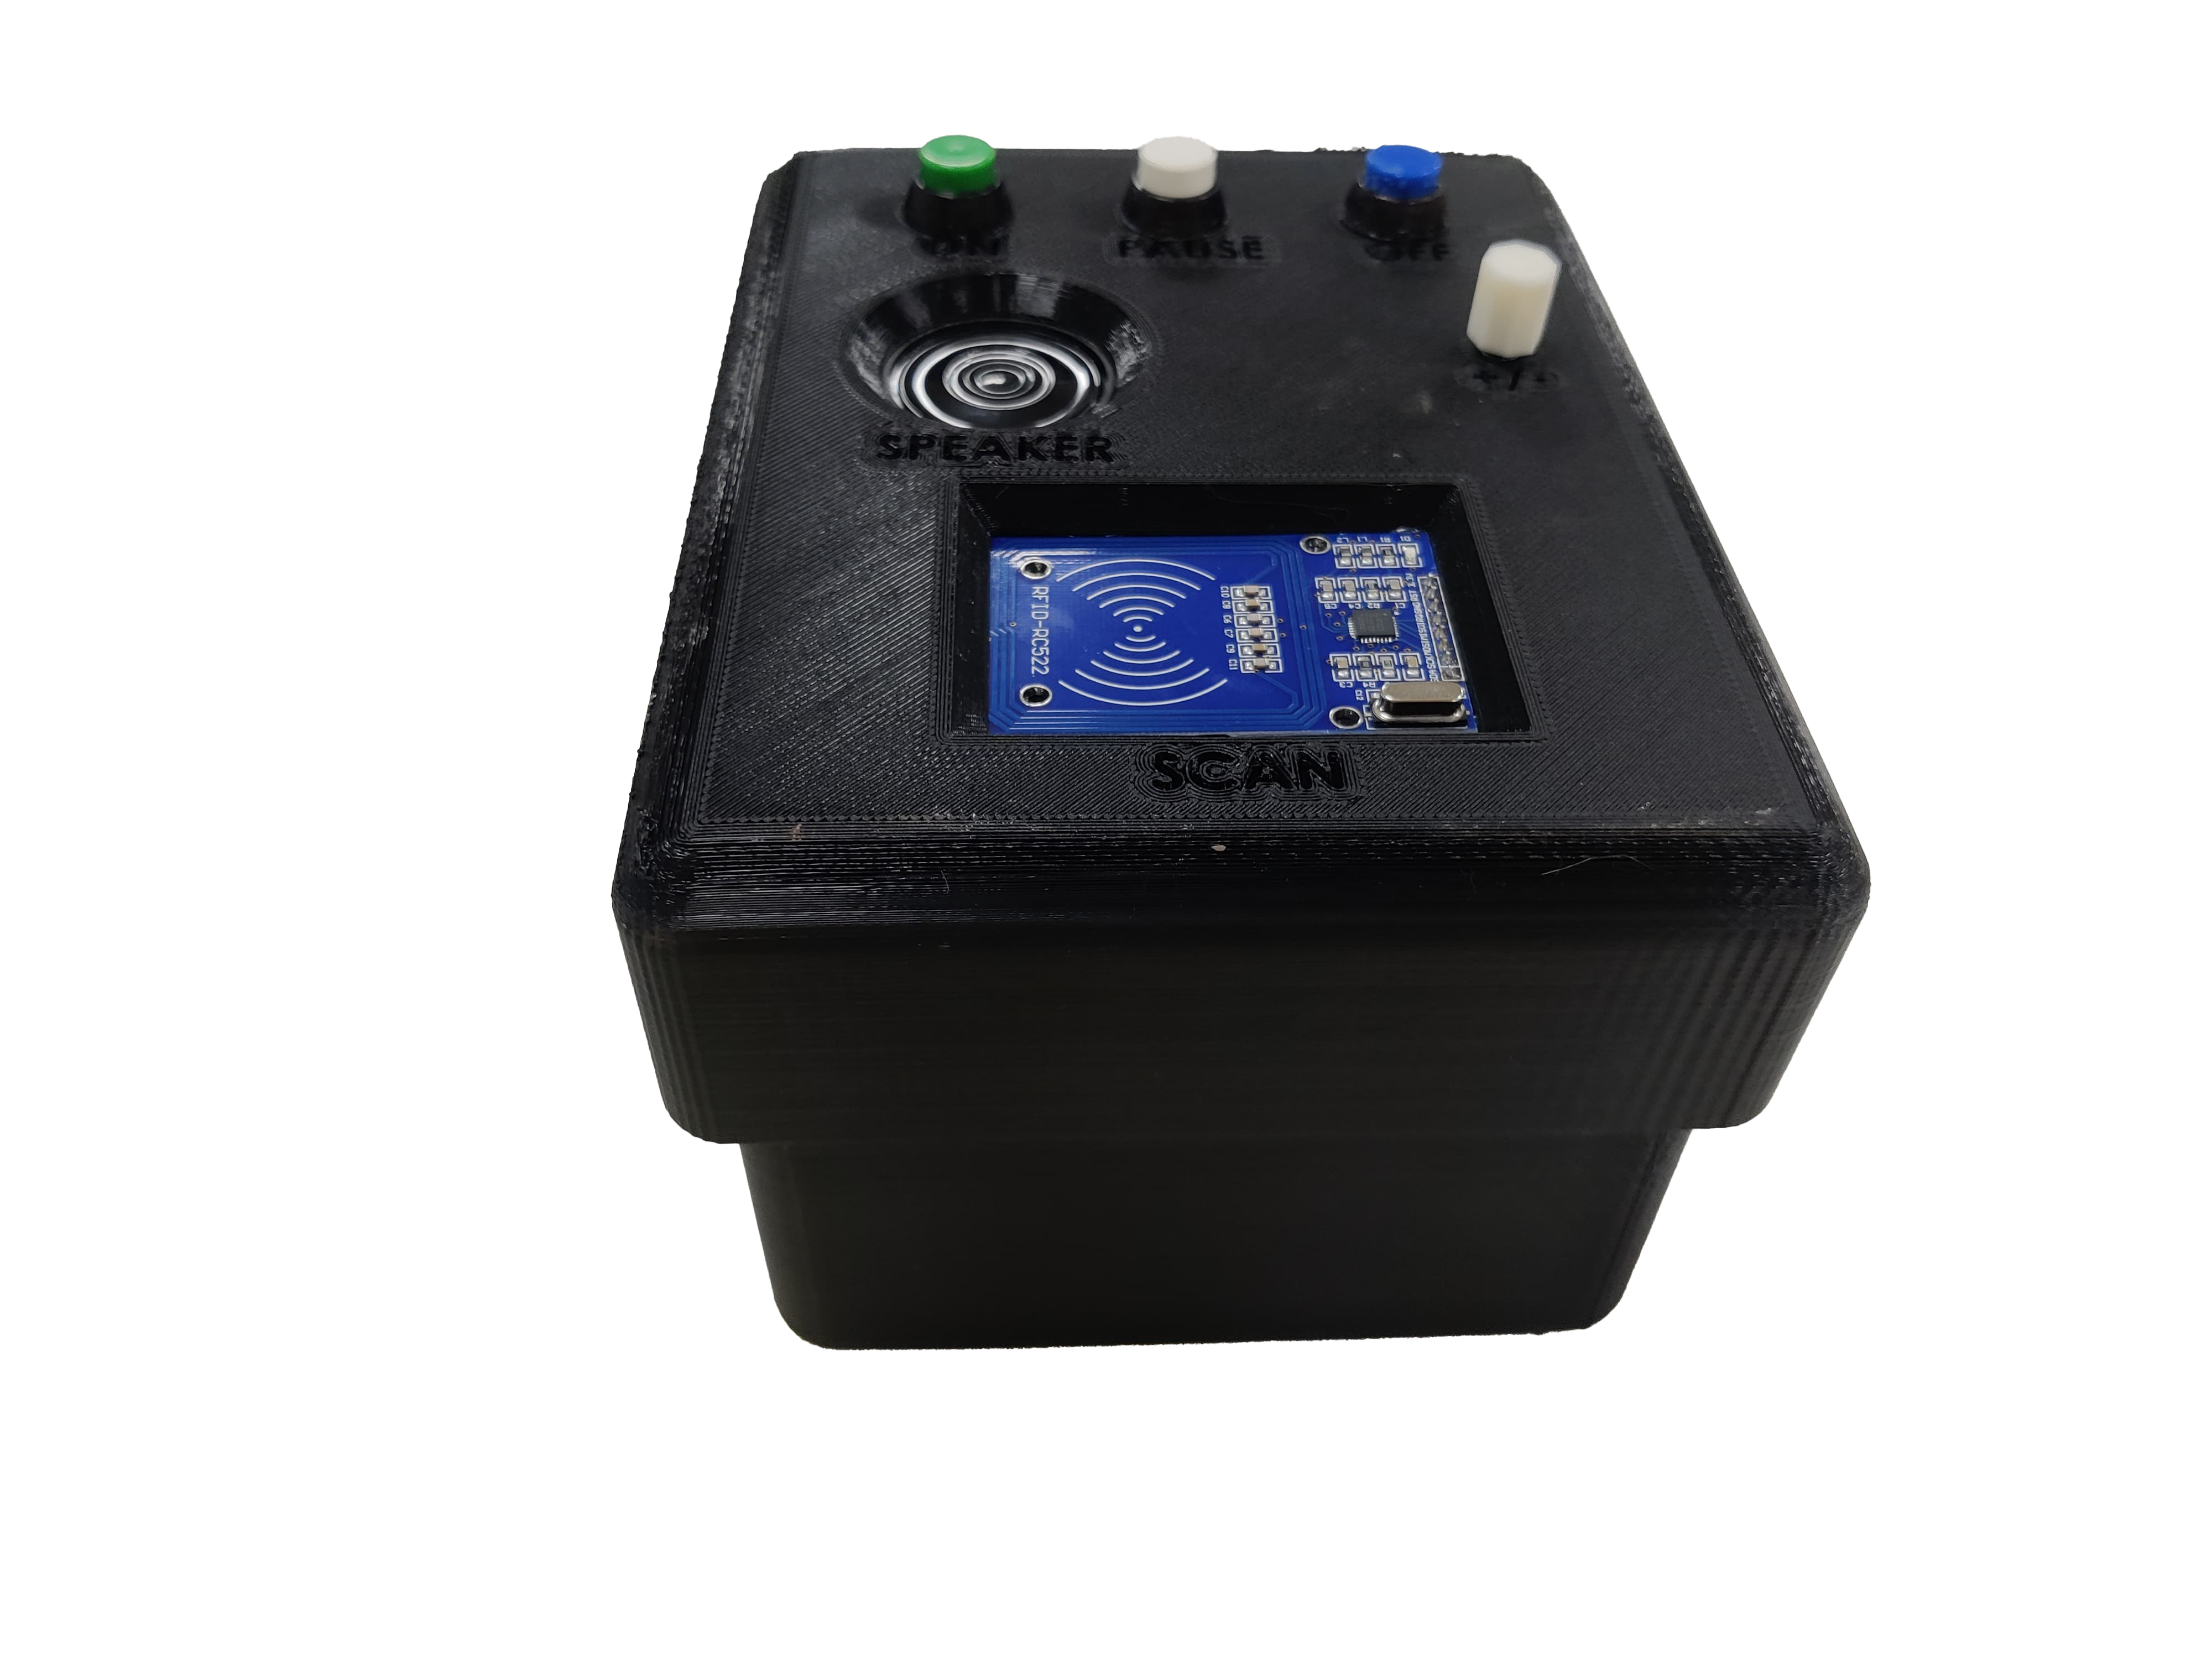
3D Print Entire Casing: I designed and 3D printed the casing to house all the components securely, providing durability and ease of use.
Packaging and Installation: I assembled all parts into the final product casing and packaged it for use.
Problems Faced and Solutions
Power Supply Issues:
Problem: Ensuring a stable power supply to all components, especially since the XIAO operates at 3.3V and some components required 5V.
Solution: I used a voltage regulator to ensure all components received the appropriate voltage. I double-checked connections and power distribution to prevent any voltage drop issues.
RFID Reader Malfunction:
Problem: Initially, the RFID reader was not consistently detecting the RFID cards.
Solution: I adjusted the positioning and orientation of the RFID reader and cards. I also checked the connections and ensured there were no loose wires. I updated the code to handle read errors more gracefully.
Audio Playback Glitches:
Problem: The DFmini Player occasionally skipped or glitched during audio playback.
Solution: I reformatted the audio files and ensured they were in a compatible format. I added delays and checks in the code to manage audio playback more smoothly.
Component Fitting in Enclosure:
Problem: Some components did not fit well in the initially designed 3D printed enclosure.
Solution: I redesigned the 3D model to better accommodate all components, ensuring they were securely fixed and accessible for any necessary adjustments.
Code Optimization:
Problem: The initial code was slow and had delays, affecting the user experience.
Solution: I optimized the code by reducing unnecessary loops and improving the logic flow. I used interrupts for button presses to ensure immediate response.
By carefully integrating each component and addressing these challenges, I was able to create a functional and engaging educational game that meets the needs of both visually impaired and sighted children.