1. Computer Aided Design (CAD)
Computer Aided Design (CAD), we recently delved into various design aspects, 2D rasters v/s vector designs,, 3D modeling, rendering, animation, and simulation. Let's break down these terms for clarity, and also compile a list of software tools commonly used for working on these designs.
The following tools were explored and exercises done.
1. Gimp (2d Rastar Design)
a. Abstract Geometric Shape
2. Fusion360 (3d modeling)
a.Lampshade
b.Bowl along with using voronator software
3. Sketchup (3d modeling)
a.Table
4.Freecad (3d modeling)
a.Phone Holder
5. Illustrator (2d modeling)
a.Name Plate
6. Inkscape (2d modeling)
a.Cartoon Character
What are raster files?
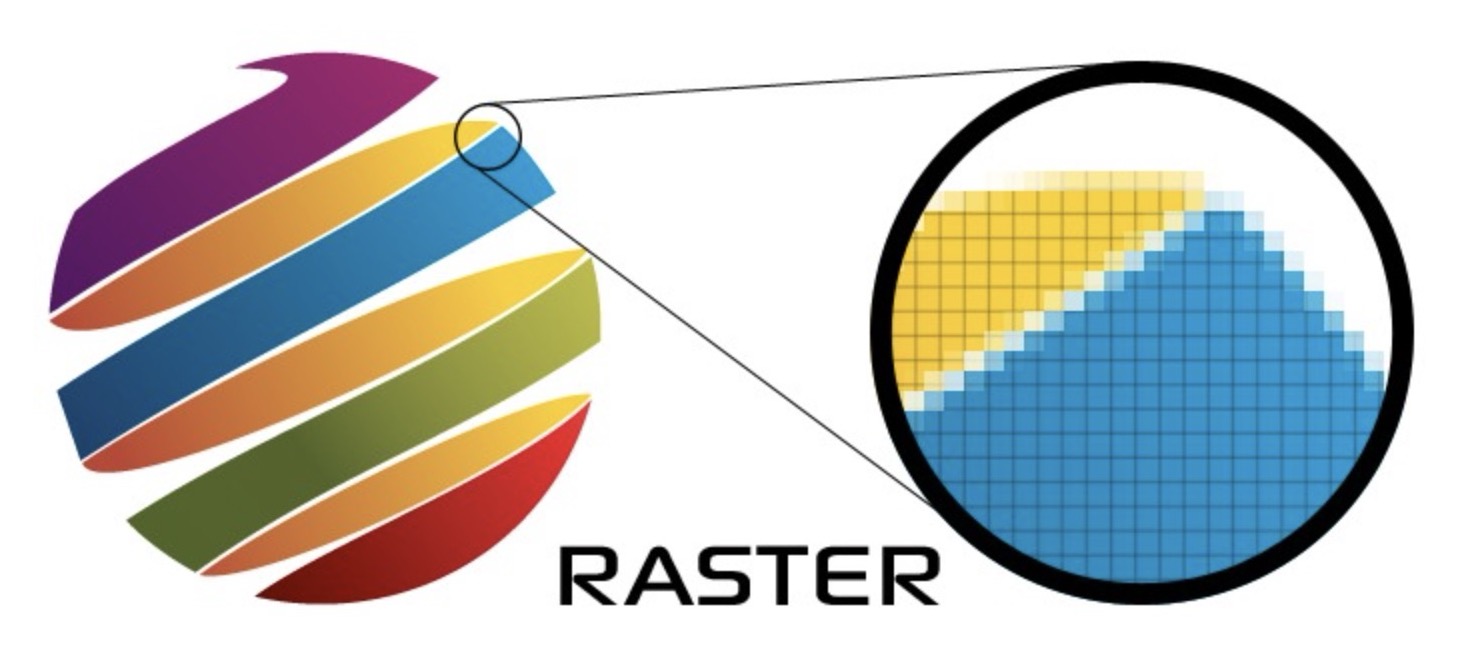
Raster files are digital image files composed of a grid of pixels, where each pixel contains information about color and brightness. These files are commonly used for photographs and images with complex color gradients. Raster images are resolution-dependent, meaning their quality is determined by the number of pixels per inch (PPI) or dots per inch (DPI). When raster images are resized or scaled up, the individual pixels become more visible, resulting in a loss of image quality known as pixelation. Examples of common raster file formats include JPEG, PNG, GIF, and TIFF.
What are Vector files?
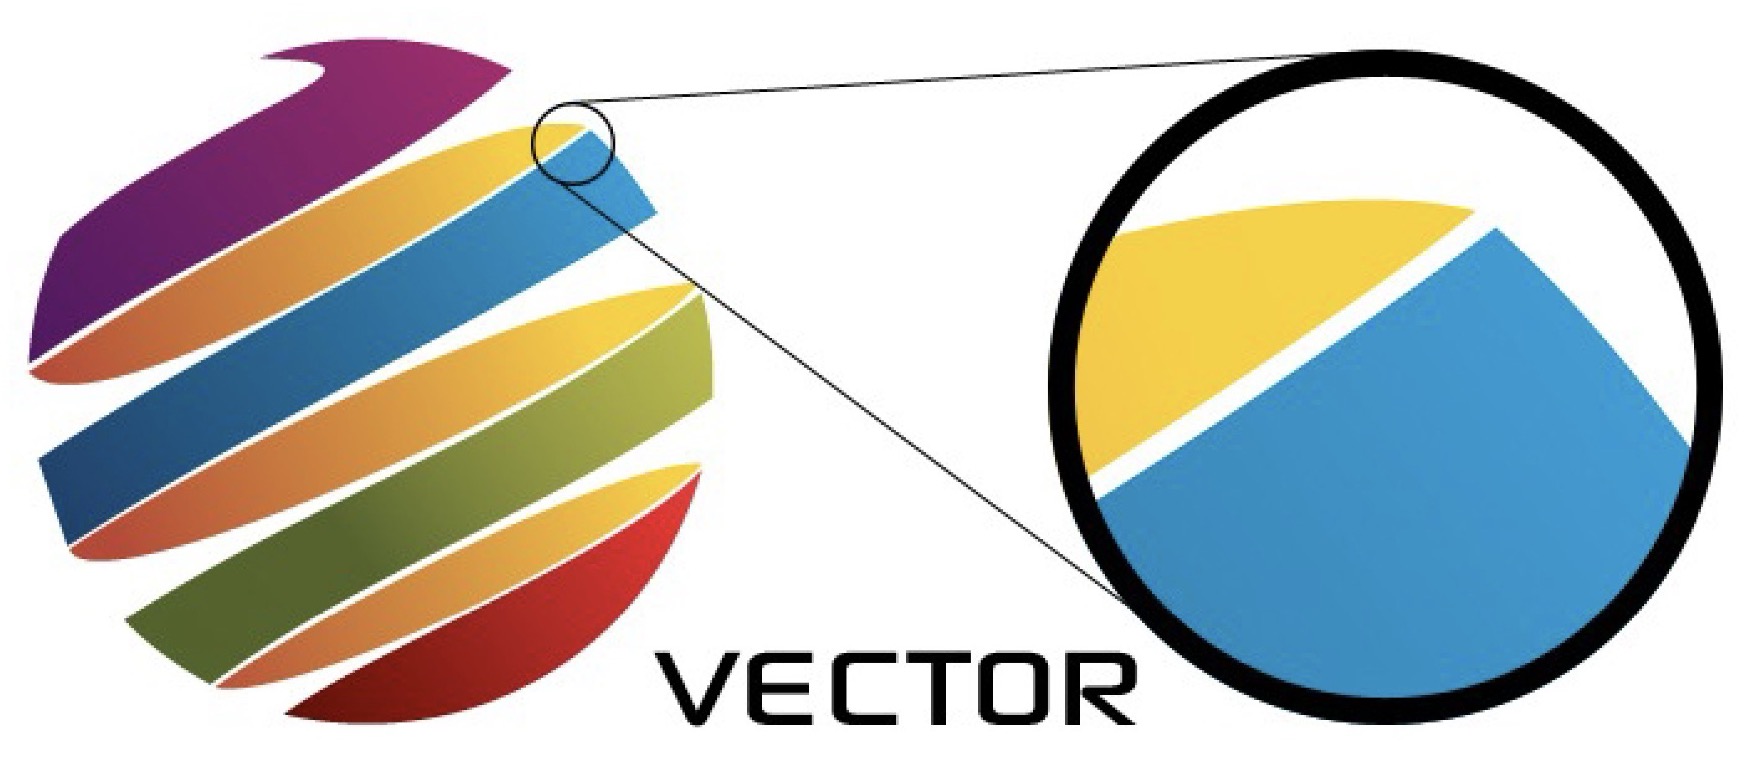
Vector files are digital graphics that are created using mathematical formulas to define shapes and lines. These files store graphic elements as mathematical equations, which allows them to be scaled to any size without losing quality. Common vector file formats include SVG, EPS, PDF, and AI.
when to use vector and raster files?
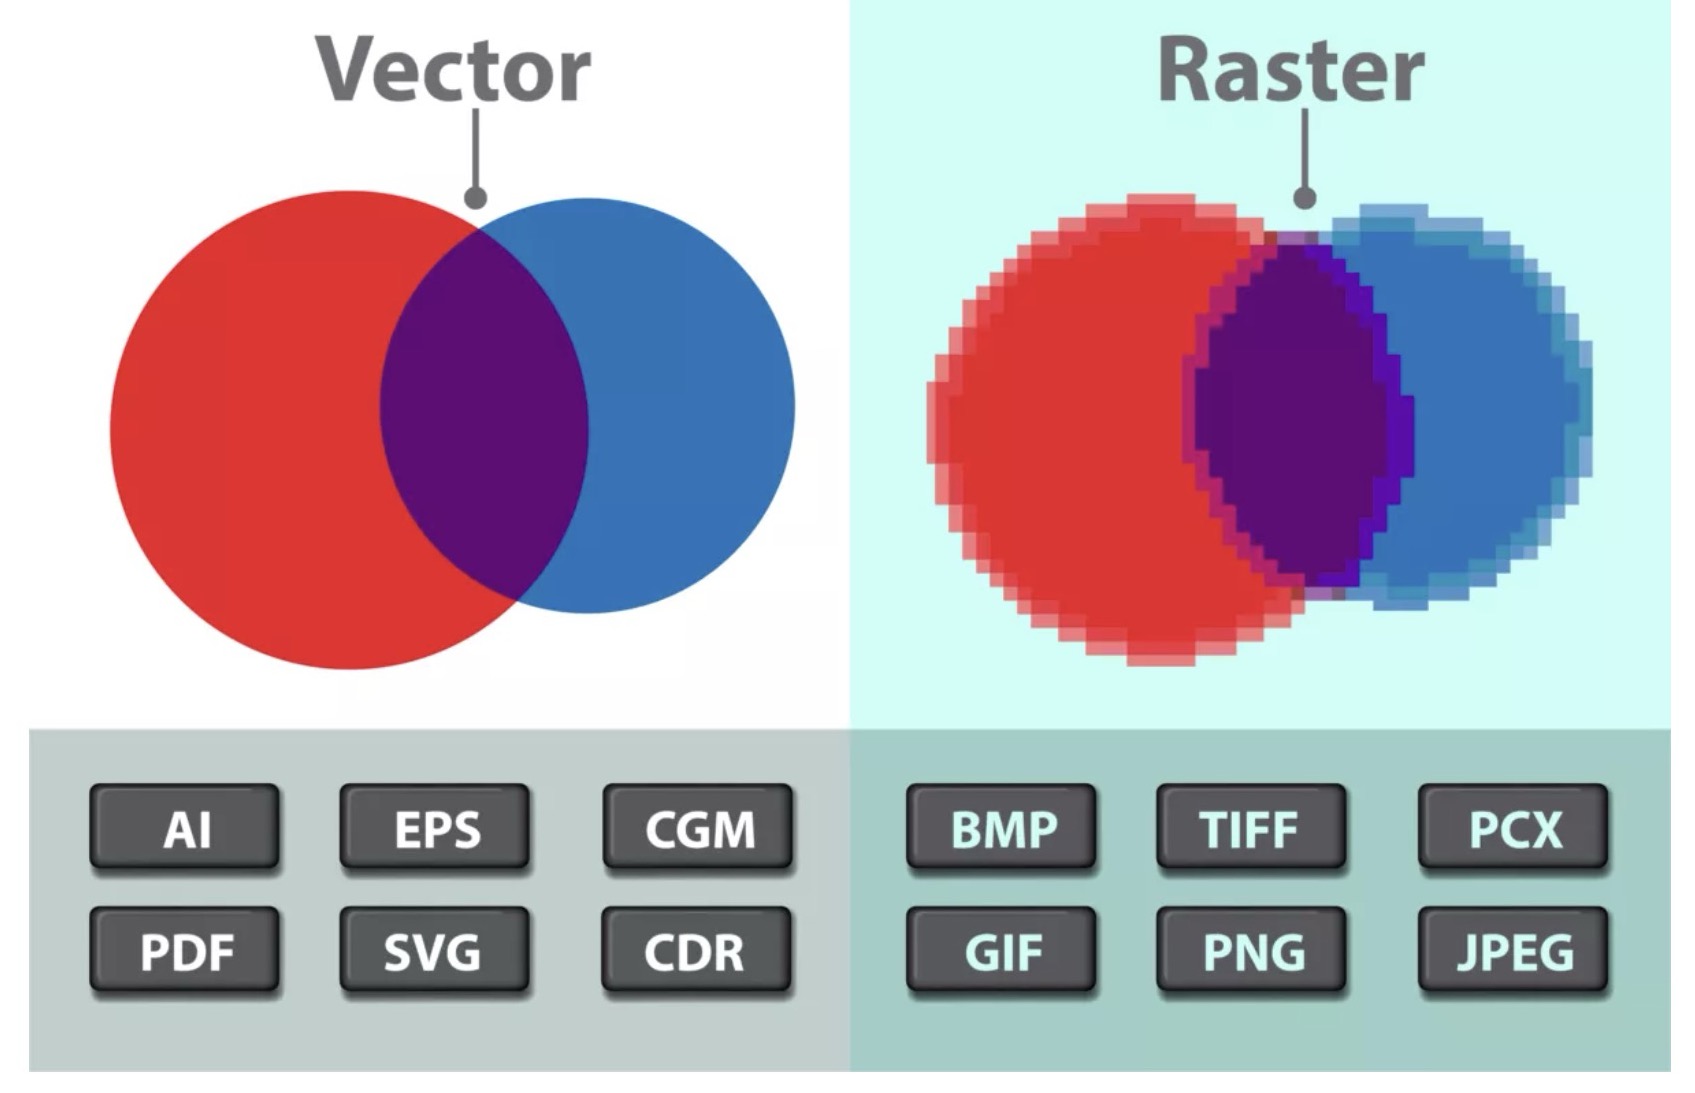
Vector files are best suited for graphics that require scalability and crisp, clean lines, such as logos, illustrations, and typography. They are ideal for printing projects, as they can be resized without loss of quality.
Raster files, on the other hand, are made up of individual pixels arranged in a grid. Common raster file formats include JPEG, PNG, GIF, and BMP. Raster files are better suited for images with complex color gradients, textures, and photographic elements. They are often used for web graphics, digital photographs, and artwork that does not require scalability.
Use vector files when you need scalability and sharp lines, and use raster files when you need detailed images with complex color gradients and textures.
Purposes and Advantages of Raster Files
Varieties of 2D raster designs can produce the following types of files:
1. Photographs captured digitally
2. Scanned images
3. Digital paintings and drawings
4.Graphics intended for web use
5. Printable flex hoardings and banners utilizing raster graphics
6. Screen graphics tailored for mobile devices and laptops
7. Low-resolution video game graphics
8. Printable posters and merchandise incorporating raster elements
Softwares
Gimp
To delve into raster files, I've extensively utilized Photoshop for years. However, this time, I decided to broaden my horizons and explore new avenues. Following a YouTube tutorial, I experimented with creating abstract geometric shapes using GIMP software, aiming to further my understanding of raster designs.
Fusion360
I've recently started using Fusion360, and I've found it to be quite beneficial. Below are some of the explorations I've undertaken, which I plan to 3D print in the future. Interestingly, I've discovered that creating 2D designs in Fusion also suits my needs effectively.
Sketchup
I recently delved into Sketchup, a software I encountered for the first time this week. In my experience, I've found it to be less user-friendly compared to Fusion 360, with notable restrictions on features. While Sketchup excels in designing interior spaces, I've found it less suitable for creating products from scratch.
Freecad
I'm eager to delve deeper into this area, although I initially found it challenging to grasp and adapt to the interface. While it proved to be a bit tricky to use, I'm keen on exploring it further in the future.
Illustrator
Illustrator has become my preferred software for all laser cutting tasks. This week, I've delved further into exploring its features, particularly focusing on creating patterns within designs.
Inkscape
I recently ventured into using Inkscape, a software that I explored for the first time this week. It proved to be challenging for me to navigate and not as user-friendly as I'm accustomed to with Illustrator. Despite this, I discovered that Inkscape can also be utilized for creating laser cutting products.
1. Gimp (2d Rastar Design)
a. Abstract Geometric Shape
Step 1: Installing GIMP
GIMP is readily available as open-source software and can be installed quickly within minutes. The installation process is quite straightforward and intuitive, making it accessible to users.
Link for downloading gimp software is Here
Step 2: Grasping the Interface
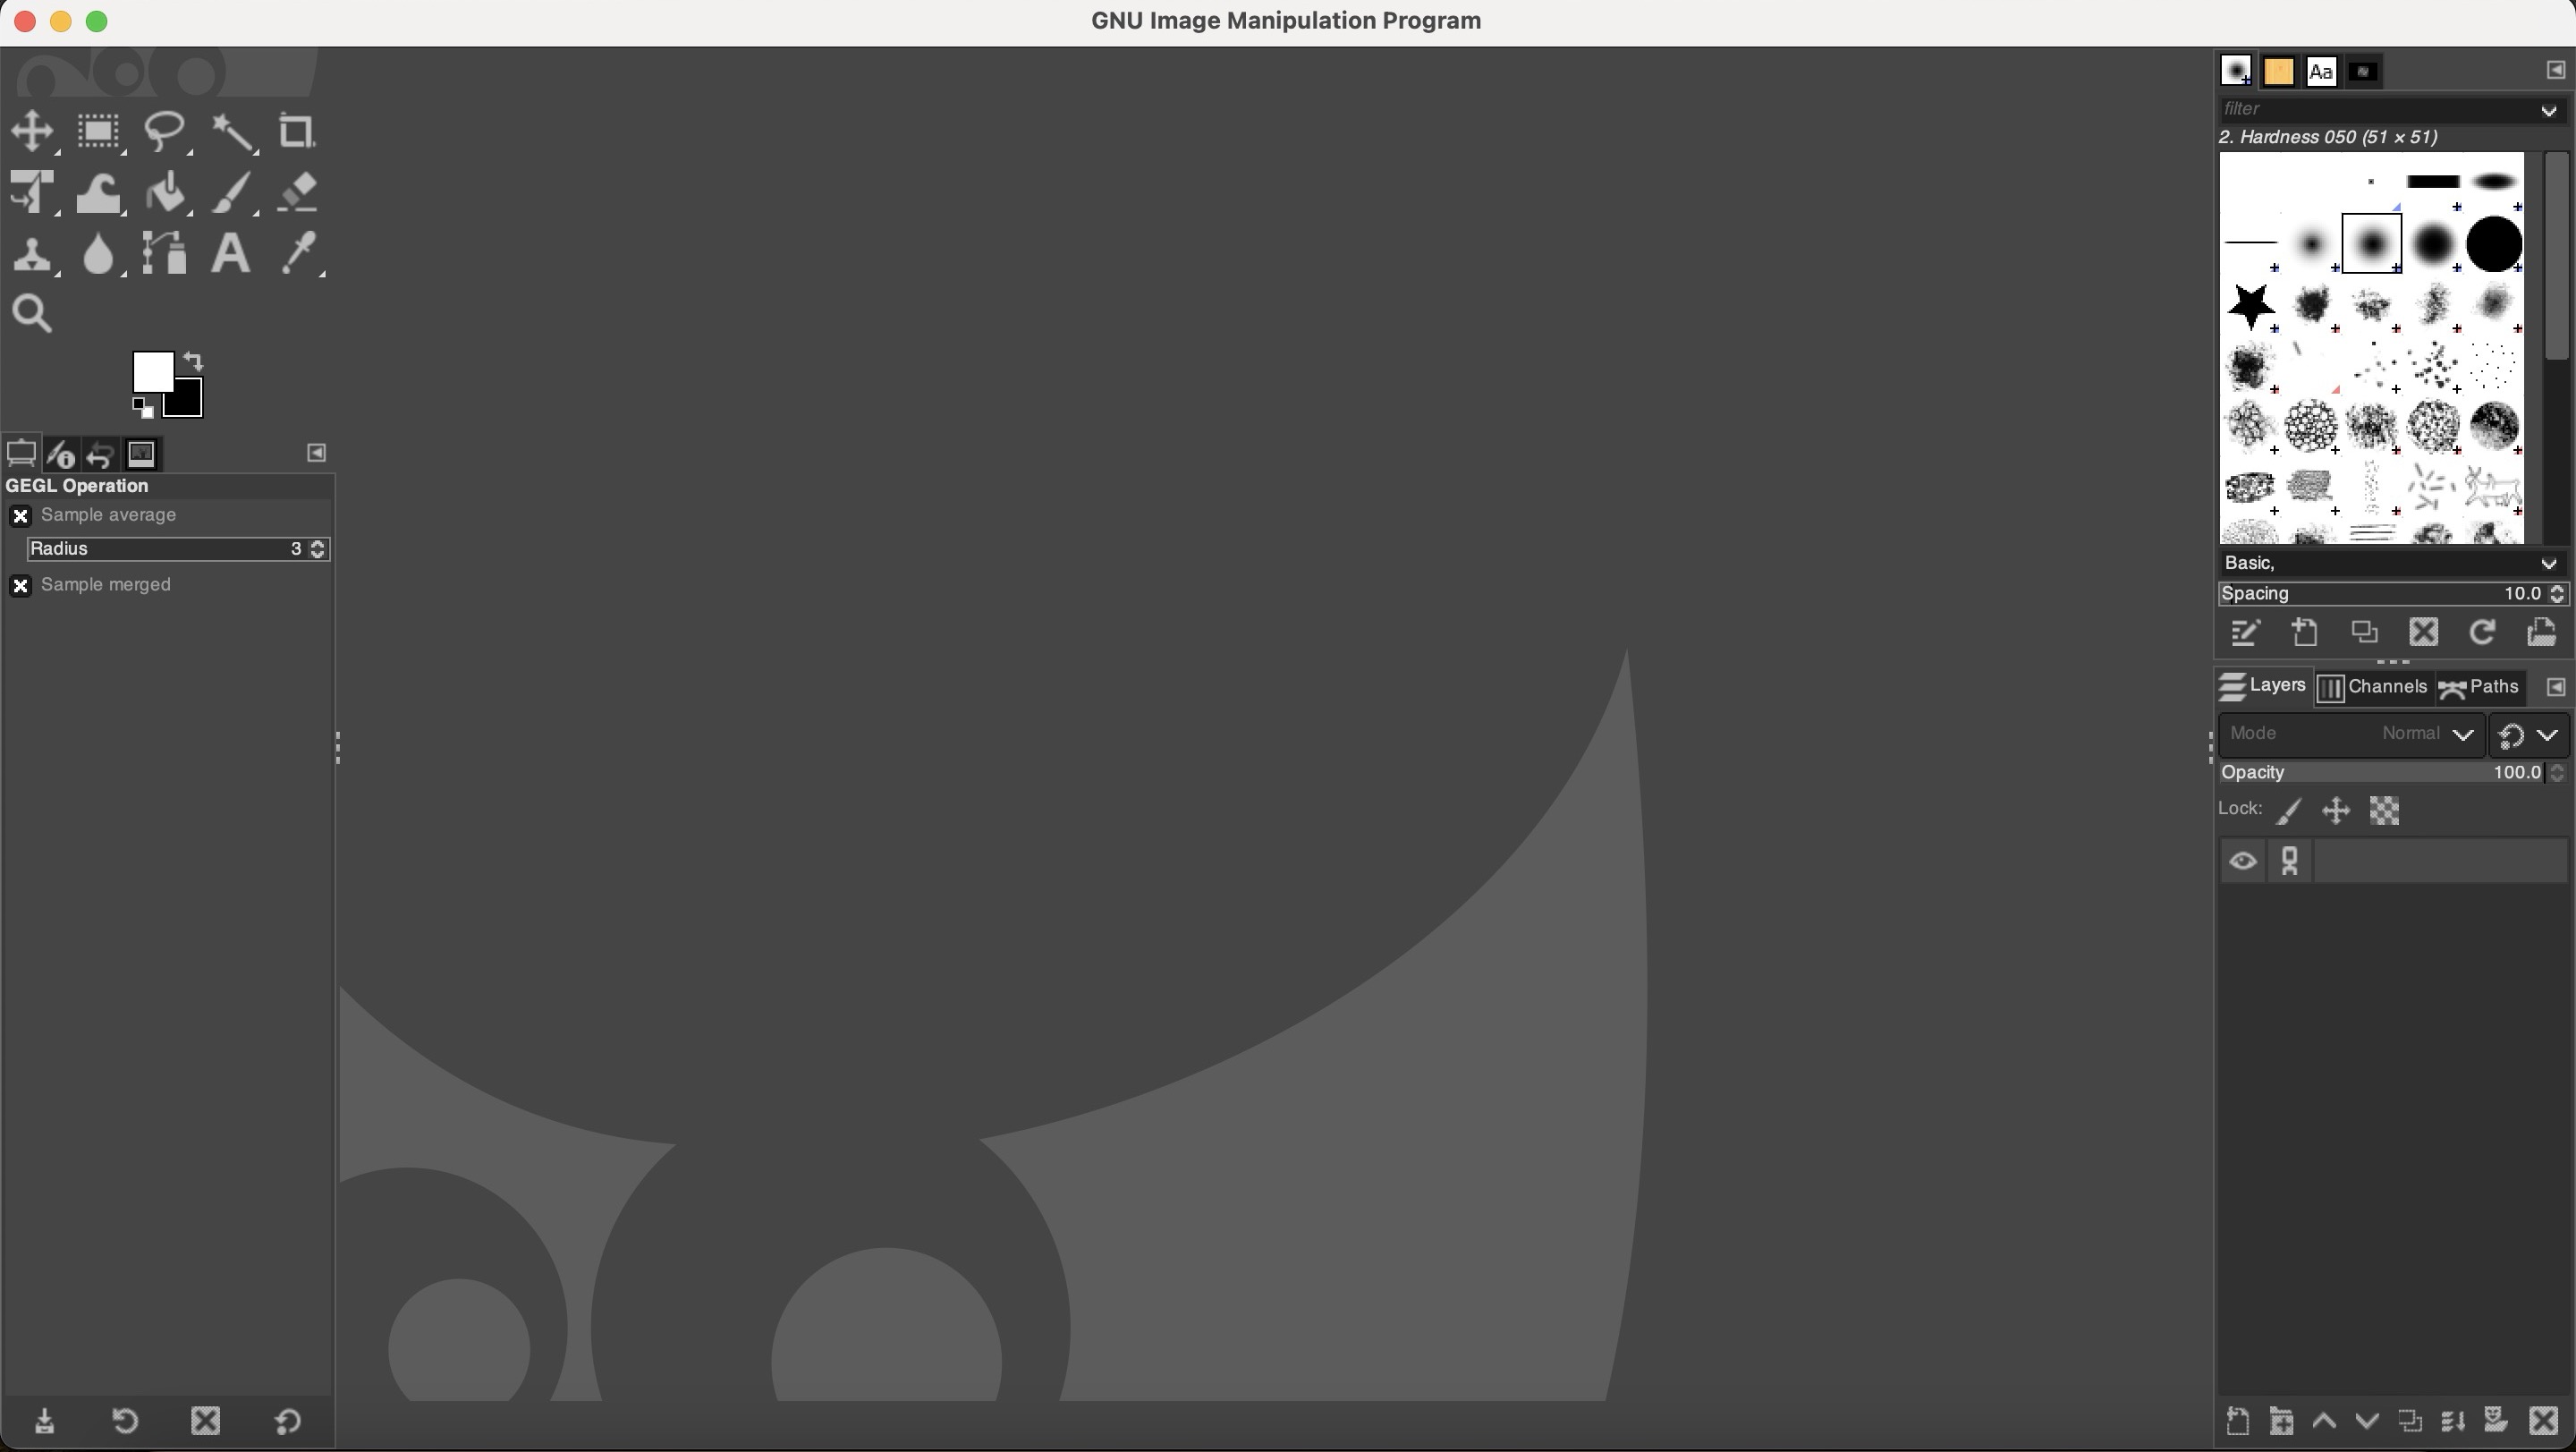
As depicted in the illustration below, the interface of GIMP is surprisingly straightforward. The tools panel is conveniently situated on the top left side, with the properties of the selected tool displayed just below it. Additionally, the brush stroke style can be selected from the panel located in the top right corner. Furthermore, there is a layer panel positioned in the bottom right corner. All other fundamental features are comparable to those found in similar software. To begin a new artboard, simply navigate to the File menu located at the top.
To learn in detail about the software Go here
Step 3: How to draw and Designing in GIMP
I decided to experiment with creating a freestyle logo in GIMP. Using a touch screen laptop or a Wacom tablet enhances convenience, as freehand drawing with a touchpad or mouse can be challenging. GIMP offers a variety of built-in, enjoyable brush stroke styles to explore, as depicted in the figure.
Step 4: Made a basic shape
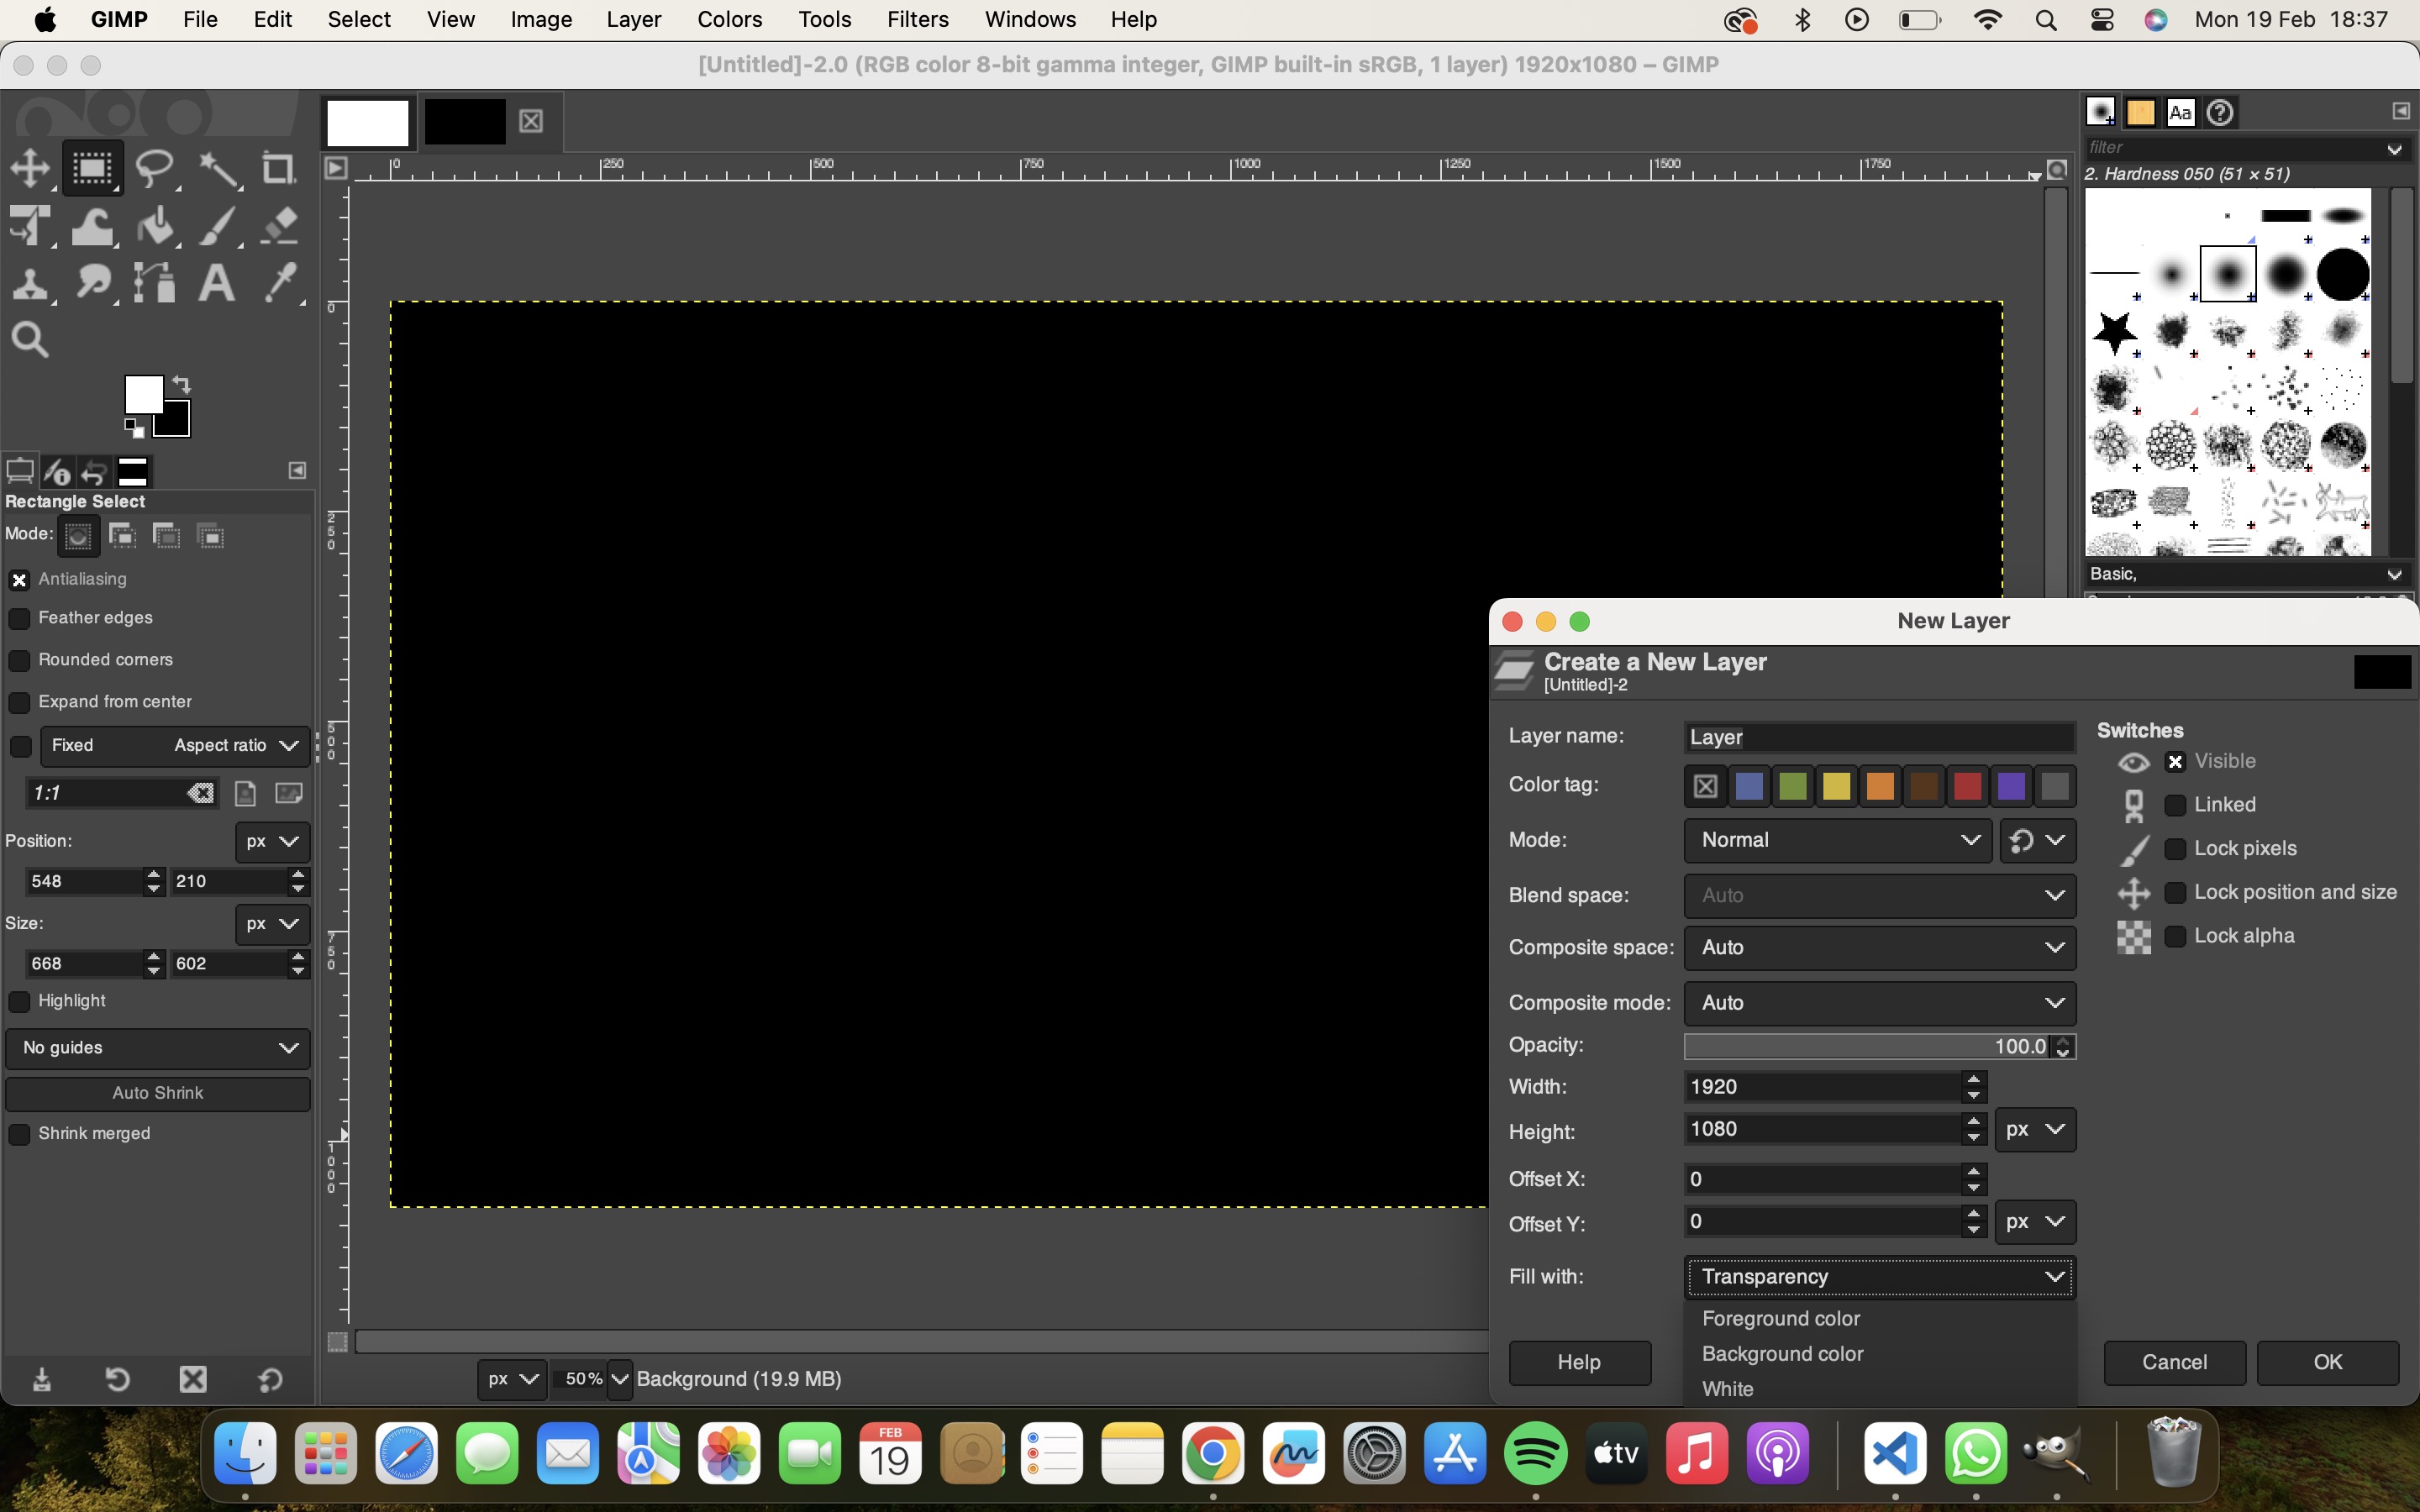
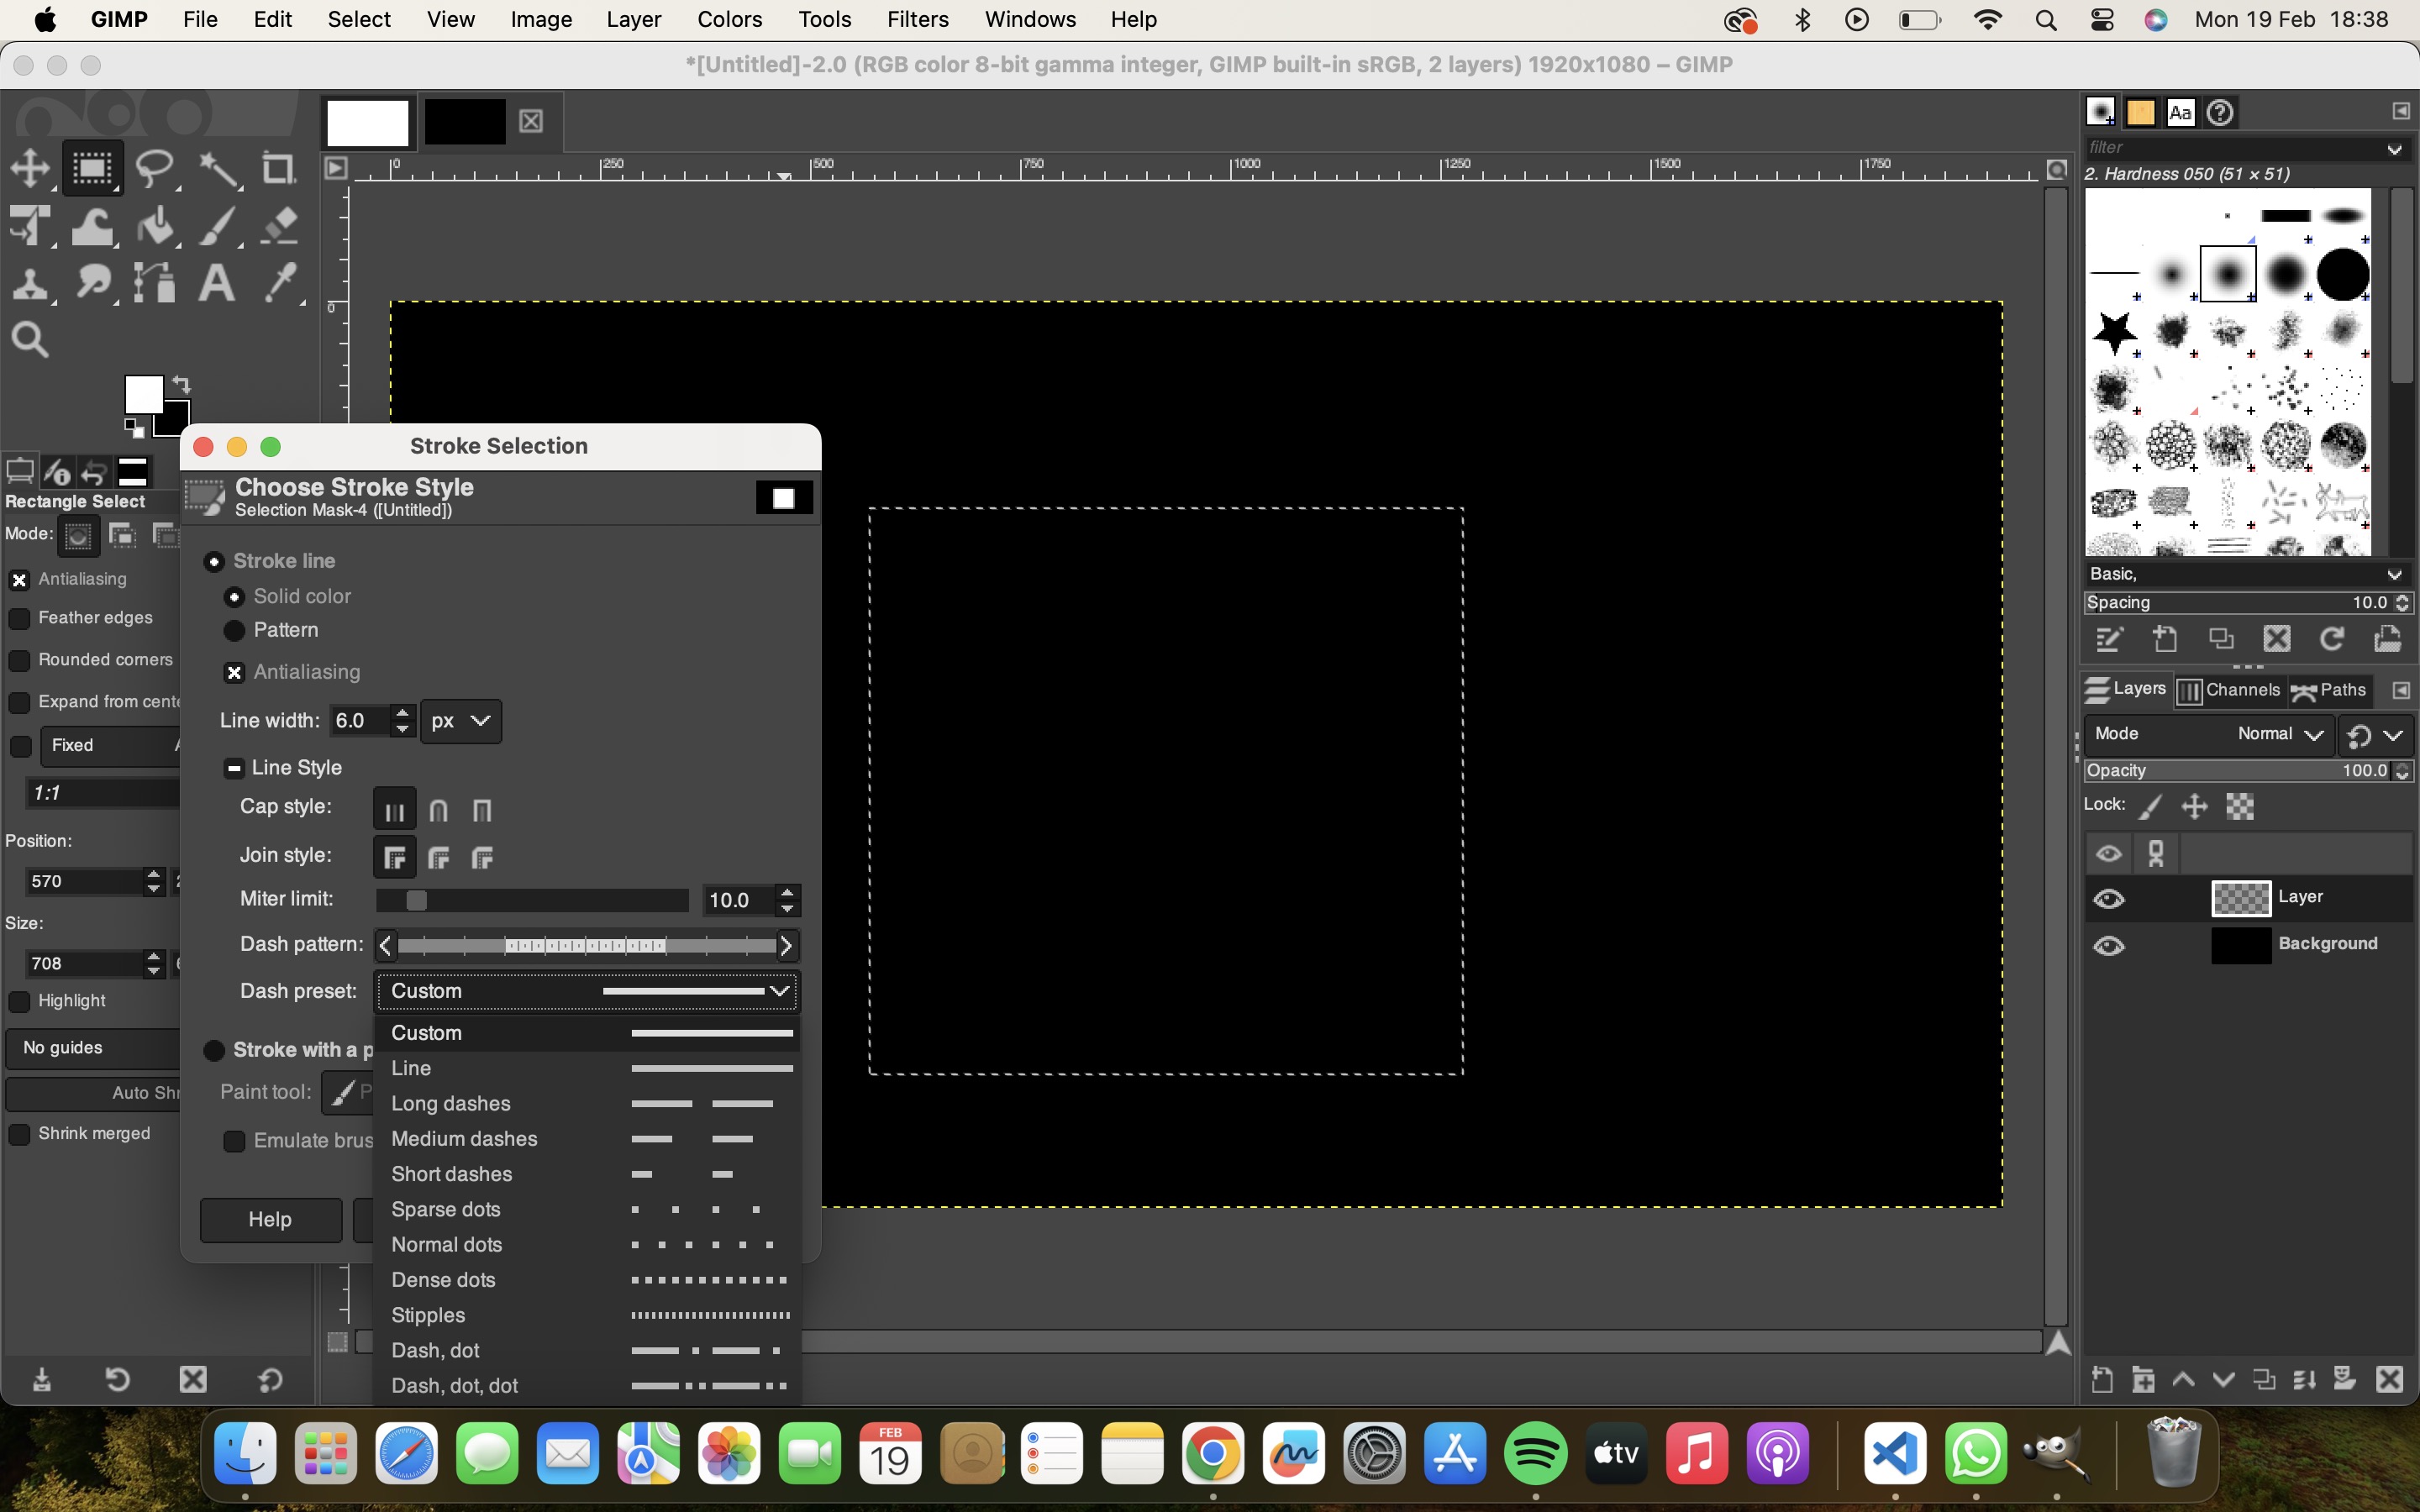
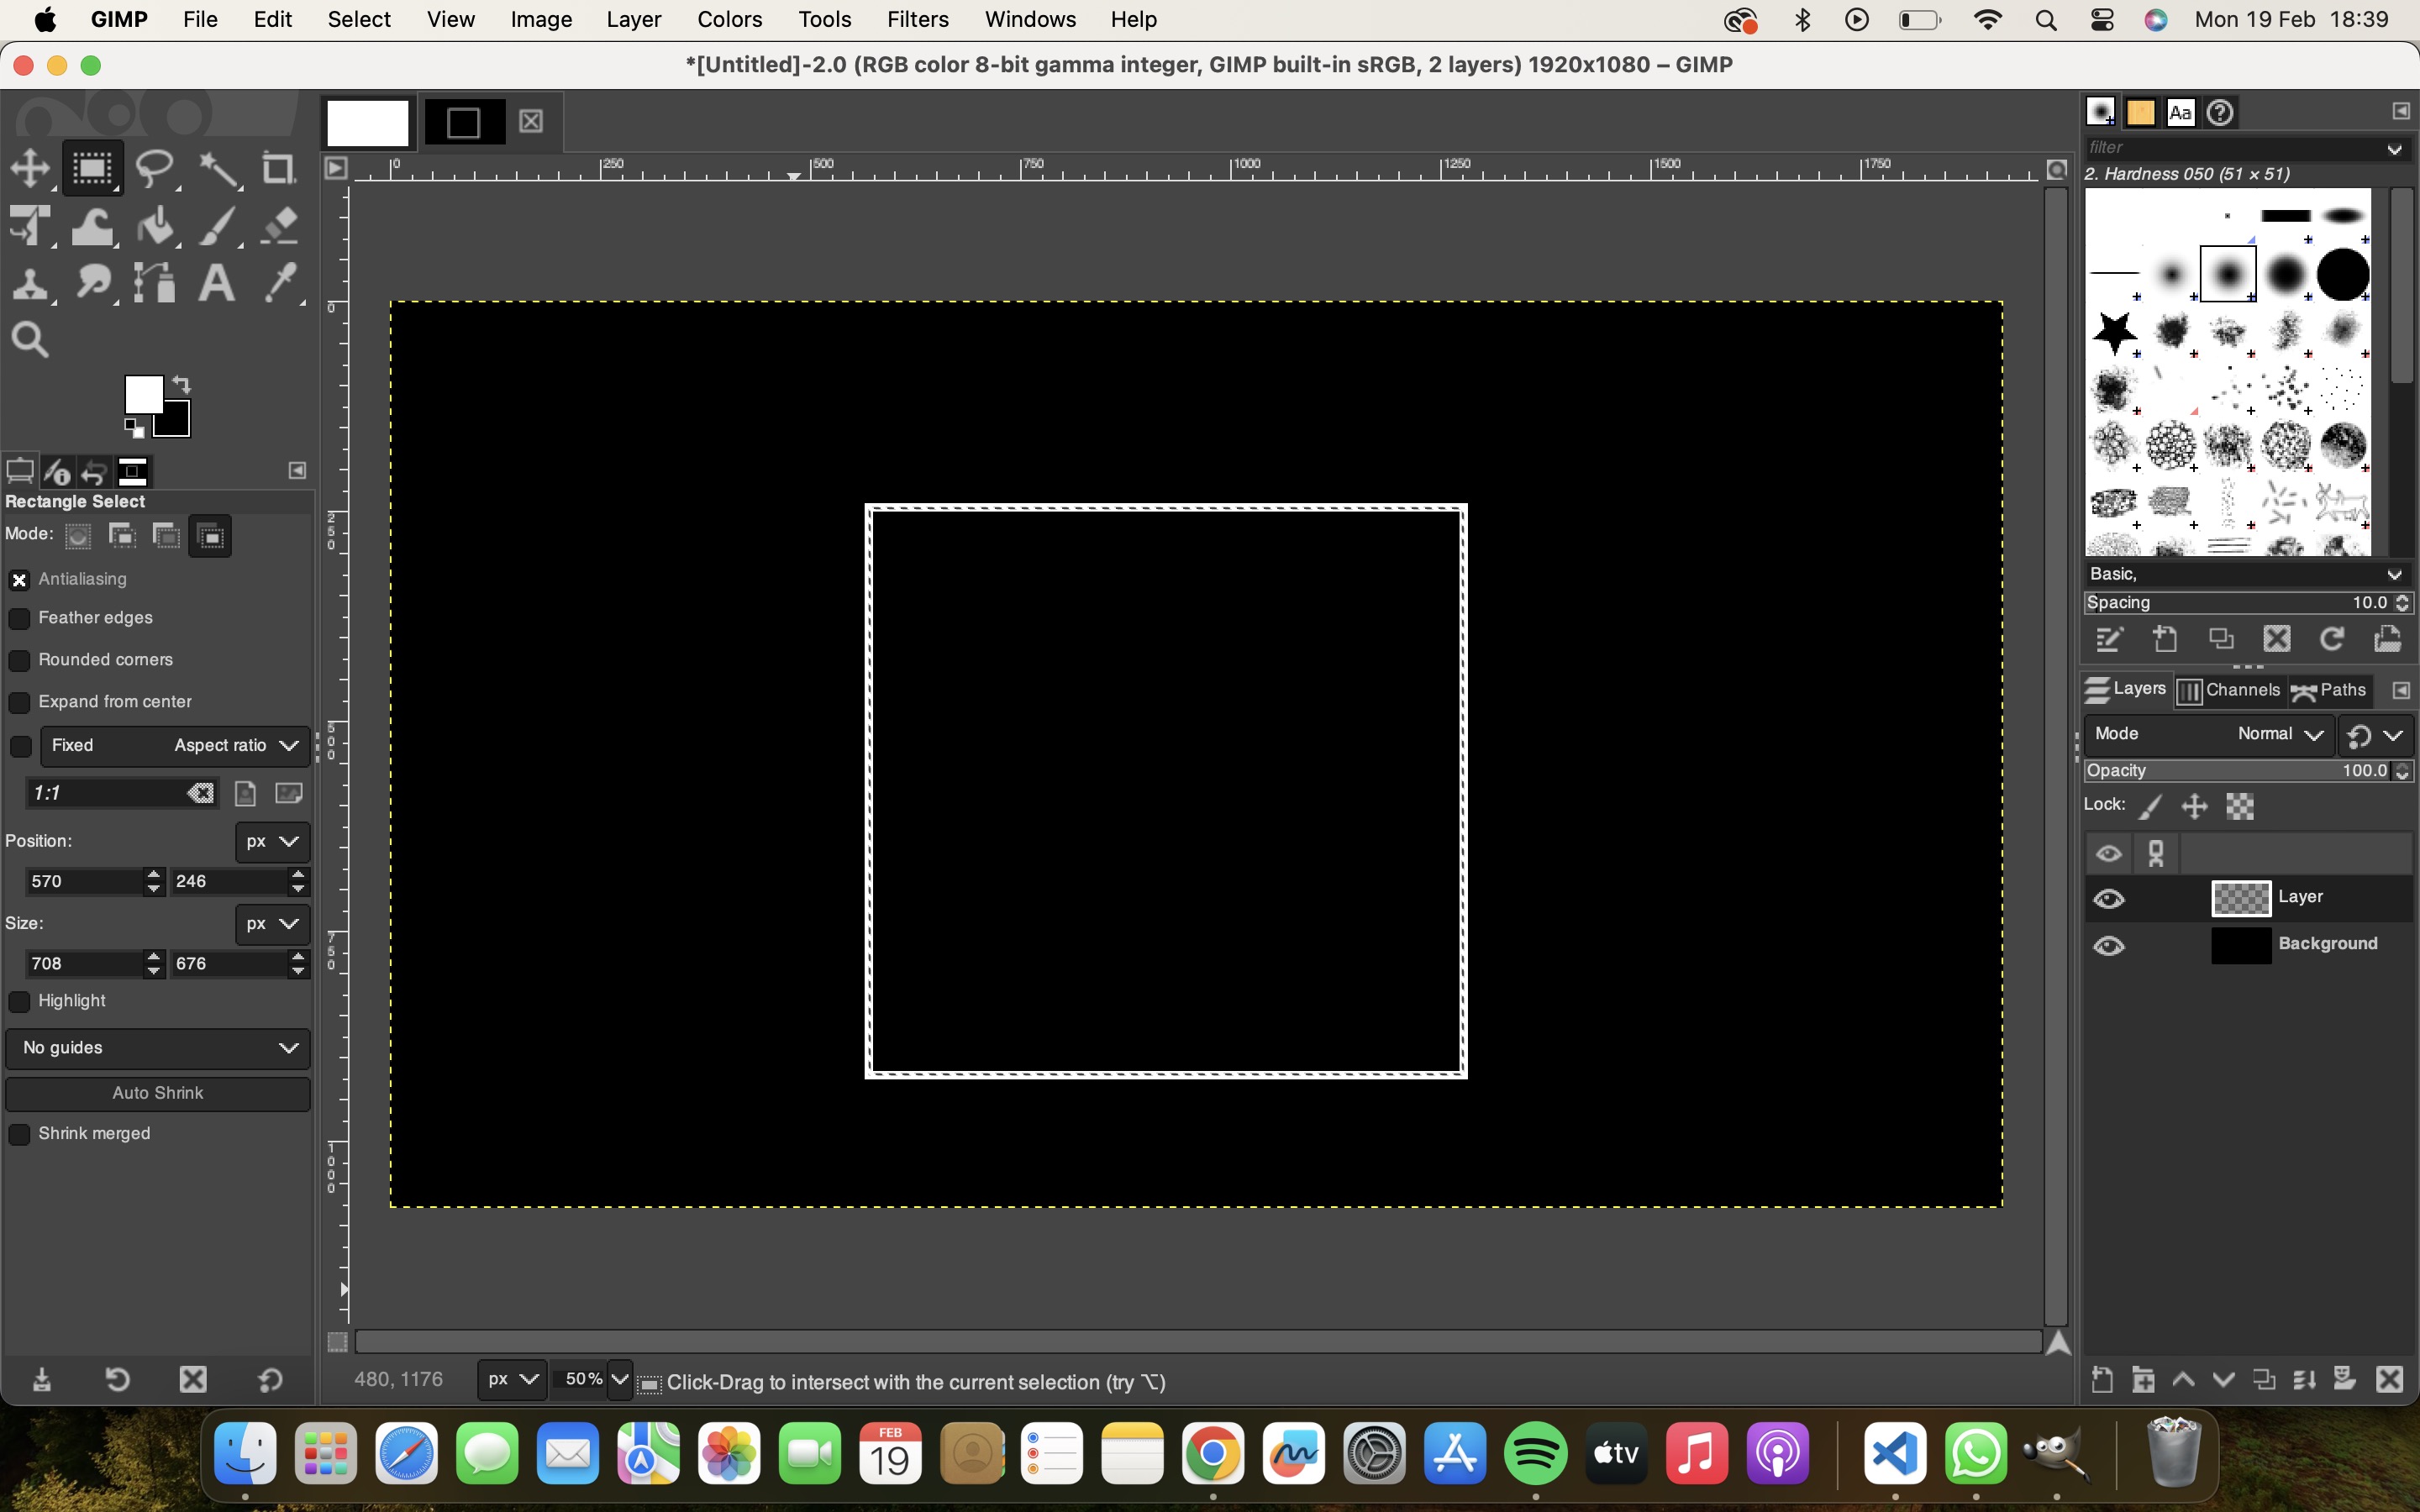
I was exploring the inbuilt shape and I made a rectangle with rectangle tool. To give a stroke to the rectangle I went on edit stroke selection, gave a line stroke of 10px and clicked on stroke.
Step 5: Give it an abstract shape.
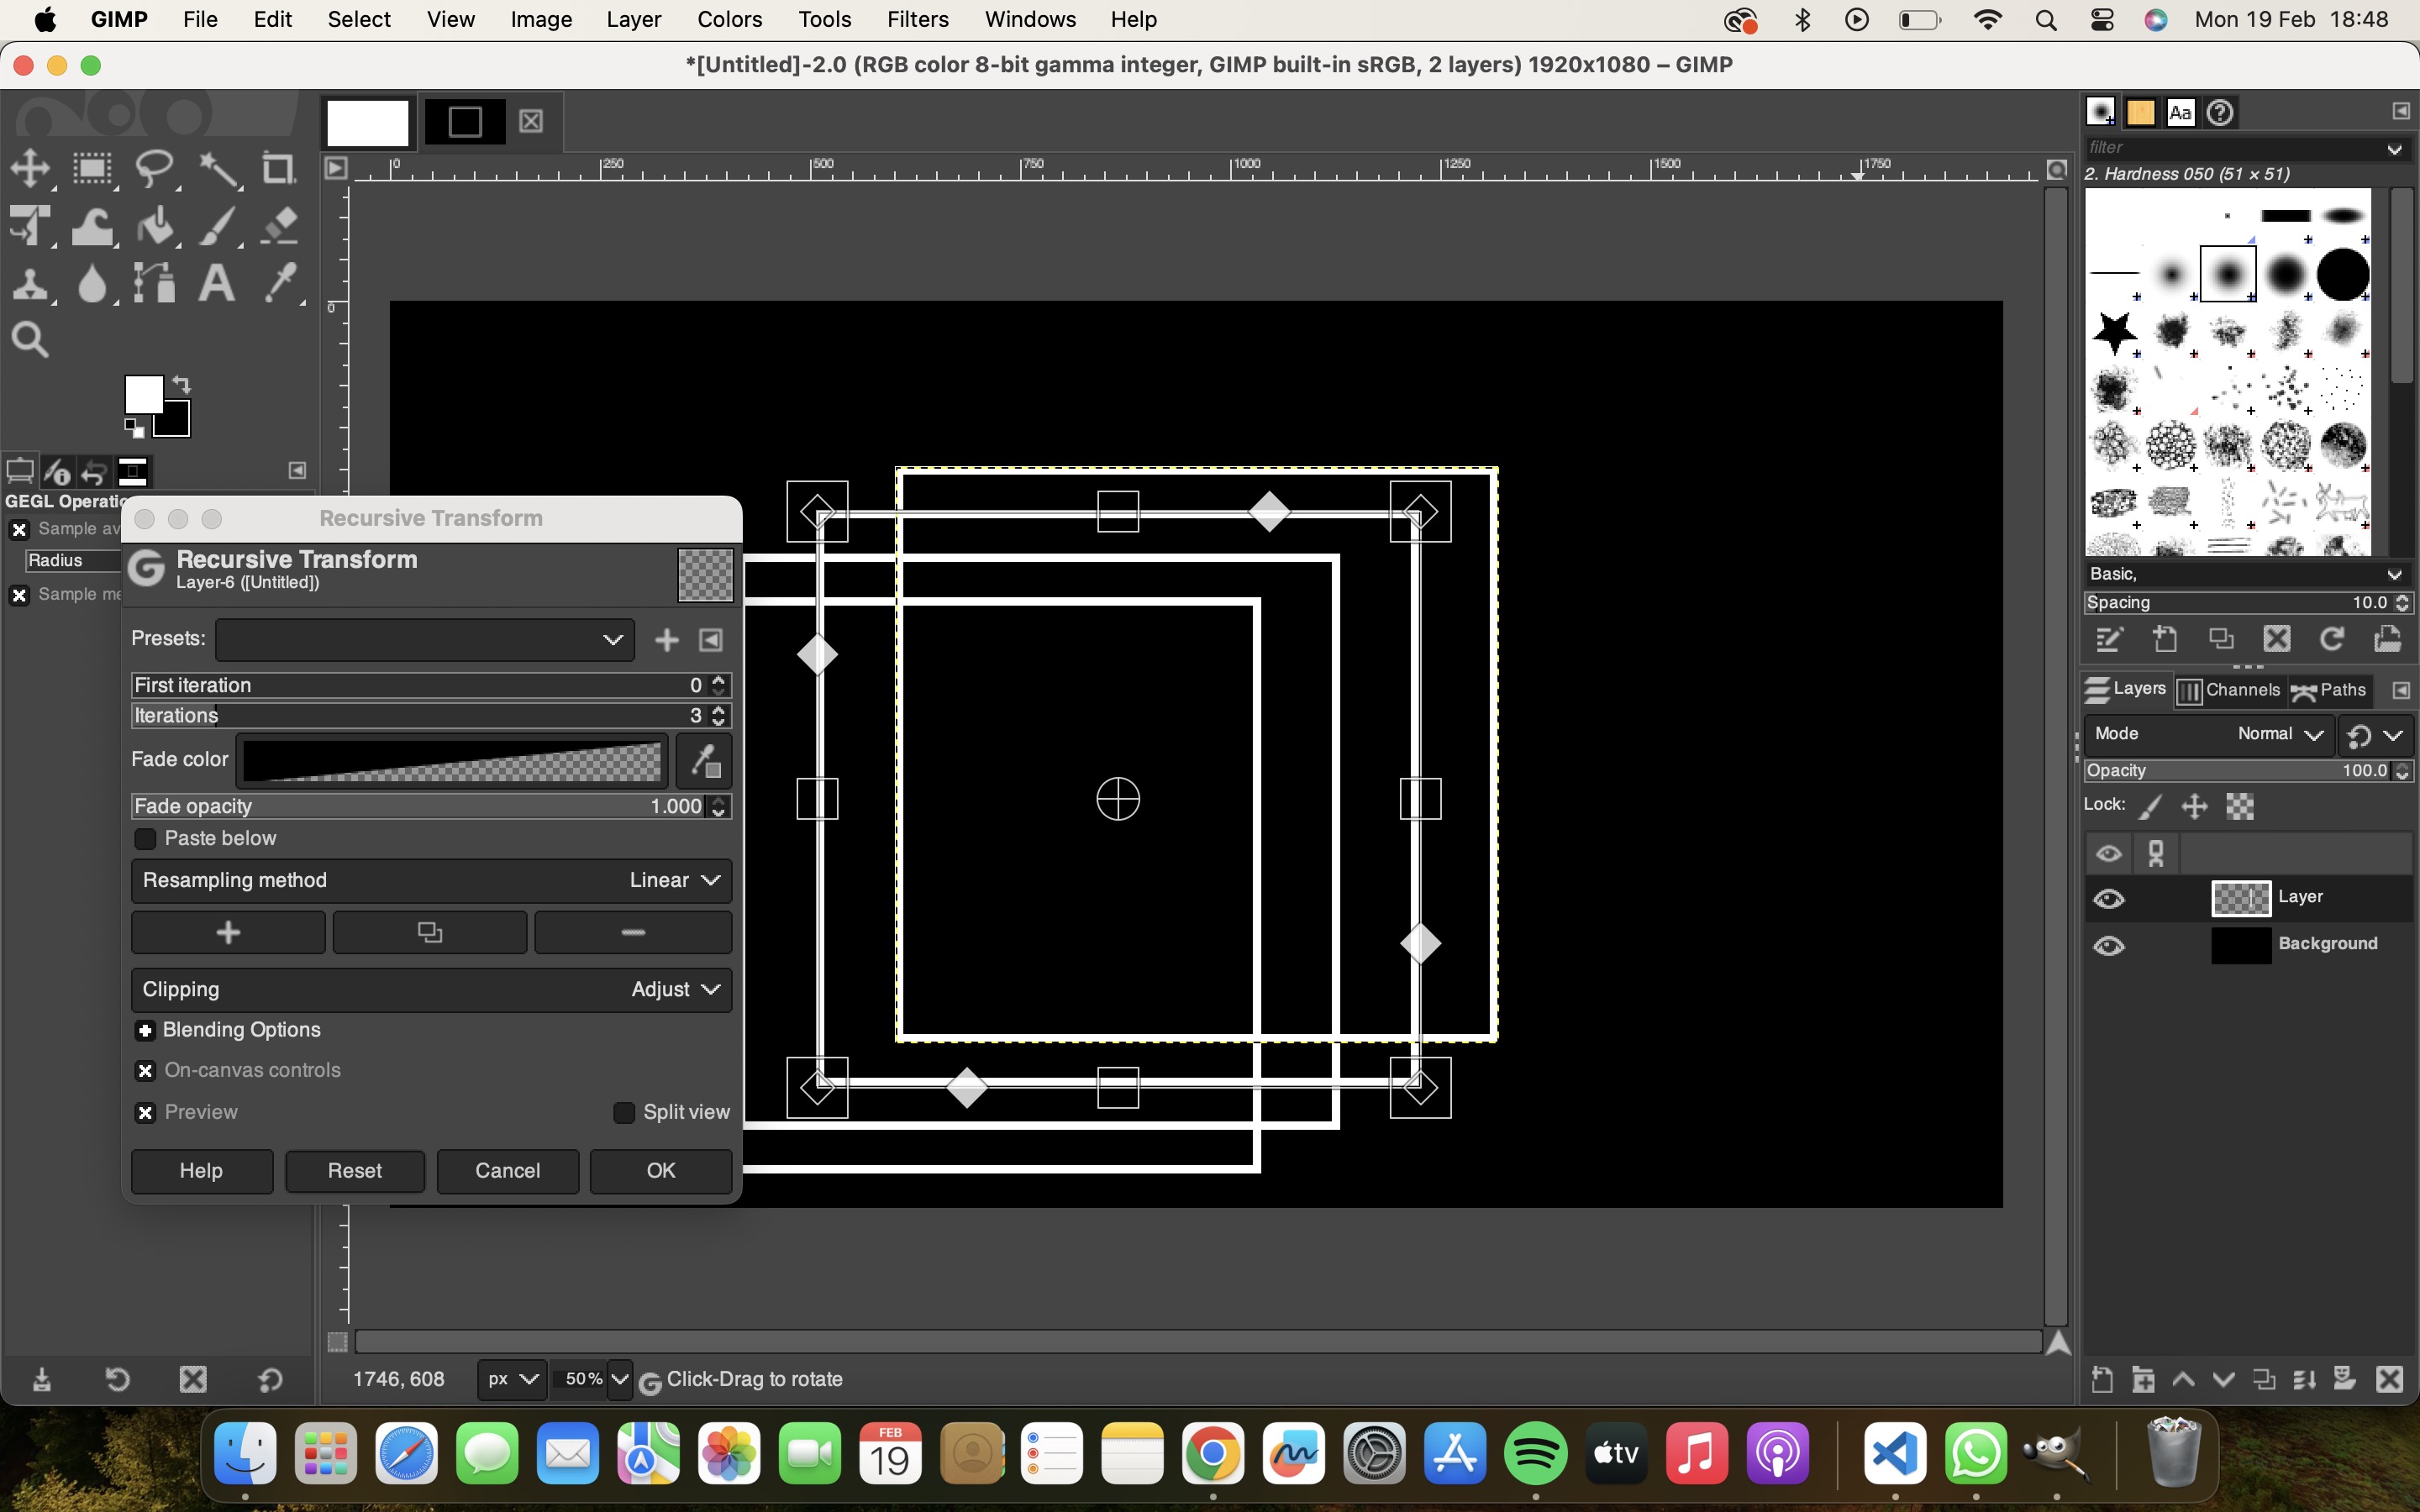
To give it an abstract shape I selected the rectangle went on filters which is above in navbar in that I selected Map then recursive transform and a window opens as shown in the image below.
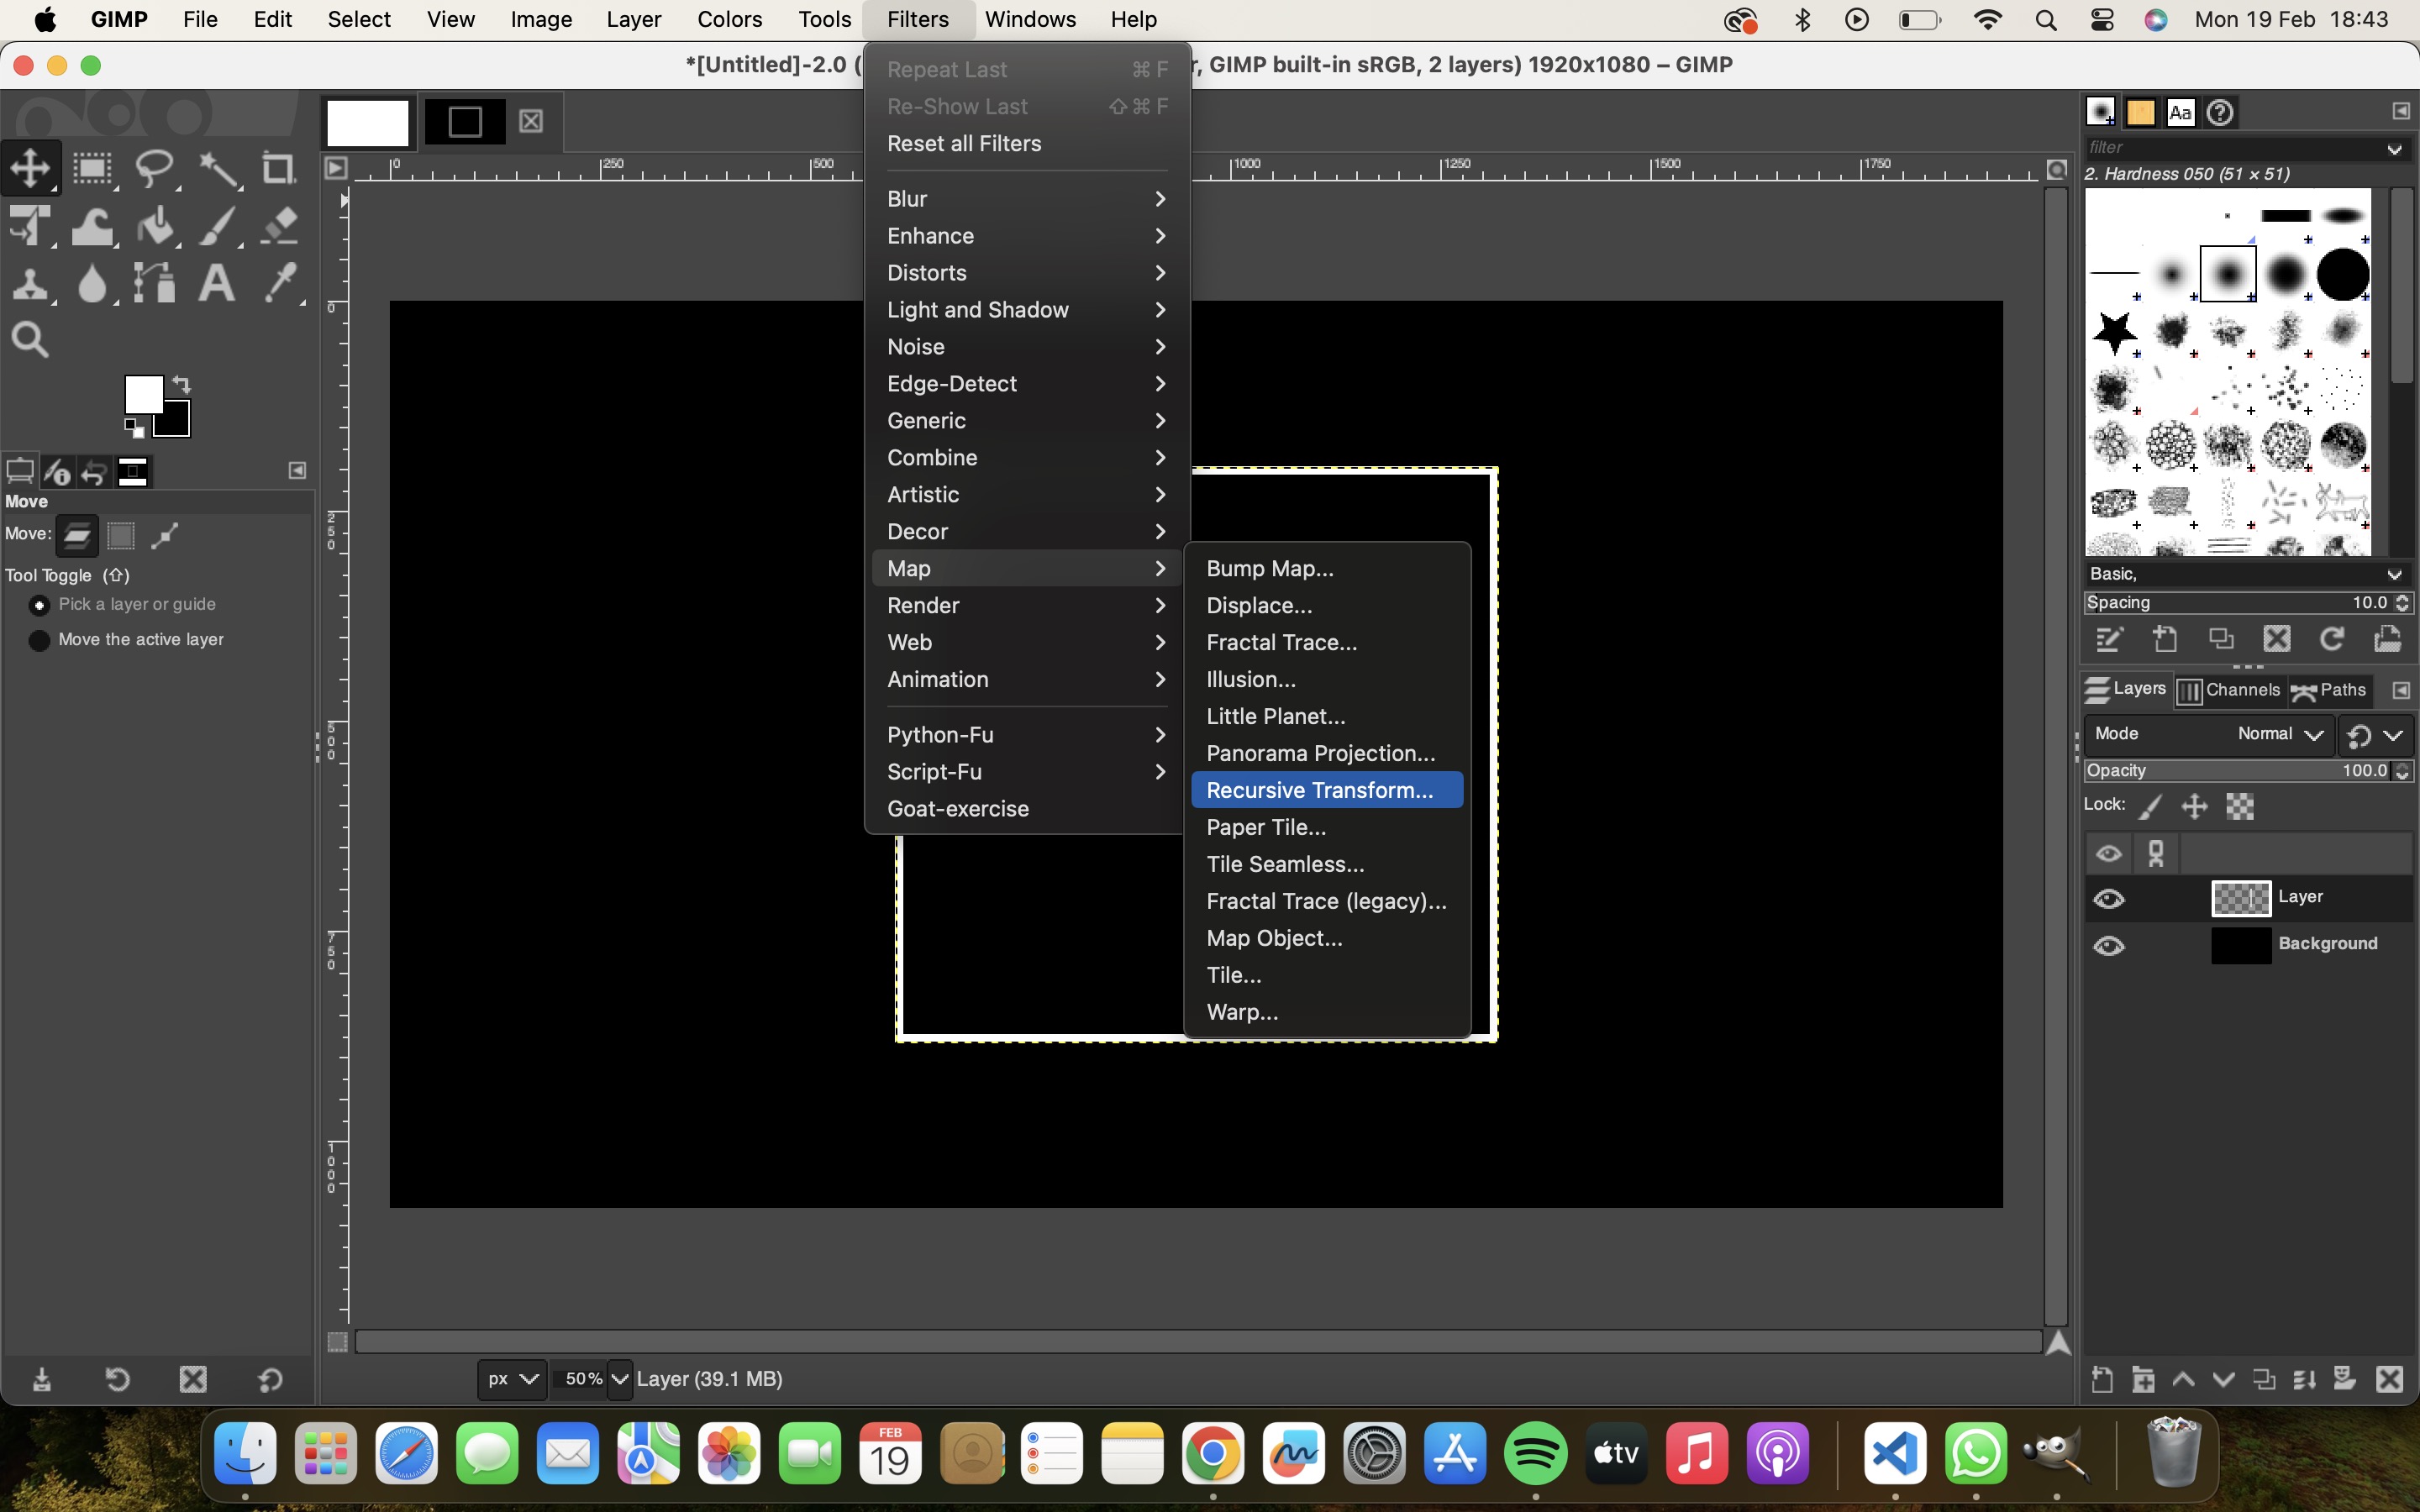
I started experimenting with all the sides
if you select the top line and drag it on thr right side it increases the top part as shown in the image below.
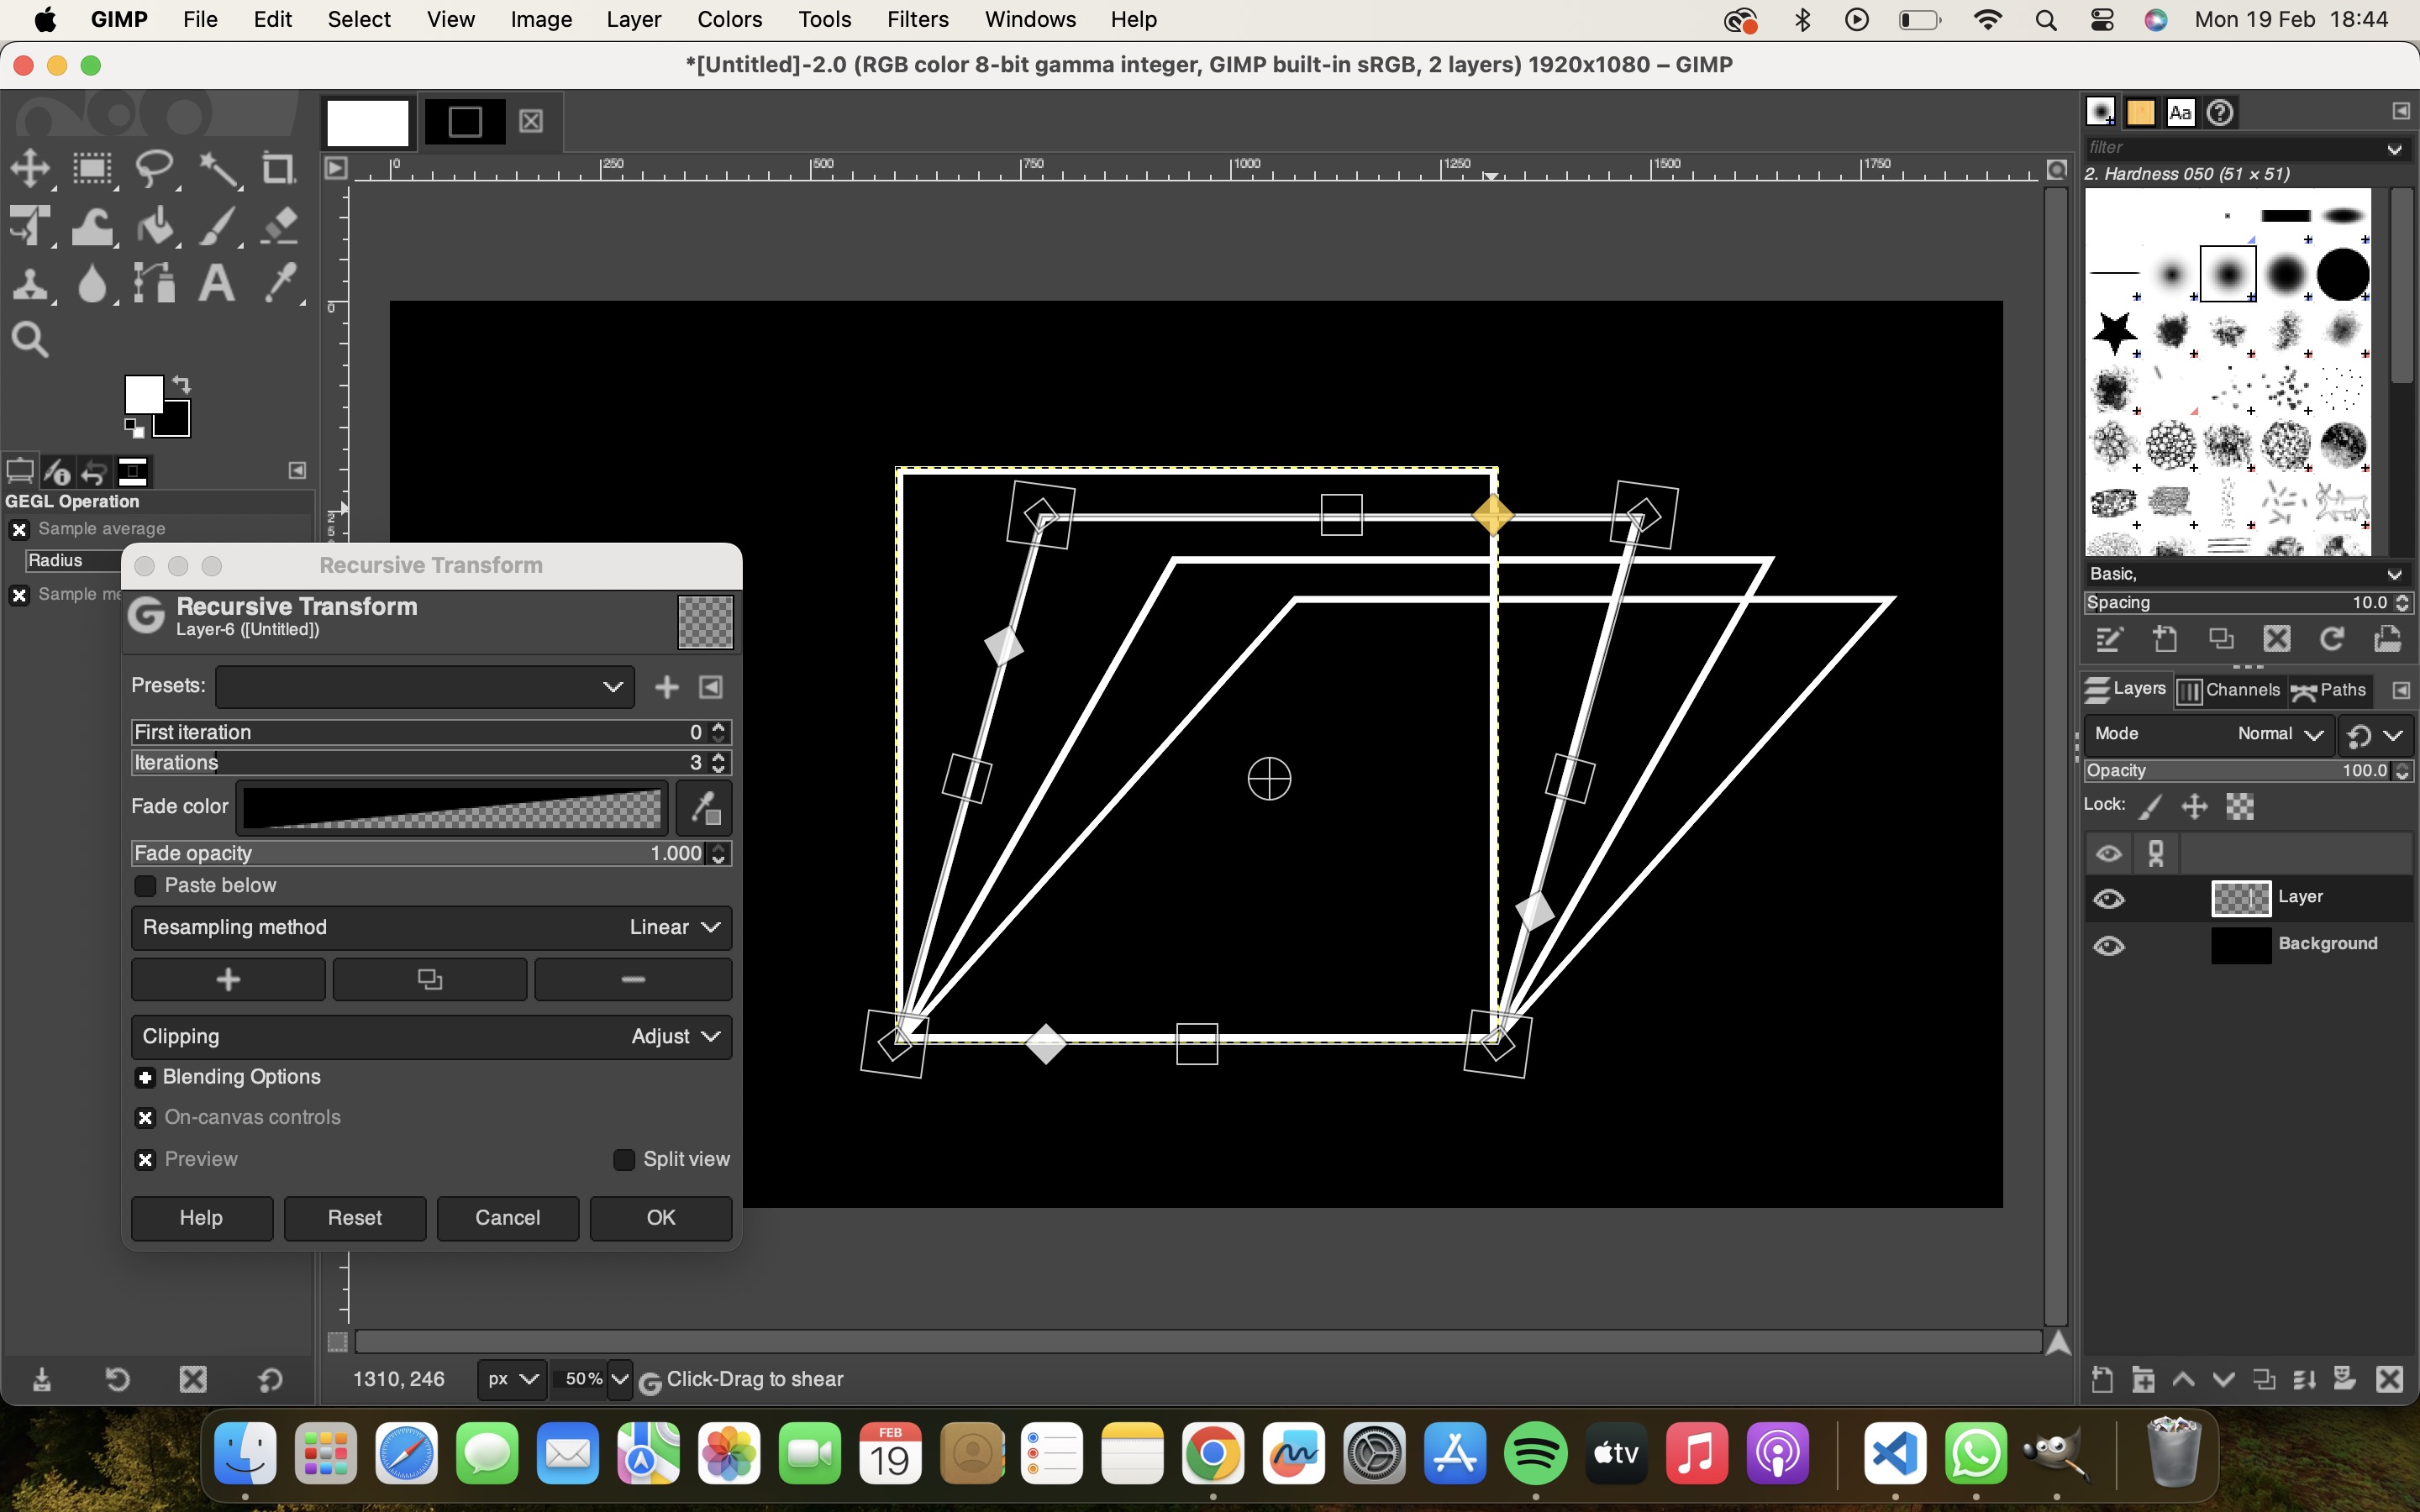
If you select the left hand side vertical line and drag towards right it looks like these:
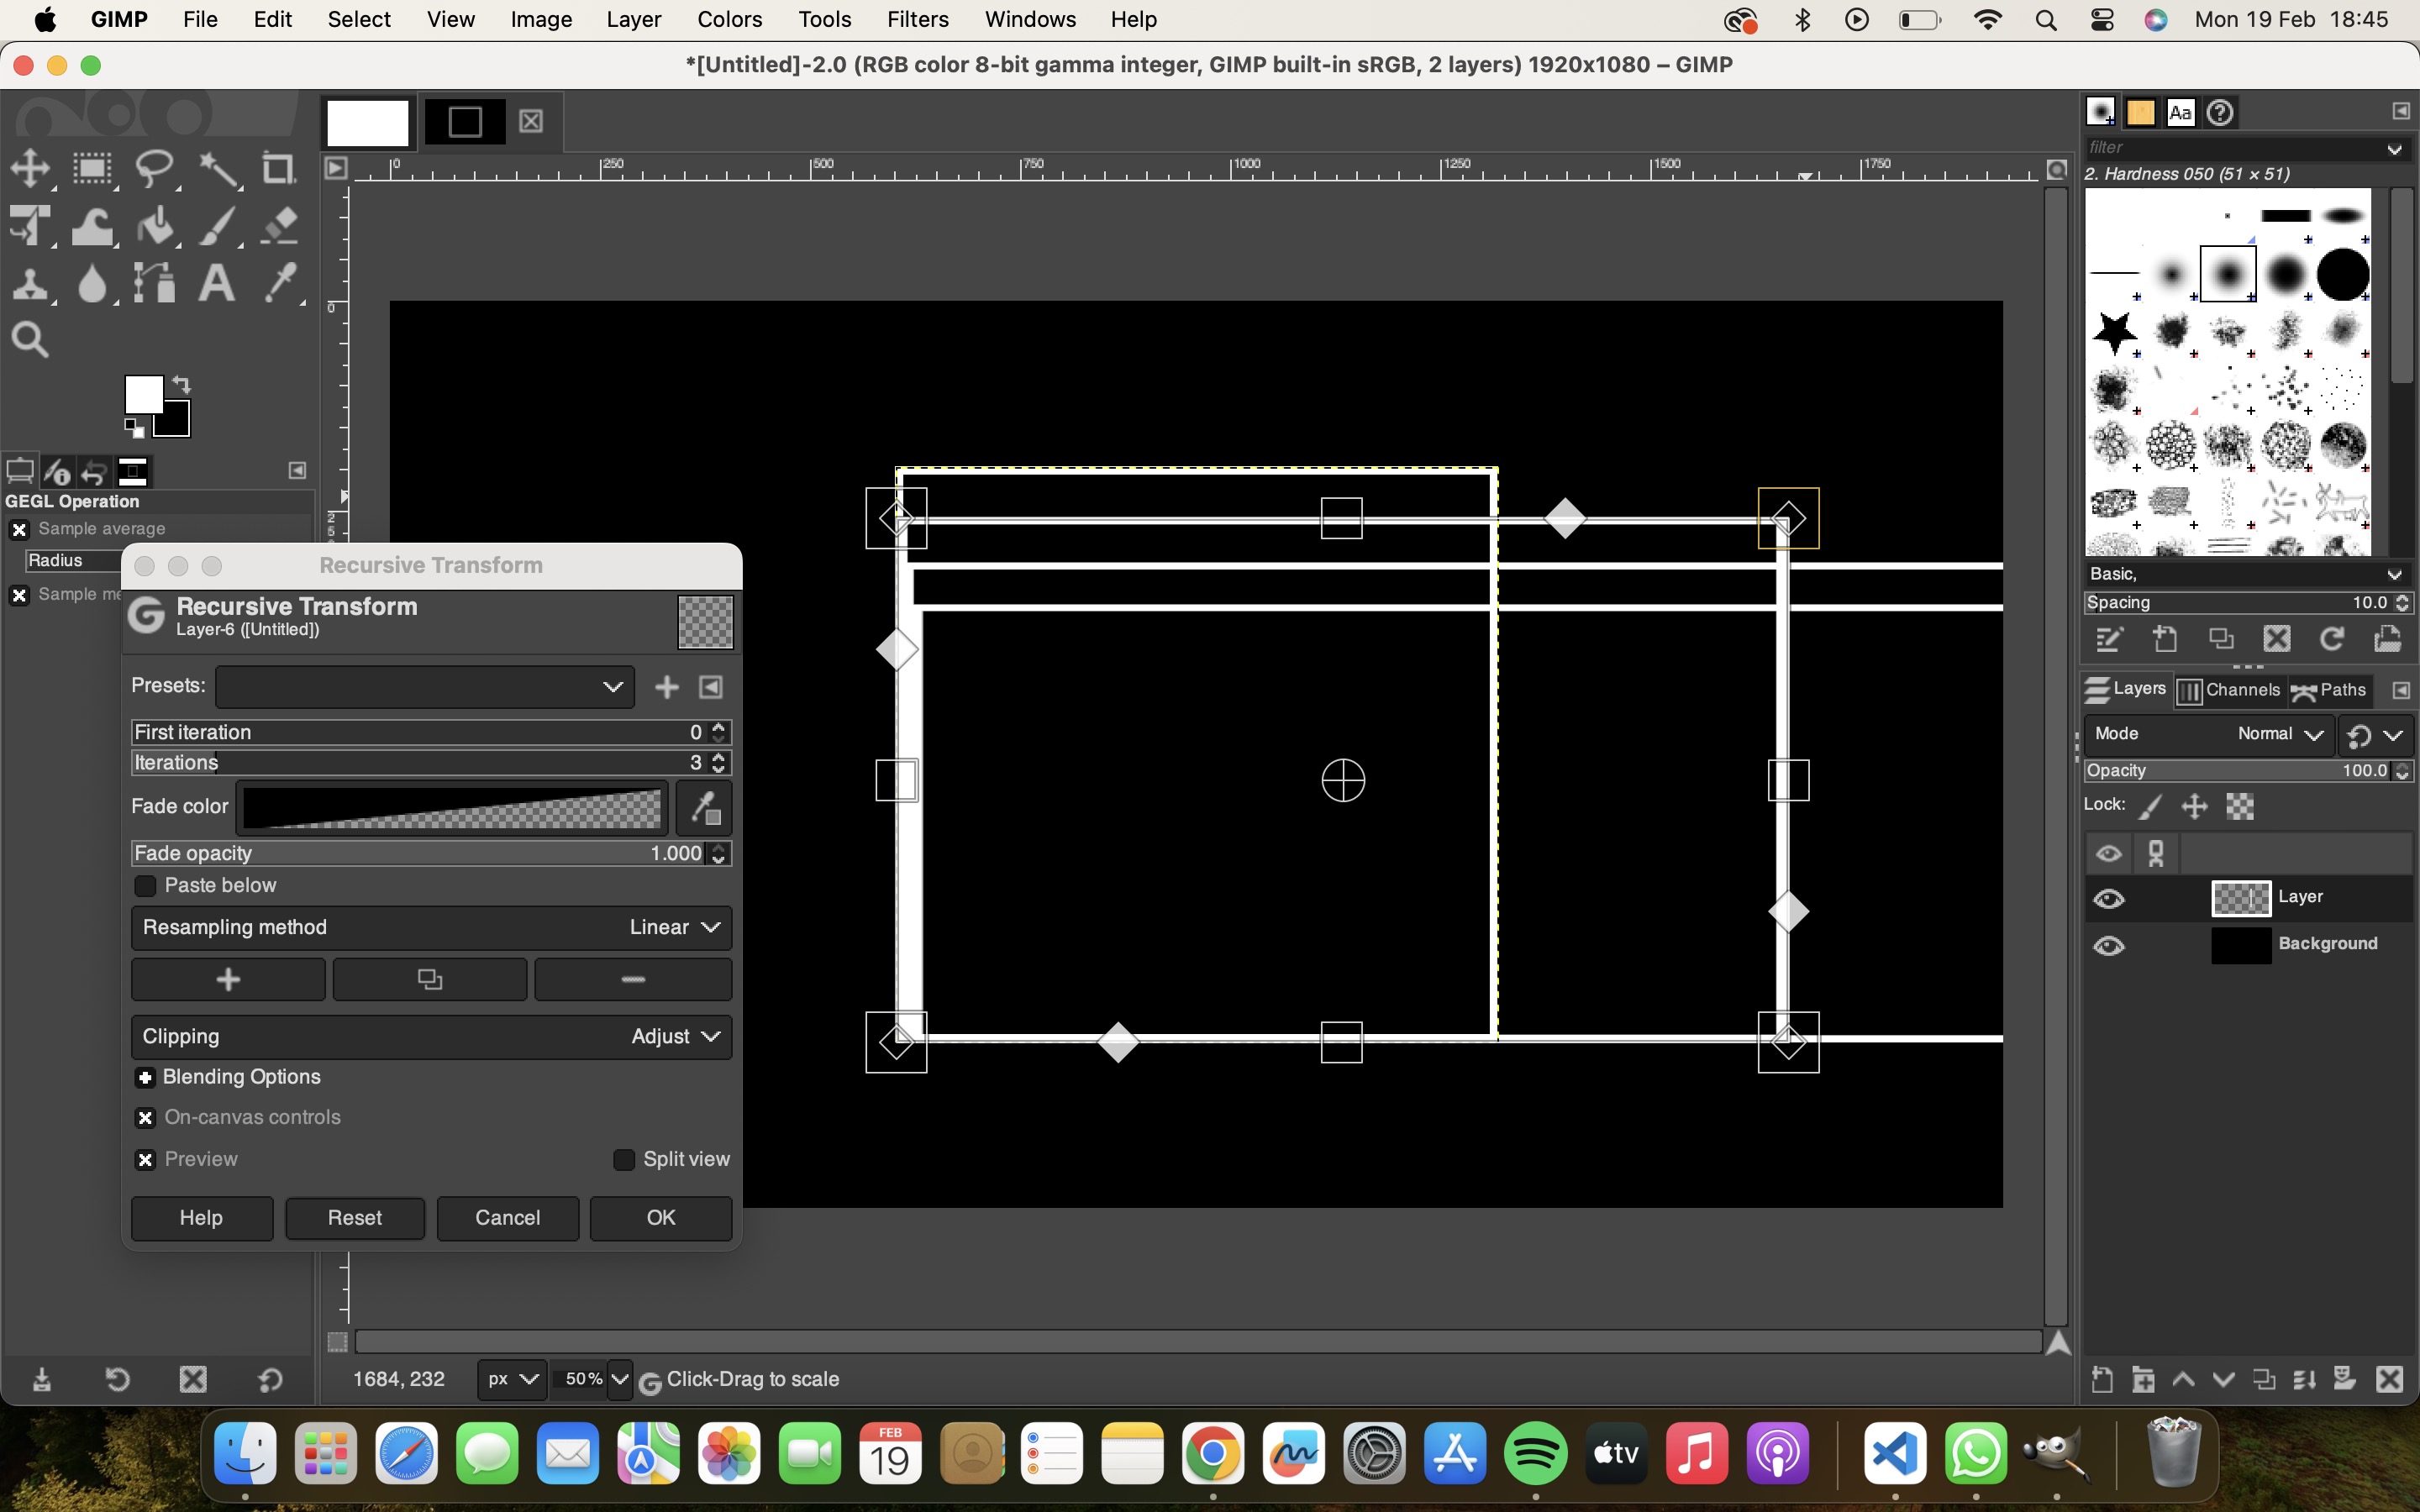
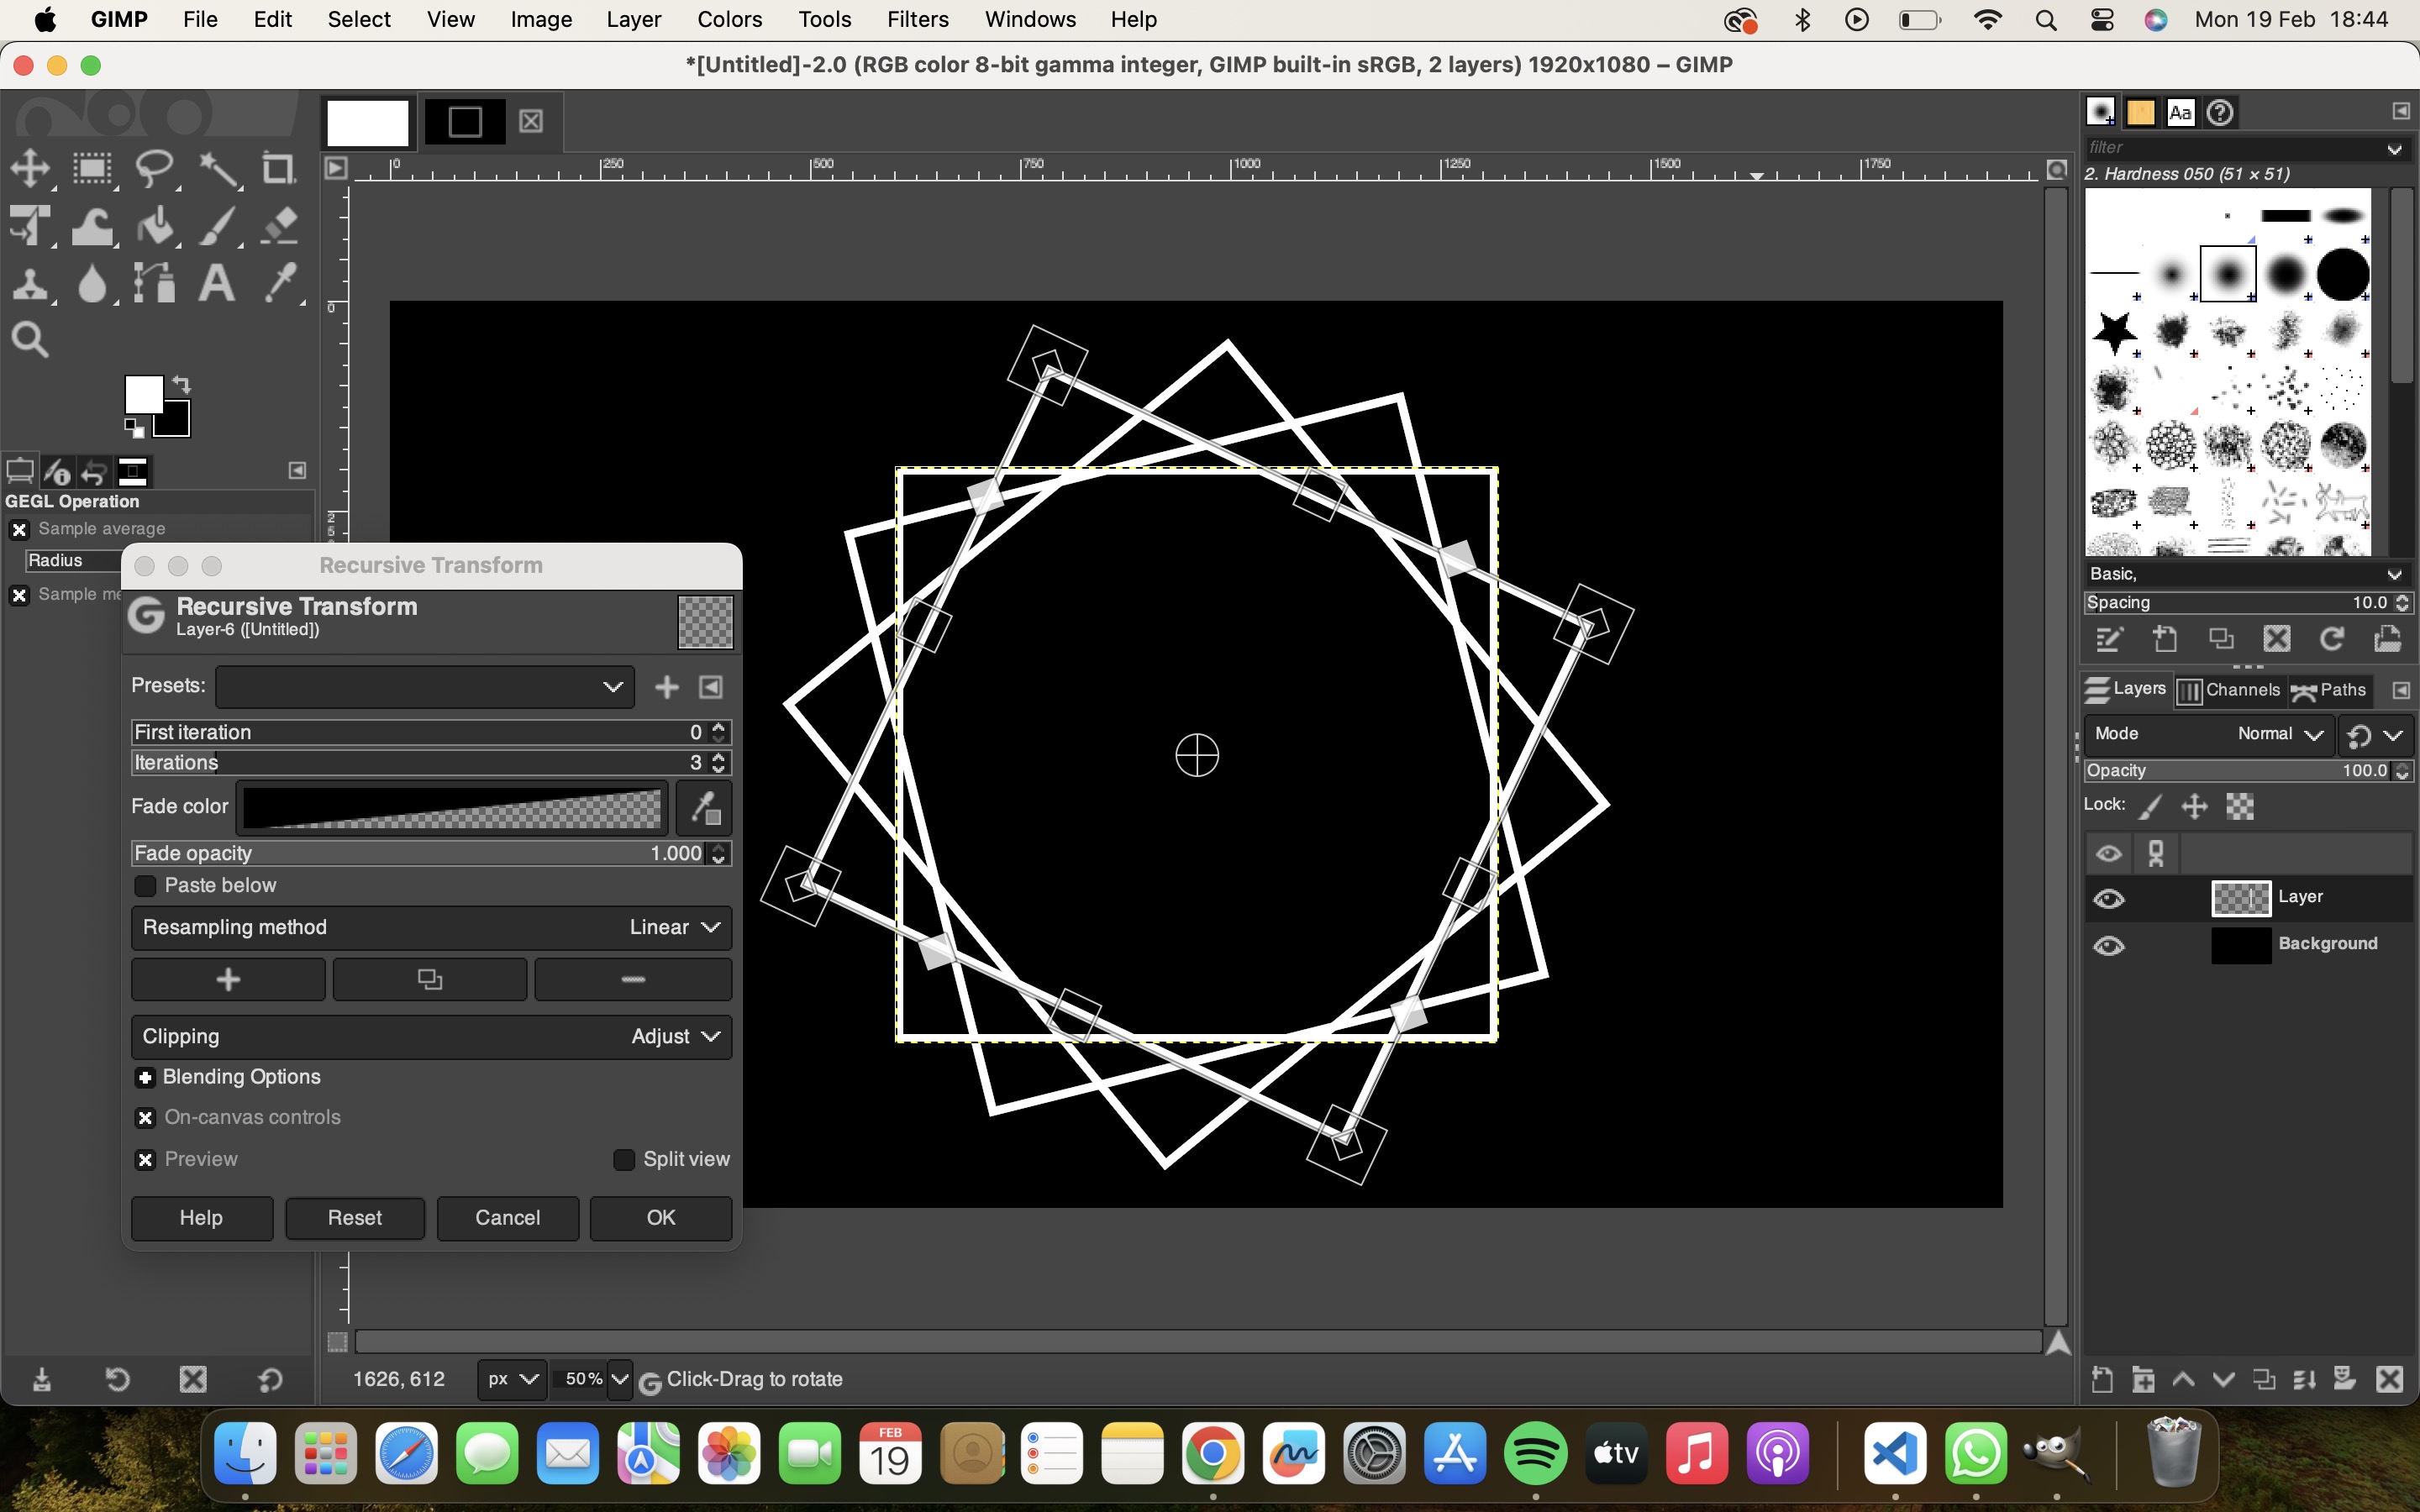
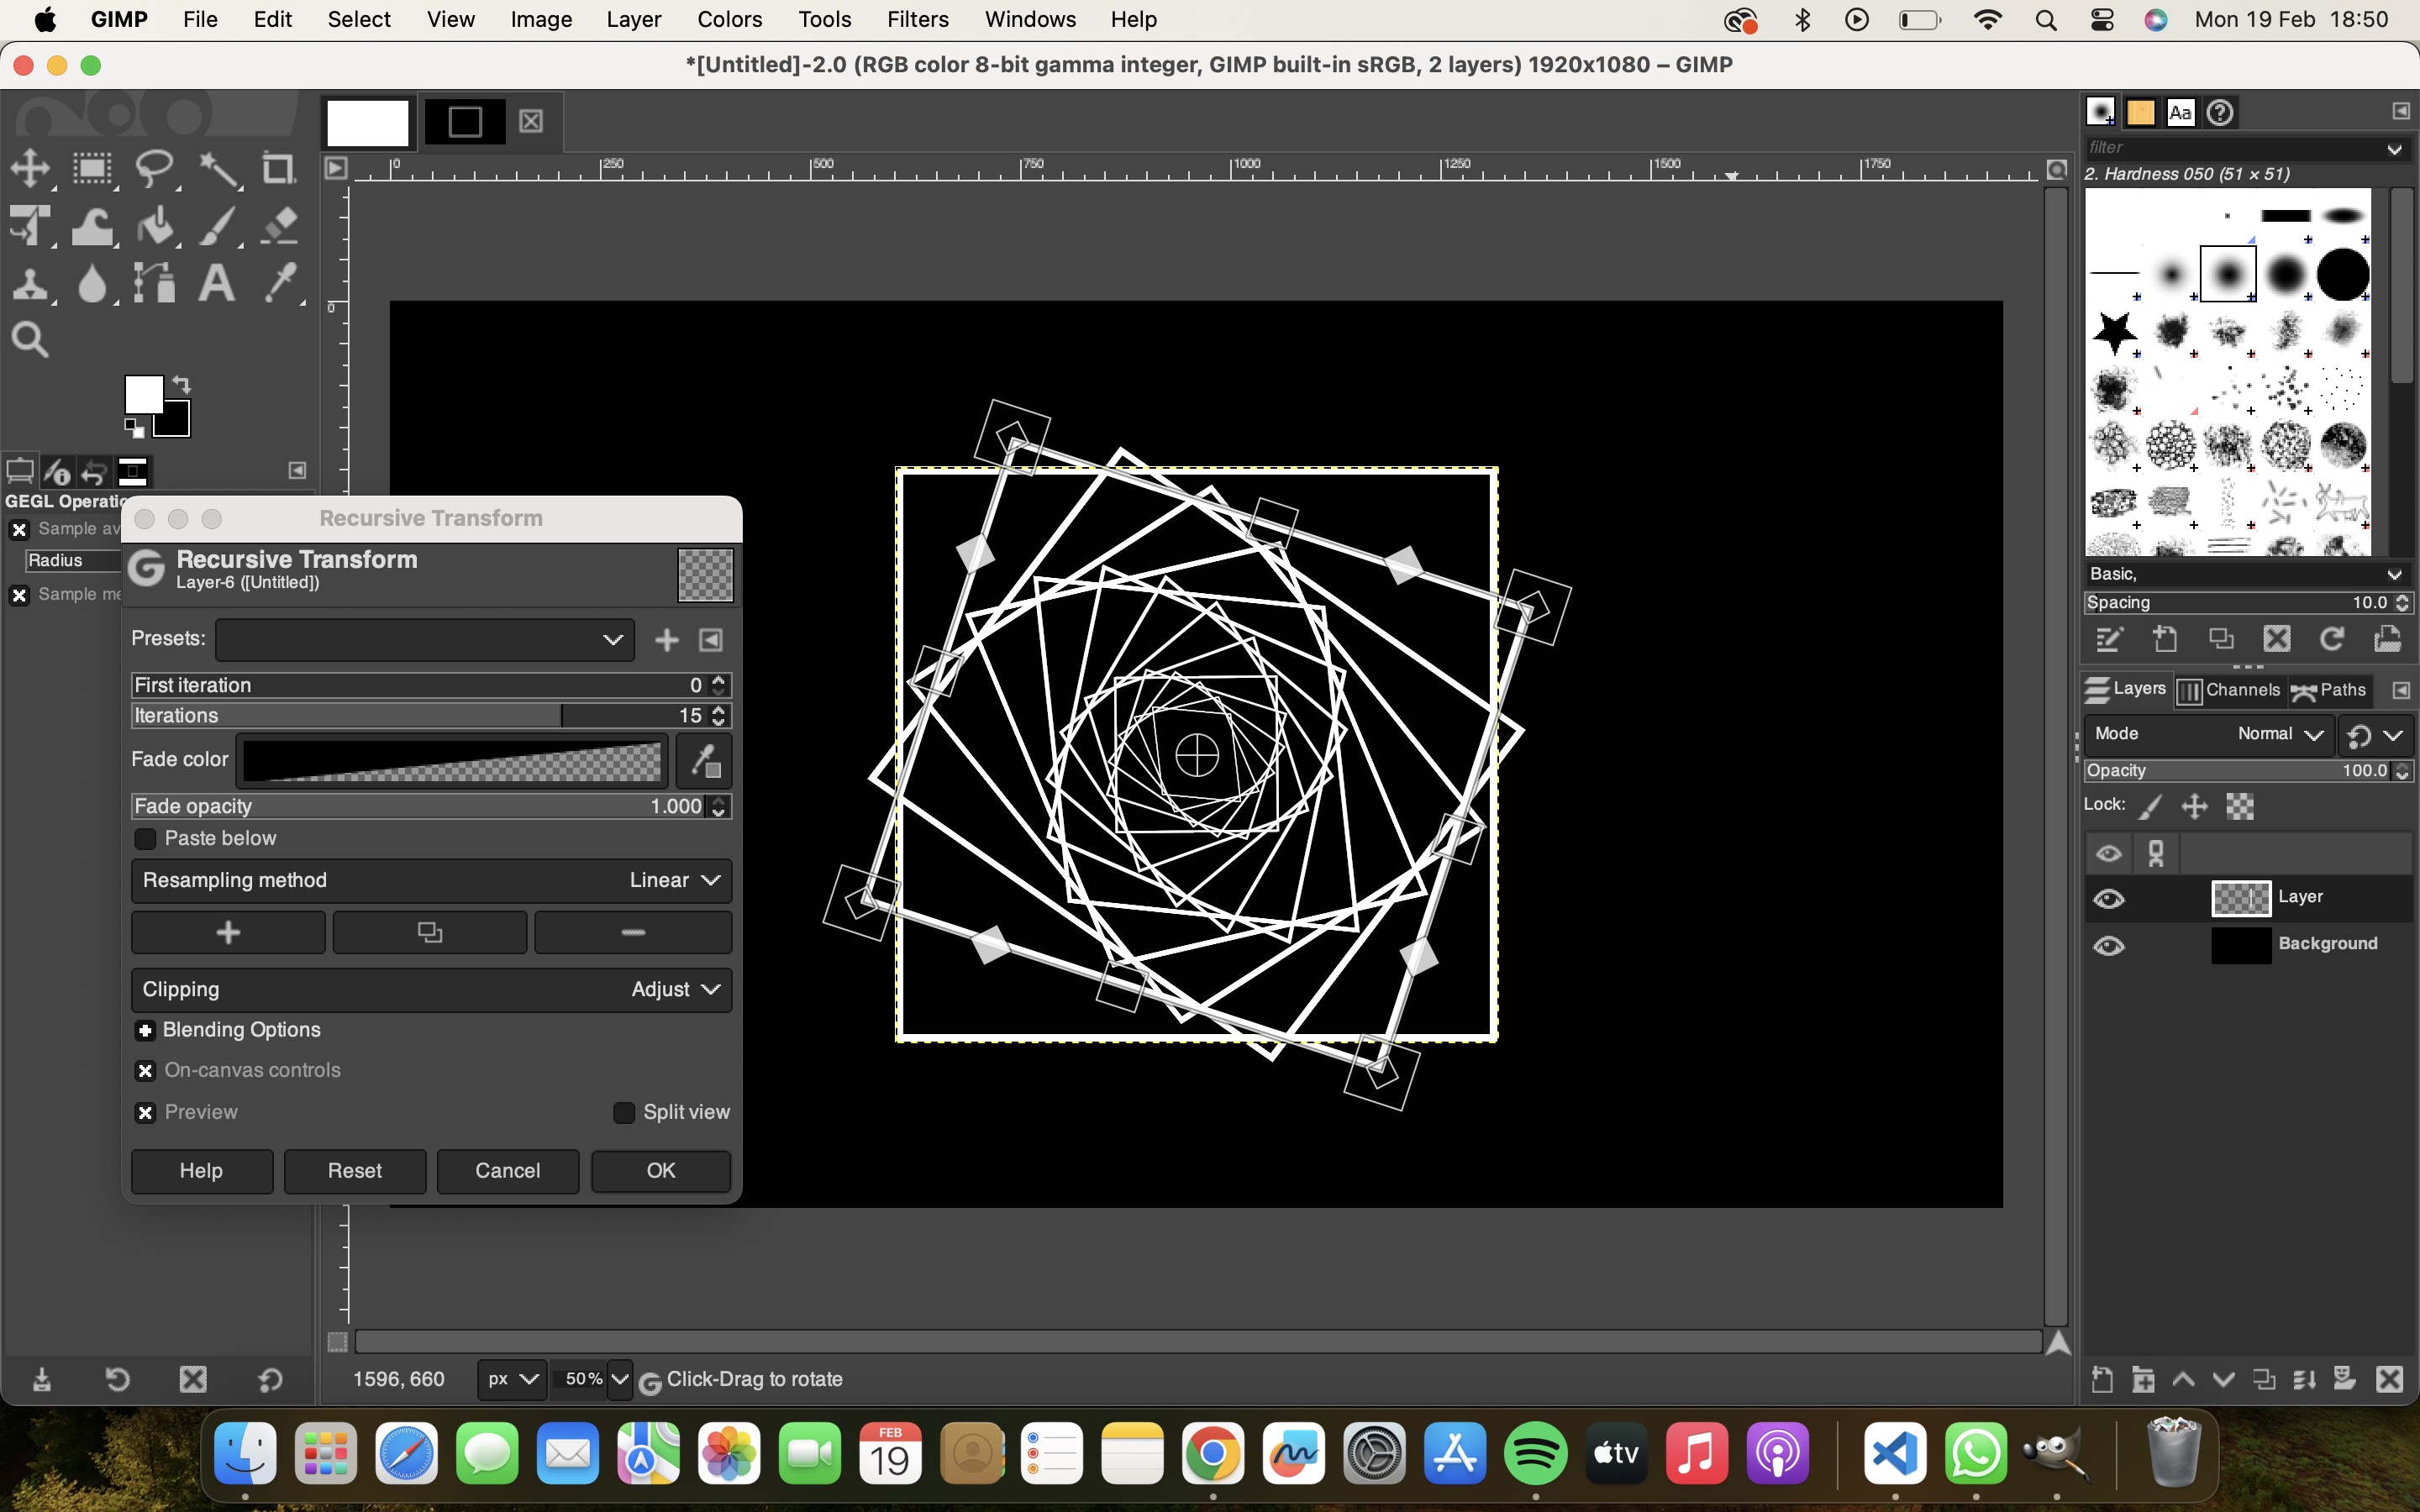
If you select in between and then drag in any side it increases the square on that side, if you drag inside multiple square will come inside, if you drag outside squares will increase outside. You can also manually change in first iteration and liberation column
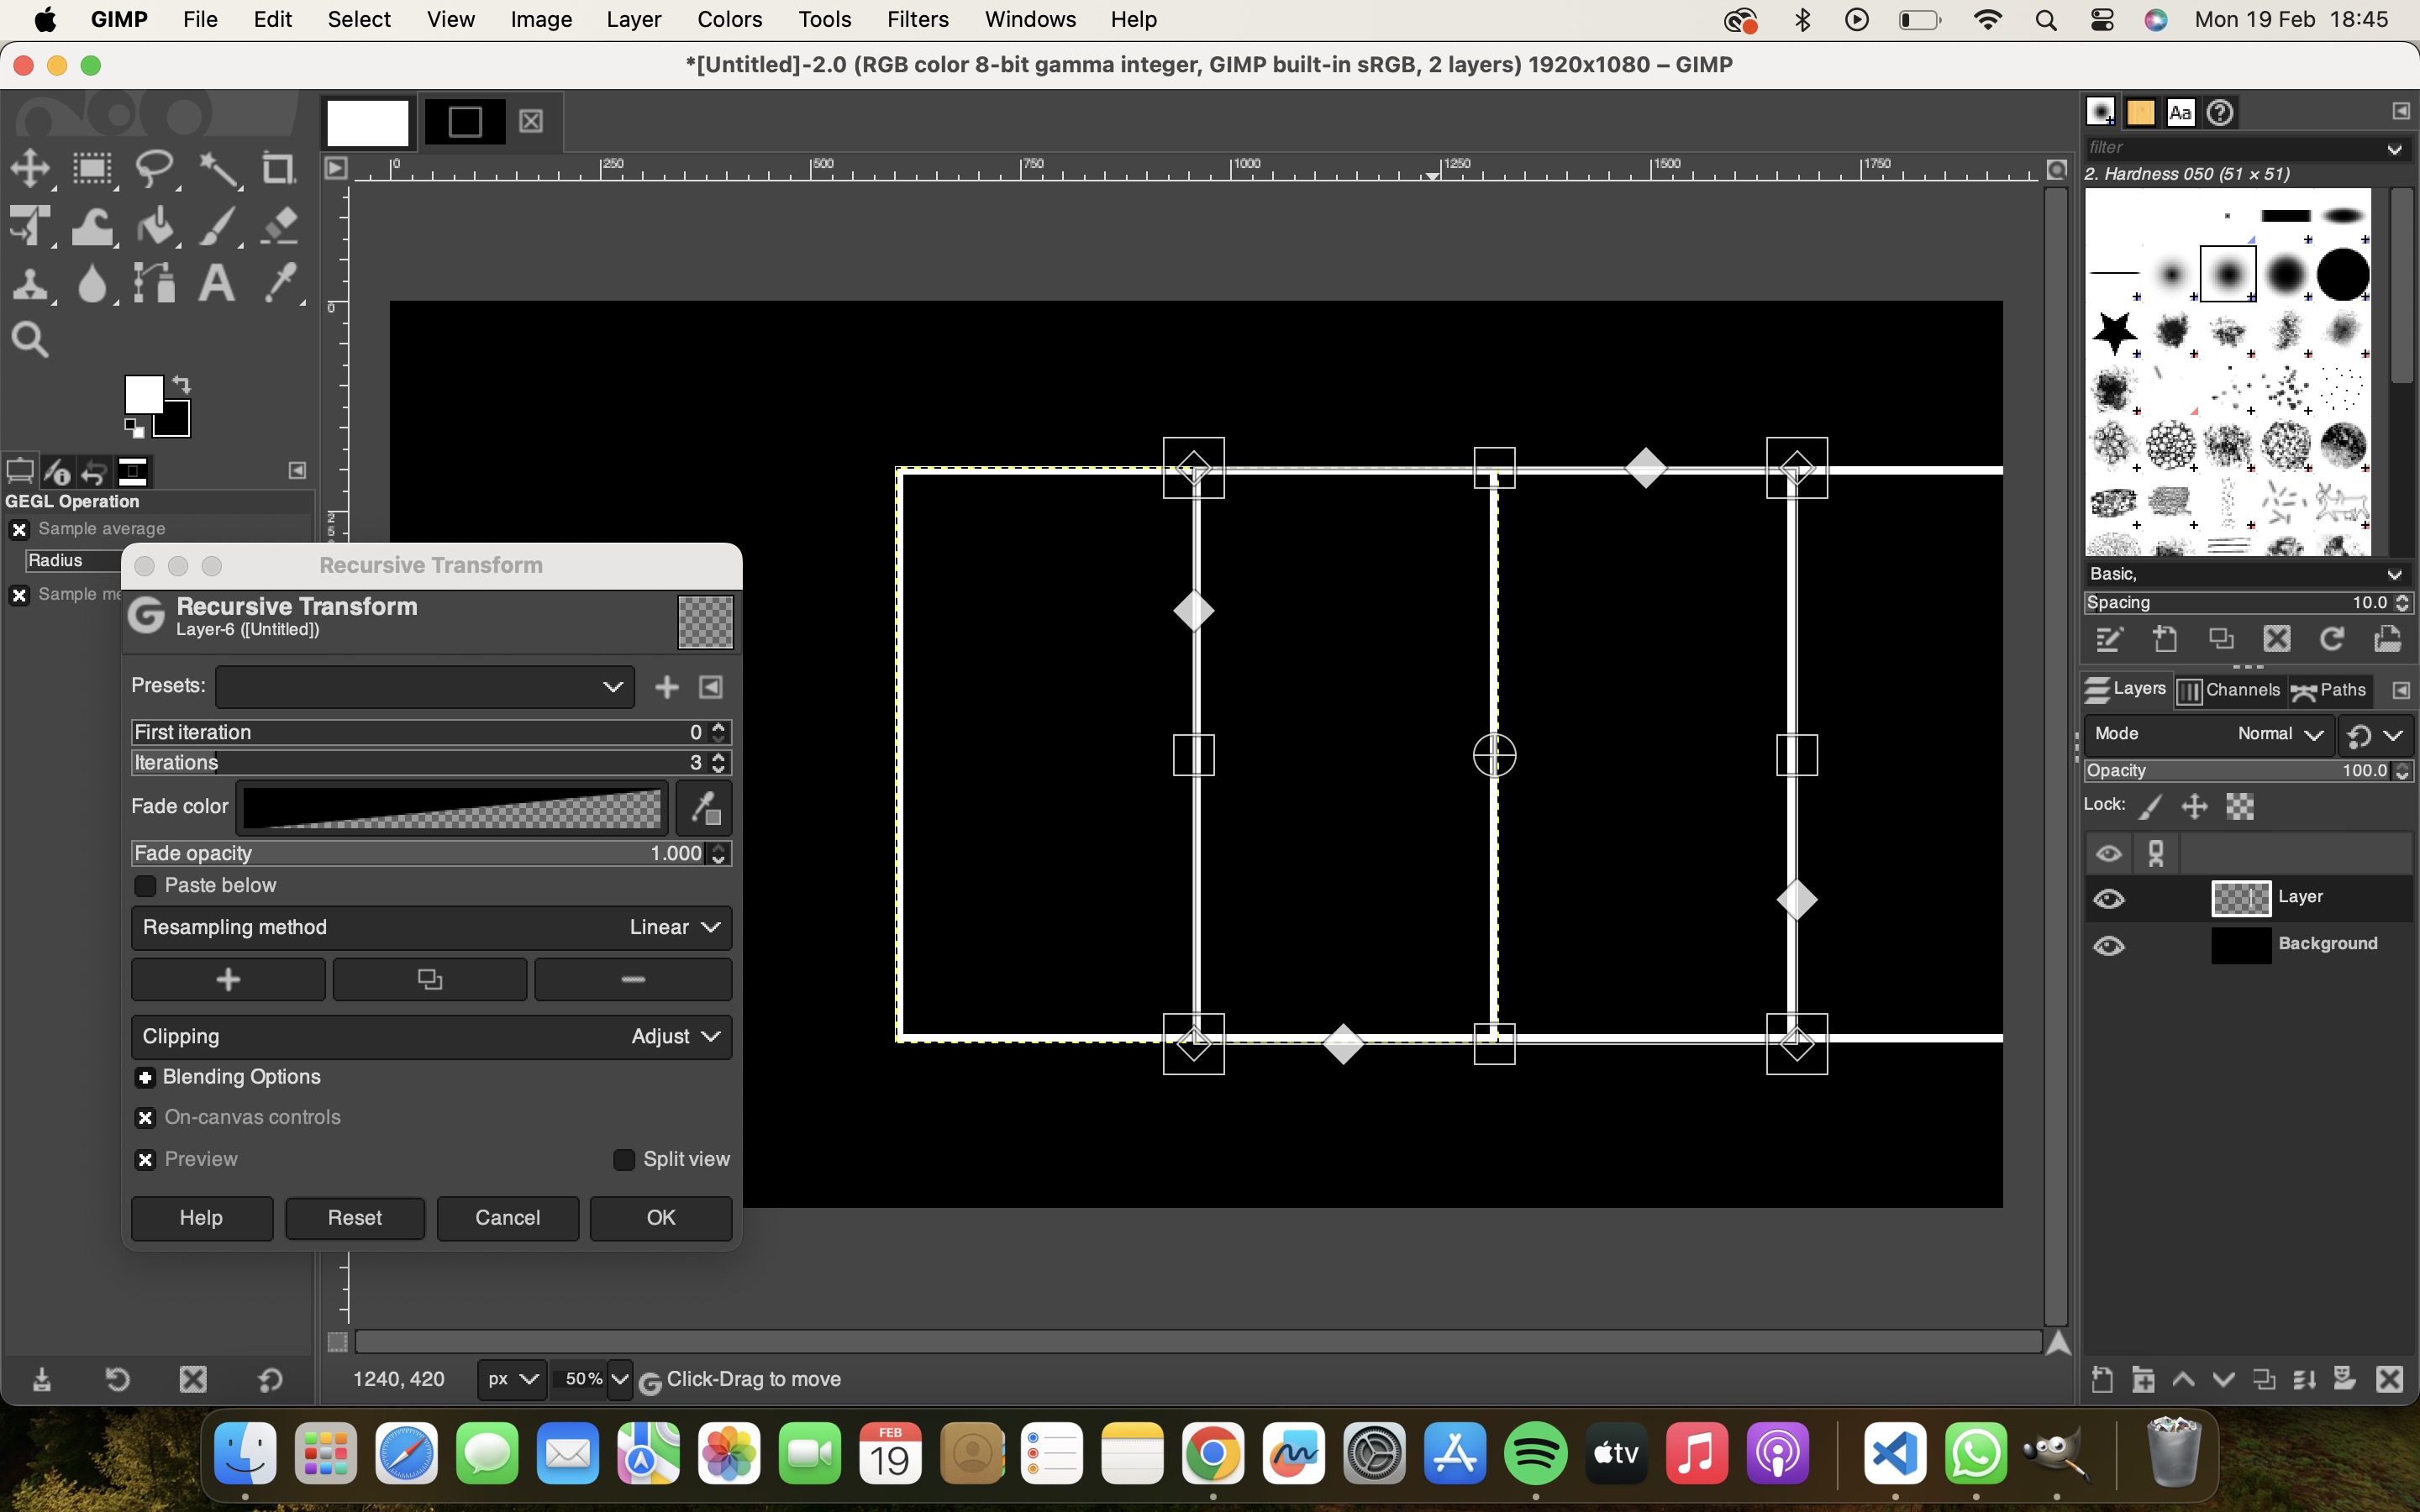
I selected ouside and we can rotate it as shown in the image below:
I selected multiple squares inside and then selected outside and rotated it
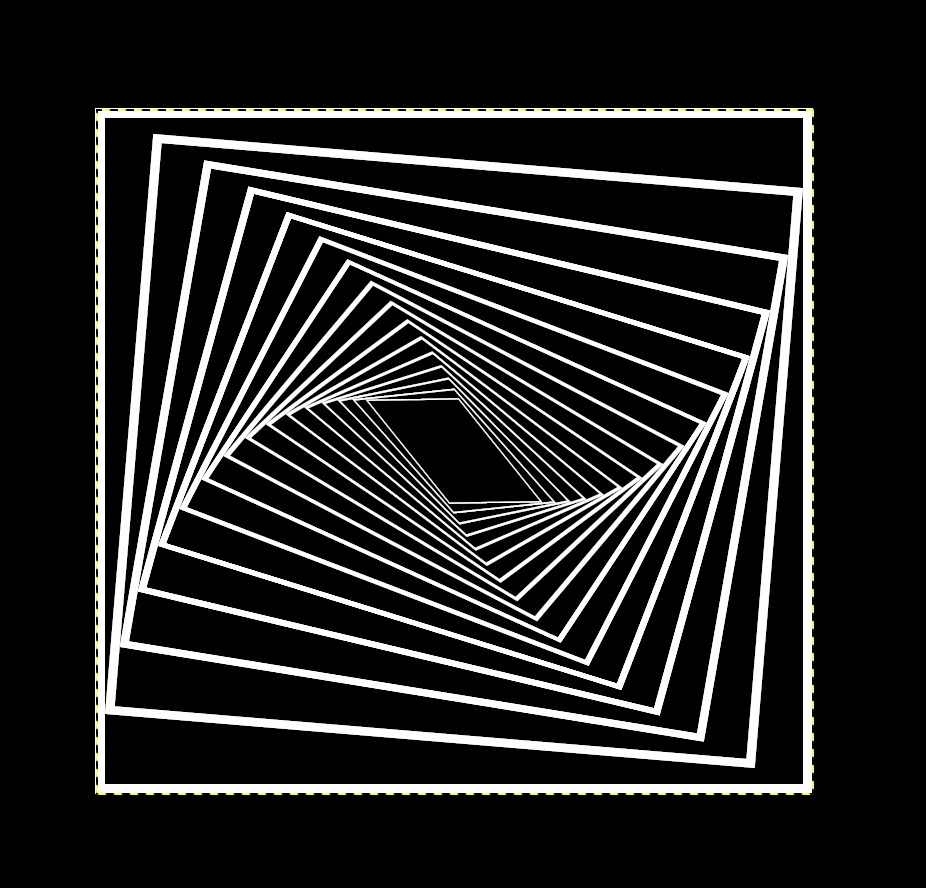
Final outcome
2.Fusion360 (3d modelling)
a. Lampshade
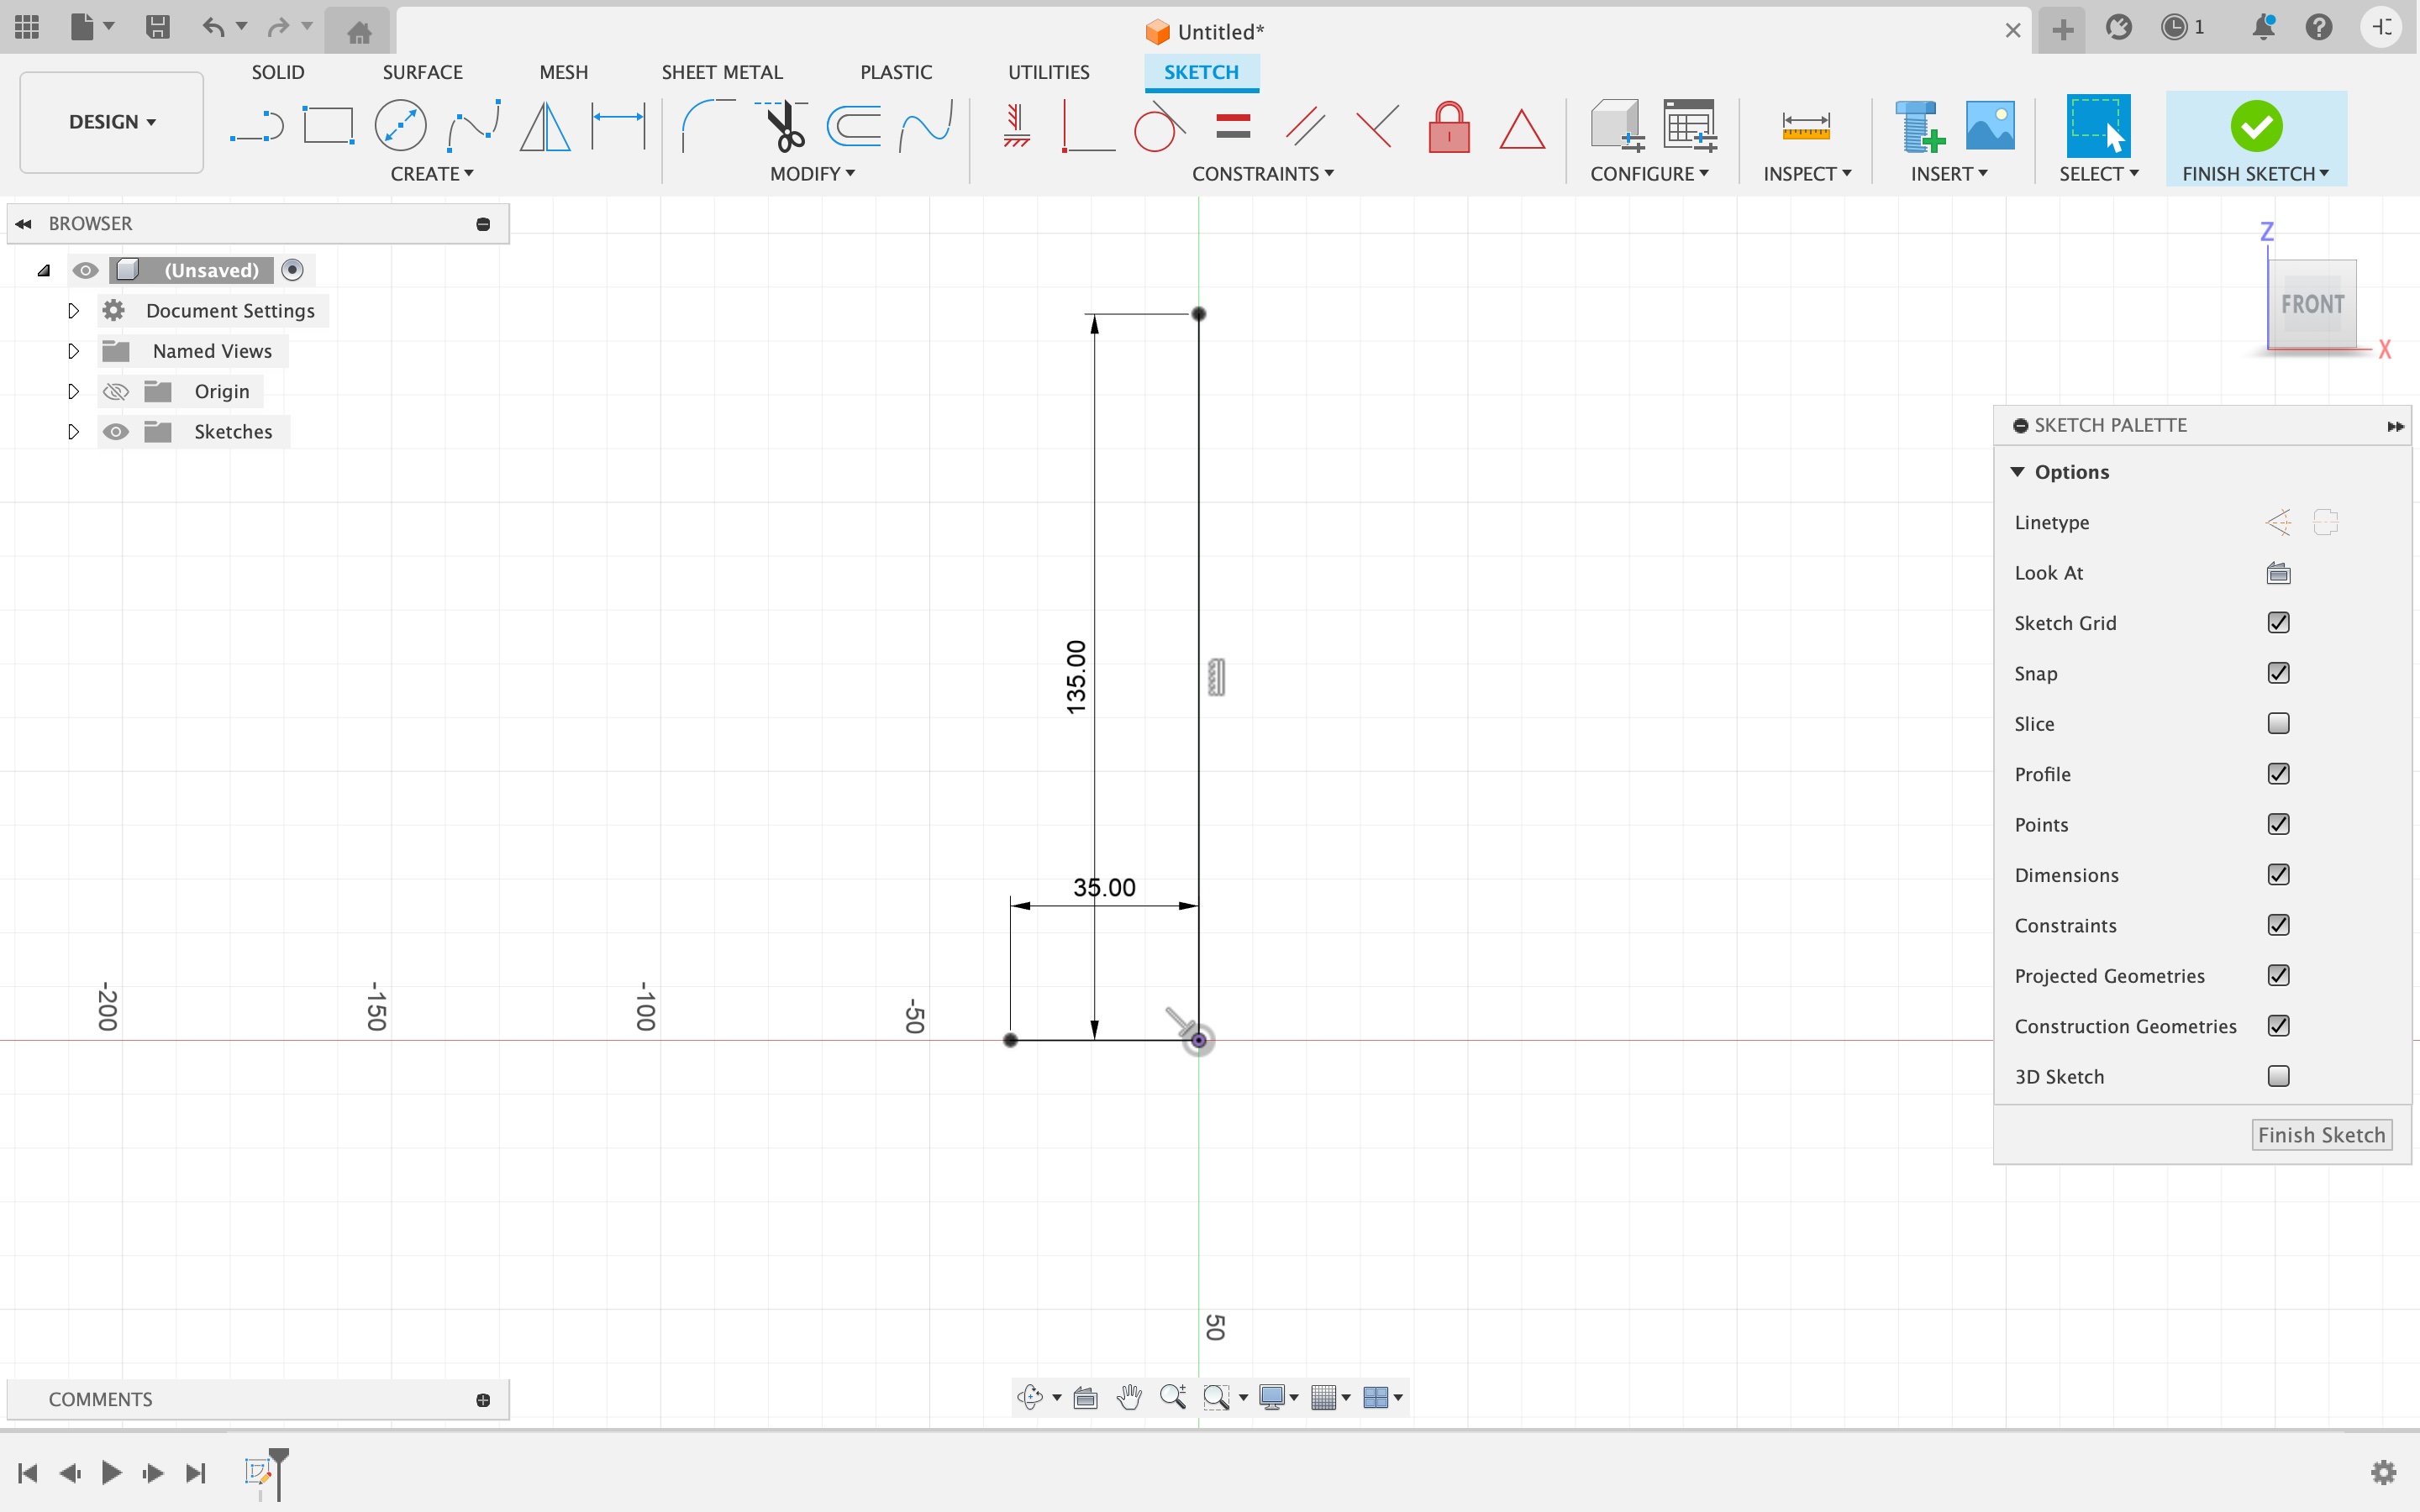
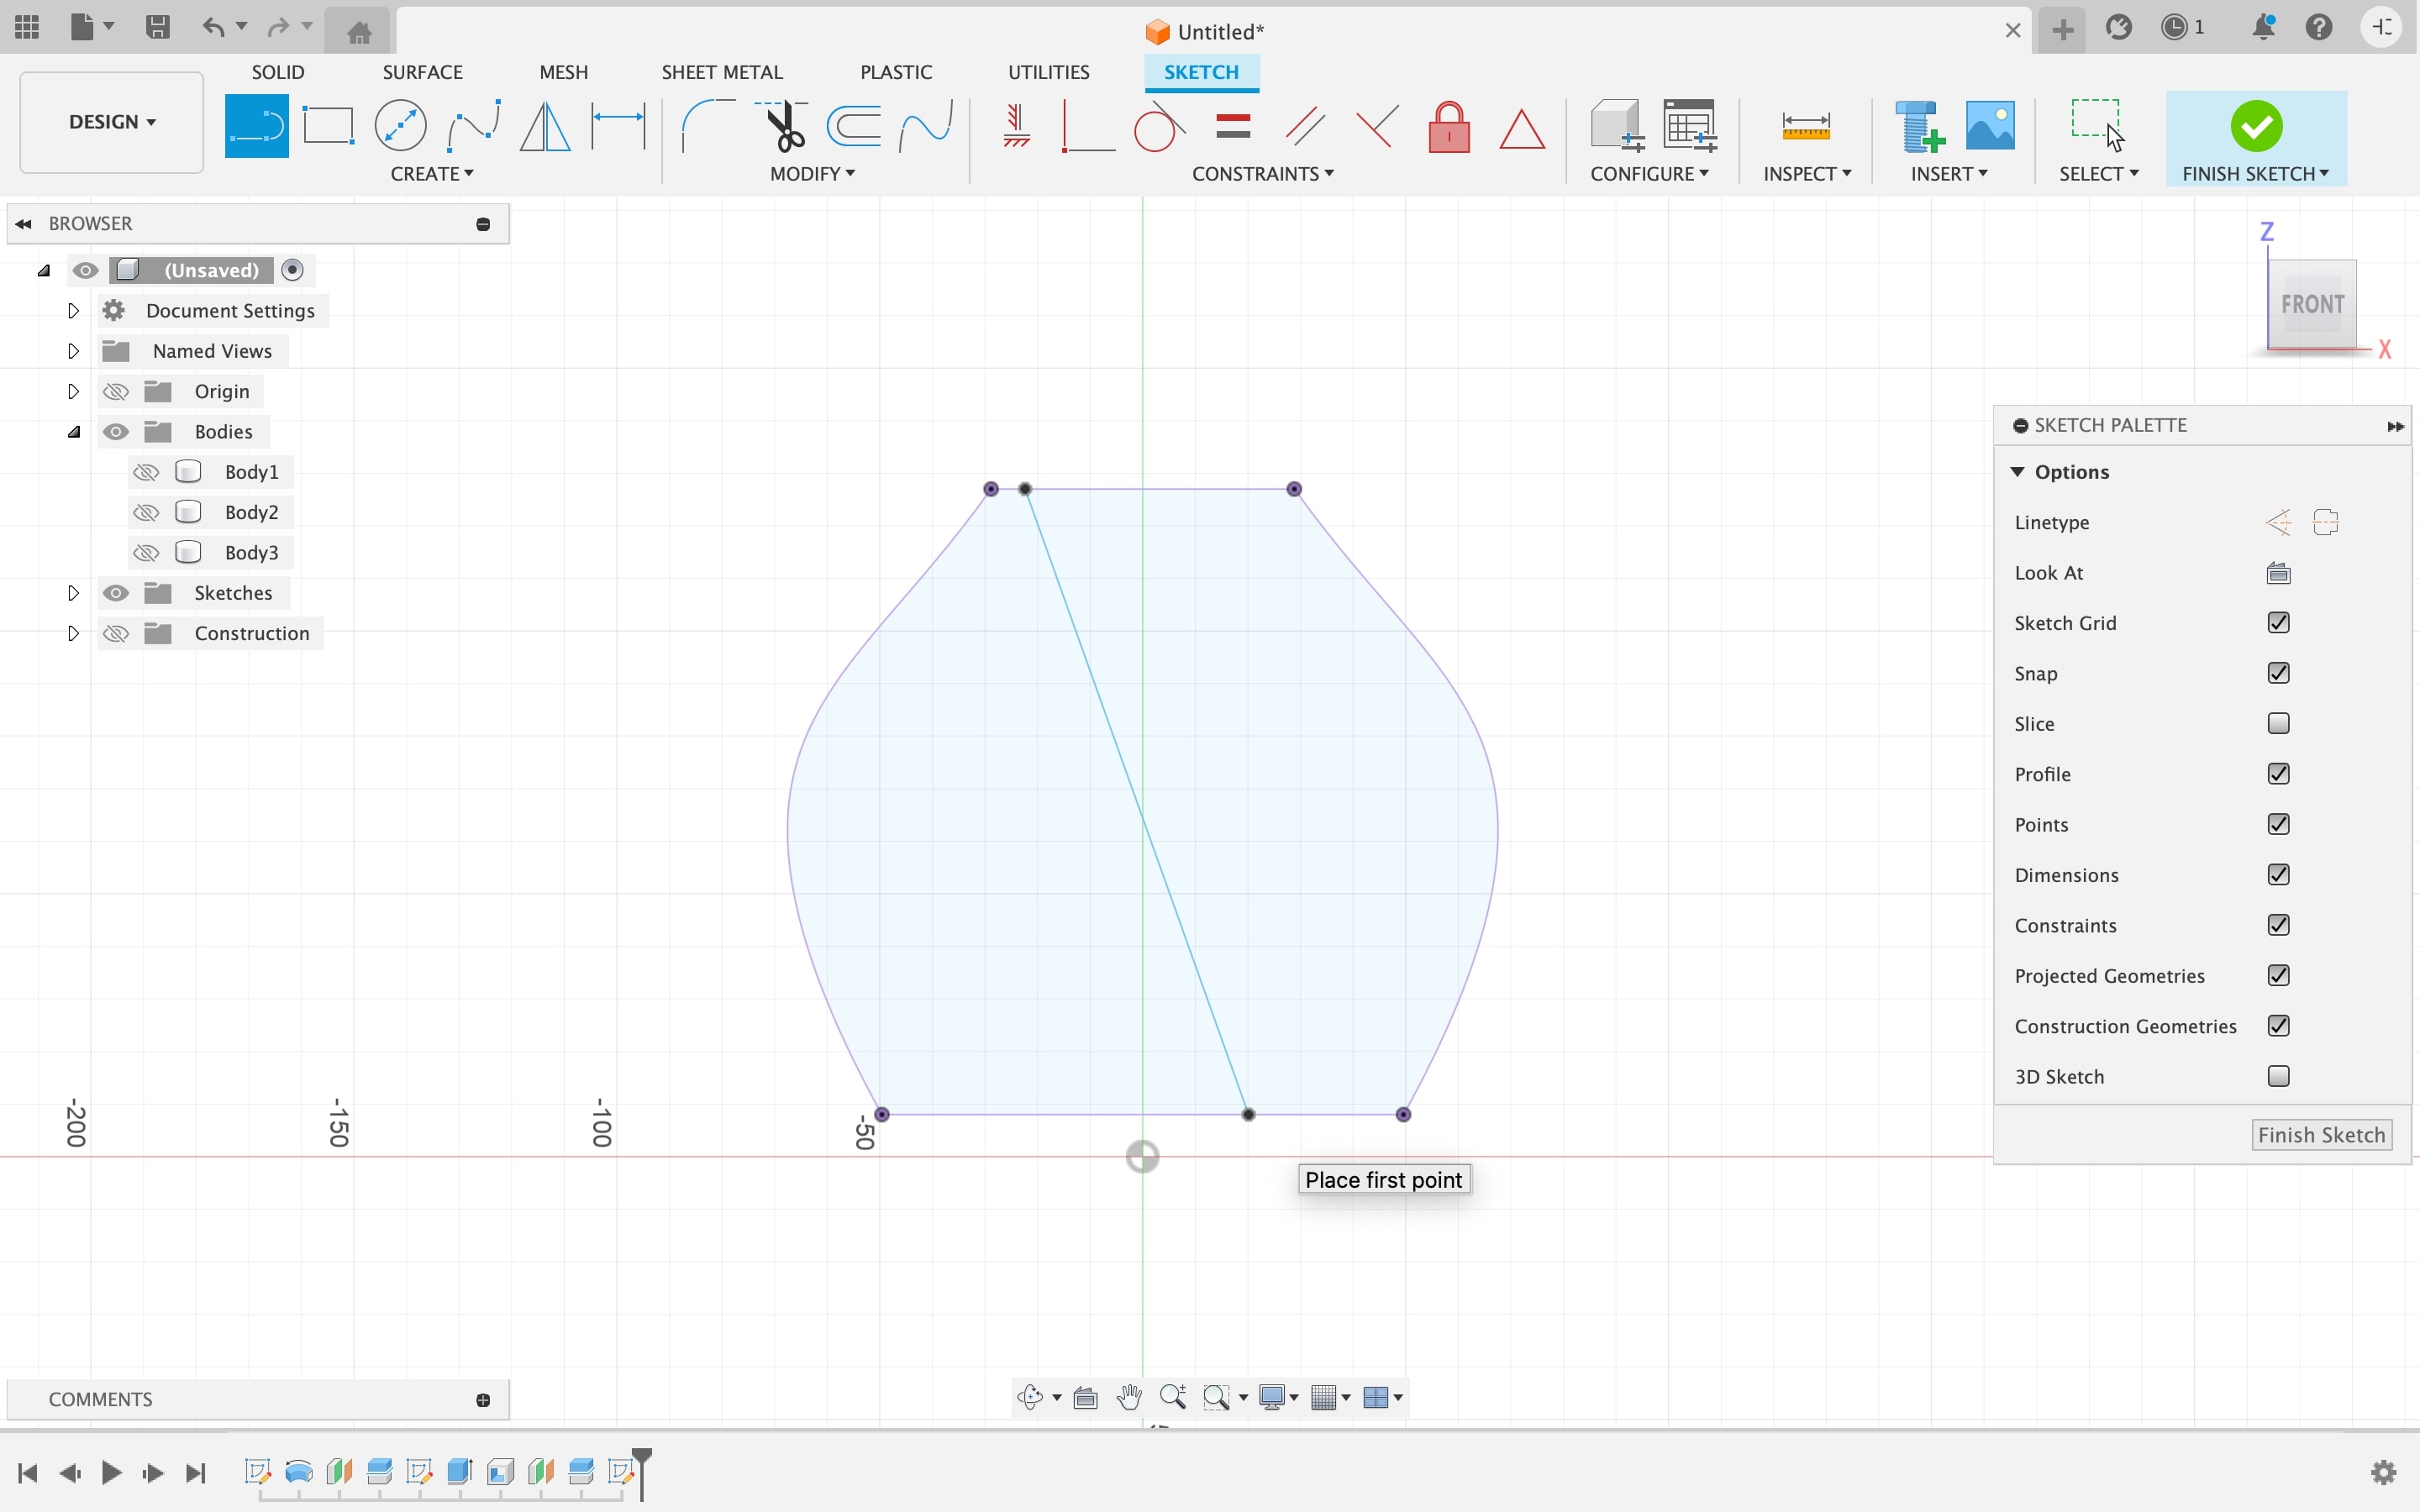
The lampshade model started with creating a sketch, I made a line and slowly made a half side shape of the lamp.
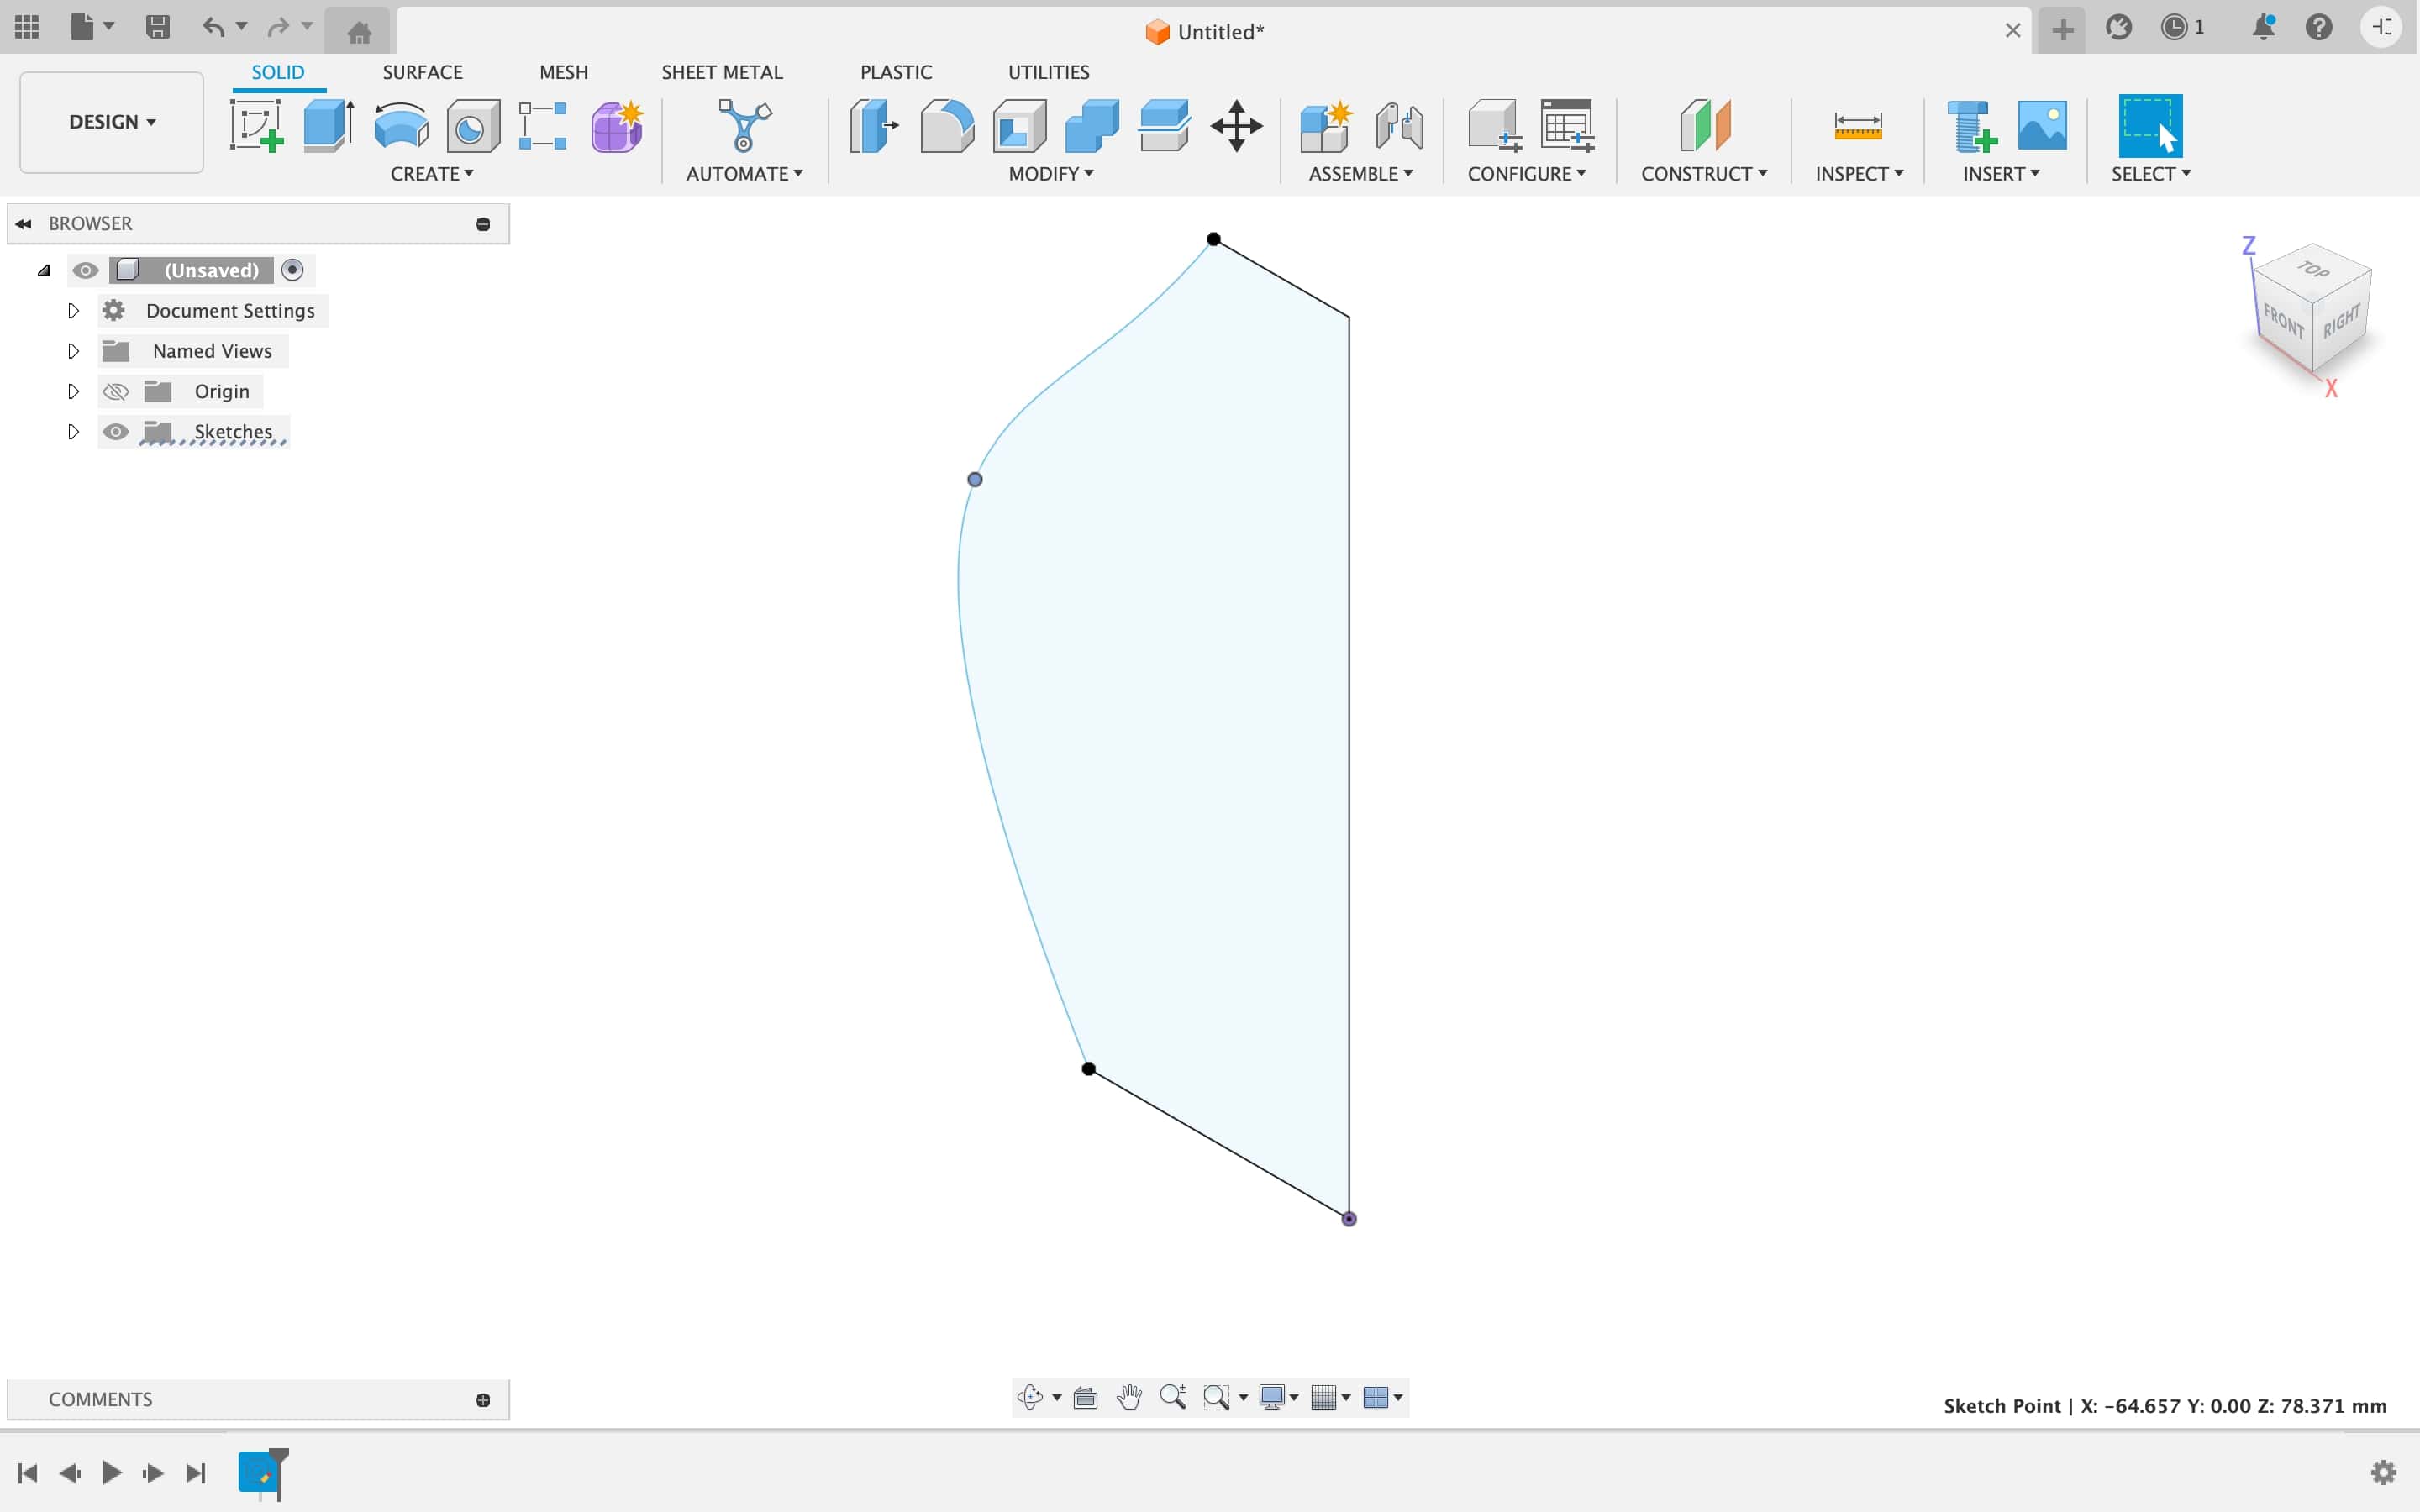
After that I rotated the sketch in 360 degree.
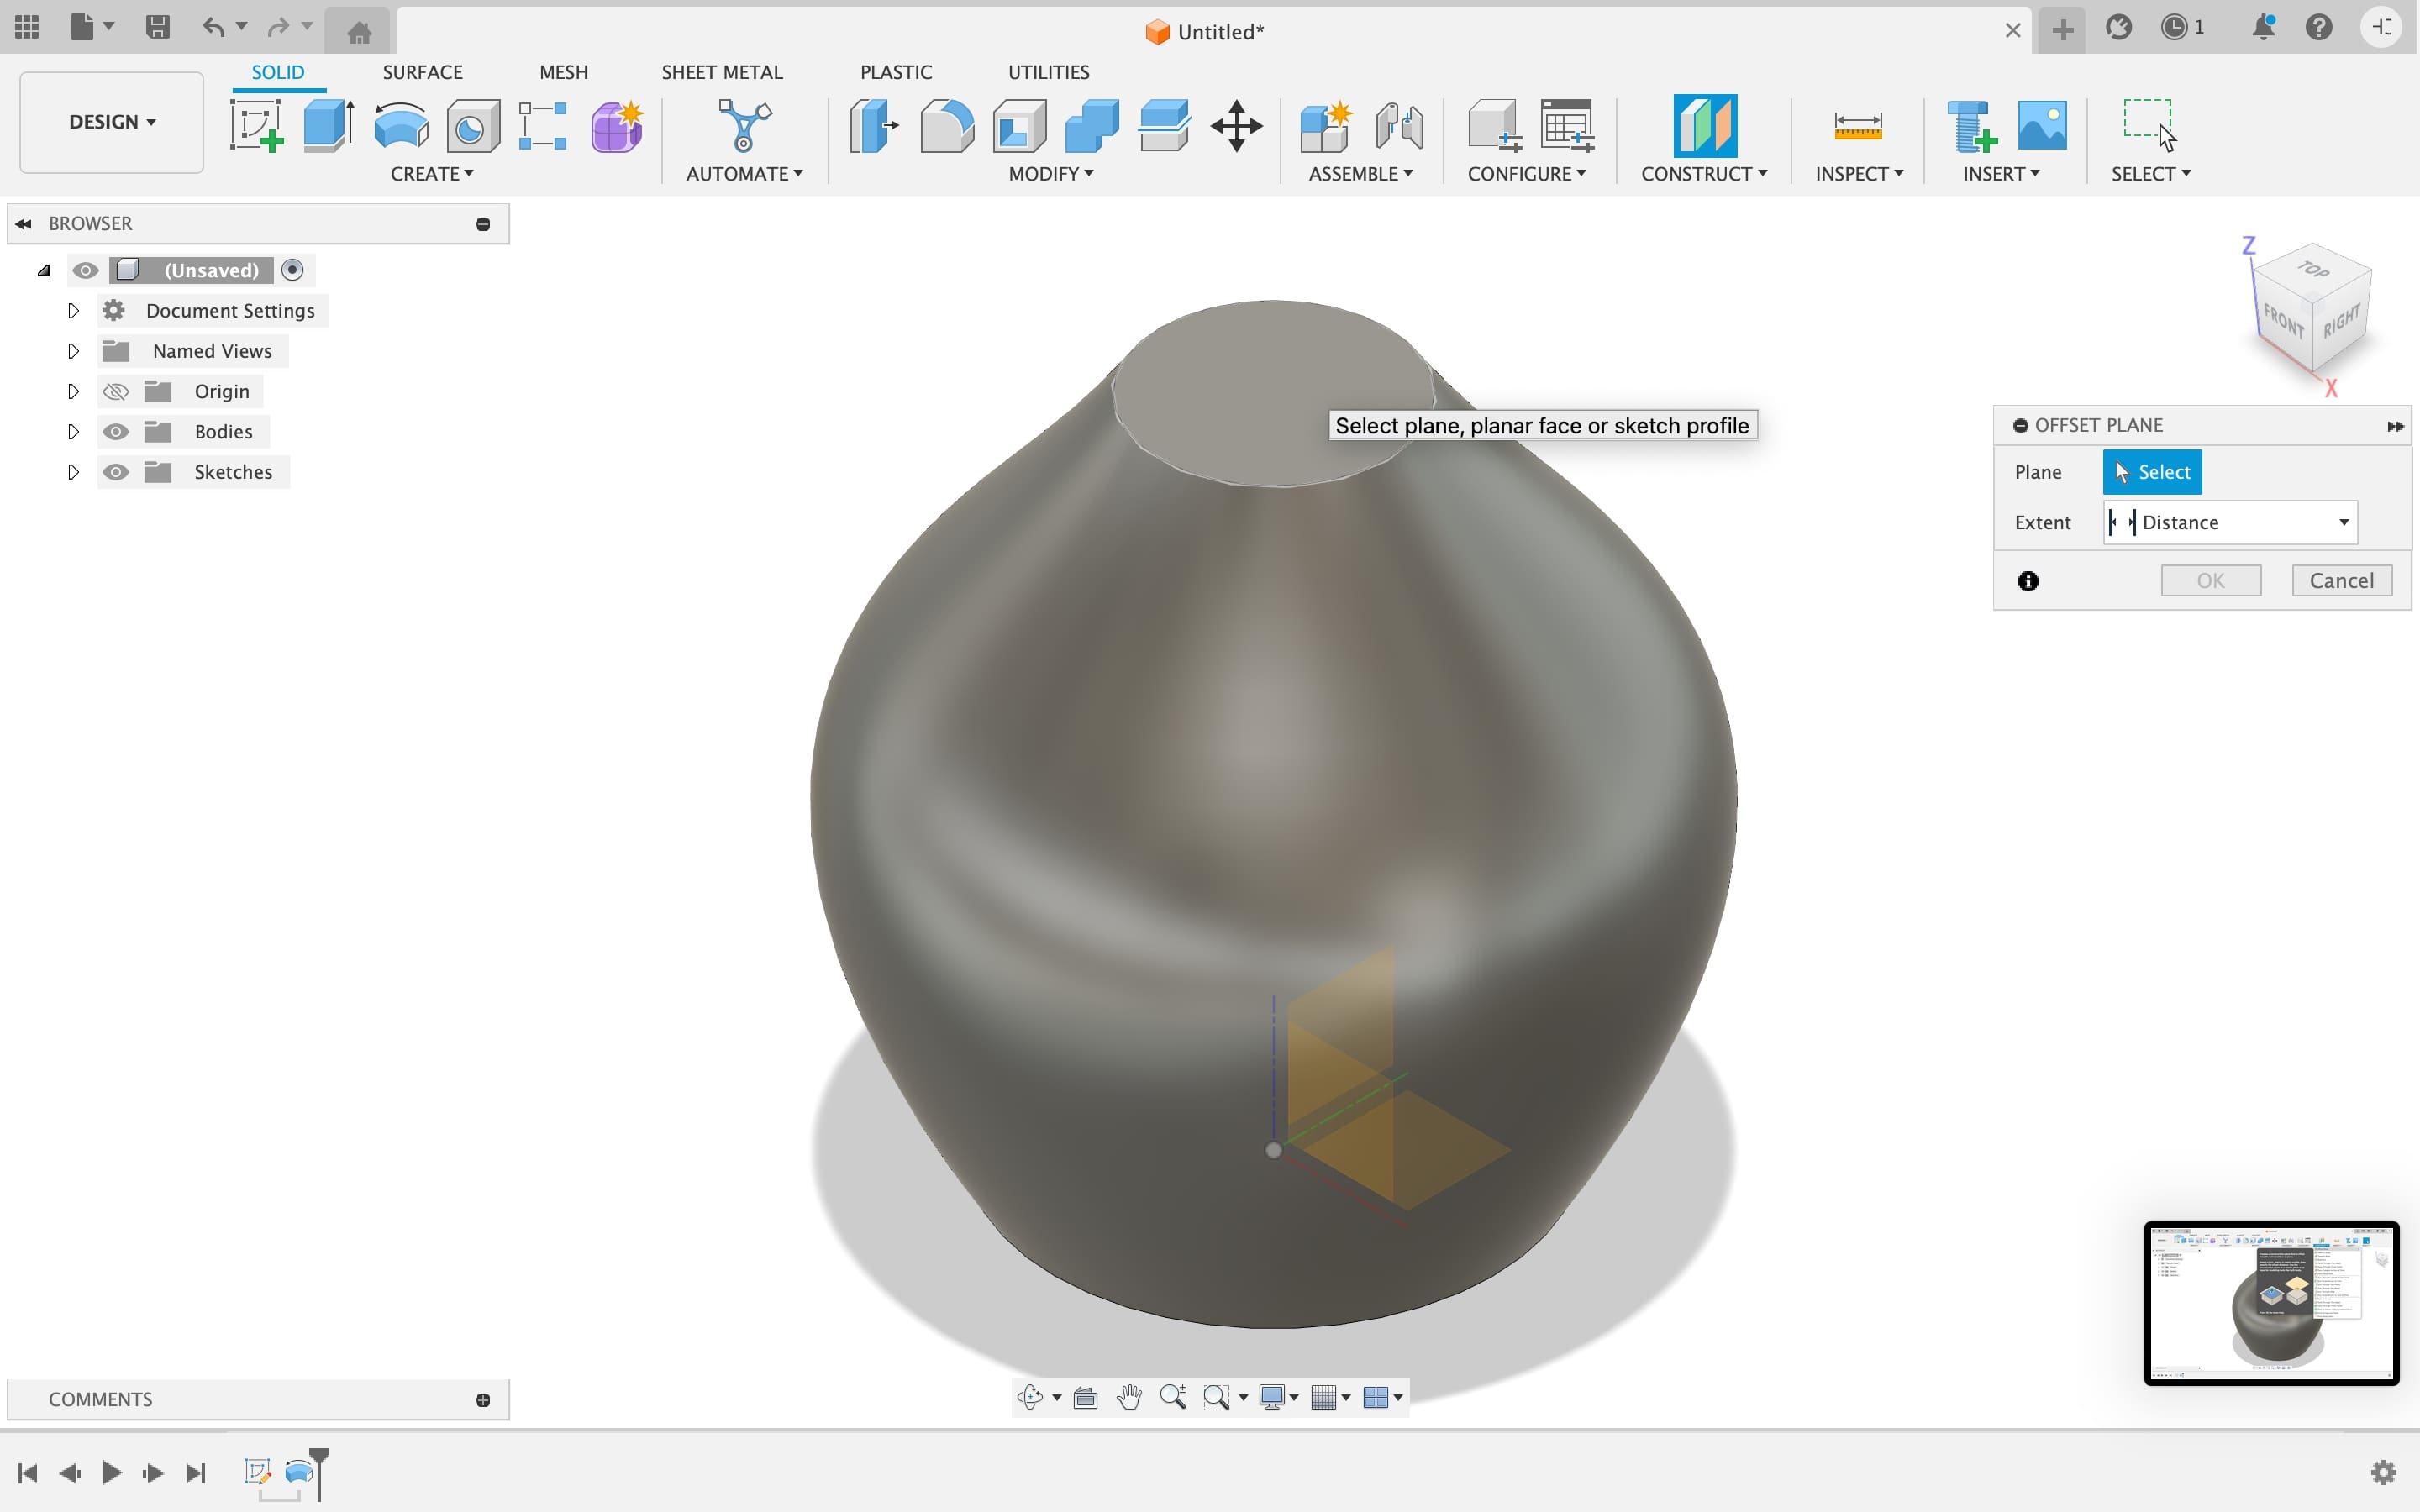
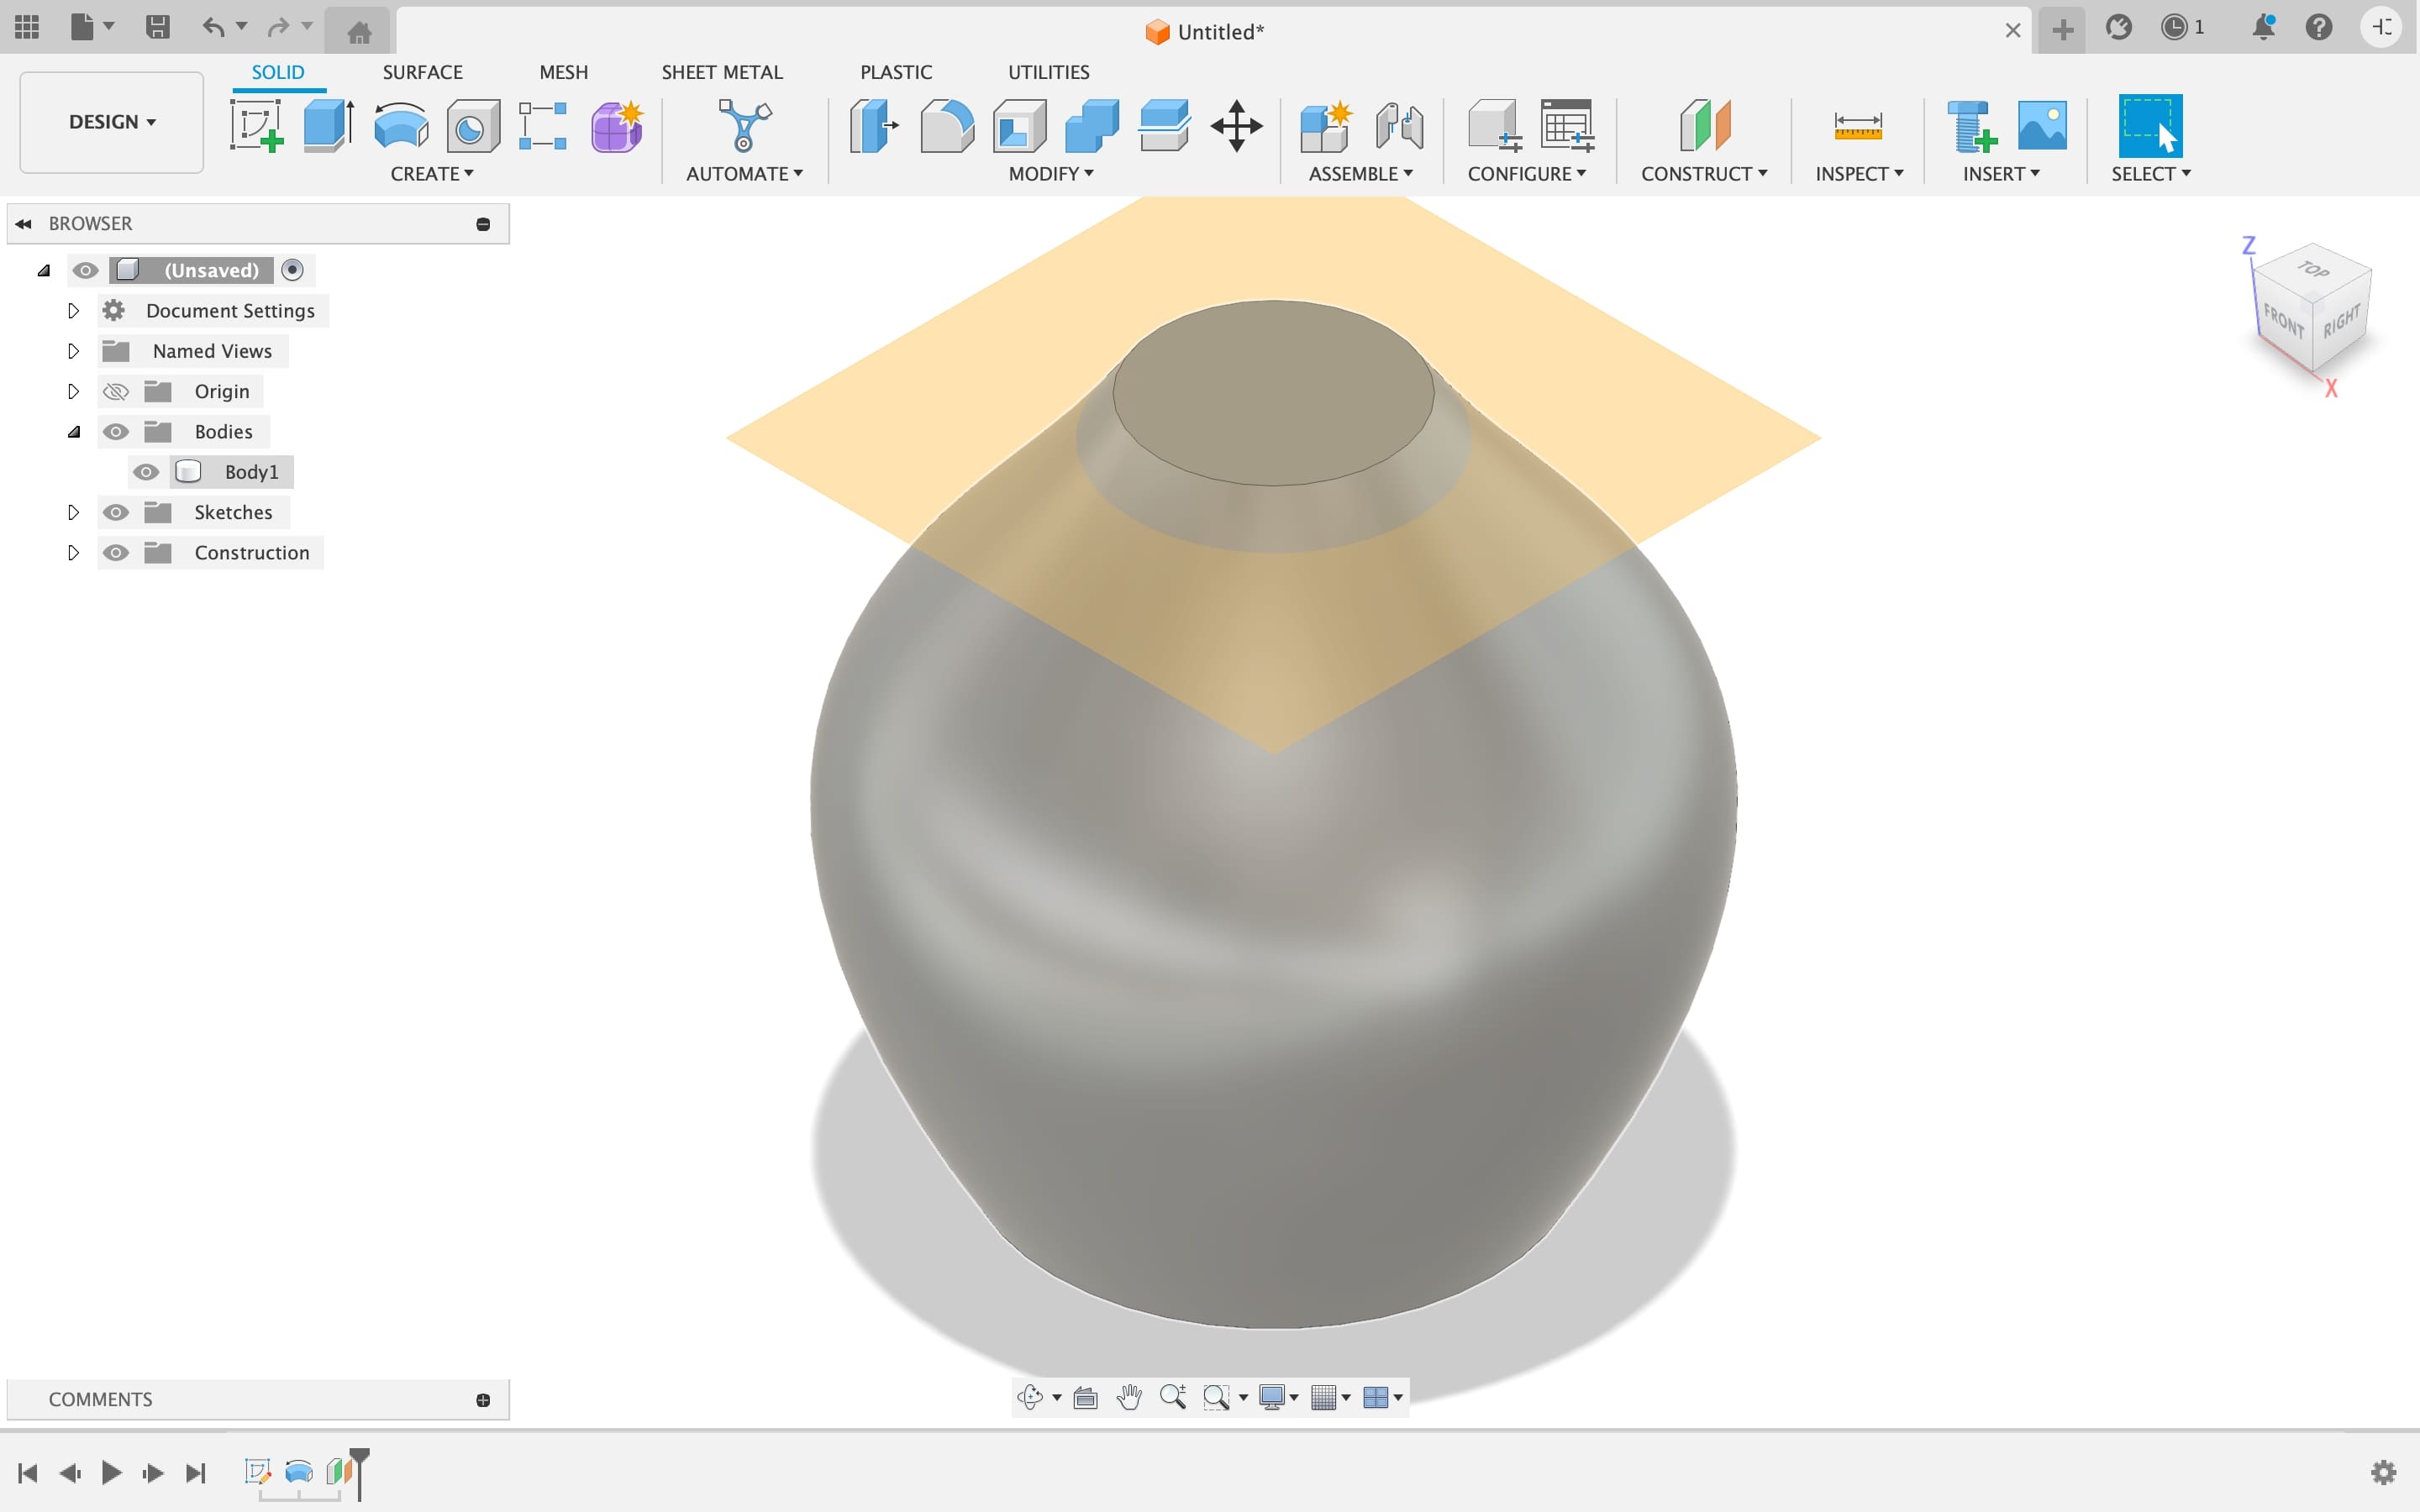
After that I made a construction plane and separated the entire lamp into three parts: the above ring, the body and the below ring.
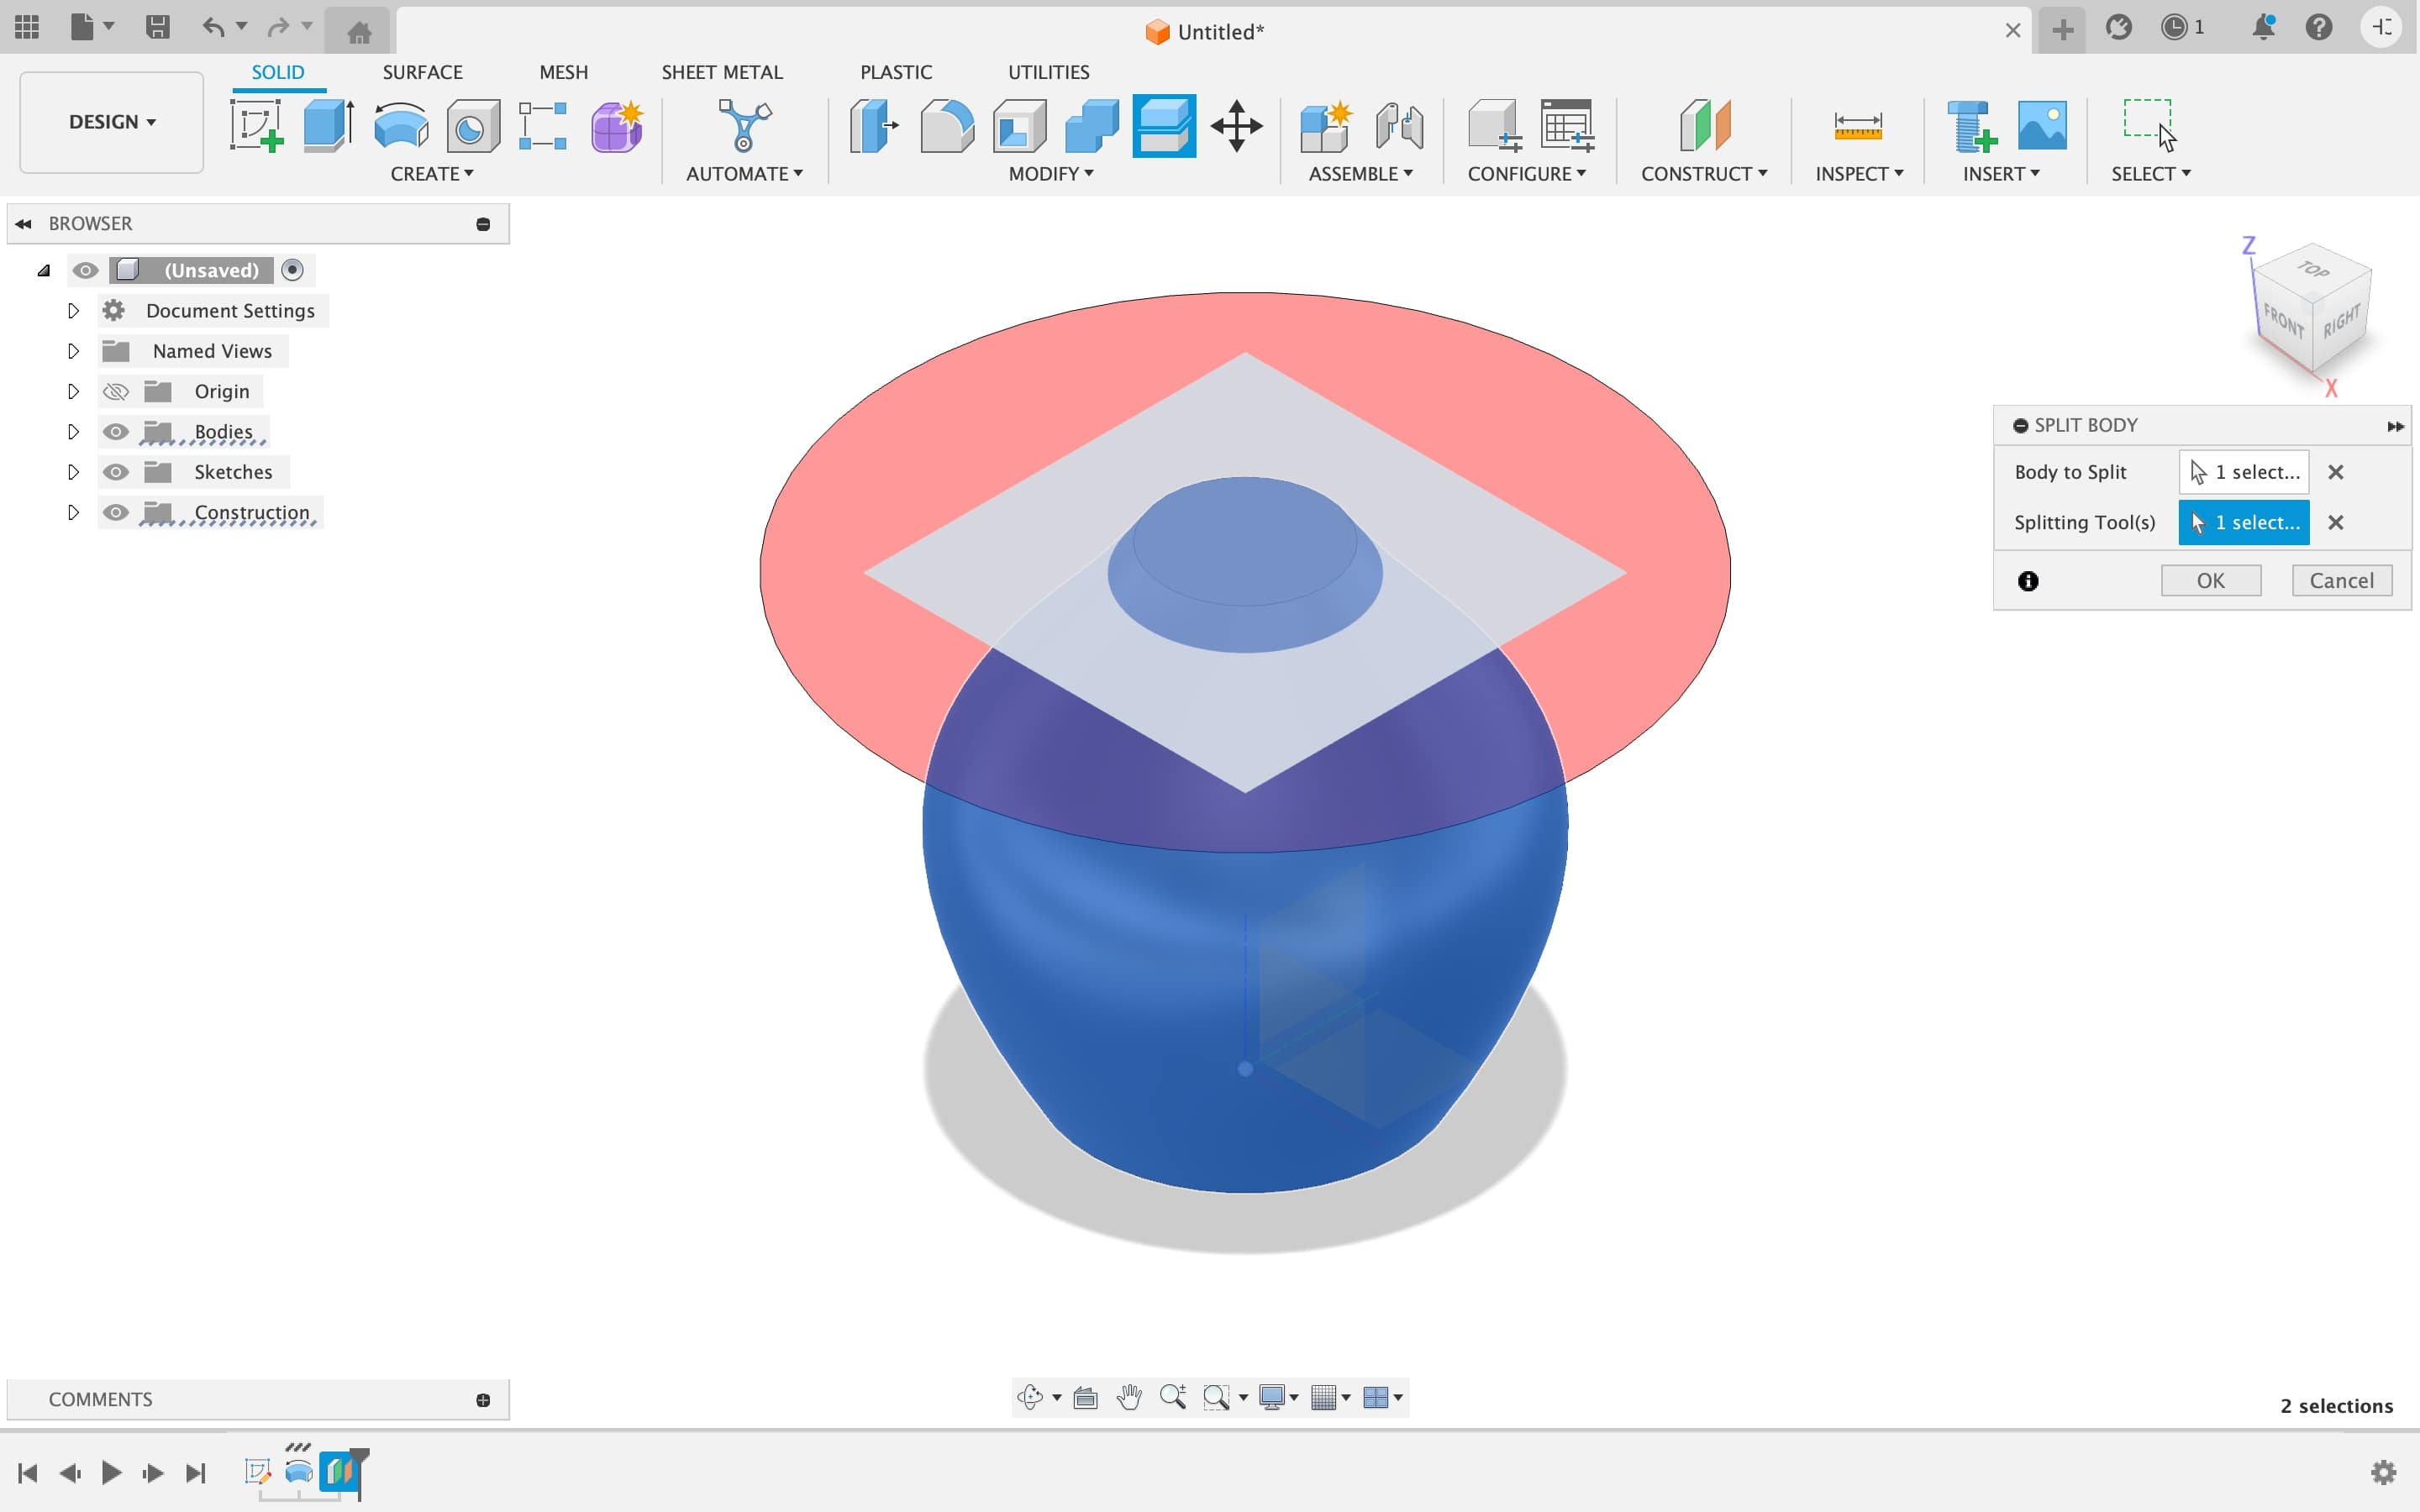
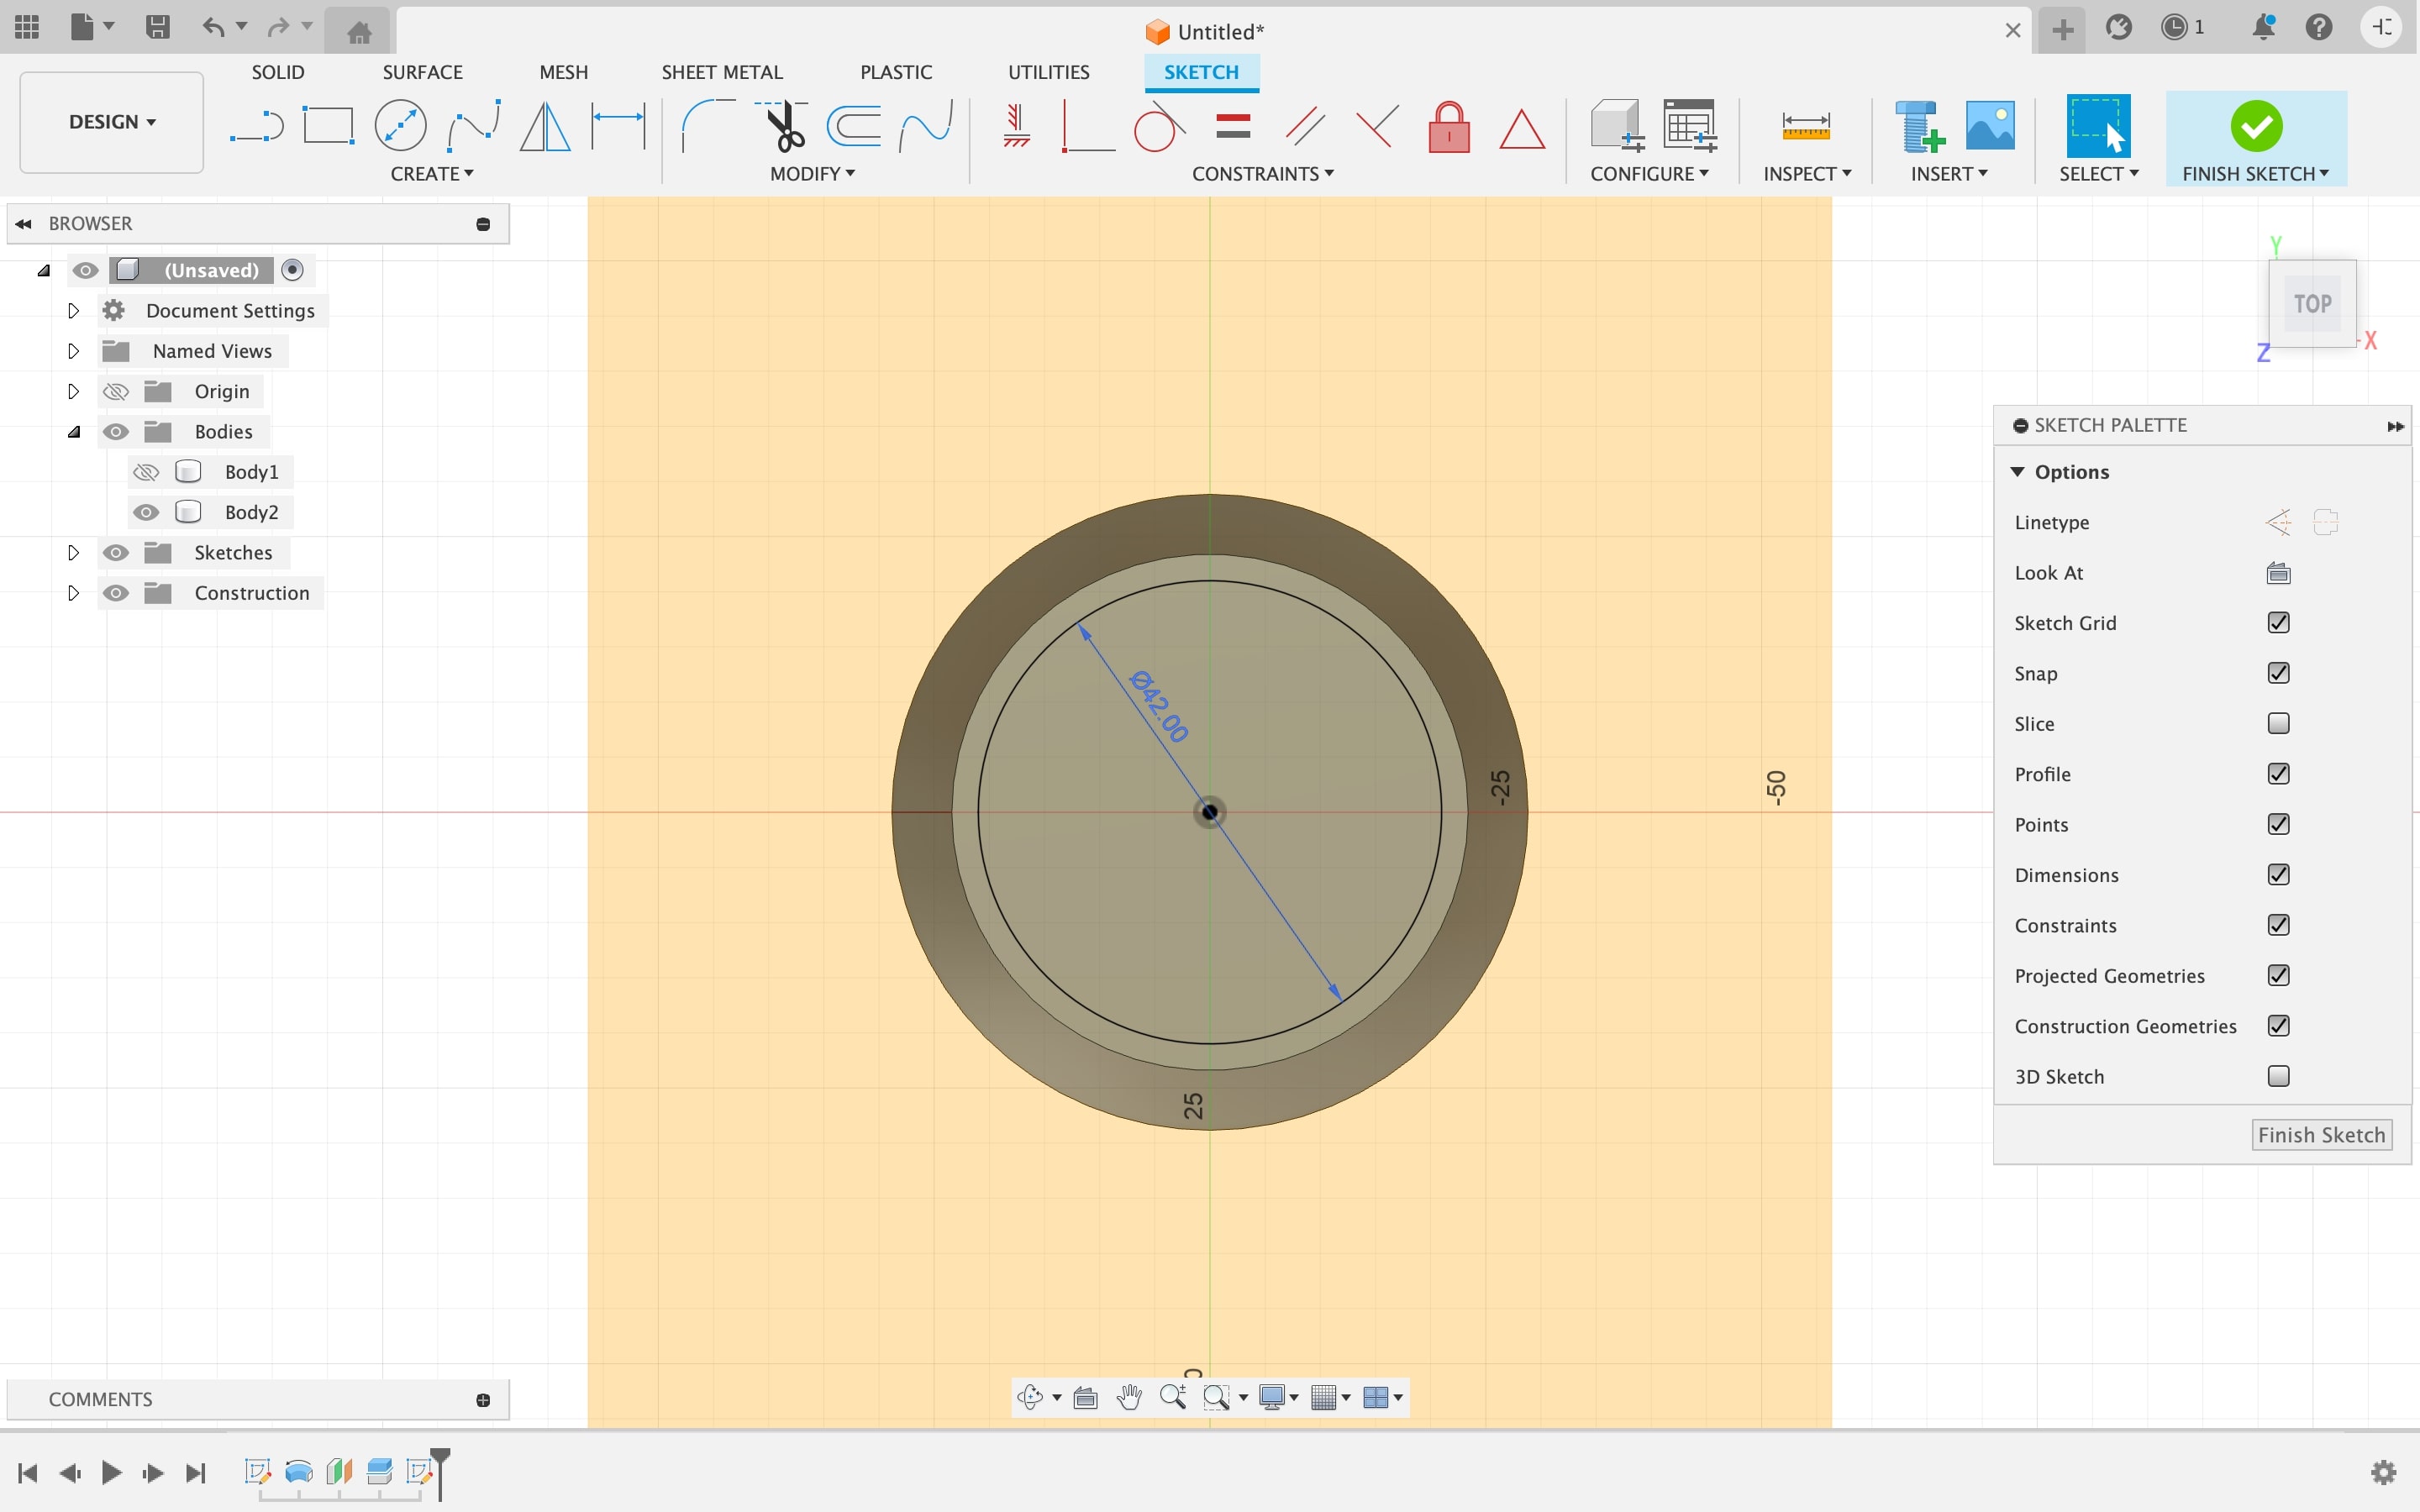
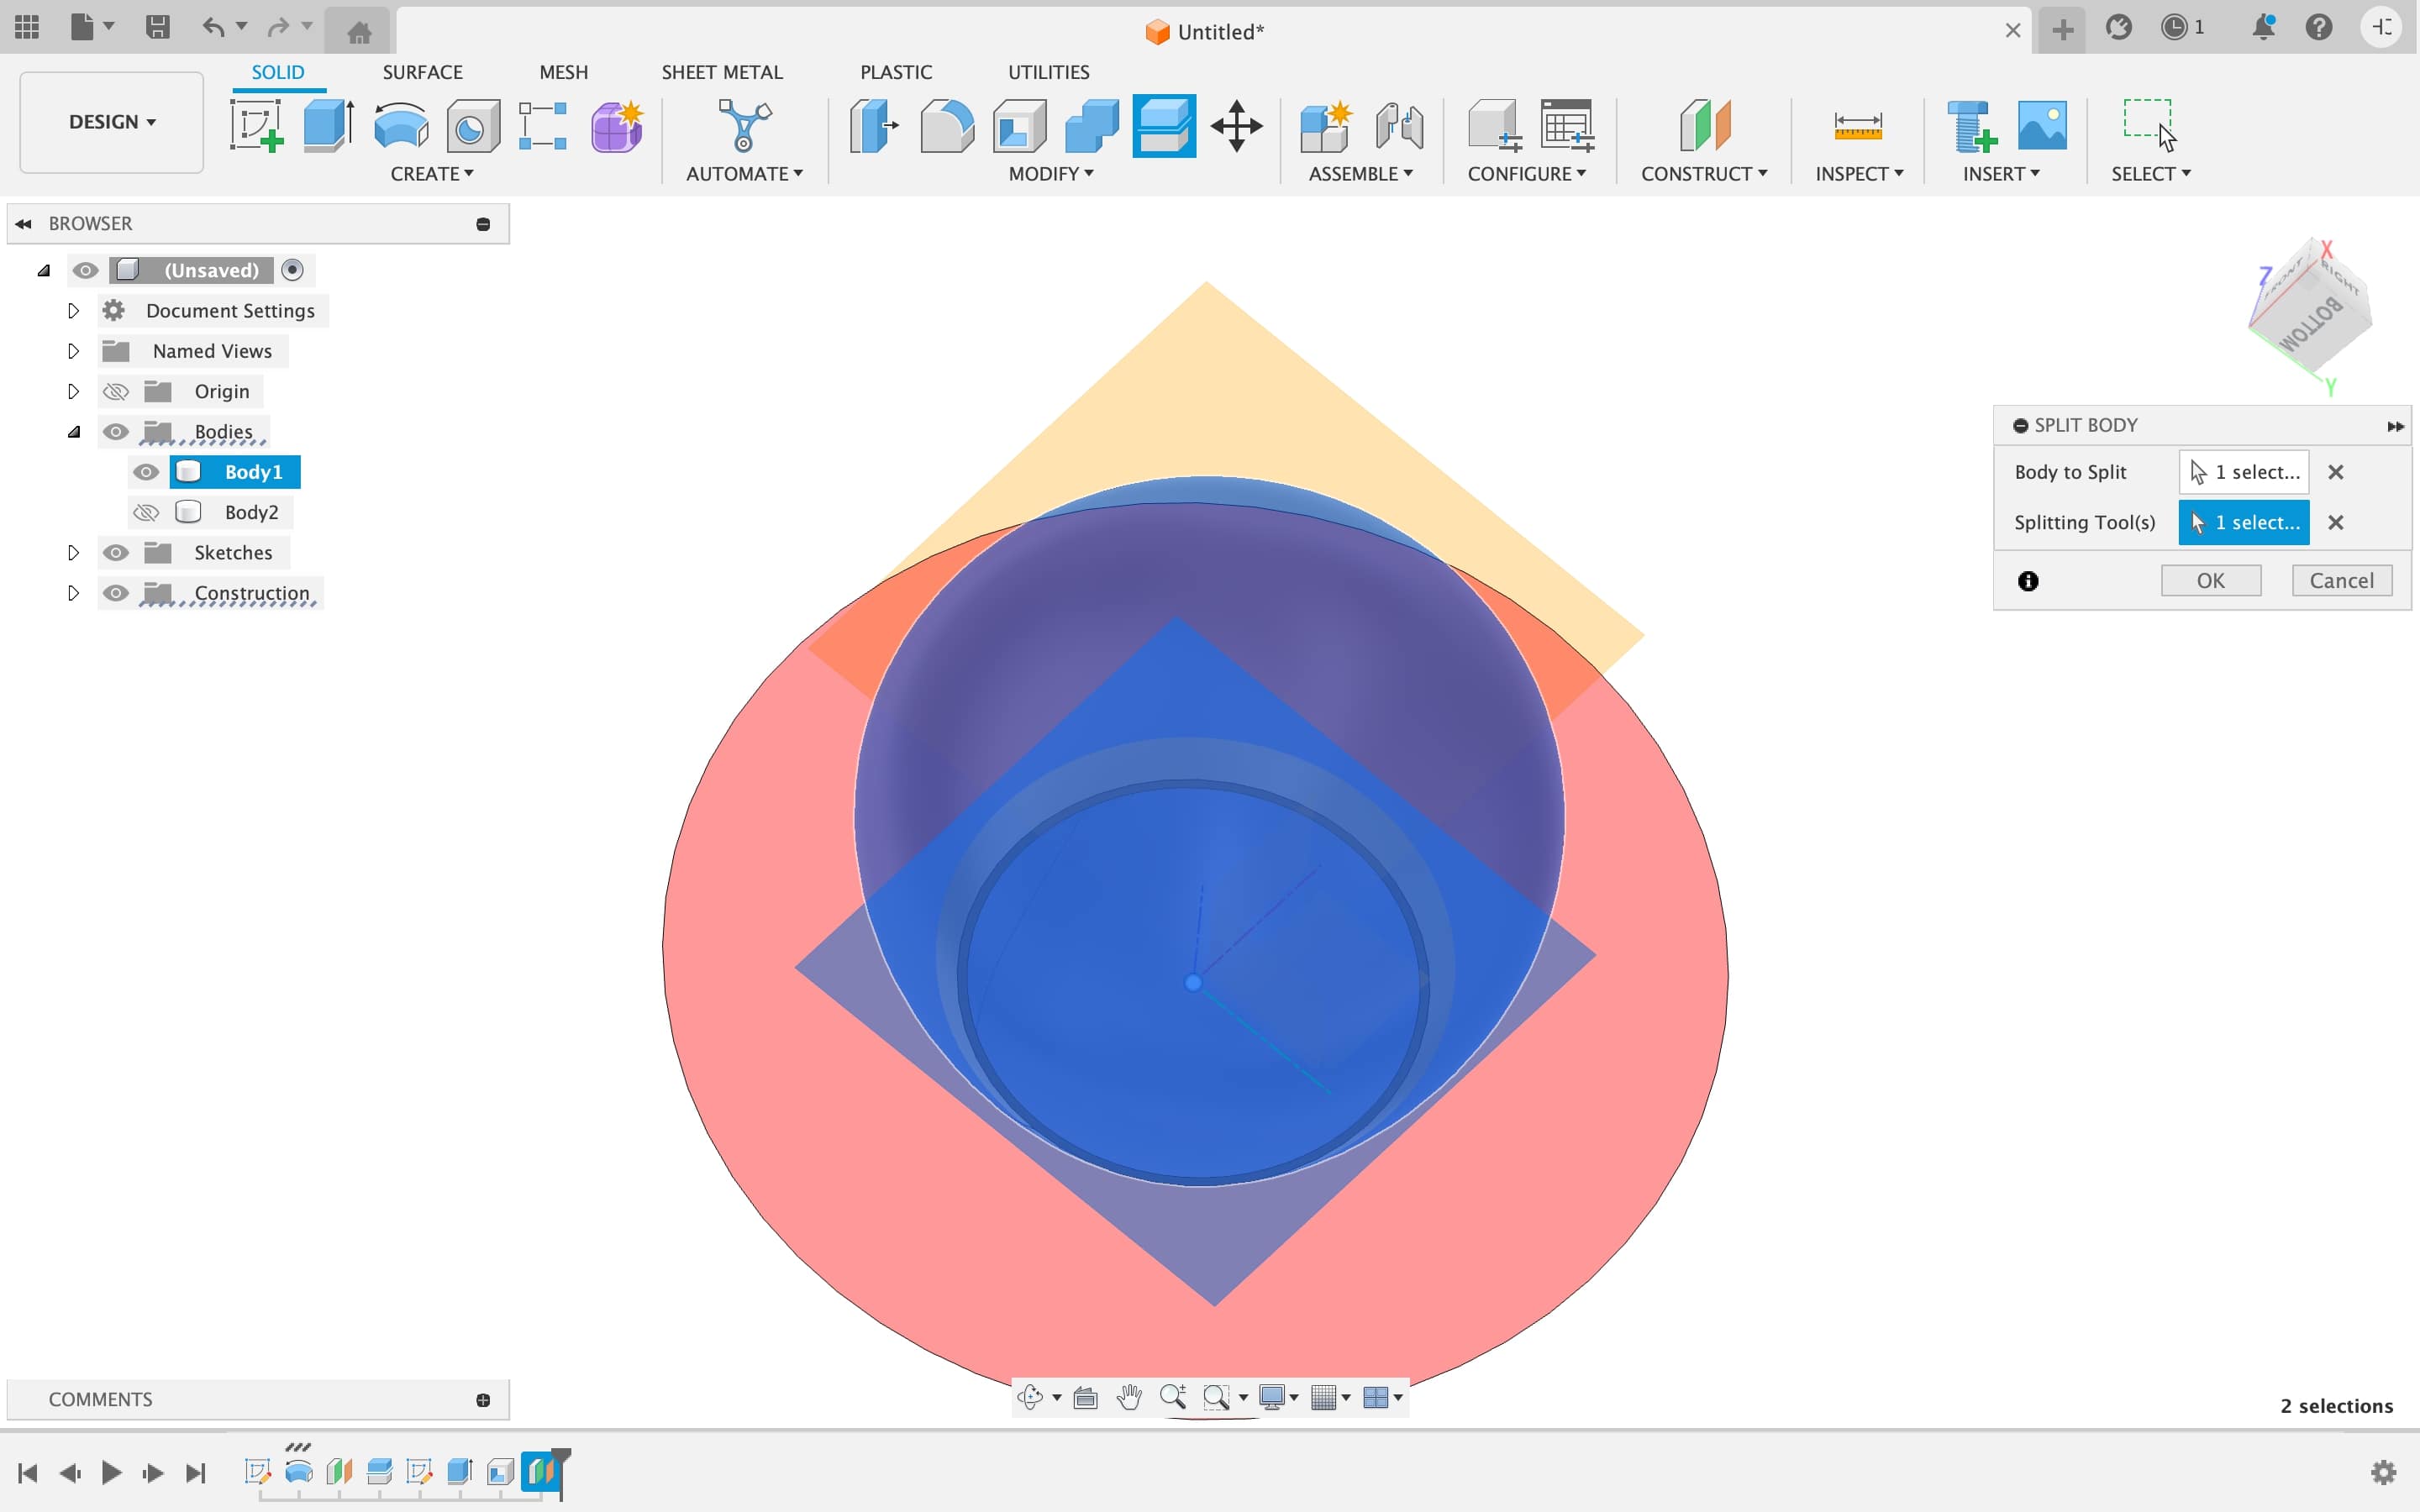
After that I created a pattern on the middle body of the lampshade and we started by sketching on one of the middle bodies, projected into existing geometry and after completing the sketch I extruded into and changed the side into symmetric from one side.
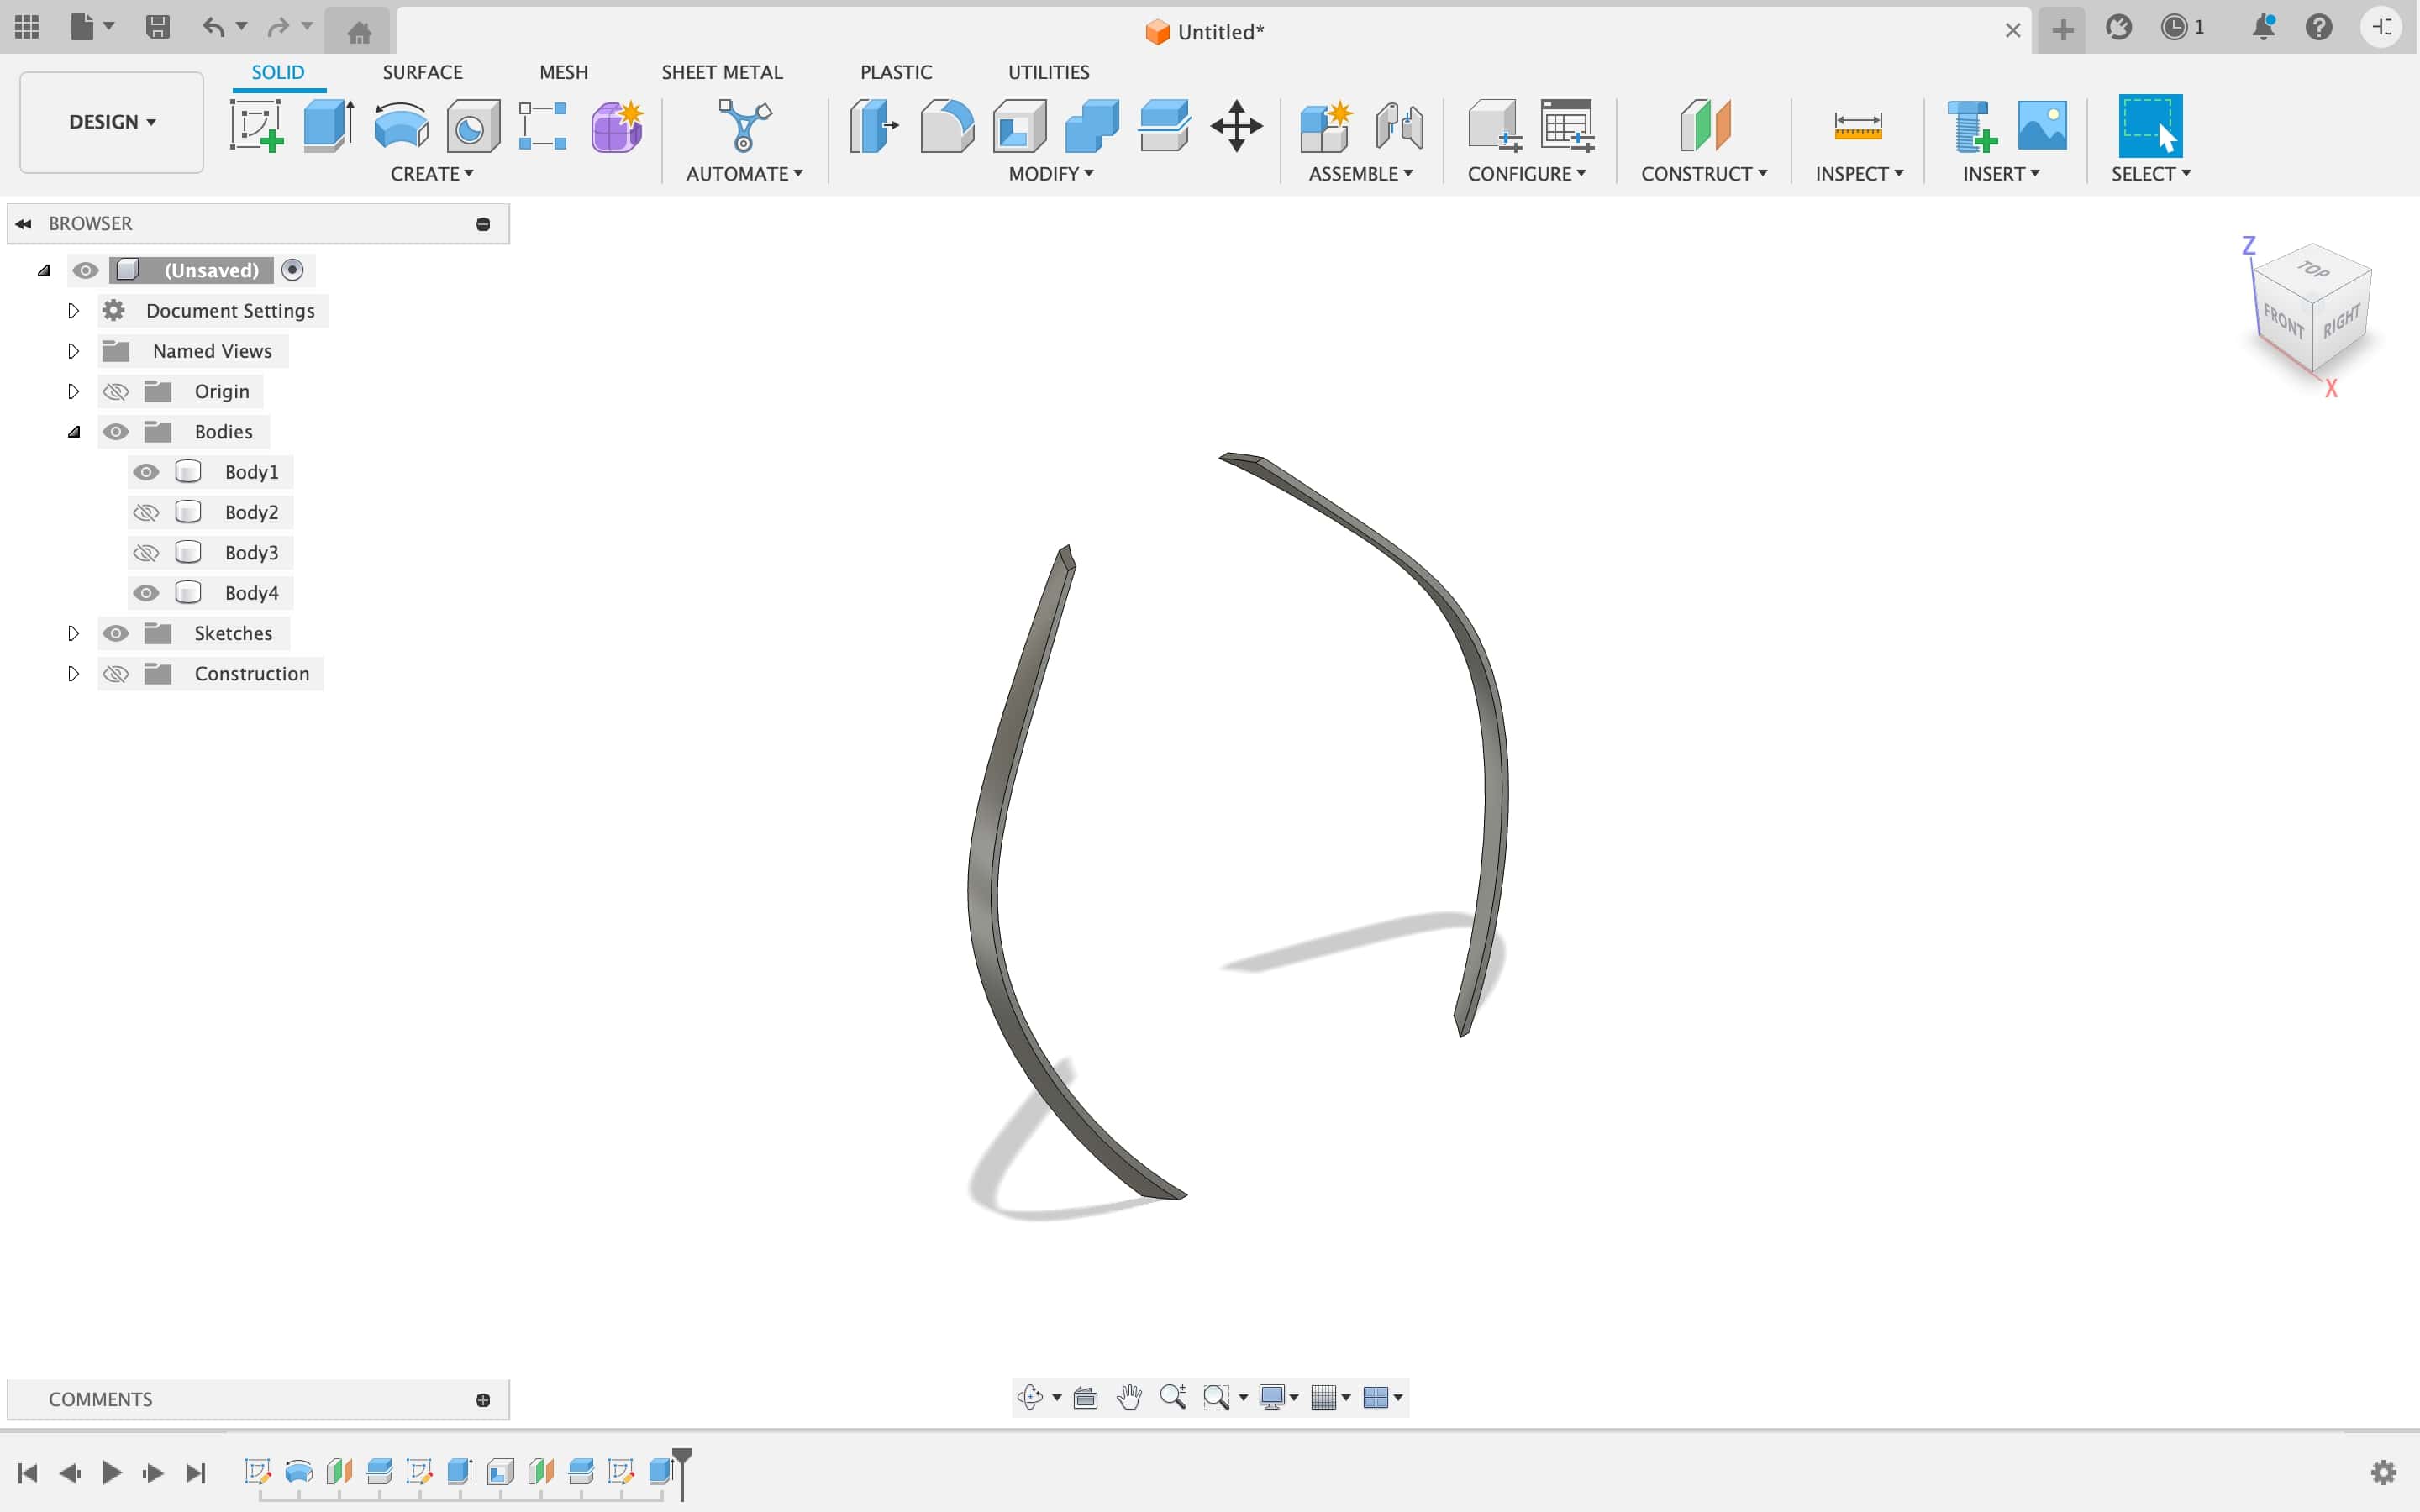
Then I was left with 2 symmetric strips from which we can make patterns around the body.
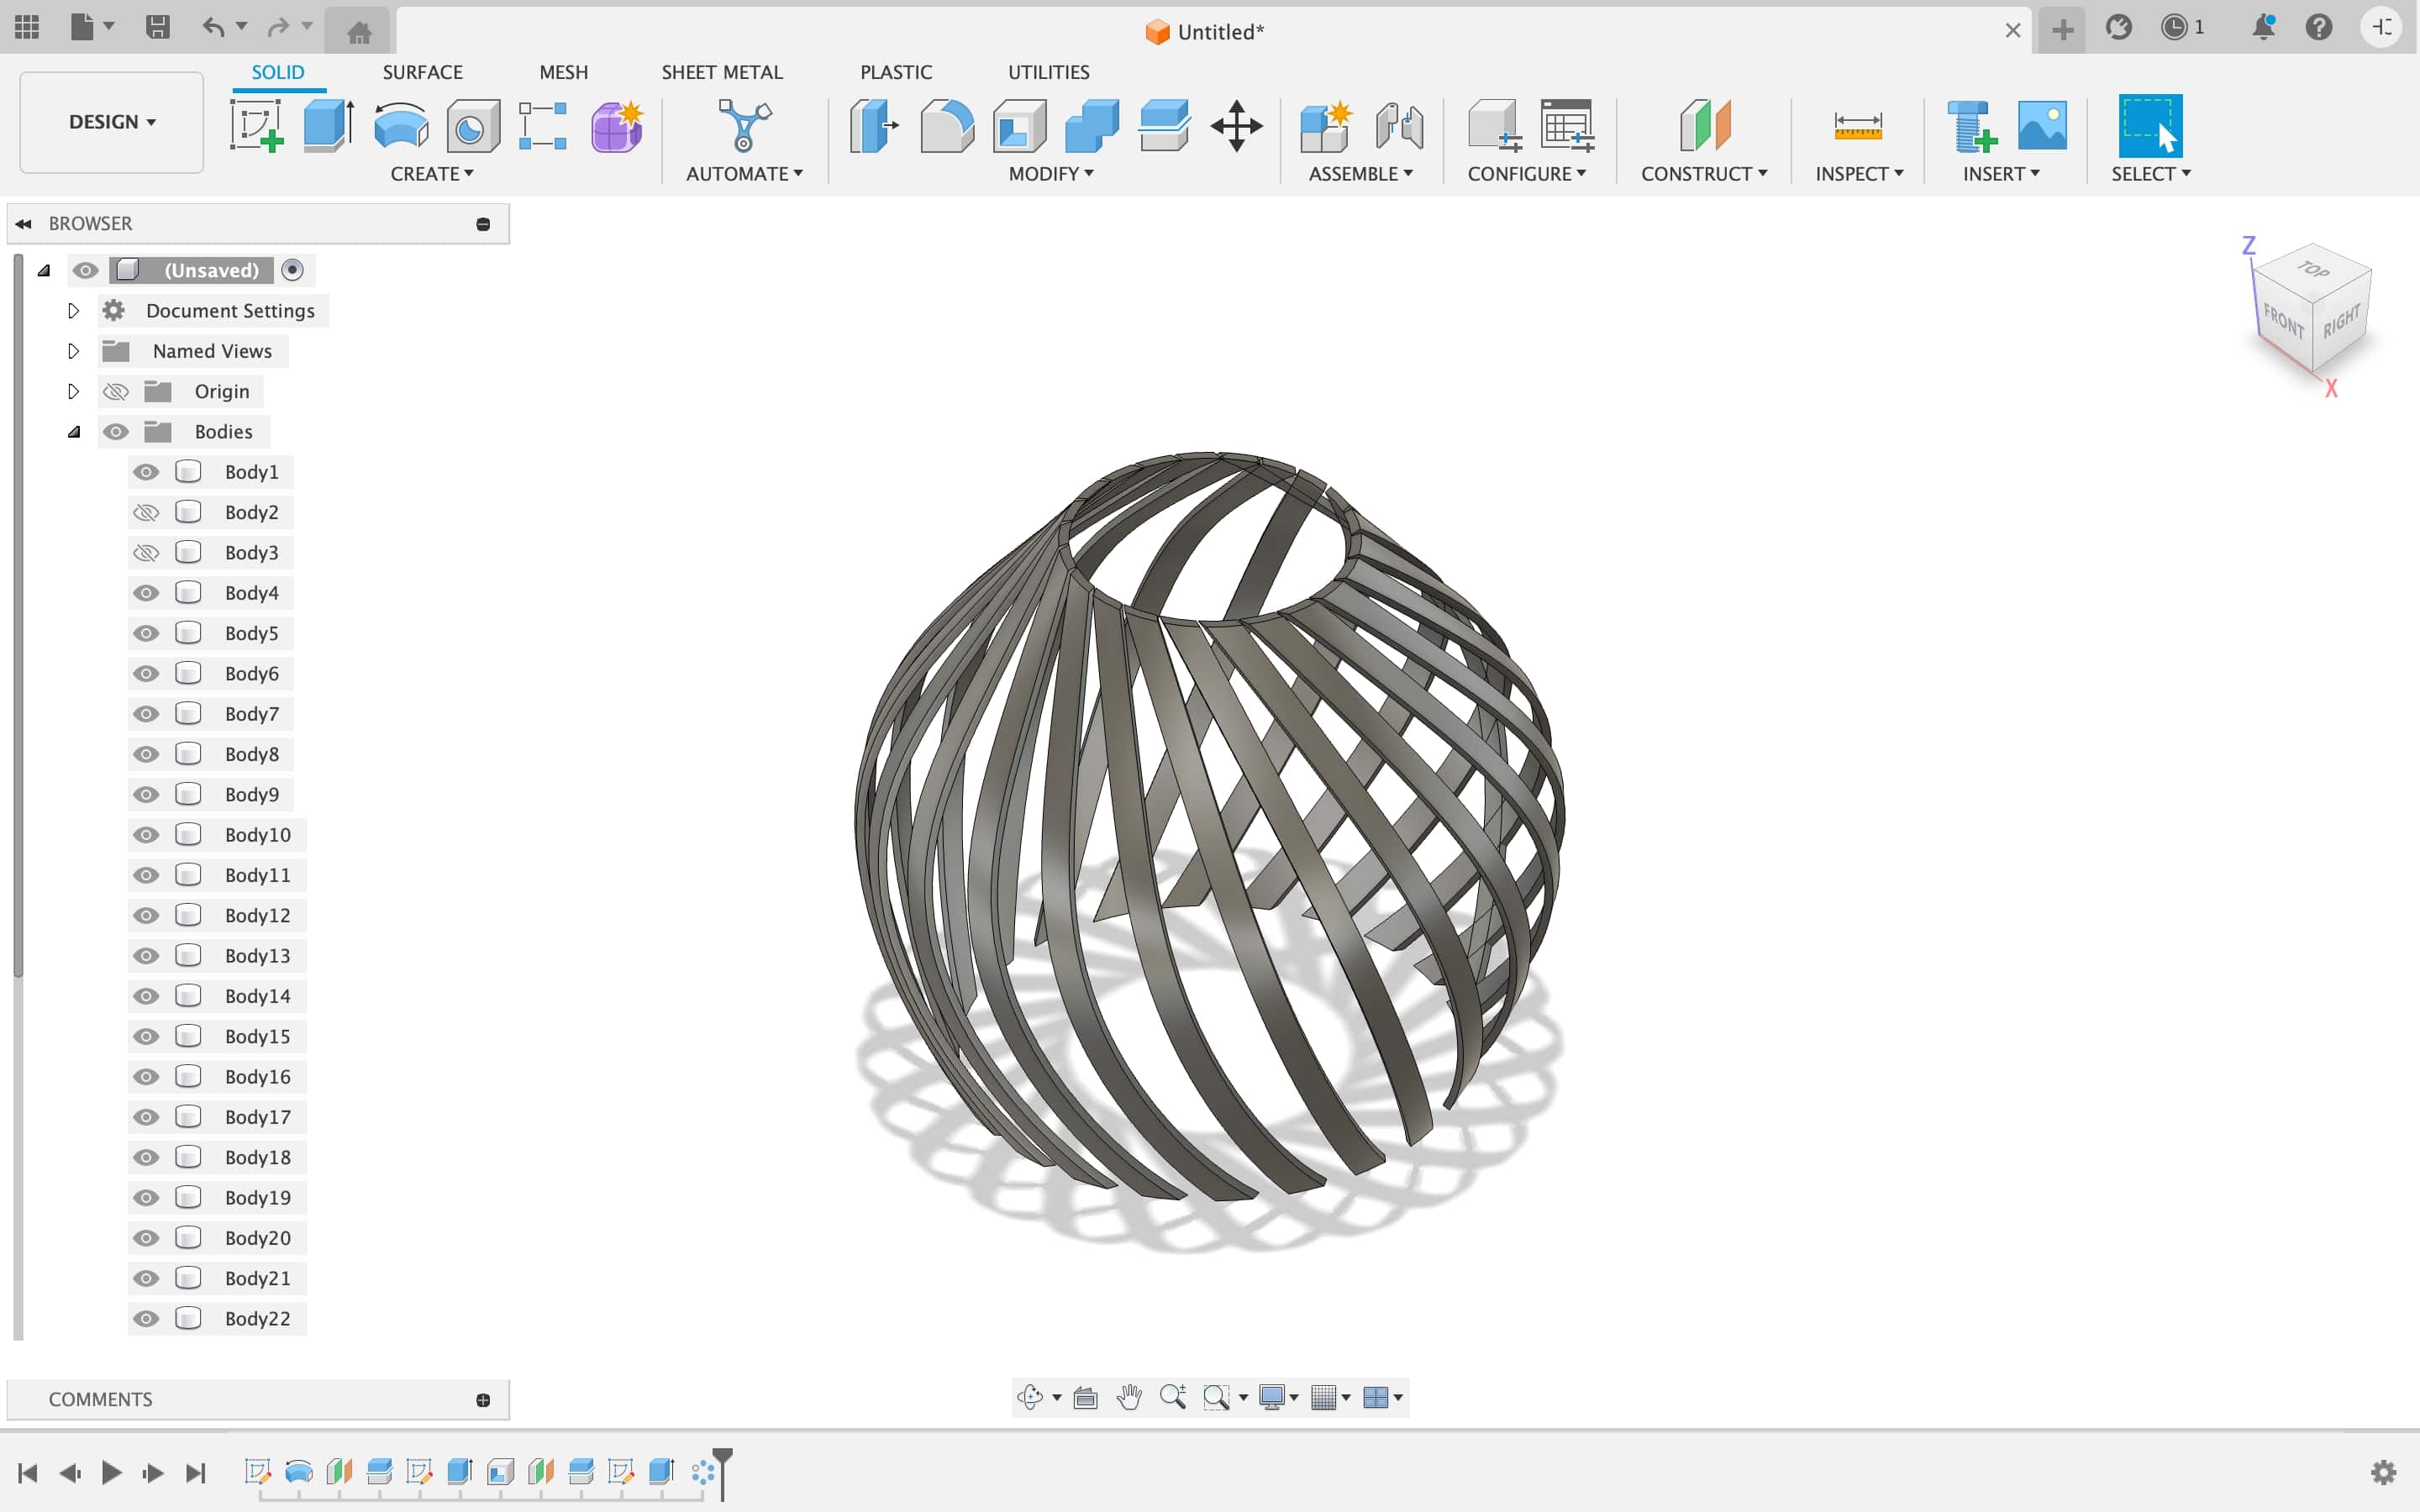
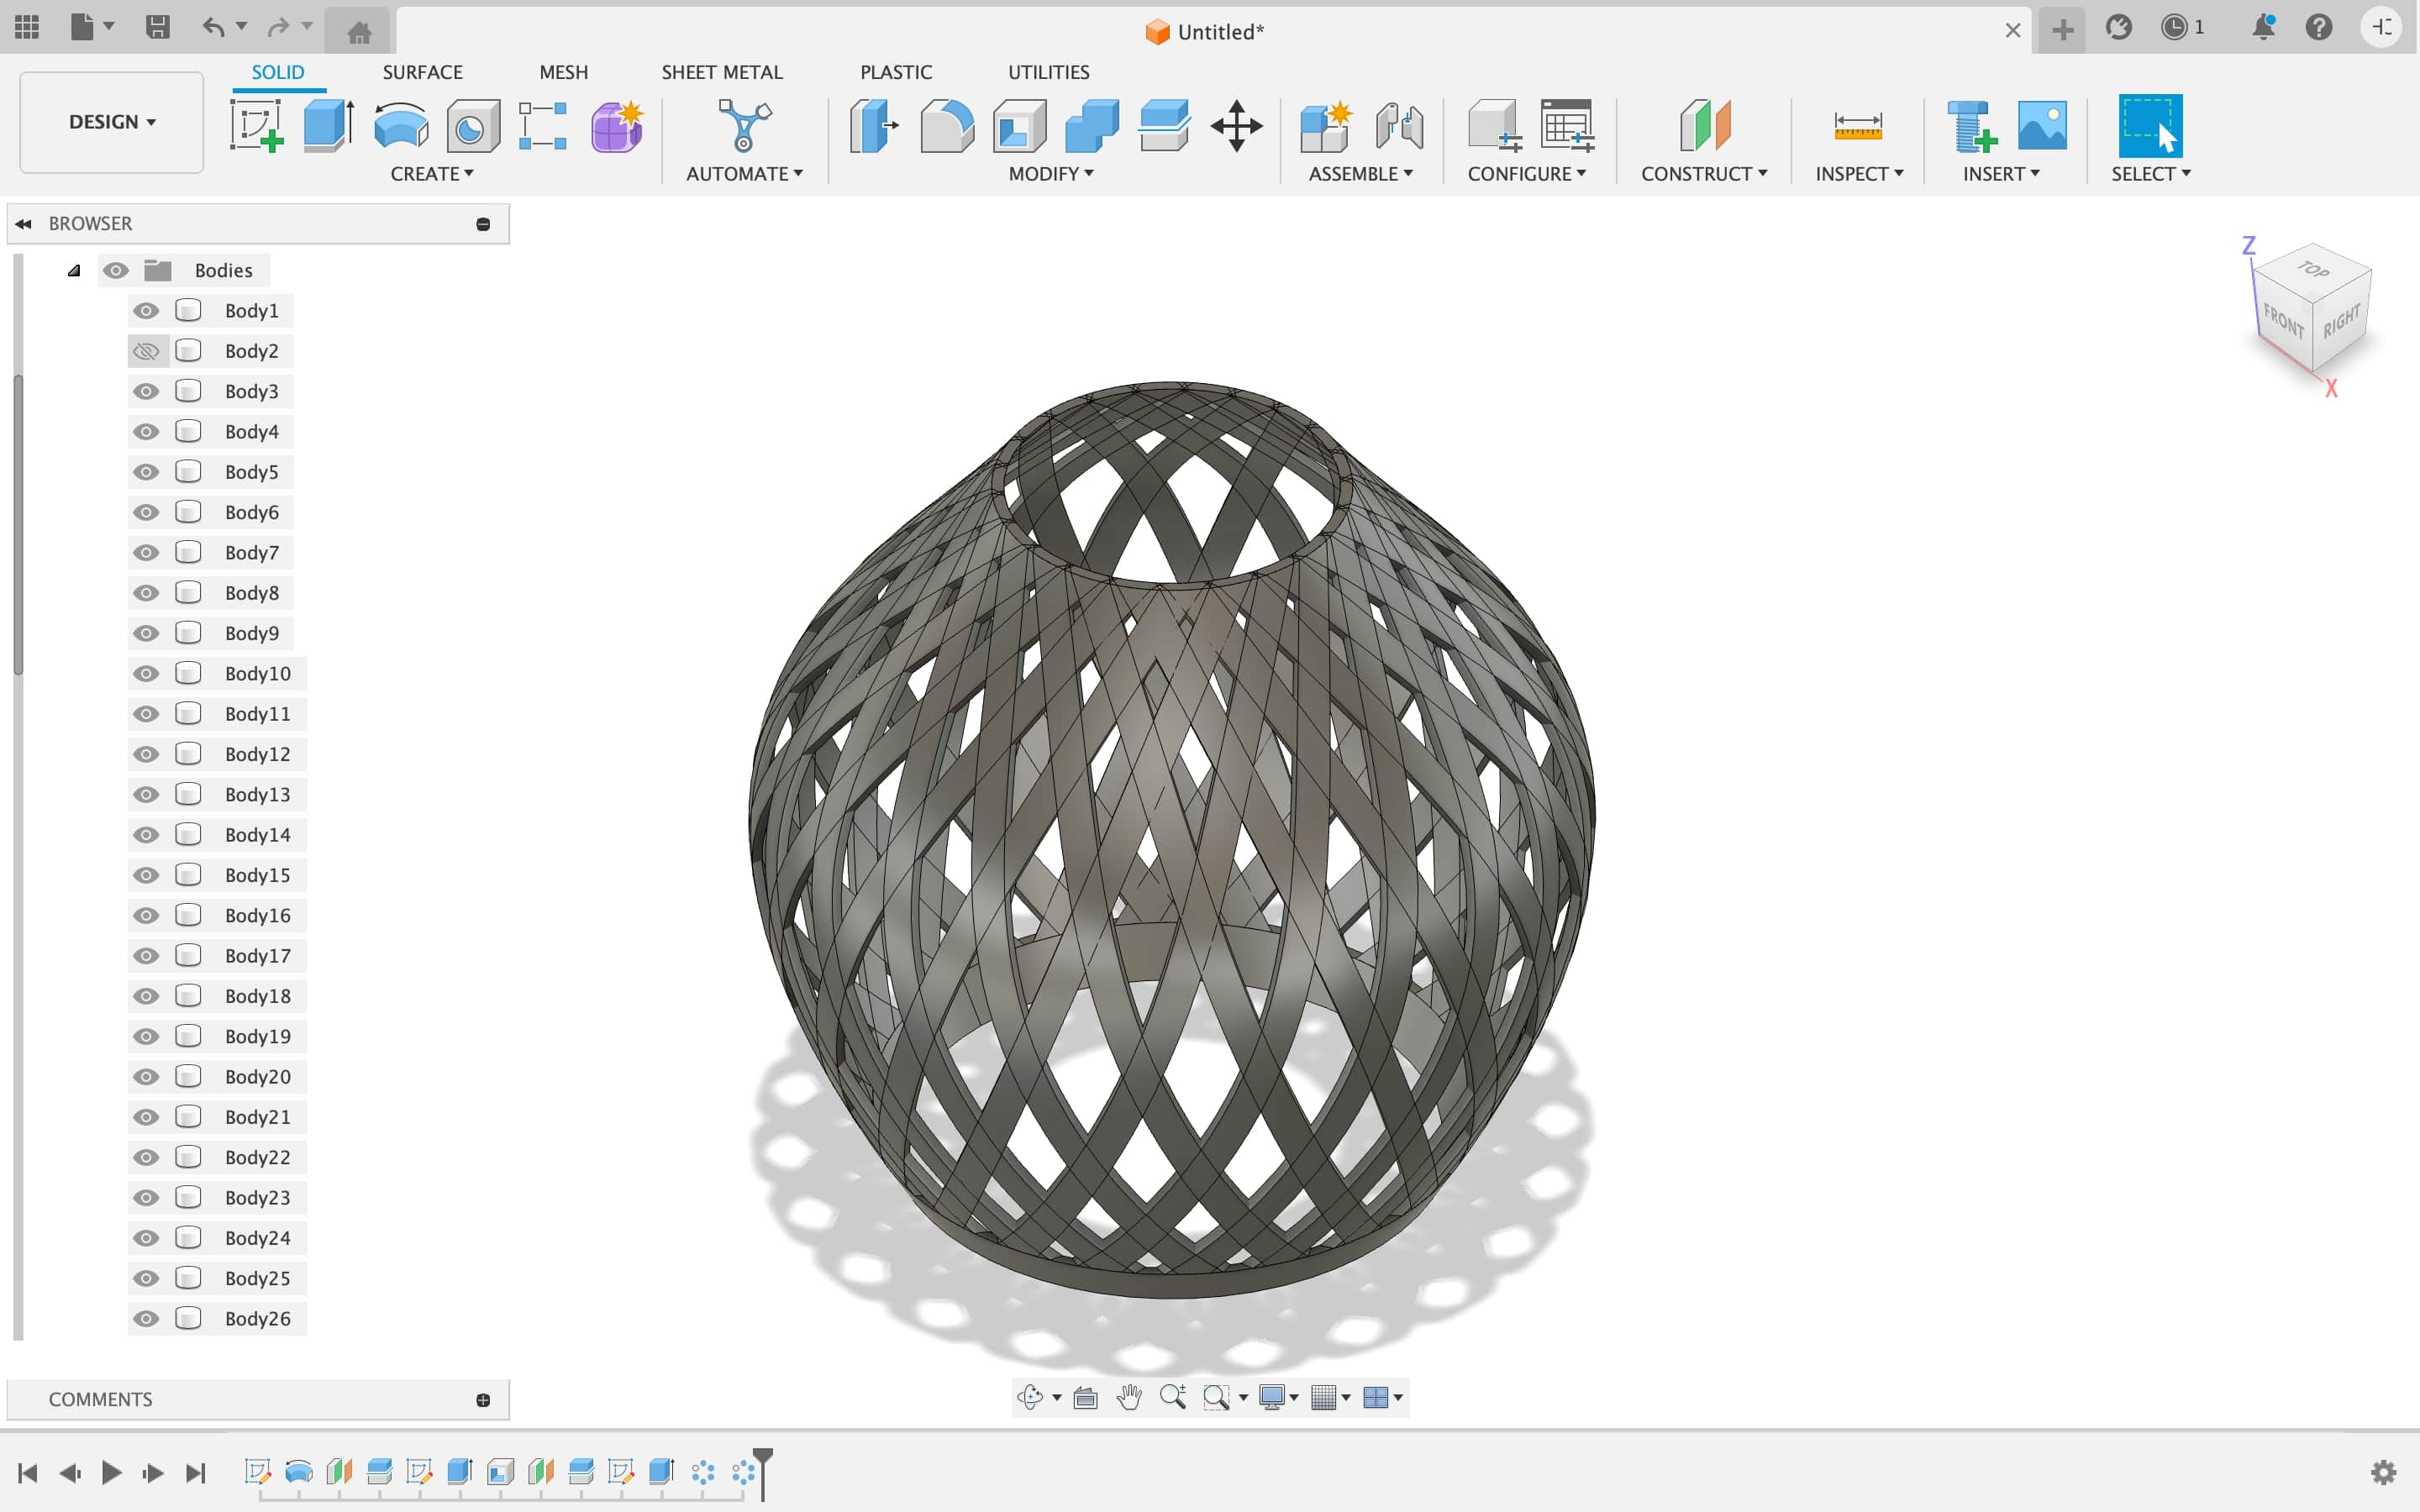
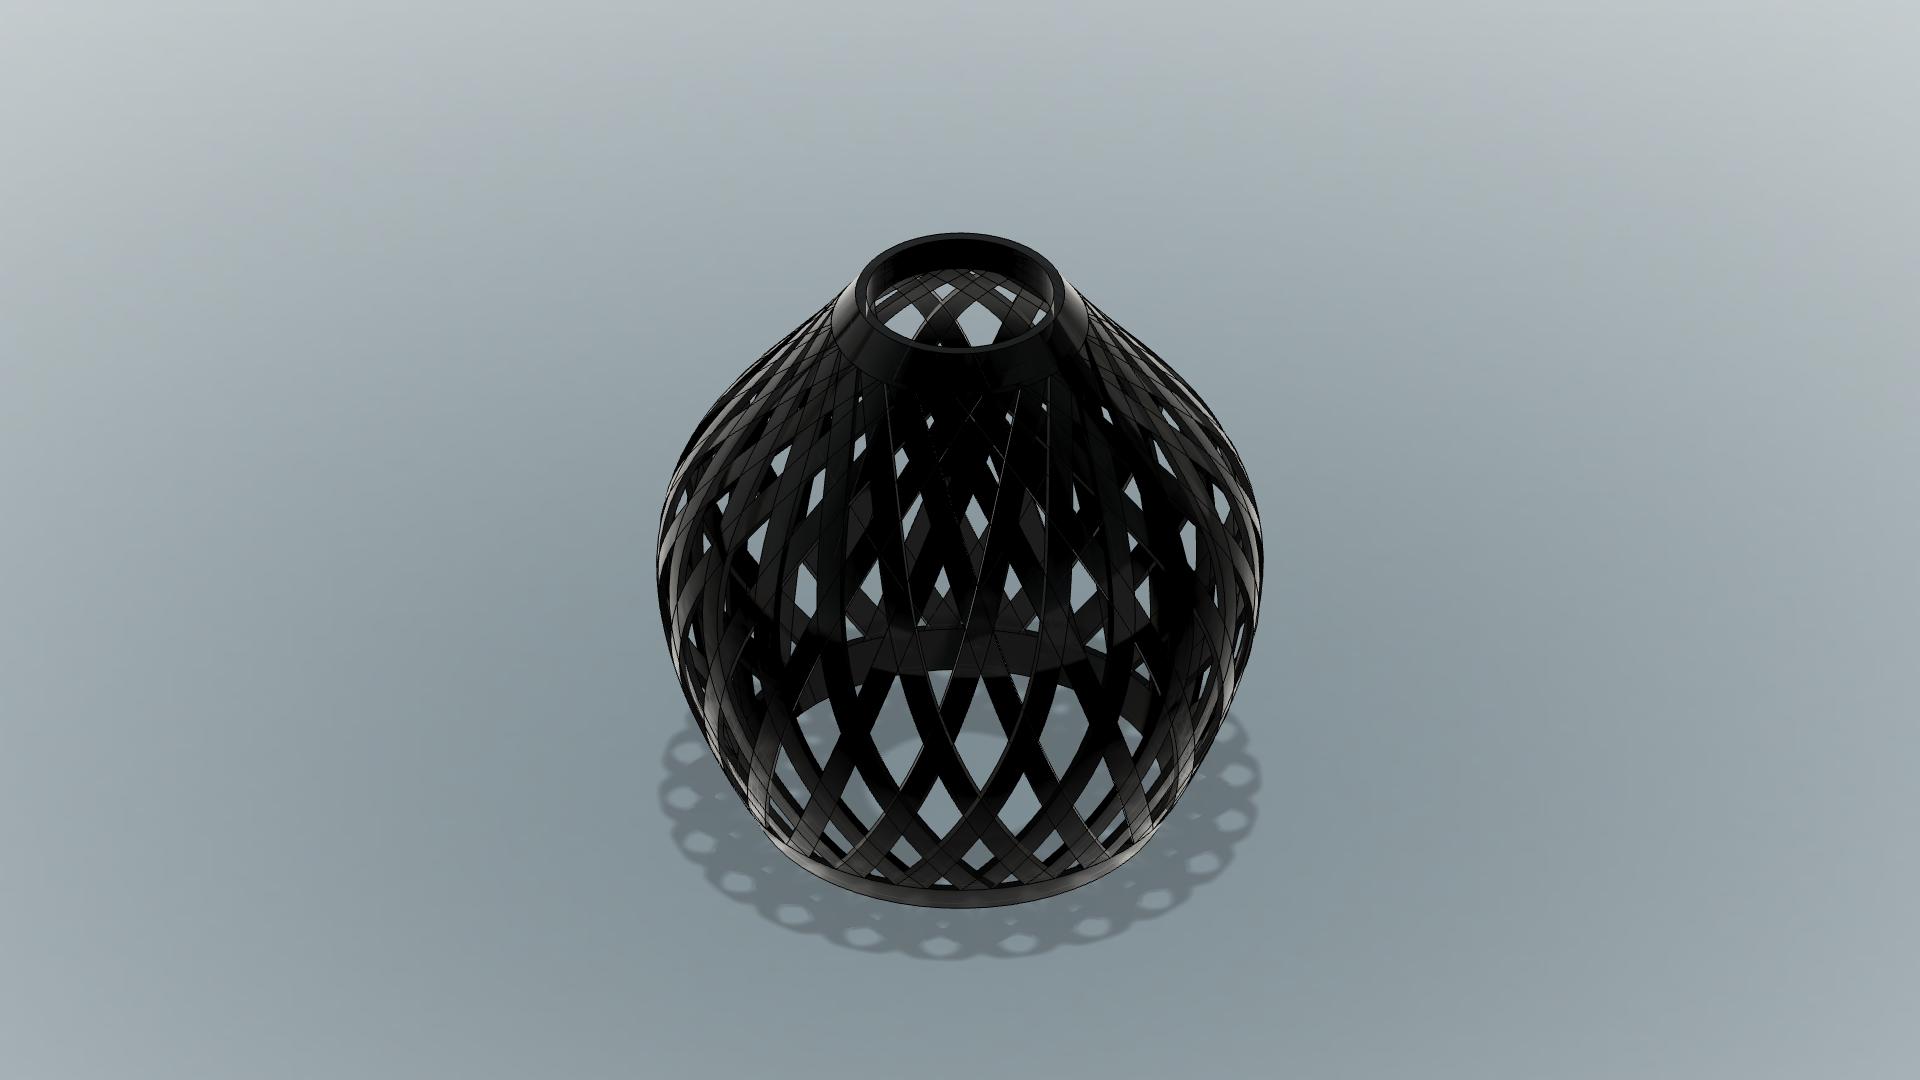
After putting the pattern I applied the appearance on the lamp for rendering.
Final outcome
b.Bowl using voronator software
I opened fusion and I selected create sketch and started sketching the shape I wanted for the bowl
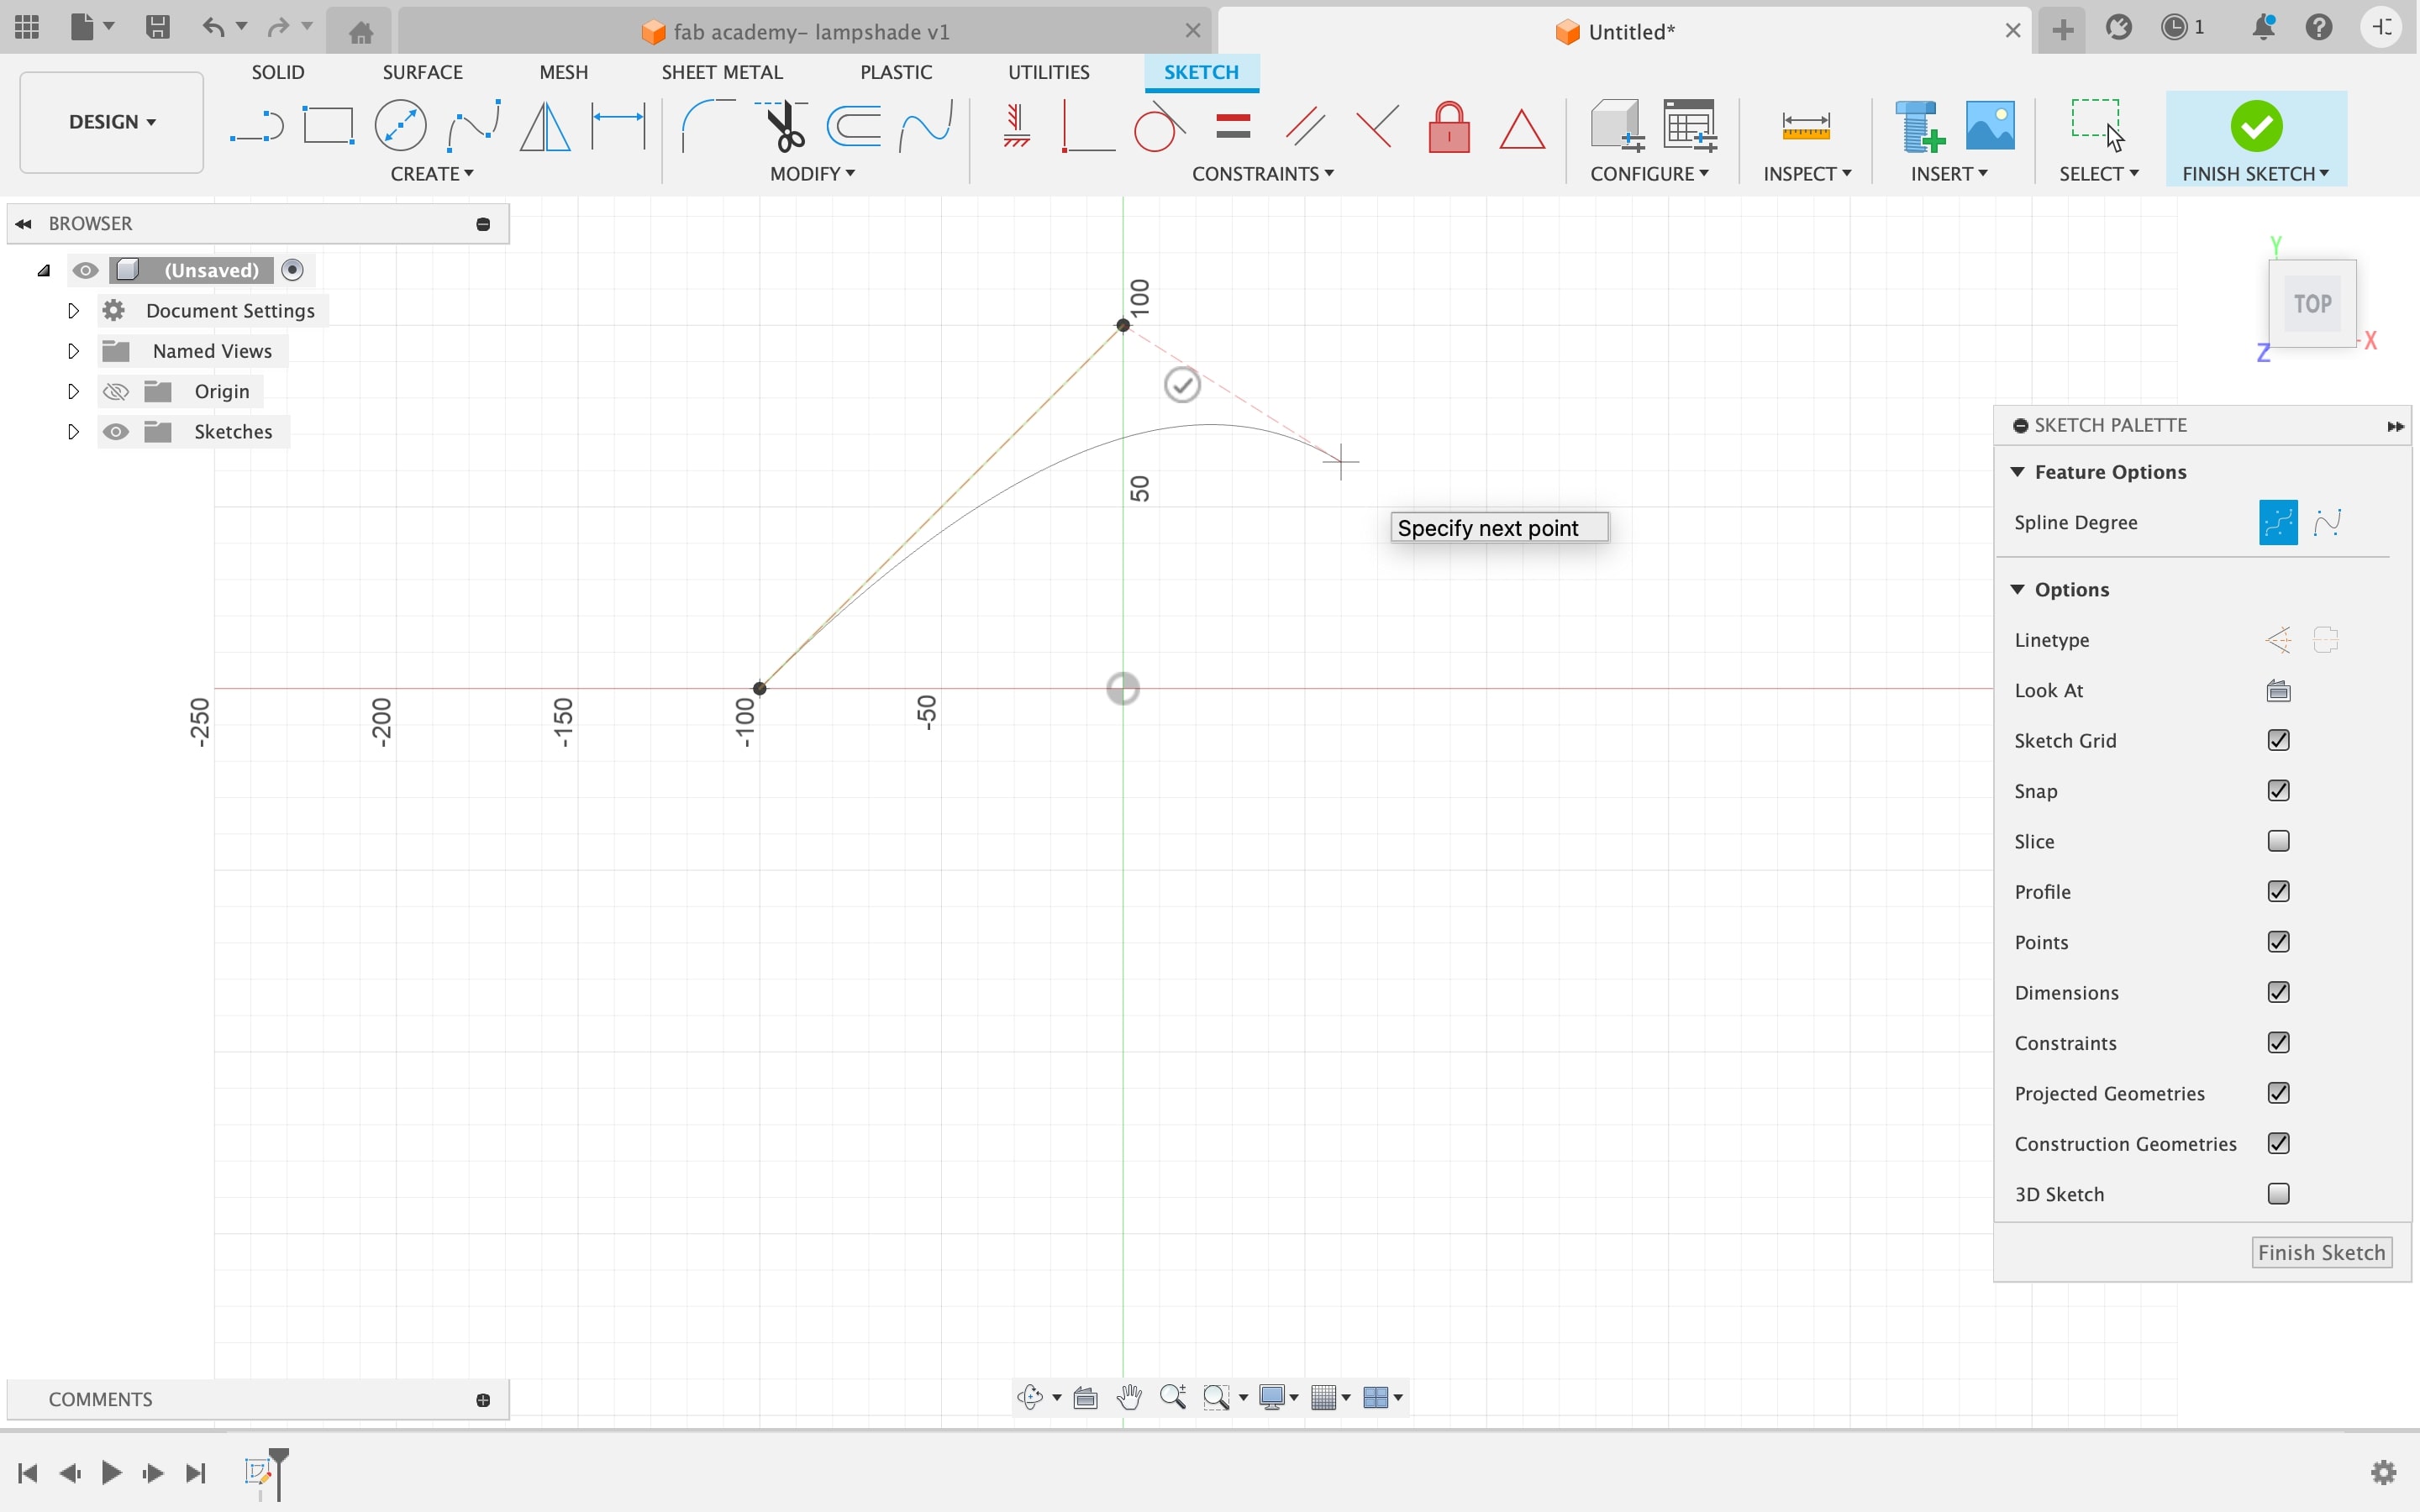
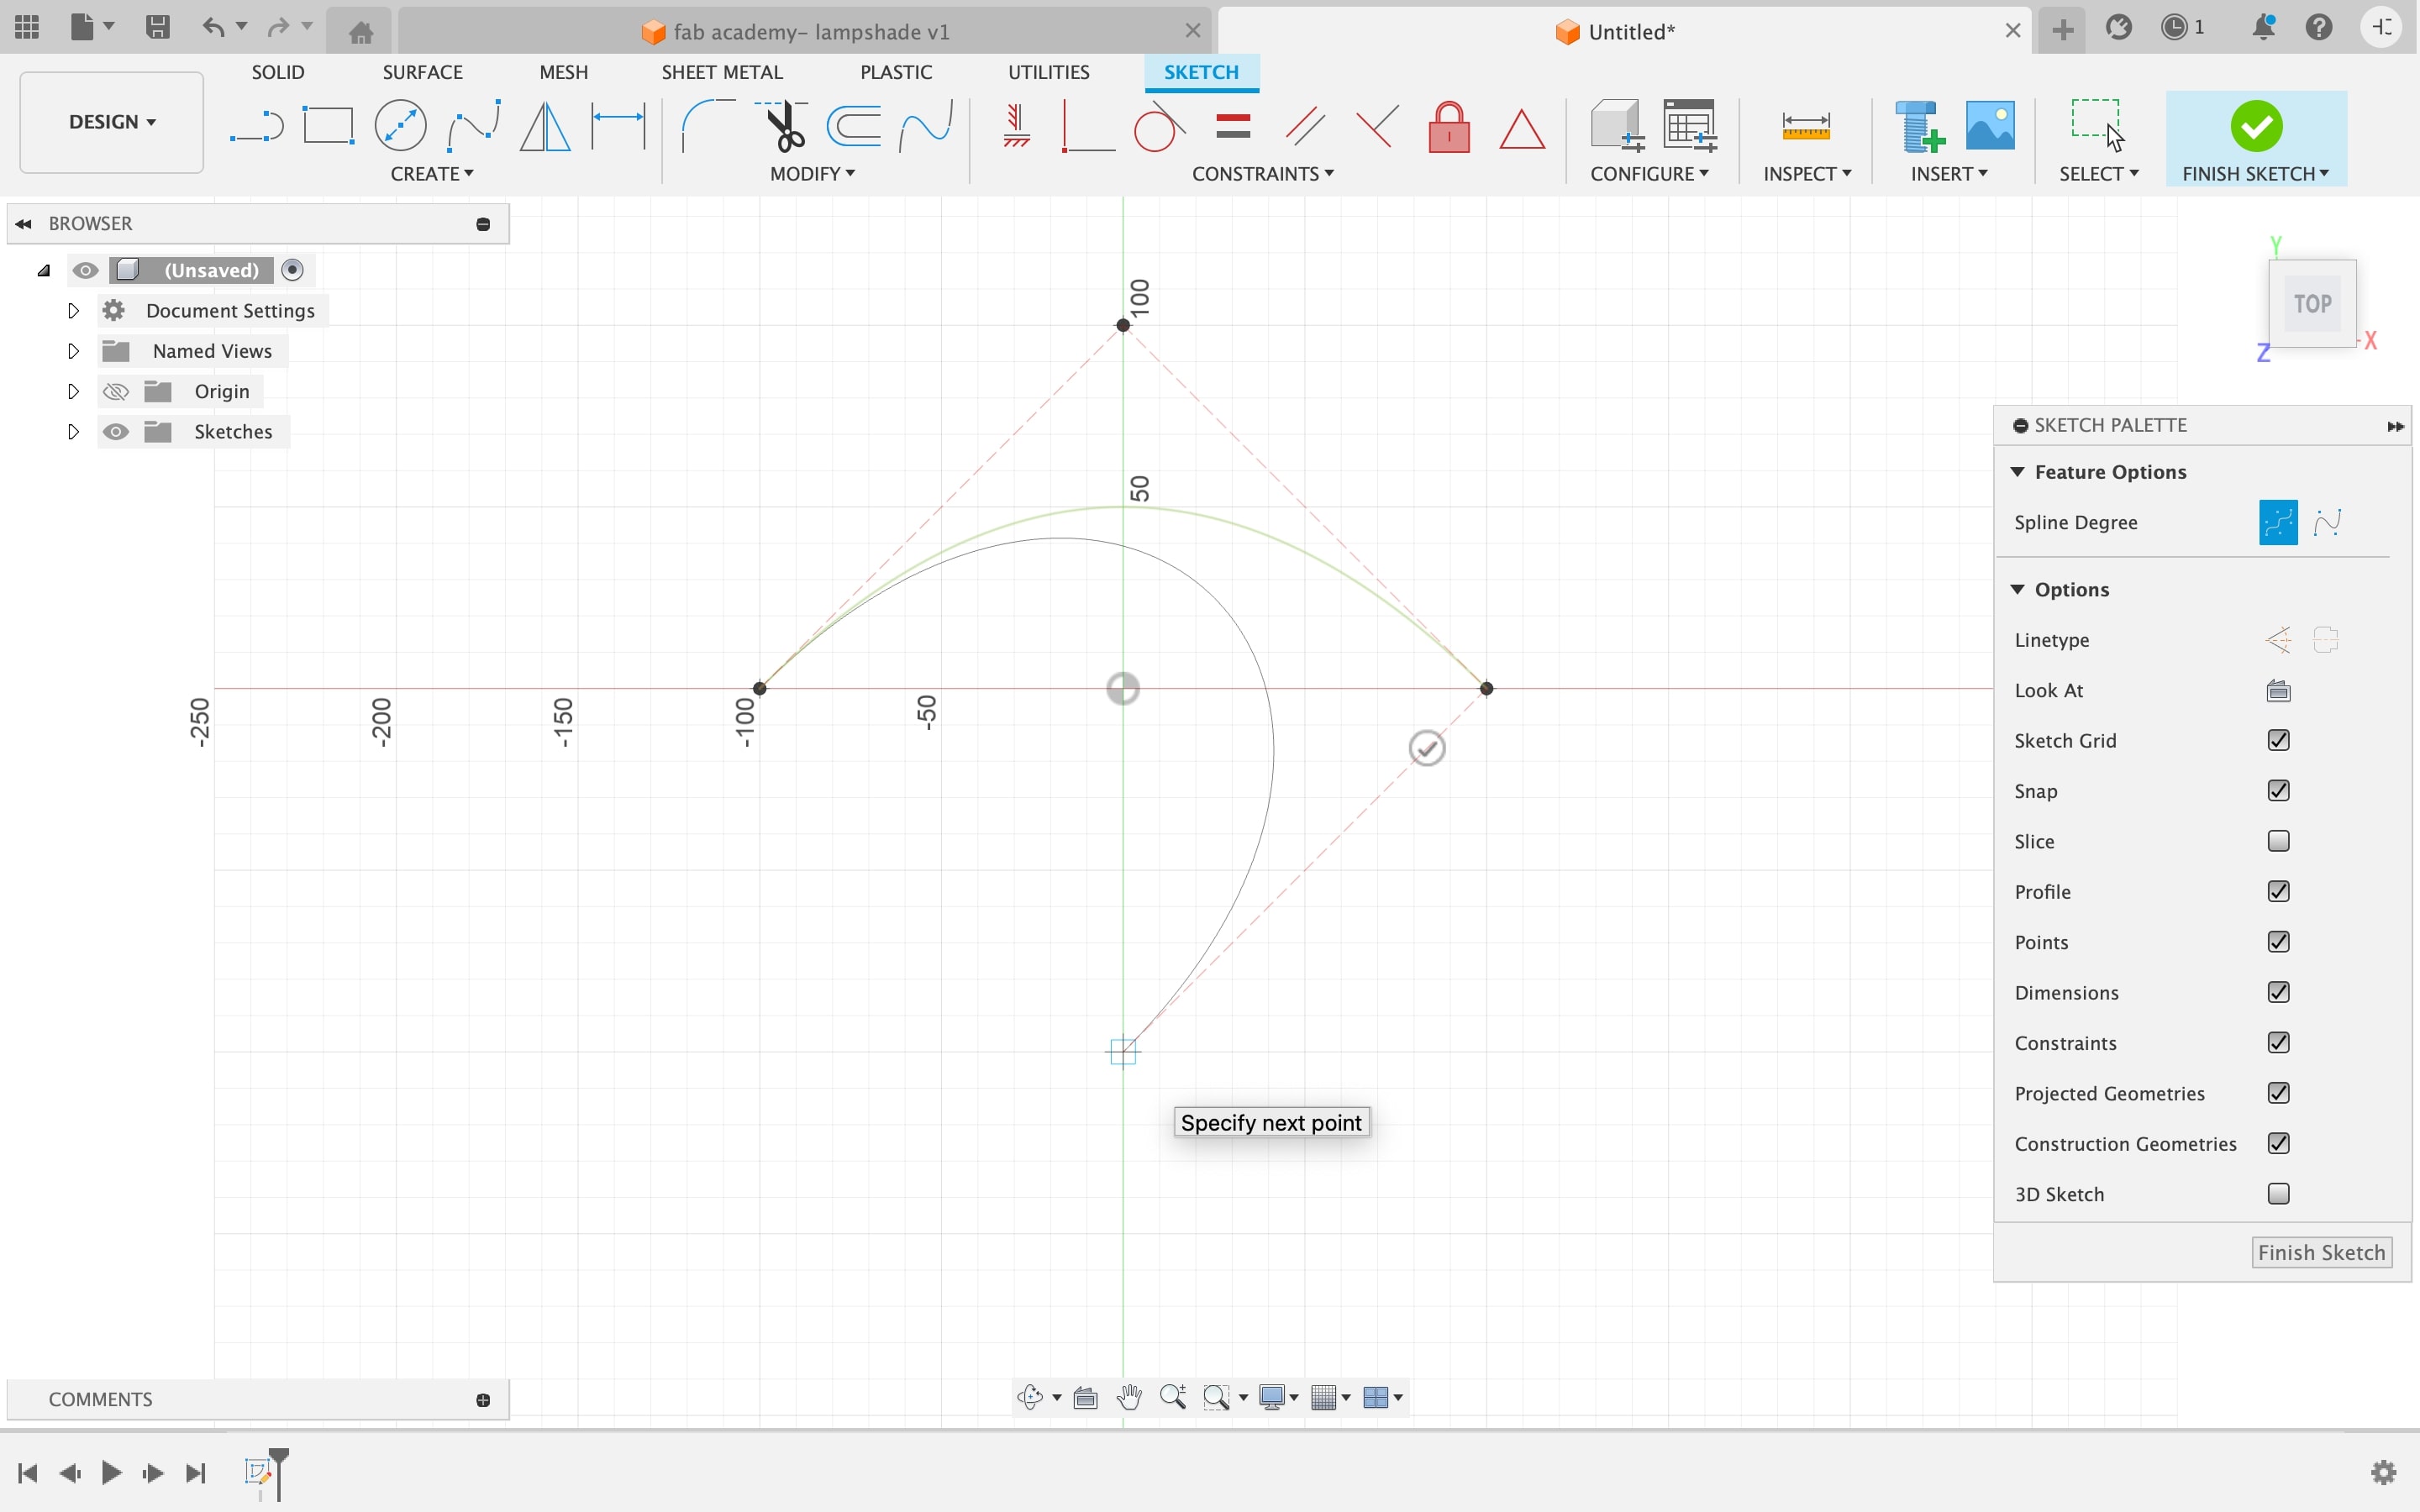
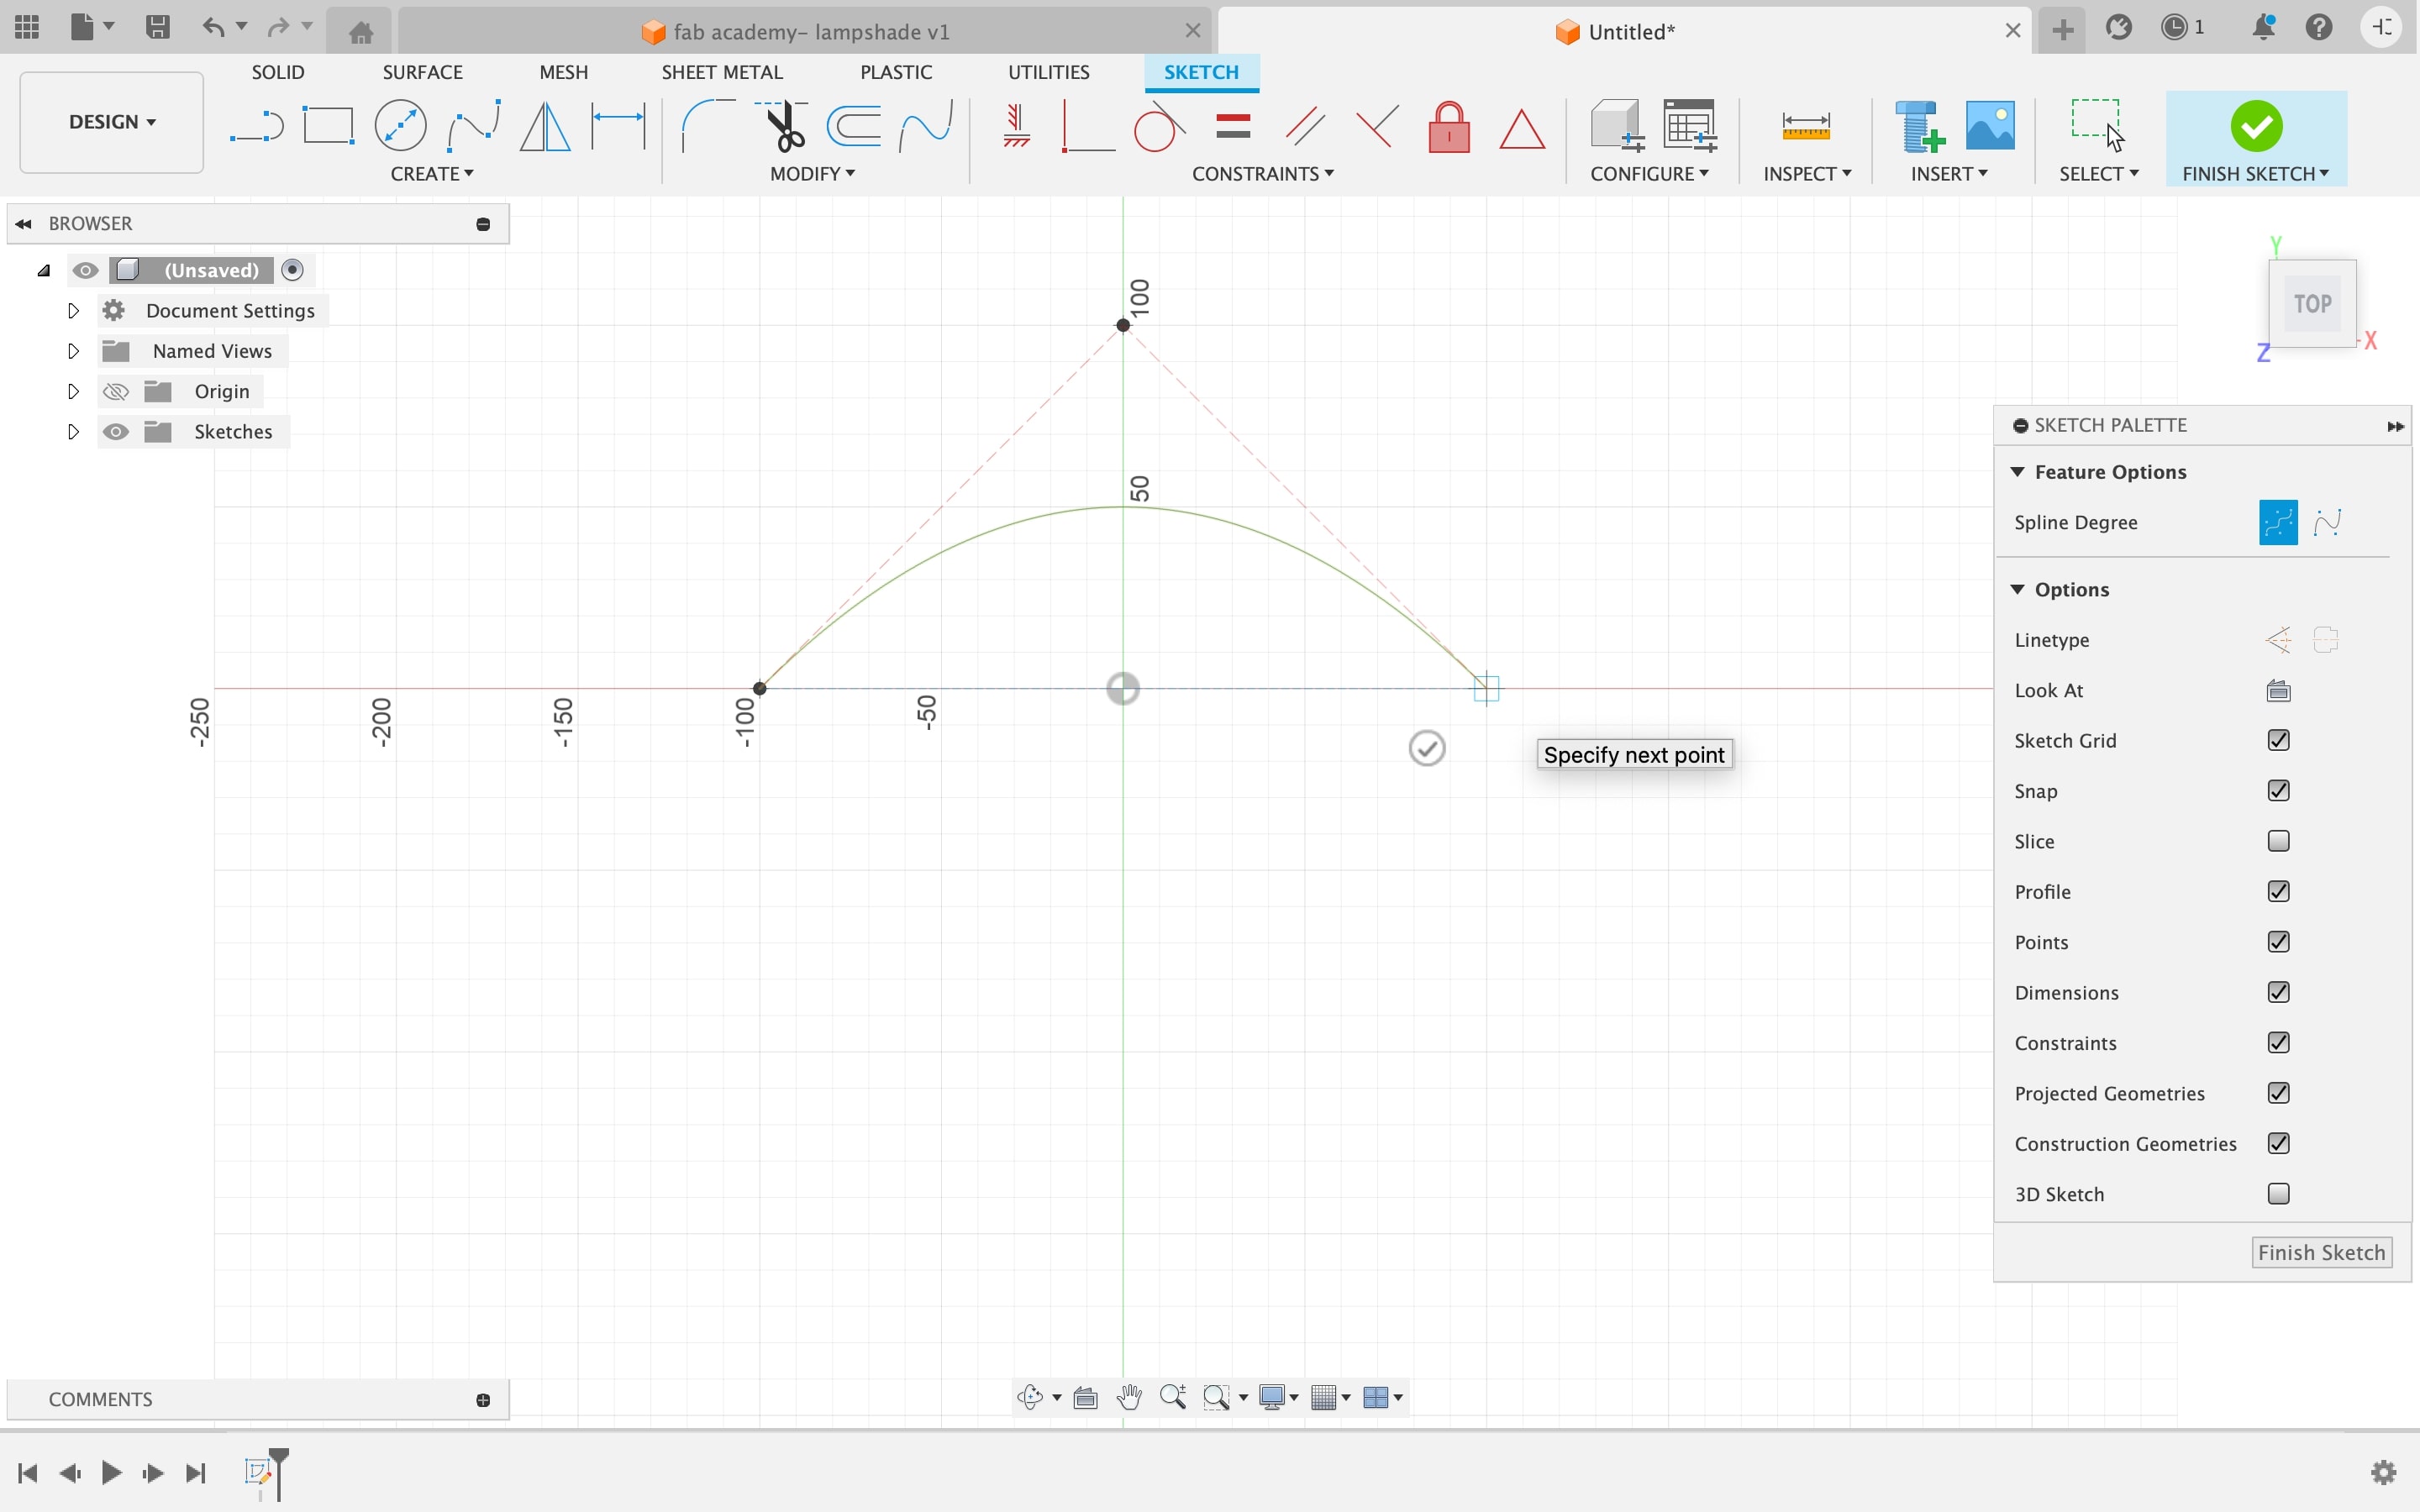
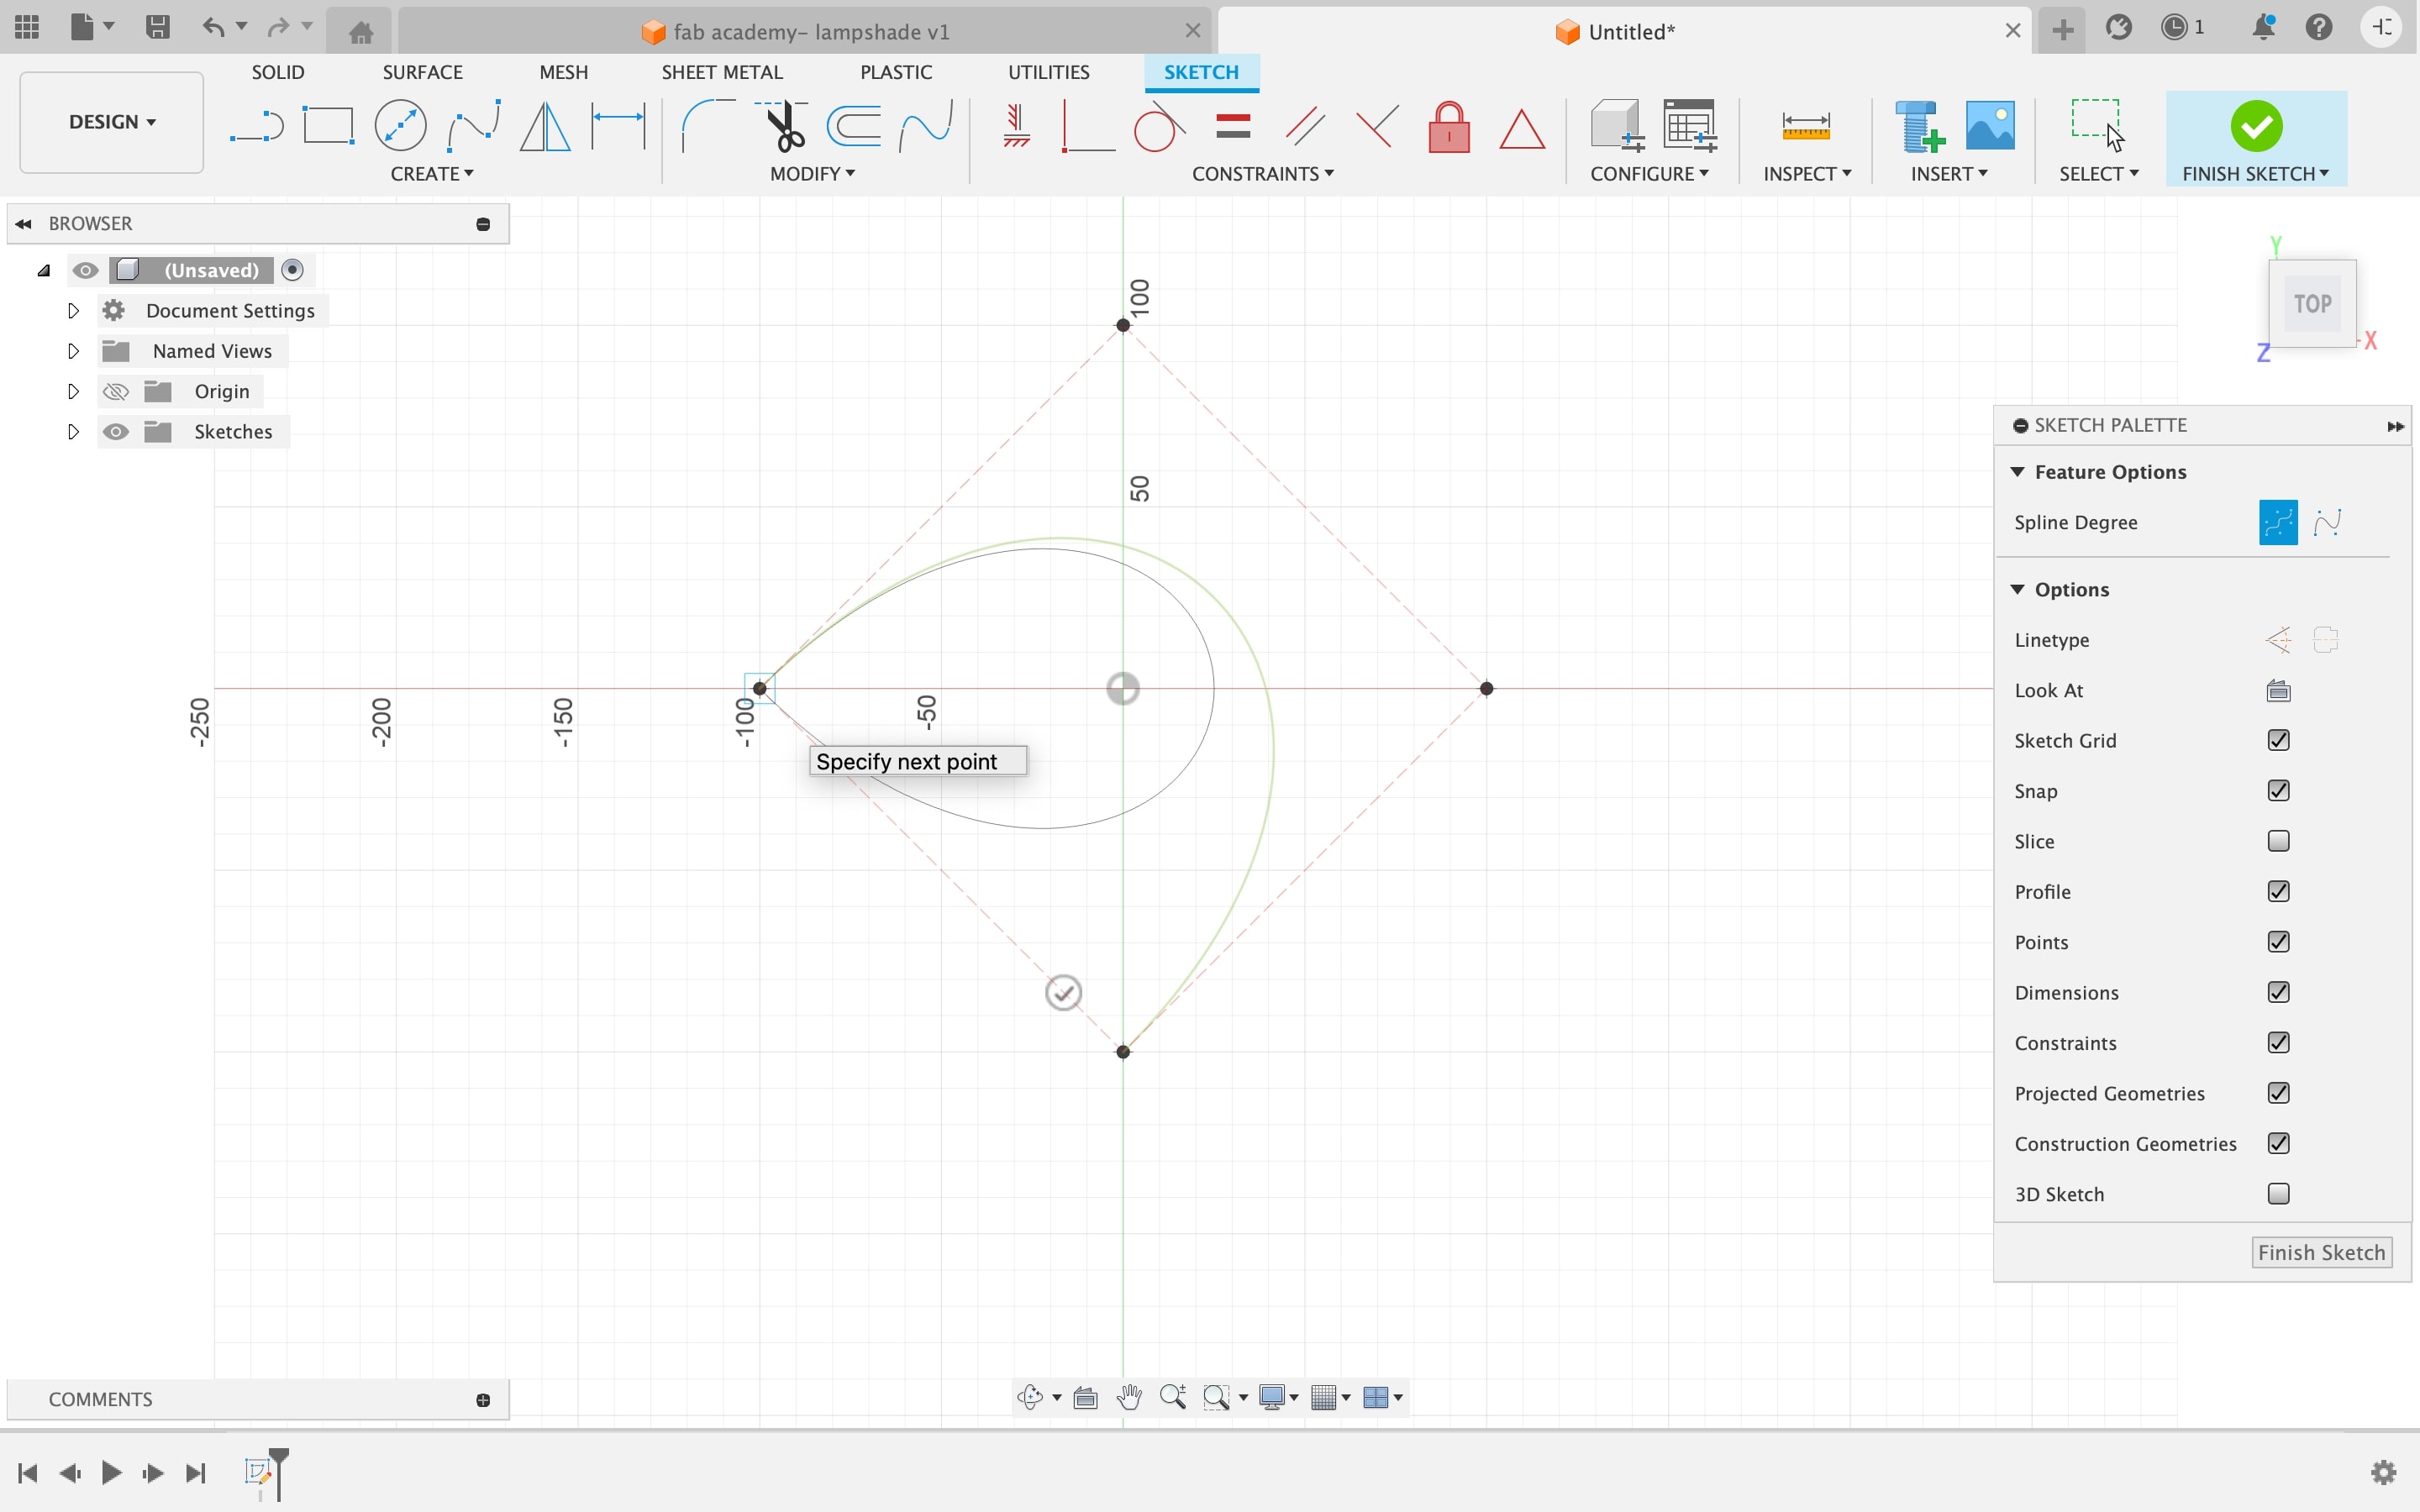
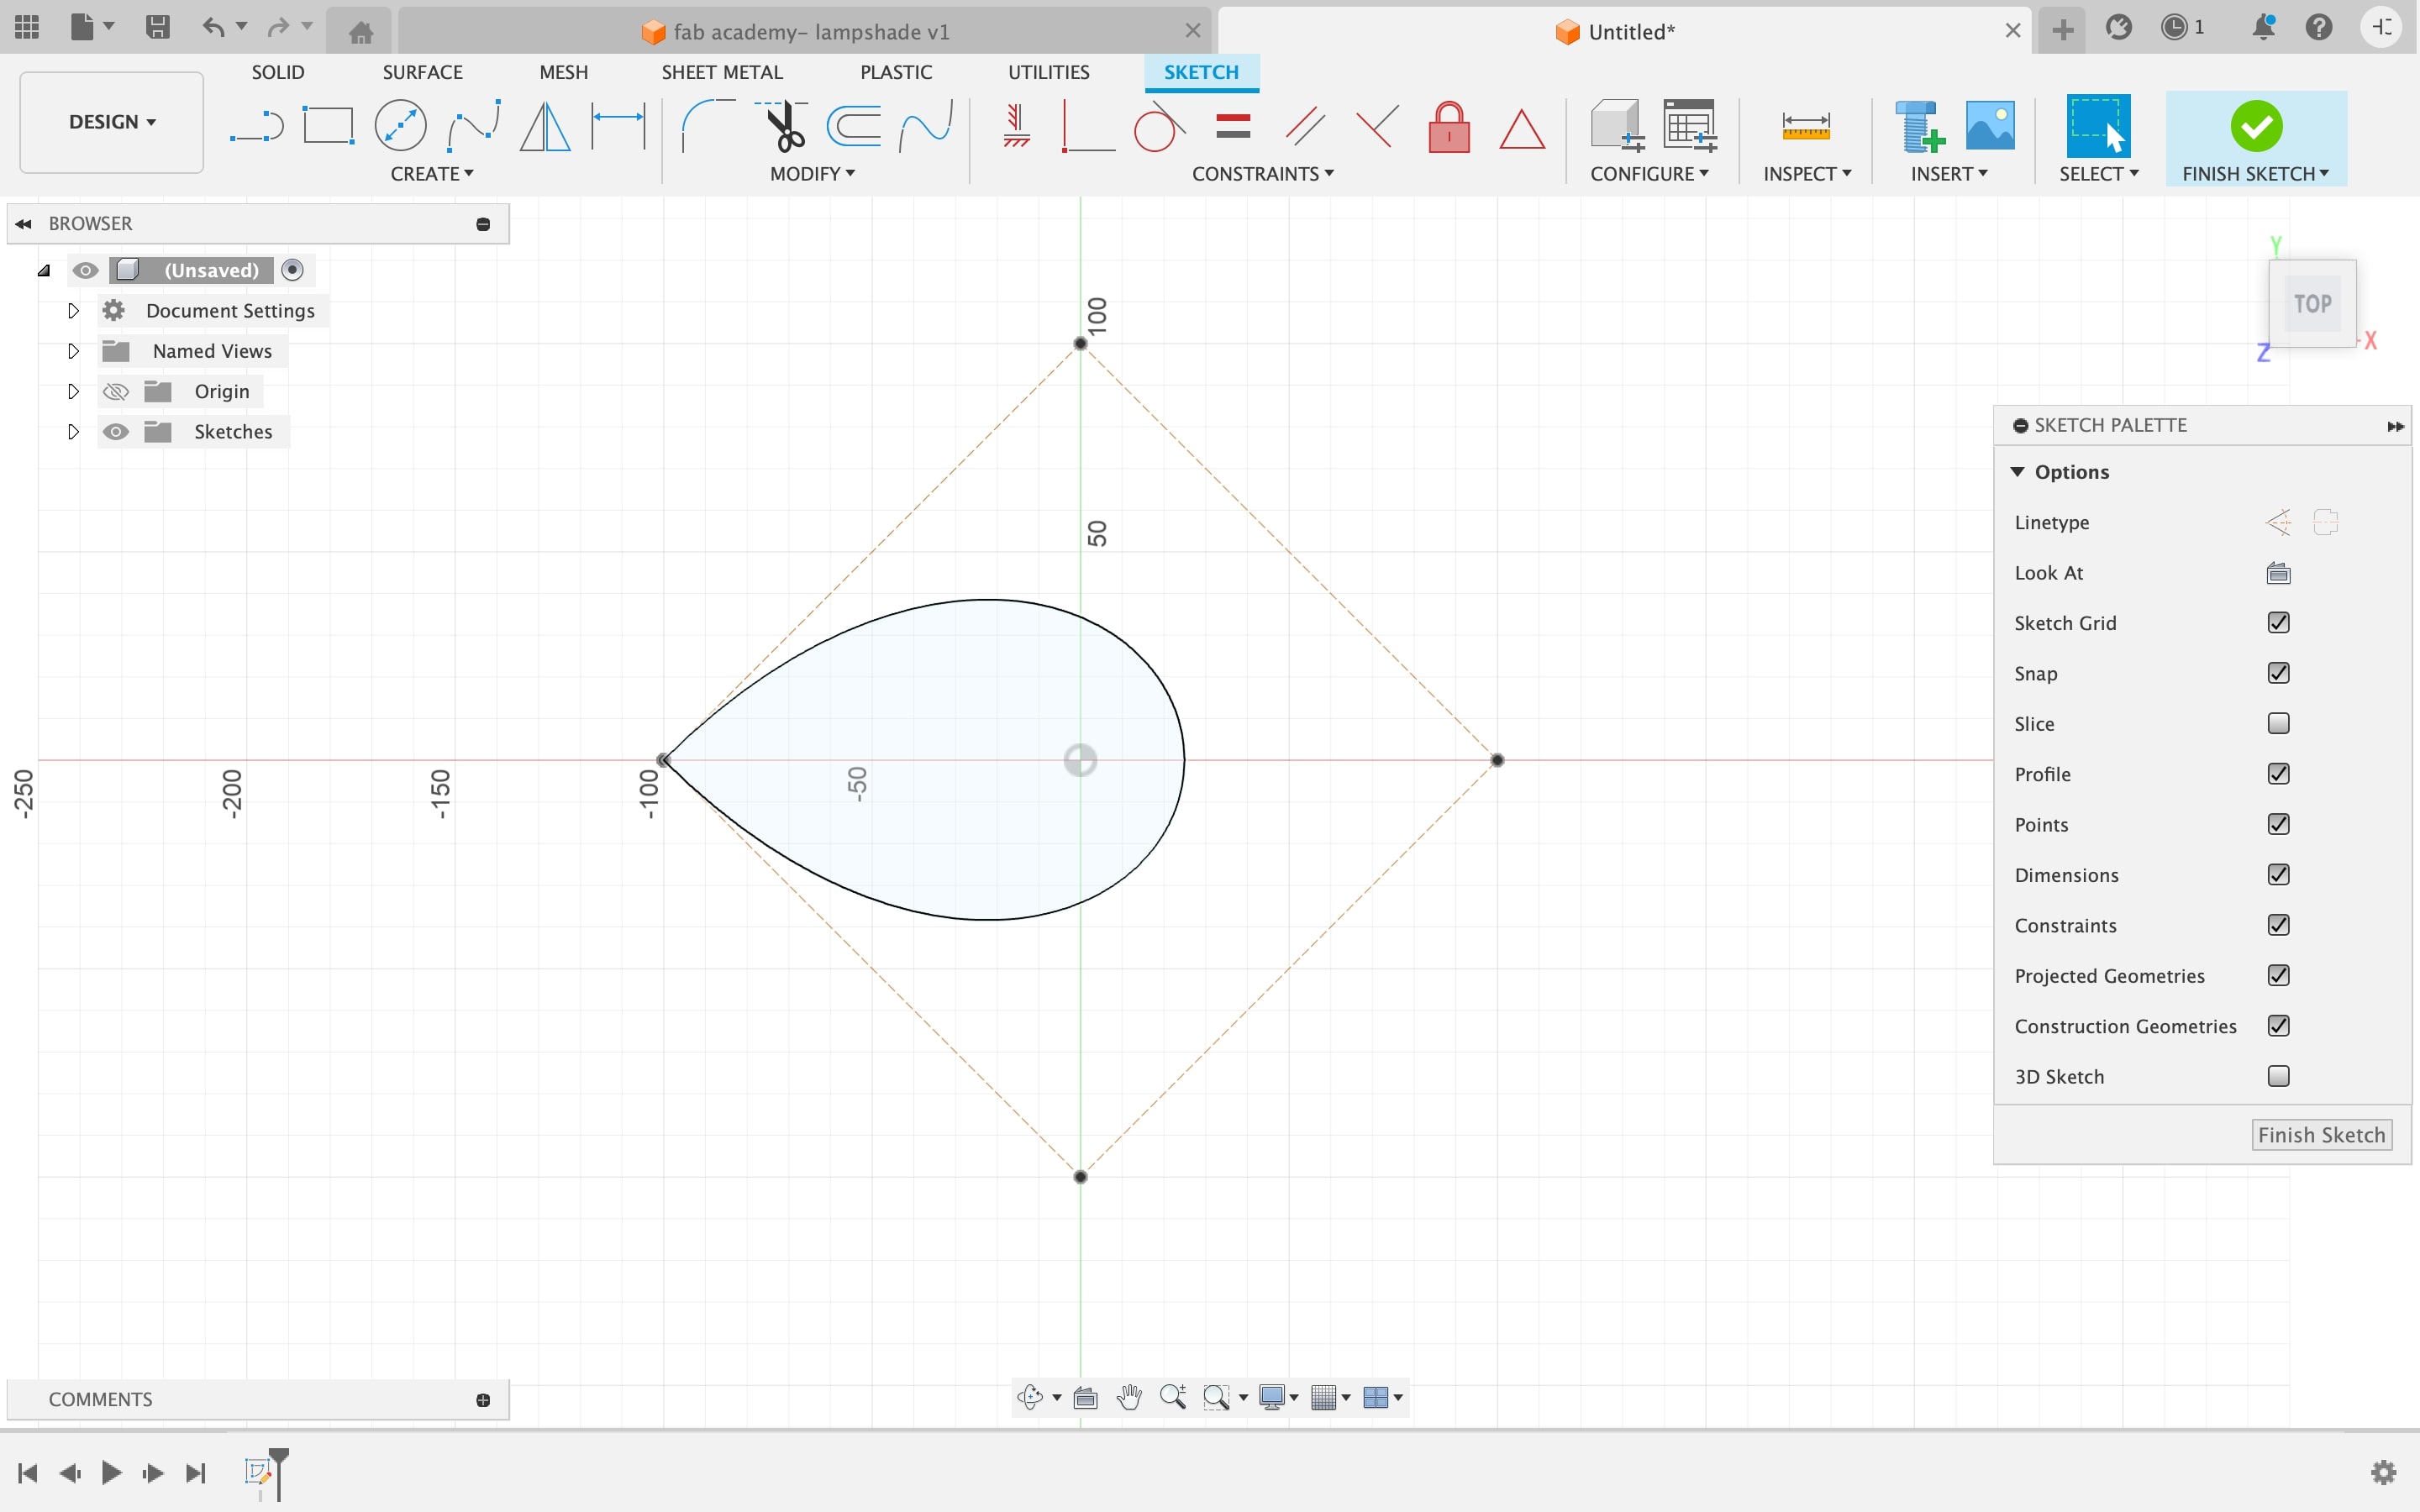
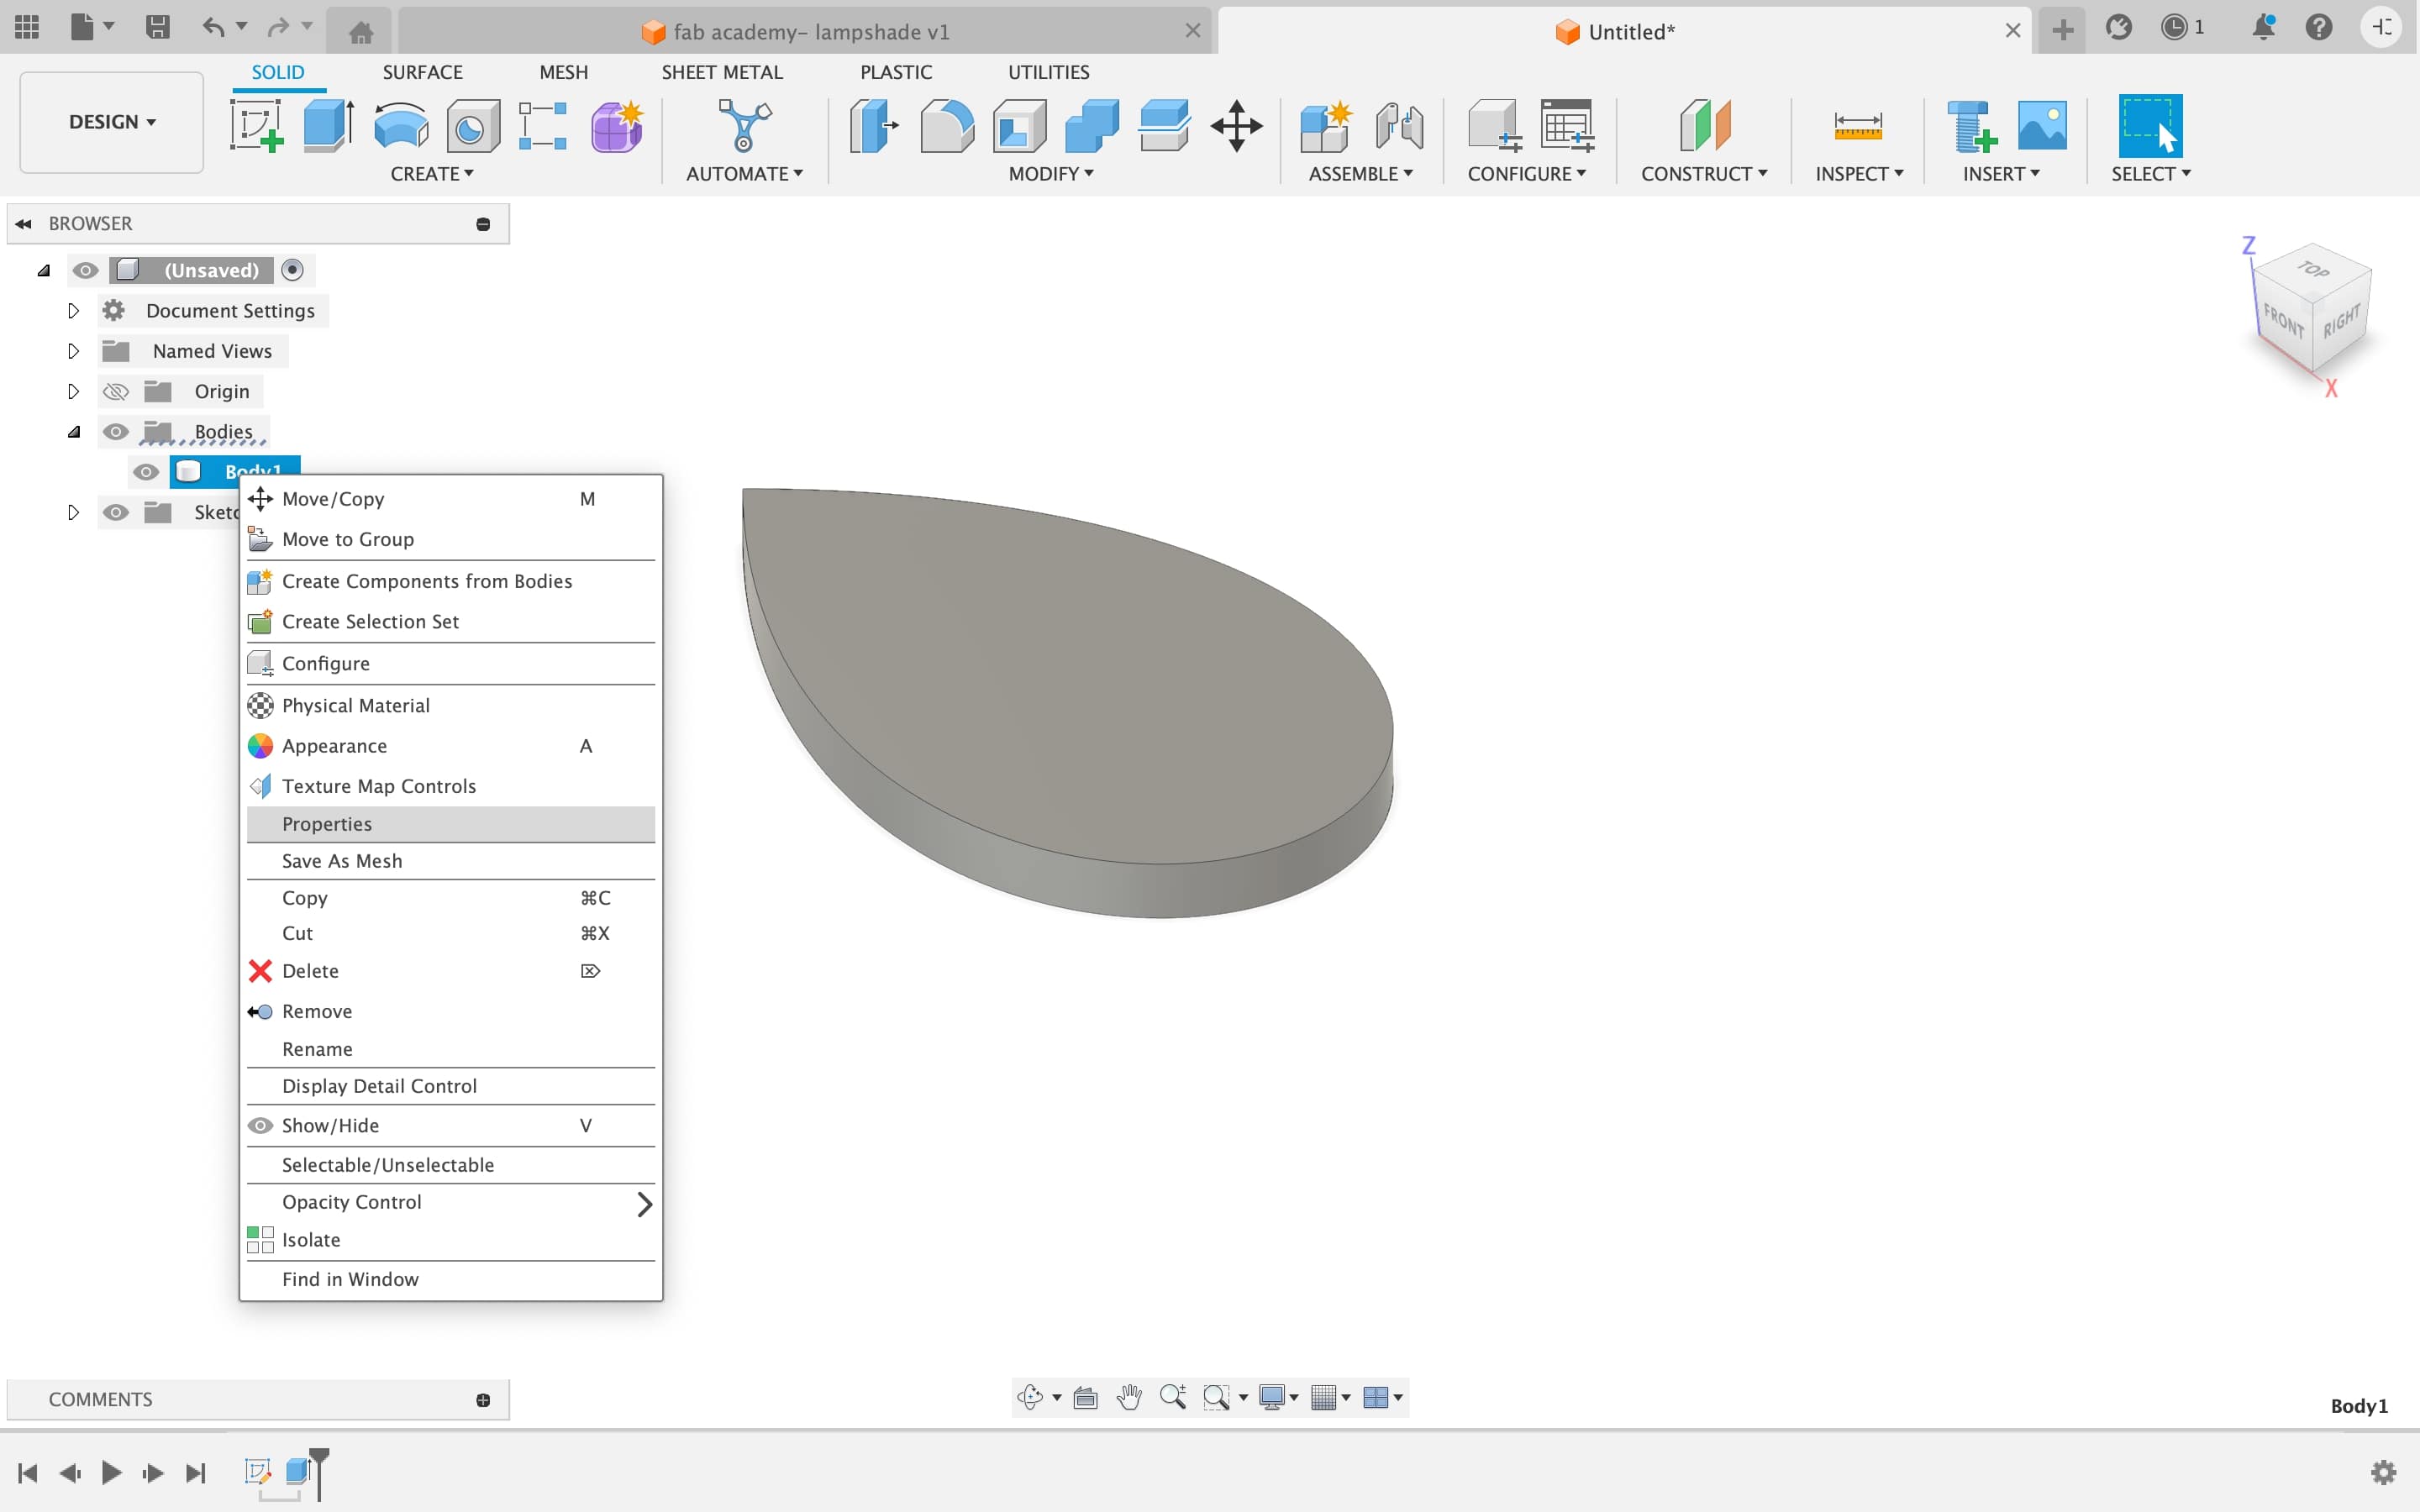
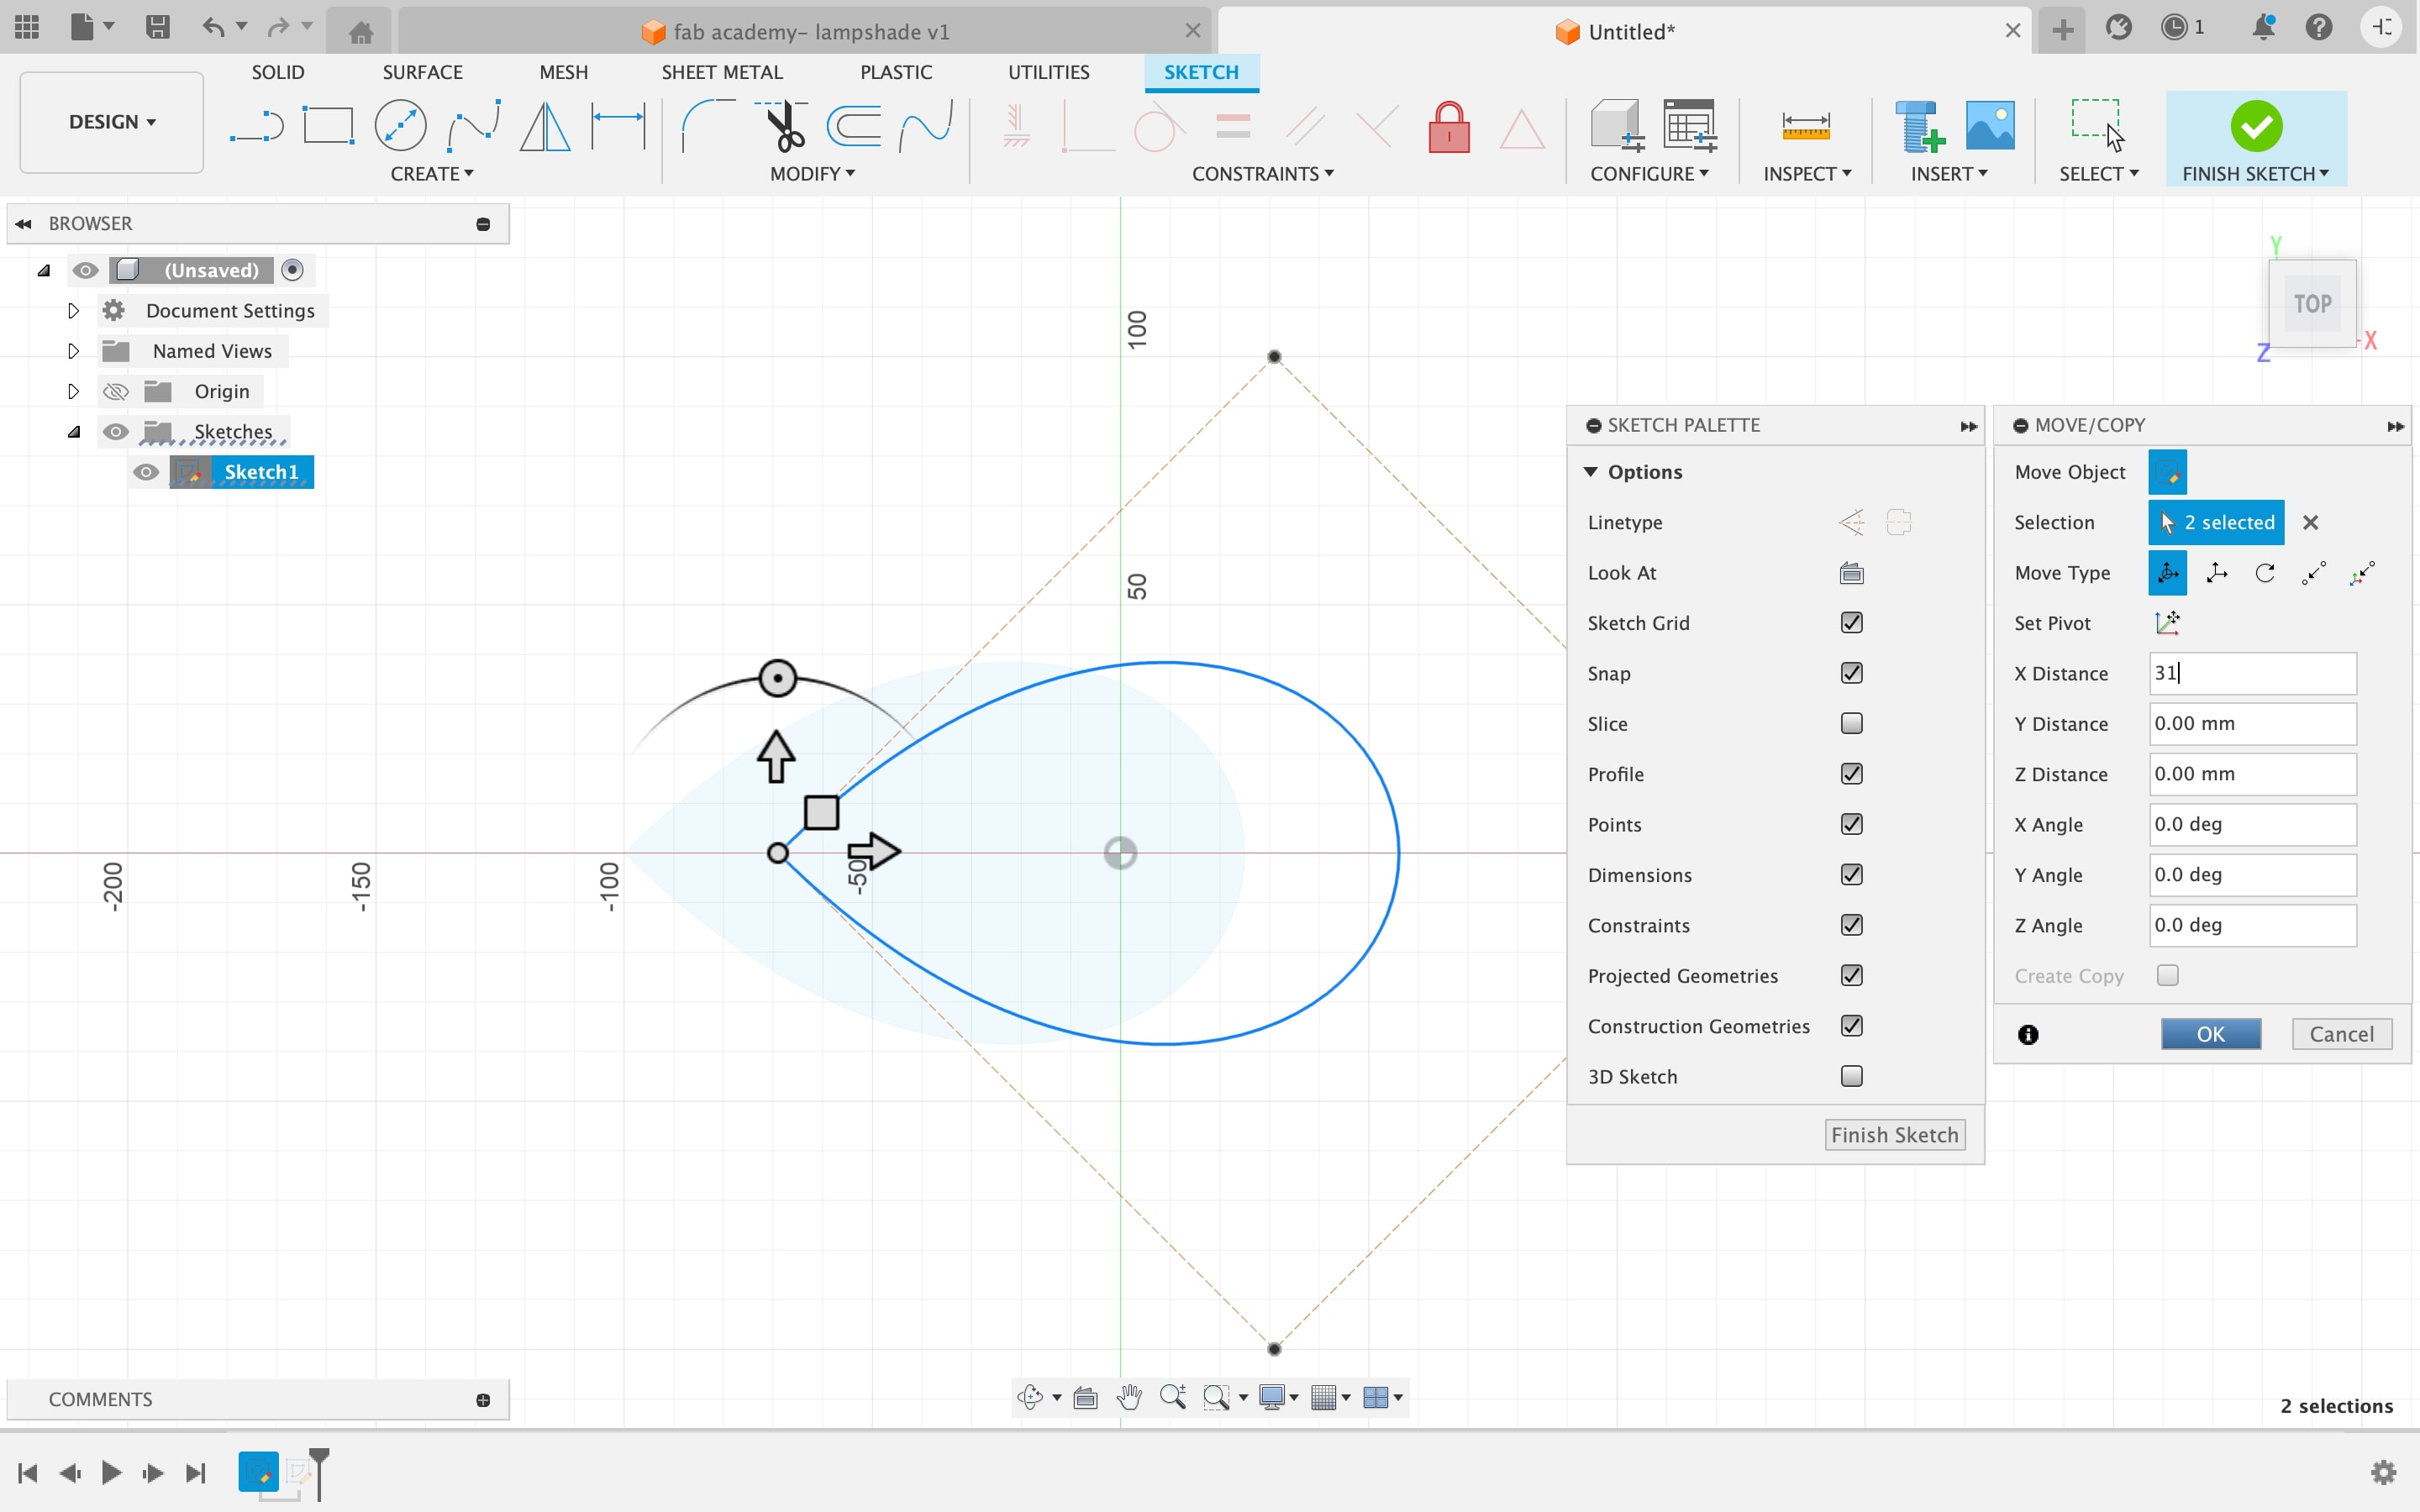
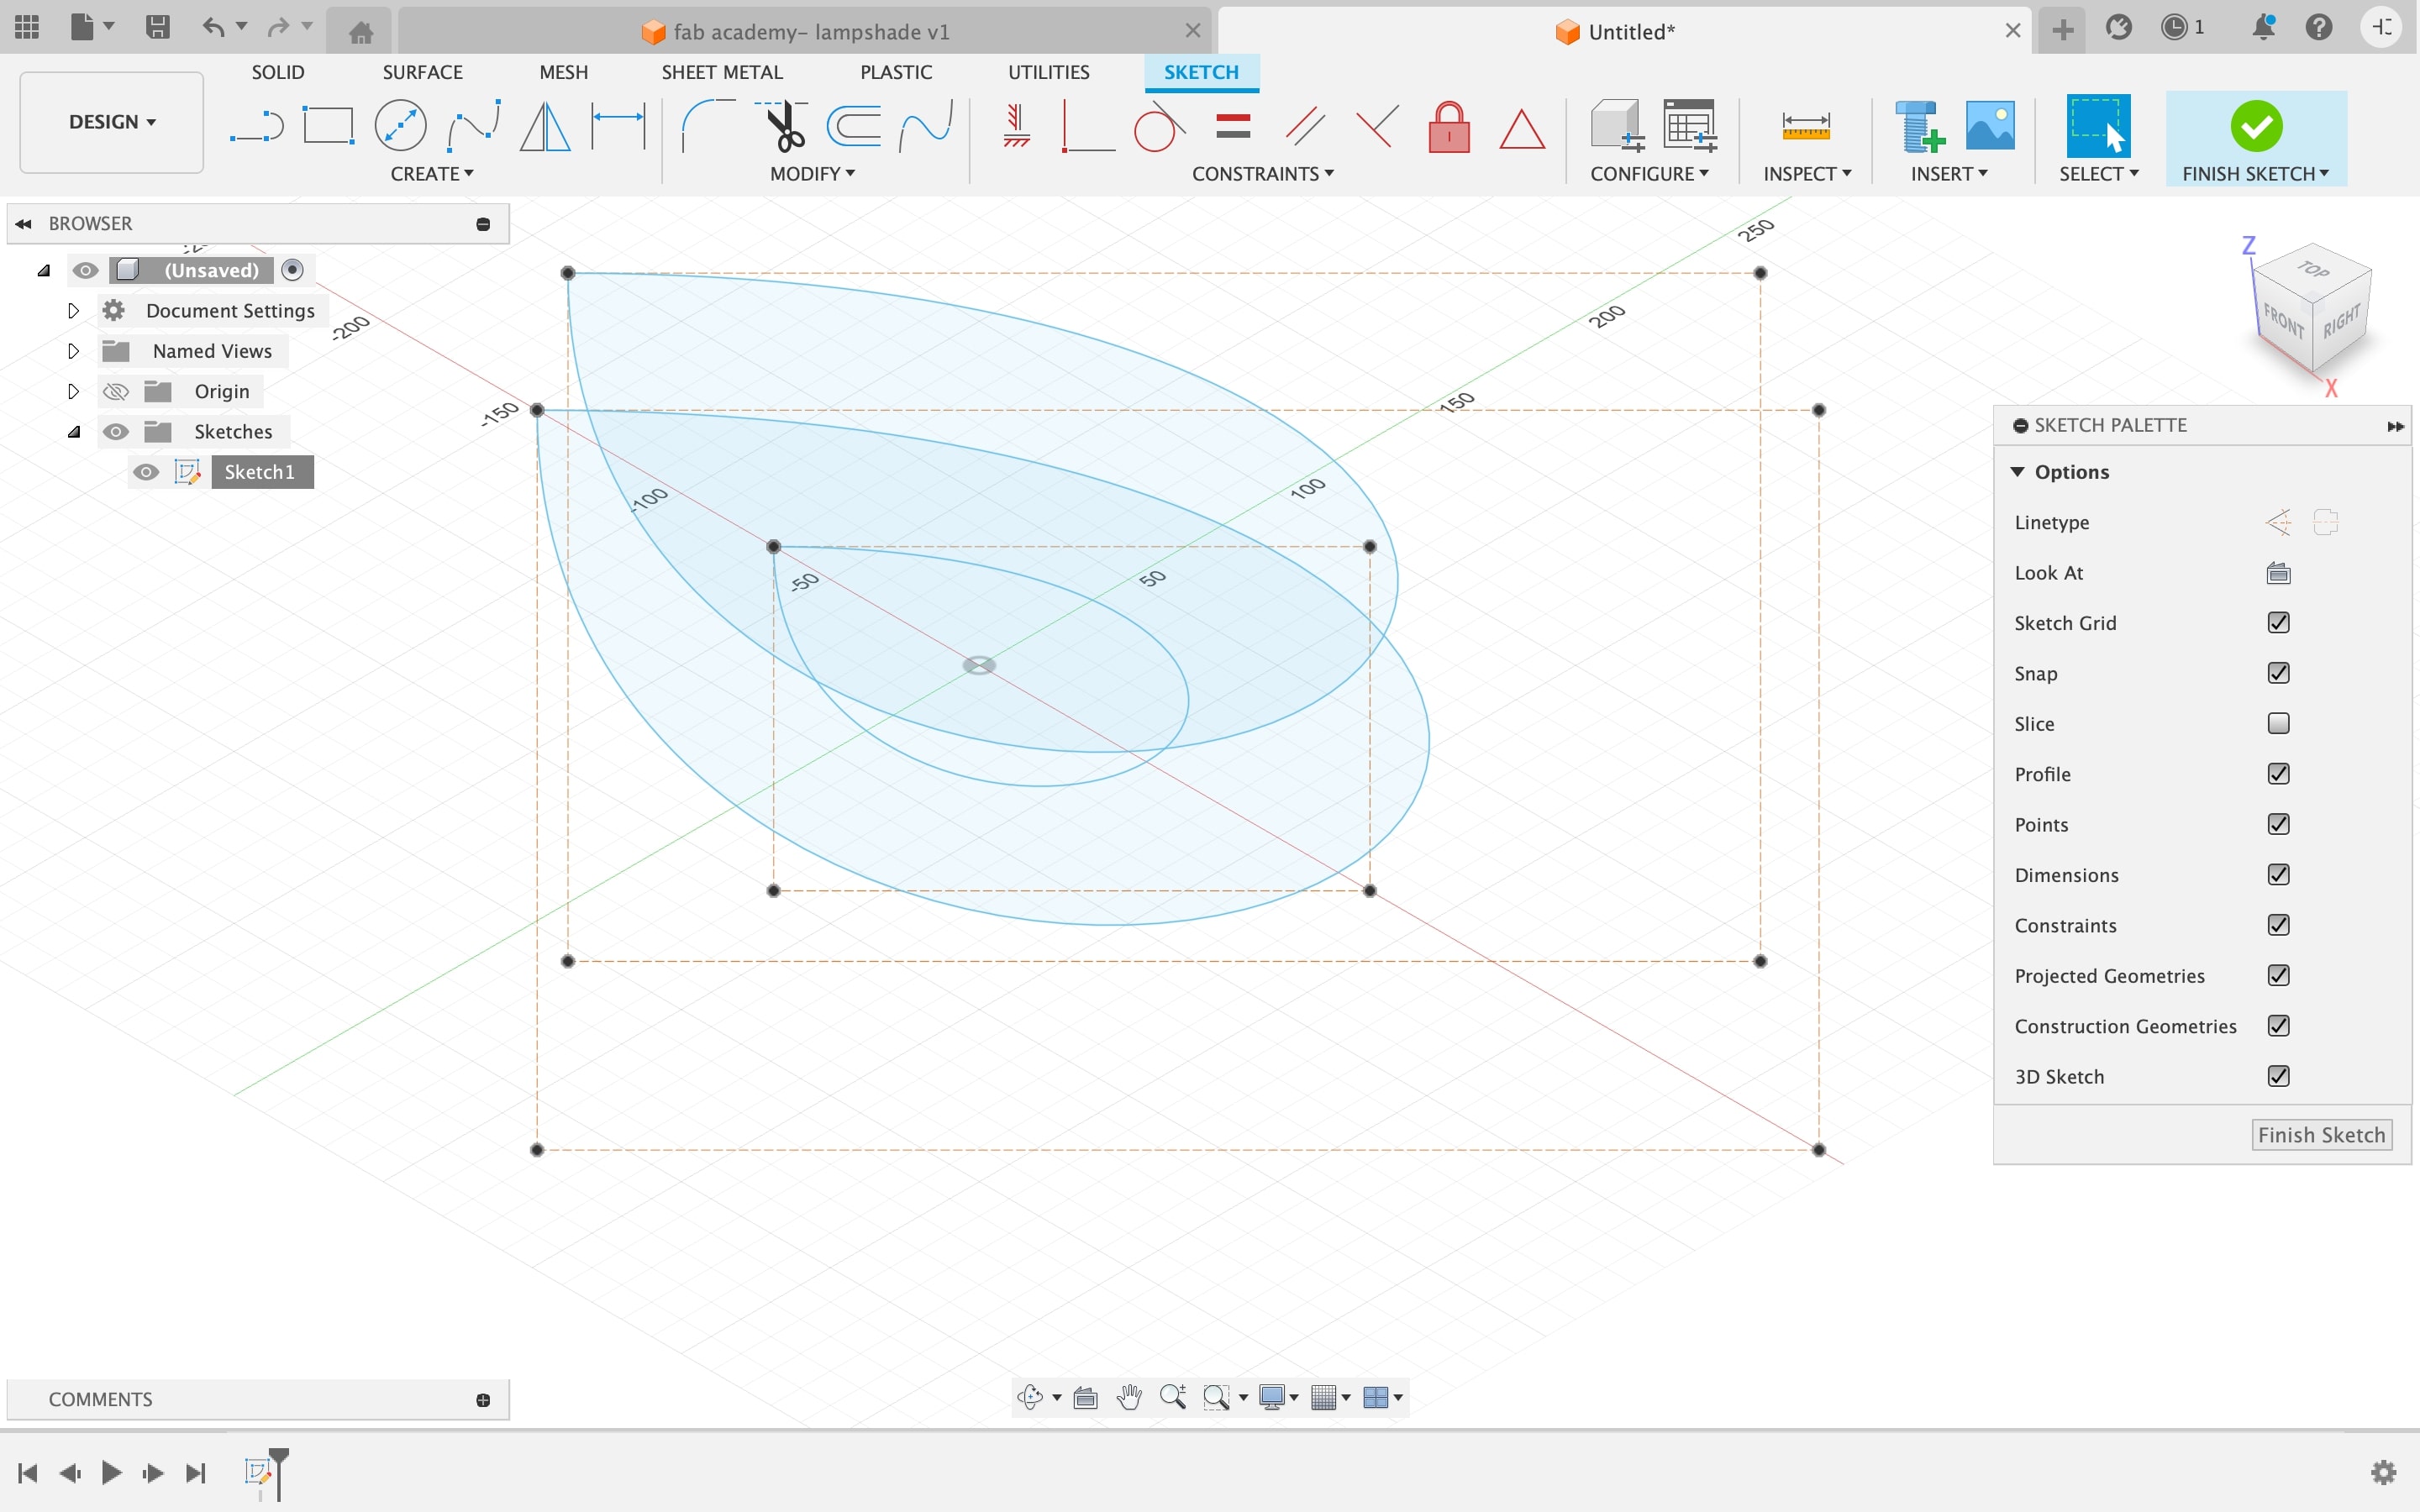
Then I resized it by changing the X, Y and Z dimensions of the shape.


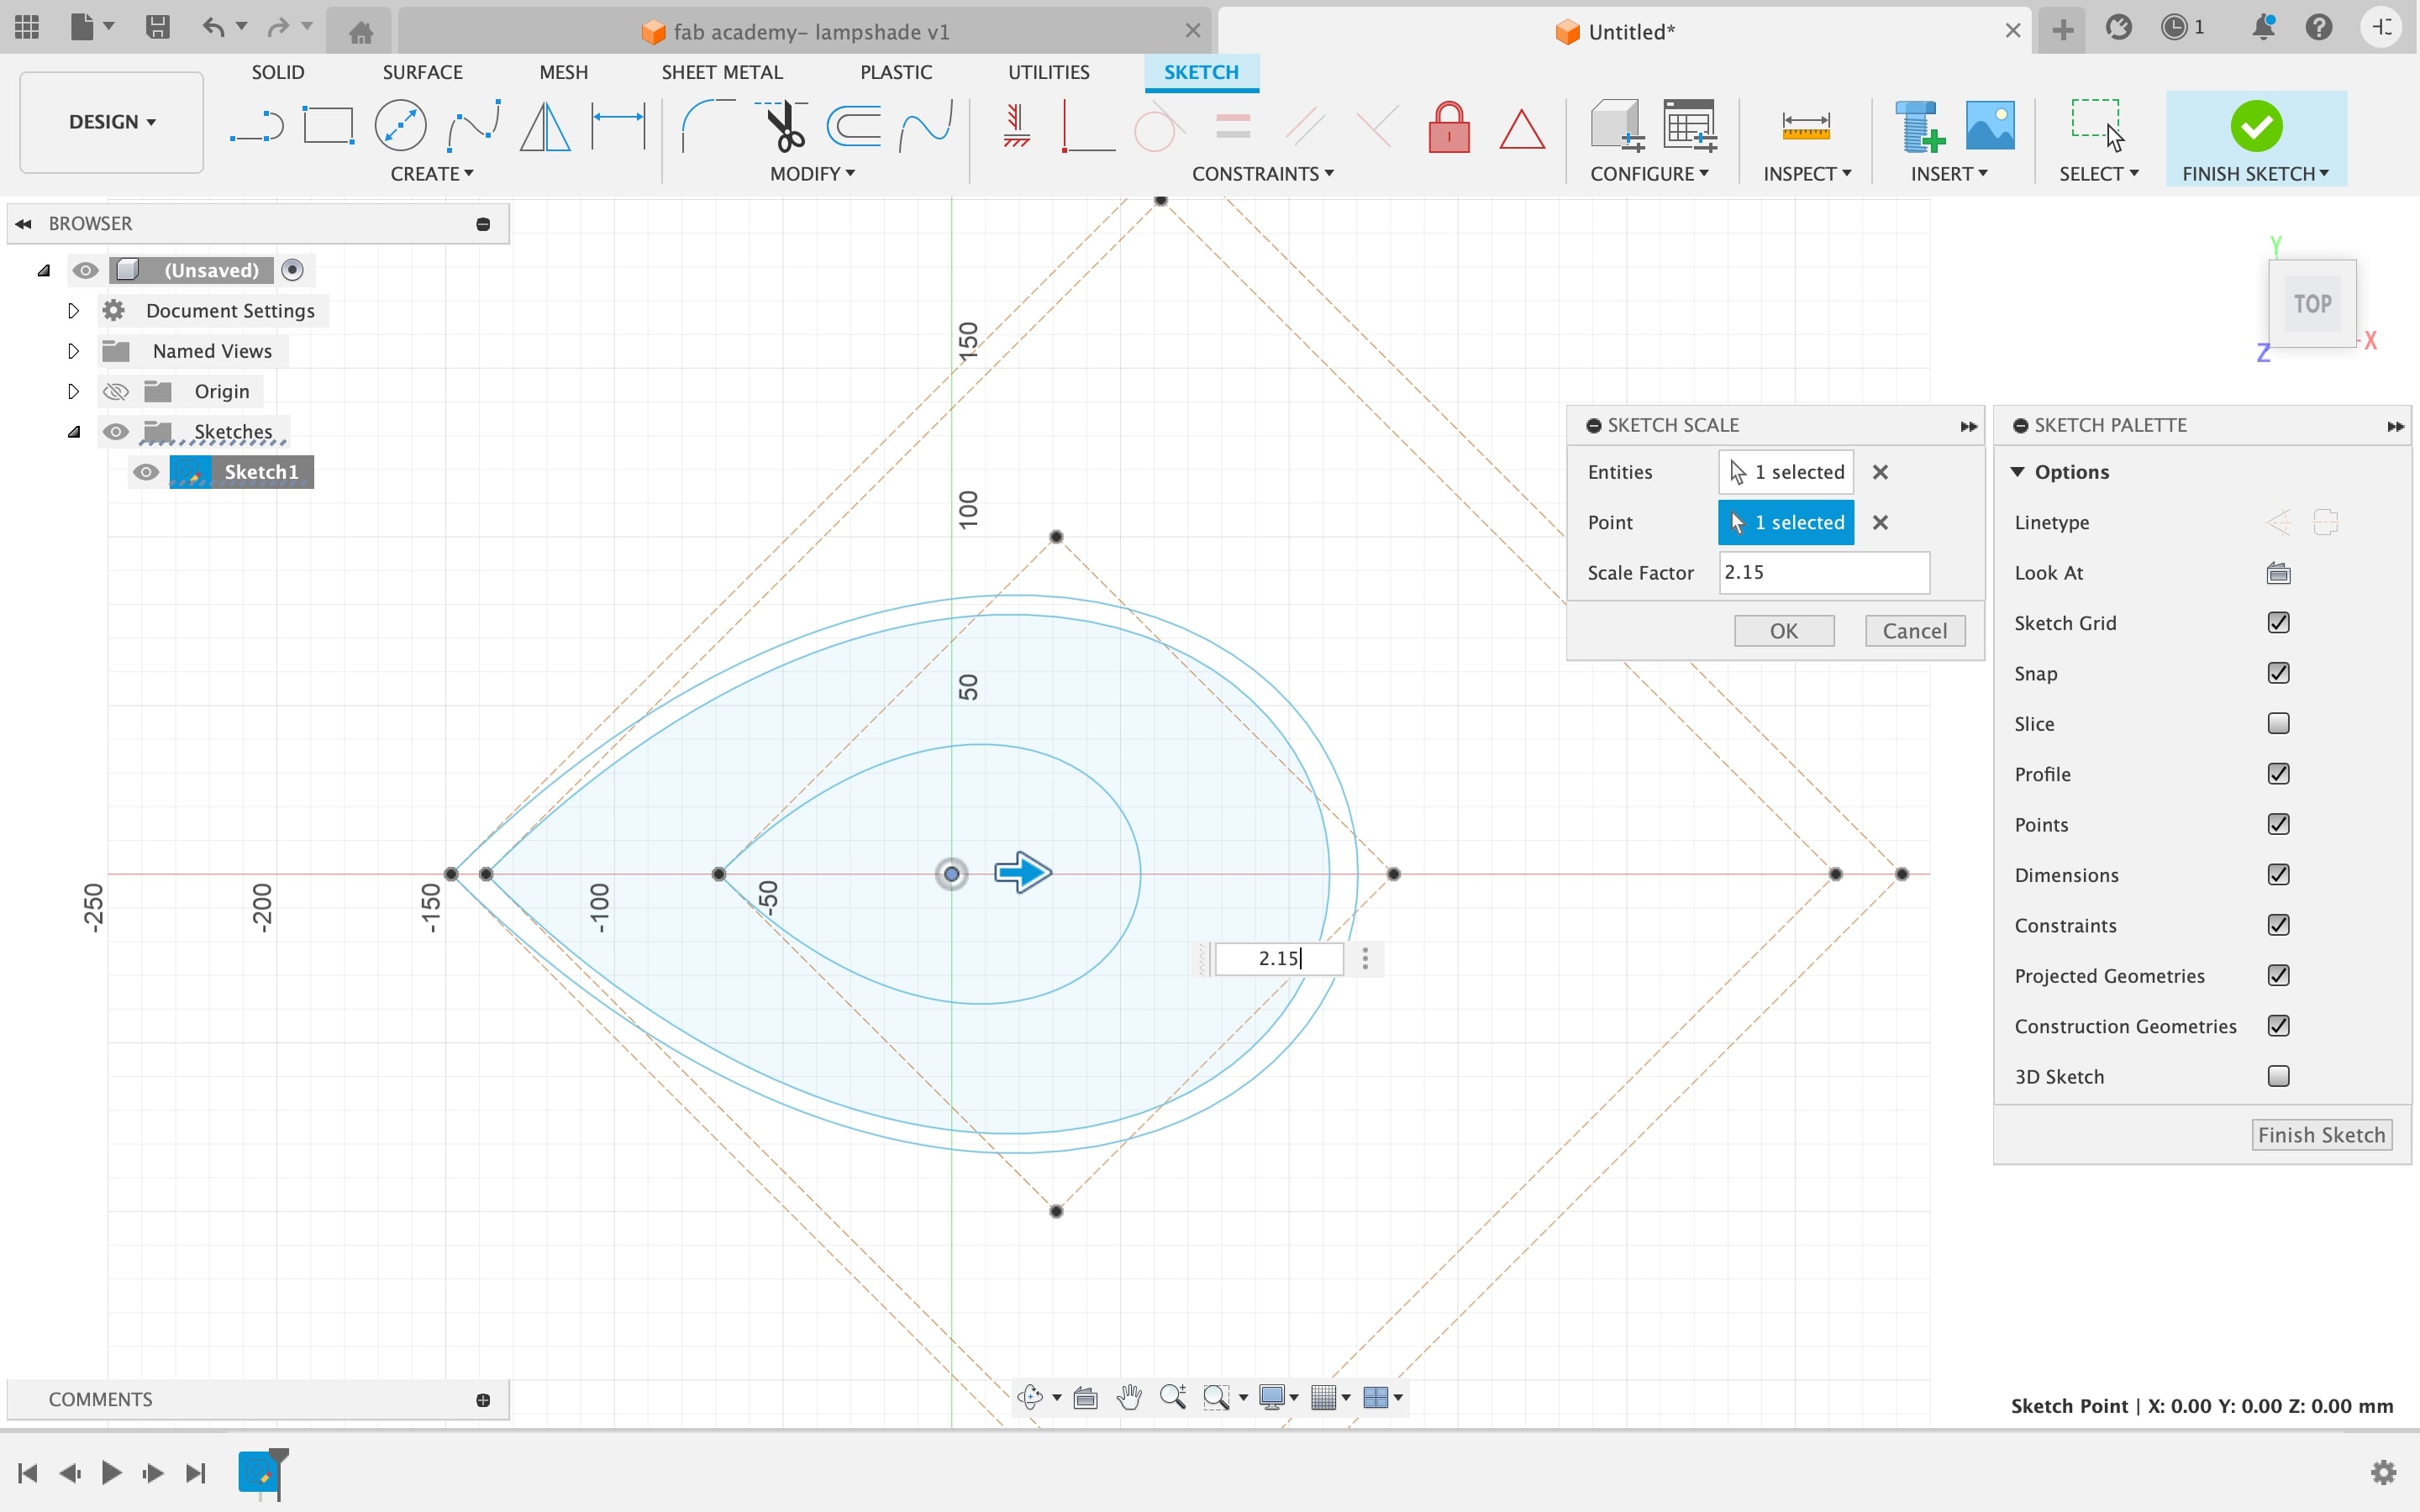
I started sketching on the same body and in the modify tab I used a sketch scale to make the same shape but in a particular distance from the center. I selected my main body as my entities and for the point I selected the center and scaled it by 1.75mm.
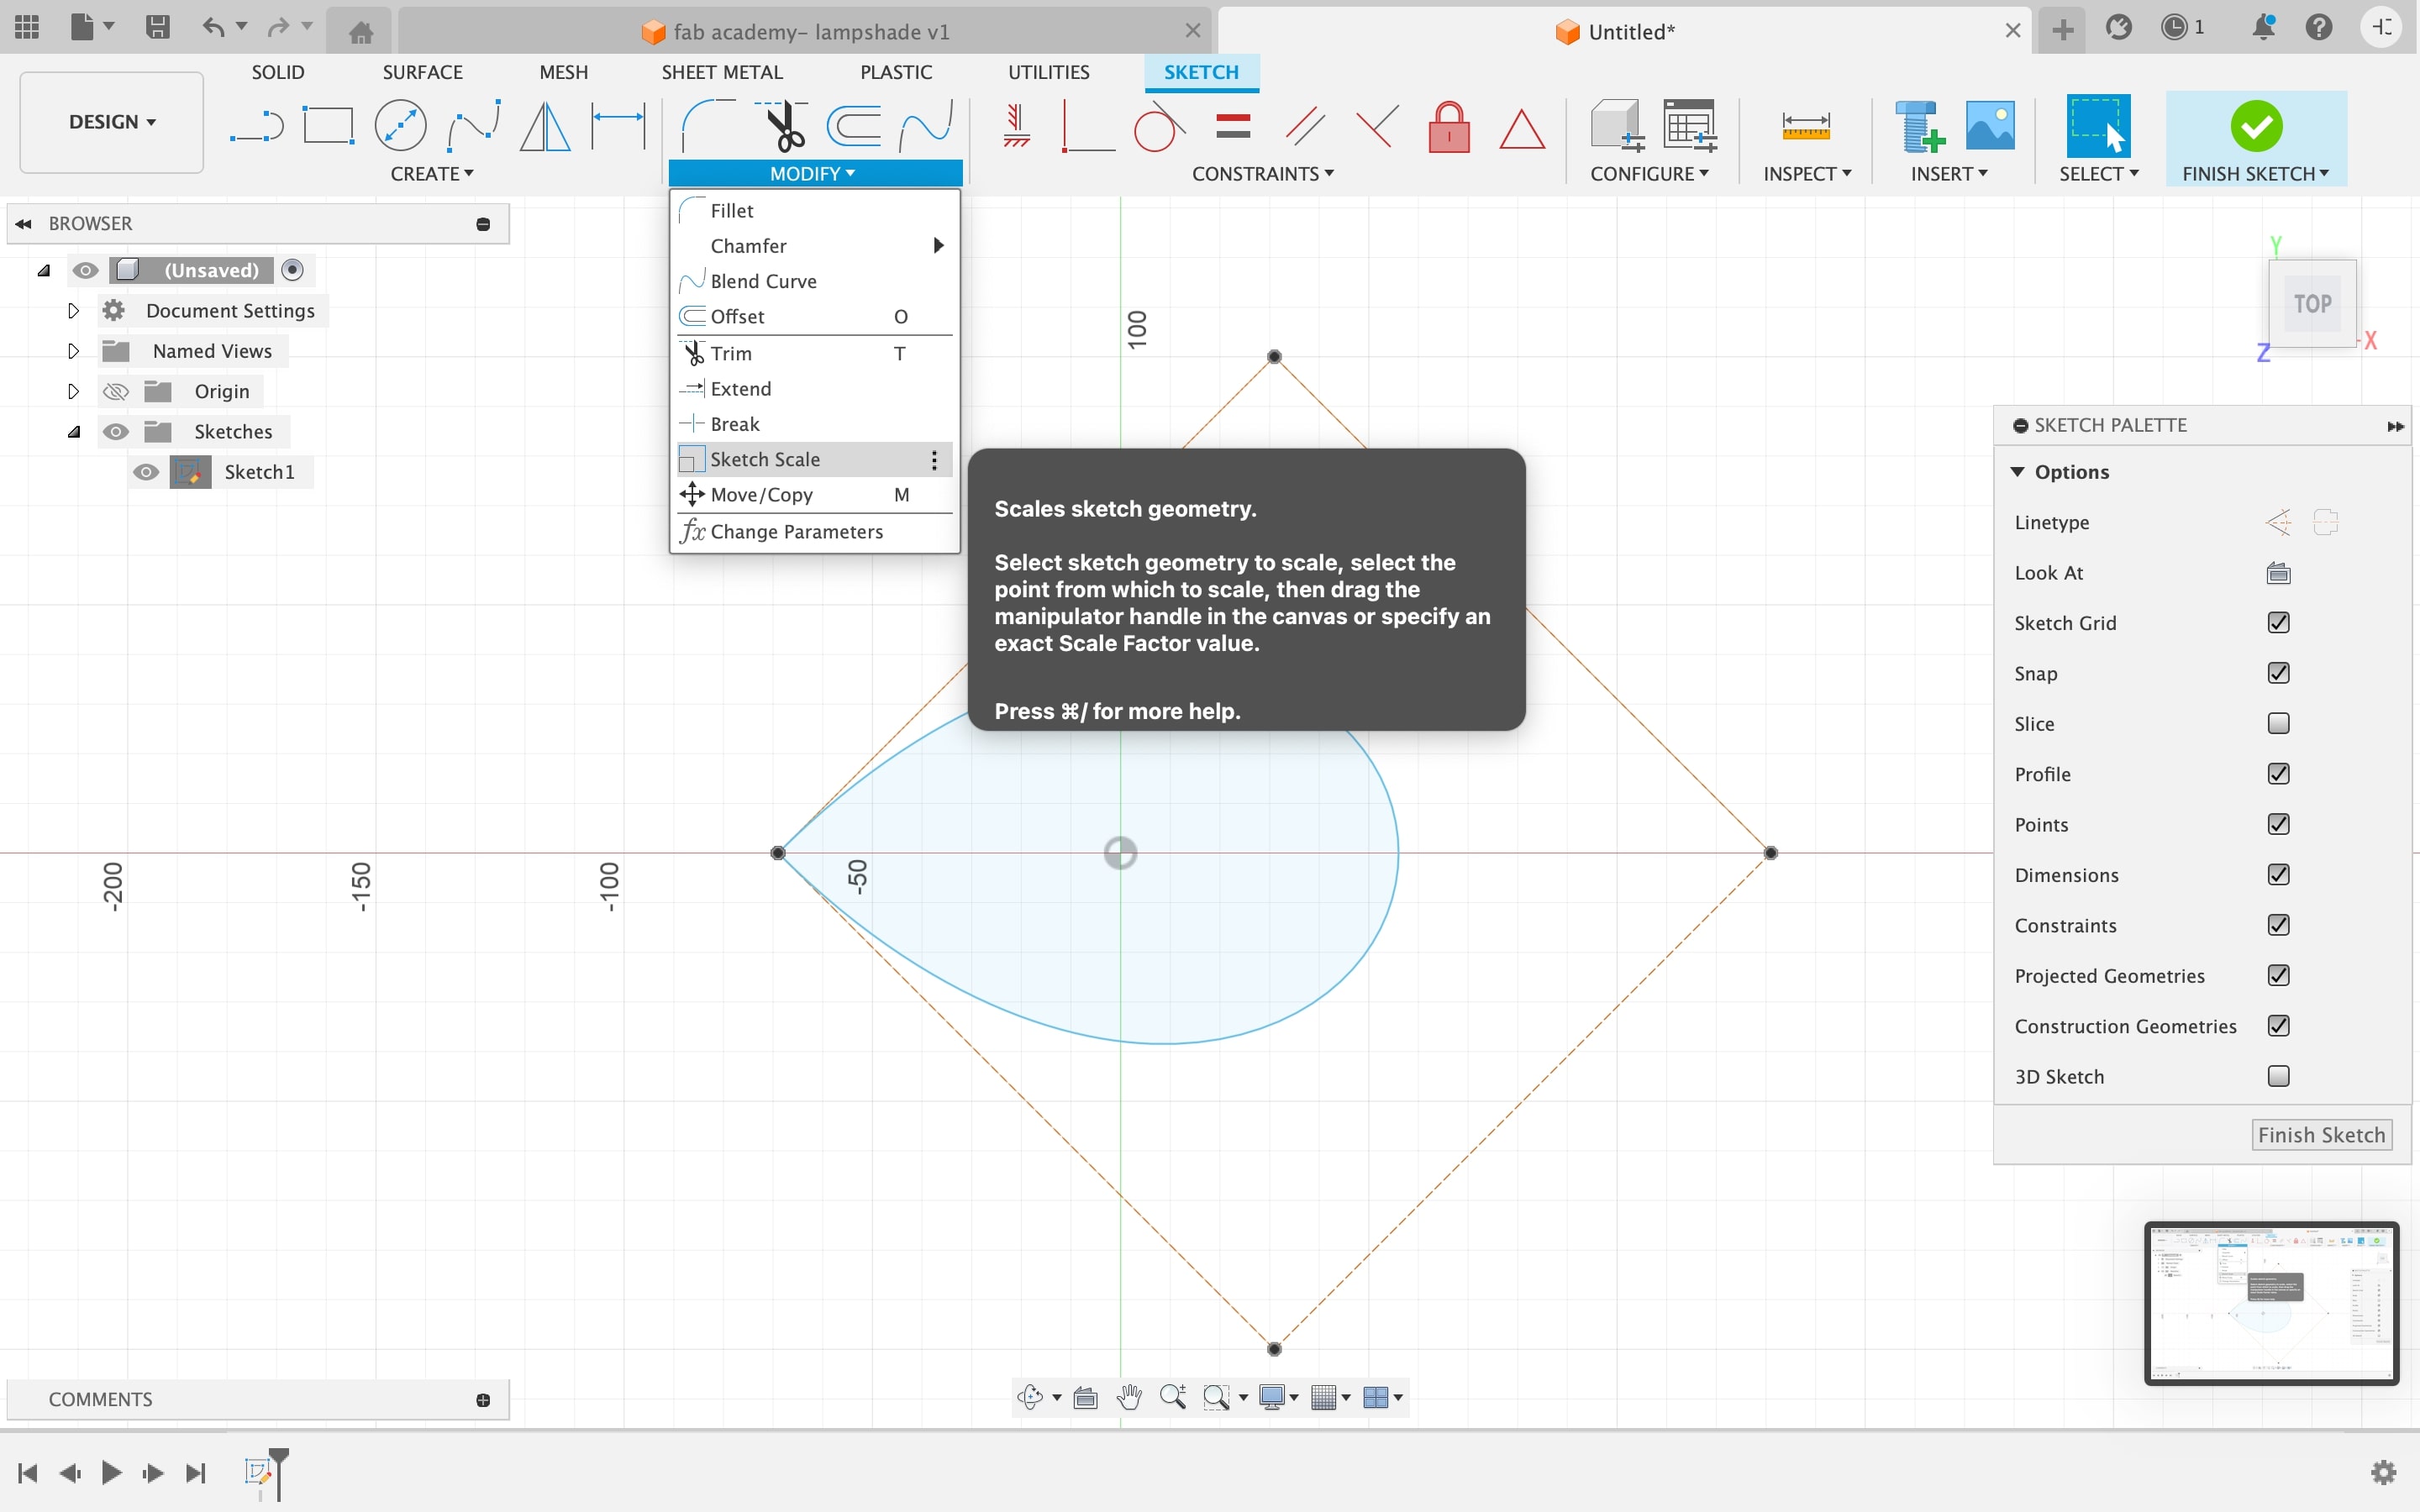
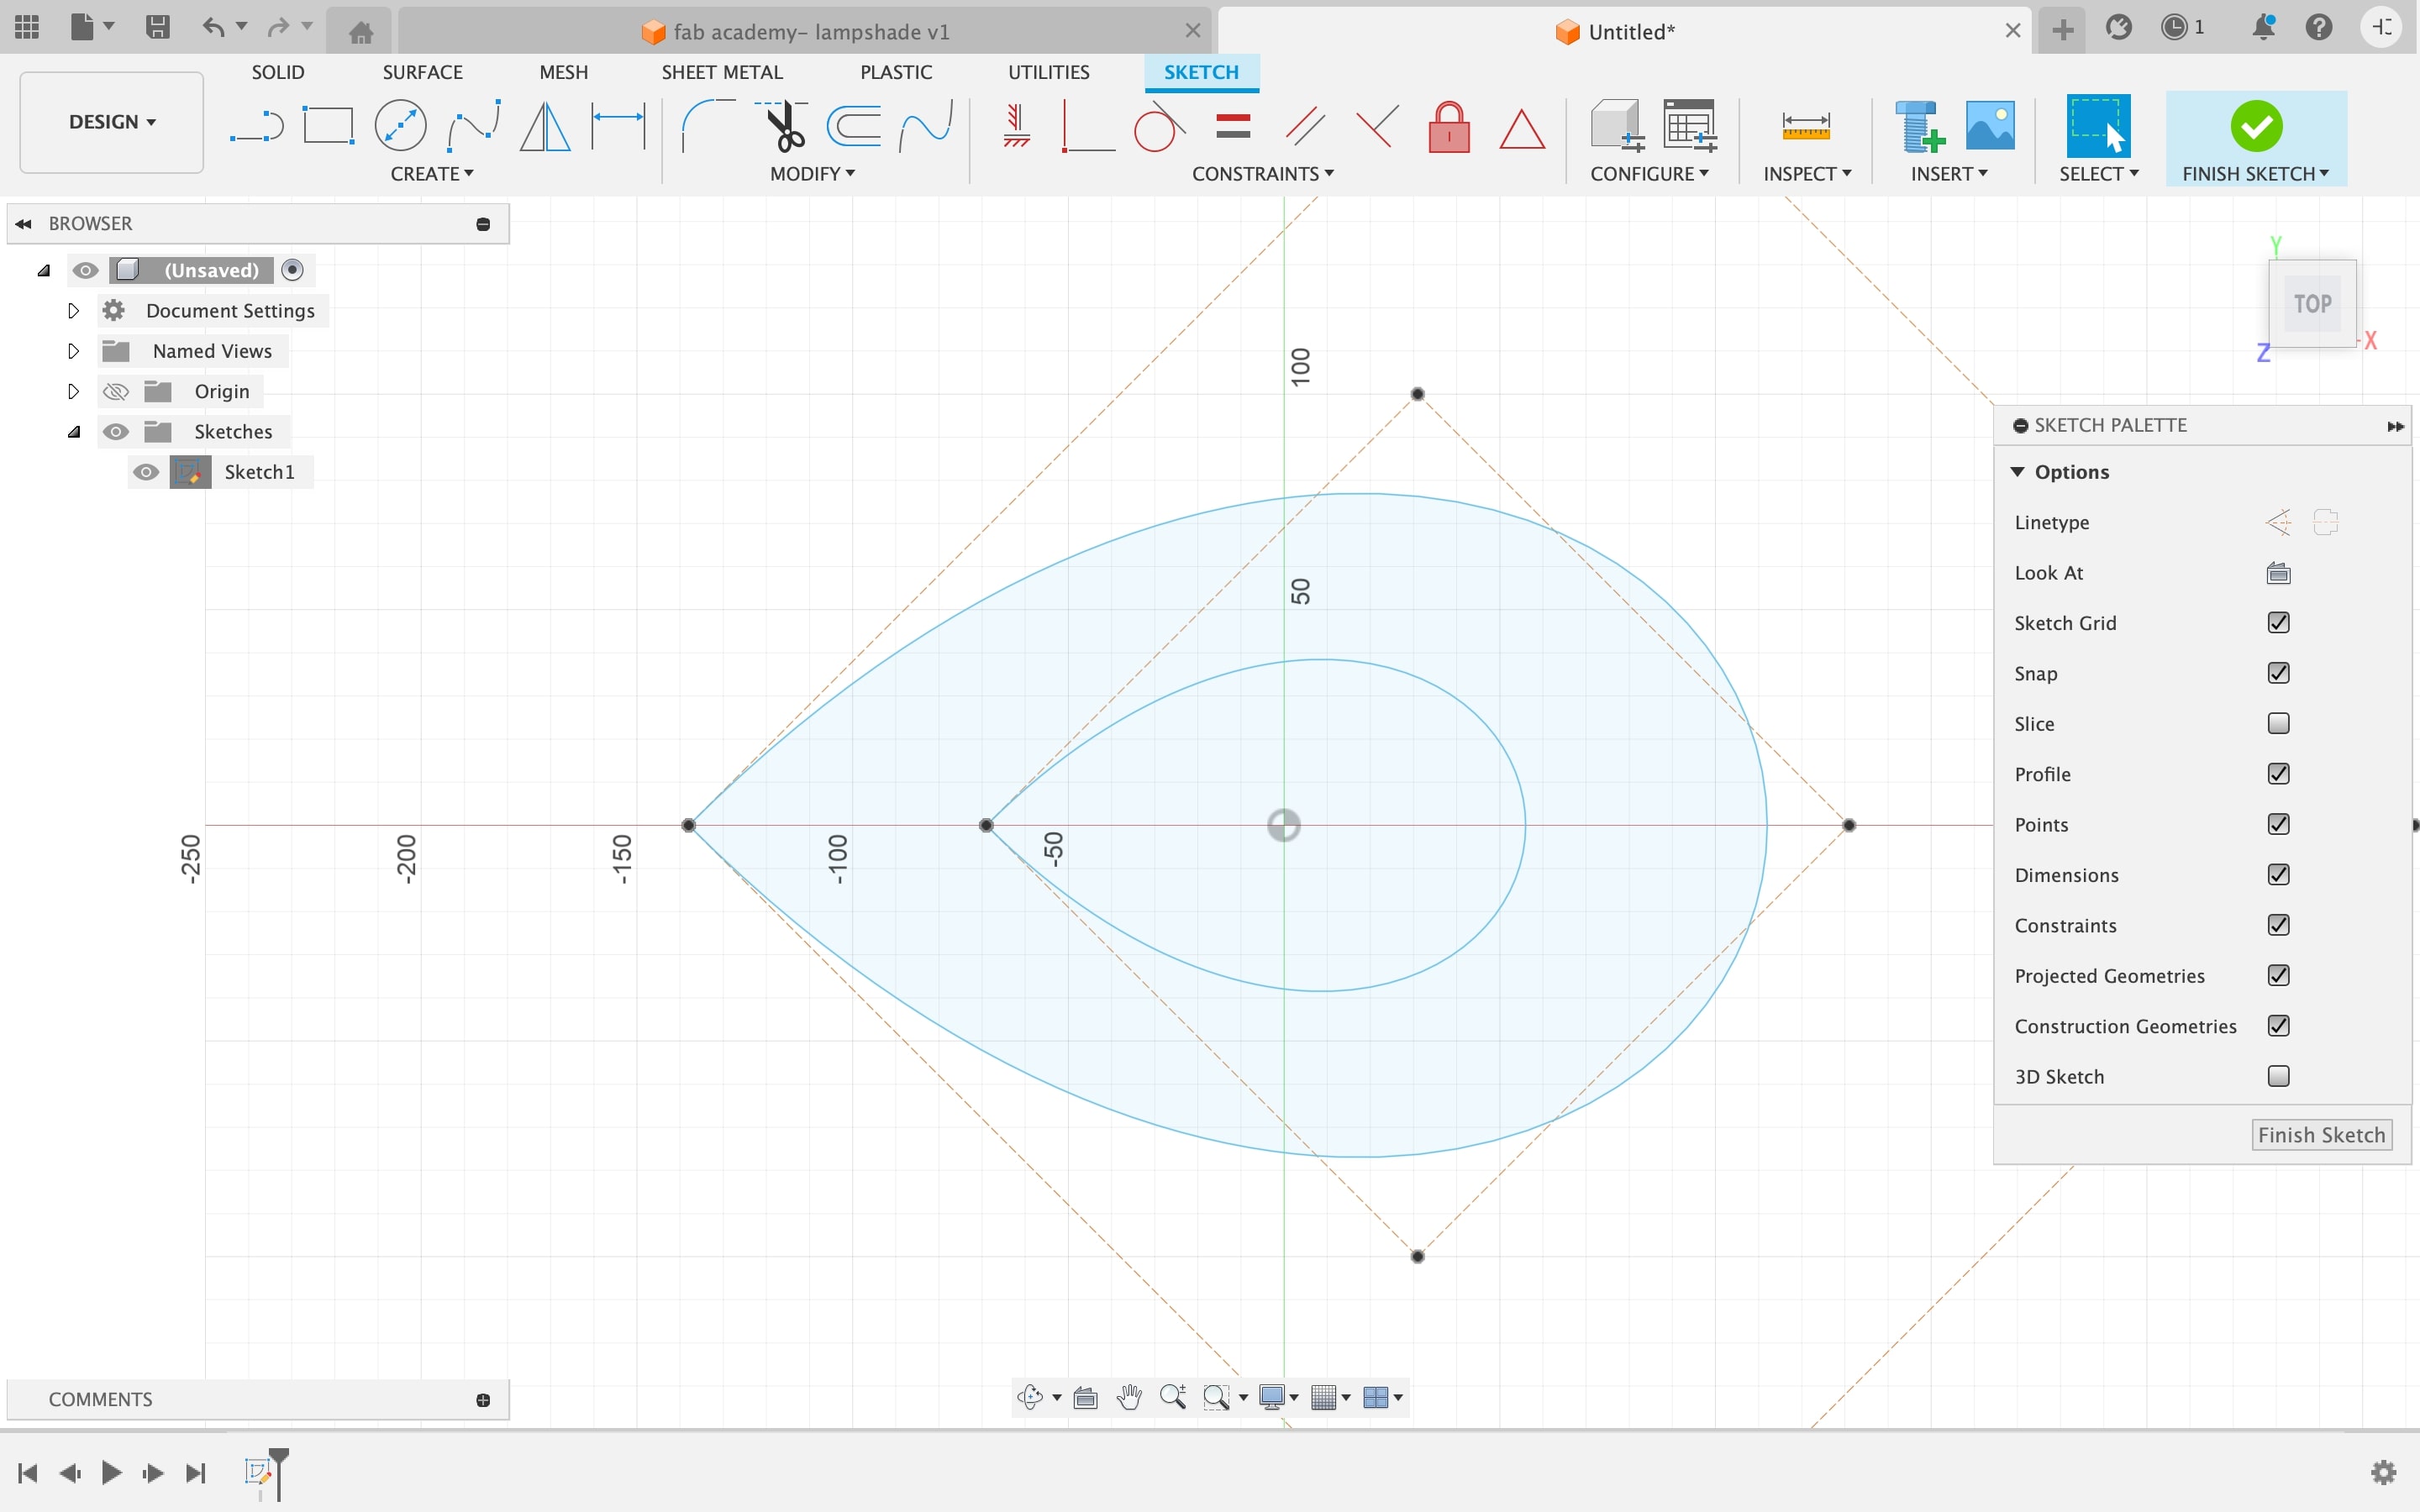
Again I did the same thing and scaled it to 2mm which helped me in making my all 3 shapes for the bowl.
After pressing the finish sketch I selected each and every shape and started changing it’s position by right click, move and changed its X, Y, Z values as I wanted the bowl's shape.
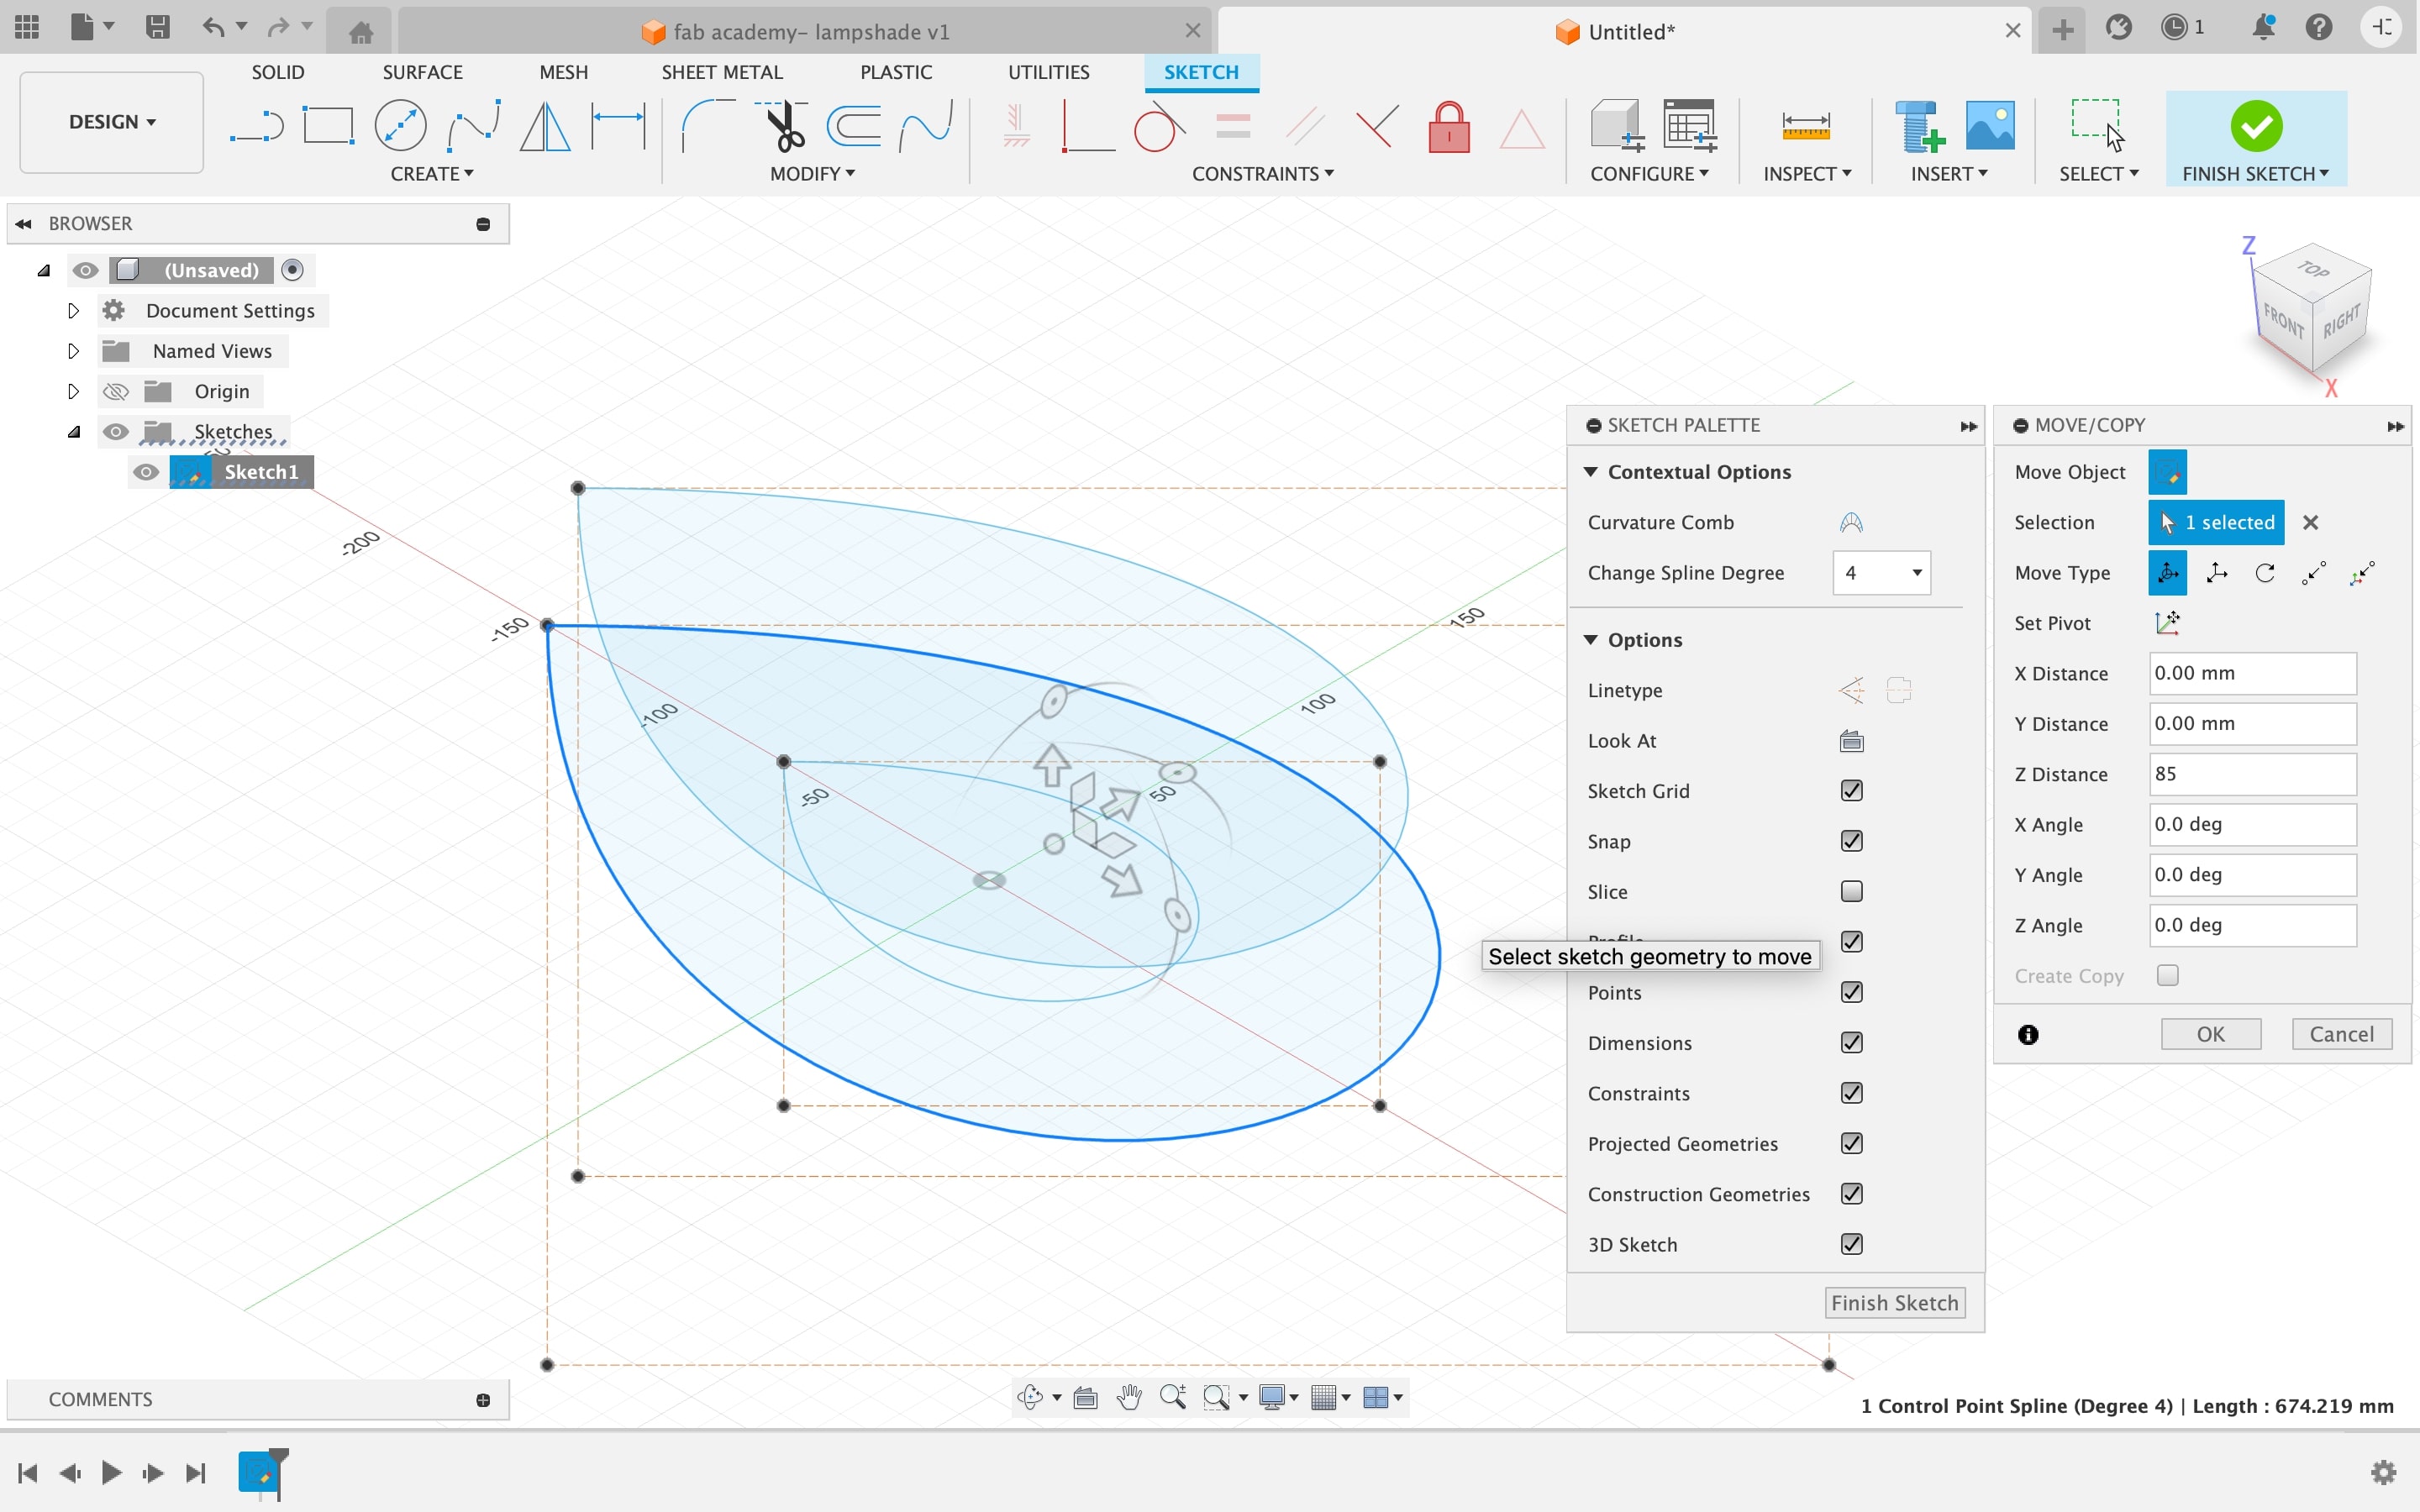
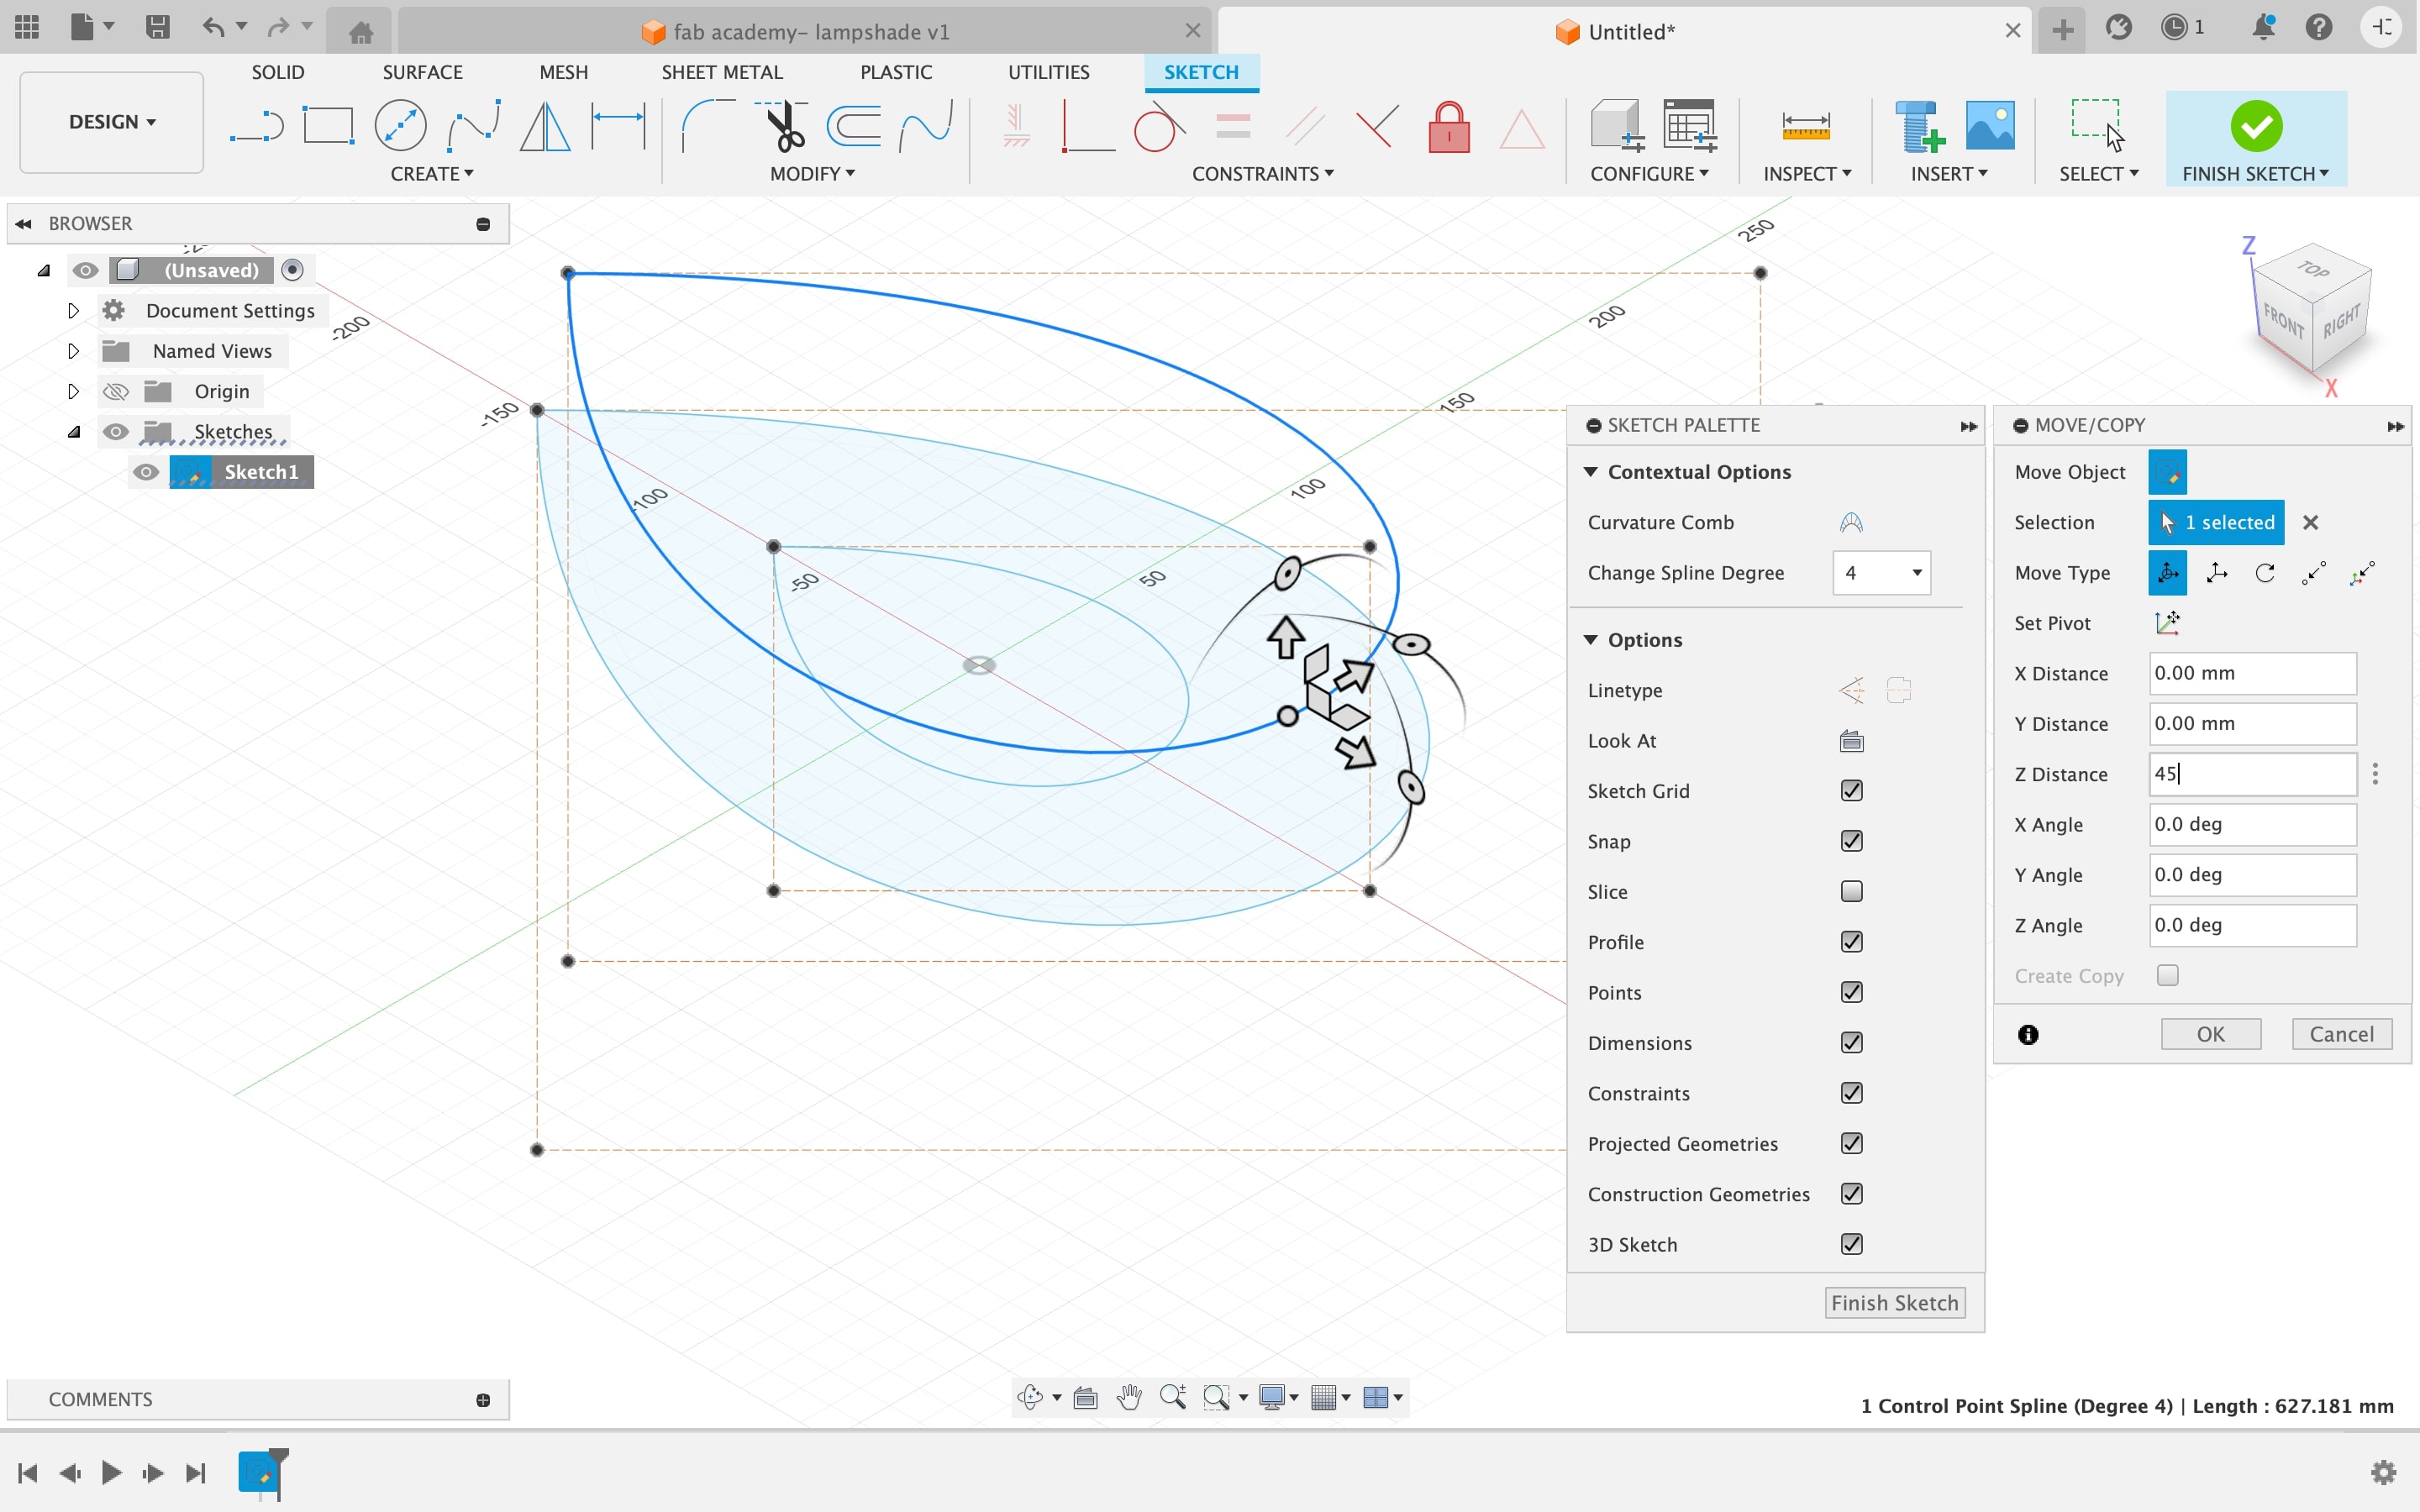

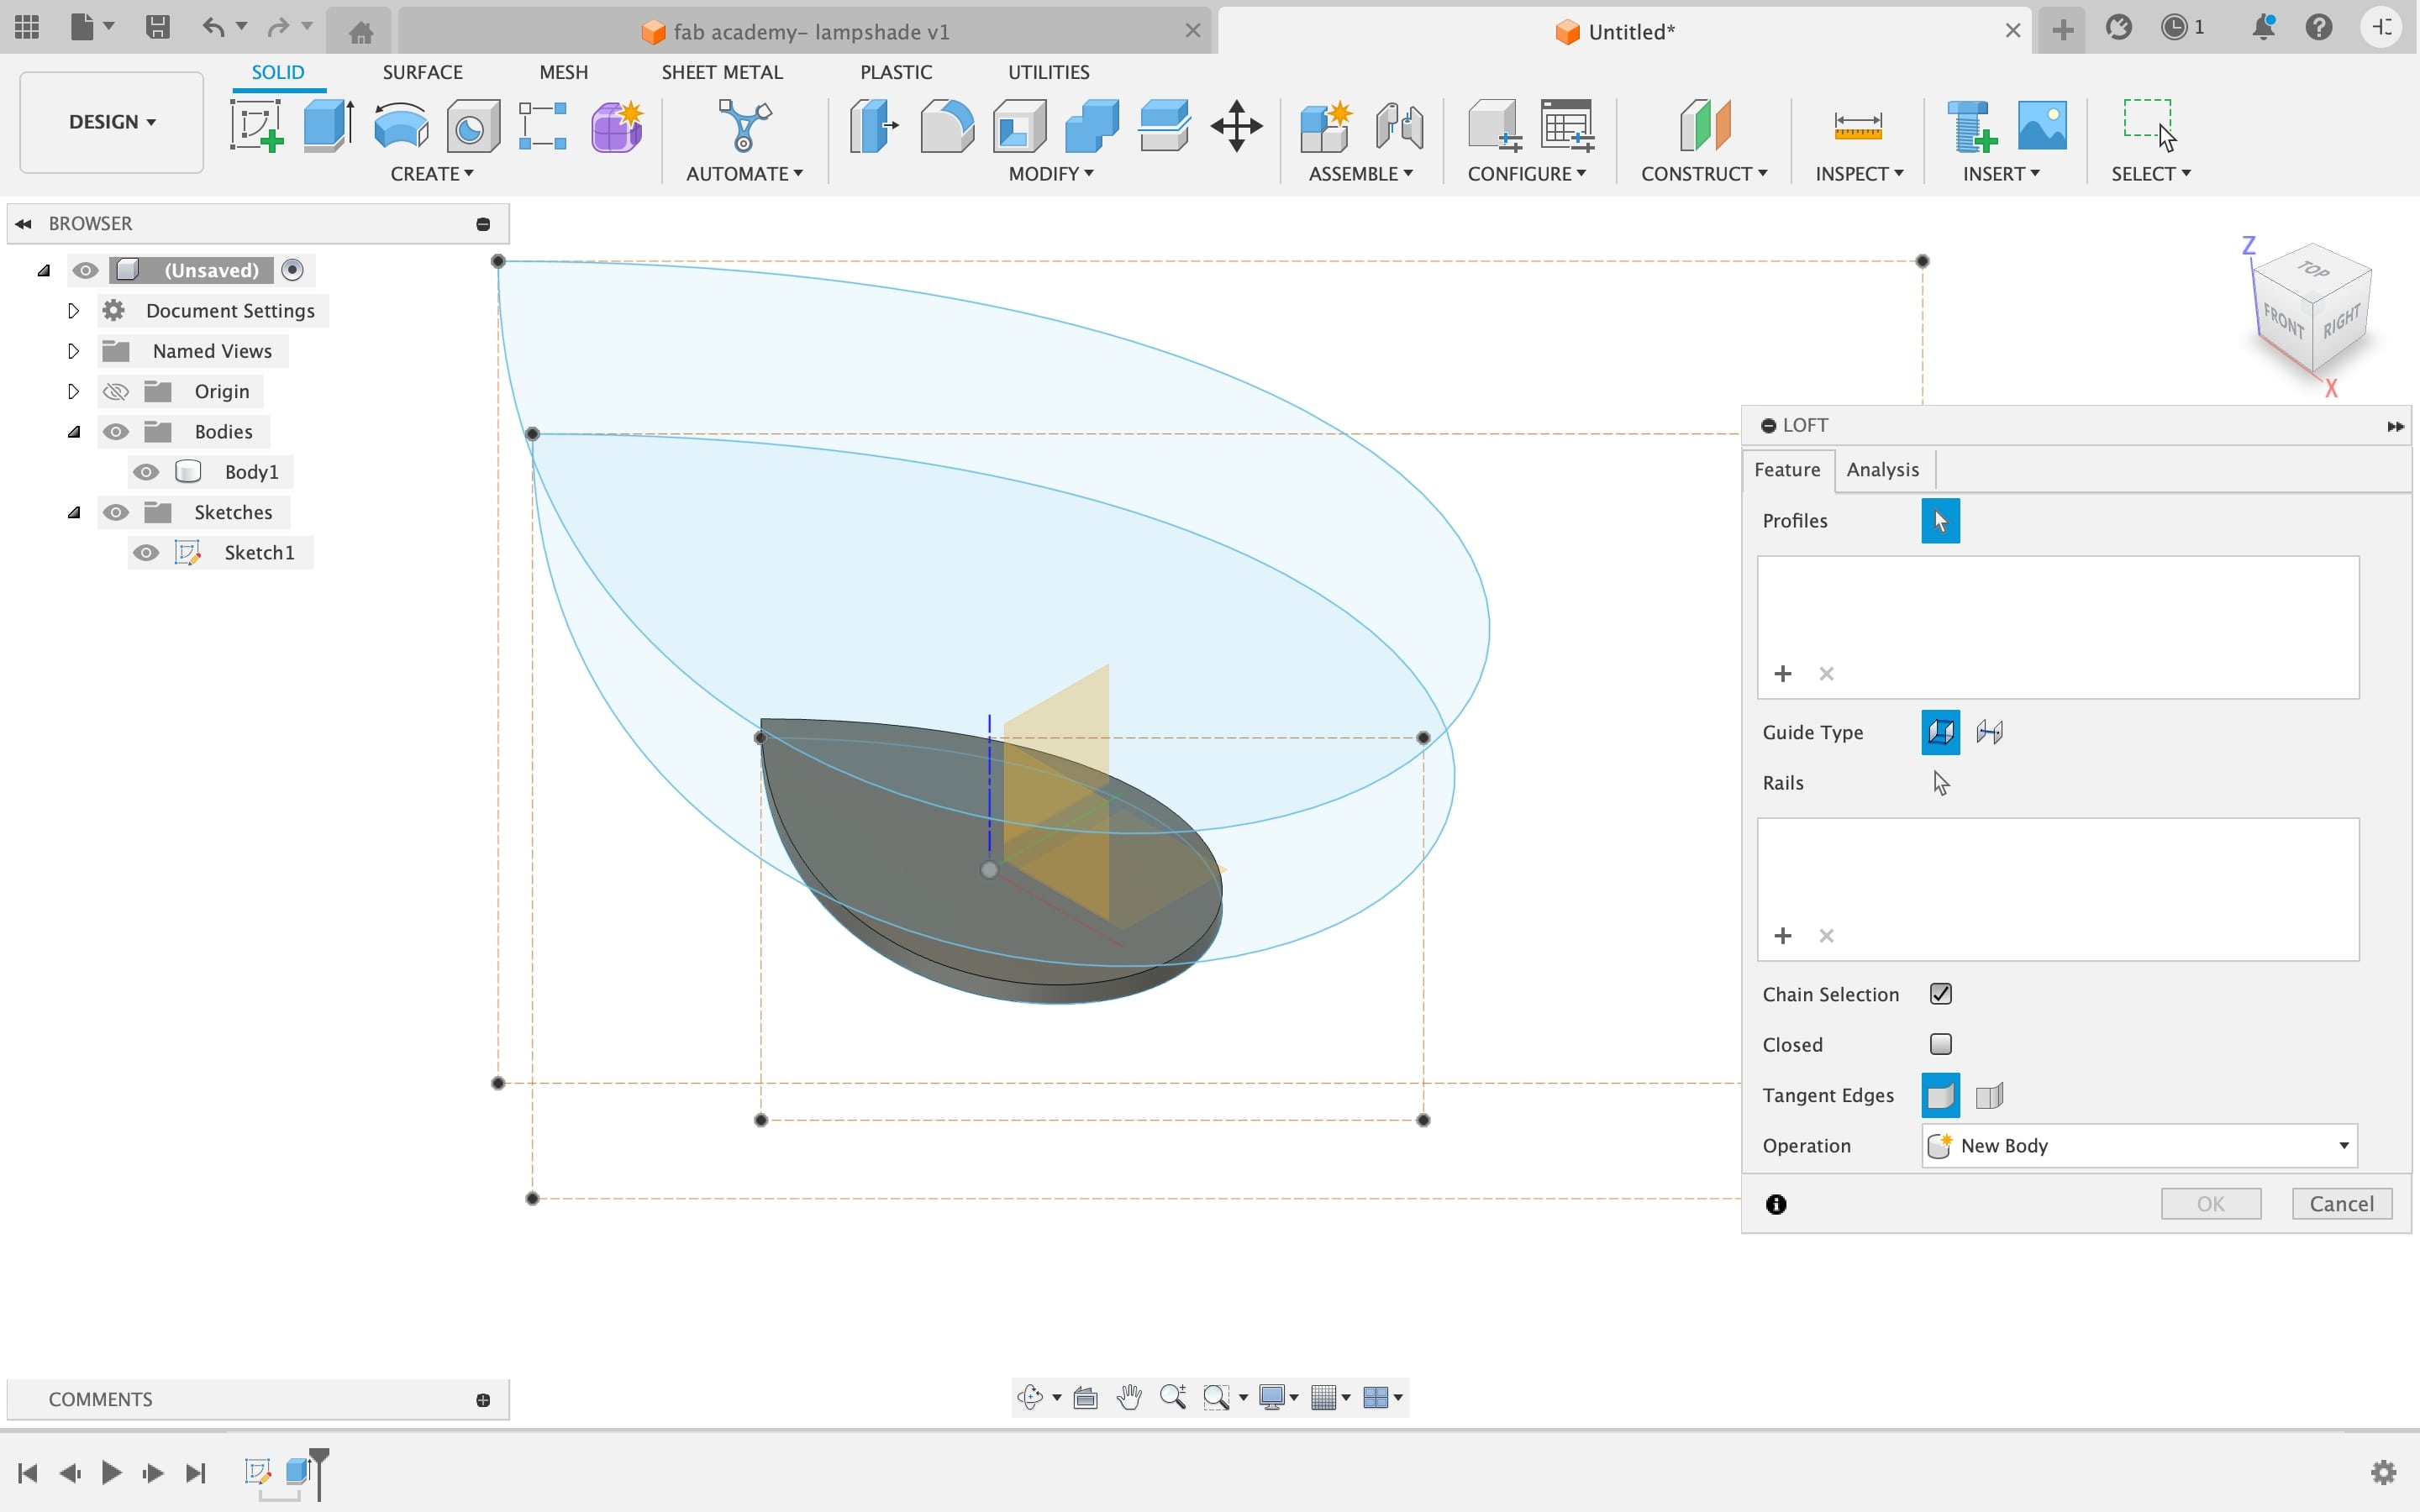
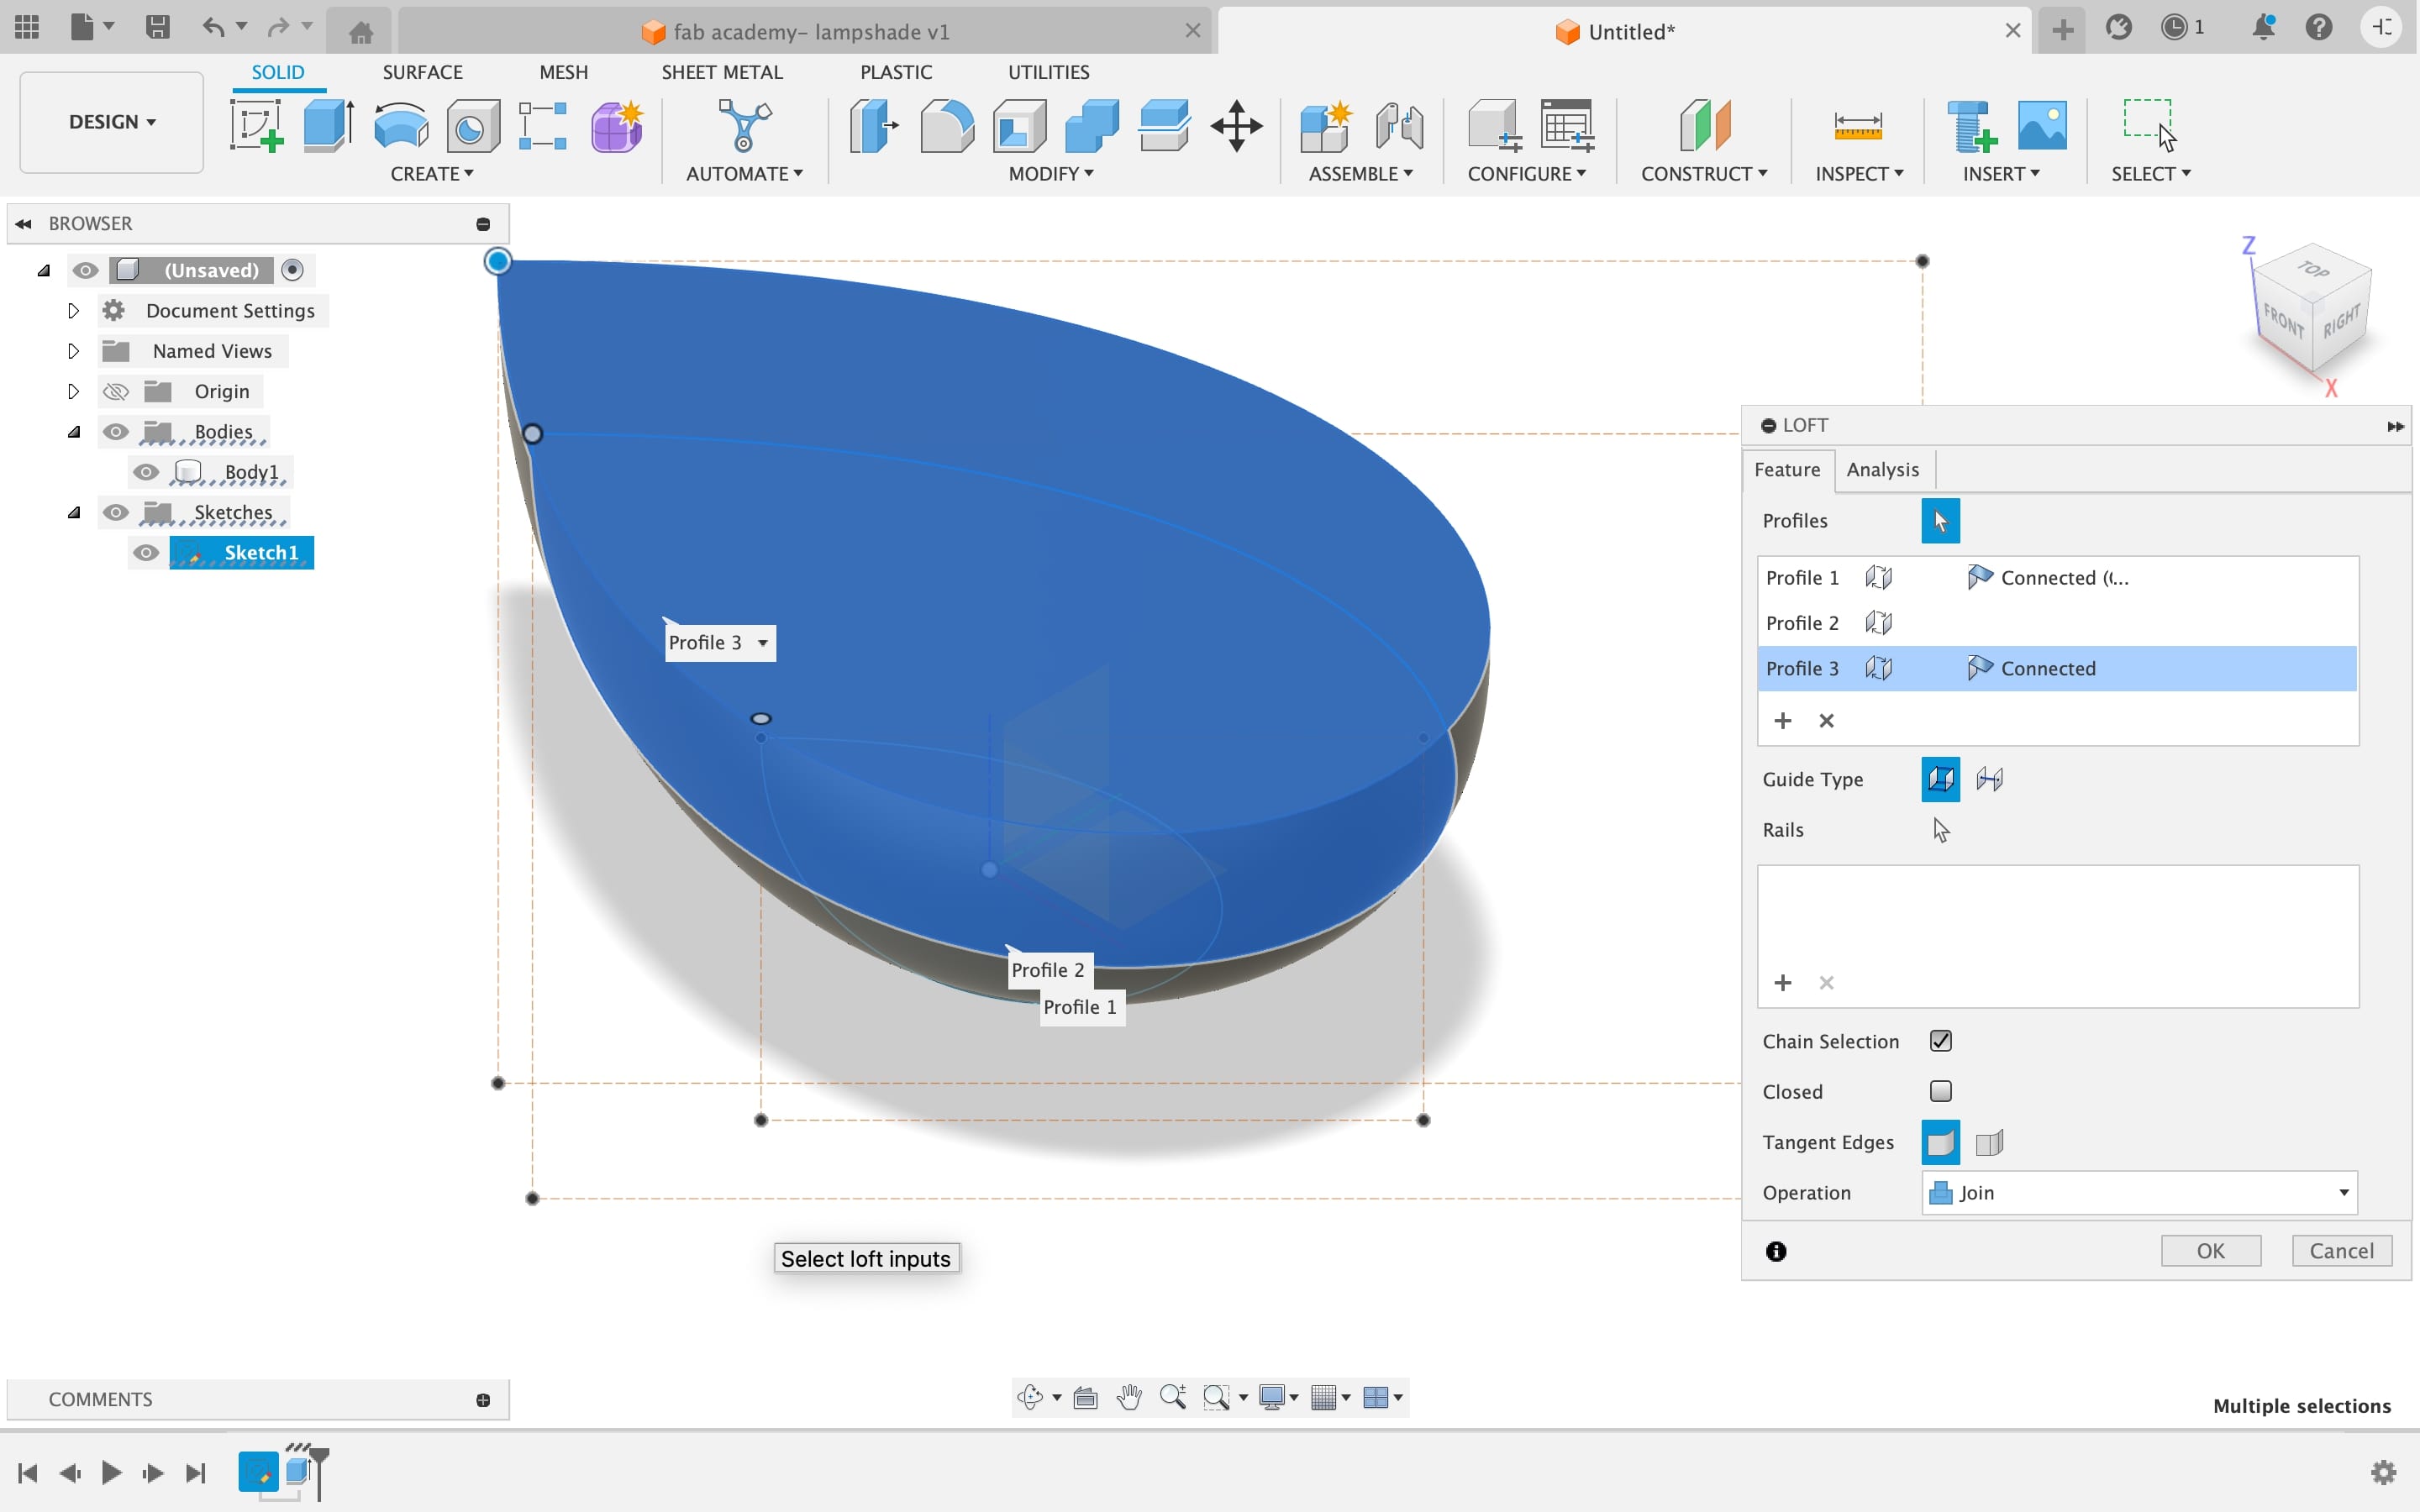
To complete the shape of the bowl I selected the below shape and Went in create tab, there I selected Loft and made the bowl.
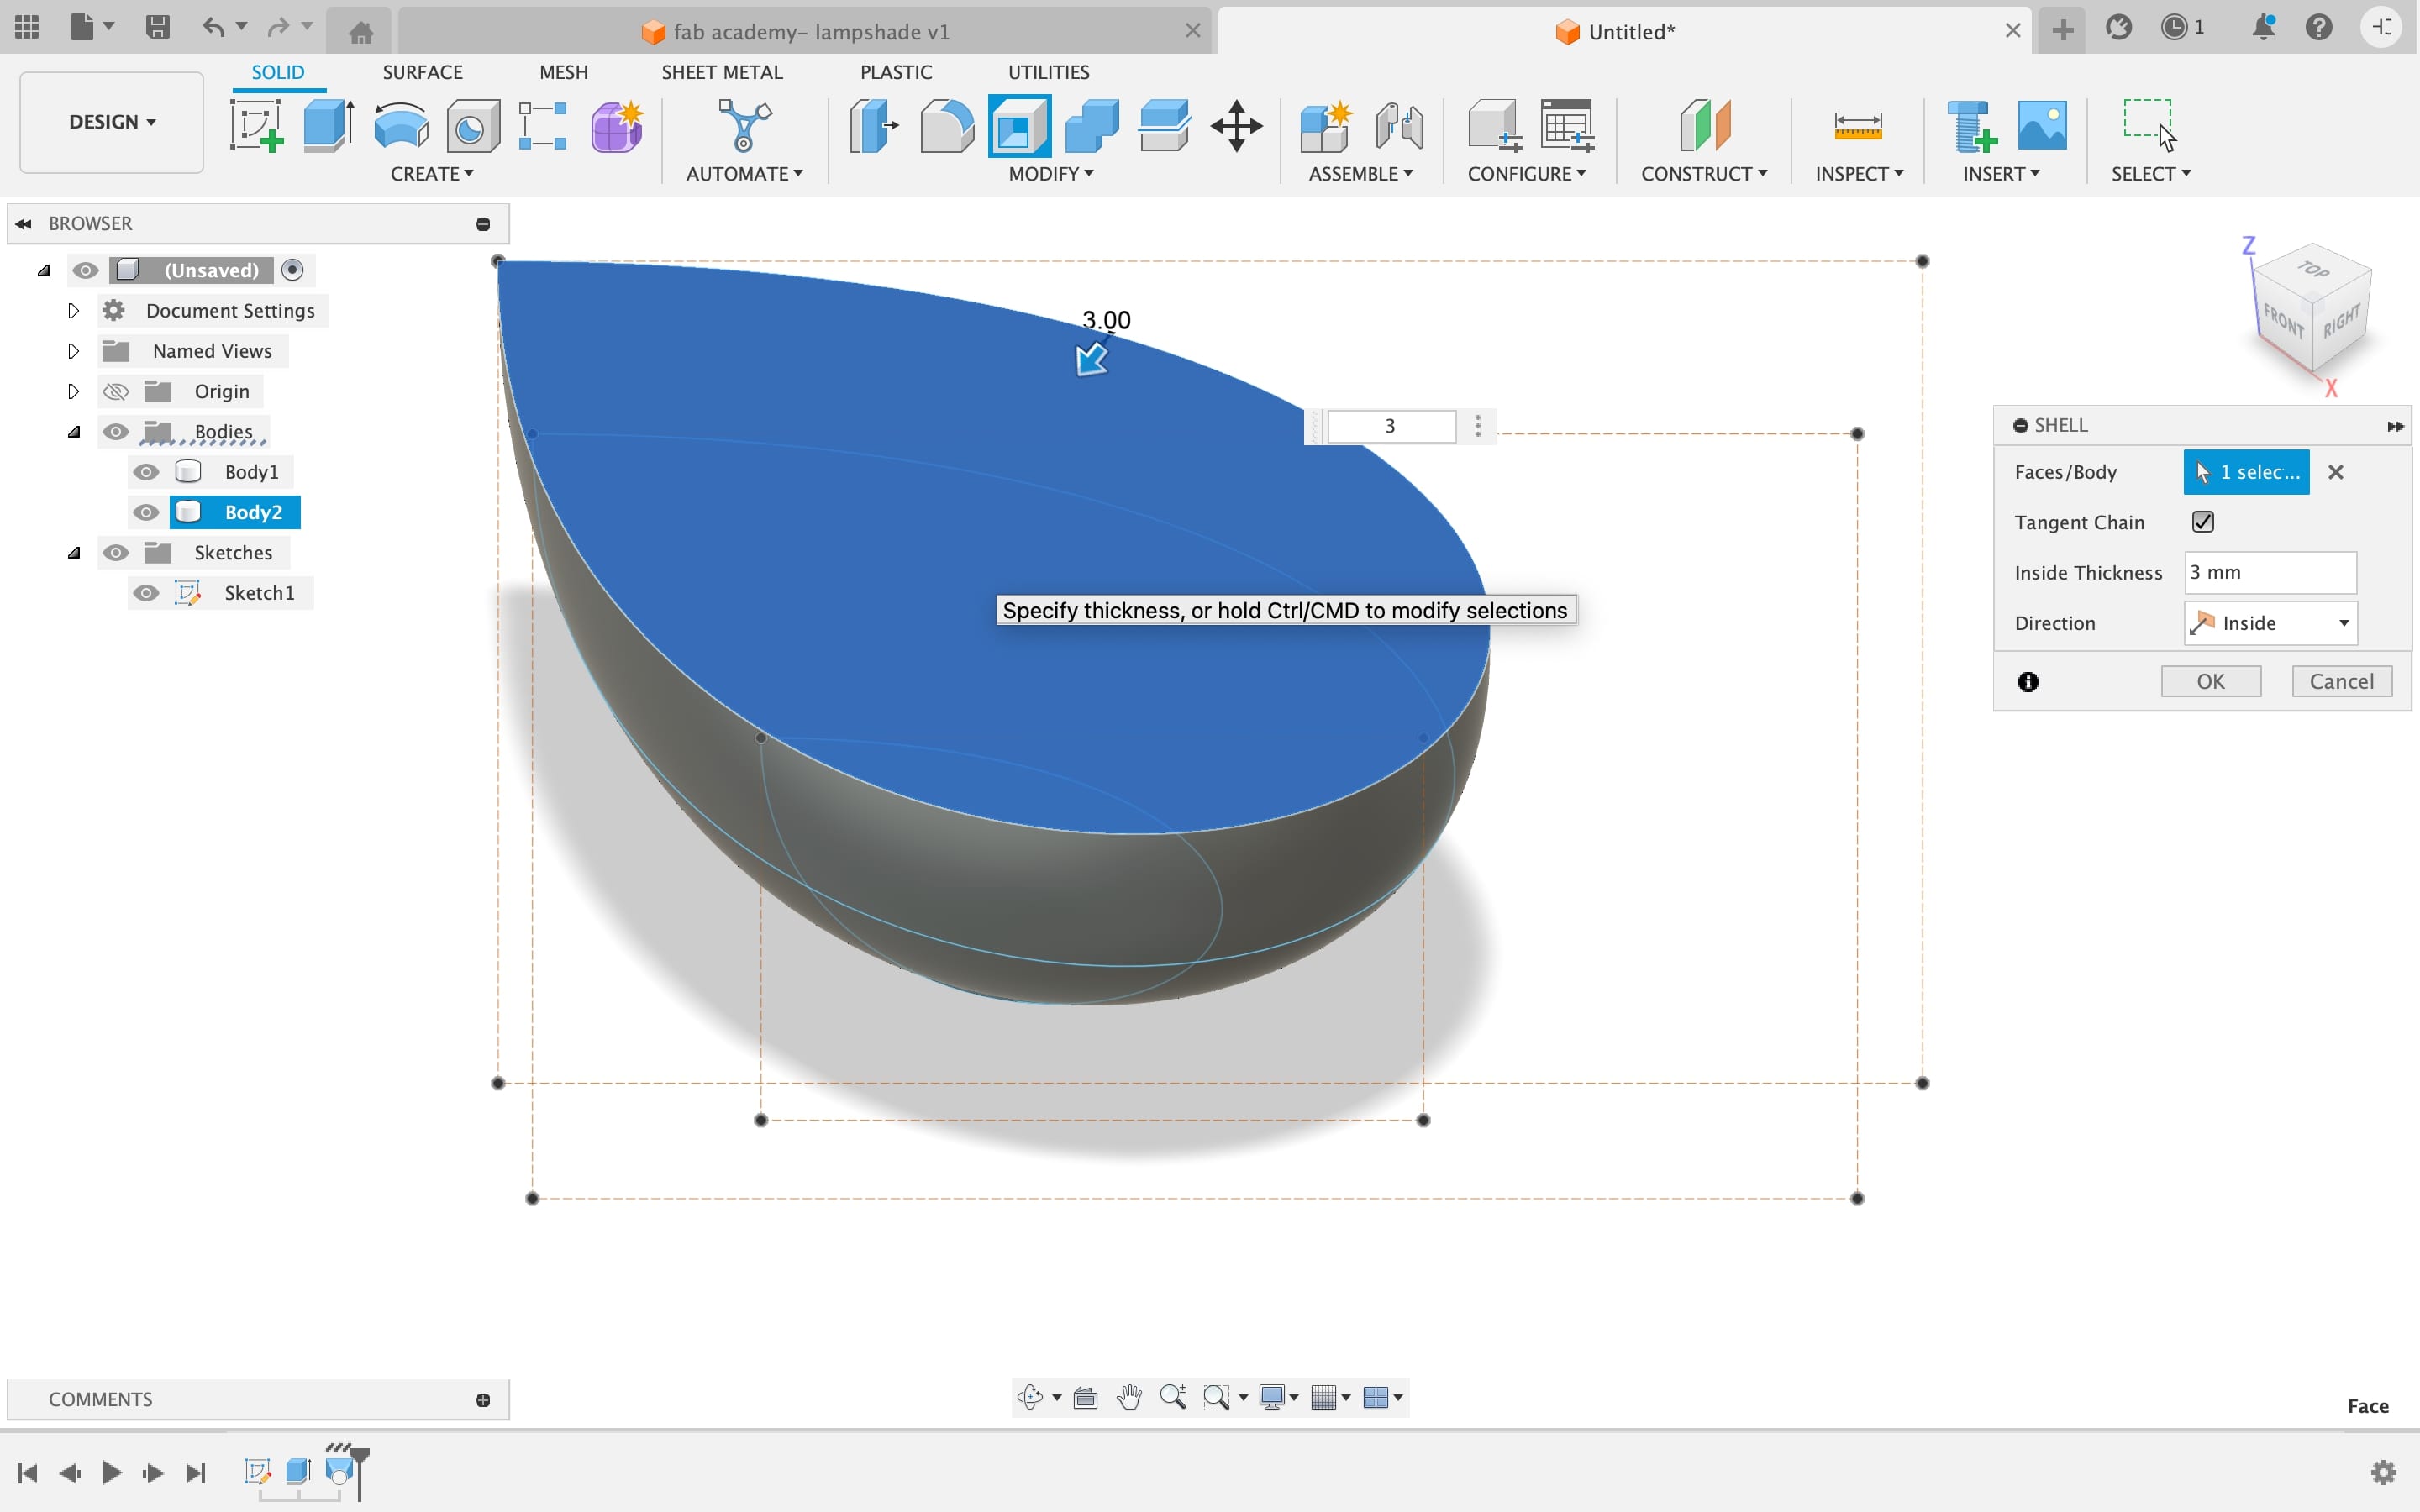
To make the bowl hollow I selected the hole tool, and made a hole leaving 3mm from base in the bowl.
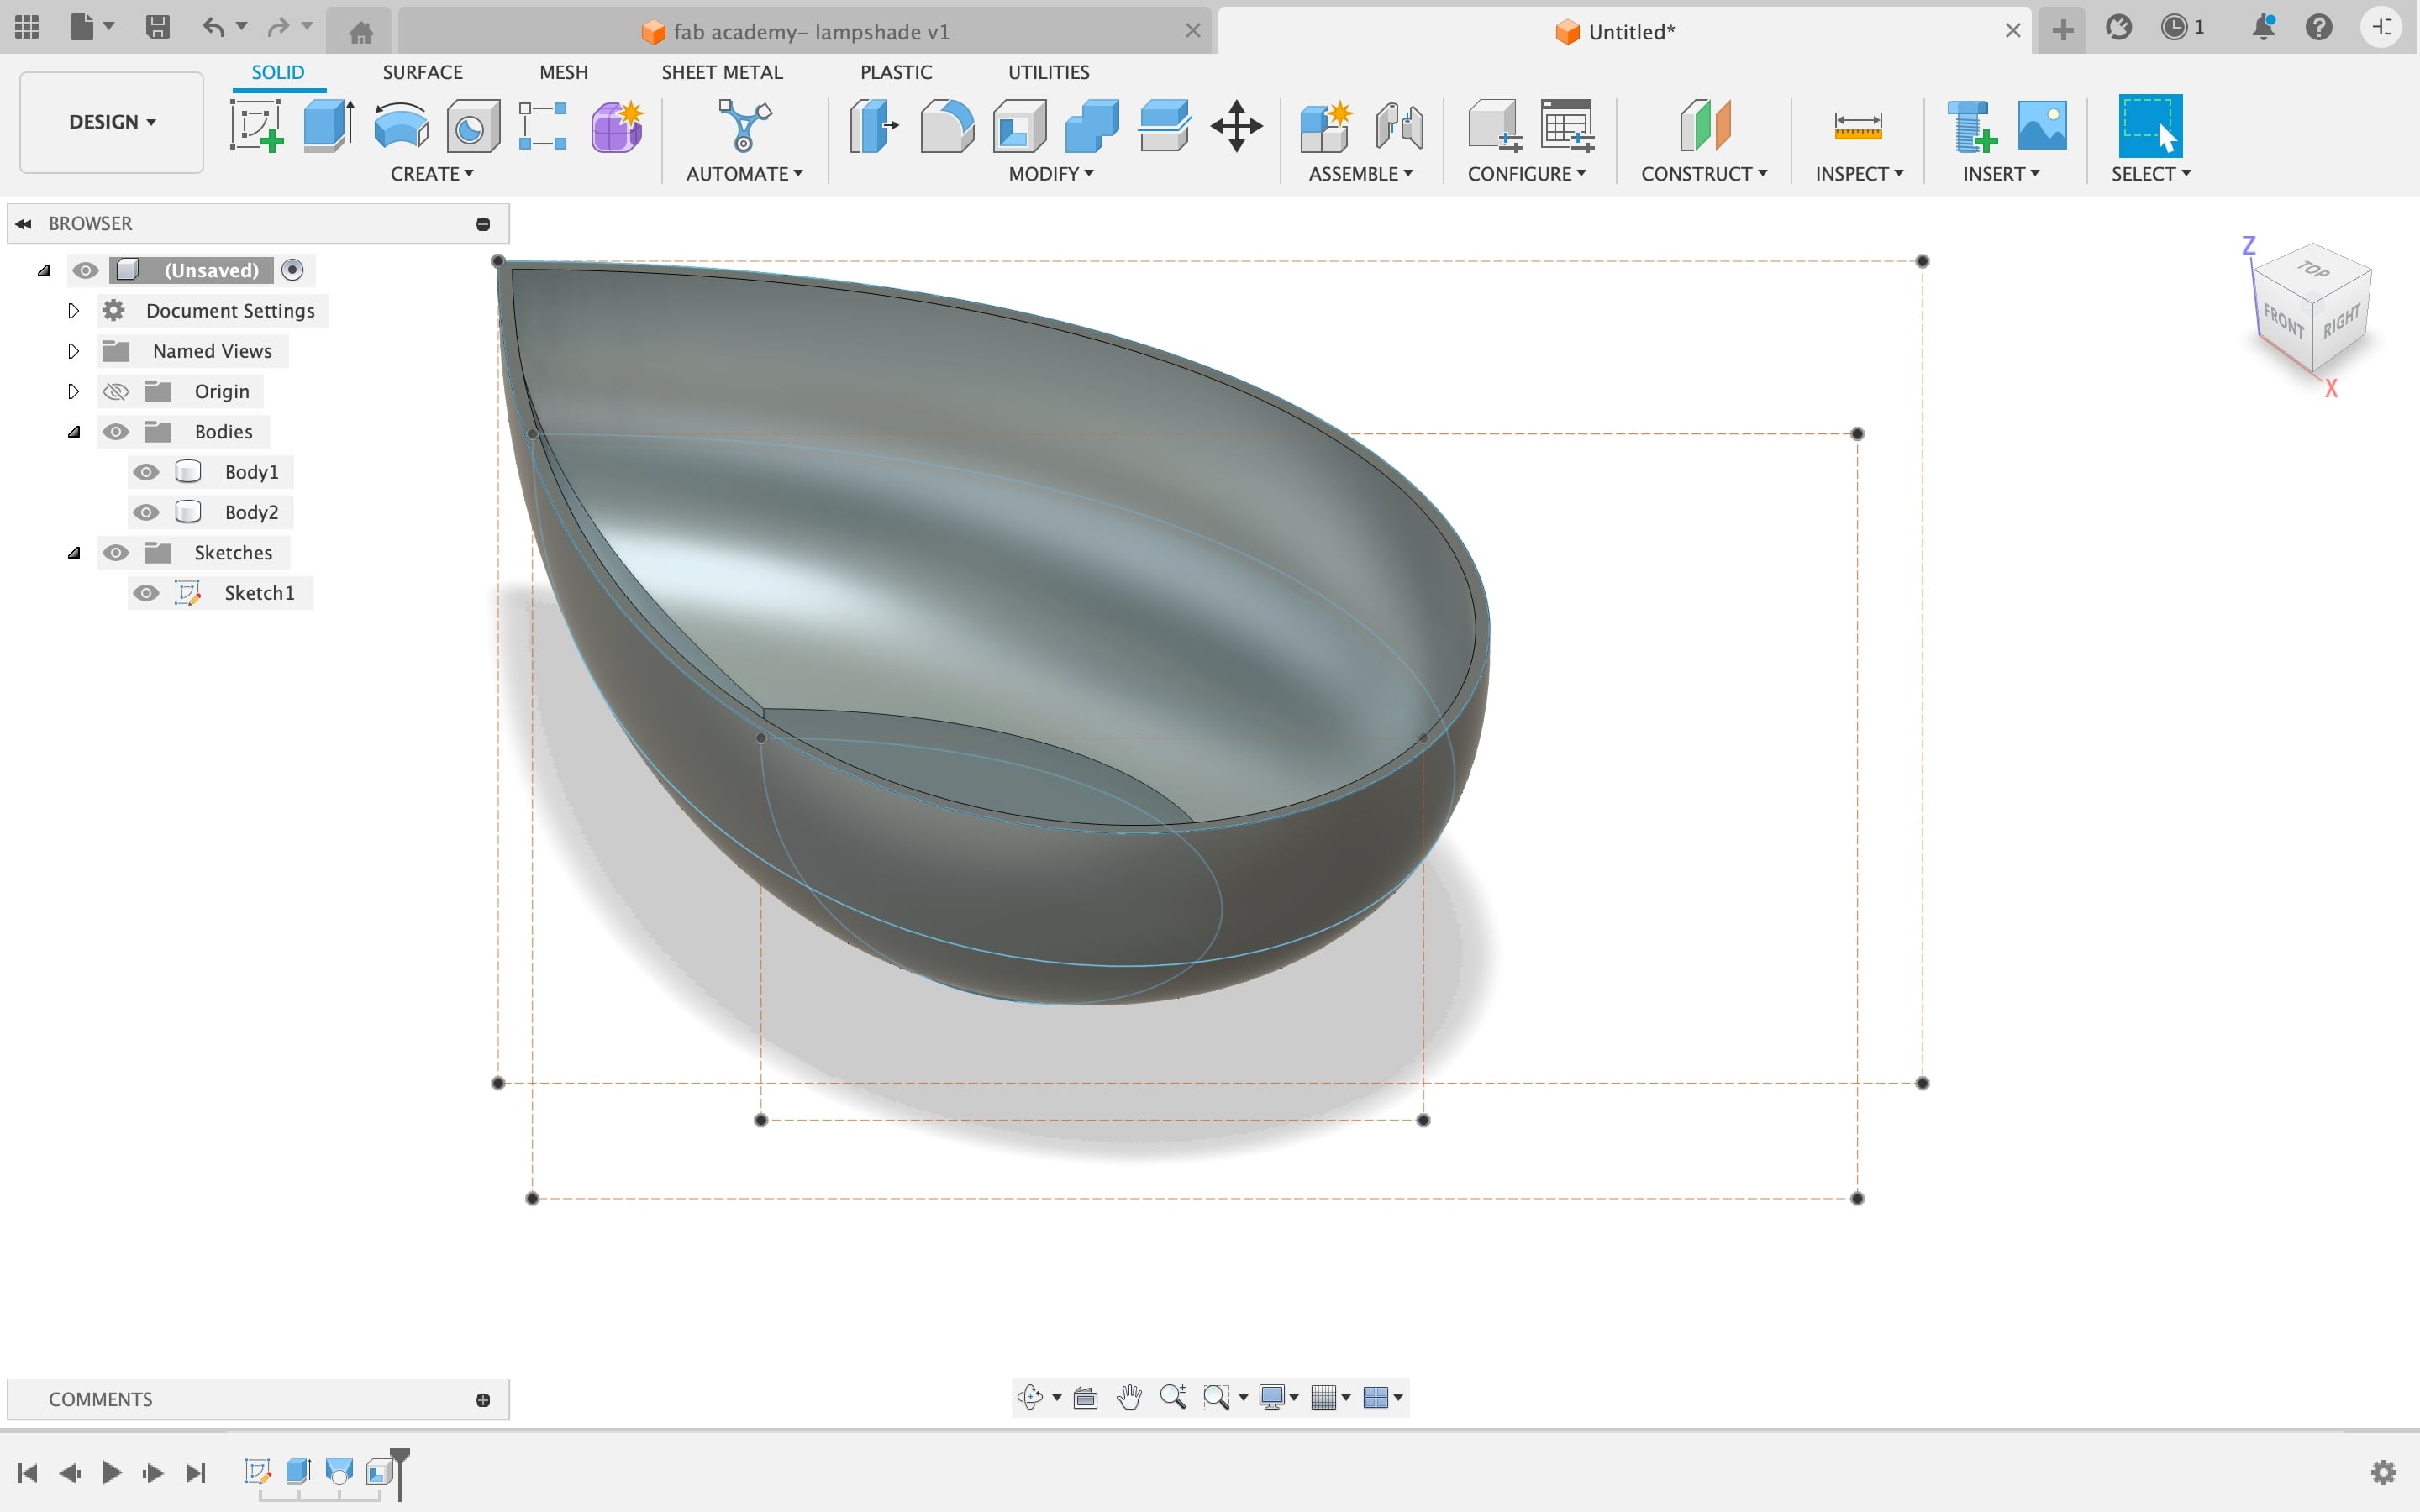
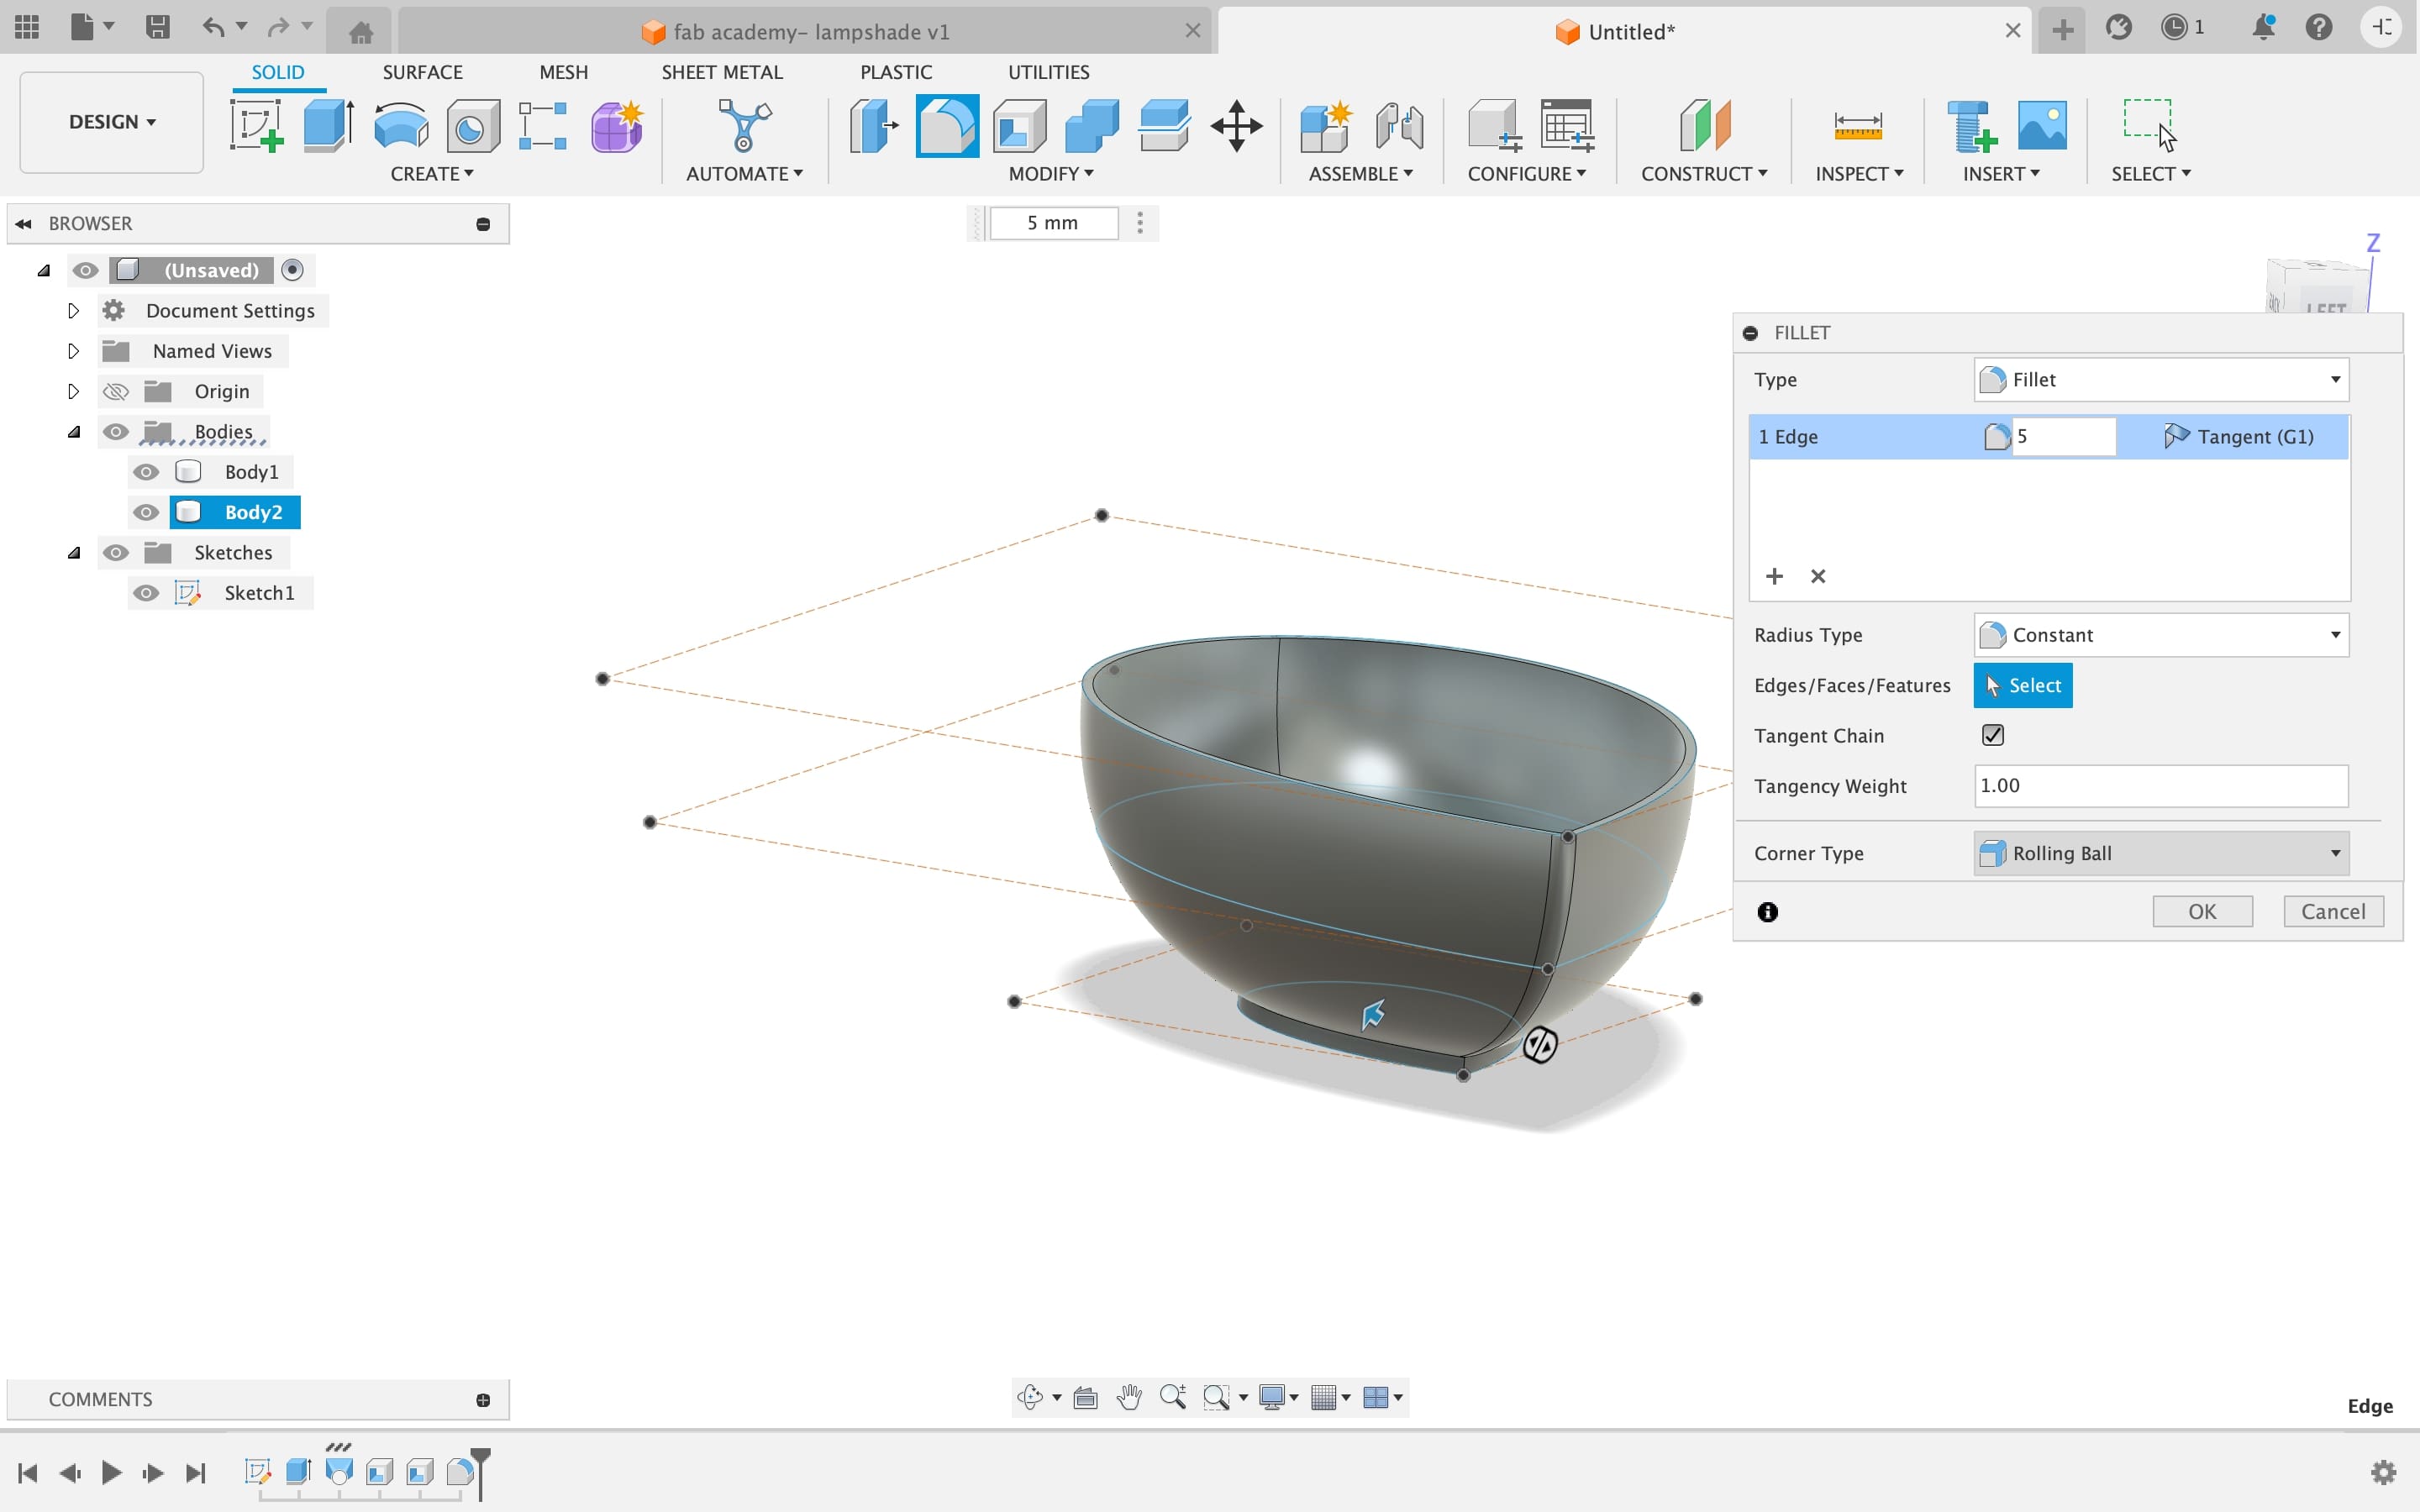
As you see the edges are pointy so to make it smooth I applied fillet command on all the edges.
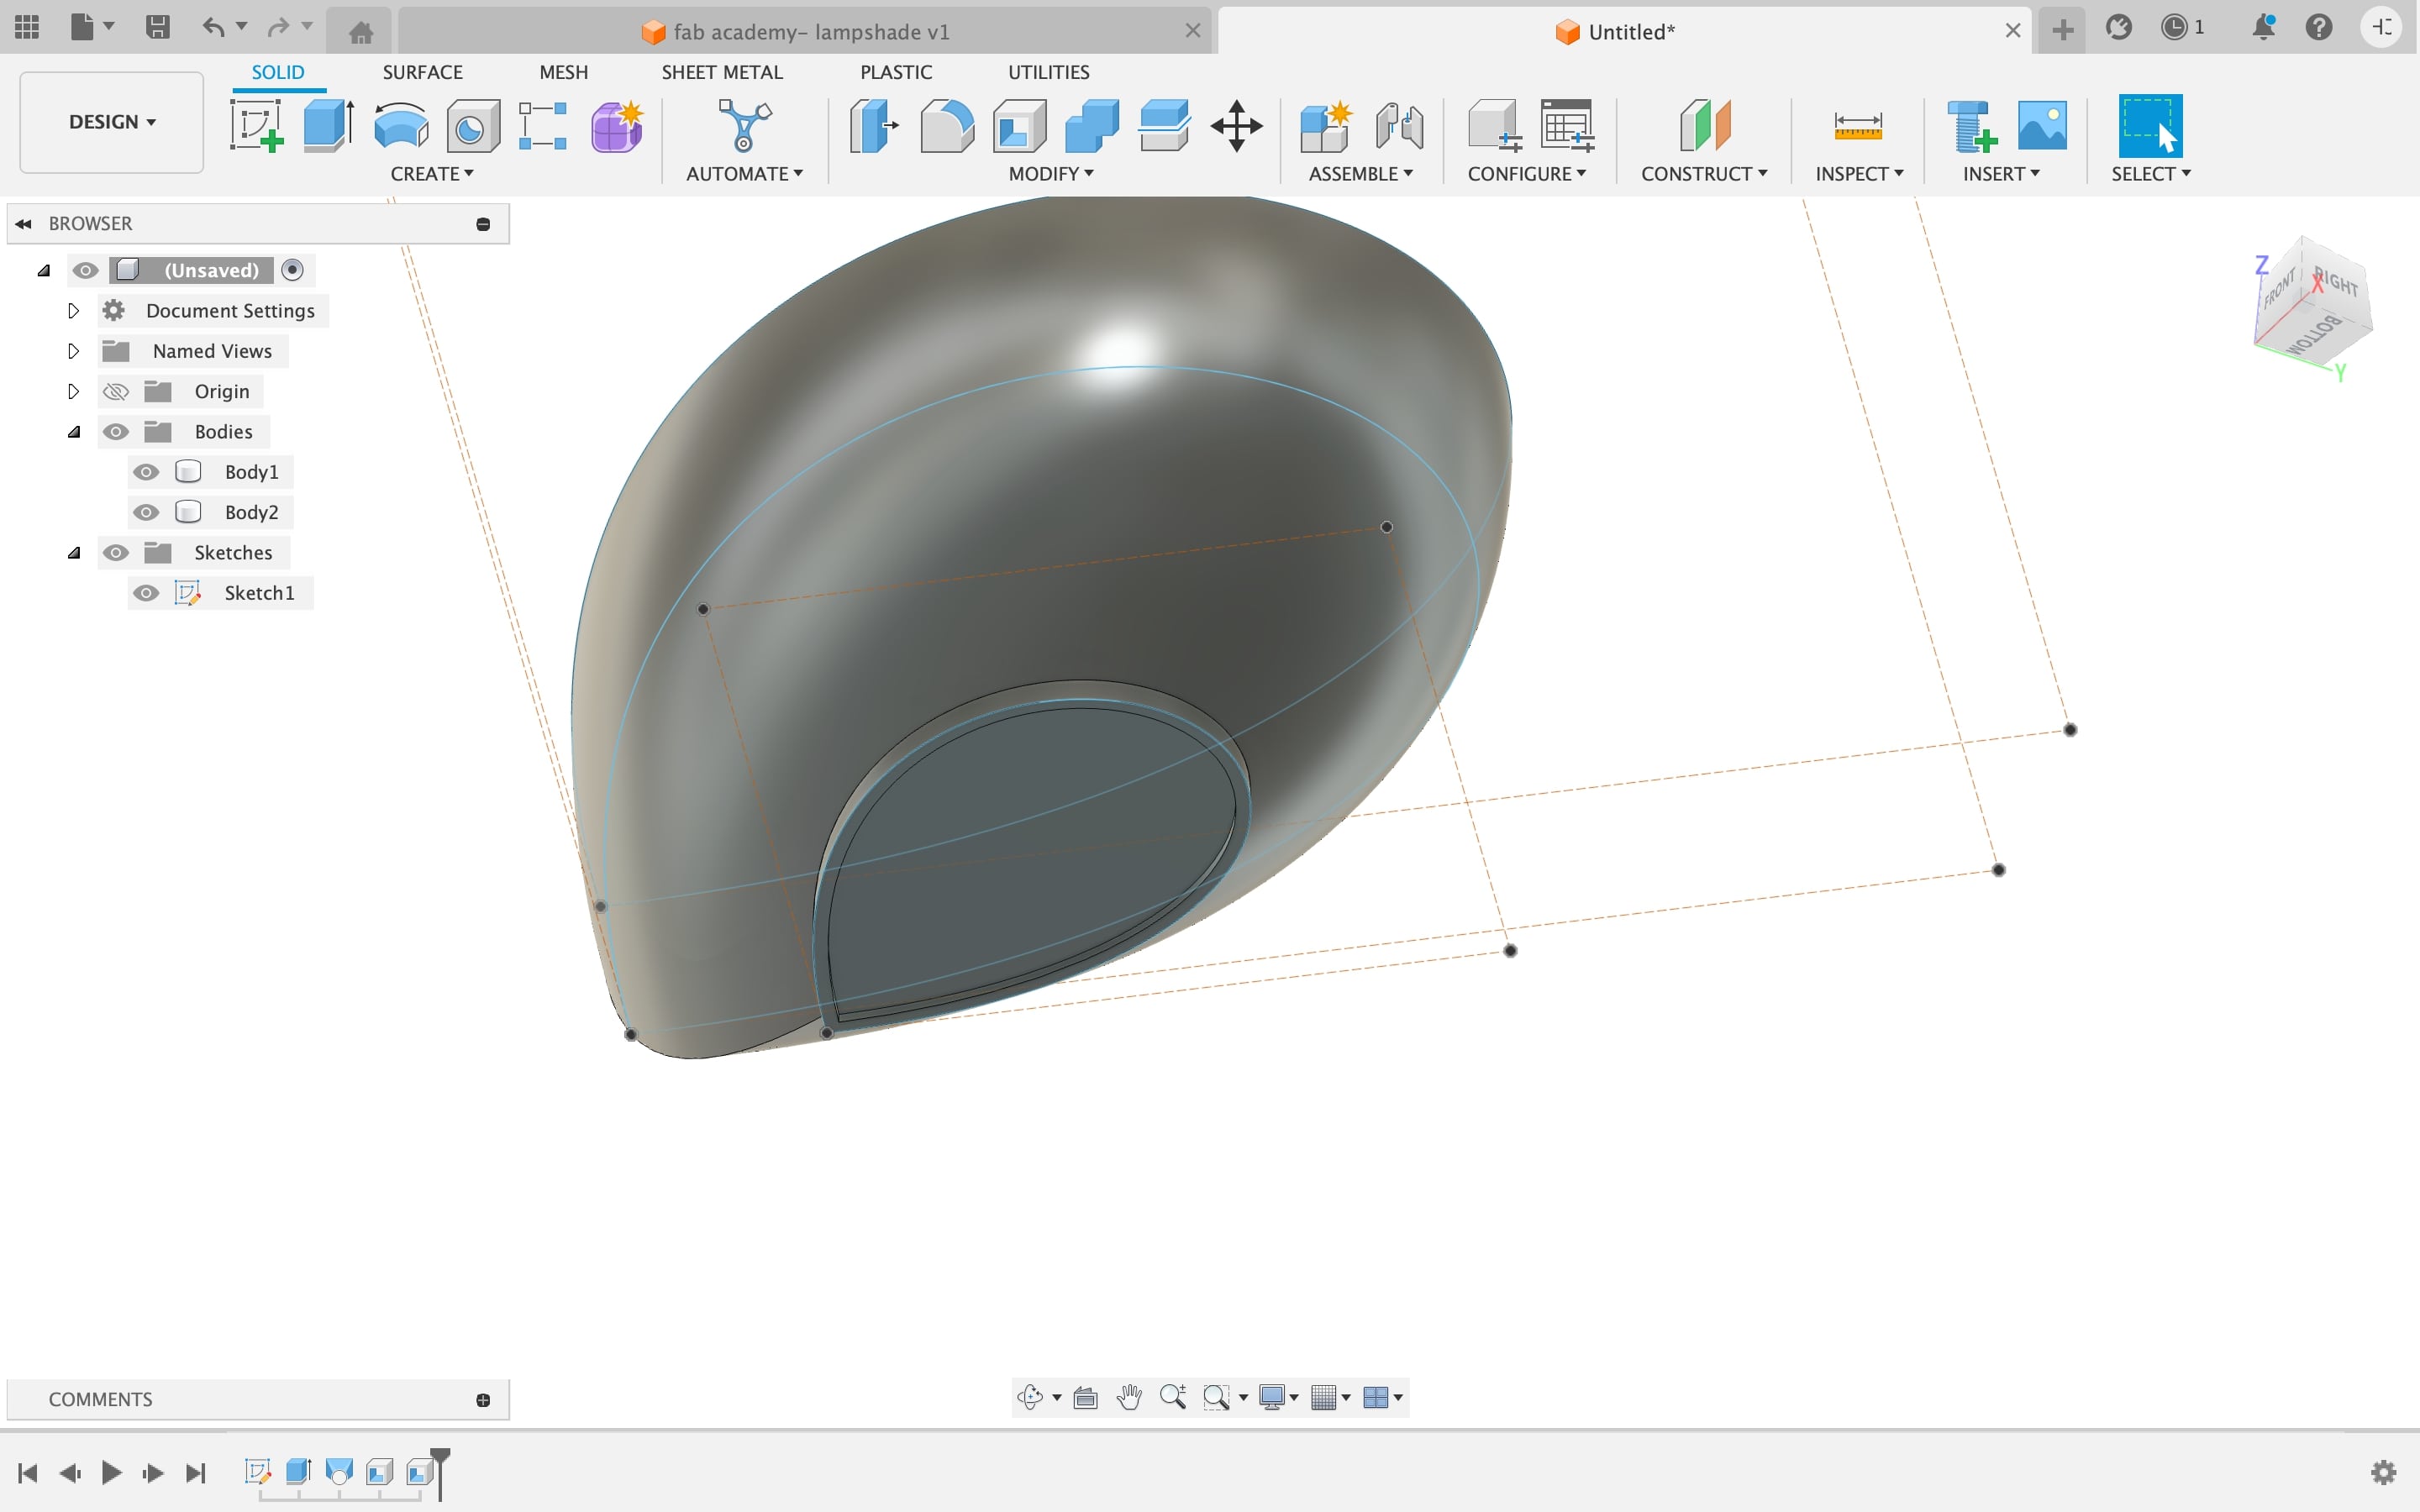
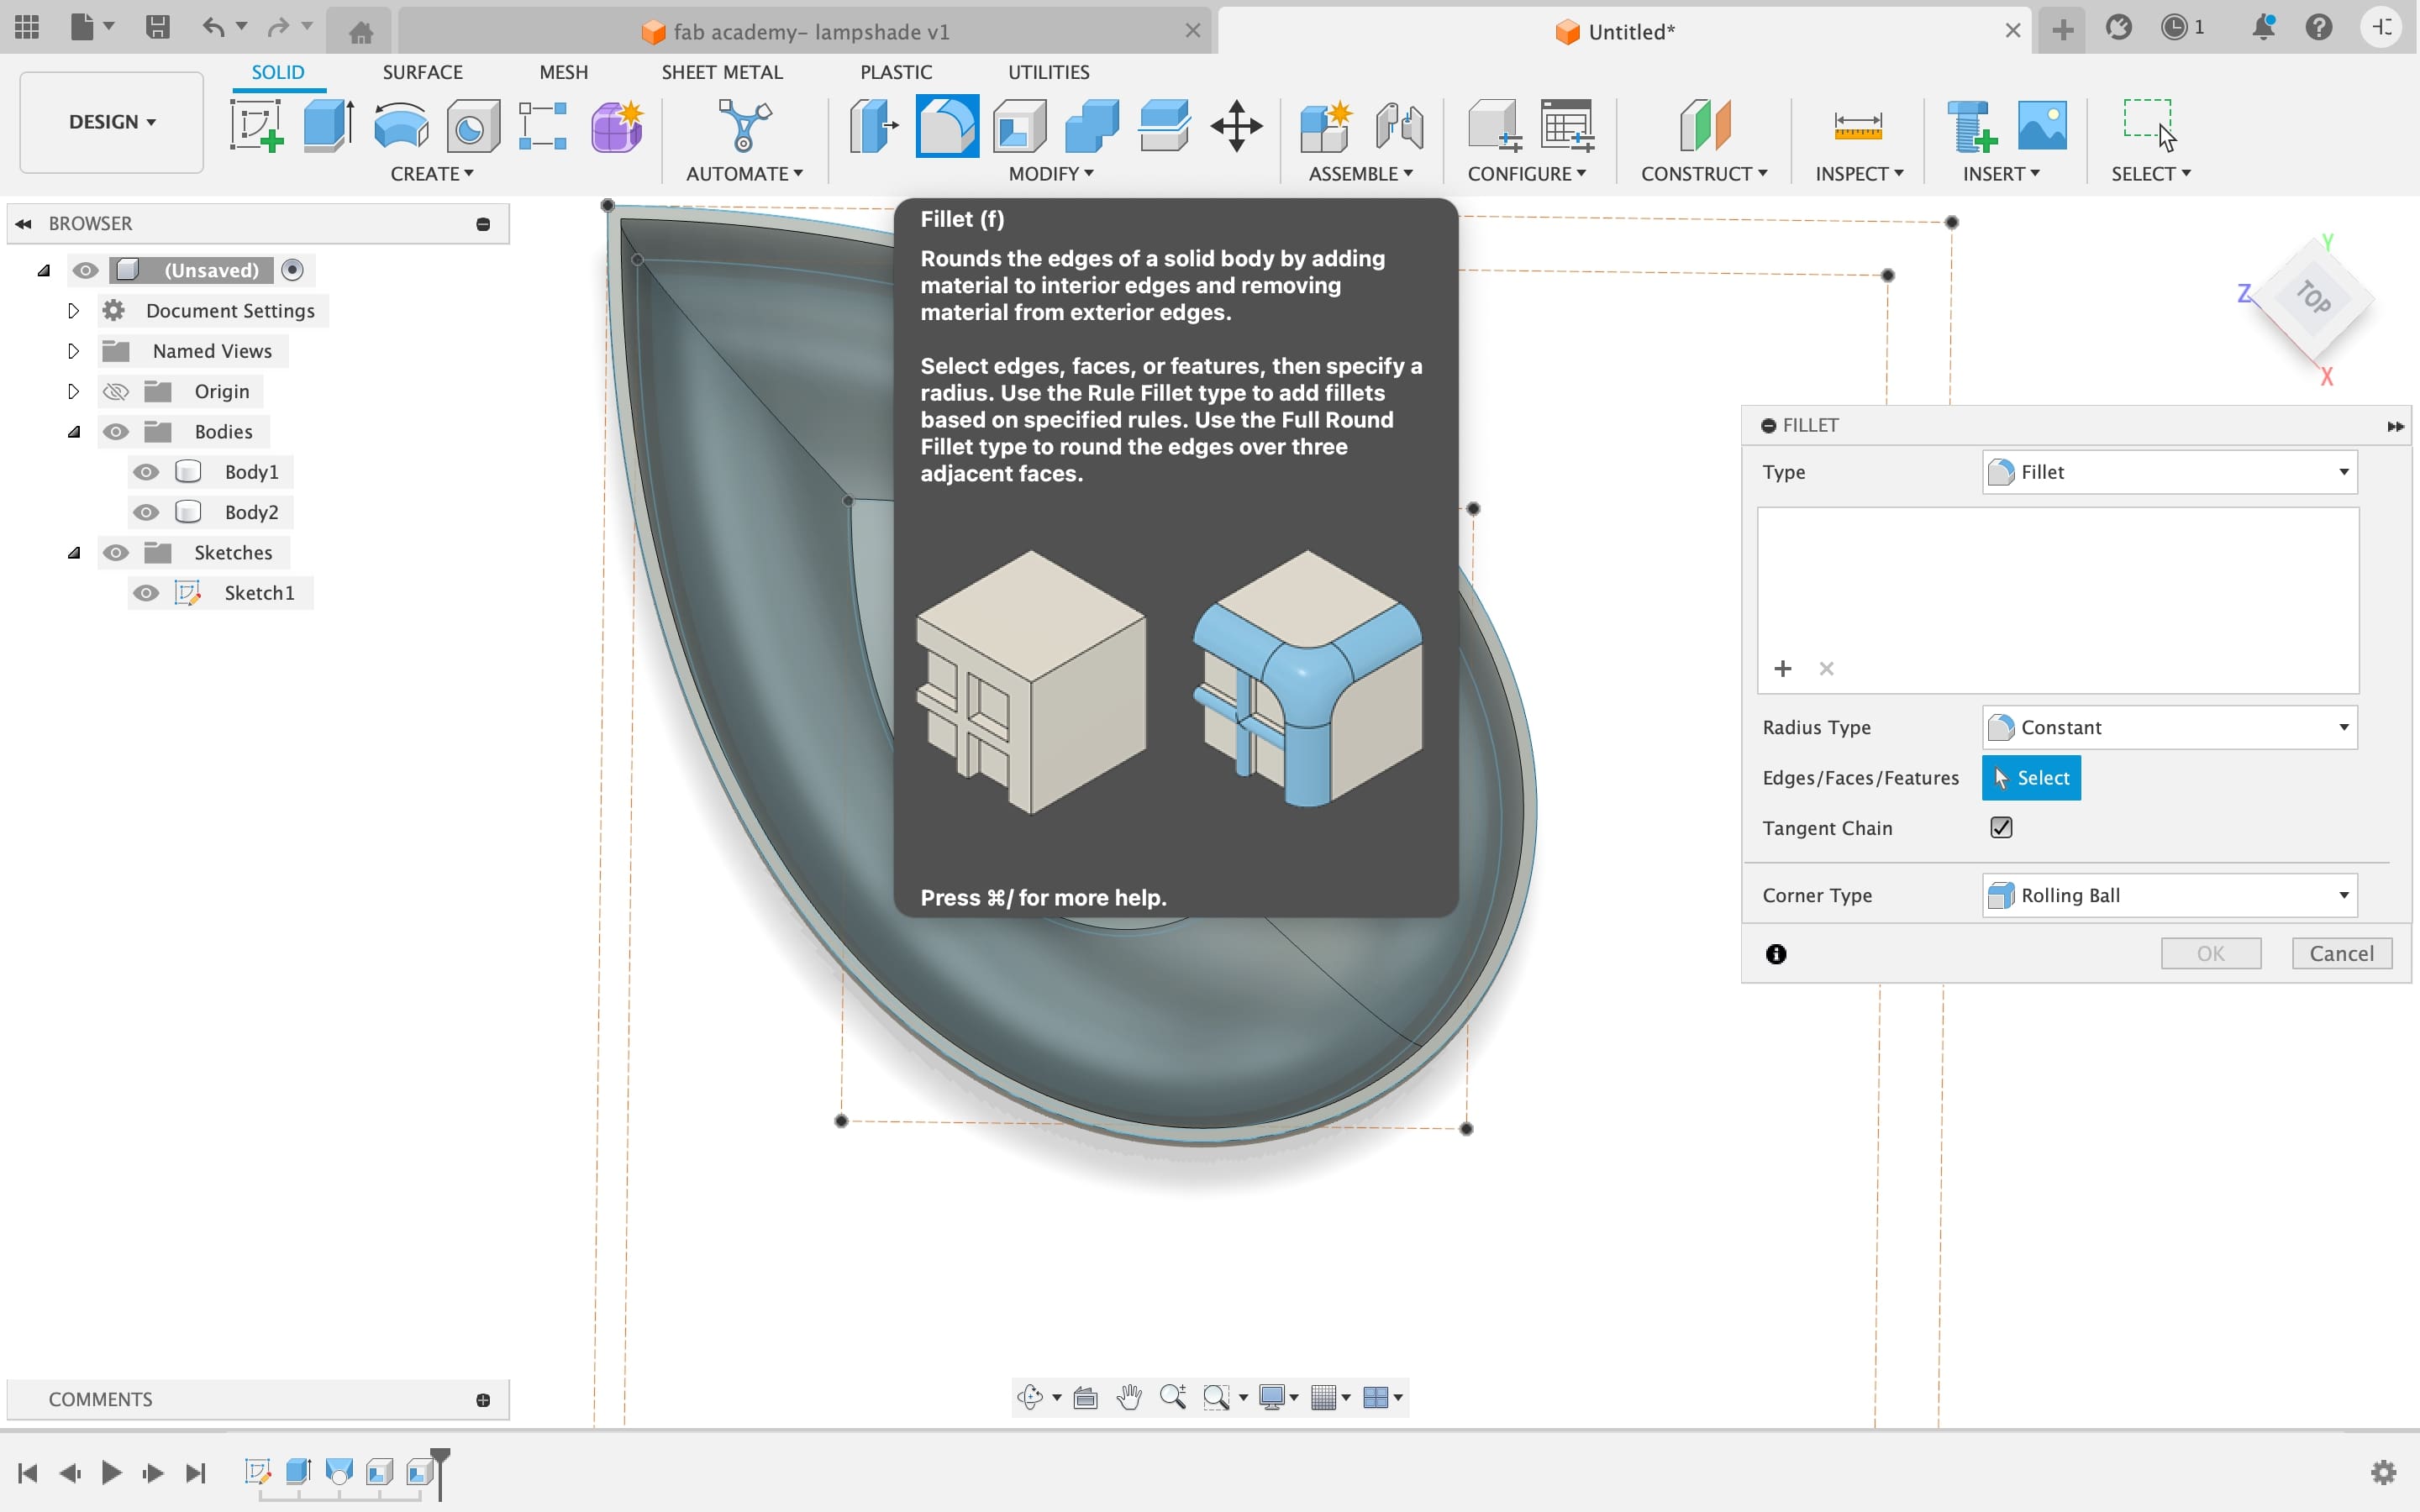
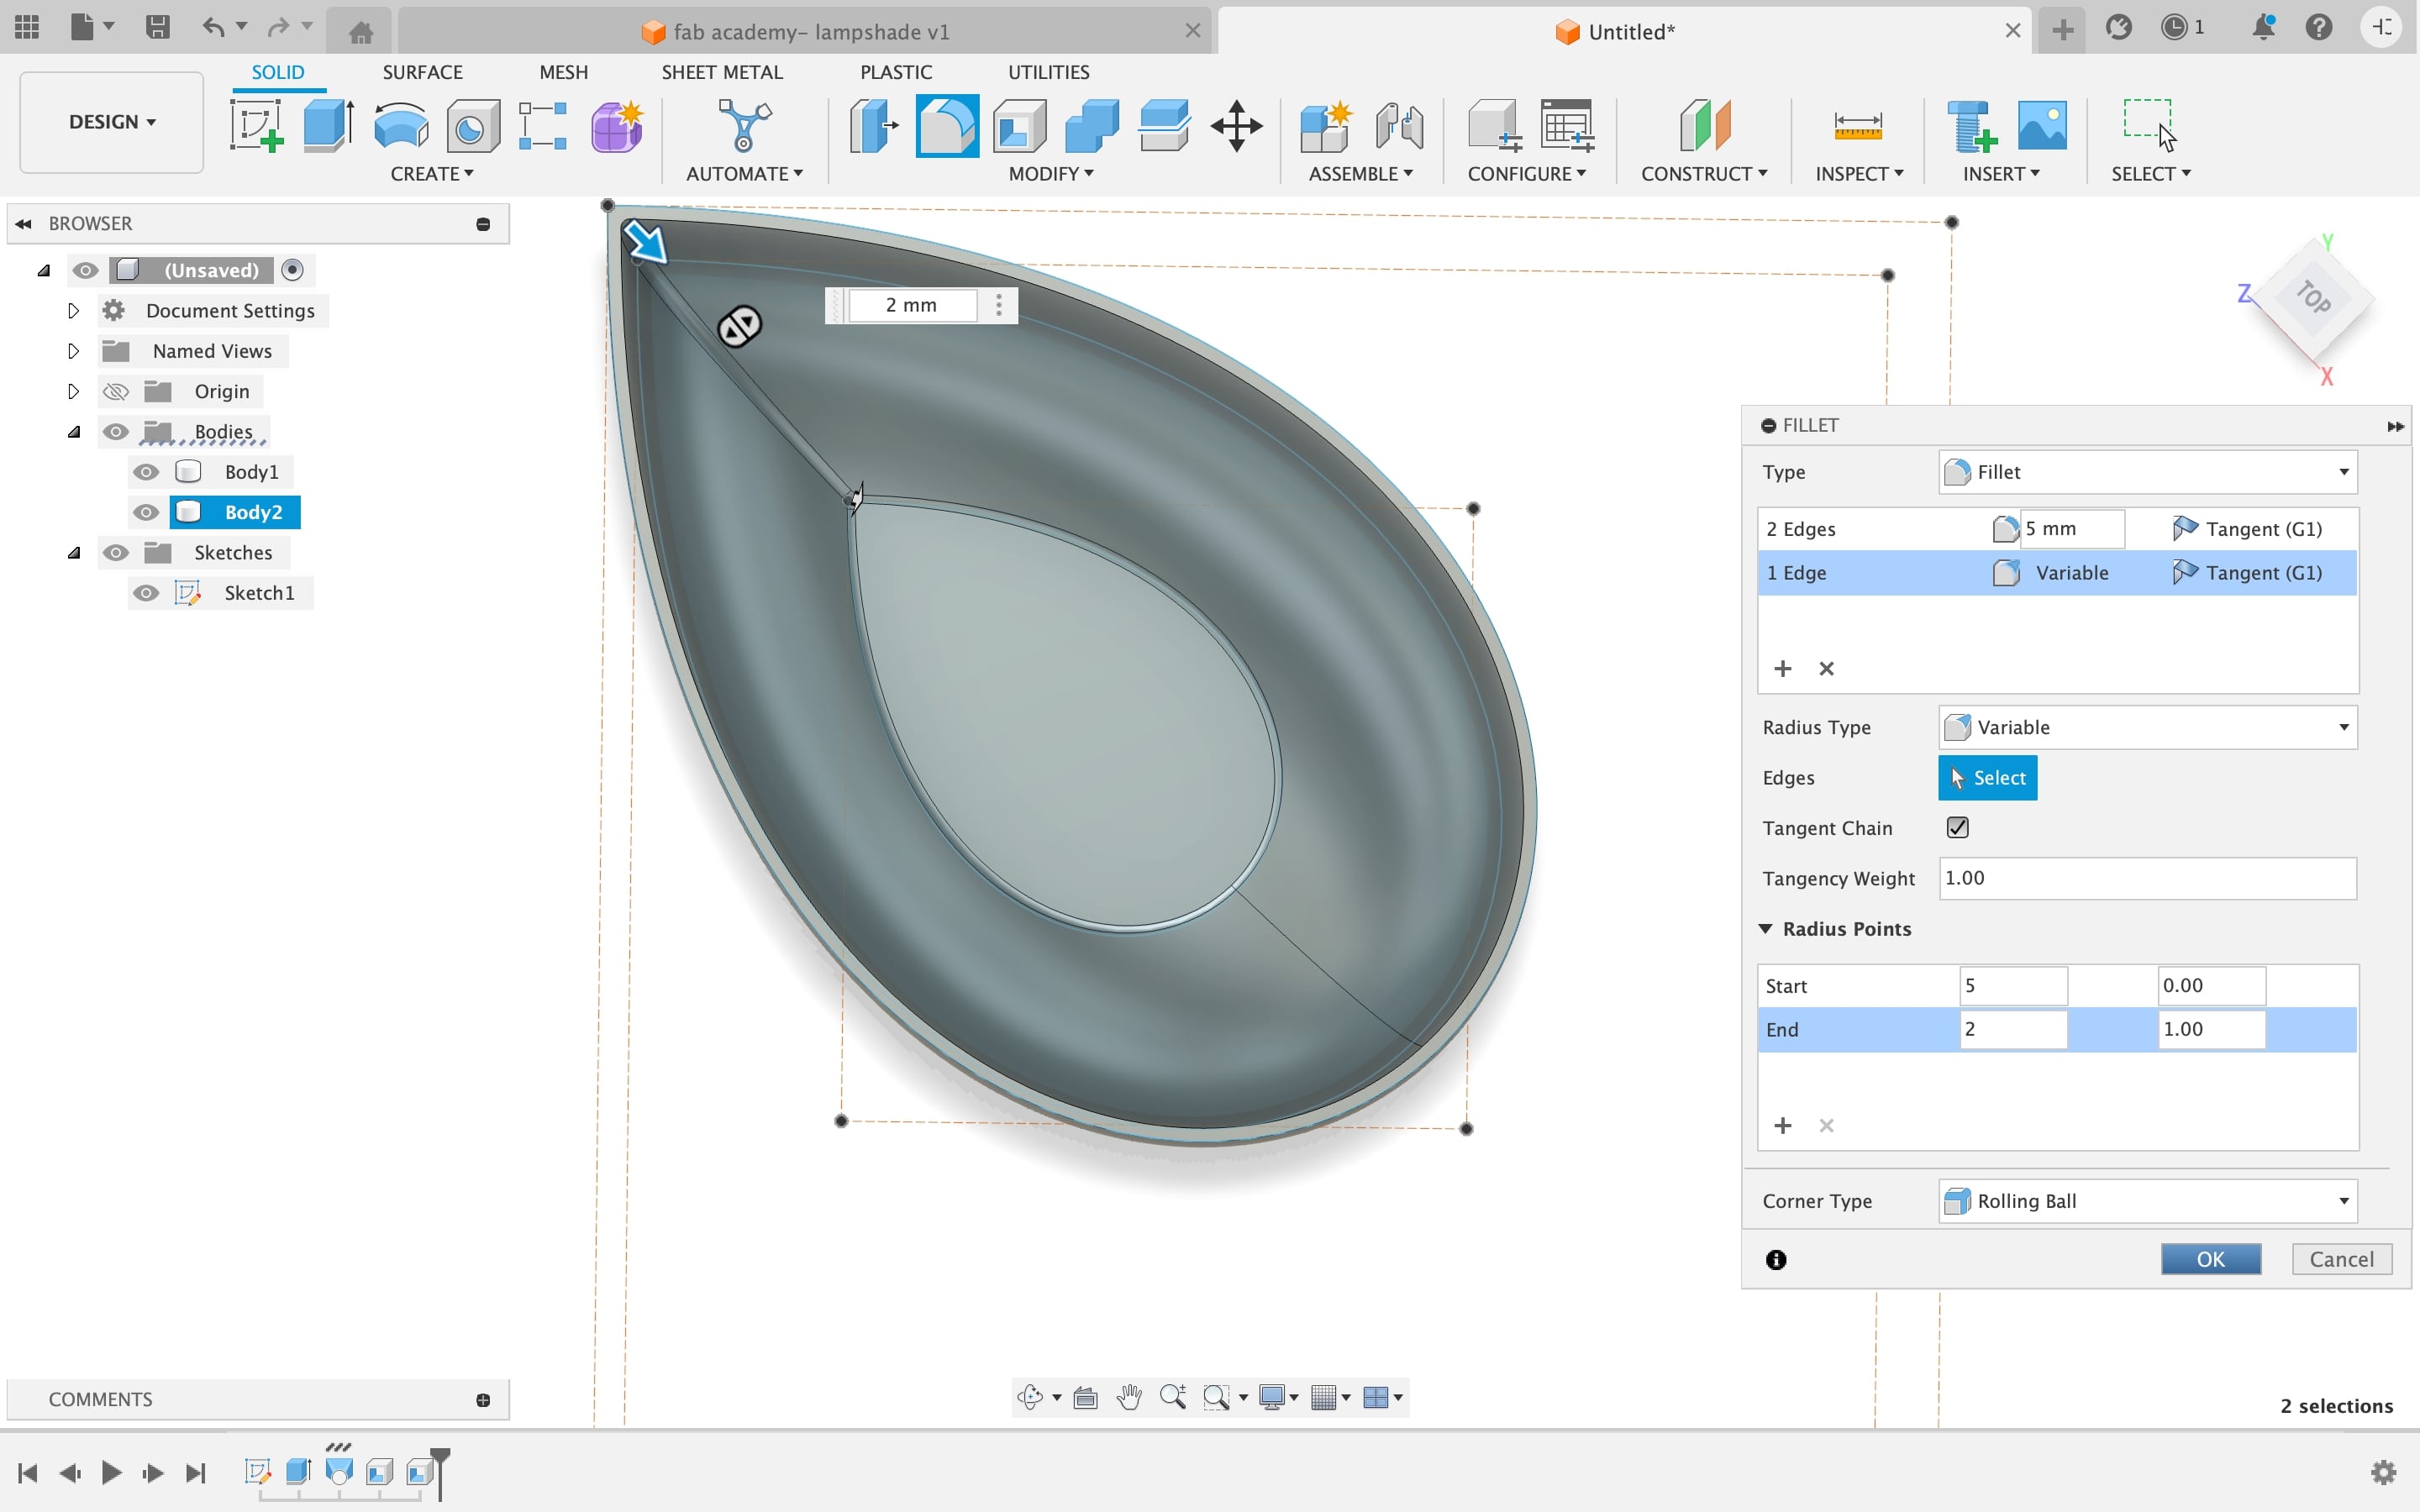
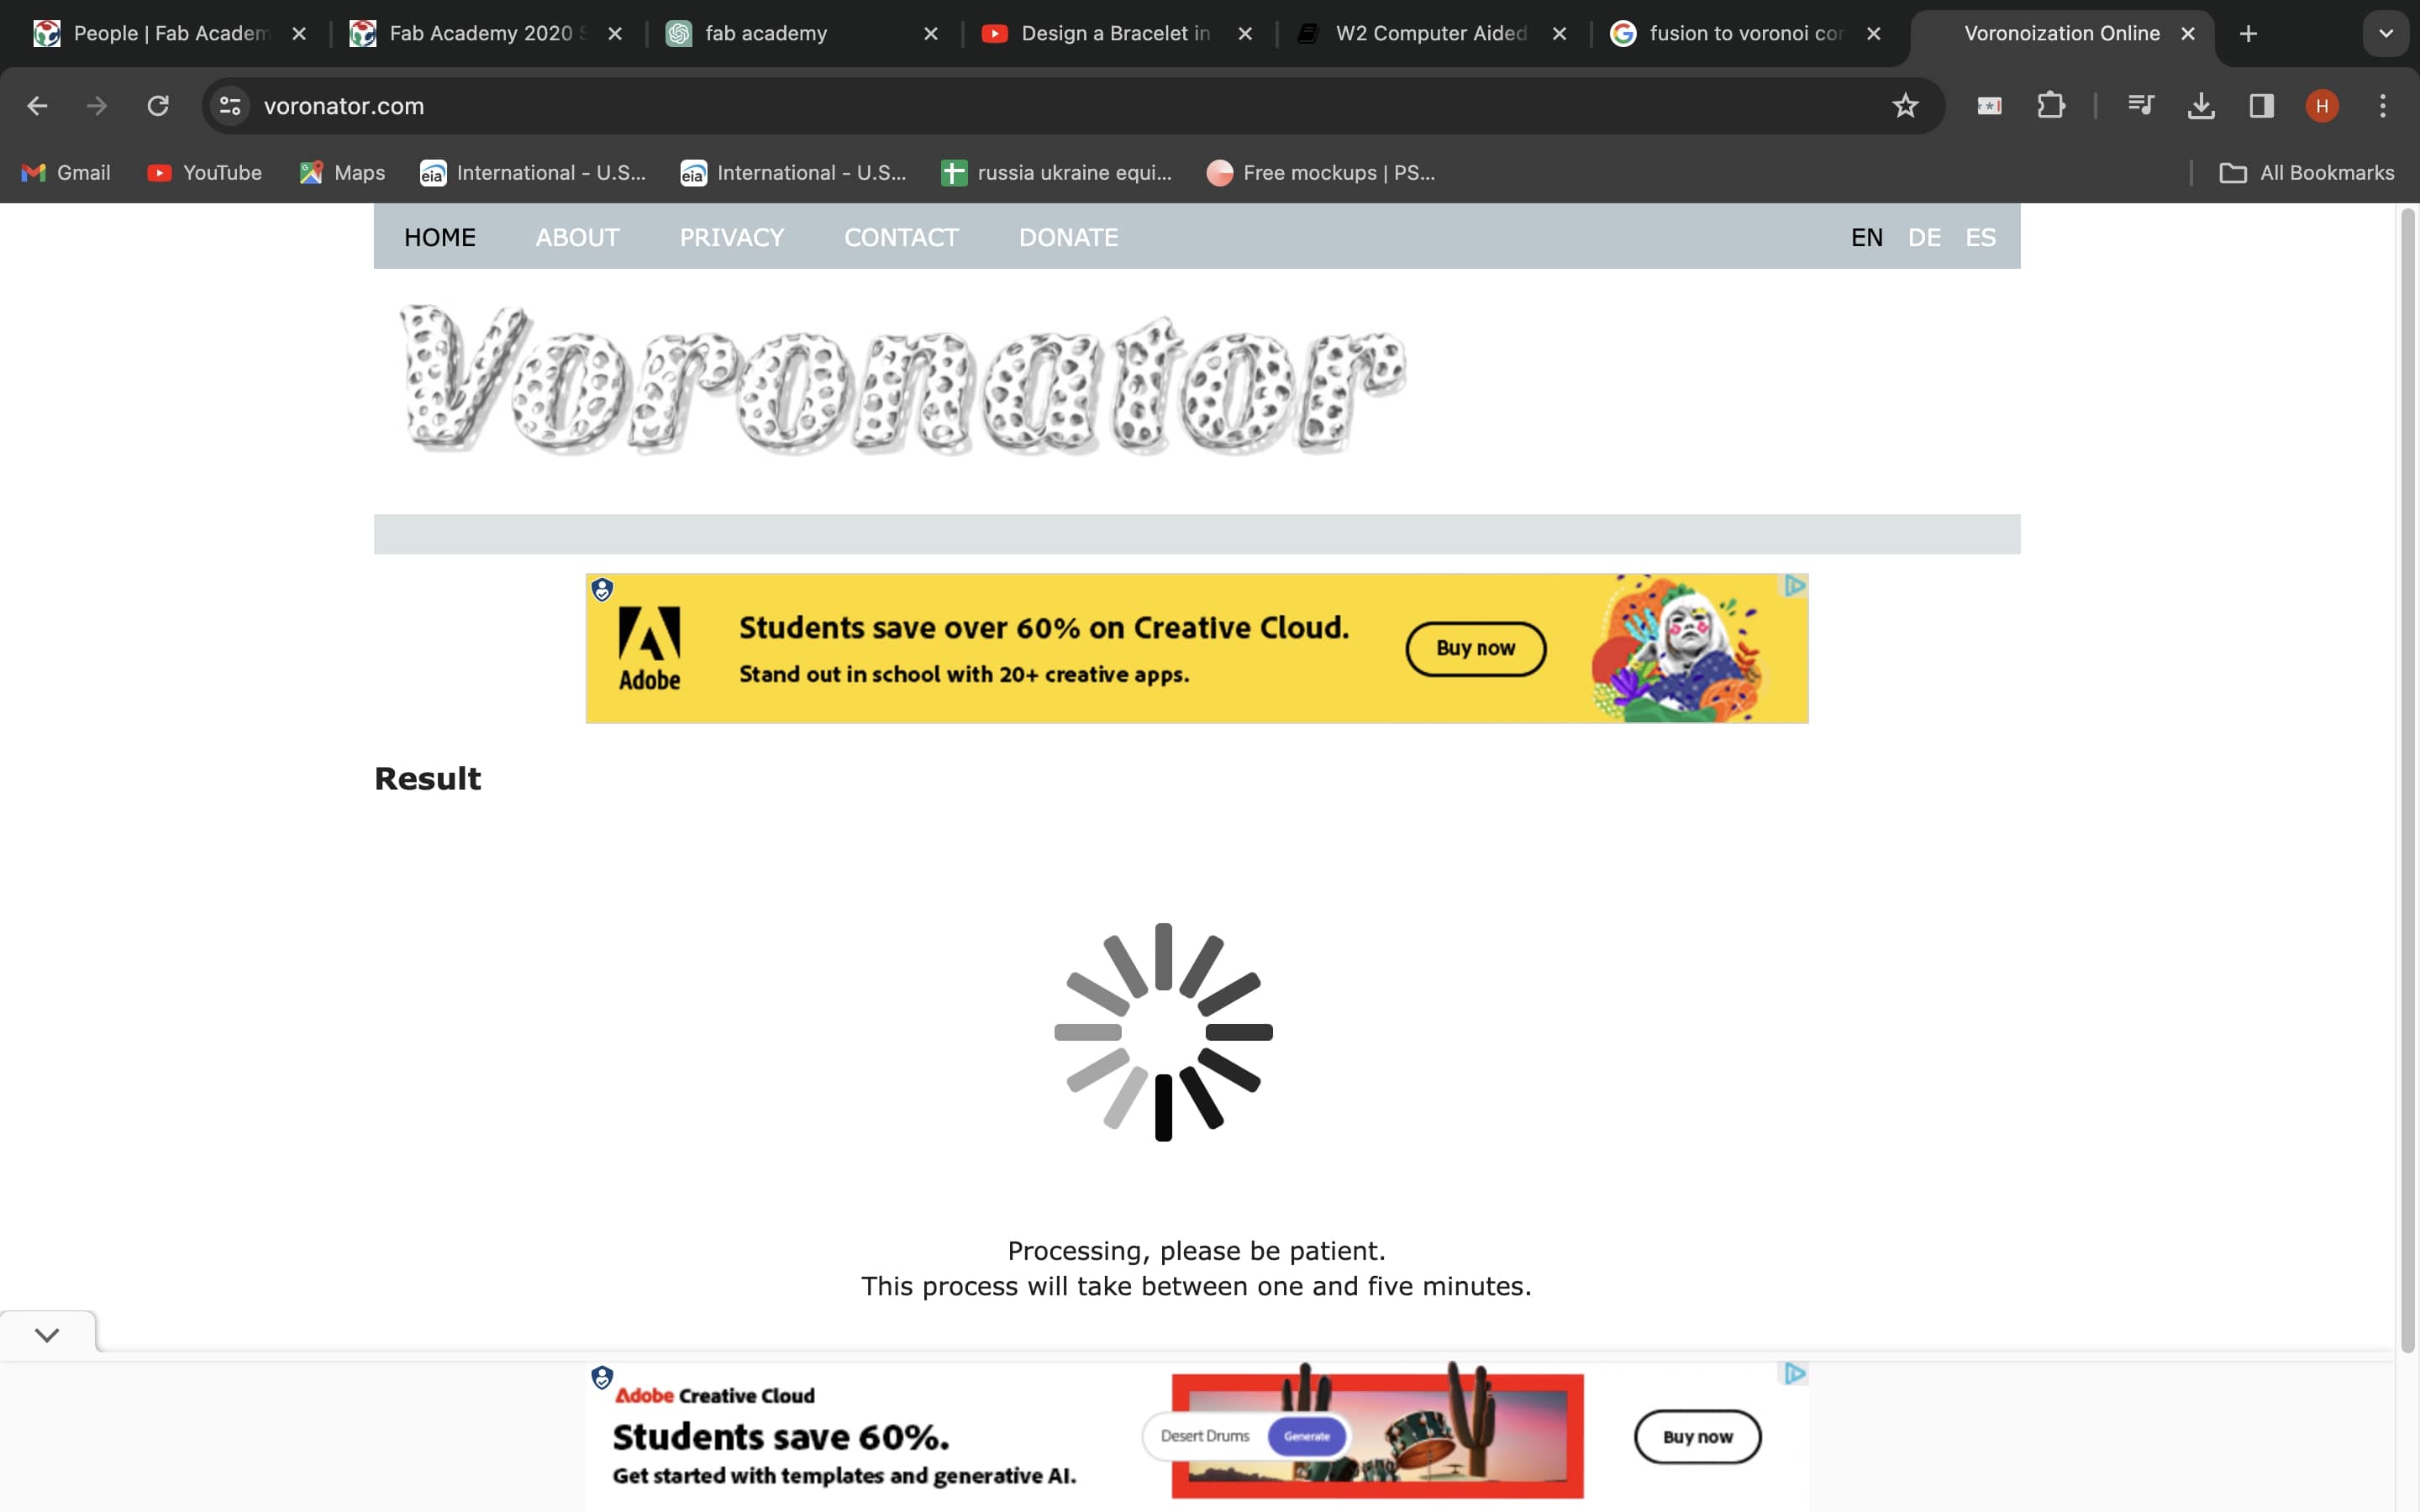
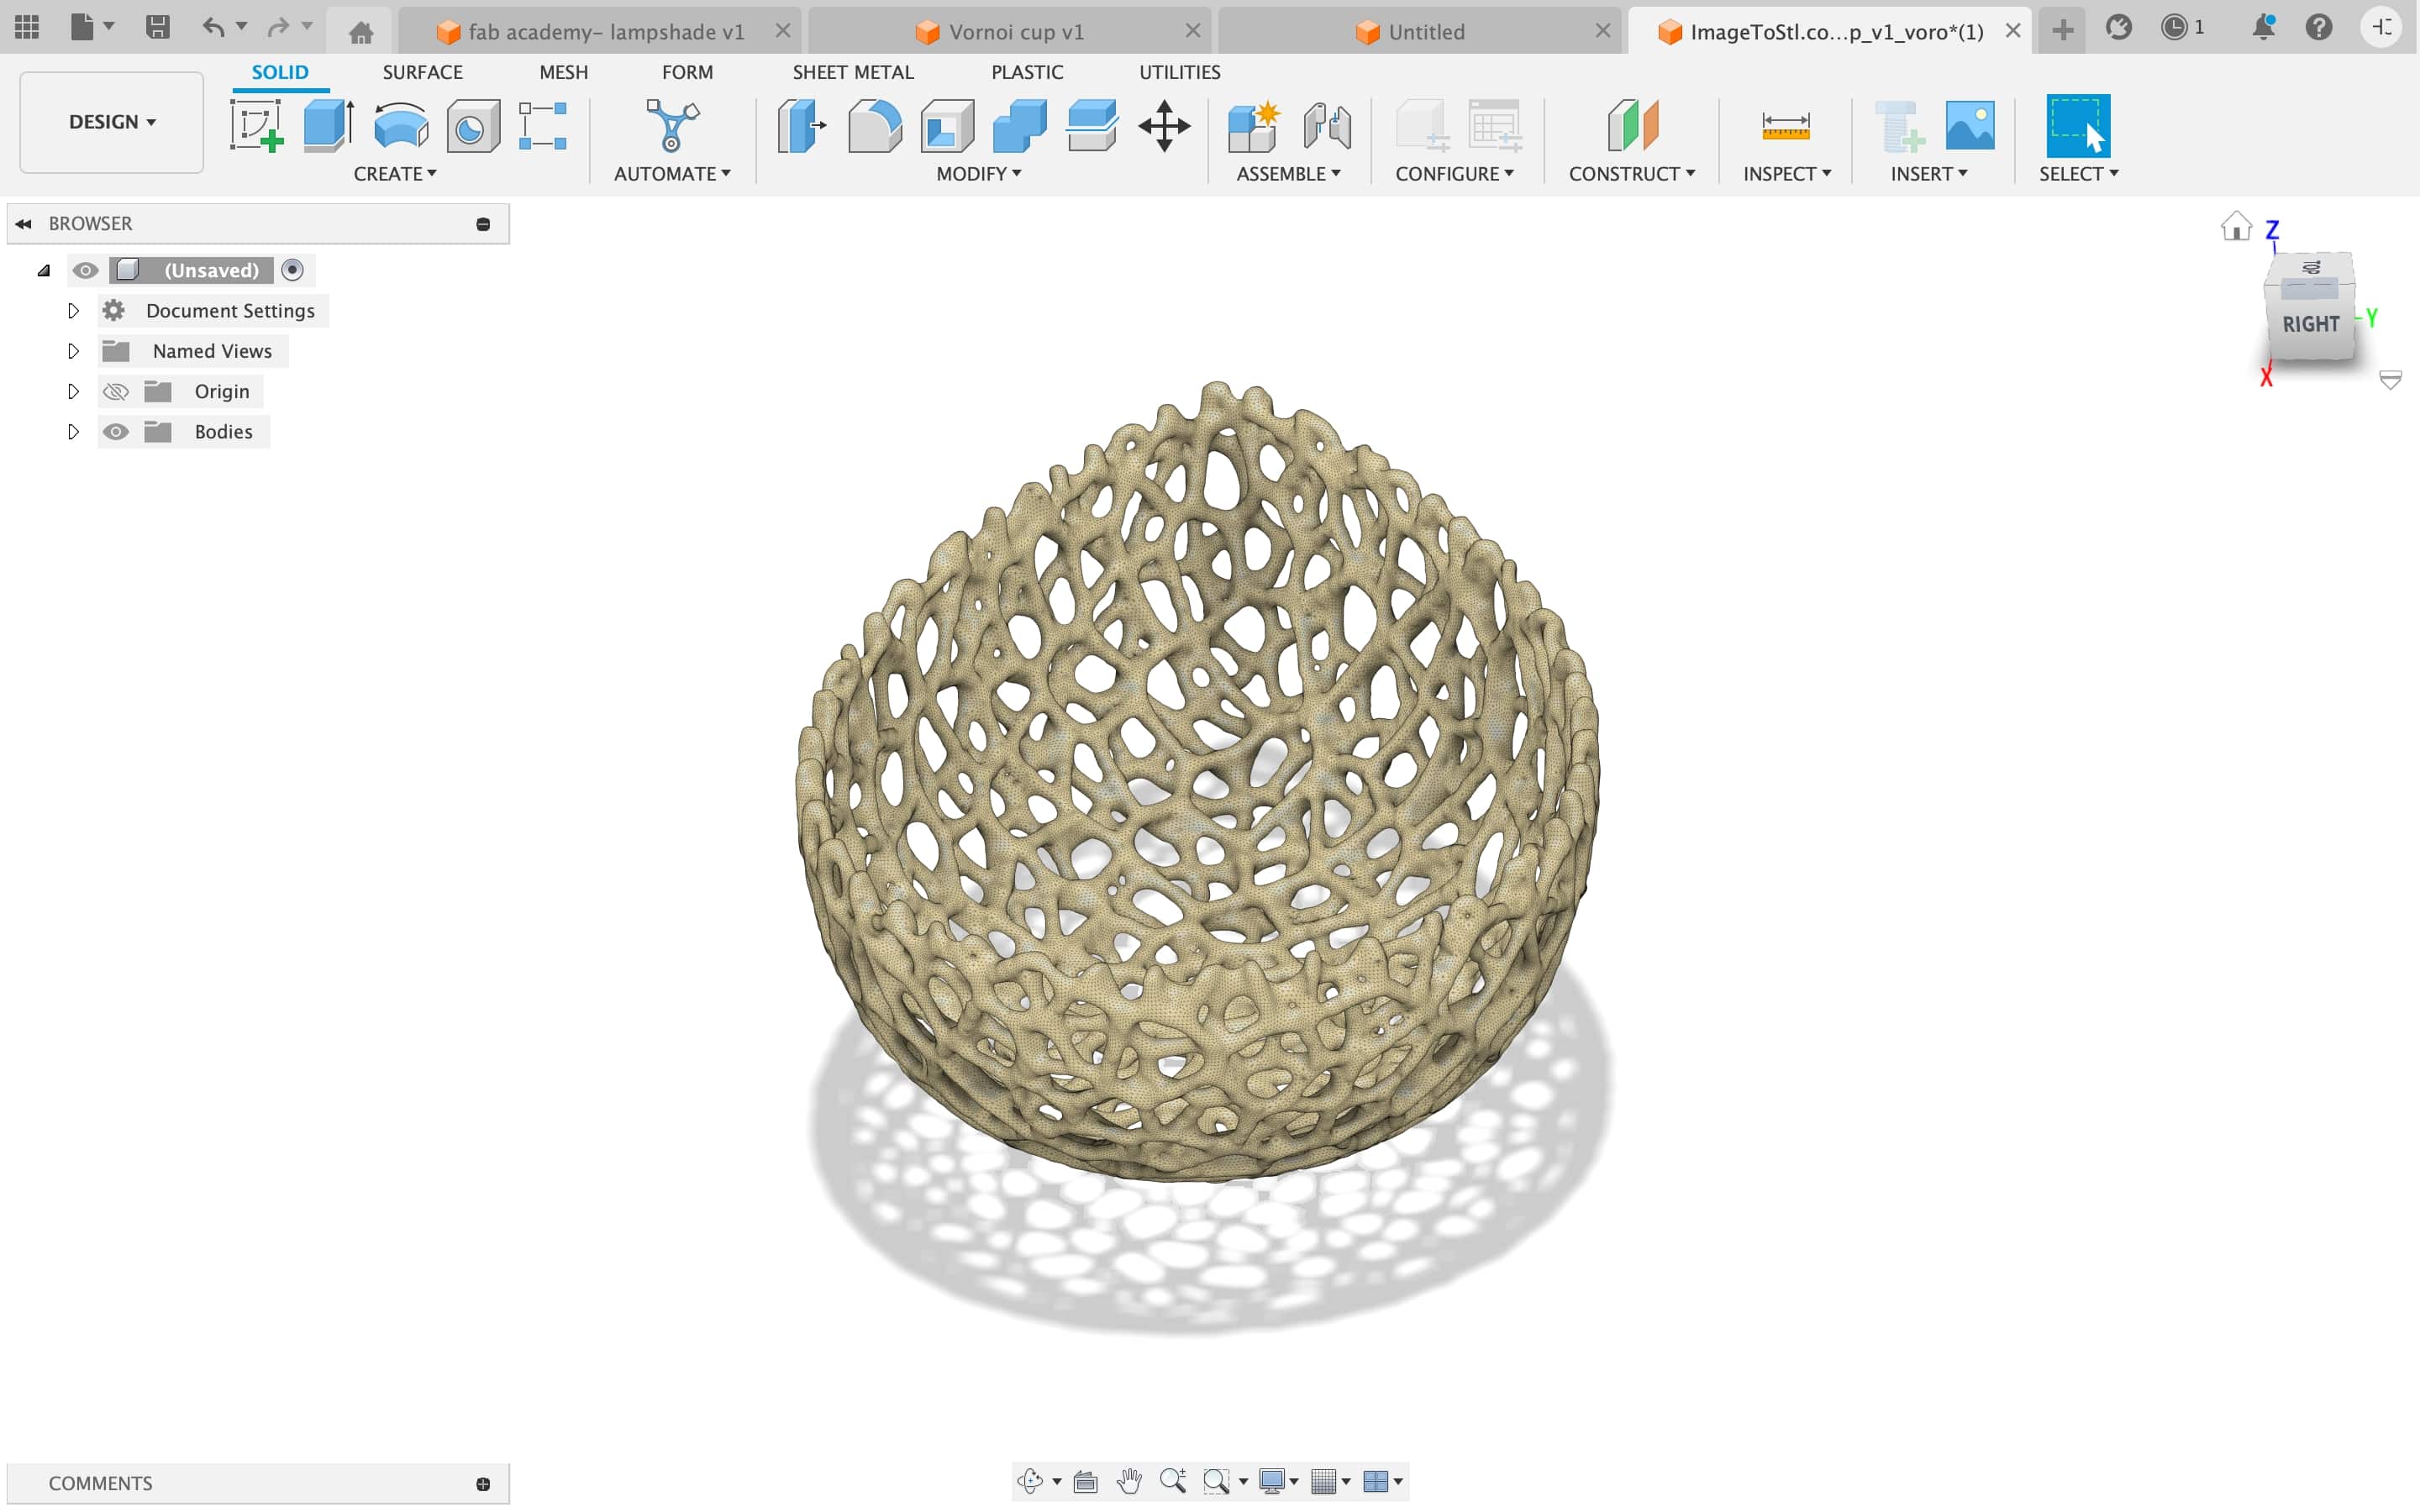
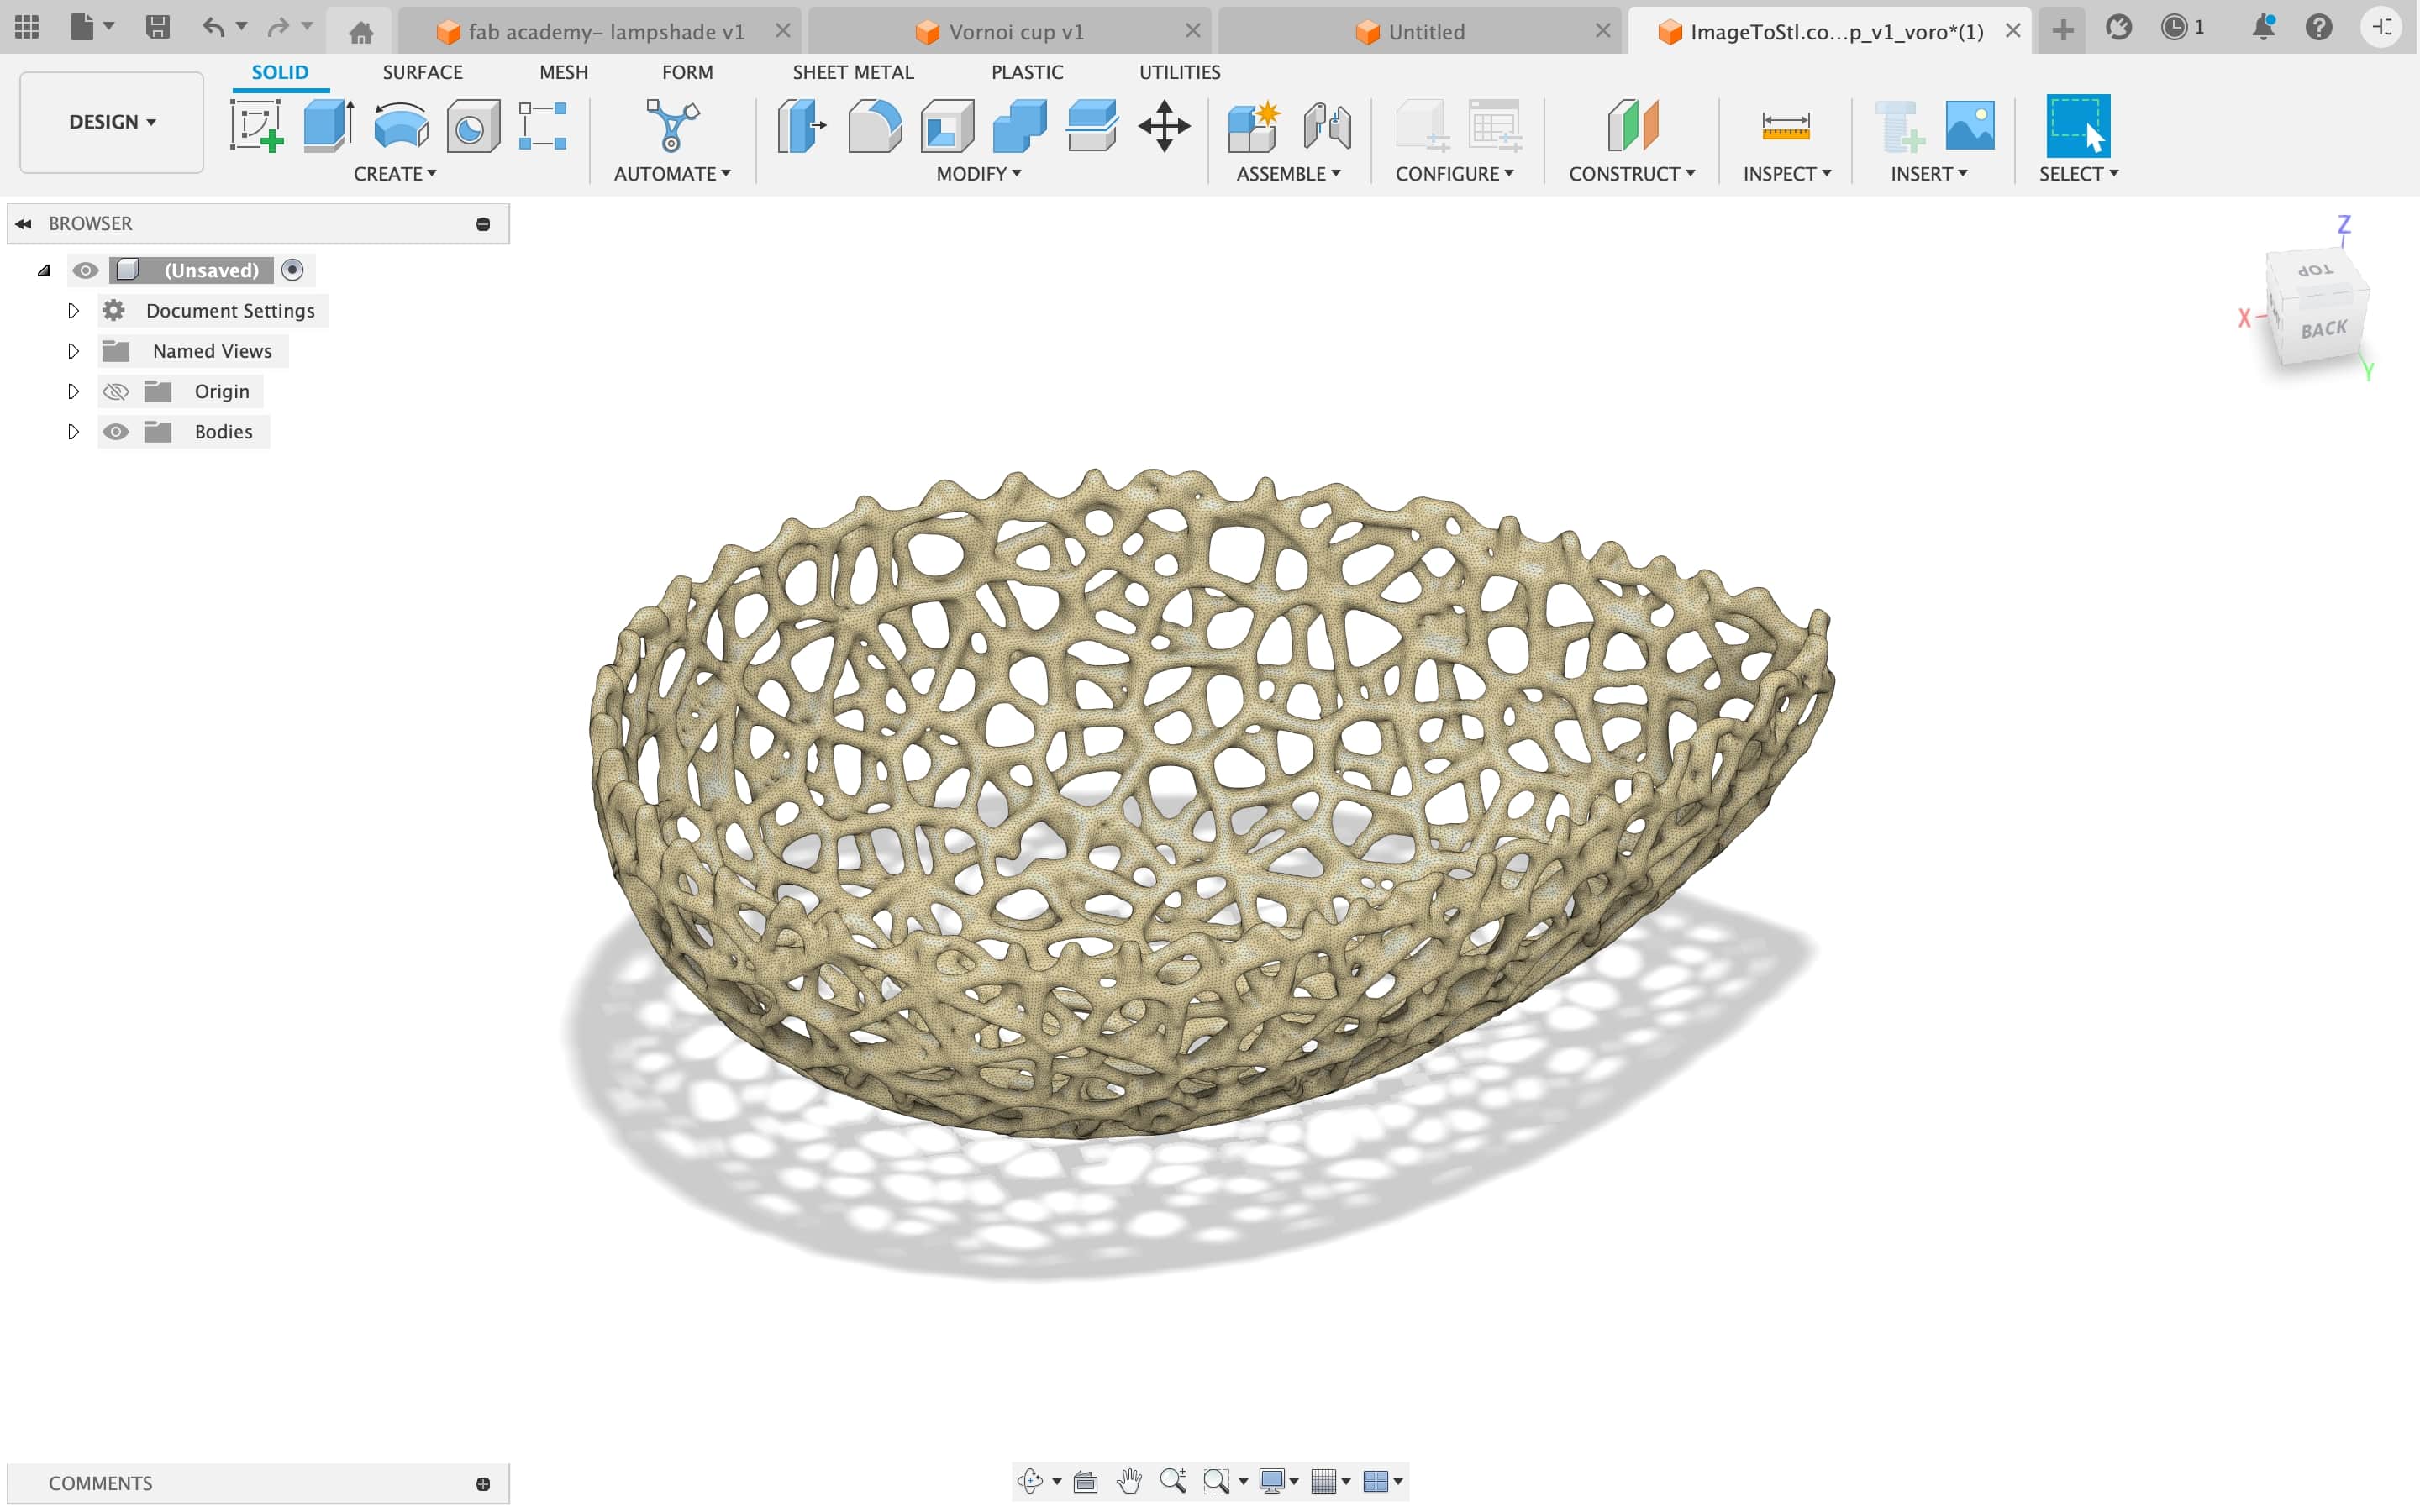
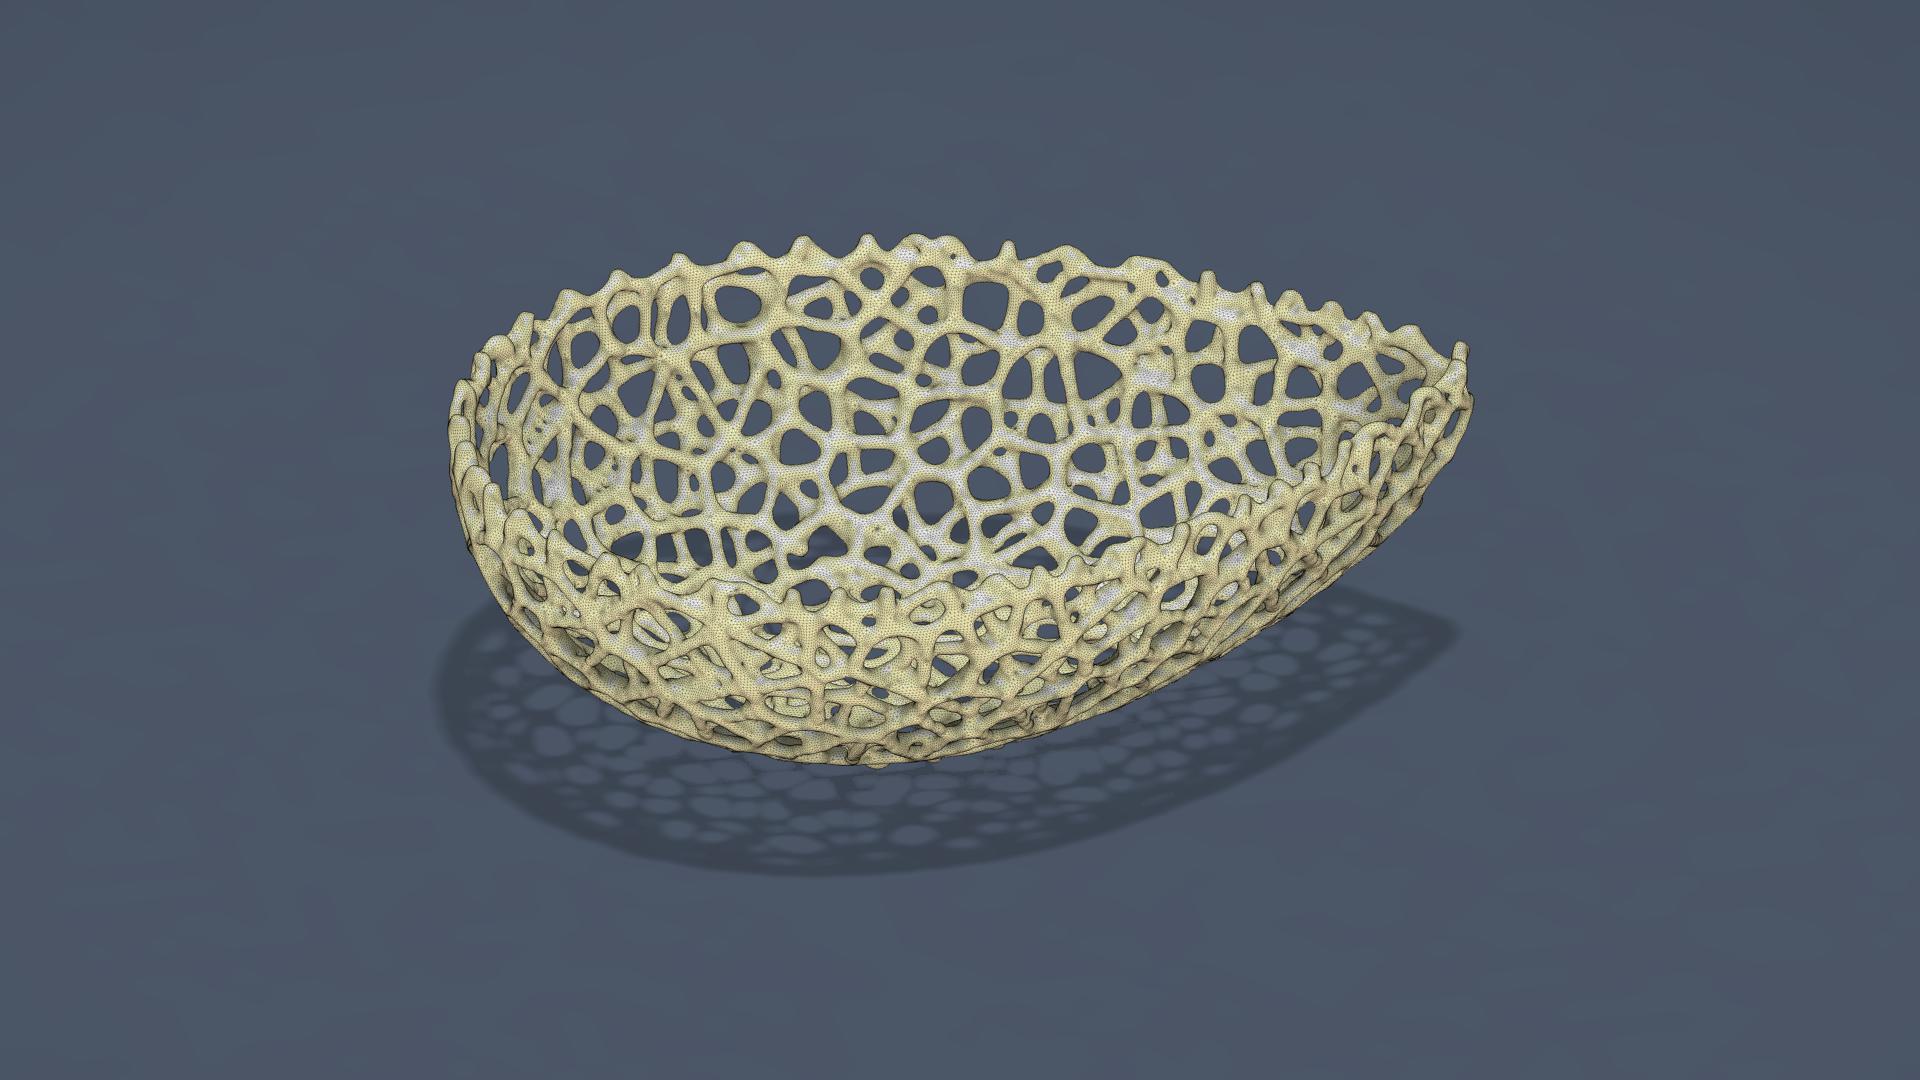
After completing this I wanted to give voronoi pattern on the bowl but as I was using free software of fusion360 I couldn’t use that feature but I still wanted to do that. I researched a bit and found this tutorial on youtube where you can just save the file in OBJ format and open voronator.com and upload your file there, it is a free online page where you can convert your designs into patterns.
youtube tutorials
The file which voronator.com gave was in ply format and which is not supported in fusion360, so I wanted to open the file in fusion and give render and export the same file for 3d printing.
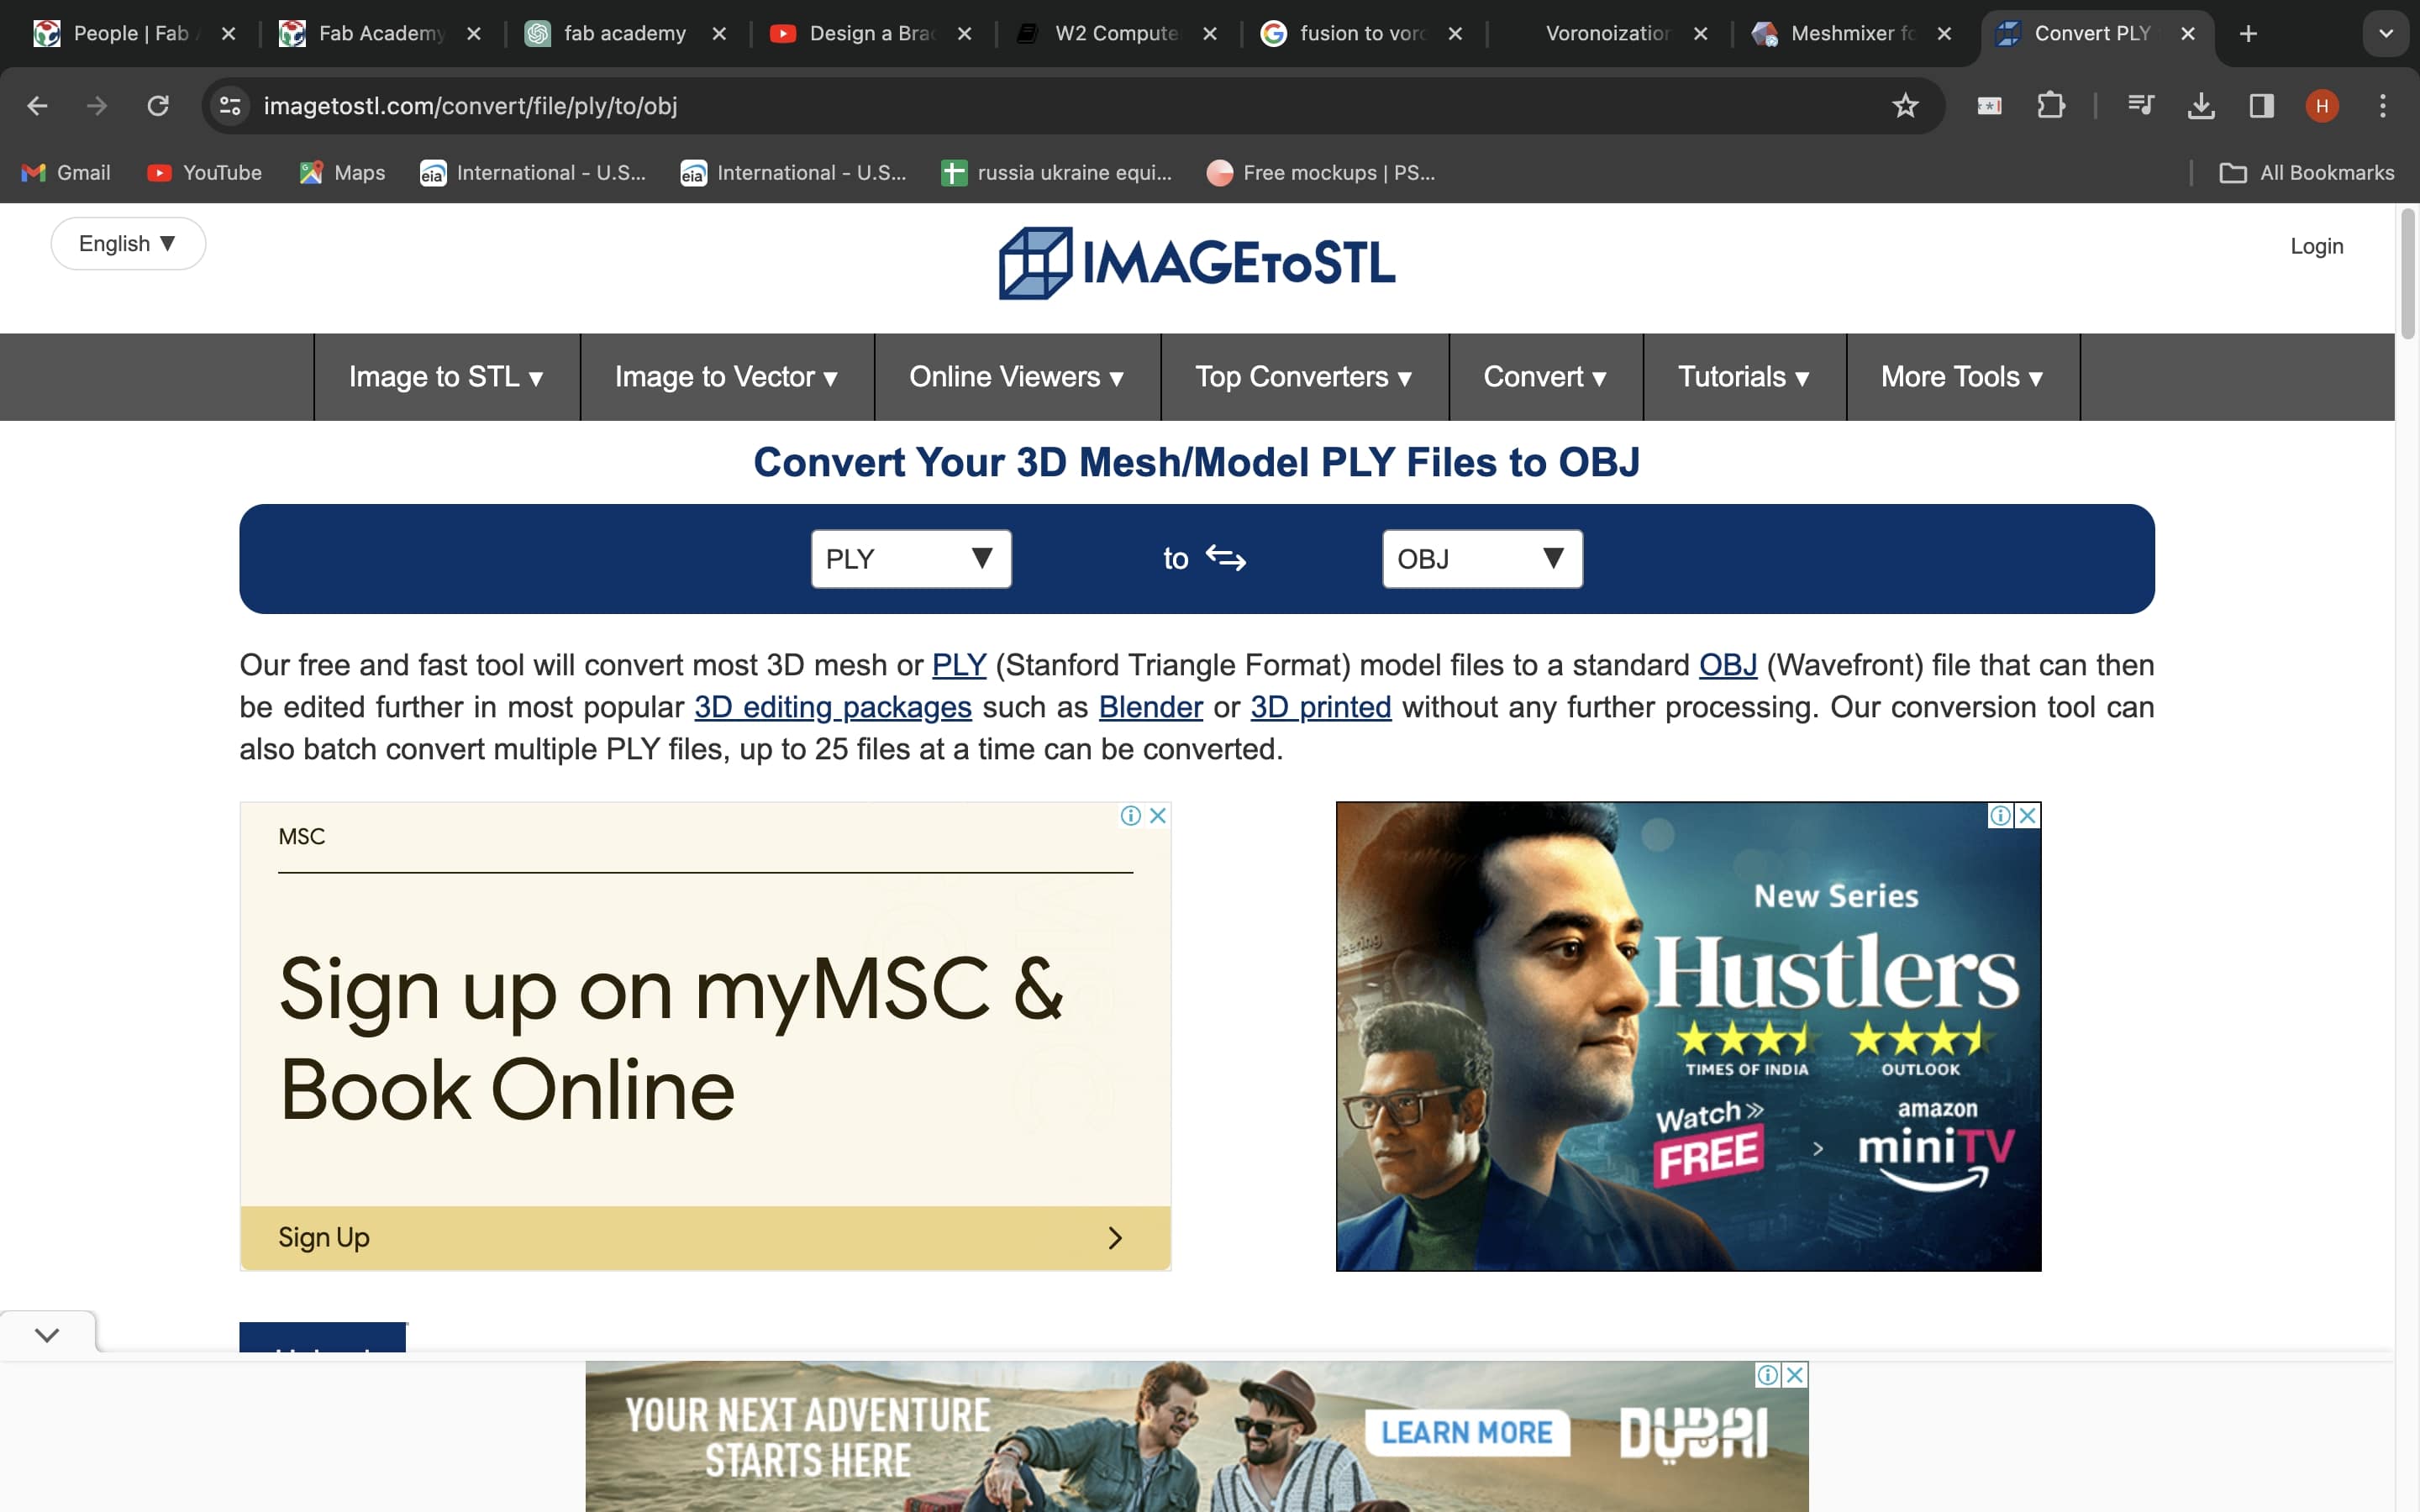
I converted PLY to OBJ format by an online converter and then opened it in fusion360.
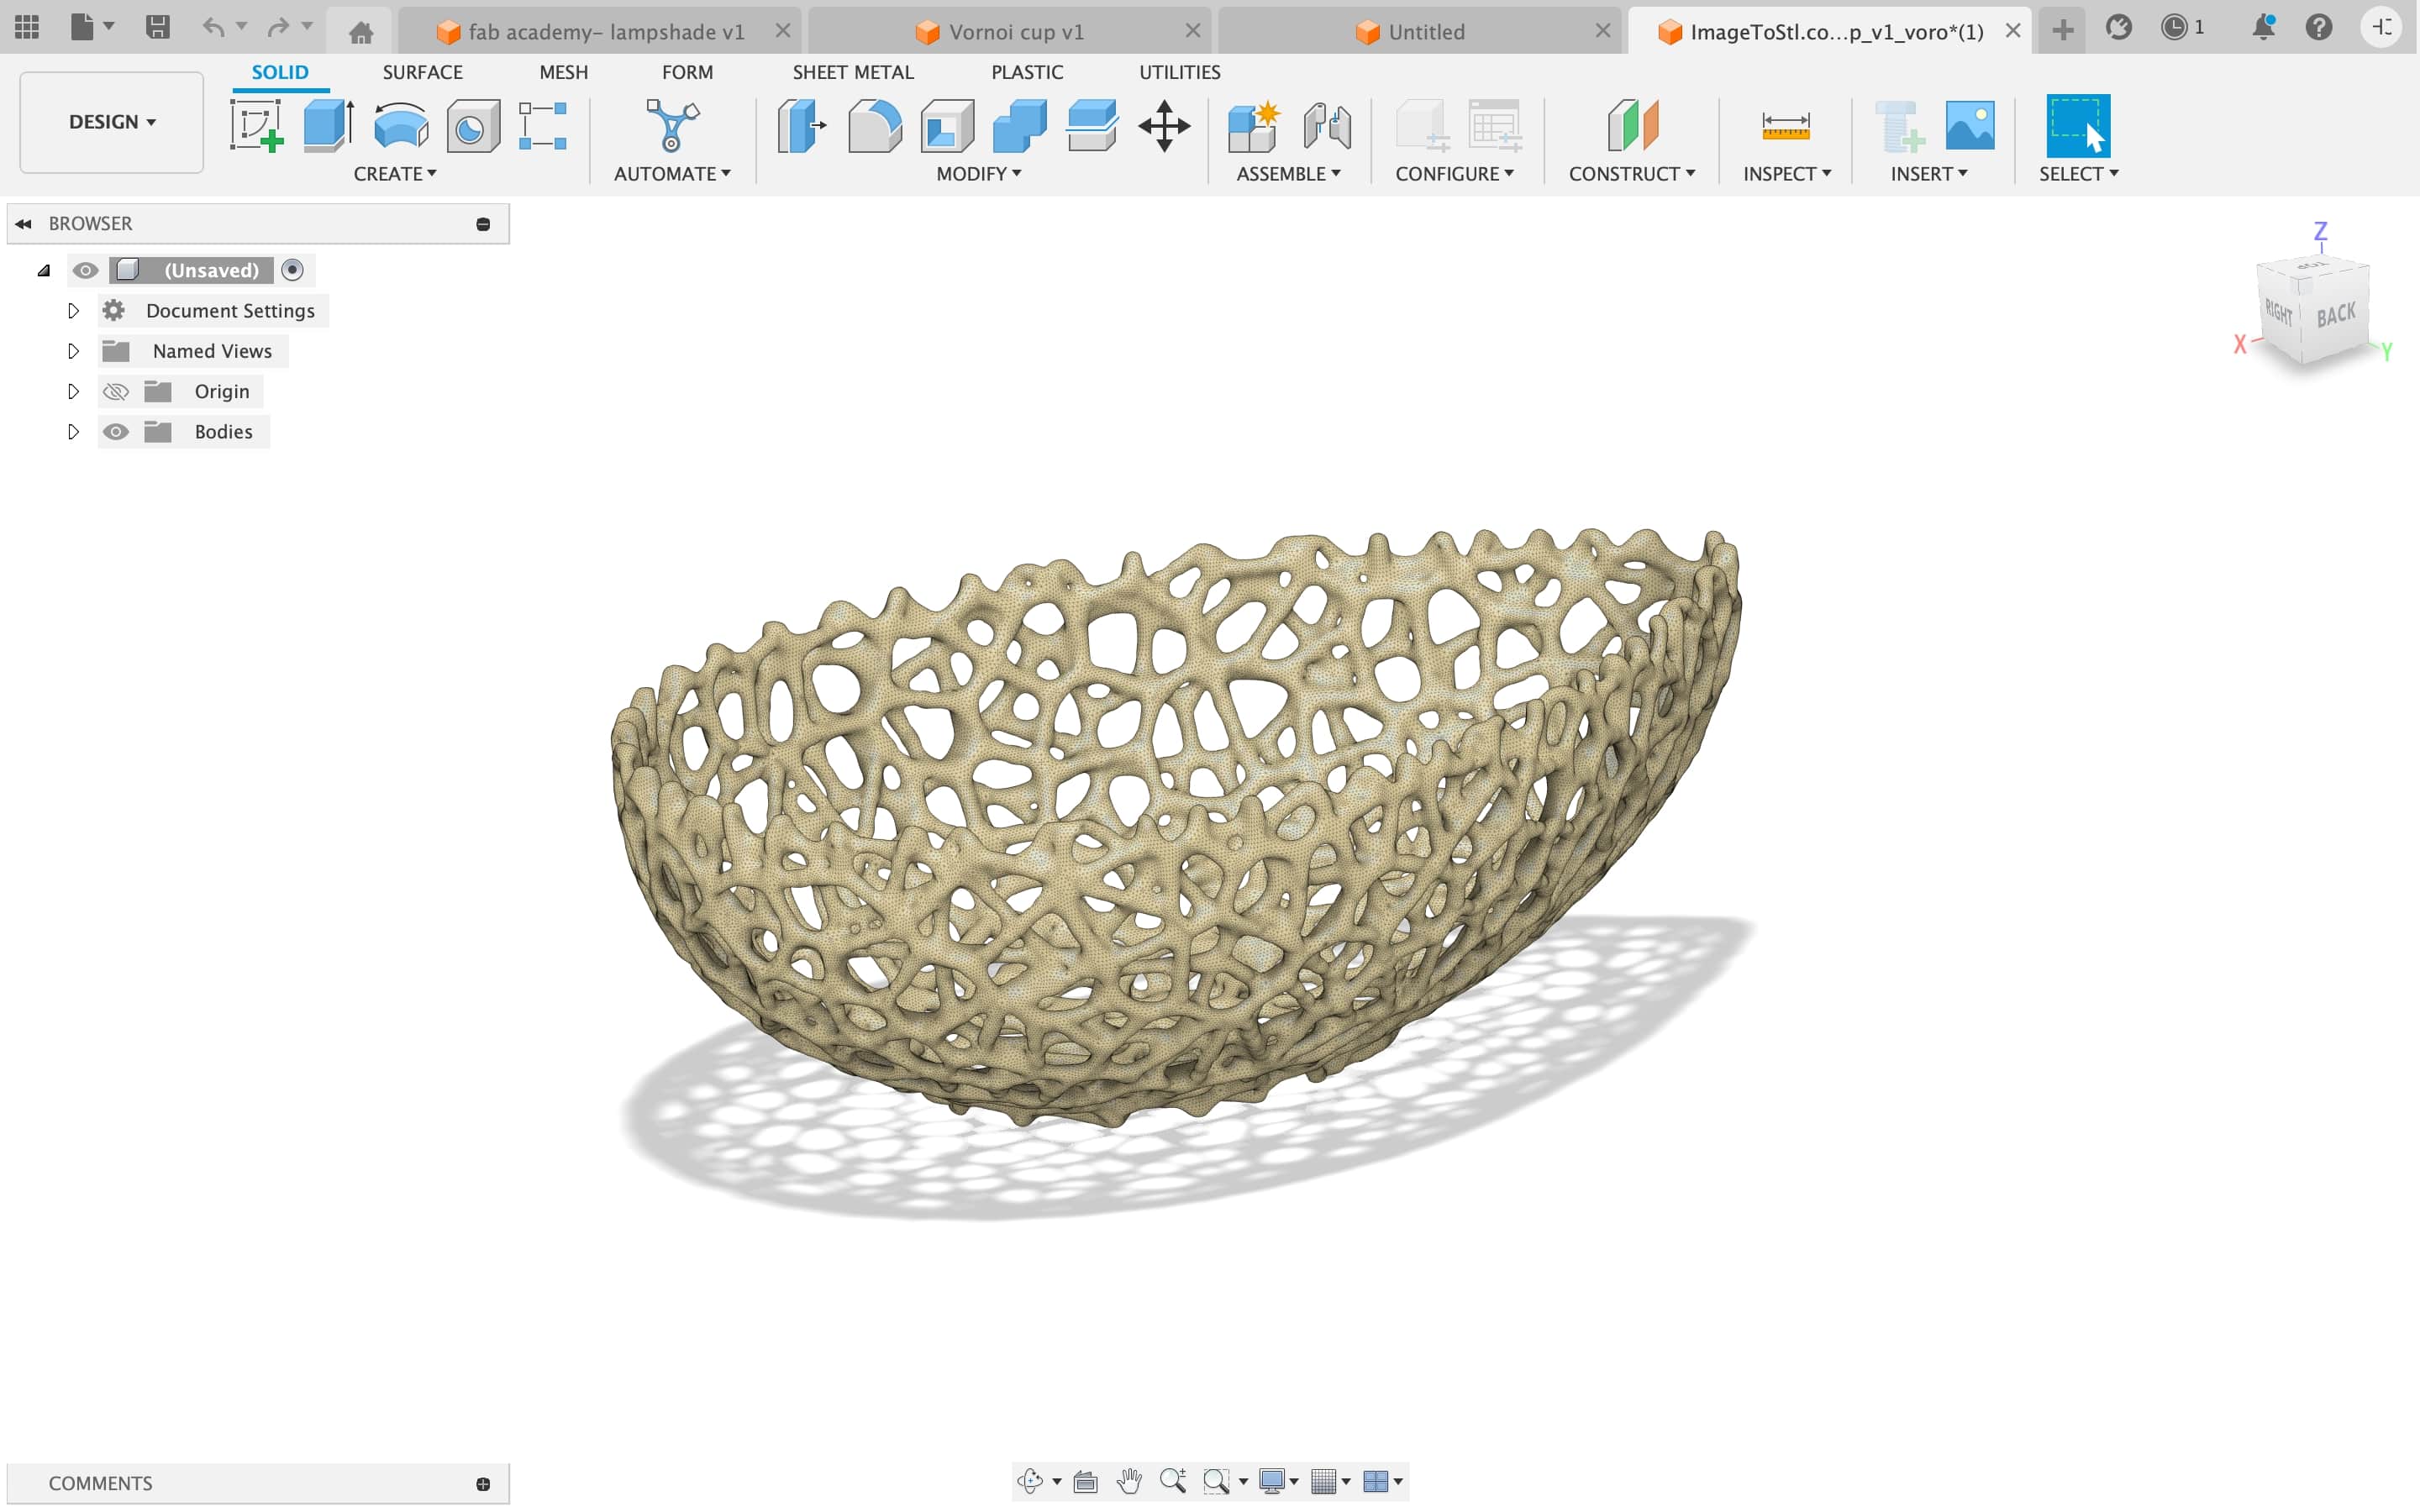
But after opening I realised I can't edit that file here, nor can give a render effect, so this is the con of this online converter.
Final Outcome
3.Sketchup (3d modeling)
a.Table
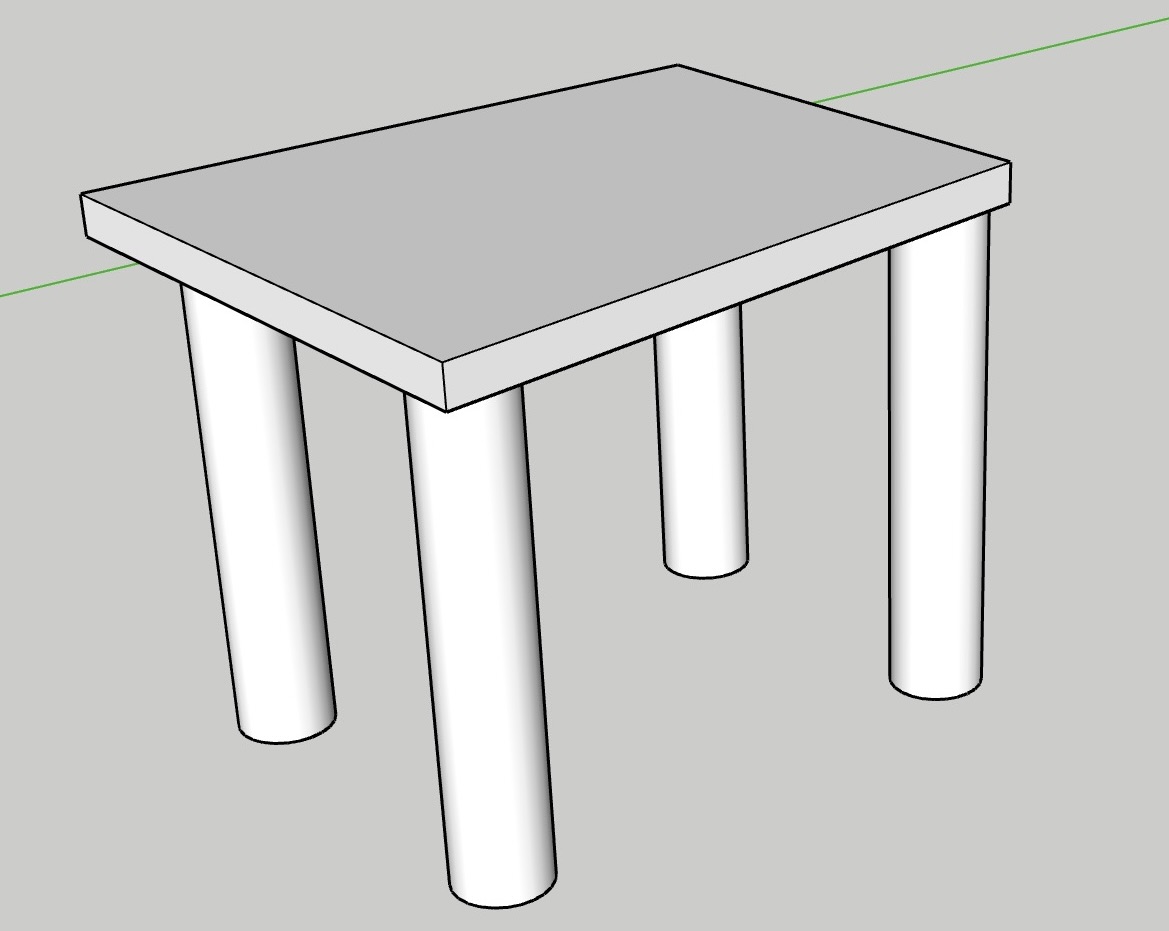
I used sketchup on my browser, so this is how it looked, I explored sketchup with one of my interior design friend and she told me that the browser interface is a bit different from the normal application one and also the free ready 3d objects were not accessible and I started with exploring basic available tools.
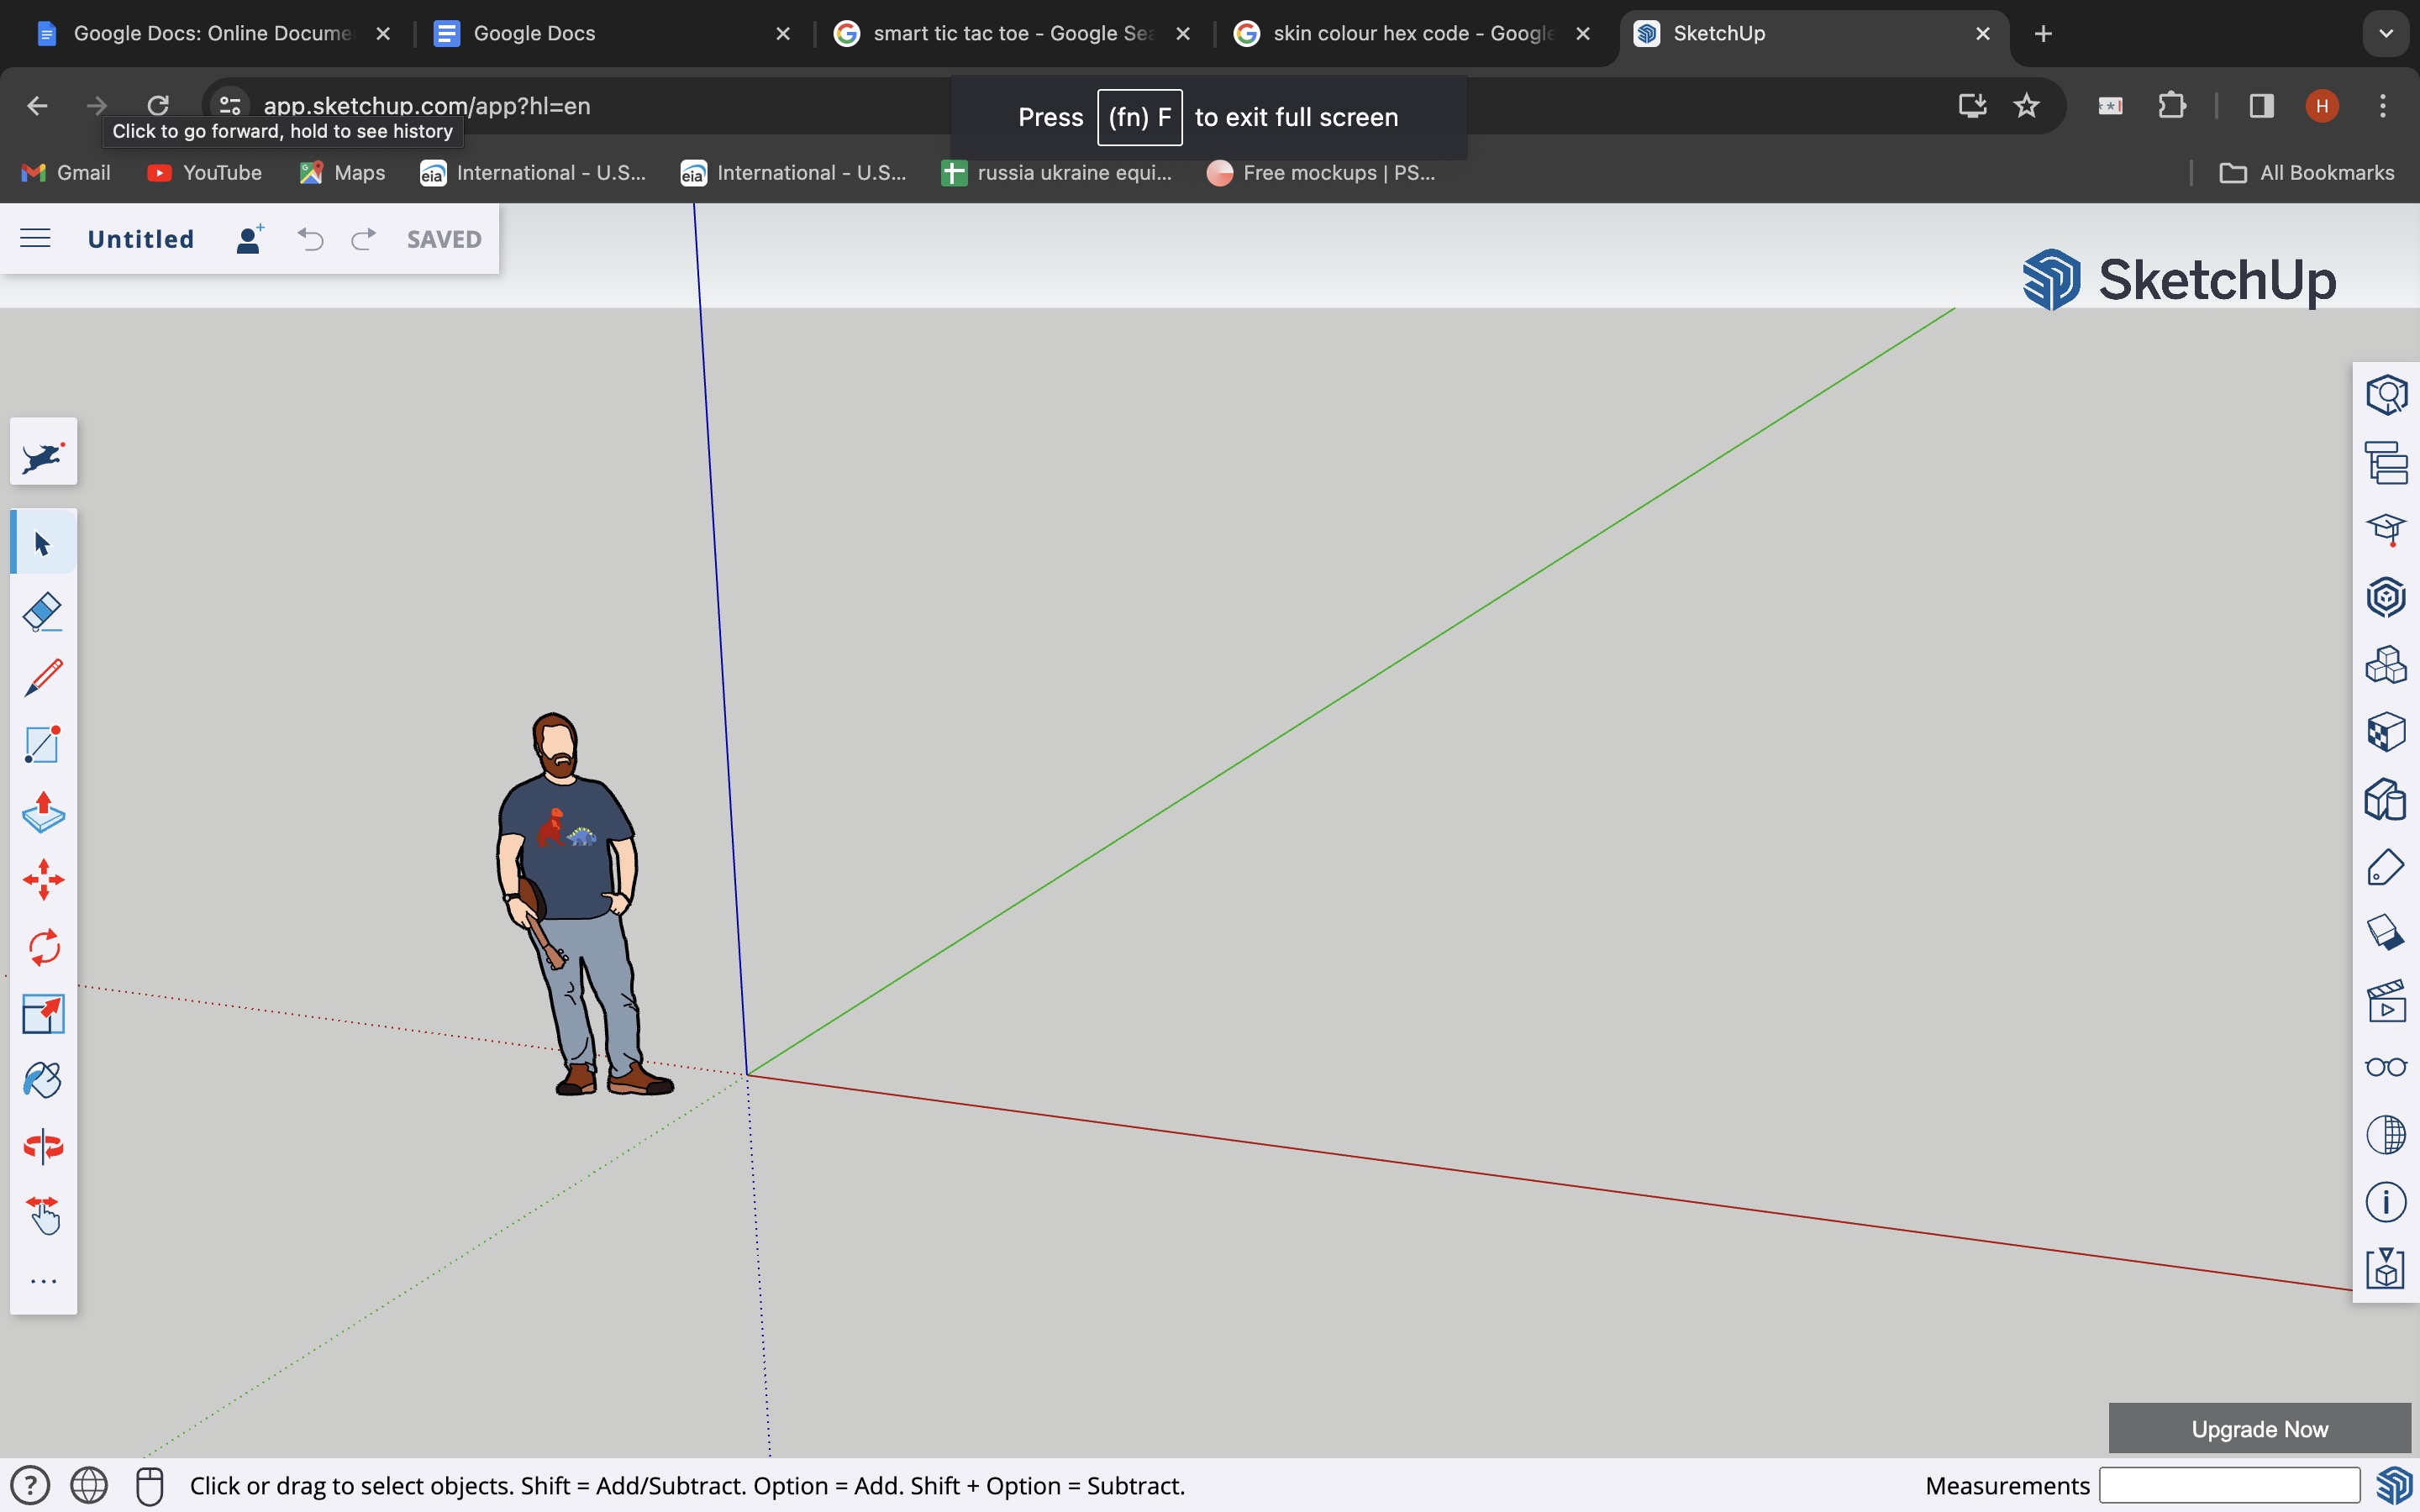
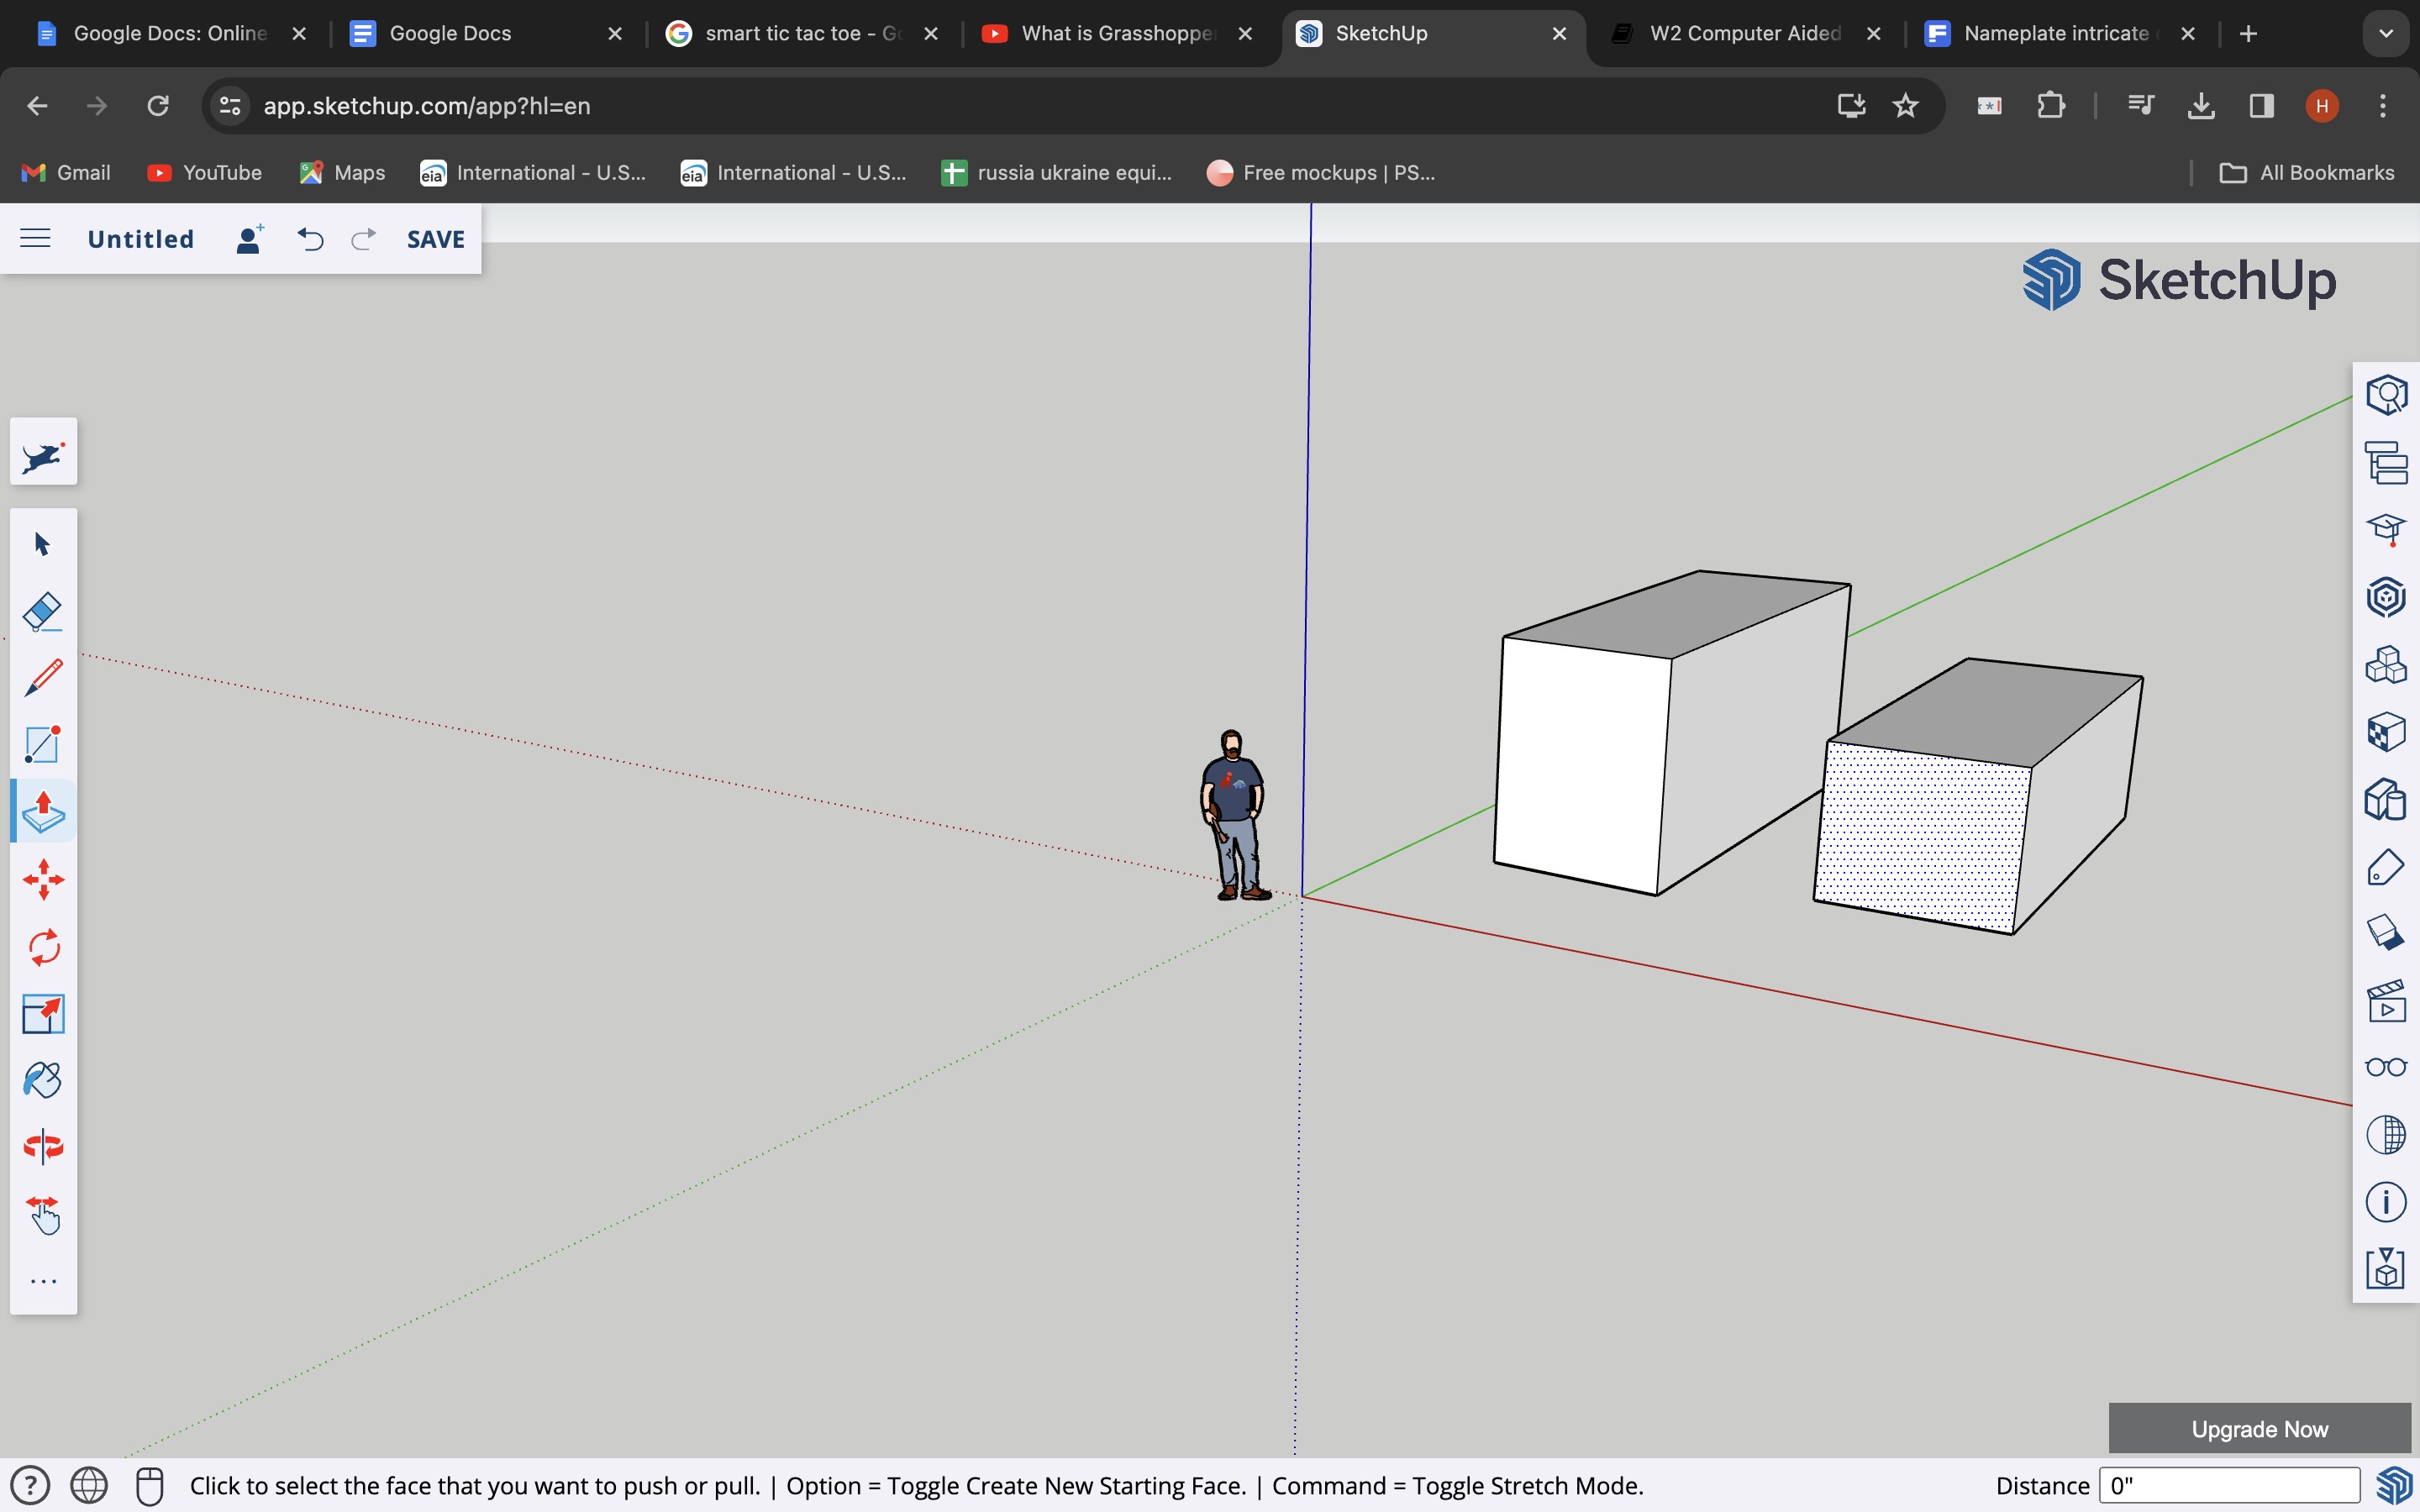
As this software is made for making interior design spaces, I thought I'll make a table and not take directly from free objects as it was not available.
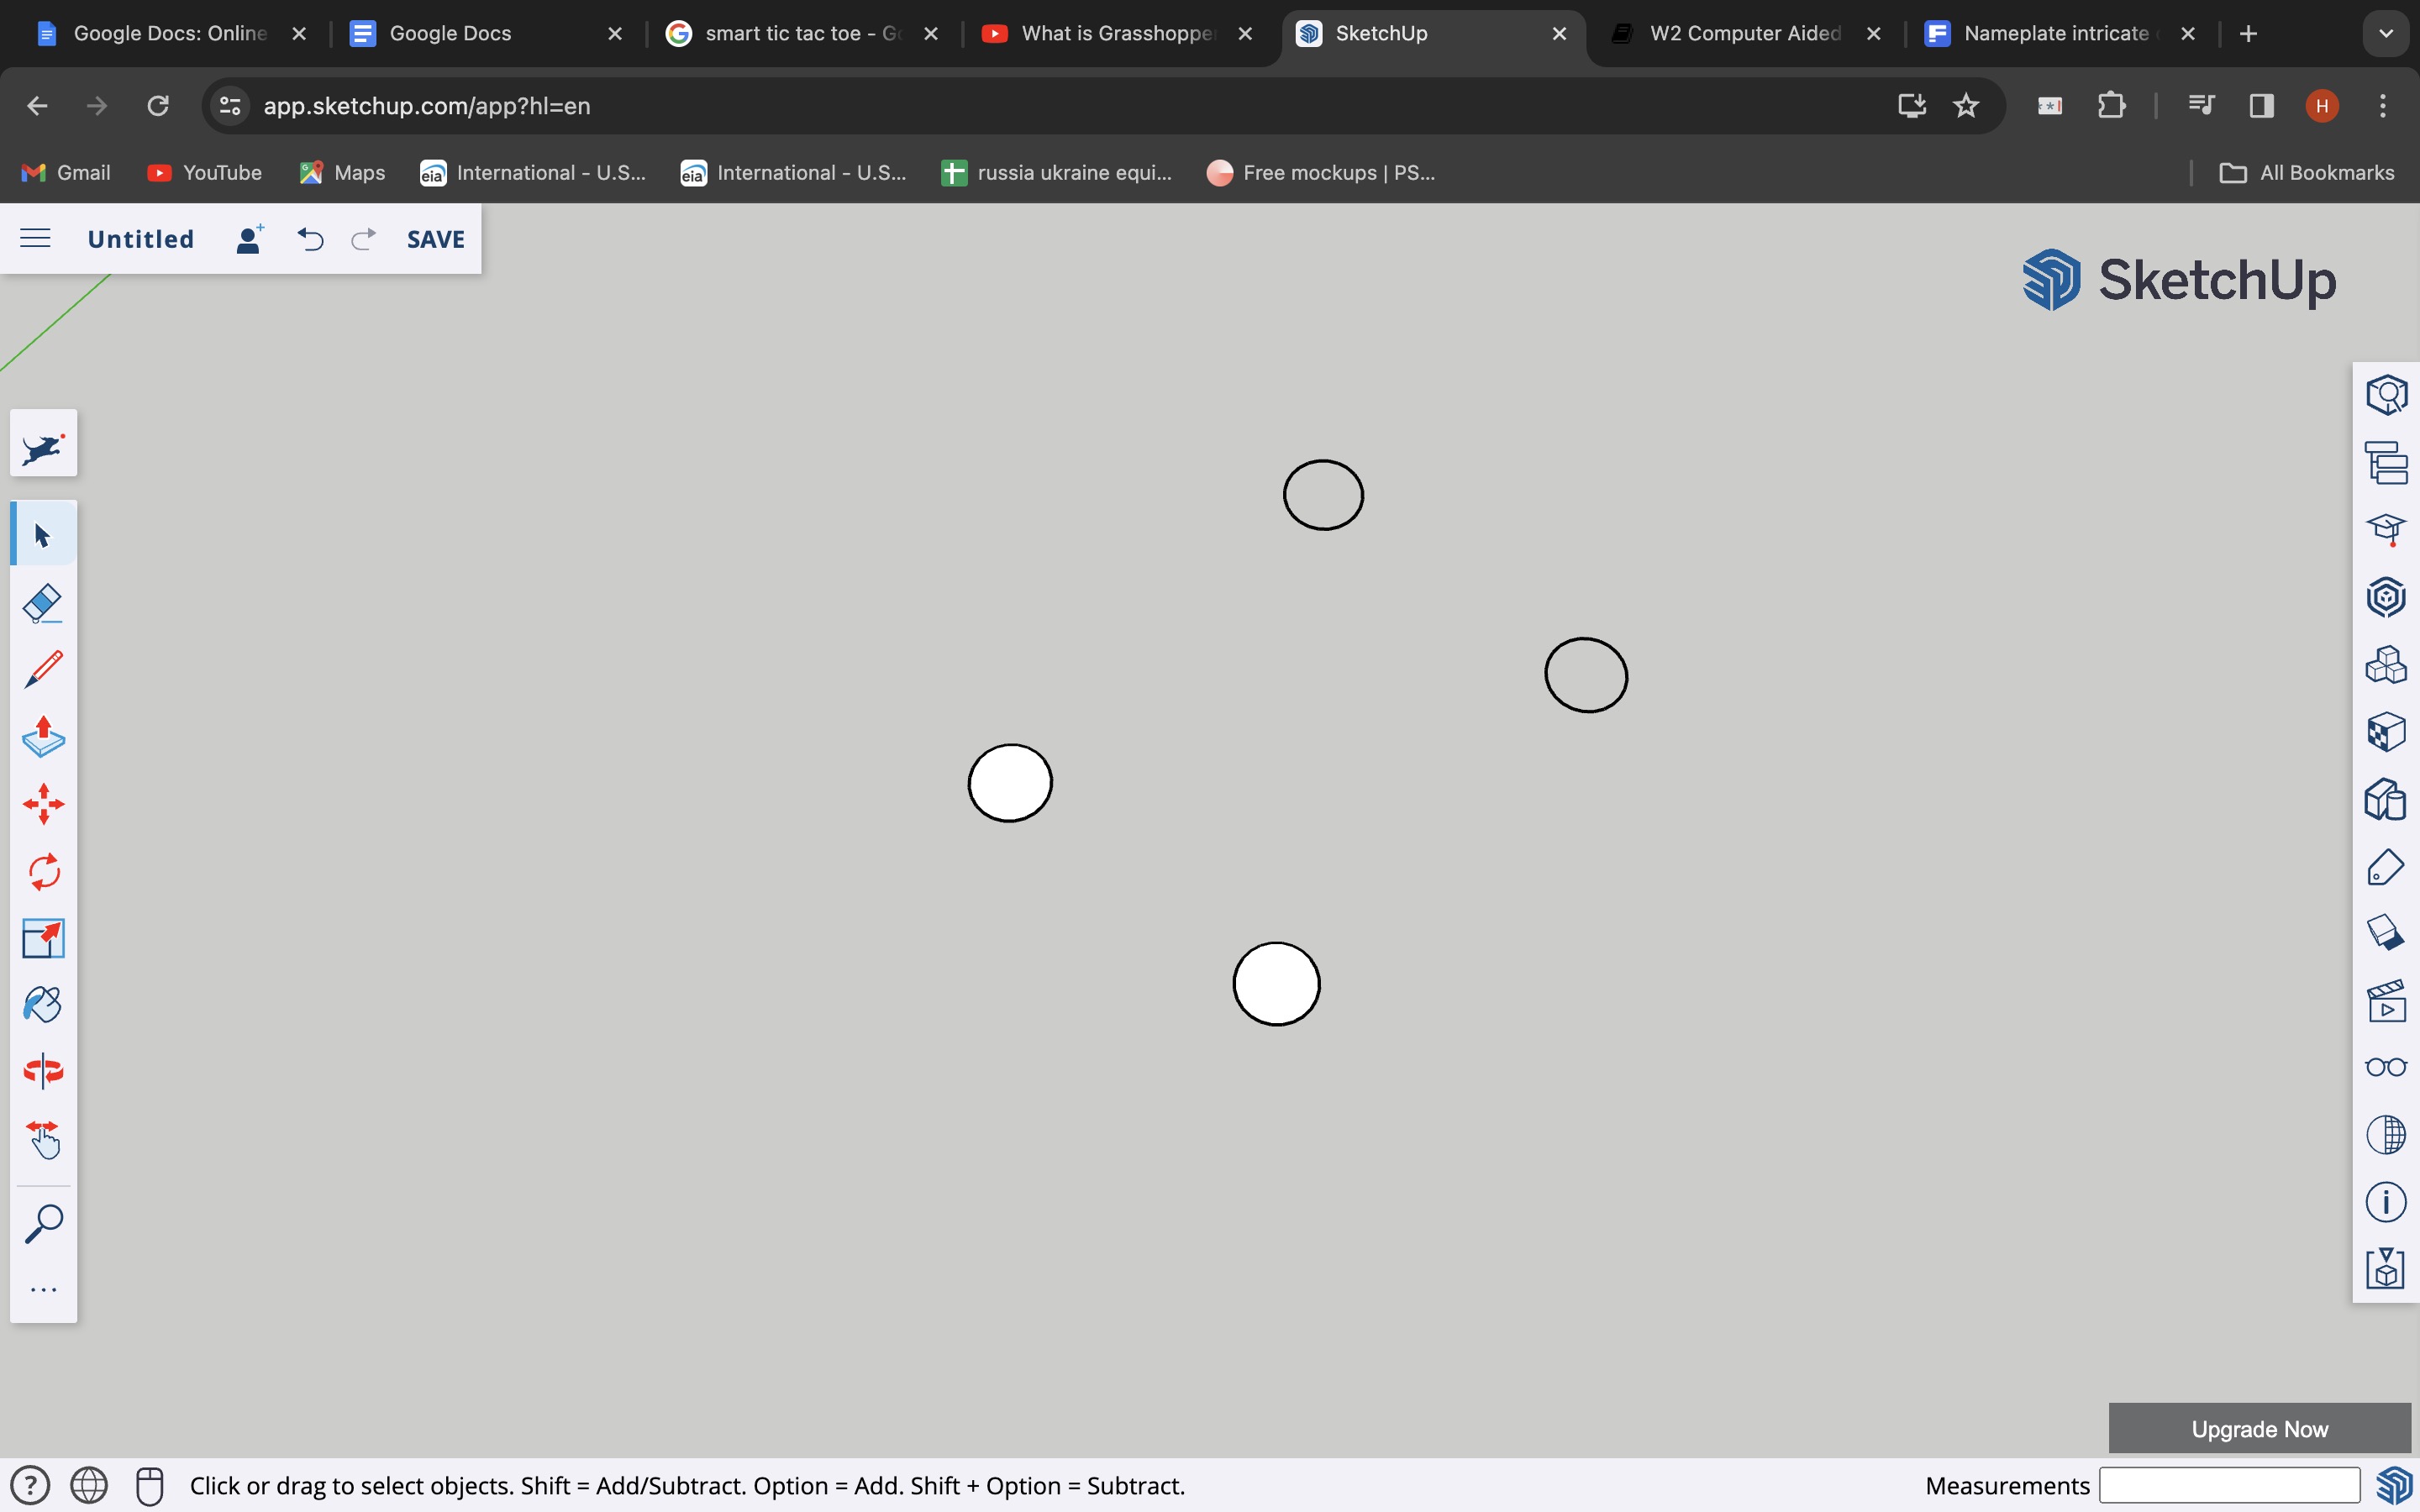
I started making basic 4 circles for the legs and then applied pull command which converts it into 3d, it is basically like extrude in fusion360.
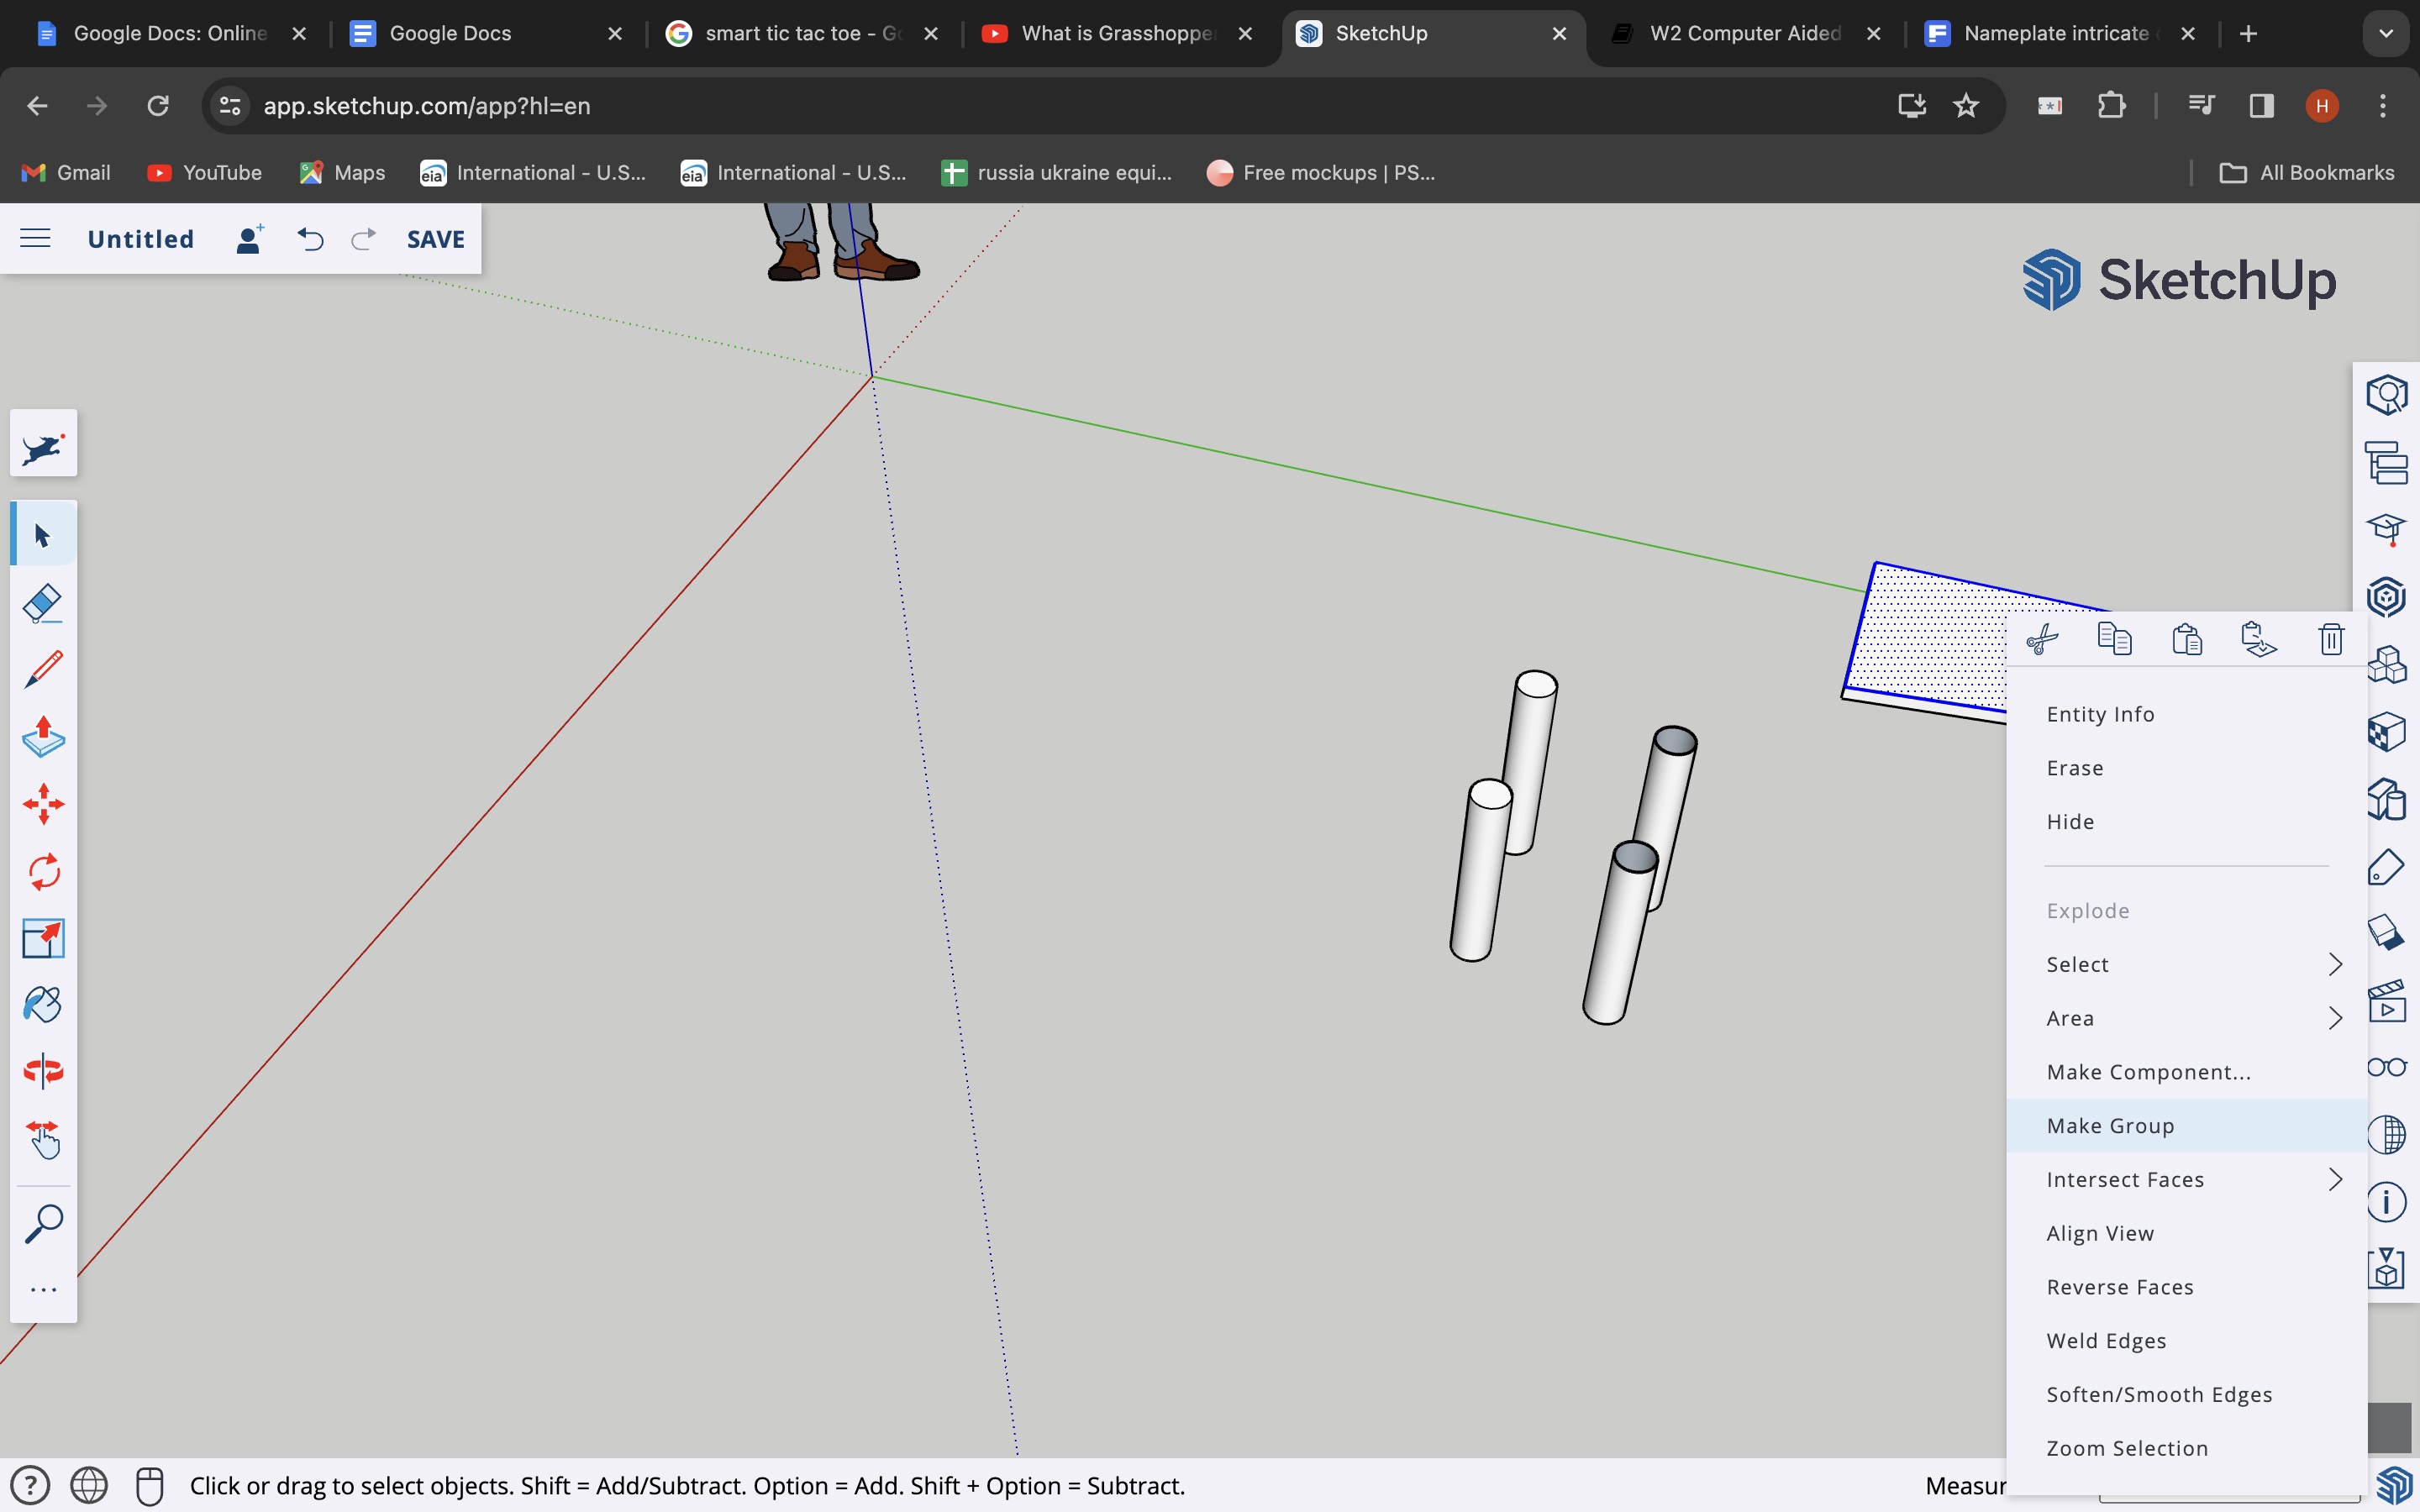
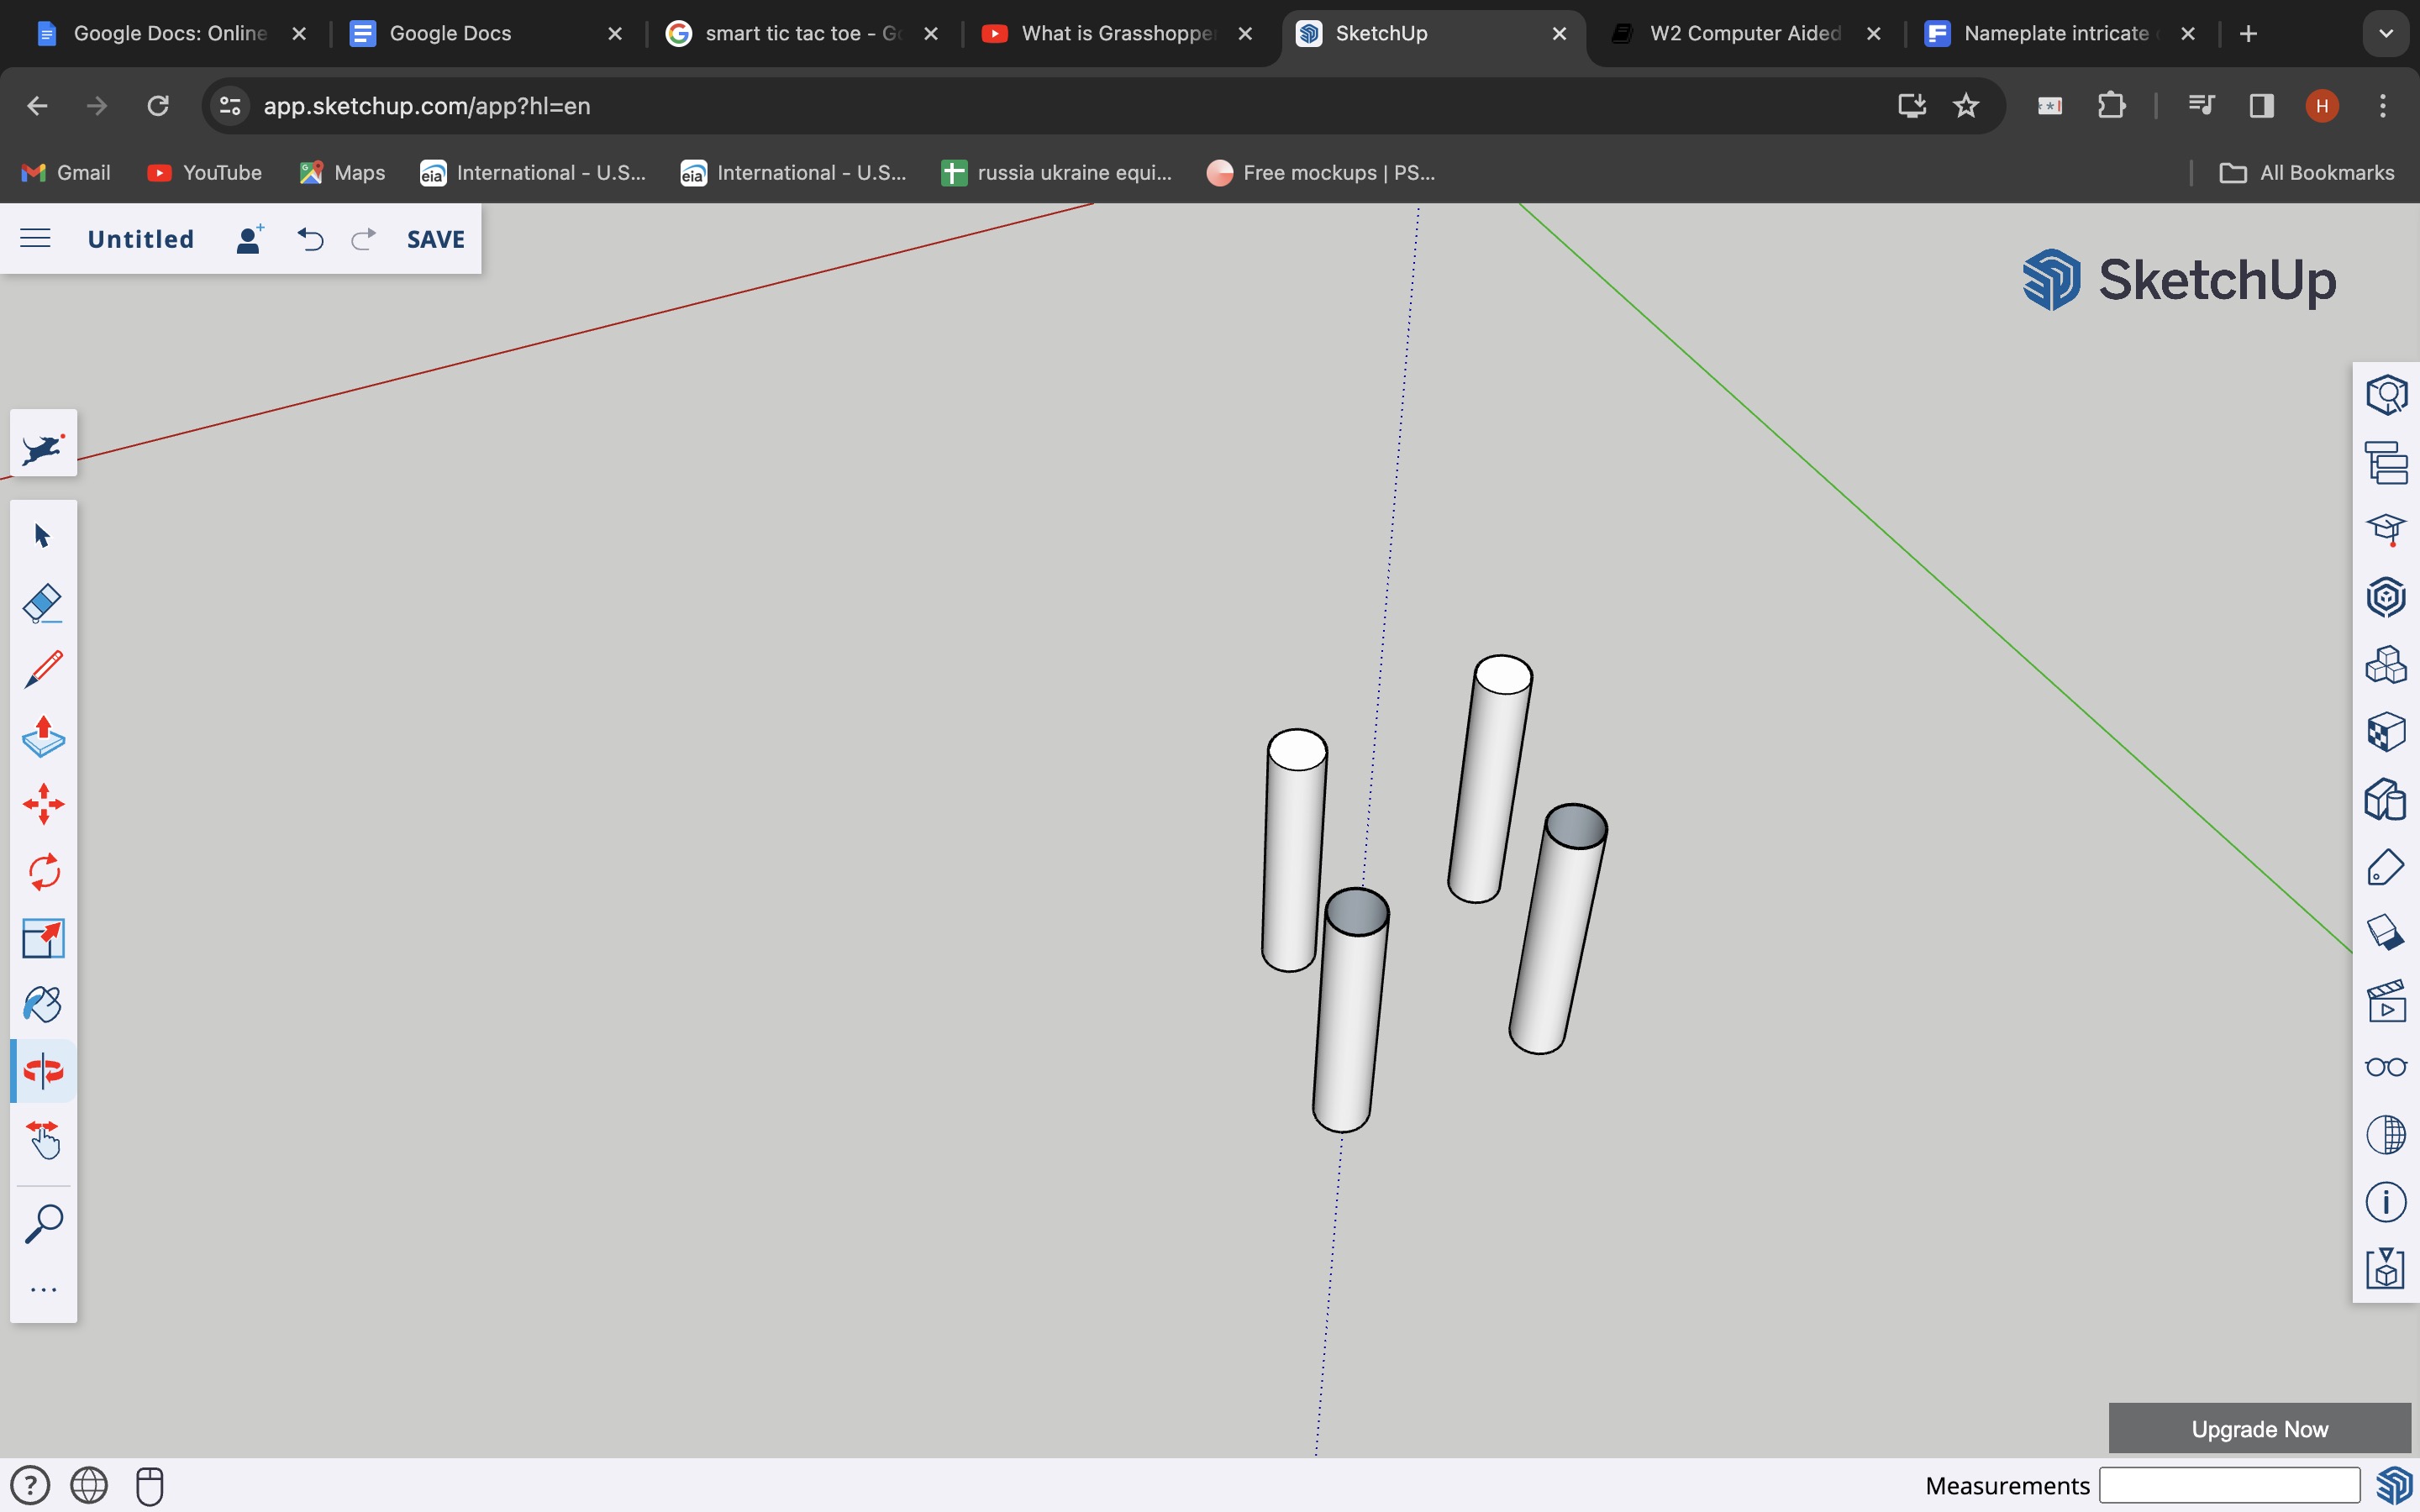
I made the rectangle as made in exploration and pulled it again and adjusted that rectangle on the 4 legs.
So this is my final outcome for the same
Final Outcome
4.Freecad (3d modelling)
Phone holder
As freecad was new for me I have to download it, and to make the phone holder I referred a youtube tutorial
youtube tutorials
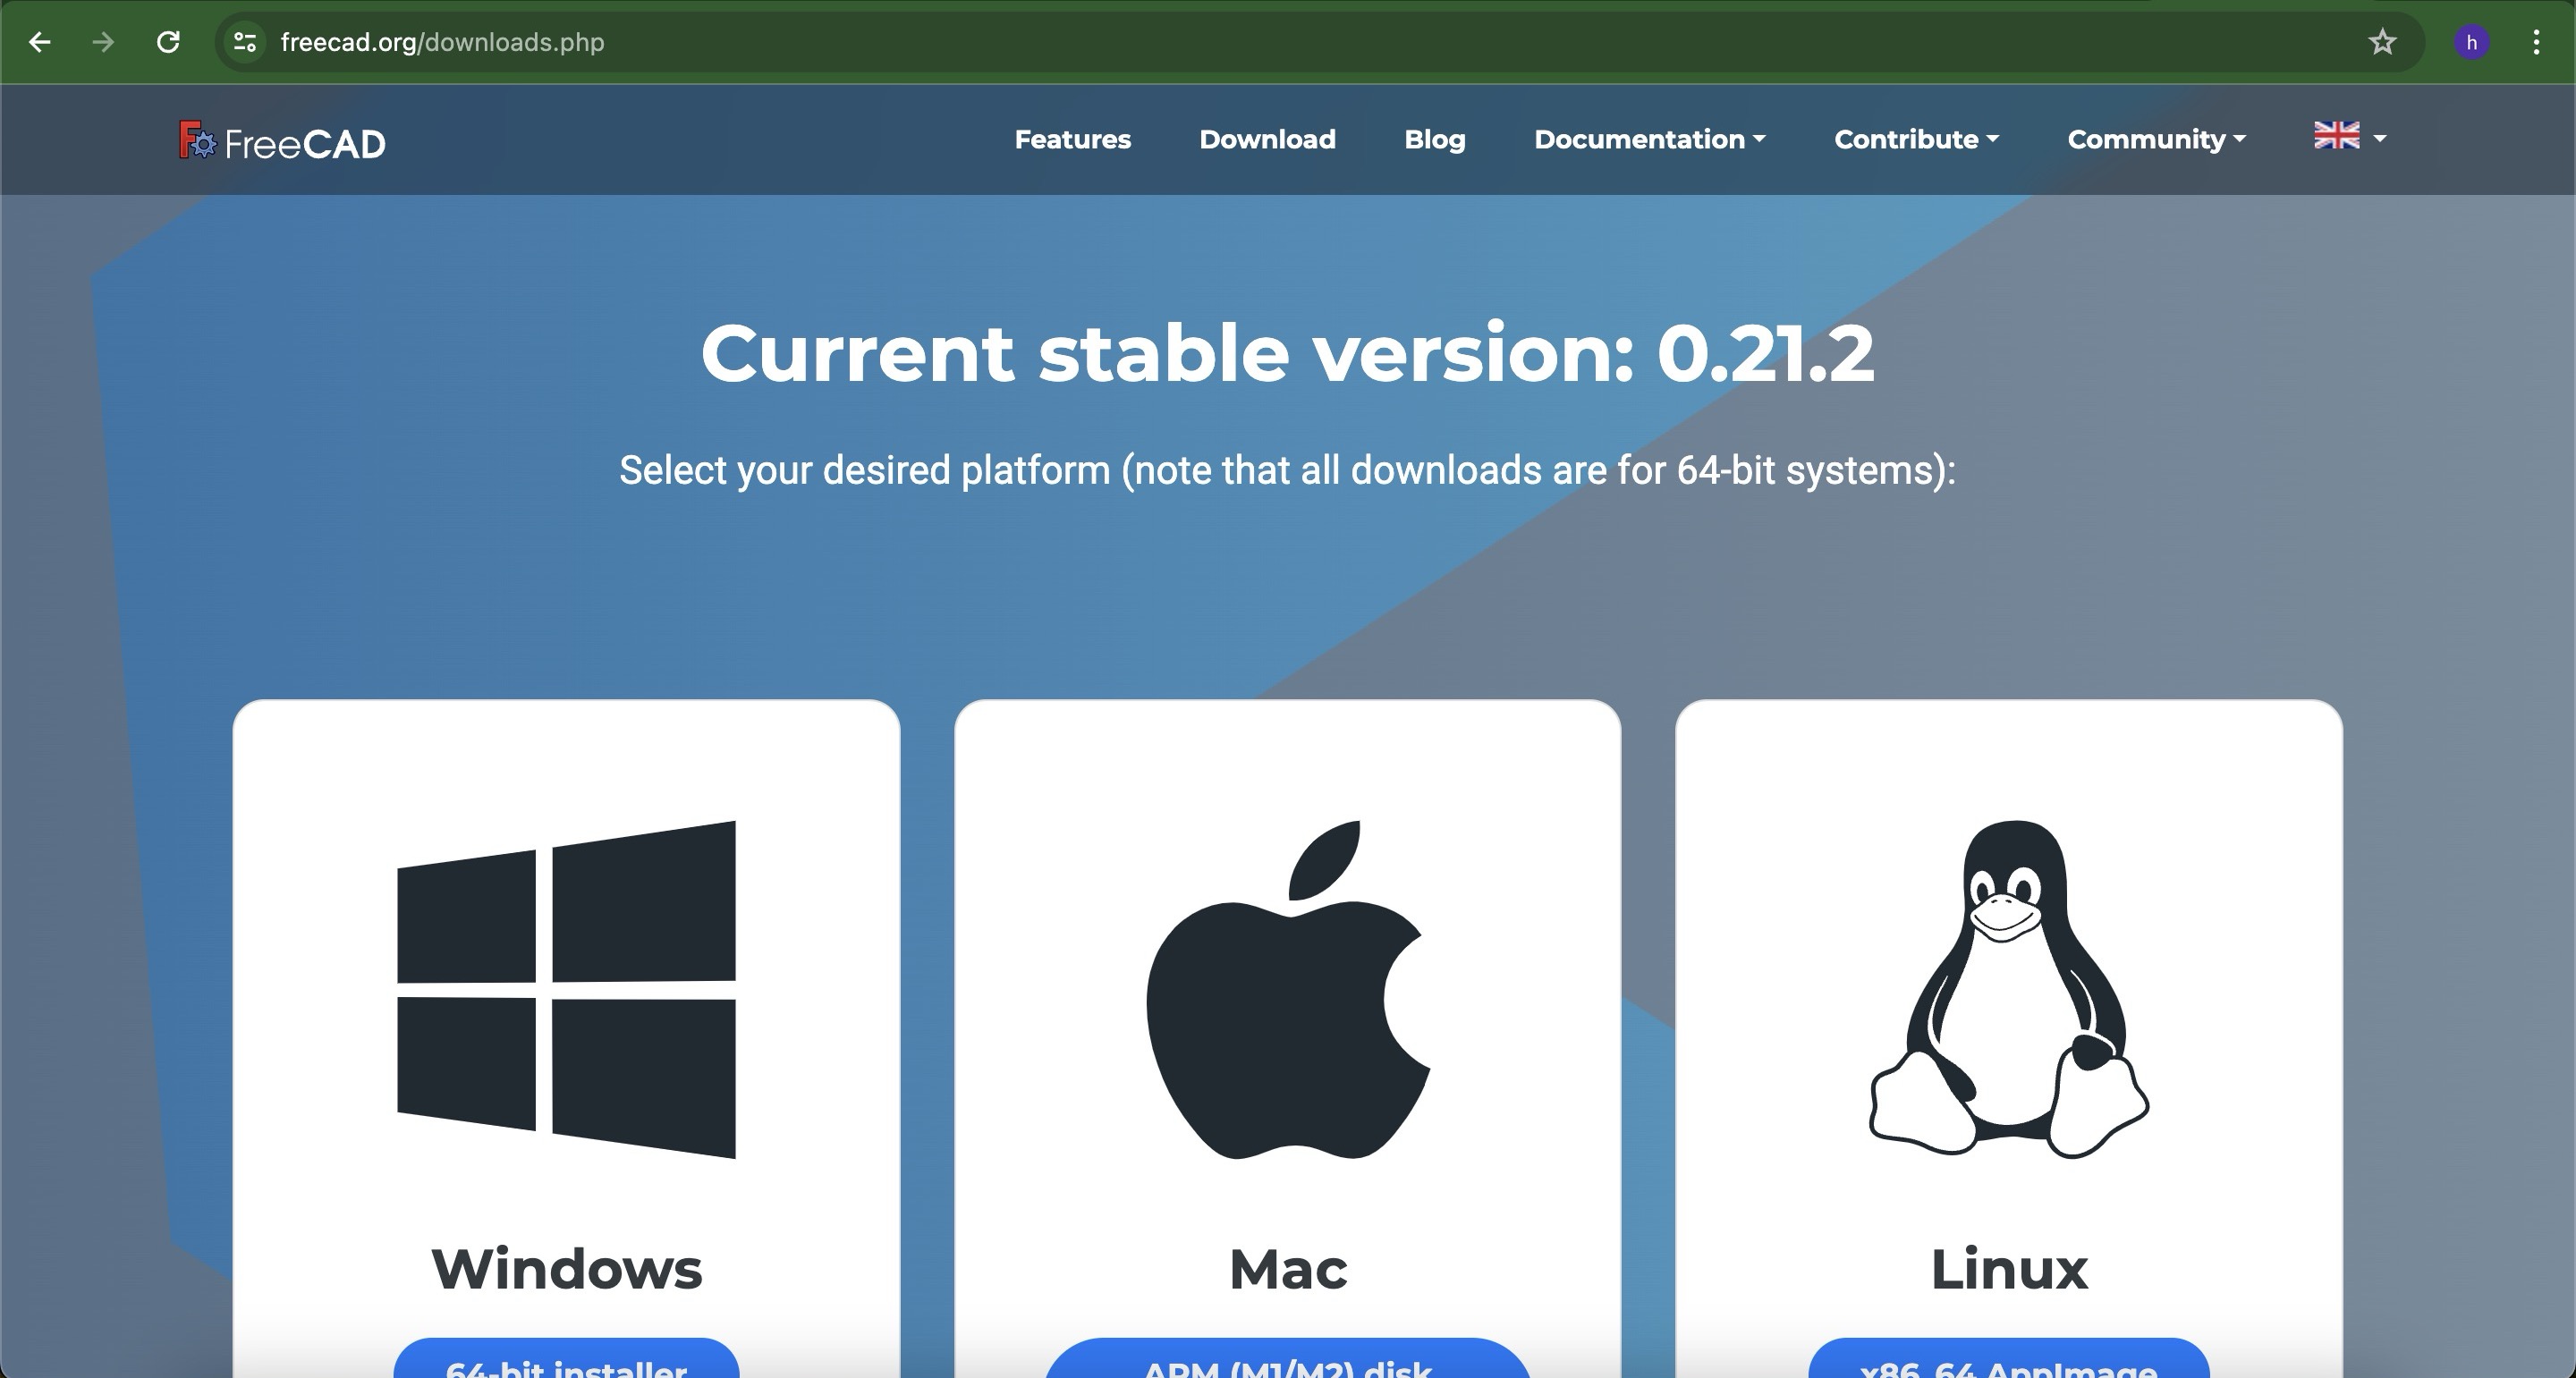
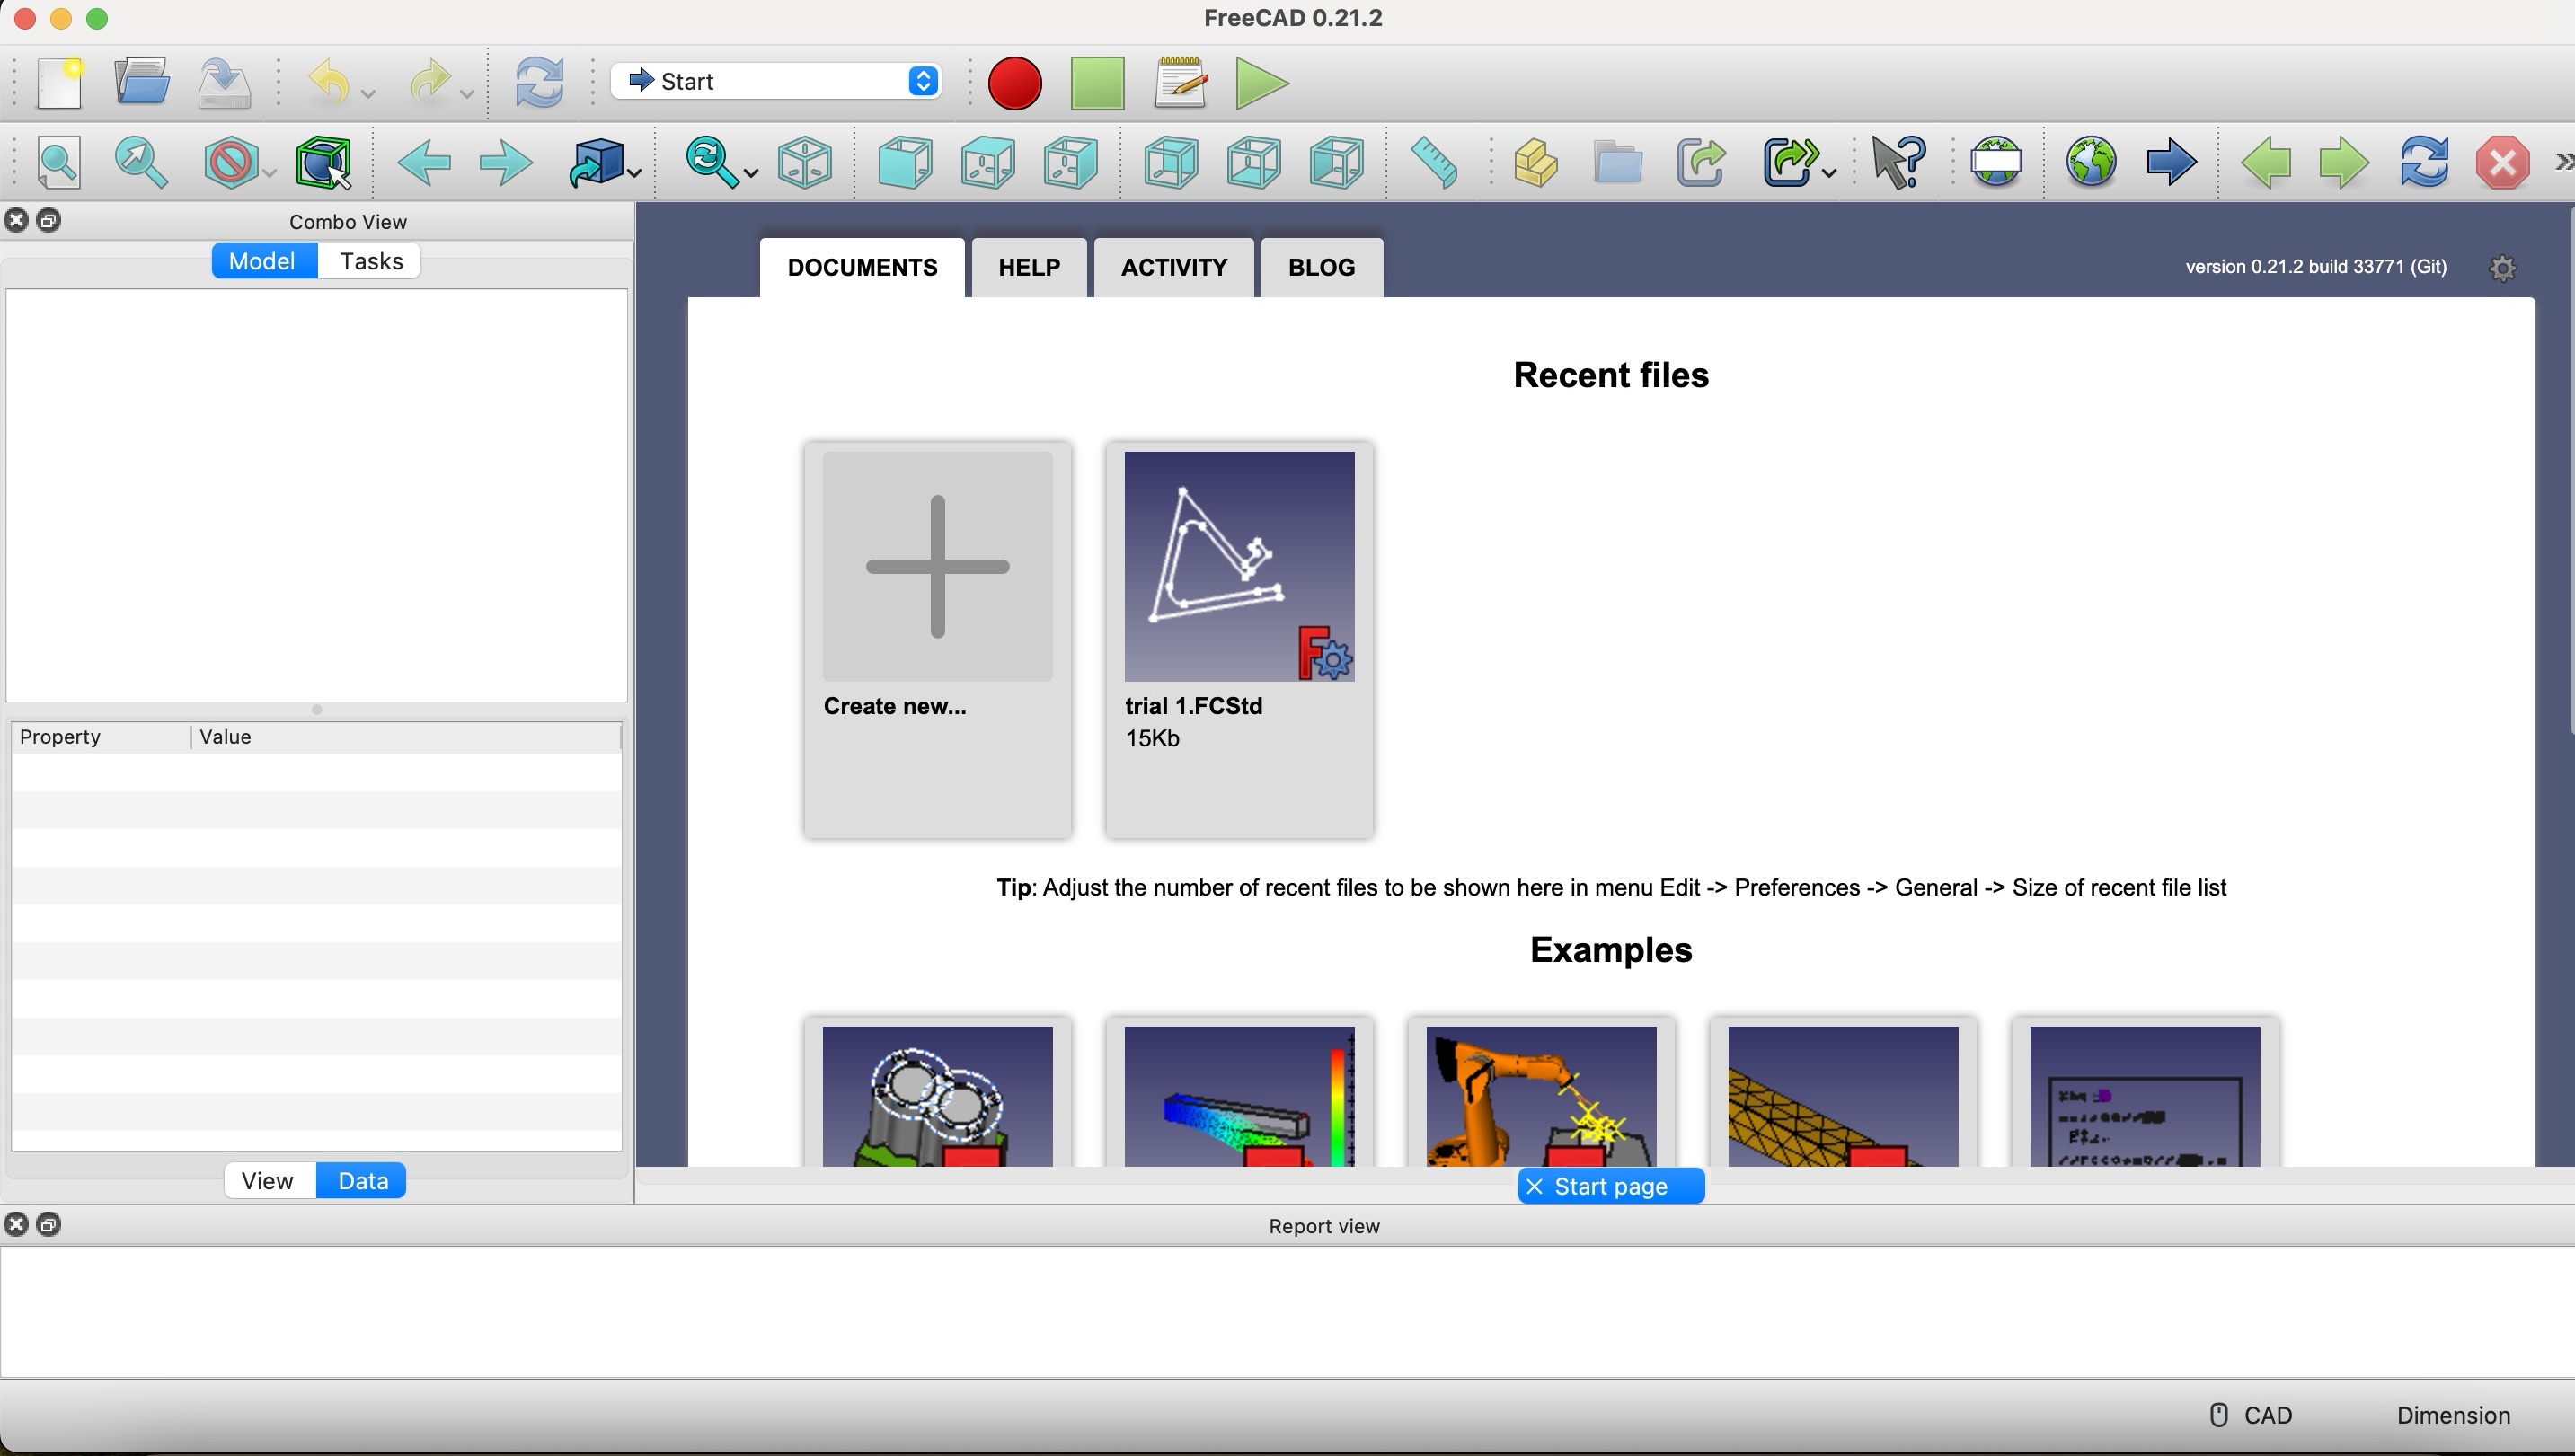
The interface was very new for me and it was very confusing, I reffered some youtube tutorial to know more about the software but all the tutorials which I got was not updated and had a old interface, and fab's teaching video was also not updated after 2015, so I faced challenged there, I started following this tutorial for making phone holder.
youtube tutorials
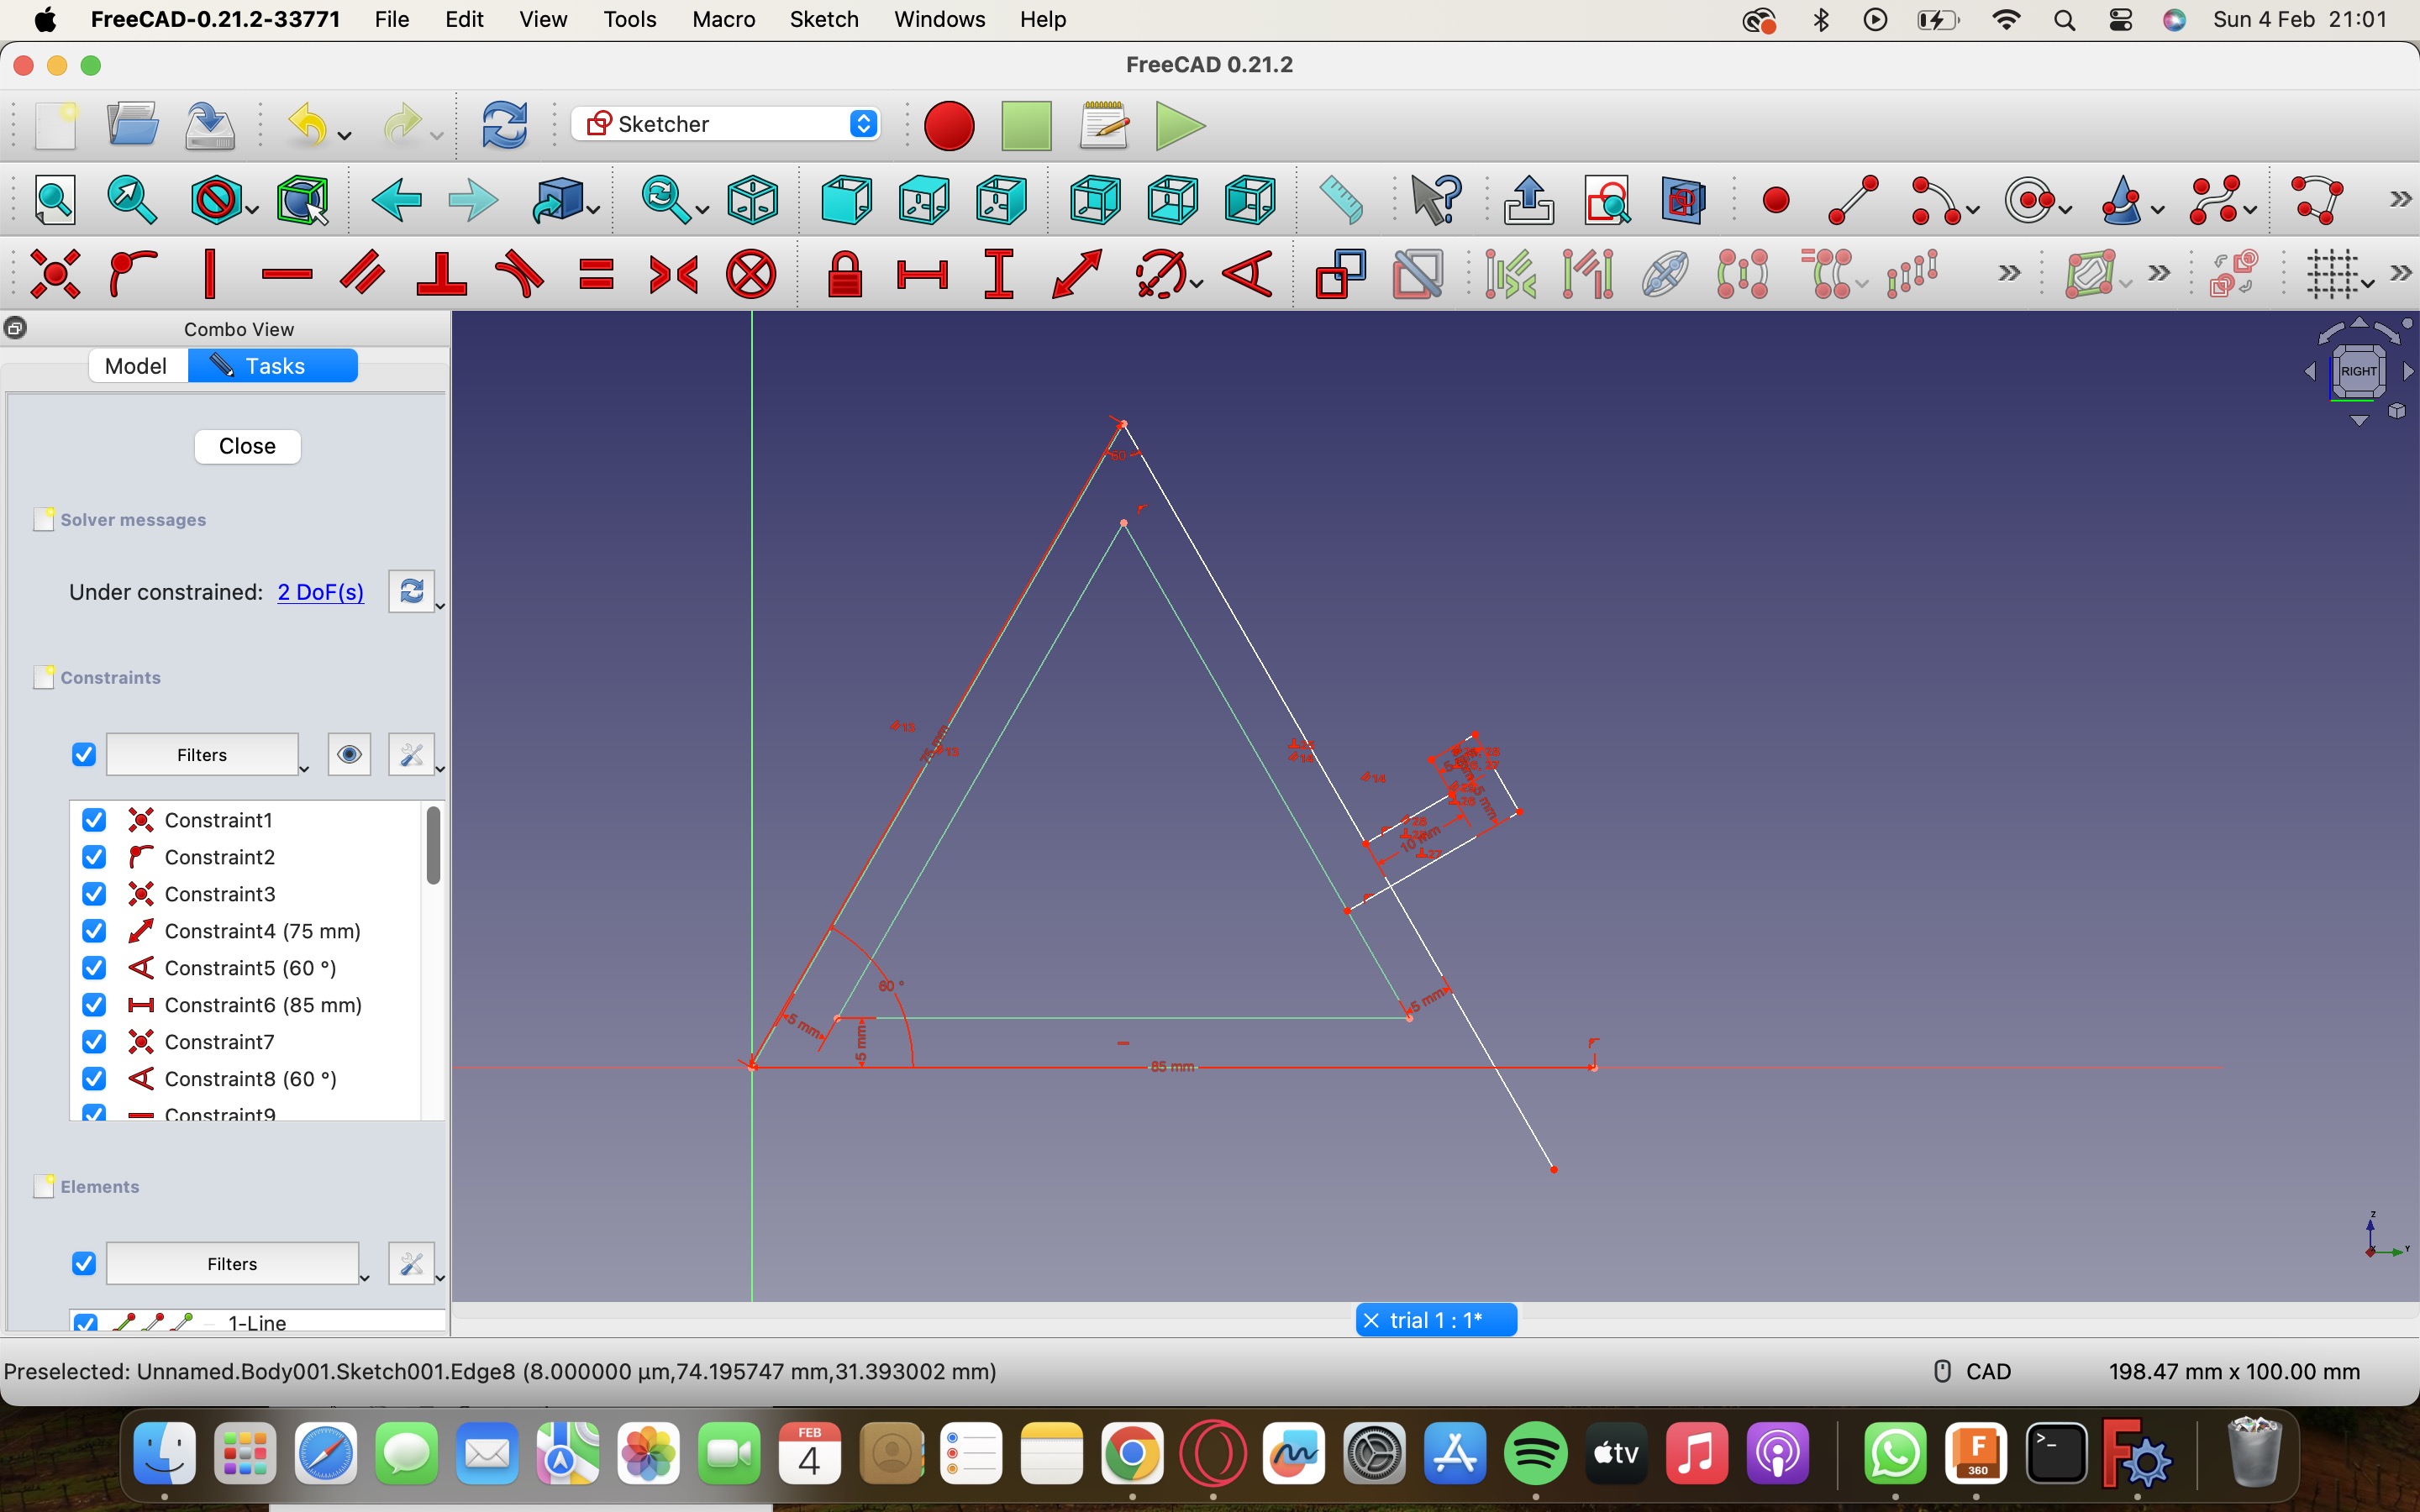
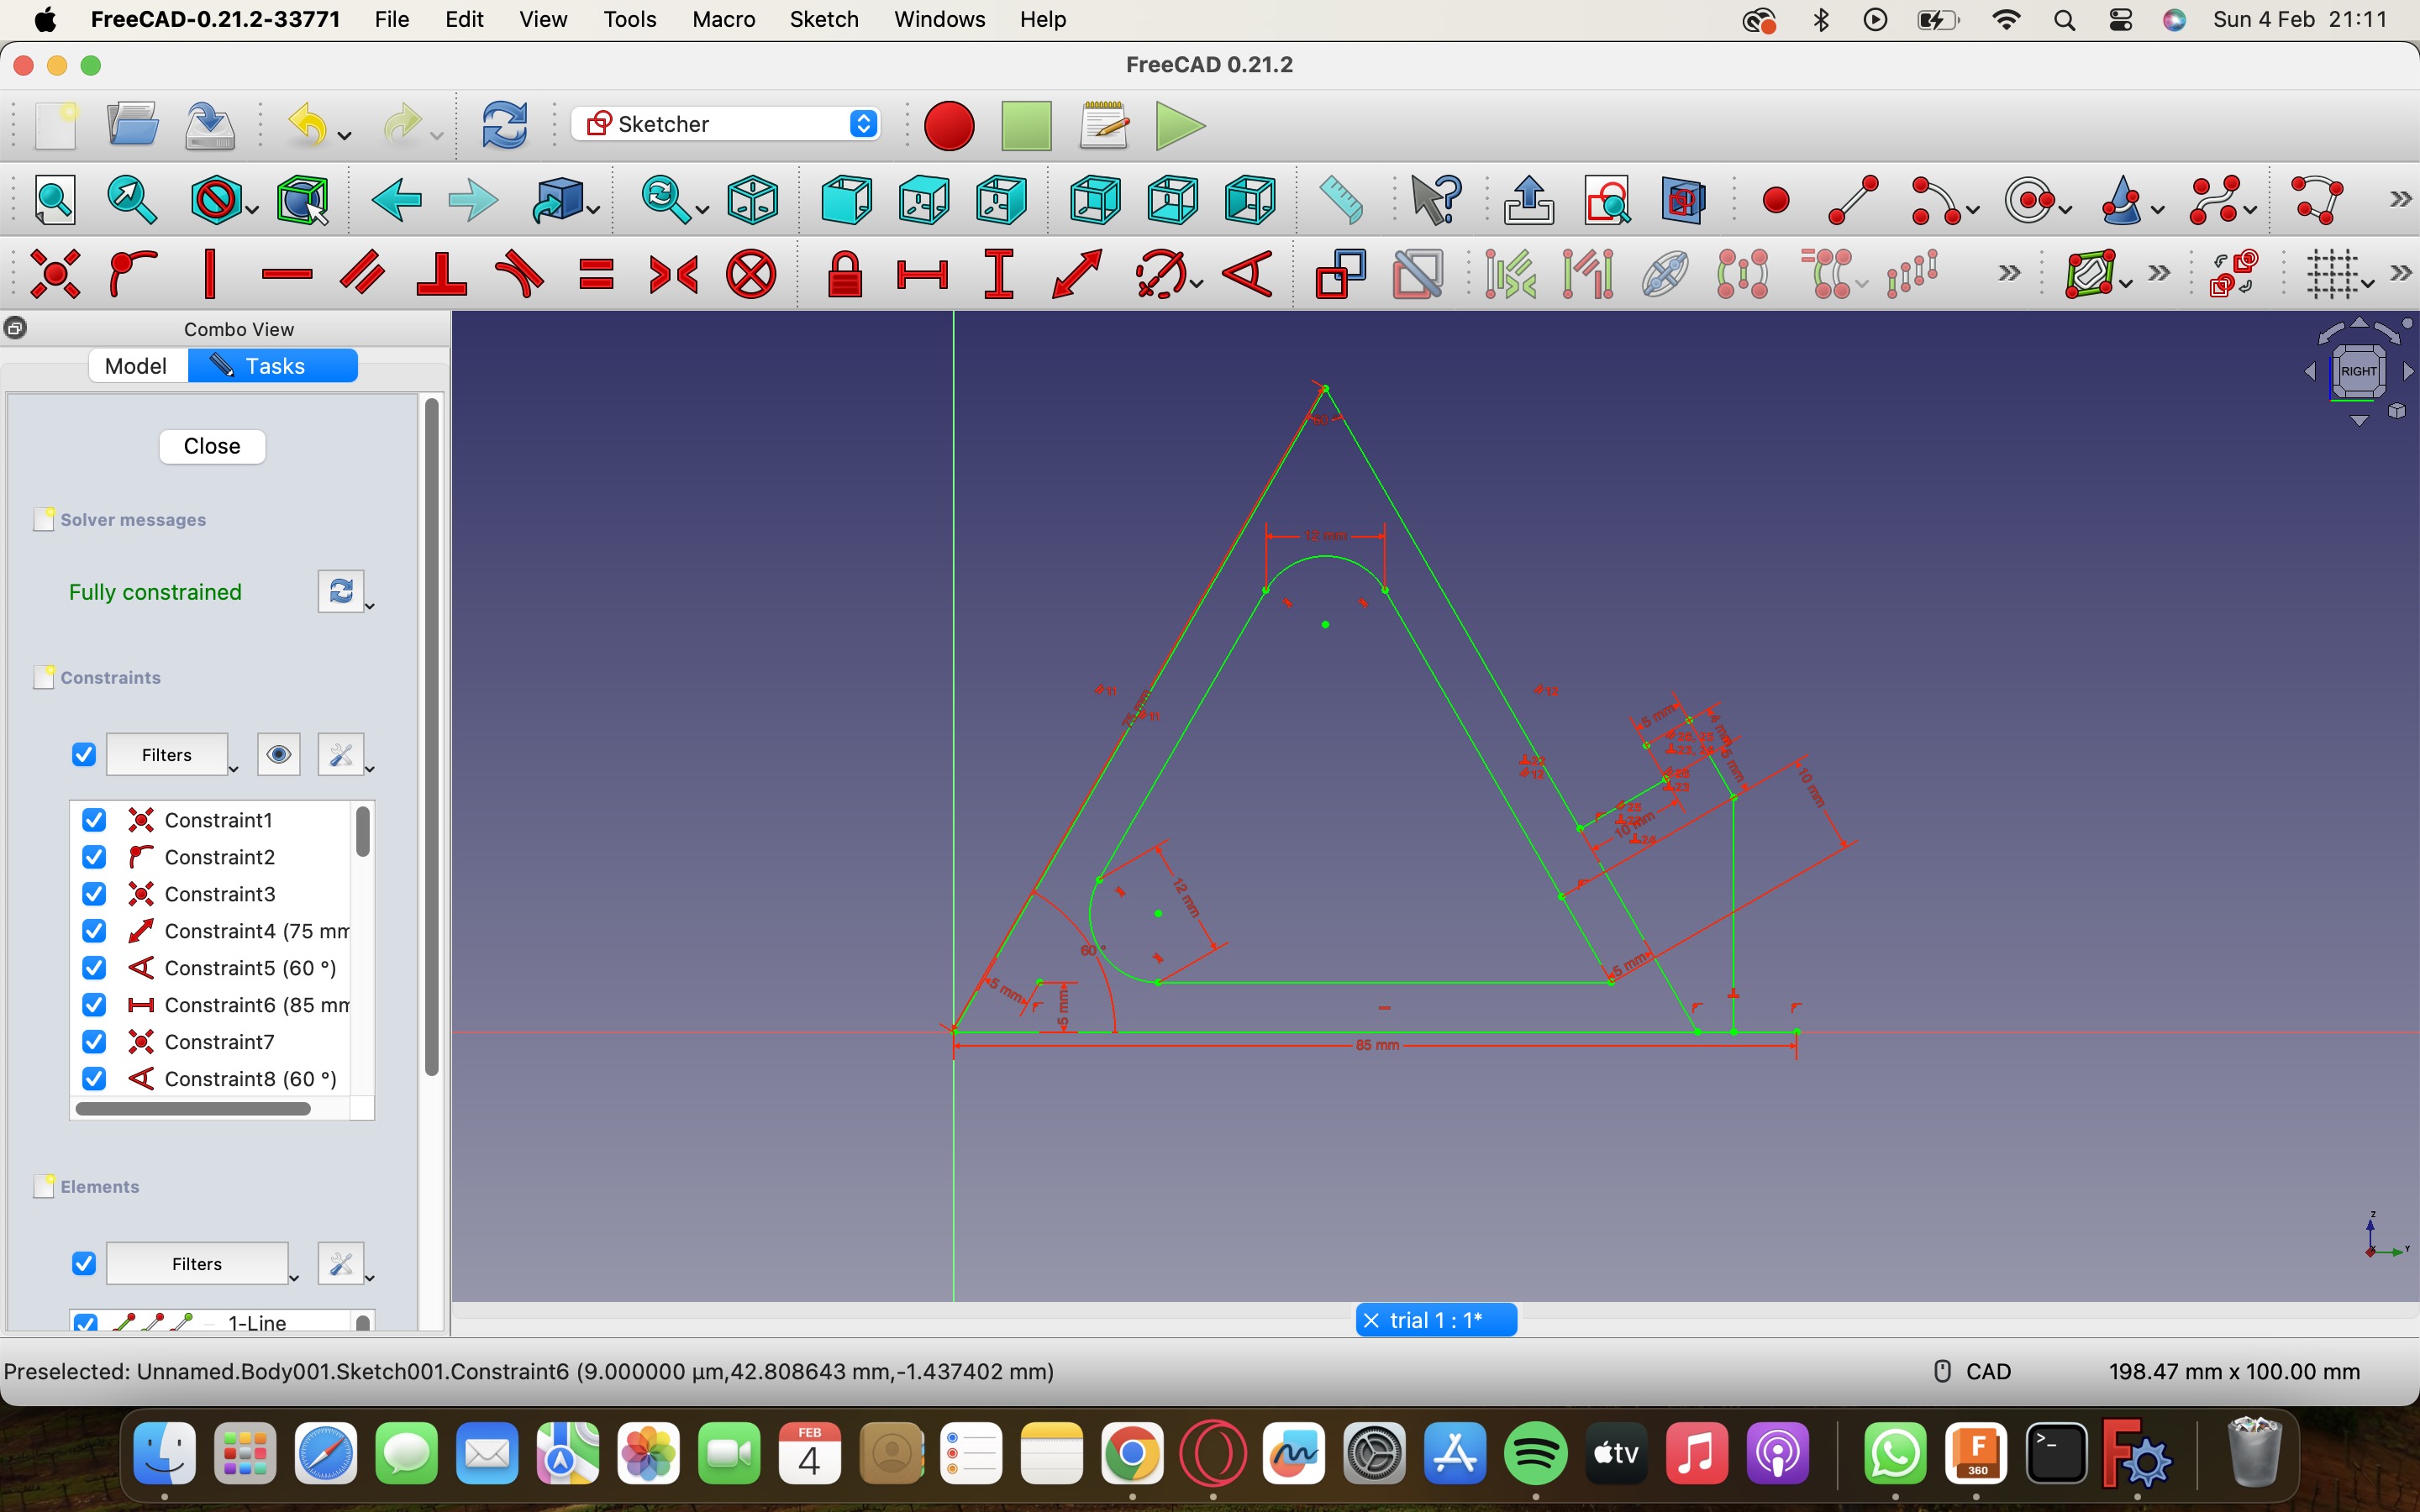
I used line tool and made the lines, to give it an angle of 60 degree I selected the angle dimension tool.
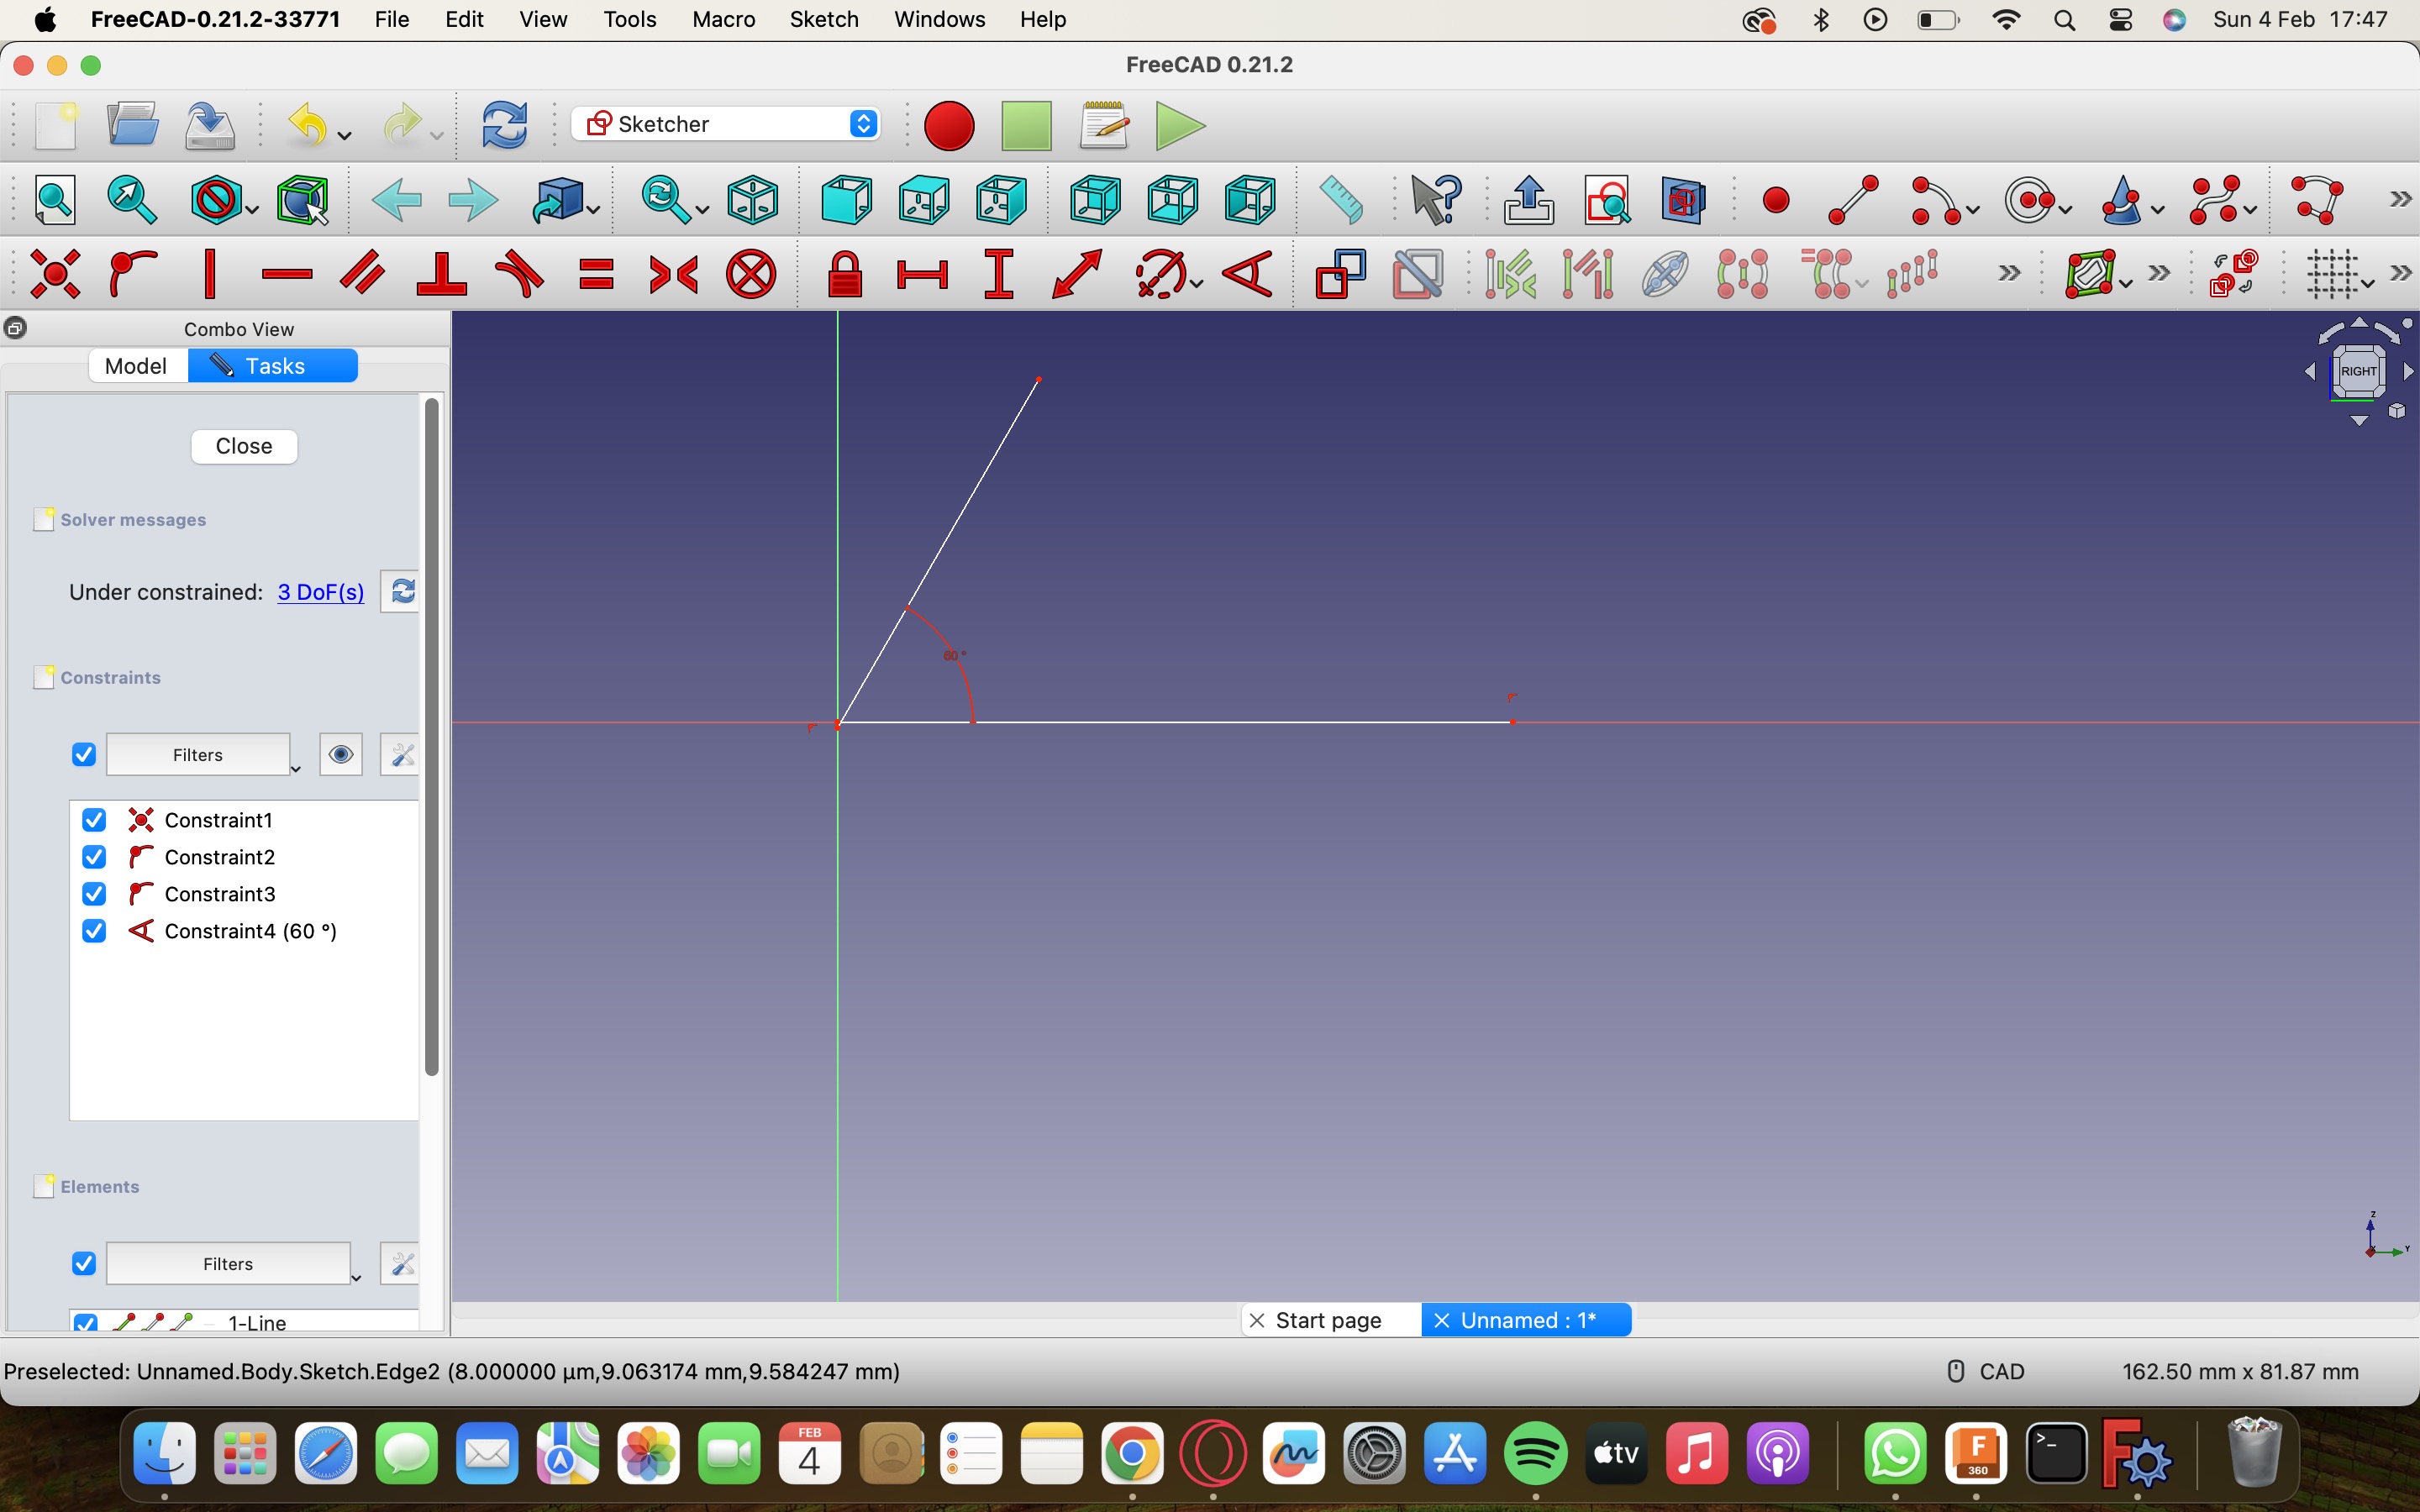
Using the dimension tool I started giving dimensions and here I realised that the dimension tools were different for horizontal, vertical and angle dimensions, so we need to select the tool according to what line we are doing the dimension.Once the dimension was done I made the 3rd line of the triangle but I didn't completed the triangle as I was looking for a phone holder so I went with that design.
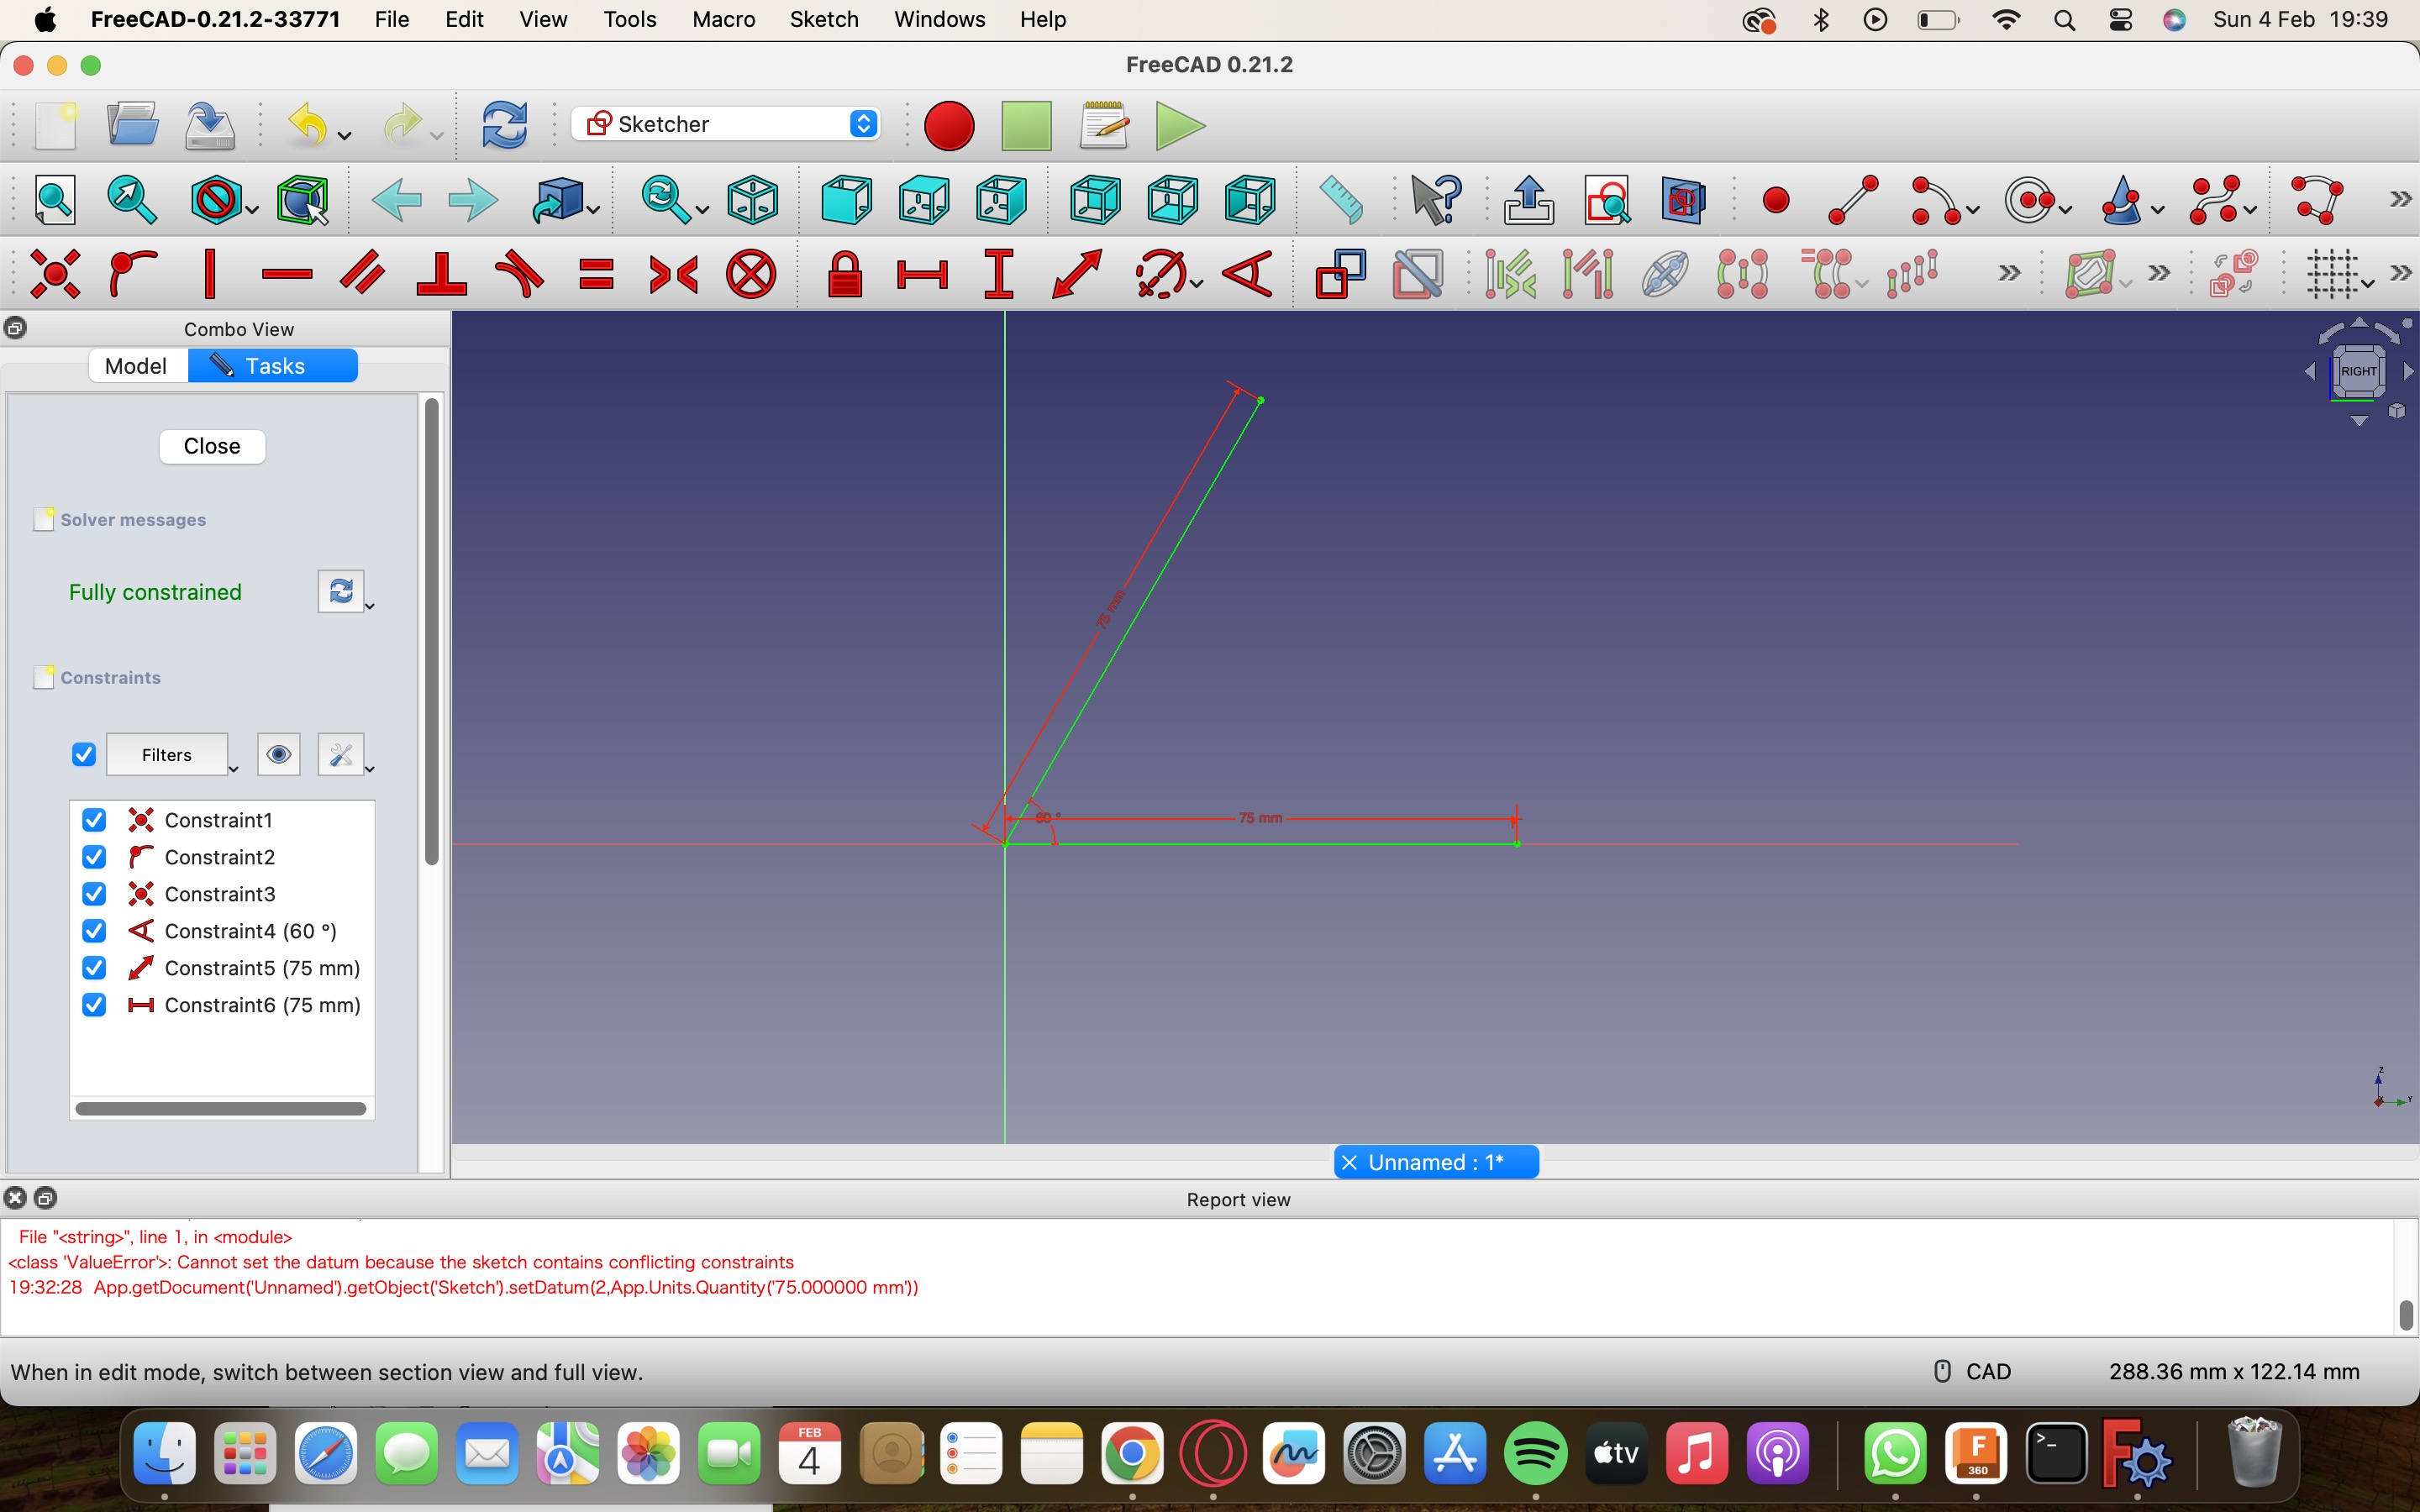
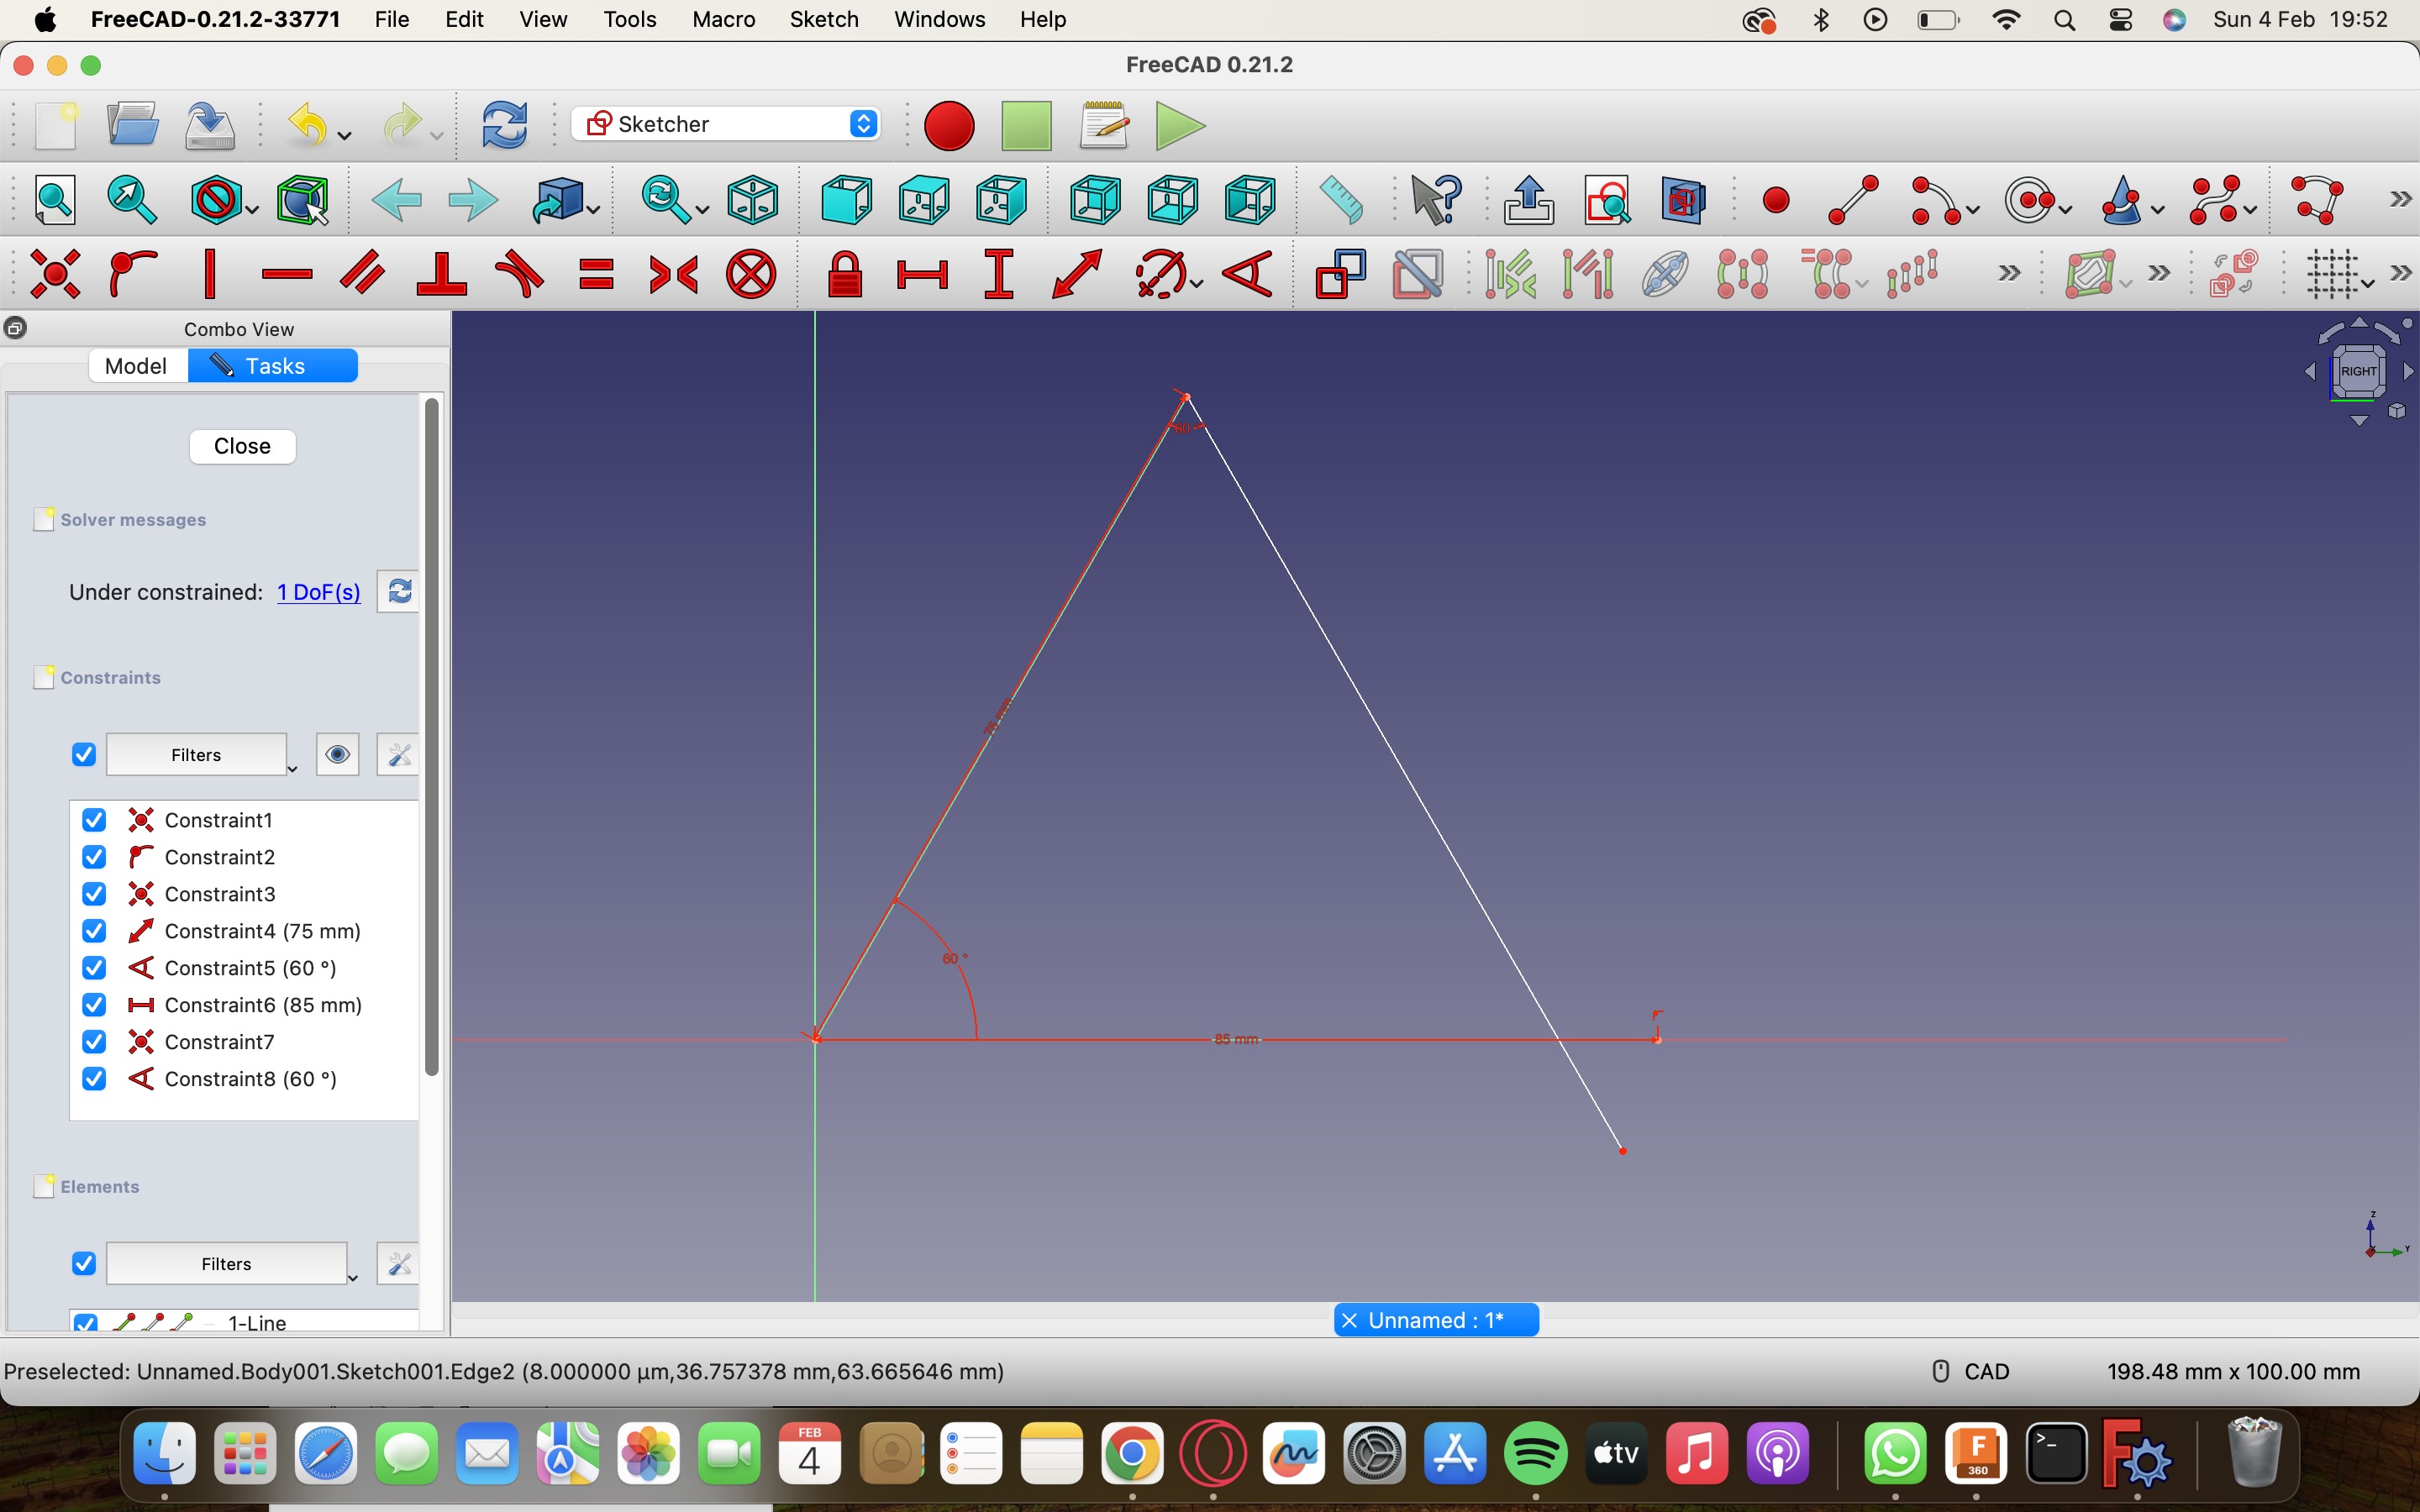
I created the inner triangle by line tool again and gave bothbthe triangles parallel constraints and dimension so that it is perfectly alligned in the centre.

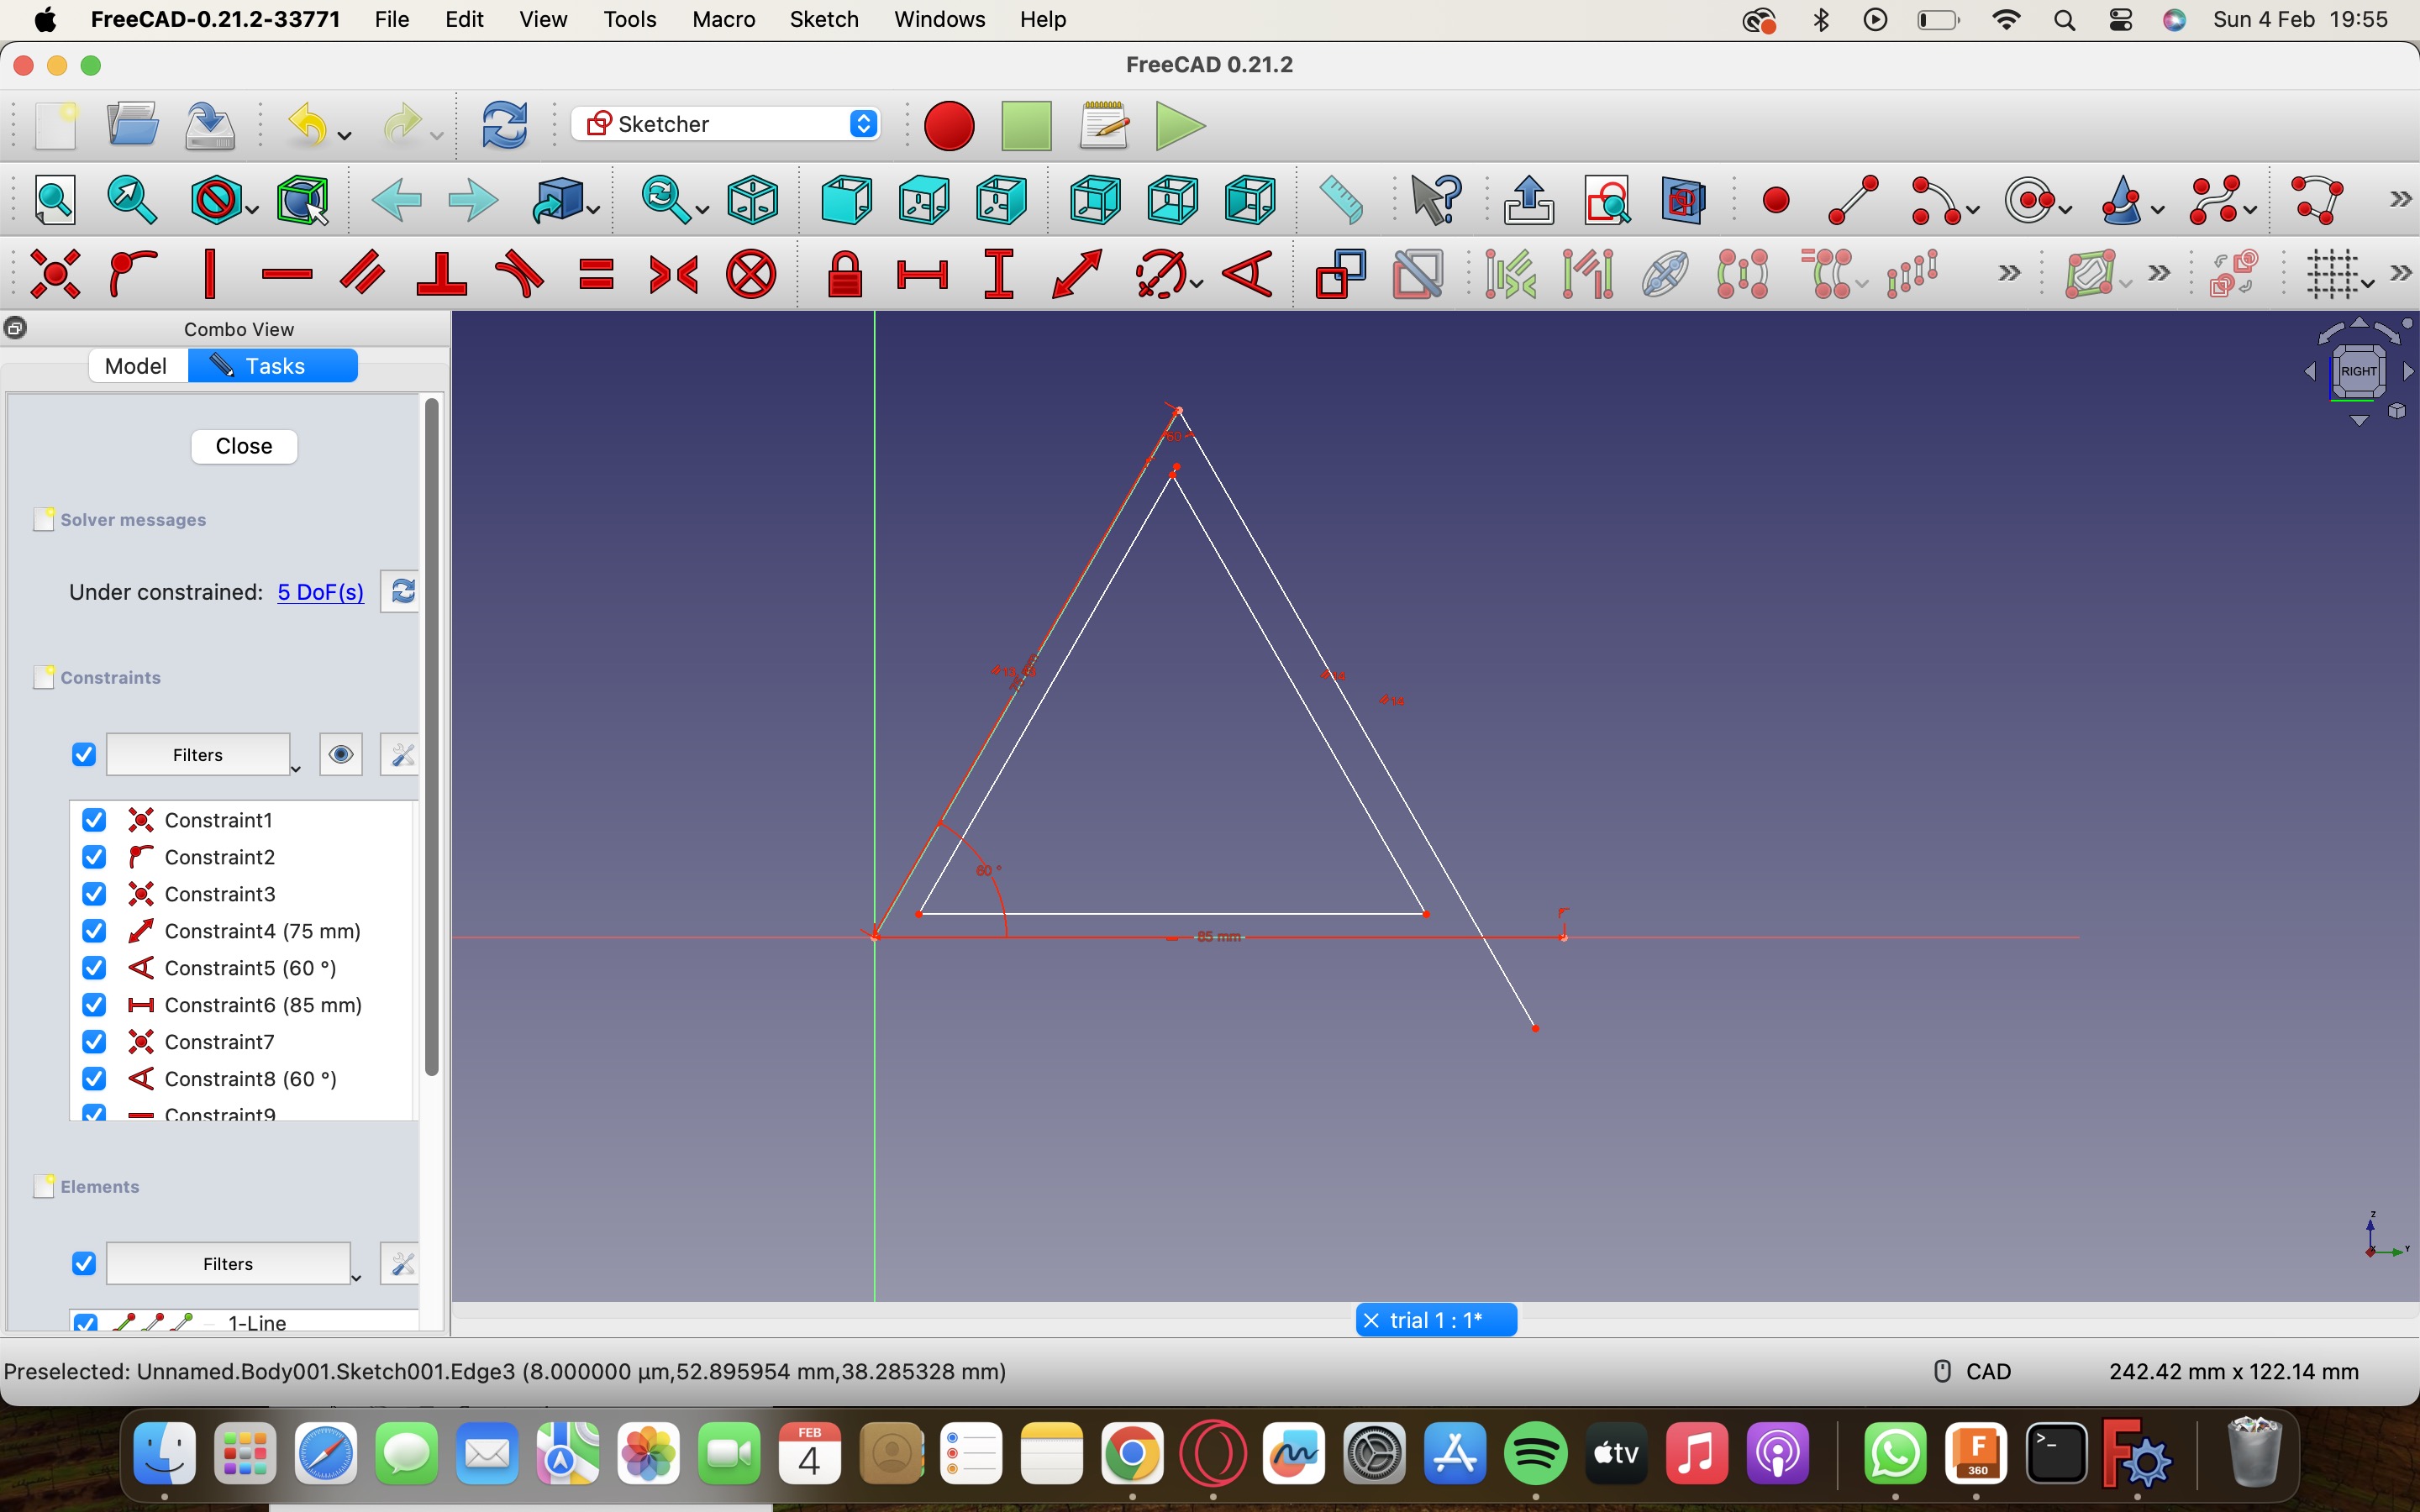
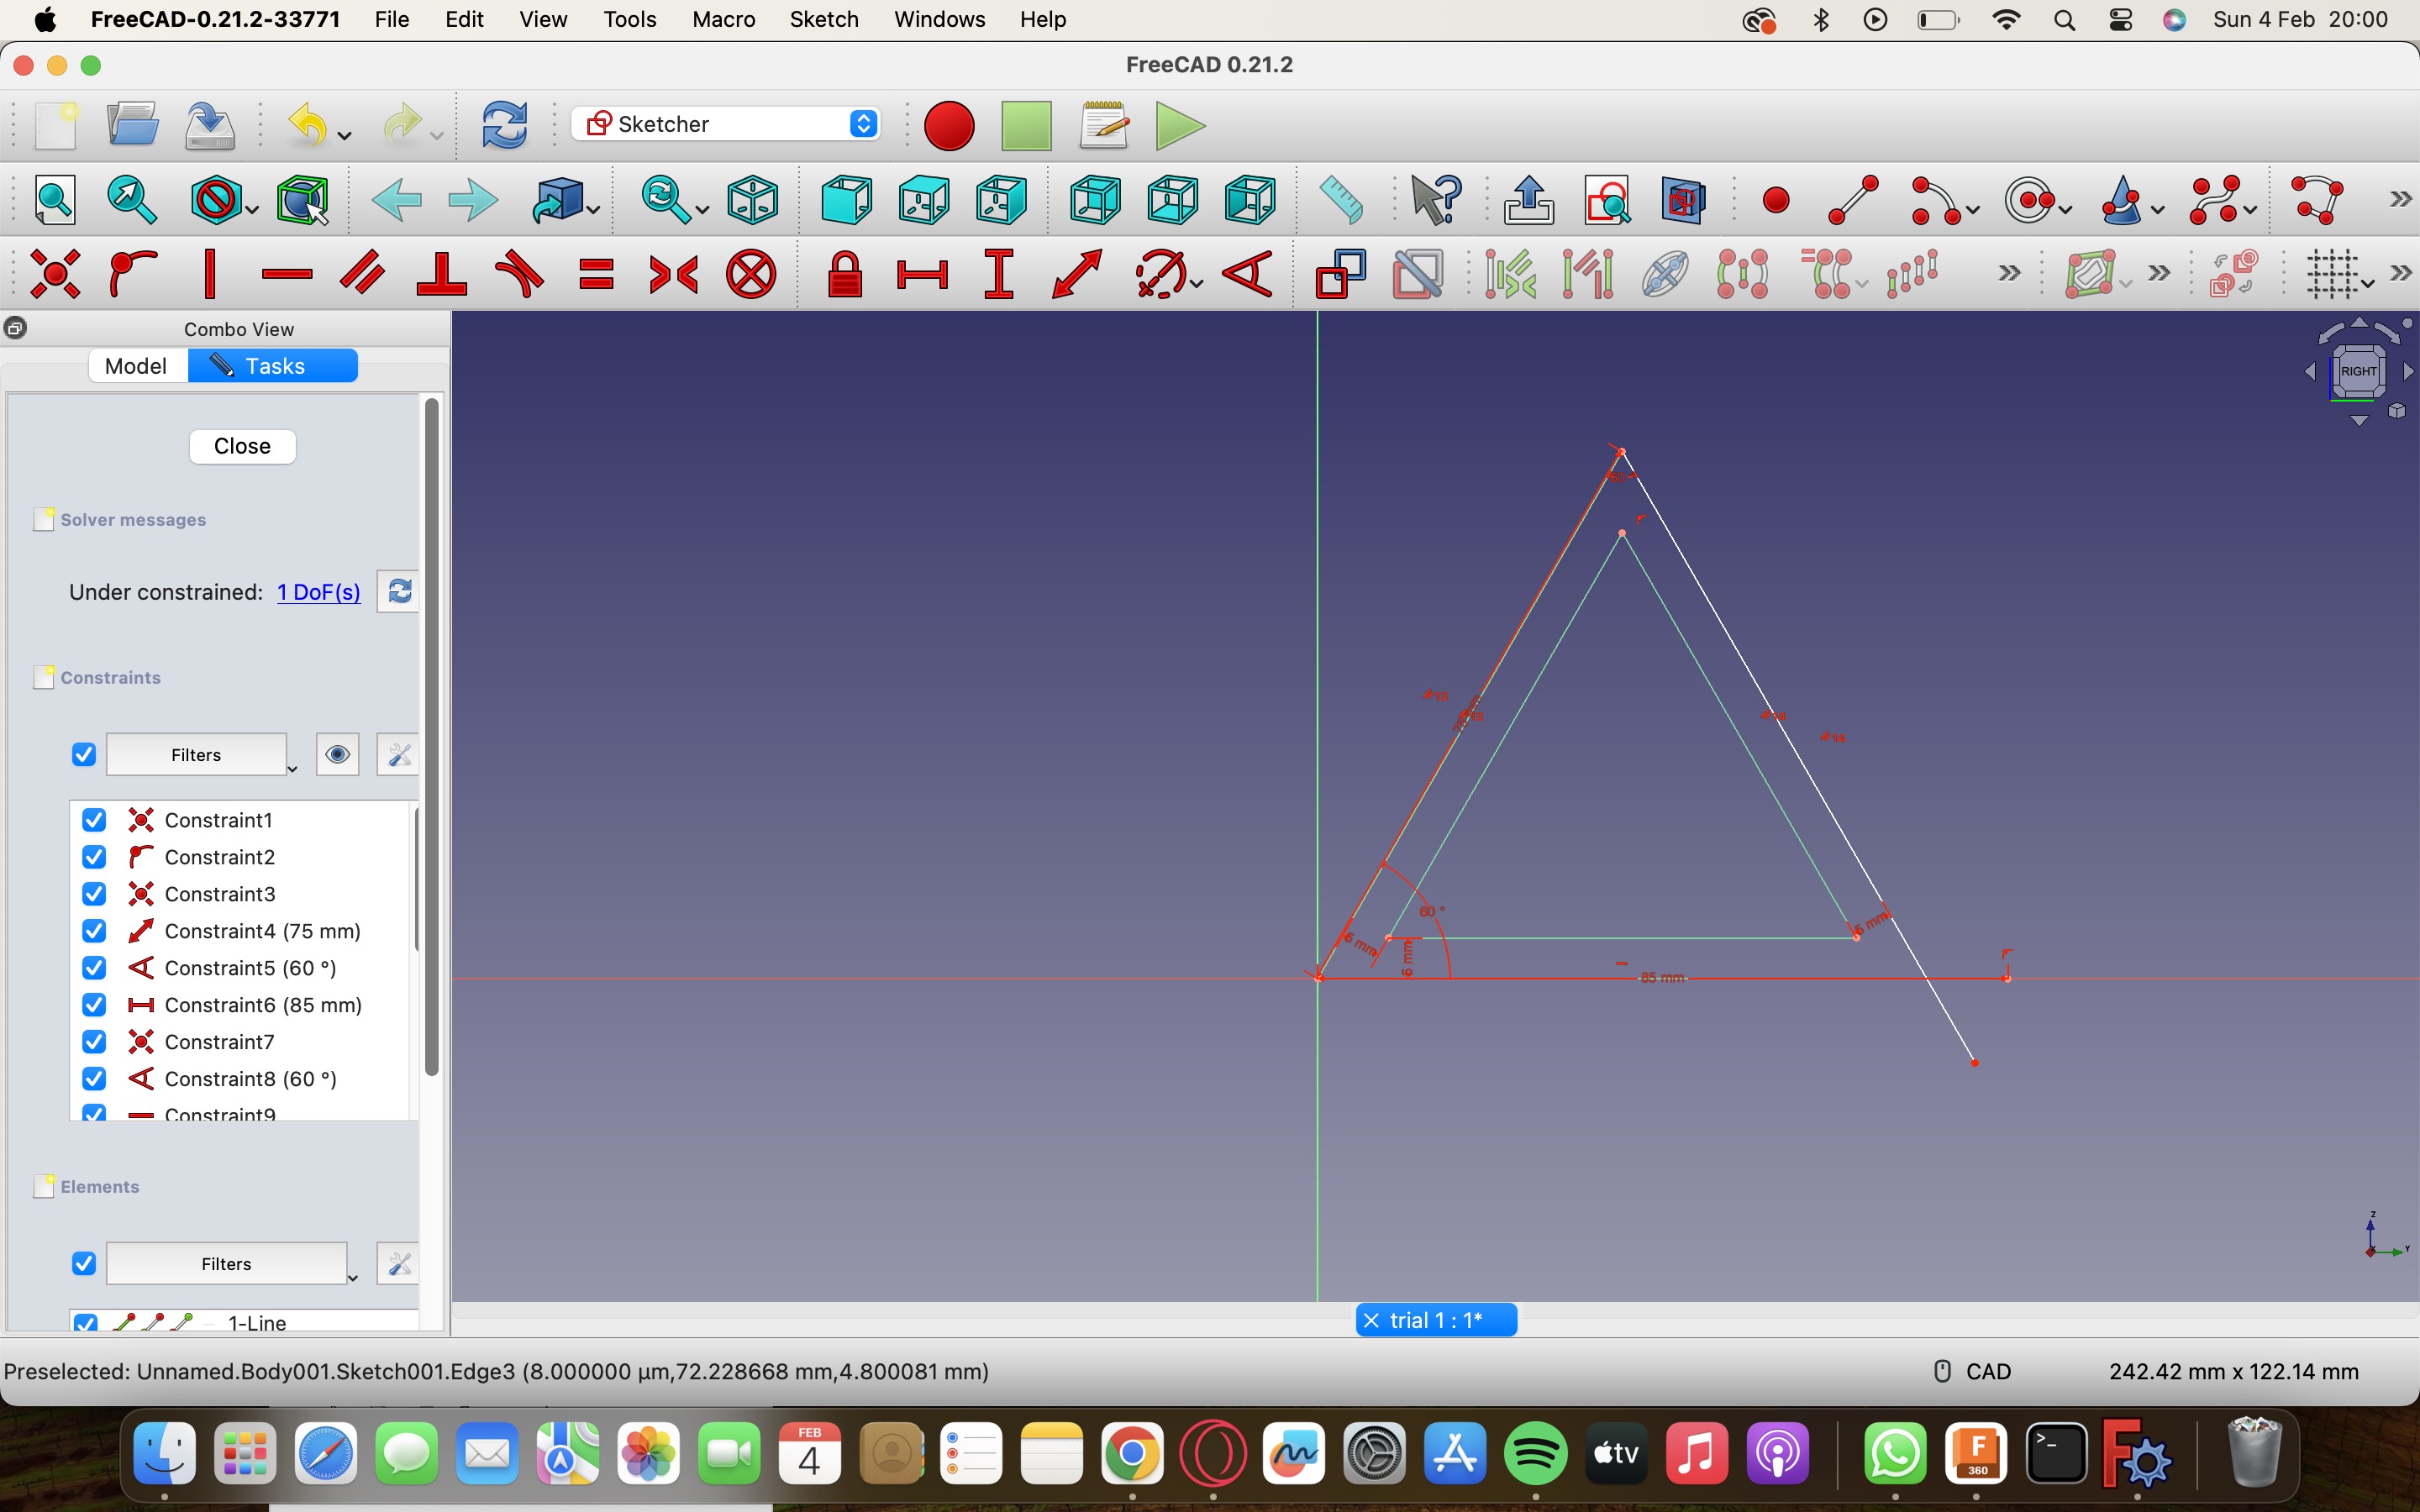
Similarly I made the side part of the holder and gave it perpendicular constraints and then gave it dimensions.

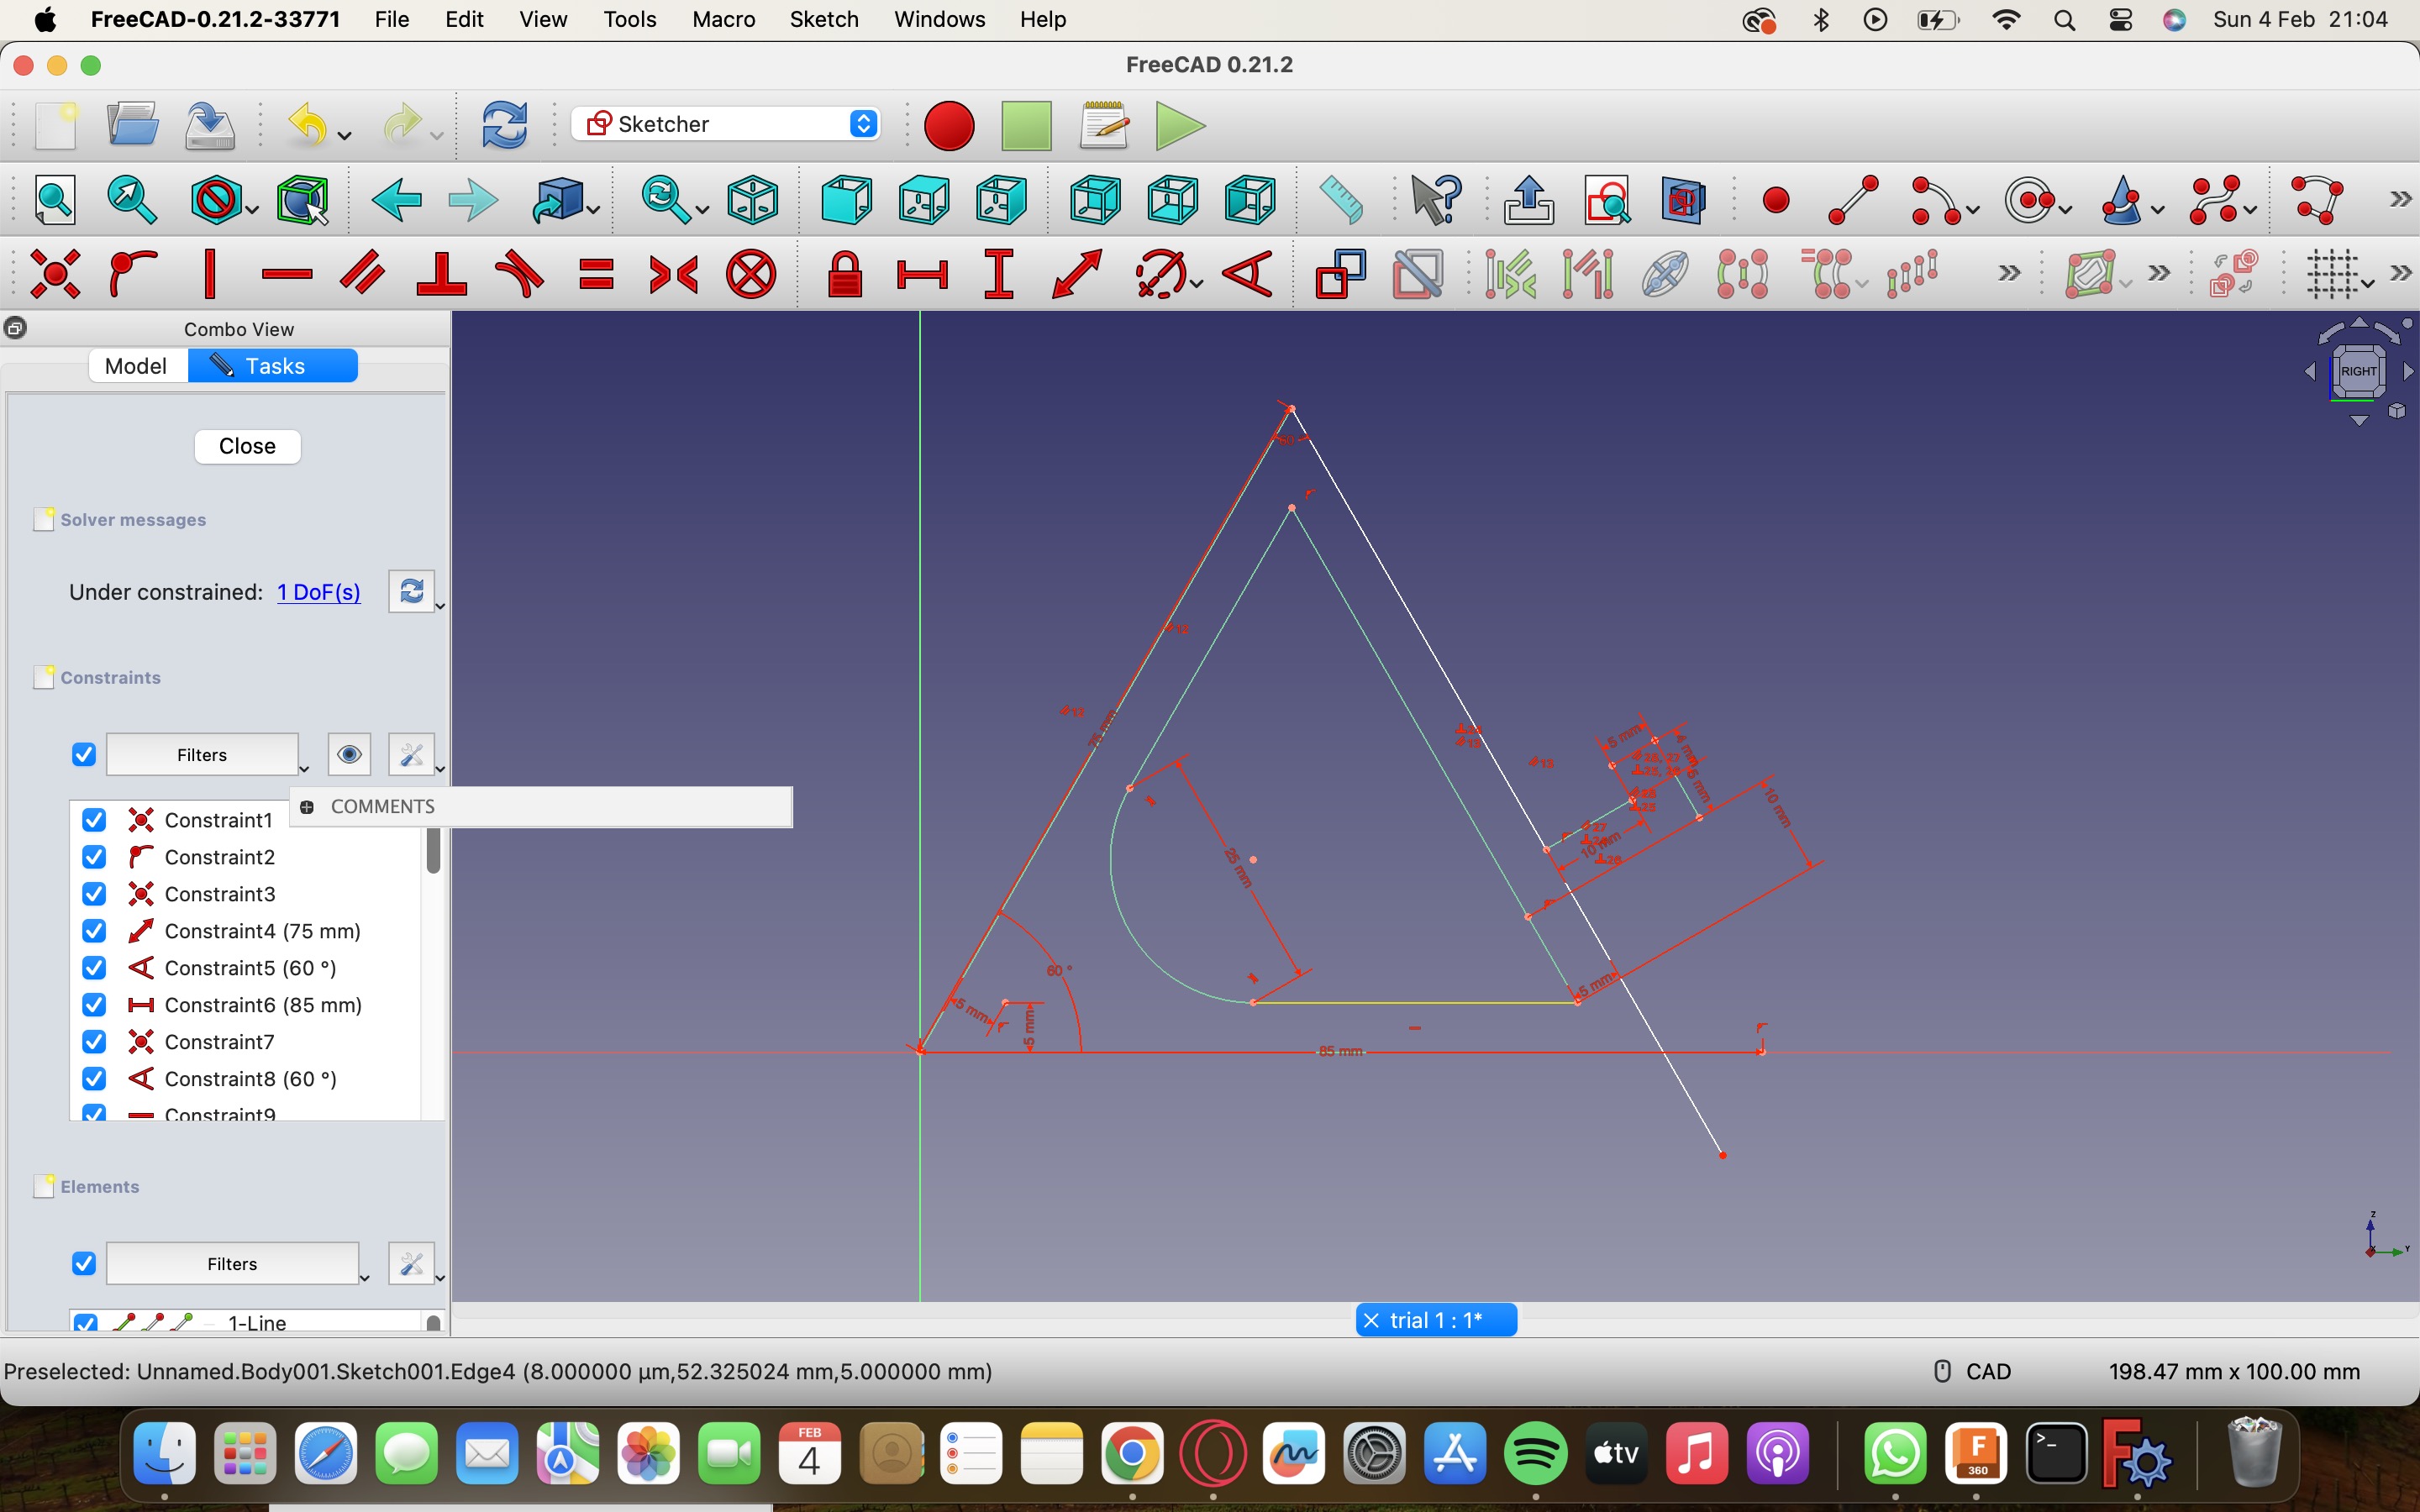
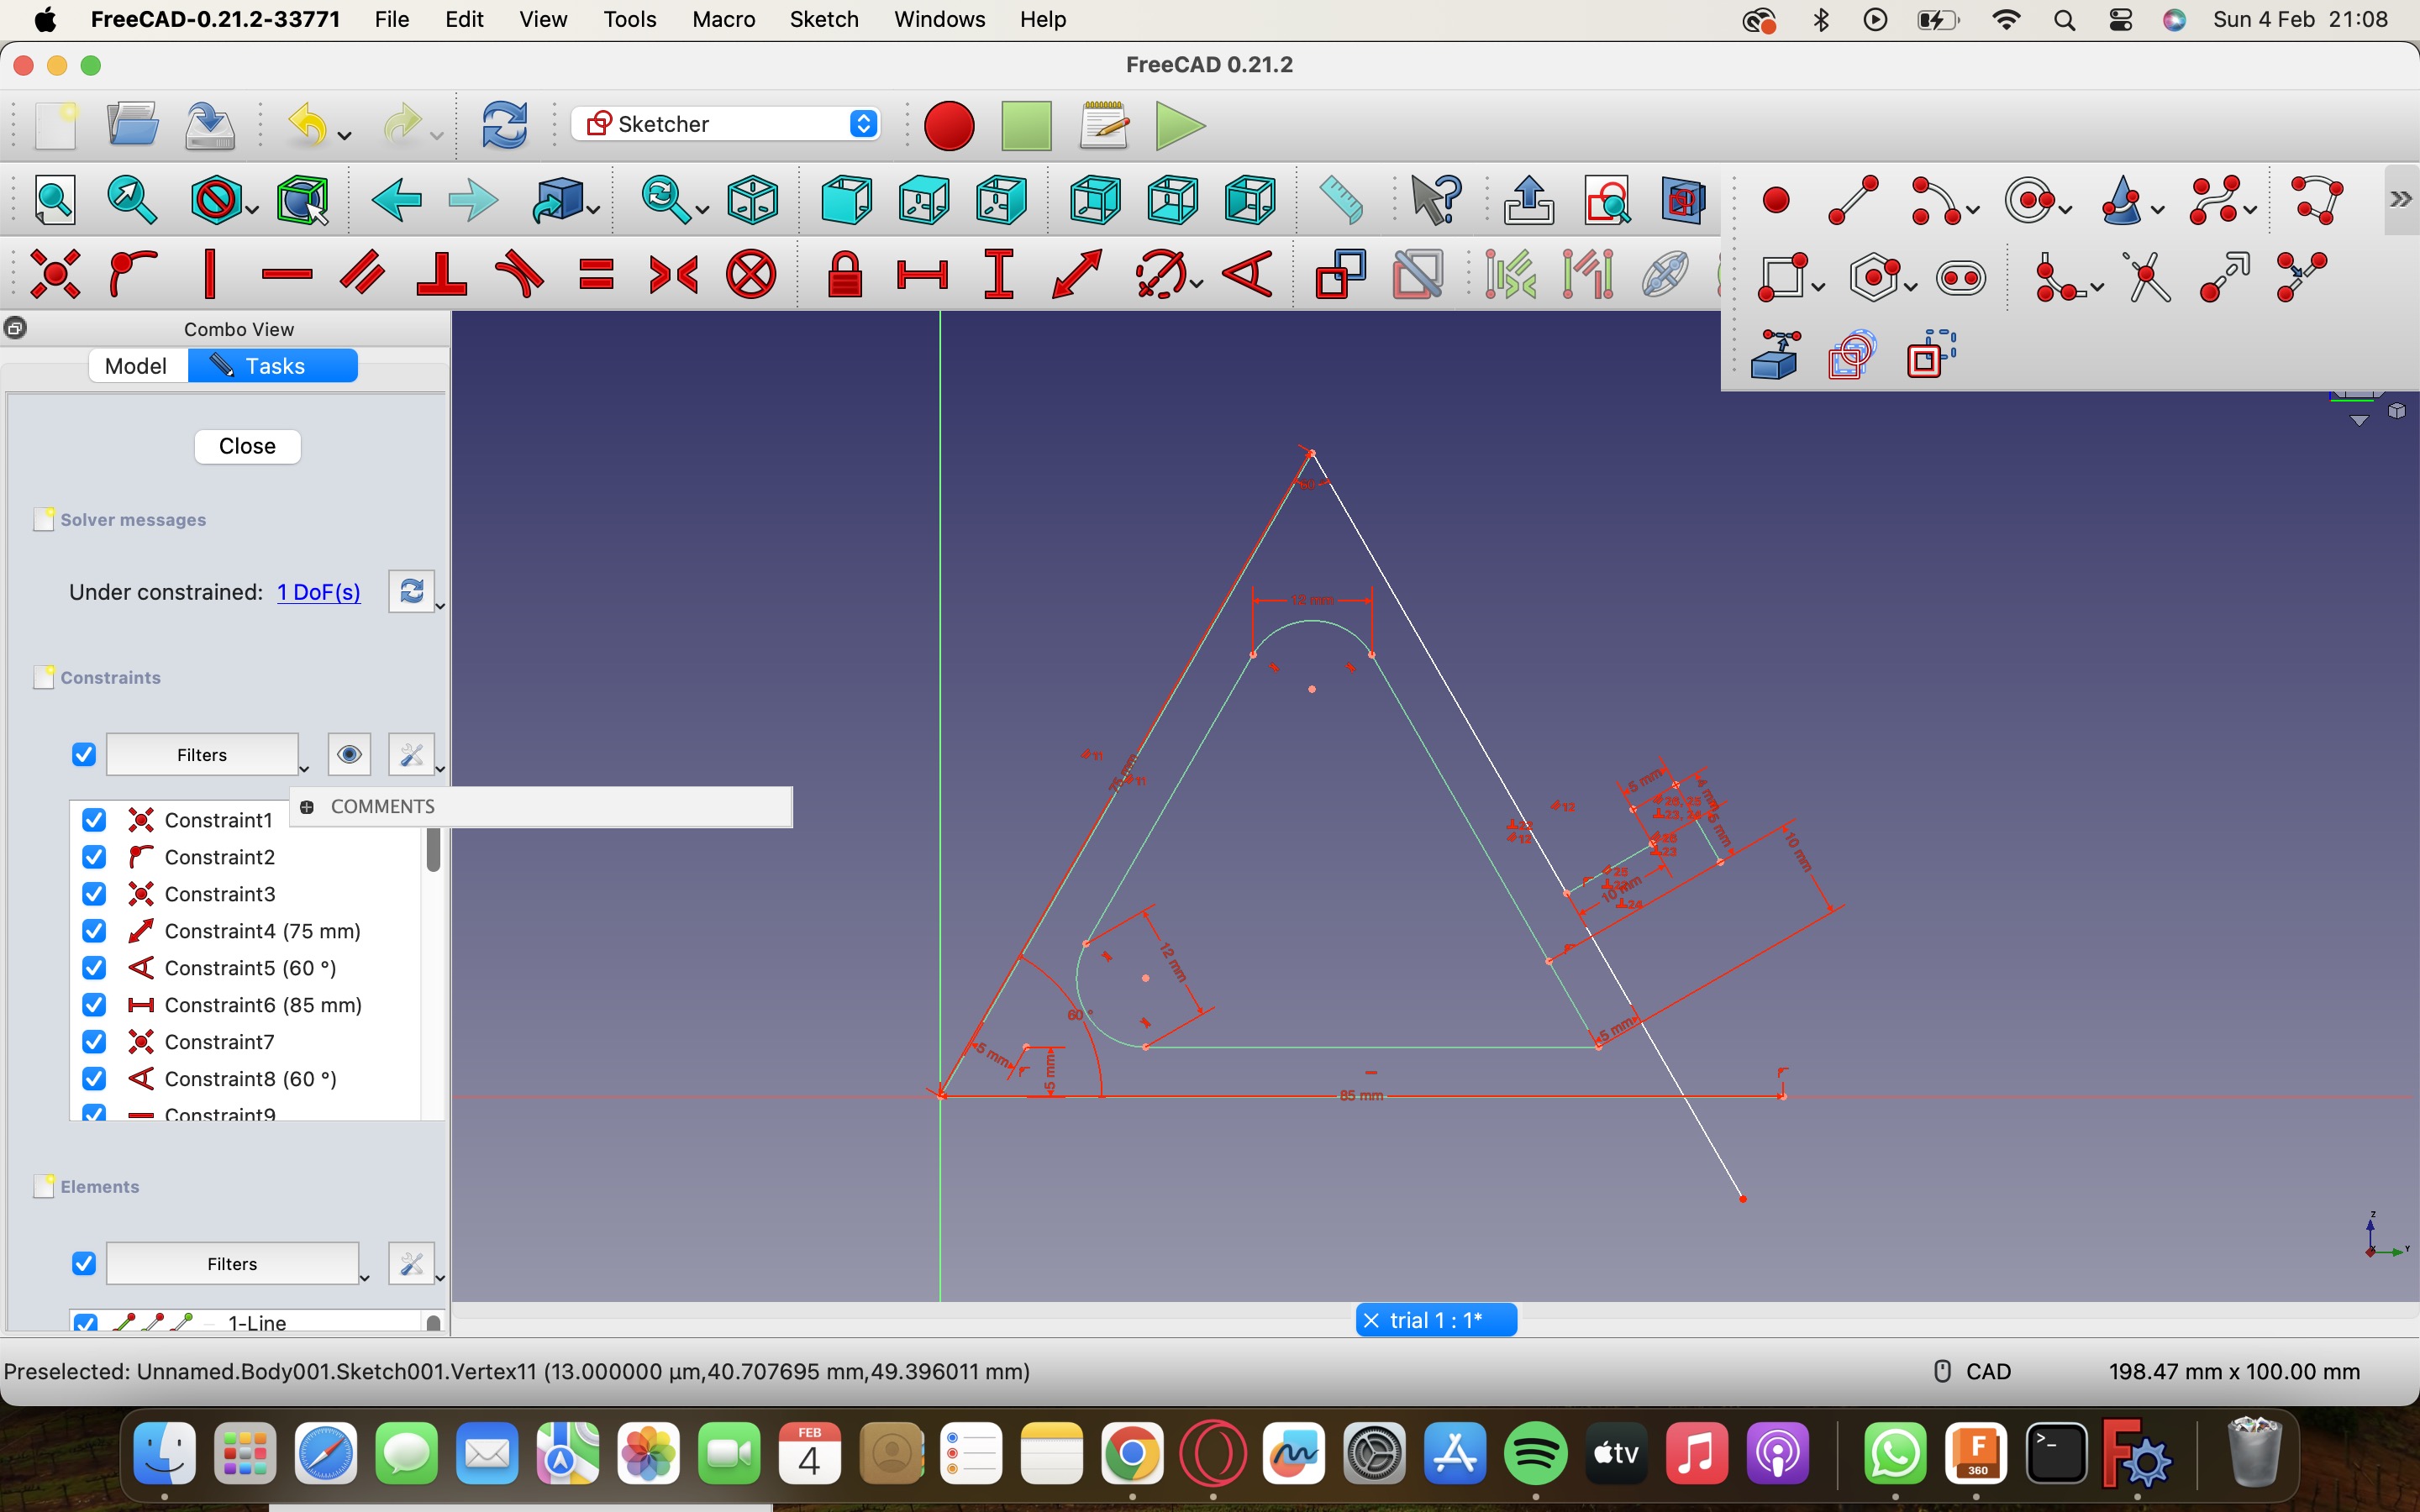
To give it asmooth curved surface I gave it a fillet on the inner triangle and again gave it constraint.
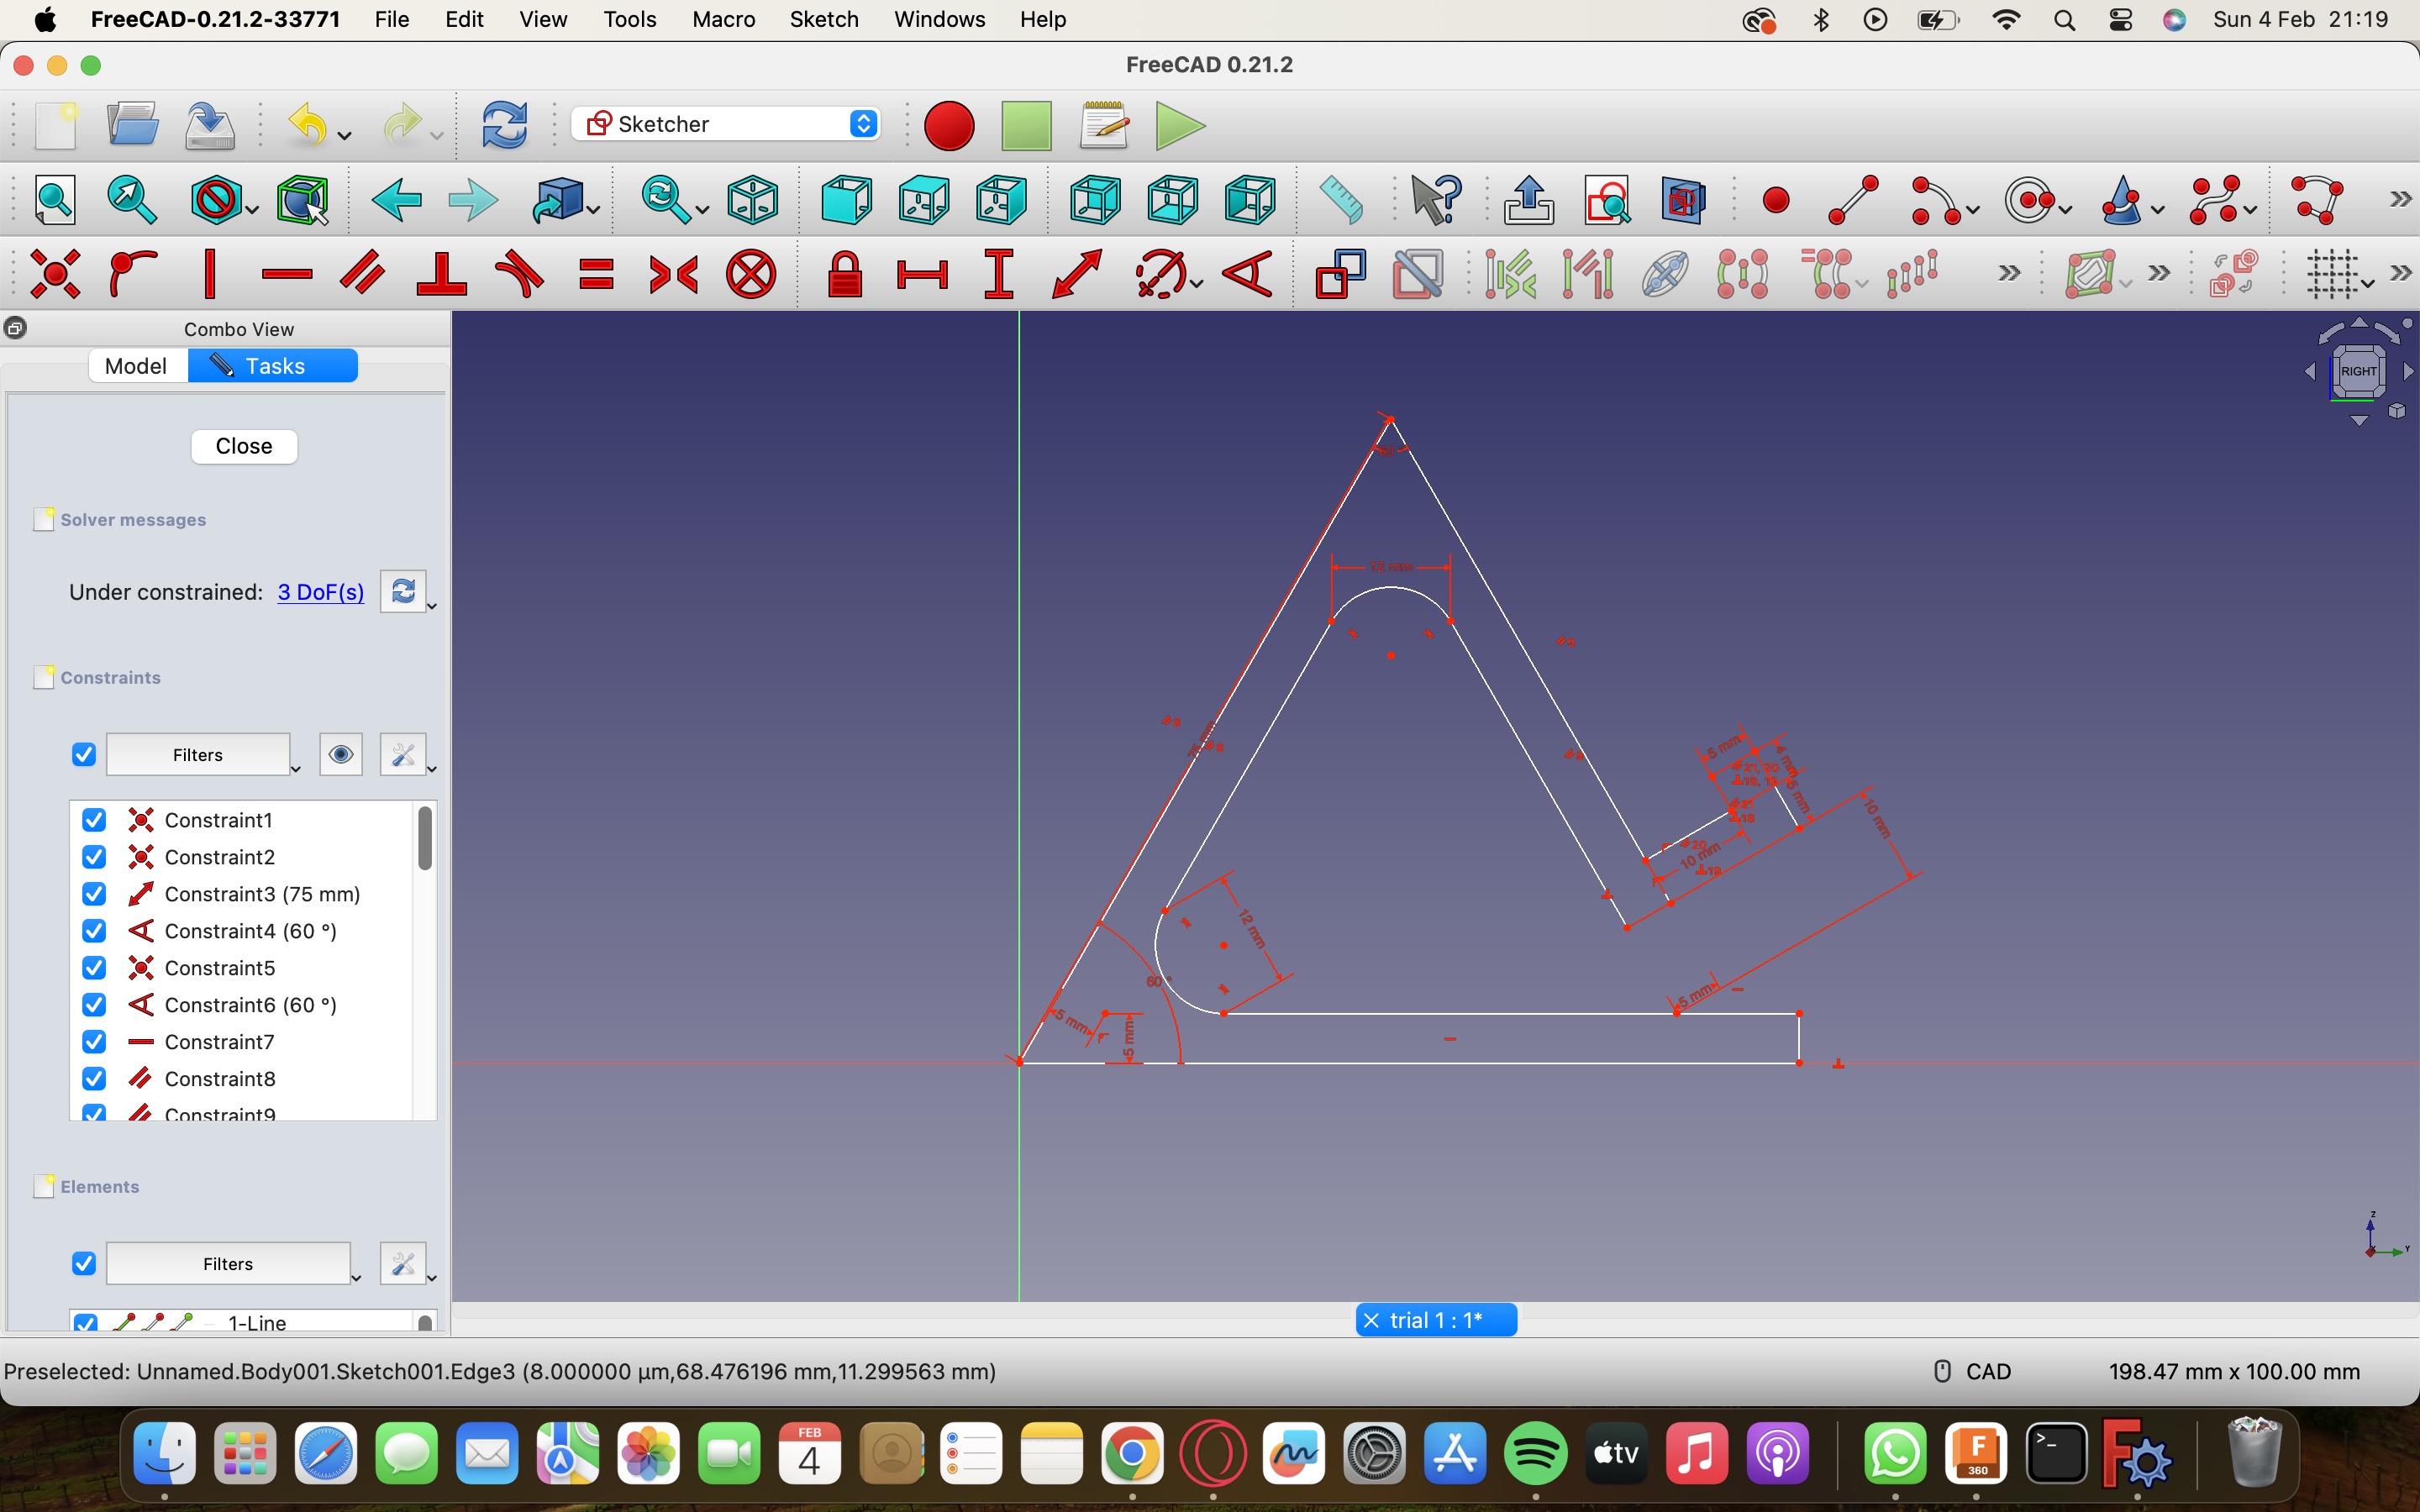
After this to extrude it there is a tool called pad here but I was not able to pad it as the pad option was off, I tried a lot but failed at all attempts so I stopped here
5.Illustrator (2d vector)
a.Name plate
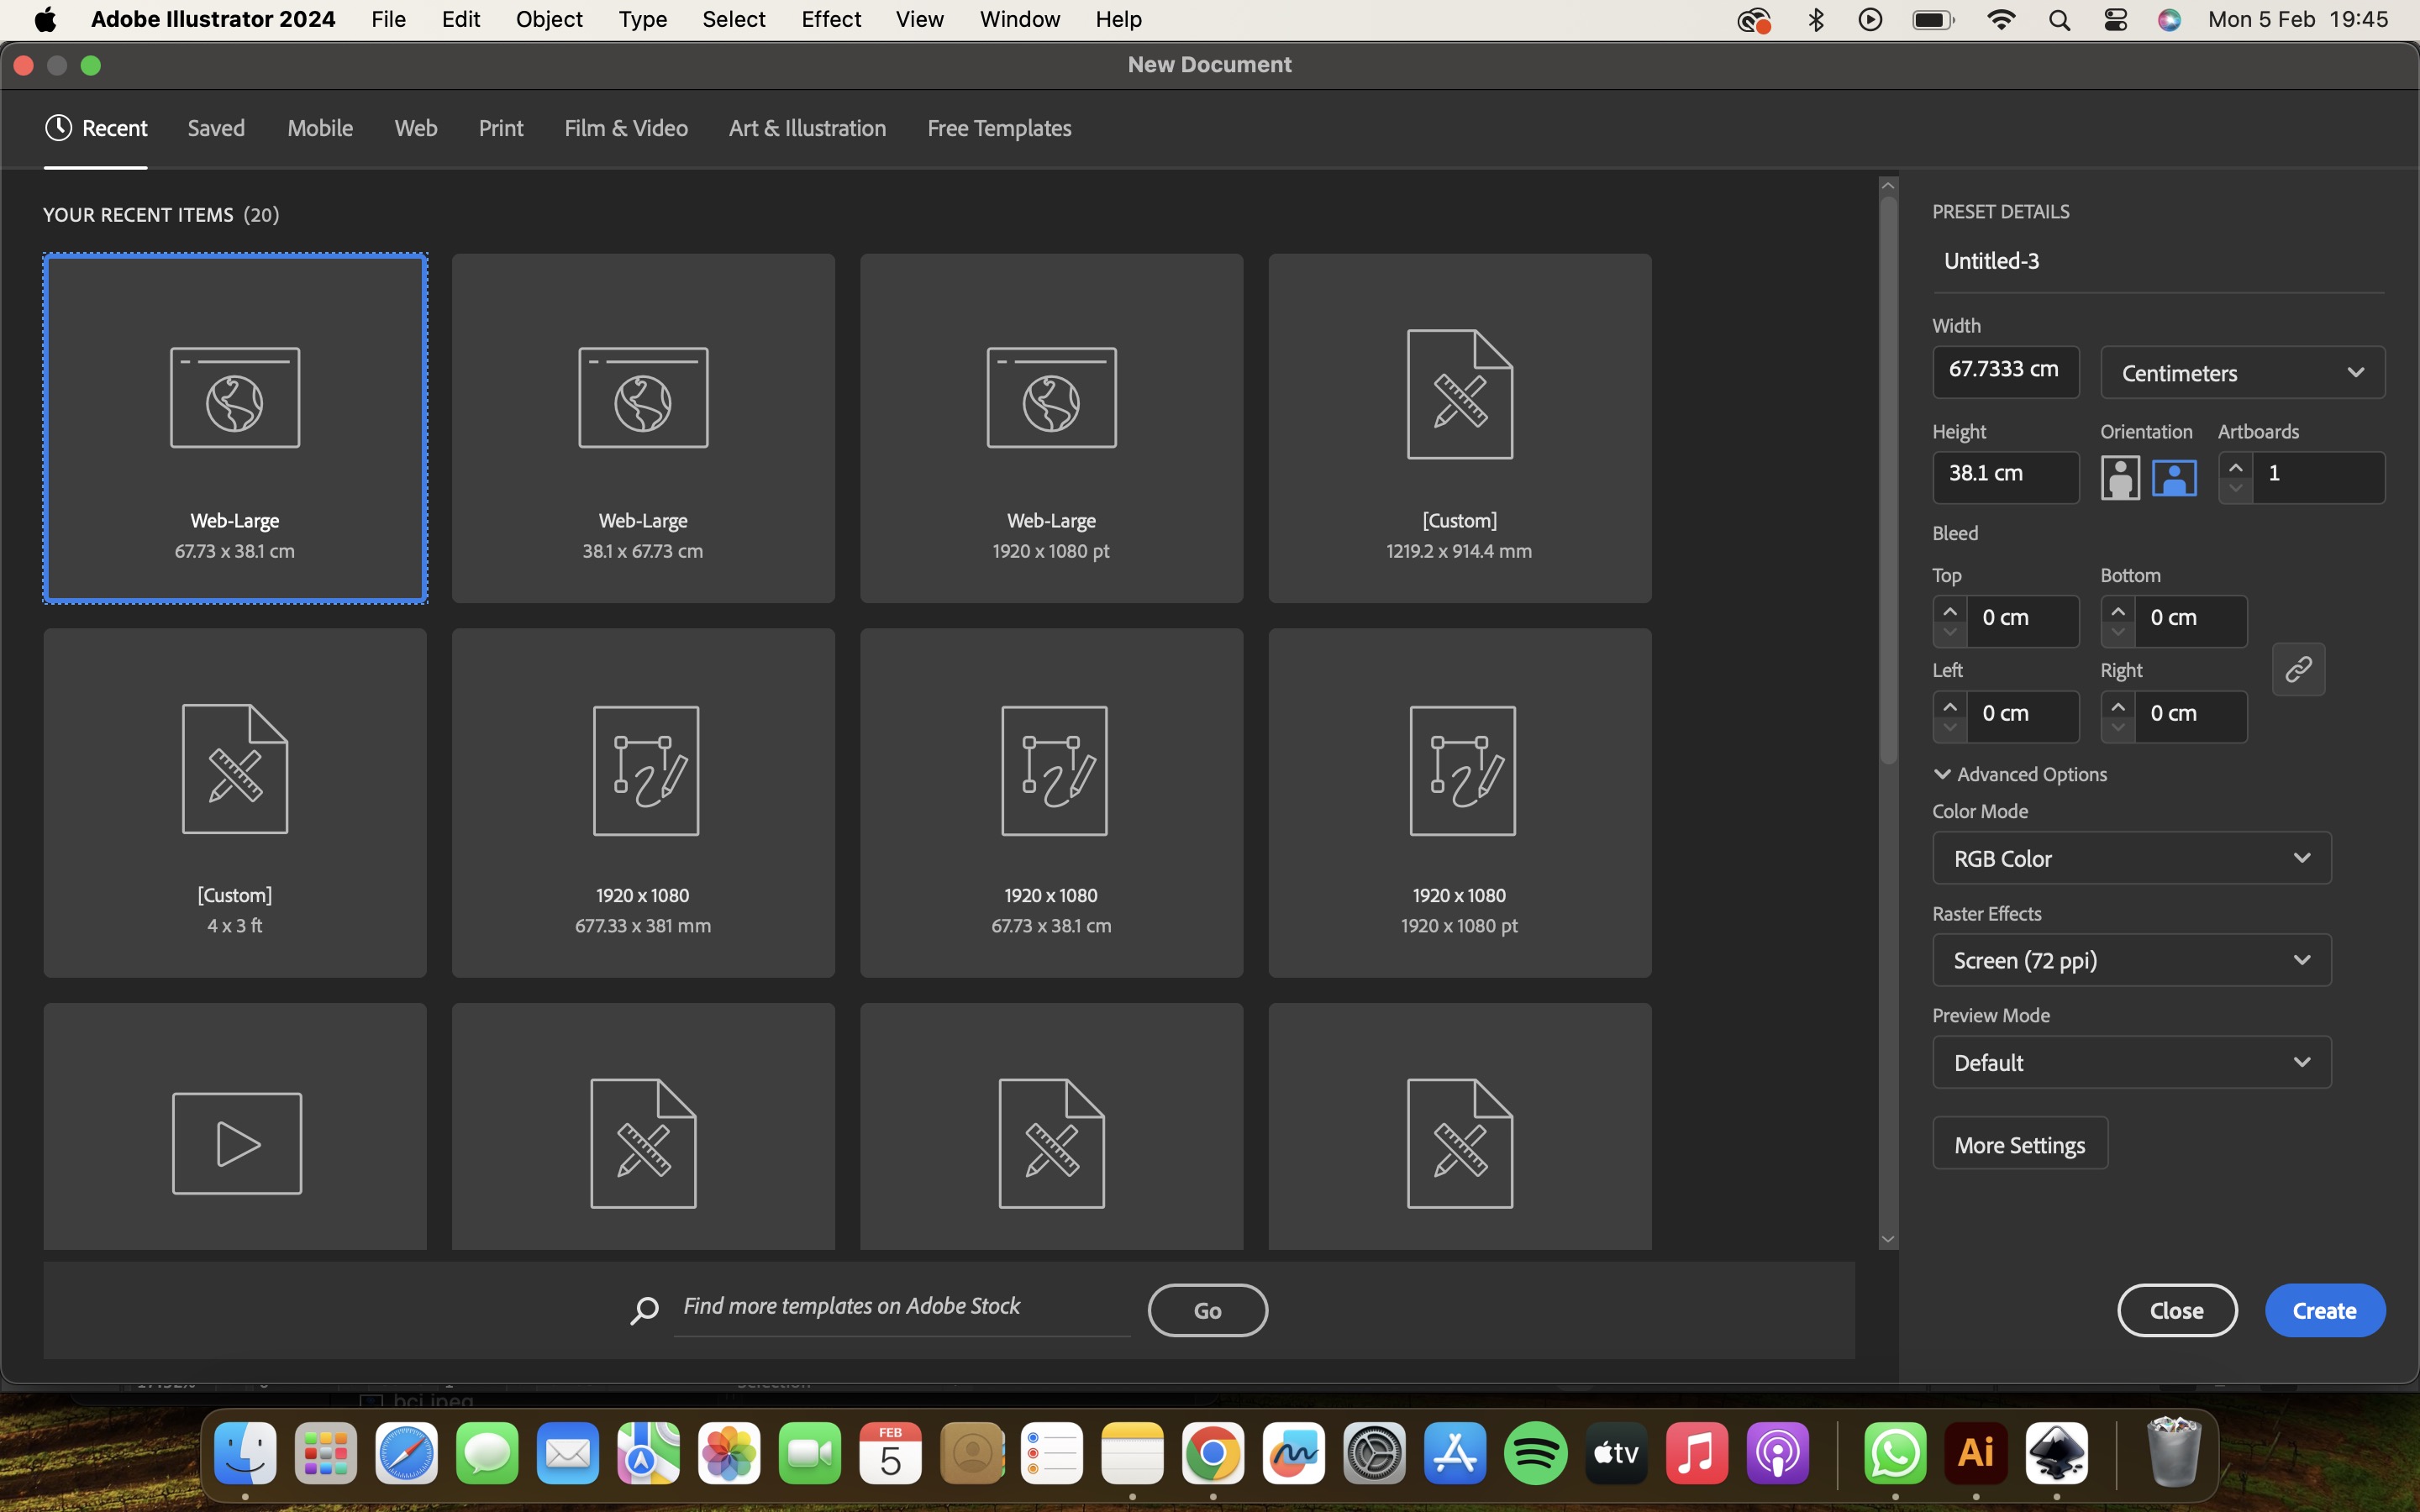
As i knew illustrator a bit from the start, I thought I'll make a name plate which can help me in my next weeks laser cutting assignment too.
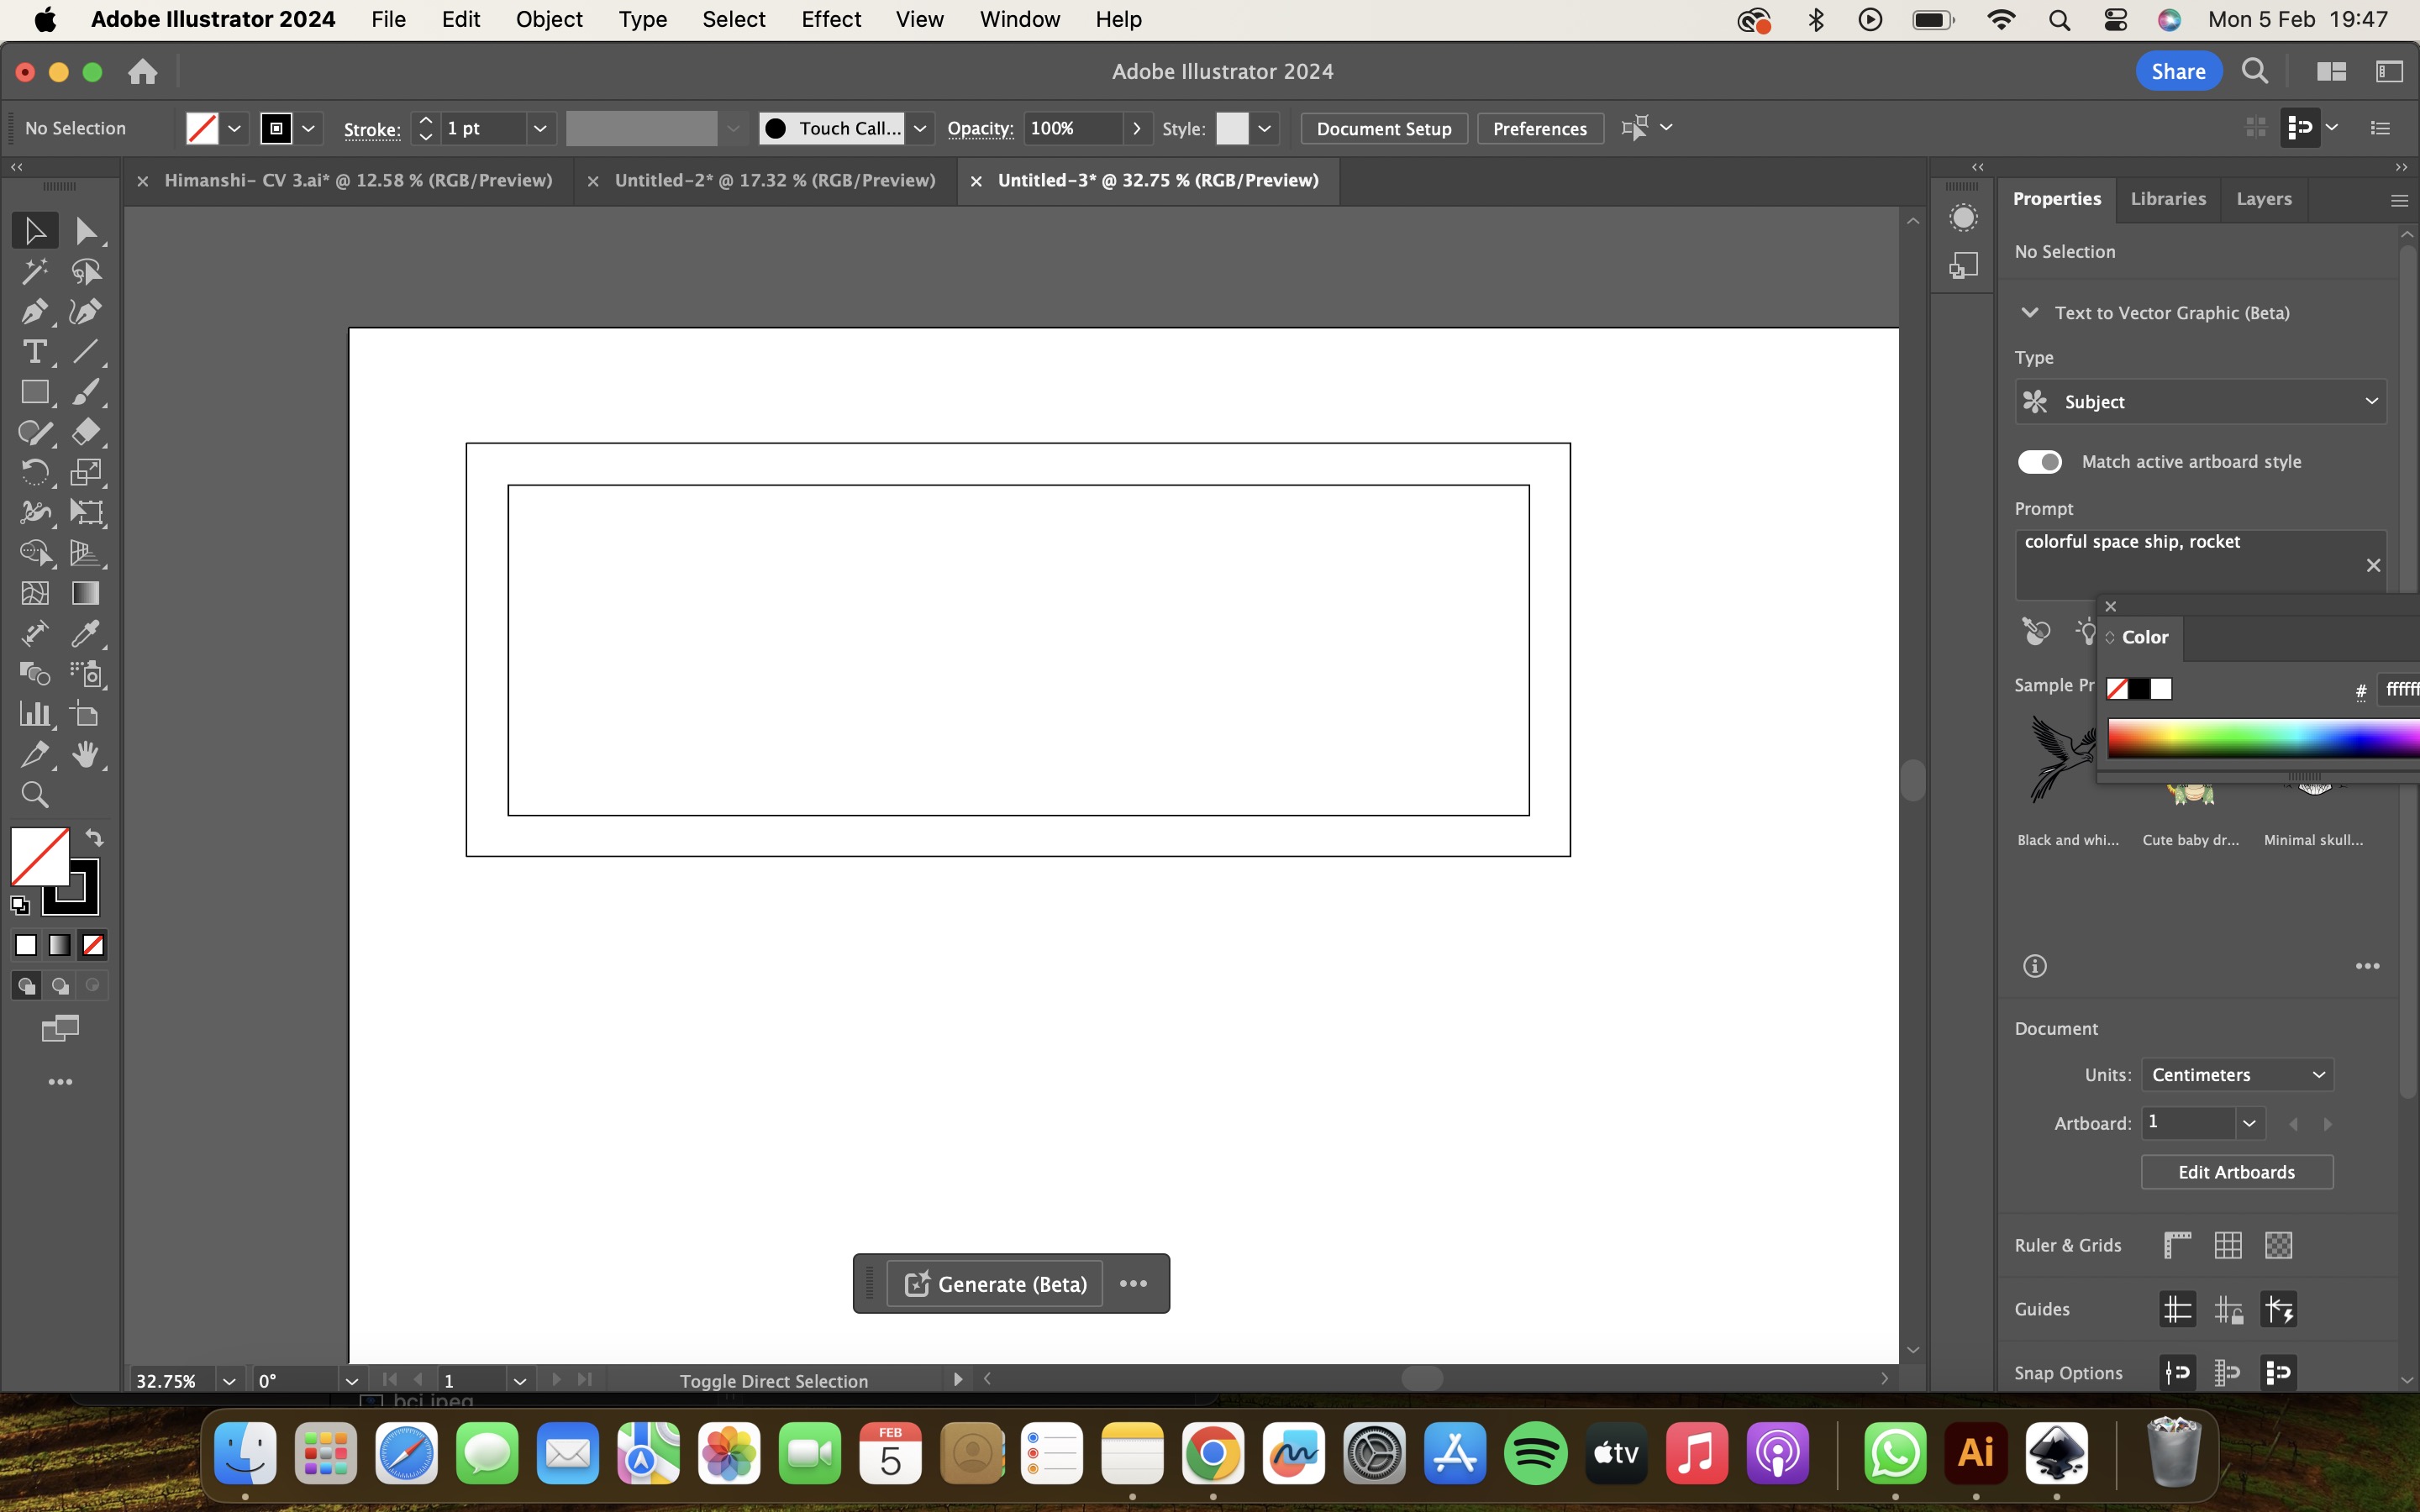
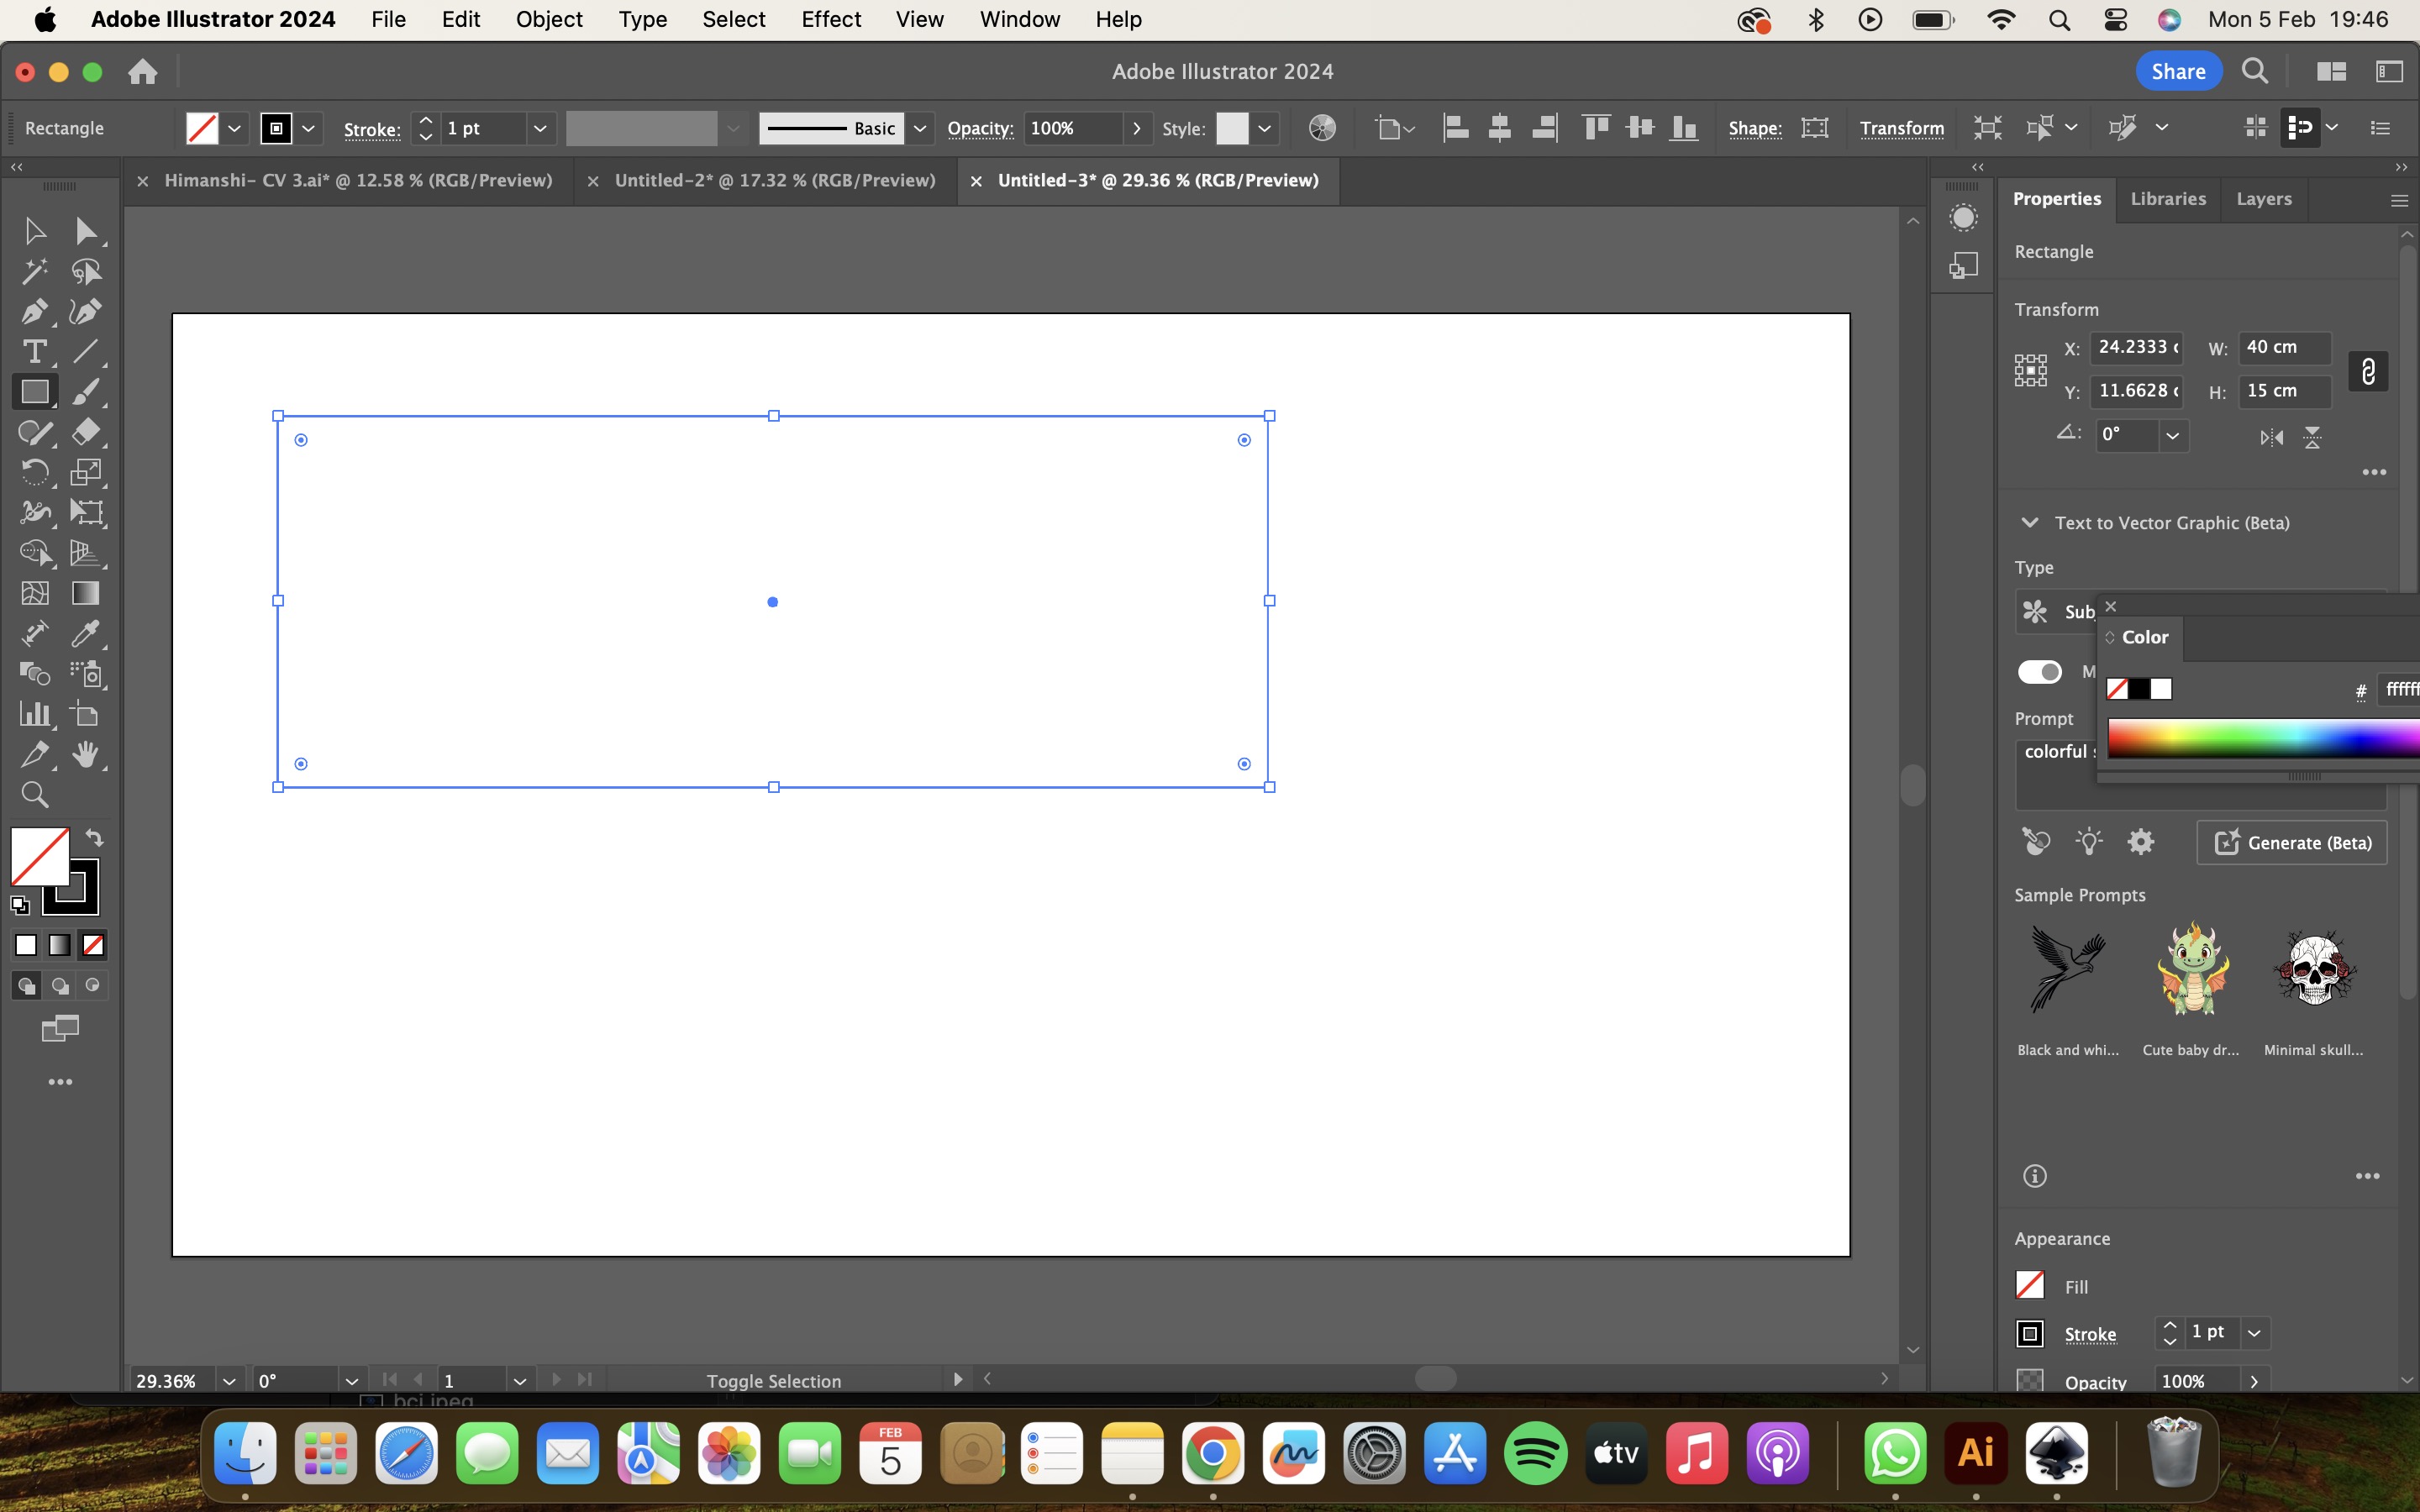
I opened the illustrator and started making the basic outer rectangle by using rectangle shape tool along with the dimensions I want, after that I made the inner rectangle by leavig 1cm from all sides.
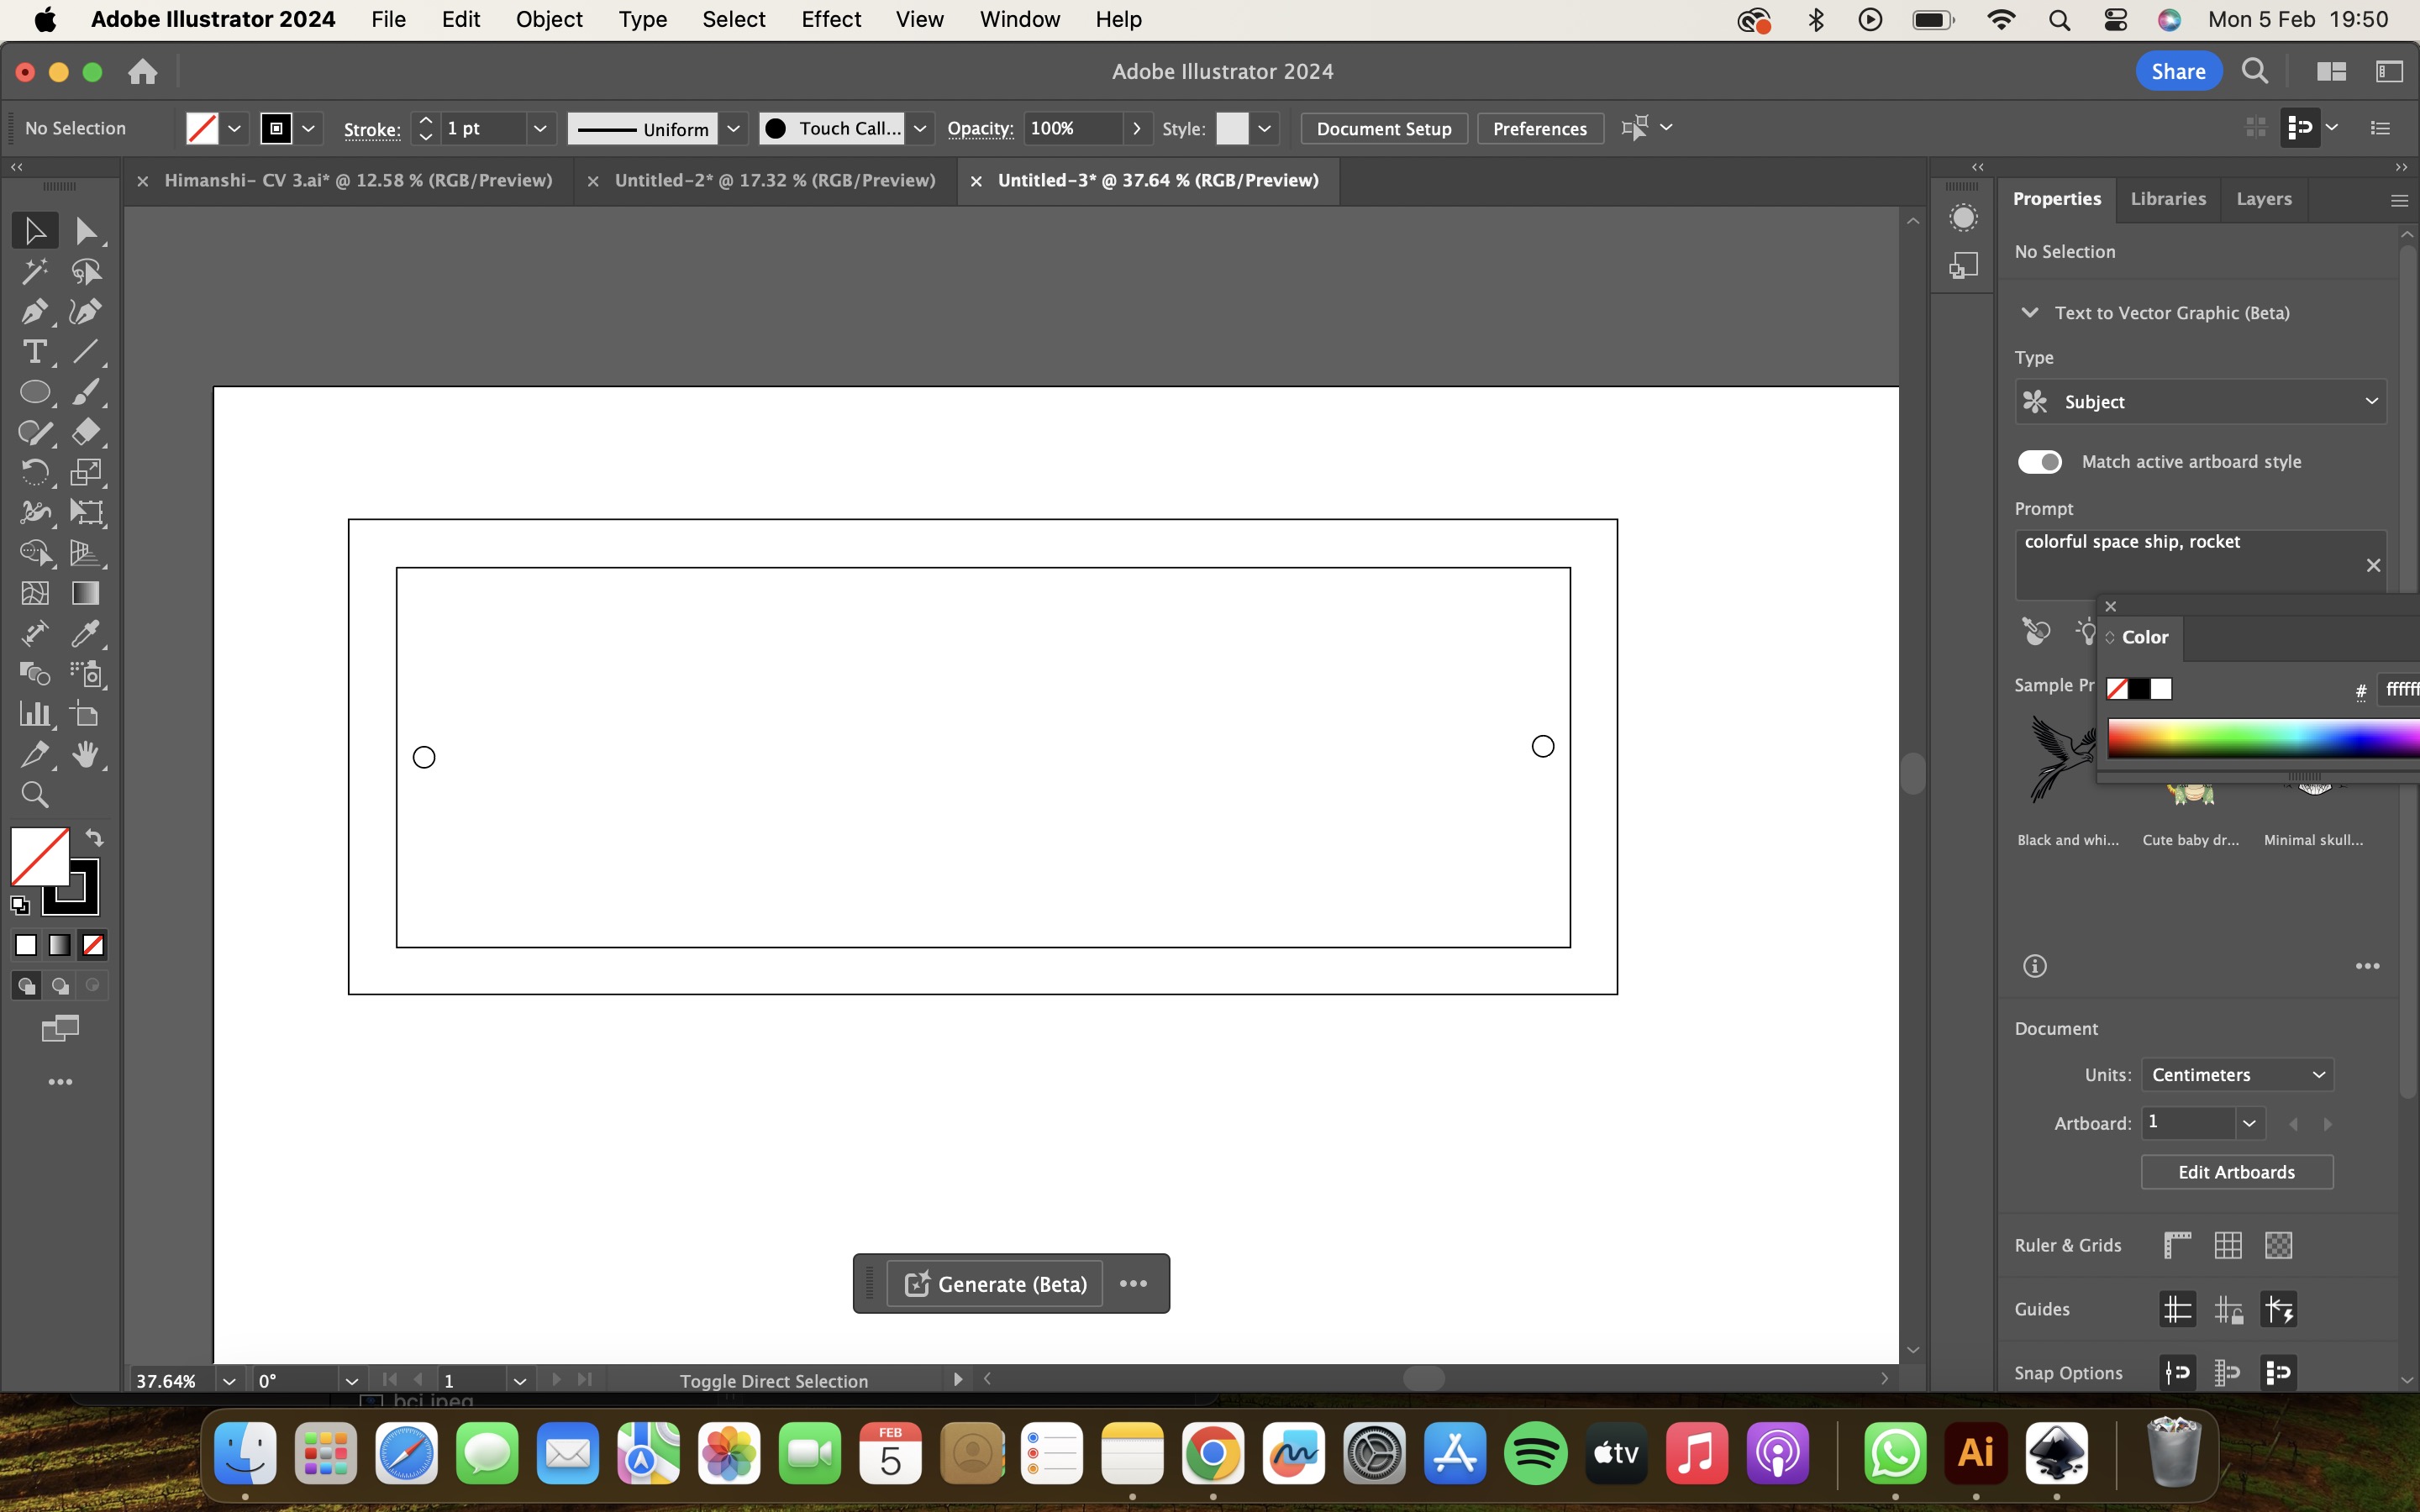
Then I selected the object and the 4 dots which you can see we can curve the edges by selecting that dots or manually do by changing the dimensions in corners tab.
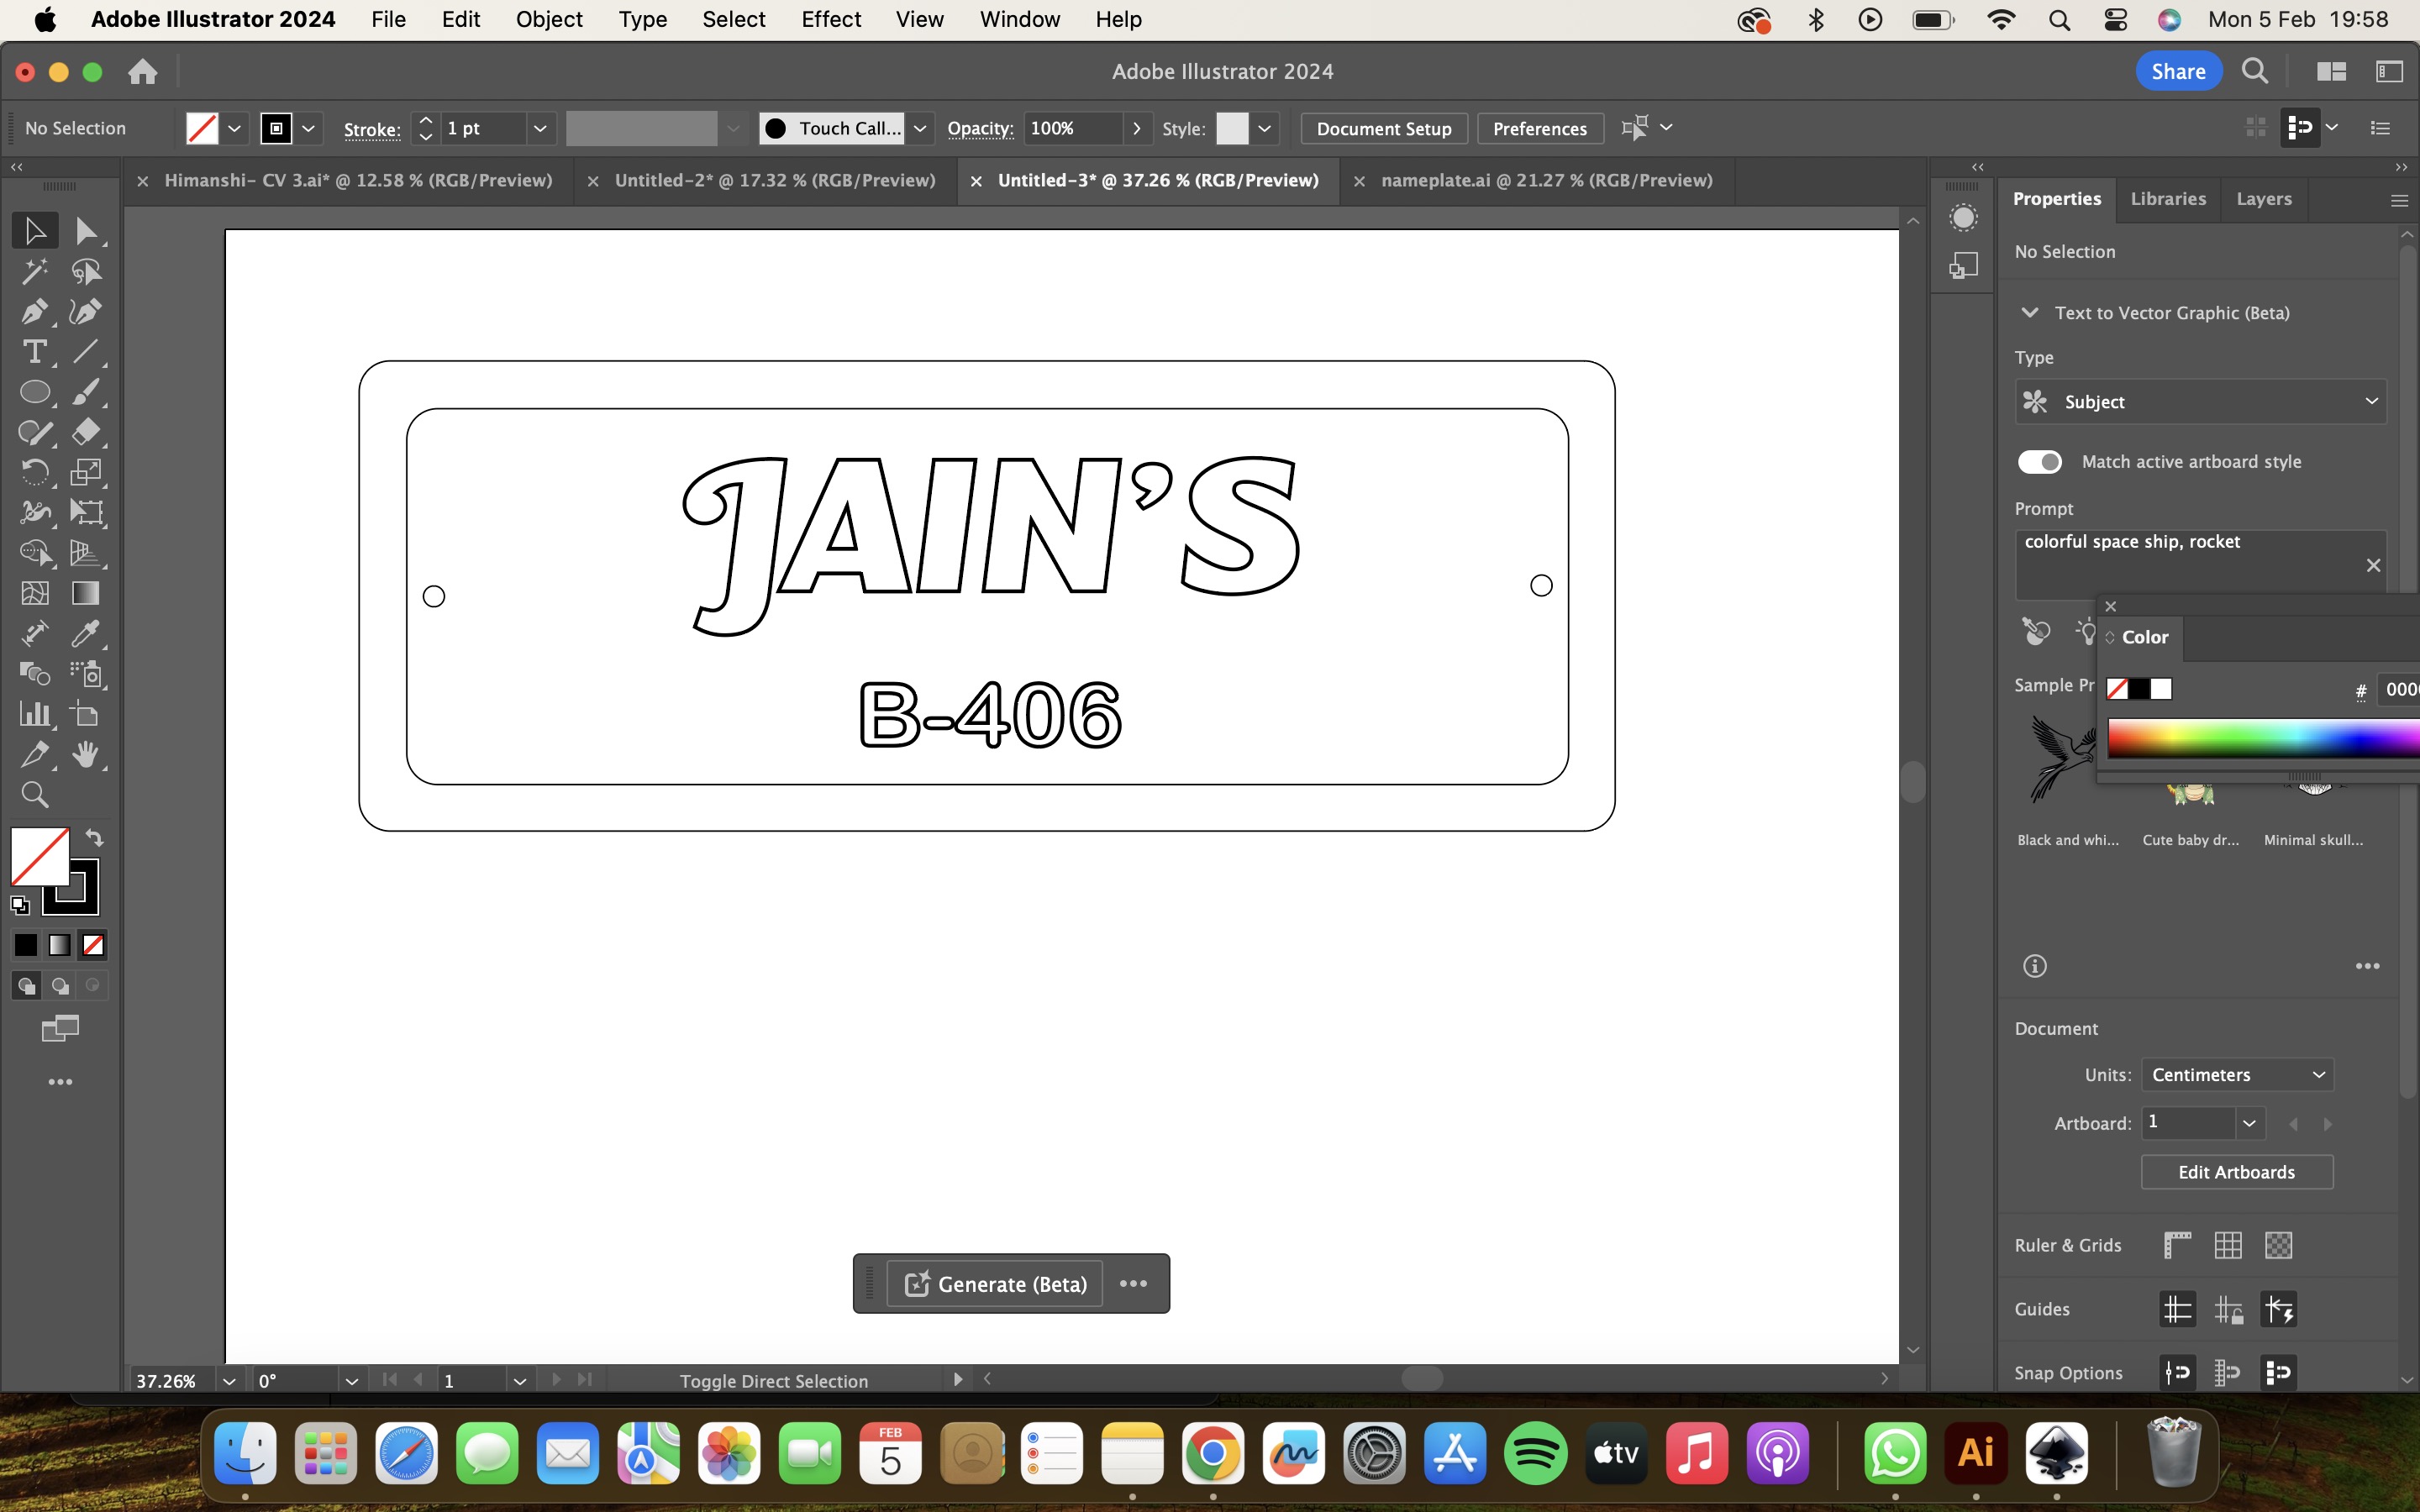
I wrote the text by selecting the icon T from left side and wrote what I wanted, I manually changed the fonts by going in character tab and browsing from there, From the paragraph tab you can change the size of the text and took the pattern from freepik.
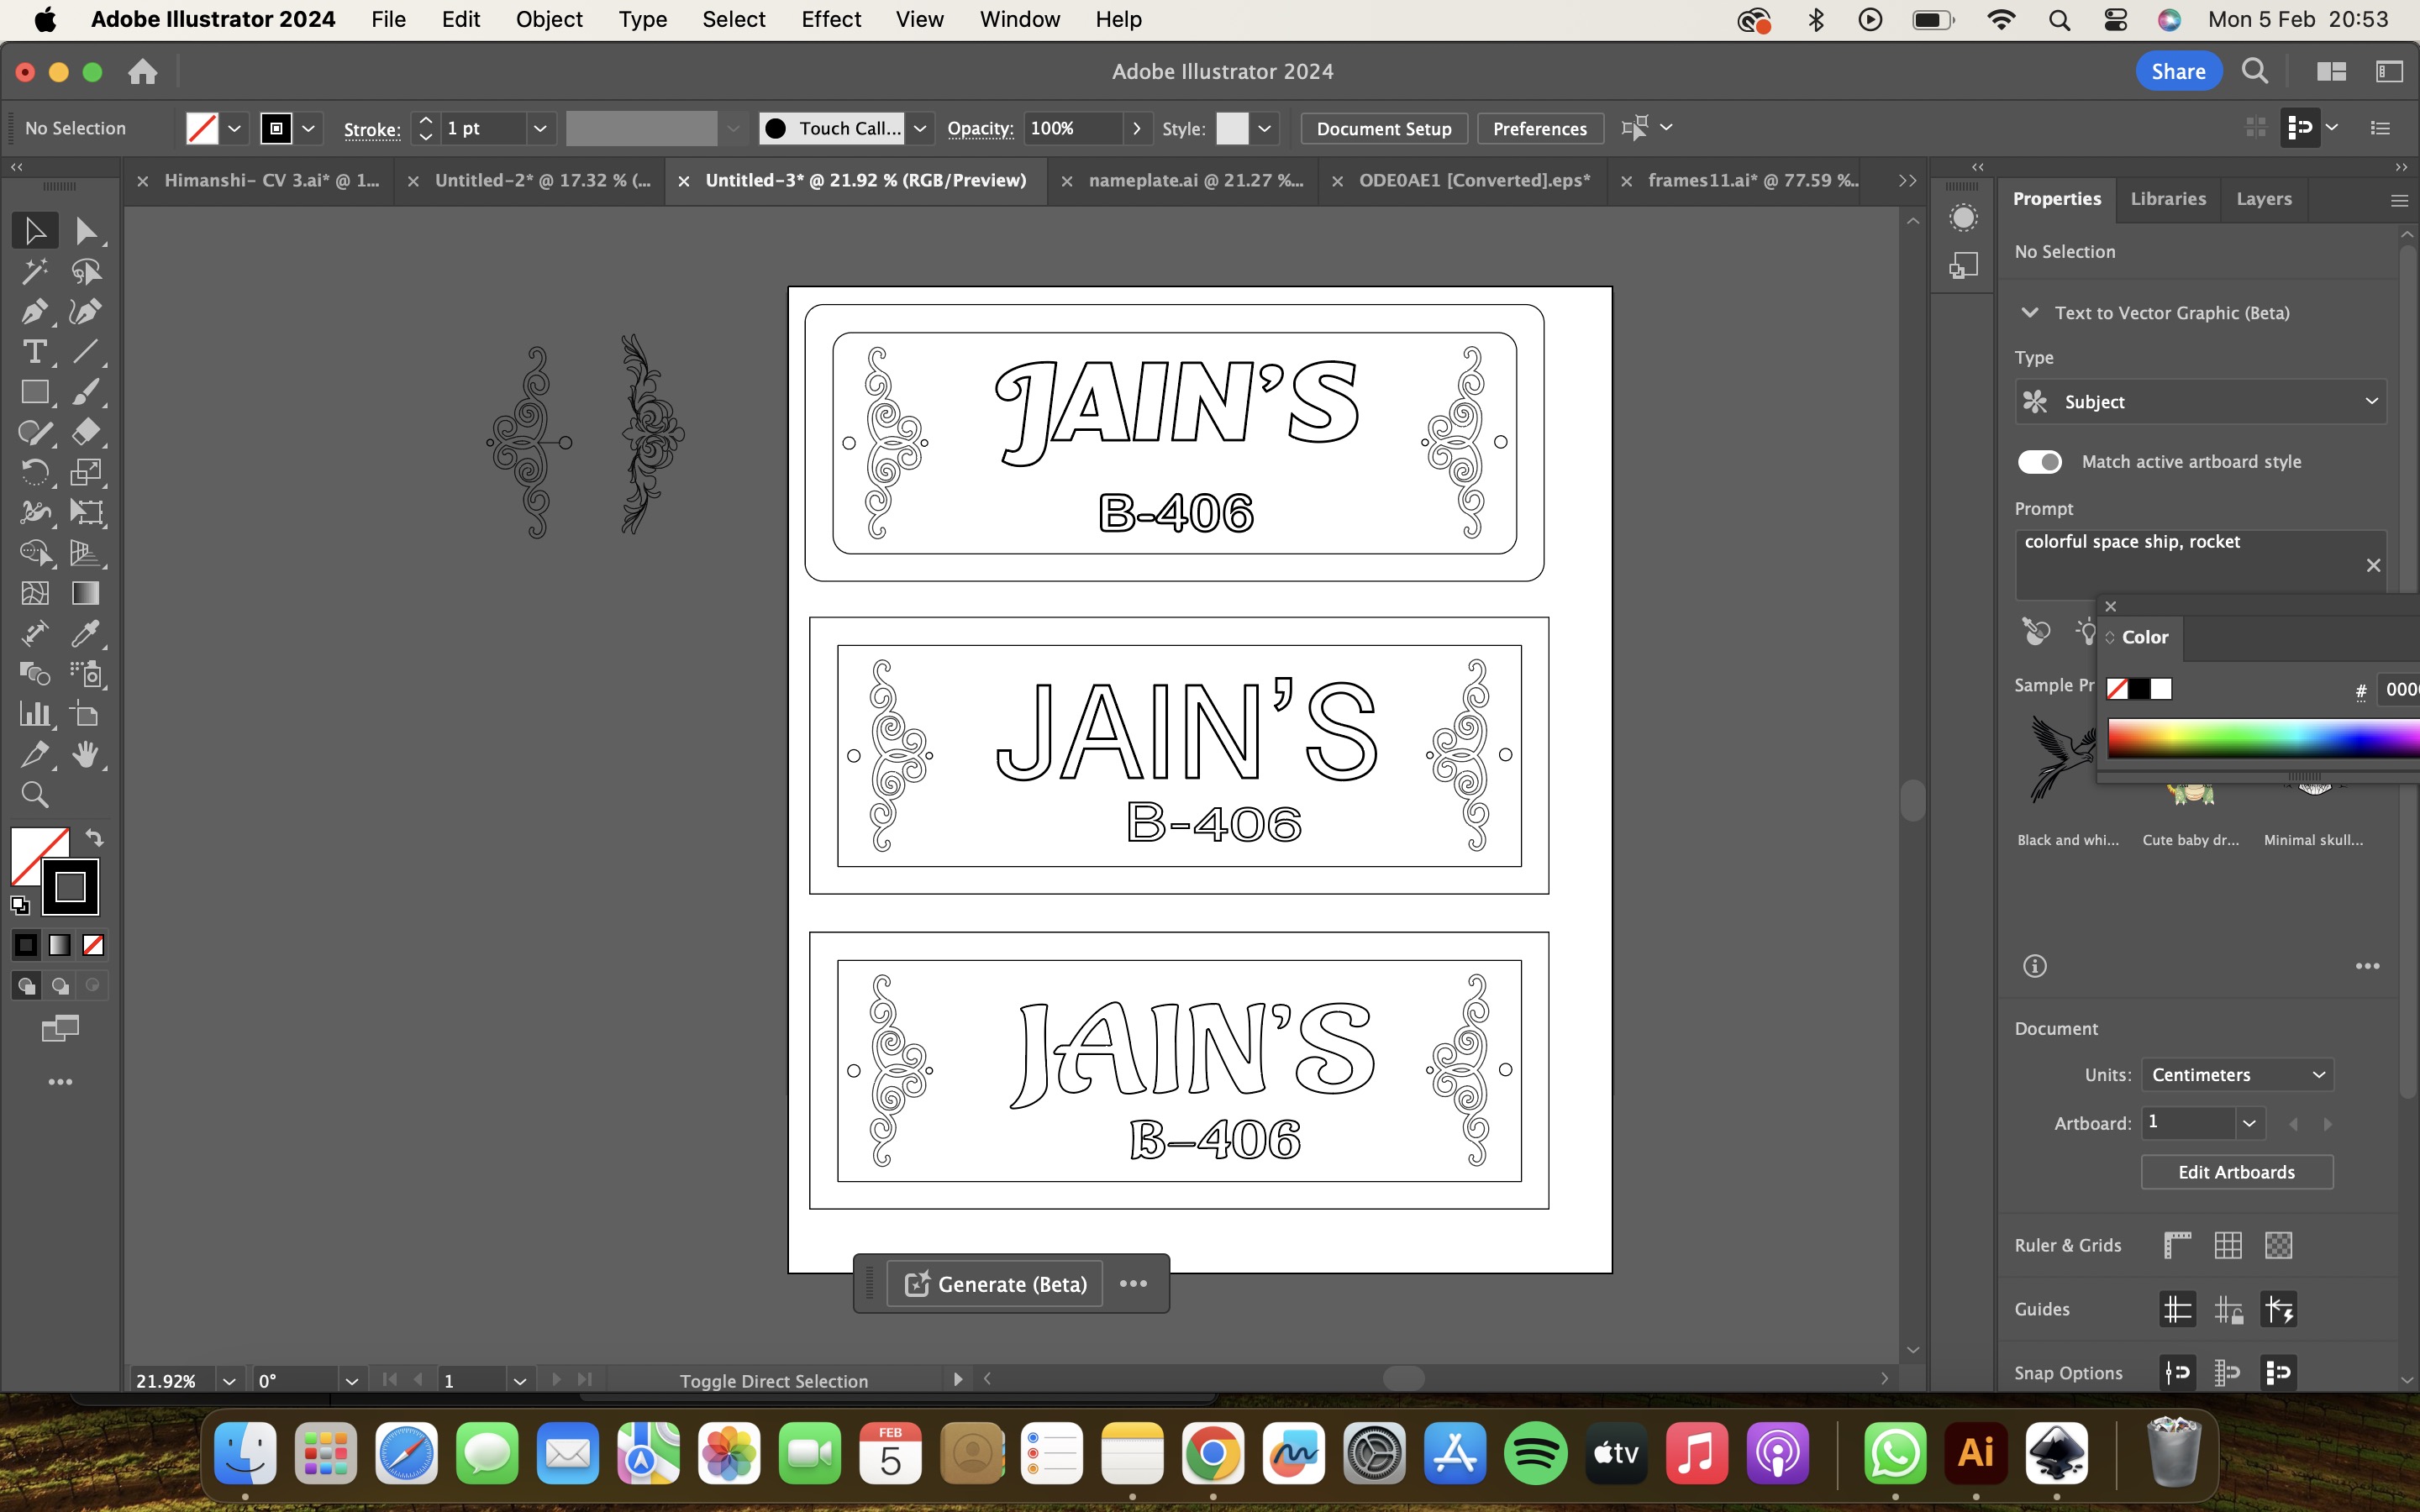
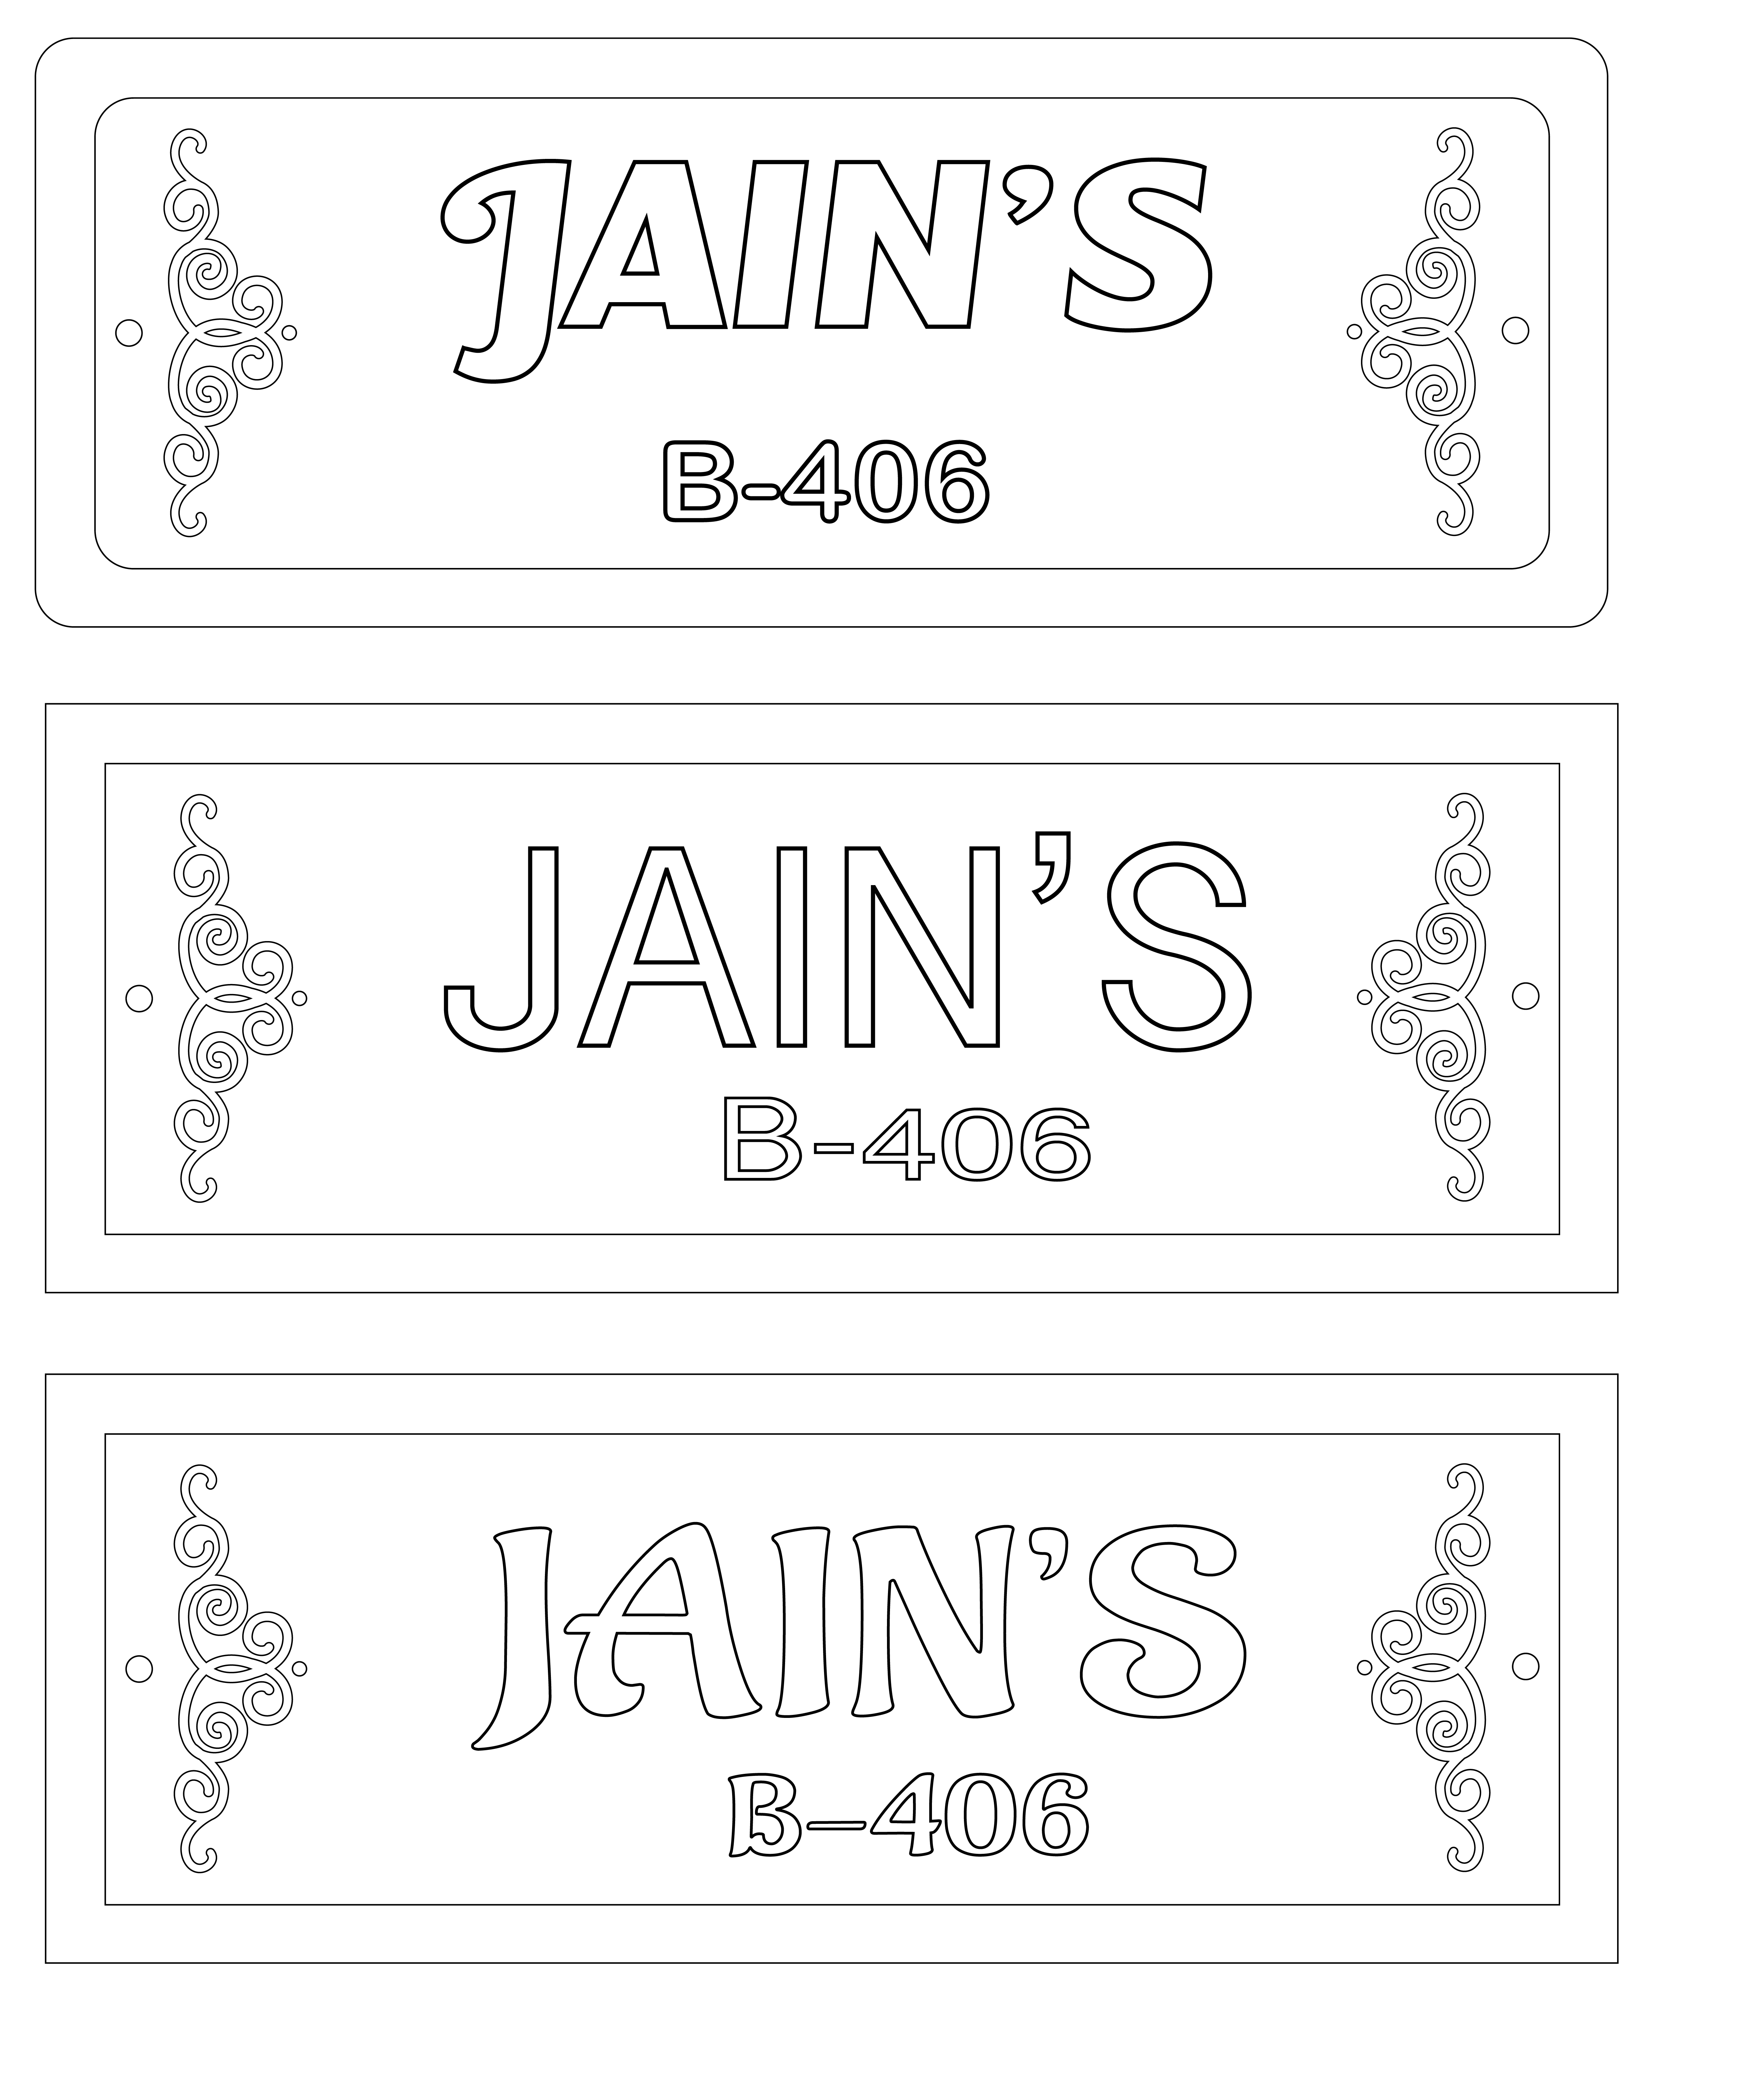
Final outcome
6.Inkscape (2d vector)
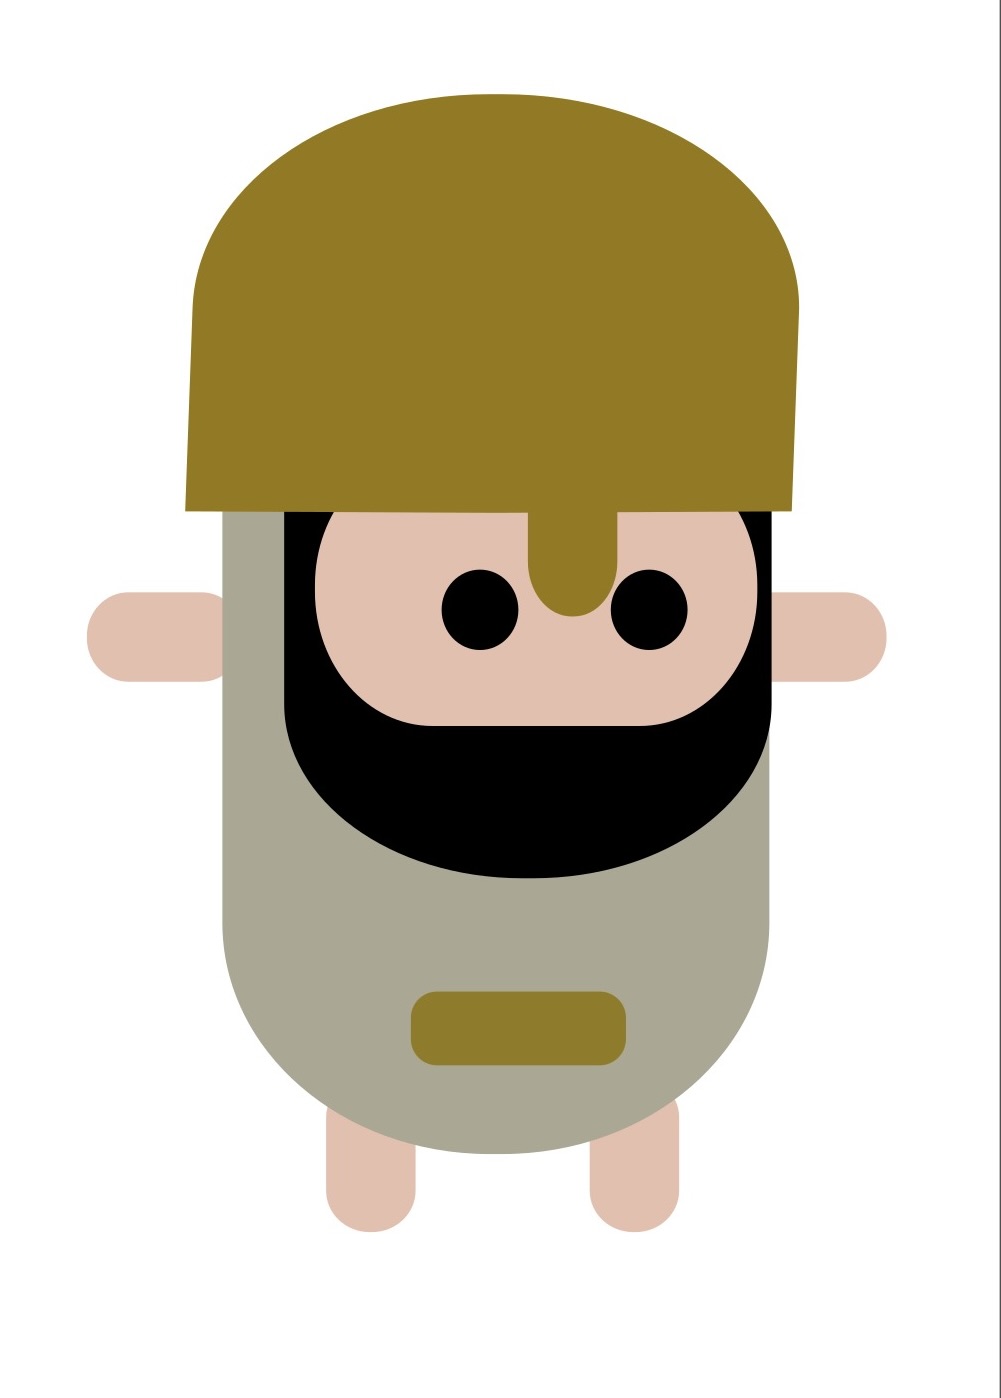
a.Cartoon Character
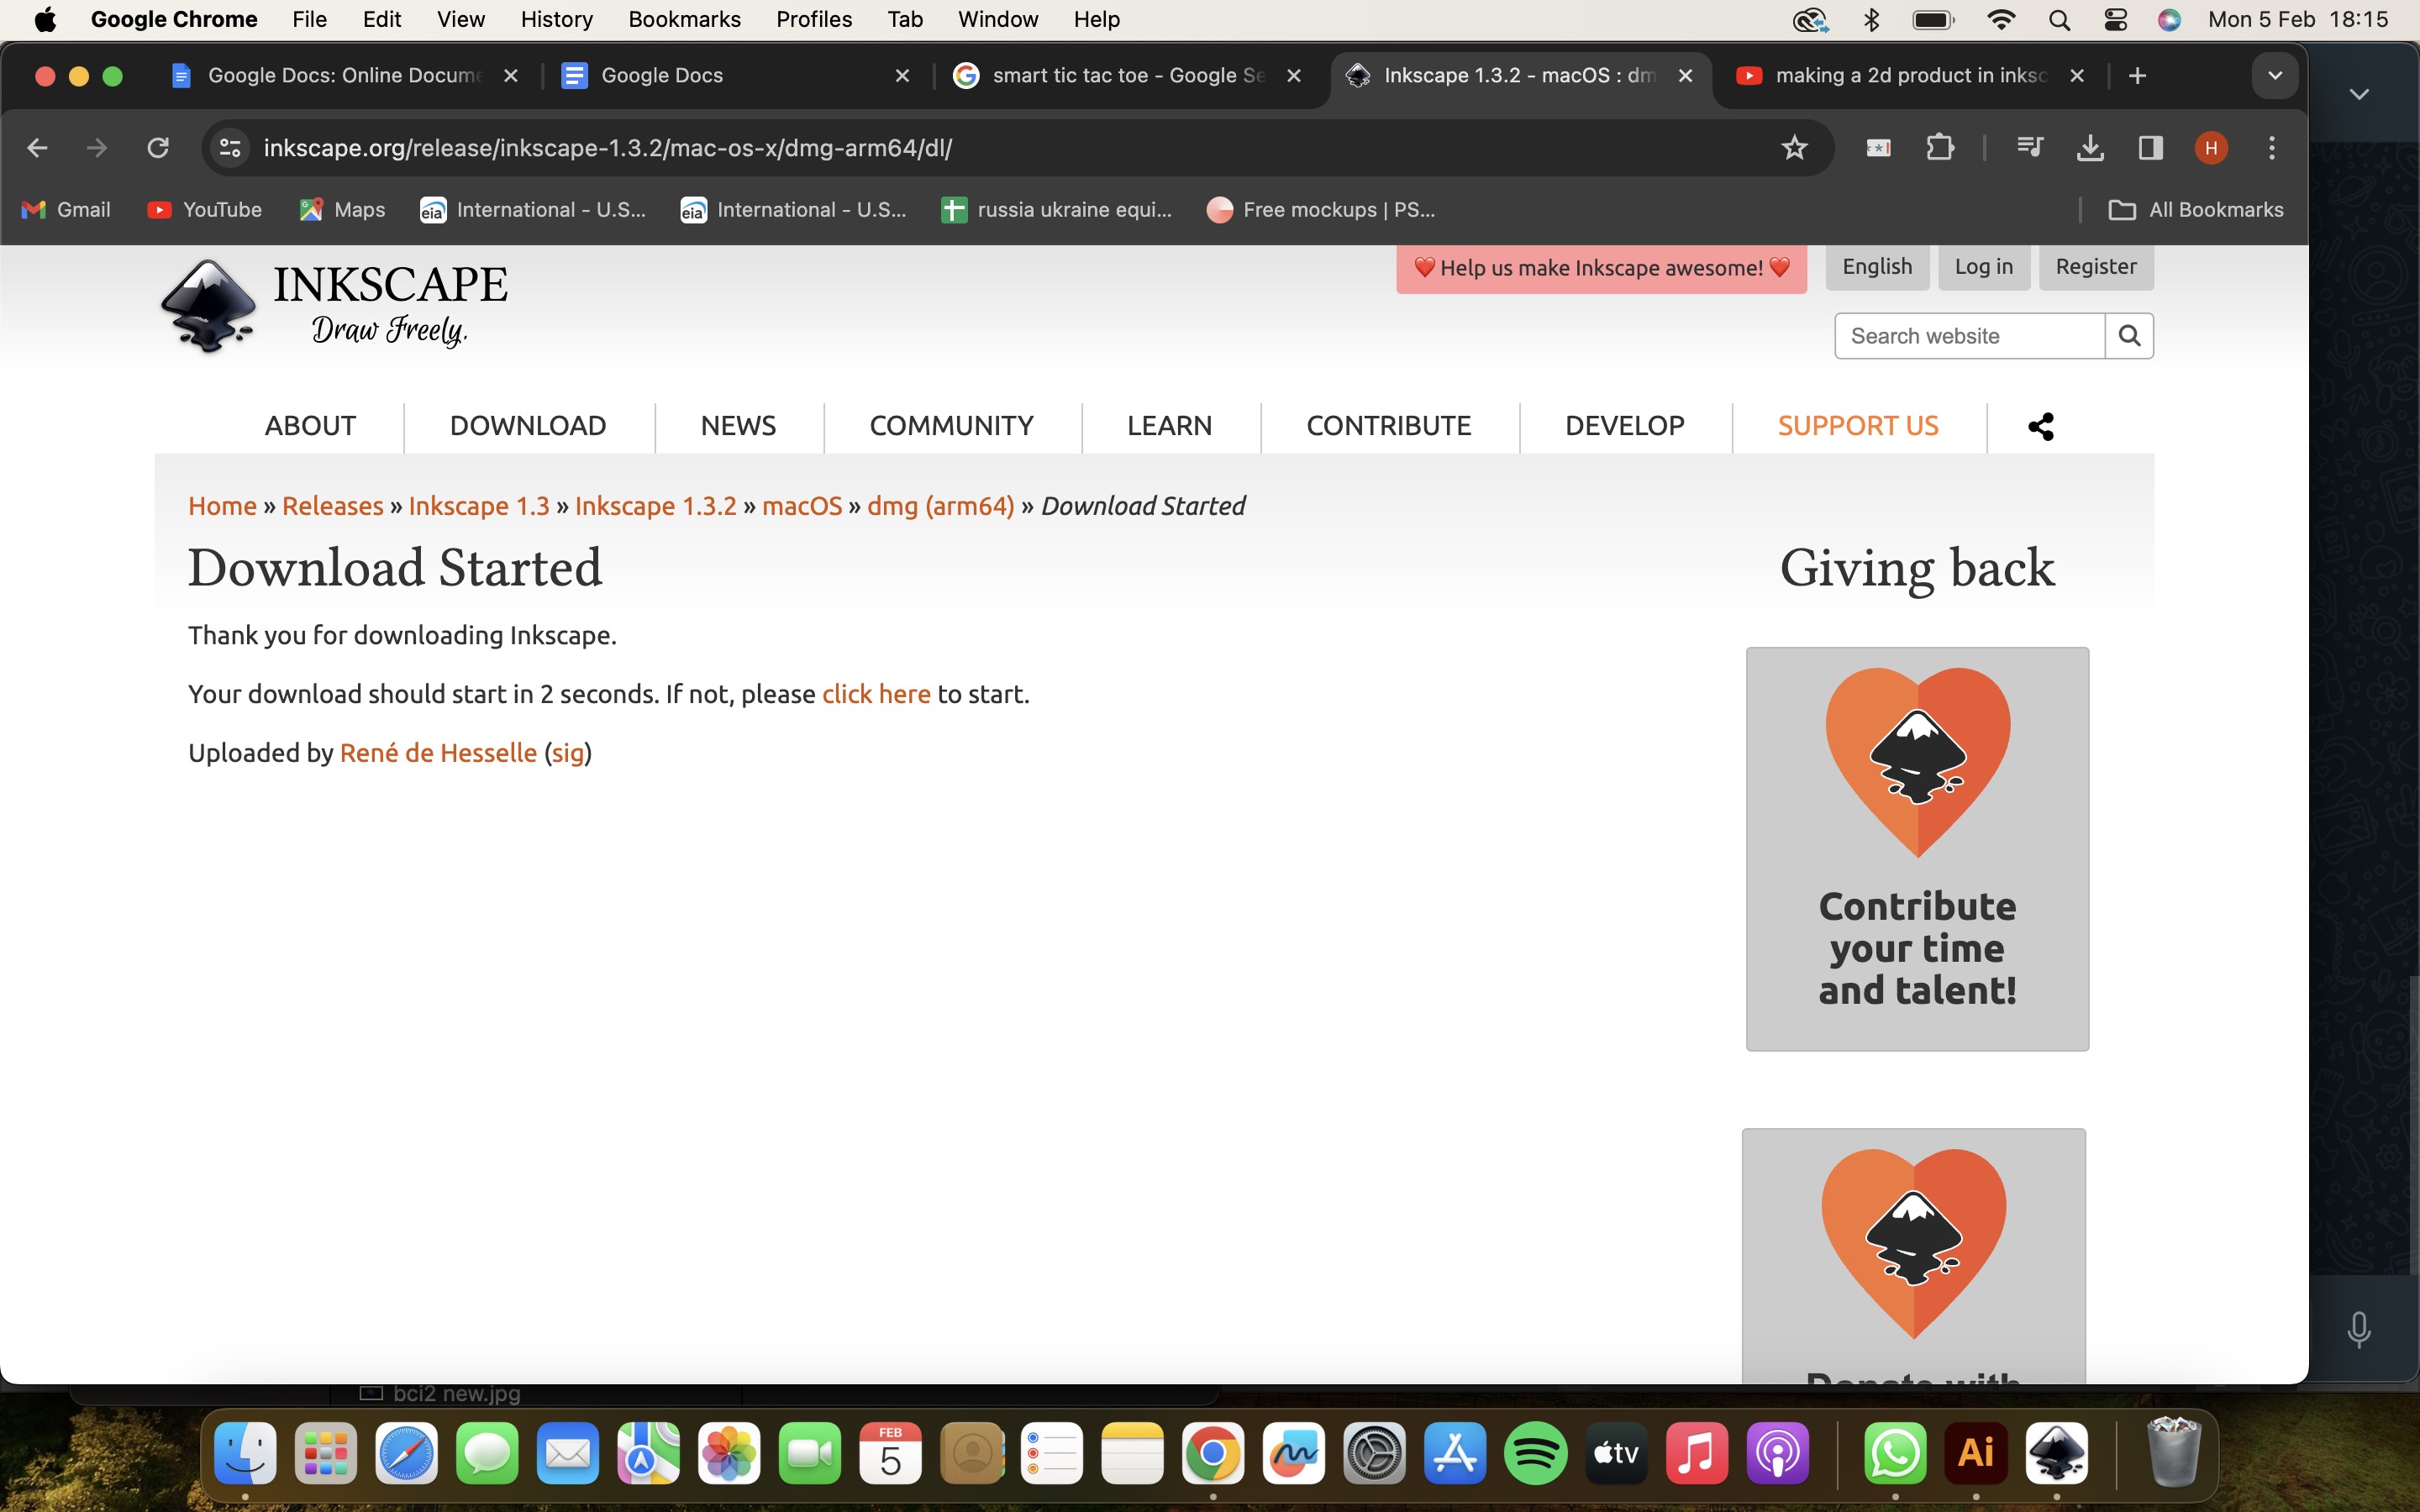
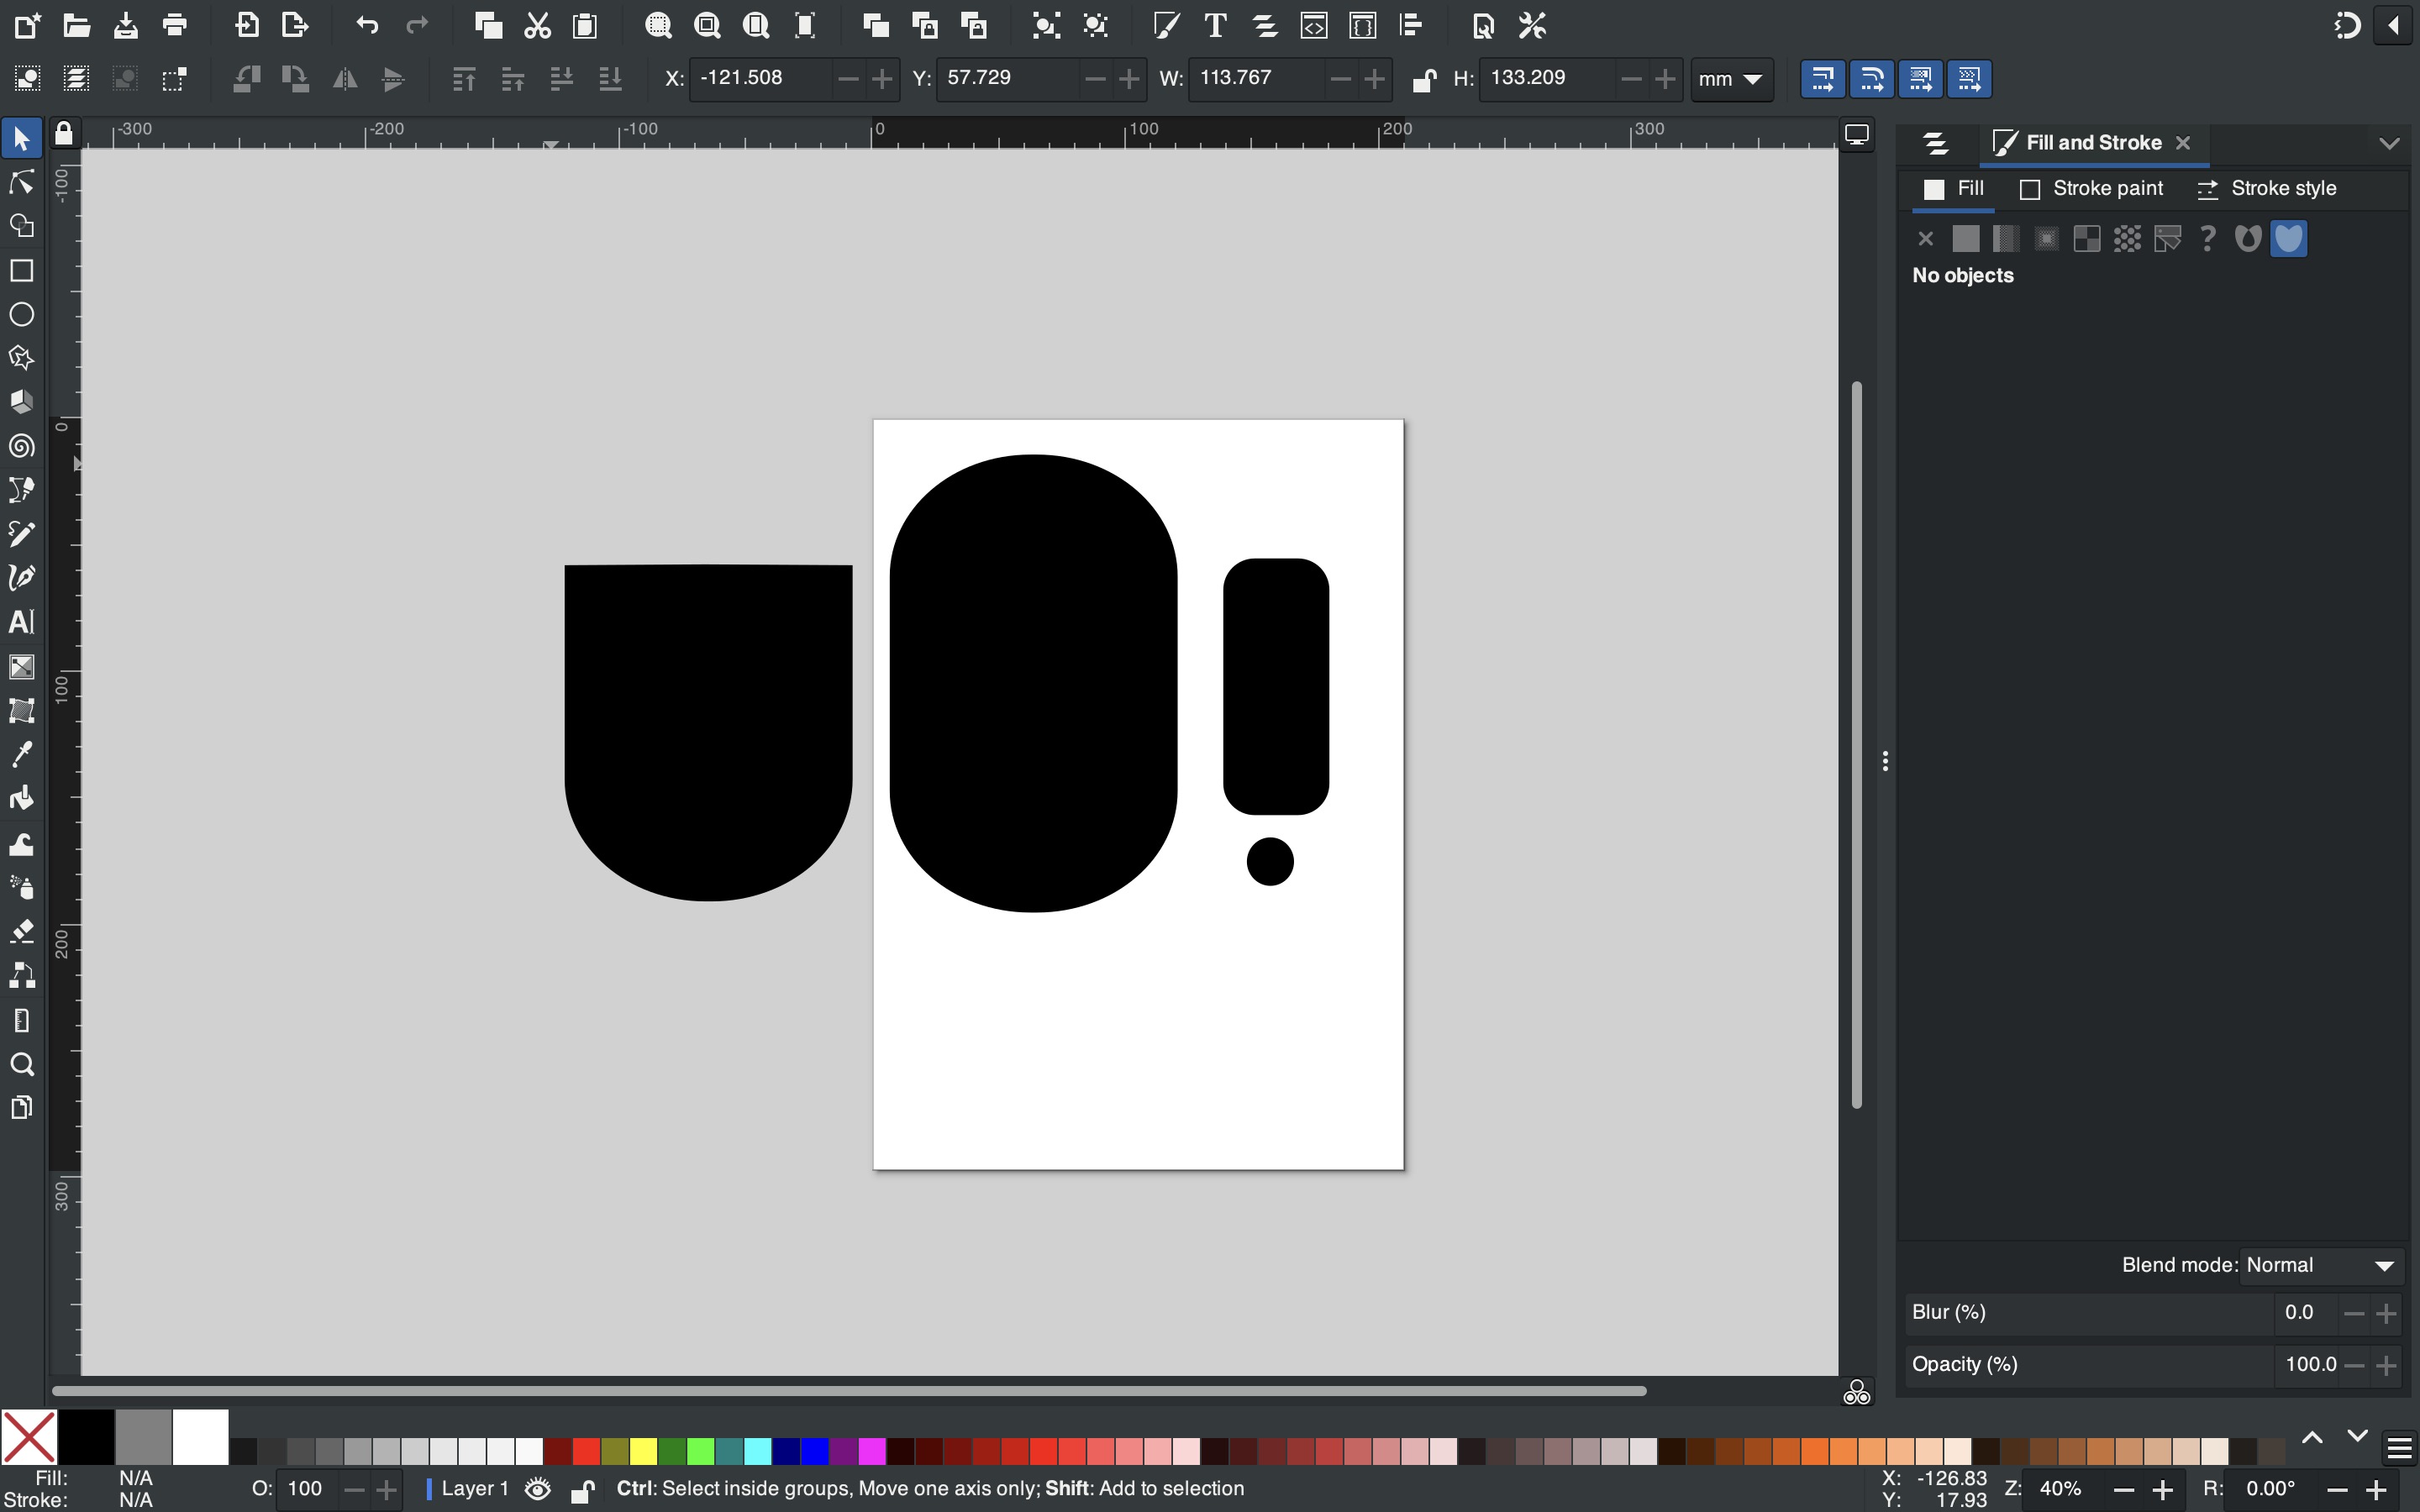
I downloaded inkscape and started looking for basic shapes, the name of the tools were similar to illustrator but the interface was not that good and not that friendly for me, I started exploring basic shapes and thought I'll make a cartoon cahracter.I started by making a basic square. As it was new for me I was foloowing a youtube tutorial.
Basics of Inkscape
youtube tutorials
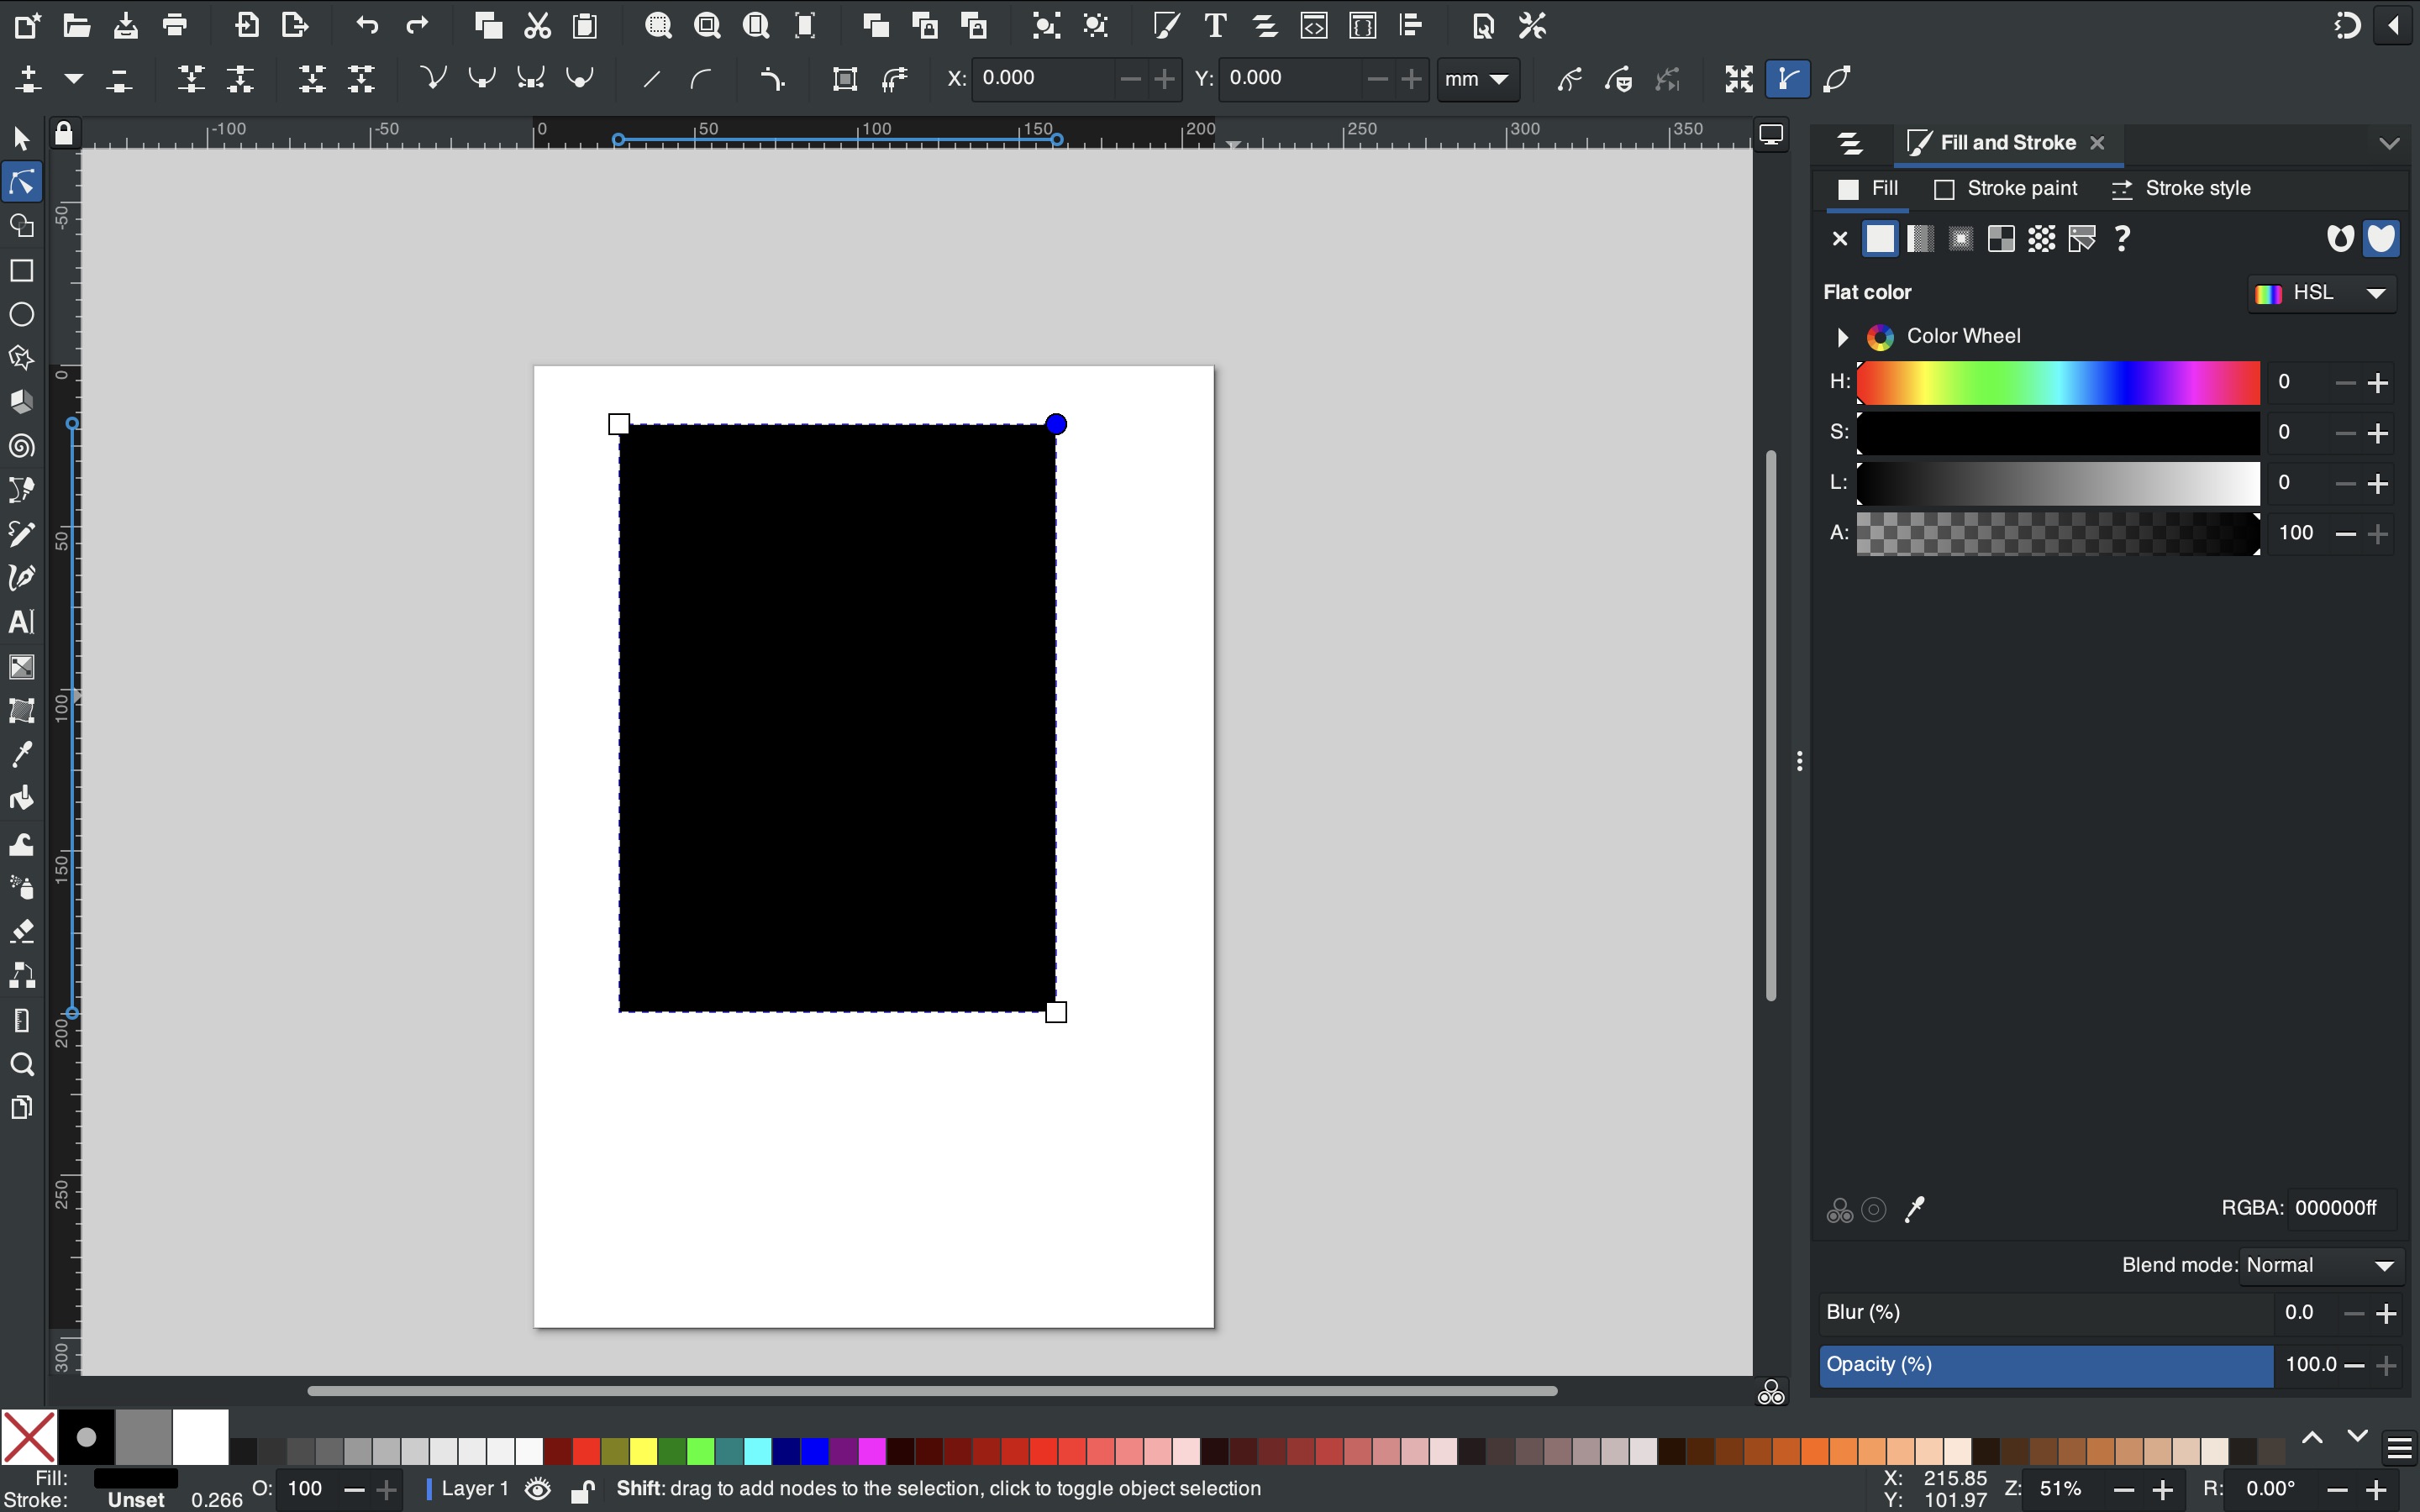
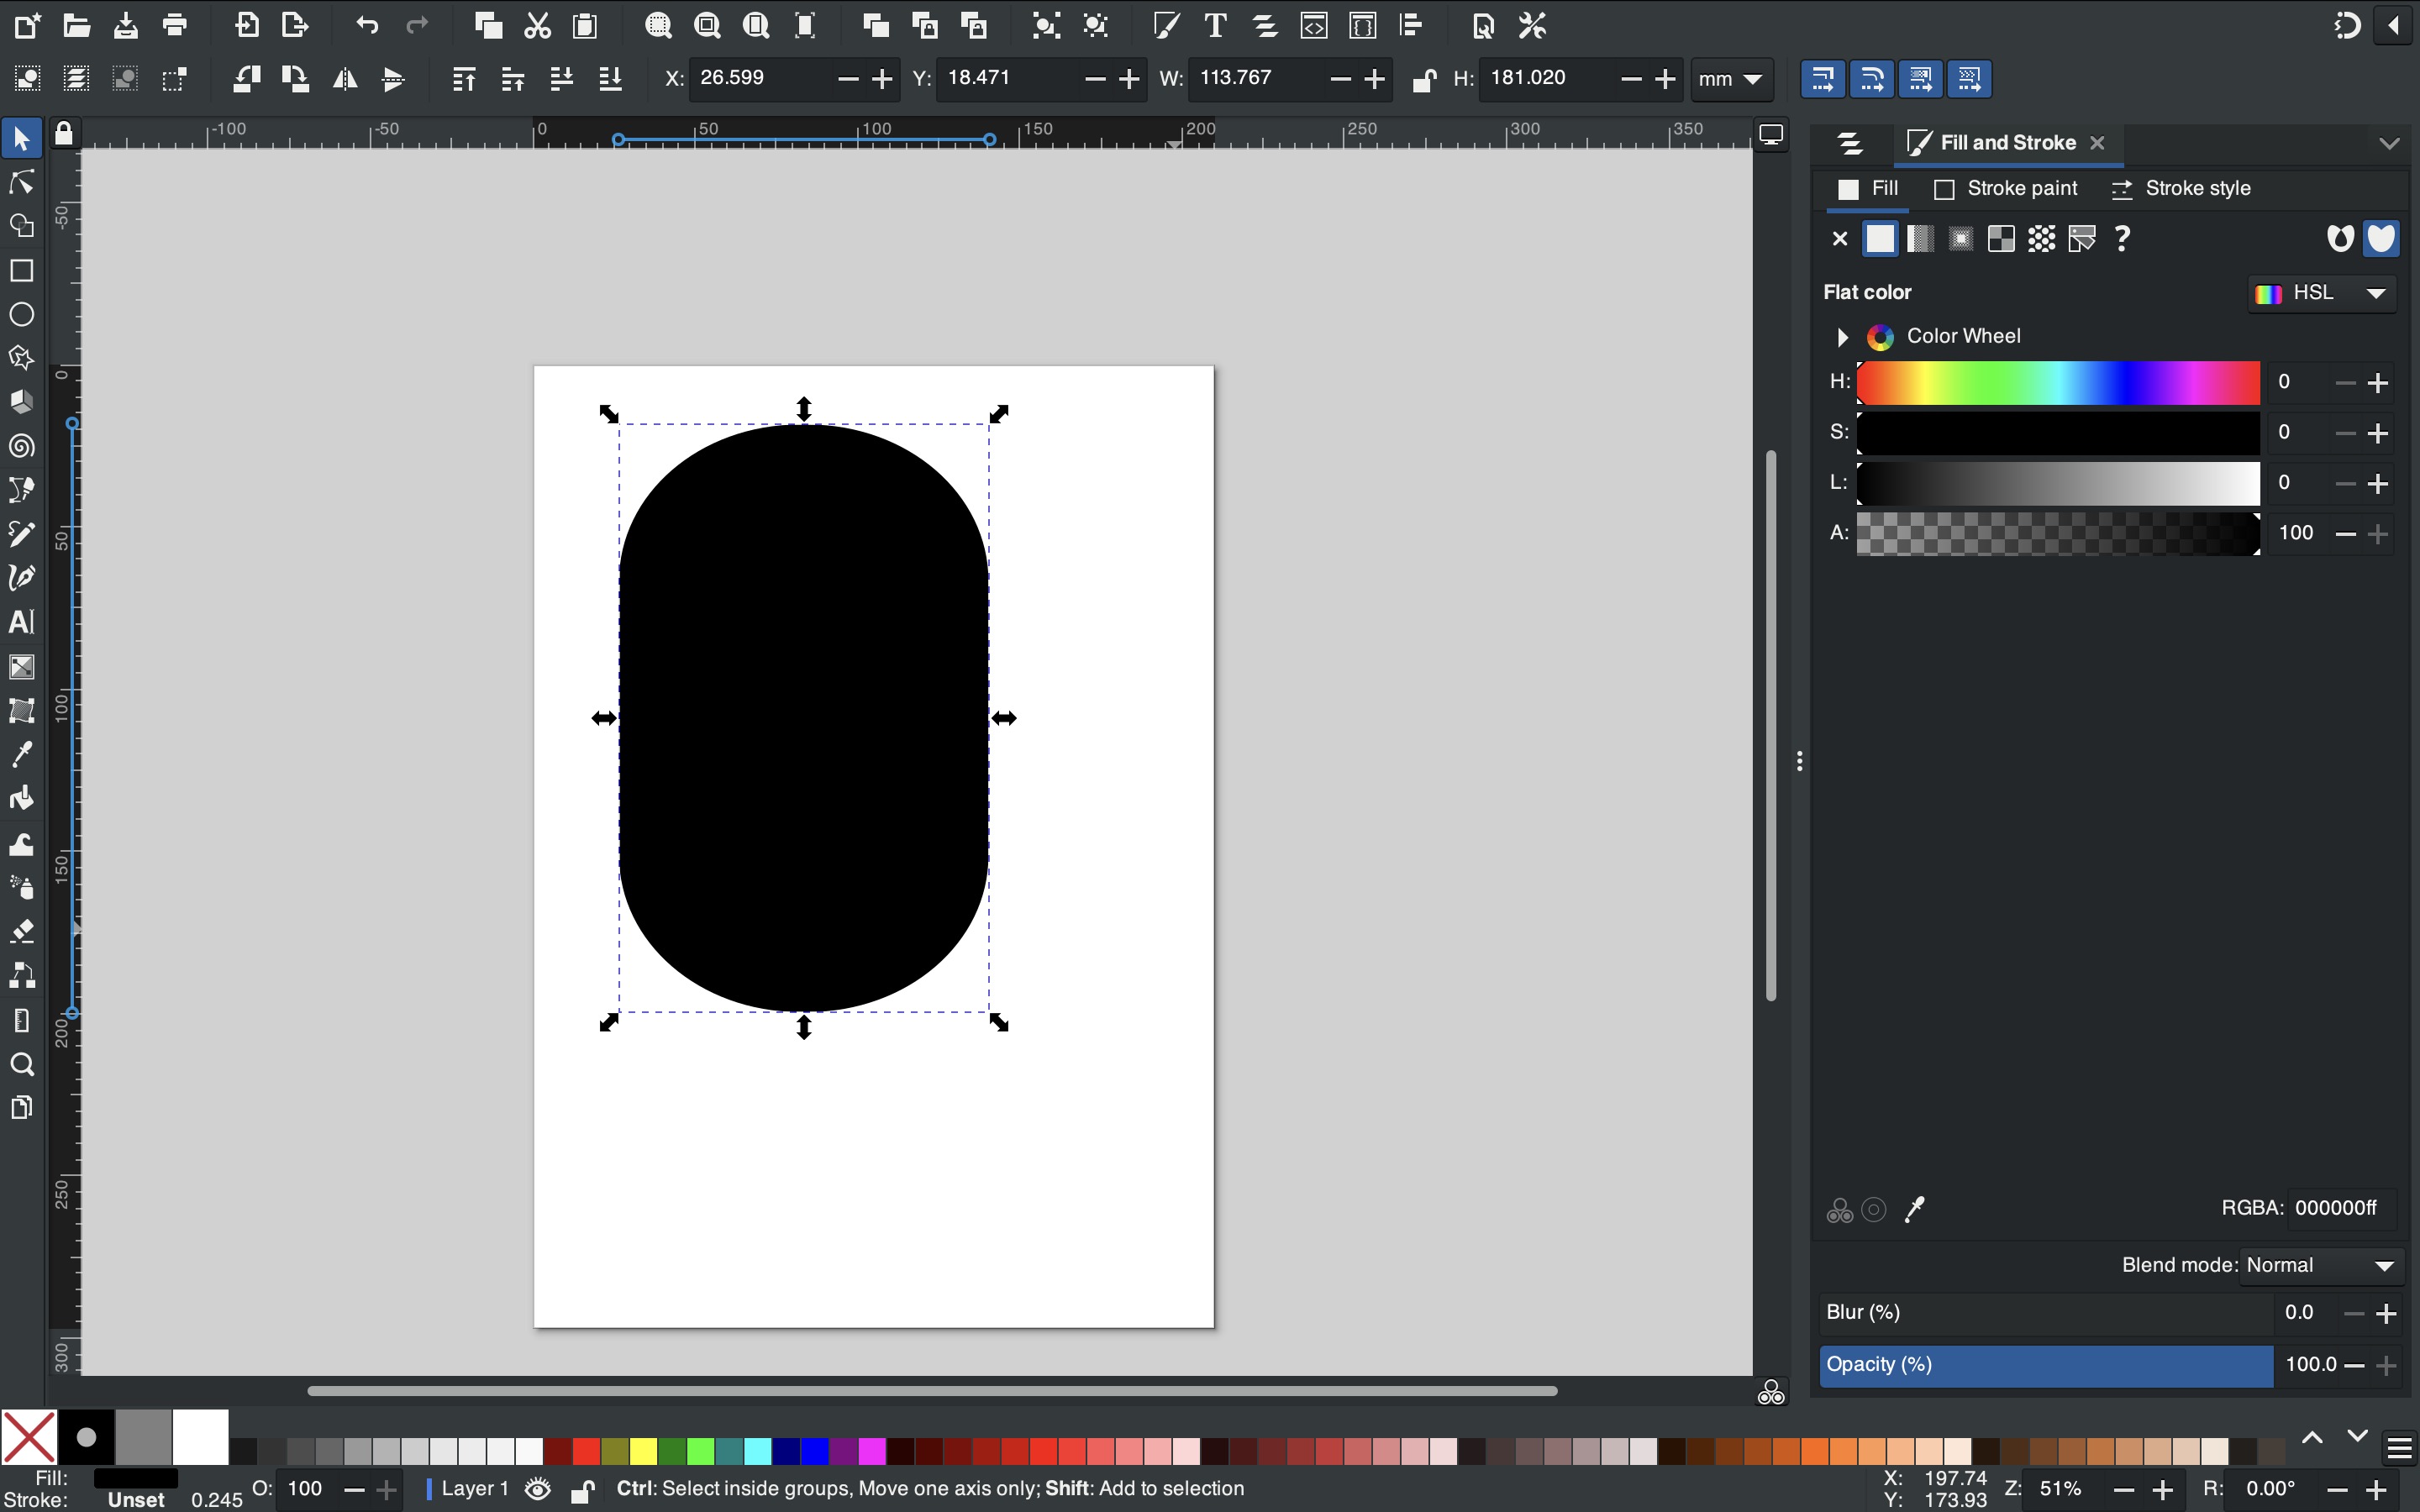
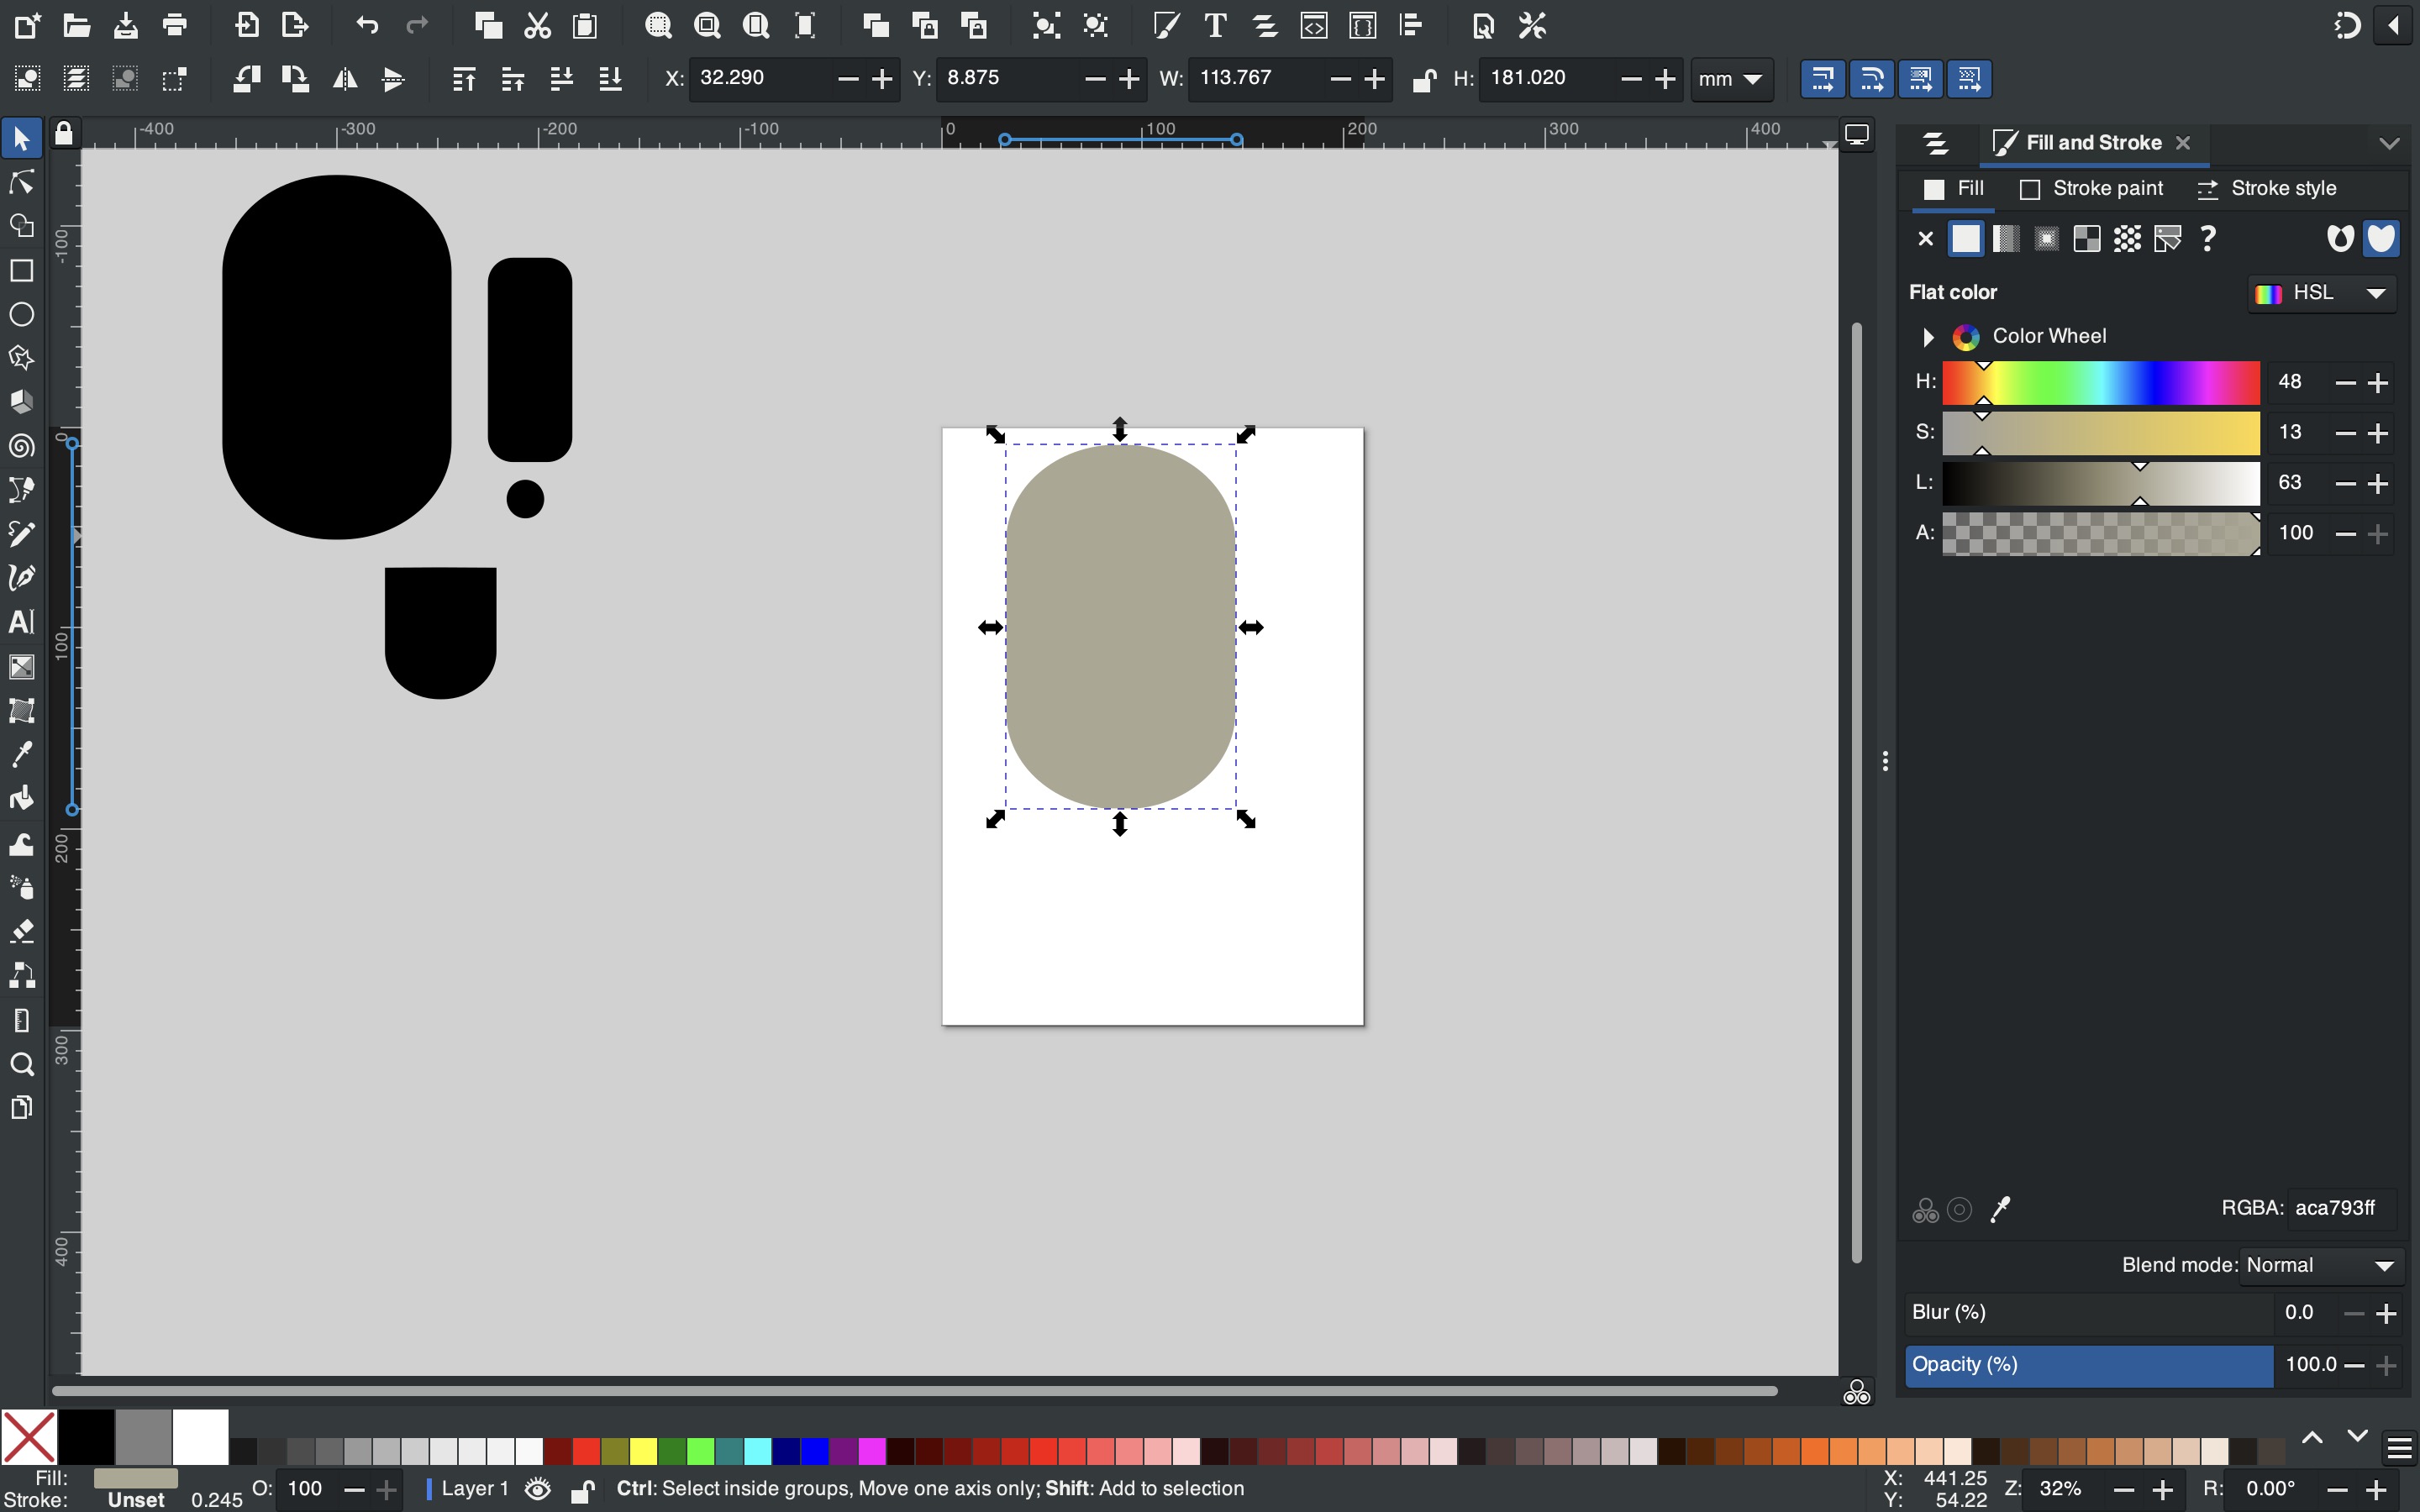
I wanted to curved the edges but I wasn't finding the tool, it was very difficult for me and then I saw a tutorial and got to know the second tool from top which looks a bit like roate was used for curved edges, I made the same shape again but a bit flat this time and with the help of circle tool I made the circle.
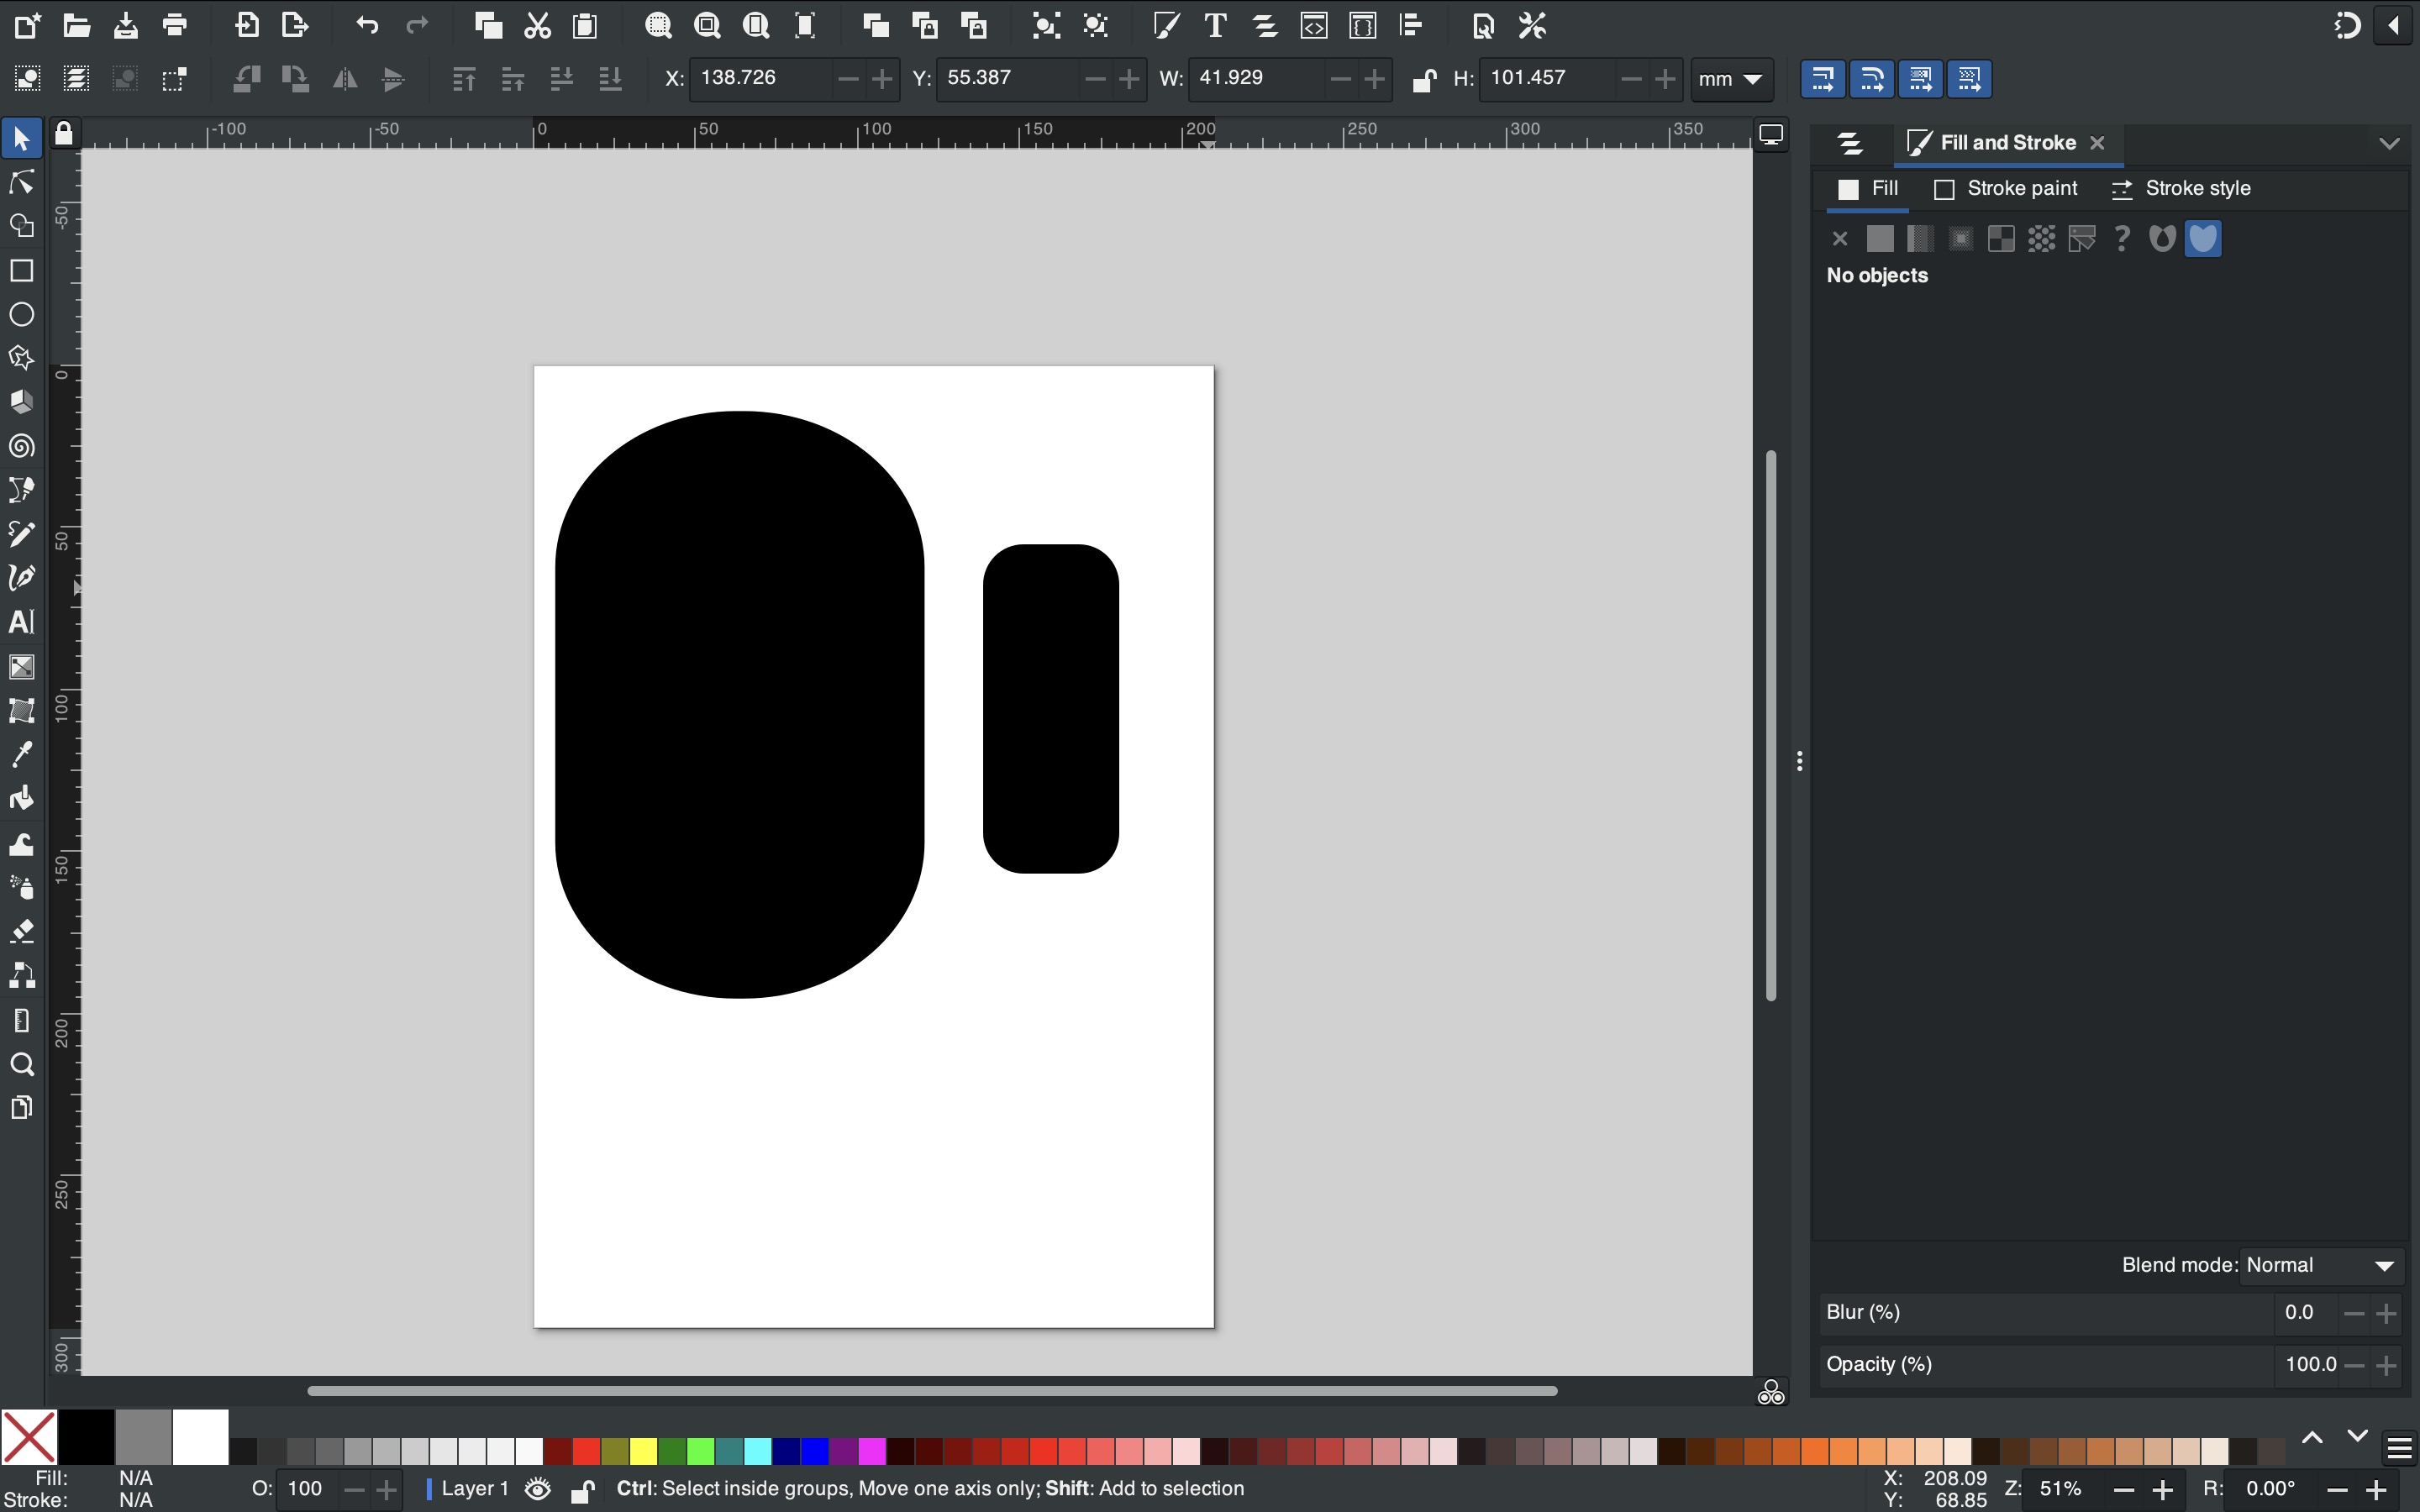

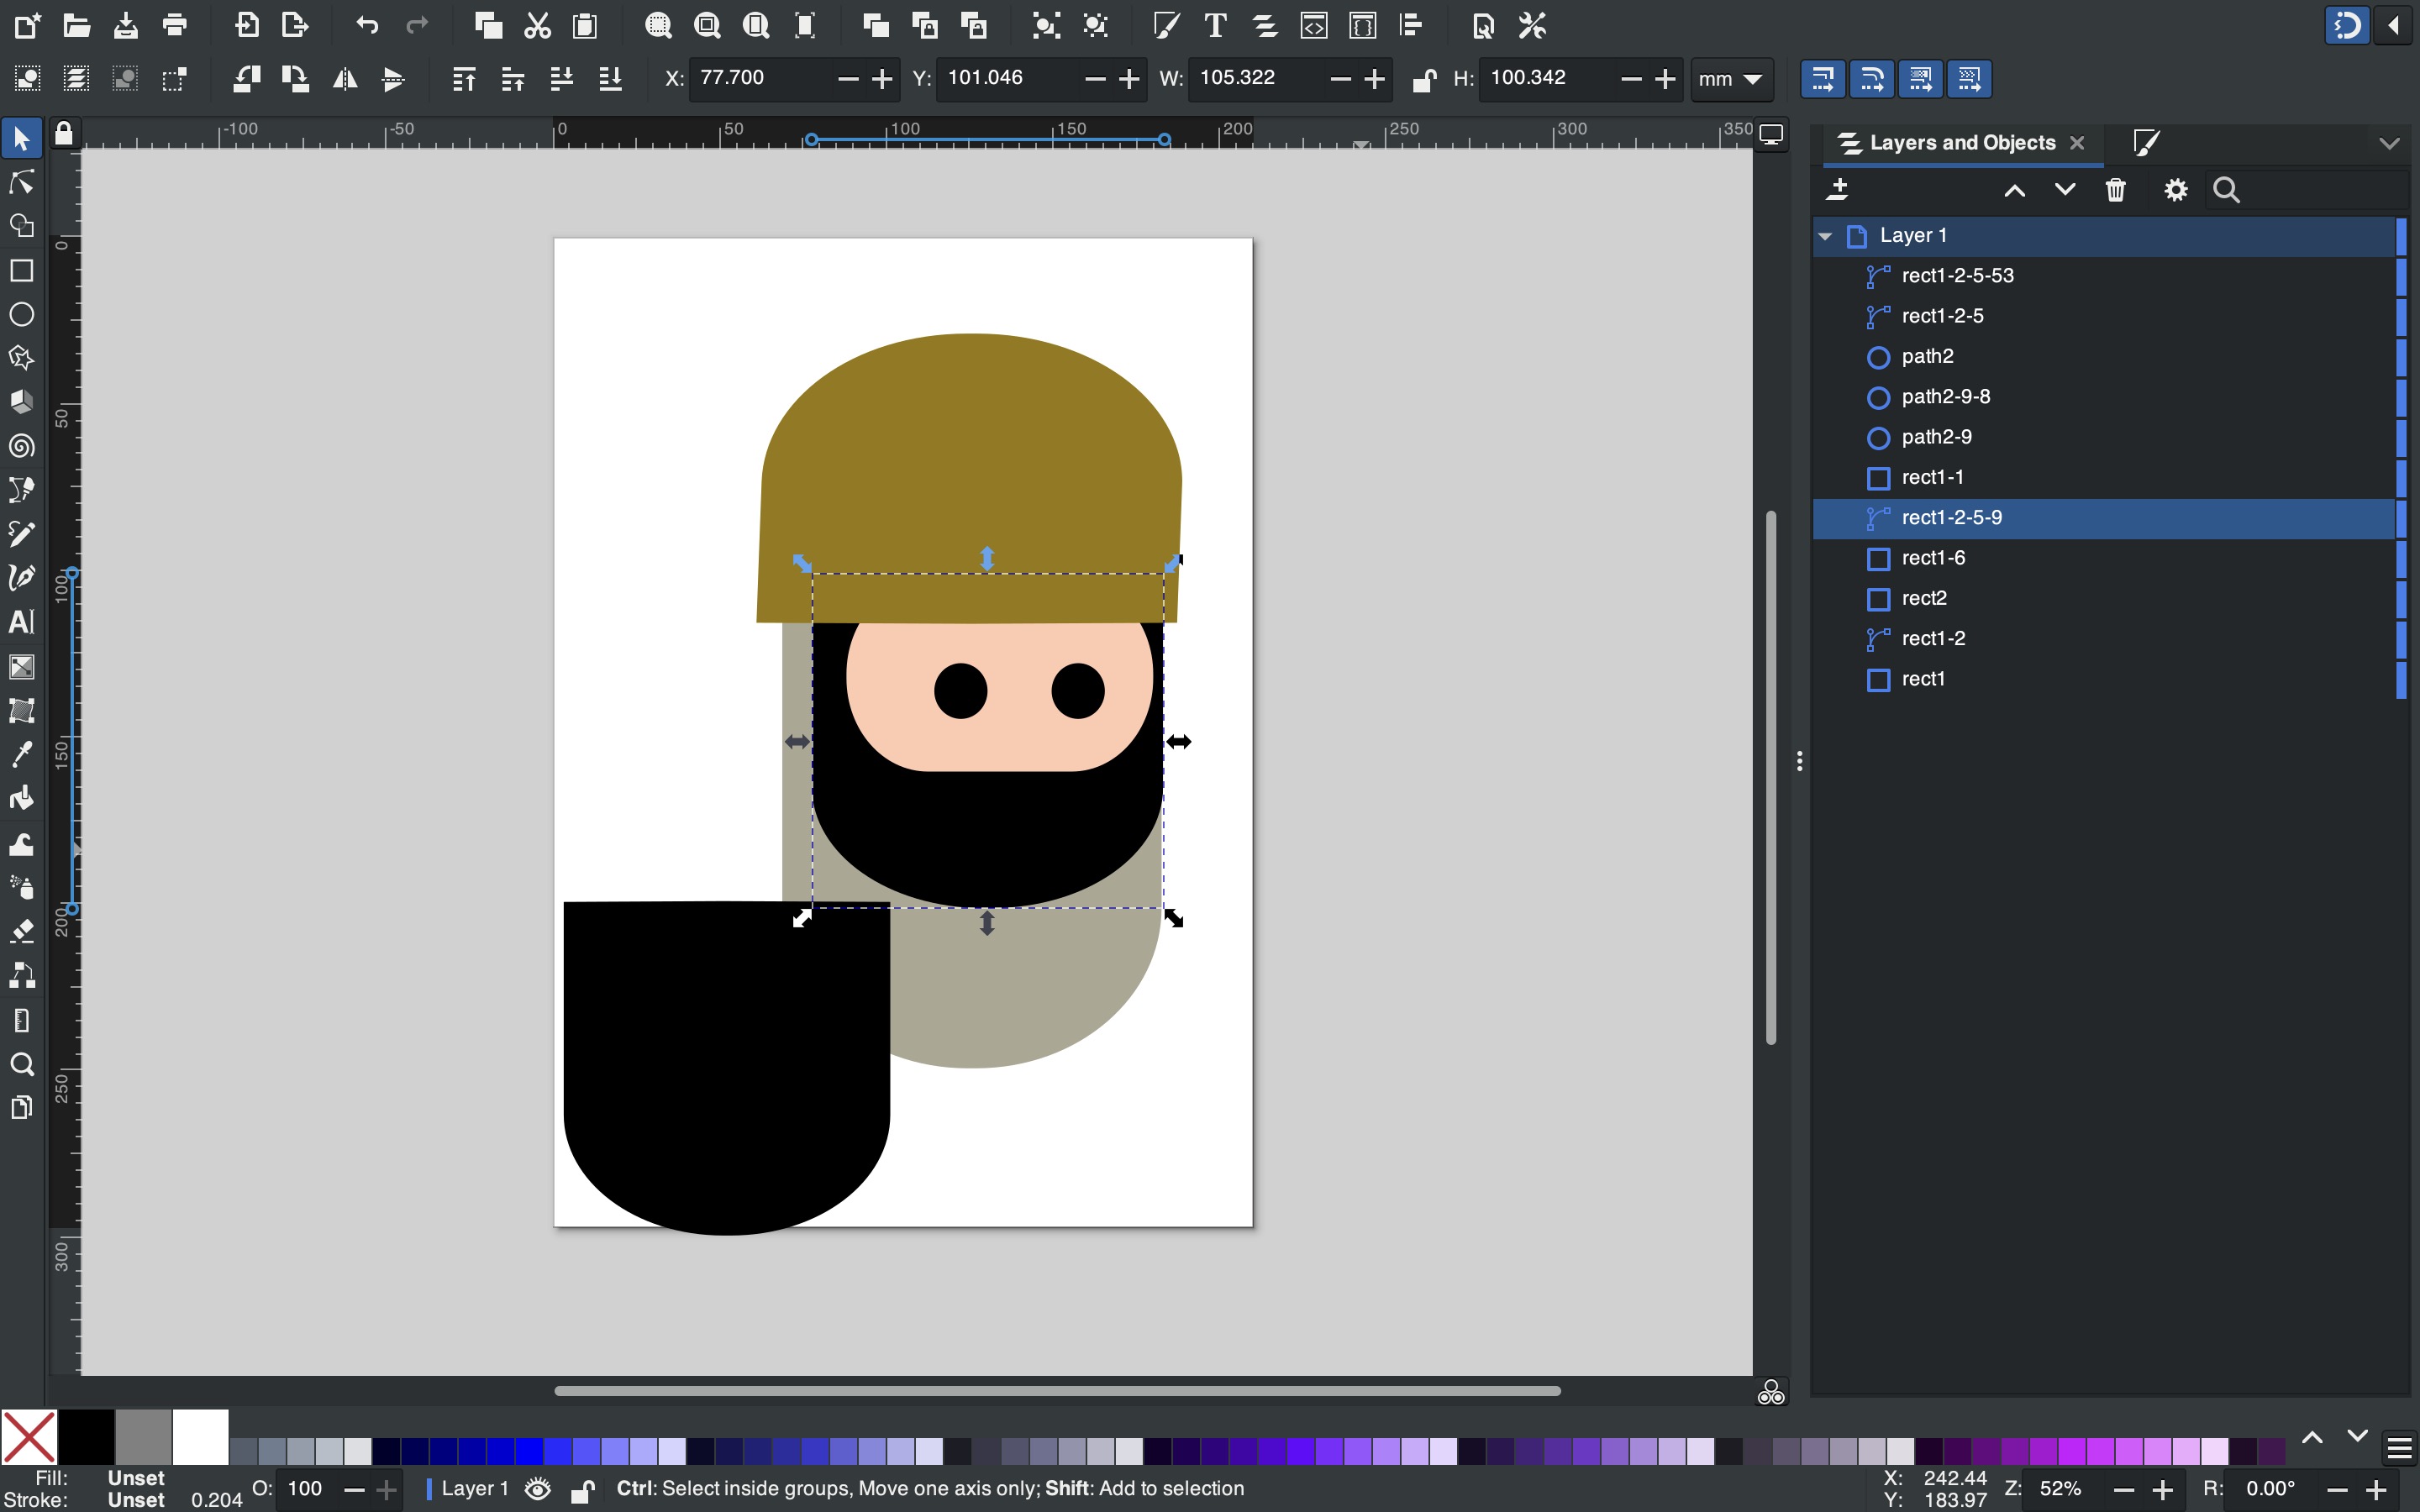
I wanted to trim the shape into half, again was not able to find the same, I took too much time to figure it out and eventually there was an arc like icon on the top which was used for trimming the objects, after that I started giving basic colours by the fill colour option which is given below.
Final outcome
Conclusion From Week 2
I have compared my software using experience above but to summarise it for 3d software fusion was only convinient I learned a new way of doing voronator effect, Freecad interface was difficult for me to understand but I need to practice more on that, Sketchup is not a software for me it's interface is not stable and it is a software where you want to make blocky, squarish structure like home, walls etc. In 2d software illustrator has everything and it is easy to use, Inkscape was also good but it has some limitation and it does not have all tools like illustrator, I liked spraying tool which was new in Inkscape.
Download files
Gimp file
Fusion - lampshade file
Fusion - Voronator cup
Freecad File
Illustrator - Name plate
Image Credits
All images of cover page are credited below:
https://images.app.goo.gl/Yoi8gTVWy6kGDzEm9.
https://images.app.goo.gl/iPXTetGCzg2g7Sgt8
https://images.app.goo.gl/tap7myxvjLGQUELUA