1. Project management, Principles and Practices
Initially, I used the Web IDE on GitLab to do the basic edits needed for Week 1. The tasks included:
1. Adding the student agreement to the repo
2. A brief writeup of myself on the About Me page
3. A brief writeup of a project I intend to do
The Web IDE functioned fine, and I was able to do the requisite tasks by editing the raw HTML, as well as using the GitLab website interface to upload files and manage the repo.
1. I downloaded the student agreement, edited it to add my name, and uploaded it to the root of my repo.
2. I uploaded images for the About Me page through the IDE.
3. I linked to these images within the HTML code I wrote up for the About Me and Project pages.
At first,
the major challenge I had was about getting sufficient information about how to use gitlab. I had never used gitlab but I did had basic background as I did use github for my previous job.
Second step
involved understanding the documentation process followed by th Fab Academy and to try build on for myself.
Last step for the week
was to explore and define possibilities for the final project of the course. Ofcourse plan out the same. I worked on defining my final project idea and started to getting used to the documentation process using HTML. So basically all three requirements were attempted in parallel.
Understanding Git, GitLab and GitHub
Git serves as an invaluable open-source version control system, empowering DevOps teams to effectively manage software development endeavors of varying scales. Its capability to track changes facilitates flexible, non-linear development processes, enabling team members to seamlessly modify, append, or remove files as necessary.
Among the array of Git hosting providers, GitHub stands out as a widely embraced platform renowned for its robust features and reliable performance. Its interface encompasses a plethora of functionalities, including Git repositories, collaborative workflows facilitated through forks and pull requests, automated safety validations, GitHub Actions, and a comprehensive ticketing system integrated with milestone tracking.
In contrast, GitLab emerges as a formidable competitor to GitHub, offering a similar suite of tools tailored for software development projects. While both platforms revolve around Git repositories, GitLab distinguishes itself by maintaining the application's source code publicly accessible on the internet under an open-source license. Additionally, GitLab provides the option to deploy a GitLab server within one's own data center, presenting potential cost-saving advantages. This approach affords users the autonomy to host GitLab locally, ensuring sensitive code and business data remain secure and under their direct control, whether for commercial or open-source initiatives.
Fab academy's Documentation Process
Writing down lots of information might feel both exciting and a bit boring at the same time. It's kind of like a mix of feelings because you know you might forget things after a while. But, it's super useful! The cool part is that when you document things well, it's like creating a helpful guide that you can always go back to. It's like having your own website that stays active, and you can visit it anytime. Plus, you can even share it with others so they can check it out too. This way, you're ready for anything that comes up in the future!
Understanding how to use HTML
What constitutes an HTML element?
An HTML element is characterized by an opening tag, followed by its content, and finalized with a closing tag.
Certain HTML elements lack content, such as the
element. These elements are referred to as empty elements. Empty elements are distinguished by the absence of an end tag.
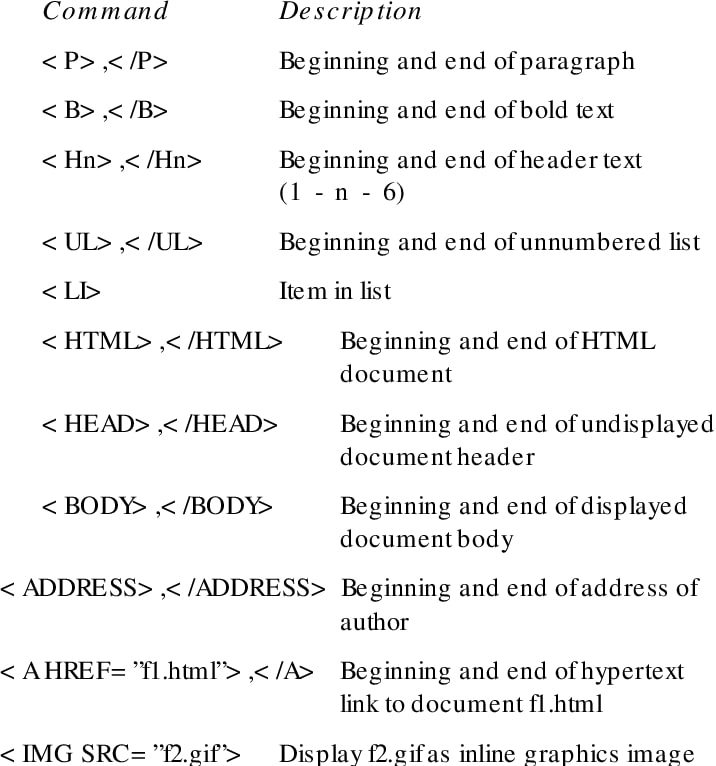
Fundamental HTML body structure code:
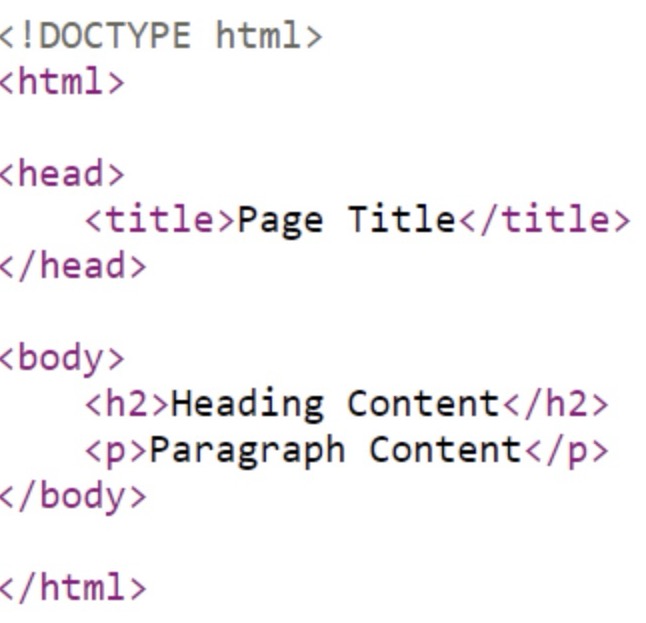
The content inside the section will be displayed in a browser. The content inside the element will be shown in the browser's title bar or in the page's tab. I have heavily used W3Schools website for help whenever I used to get stuck with basic syntax issues. The site is linked here : W3 School.
Guidelines for building the website

1. Grasping the project needs
2. formulating specifications based on those needs
3. designing layout with inspiration from various websites
4. validating the layout with the local Fablab instructor
5. acquiring necessary software and framework files for development initiation
6. crafting an index.html file, and establishing resource folders (CSS, IMG, JS) for storage.
7. Generate an additional page to detail the initial assignment and replicate the process for each subsequent assignment.
1. Becoming familiar with HTML and GitLab
To enhance my grasp of the documentation process and improve my understanding of HTML, I sought guidance from my fab mentors, an IT engineer. I started by exploring the fundamentals and syntax of HTML, experimenting with local HTML using Microsoft Visual Studio, as depicted in the image below.
I've got intentions to enhance the visual appeal of my website through better layouts, images, and overall aesthetics. However, it'll take me some time to delve into the details of HTML before I can work some magic.
After investing considerable time in delving into HTML and its syntax, I made significant progress in understanding it better. However, I encountered hurdles while attempting to connect GitLab with the local Visual Studio for Git push. As an alternative, I chose to directly edit in the GitLab IDE, which initially proved effective. Yet, upon realizing that this practice wasn't recommended, I explored Mkdocs as an option, but faced installation challenges on my Mac. Despite seeking guidance from regional reviews and attempting suggested solutions, the issue persisted.
In a serendipitous turn, during a conversation with our college director, Dr. Irfan, I shared my struggles, and he promptly resolved the problem with a simple command: "Pip3 install Mkdocs." This successfully installed Mkdocs on my Mac, marking a turning point in my documentation journey.
Acknowledging the collaborative spirit, I sought assistance from various mentors and colleagues, including Pranav sir, Jesal sir, Mitul Jain from riidl, and my classmate Tejas Dandge. Their collective guidance played a crucial role in overcoming the challenges associated with connecting Visual Studio and Git push. I am still trying to figure out Mkdocs for timining I have done it through HTML.
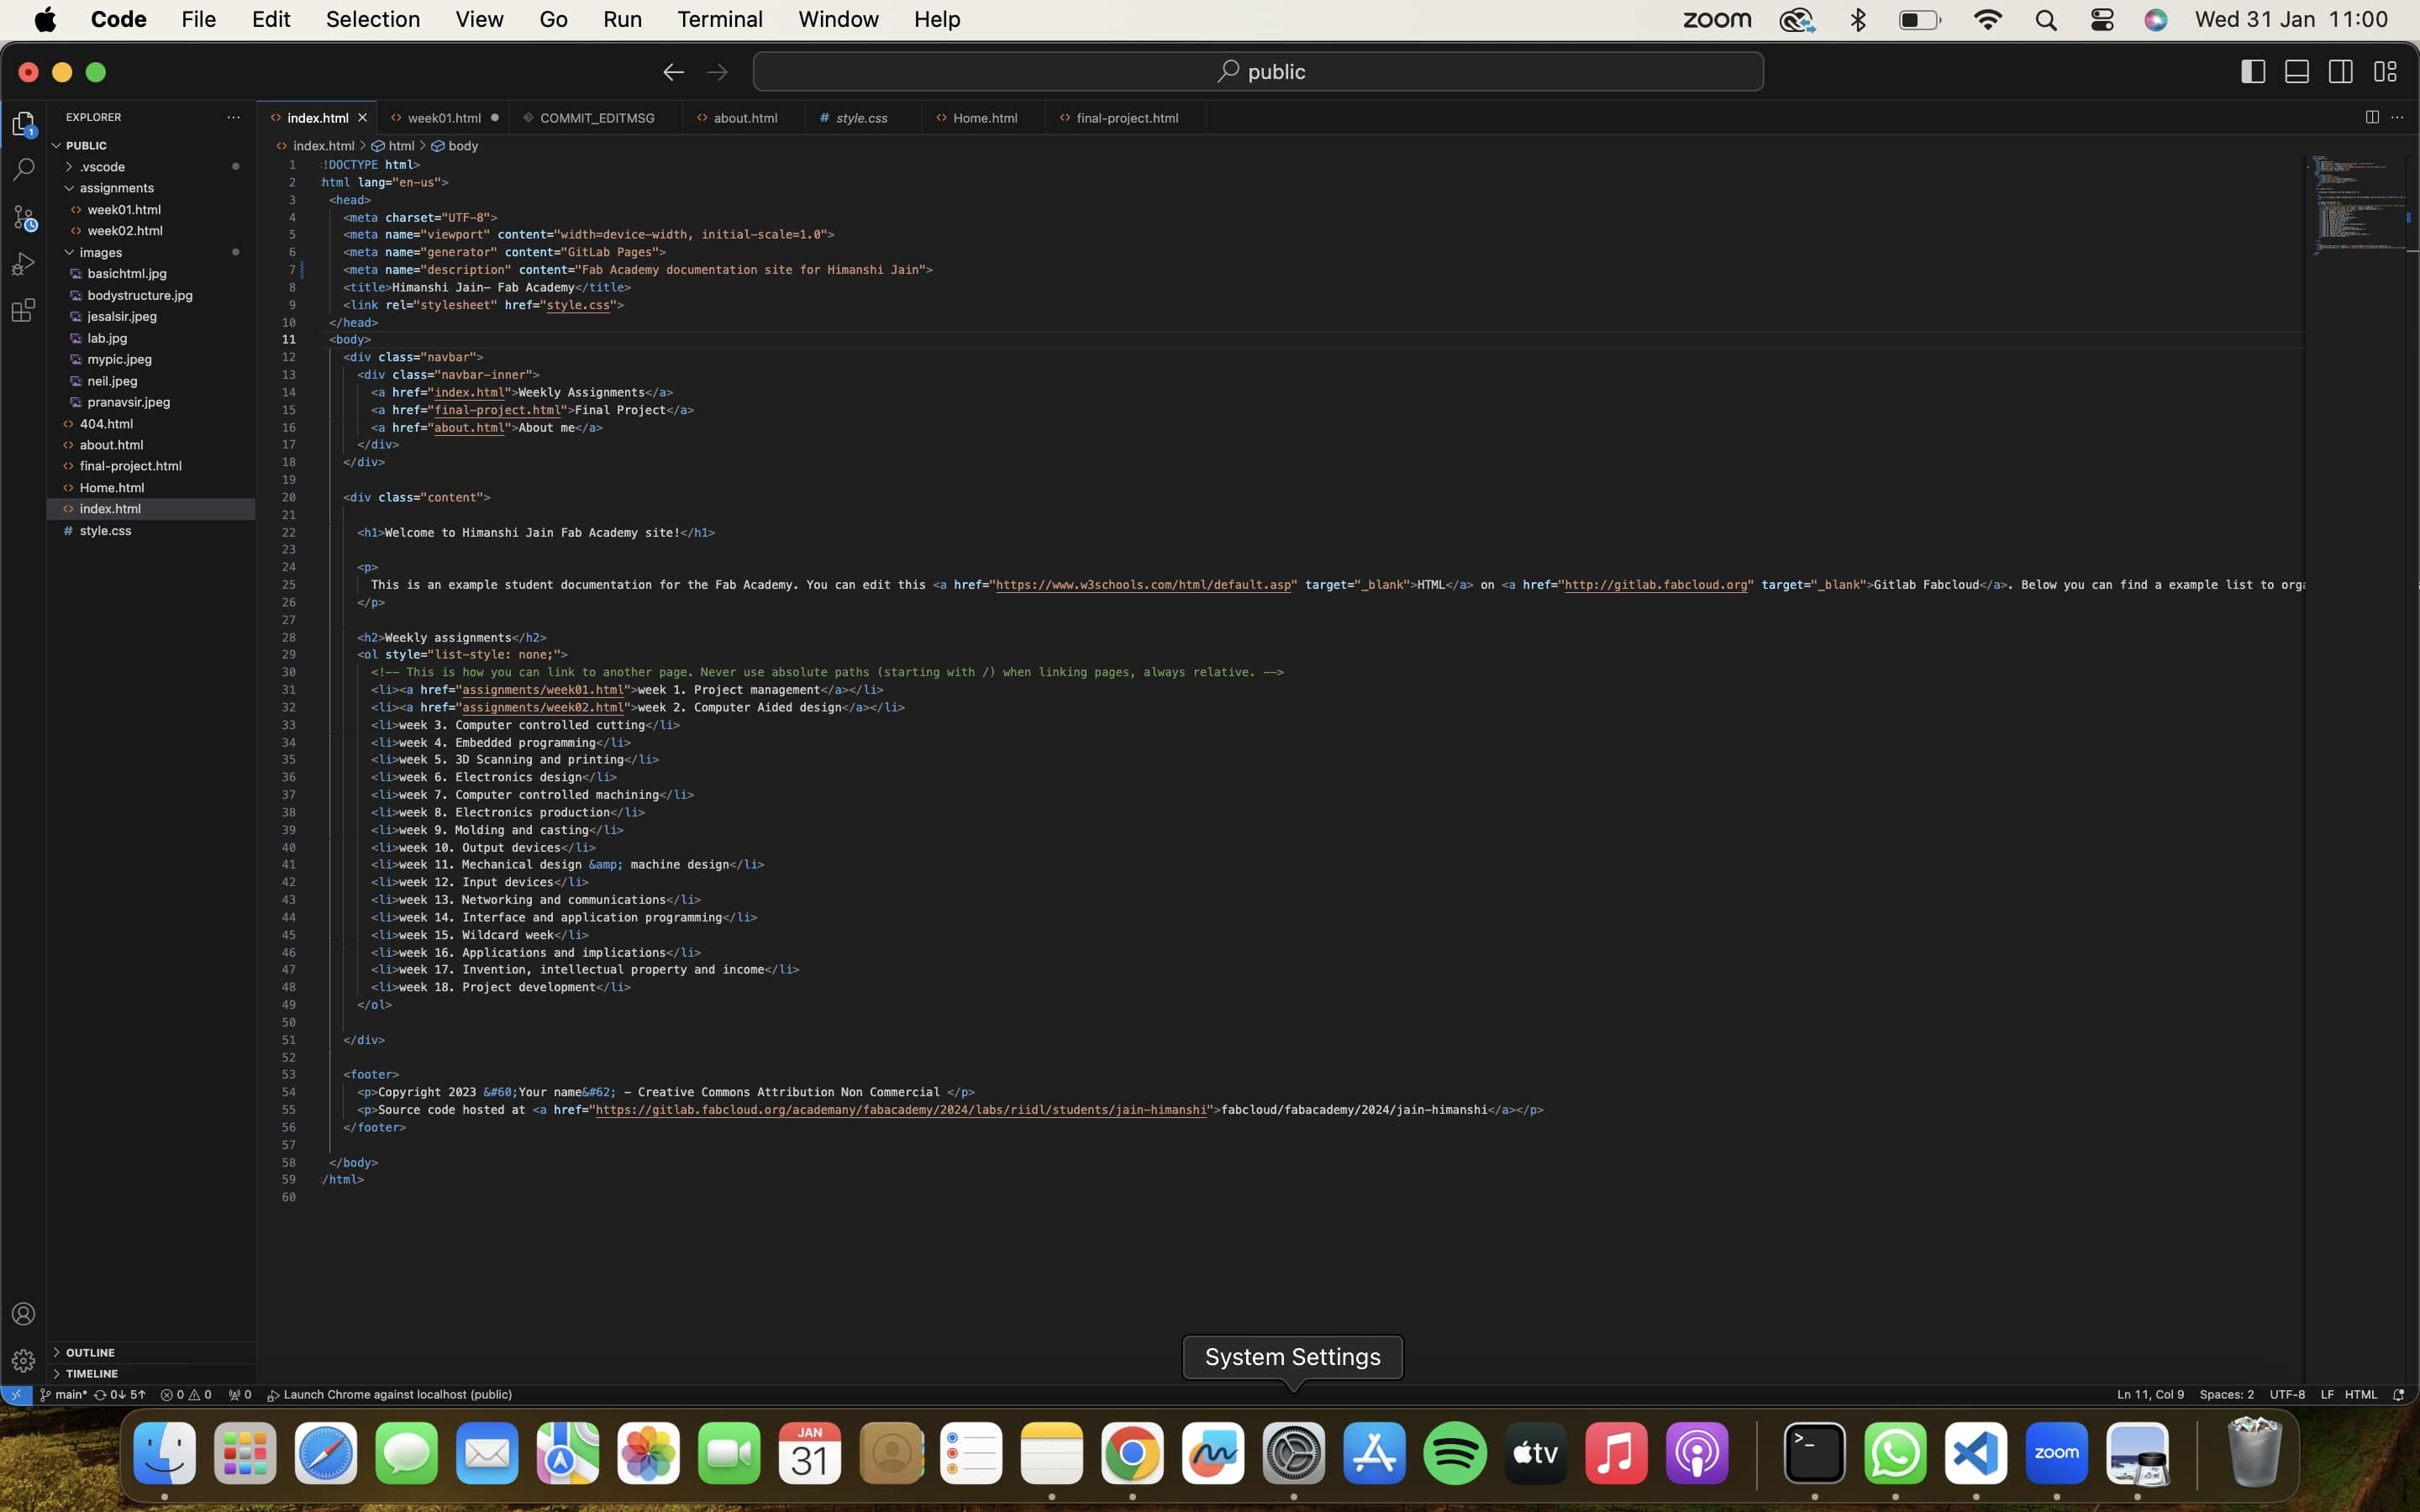
Utilizing Visual Studio Code for documentation purposes
In my coding and documentation journey, I exclusively utilized Visual Studio Code as the primary software for web development. Rather than adhering to a standard template, I customize the .css file to introduce color variations, font size adjustments, and a structure with multiple headings, subheadings, and options. The layout and code organization were meticulously handled within the Visual Studio Code environment.
Being relatively new to coding, the learning curve was steep, and it took considerable time to reach my current level of proficiency. Initially, I worked directly on GitLab, pushing changes without an intermediate step. However, this approach proved to have its pitfalls, and it was only through the guidance of my instructor that I realized the importance of utilizing Visual Studio Code for a more streamlined and efficient workflow.
In detailing my experience, I've made an effort to elucidate both methods—directly on GitLab and via Visual Studio Code—and highlight the mistakes I made along the way. The aim is to provide readers with insights that can contribute to a better understanding of the nuances and challenges involved in the documentation and coding process.
Operate Directly within the GitLab Interface
If you opt to work directly within the GitLab root directory (although it's not advised, but temporarily), here are the steps to proceed:
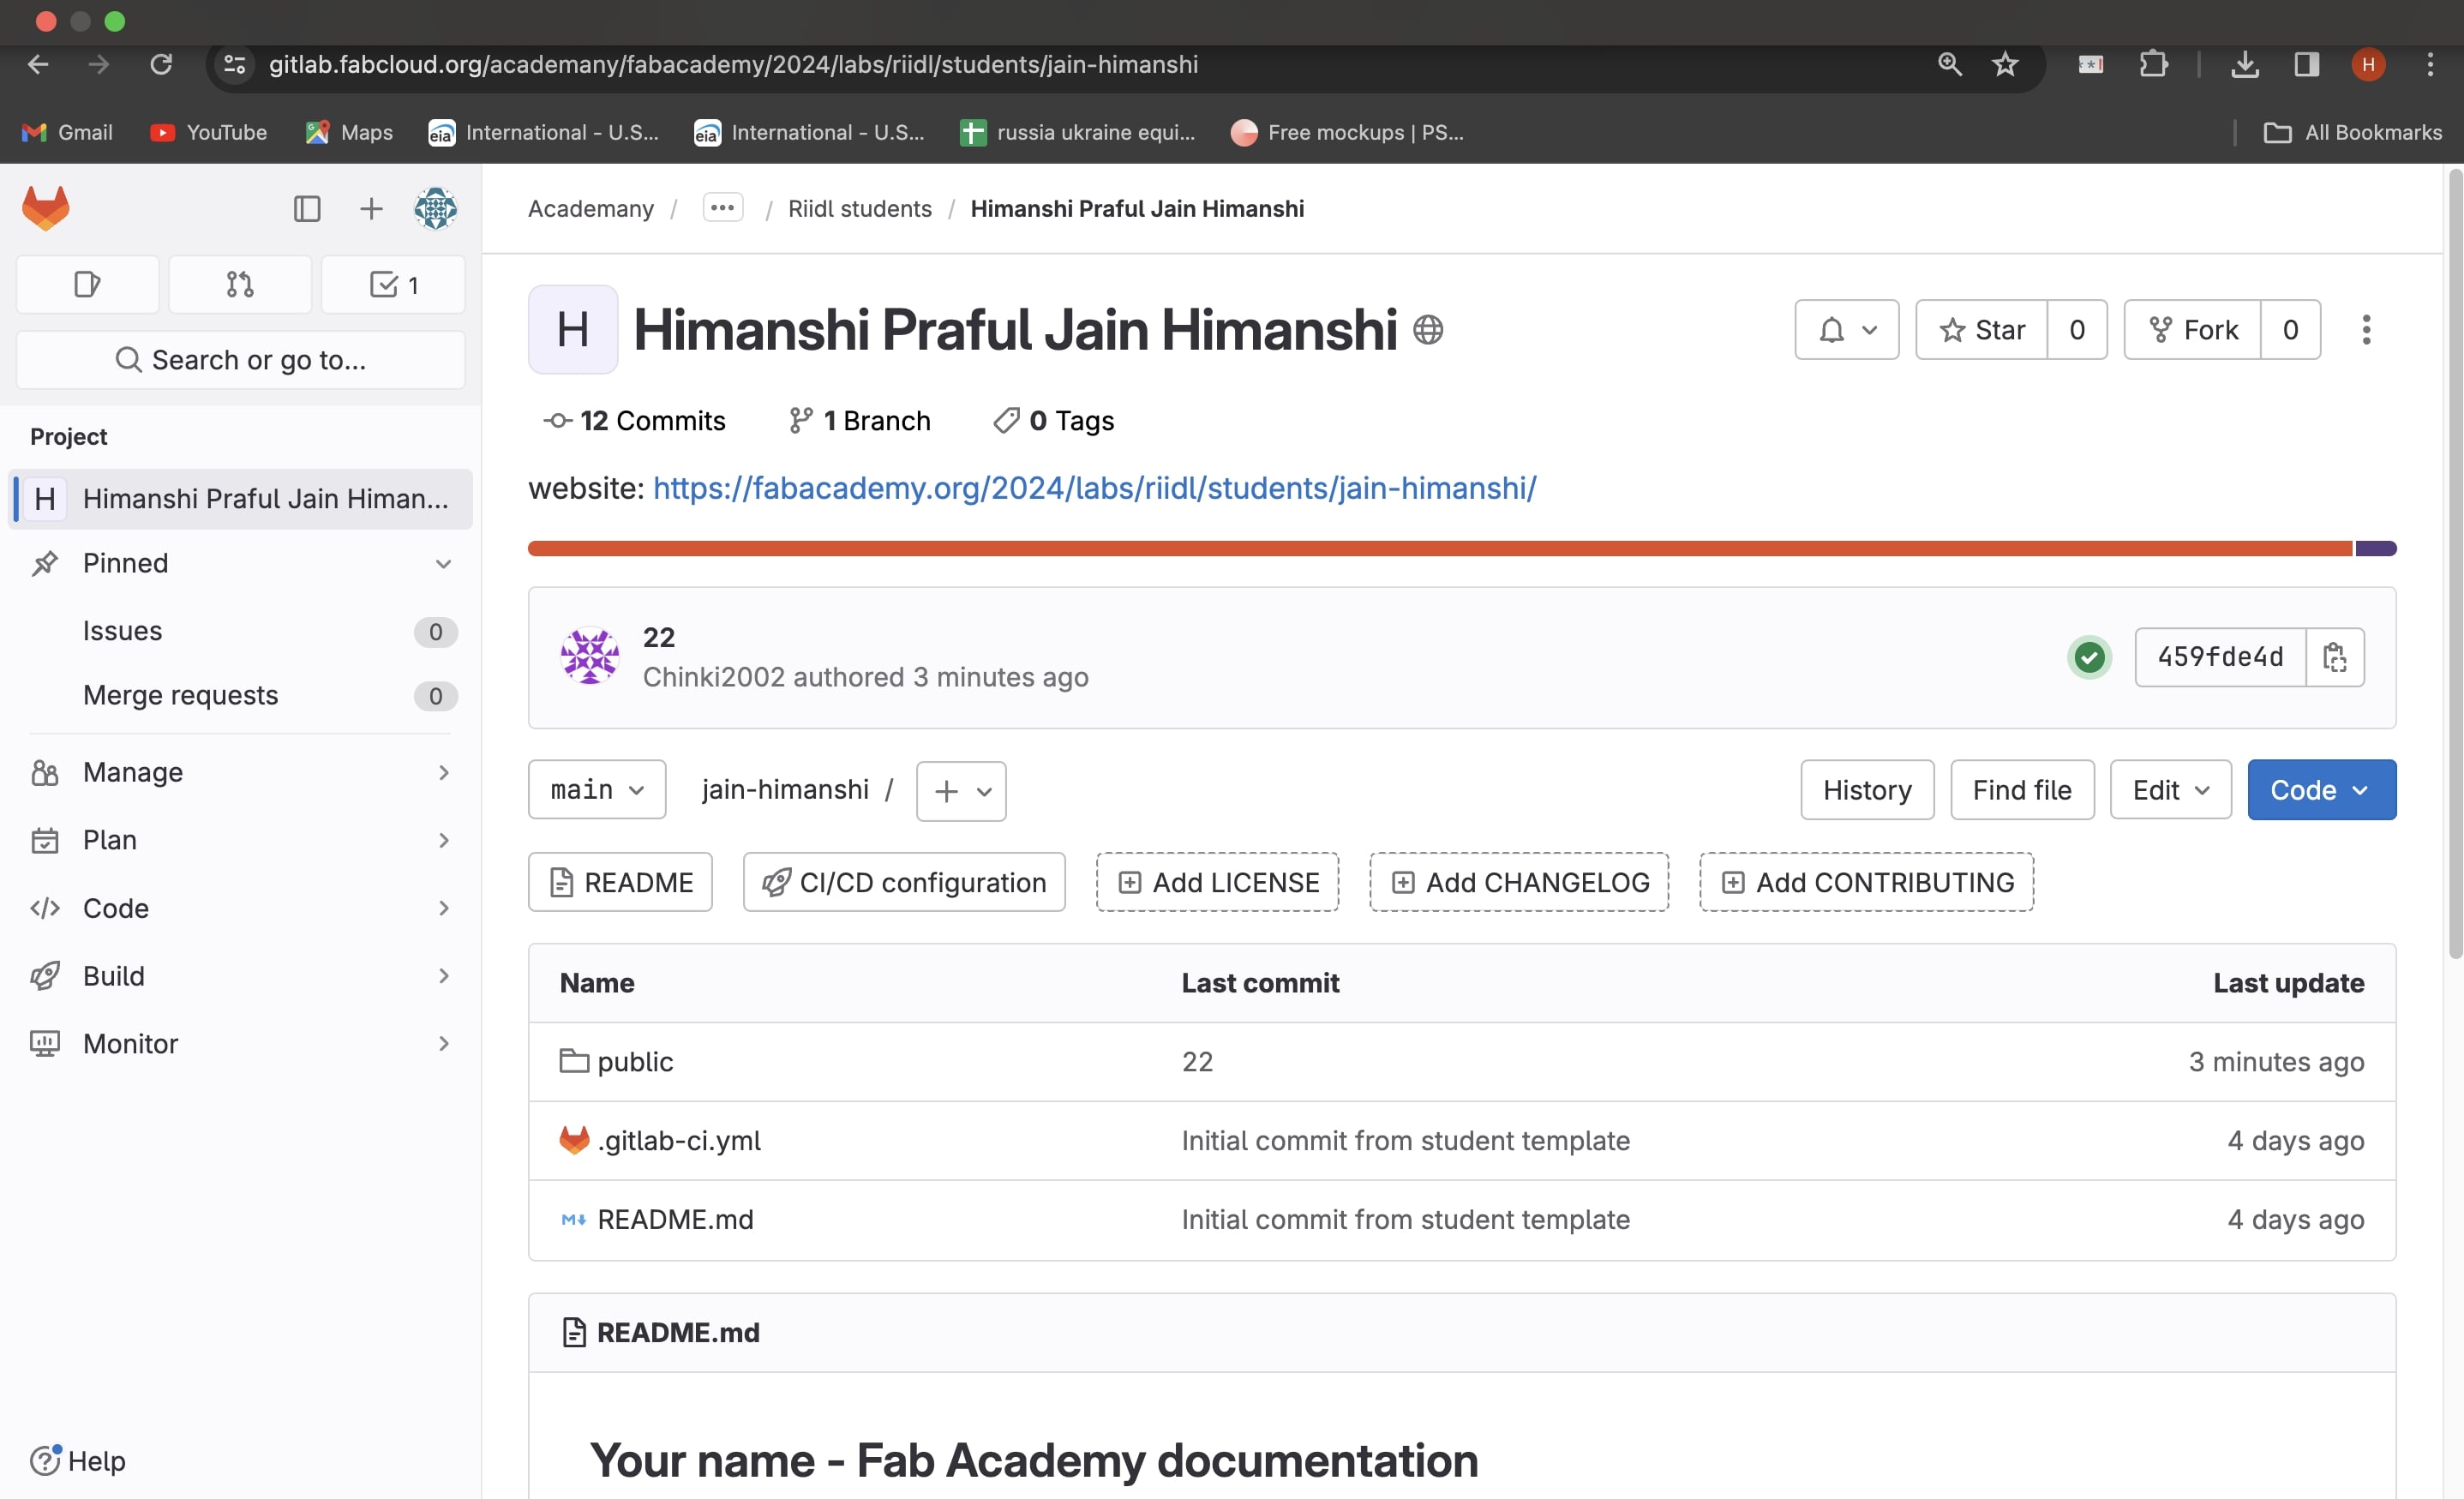
1. Navigate to GitLab and access the public folder.
The corresponding URL is: fabcloud/fabacademy/2024/jain-himanshi (please update the year, fablab name, and student name accordingly). Additionally, make sure to log in using your fablab ID to access GitLab.
2. Web IDE Editing..
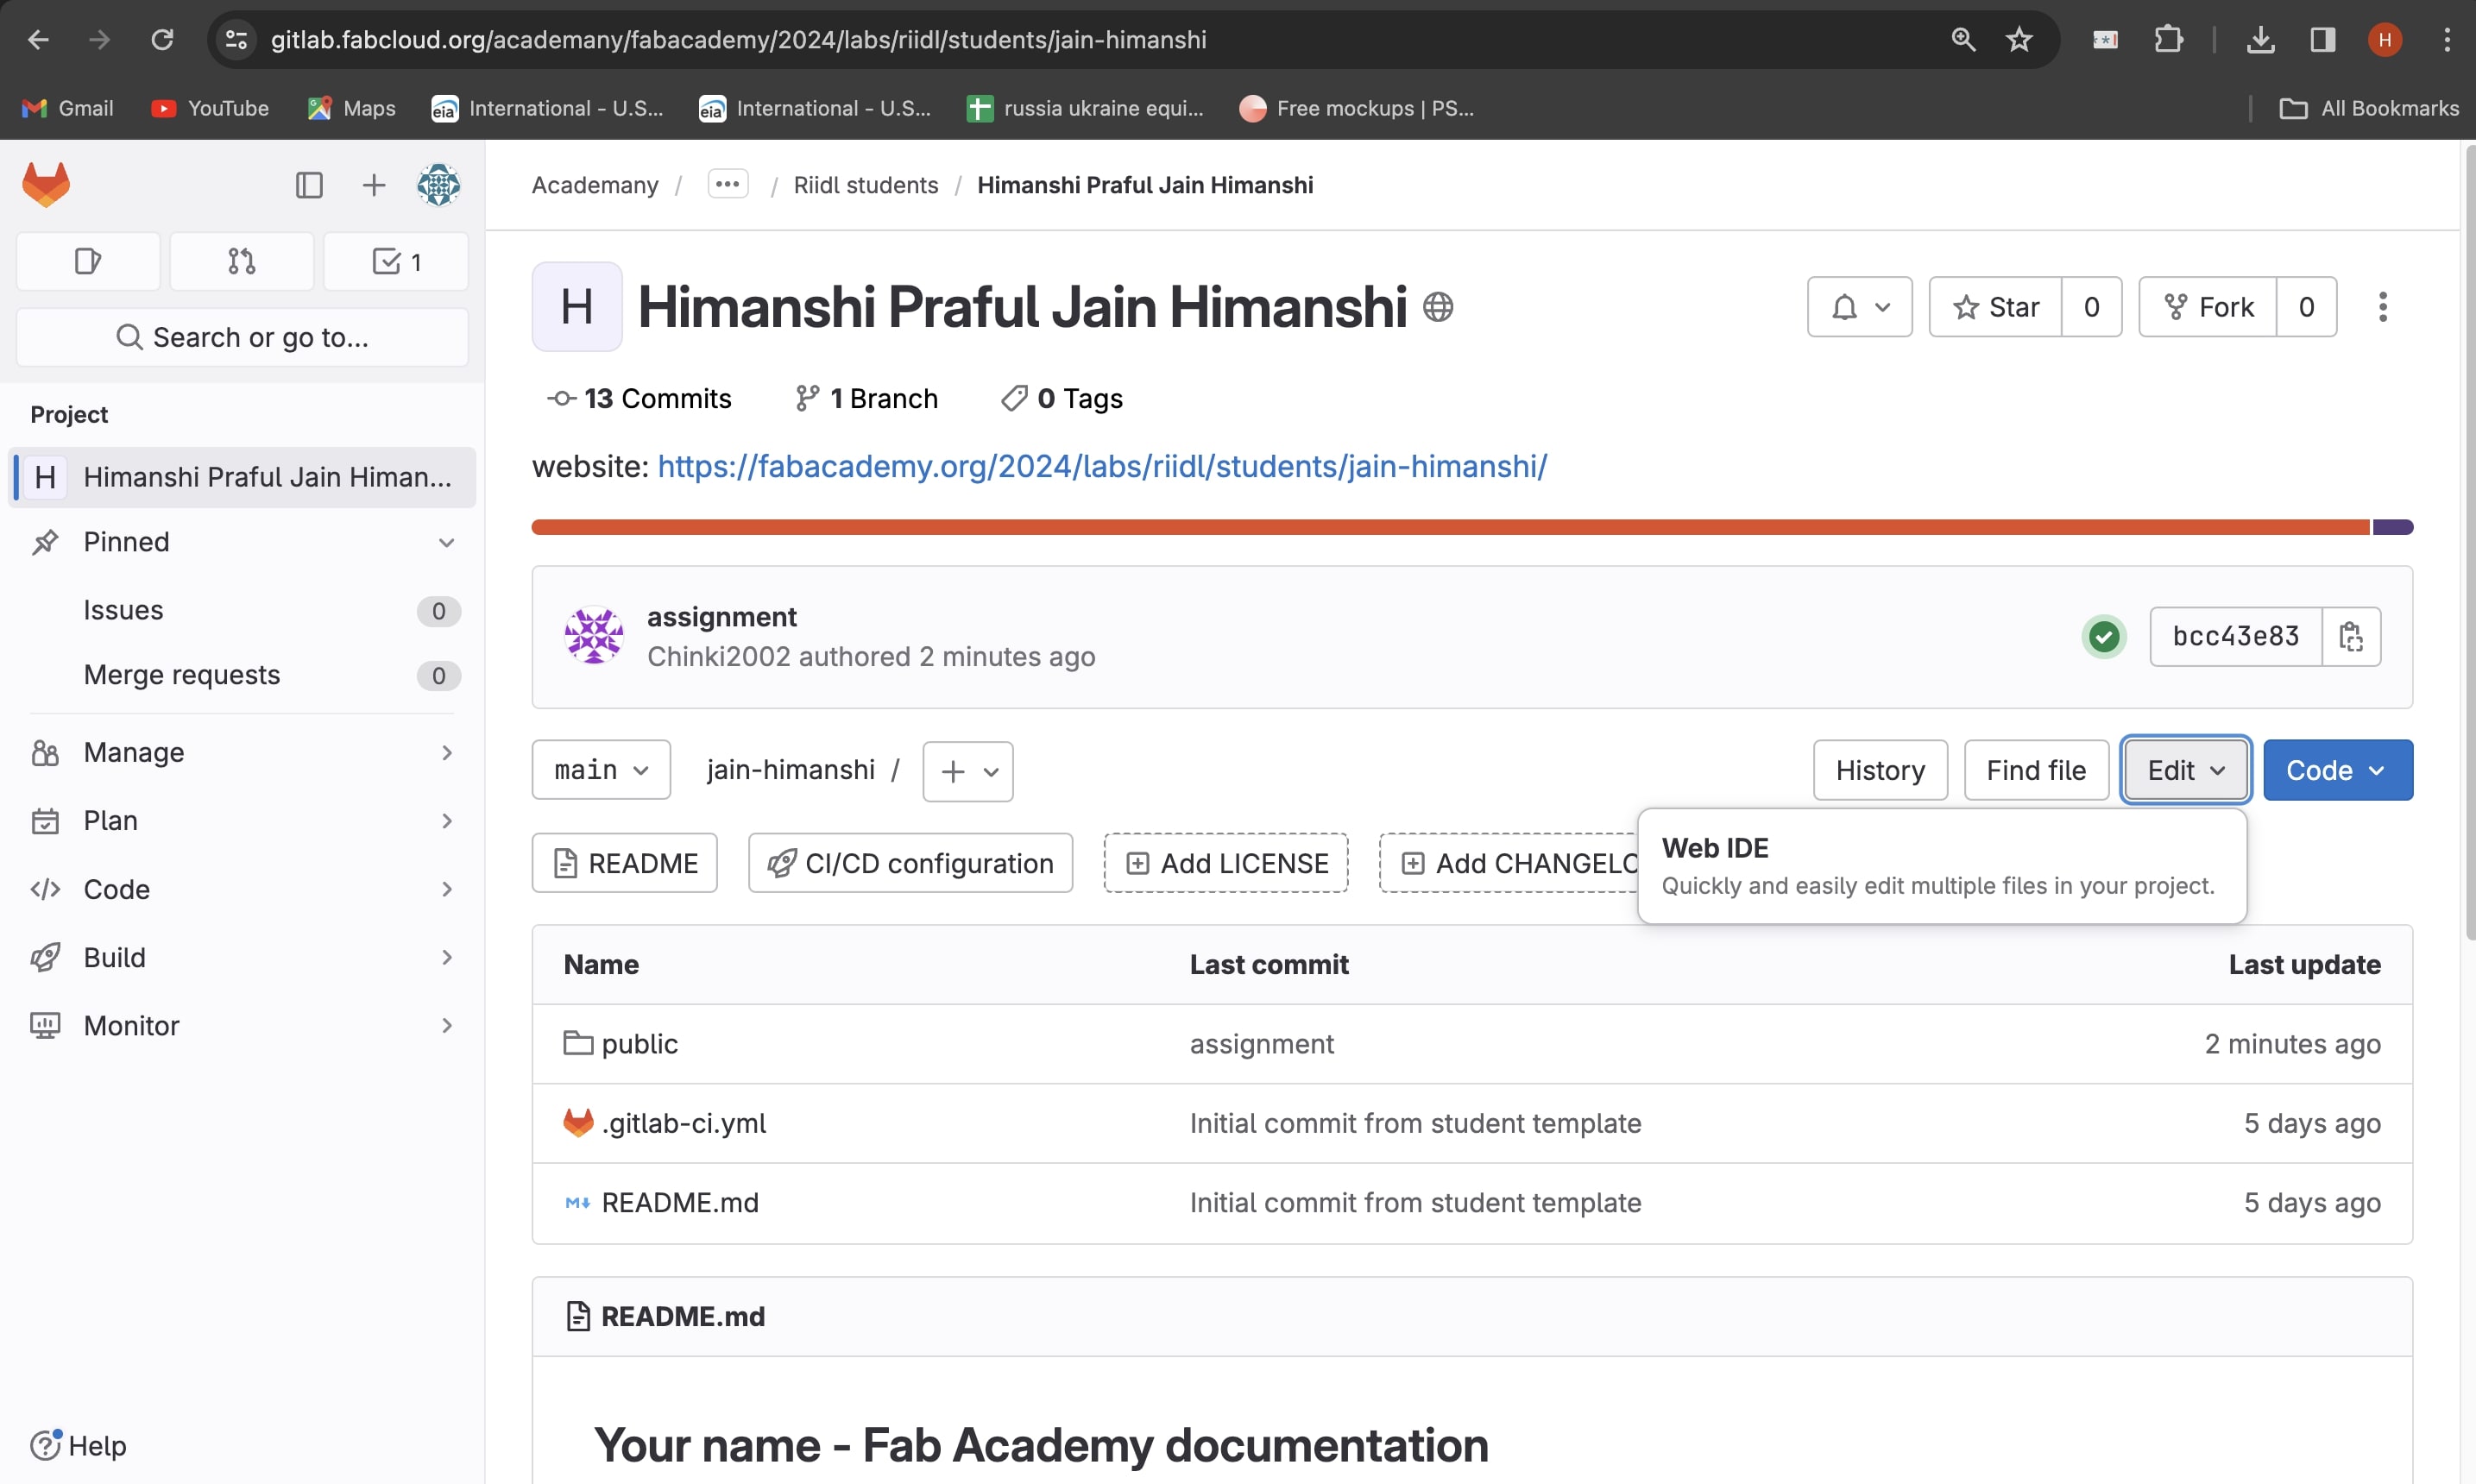
3. Code, Build, Iterate.
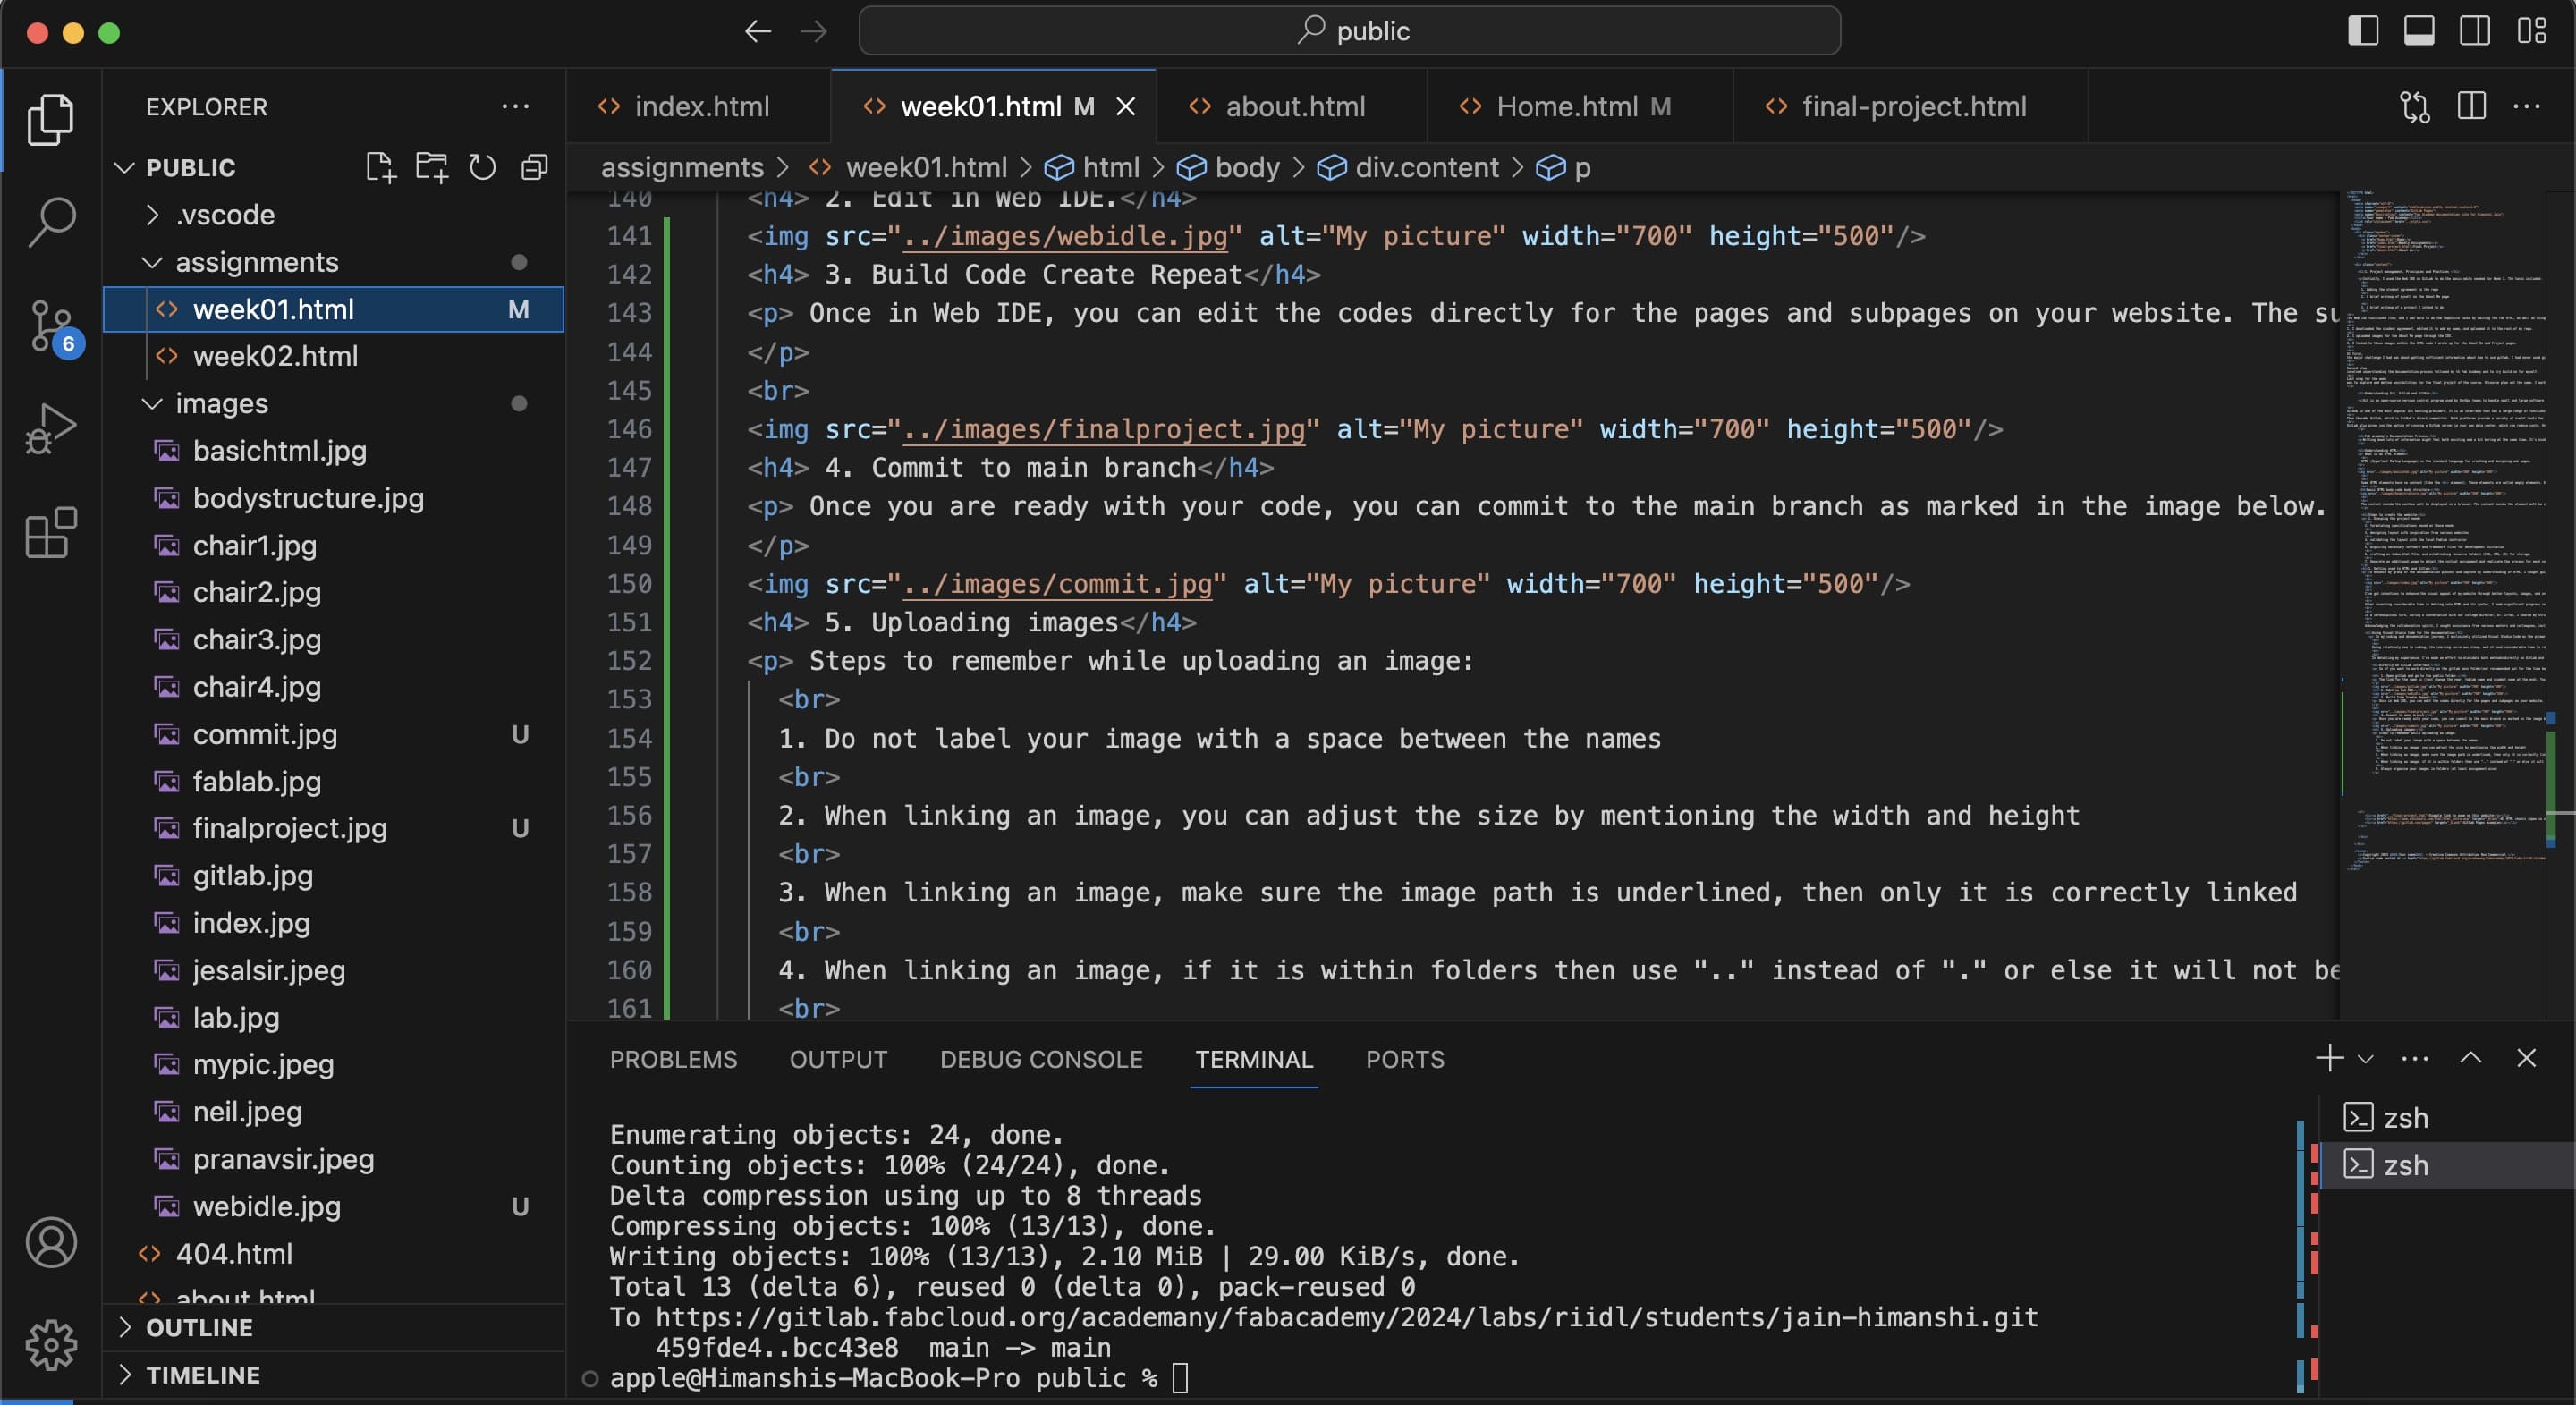
Within the Web IDE, you have the capability to directly modify the code for both the main pages and subpages of your website. The subpages are conveniently displayed in the left sidebar, as illustrated in the accompanying image.
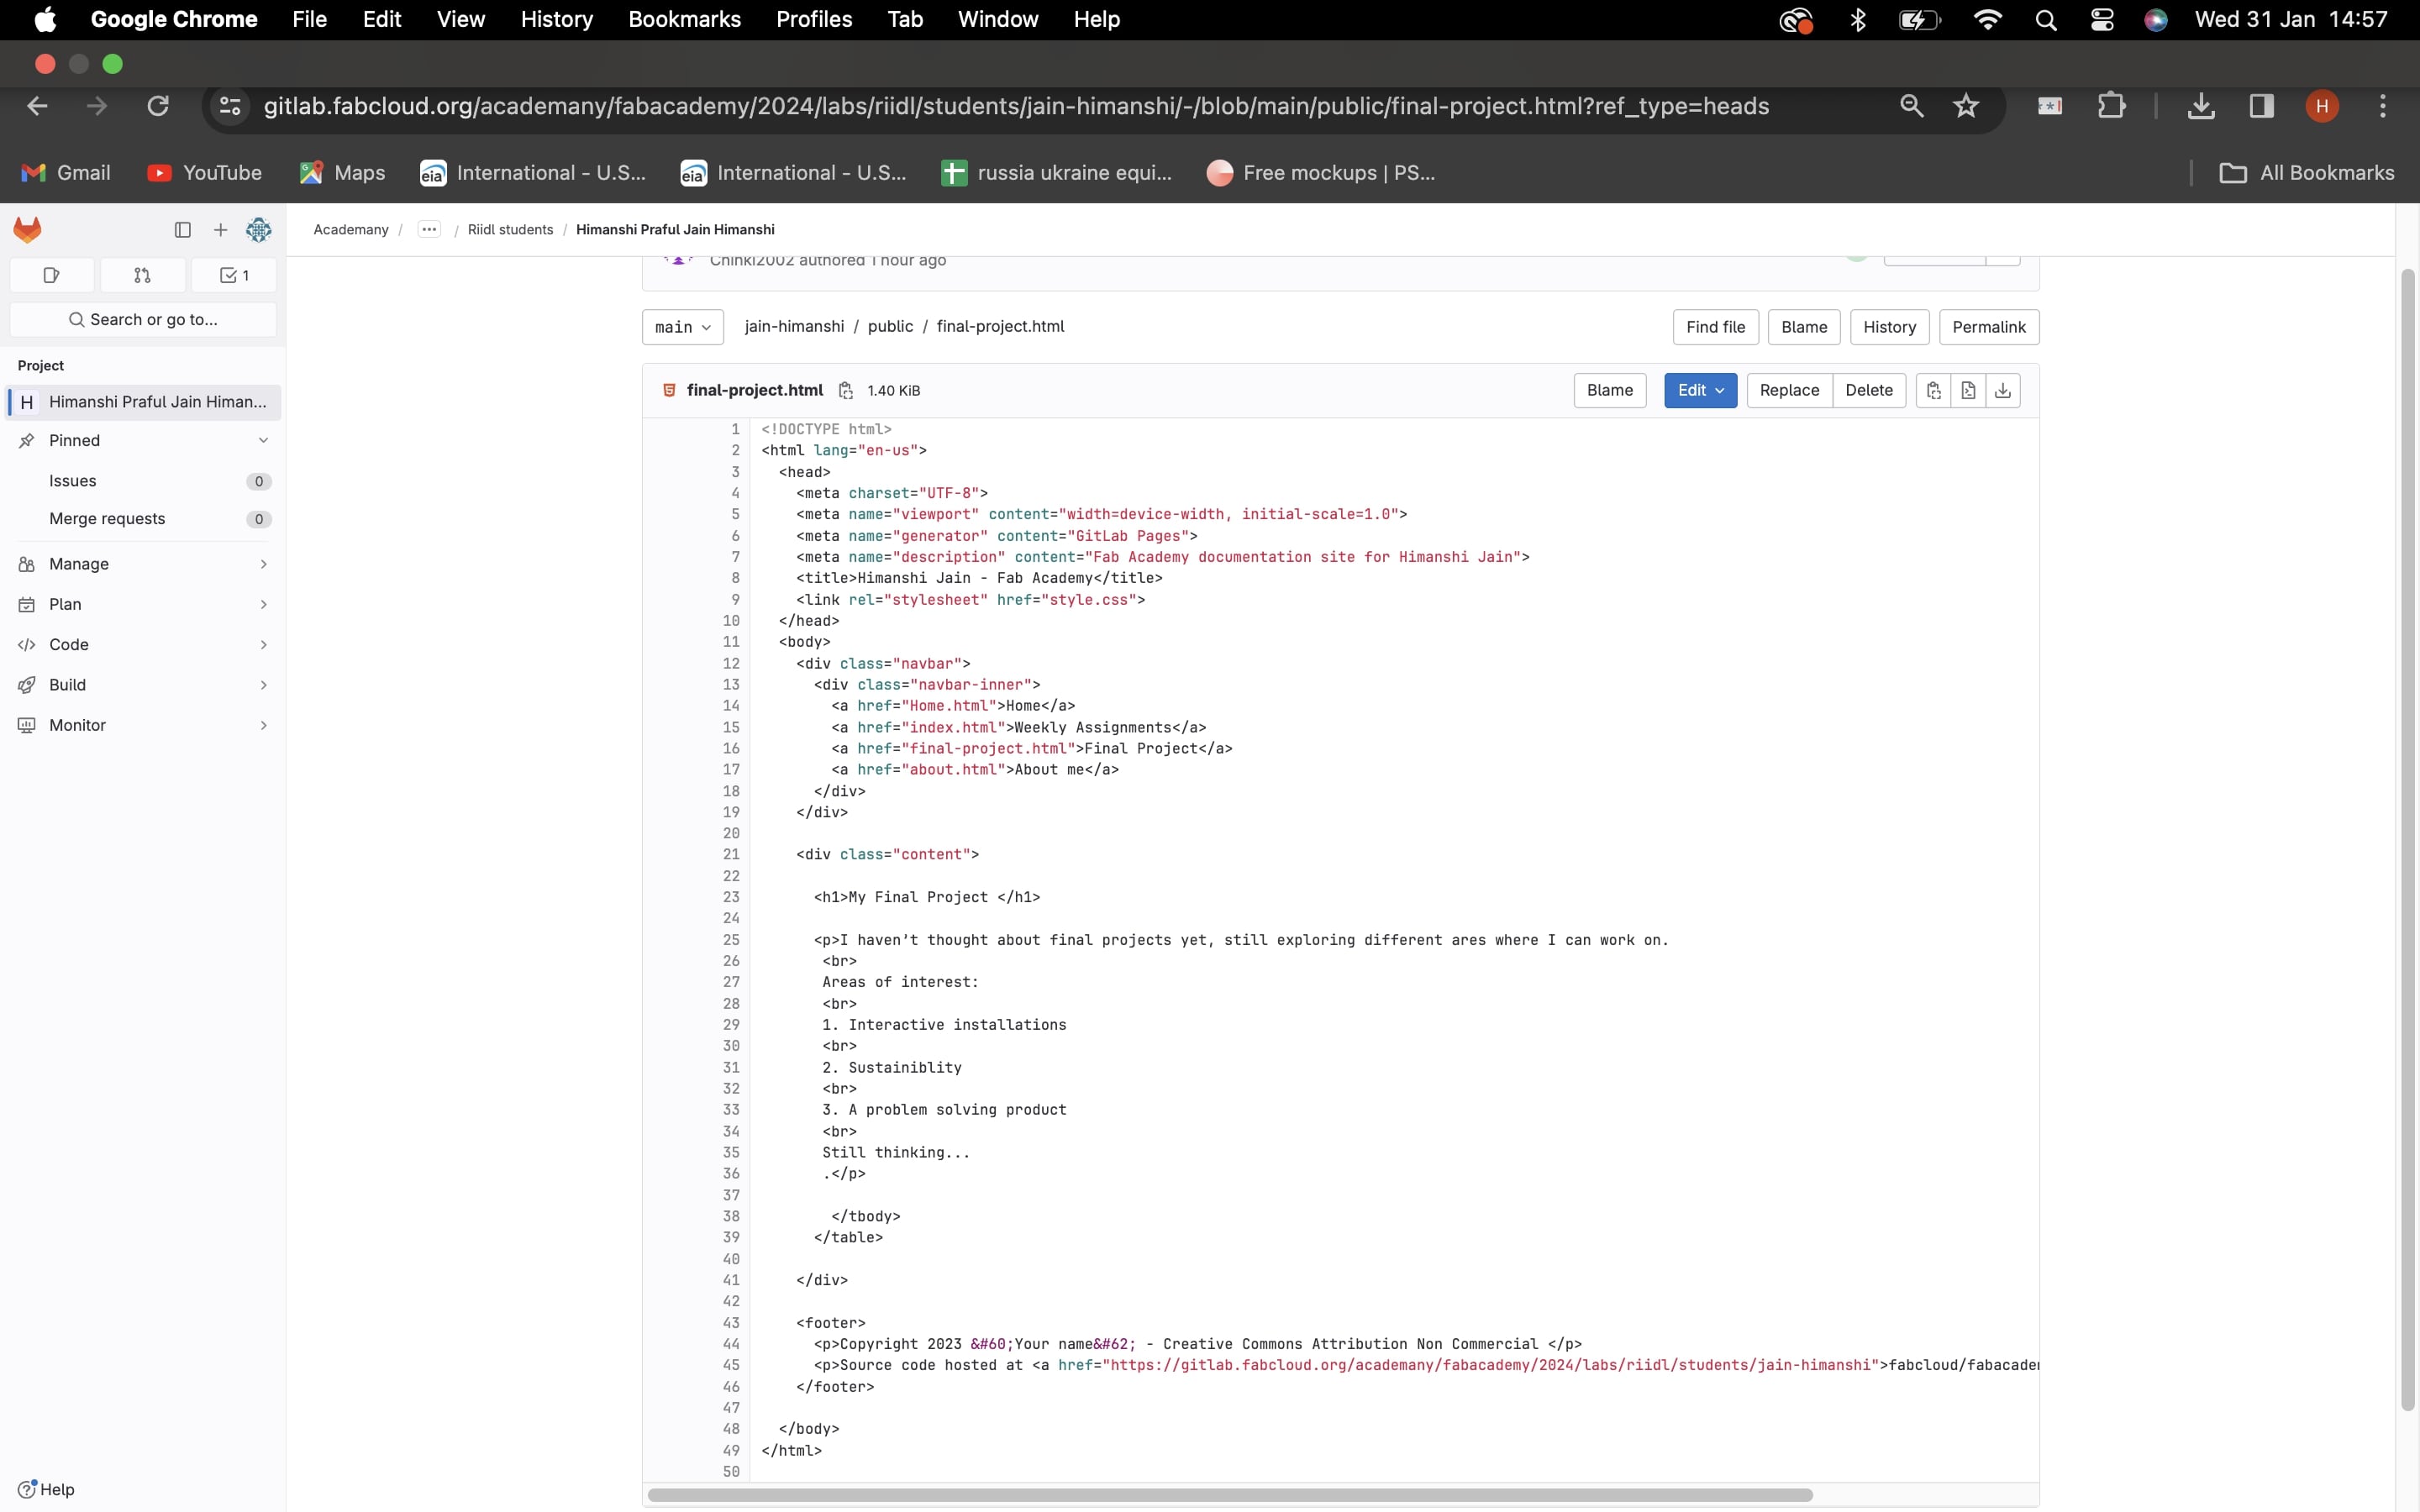
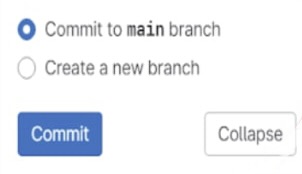
4. Main Branch Commit
After finalizing your code, proceed to commit it to the main branch, as indicated in the image below. Subsequently, you can observe the site's updates reflected within moments.
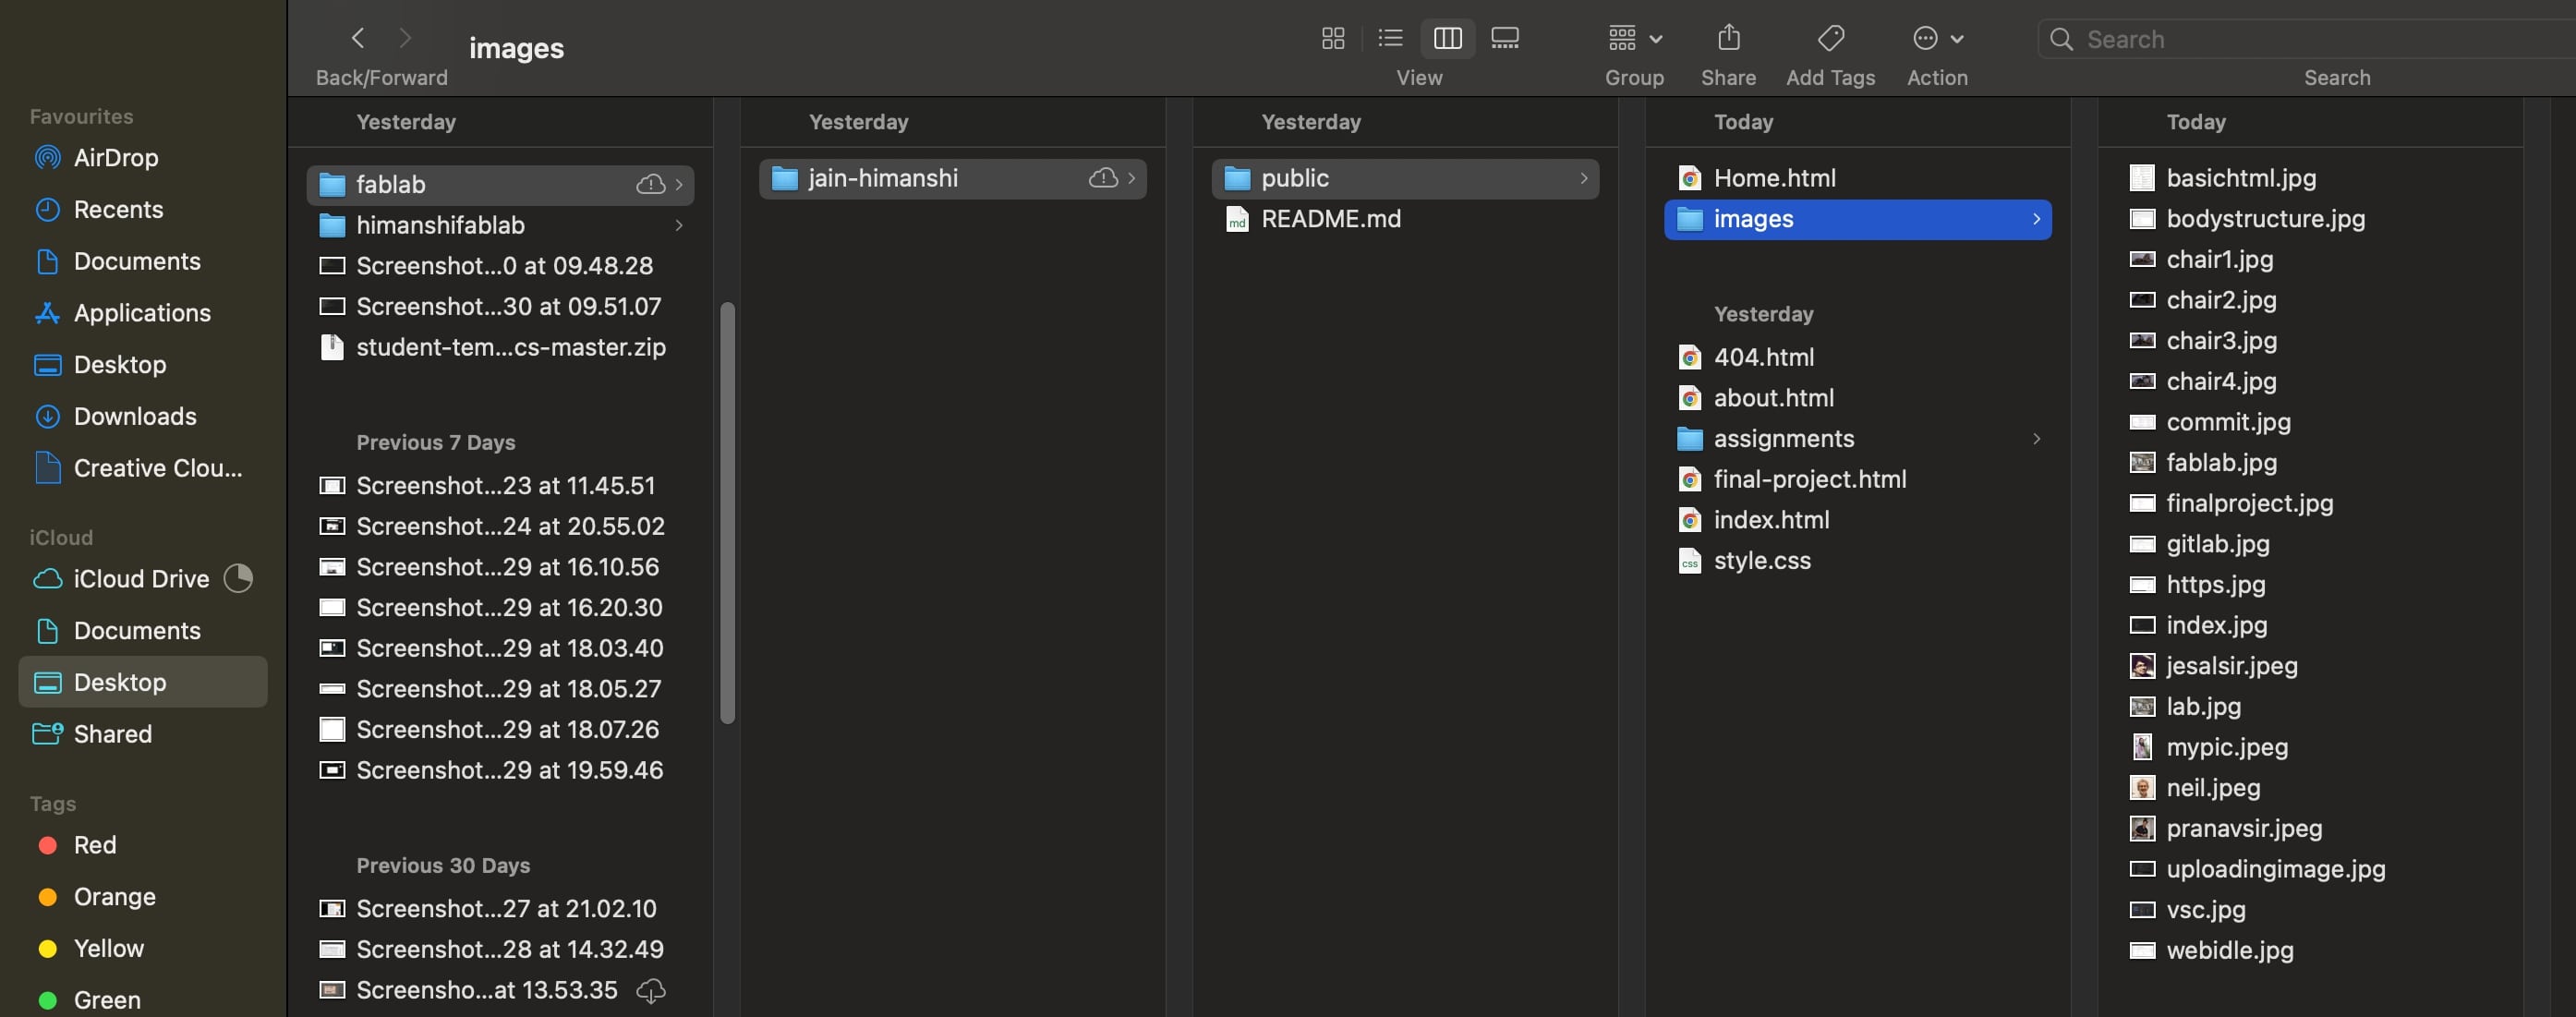
5. Image Upload
Guidelines to Follow When Uploading an Image:
1. Avoid using spaces in image filenames.
2. Adjust image size by specifying width and height when linking.
3. Ensure that the image path is correctly underlined when linking.
4. If the image is within folders, utilize ".." instead of "." to ensure proper linking.
5. Organize images into folders, preferably based on assignments.
Cloning for Local Editing
I've begun working locally in Visual Studio Code for convenience and to minimize multiple pushes to the main branch on the GitLab platform. However, I'm still in the process of figuring out how to execute a git push.
Here are the steps to follow for local work:
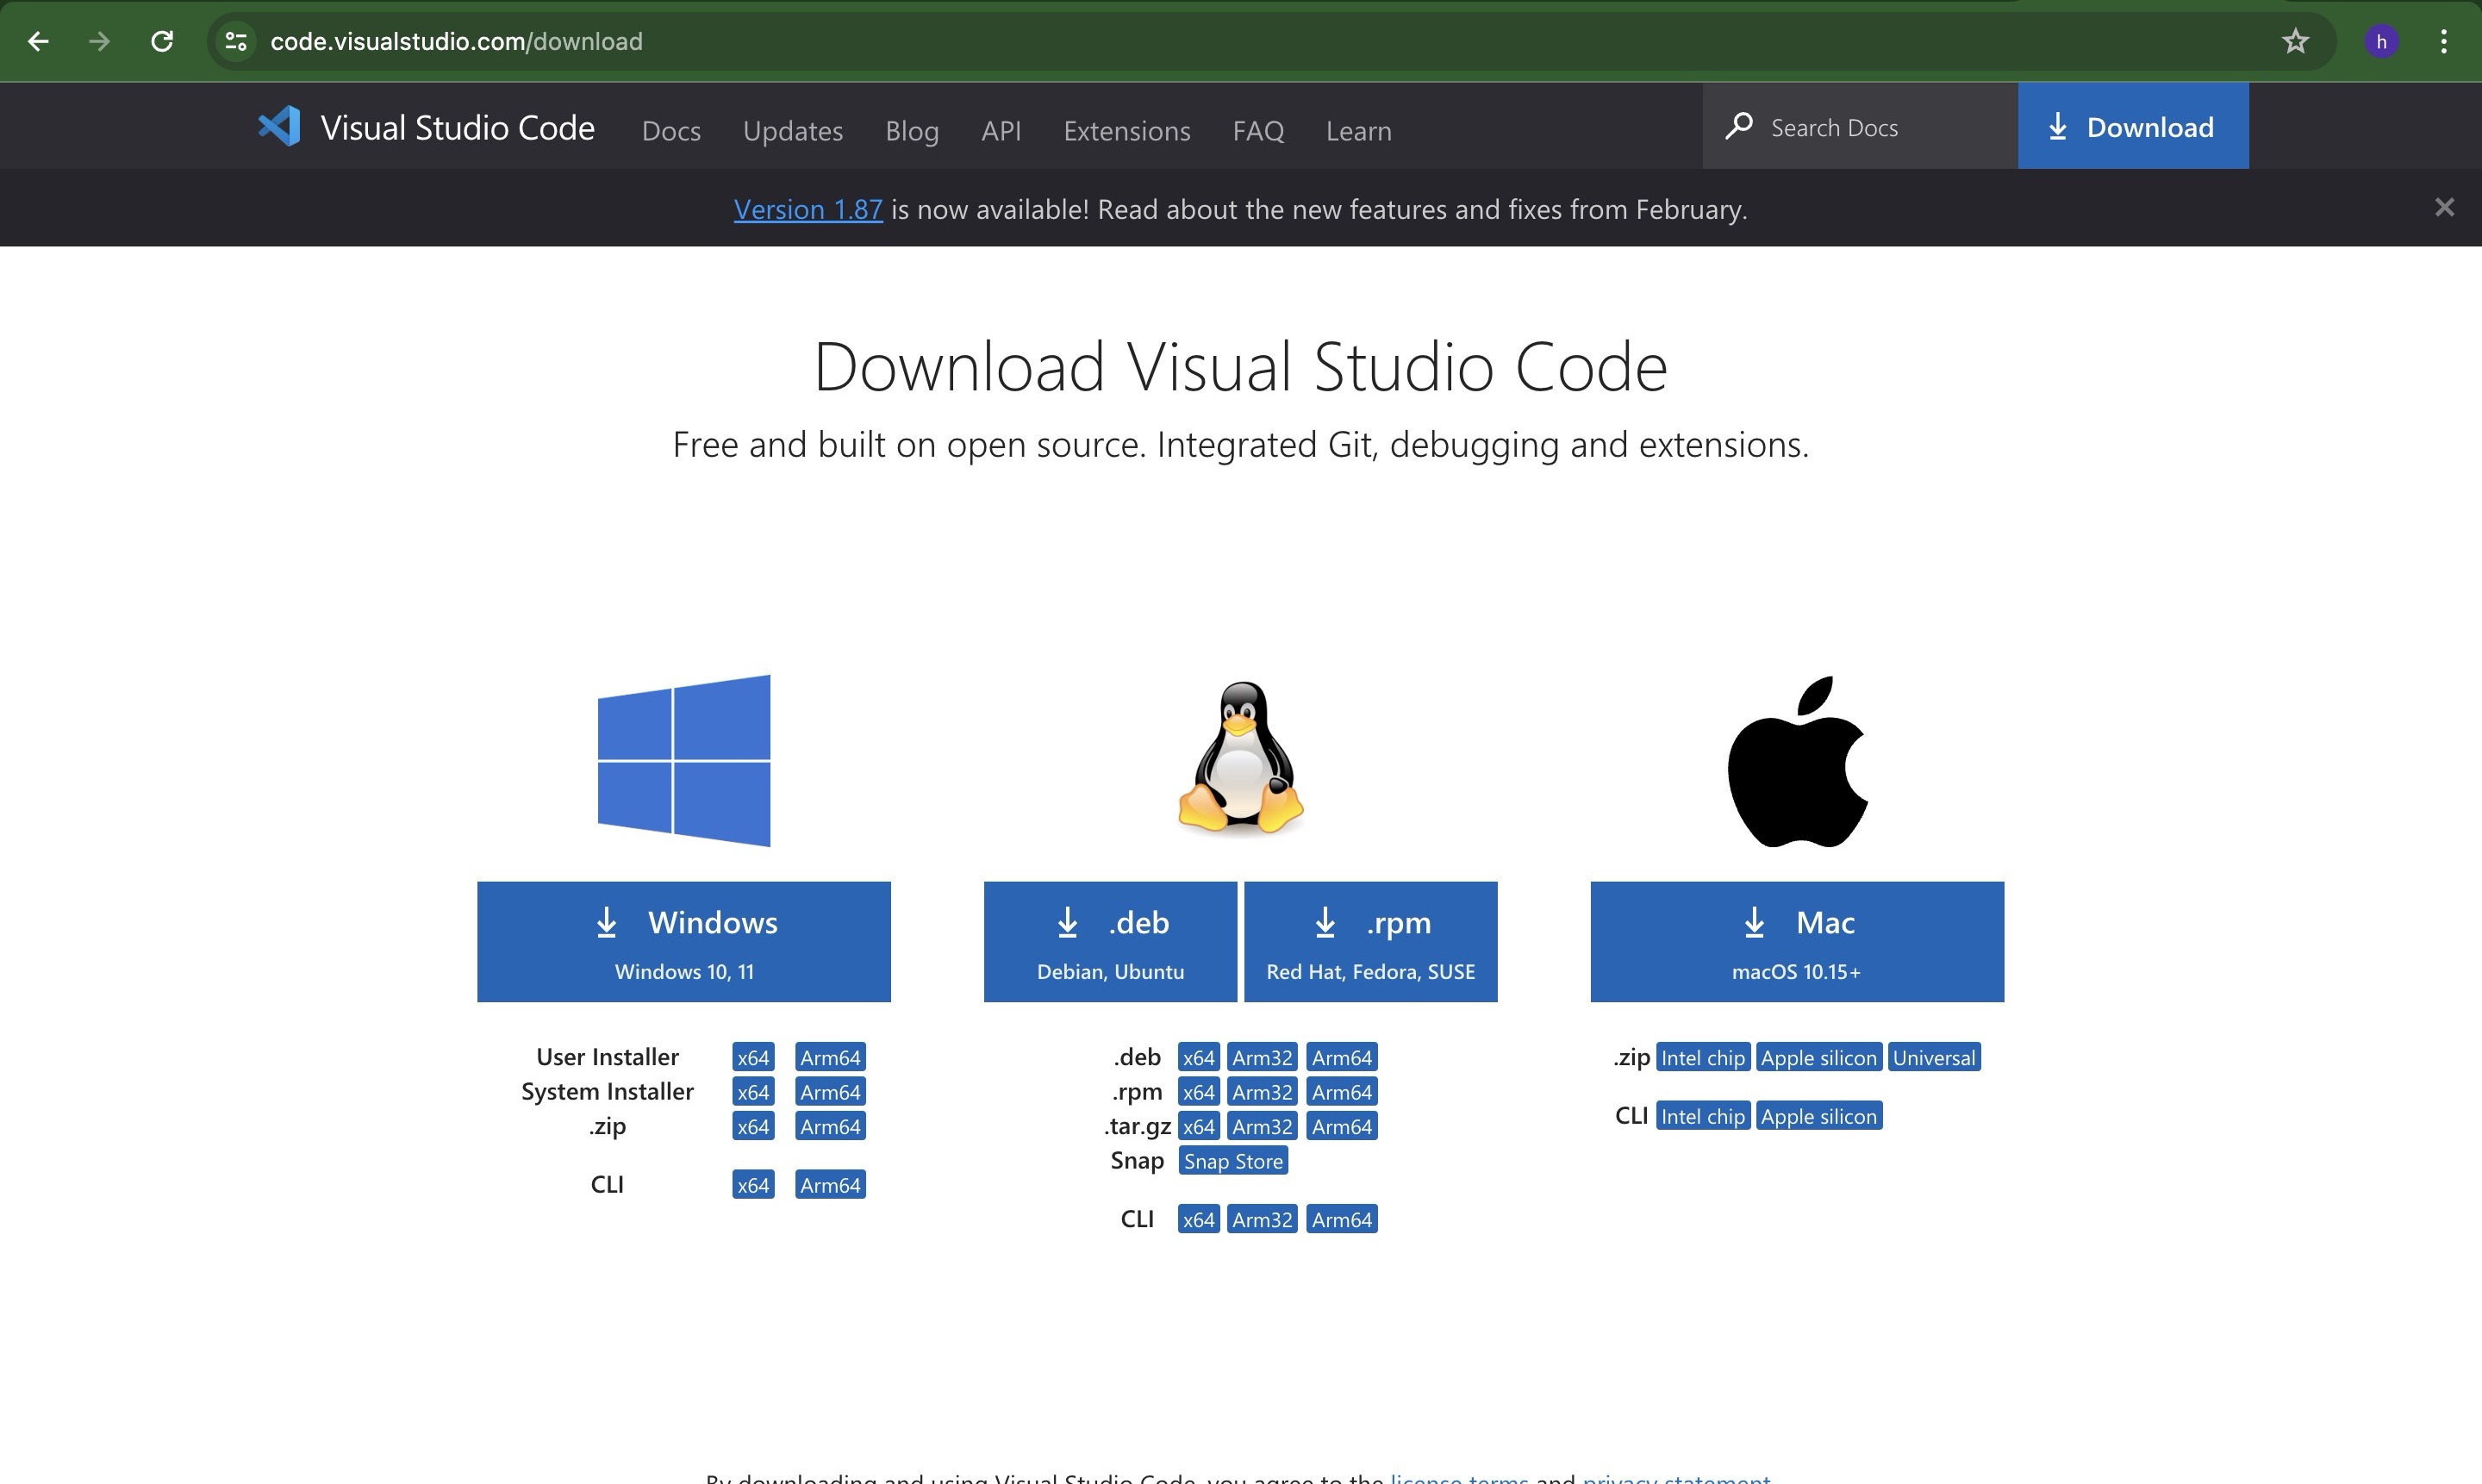
1. The initial step is to install Visual Studio Code, the git repository, and other necessary tools.
To work locally, it's essential to have coding software installed for convenience. Visual Studio Code is commonly utilized for HTML tasks on Windows, as far as I'm aware. Previously, for my work in another office, I employed Linux for Python development. Additionally, you'll need to install Git.
Here is the link to install visual studio code
2. Clone Repository in Visual Studio Code
Once the software is set up, navigate to GitLab, log in using Fablab credentials, and proceed to clone the public repository.
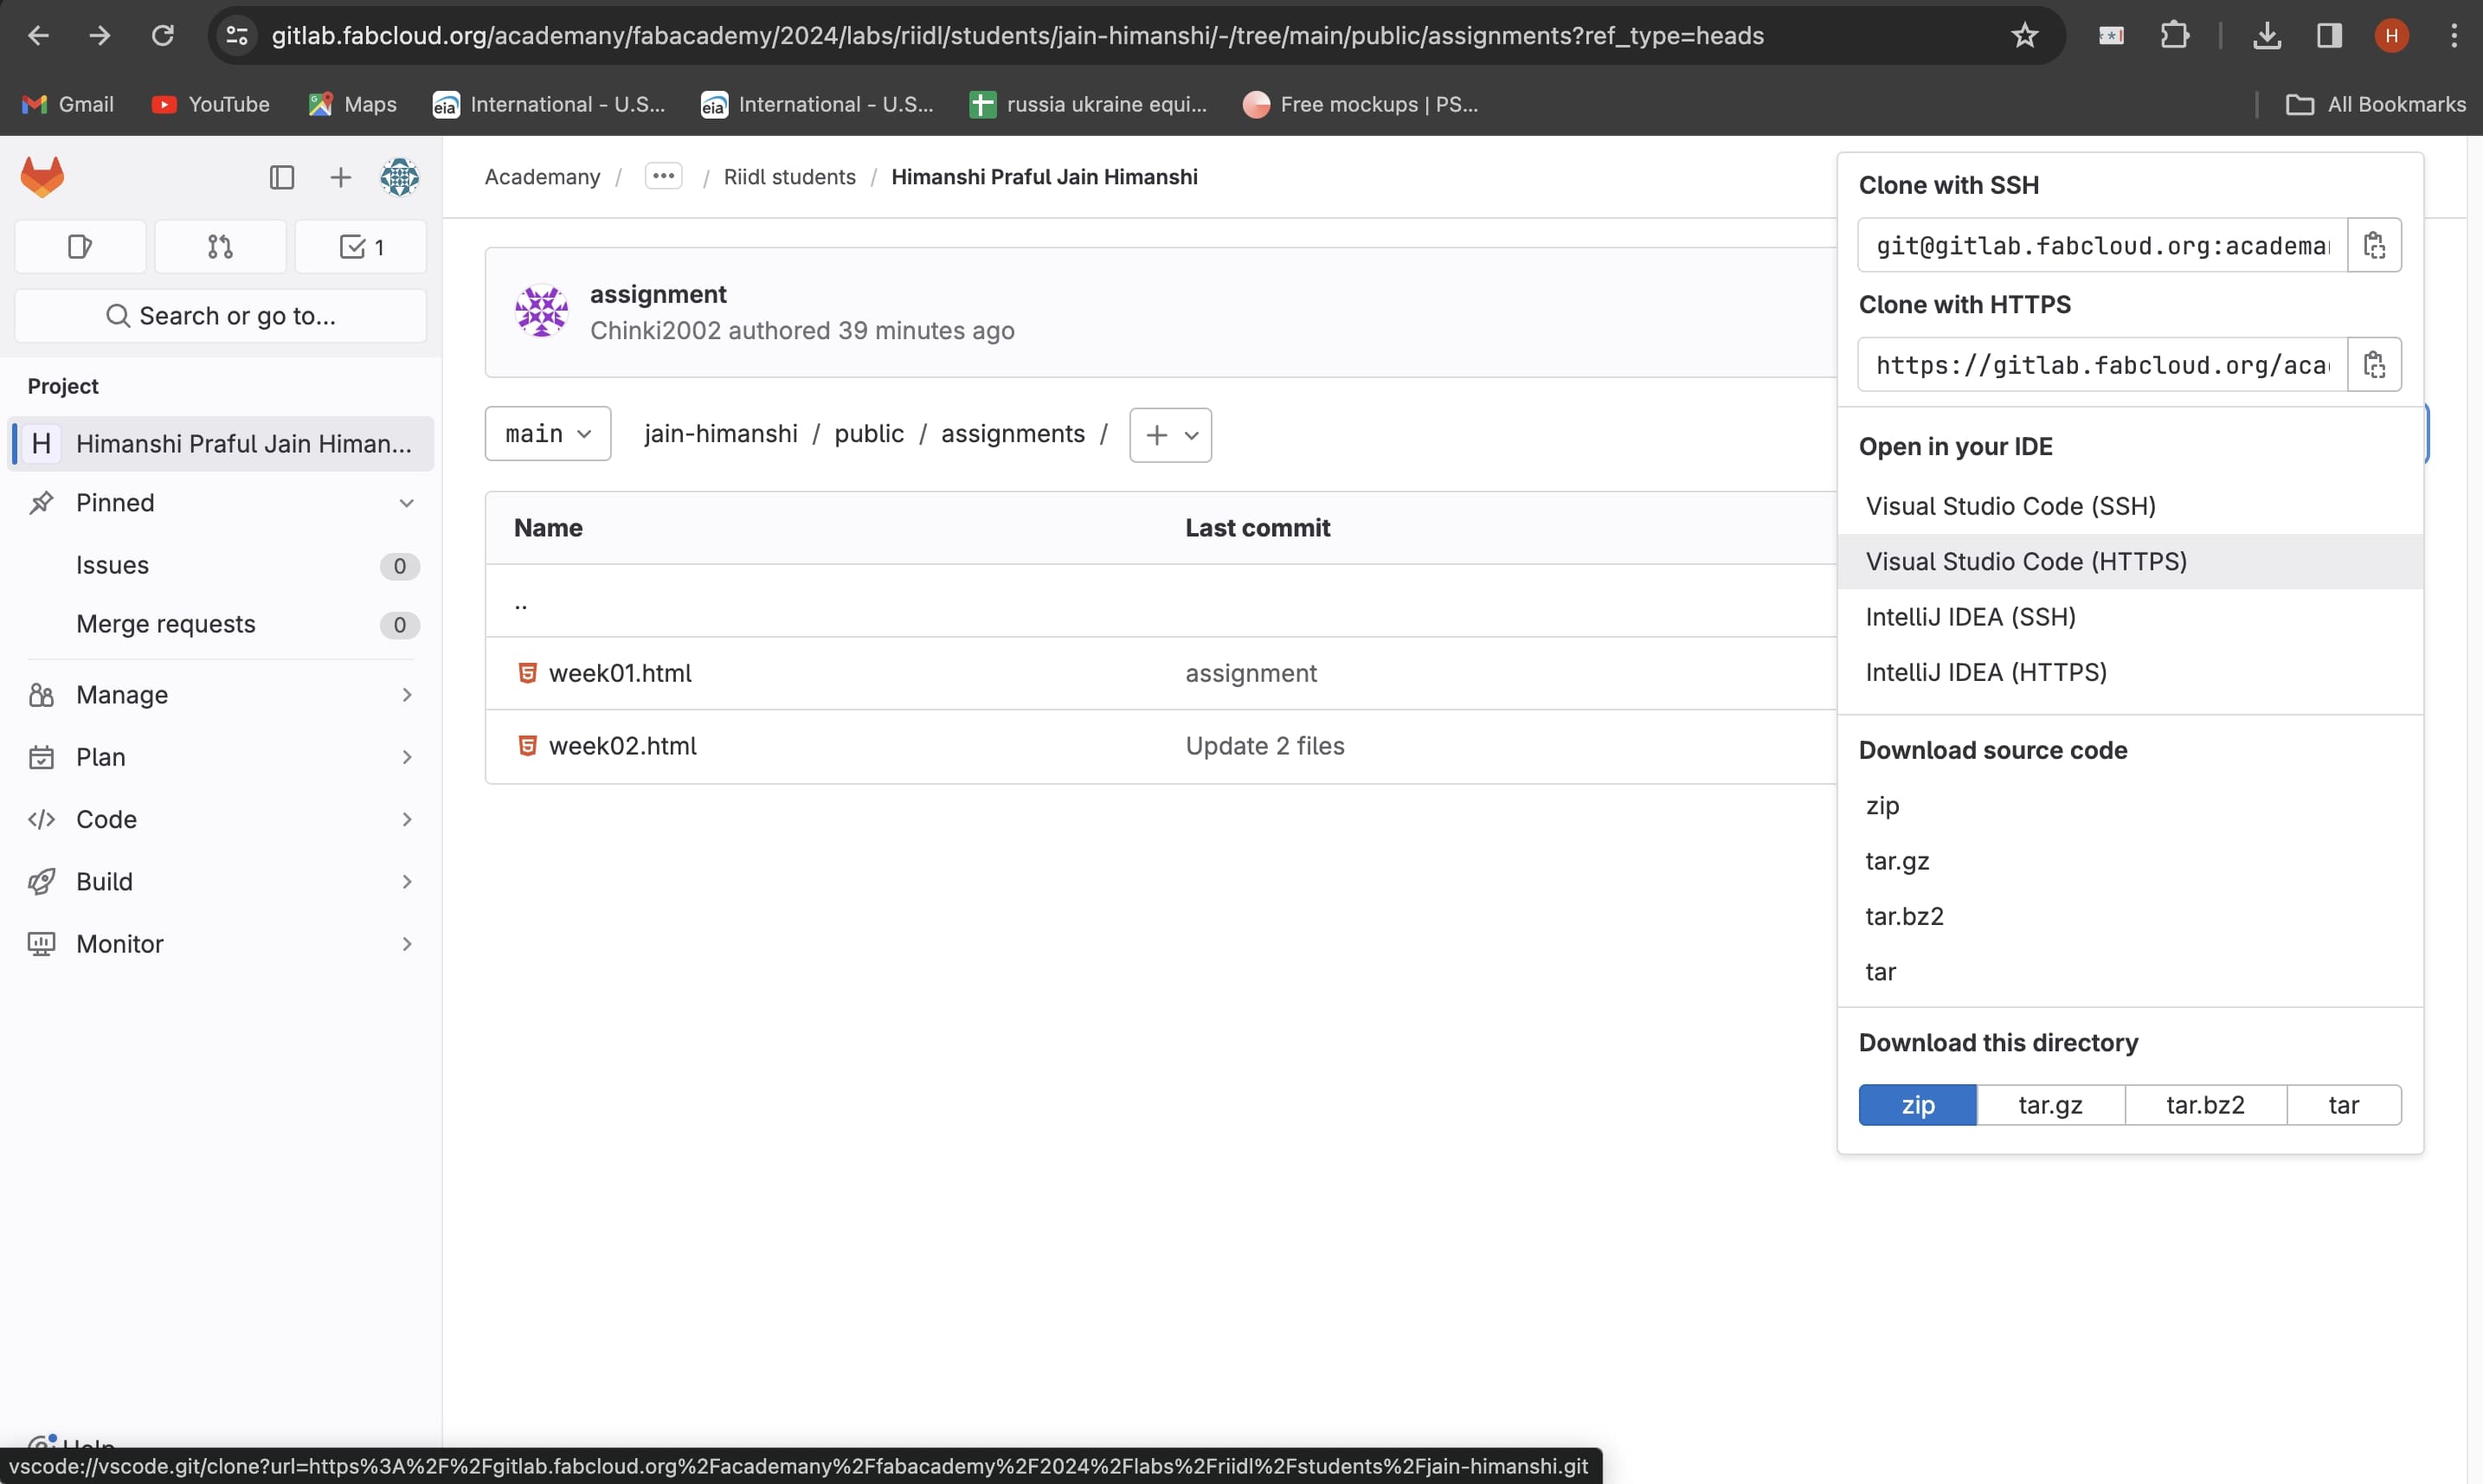
3. Unzip the repository folder
The cloned folder is compressed and saved locally. Extract it to a folder of your choice for convenience, and take note of the path. This path allows you to locally access the site whenever you wish to test your modifications before pushing changes with Git.
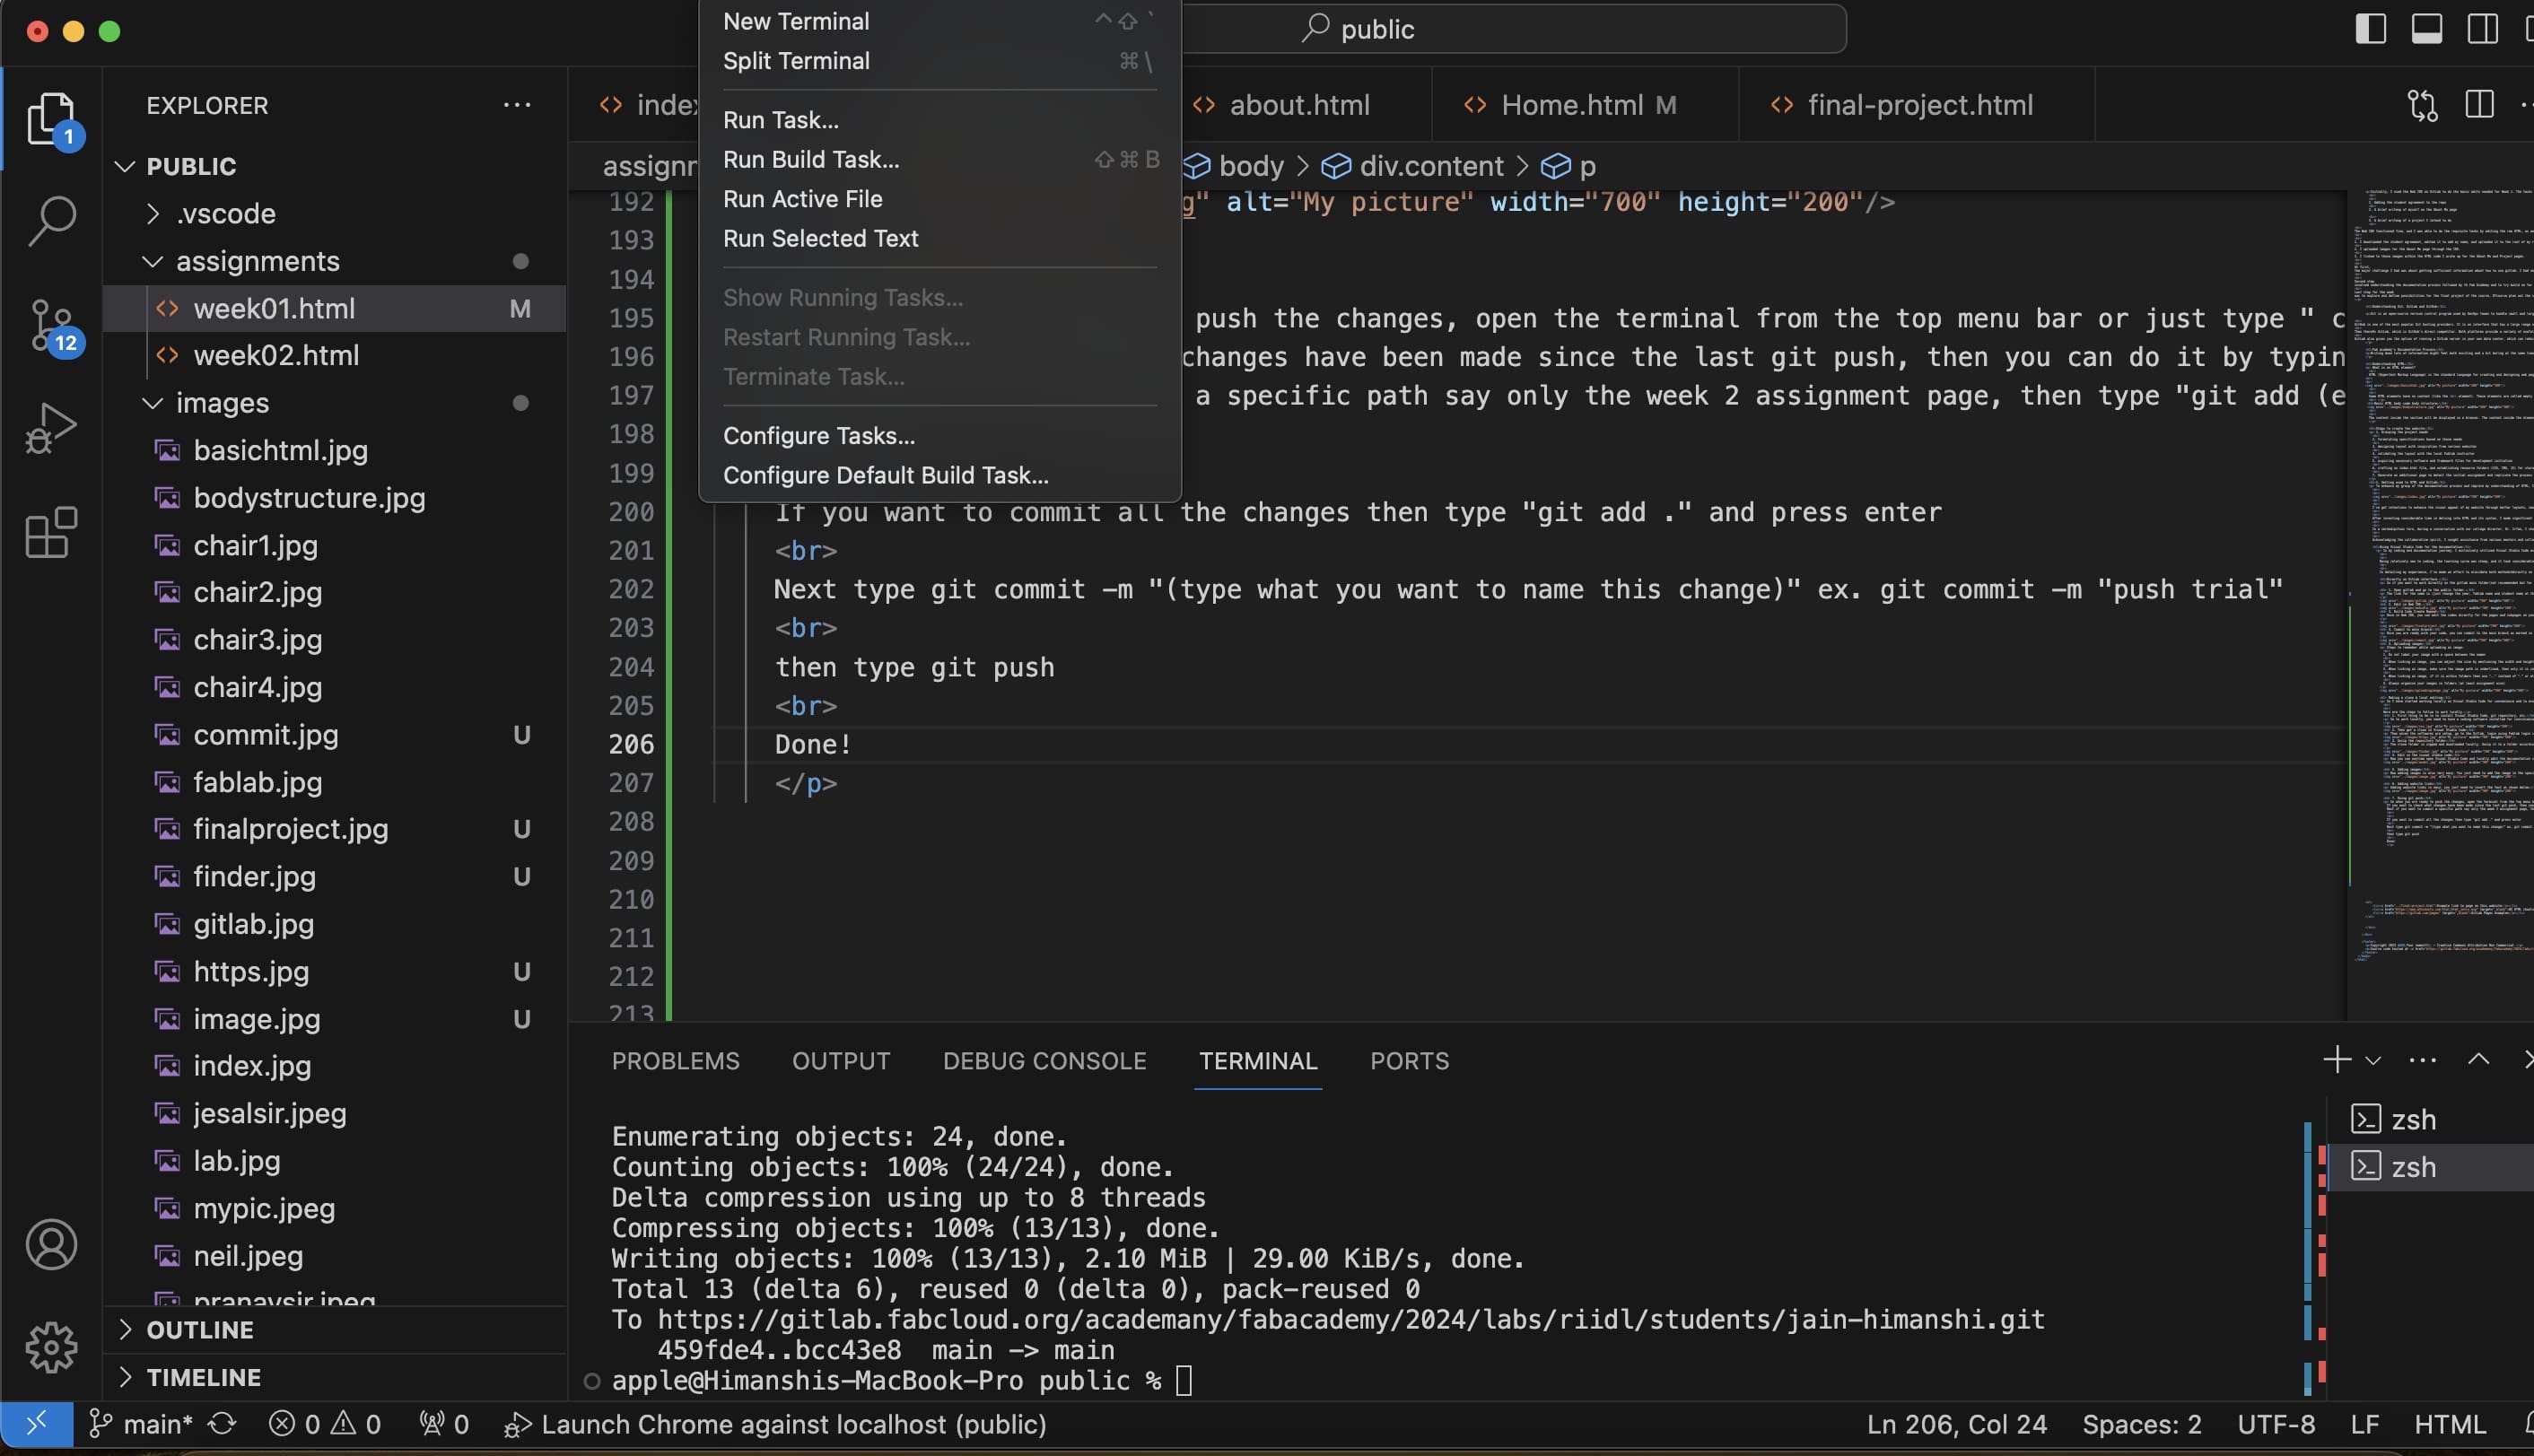
4. Start editing in the visual studio code
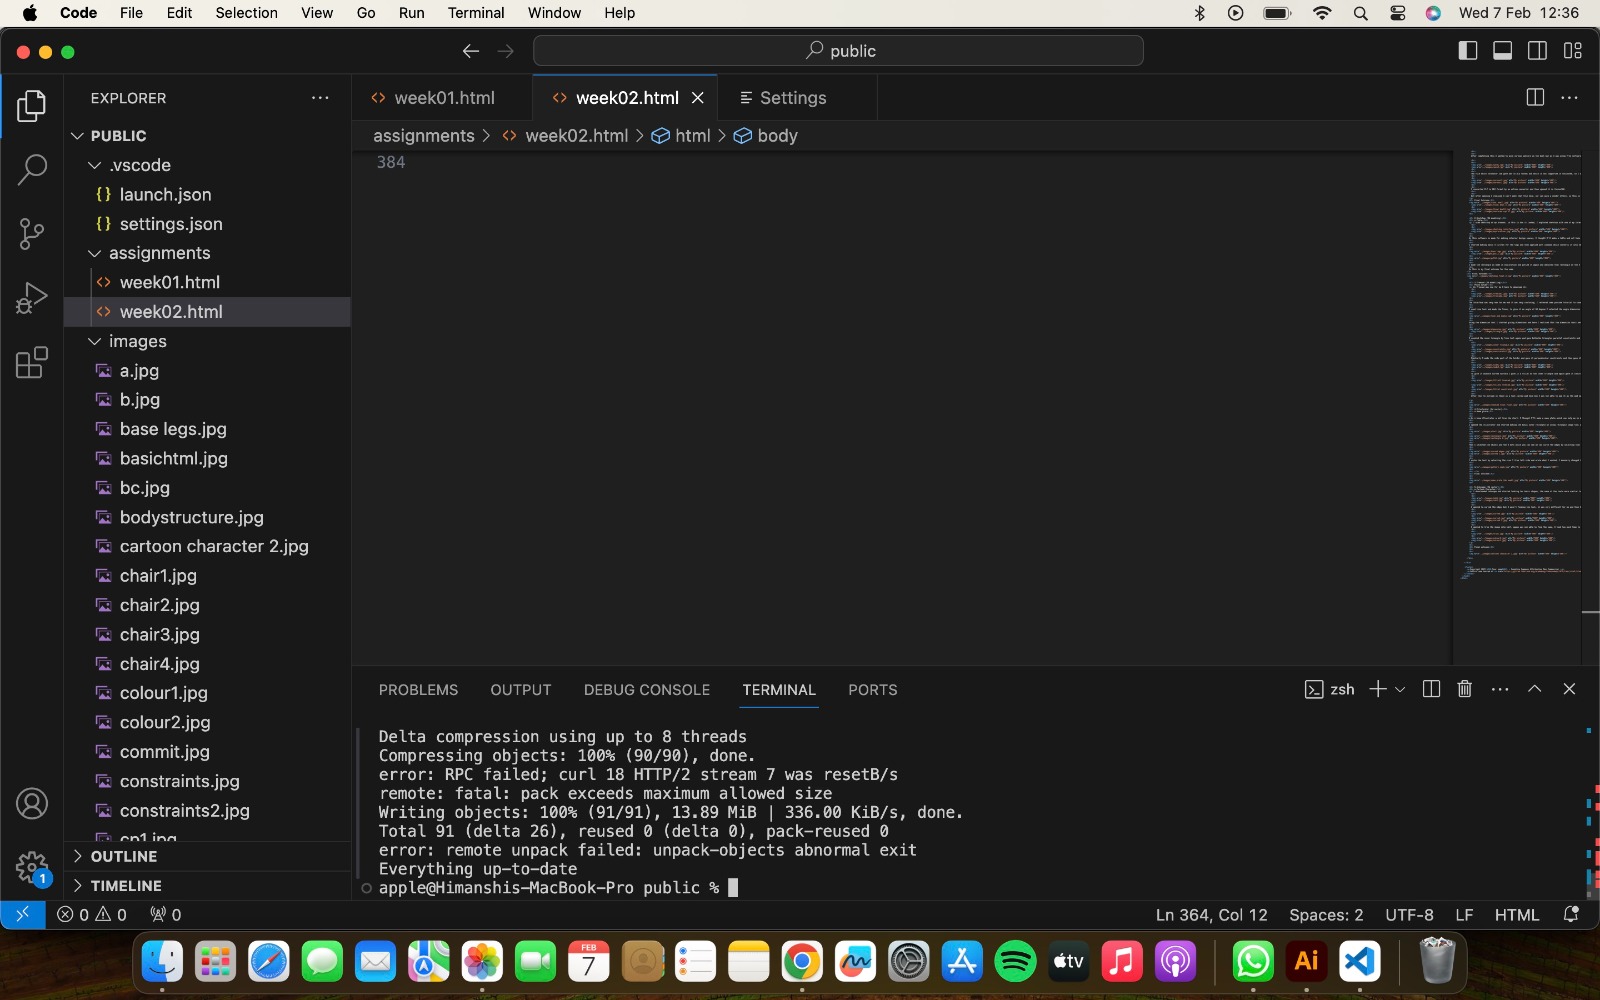
You can now open Visual Studio Code at any time to edit the documentation site locally. Here's what the interface looks like. In the explorer view (the first icon at the top left), you'll find the complete hierarchy of folders and pages you're working with.
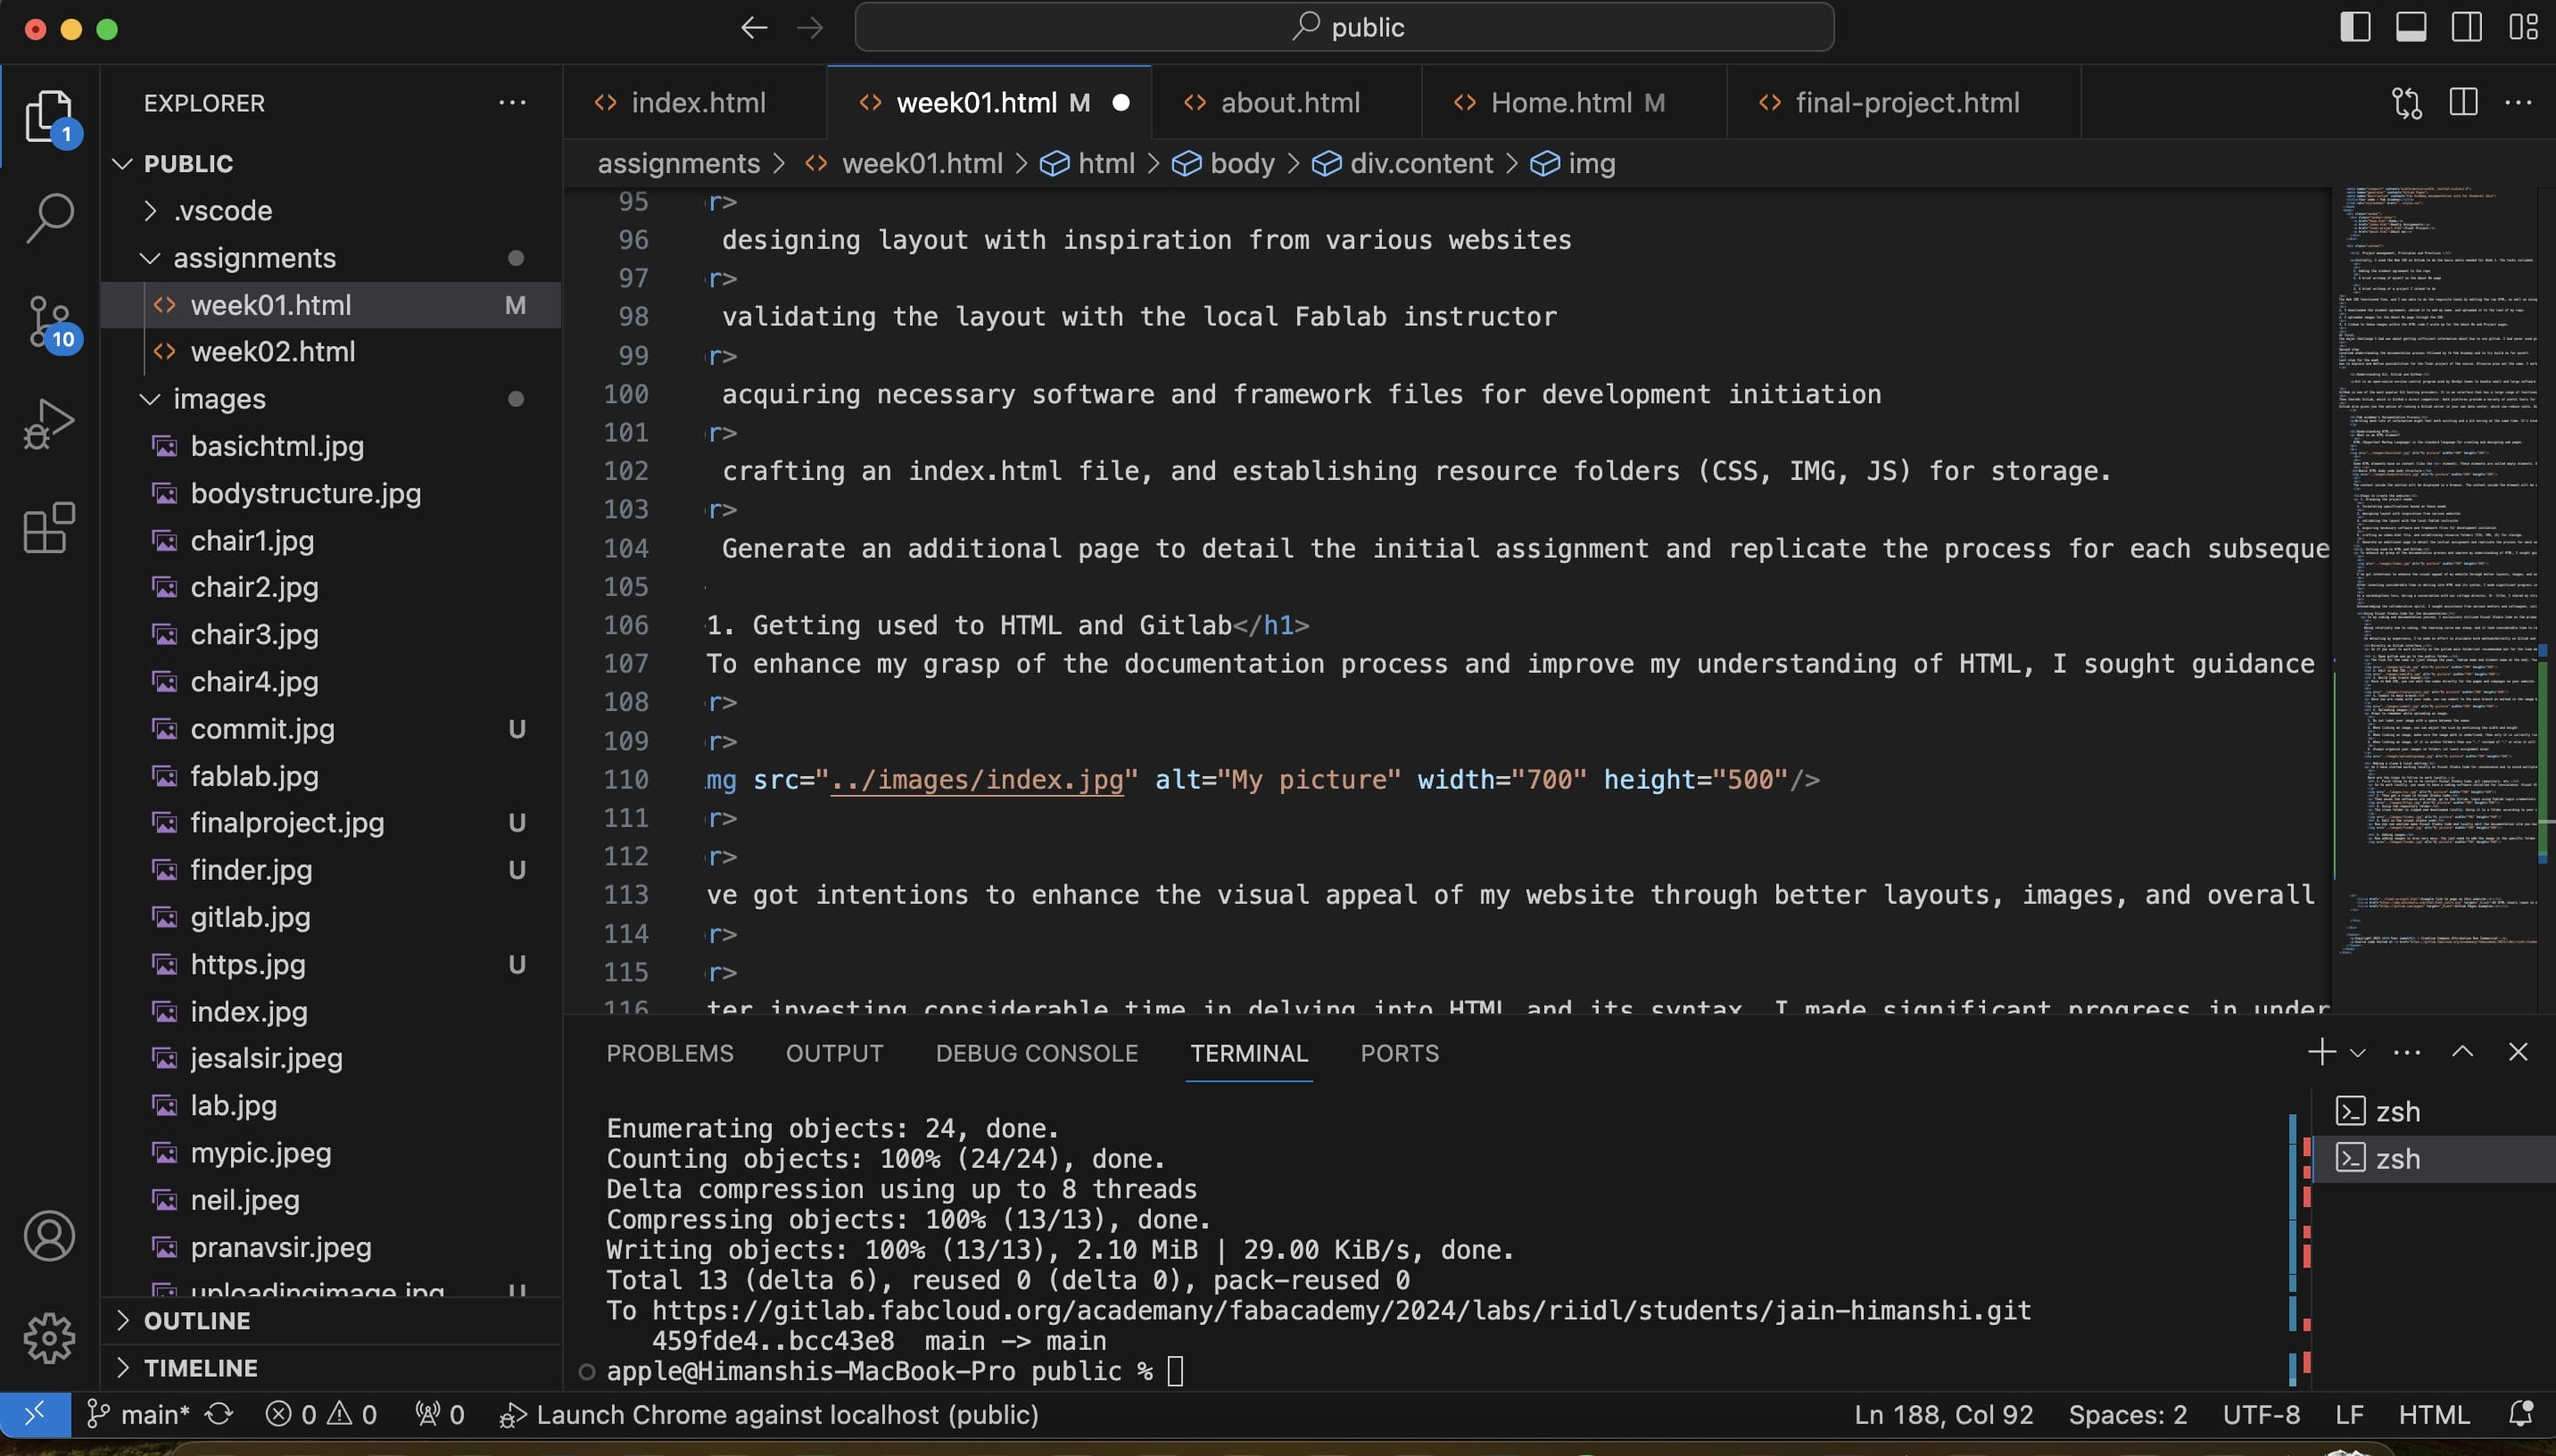
5. Start incorporating images
Adding images is a straightforward process. Simply place the image file in the designated folder within the directory where you extracted the folder, then copy the file path into the code. You can also view the images and their corresponding paths in the explorer sidebar of Visual Studio Code and insert them into the code accordingly, as depicted in the figure below:

6. BIGGEST ERROR
I uploaded images more then 10mb and then I wasn't able to do the git push, as it exceeds the limit
HOW DID I SOLVED IT?
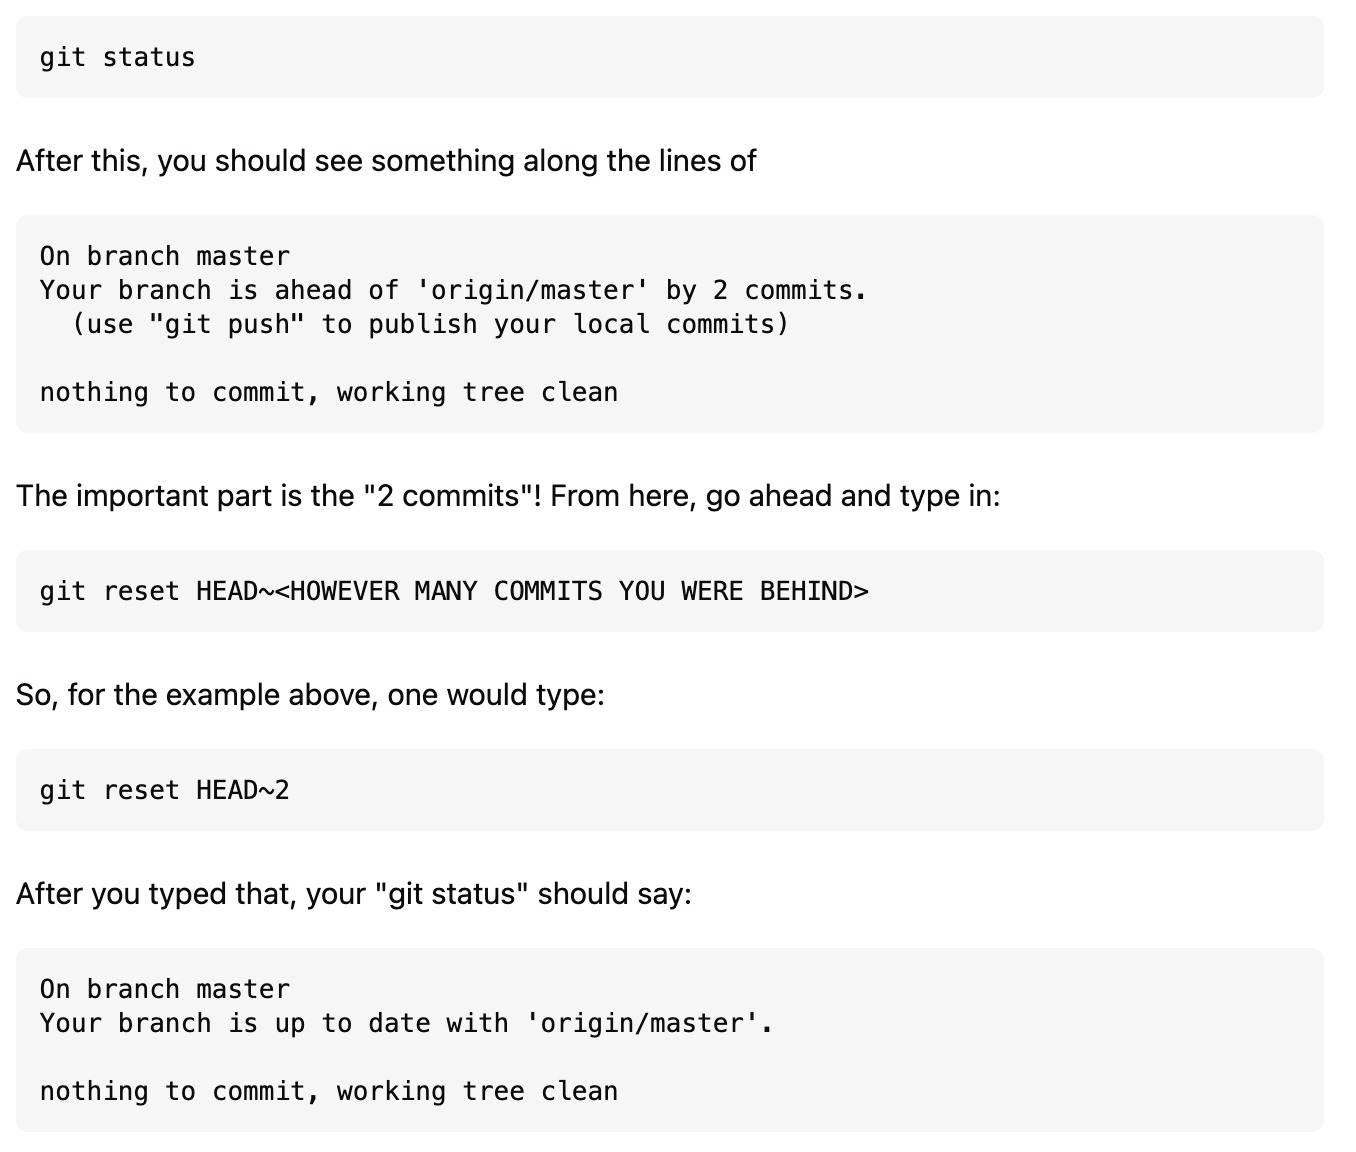
Whenever I was doing git push it was not reflecting and it was showing that your branch was ahead of 1 commit.
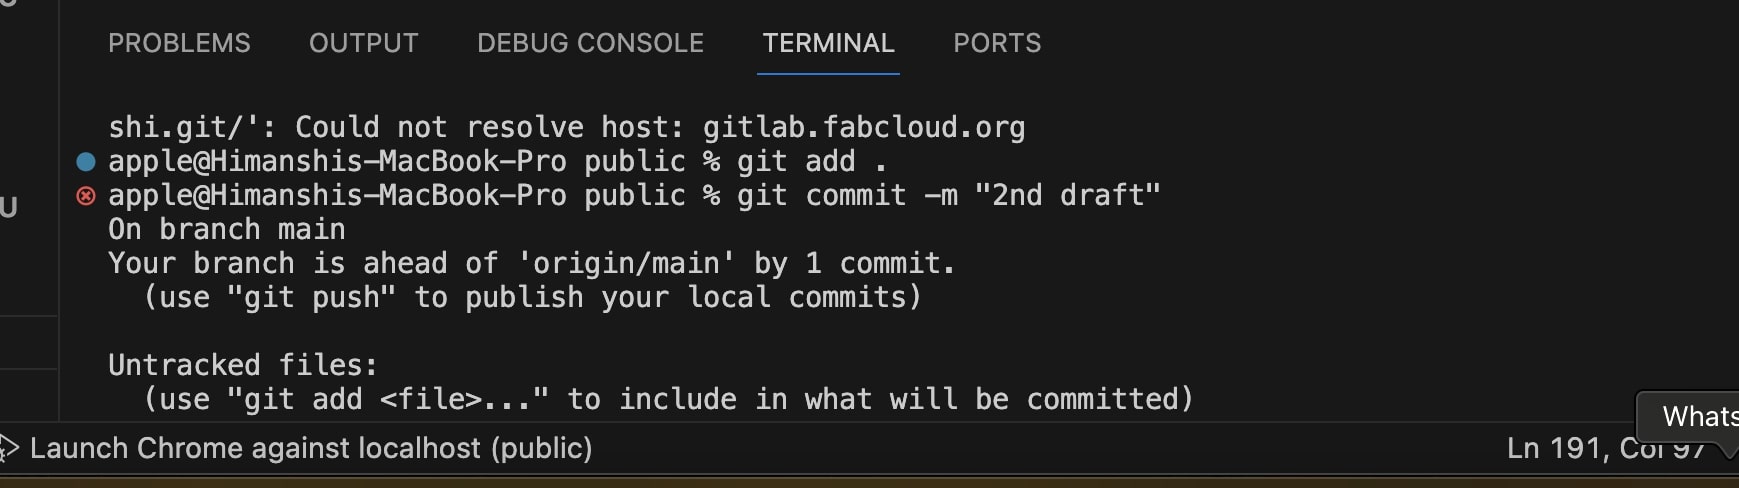
Steps for solving the same-
1. Check the number of commits you are ahead of and if it does not shows how much commits are you ahead then in the terminal type git status then it will give you the number of commits you are ahead.
2. After checking the number of commit type git reset HEAD ~and number of commits you are ahead, so in my case it is git reset HEAD~1.
3. Then the problem is solved you can do the git push
Below is the reference image of the solution
7. How to make hyperlinks
Incorporating website links is straightforward. You only need to input the desired text, as illustrated below:

8. How to git push
When you're prepared to push your changes, access the terminal either from the top menu bar or by pressing "ctrl + `". To inspect the alterations made since the last git push, input "git status" and press enter. If you wish to commit specific changes, such as only the week 2 assignment page, type "git add (enter the path here)", for example, git add public/assignments/week02.html, and press enter. Alternatively, to commit all changes, type "git add ." and press enter. Subsequently, input "git commit -m "(describe the change)"", like git commit -m "trial push", followed by "git push". You're done!
Final Project
Plan and sketch a potential final project
To know in detail about final project click here.
Inspiration and Idea
As a designer, my inspiration for creating this game came from a recent visit to a blind school where I observed that while the kids were incredibly smart and proficient in languages, they were not learning the basics effectively. At the same time, I noticed in my own building that small children were spending a lot of time on YouTube, with parents using the platform to teach them animals, fruits, and colors. This contrasted sharply with my own childhood, where we learned these basics from boring textbooks.
I realized that there was a need to make learning more engaging and fun, moving away from both the overuse of smartphones and the traditional, unengaging methods of textbooks. I thought, why not create a game that makes learning interactive and enjoyable? Thus, I developed "The Jungle Puzzle Quest" to provide an educational experience that is both fun and effective, without relying on smartphones or dull textbooks. This game aims to capture the curiosity of children and make the learning process exciting and accessible for all.
Name of the game- "The Jungle Puzzle Quest"
Storyline:
Once upon a time, in a lush jungle far, far away, there lived a curious child named Alex. Eager to explore the secrets of the jungle, Alex embarked on an exciting adventure. Equipped with nothing but courage and a sense of wonder, Alex stepped into the dense foliage, ready to encounter the majestic creatures that called the jungle their home.
As Alex journeyed deeper into the heart of the jungle, the sounds of chirping birds and rustling leaves filled the air. Suddenly, a mischievous monkey swung down from the trees, its playful chatter drawing Alex's attention. The friendly monkey, named Milo, greeted Alex and offered to be their guide through the jungle.
Excited to learn more about the jungle's inhabitants, Alex followed Milo's lead. Along the way, they encountered a wise old rabbit named Rosie, who shared fascinating tales of the forest. Rosie, sensing Alex's eagerness to learn, directed them to a mystical pond where a graceful swan named Sera glided serenely.
With each encounter, Alex's knowledge of the jungle grew, and they discovered the unique traits and sounds of each animal they met. Guided by Milo, Rosie, and Sera, Alex's adventure led them closer to their ultimate goal: finding the king of the jungle, the mighty lion.
As the sun began to set, casting golden hues over the canopy, Alex and their newfound friends reached the edge of the jungle, where the lion's roar echoed in the distance. With hearts pounding with excitement, they knew that the final challenge awaited them - to unlock the secrets of the lion's domain and complete their animal adventure.
And so, with Milo, Rosie, and Sera by their side, Alex prepared to solve the ultimate puzzle and prove themselves worthy of meeting the king of the jungle, the majestic lion.
Objective:
In this electronic card game, designed for both partially sighted and sighted players, the main aim is to introduce children to various animals, their sounds, and characteristics, fostering learning through auditory and tactile experiences, all without the need for screens or phones.
How to play the game
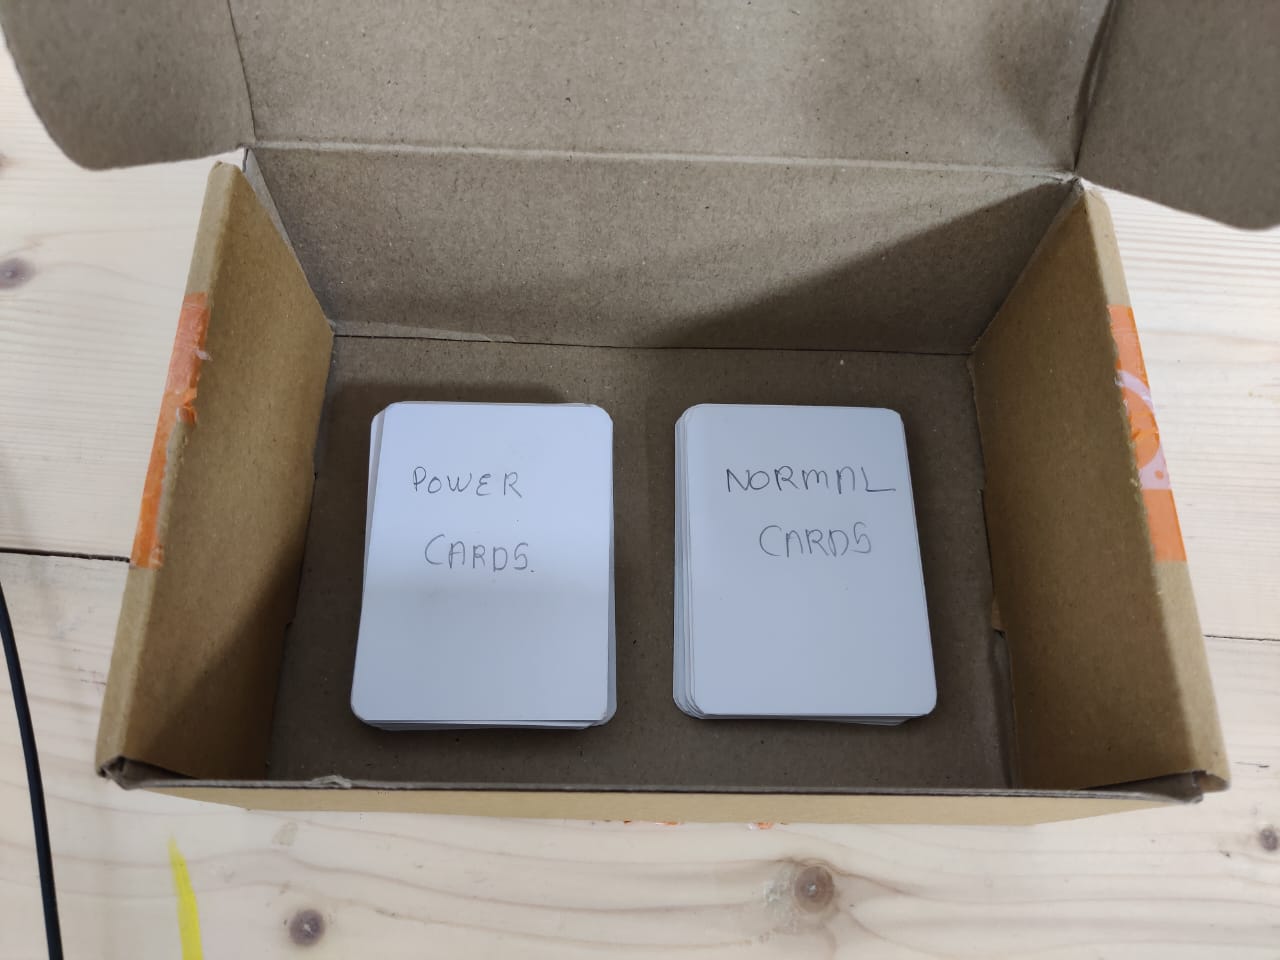
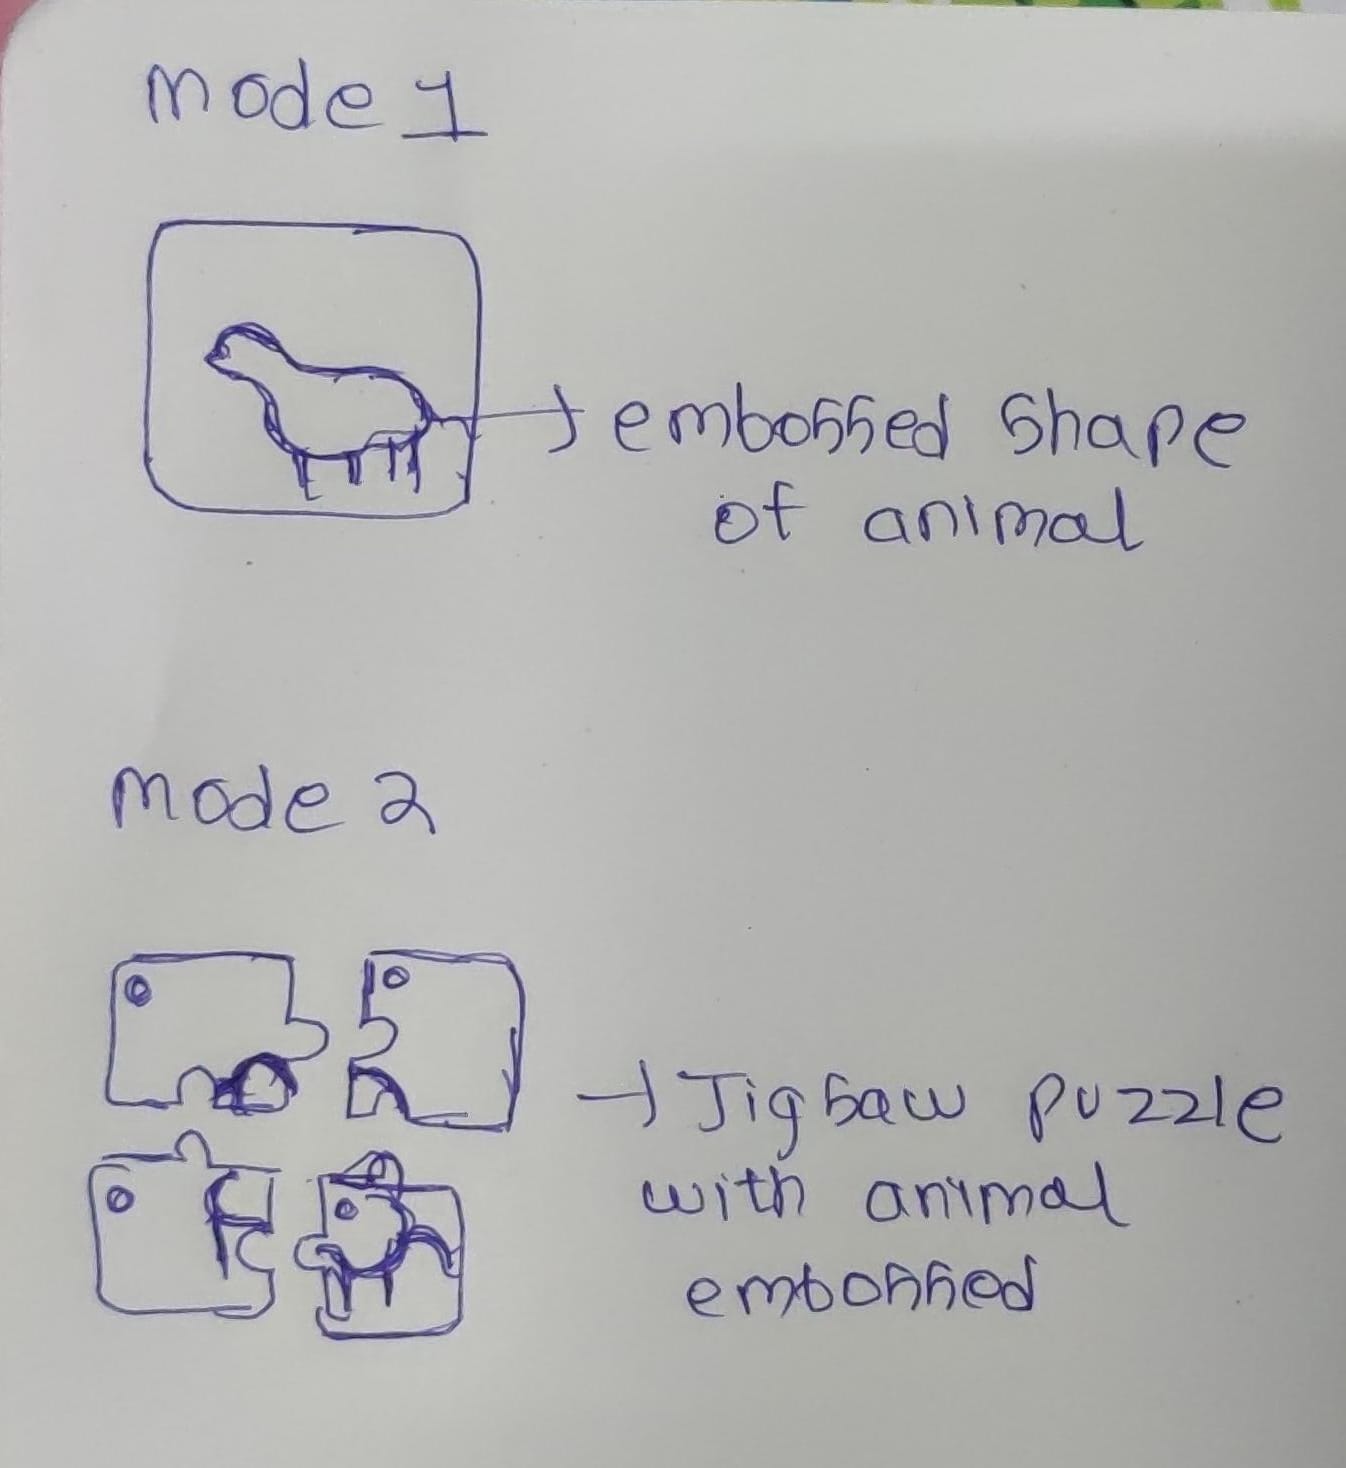
There are two decks of cards. One deck features animals embossed on each card, one animal per card. The other deck contains puzzle cards, with each animal represented by four jigsaw puzzle pieces. To distinguish between animals, each puzzle card bears a symbol, such as a circle for elephants, as specified in the rule book.
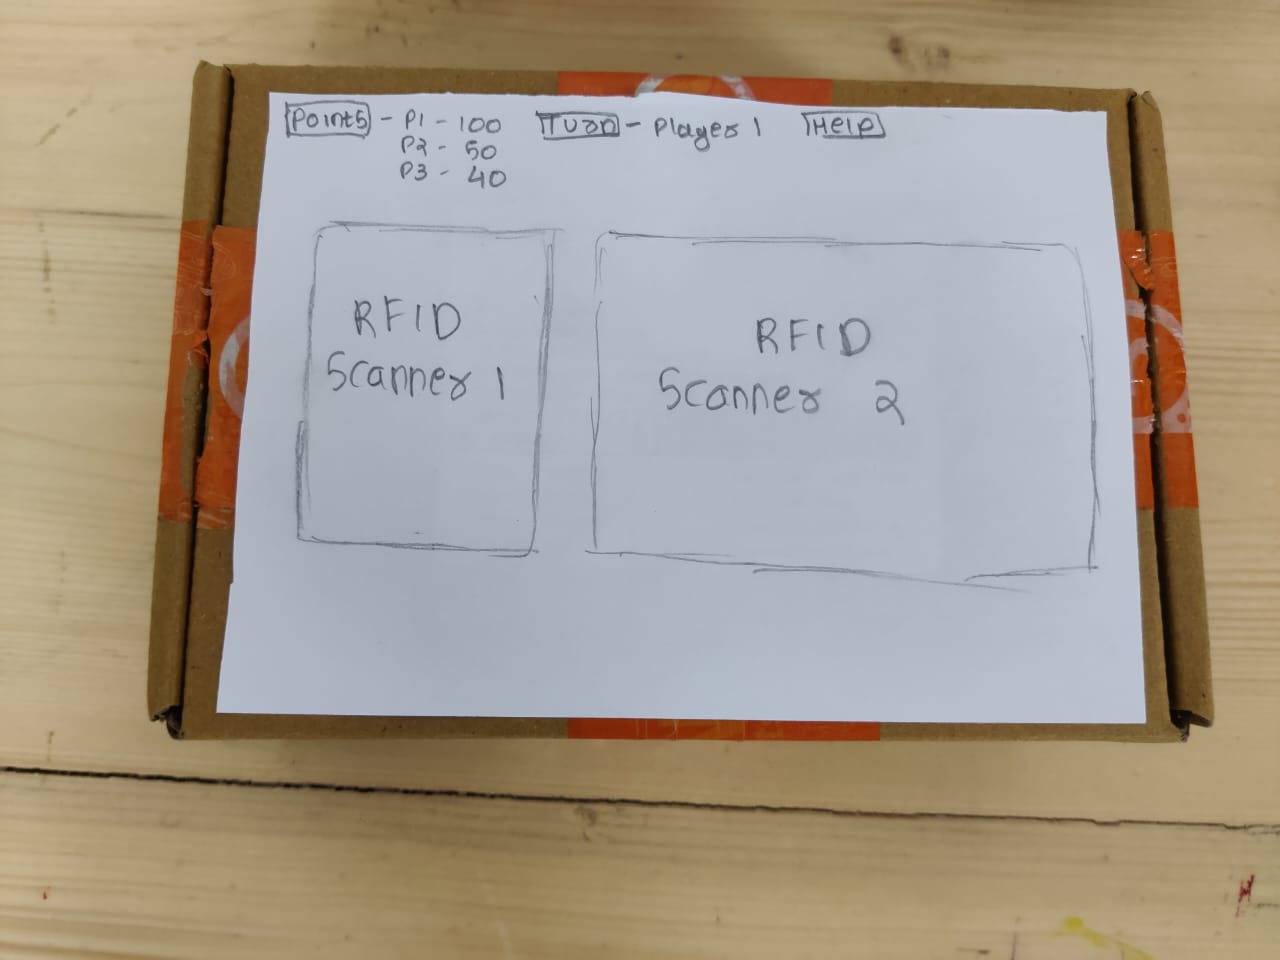
In Mode 1, players select a card from the first deck featuring the full animal. By feeling the embossed card, players engage their tactile senses. After selecting a card, they scan it using the RFID reader atop the box. Upon scanning, the game emits a sound describing the animal's features, unique traits, and its sound. Through this mode, players can learn about numerous animals by feeling and scanning different cards.
In Mode 2, players apply their newfound knowledge in a hands-on activity - solving jigsaw puzzles. Upon selecting Mode 2, a prompt instructs players to assemble a specific animal puzzle, like an elephant. Players refer to the rule book to identify the symbol associated with the animal (e.g., a circle for elephants). Then, they locate and remove the four puzzle cards corresponding to that symbol from the deck. By fitting the puzzle pieces together, players reinforce their understanding of the animal's shape learned in Mode 1. After assembling the puzzle, players scan all four cards together. If correct, the game unlocks the next level, prompting players to assemble the puzzle of the next animal in line.
This engaging game structure ensures an enjoyable and educational experience for players of all abilities, encouraging interaction with animals in a fun and inclusive manner.
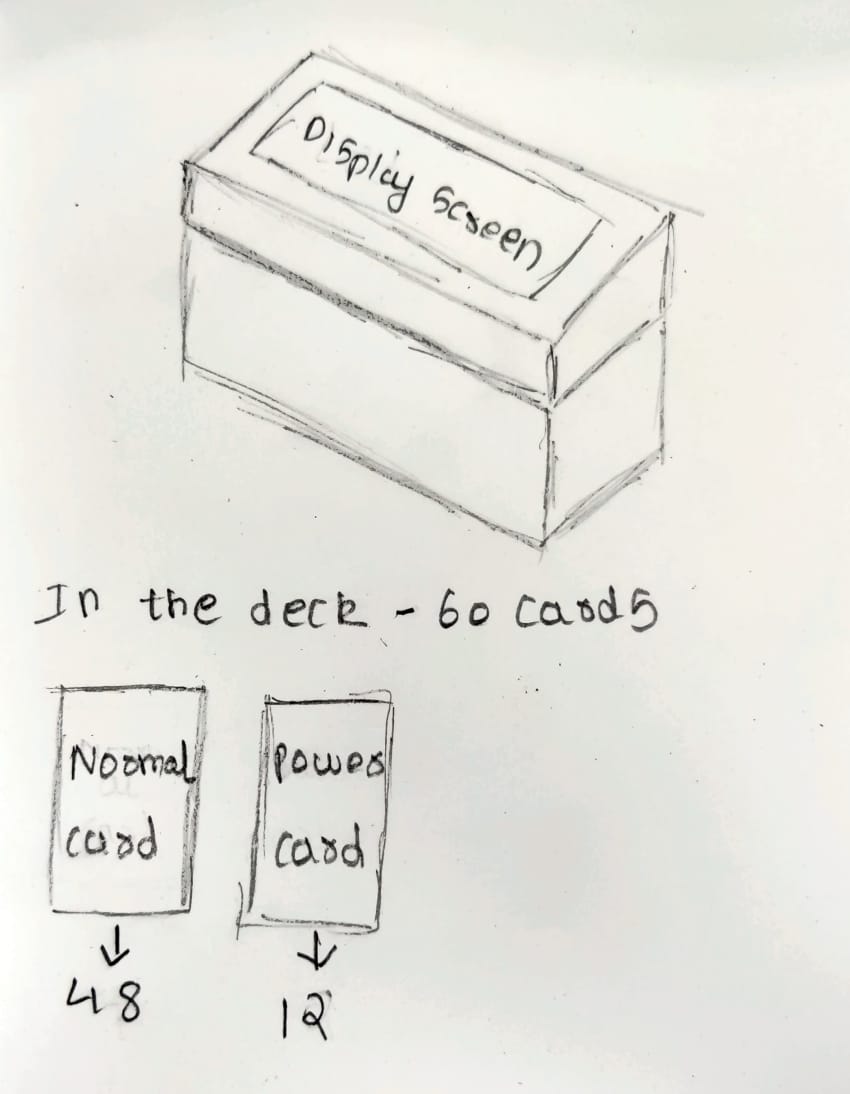
Basic Prototyping
Initial idea of how my box will look and where will be the placement of cards and scanner also how will the cards be looked.
Conclusion From Week 1
I was totally new with this website making and even with the coding, initially it was very hard for me to understand the entire system of git lab, Mkdocs, visual studio code, Git repository, how to clone git. I was jumping between Mkdocs and HTML but in my macbook I was struggling to download Mkdocs and then I decided to learn HTML and I think it was a good decesion as I learned a new coding language, it took me one full day to learn but now I am used to HTML syntaxes and how to go about solving the issue
Fab academy Student Agreement
student agreementImage Credits
All images of cover page are credited below:
https://images.app.goo.gl/ZMYHJ9ftrYE9HCc66.
https://images.app.goo.gl/xaCxGb8Z1xuvTds47
https://images.app.goo.gl/jCKsjUJdyWgkK2Sc6