3D Scanning & Printing
Week05
Group Assignment
This week´s group assignment seemed easier than the previous ones. We "only" had to identify and characterize our in-house 3D printing machine. Personally, my first contact with 3D printing machines was around 2012, when I was starting my journey working at Universidad Anáhuac. During that time, the institution was setting the labs for its expansion plans, focusing on engineering and design. I was lucky enough to being friends with one of the first providers of these machines in Queretaro.Also, I´ve known for a while the owner of Tridi, a printing house that started in that year and sold the business for an astonishing high value. He was smart enough to develop relations with bigger and bigger factories and fulfilling the design and protoyping areas satisfactorily with this technology.
I recognize that I knew the principles: these machines worked pretty much like the paper printers, but instead of using ink, they used plastic fillaments. Now, by wathcing the process closer, I can say that the functionality is more similar to a sewing machine, just with a 3rd ax: Z.
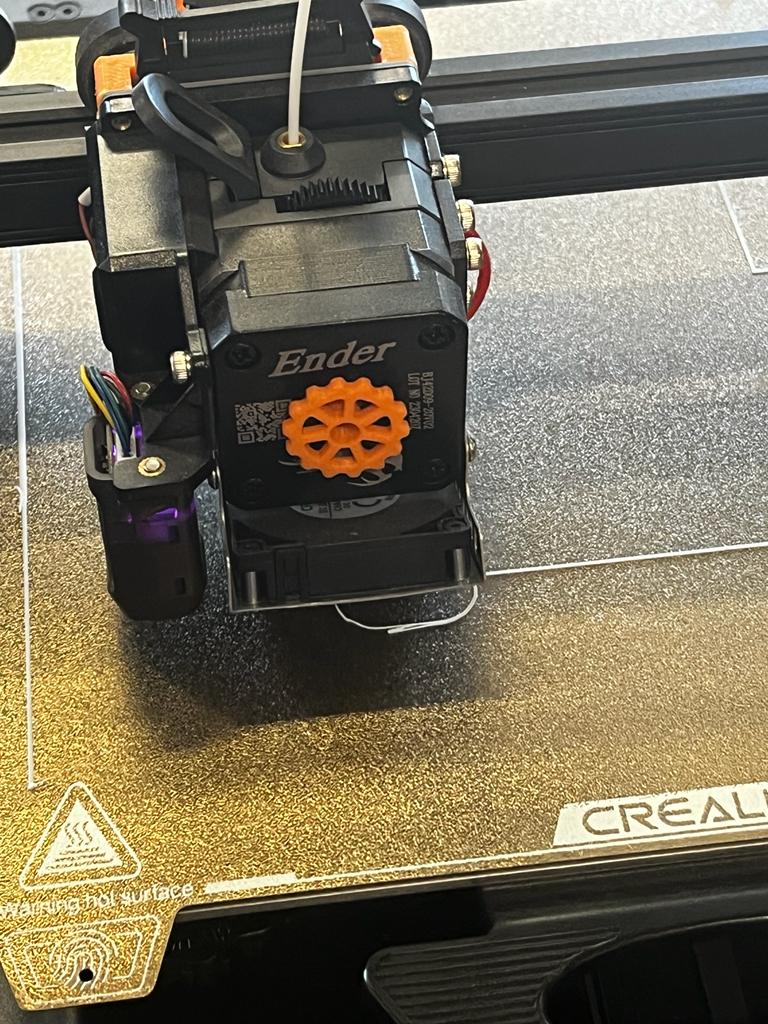
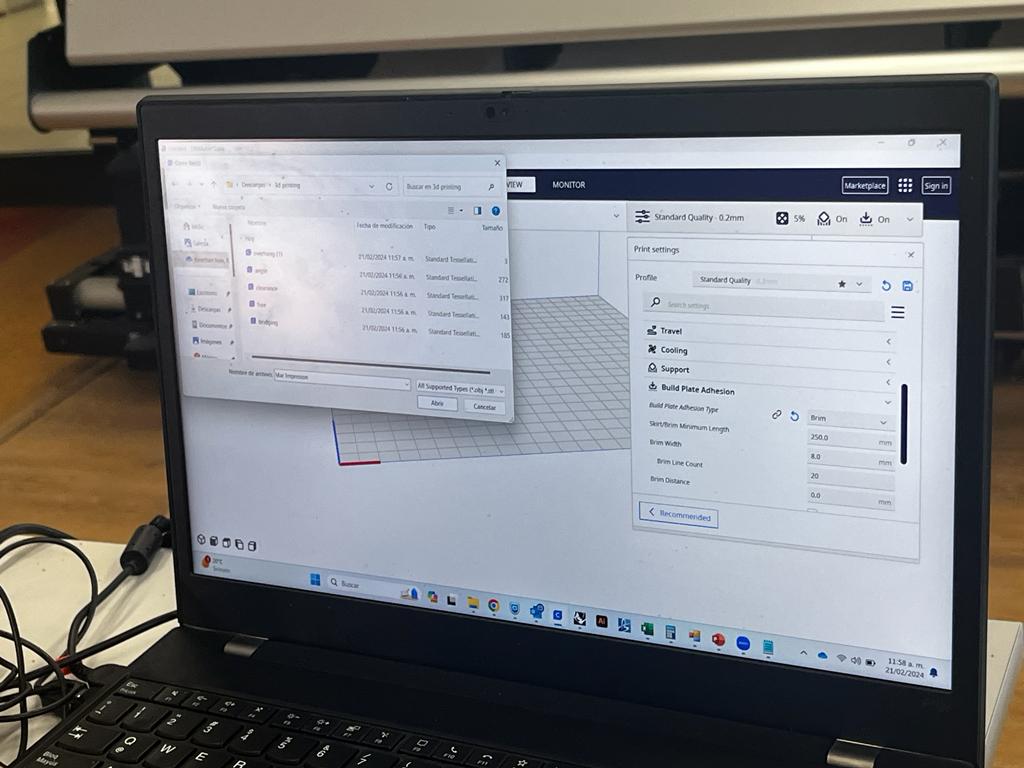
Next, you will see different images that describe the process held by us as a group. Fablab Queretaro´s machine is the Ultimaker Ender Creality. We used the program Ultimaker Cura.
Steps:
1. Import the template in Cura, by selecting File->Open File->Select File.
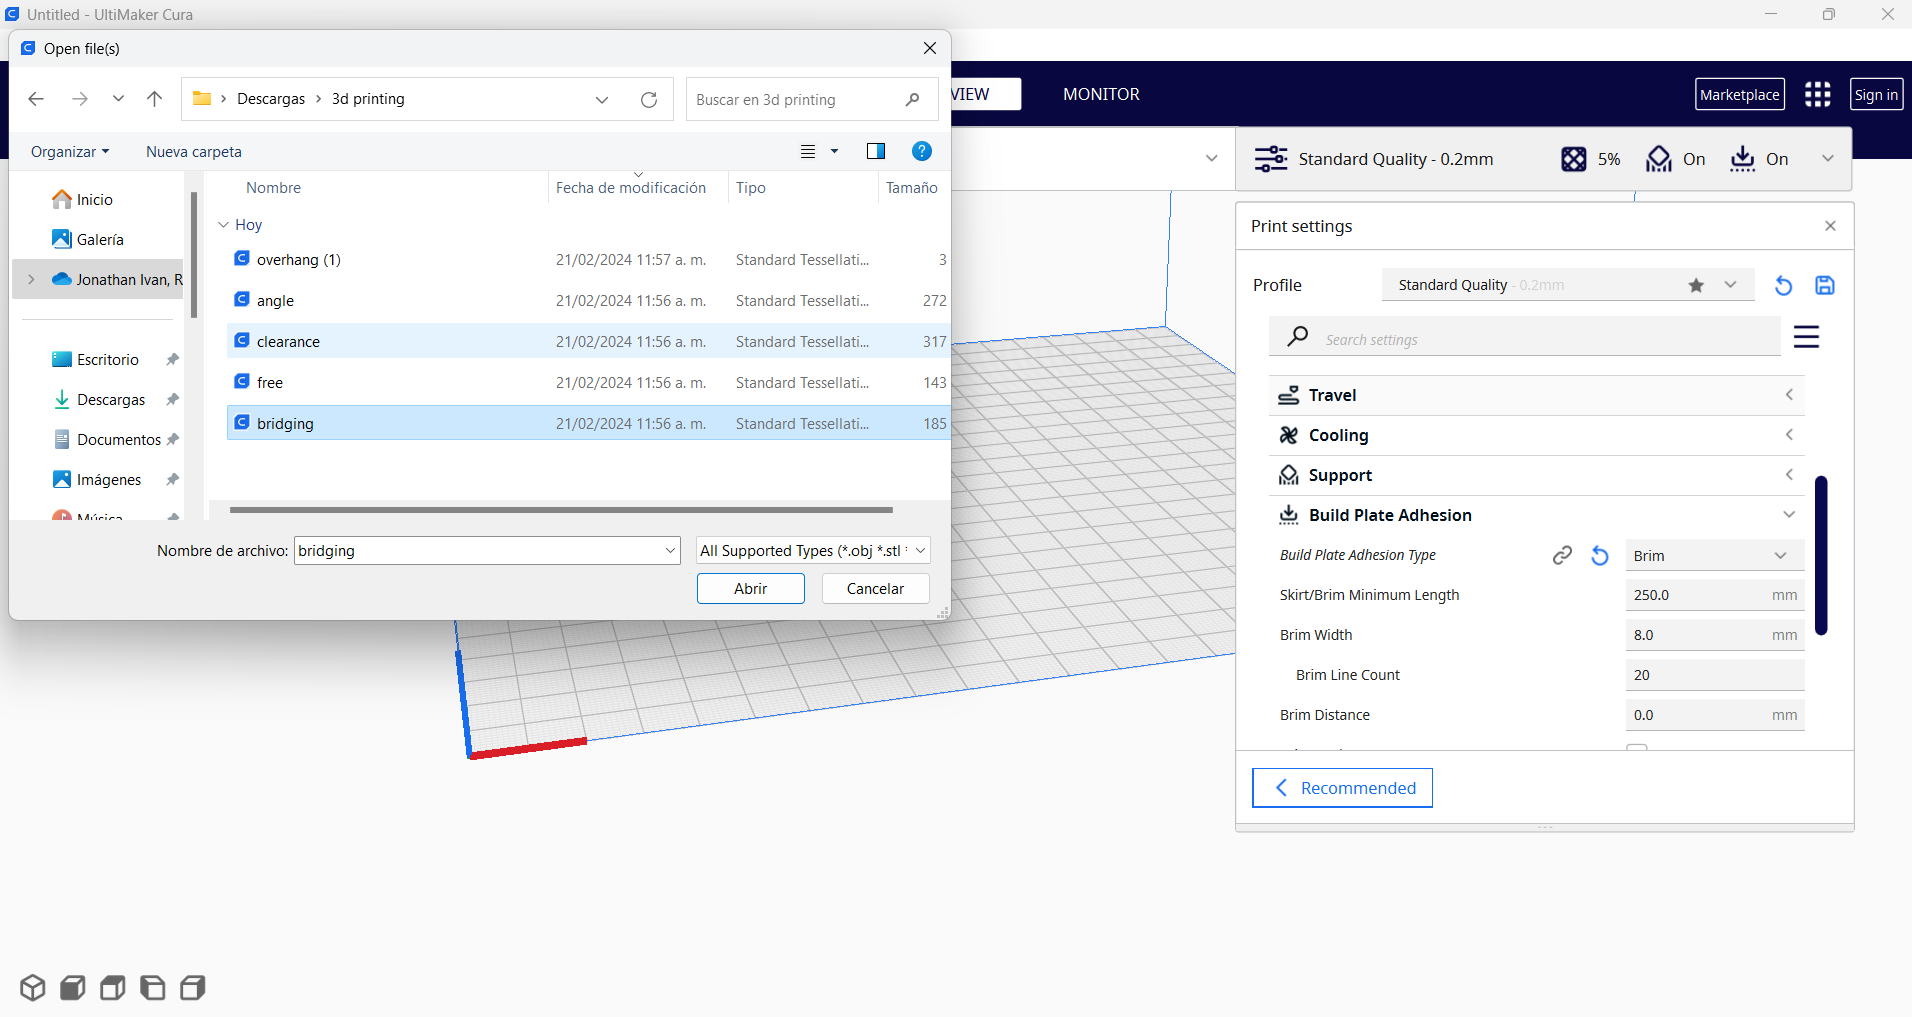

2. Set the printing parameters. Consider
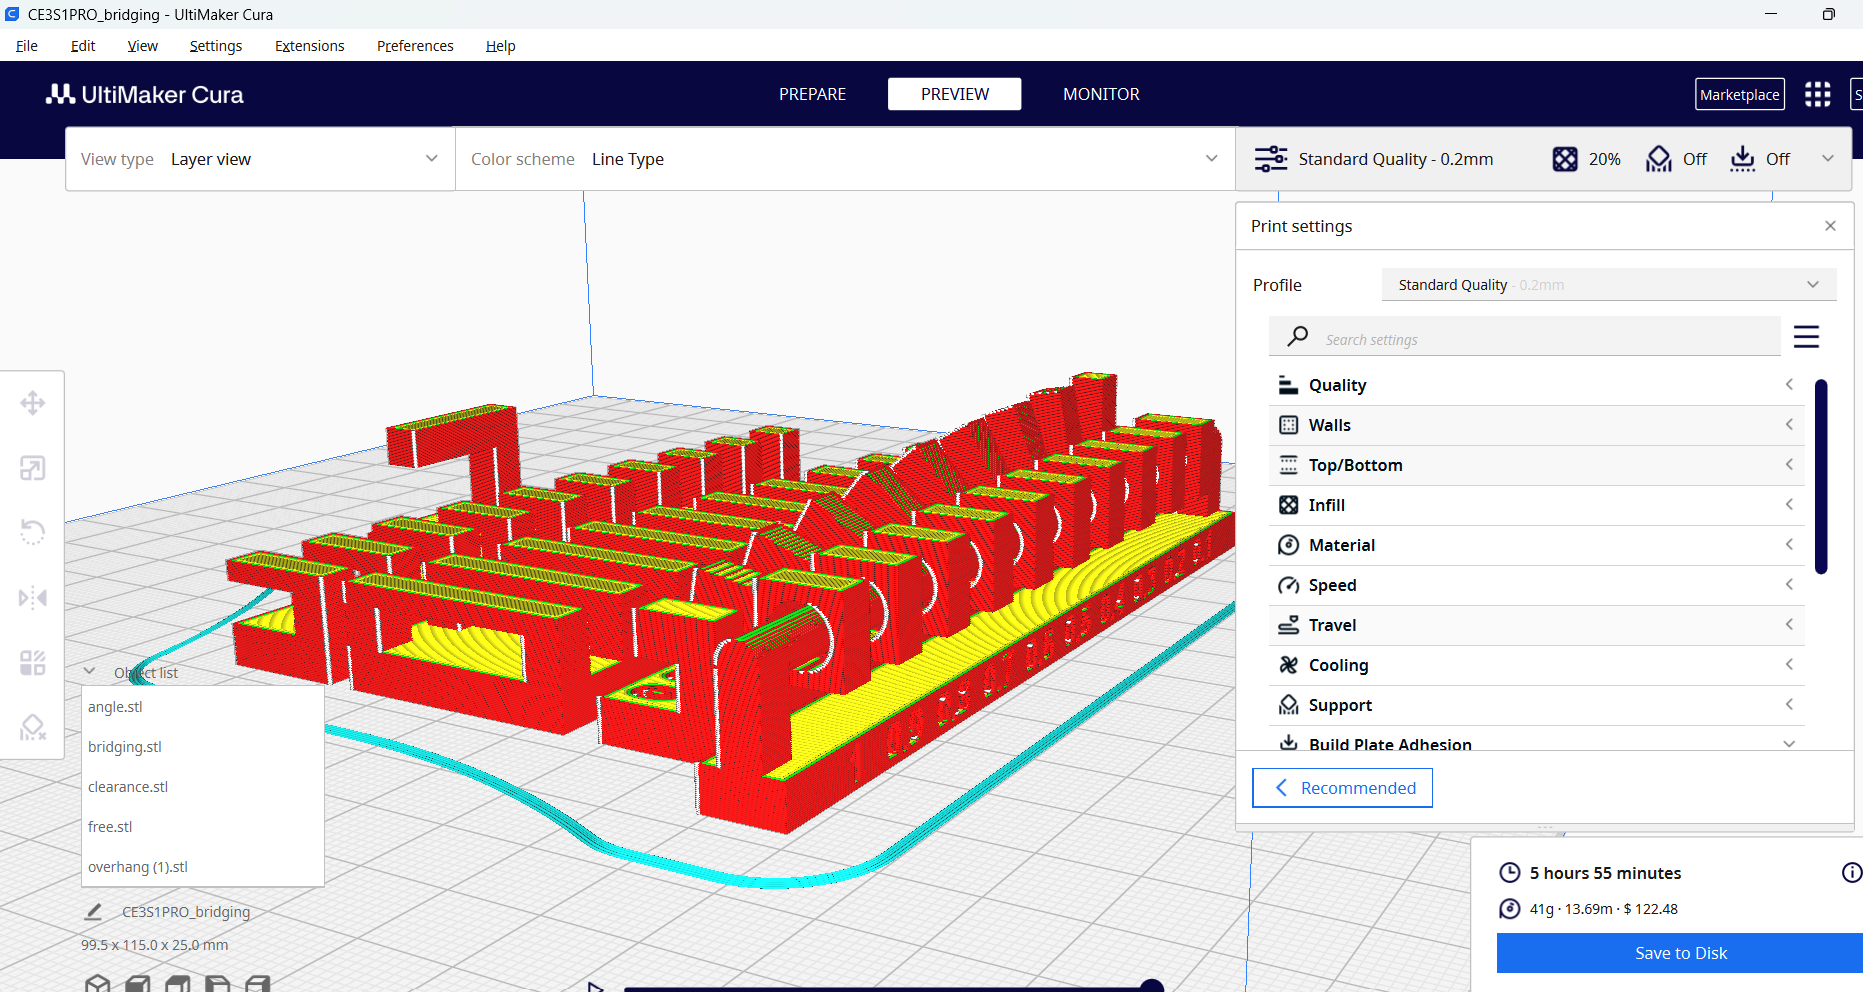

3. Export the gcode. Save to an SD card, transfer it to the printer and begin building the bodies.
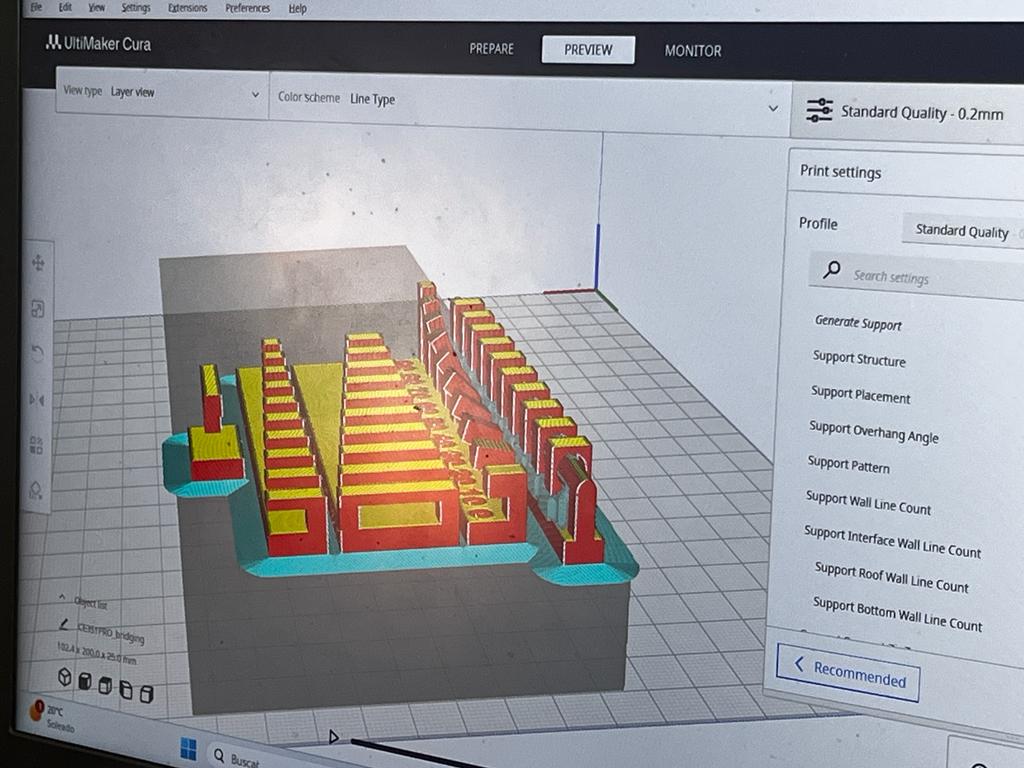
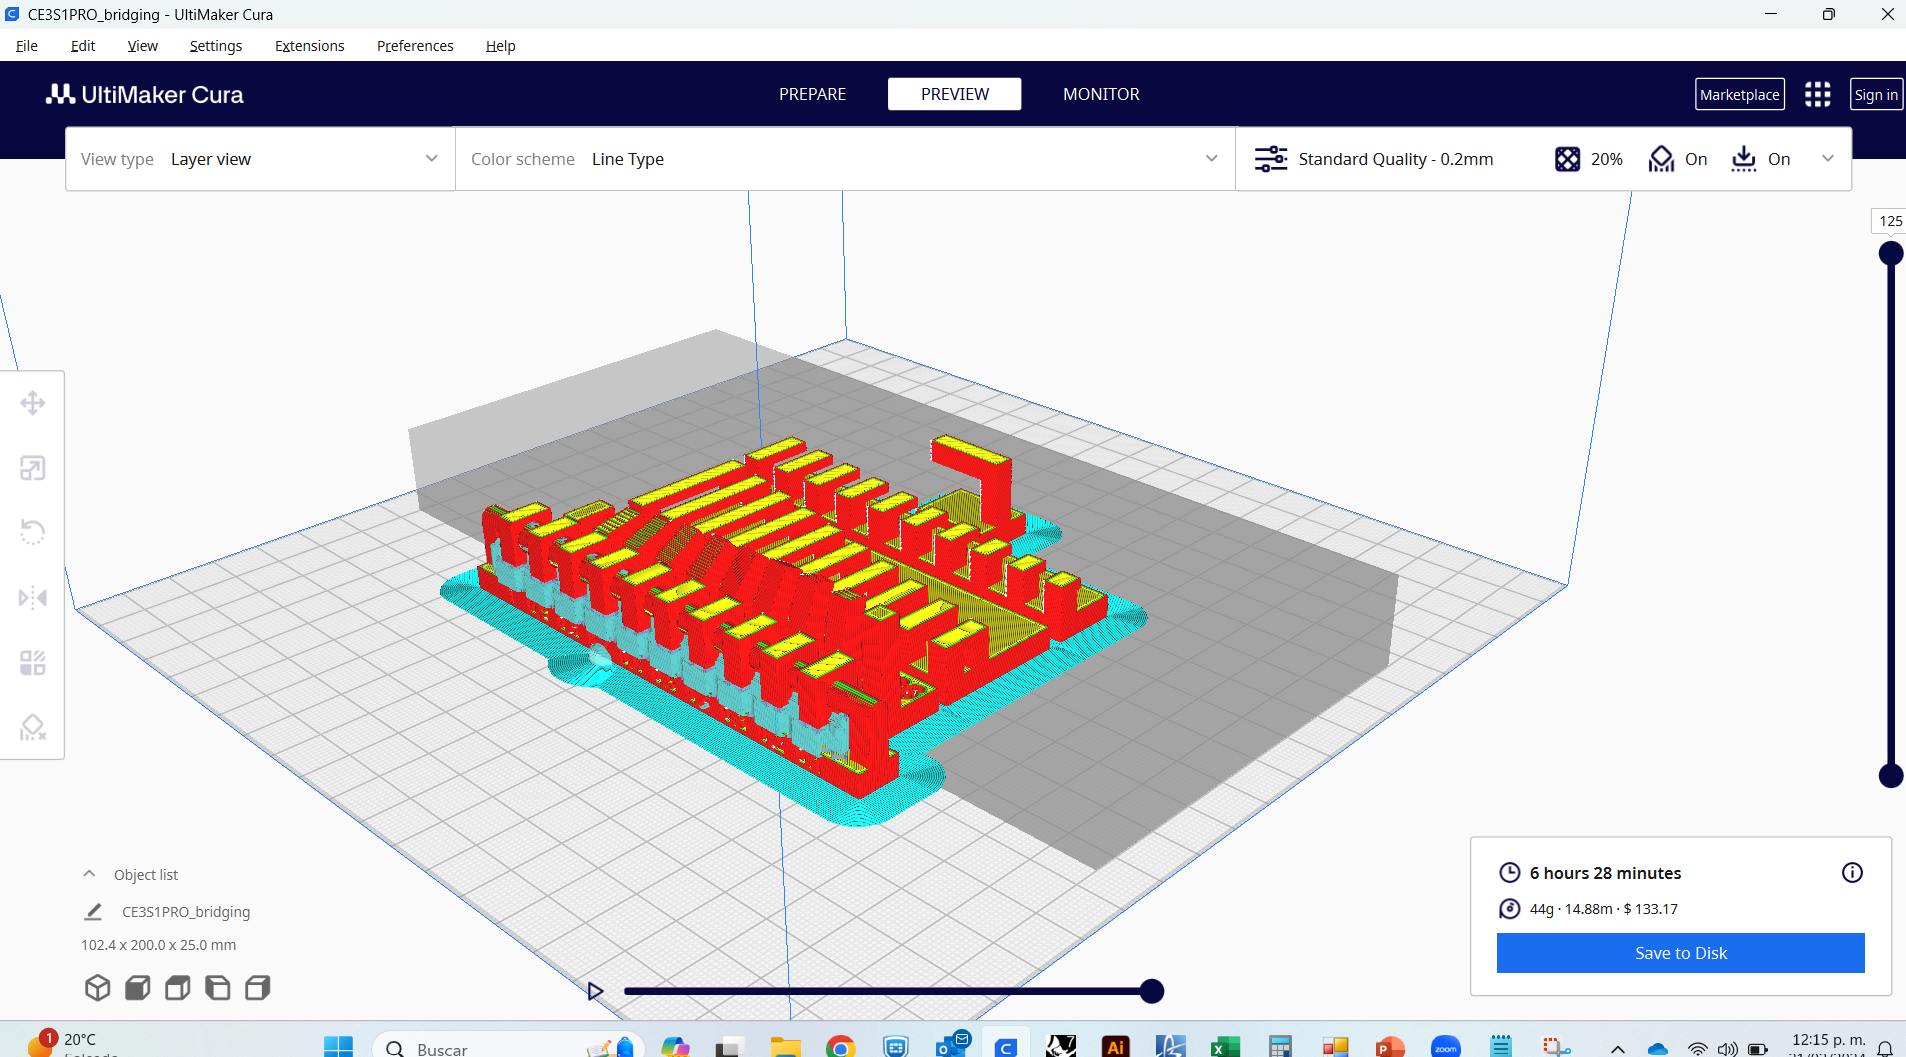
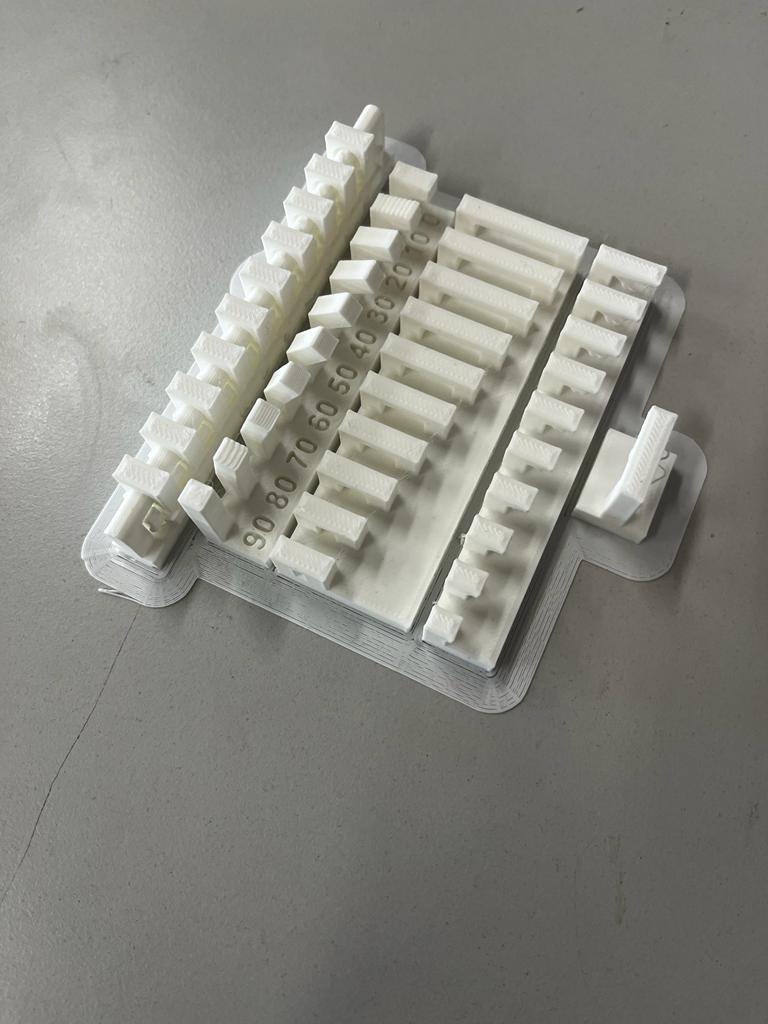
The process lasted about 6 hours, as you may see in the previous picture. The most troublesome part is to set the walls, if you want to optimize the fillaments.The exercise was useful to know the limits of the machine.
You may find the files we used and worked here:
I really hated that all the effort I have given compacting file sizes was kind of useless with the Gcode. My repository now weighs a lot more, only due to 1 Gcode using 94% of the occupied space.

Individual Assignment
For this part of the assignment, I was asked to do 2 things: 3D print something that could not be done subtractively, and 3D scan an object.
3D Printing
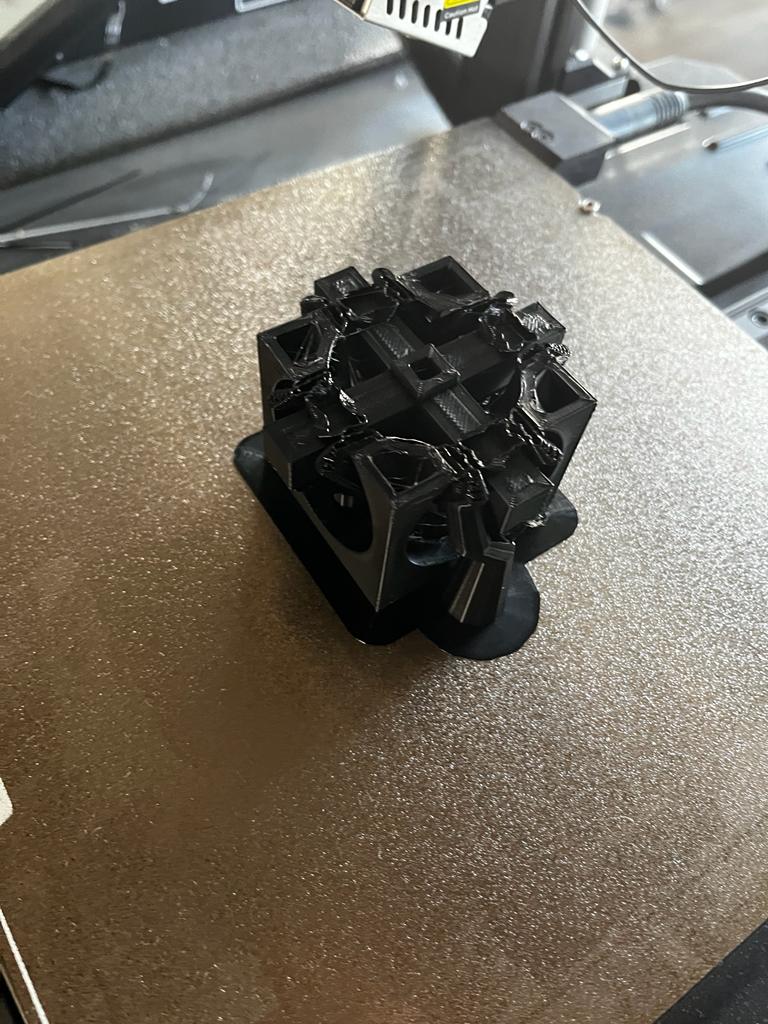
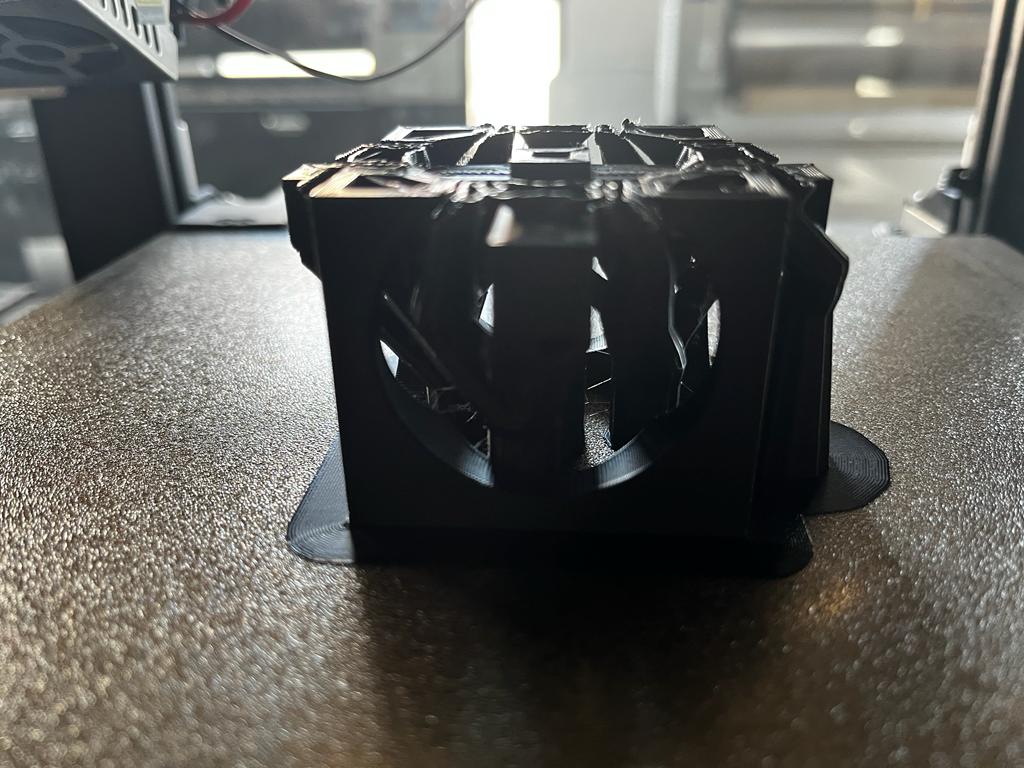
For the first part, I went to my now favorite software Fusion. After a while, I came up with something. Next, I show a short video of how I built it, then how I transformed it in Cura:

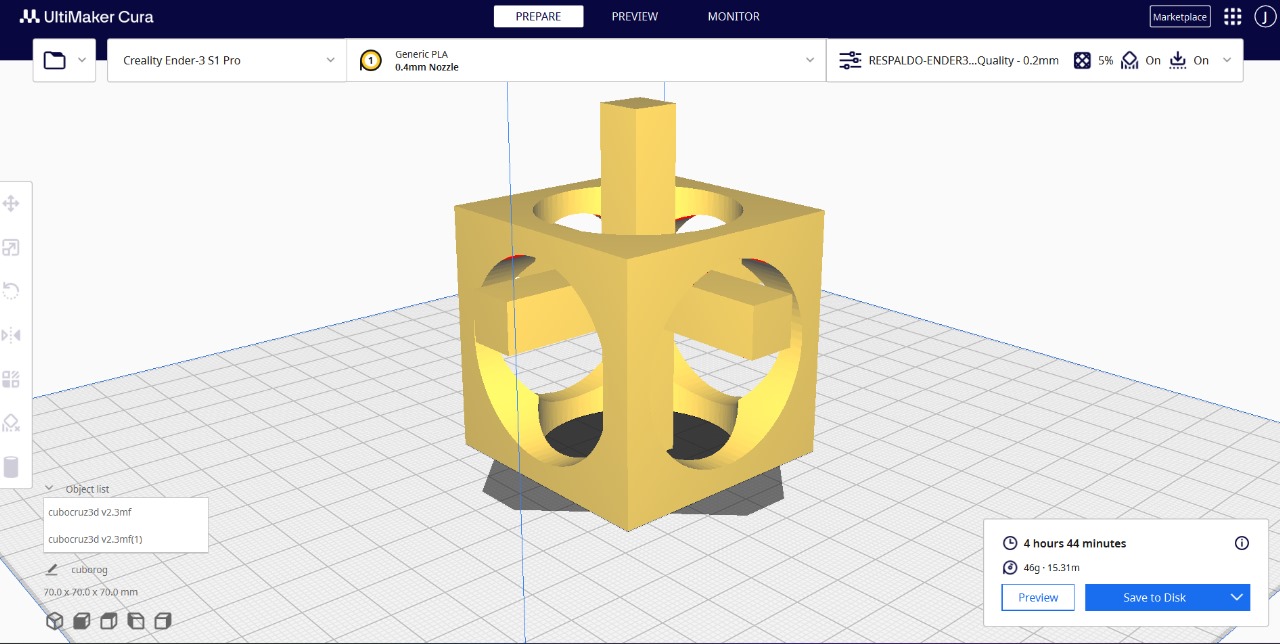
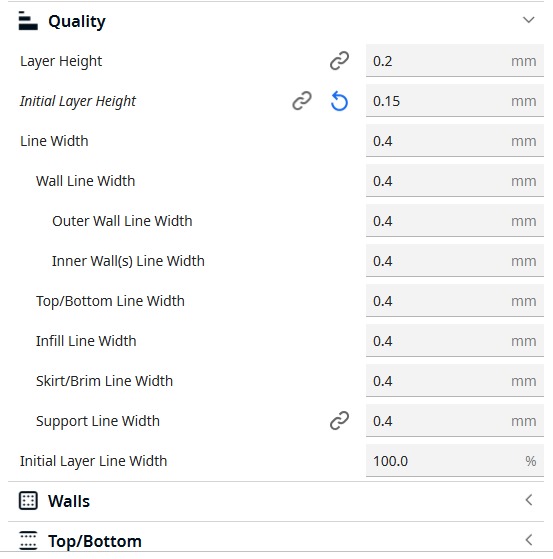
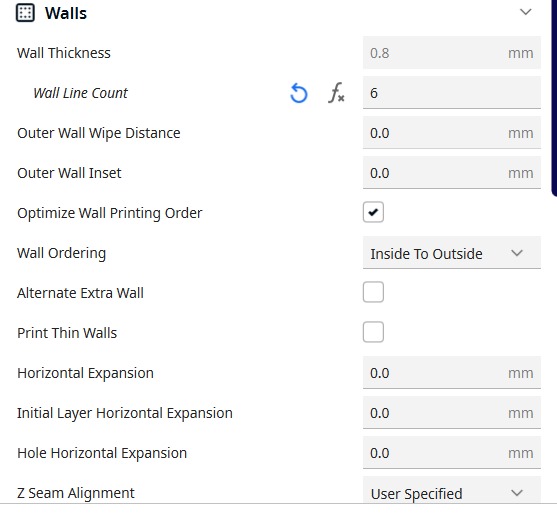
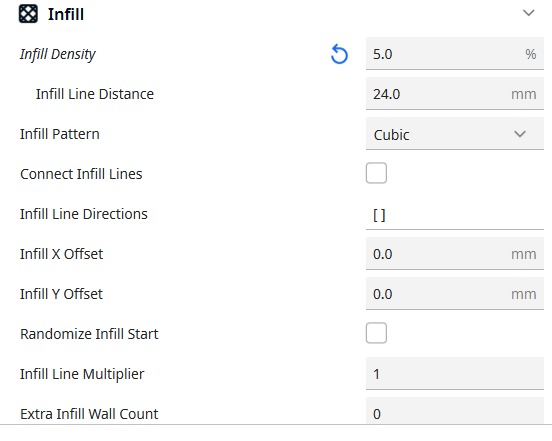
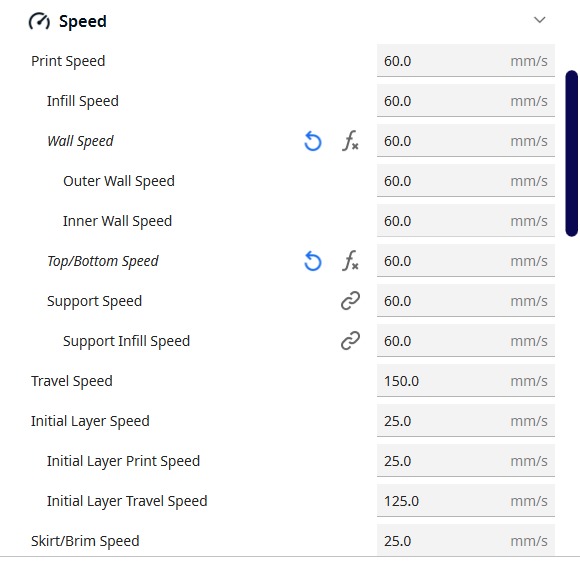
It is important to mention that temperature, time, and even the weather surrounding the Ultimaker may affect the results. Next, you may see the settings I established for the machine to print my work:

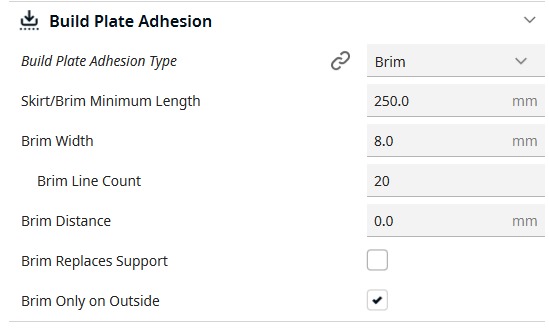
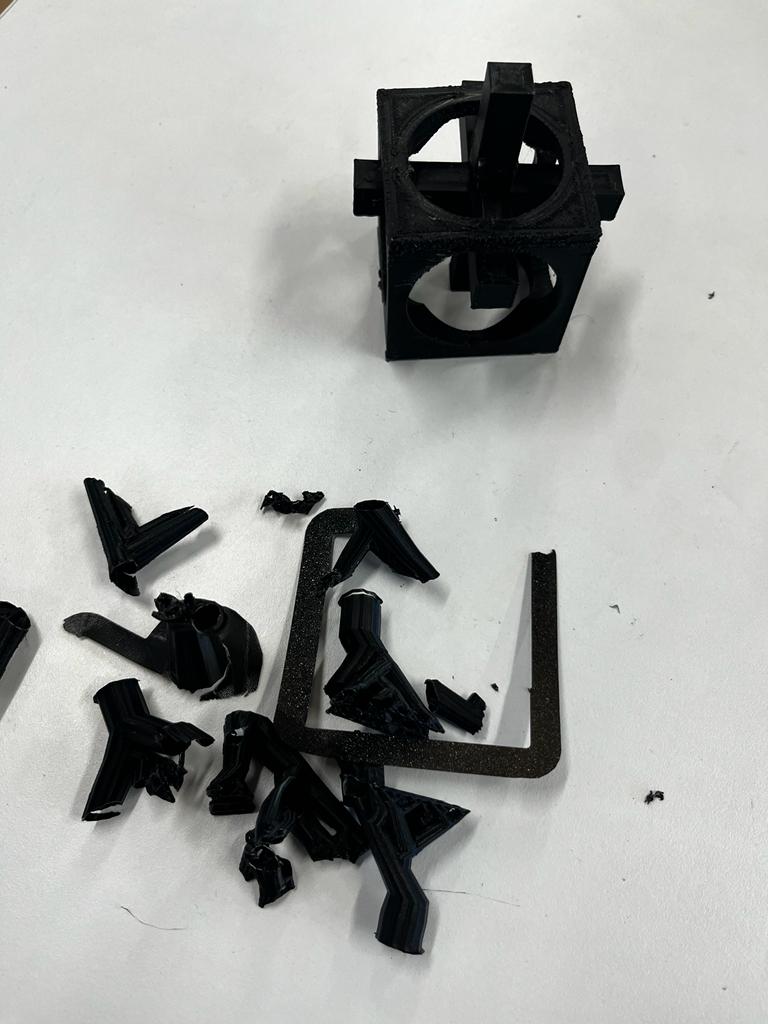
I was really relaxed, as I left the Ultimaker working for the night. The expected time were about 6 hours, so the next morning when I enthusiastically arrived to the Lab, I came accross this:
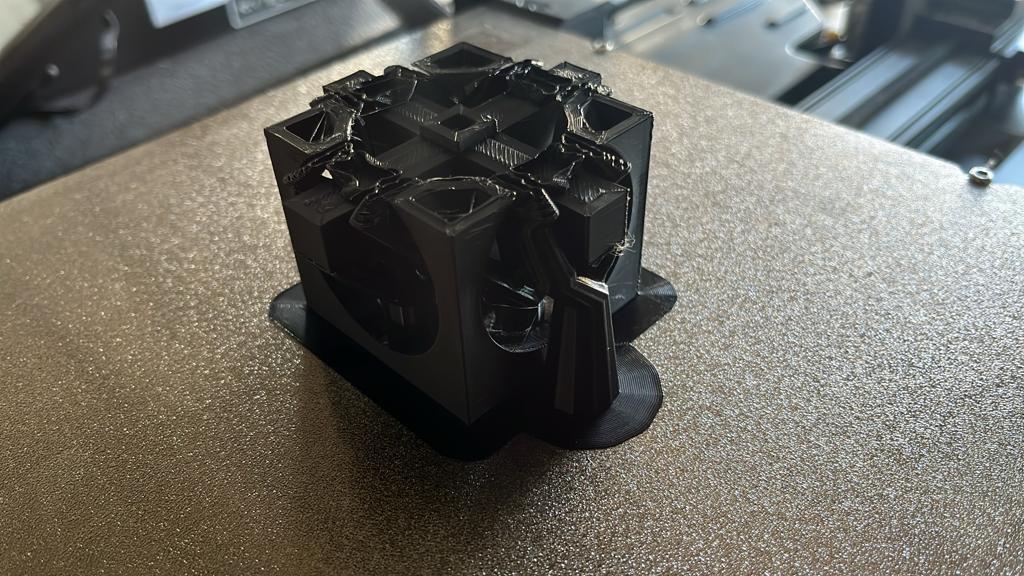
I am sure I probably deceived my mentor Jonathan Leon. I was horrified to start the process from 0. Luckily, he told me it was just a matter of inserting the new fillament and
By the way, you may find the files I developed here:
- first try
- final file in 3mf
- final file in Cura
The bodies were not completely fusioned
3D Scanning
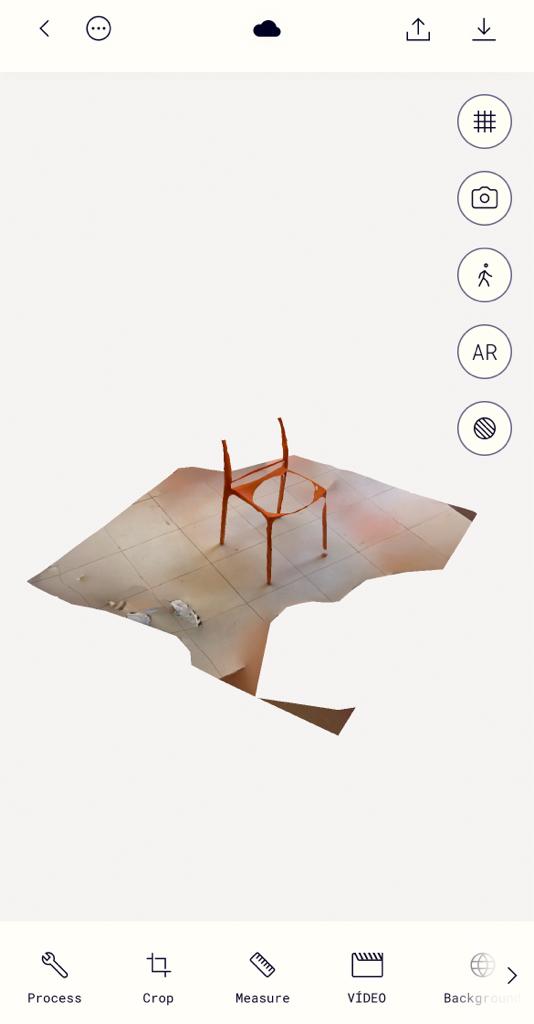
For this part of the assignment, I used an app from the
I made multiple trials, first with a chair in the middle of a patio. I took 25 pictures of it with the iphone camera, opened from within the app. I got along with the different functionalities, such as rotating it, zooming in and out, changing angles, and even inserting the 3D object in a space as augmented reality:
As you have seen, the results were both frustrating and motivating. So, I came up with a new trial. This time I asked a good mate from the office to scan me. He is very methodic, he took me close to 40 pictures, walking really slowly around me. I saw better results, so I repeated that way of scanning with another colleague, and when I arrived home, with my beautiful wife.
You will notice in the first video, that there are many options to share the object, sadly all of them are only included in the "pro" version of the app, which isn´t free. Also, I tried another way to share the object in the second video, same results. Finally, I came to peace with the results, knowing that for now I can only share them in video format, and my fun will end sooner than I would desire.
Please, enjoy the videos and try to judge me the least possible, as my pulse is only useful to throw sugar to Mexican churros:
The main differences among the first scanning of the chair and the ones of people were:
- First, the number of pictures apparently correlates positively with the quality of the 3D object.
- Second, the less the "photographer" moves, the better the resolution of the 3D images.
- Third, it is useful to have a big space for you as a photograhper to move around the "object". The more the space, the better the quality.
- Fourth, for the chair, I took a couple of pictures from above and below; on the contrary, for people I "only" moved around horizontally.
Final Comments
I was thankful for this assignment, as it helped me to reassure the previous knowledge. For instance, to develop the file I used for 3D printing, I used less than 1/10 of the time it took me to develop the files on my first assignment. I am motivated and willing to working with the next, more and more challenging assignments.