Week 14: Interface and application programming
Grupal Assigment
For this week's group assignment, we compared three different interface tools:
- FlutterFlow
- AppInventor
- QTDesigner
- Processing
Qt
Background: Qt is developed as free and open-source software through the Qt Project, involving the community and developers from Nokia, Digia, and other companies. It uses C++ natively and is widely used in KDE desktop environments.
- Pros: Cross-platform, native look, great control with C++, open-source, enterprise support, not just a UI library.
- Cons: Metaobject compiler adds complexity, QtCreator dependence, reinvents standard library components, long startup times.
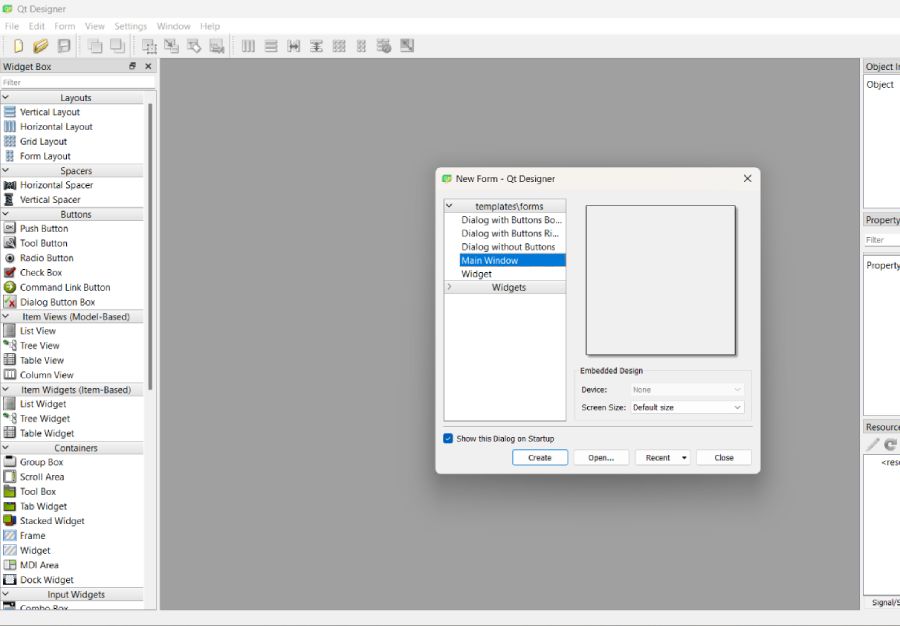
- Usage: Upon opening, you can choose templates, adjust screen size, drag items into Canva, and use the object inspector and property editor. CSS code can be added for modifying object styles.
Processing
Background: Started by Ben Fry and Casey Reas in 2001, Processing is a software sketchbook for visual programming.
- Pros: Free, open-source, cross-platform, great for creative types, strong community support.
- Cons: Limited code control, not efficient with system resources, confusing evolution, not available for iOS.
- Usage: Works like Arduino IDE with setup and draw functions. Basic commands include size, background, ellipse, rect, line, fill, stroke, noFill, noStroke, and translate.
App Inventor
Background: An open-source web application originally provided by Google, now maintained by MIT, for creating Android apps.
- Pros: Easy, intuitive, online development, fast app creation, access to phone functionalities.
- Cons: No Java code generation, only for Android.
- Usage: Divided into Designer and Blocks tabs. The Designer tab allows drag-and-drop interface design with real-time changes. The Blocks tab uses object-oriented programming for assembling instructions.
FlutterFlow
Background: A web-based platform using Google's Flutter framework for building cross-platform mobile apps with a visual drag-and-drop interface.
- Pros: Easy and intuitive, cross-platform development, rapid prototyping, Firebase integration, extensive customization, real-time preview.
- Cons: Limited custom code, subscription-based model, learning curve for complex features, platform dependency.
- Usage: Similar to App Inventor with a palette of objects, a canvas for placing objects, and a properties window. Provides code for the app, offering more flexibility.
Create Interface with QT
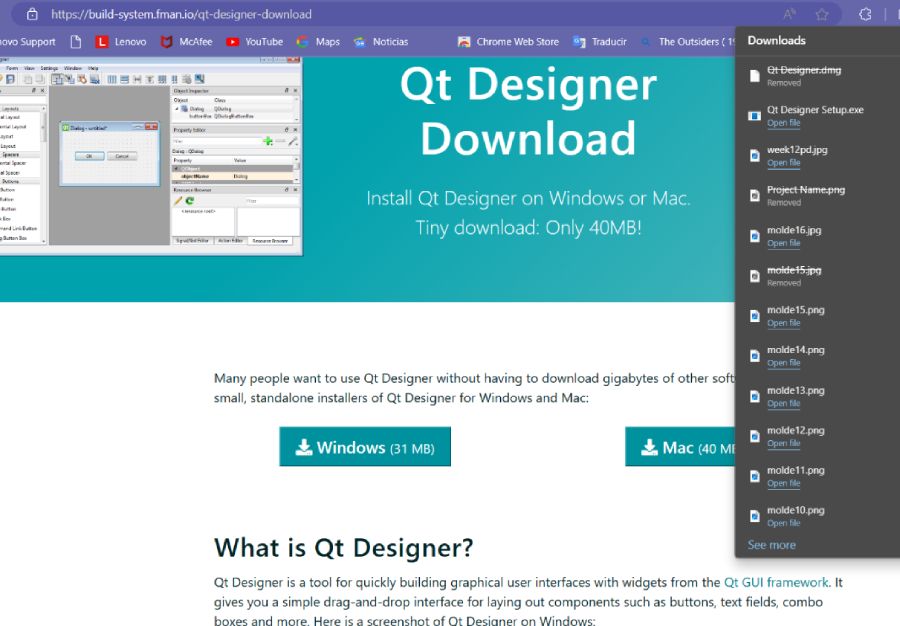
First Install Qt Download here
This is the software that we are going to be using to create or interface
Then open the platform to analize de tools.
- First click in main window to see the work frame
- Then insert labels and buttons to arrange the interface wwith the tools that you may need
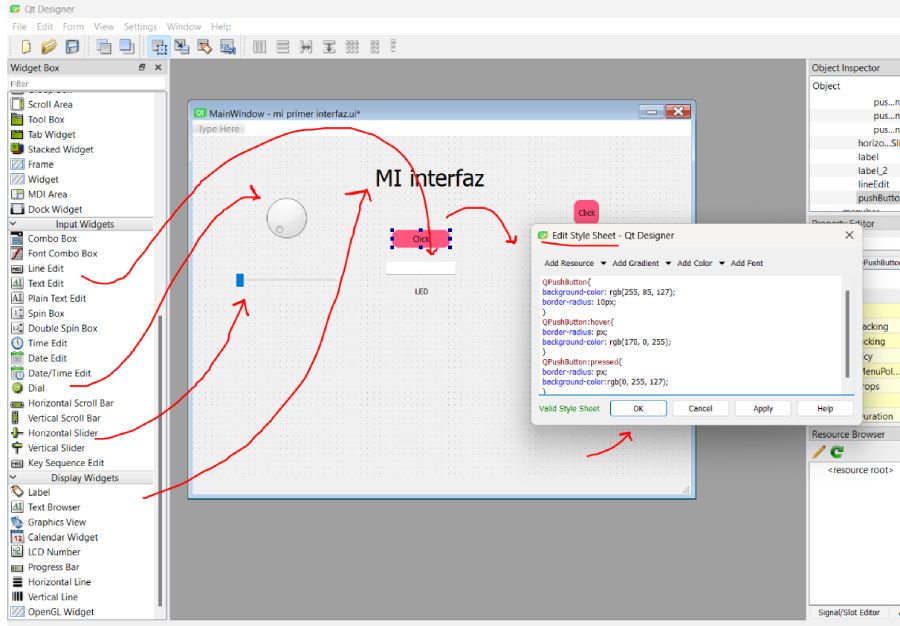
To personilize each lable there are some windows to specify width, color, and layouts
- Stylesheet: in this excercise you can add commands to arrange color, font and form of the frame
- Alignment: to align the lables we can use layouts and change the name to recognice them more easily
- With & height: tat the right side of the app there are colored sections were you can find the minimum and maximum size
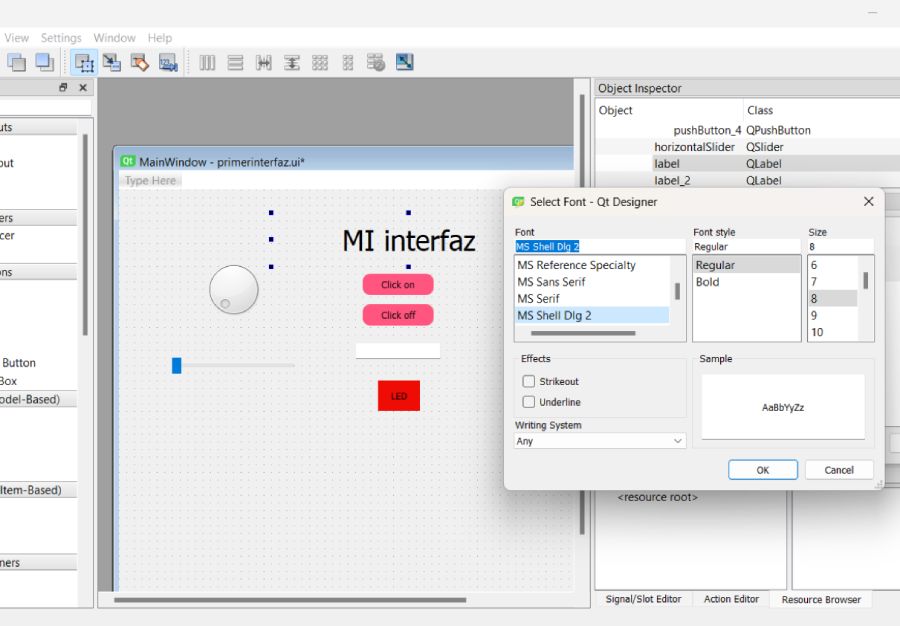
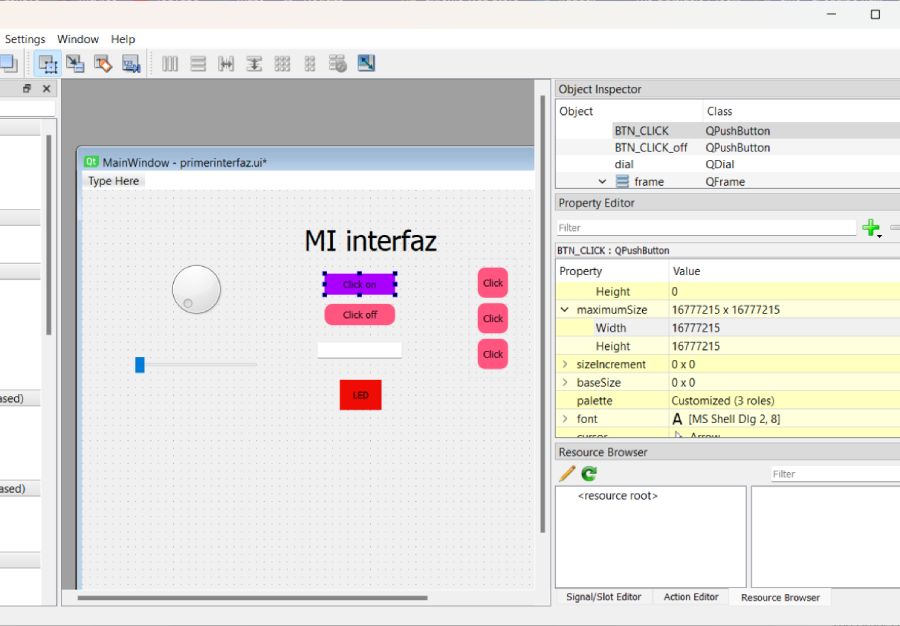
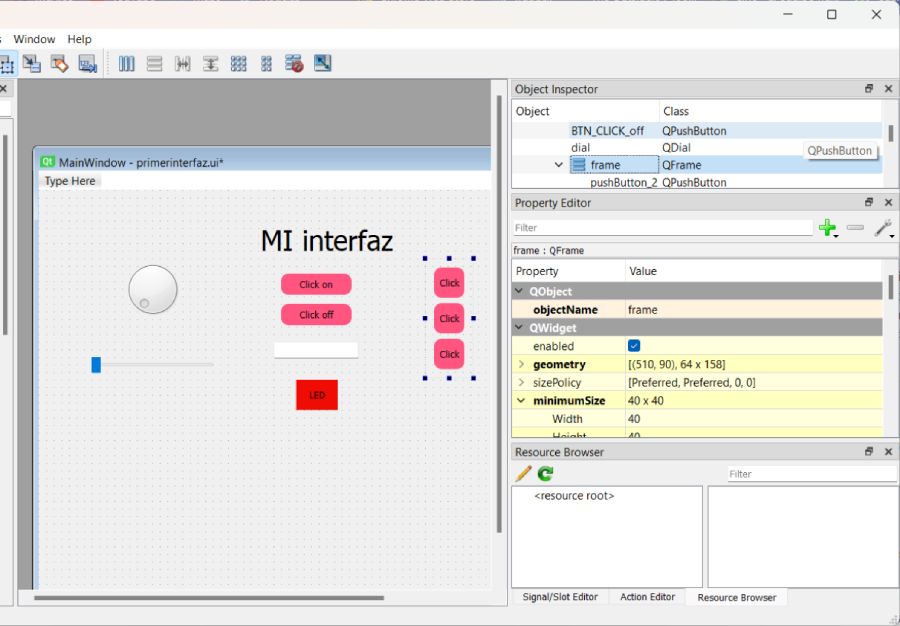
To see the preview you can click Ctrl + R
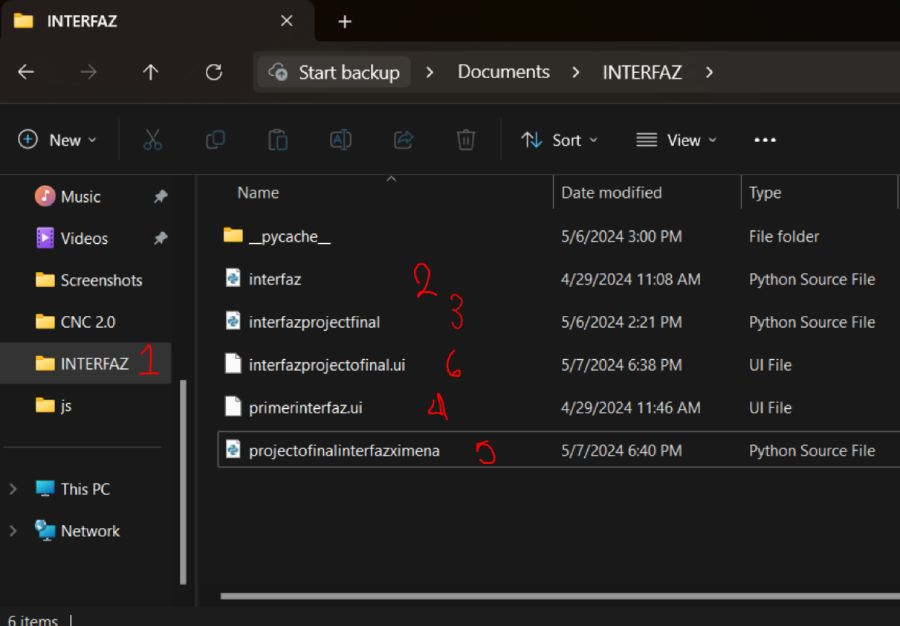
Then save the file in a new Folder in this case I name it "Interface" and the archive "firts interface.ui"
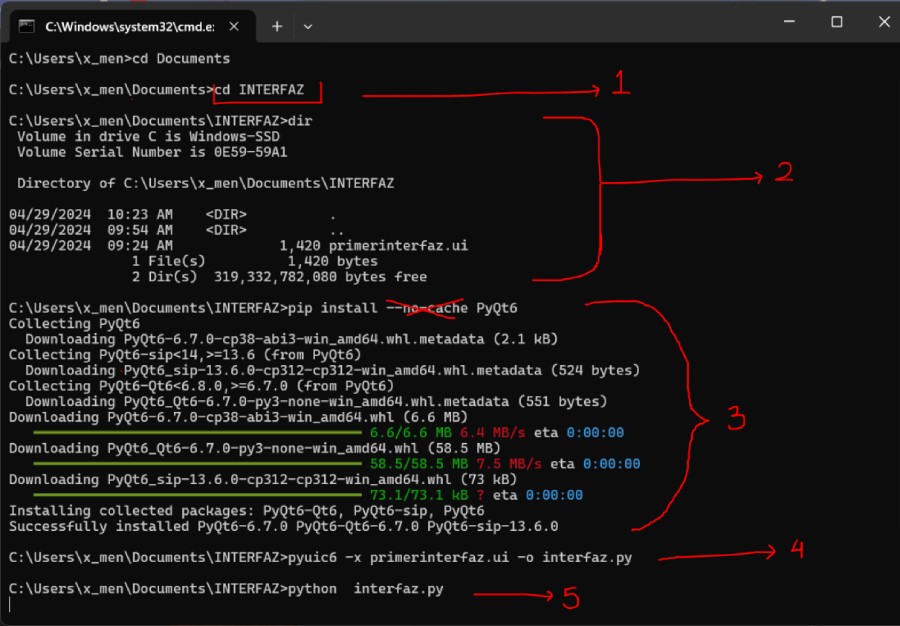
Later at the Terminal we are going to save the same interface in different types in order to allow us to visualice in the other tools
Now there is the side by side compare between the terminal and the "Main Window" This is how you are going to view all the changes that you add to your inteface.
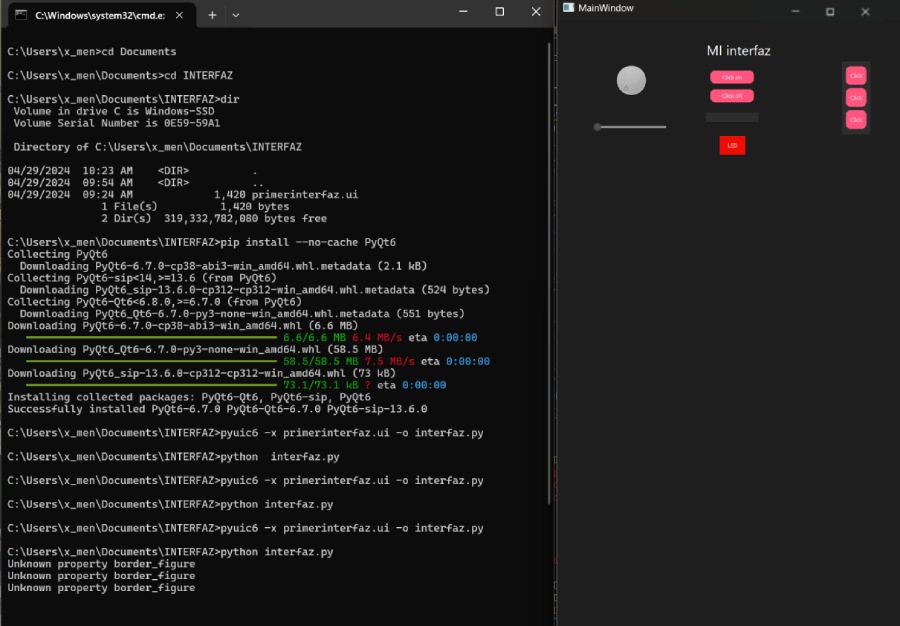
- Fisrt wit
cdwe open the Folder INTERFACE - Then with
dirwe check the value - We installed Python and used
pip install PyQt6and if it is correctly installed we may continue - With
pyuic6 -x"name of project"-o"name of new py archive" - We are going to save the new version and open the to visualice the interface so far
python"name of new py archive"
Final Proyect Interface
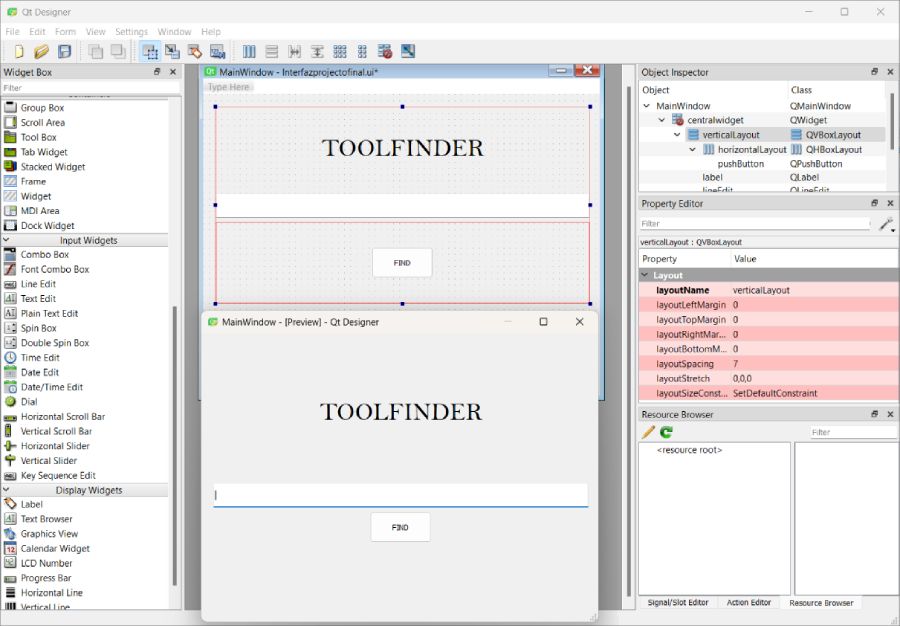
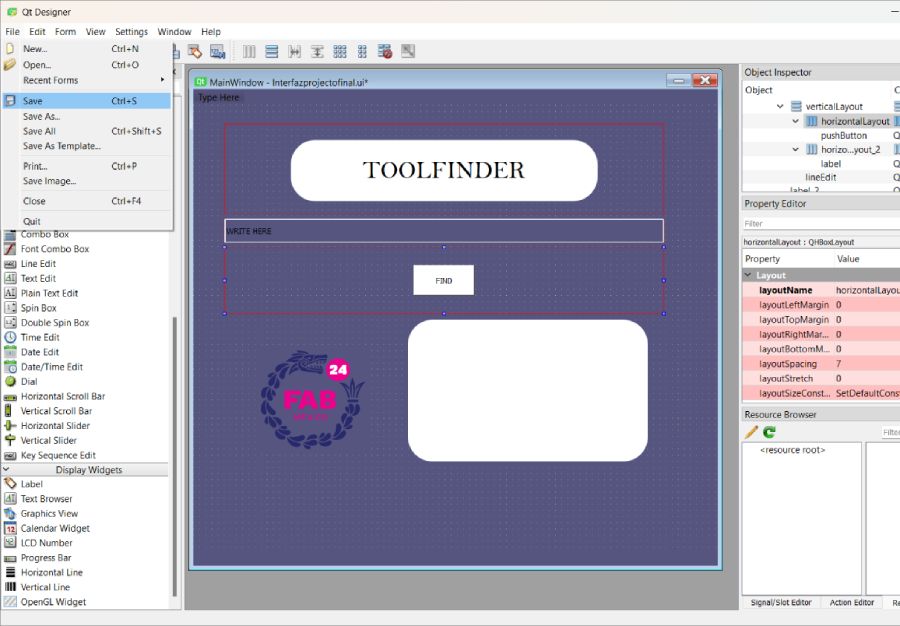
Same as the first excersice we need to save the file and personilize the window
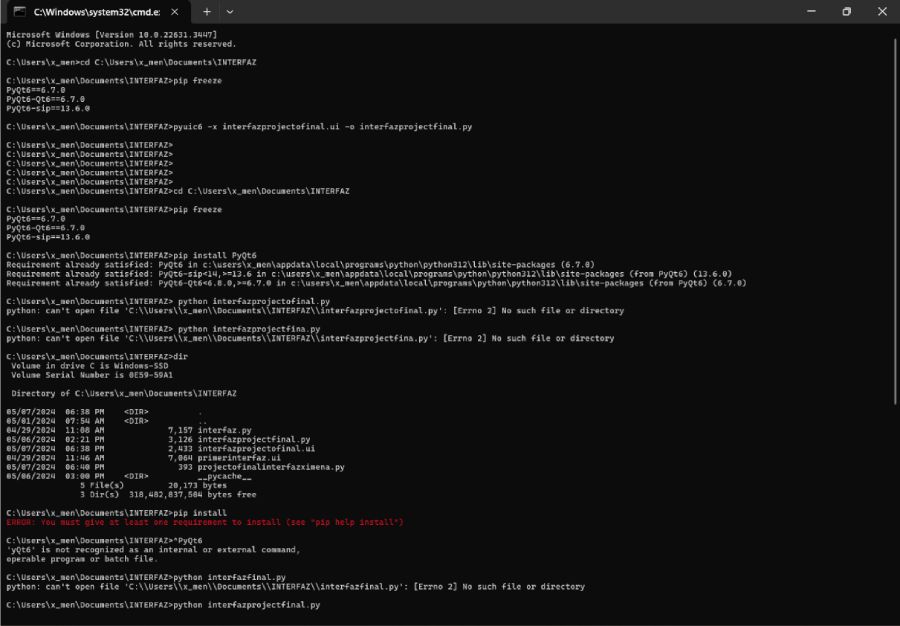
These are the characteristics added to my interface
- Label for the Title
- Buttom to find the tools
- Same or different button to turn a LED
- Text Browser to write the tools
- A frame to verify if the program finds the tool
- Image to decorate
This may be whit you be looking at while repeating the codes I provided above.
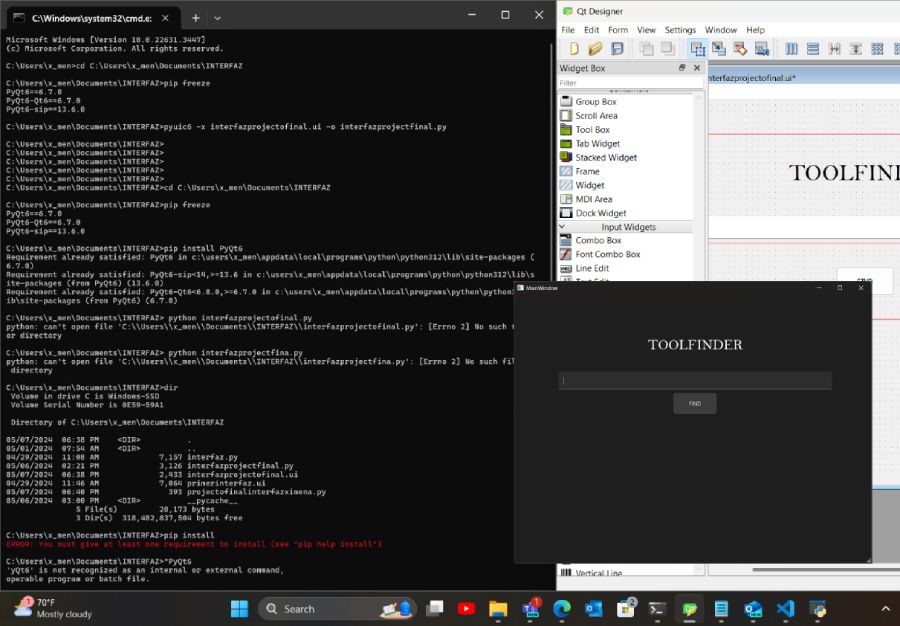
After the updates the interface looks more like what we want
Programming
Install librariesOnce installed, python and saving tha archive refresing in terminal with pyuic6 -x "name of project"-o"name of new py archive". To generate the Python file and save the new version
Then we will use VSCode.
Posible errors*When developing applications, there are instances where we need to modify designs or display different content. If we directly modify the file we initially created and then make subsequent changes, there's a risk of losing everything.
To mitigate this risk, we'll create a new file named "app" for example to separate hardware and design concerns.
Once we open the py archive we will find a similar code
When developing applications, there are instances where we need to modify designs or display different content. If we directly modify the file we initially created and then make subsequent changes, there's a risk of losing everything.
To mitigate this risk, we'll create a new file named "app" to separate hardware and design concerns.
CodeIn the next code, there is the interface.py, which represents the code that Qt gives us for our interface. Then, there is program.py, which is the code that tells the objects in interface.py what actions they perform when we interact with them. Finally, there is the Microcontroller program. This last one you need to upload first into the controller once it is connected with the elements you want to control, in order to receive the info from the fir
Final Results
Files
- Folder with 3 codes"
Reflection Summary
This week, I focused on designing a user interface (UI) using PyQt6. The tasks included setting up the interface, personalizing labels, arranging elements, previewing the design, and programming the UI to interact with hardware components.
Challenges and Solutions
Designing the Interface: Personalizing each label and arranging the interface using the tools available in PyQt6 was challenging. To address this, I utilized the stylesheet commands to customize the color, font, and form of the frame. Additionally, I used alignment tools to properly arrange the labels and adjusted the width and height using the specified colored sections on the right side of the app.
Previewing and Saving the Interface: Ensuring the interface design was correct before saving was crucial. I used the Ctrl + R shortcut to preview the design and saved the file in a new folder named "Interface" with the archive titled "first_interface.ui". This systematic approach helped me keep track of the different versions and changes.
Converting UI to Python: Converting the .ui file to a Python file required installing Python and PyQt6. After navigating to the folder in the terminal using `cd` and `dir`, I used the command `pyuic6 -x "first_interface.ui" -o "interface.py"` to generate the Python file. Running `python "interface.py"` allowed me to visualize the interface.
Programming the Interface: Incorporating buttons and frames to interact with hardware was another challenge. I added labels for the title, buttons to find tools and turn an LED on/off, a text browser to list tools, a frame to verify tool detection, and an image for decoration. The interface updates made the UI more functional and visually appealing.
Future Applications
The skills and knowledge gained in designing and programming UIs with PyQt6 will be beneficial for future projects that require user-friendly interfaces. Mastering these techniques will enable the creation of sophisticated applications that interact seamlessly with hardware components.
Understanding how to customize and arrange UI elements, as well as converting and managing different file types, will be crucial for developing robust and flexible software solutions. This expertise will be invaluable for projects involving complex interfaces and real-time hardware interactions.
Overall, the ability to design intuitive and functional user interfaces will enhance the usability and effectiveness of various applications, leading to improved user experiences and more efficient system management.
