Week 05: 3D Scanning and printing
For practice purposes I review diferent videos to learn how to use 3D Scanning and printing refered at the end.
Grupal Assigment
3D Printing Technology3D printing, also known as additive manufacturing, is like having a mini factory on your desk. Imagine drawing something on your computer, and then, instead of printing it on paper, you bring it to life in three dimensions. It stacks layers of material, usually plastic, but sometimes metal or even chocolate, one on top of the other until you've got a physical object. You can create almost anything, from toys and tools to complex parts for machines or even prosthetic limbs. It's a game-changer because it allows for custom, on-demand production without needing a whole assembly line. Just design, print, and voilà!
Main 3D Printing Technologies- Stereolithography (SLA): This is like using a magic light wand to solidify liquid plastic into cool shapes...
We have to admit that in FabLab Puebla one of our most sought after technologies for rapid prototyping is 3D printing. That's why we have a staggering 27 3D printers in total.
- Ender 3 (14 units): These are the workhorses of the 3D printing world...
There are various materials that can be used for 3D printing, each with its own characteristics and properties...
| Material | Description | Printing Temperature |
|---|---|---|
| PLA | PLA is rigid, has good strength, and provides good print quality... | Bed: 50-60 °C Extruder: 190-220 °C |
Overhangs refer to parts of the model that extend out over an area with no material beneath them...
Support - InfillThe inside of a 3D print is called infill, and it can be adjusted in terms of density 0% is hollow while 100% is solid...
Finally, you can look at more information on 3D Printing on the following link.
3D Modeling Process
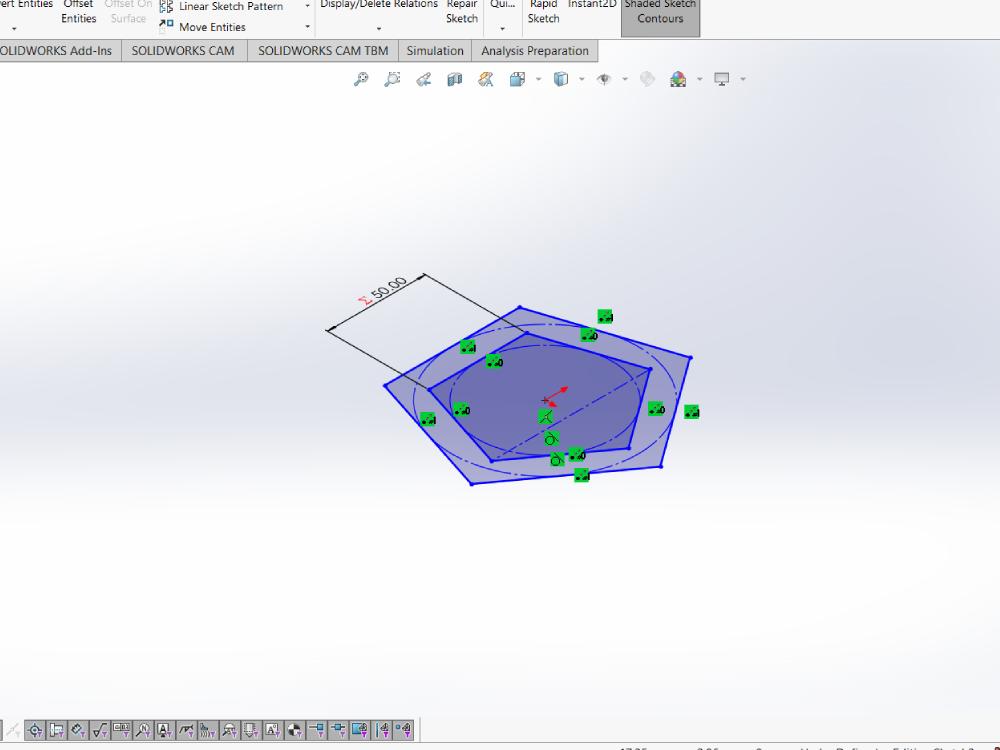
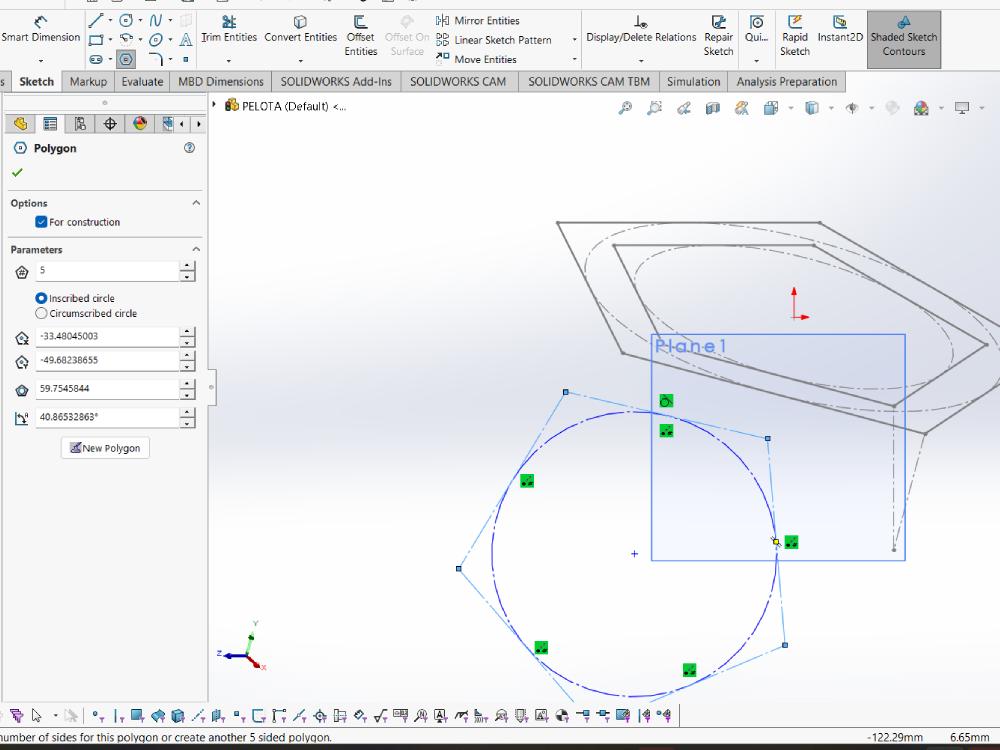
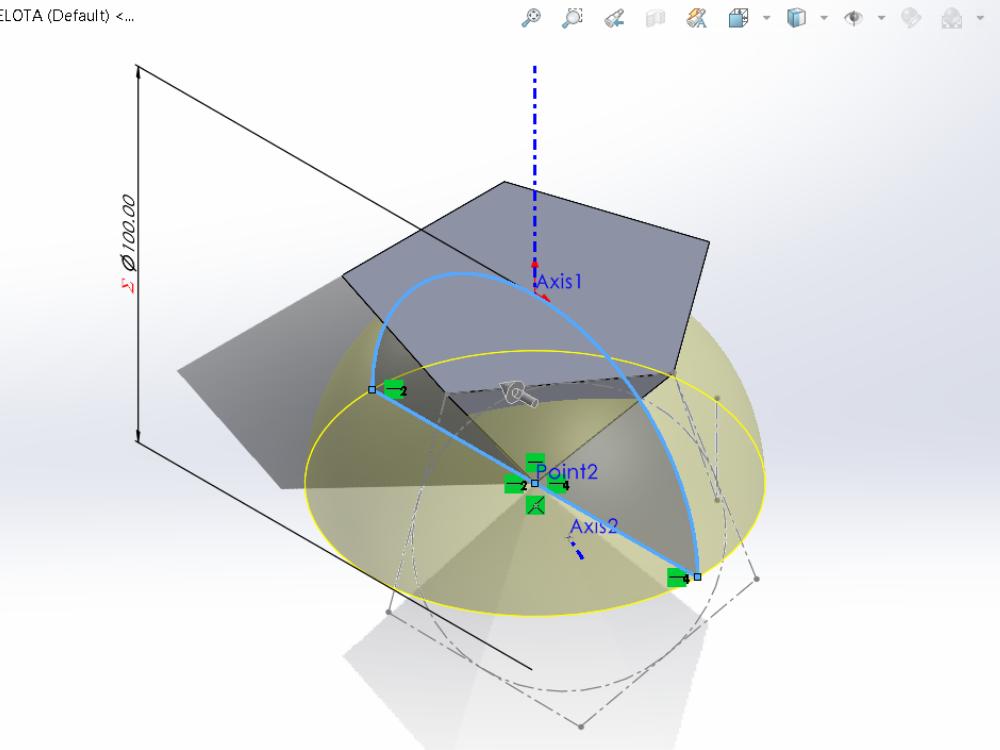
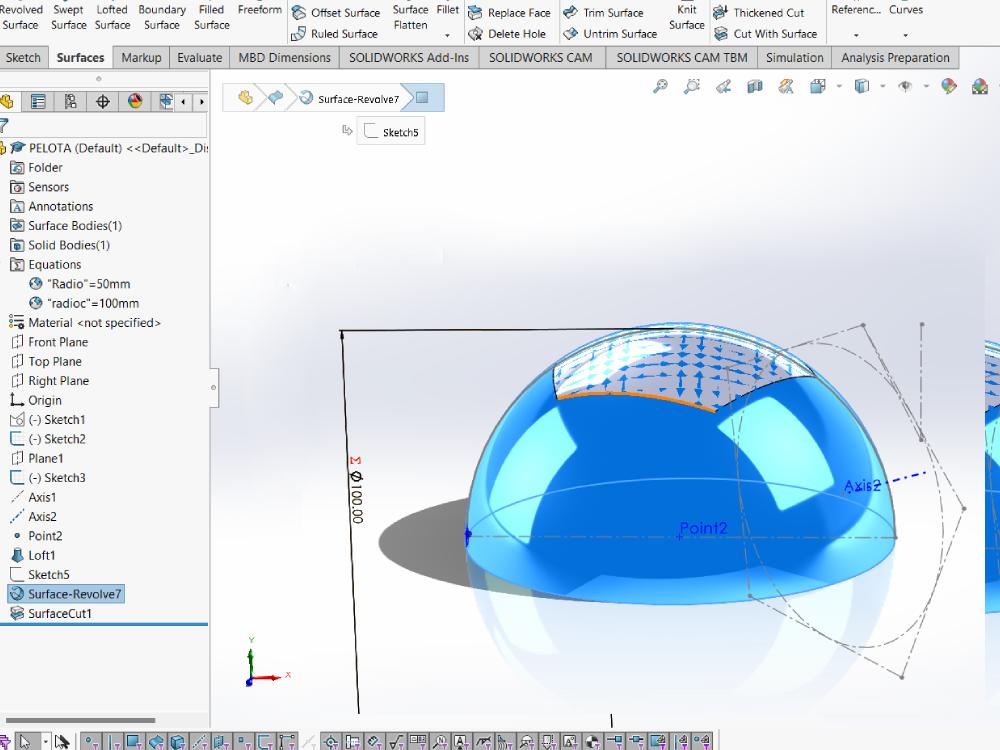
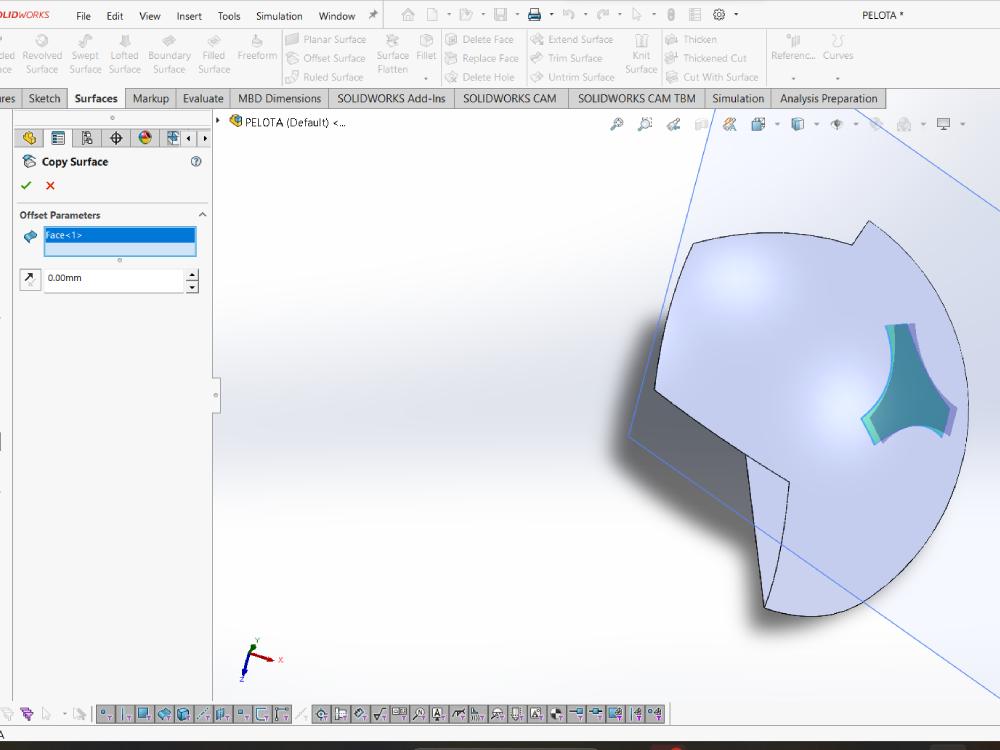
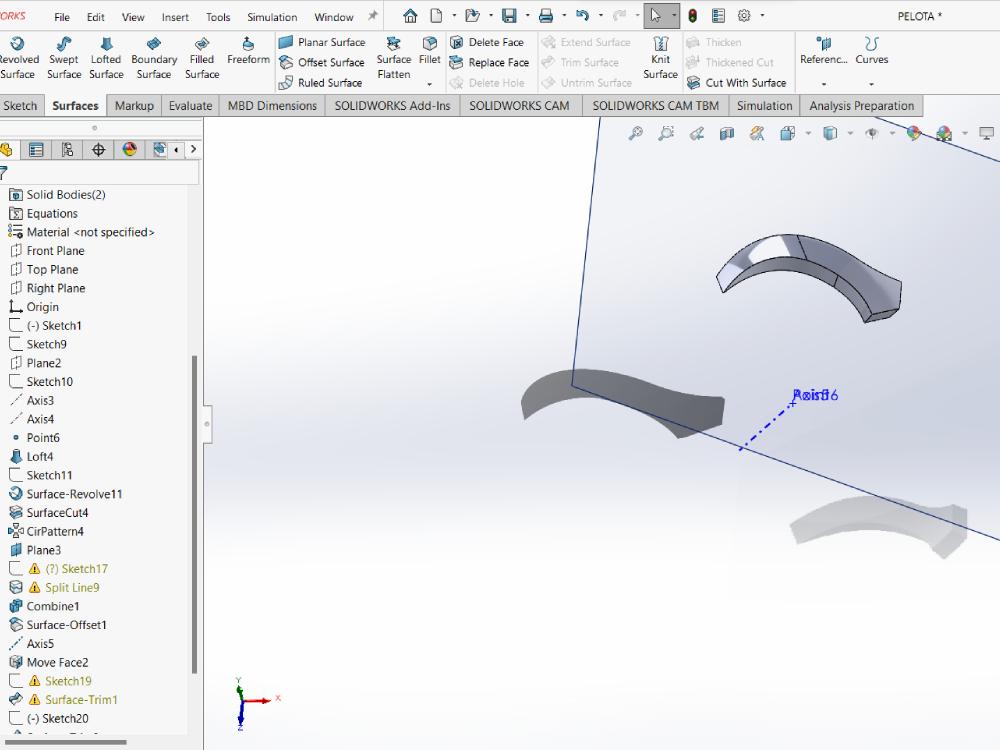
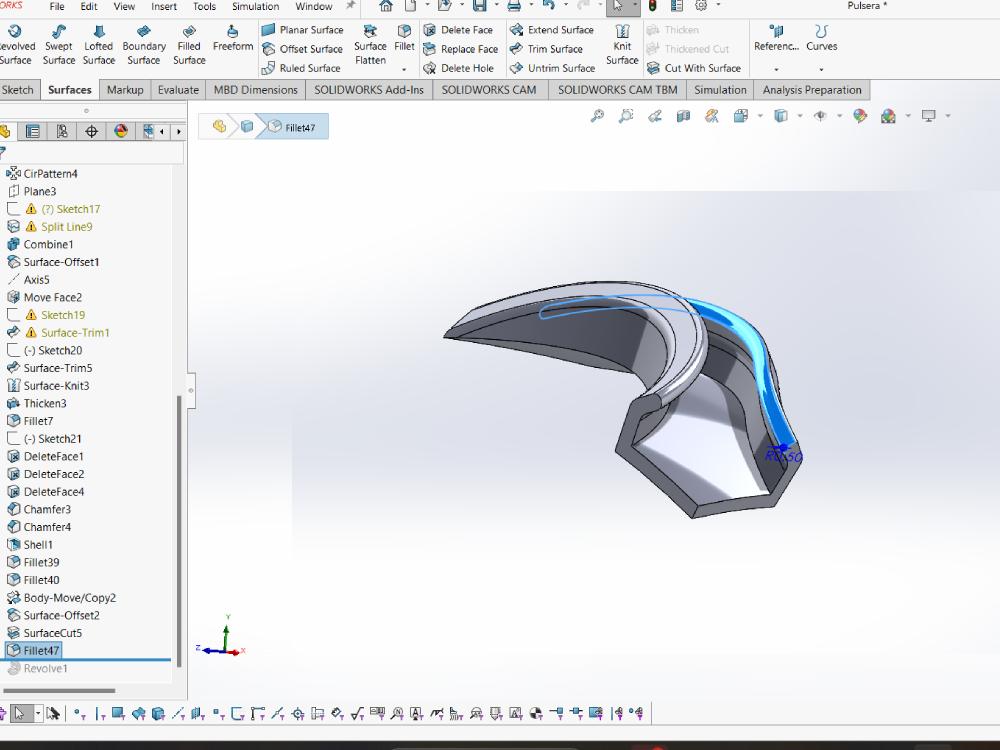
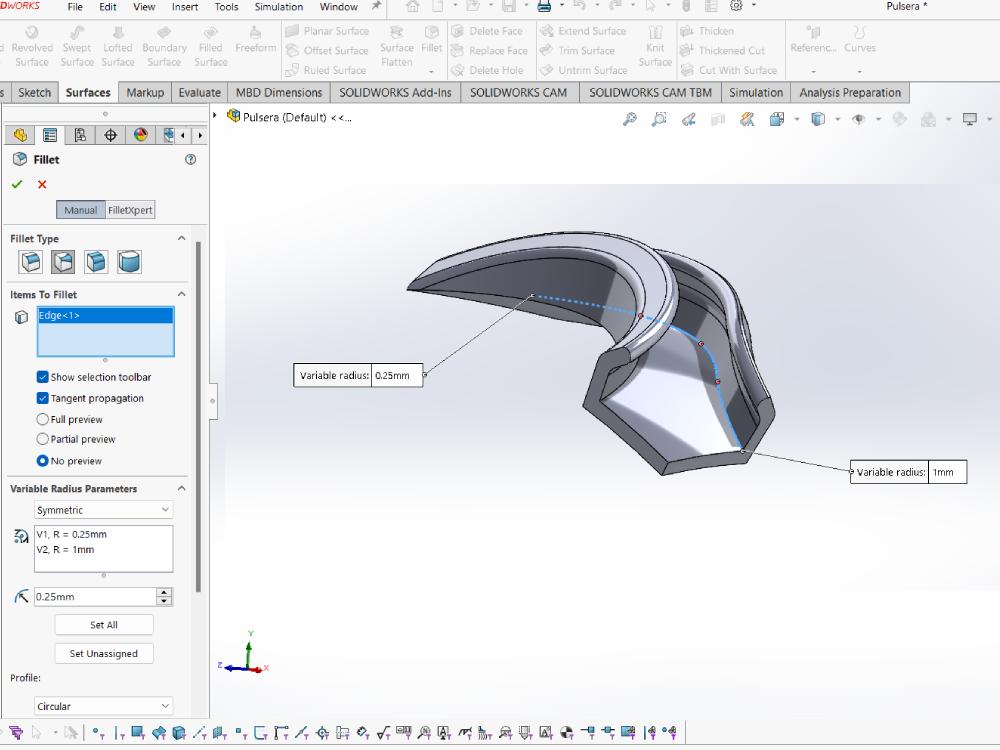
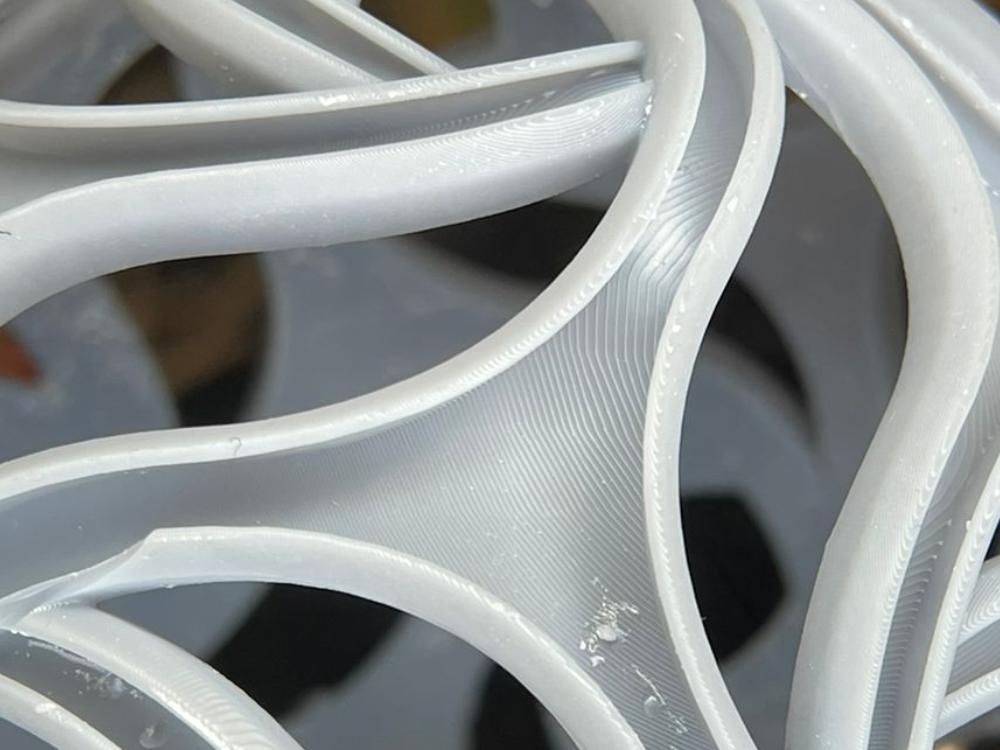
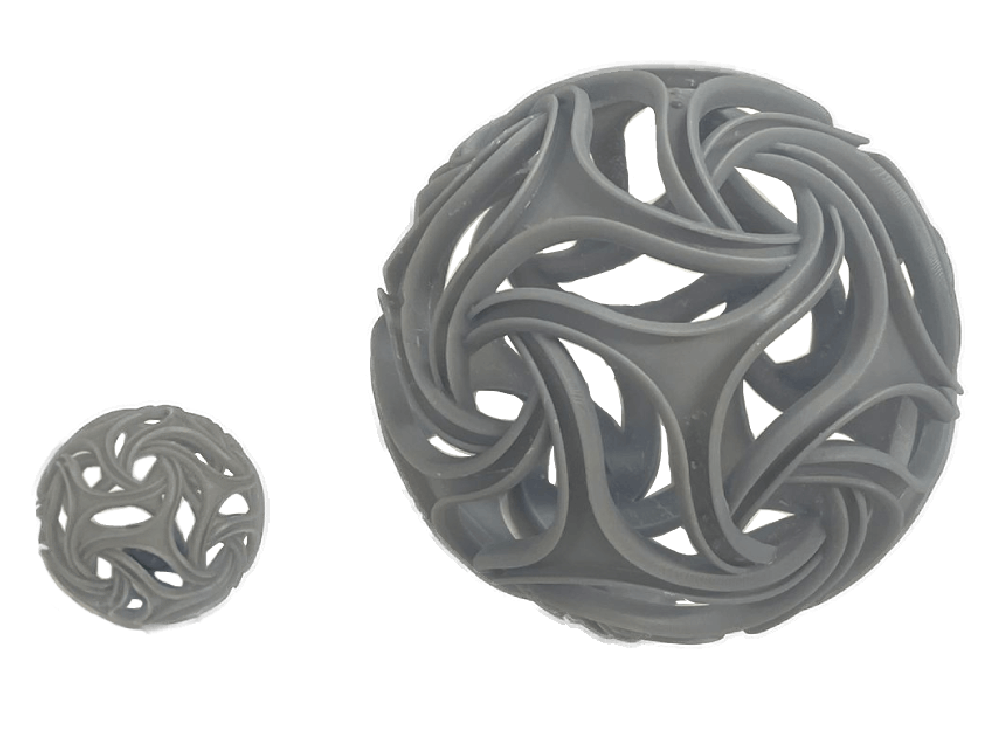
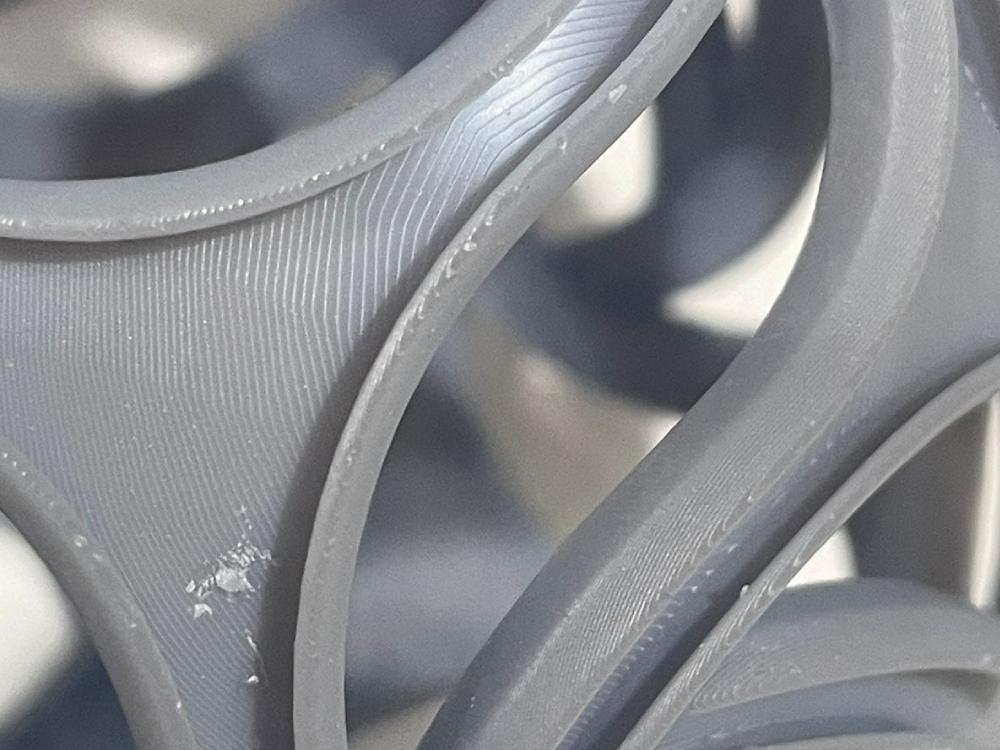
RenderingFor this assignment, I decided to create a sphere. For this specific project, I chose to use SolidWorks, as the tutorial suggested. Later, I will highlight the most important steps to complete this model and the errors that I encountered, as well as how I solved them.
.jpg )
Difficulties and addaptation
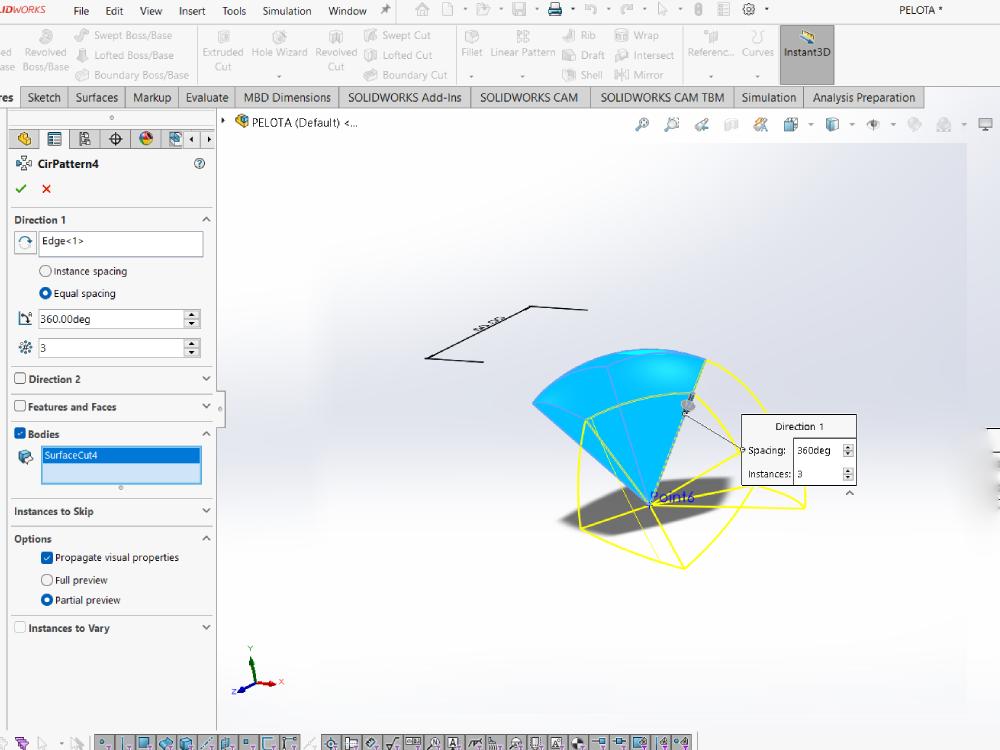
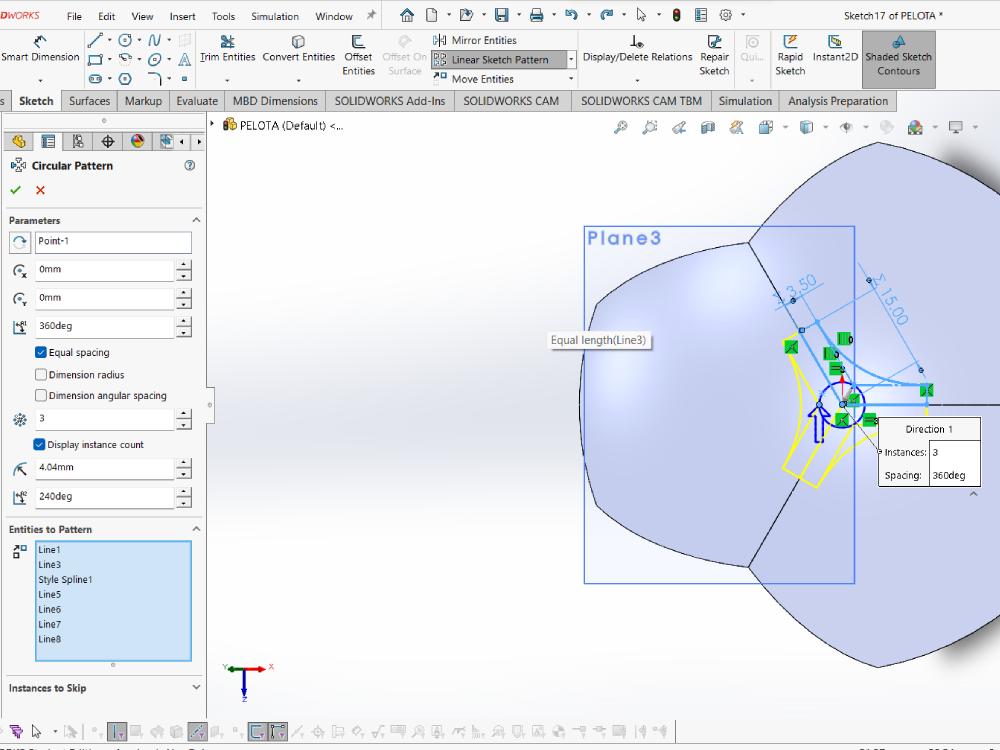
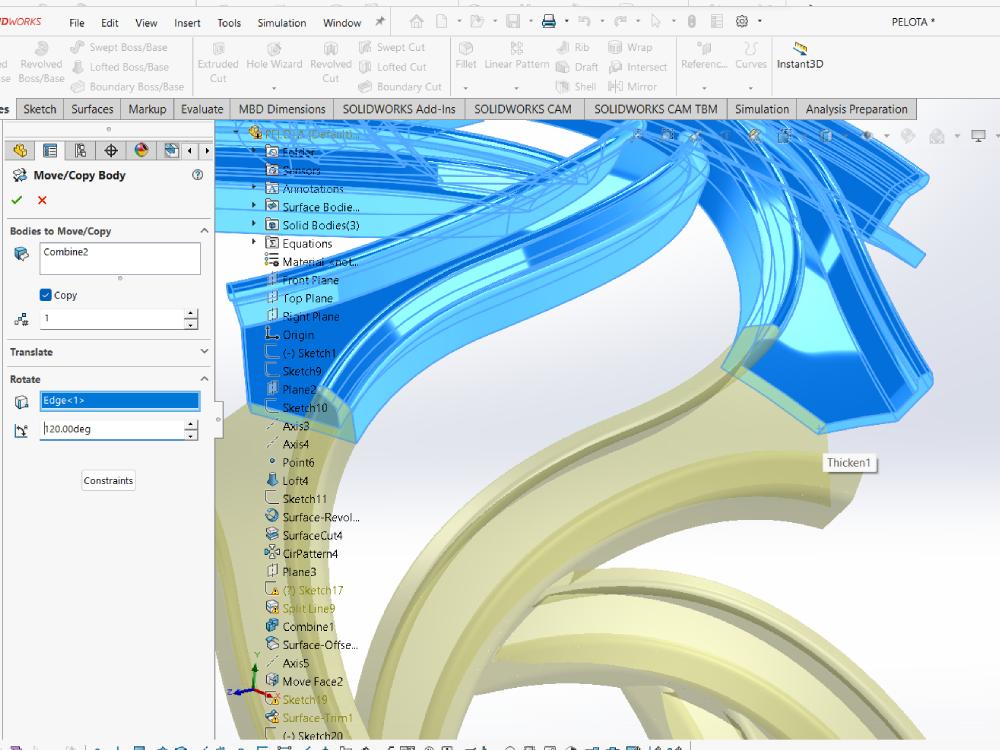
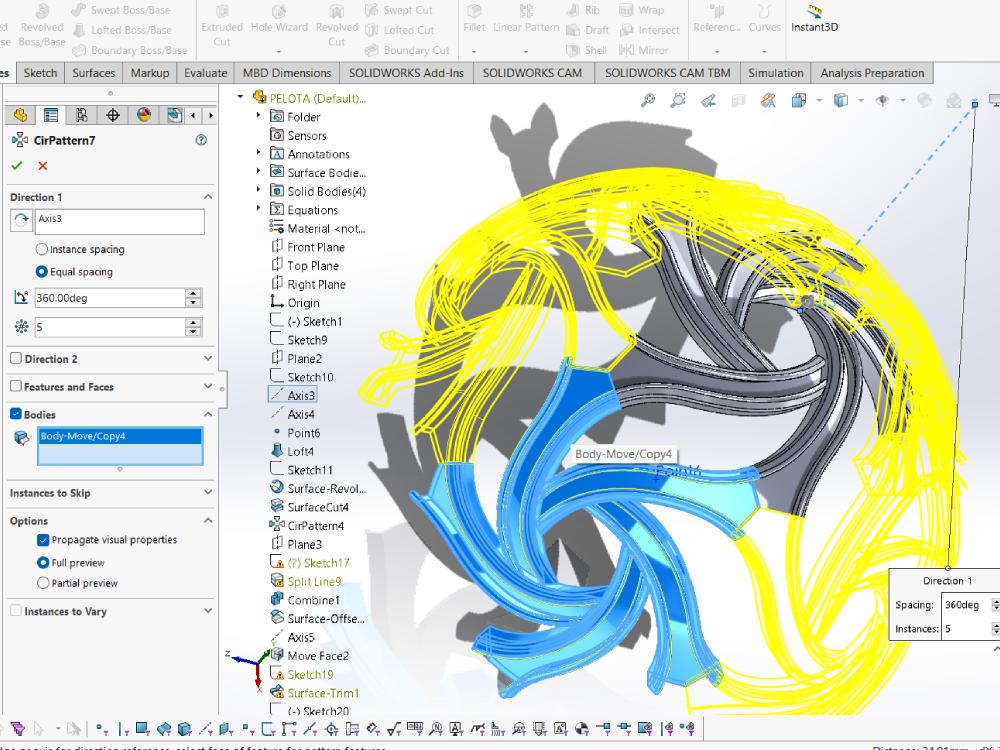
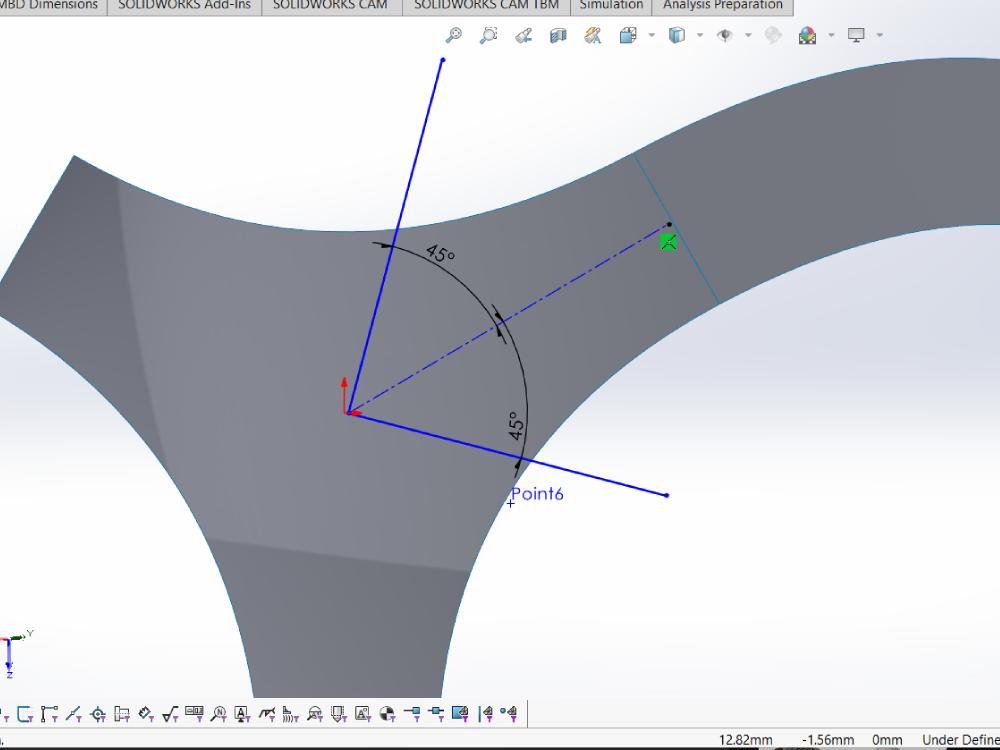
In the instructional video, specific angles are provided for crafting the sphere pattern. Initially, the angles are set at 45 degrees, followed by 180 degrees, and ultimately completing the sphere with a 360-degree angle. These angles are pivotal in achieving the desired spherical shape accurately.
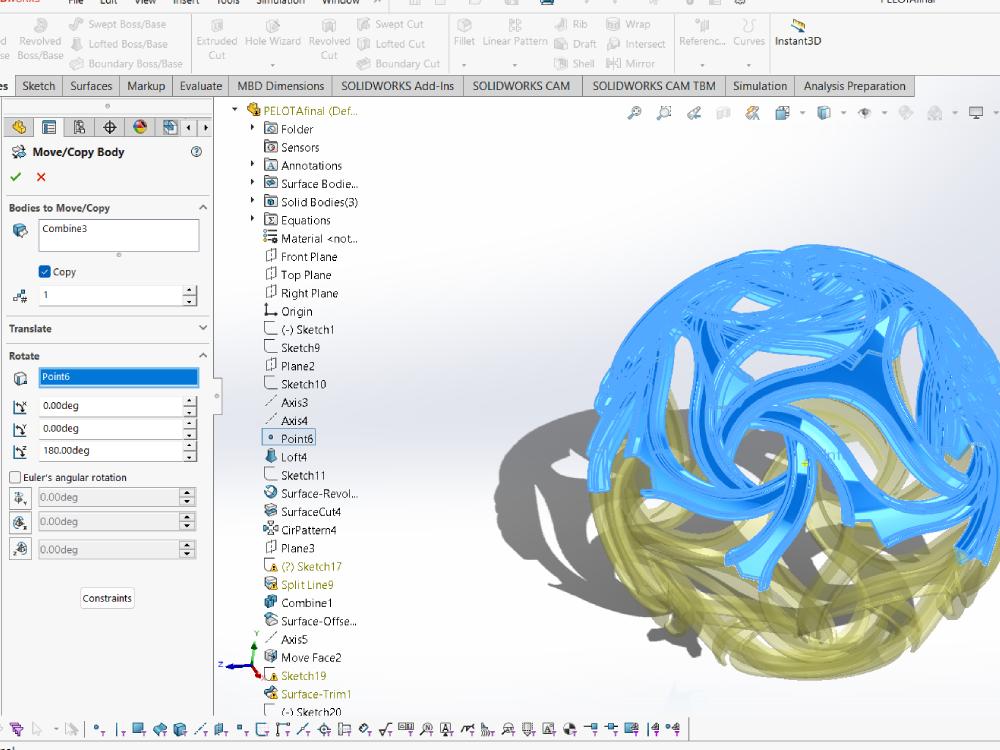
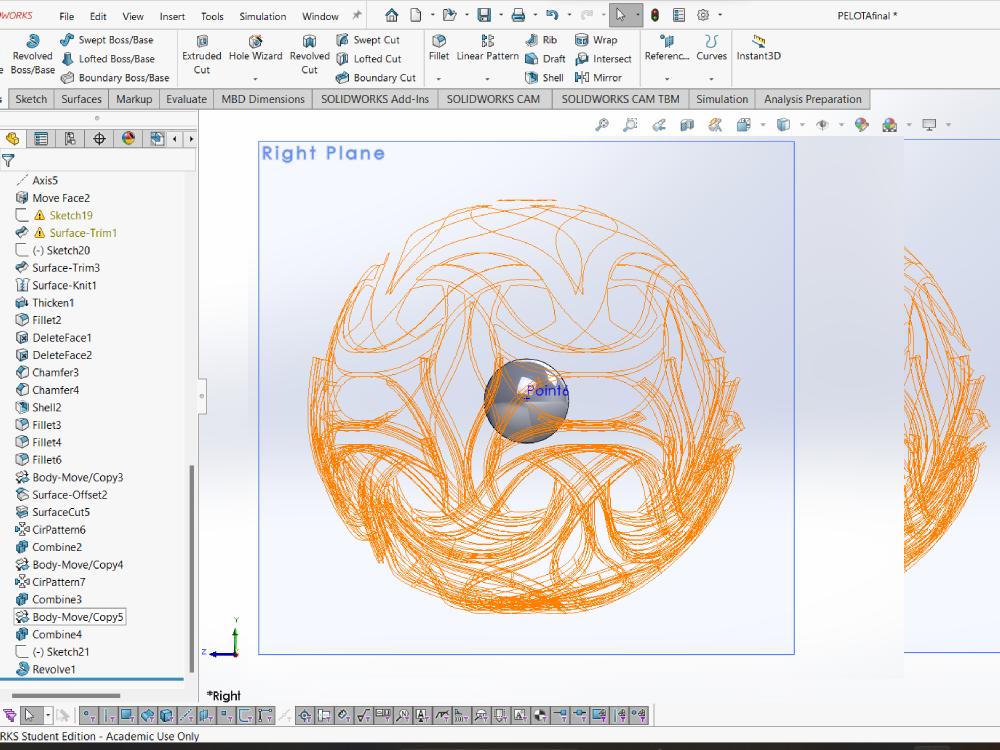
For adaptation purposes, I encountered challenges when initiating the first model. To test the printer and ensure optimal support structures, I introduced a small sphere in the center. This preliminary step required drawing a middle plane and a middle circle. However, if your initial figure differs, manual calculations become necessary to generate the initial group of figures.
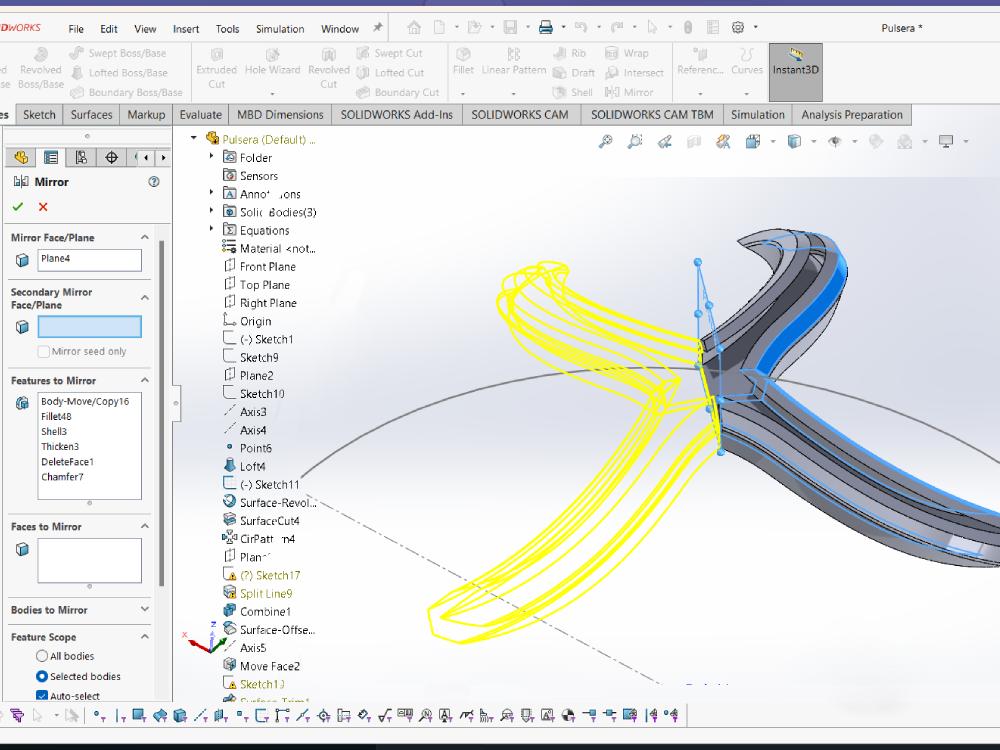
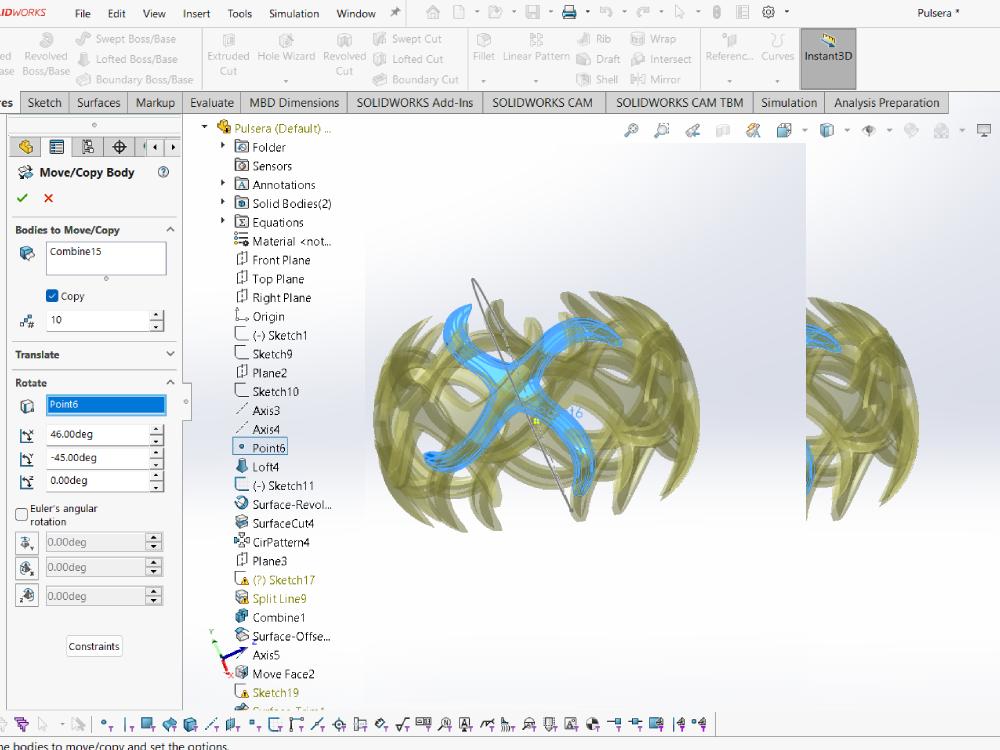
In my case, I used a similar piece resembling the initial figure. I adjusted the center at 45 degrees and subsequently replicated the groups at 46-degree intervals, effectively tracing a bracelet-like structure. These adaptations were crucial in overcoming initial hurdles and achieving the desired outcome
Rendering
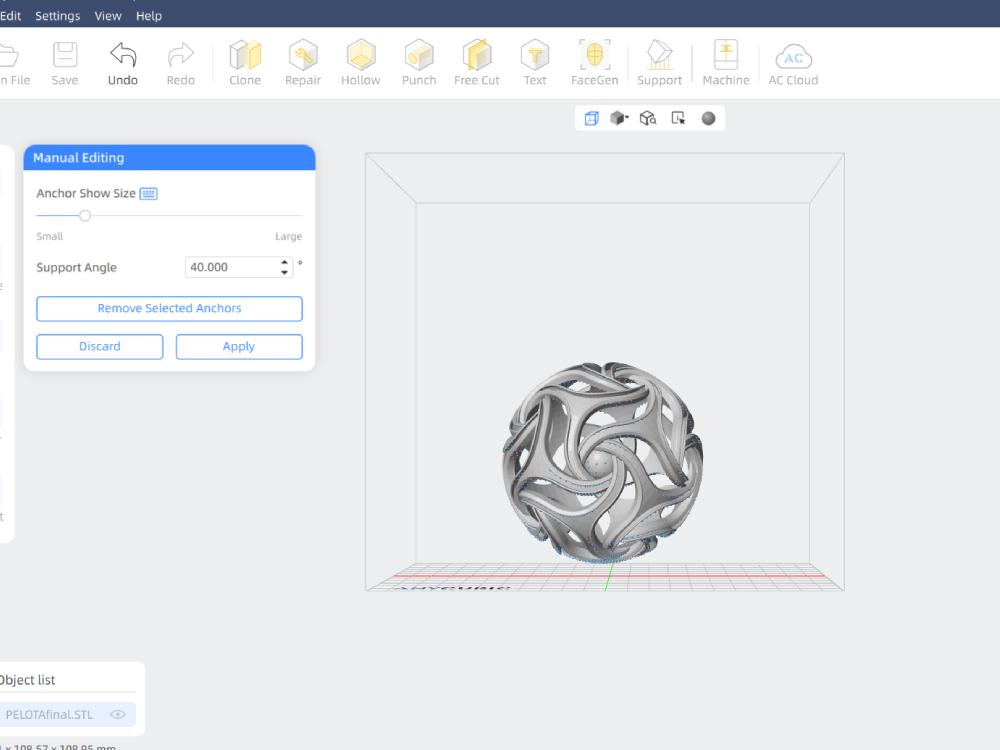
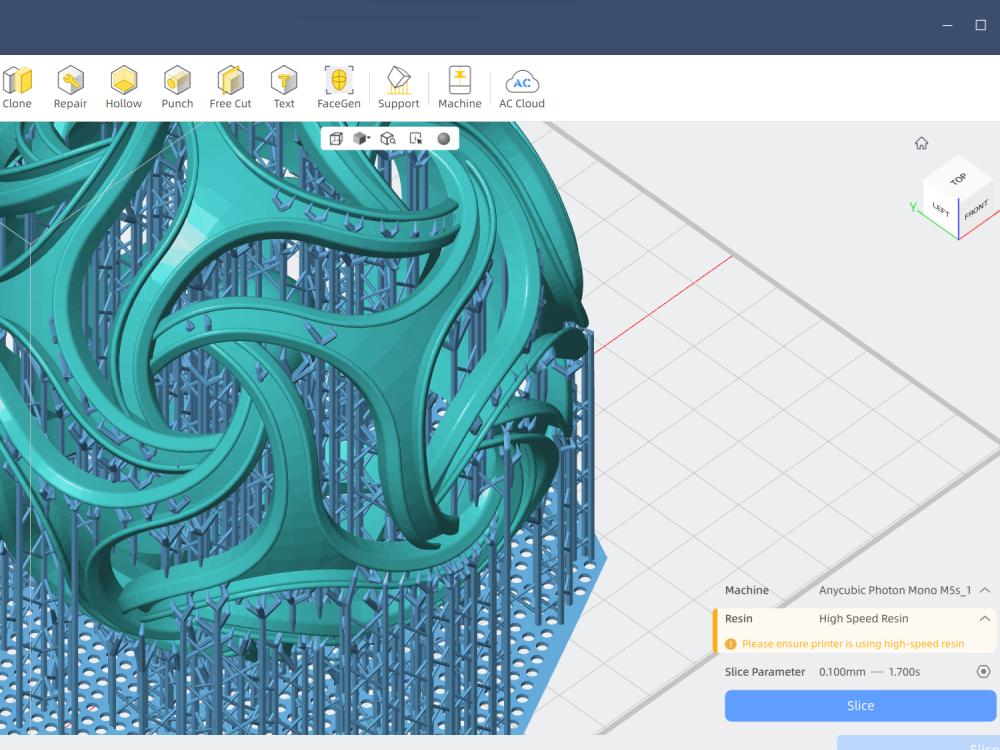
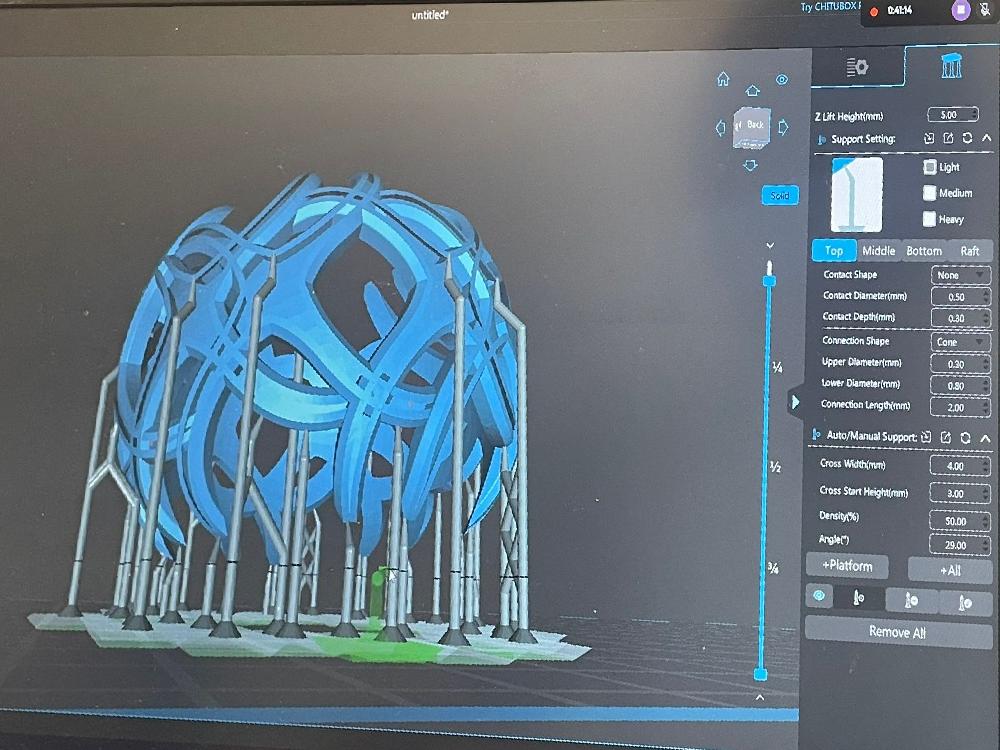
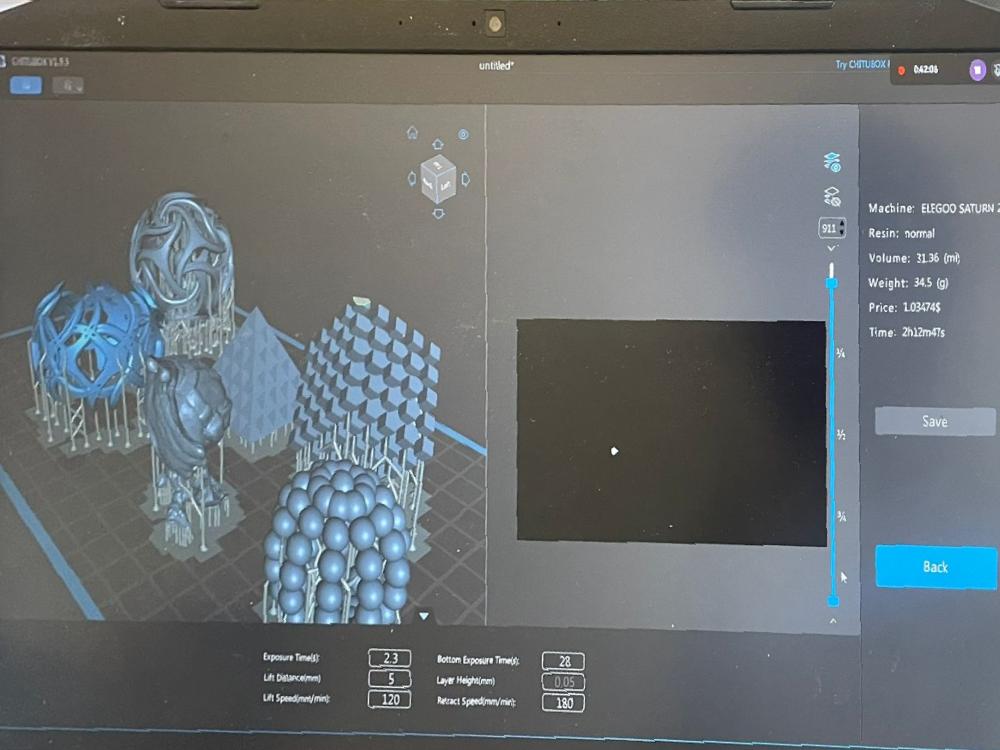
Printing Process
- Exporting the File to STL: After completing the design in SolidWorks, export the file in STL format.
- Slicing with Anycubic Photon Workshop: Open the STL file in Anycubic Photon Workshop and configure print settings.
- Configuring Parameters for Anycubic Mono M5s: Select printer model, resin type, and adjust print parameters.
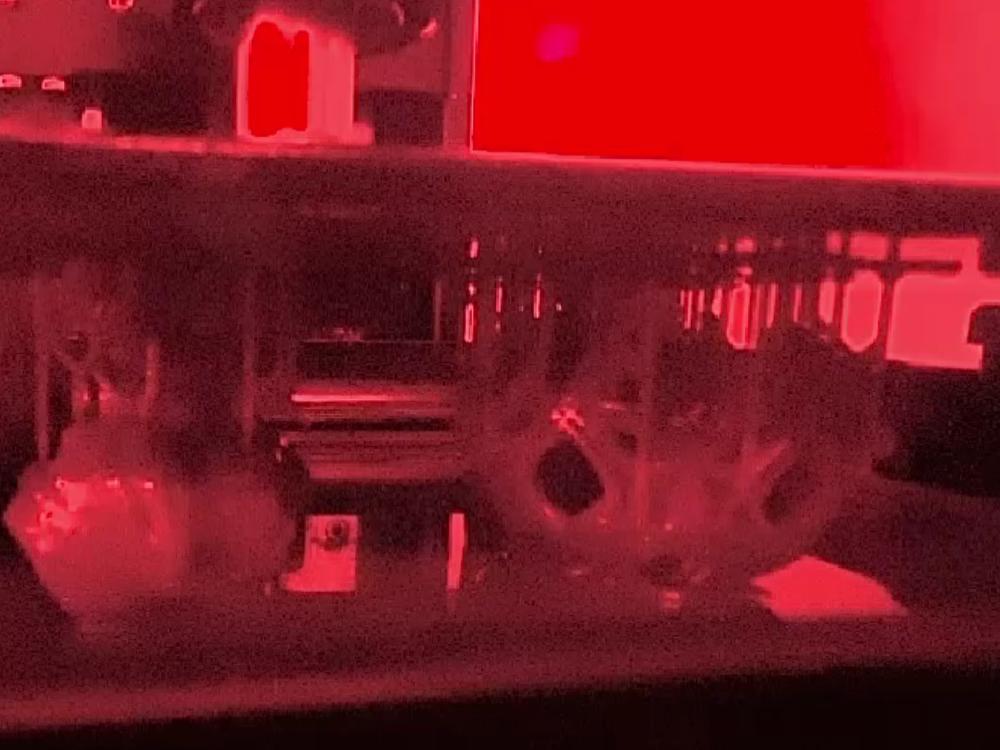
- Printing Process: Load resin, transfer G-code to printer, and initiate printing.
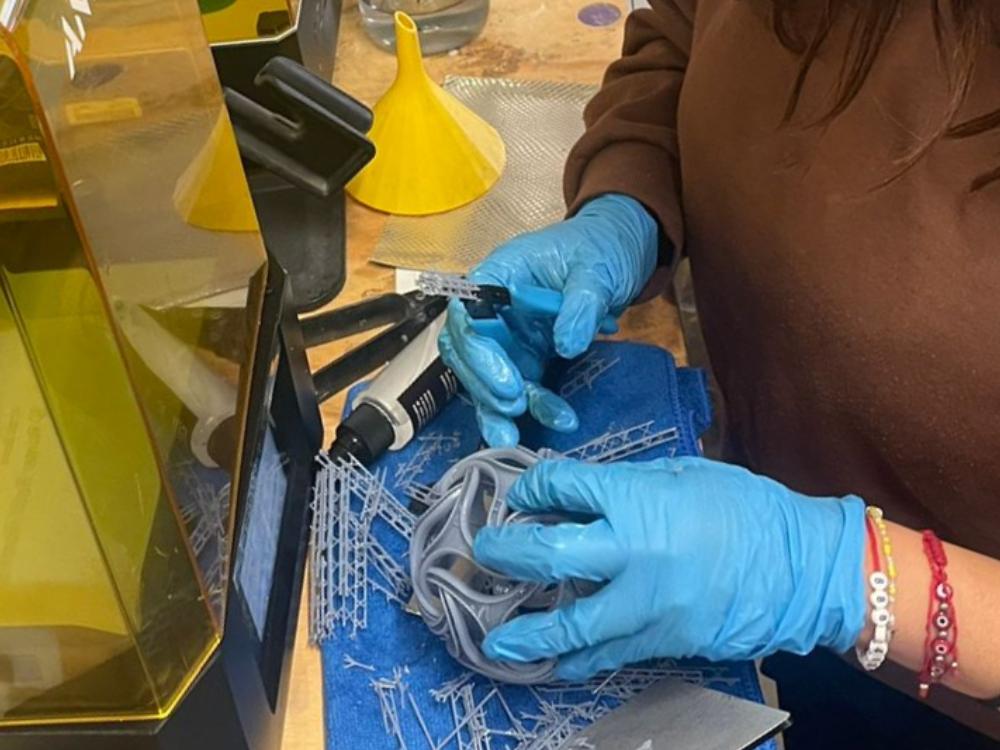
- Drying the Pieces Diagonally: After printing, allow pieces to dry diagonally to minimize resin wastage.
- Cleaning with Alcohol: Submerge printed pieces in isopropyl alcohol for cleaning.
- Repeat Process for Different Printers and Sizes: Adjust settings and parameters for different printers or sizes.
- Post-Curing with UV Light: Expose cleaned pieces to UV light for complete curing.
- Removing Supports (if applicable): Carefully remove supports from printed pieces.


Final product
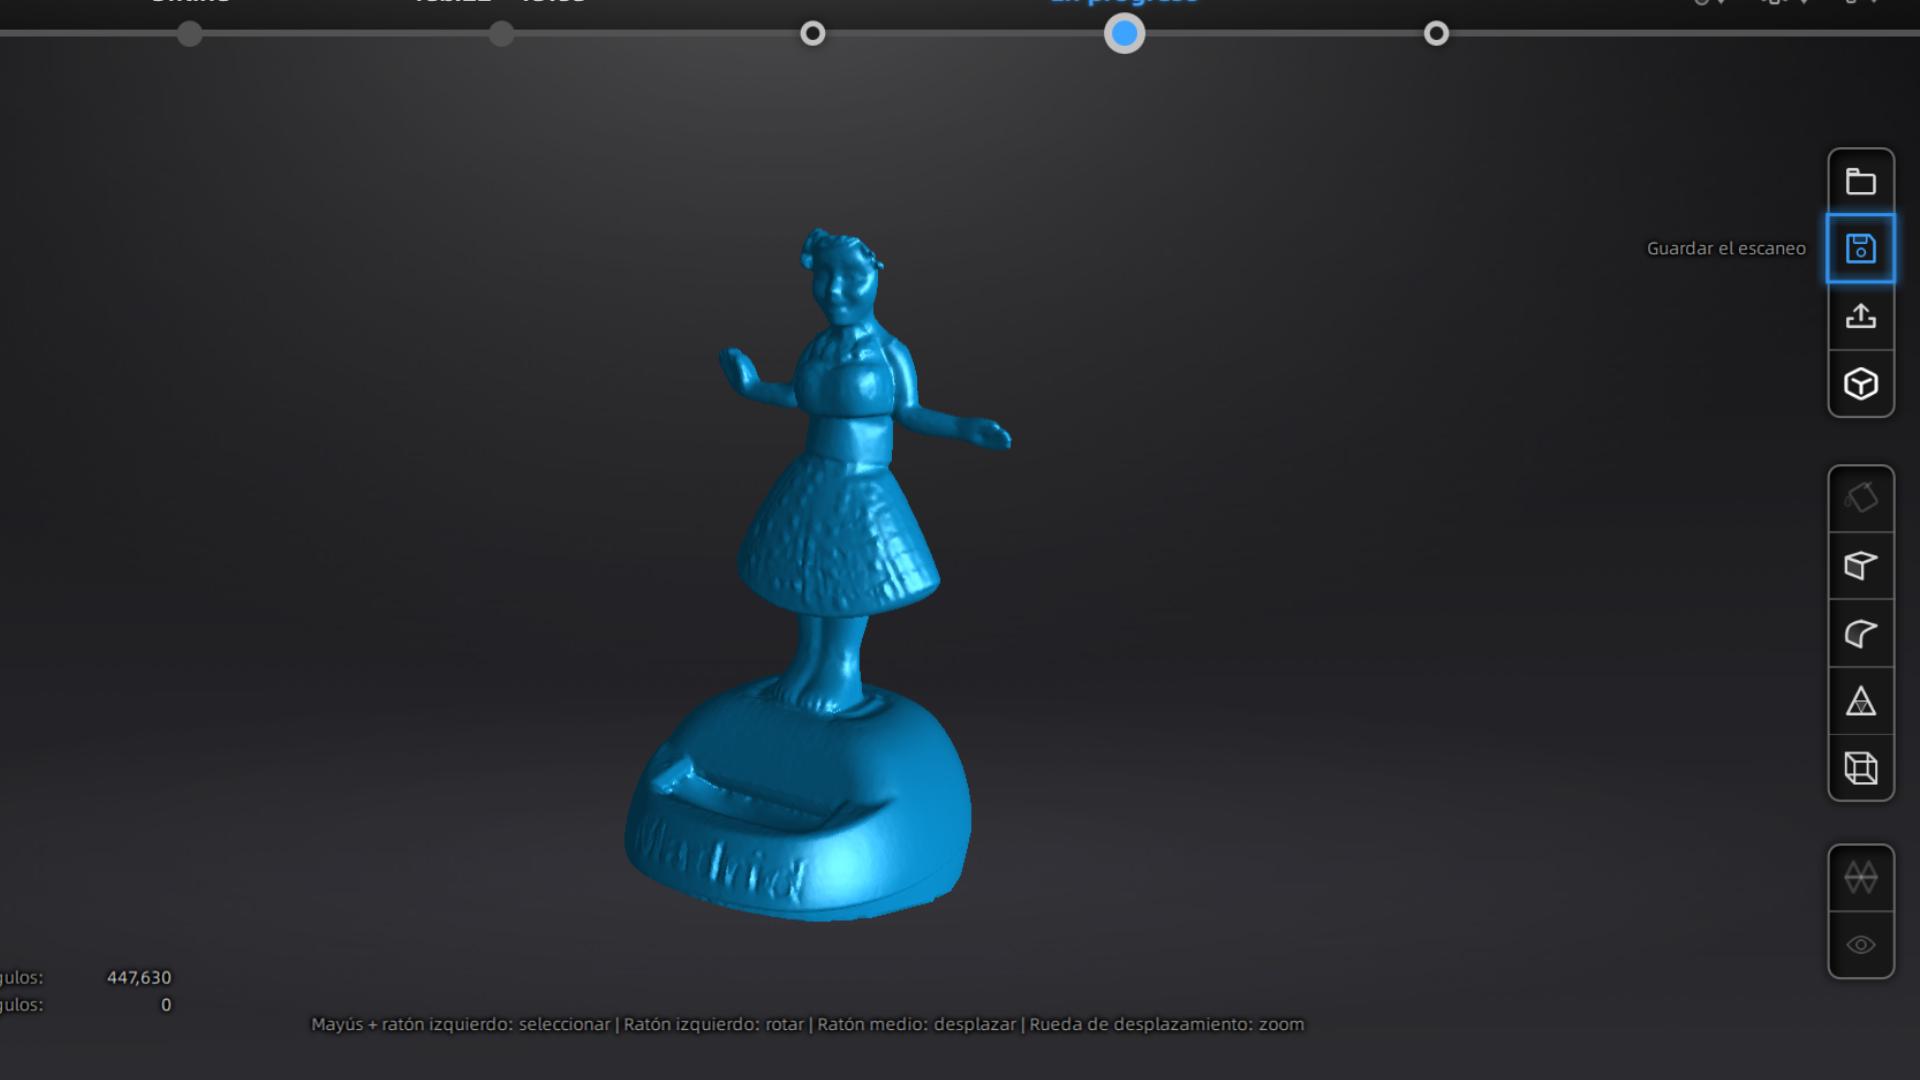
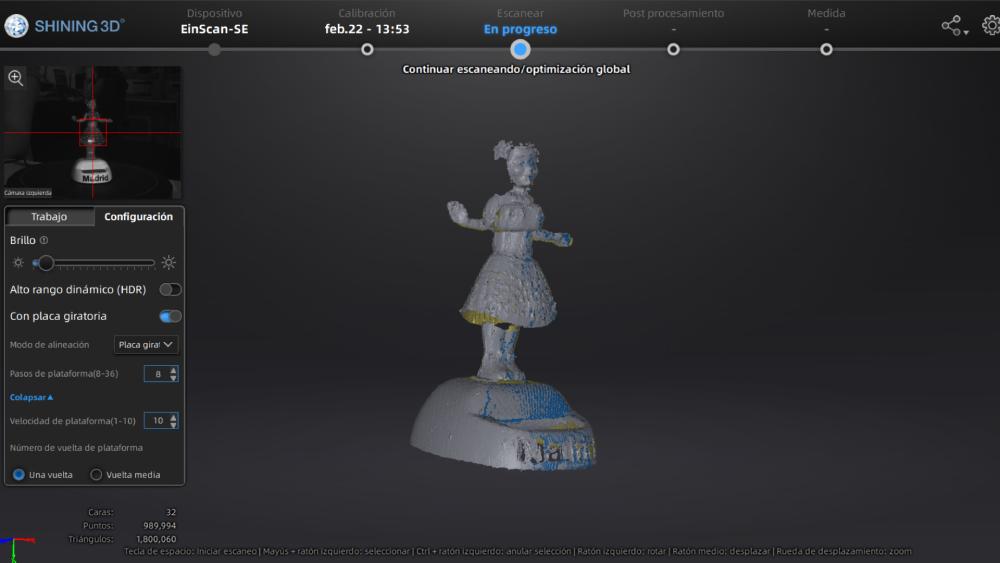
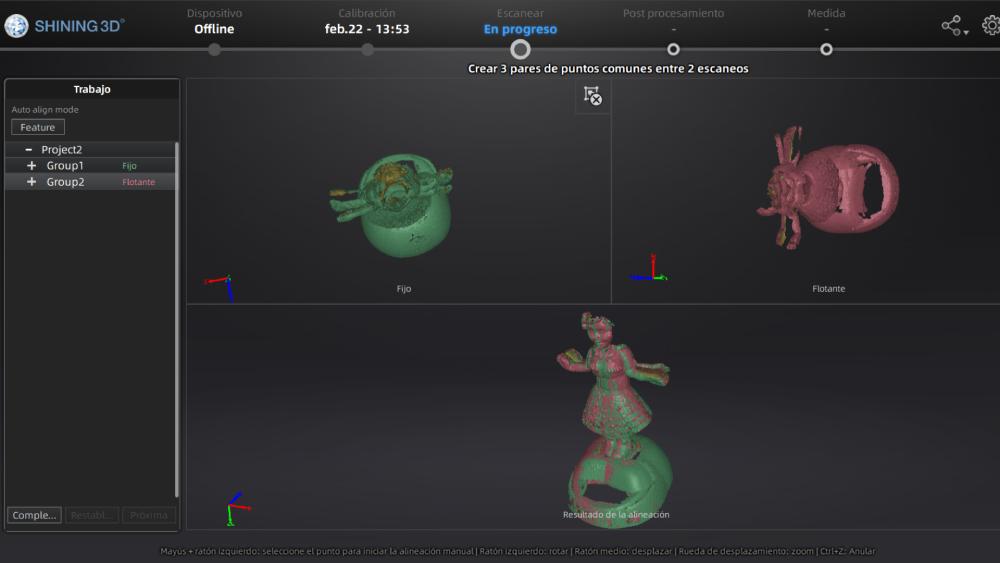
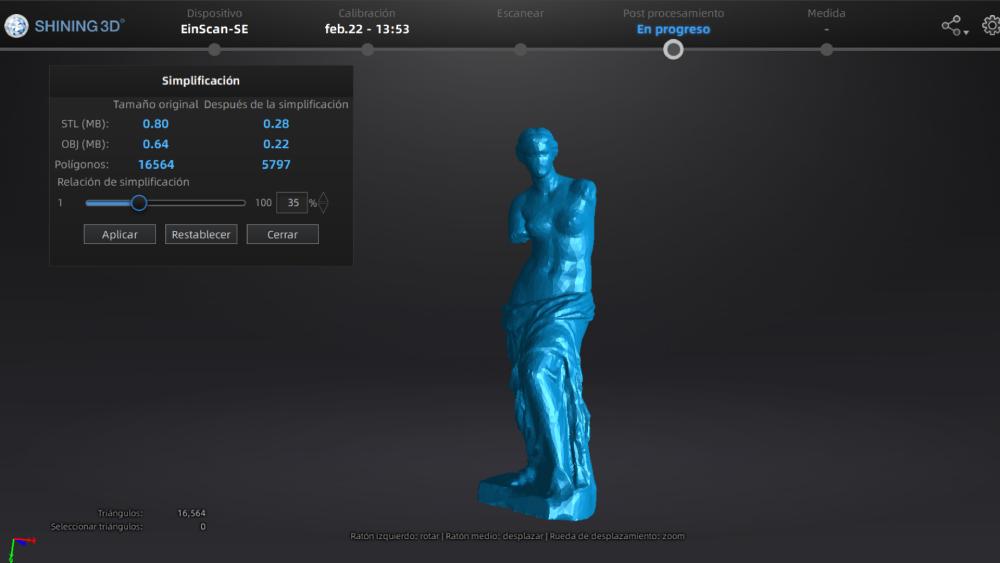
3D Scanning
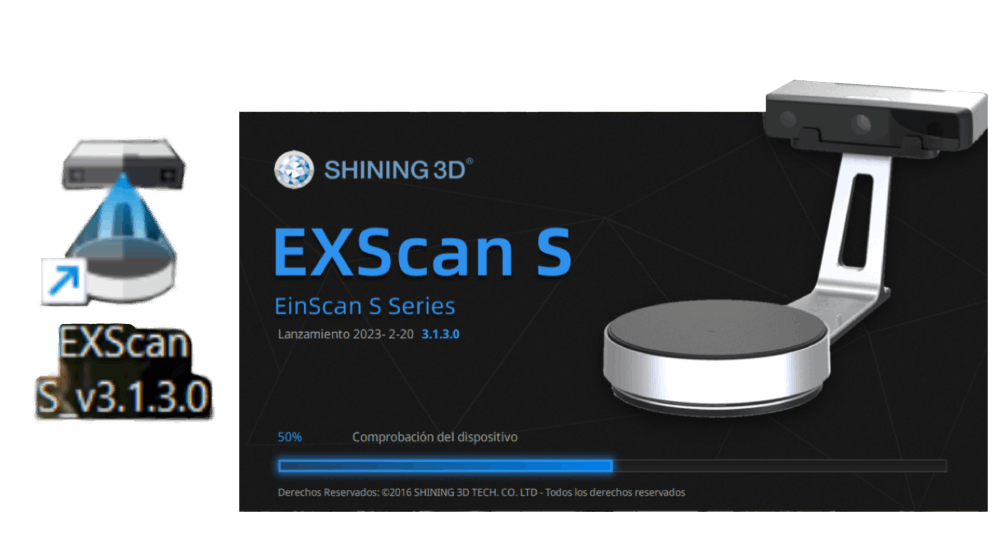
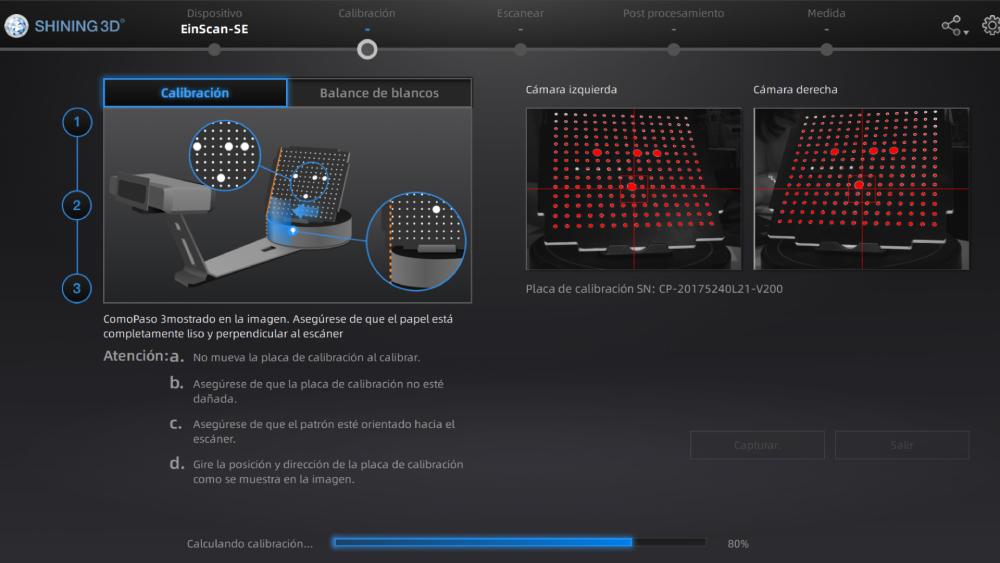
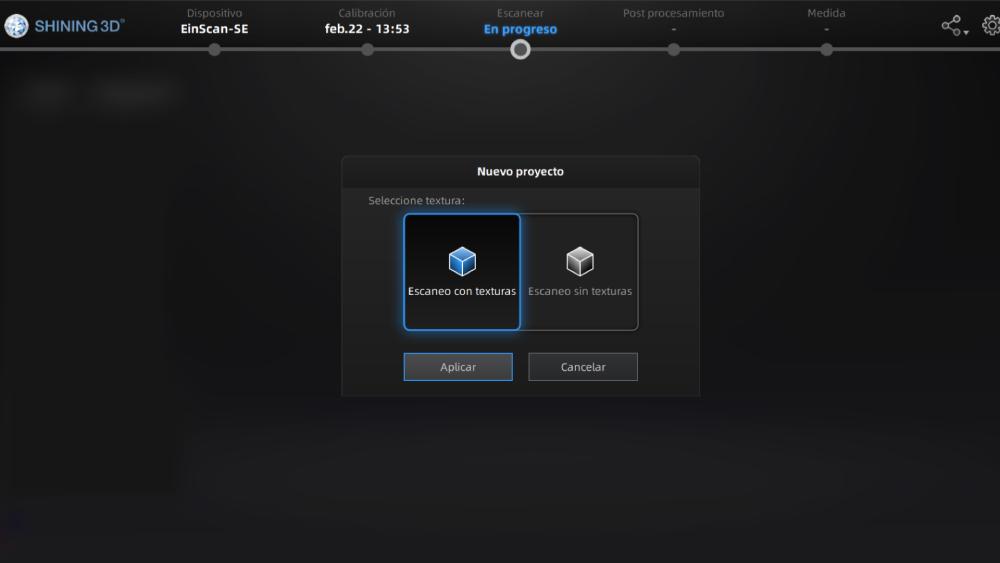
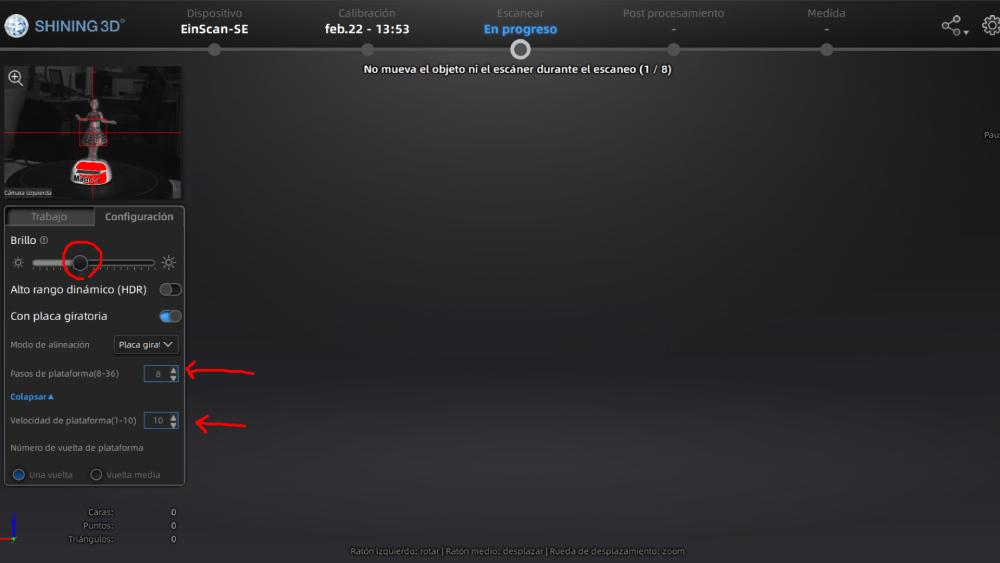
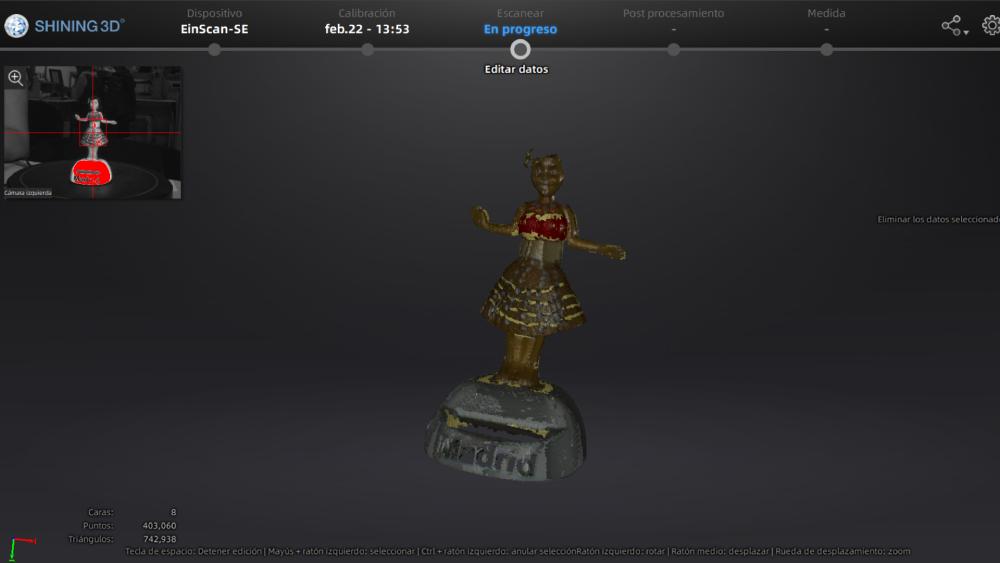
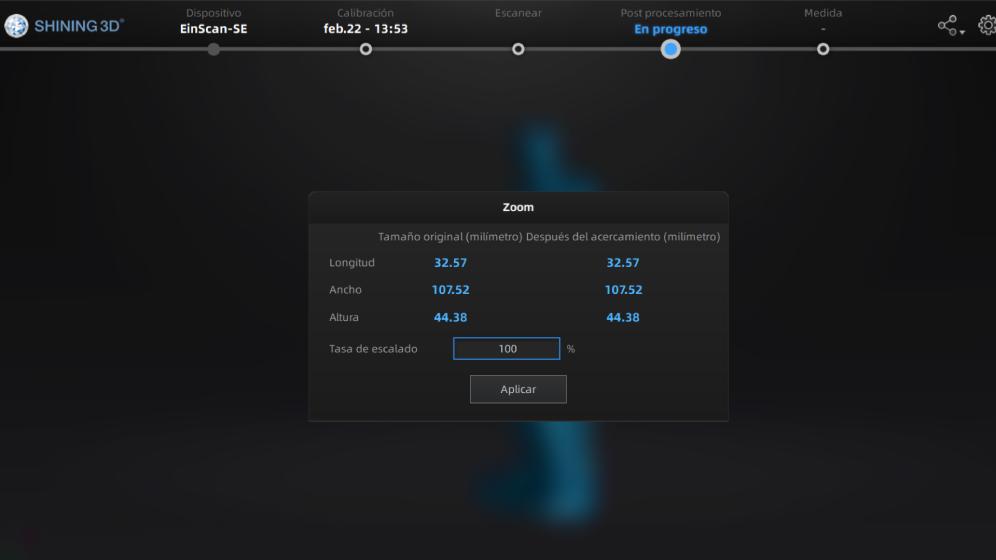
For this assignment we used Scanning EXScan S, we also had to scan an object. Our university provides the EinScan S from the EinScan S series. In the next slides, I will describe how to use this tool.

Exporting and Usage
Export Options: Export the scanned model in common 3D file formats such as STL, OBJ, or PLY. Use a consistent naming convention for exported files.
Applications: The scanned model can be imported into 3D printing software, used as a base for 3D modeling, or for analysis in various fields like reverse engineering and quality control.
Tips and Tricks
For complex objects, perform multiple scans from different angles and merge them. Use a matte spray on reflective objects to reduce glare. Familiarize yourself with the scanner and software through practice scans.
Troubleshooting
If the scan fails or appears distorted, check the calibration and ensure the object is stable. Restart the software and scanner if there are software issues, and make sure the latest version of the software is installed.
Documentation
Document each step of the scanning process, including settings used, challenges faced, and solutions applied. This will help in refining the
Final Result
Files
Tutorial videos
Reflection Summary
This week, I focused on rendering and 3D scanning. Using SolidWorks, I designed a detailed 3D model of a sphere, and later, I used the EinScan S scanner to digitize physical objects.
The most significant part was learning to create and refine 3D models in SolidWorks, involving steps such as sketching, extruding, cutting surfaces, and applying patterns. Additionally, the scanning process using the EXScan S software highlighted the importance of precise calibration and post-processing for accurate digital representations.
Challenges and Solutions
One of the biggest challenges was achieving the desired precision in both modeling and scanning. In SolidWorks, ensuring smooth and accurate surfaces required multiple iterations and adjustments, especially when accounting for angles and dimensions. Similarly, during the scanning process, calibrating the scanner and dealing with reflective objects posed difficulties. To overcome these, I practiced iterative design adjustments in SolidWorks and used techniques like matte spraying for better scan results.
Future Applications
The skills gained this week are essential for advanced digital design and fabrication. Mastering SolidWorks for 3D modeling allows for creating intricate and precise designs, while proficiency in 3D scanning with EXScan S can be applied in reverse engineering, quality control, and creating digital replicas of physical objects. I look forward to integrating these techniques into more complex projects and continuing to refine my digital design and scanning capabilities.