4. Electronic Production
On this week we worked on Electronic Producting by creating a PCB from an image which our instructor help us to make. The group assignment link is here.
The PCB preparation: creating the files.
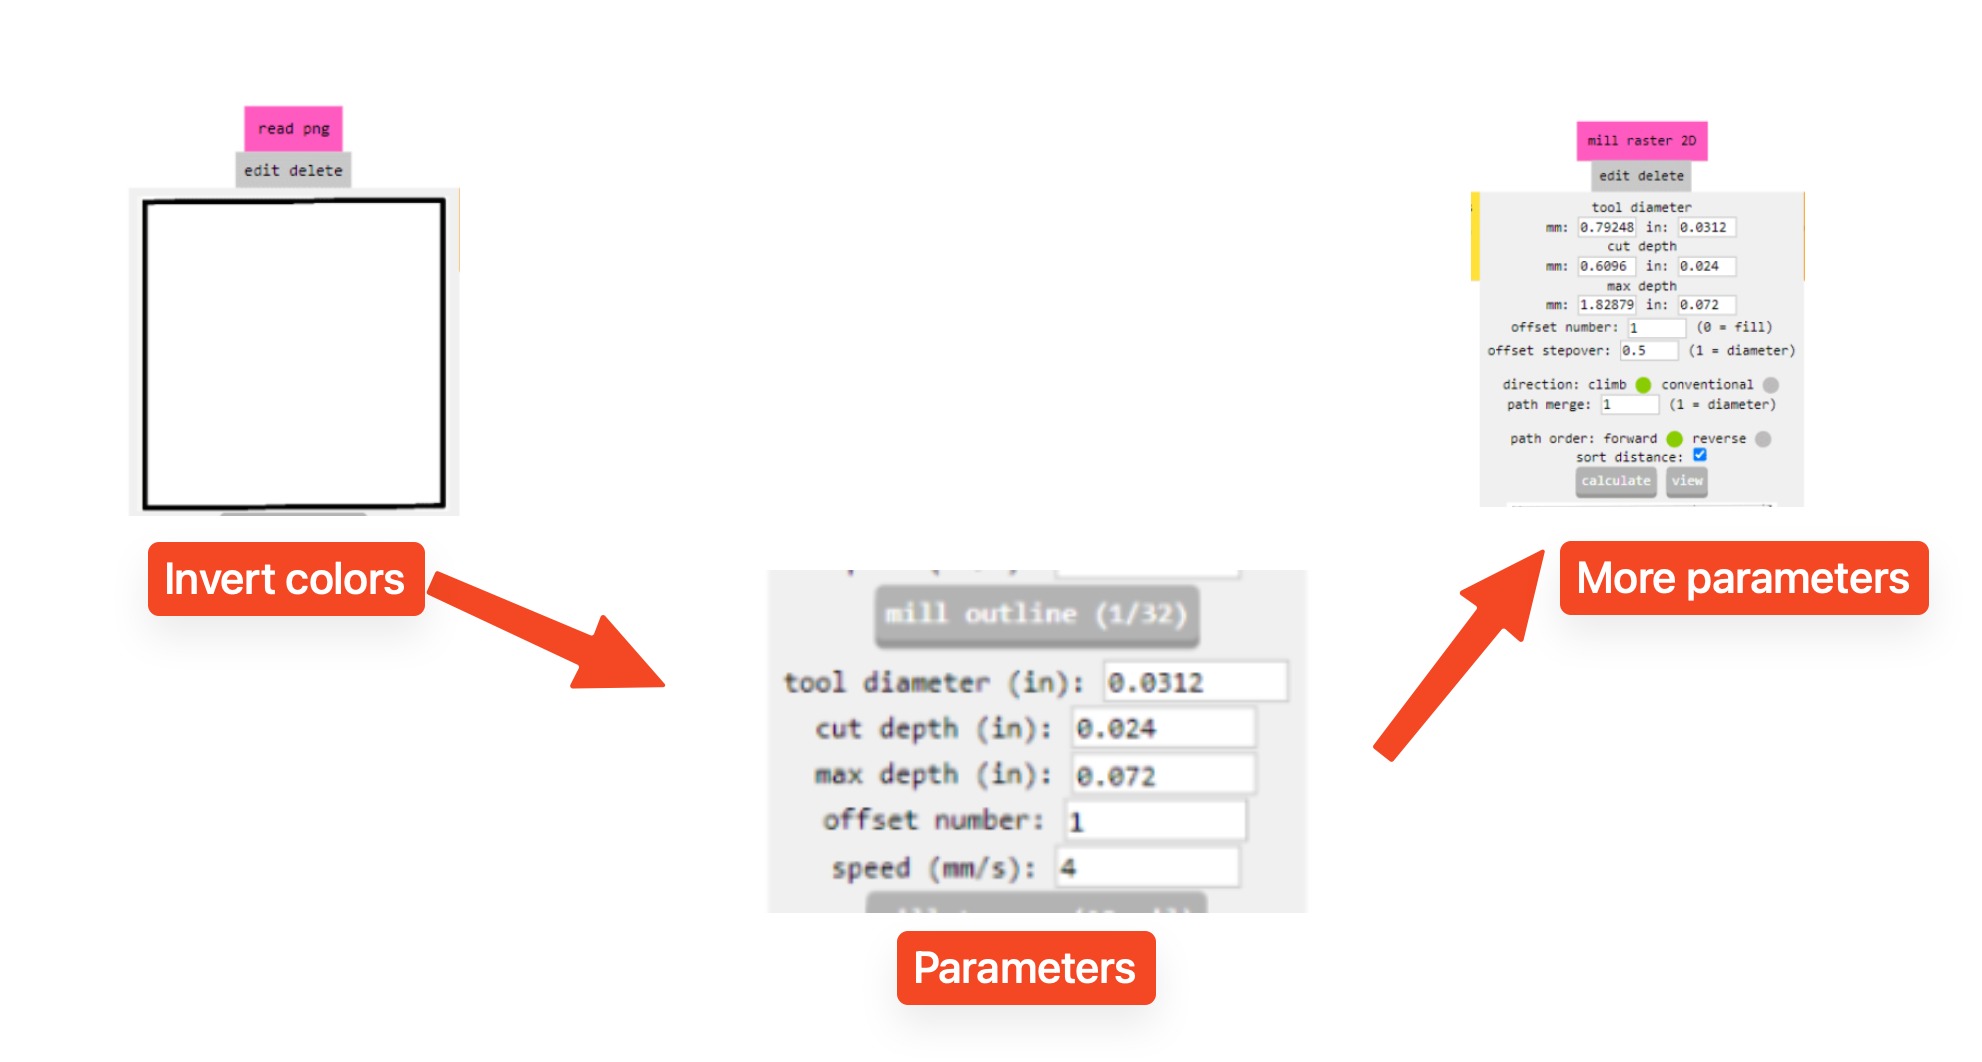
It was needed at first to make the files compatible with the machine, so in order to make this we use a software called mods project .
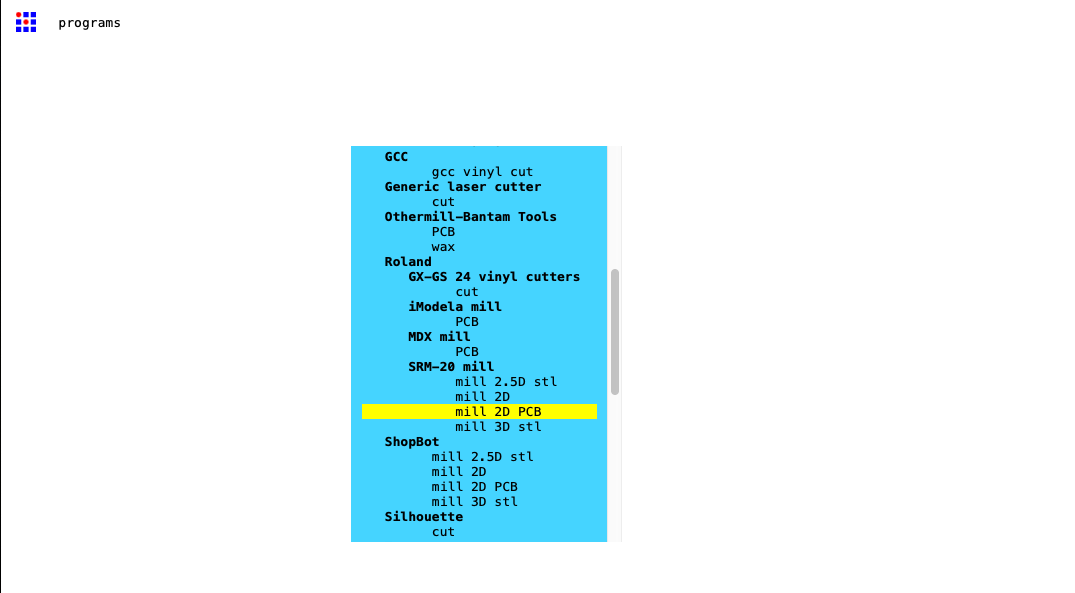
Then a setting was changed after loading the first image, which can be found on the group assignment. The first image that we are going to use is going to be the one that is going to create the traces.

After that more parameters on another section.
Then I added everything on the directory /public which is the one that will contain the page.
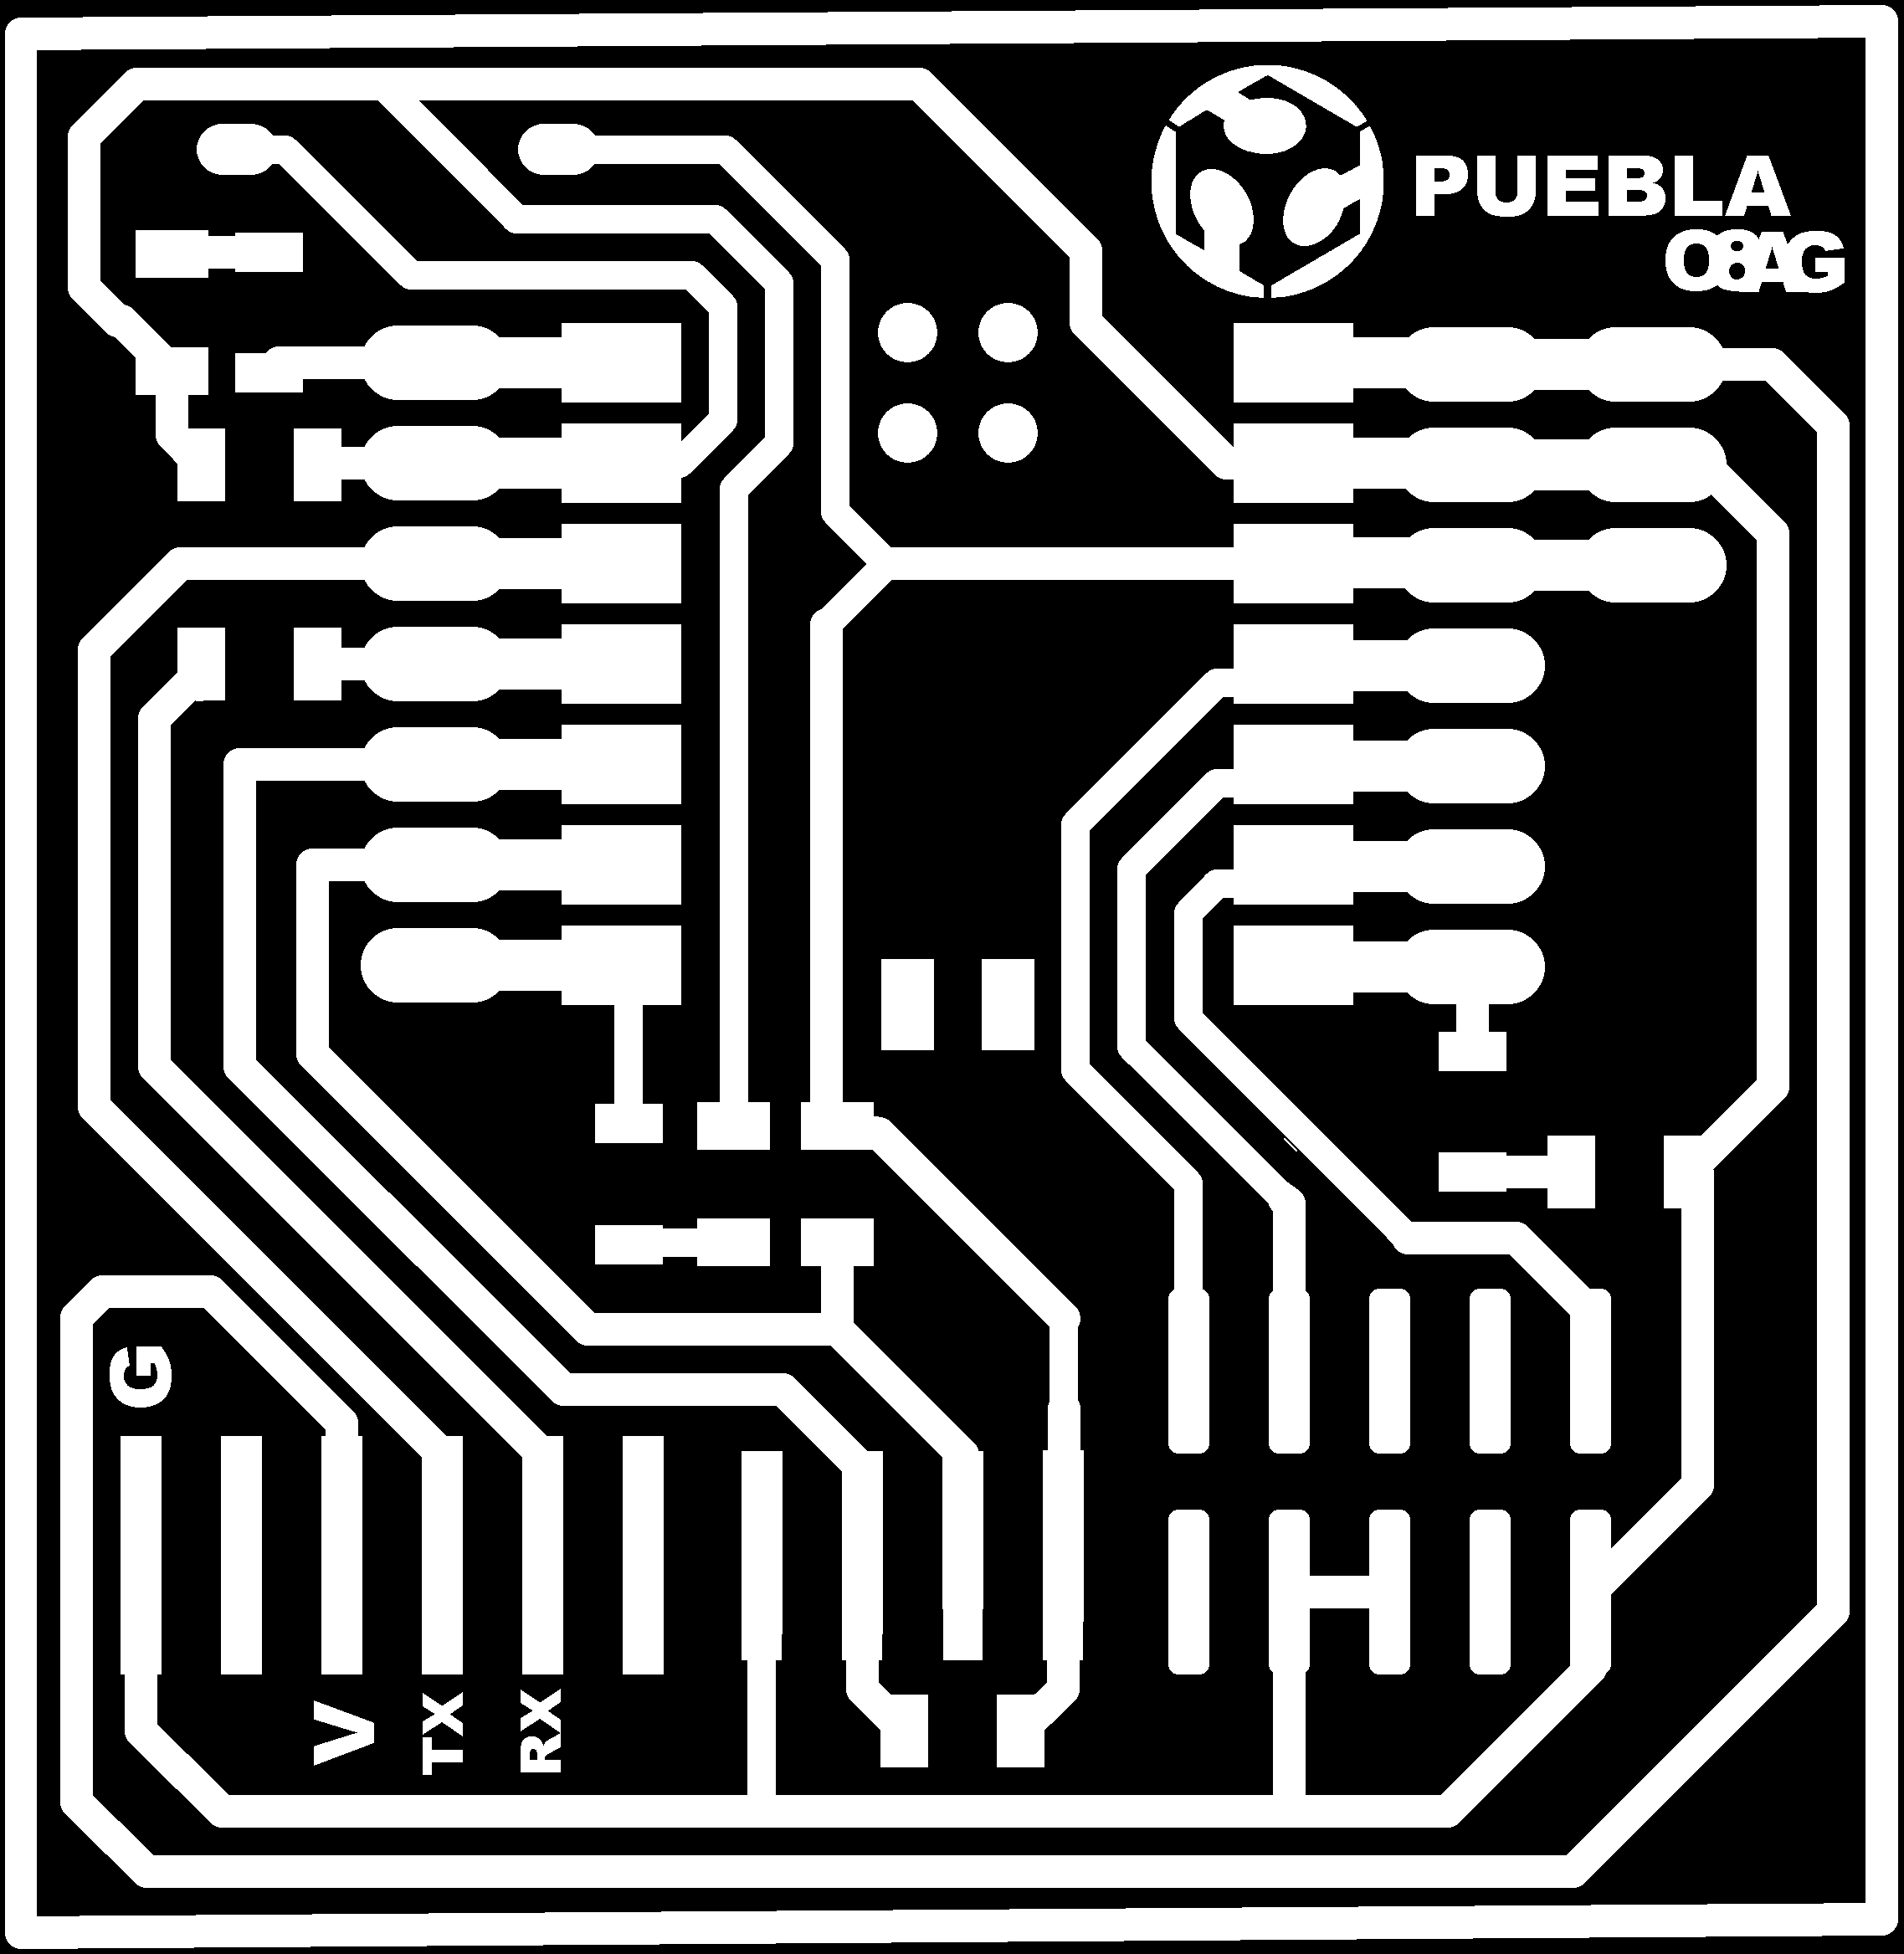
Finally for the traces we got this preview of what the machine is going to do.

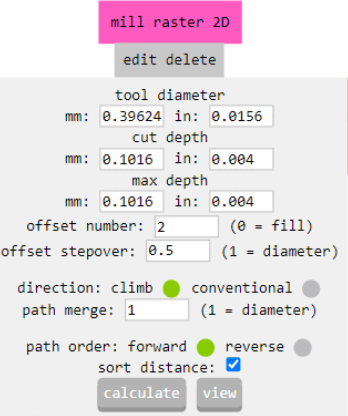
The last was only the traces, then the cut is needed so I used this image to get the cut. On the software a setting to change the white to black and the black to white was needed to cut only the borders and not the center.

Now the parameters for this cut were kind of distint, those were the next:
using the machine and creating the PCB
Then after having the two files converted is time to use the machine:

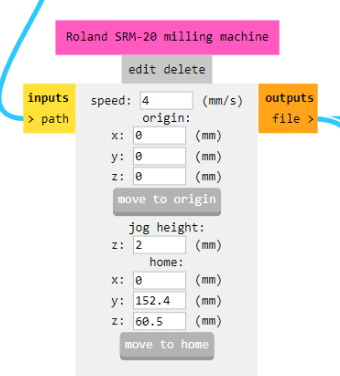
The machine we use on this project is a ROLAND SRM-20 model. The machine has the next features:
- Cutable Material: Modeling Wax, Chemical Wood, Foam, Acrylic, Polyacetal, Acrylonitrile Butadiene Styrene (ABS), Printed Circuit Boards
- Operational Travels in X, Y, and Z: 203.2 mm (X) × 152.4 mm (Y) × 60.5 mm (Z)
- Loadable Workpiece Weight: 2 kg
- Operation Speed: From 6 mm/min to 1,800 mm/min
- Software Resolution: 0.01 mm/step (RML-1), 0.001 mm/step (NC Code)
- Mechanical Resolution: 0.000998594 mm/step
- Spindle Rotation Speed: Adjustable from 3,000 RPM to 7,000 RPM
- Interface: USB
- Operational Noise: During operation: 65 dB(A)
- External Dimensions: 451 mm (width) × 426.6 mm (depth) × 426.2 mm (height) (17.76 in [width] × 16.80 in [depth] × 16.78 in [height])
- Weight: 19.6 kg
First step after downloading the software is to open it when the computer is connected to the machine.
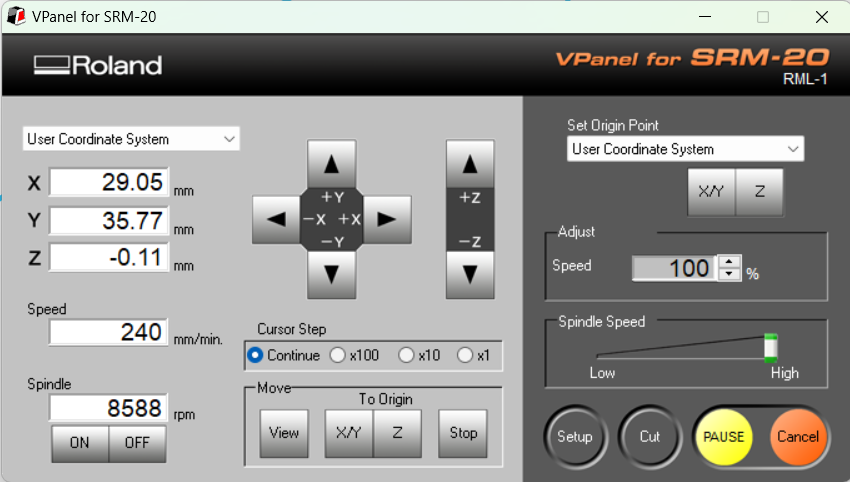
Then charge the machine with the copper plate.
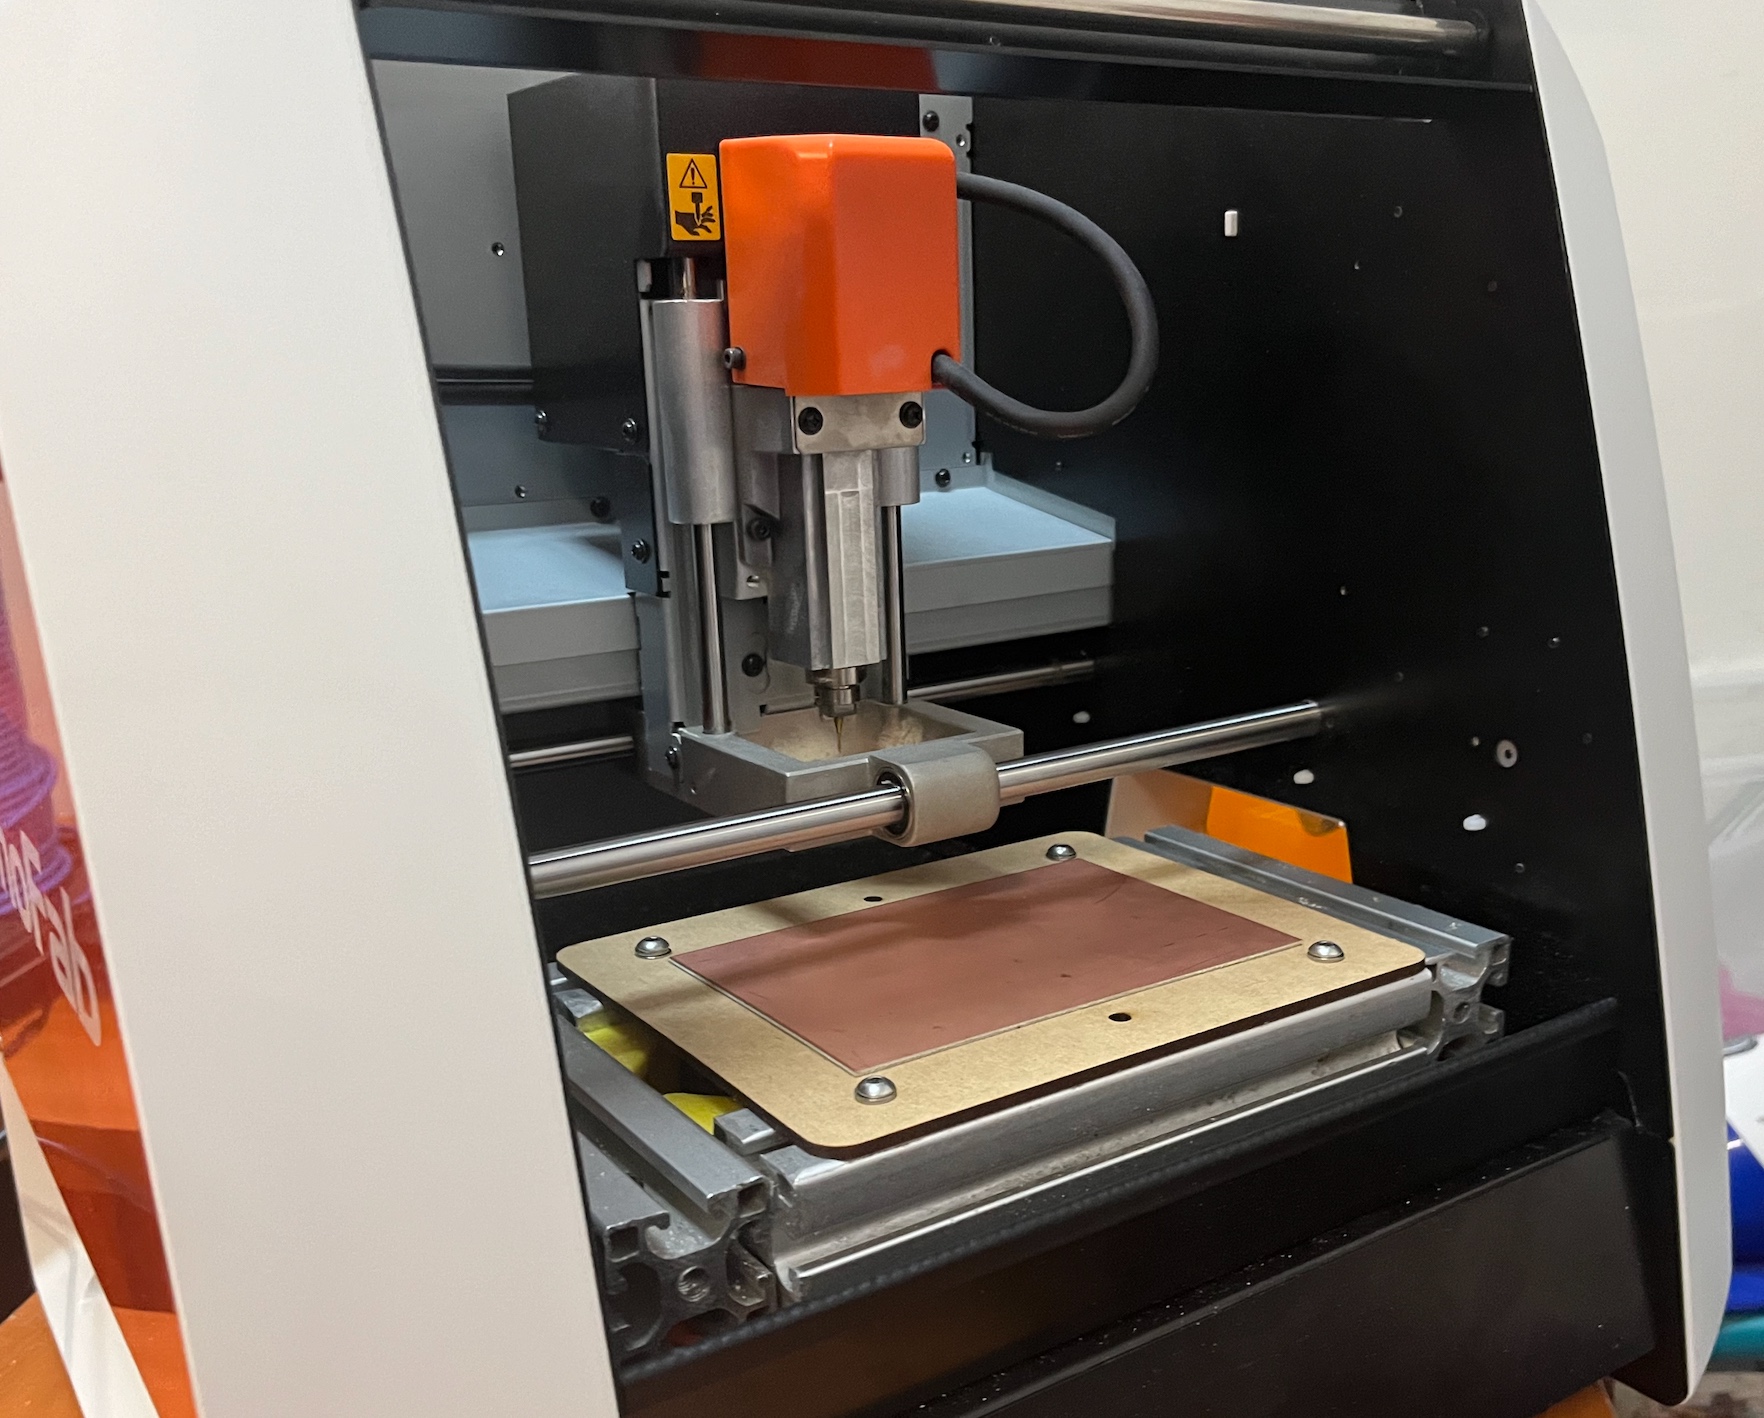
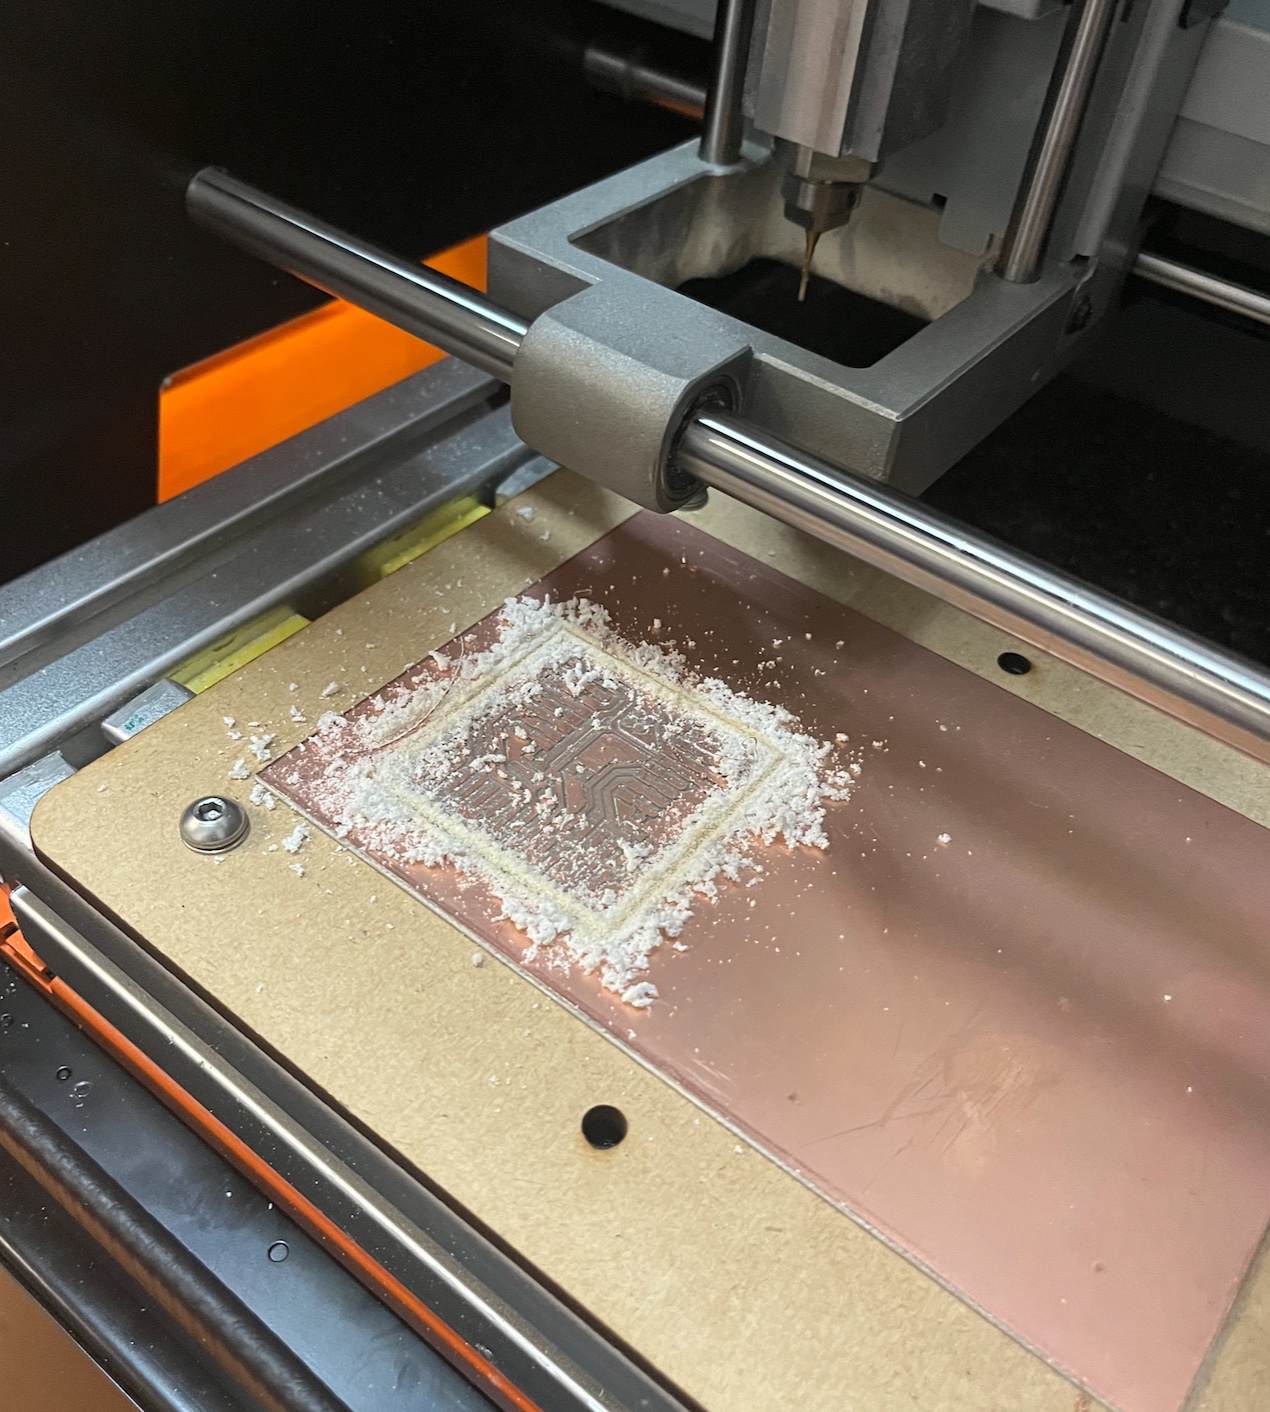
Start "cutting" the traces.

Then the borders.

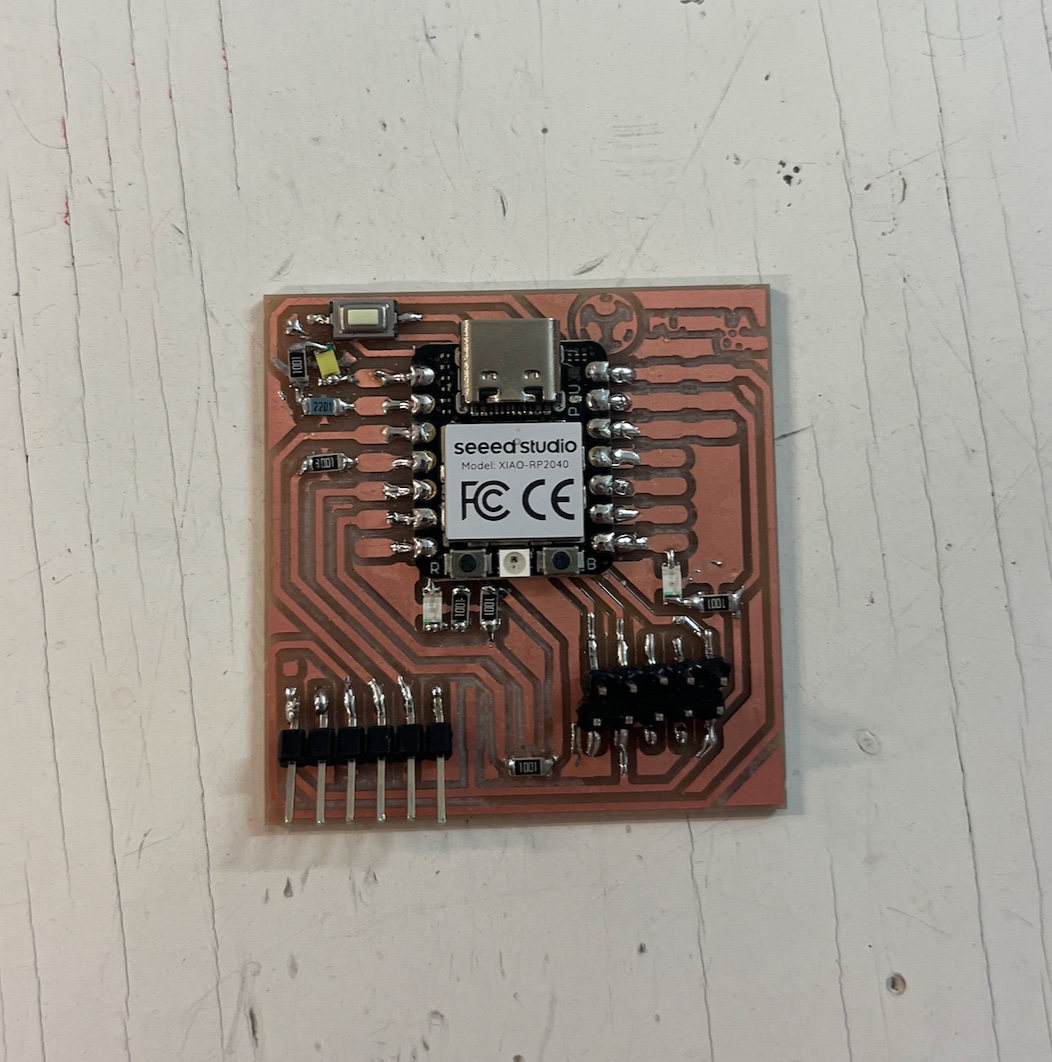
What we got inside the machine.
It's time to solder, for this I needed first to practice on a test board and the solder on the PCB.

After soldering the components and using the specific materials:
- 1: XIAO RP2040
- 1: Tweezers
- 7: 8200 ohms resistor.
- 3: Leds.
- 1: push button.
- 1: 6-pin Right-Angle SIL Headers.
- 5: 5-pin Right-Angle SIL Headers
- 1: Roll of tin for soldering
- 1: Soldering iron
It's time to charge it with a program to turn it on and know if everything is working and properly soldered. In this case the code this one, click here to download it. This program makes the leds to blink and keeps one led turned off until the button is pressed.
Time to turn it on and check if everything is working.
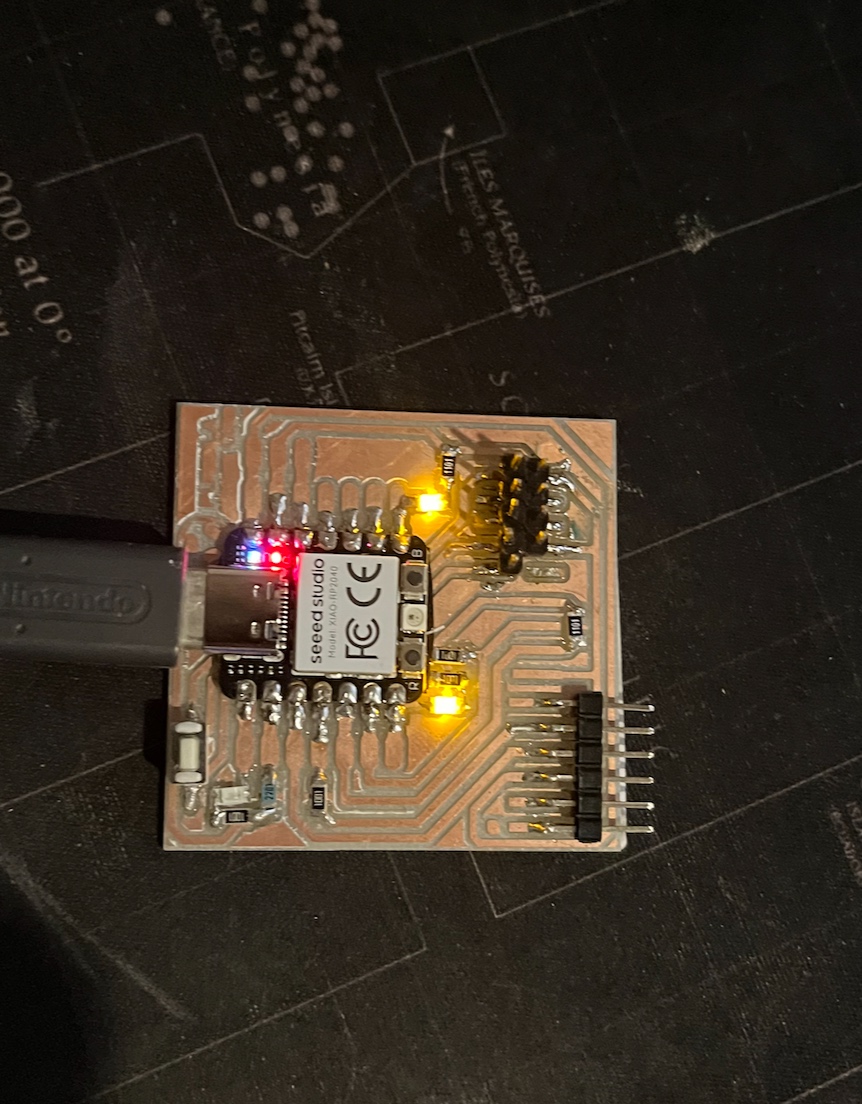
everything is working!!!