13. Network and Communications
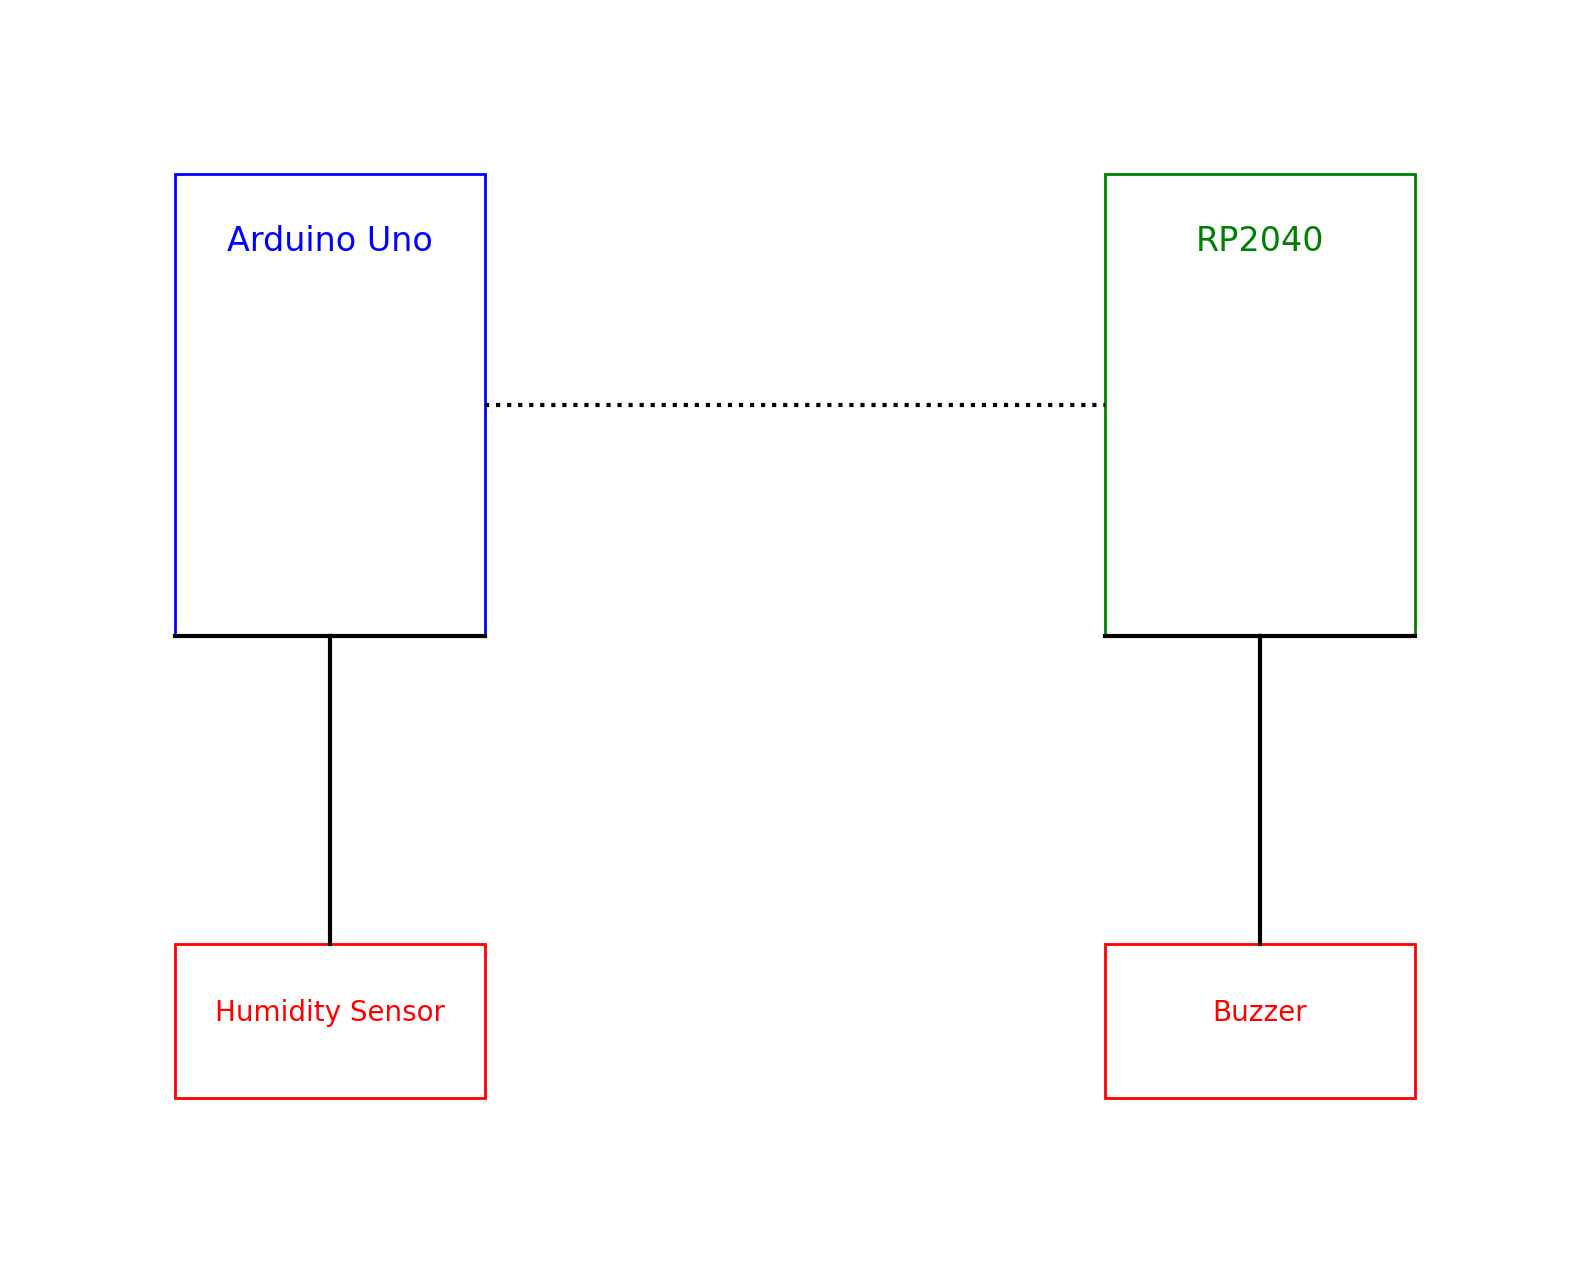
The first thought that crossed my mind was to use the sensors I already had, specifically the humidity sensor and the buzzer. Considering this, I decided to utilize the RP2040 and an Arduino Uno to connect the sensor and the buzzer. Consequently, I designed a circuit board to facilitate the connection between the buzzer, the humidity sensor, the Arduino, and the RP2040.
Here is a diagram illustrating the connections between the Arduino Uno, RP2040, humidity sensor, and buzzer:
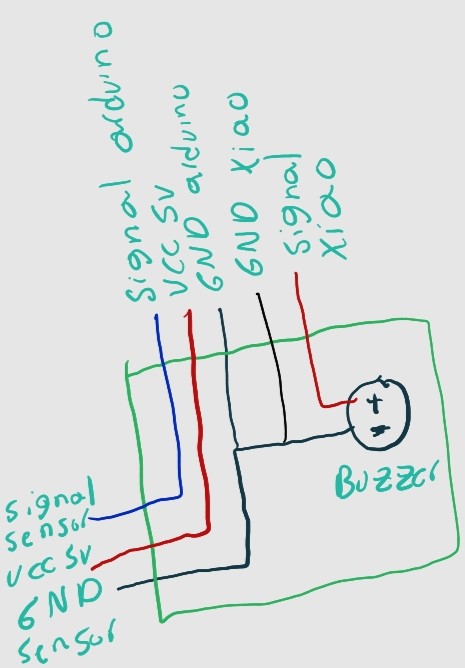
The first step was to use the PCB i had done in week 08.
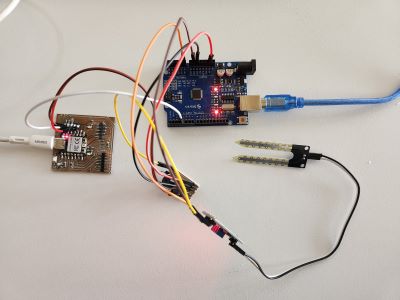
It was necessary to connect all the components as I had done in my diagram. This involved carefully soldering the humidity sensor and buzzer to the designated spots on the PCB, and ensuring the correct connections to the Arduino Uno and RP2040. Attention to detail was crucial during this step to avoid any short circuits or misconnections that could impact the functionality of the circuit.
With the physical connections completed, the next step was to program the Arduino and the Xiao RP2040 so that each would perform its designated function.
For the Arduino, I wrote a program to read data from the humidity sensor and send the readings to the Xiao RP2040. This involved setting up the appropriate pins, initializing the sensor, and creating a loop to continuously read and transmit data.
#define HUMIDITY_SENSOR_PIN A0  // Pin al que está conectado el sensor de humedad HW-103
#define SIGNAL_PIN 4            // Pin que enviará la señal al XIAO RP2040
const int HUMIDITY_THRESHOLD = 600; // Umbral de humedad, ajustar según sea necesario

void setup() {
	Serial.begin(9600);
	pinMode(SIGNAL_PIN, OUTPUT);
}

void loop() {
	int sensorValue = analogRead(HUMIDITY_SENSOR_PIN);
	Serial.print("Humedad del suelo: ");
	Serial.println(sensorValue);

	if (sensorValue < HUMIDITY_THRESHOLD) {
	digitalWrite(SIGNAL_PIN, HIGH);  // Enviar señal al XIAO RP2040
	} else {
	digitalWrite(SIGNAL_PIN, LOW);   // No enviar señal
	}
	delay(1000); // Leer el sensor cada segundo
	}
For the Xiao RP2040, I developed a program to receive the humidity data from the Arduino and control the buzzer based on the readings. This program included setting up communication with the Arduino, processing the incoming data, and activating the buzzer when the humidity levels reached a certain threshold.
#define SIGNAL_PIN 2  // Pin que recibe la señal del Arduino Uno
#define BUZZER_PIN 3  // Pin al que está conectado el buzzer

void setup() {
	pinMode(SIGNAL_PIN, INPUT);
	pinMode(BUZZER_PIN, OUTPUT);
}

void loop() {
	int signal = digitalRead(SIGNAL_PIN);

	if (signal == HIGH) {
	digitalWrite(BUZZER_PIN, HIGH);  // Activar buzzer
	} else {
	digitalWrite(BUZZER_PIN, LOW);   // Desactivar buzzer
	}
	}
To recap, when the humidity sensor detects water, it sends the signal to the Arduino which through pin 4 lets the Xiao rp2040 know that the humidity sensor has detected water so the Xiao rp2040 sends a signal to the buzzer through pin 3.
Here is a video demonstrating the functioning.