3D Scanning and Printing
This week's assignment is called: 3D Scanning and Printing. Which consist in printing in the 3d printer something of our own creation and using the 3D scanner
Team Practice
Link of our team practice.
Modeling
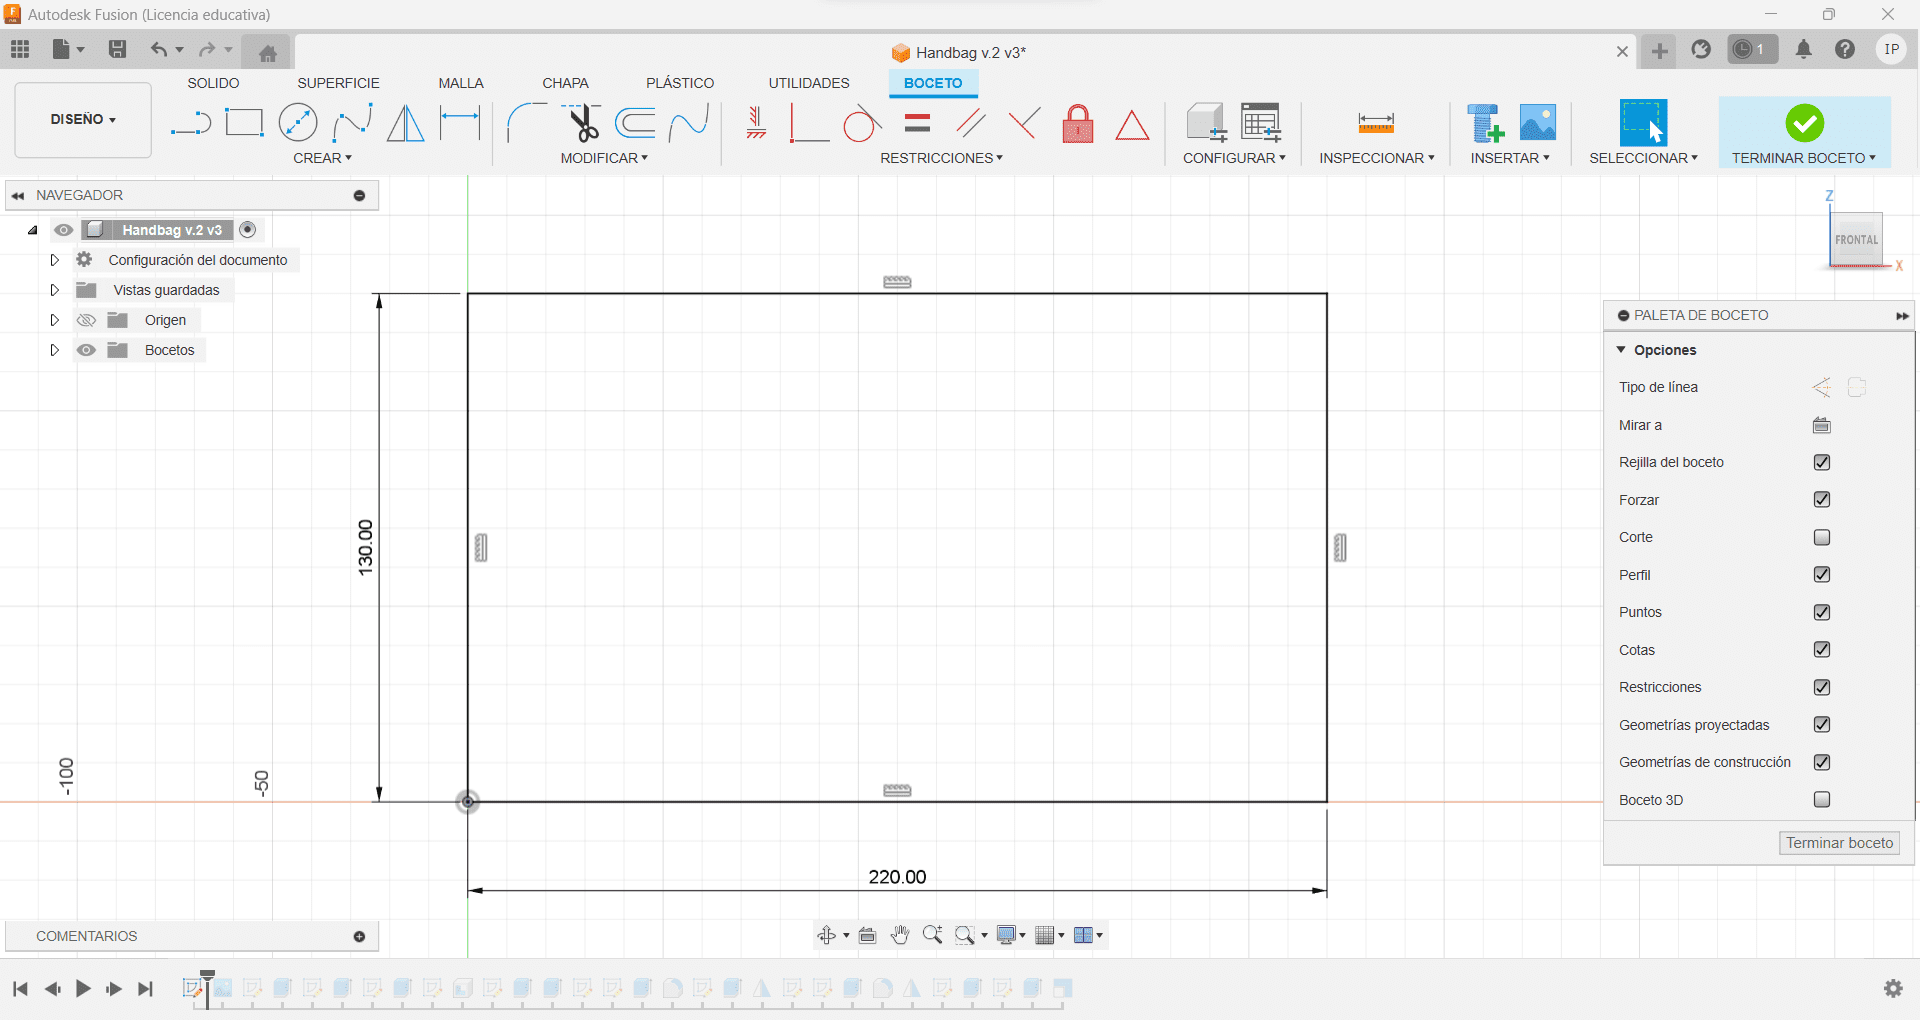
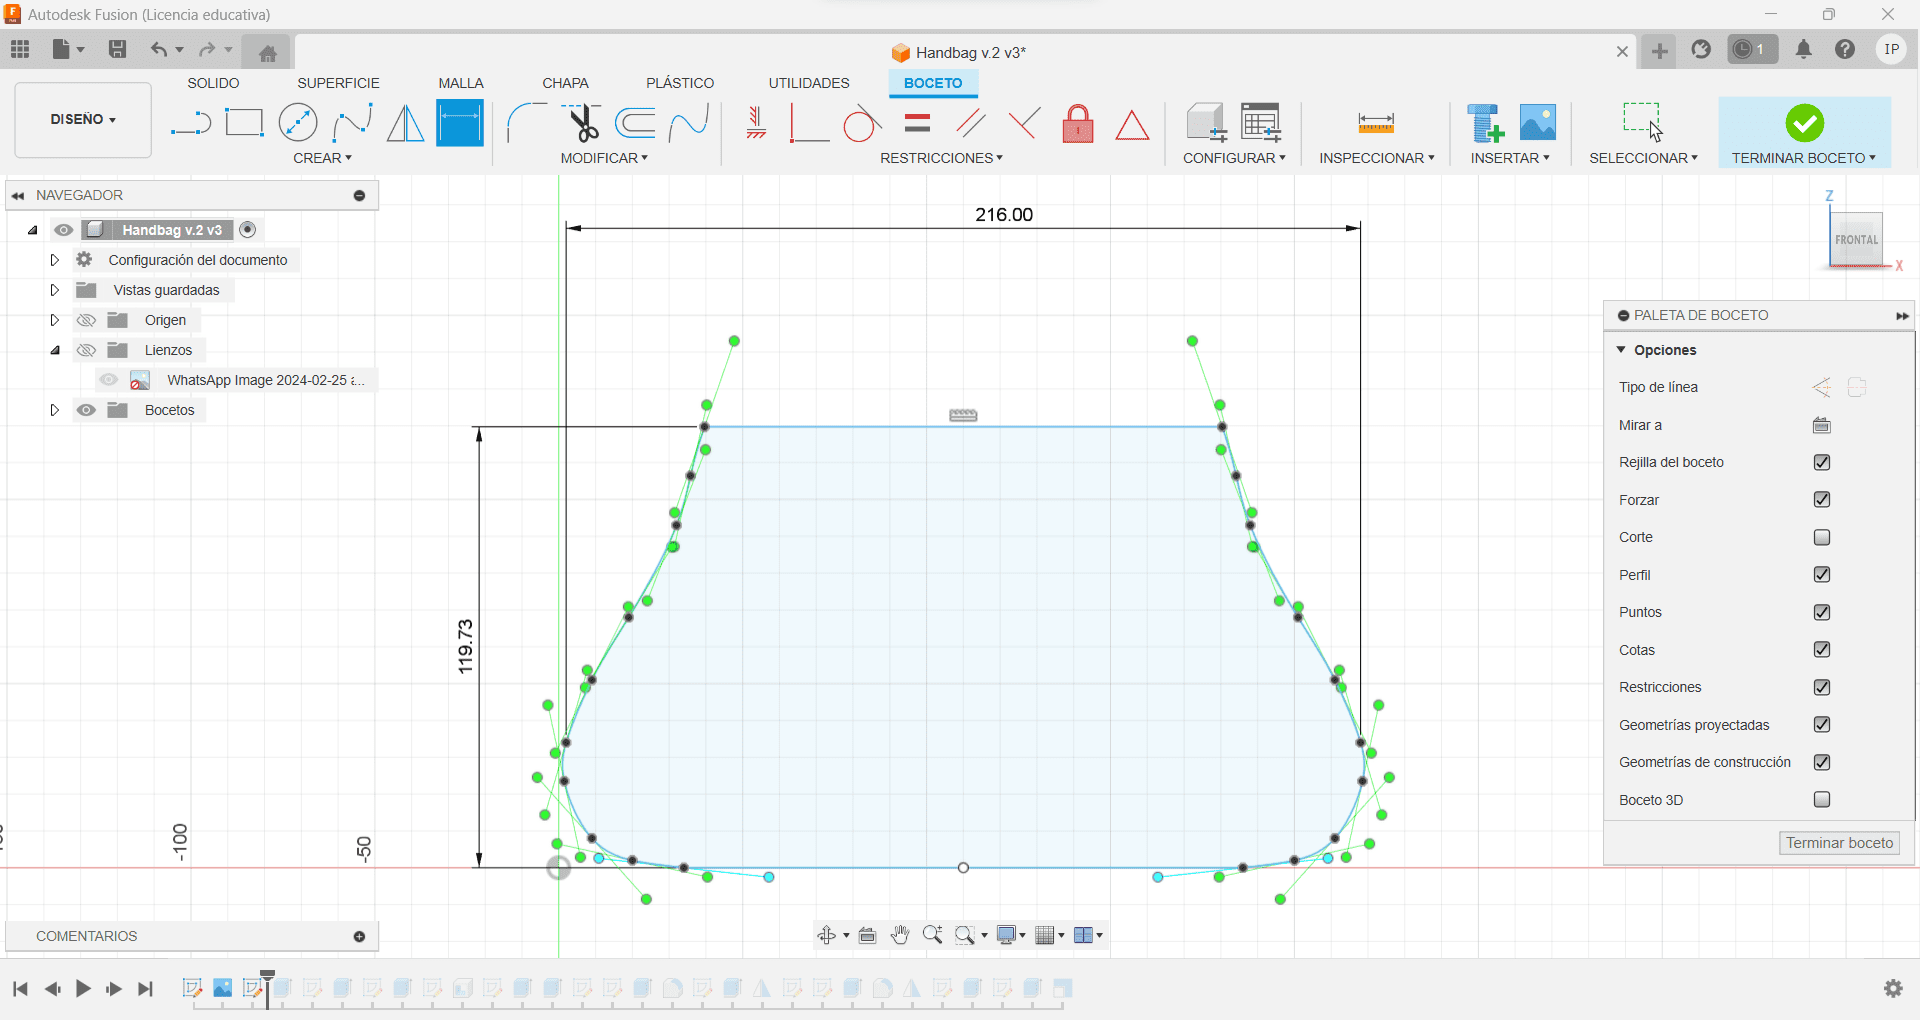
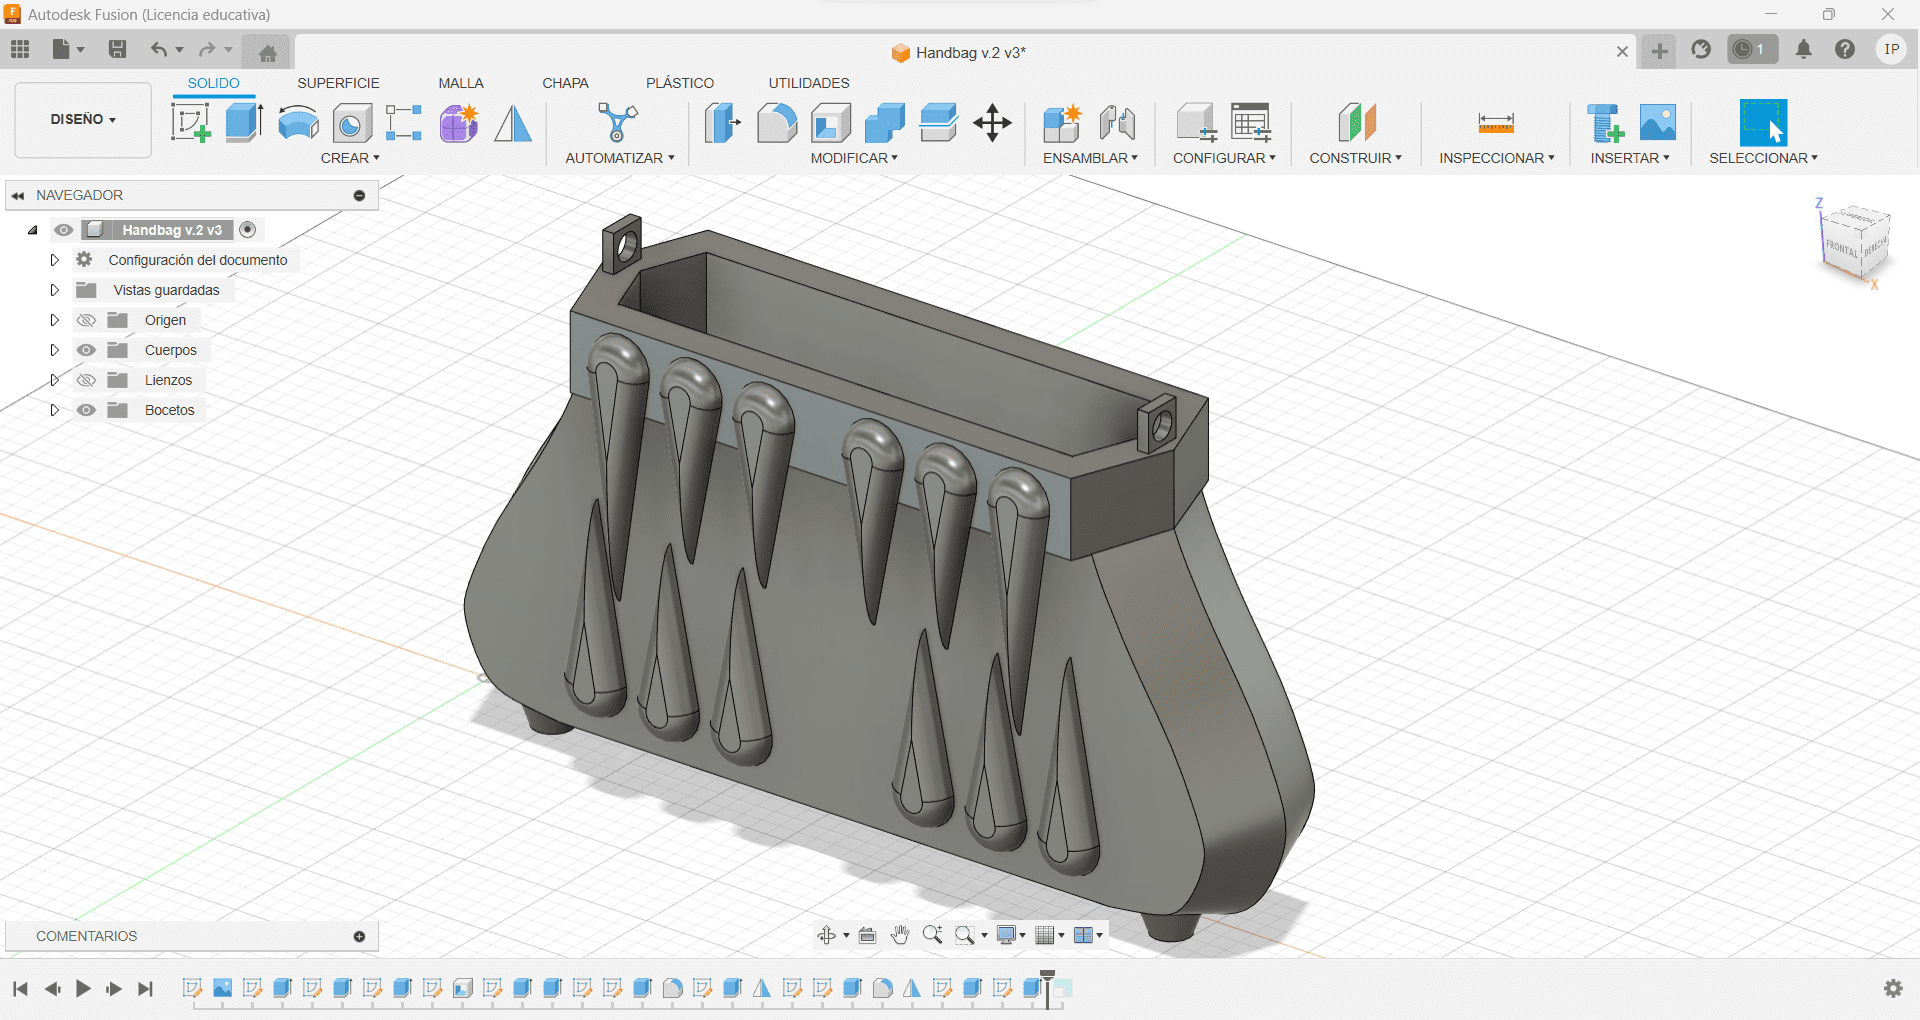
For the modeling part, I decided myself for creating a handbag, I had some sketches already of a bag design I had drawn already. Now, on Fusion 360 I created a reference of the bag dimensions, making a rectangle of 130mm x 320MM, then I inserted the reference image I had of the design I mentioned, and dimension it to fit inside.
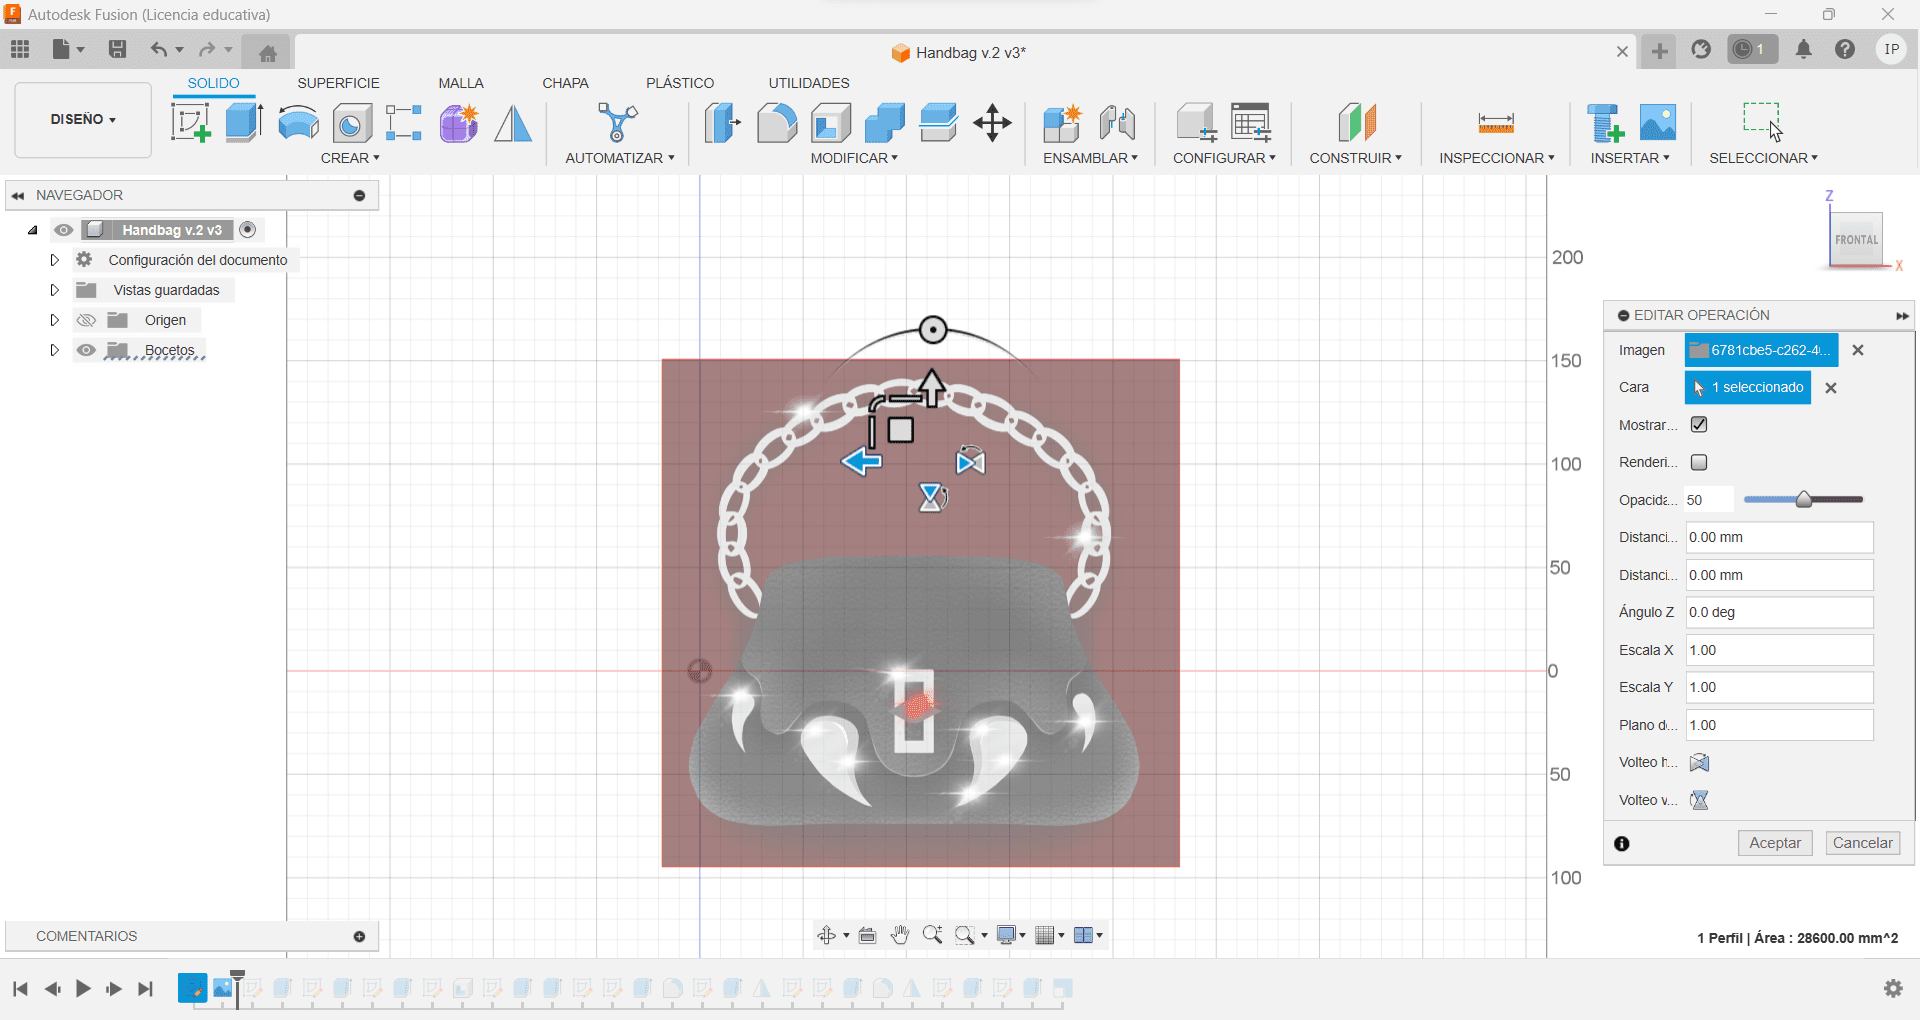
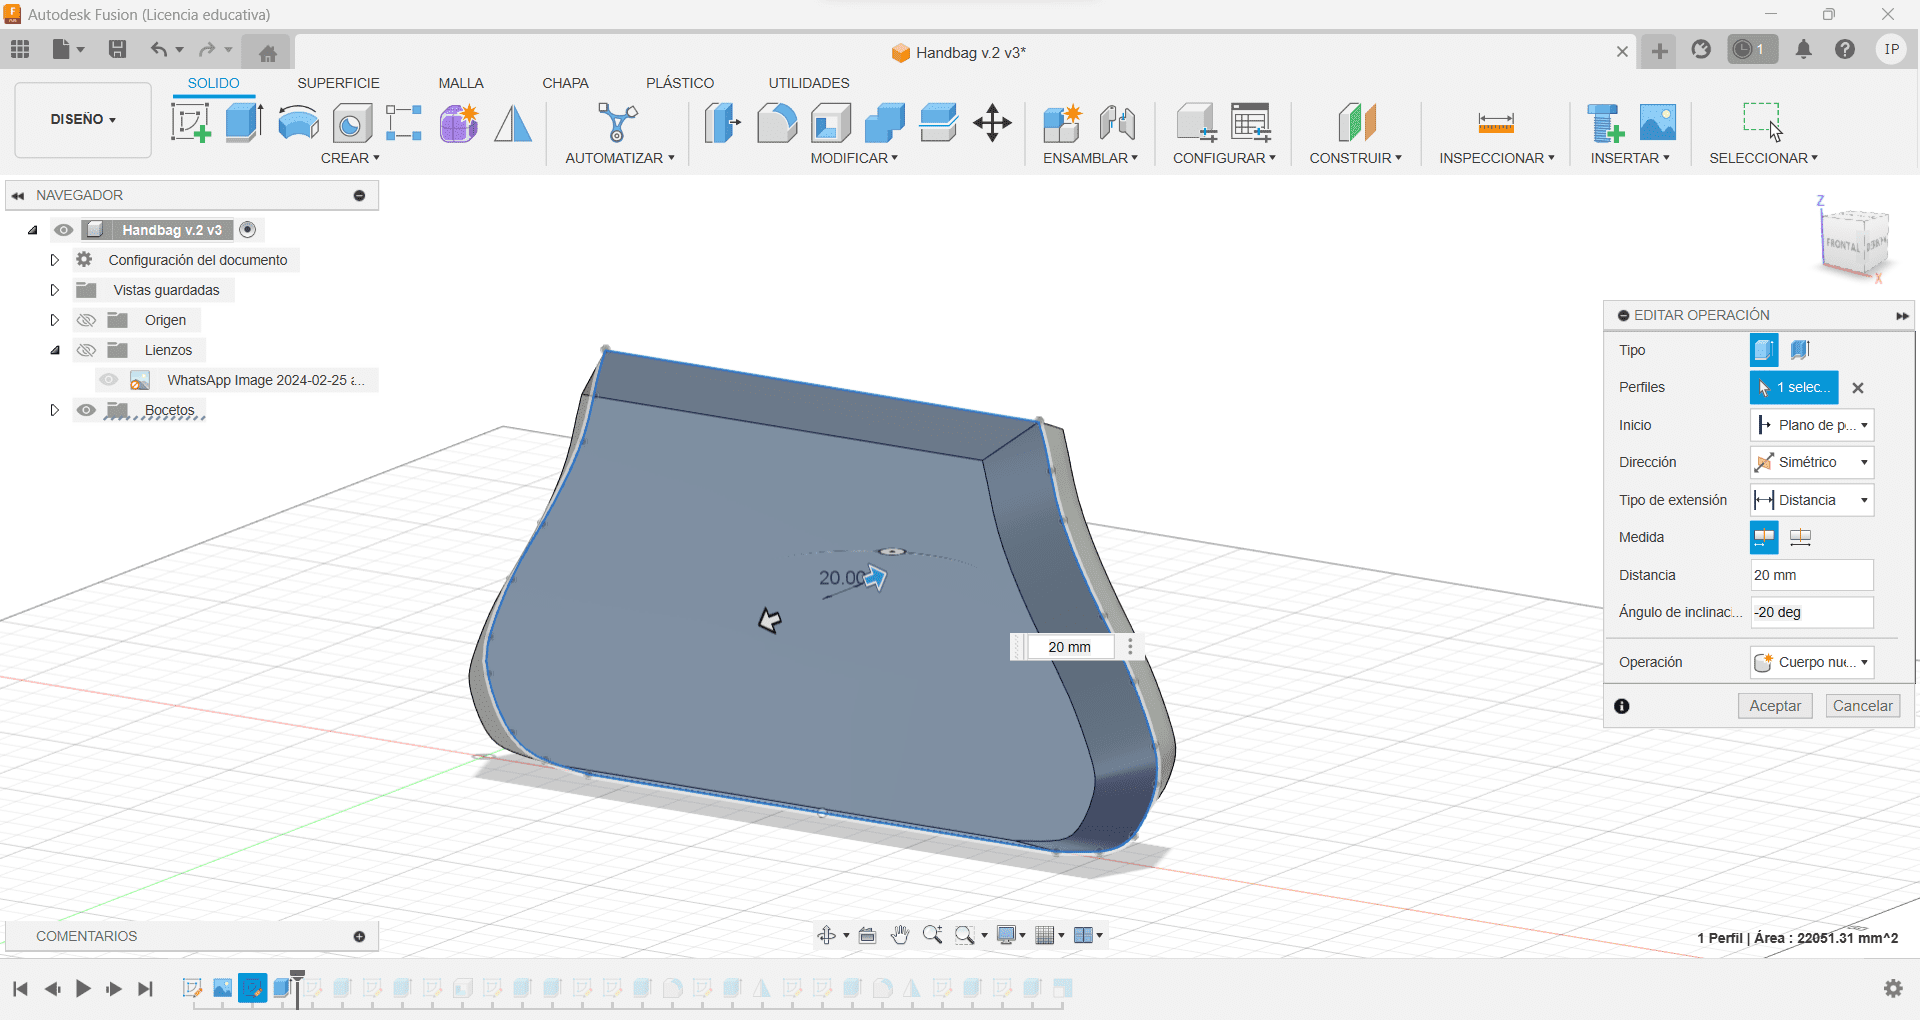
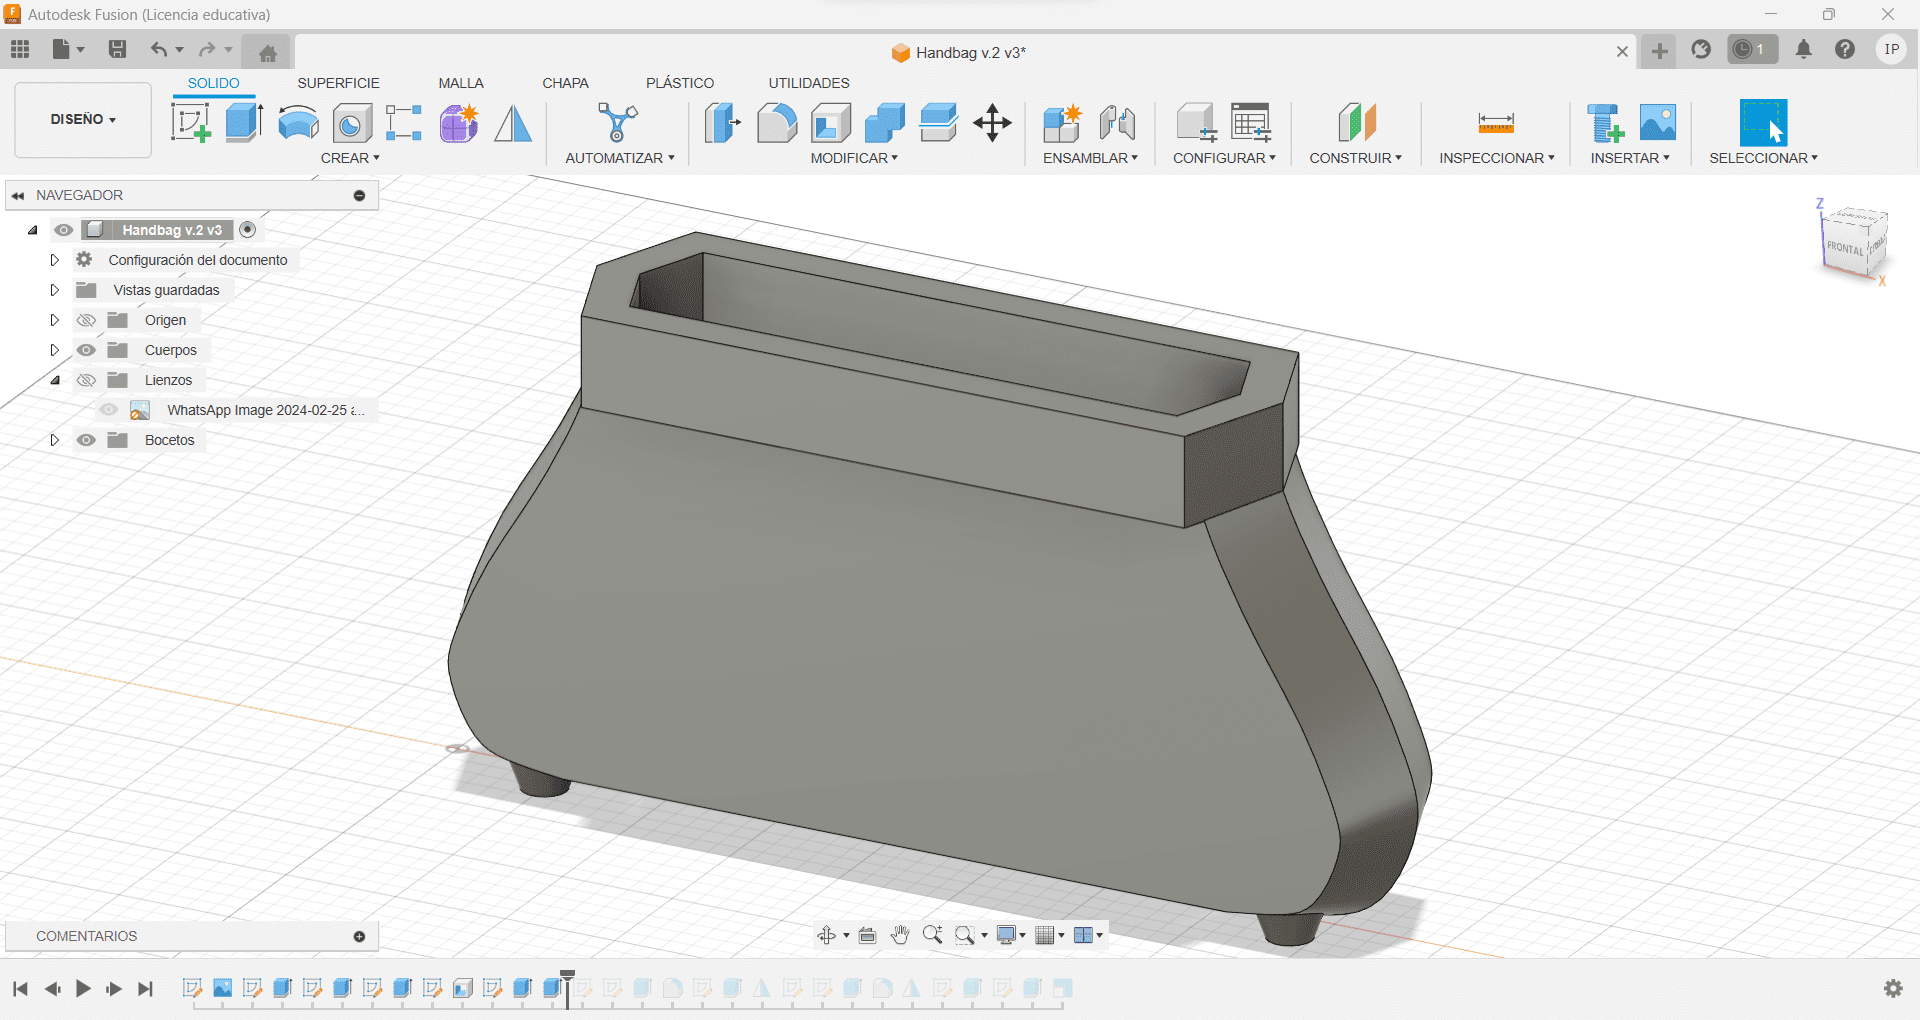
Having those references, I created the bag silhouette using the Spline Set Point tool (Green), once traced, I finished the sketch, and extruded it, making it 20mm on each side, adding up to 40, I then went over the Edit Operation window and changed the inclination angle to -20deg
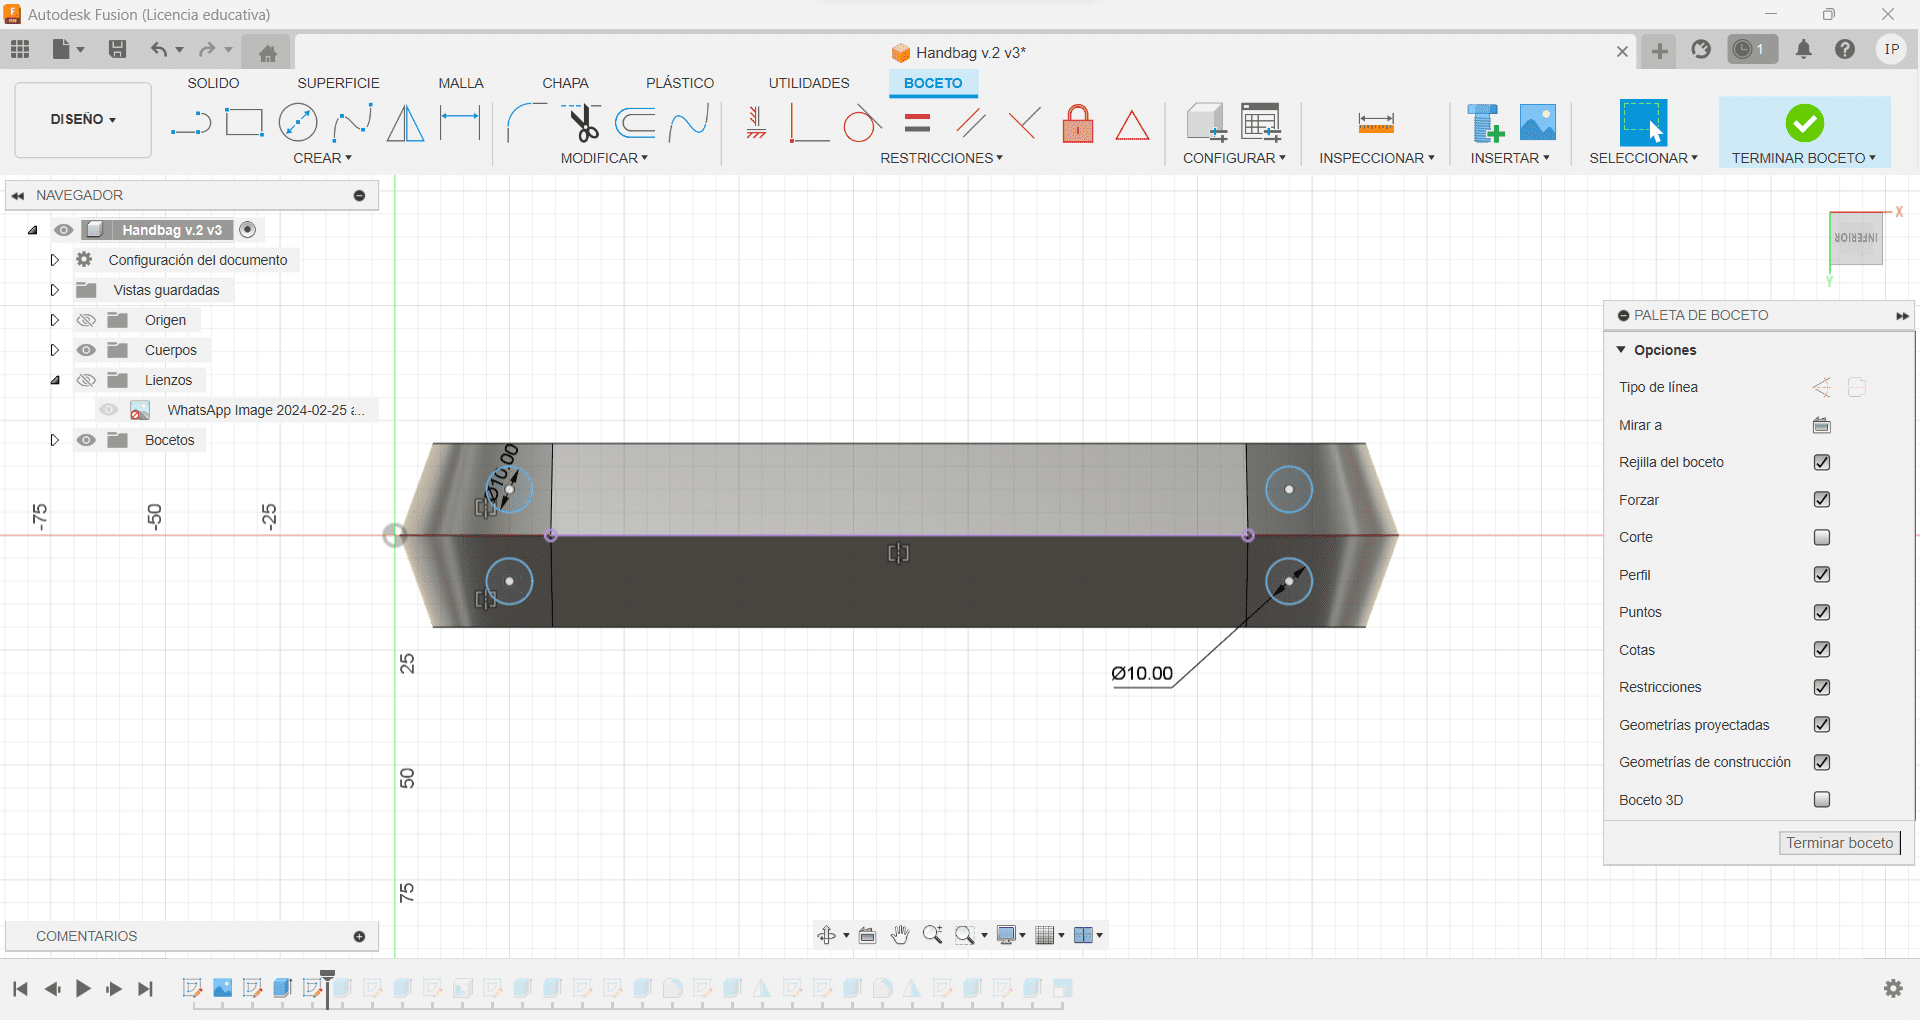
Once that, I had the overall body of the bag, I made another sketch in the bottom of it, and then created 4 10mm circles on the corners, this I then extruded giving it a 20deg angle to connect to the bag, this will serve as little "feet" so, since its rigid, will stand on itself on a surface. I then made a rectangle on top of the bag, right where the slope ends.
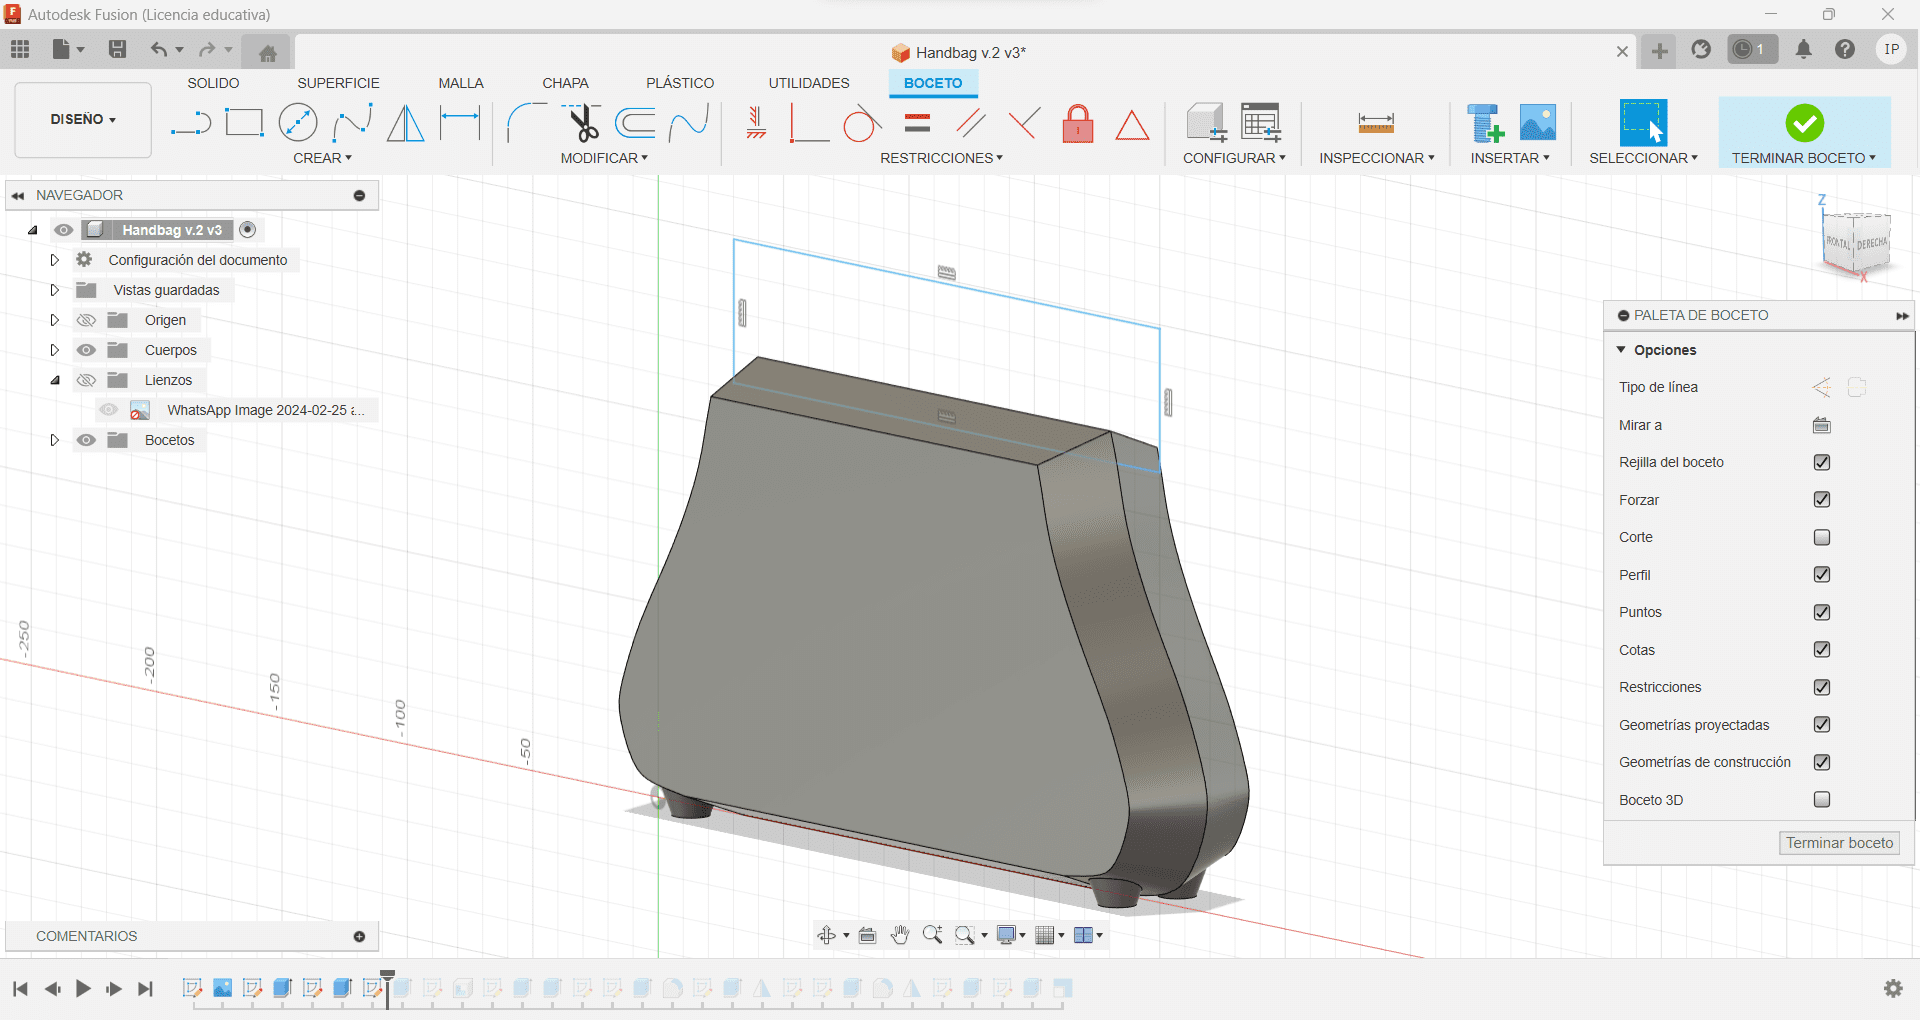
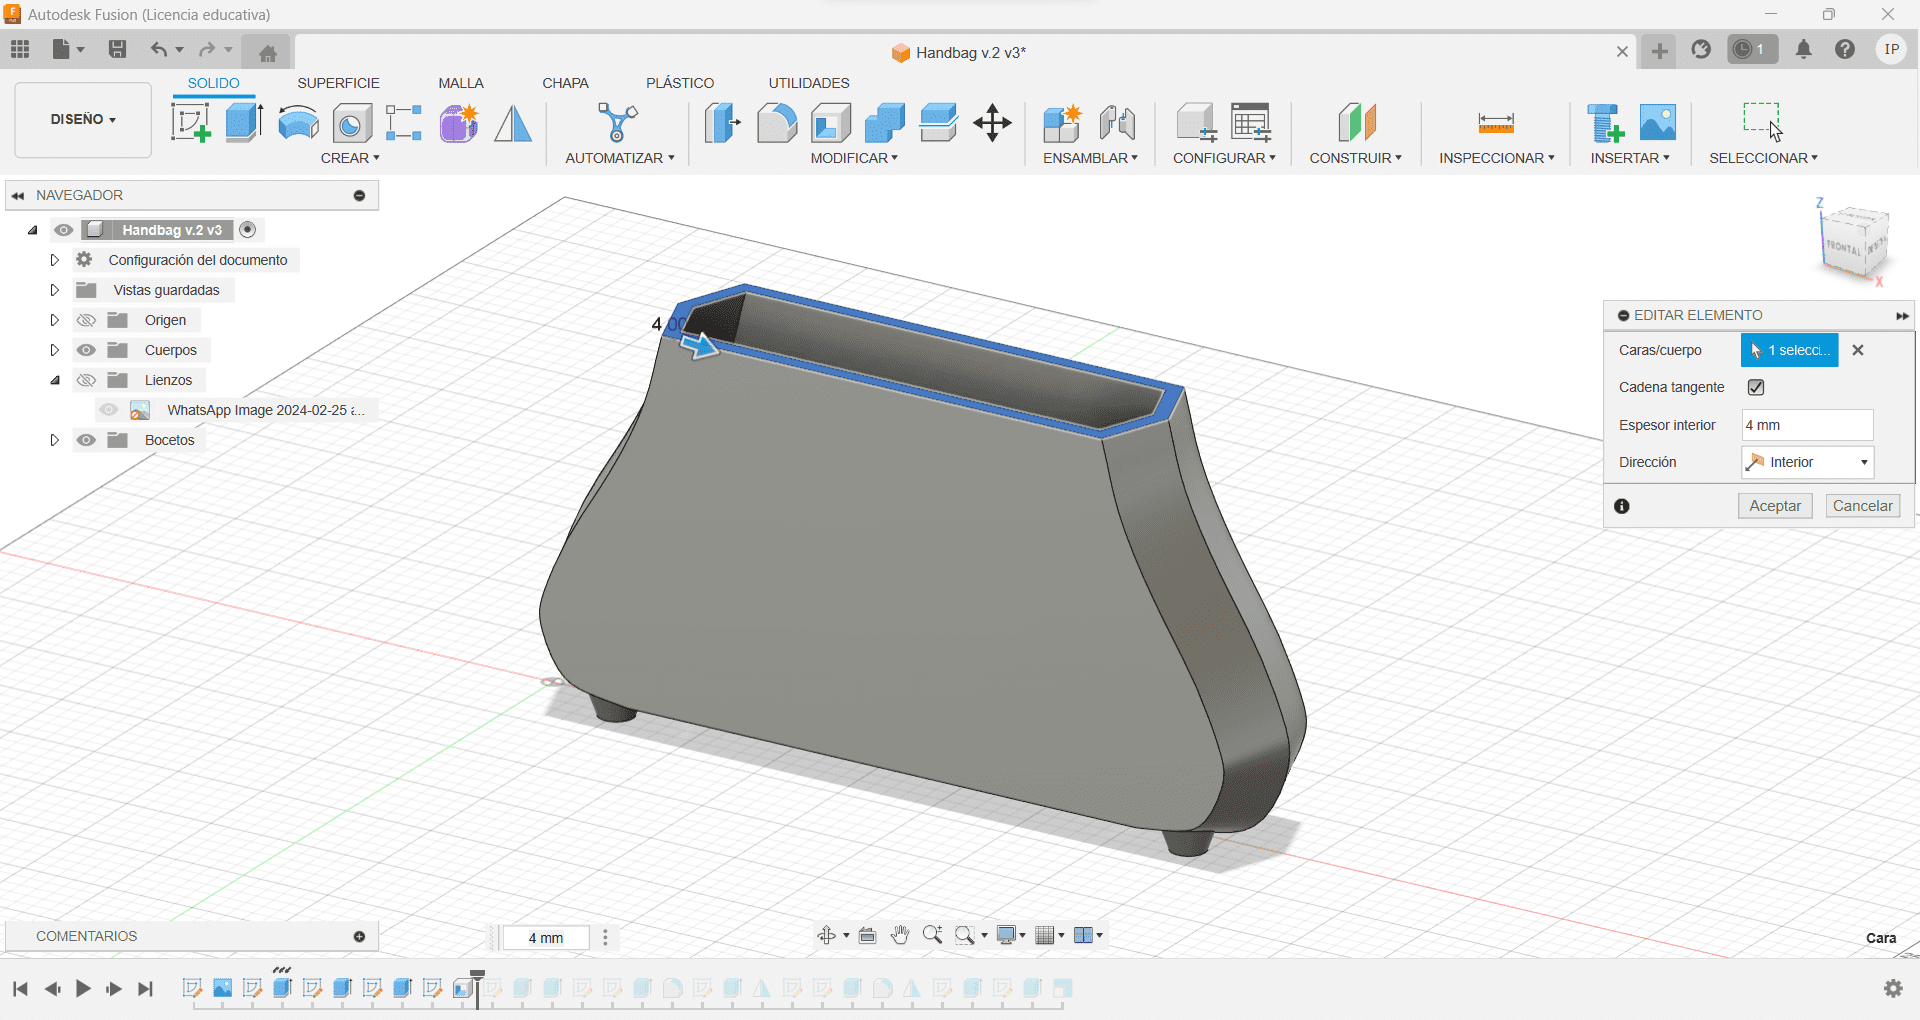
I then extruded it on both sides symmetrically, and changed the operation to "cut" so I could be left with a plane top part. Next I used the tool Emptying and keeping an inner thickness of 4mm. Once I had the hollow bag, I used the stretched hexagon as a base for another sketch of that silhouette, created an offset of that hexagon of 10mm and used that shape to extrude it down to 20mm, then used the inner hexagon to extrude up and again cut the shape we just created.
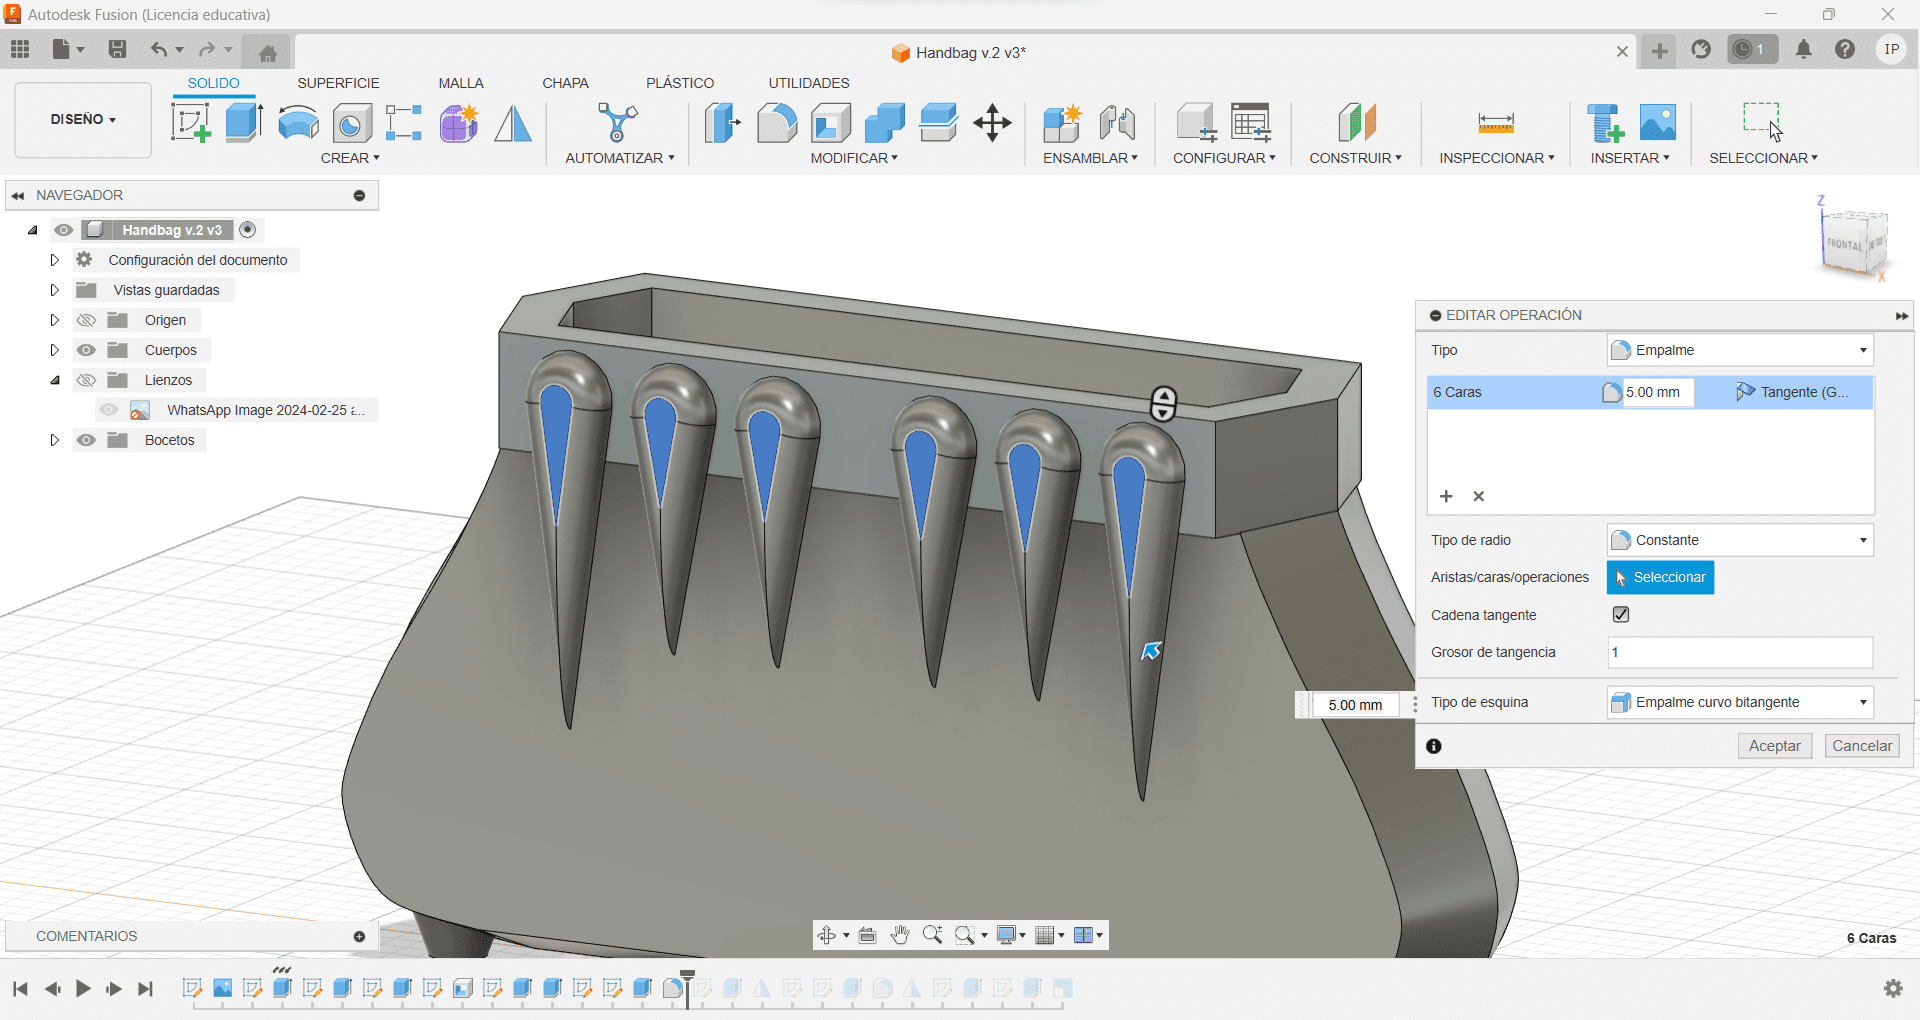
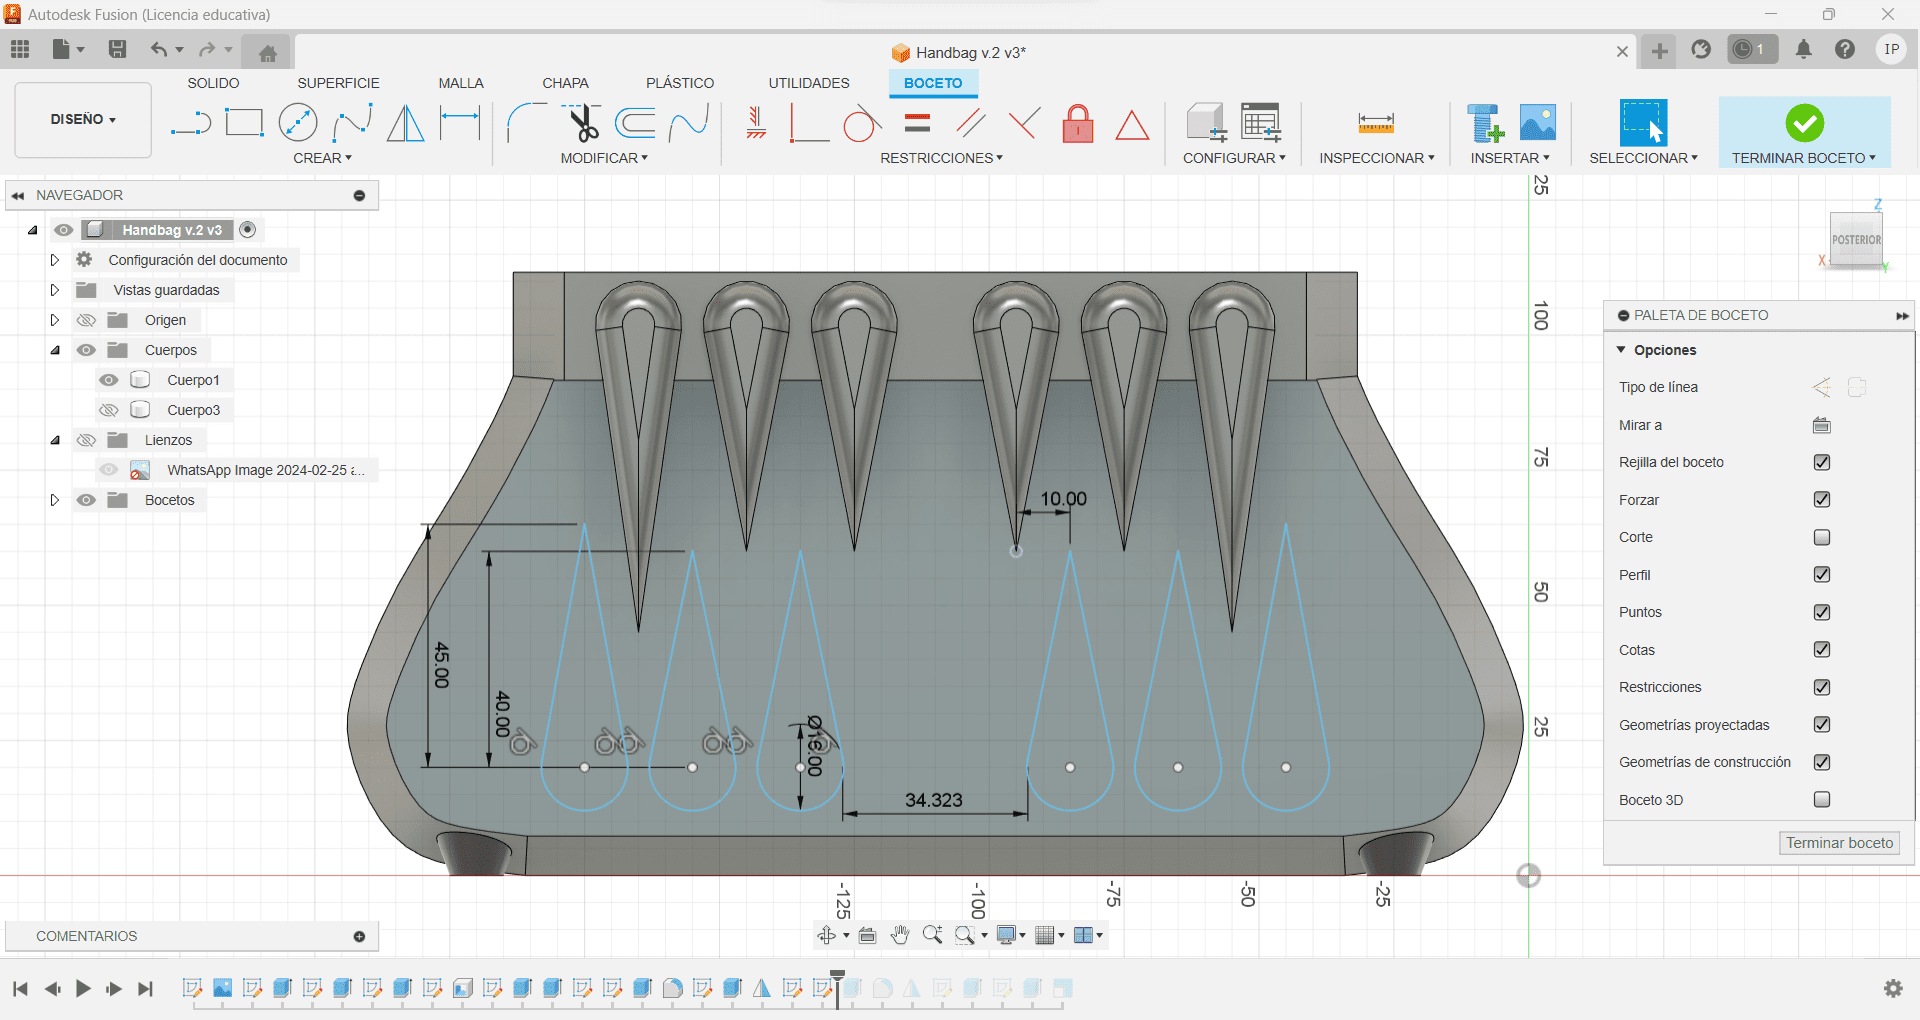
Using the upper front face of the bag, I created a sketch and made the teeth, having 6 all along the space. With 3 on each side, I started with the ones on the side having a base circle base of 8mm of radius and 57mm long, starting from the center of the circle I made them creating a baseline and then connecting it to the tangent of the circle and cutting the lines on the inside, once done I made the middle ones with the same base but with a length of 42mm. Now that I,ve done with the teeth, I used the extrude tool to make them 5mm thick. I used the splice tool and also gave it 5mm.
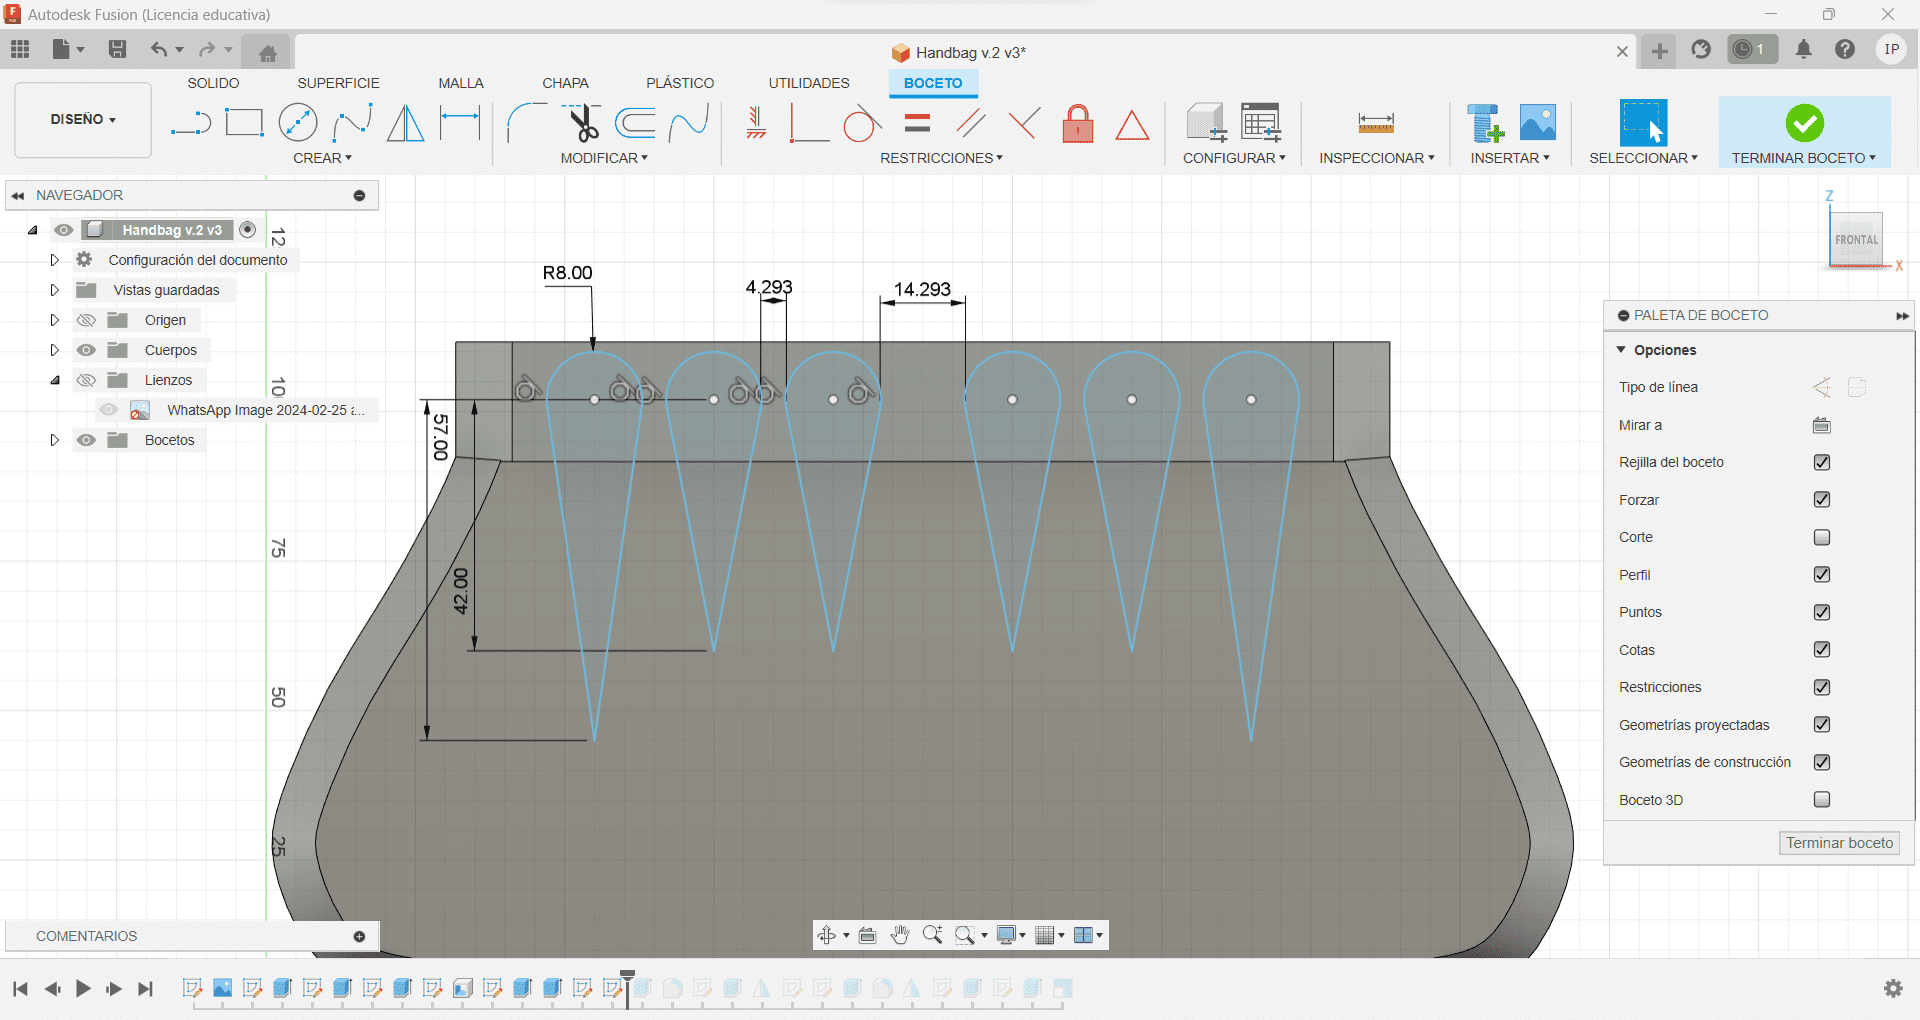
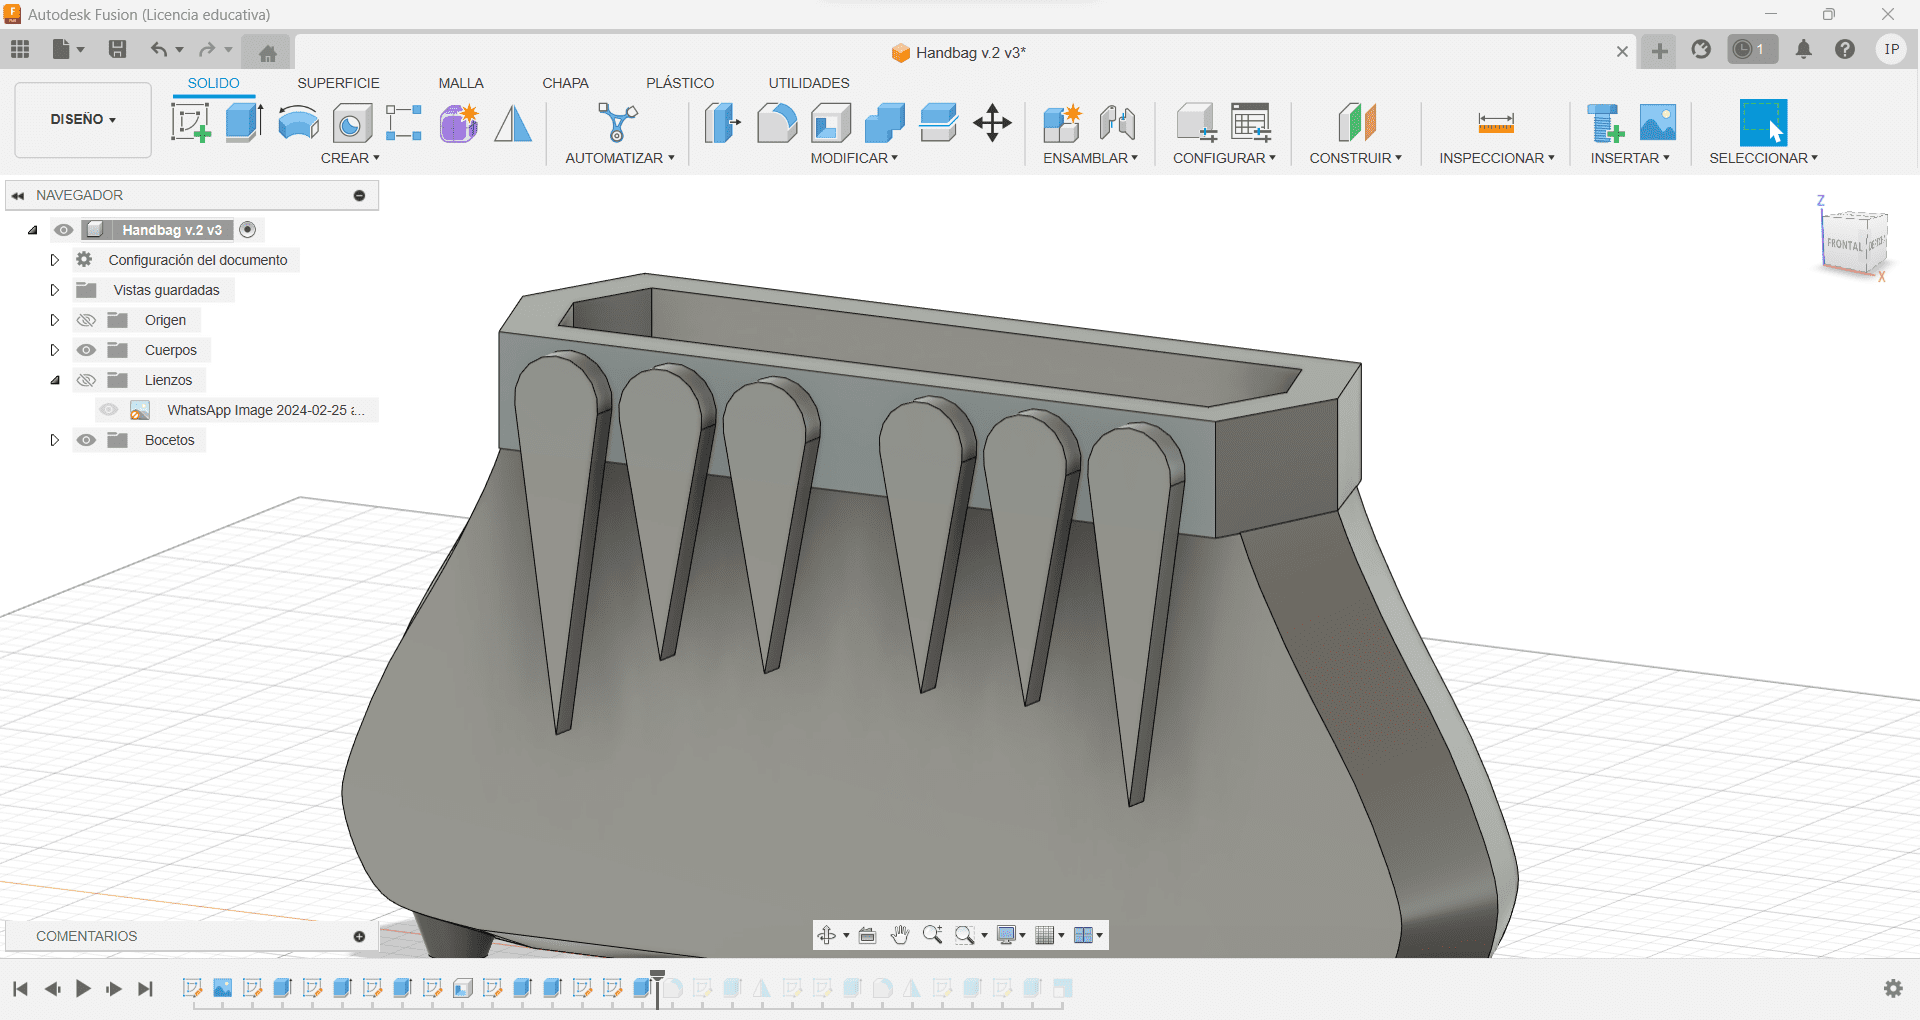
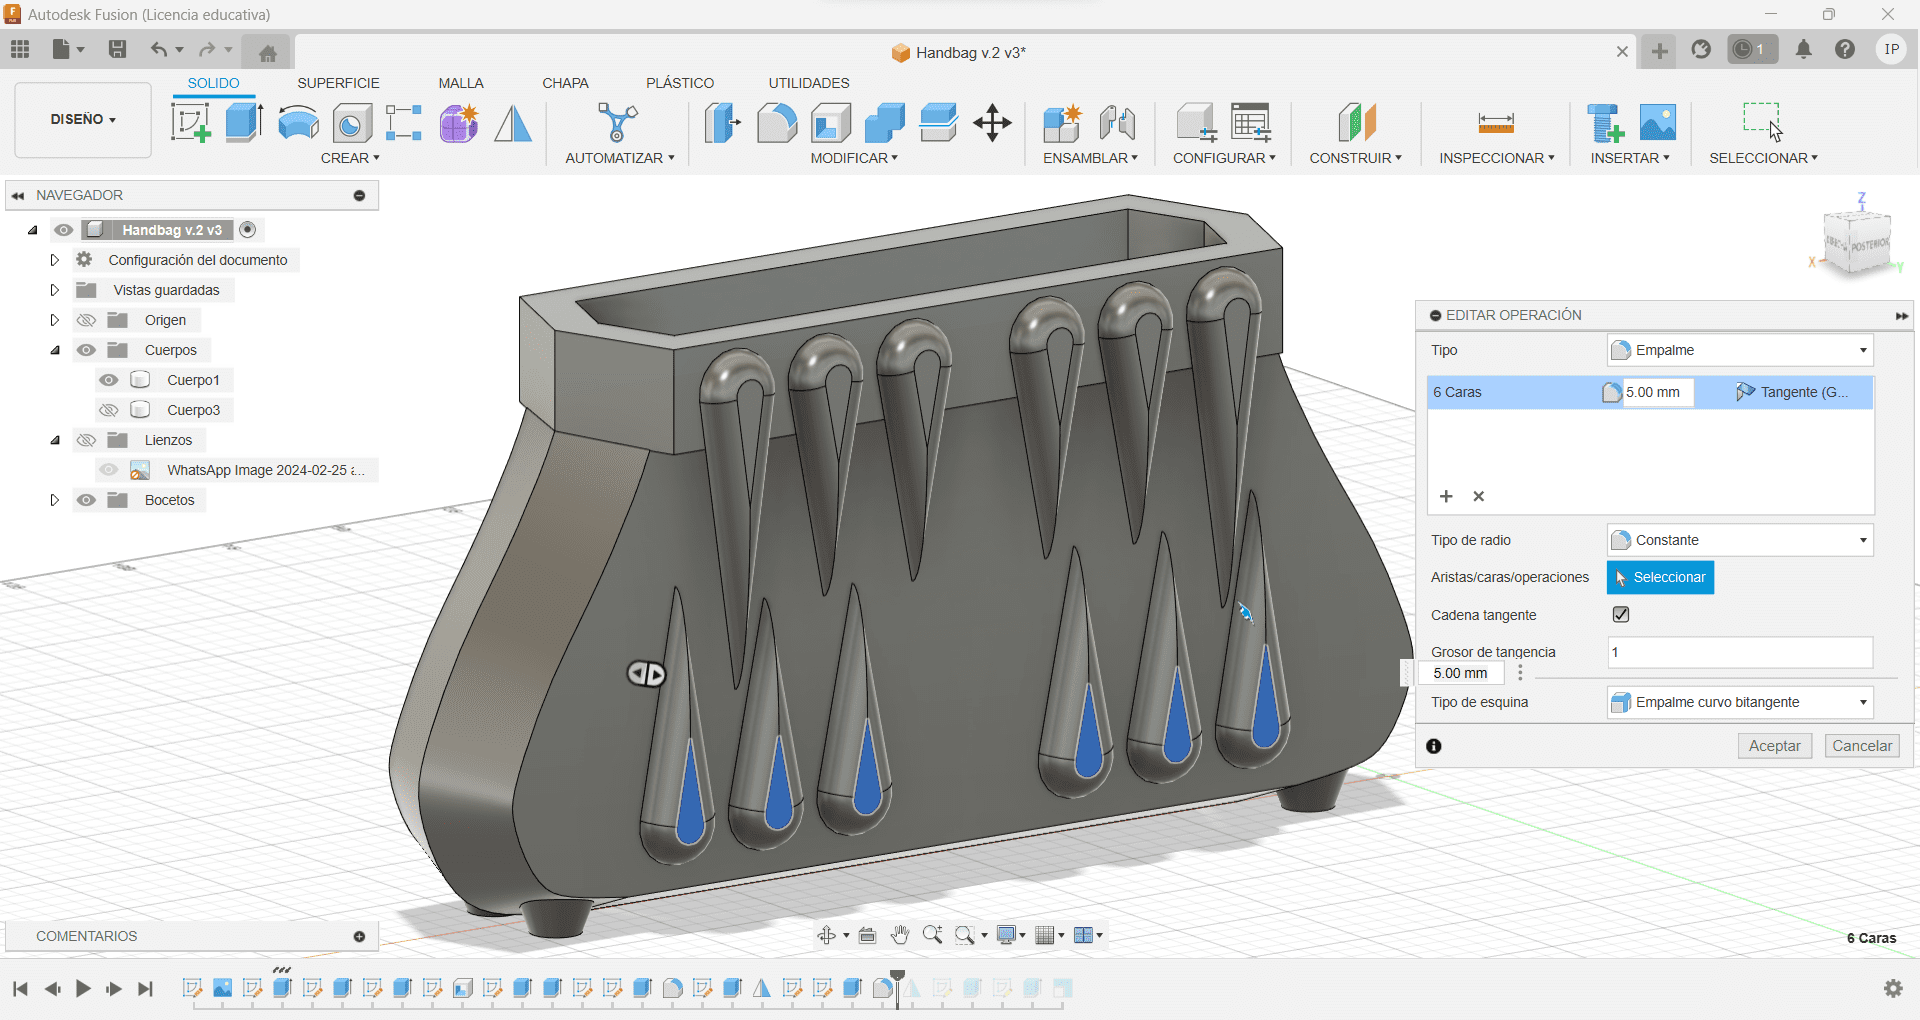
For the bottom ones it was basically the same process, having a 8mm radius circle and creating a baseline, so I could connect it to the tangent, we just needed to change the size since I wanted these to be smaller to create some depth. For the sides I made them 45mm long, and for the middle ones I had them 40mm long. Again used the sketch and used the tool extrude to give it a splice of 5mm. I used the tool Symmetry to copy them to the other side
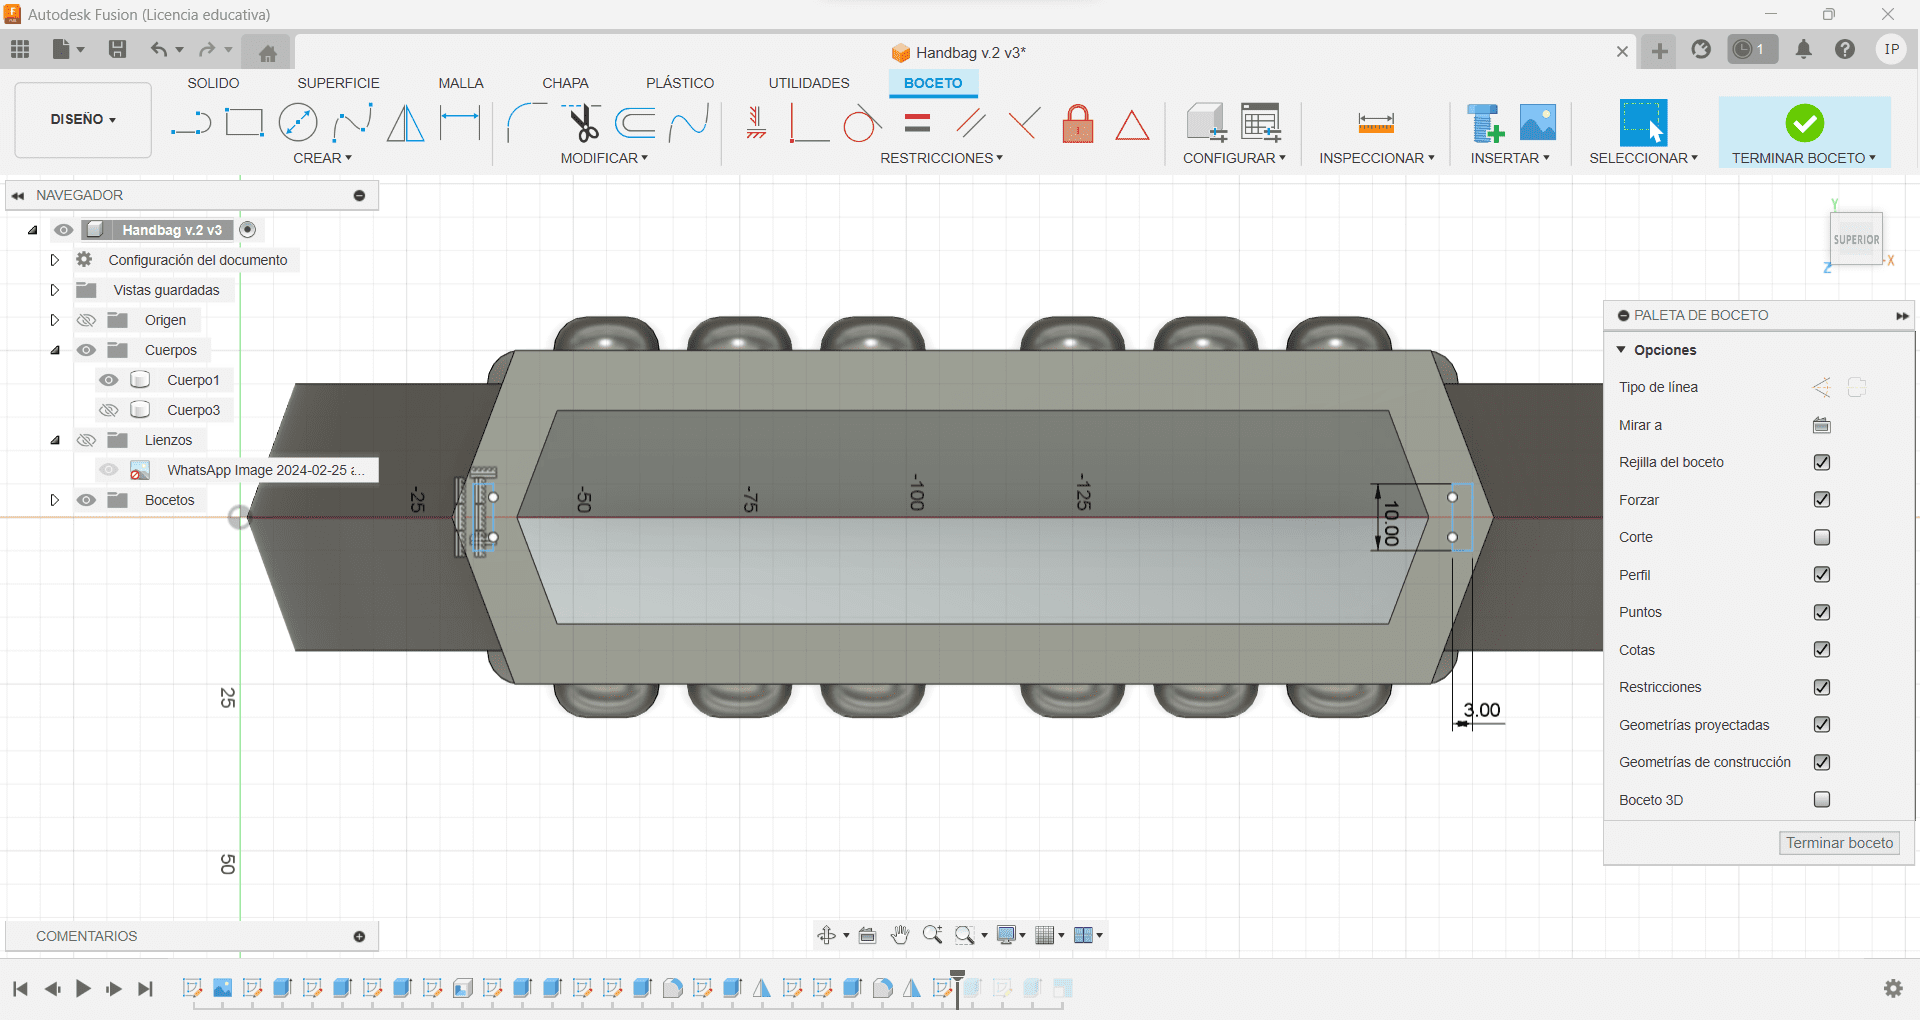
I needed a holder for the chain I had for the bag, so in the top view I created a sketch and made two 3mm x 10mm rectangles, which I then extruded to 10mm, on the side of that square we just made, I traced a 7mm circle in the middle, so I could then extrude and cut along both the squares created. We are now done! Let's start with the printing.
Mistakes were made
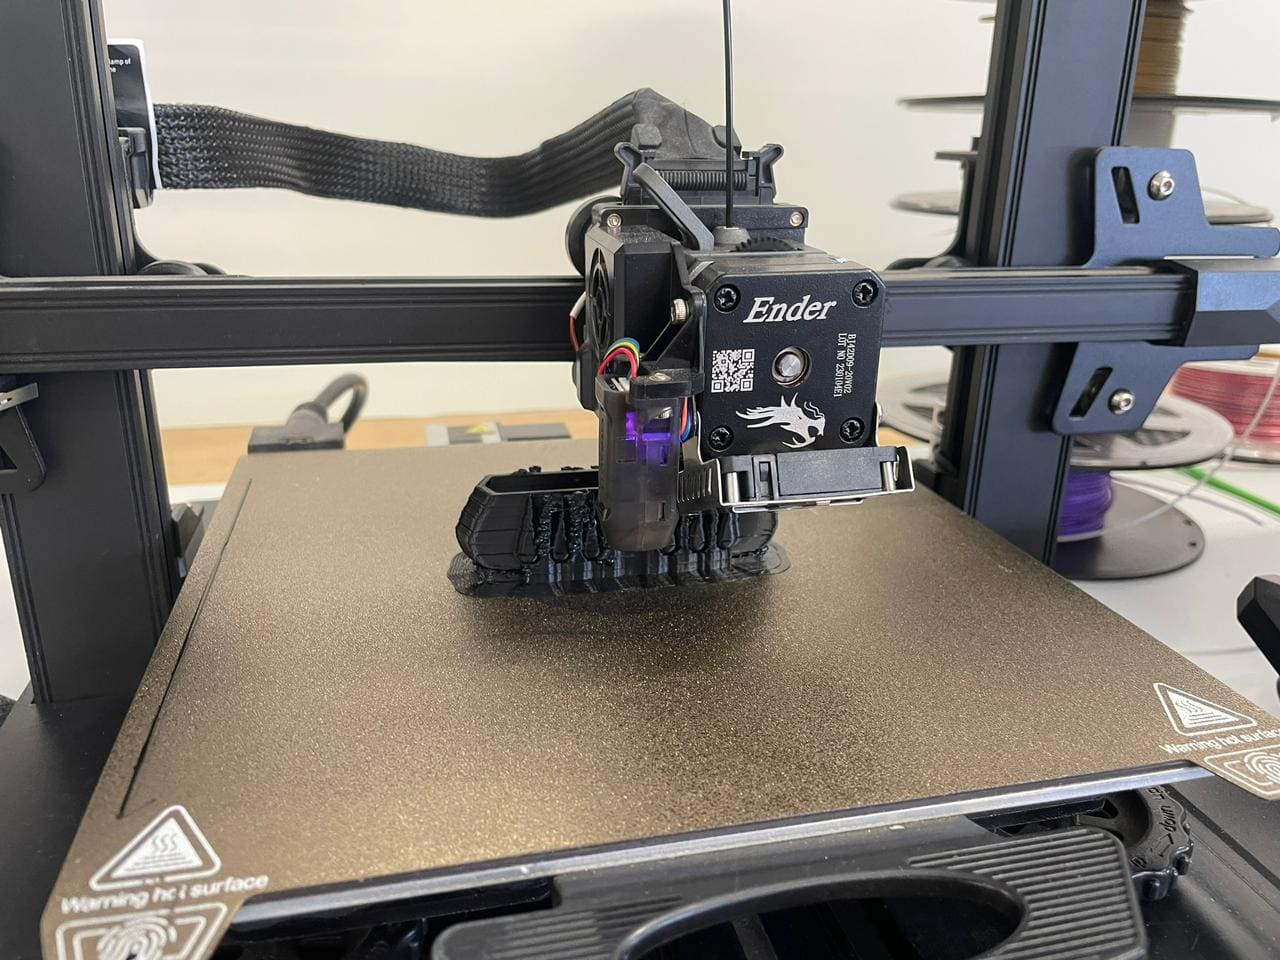
In the process of finding the best way to create the bag, I first tried on the 3D Filament Printer, however, I made it smaller in order to finish early. This made the print to fail because it didn't correctly attach to the table. I made this mistake another 2 times. I then decided to use the Resin Printer, I didn't know how to print in Resin and made the same mistake and also didn't use the proper supports.
3D Filament Properties and Application Table
Here you can check which filament is the one you can use for your project depending on what you are creating!:
| Filament Type | Properties | Applications | Print Temperature Range | Bed Temperature Range |
| PLA (Polylactic Acid) | Biodegradable, low warping, easy to print | Prototyping, hobbyist projects, props | 180-220°C | 50-60°C |
| ABS (Acrylonitrile Butadiene Styrene) | Durable, impact-resistant, post-processing with acetone | Functional prototypes, automotive parts | 220-250°C | 80-110°C |
| PETG (Polyethylene Terephthalate Glycol) | Strong, chemical-resistant, low shrinkage | Mechanical parts, food containers | 220-250°C | 75-85°C |
| TPU (Thermoplastic Polyurethane) | Flexible, elastic, wear-resistant | Phone cases, shoe soles, seals | 200-220°C | 40-60°C |
| Nylon | Strong, durable, resistant to abrasion | Gears, bearings, structural components | 240-260°C | 70-90°C |
| ASA (Acrylonitrile Styrene Acrylate) | UV-resistant, weatherproof, high strength | Outdoor applications, signage | 230-260°C | 90-110°C |
3D Resin Printing
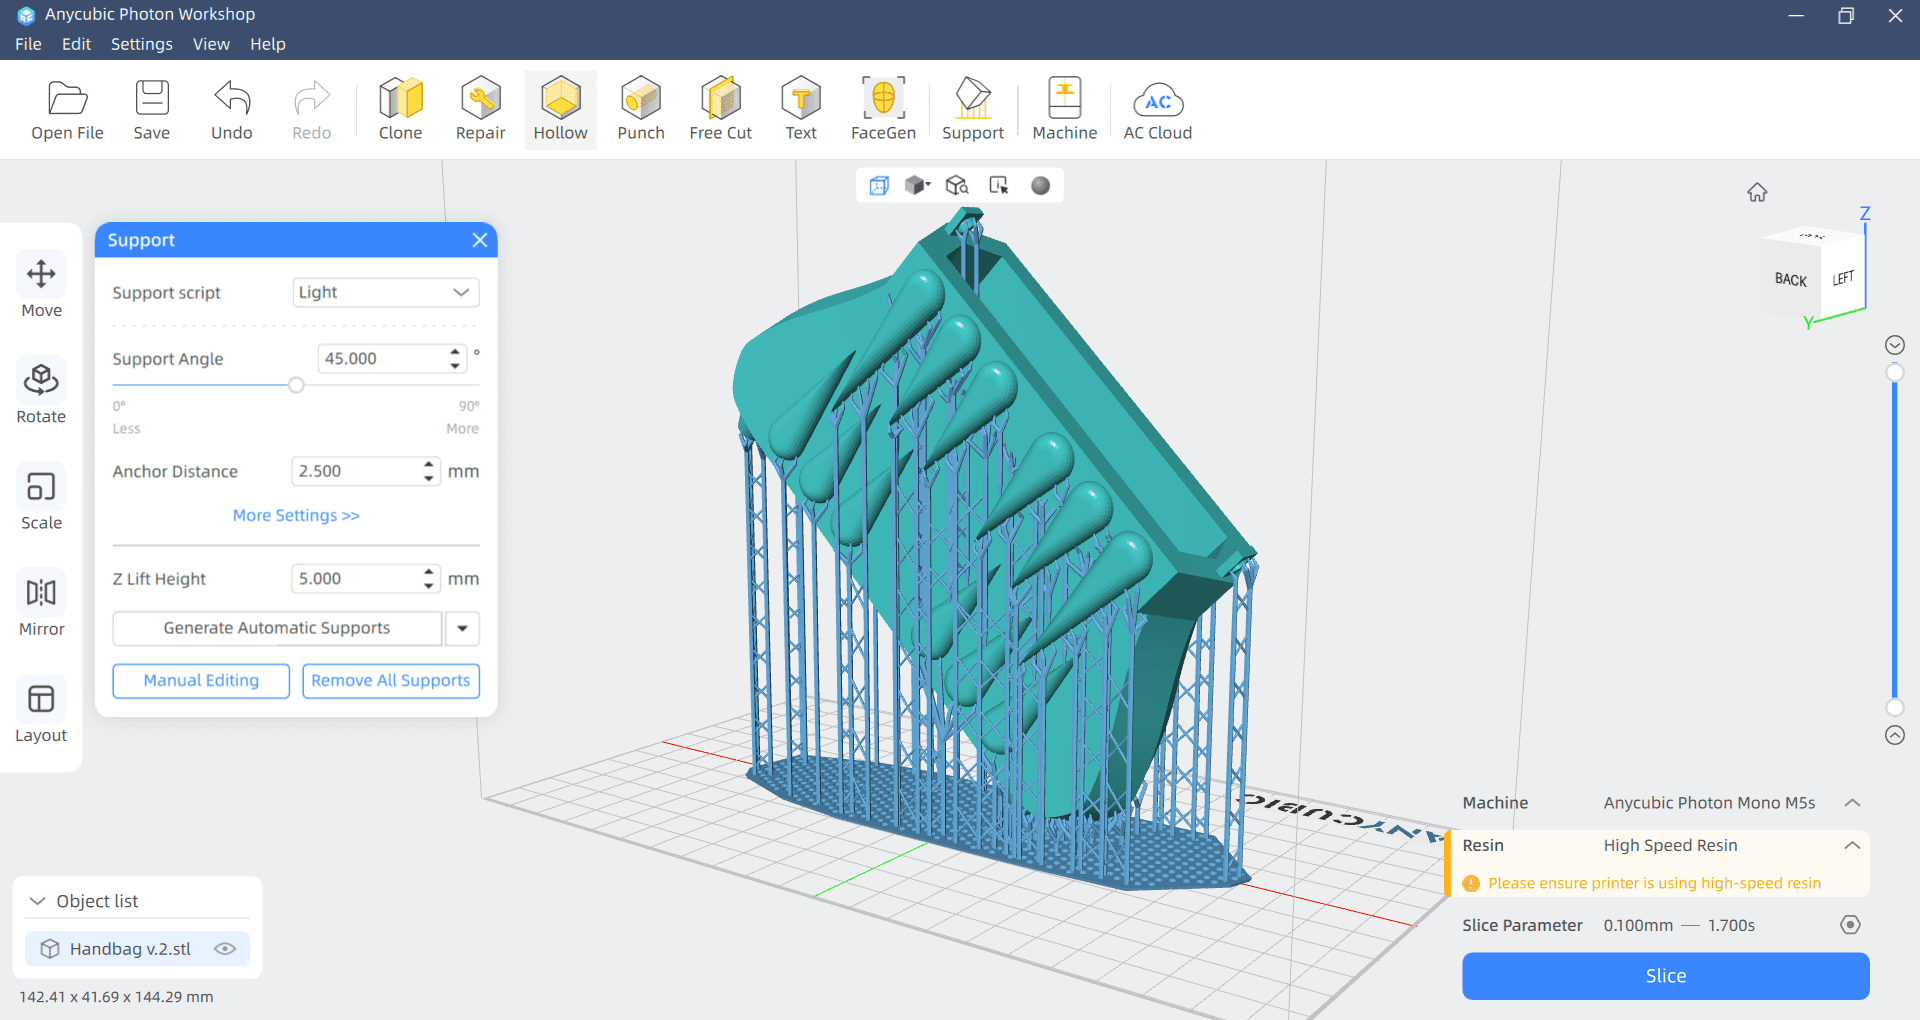
I saved my file as an STL, I then downloaded the AnyCubic Photon Workshop that my teacher gave me, opened my file and rotated it 45deg to the Y plane, this is for the print to go a little more smoothly and the printer can reach all the sides of the bag. In the bottom right window I selected the High Speed Resin, since is the one I will be using.
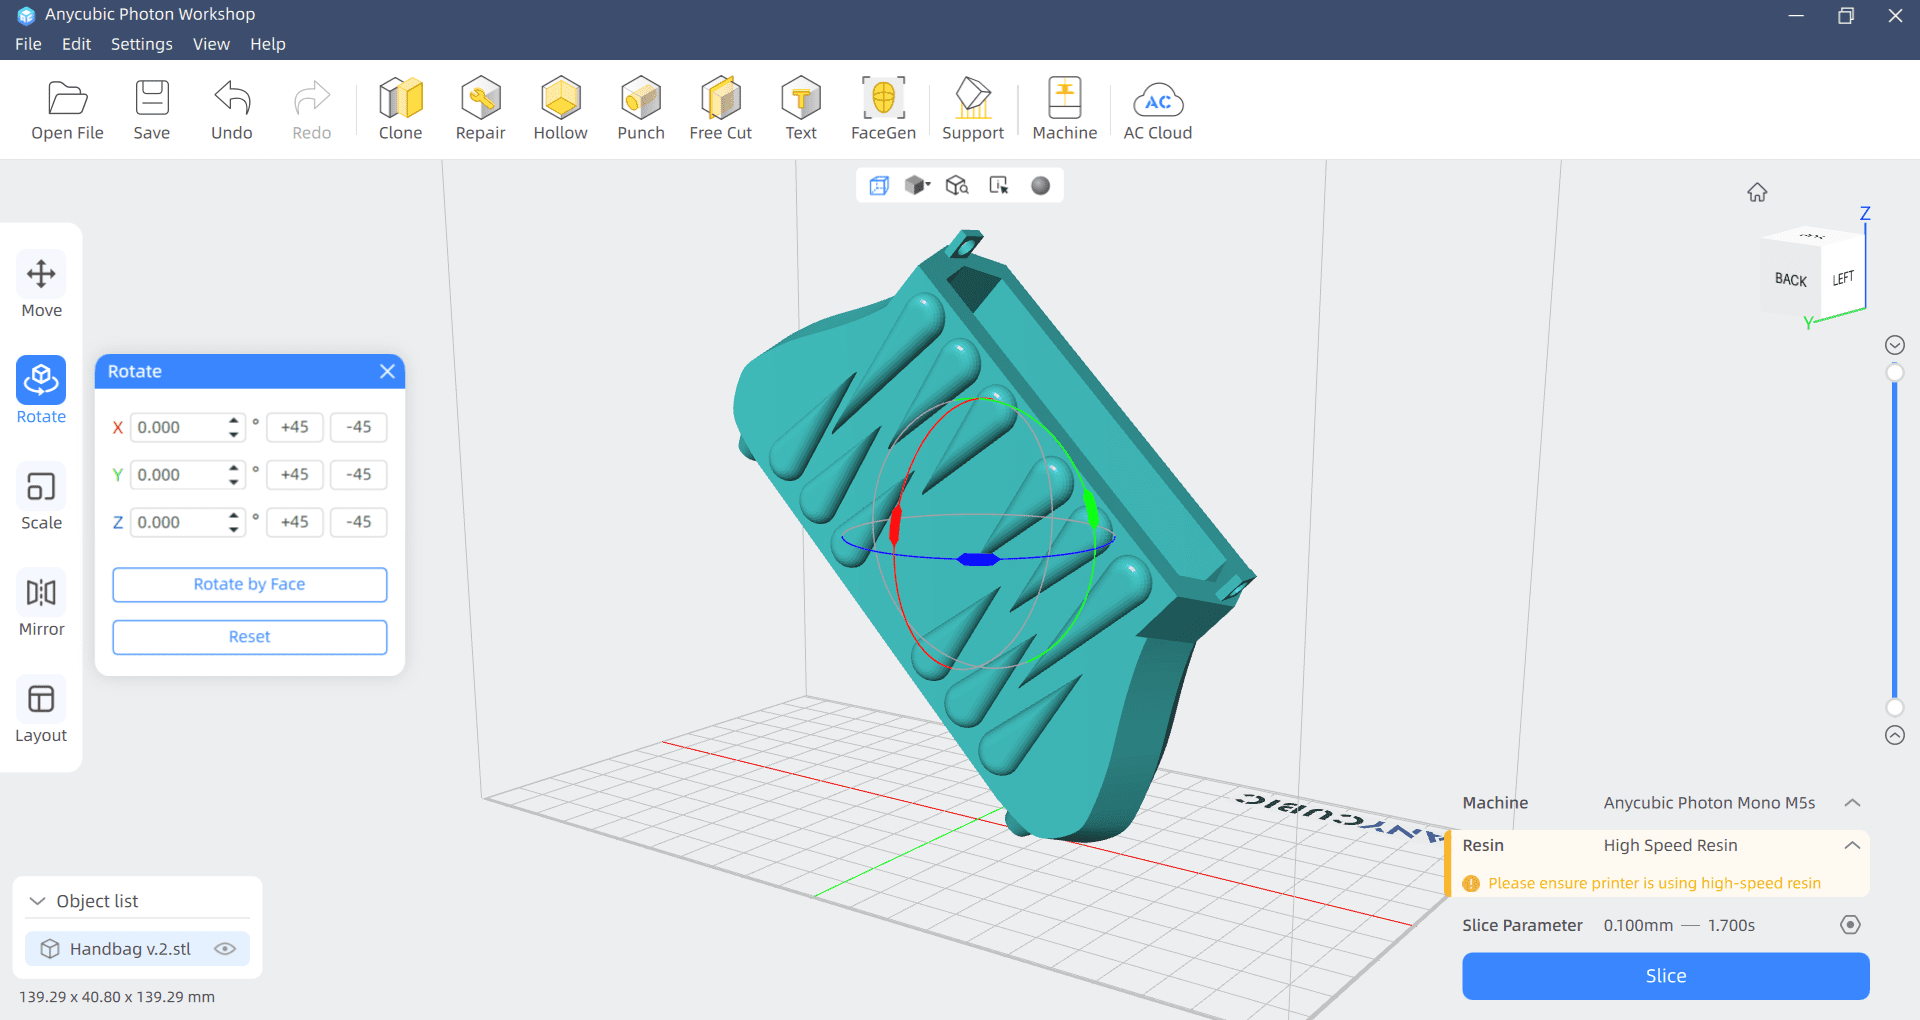
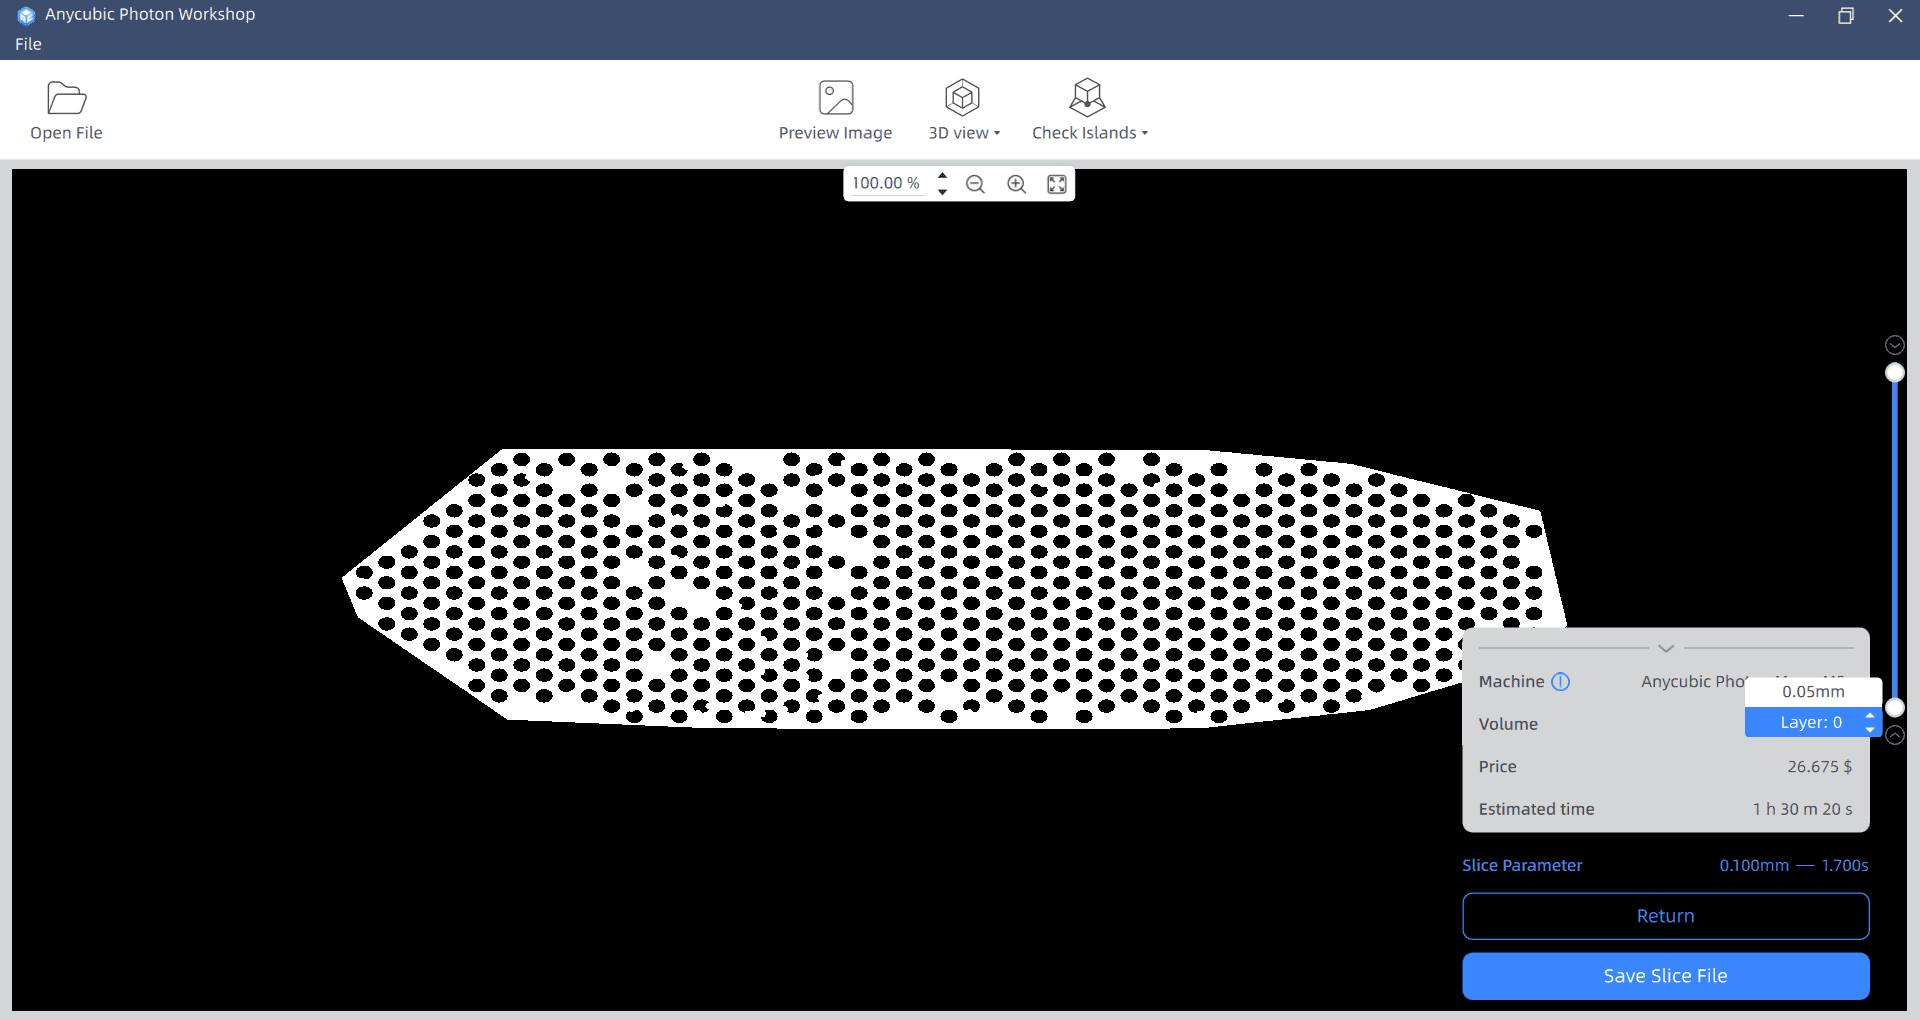
I now gave it the supports for the print, In support script I selected Light, and left all the other parameters the same, then clicked Generate Automatic Supports. I ensured there were no errors and clicked slice, it loaded for a second and then showed me all the layers the printer will do, I clicked on Save Slice File and saved it in my USB drive.
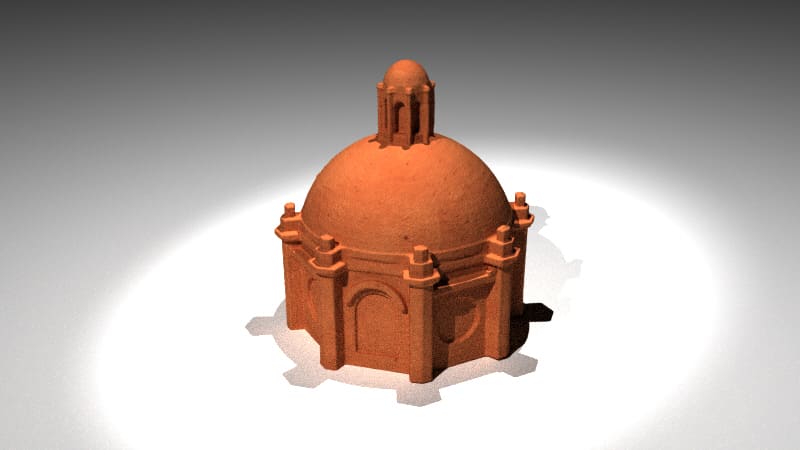
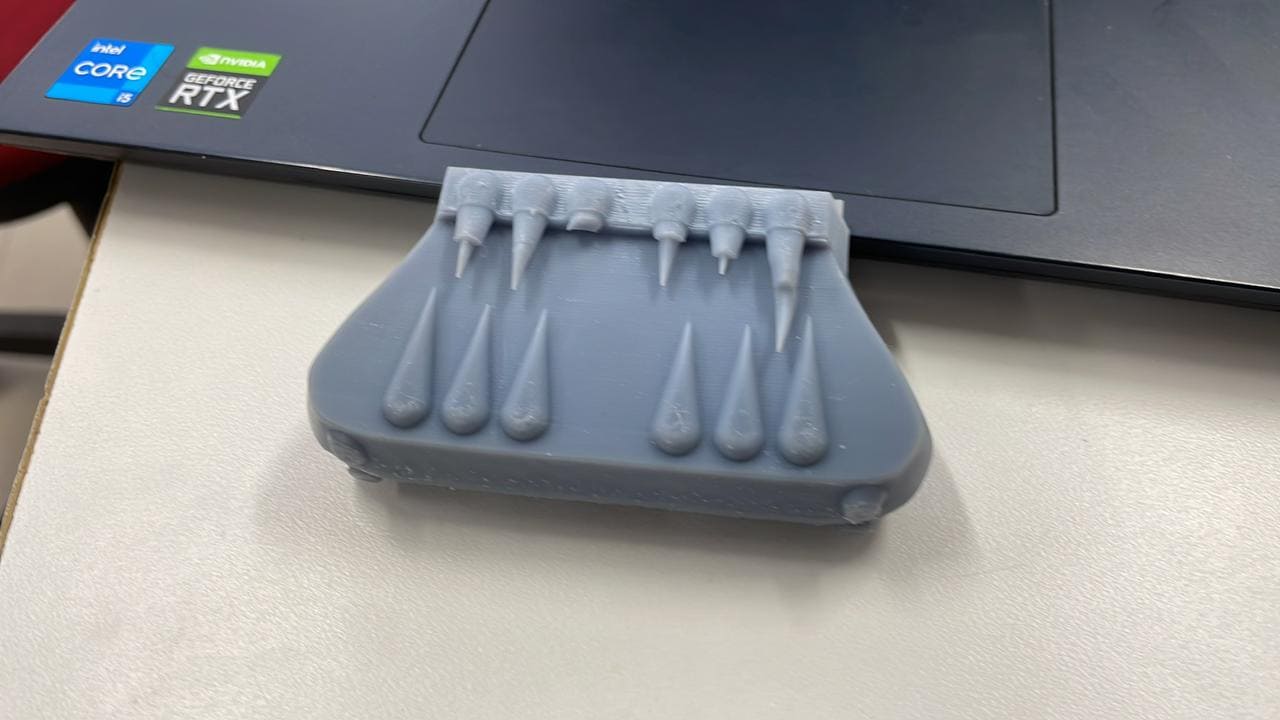
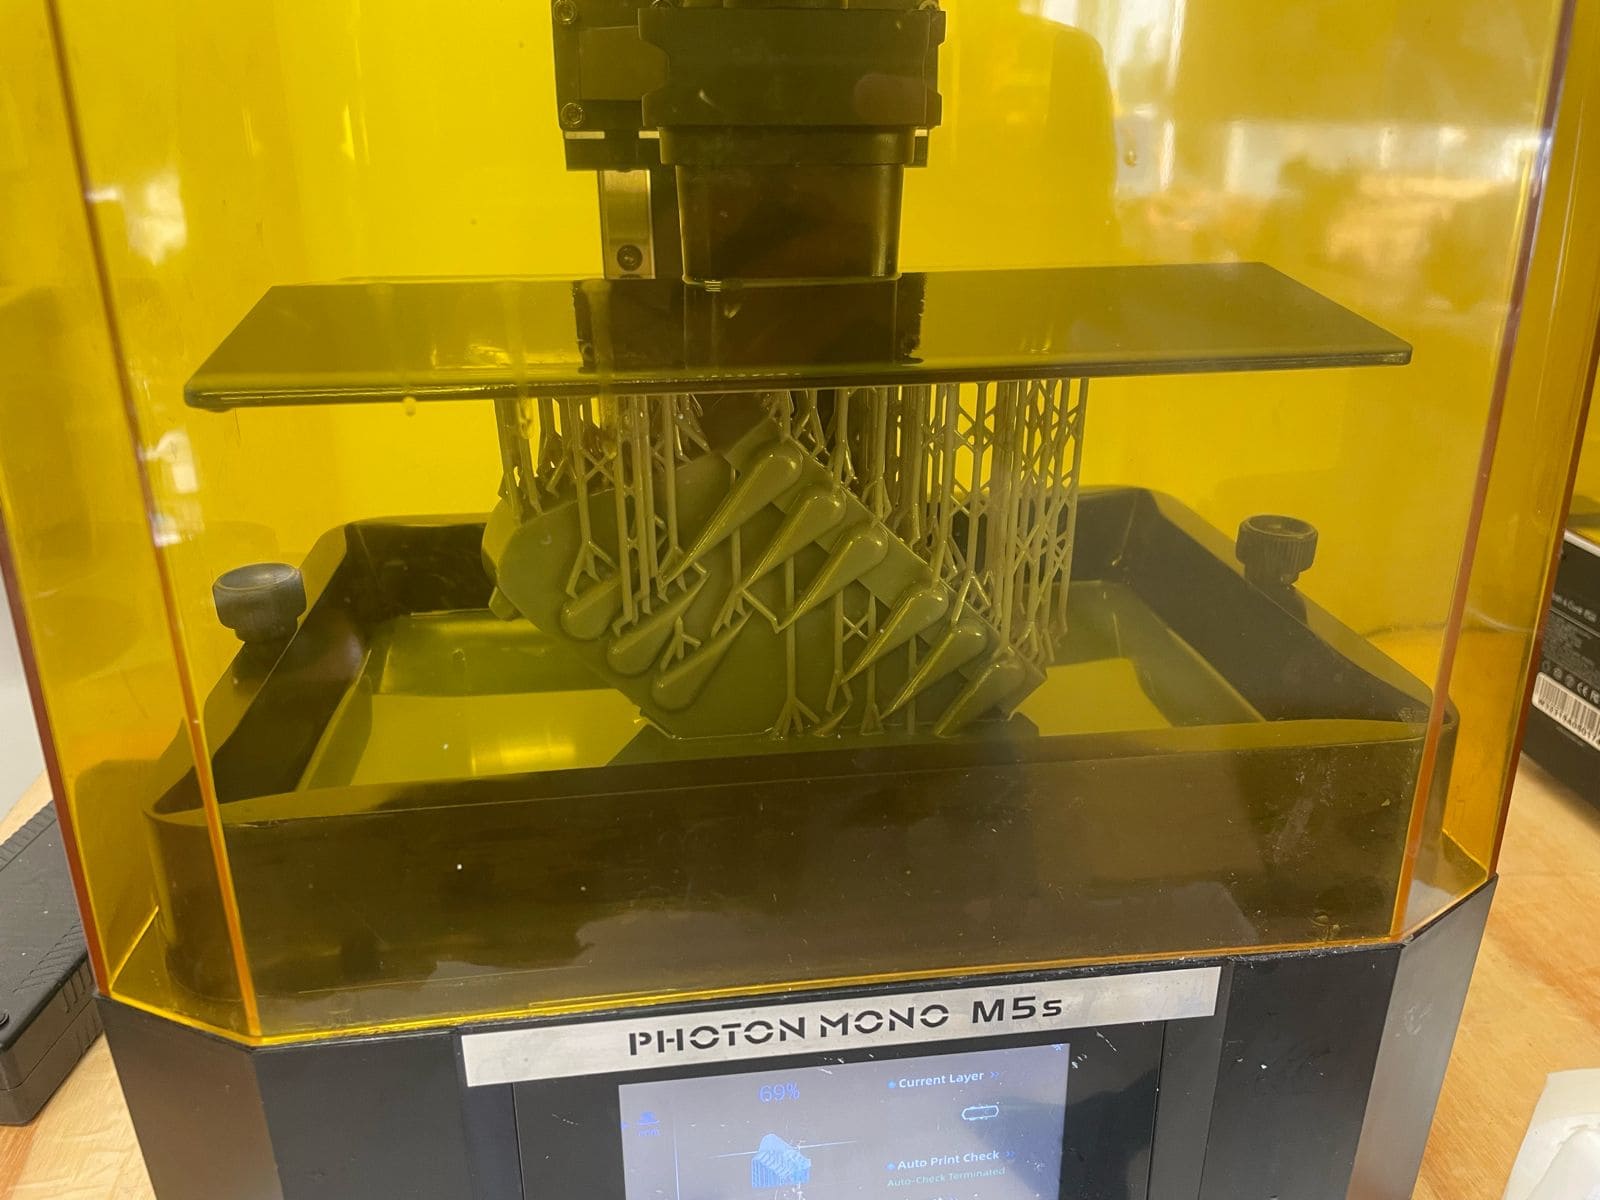
Once I had the file in the USB drive, I turned the printer on inserted my drive on the port, I then selected my file, and It started printing! The printer was already loaded with the resin. After approximately an hour and a half, it was done! I left it a few minutes to let the resin drop back to the pool. Once it has dried a little, I took it out of the printer and loaded it in the alcohol bucket for cleaning, moved it to the wash and cure machine and gave it 10 minutes to wash.
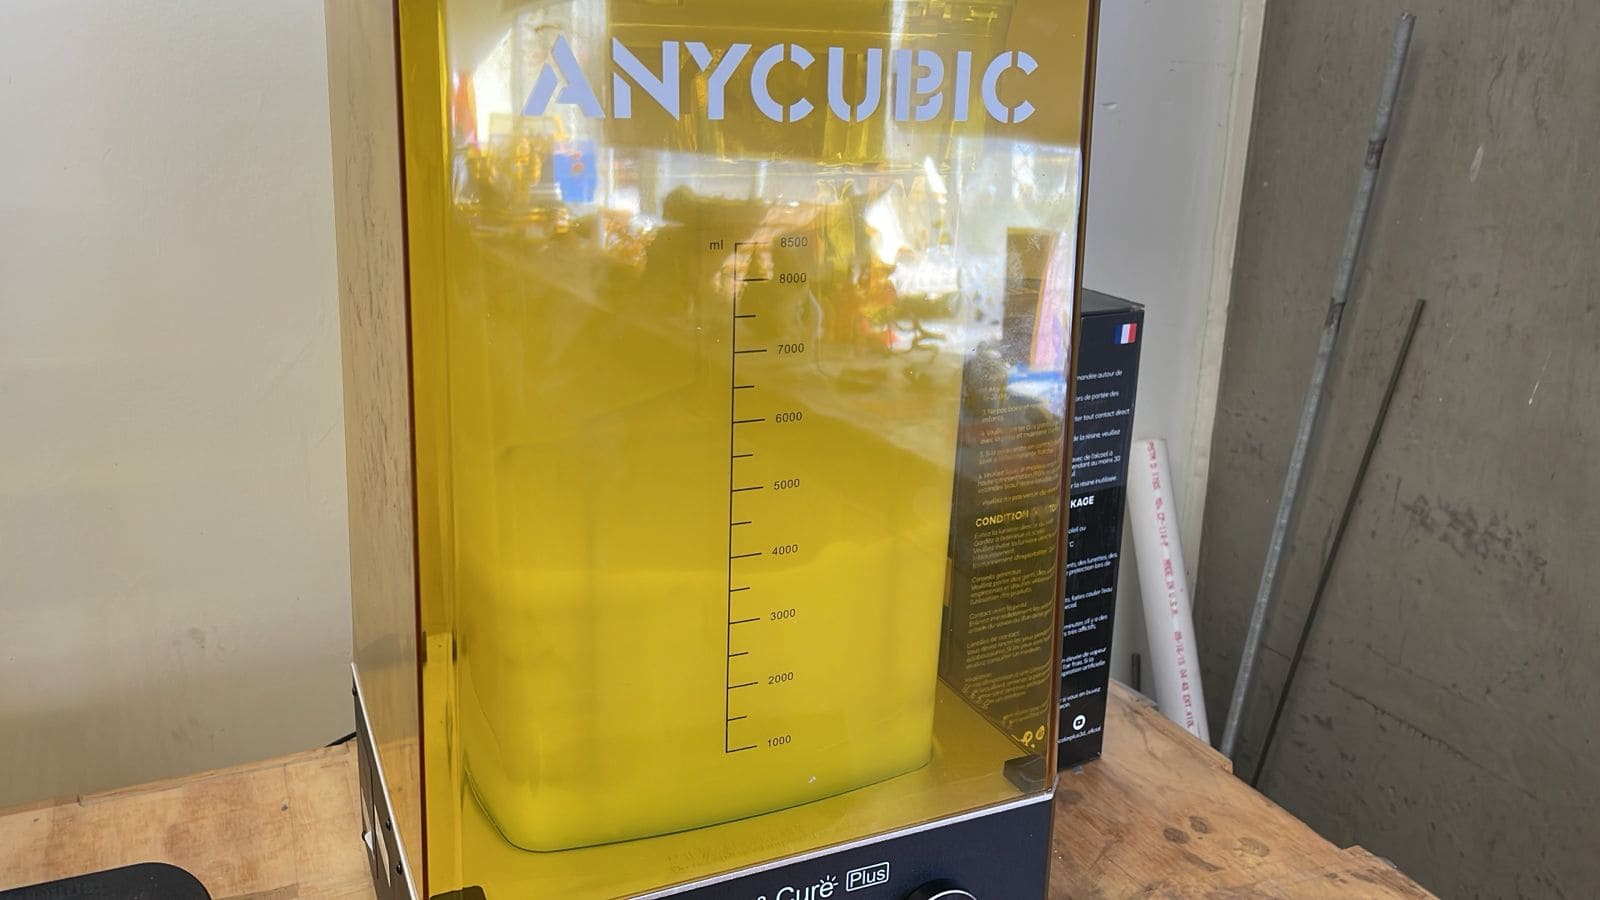
I waited for the cycle to end and took the bag out of the alcohol. I took advantage of this moment to remove all supports and changed the setting of the machine to "cure" so I could start another 10-minute cycle with just the bag. It was ready! I unfortunately didn't have enough time to sand and paint, also, the chain didn't fit because I had to scale the bag for time management, but it looks great, this is a wonderful prototype for manufacturing!
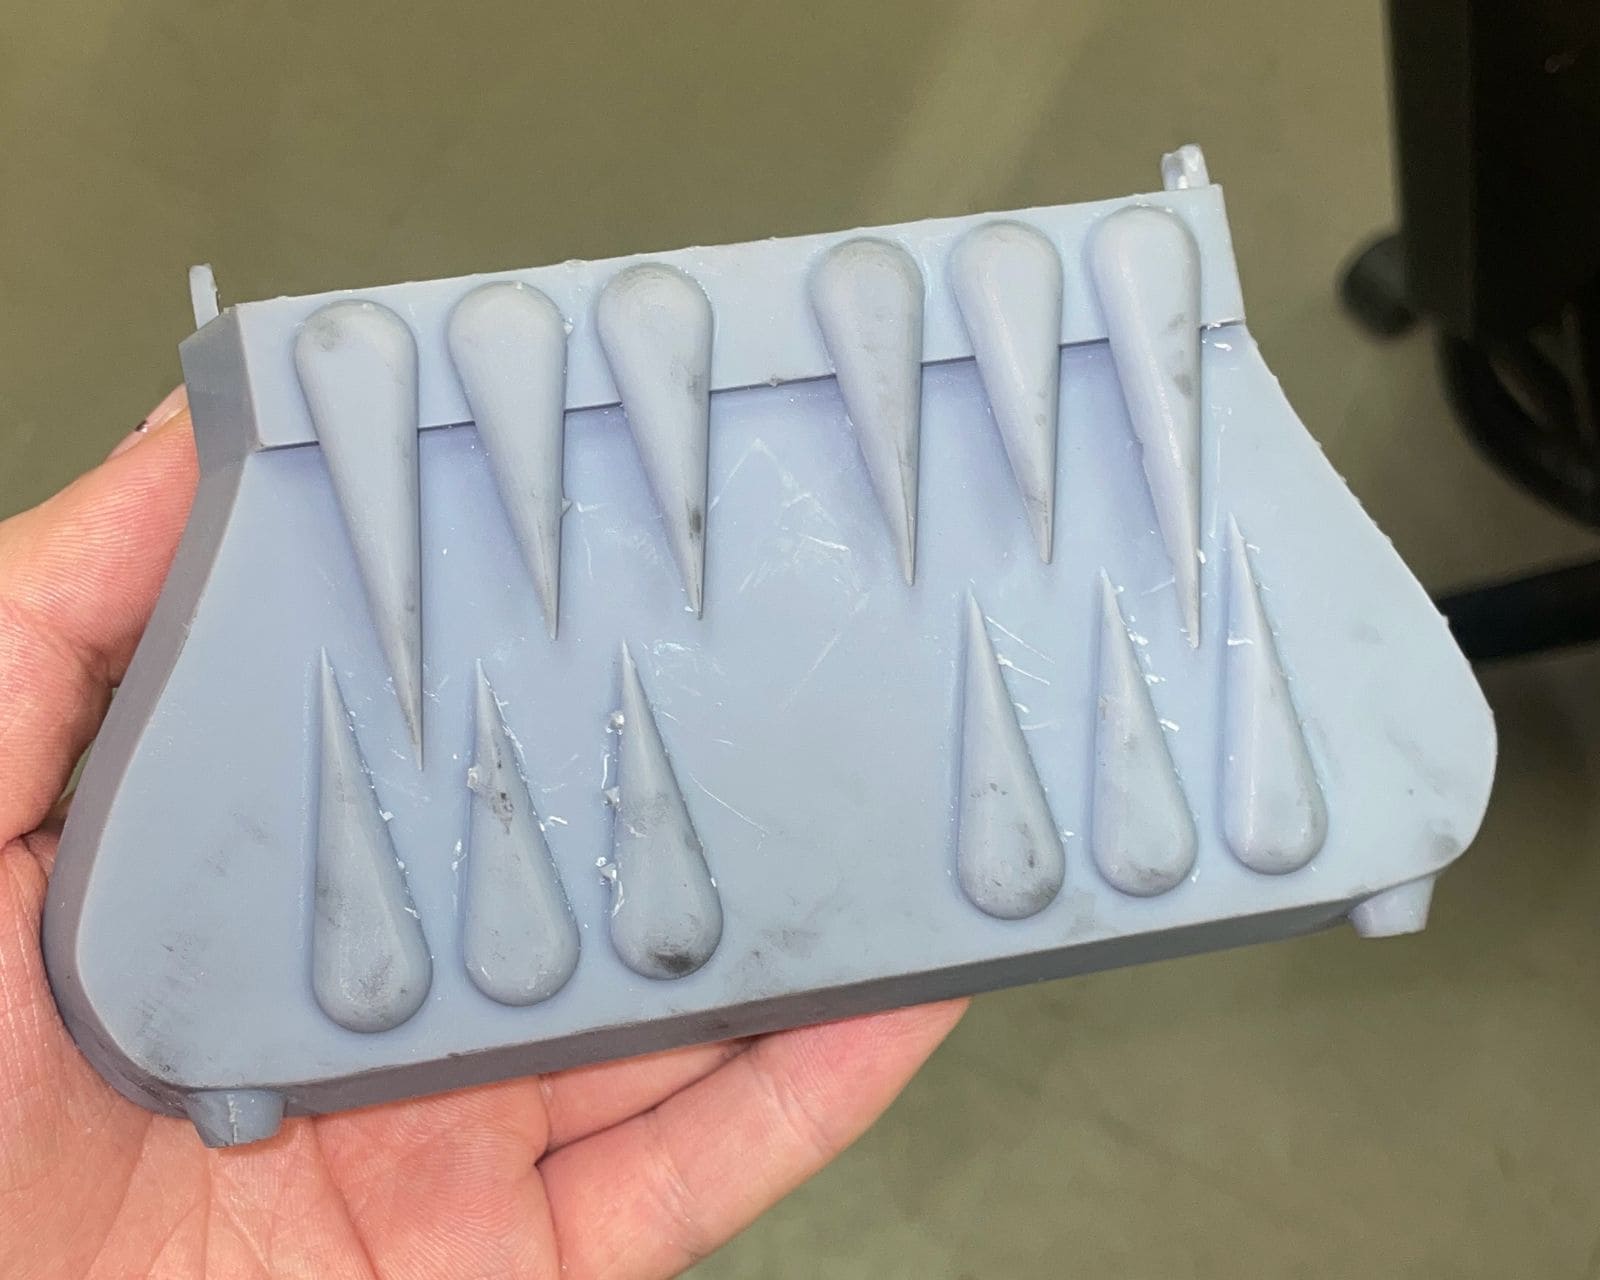
3D Scanning
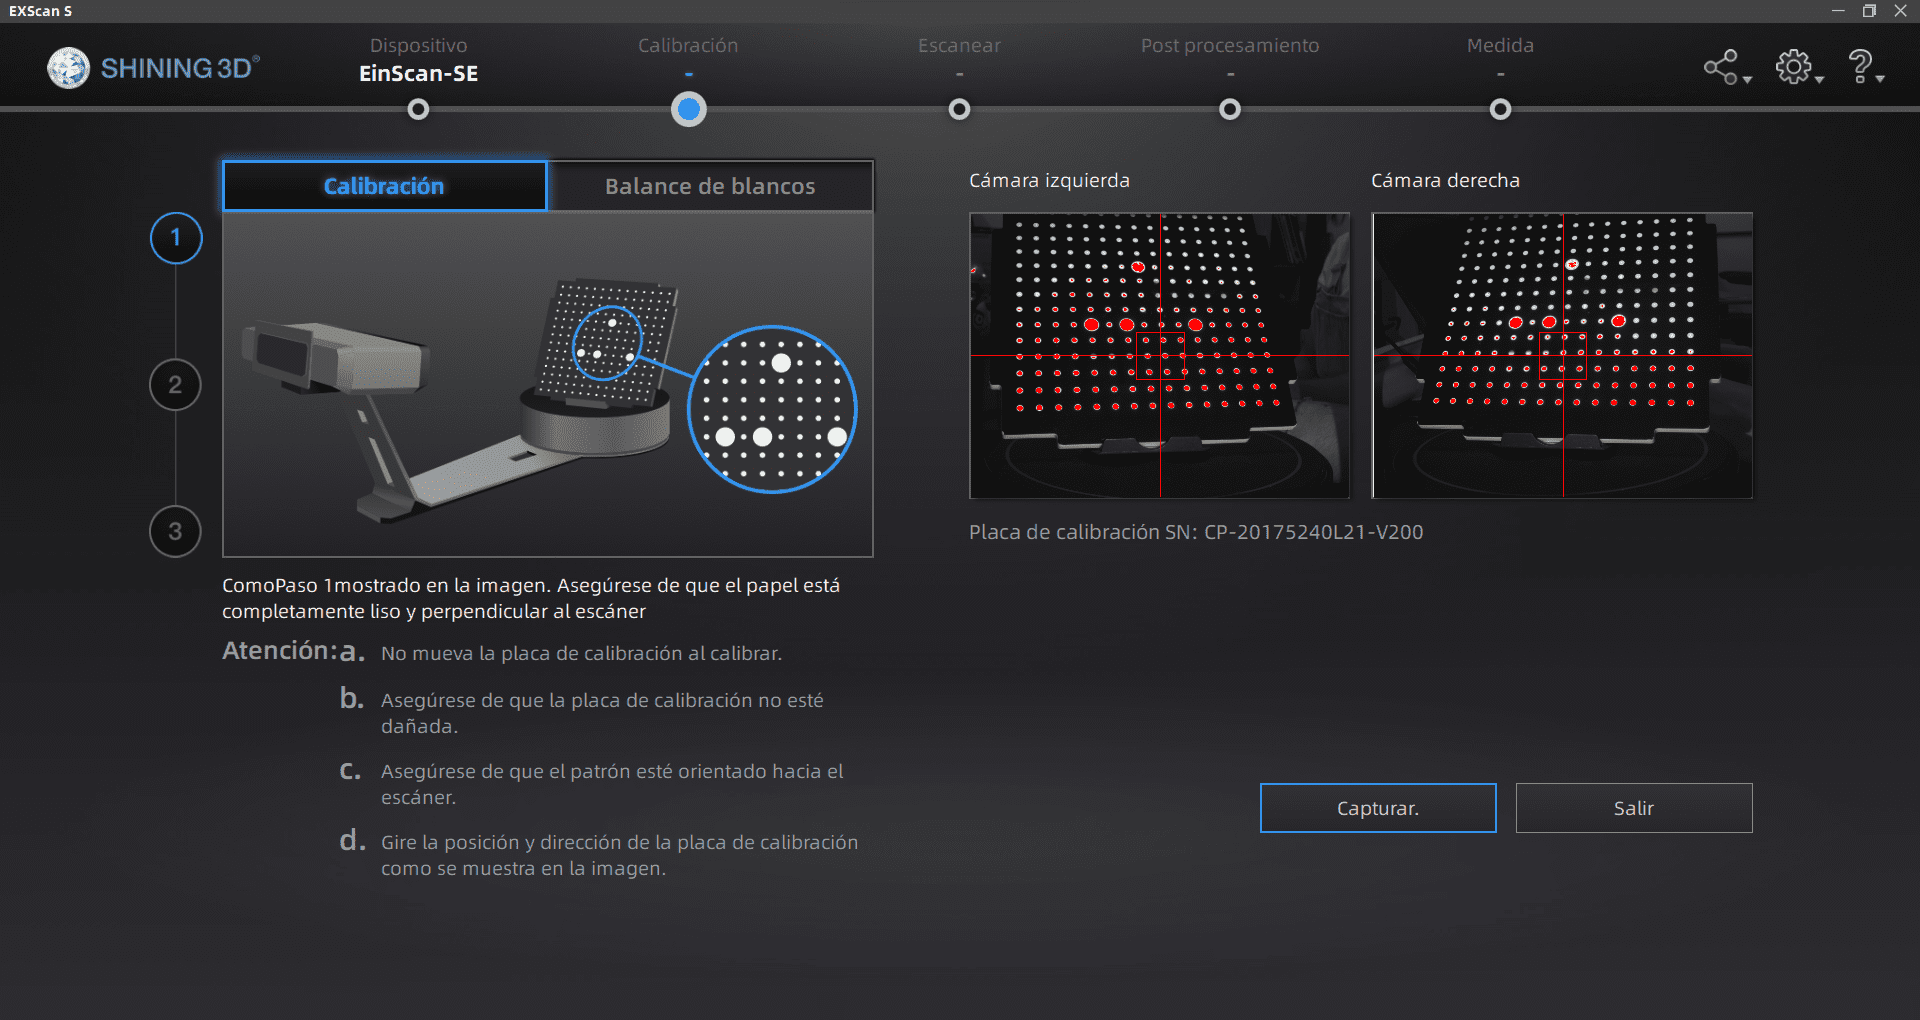
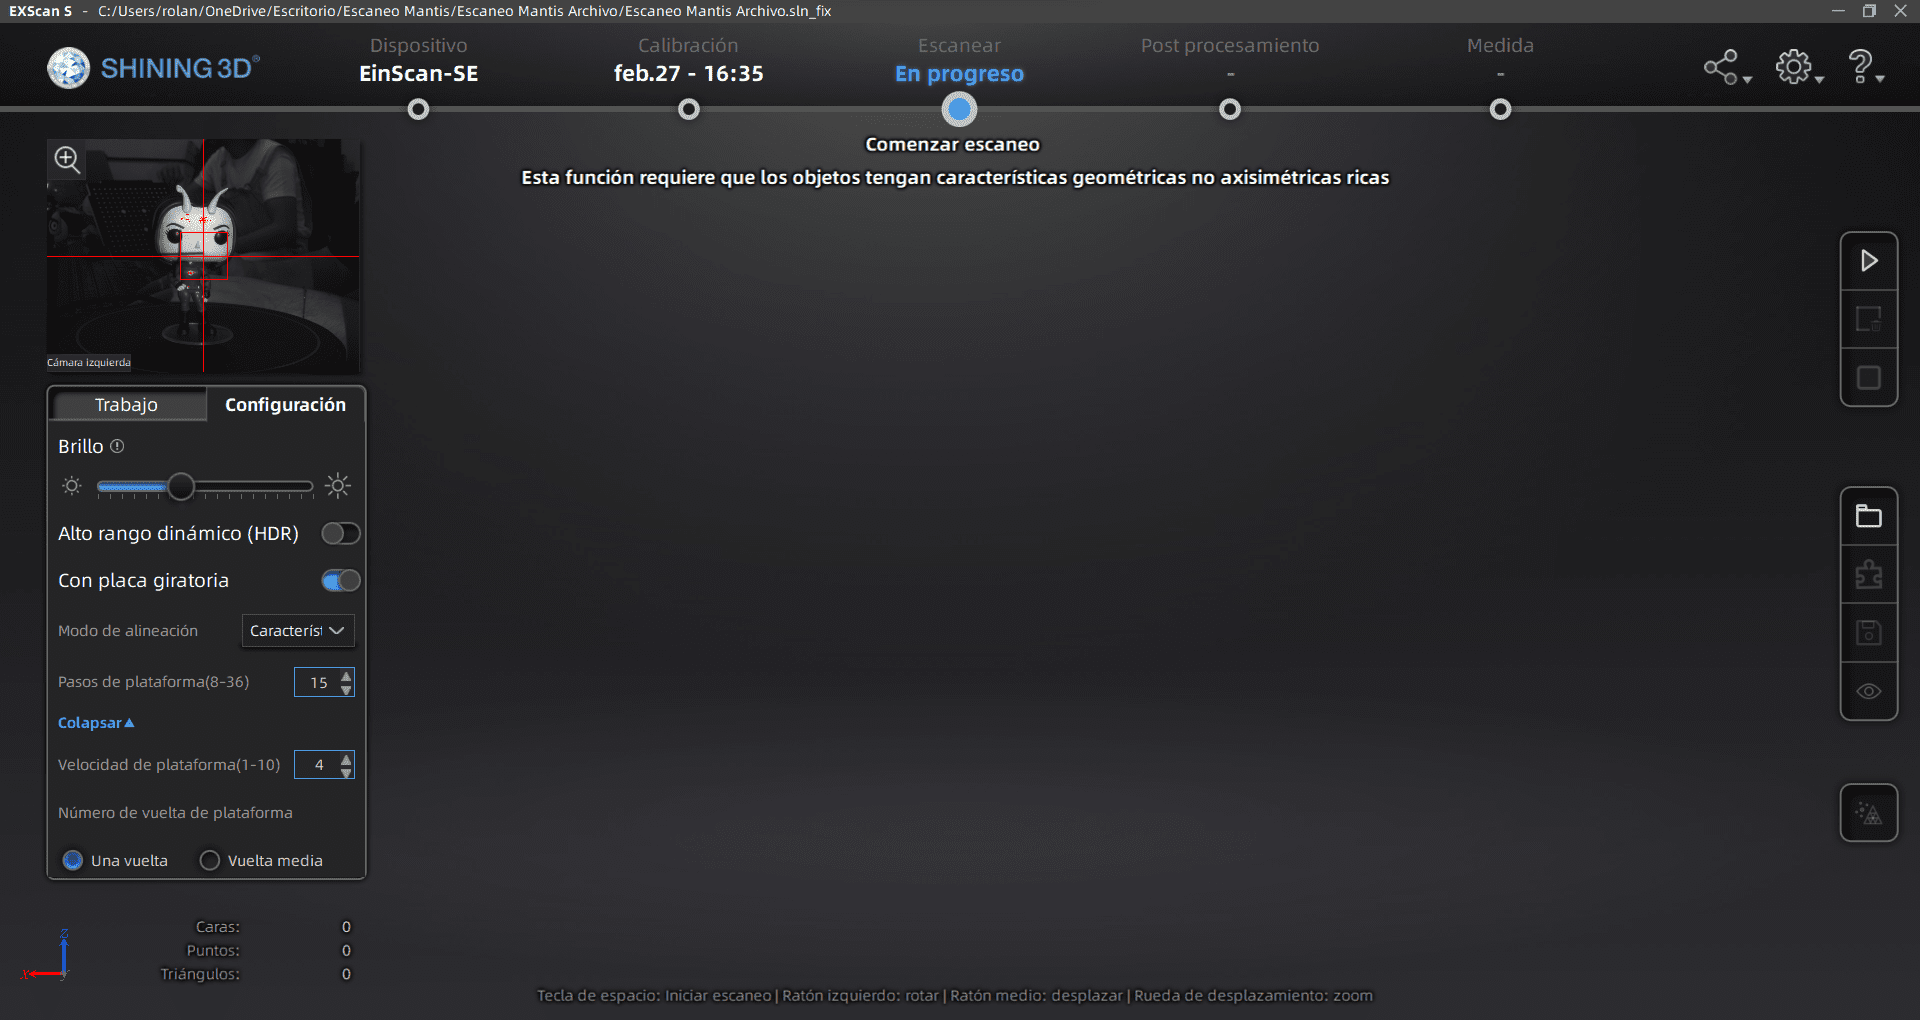
I first needed to download the "EXScan SE" program for me to use the 3D scannet. Once there, I opened a new workspace and I started to calibrate the scanner using a dotted plate and moving it around
EXScan SE Download Link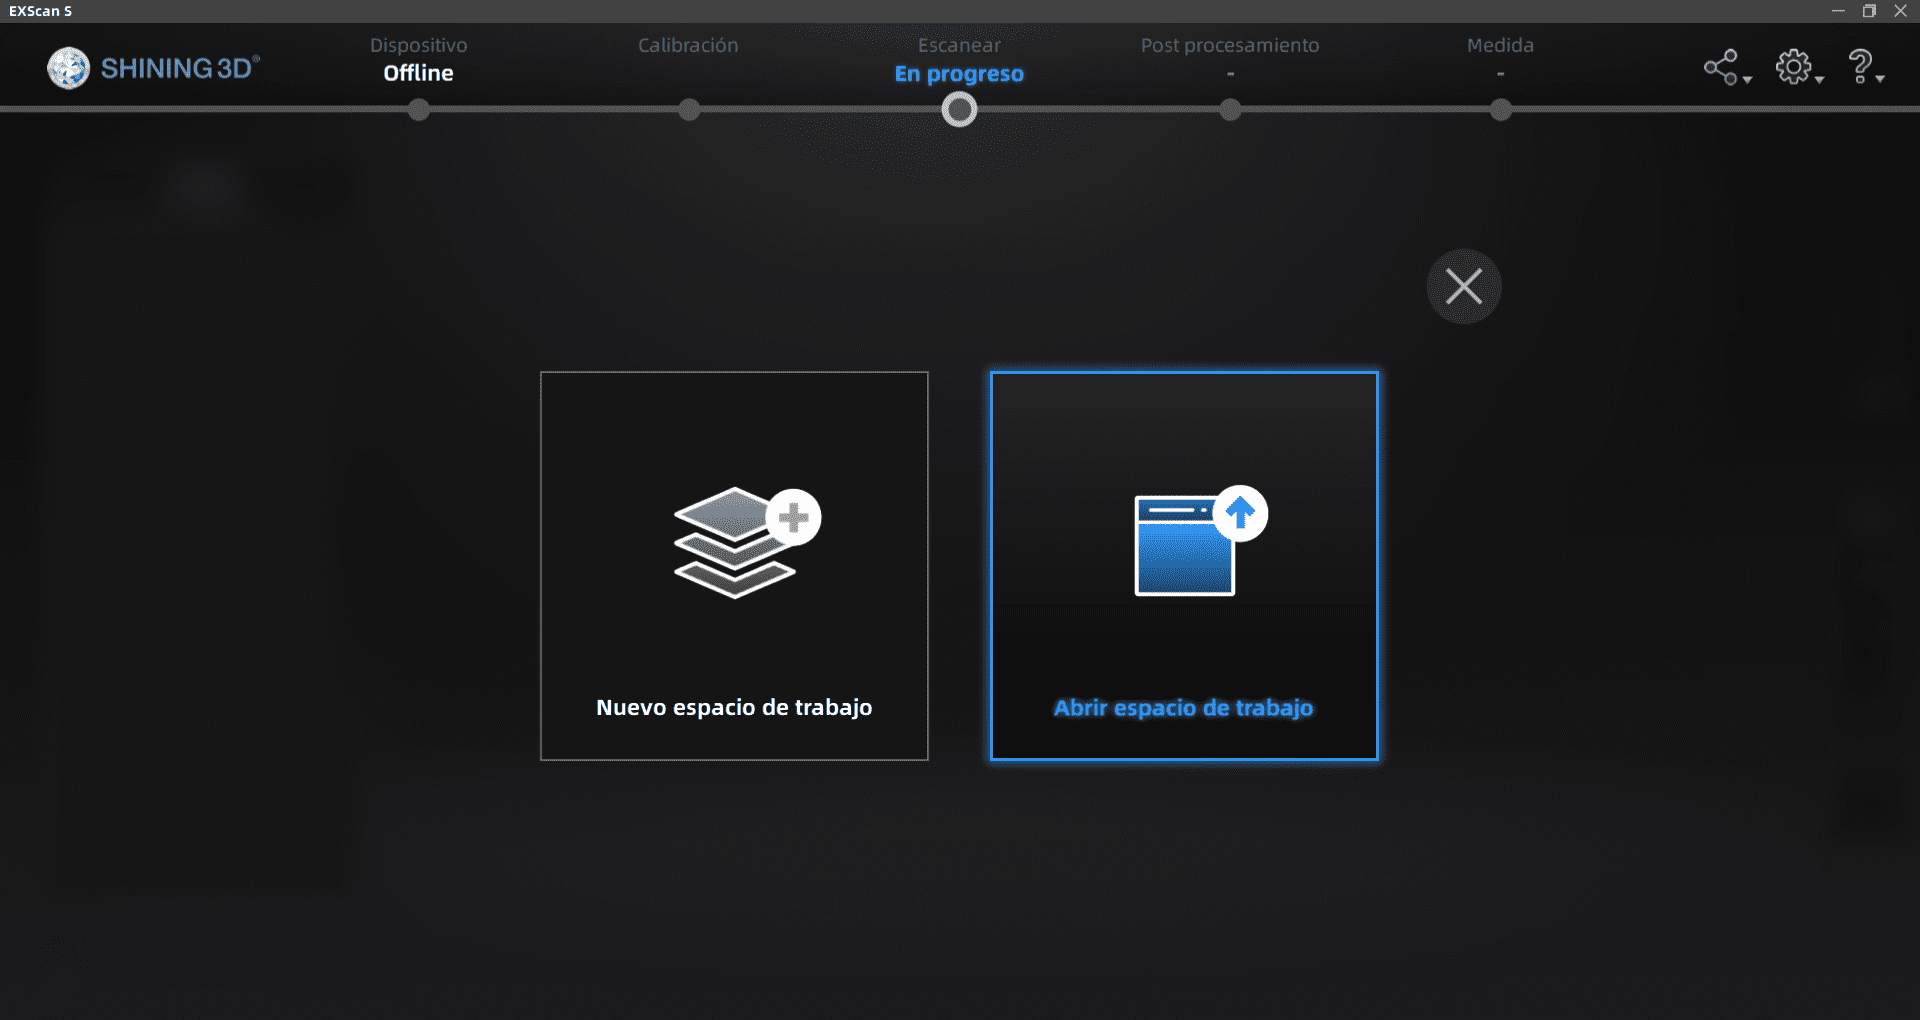
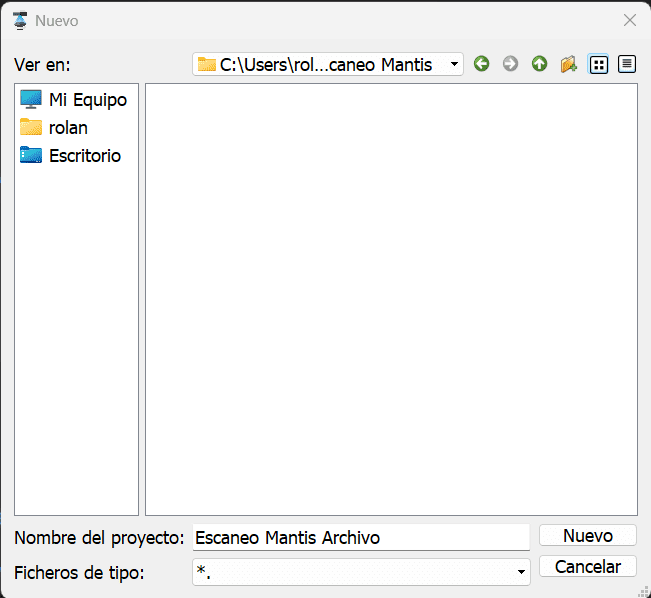
Now I needed to choose a location on my computer for the file once scanned, so I created a folder for it. I can now place my object on the plate and I changed some parameters in the configuration section: I changed the brightness of the object because it showed a lot of red reflection on the preview, I also changed the steps number to 15, this is the number of steps it will take for a full circle, lastly I changed the speed of the platform to 4.
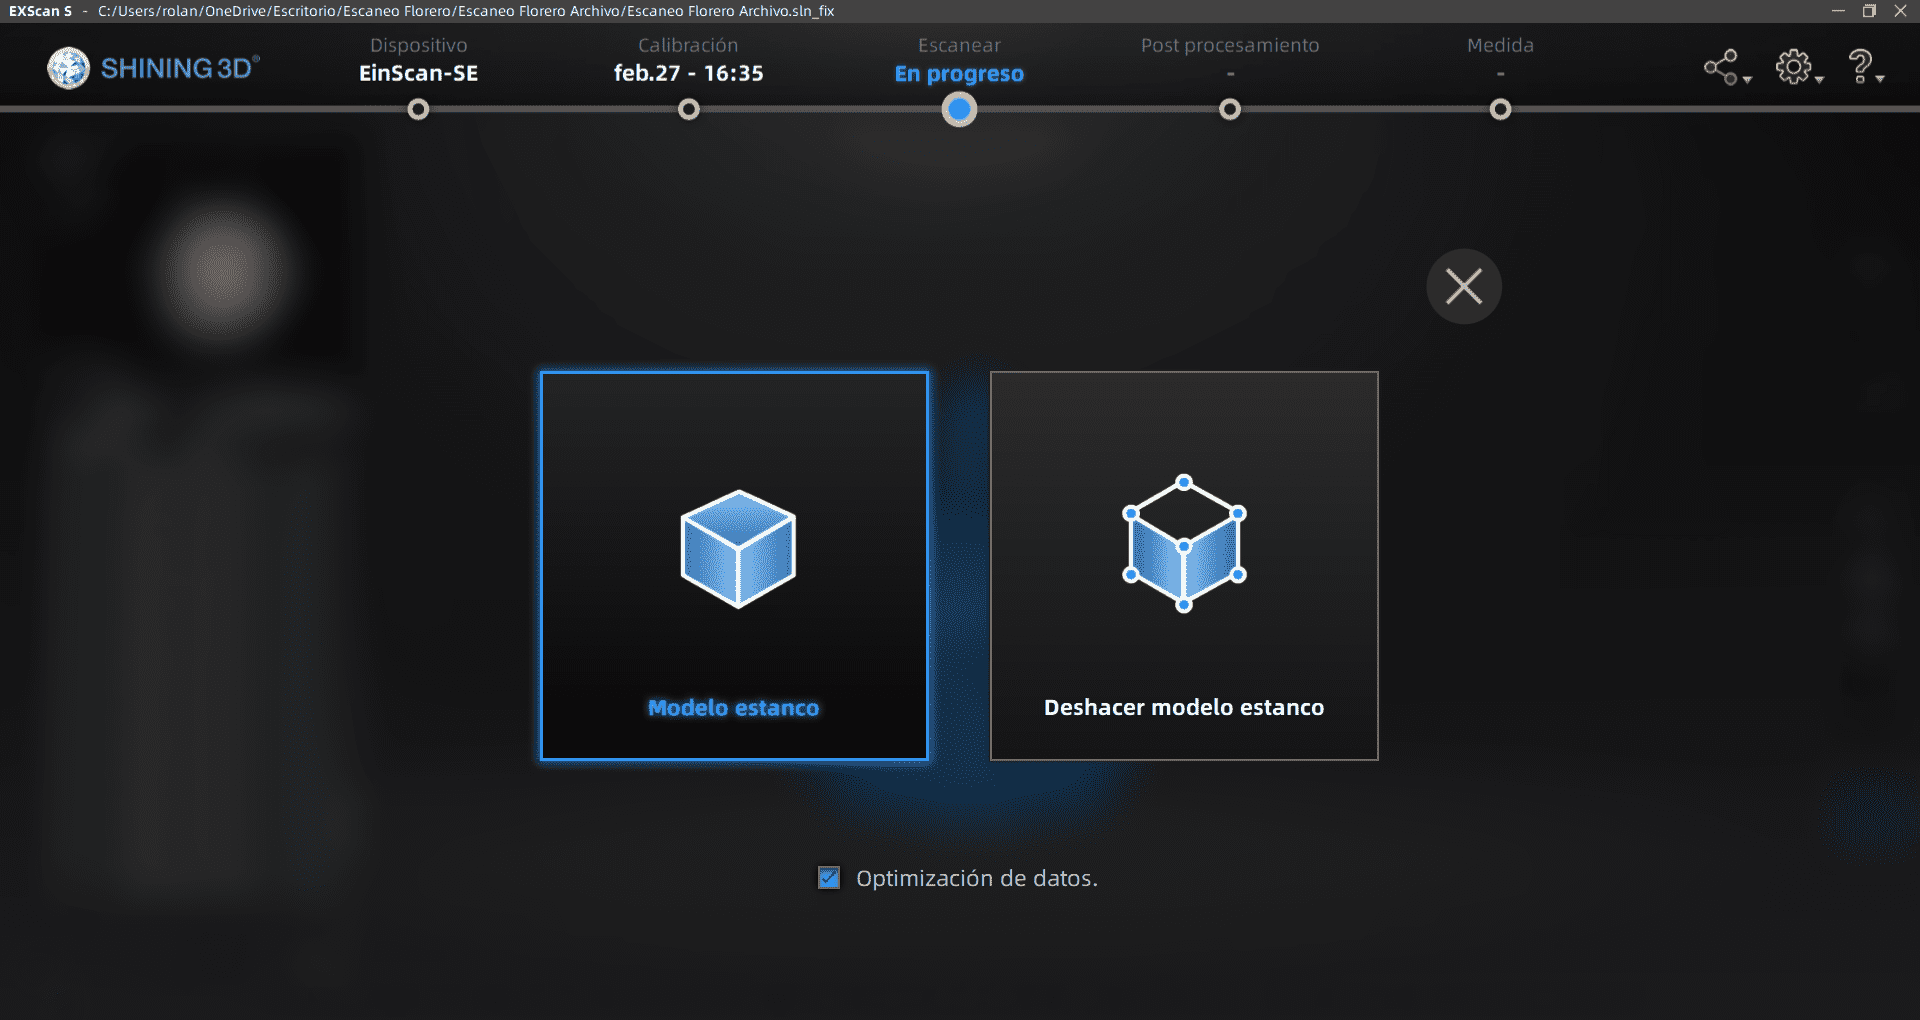
Once finished, I saved it and then started a new one once I rotated my object so it gets to new angles it couldn't reach in the first one, and once that was done I pressed the merge button in the puzzle icon, this will make both of the scans to combine into 1. I didn't need any more angles or rotations on my piece, so I was ready to save it and export as an STL mesh. I then selected the Static Model option, and then a Medium Detail. We were all done!