Week 5 3D Scanning and printing
3D Printing Technology
3D printing, also known as additive manufacturing, is a process of creating three-dimensional objects from a digital file. The technology works by adding material layer by layer, which is why it is called "additive."
Types of 3D Printing Technologies
- Fused Deposition Modeling (FDM)
- Stereolithography (SLA)
- Selective Laser Sintering (SLS)
- Digital Light Processing (DLP)
- Metal 3D Printing (DMLS, EBM)
Applications
- Prototyping
- Manufacturing
- Medical
- Construction
- Education
- Art and Jewelry
Advantages:
- Reduces waste
- Allows for customization
- Can produce complex geometries
Disadvantages:
- Limited by the size of the 3D printer
- Potentially lower strength and durability
- High costs for quality systems
3D Scanning
3D scanning is the process of capturing the shape and size of an object and creating a digital representation of it.
- 1. A 3D scanner takes a series of snapshots of an object
- 2. he images are stitched together to form a 3D model
- 3. The resulting digital file can be used to create a virtual model or physical copies of the object
3D scanning can be used for many purposes, including:
Manufacturing3D scanning can be used to scan existing products, reverse engineer parts, and create meshes for 3D printing
Digital engineering
The resulting digital file can be used for inspection and reverse engineering
AssigmentGroup assignment and group page :
- 3D Printing
- 3D Scanning
Potable case
Creality Ender
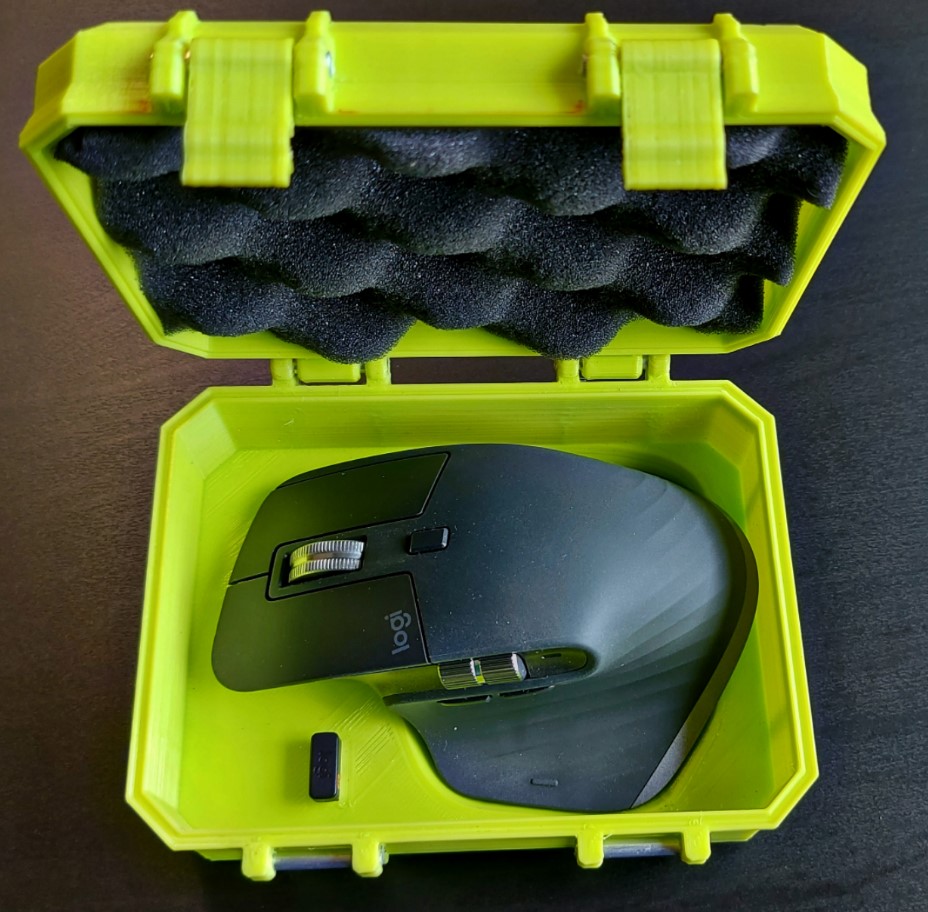
i took an inspiration on this image, since many months go i wanted to have something to protect my mouse so looking around in internet i found this case to save in the mouse, initially i wanted to fabricate something equal or very similar, but i notice the dimension of the 3d printer board, and it didn't enough bigger also my instructor told me it would occupied a lot of material, so using the same idea as the beginning i just scale the design to have like a mini jewerly box.
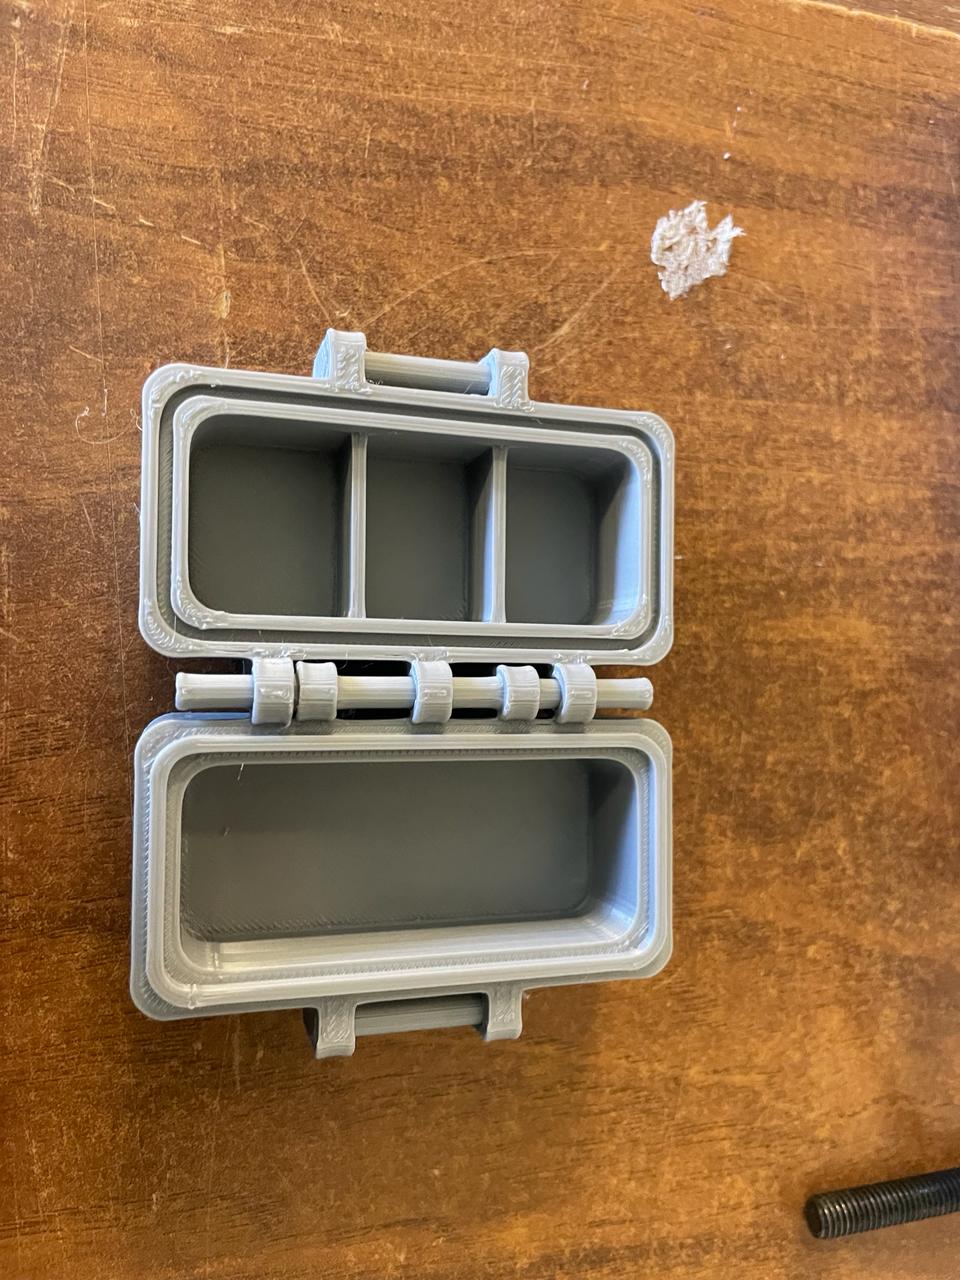
Step 1: Design on solidworks
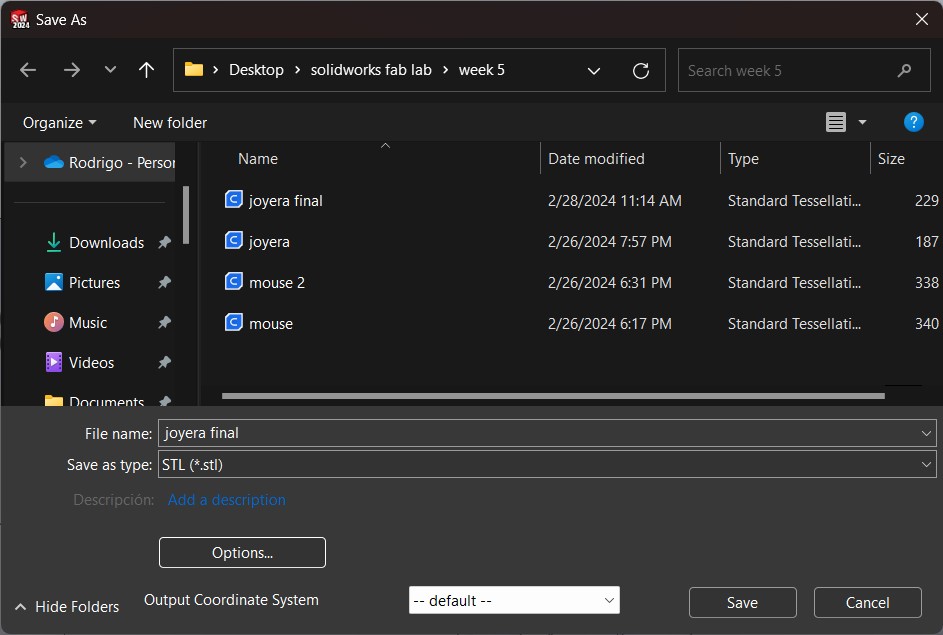
Basically, what I did was take the base measurements that already existed on a page of 3D pieces for the mouse protector. However, when I transferred it to the UltiMaker Cura program, I realized it would take a long time, and my advisor said it was too long. So, I chose to change the dimensions and purpose. I reduced its size as shown in the following figures and adapted it with two separators to store earrings or rings so that my girlfriend could use it.
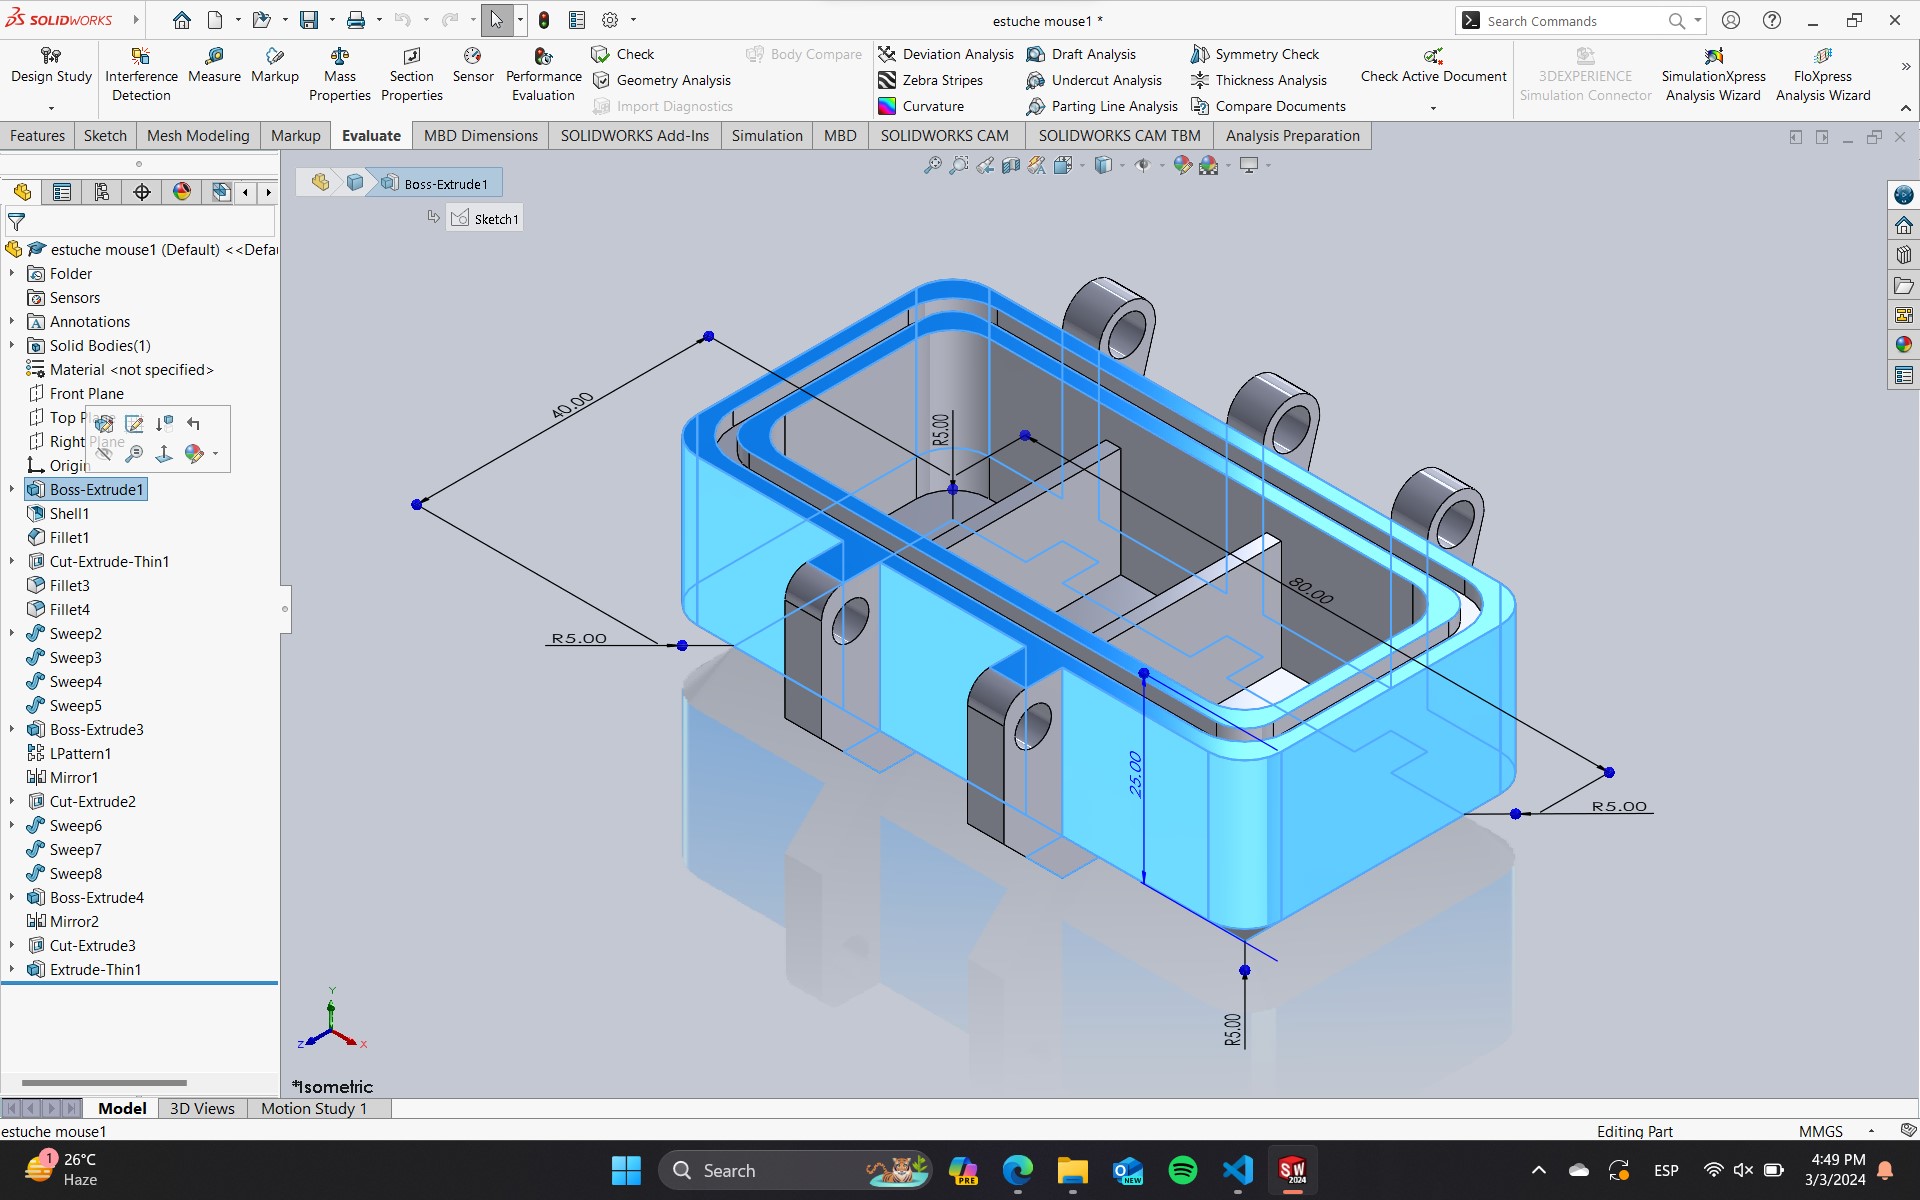
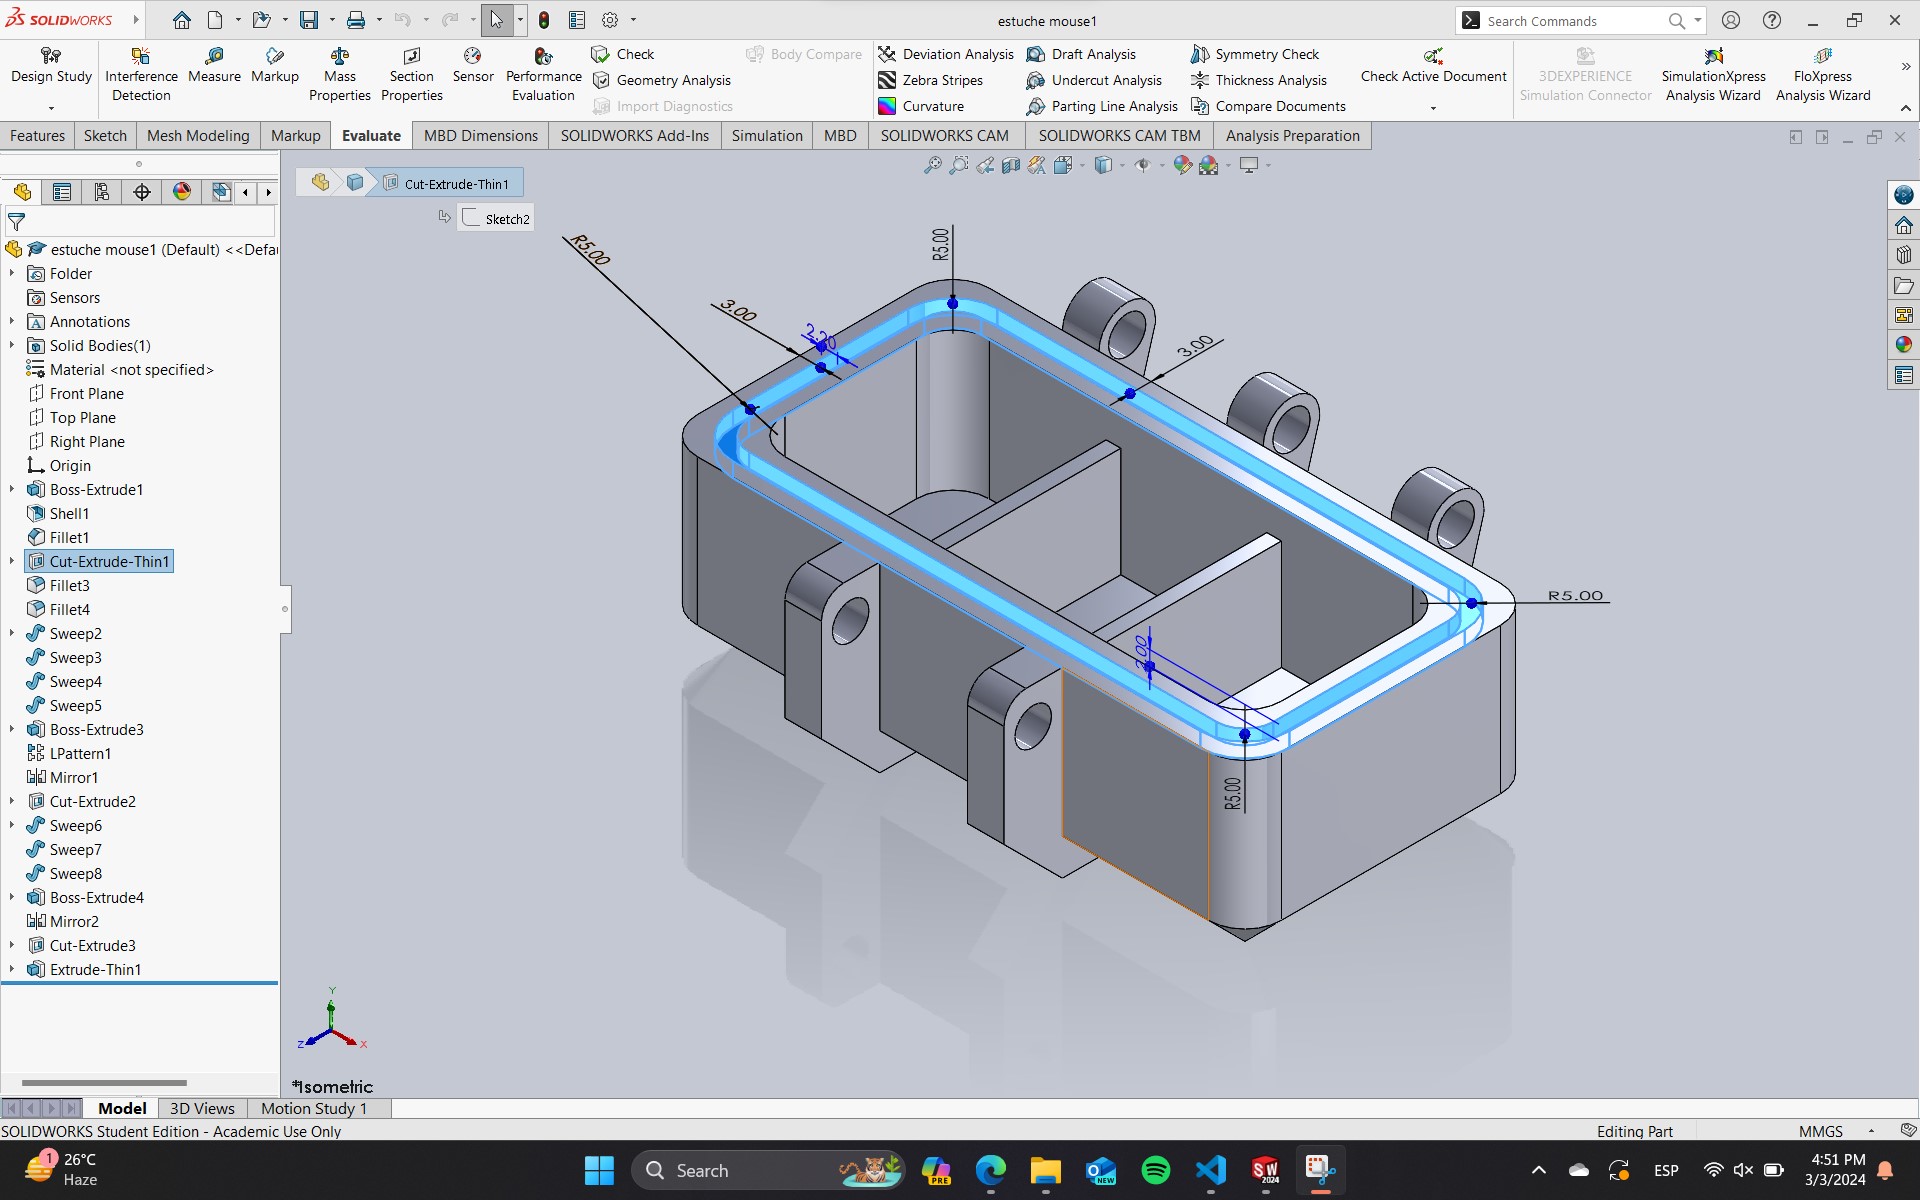
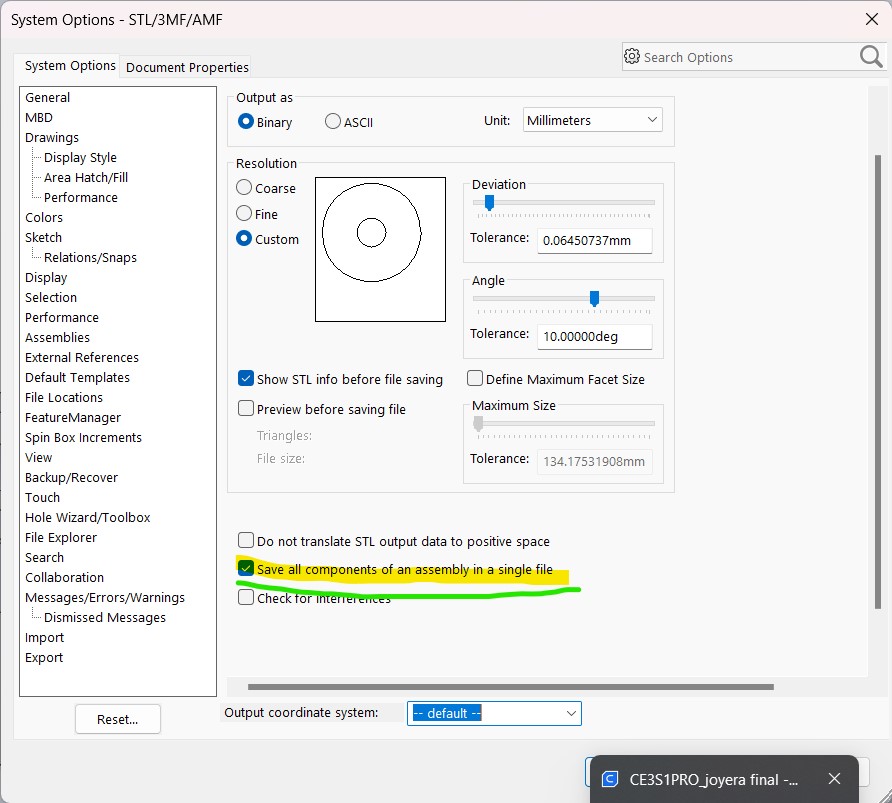
They were two different pieces, as one needed to have a pad and the other an extrude to fit together when closed, considering a tolerance of -0.5 mm. As they were two pieces, I made an assembly to ensure they matched correctly as I imagined. To save them in the same STL document for printing, I followed the instructions as shown in the second image.
* Click on Output coordinate system > Save all components of an assembly in single file
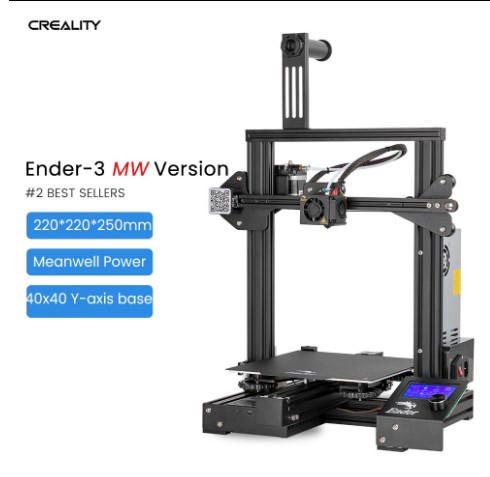
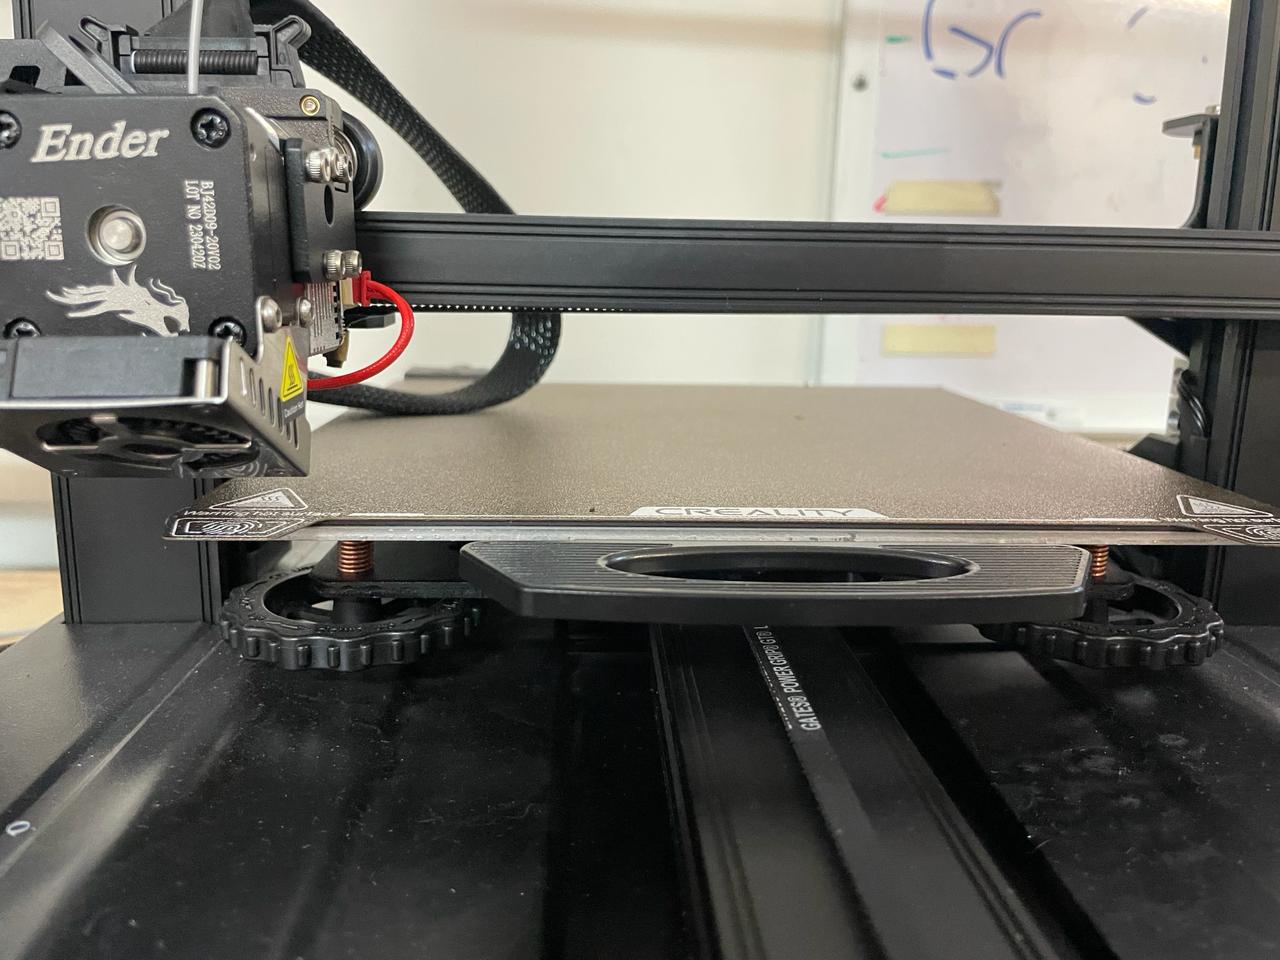
Step 2: Creality Ender & UltiMaker Cura
The Creality Ender 3D printer is a cost-effective and versatile choice for both beginners and experienced users. Known for its ease of assembly and upgradeability, it supports a wide range of materials and features a heated bed for improved print quality. Compact and reliable, the Ender 3 is ideal for those looking to explore 3D printing without a significant investment.
This was the printer I used for the task, and to operate it I used the UltiMaker Cura software, which you can download at the following link
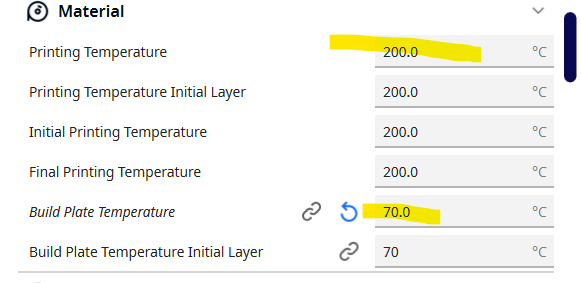
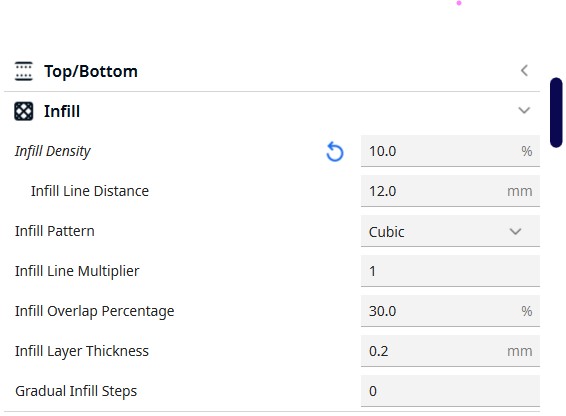
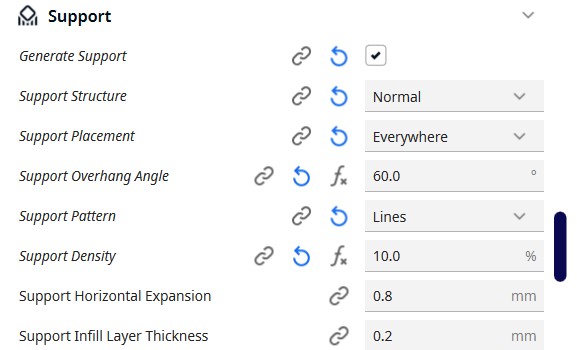
Parameters
Below, I list the parameters that I used for printing and that worked perfectly for me:
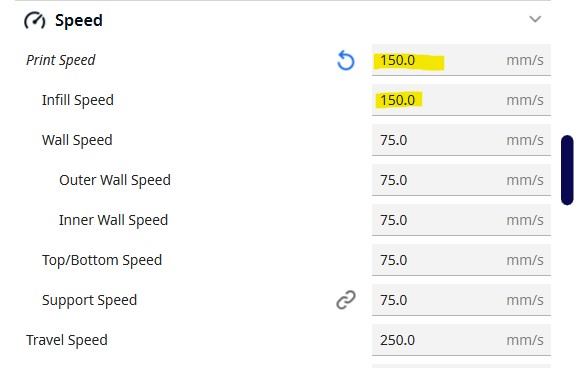

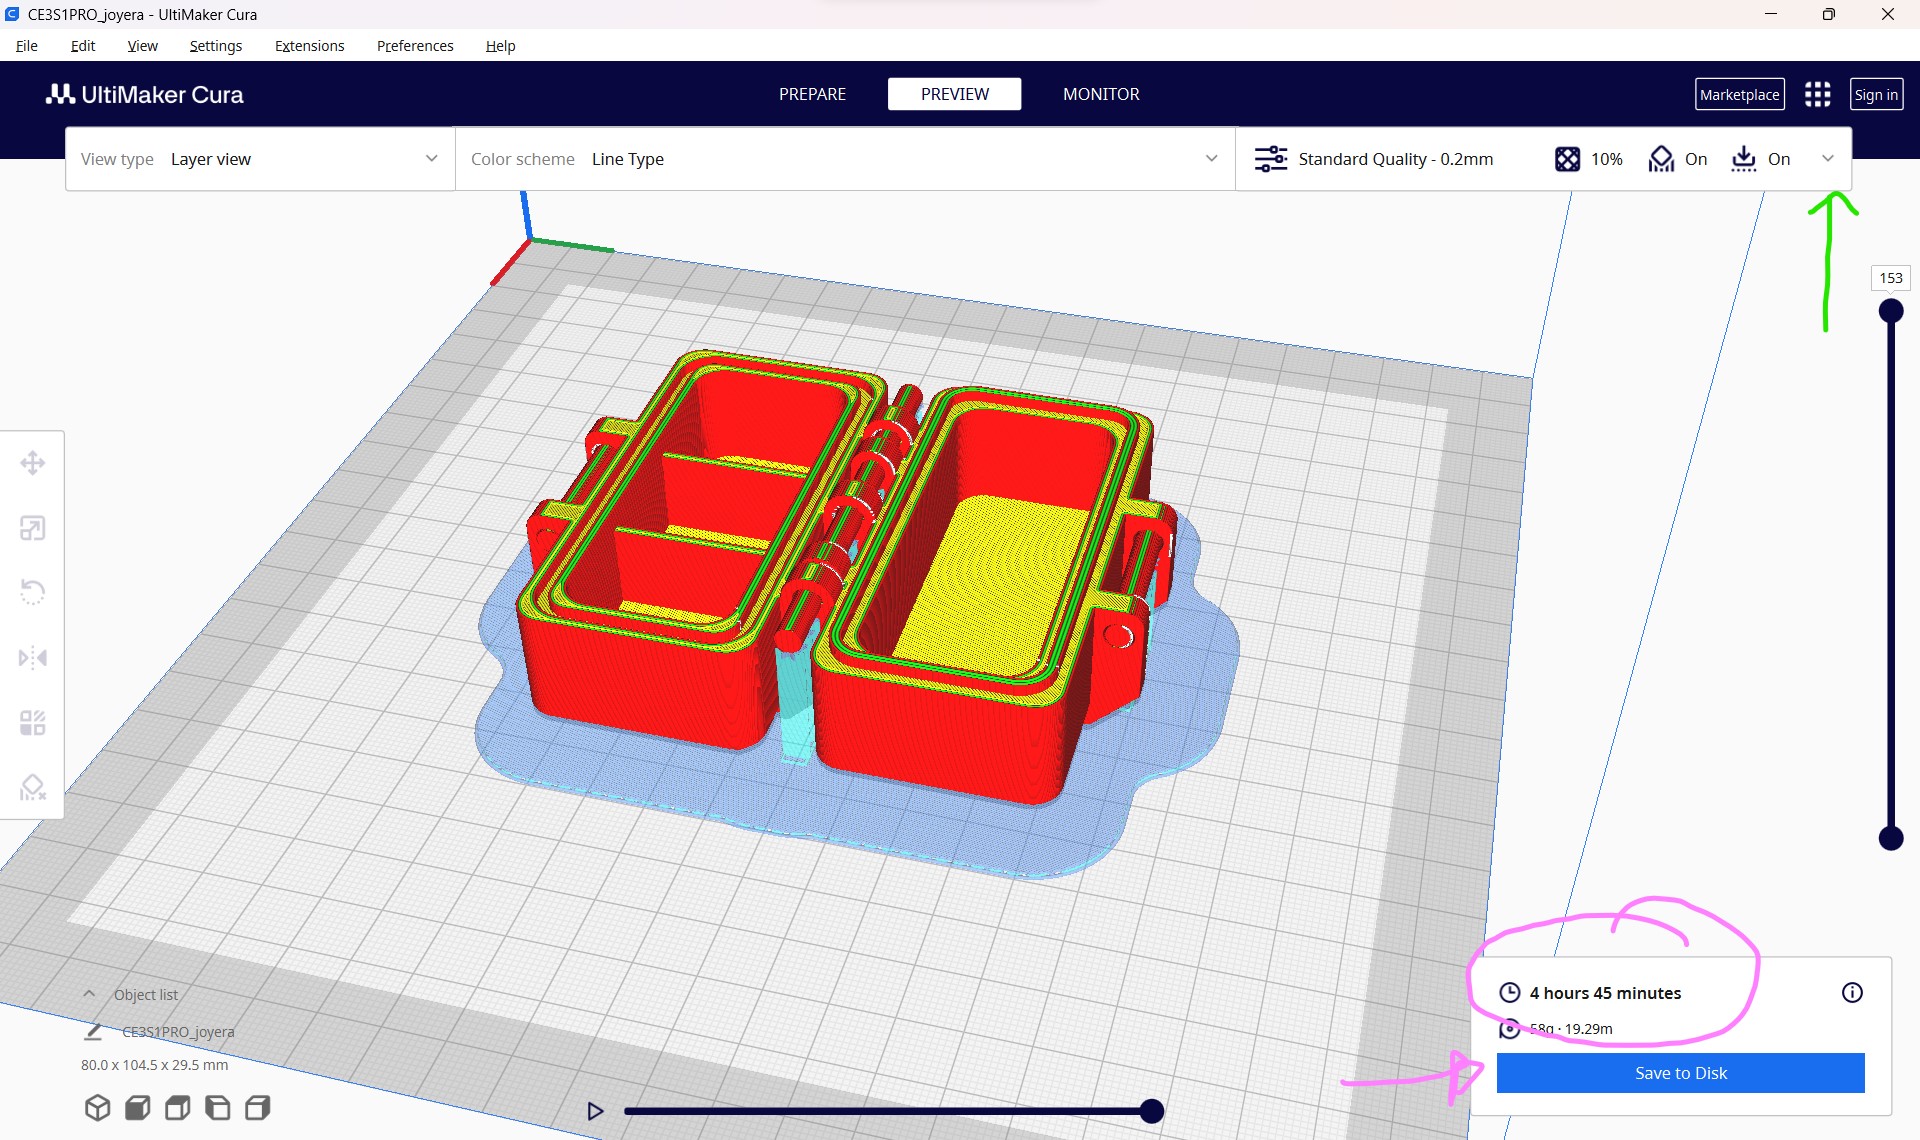
Here on the sofware you can visualize how much time it will take by clicking on SLIDE
Export .STL
Click on continue and select where you want to save it, you had to have an Mirco SD to put into the Creality Ender Printer.
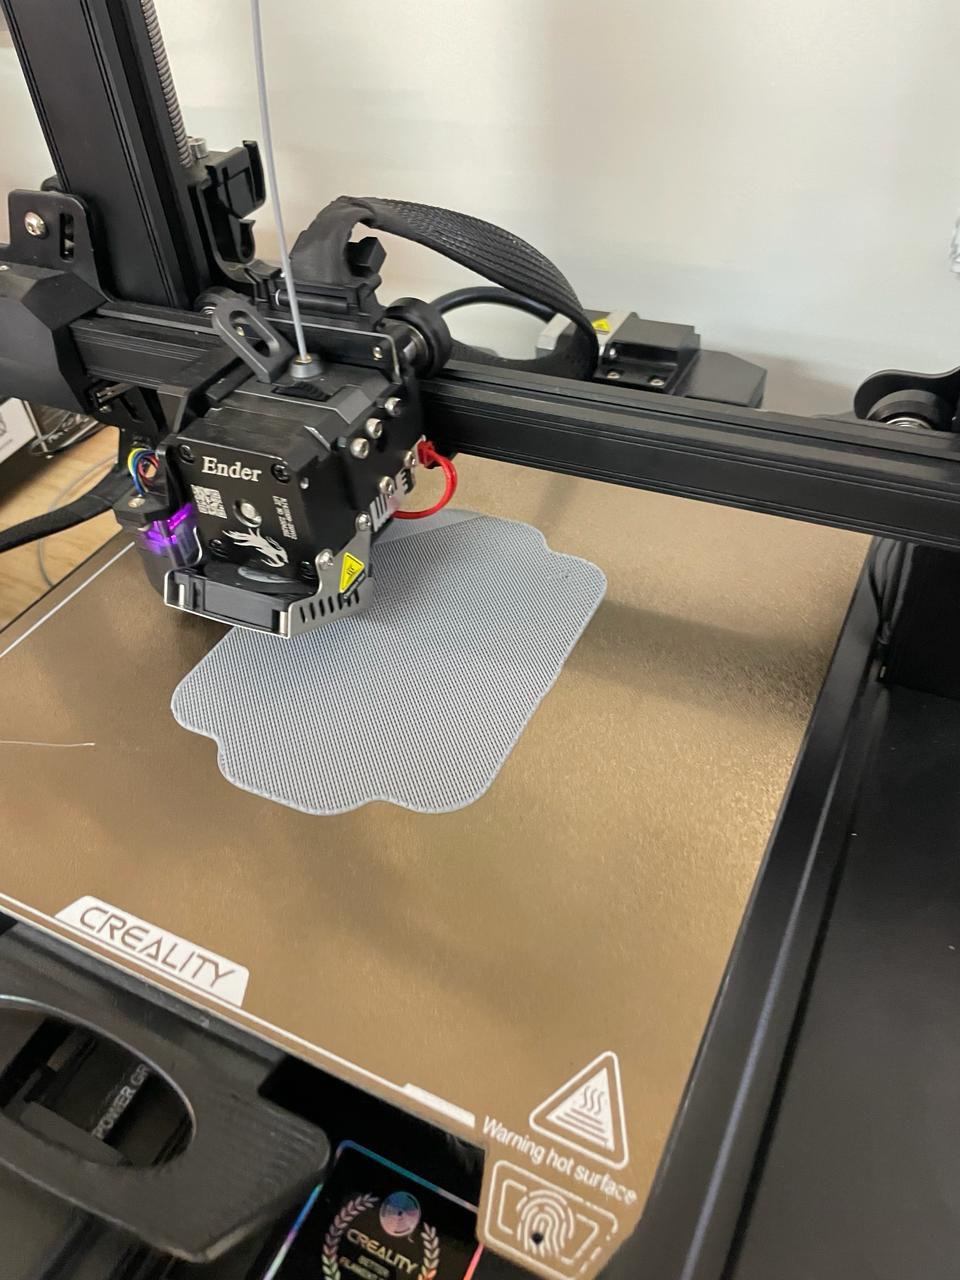
Step 3 Print
In this interface, when you connect your memory stick, you can choose the file you want to print, where you can pause and continue. Here you can also modify the parameters previously set in the software in case you see that the material does not adhere properly or needs more temperature or speed.
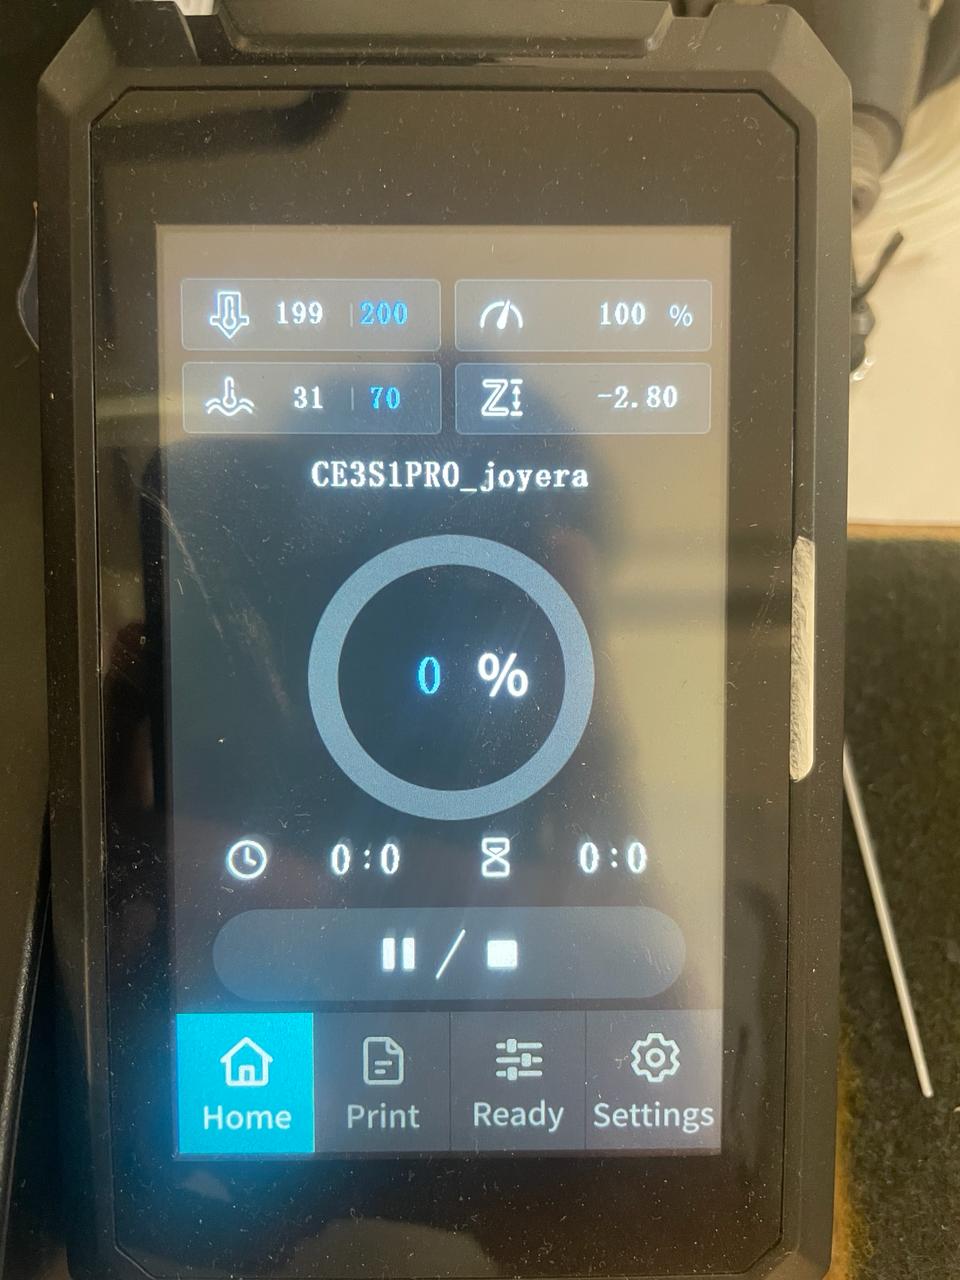
My recommendation is to stay for the first 10 minutes of the print to verify that it does not lift off the plate.
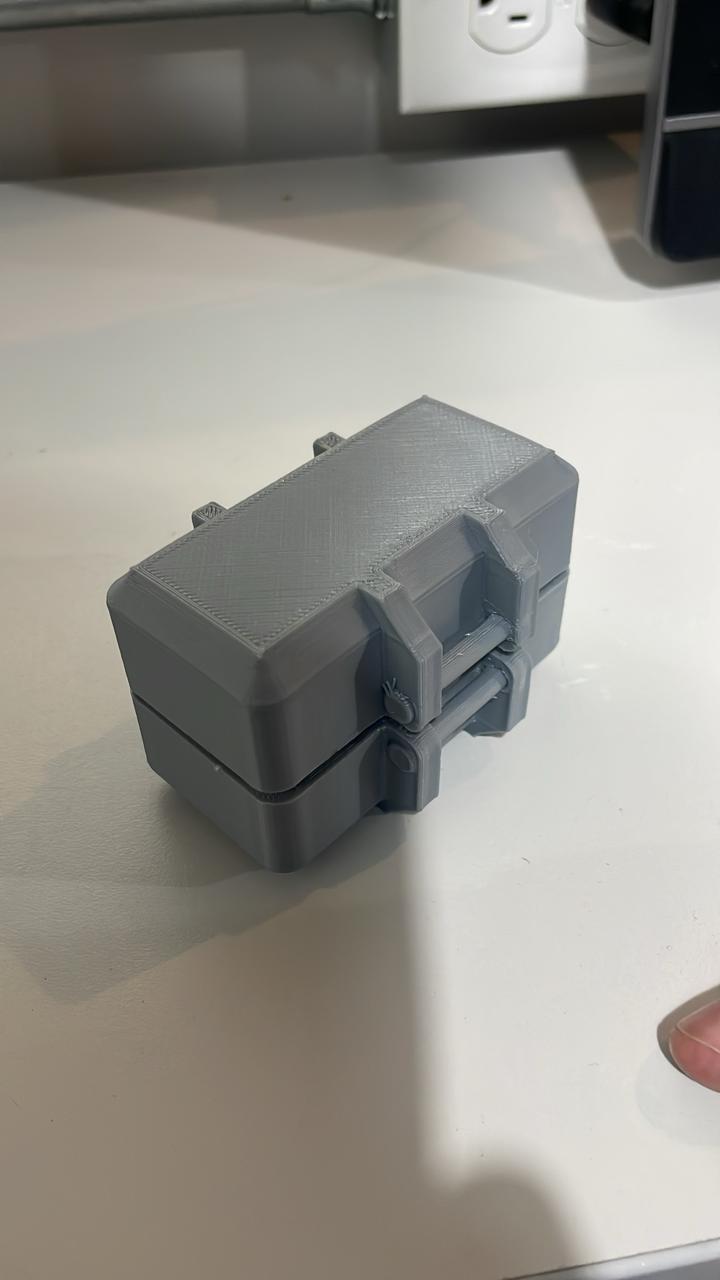
This is the final result of my jewelry box.
Files
3D Scanner App
I decided to use the 3D Scanner App, which you can find on the Apple Store for free. I tried other free versions of different apps, but this one convinced me the most and worked the best.
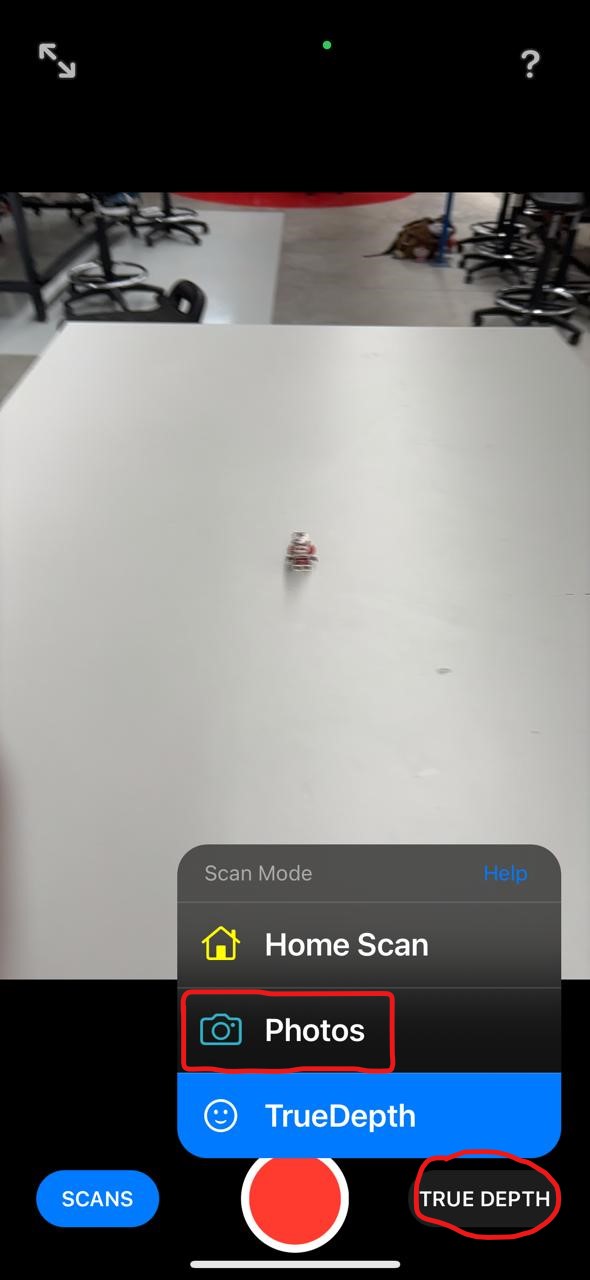
Next, I'll show you how I did the scanning process, first: I opened the app > True Depth > Photos.
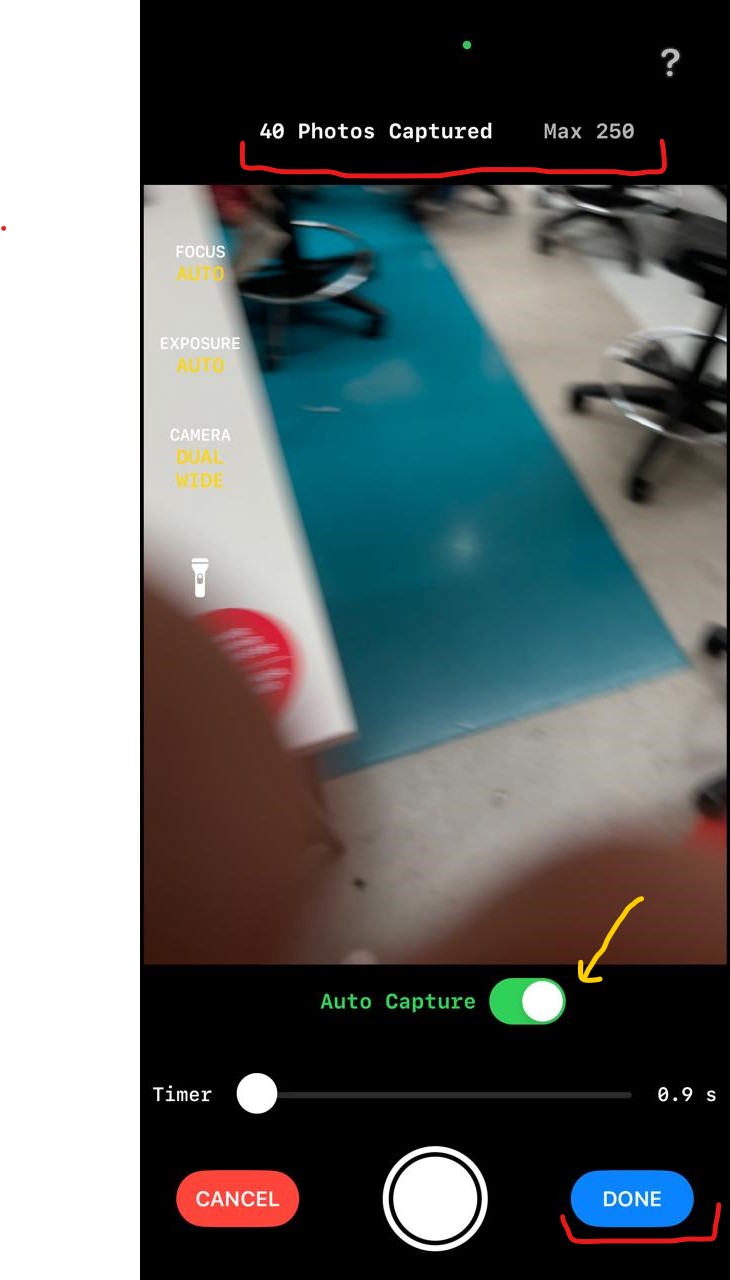
Step 1.
Take many photos to improve the scan quality; this app allows a maximum of 250 photos, but I took 40. If you want to place your phone on a tripod and have it take photos automatically, you can set the timer by activating Auto Capture on the yellow arrow. In the end, click DONE.
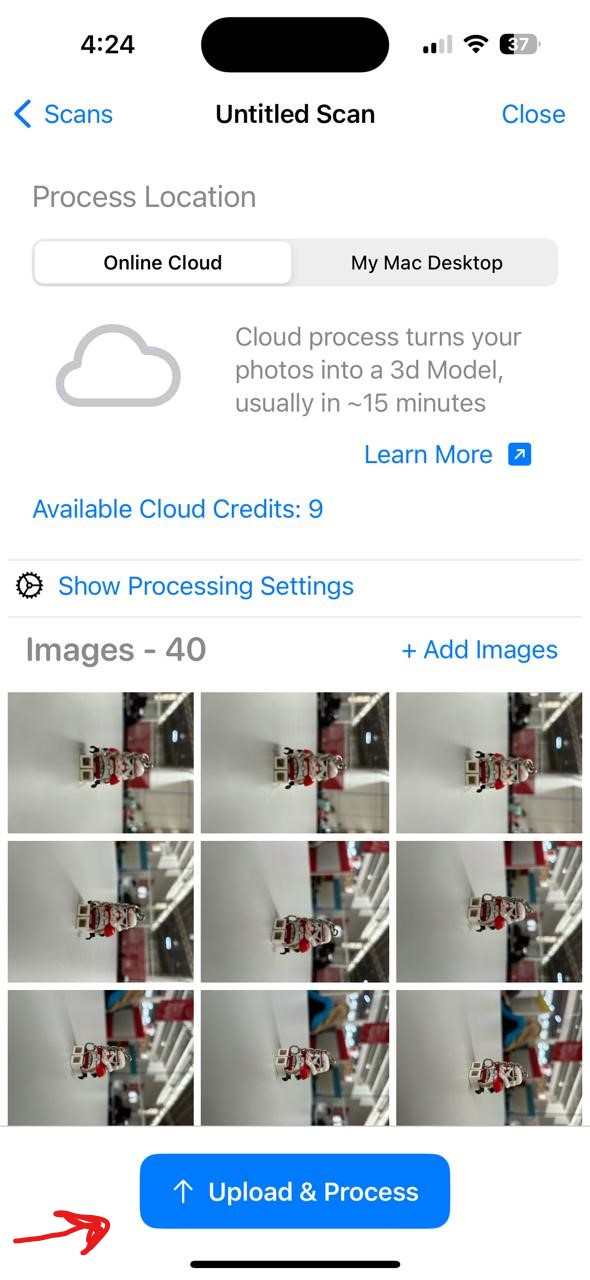
Step 2.
Once you finished you would be able to change the title of the Scan, finally click on UPLOAD & PROCESS.
Step 3.
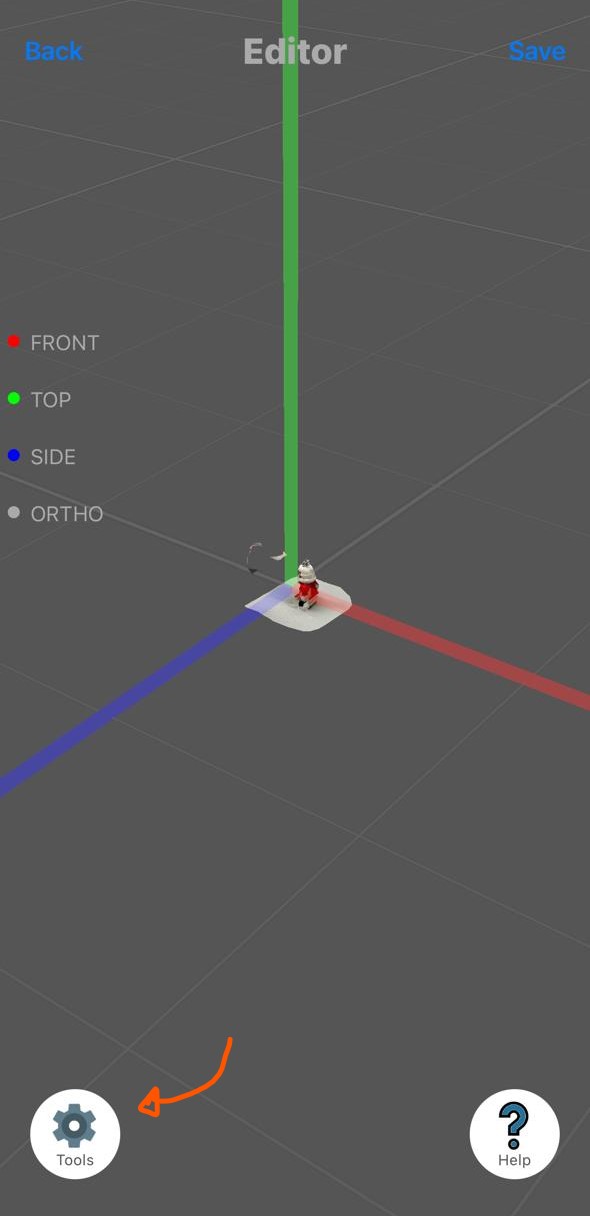
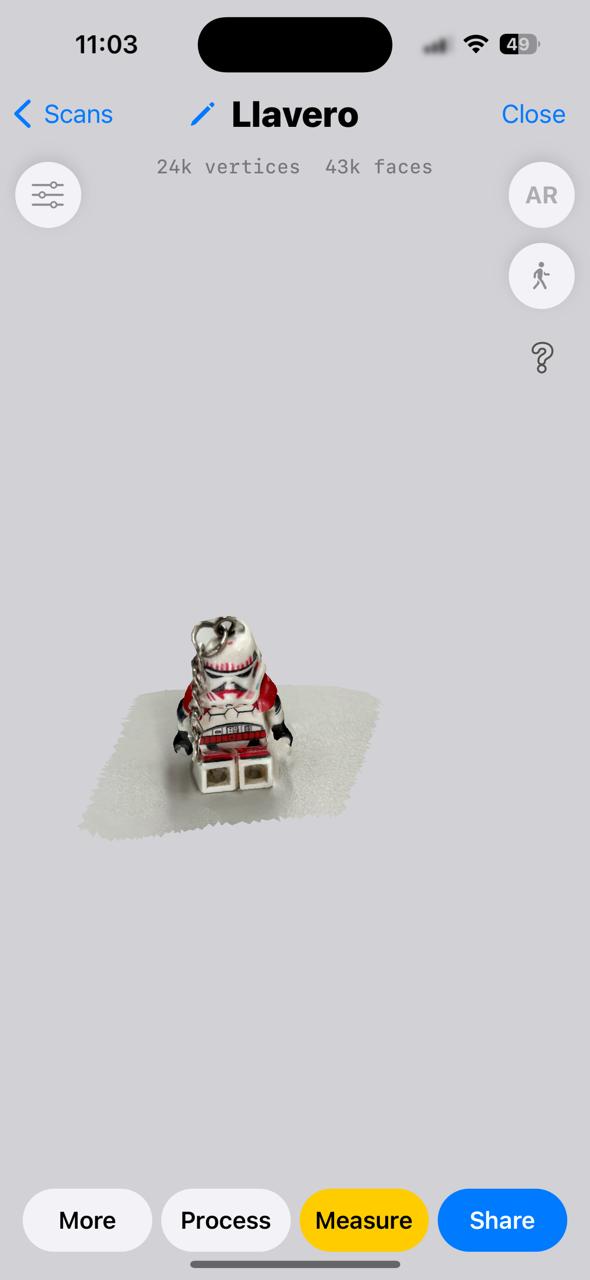
Click on Tools, in my case i will use tools to delete something wrong i notice after scanning.
Select Crop option.
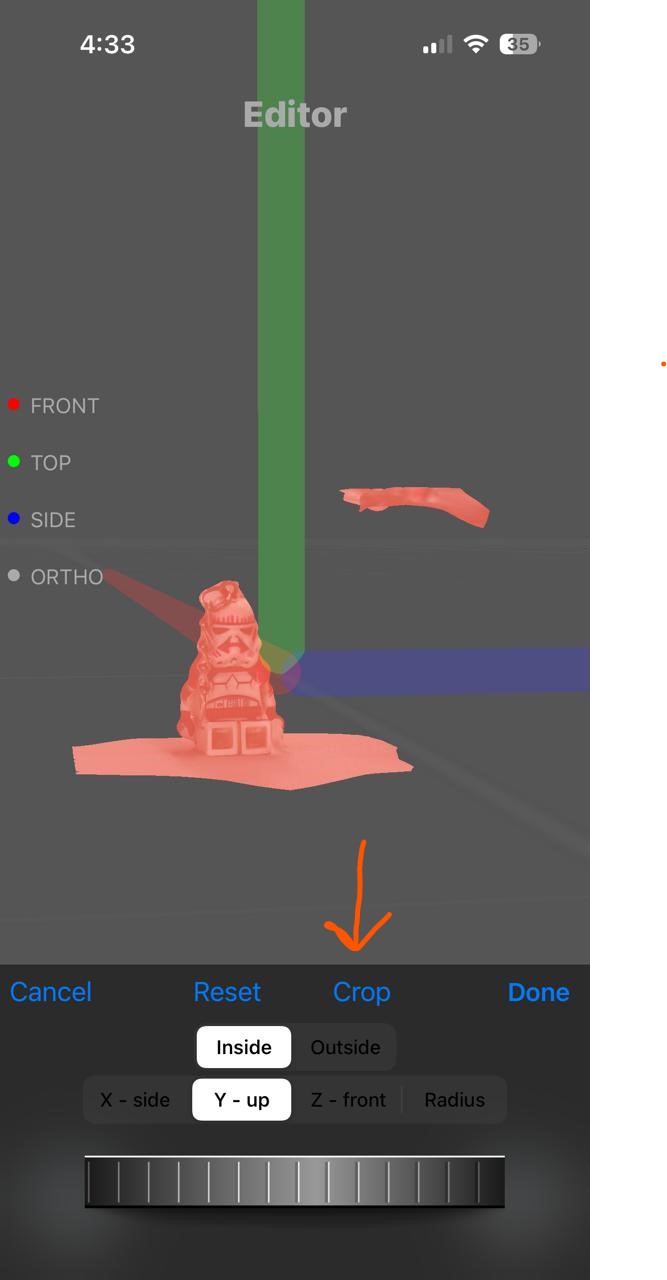
Step 4.
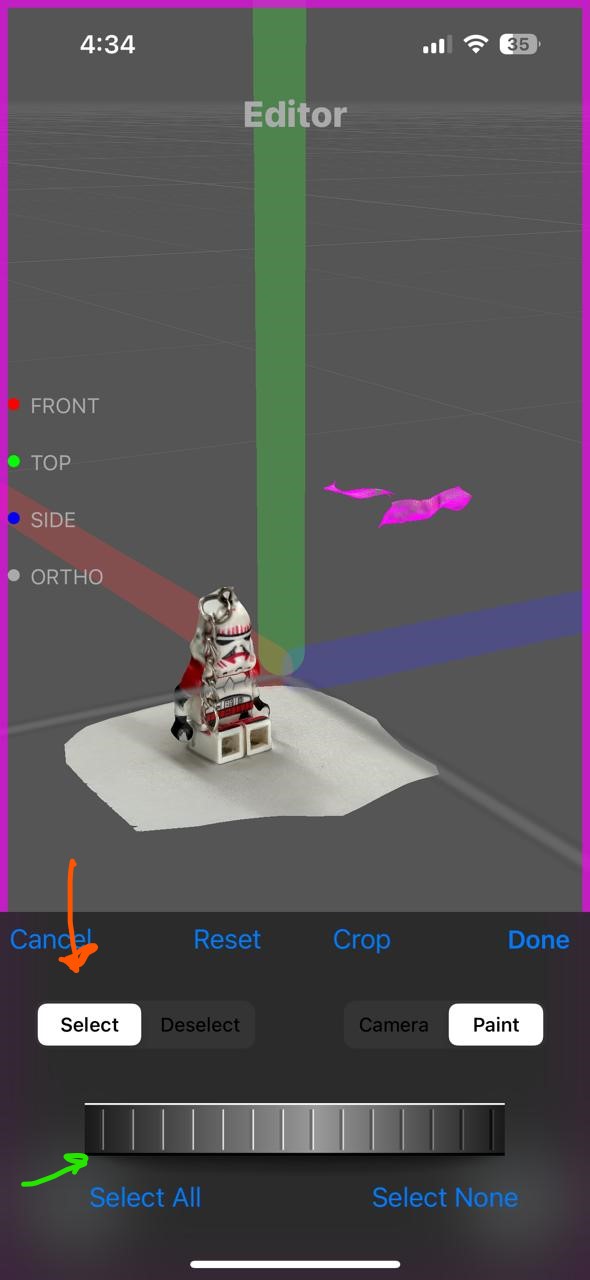
I noticed that an object appeared at the top of my figure and I wanted to remove it, so I clicked on "Select," and with the tool marked with the green arrow, I adjusted the size of the point with which I selected what I wanted to eliminate. Then I clicked on "Crop." In the following image, we can see that the object we selected was indeed removed. Finally, we click on "Save."
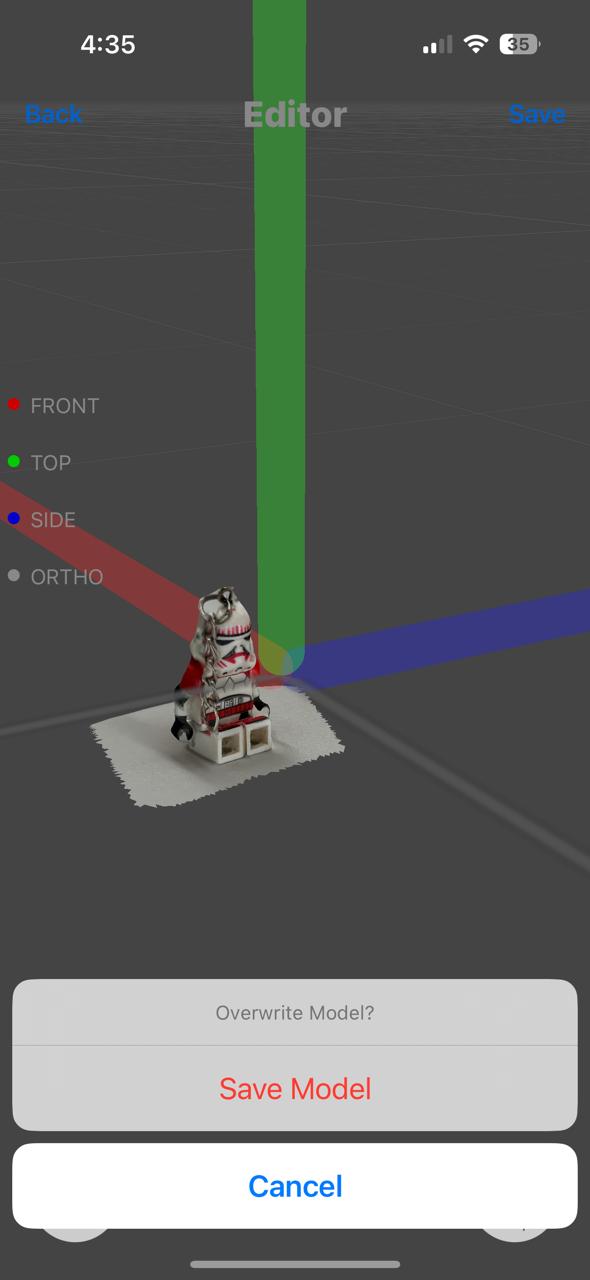
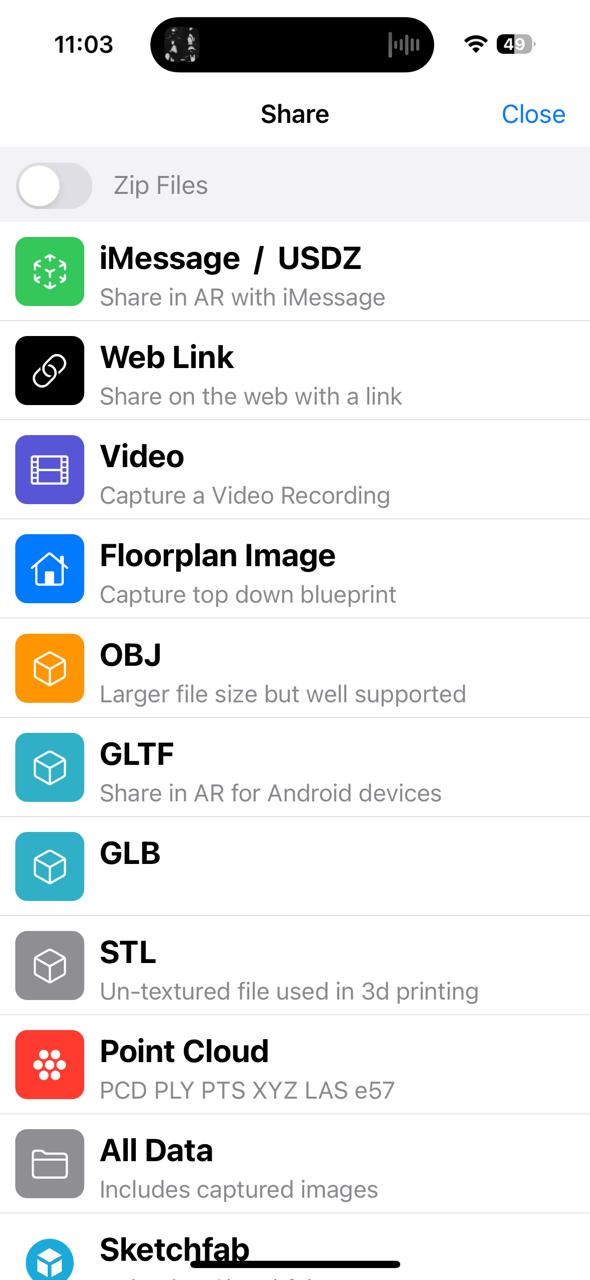
Step 5.
At the bottom, we click on "Share" and finally export it in STL format.
Step 6
I open it on the UltiMaker Cura to veryfy the dimensions and verify it really works.

Polycam
In addition to using the Polycam app, I was asked to subscribe and pay $100 for an annual subscription in order to export my file. However, I was able to download a video showing how the scan looked in that app.