Interface and application programming

There are different programs to edit interfaces
Click here to see the group assigment
I selected QT Designer Click here to download
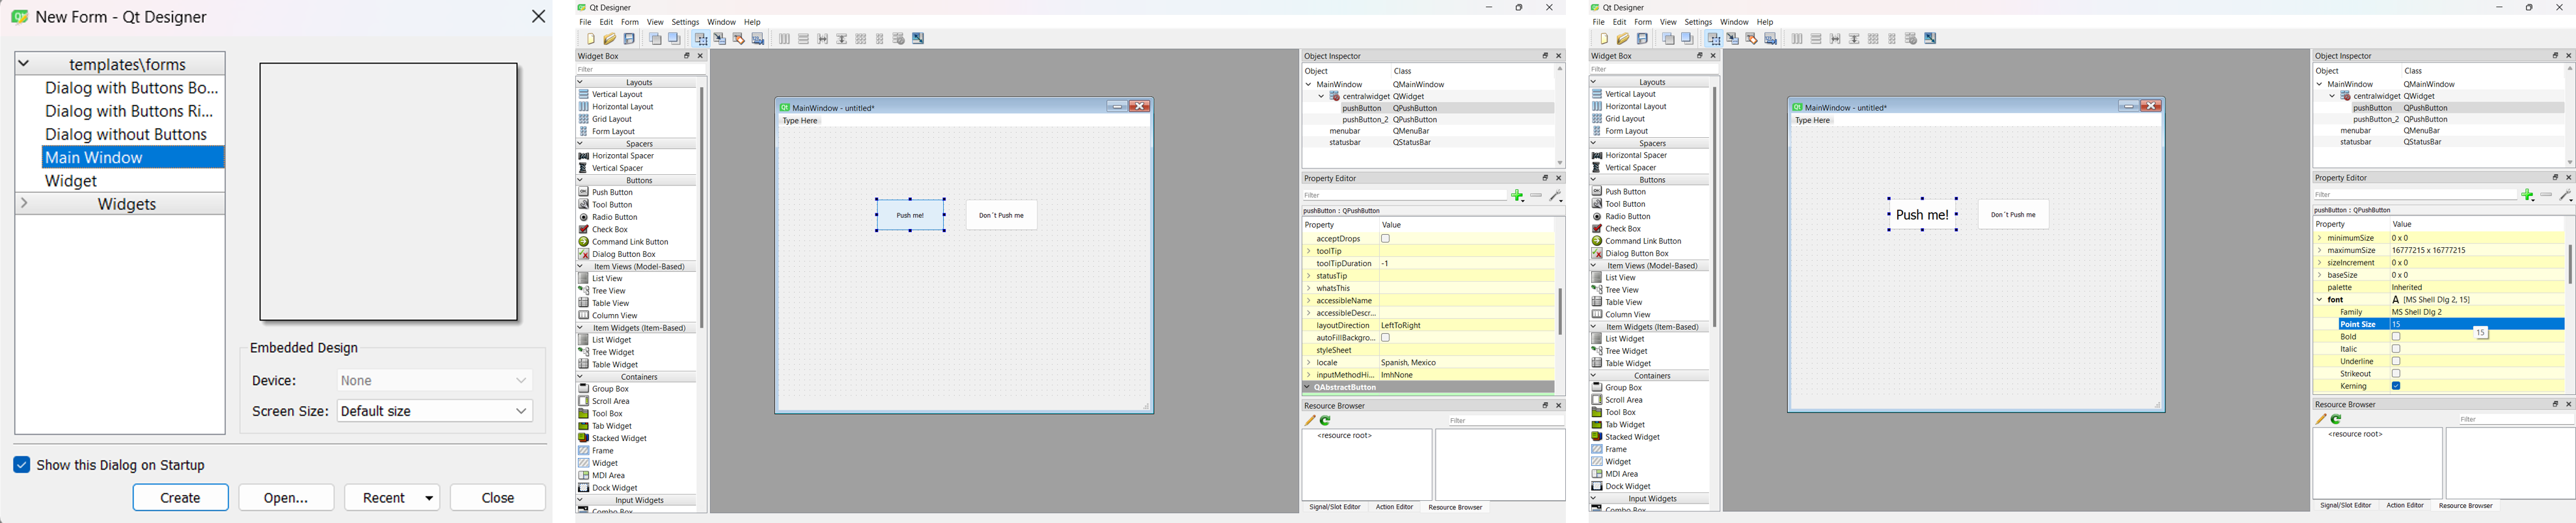
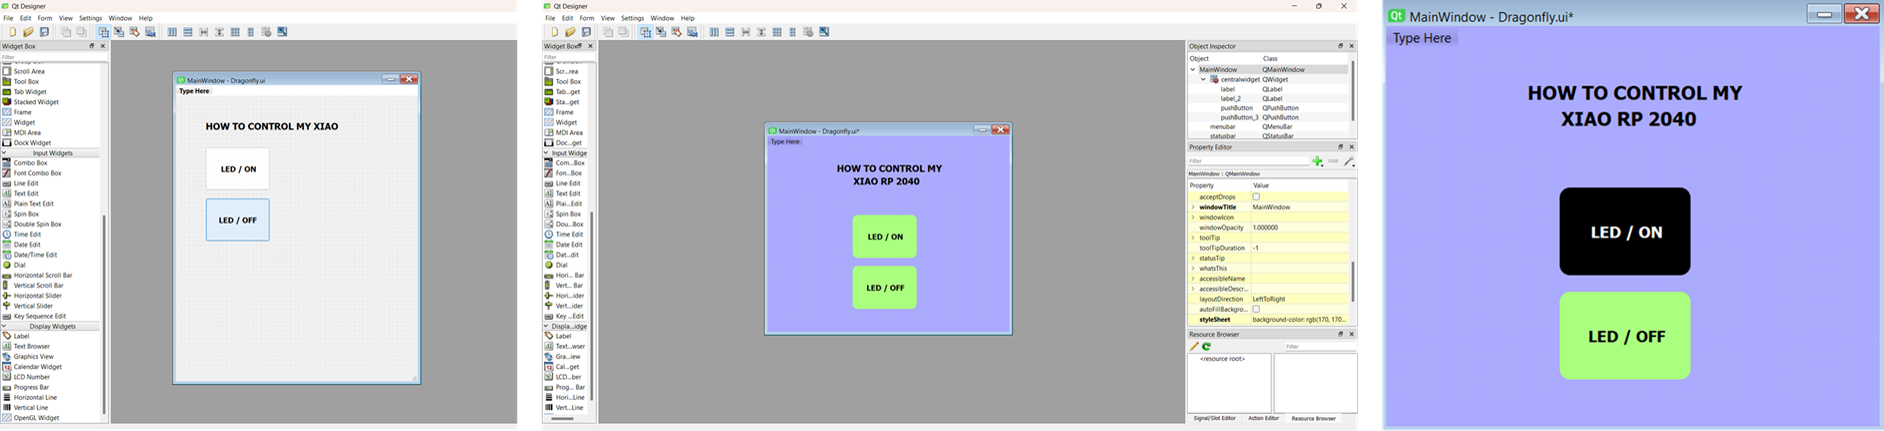
We download Qt Designer and when we open it we select the ideal type of canvas for our work. In this case, we use the "Main Window" option
- On the left side we have the menu of components that we can add
- On the right side is the breakdown of the properties of each selected Widget.
- To add components we can simply drag them
- And if you want to change the name, a double click is enough.
- The size can also be edited as in design software (By dragging the edges)
- If you want to change the font size, you can do so from the properties menu on the right side
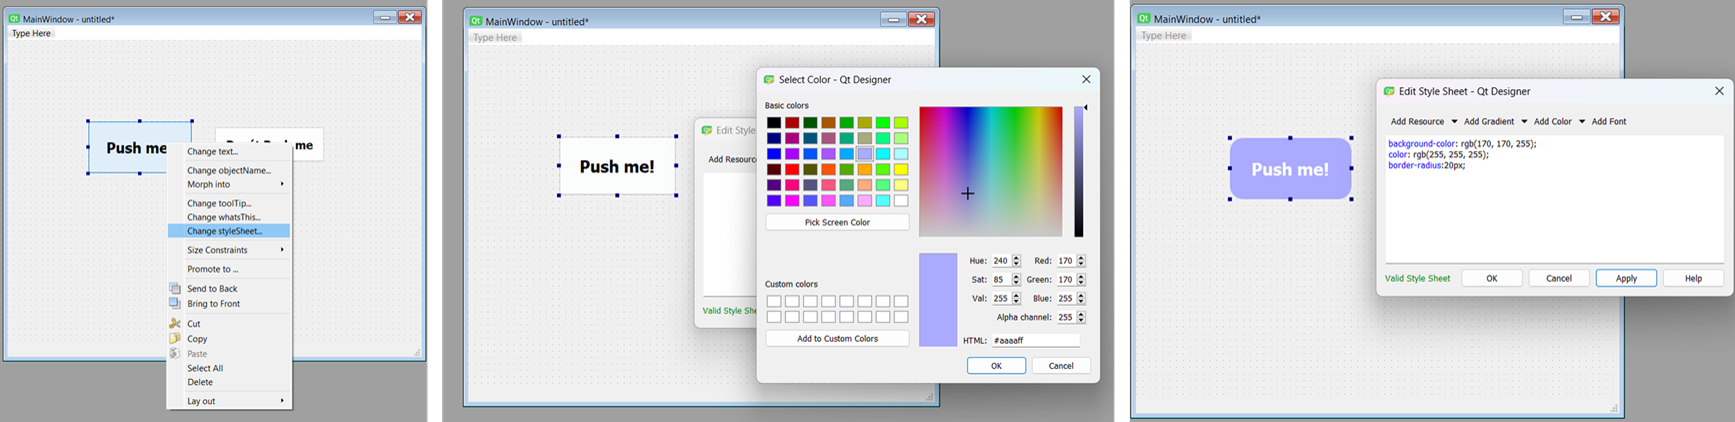
- To modify the style of each element, we can select the “Change styleSheet” option.
- In this case, I decided to change the background and font colors of the button.
- And there are other types of commands that you can use to change the dimensions of the selected element. (border-radius) is used to round the corners.
- I used the “QPushButton” and “QPushButton:hover” command to make the button change color when you hover over it.
- And to achieve faster editing, we can use the “FRAME” tool and copy the same properties of the previous button, the elements that you add to the “FRAME” automatically acquire the same configuration.
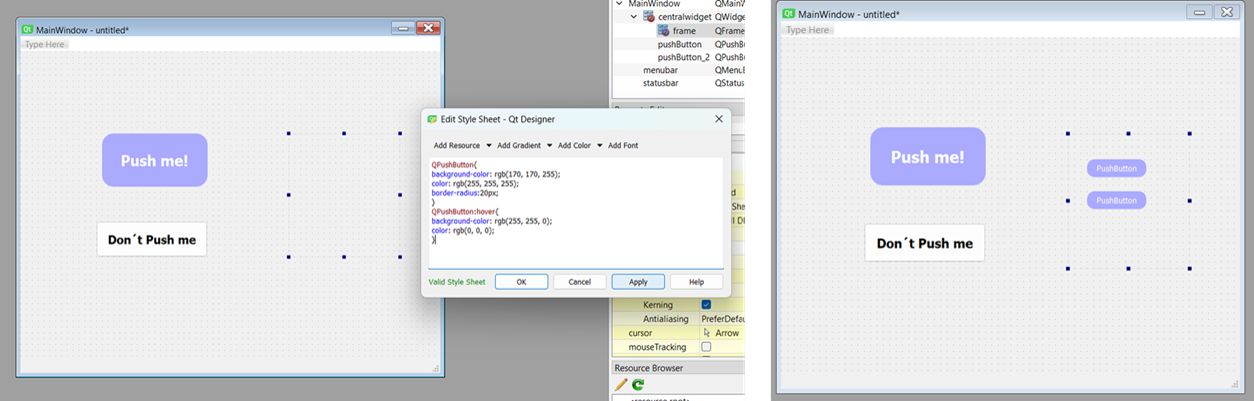
I decided to create a very simple interface to explore the movement of the servomotors I had worked with, so I inserted a title with the “LABELS” option and added two buttons. My idea is to be able to "turn on and off" the servo system with the interface buttons
Now, code mode!
QT generates files with a UI extension, so to manipulate them you have to transform them
- In this case I will use Python.
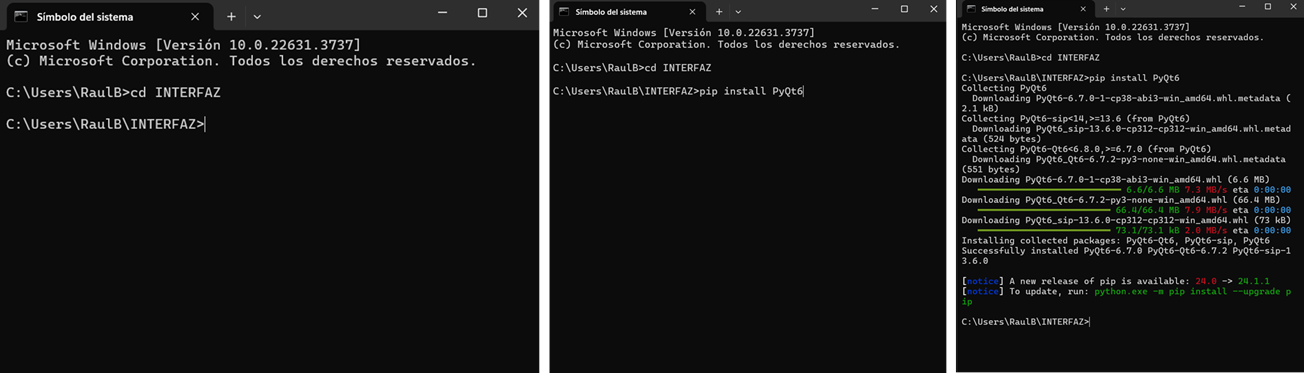
- And to do this we must install the library, so we open “SYSTEM SYMBOL” and look for the folder in which we save our QT design
- We install the Python Library with the pip install PyQt6 command to transform the code from QT to Python
While following a tutorial, I made a mistake and typed the command incorrectly, but the terminal told me the error and I changed it.
The command we use to display our interface is the following:
pyuic6 –x “Name of your QT file.ui” –o “New name”.py
And to check that the command worked, we used the “Python “New name.py” command and a window automatically appears with the design of your interface. Whenever I want to make a change in my QT layout I have to run the command Pyuic6 –x “Name of your QT.ui file” –o “New name”.py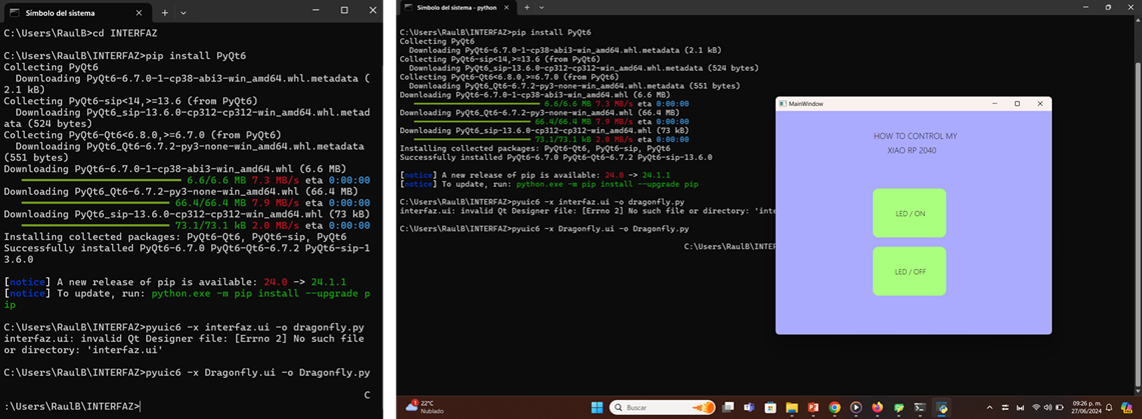
NOTE: To avoid overwriting our code, we create a new folder and name it “APP” and copy the following code and replace the name with the “new name” of our interface.
from “THE NAME OF INTERFAZ” import *
class MainWindow(QtWidgets.QMainWindow, Ui_MainWindow):
 def _init_(self, *args, **kwargs):
QtWidgets.QMainWindow._init_(self, *args, **kwargs)
self.setupUi(self)
# From here, (your logic)


if _name_ == '_main_':
app = QtWidgets.QApplication([])
window = MainWindow()
window.show()
app.exec()
- That way, we separate the front end and the back end
- This code imports our previous code as if it were a library
- So, I can use the “python app.py” command from the terminal and see it open the interface just like I did at the beginning
- To start communication with the card we connect, we install the “SERIAL” library using the command “pip install pyserial”

To communicate with a pcb
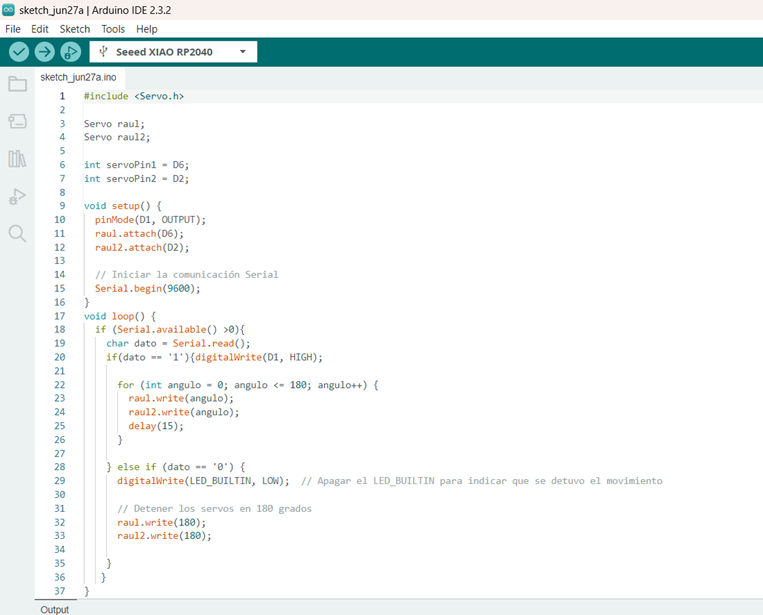
I used the following code to establish serial communication. And once the code is loaded into the microcontroller, we can check the communication by sending signals. For this first test, I used the XIAO RP2040 QUENTORRESClick to download code
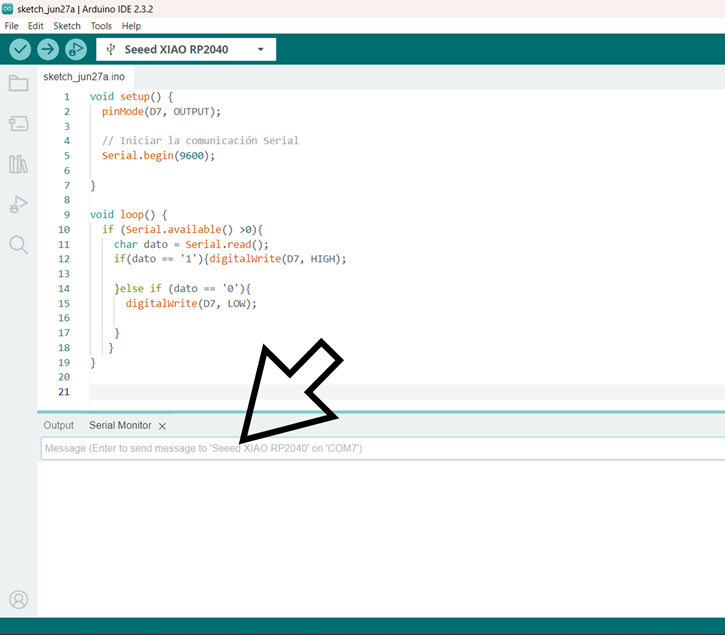
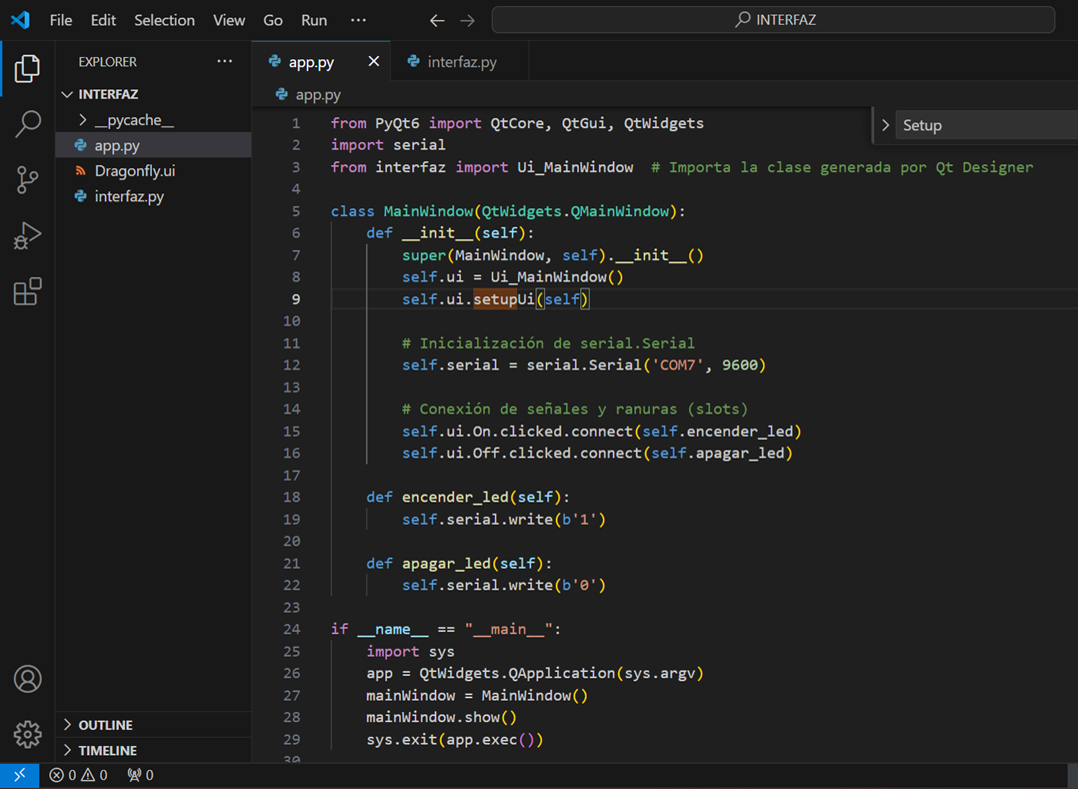
The final code (in Visual Studio Code)
To start the communication
from PyQt6 import QtCore, QtGui, QtWidgets
import serial
from interfaz import Ui_MainWindow  # Importa la clase generada por Qt Designer

class MainWindow(QtWidgets.QMainWindow):
    def __init__(self):
        super(MainWindow, self).__init__()
        self.ui = Ui_MainWindow()
        self.ui.setupUi(self)

        # Inicialización de serial.Serial
        self.serial = serial.Serial('COM6', 9600)

        # Conexión de señales y ranuras (slots)
        self.ui.On.clicked.connect(self.encender_led)
        self.ui.Off.clicked.connect(self.apagar_led)

    def encender_led(self):
        self.serial.write(b'1')

    def apagar_led(self):
        self.serial.write(b'0')

if __name__ == "__main__":
    import sys
    app = QtWidgets.QApplication(sys.argv)
    mainWindow = MainWindow()
    mainWindow.show()
    sys.exit(app.exec())
"python app.py" to open the interface
If it worked with the Quentorres, it will work with mine
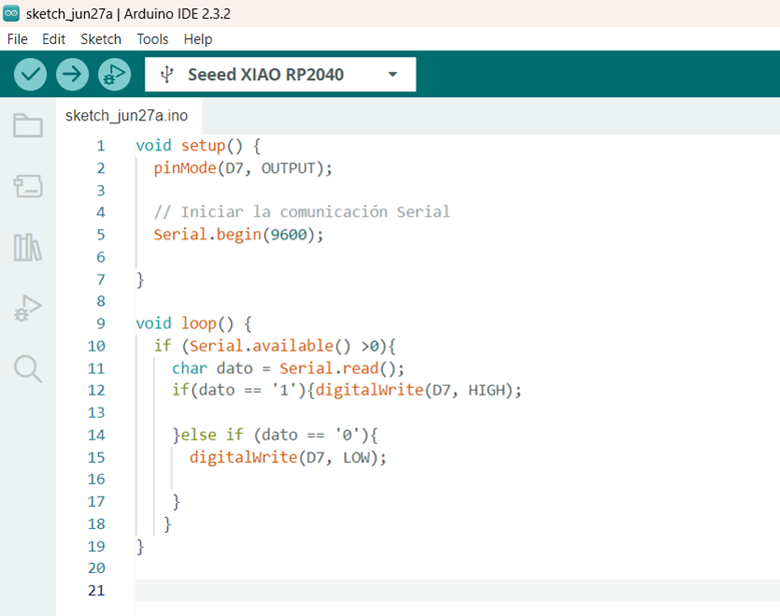
Let's try one LED
How to turn on the led
Click to download code
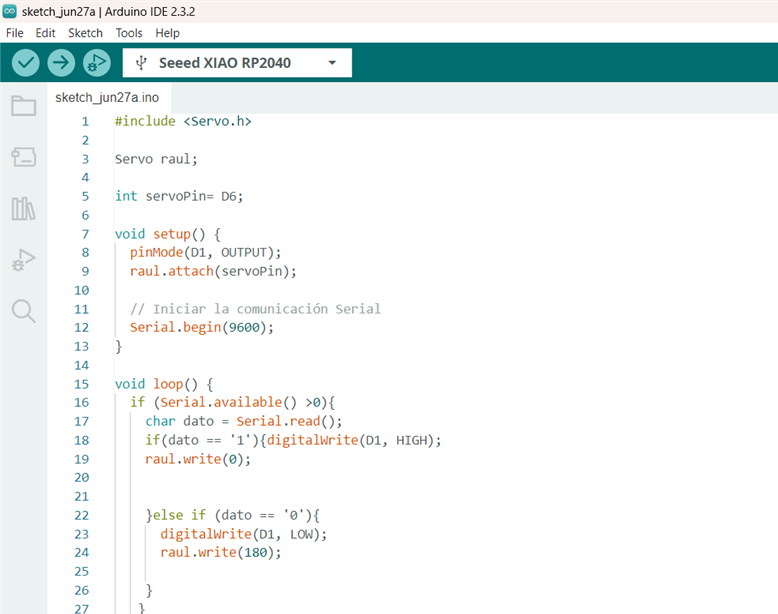
Now, with one servomotor
On-Right & Off-Left
Click to download code
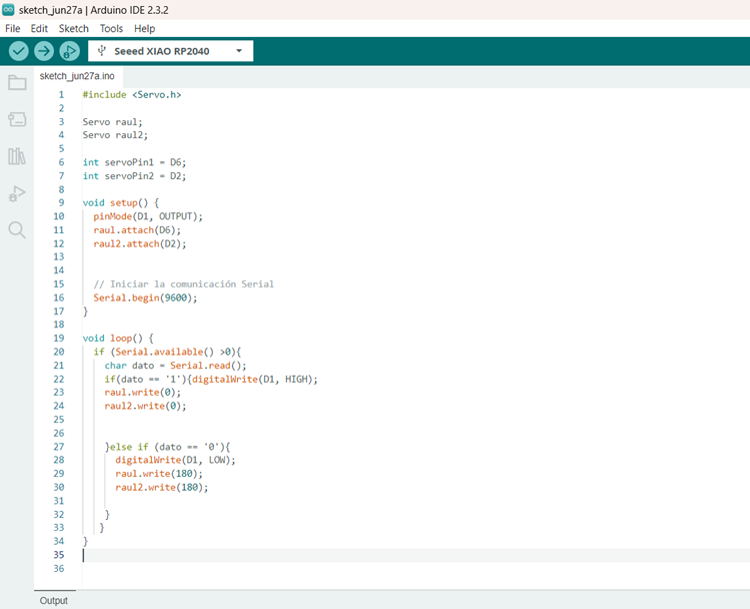
Let´s see what happens with 2 servos
All the same time
Click to download code
To finish, let's break a loop
On-0° & Off-180°
Click to download code