Molding & Casting
Click here to see the group assigment
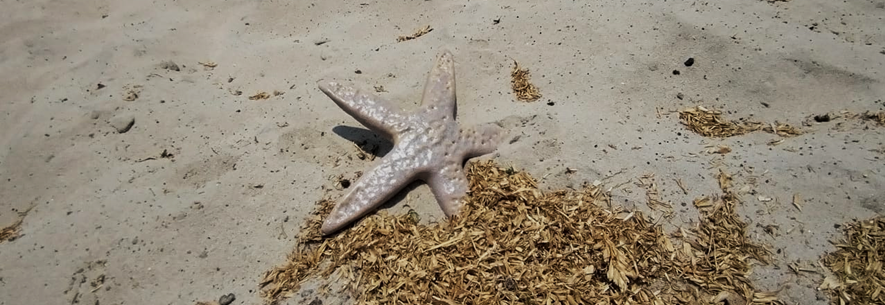
I love the Starfish Anatomy
You can download both designs
Starfish 1 and Starfish 2
I was inspired by starfish to model 2 different textures that could create a single piece.
-After modeling the original parts, I added a container that would help me with the silicone pouring process.
-I added some spheres in the opposite direction so that the molds would match when I poured the material.
IMPORTANT: The pieces must have a shape that allows them to be easily removed from the mold. In this case, he decided to create a chamfer along the entire edge of the original piece to obtain an ideal draft angle.


The Vcarve file
- Once I finished the model, I realized that with a square shape, I would have to use more material, so I decided to change it to a circular shape.
- Now, to prepare the file in VCARVE, the first thing I did was configure the dimensions of material.
- In the modeling option, I imported the STL file and arranged it in a medium plane
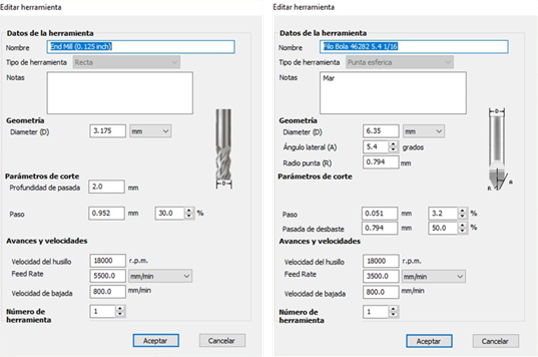
- Once I set up the model, I used the toolpaths menu to set up the cut. I started with the “Roughing” toolpath and set the tool to “3.175 diameter.”
- After repeating the process but now, set the path of the "Finish" with a 6.35 mm diameter ball nose tool.


Tools configuration |
Trajectory simulation |
 |
Machining
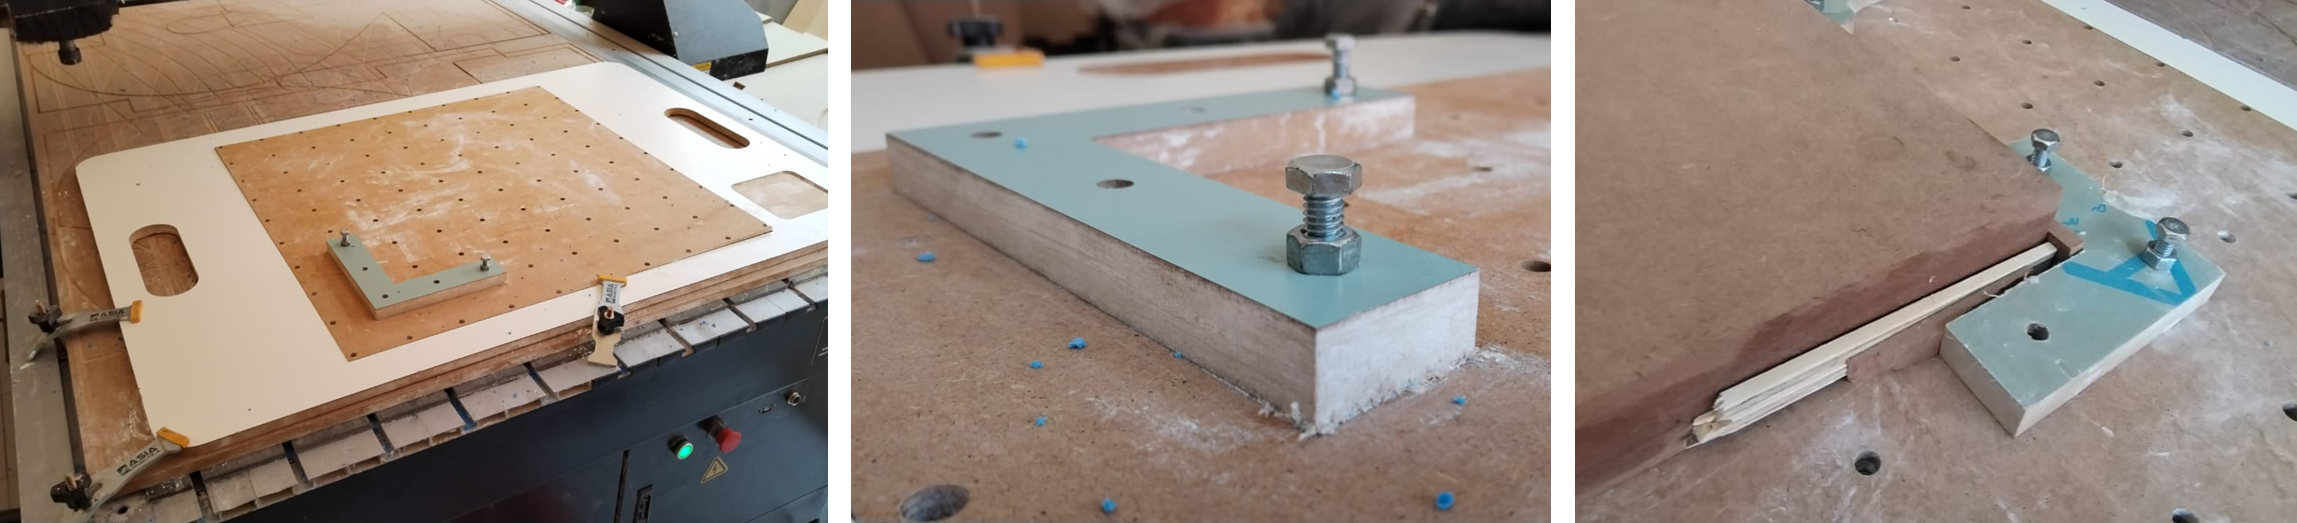
This time, I used the CNC Router Asia Robotica

It´s never too much glue
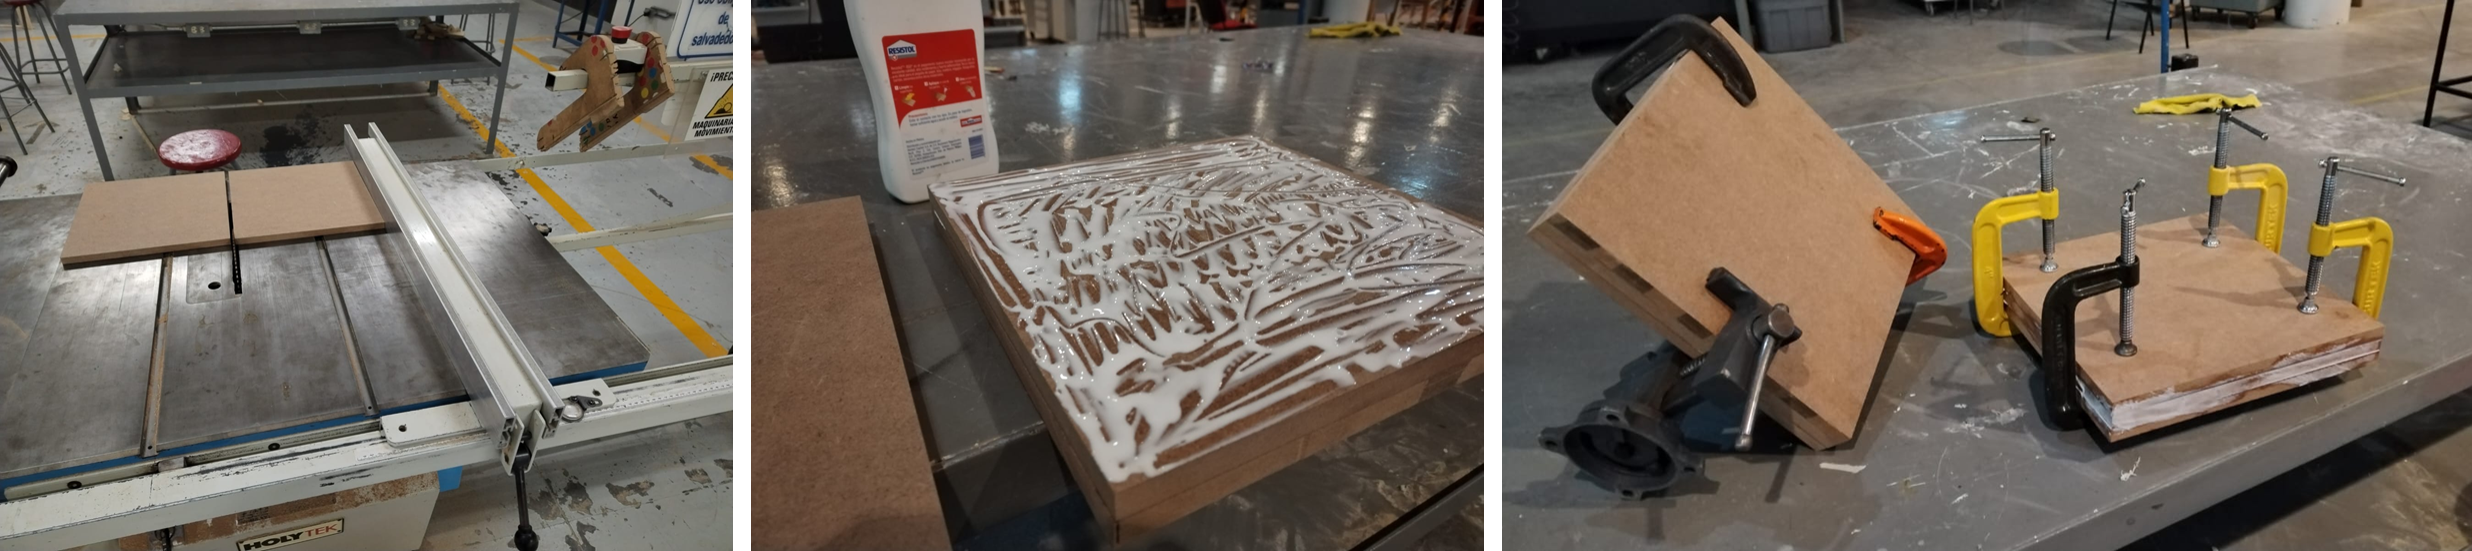
Material preparation & cutting
I used 3 plates of 15mm to reach the ideal thickness.I glued them with White Resistol and pressed them overnight to ensure the material bonded.
To accommodate the material on the Router bed, I rely on a base with a system of guides and screws that secure the material to prevent it from moving during machining.
(You can also make this base with the Router)
To machine it, I first loaded the rough cut and when it was finished, I changed the tool to start the finishing path.
Just like making pancakes
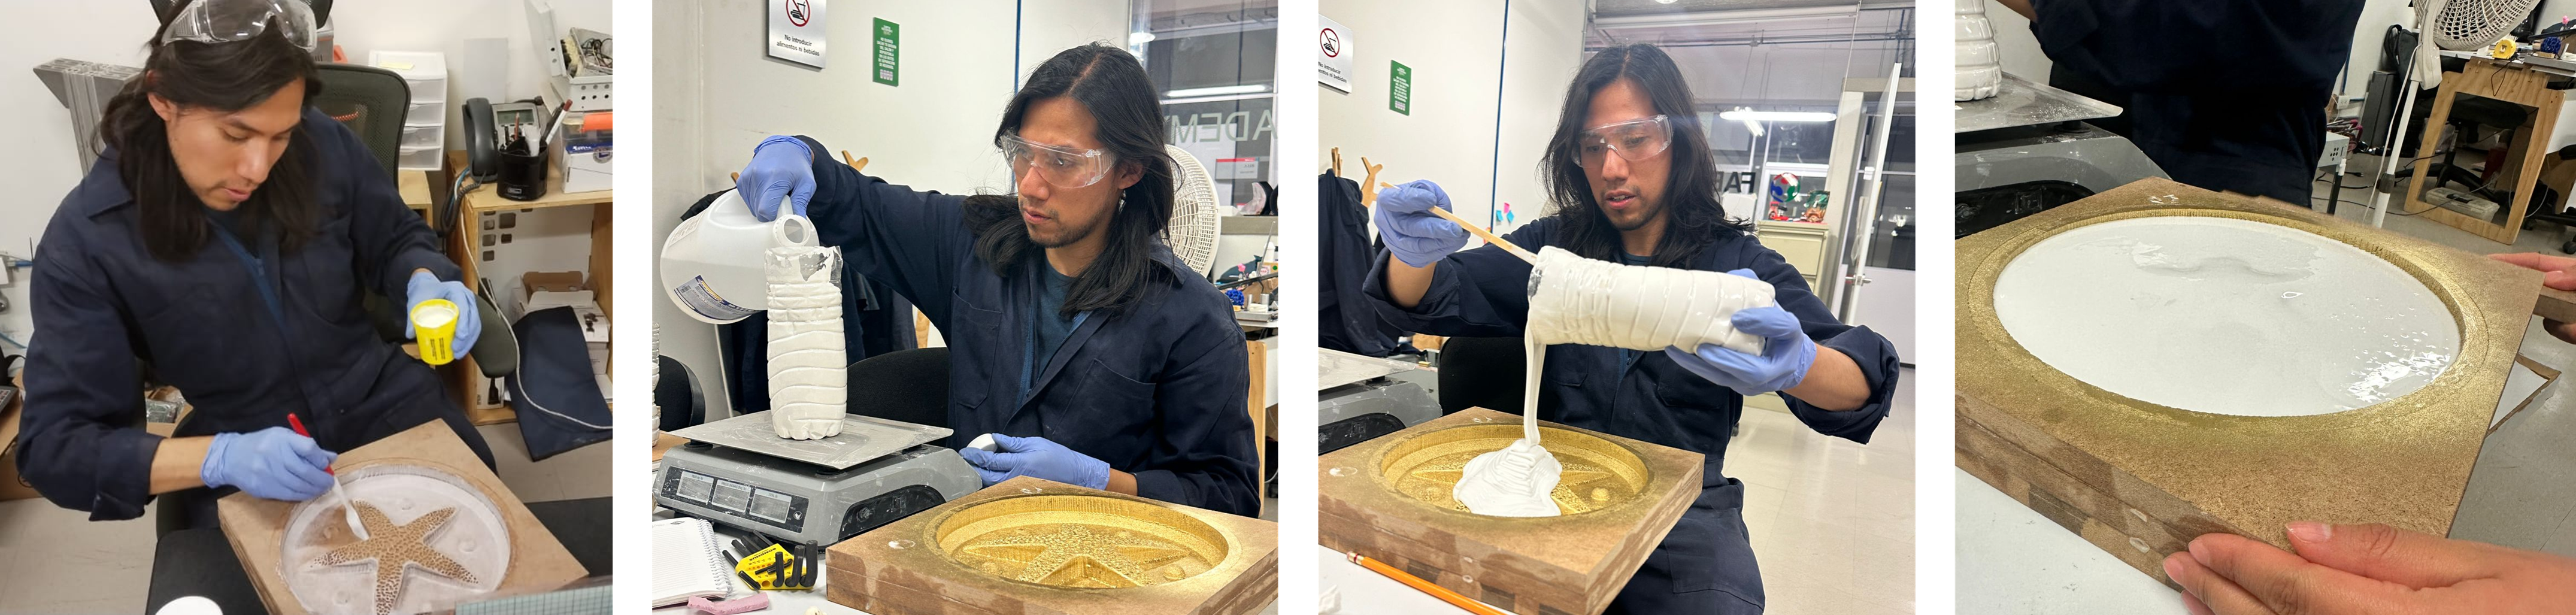
Remember don´t use latex gloves, please!
For the flexible mold I used Smooth ON 3030 silicone from the Mold Max™ 30 series which requires you to use a 100% silicone formulation + 10% catalyst and takes 24 hours to dry.NOTES:
- It is recommended not to use any latex element during the formulation since this can alter the silicone drying process.
(I used Nitrile gloves)
- Before pouring the silicon into the wooden mold, it must be sealed to prevent the pores of the material from absorbing the material
(I used water with white Resistol)
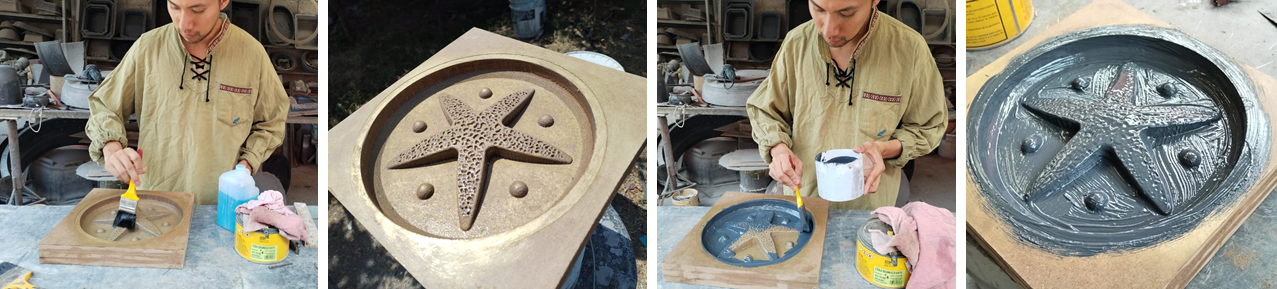
Let's try with Fiberglass
For the rigid mold I used the same mold but this time I prepared it with wax and mold release agent.I the mold dry in the sun for a few minutes before applying GELCOAT, which helps a lot as a base for detailing the piece when unmolding.
When the Gelcoat dried or lost touch I applied 1 1/2 layers of fiberglass in small pieces so that when applying the resin it would not create air bubbles. I used a general purpose resin
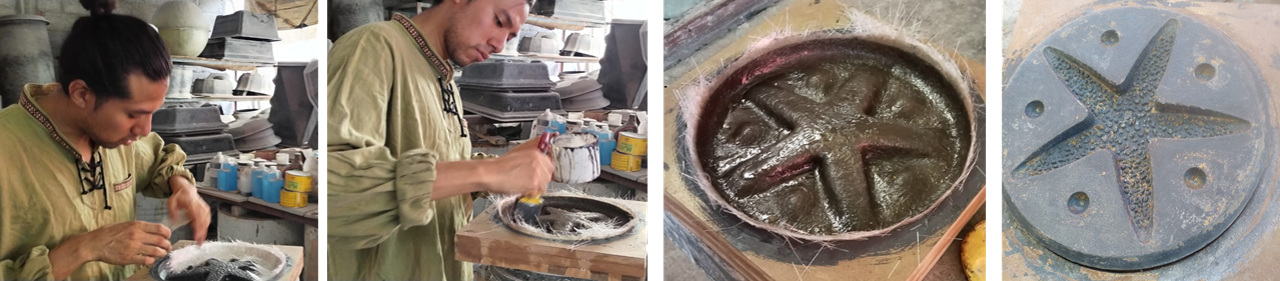
Completely balanced
Black & white, Day & Night, Yin & Yang, Flex & Hard.
Let's experiment with clay
The noblest of materials (Yeah...)
I decided to experiment with ceramics to obtain a more realistic texture in the final piece, plus the ceramic workshop had some liquid slip clay, so I took advantage of the material available.- I used a plaster board to absorb the greatest amount of moisture from the material and I used a heat gun to speed up the drying process. Once the material was dry enough I kneaded it until the material was more homogeneous.
- I used a press to reach a thickness of 6mm and with a cutting tool I removed the excess material.
- I pressed the material on the silicone mold with a damp sponge to trace the shape of the mold and then removed the excess material.
- To maintain the hollow shape of the star, I used crumpled newspaper under the piece and with a heat gun I removed as much moisture as possible (the drier the piece, the better the feel that prevents the piece from warping)

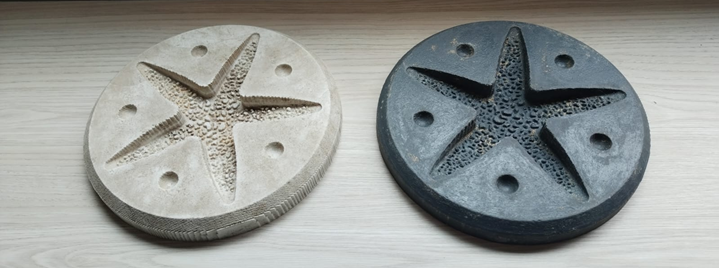
I used the ceramic oven to dry the piece (The material loses color when it is completely dry) and with a 180 grit sandpaper I removed excess material on the edges of the piece. To seal the piece, I used a lavender glaze with yellow spots that did not melt completely, but hey, that's how you learn...(LOL)
Without glaze / with glaze
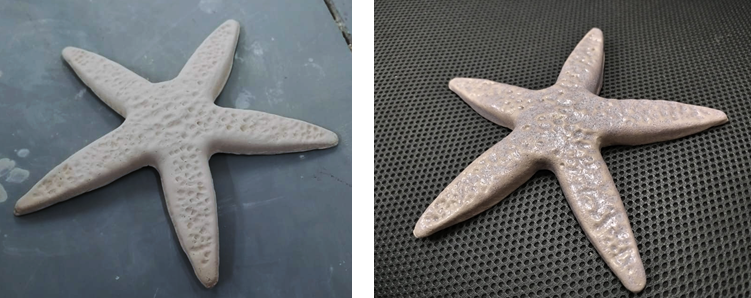
An almost exact starfish copy
And I think it turned out beautiful.