3D Printing
It's more that extruding
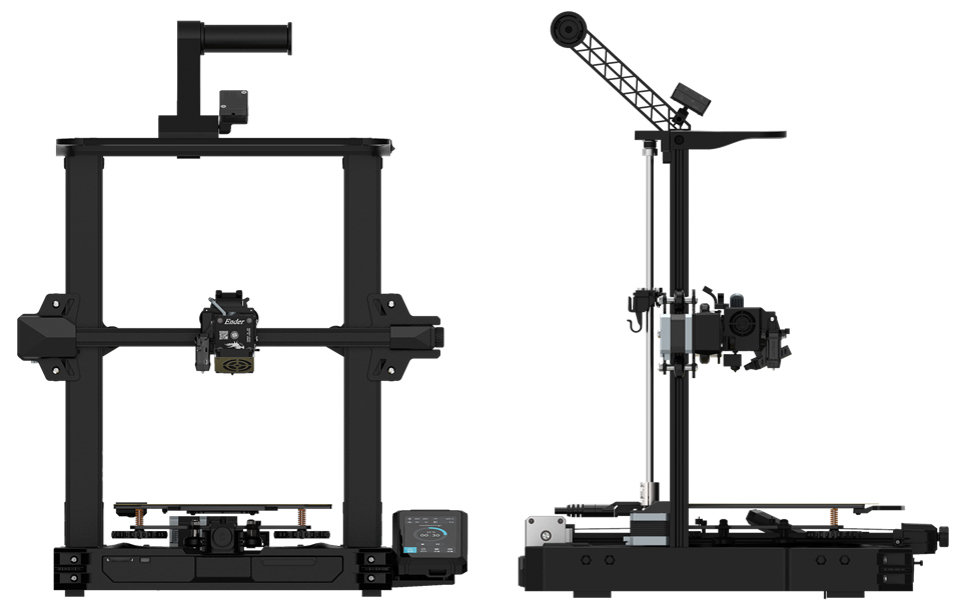
Creality Ender S1 Pro
For this exercise I used an Ender S1 Pro 3D printer, because its structure is more
versatile for printing small scale parts. And refilling the filament is more comfortable
If you want to know more about this printer
Click here
Modeling
Beauty wings
For this exercise, I decided to use a concept from my final project. I took an image as a reference and drew some dragonfly wings in solid works taking into consideration that the piece would make a curvature of approximately 6 cm in diameter.
I used the extrude tool and bending operation for the first piece.

Later, with a plane parallel I drew a similar figure but, with another position and with the same extrusion and bending process I managed to make the piece have a second layer.
And finally, I used an extrusion between both pieces to join them in the center and achieve a floating effect in the second layer.
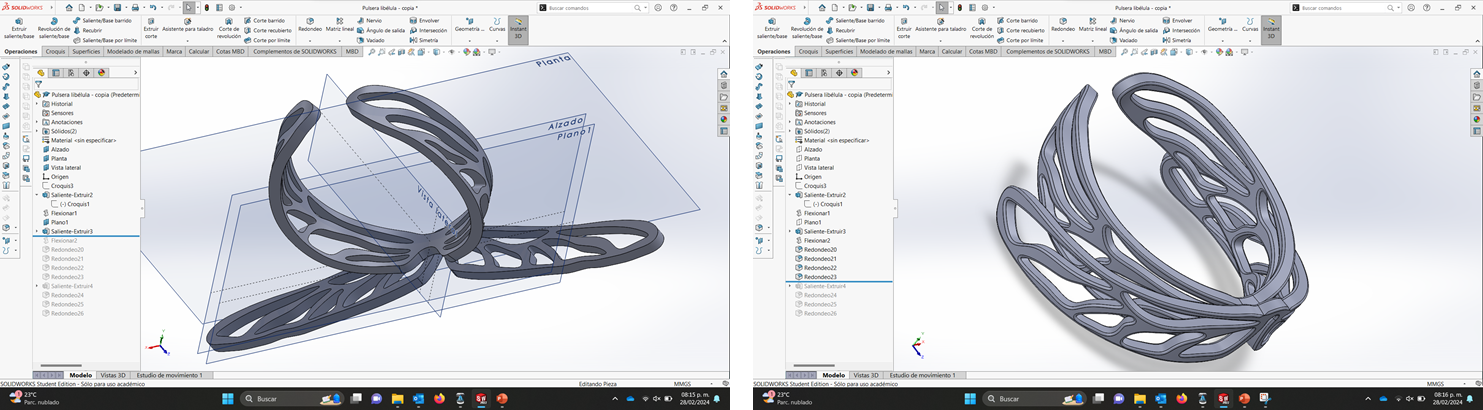

If you want to download the file
in Solid Works Click here!
ULTIMAKER CURA
How to prepare the print
To prepare the file, the part must be exported as STL and prepared in the Ultimaker Cura software, which allows you to prepare files for various filament printers. The properties of each printer are different, so it is important that you make sure you select the appropriate printer.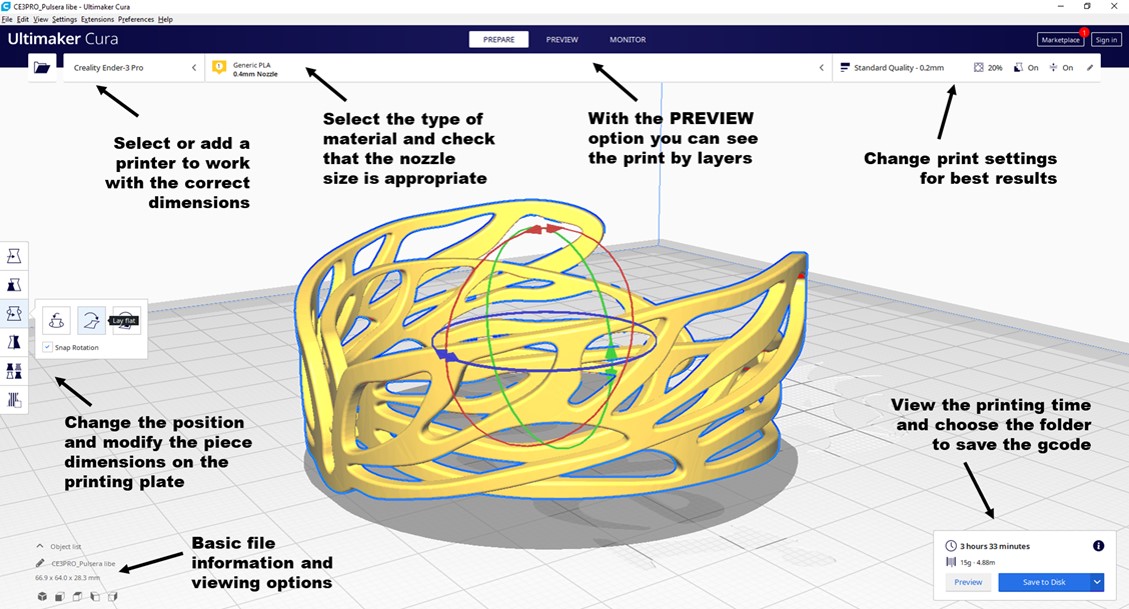
The basic settings
Ultimaker cura allows you to edit variables in different formats, from the most basic to something more detailed.
Something important is that each piece will have a different configuration depending on its characteristics and the result we are looking for in relation to quality, printing time, strength of the piece, among others.
This table will help you remember the most important parameters for printing configuration
| Quality | The quality defines the thickness of the material in each layer. Consider that the lower the parameter, the higher quality you will obtain, although it will take longer. | Walls | The walls define the thickness of the layers that you can have inside or outside the piece. If you want to give your piece a finish, you should use more walls, because by sanding the piece you eliminate part of the material. |
| Top / Bottom | Depending on the piece, you may need the first or last layers to be more solid, so you can modify the quality to ensure a greater concentration of material in those layers. | Material | Modify the temperature depending on the type of material you use. In the following table you will find some temperature parameters for different filaments |
| Speed | The printing speed not only defines how fast the printing will be, some materials require the speed to be very slow, such as TPU which has a more viscous consistency. | Travel | In some cases, in the travel configuration, you must activate or deactivate the material retraction, to ensure the correct fluidity of the material and avoid unnecessary details in the print. |
| Infill | Modify the filling of the piece to make it lighter or denser.There are different types of filling that can ensure the quality of your piece. | Plate adhesion | This may be the most important variable, since the correct temperature of the printing plate helps the first layers of filament to adhere, avoiding errors in the extruder path. In the following table you can see the recommended parameters for the temperature of the printing bed depending on the material. |
3D print filament
Some important features
| MATERIAL | Properties | Application | Print temperature | Bed temperature |
| PLA | Easy to print, enviromentally friendly, degradable, low shrinkage, high tensile stregth, variety in color | Medical devices, food handling, packaging, automotive components | 190 -220°c | 50 -70°c |
| ABS | High rigidity, good heat resistance, good impact resistance, good weldability, good abrasion and strain resistance, high shrinkage | Home appliances, building and construction, fittings, housings, pipes, automotive components, electronics | 230 -250°c | 80 -120°c |
| TPU | High elasticity, high abrasion resistance, high shear strength, transparency, oil and grease resistance, high shrinkage | Automotive components, sporting equipment, medical devices,outer cases, seals, gaskets, tubes, hoses | 240 -260°c | 40 -60°c |
| PETG | Easy to print, good thoughness, good transparency, good heat resistance, good water resistance, good chemical resistance, low shrinkage,high tensile strenght, recyclable | Food and drink containers , medical and pharmaceutical devices, retail stands and displays, machine guards | 230 -255°c | 50 -70°c |
Supports
Big help or big problem?
For the first few pieces, I decided to use PLA and set up printing horizontally using full supports, but it didn't work out very well.
In a second test, I angled the piece and used the tree supports, but when the print was finished, removing the supports was very difficult.
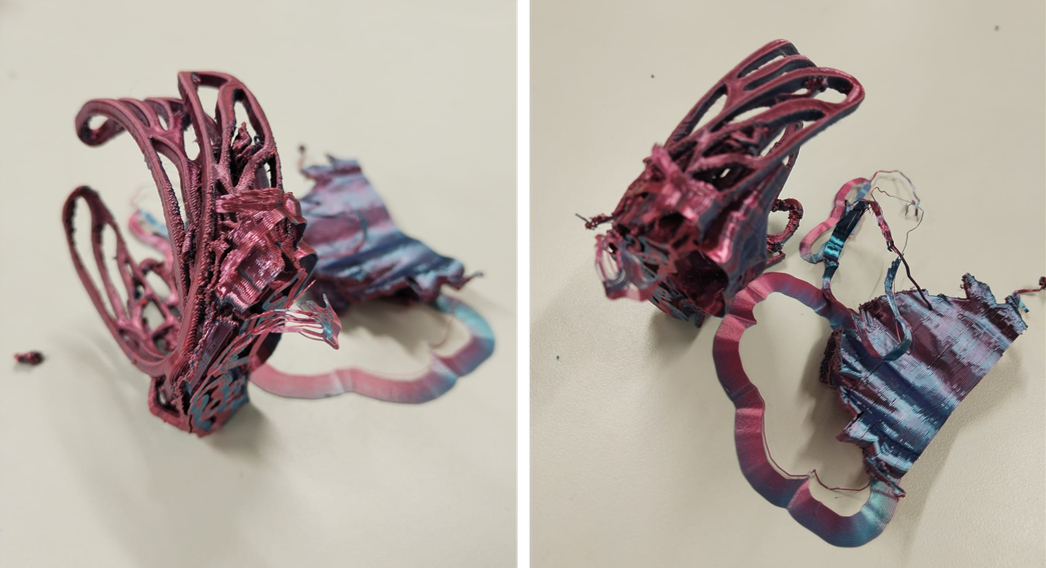
Well, I think PLA was not the best choice for this piece.
So, let's try another material.
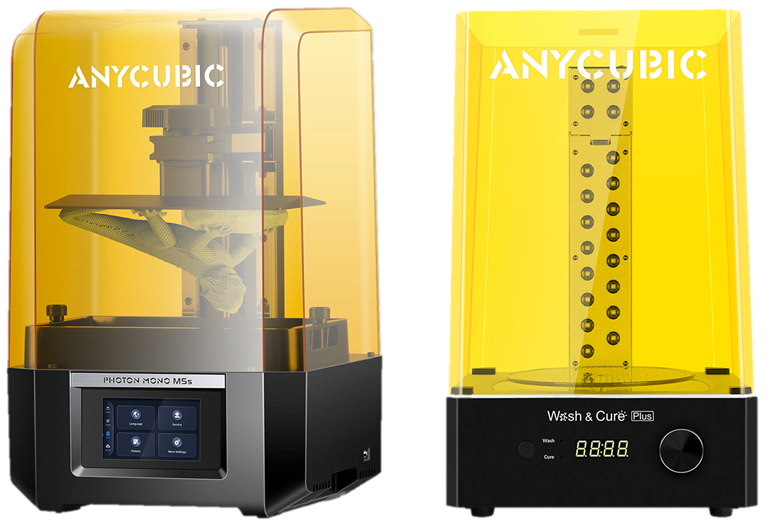
Anycubic Photon Mono M5s
To the third test, i used a resin 3D printer, because my piece needs another support types.
And the print is faster that filament 3D printer.
If you want to know more about this printer
Click here
Anycubic Photon Workshop
How to prepare file to print
To prepare the file, I downloaded the “Anycubic Photon Workshop” software and selected the appropriate printer.
The interface is very friendly, so I was able to manipulate the piece in the same way as in CURA.
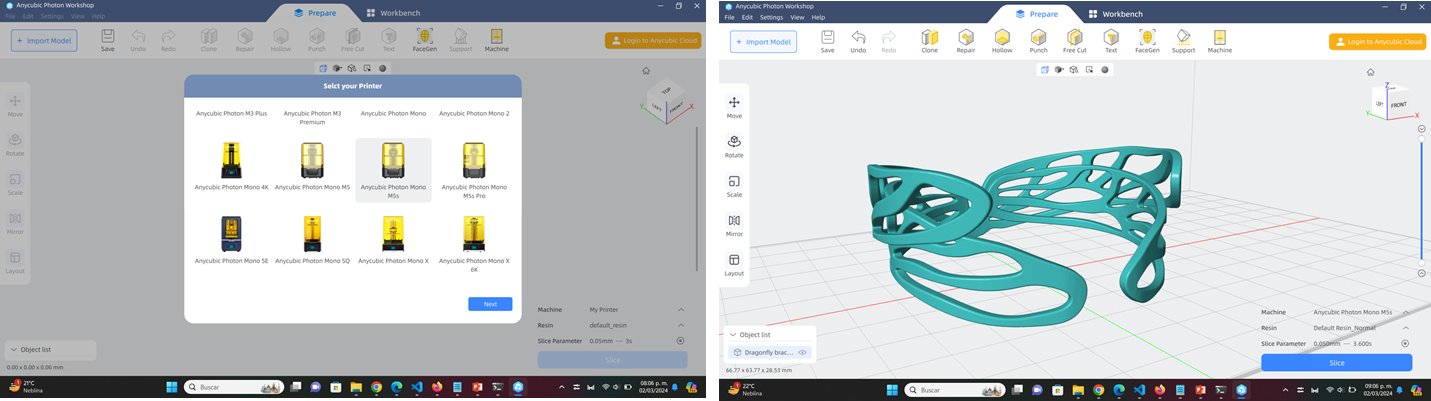
The great advantage of printing this type of parts in resin is that the supports are not very invasive, so you only need to position the part at the correct angle and save the code on a USB

The process
Remember to use gloves and glasses
1.- When the printing is finished you must change the position of the bed so that the resin drains.
2.- When you take off the piece, you can remove the supports with your hands or with cutting pliers.
3.- The piece must be washed with Isopropyl Alcohol to remove resin residues.
4.- To finish you must cure the piece with the printer complement. (Curing time 15 min)
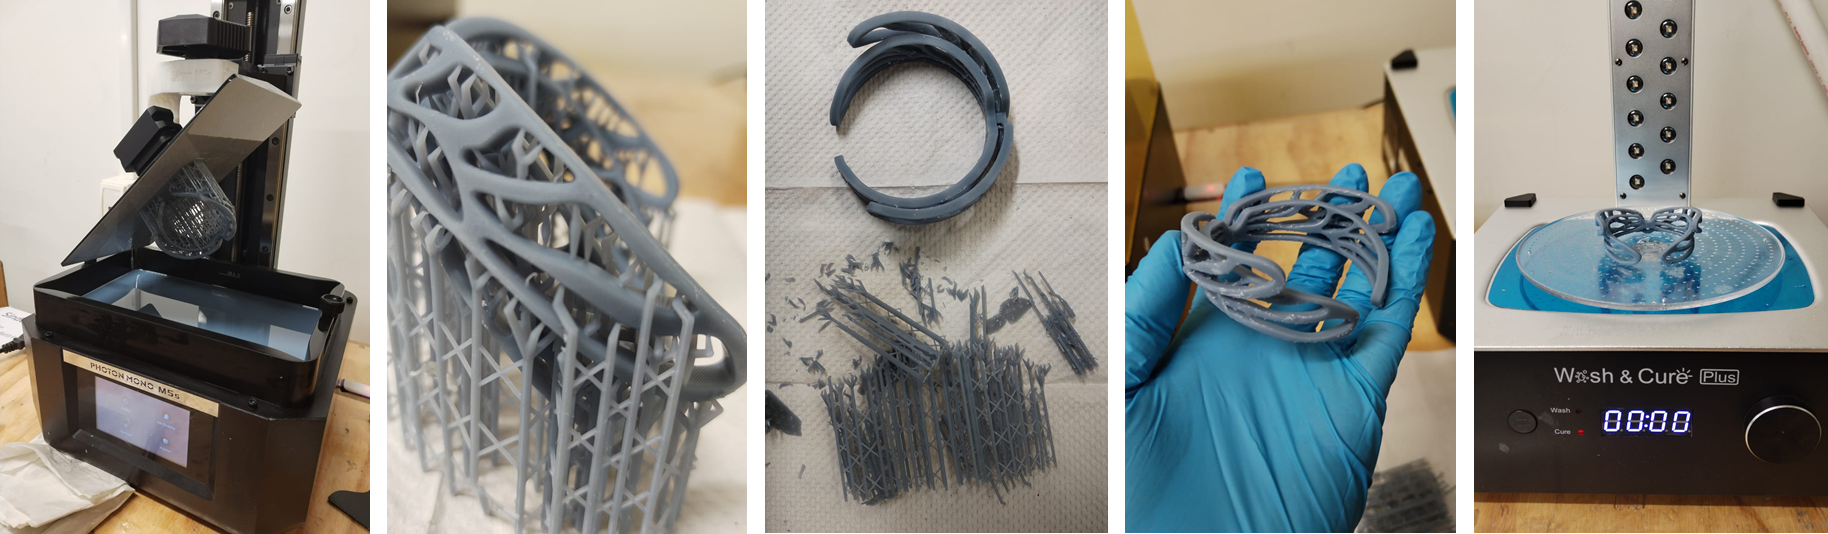
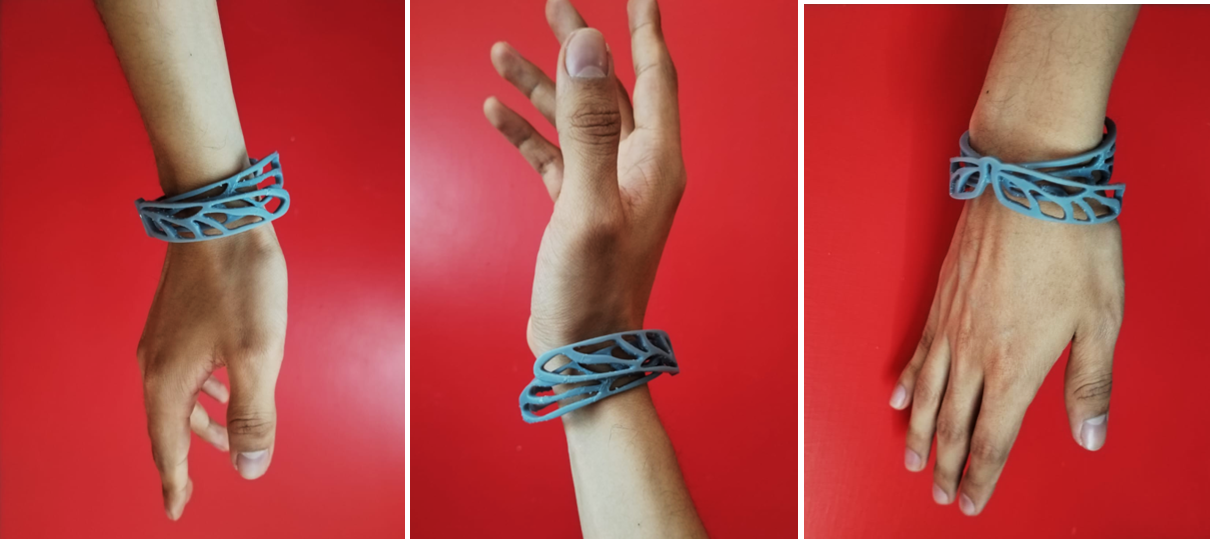
The final result
It's beautiful, isn't it?
Scanning process
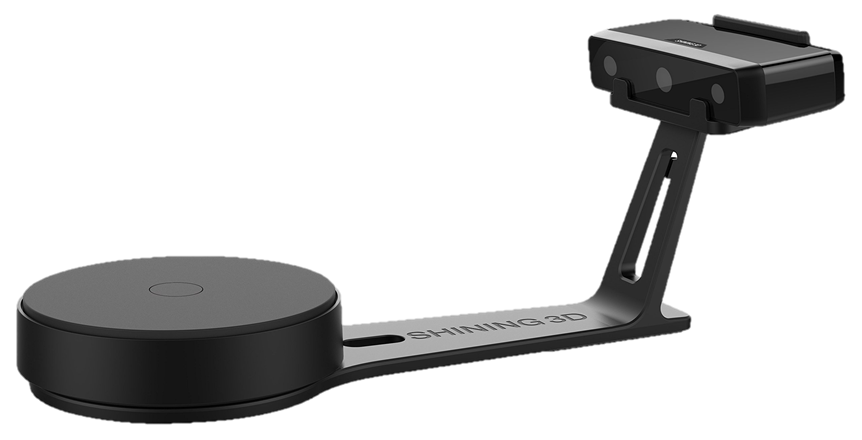
EinScan-SE V2
I think that scanning exercise was my favorite beacuse, the real challenge was finding a piece to scan.
And the EinScan - SE V2 its the easiest 3D scanning experience for non-technical users.
You can download the software to use EinScan
HERE!
Let's scan baby piccolo!
Be careful with the shine
For this exercise I used a ceramic piece, but the paint details were too shiny, so I used makeup to tone down the shine on the piece.NOTE: In the first scan, it was difficult to detect the black parts, so I used more makeup in those areas.

How to use the Scanner
 |
| For a new project, select "new workspace" Create a folder with the project name |
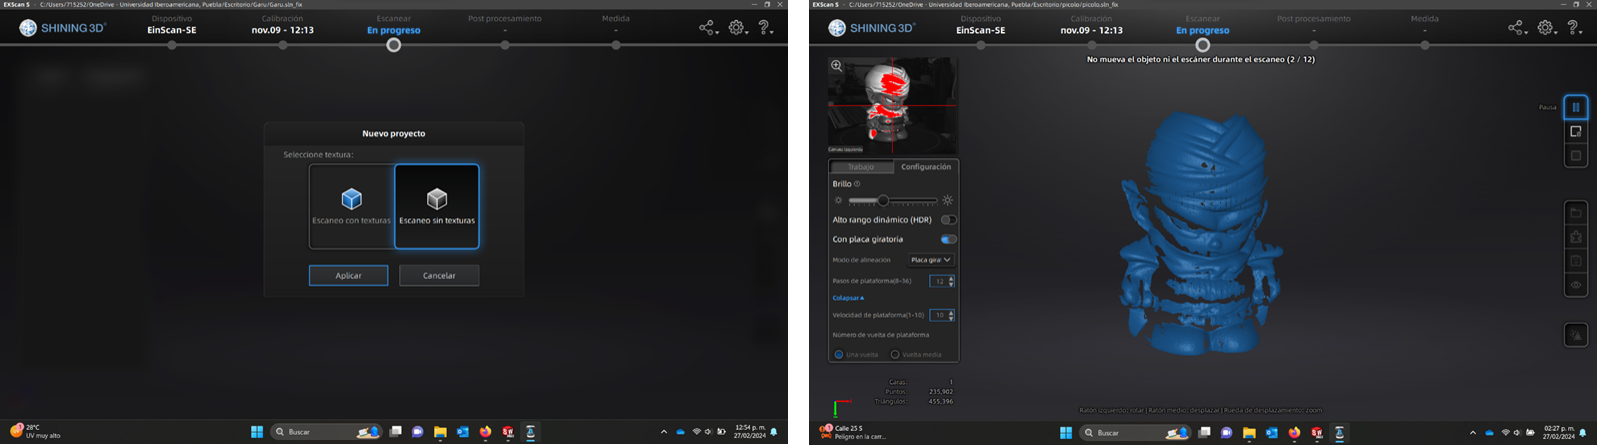 |
| Select a texture type for your scan Place your piece in the center of the plate and start the scan. NOTES: To ensure a correct scan, modify the brightness levels until the red details are minimal NOTE 2: The steps in the platen speed will depend on the size and stability of the piece. In my case, I used 12 steps and 10 in speed |
 |
| After the first lap select the "Apply edit" option and you will get the scan information |
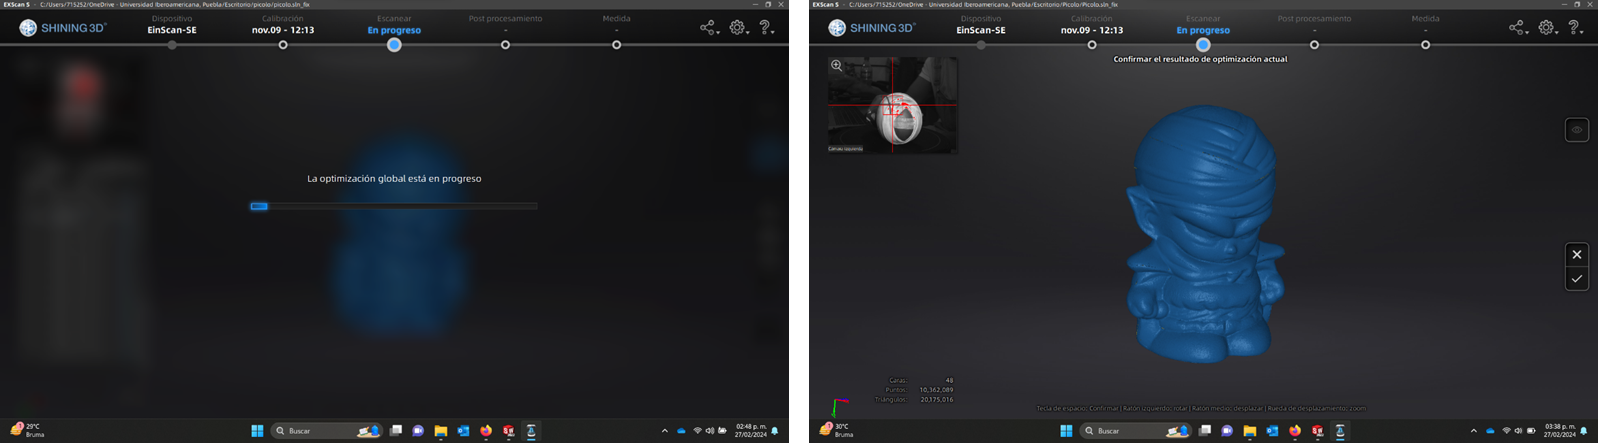 |
| You will be able to see the areas that had trouble scanning so you can select the "global optimization" option. Change the position of the piece and repeat the steps until the piece is completed as best as possible. |
Global optimization
One turn is not enough
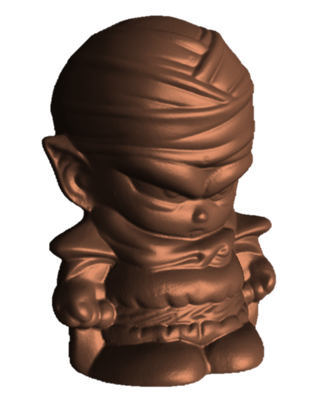
When the scan is finished you can save the STL file to print or edit later
Click here to download STL file
Note: Not all 3D modeling programs
allow file editing
 |
| When you are satisfied with the result, select the Mesh Model option Select the "watertight model" to obtain a solid |
 |
| The software allows you to edit some details of the texture. In my case I softened the piece so that its texture would be nuanced a little. |
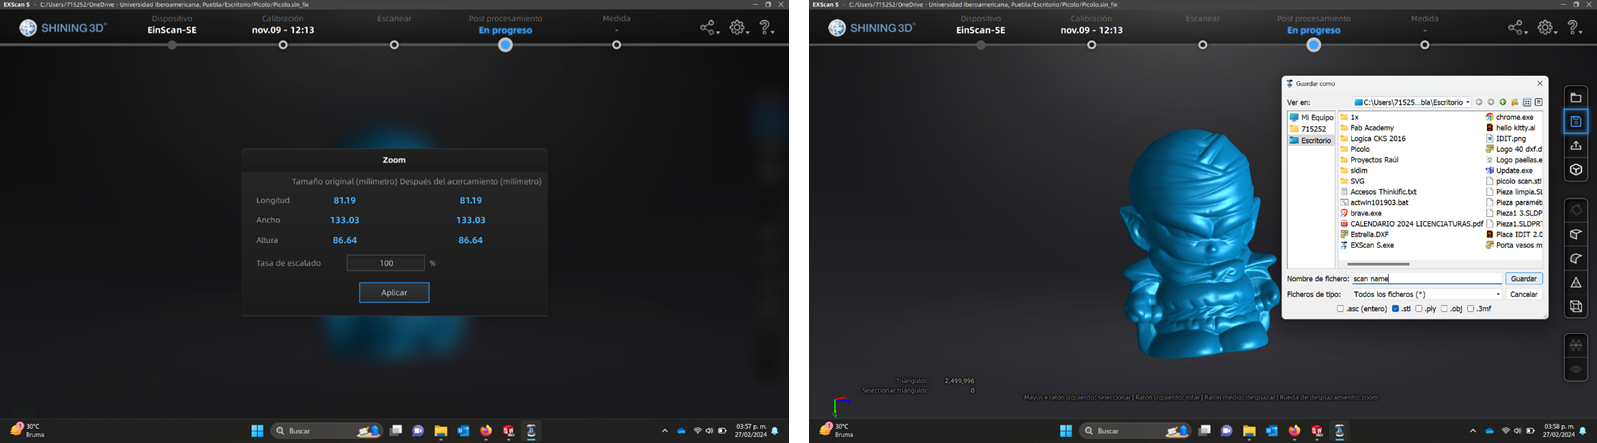 |
| When you save the part, you have the option to keep the original proportions or scale the part. The software allows you to extract an STL version of the part as a new file different from the original scan folder. |