Computer-Aided
Raster, render, animate, simulate
Vinyl, vinyl everywhere!!
Vinyls are very common, but I had no idea how to make it
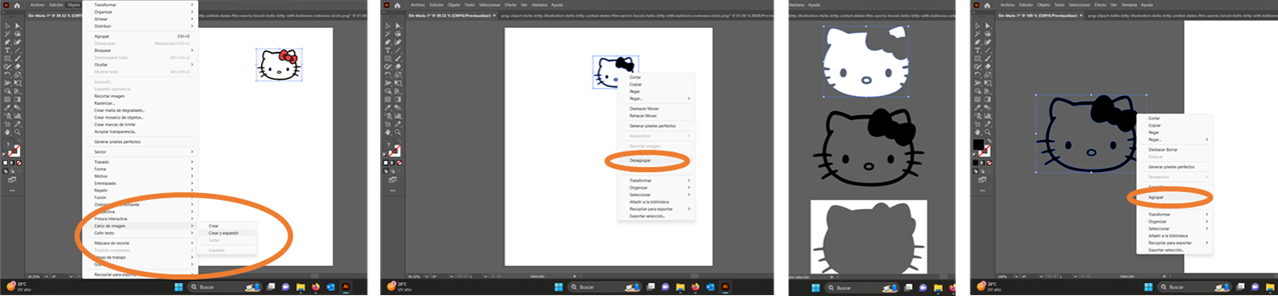
How to create and prepare the file
- I used the "trace" tool to "create and expand" the vector
- I ungrouped the vector and separated the elements
- I eliminated the white vectors and grouped the black ones
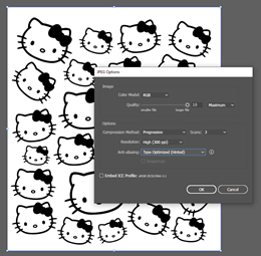
- Next, I made a pattern all over the canvas.
- And to finish, export the image as a JPG with a high resolution
CLICK HERE to download Illustrator file
Cut Studio
How to use the software
 |
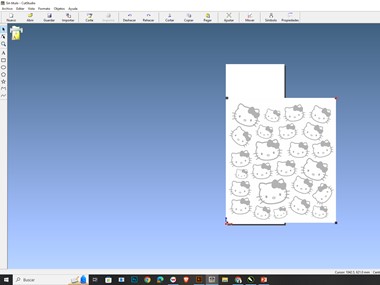 |
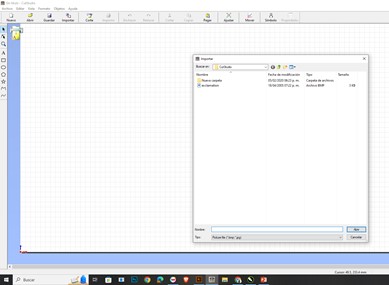
| I used the "Cut Studio" program and the first step was to import my file into a new document. |
The image was too large and was not within the cut space. |
 |
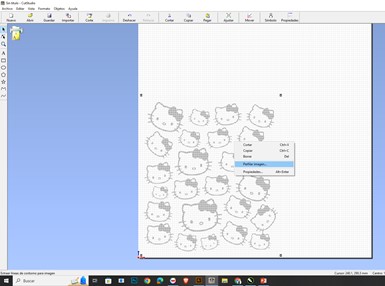 |
| So, I reduced the size of the image with the "properties" option and adjusted it exactly to the size of the bag that I am going to use for the exercise. |
I selected the "profile image" option to extract the vector from my image |
 |
 |
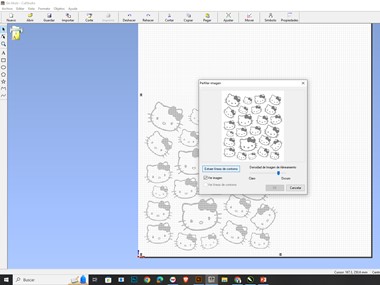
| And I used the "extract contour lines" option by adjusting the darker density. |
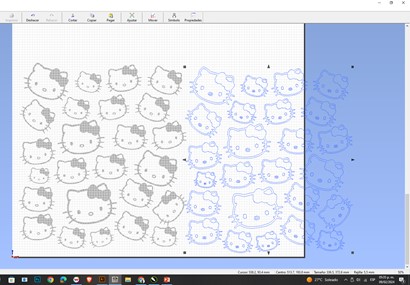
And automatically the program created a new file with only the cut lines. I deleted the jpg and rearranged the image. |
ROLAND
This is how it cuts
- I used the "ROLAND" cutter
- I placed the vinyl on the back of the machine and adjusted the edges with the front rollers.
- I selected "ENTER" and the cutter positioned itself at the zero point.
- I did a first test but it DIDN´T WORK because the cutting force was insufficient.
- In my case, I used textile Vinyl, so I raised the power from 140 to 190 with the "FORCE" button
- And I just had to click cut again.
The tote bag
how to prepare the piece
- I removed the parts I didn't need
- I did a first test with an iron, but it didn't work.
- So, I used the FabLab sublimation iron with the following settings: Time: 15 seconds and Temperature: 150°
Important: Place a sheet of paper so that the heat does not affect the garment
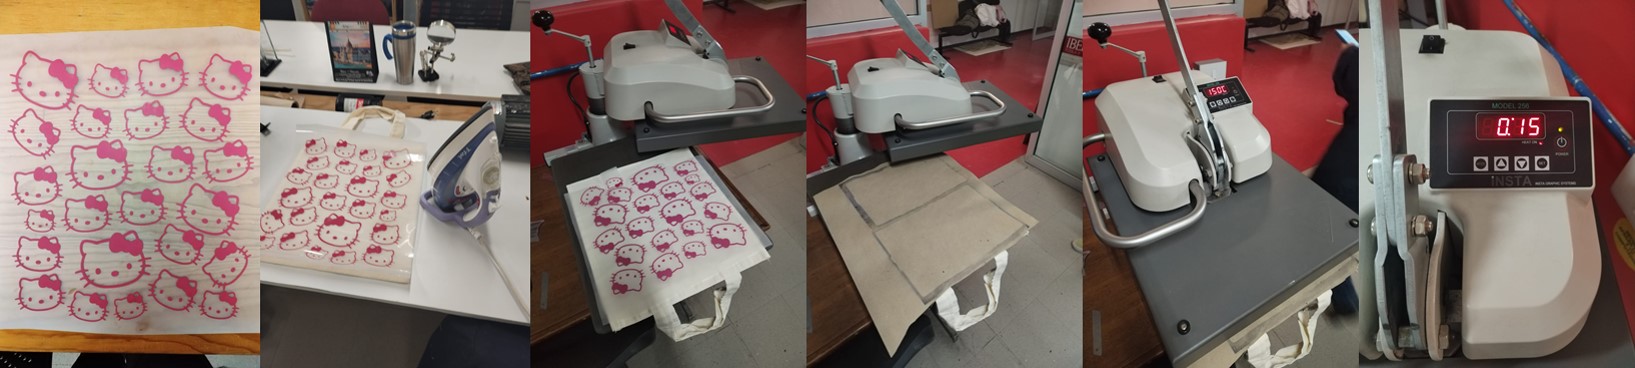
The final result
It's beautiful, isn't it?

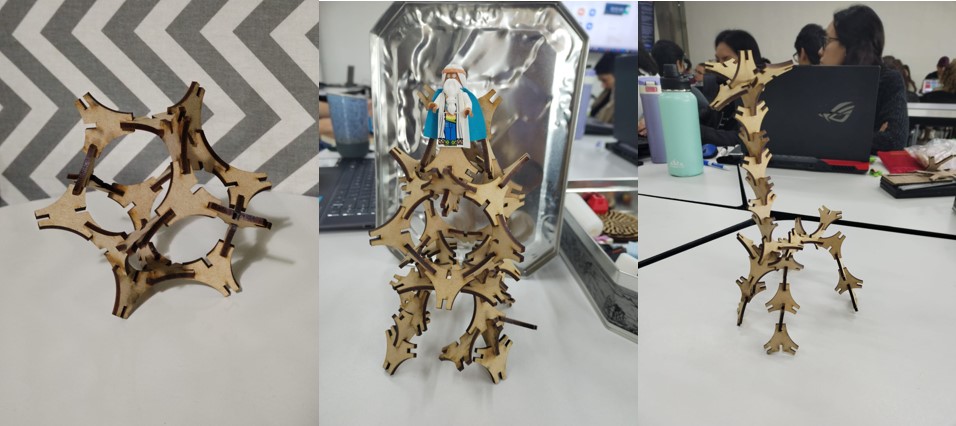
Laser cutting
Click here to see the group assigment
For the parametric piece, I was inspired by soccer ball design, beacause, are armed with several pentagons.
But, when I traced the circles for the curves of my piece, they were too open to me. So, I changed the pentagon for a hexagon.
CLICK HERE to download the parametric design in Solidworks

I used the “Equations” option to add the measurements of the piece.
This allows the piece to change its entire composition when you modify data.
To join the pieces I used a system of slots that allow them to interlock with each other, drawing a rectangle in the middle of each intersection.
After assigning the measurements with the corresponding equations, I used the "circular pattern" option to replicate the rectangles.

VERY important: In the equations assign a variable for the thickness and KERF of the material.
So, the equation looks like this: "Thickness-(kerf*2)"
Once the image was 100% defined, I cleaned up the lines I didn't need and saved the file as a DXF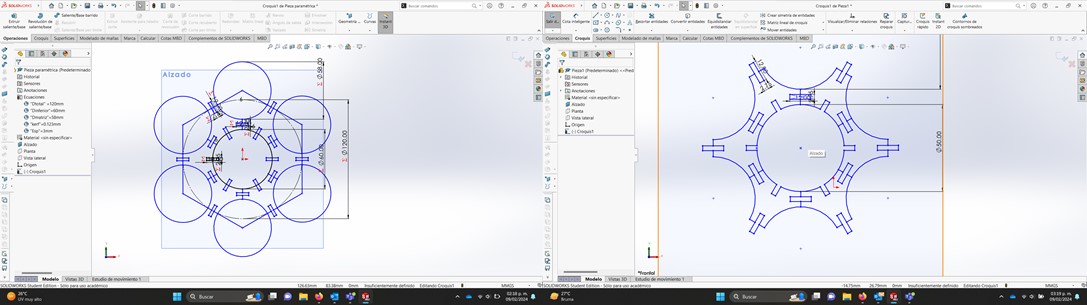
SMART CARVE
Let's prepare the file
 |
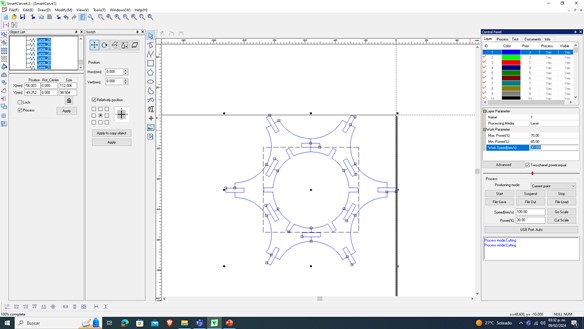 |
| To prepare the file, I used "Smart Carve" Software which allows you to change the power and cutting speed parameters. The first step is to import the file. NOTE: It is very important to verify that the file is exported in the measurements we used to plot it. In my case my piece is drawn in millimeters. |
You can configure each color with different parameters. In this case, I wanted the same parameters for the entire piece. Max Power 70 Min Power 65 Work Speed 30 NOTE: It is very important to do power and speed tests, because the machine may be worn out or your material could be thicker than normal. |
 |
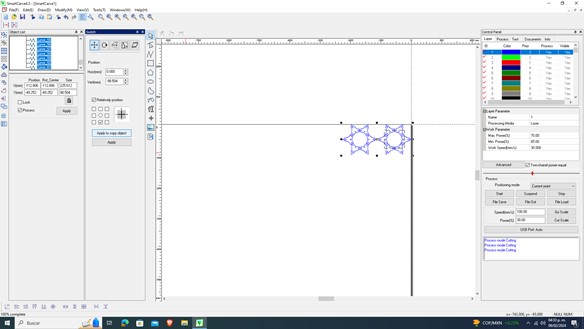 |
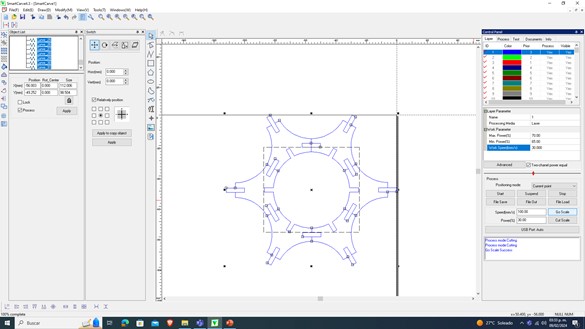
| The Software has the "Go Scale" option that allows you to view the space needed to cut your file on the cutting bed. I used a 3 millimeter MDF board that looked like the waste of another cut. |
After doing some tests, I made a pattern with the "Apply to Copy Object" option and started cutting the number of pieces I needed for my set. |
Let's start cutting
Prepare the machine
Follow these 6 steps to prepare the laser cutter
1.- Turn on the machine smoke extractor
2.- Turn on the power source of the laser cutter
3.- Take out the emergency button
4.- Connect the key and turn it so that the configuration panel turns on
5.- The white button indicates that the laser is on (Turn it on)
6.- Check that the power knob is at maximum

The process
Press start and be careful with your hands
Please don't see the laser
The final result
A whole world of posibilities