KEEP CALM
and keep going EXTRUDE!
This week, 3D modeling softwares were protagonist
Fusion 36O
Take 01 - ACTION!
The program installation
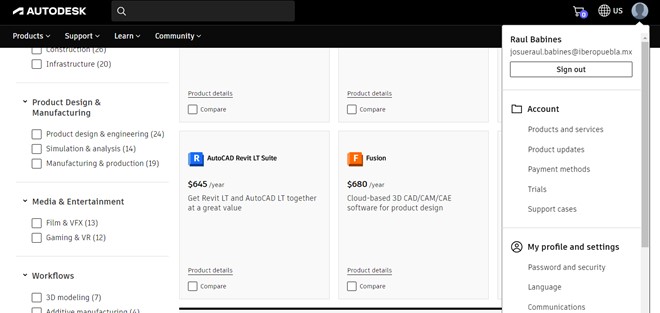
- The first step was to create an Autodesk account and to download Fusion 360Note: In my case, i used my unversity account
You can download different products by AUTODESK
 - I thought my Lap wouldn´t support the program, but it does.
- If you download Fusion 360 on your Lap, take the following considerations about system:
Memory 4GB of RAM 4 GB of RAM (integrated graphics recommend 6 GB or more)
Graphics Card DirectX11 (Direct3D 10.1 or greater) Dedicated GPU with 1 GB or more of VRAM Integrated graphics with 6 GB or more of RAM
Disk Space 8.5 GB of storage
Just a TUTORIAL drop away
How to start modeling 3D pieces
Class Online
Alberto Blanco (Fab Academy Instructor) helped us with an online class to learn about the Fusion 360 interface and some basic tools. To make it easier, we did an exercise to understand parametric design.Draw, extrude and repeat!
Tutorial on Youtube
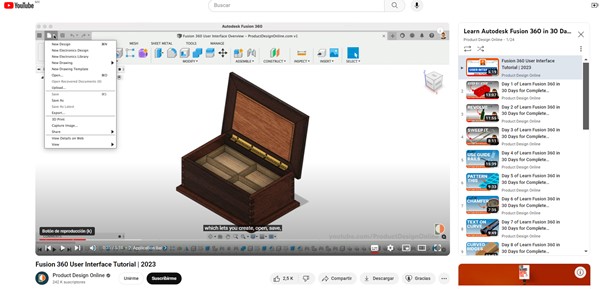
A colleague shared me a YouTube channel with microlessons to practice. Personally, I think that tutorials are not for me because, I prefer to learn in person. But, maybe it works for you.LEARN Autodesk Fusion 360 in 30 Days for Complete Beginners!
My first Steps in Fusion 360
How to make a parametric design
 |
 |
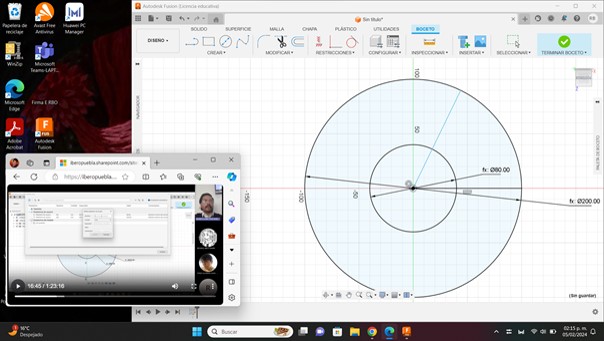
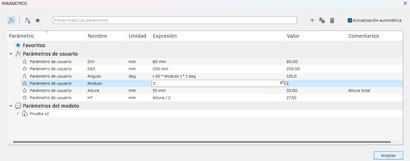
| The first thing I did was add minimum and maximum diameter parameters. This information can be changed in the restrictions section. |
After creating the drawing, I used the "extrude" tool to give volume to the piece. A window automatically appears where you can modify the operation. |
 |
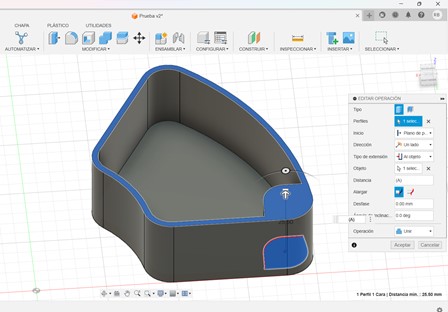 |
| Now, use the shell tool to remove the center of the solid piece. With this tool you can also edit the thickness of the walls |
We needed the piece to have a reinforced corner to add a screw. So, we draw a shape at the bottom of the part and extrude it to the edge |
 |
 |
| For the screw hole, I drew a circle in the corner that we extruded earlier. | And to make the perforation, I used the same extrusion tool. But this time, I selected the "Cut" option in the operation configuration panel. You can also modify the distance of the cut. I selected the bottom of the piece |
 |
 |
| The advantage to create a 3D model with restrictions, is that when modifying the values, the model changes its proportions automatically. |
The final piece looks like this, when you change the value of the modules |
If you want to download file
click here!SOLIDWORKS
Take 2, action!

Tutorial on Youtube
I think that I really liked the solidworks interface. Possibly, it will be the software that I´ll use to my final project. In this case, I replicated the extrude and shell exercise to compare the toolsI found a YouTube channel in spanish with tutorials to learn how to use different tools. Solidworks to Beginners!
Let's compare tools
To this exercise, I used the same tools that fusion 360
 |
 |
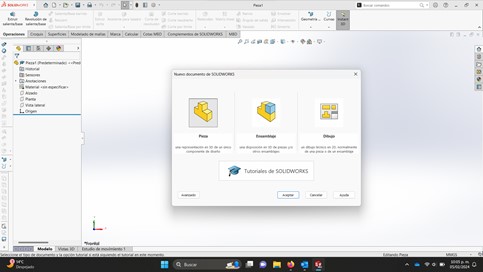
| The Solid Works interface seems more friendly to me. To start modeling, select the "New piece" option and on the left, a panel appears with the view of operation history |
I used the "sketch" tool to draw a rectangle on a plane. Then, I used the extrude tool to give volume to the piece. In this case, like "Fusion 360" you can edit the operation values. |
 |
 |
| For this exercise, I decided to round the corners of the model with the fillet tool. Like other tools, you can modify the operation values and get a preview |
To finish the exercise, I used the “Text” tool and engraved my name on the side of the piece. And with the "extruded cut" tool I drilled the piece from side to side. |

The Lamp shade
An inexact duplicate
I love this designer's work. So, for this week's exercise, I wanted to do something inspired by one of his 3D printed pieces.wooj.design
Follow him on InstagramDesign process
with solidworks
- For this design, I started by drawing a figure on a plane. And with the "smart dimension", I changed the measurement of each element.
- I used the "cut tool to eliminate the strokes that didn't work for me and I used the "Curve" tool to soften the corners.
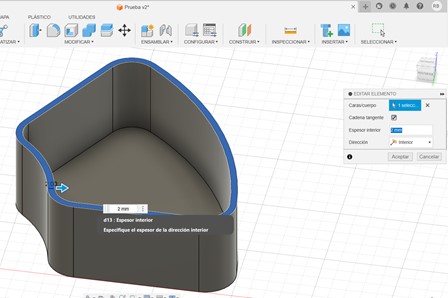
- To give volume to the drawing, I used the "extrude" tool and this time, I selected a second direction, so that it extruded up and down.

- To draw on one of the faces, I made another sketch and used the "convert entities" tool to clone the stroke.
- Next, I used the "offset entities" tool to create a similar stroke inside the drawing.
- And with the "cut" tool I removed the outside piece.
- To finish, I drilled the piece using the "extruded cut" tool, selecting the new drawing.
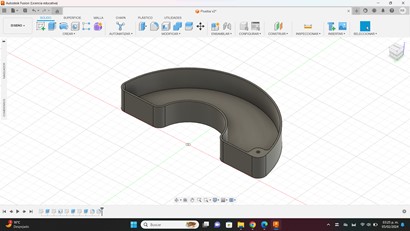
And that´s all!
We have a copy not exact of the wooj lamp

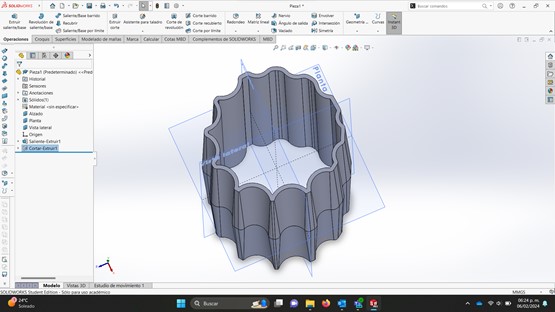
THIS IS THE FINAL RESULT
It´s simple i know, but I did it!
If you want to download STL file click here!
Let's Design 2D
Inkscape vs Illustrator
Illustrator
Let´s vectorize in black and white
 |
 |
| Open the Illustrator program | I selected a web size |
 |
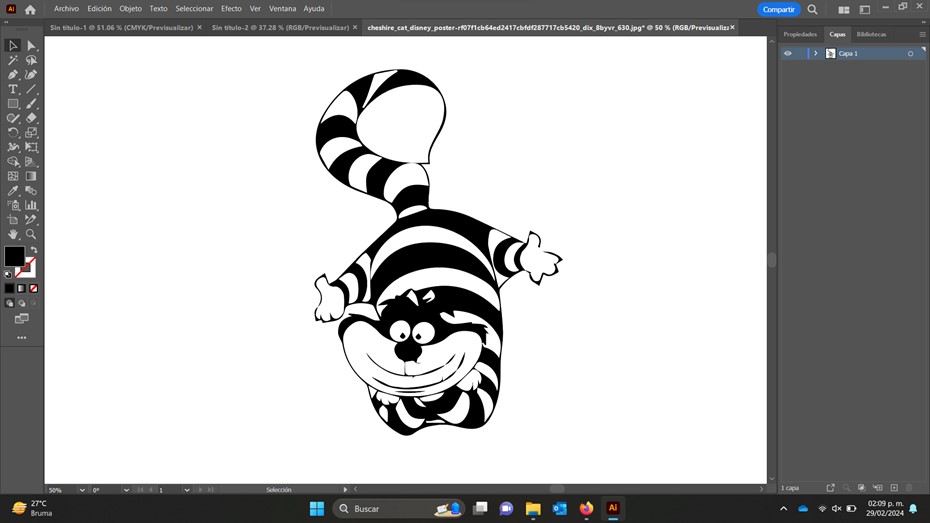 |
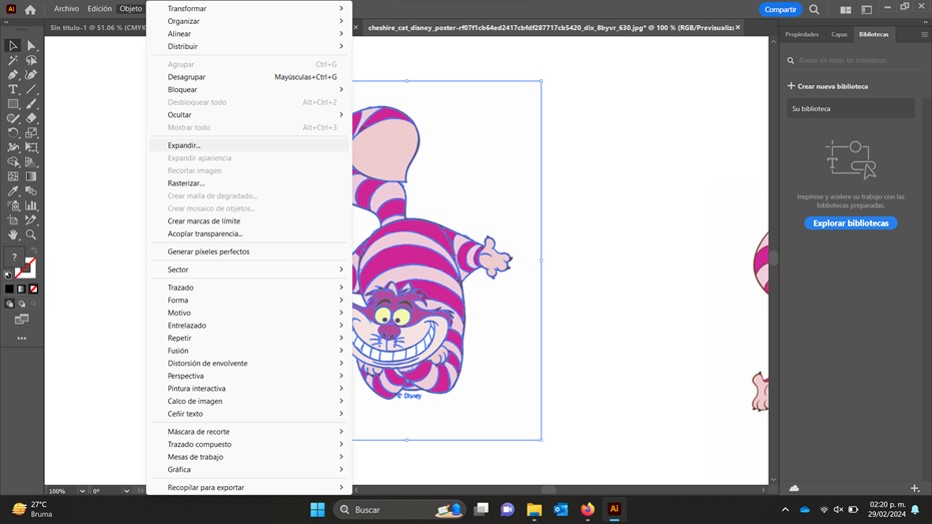
| Copy an image from the internet and select the image tracing option - create and expand |
As a result, we obtain a black and white vector with few details |
Now, let´s vectorize in color
 |
 |
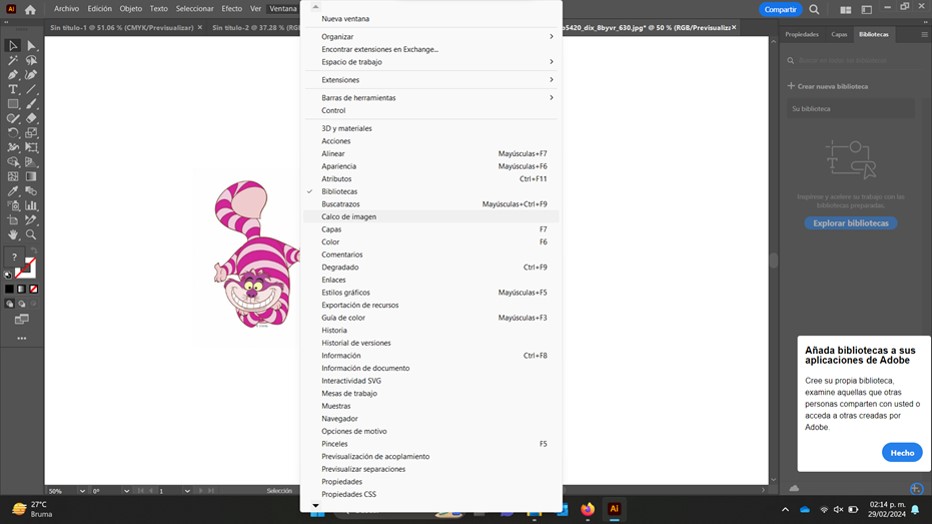
| Select Image Trace from the main menu and open the settings. | Select the "color" option |
 |
 |
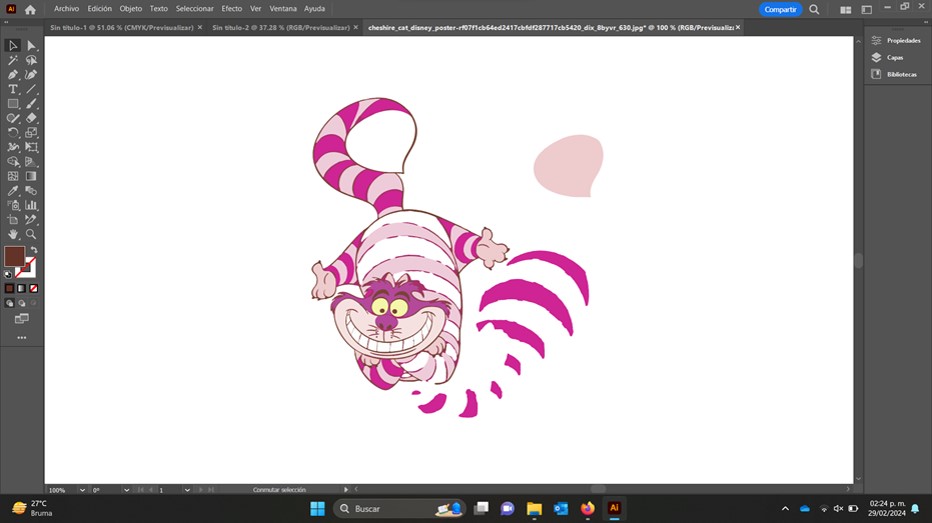
| We make the image tracing and select the entire new image and click on expand. | We ungroup the image vectors |
 |
 |
| And now, we can manipulate each of the vectors separately | In this image we can see the difference between the pixel image and the vector |
Inkscape
Let´s vectorize again!
 |
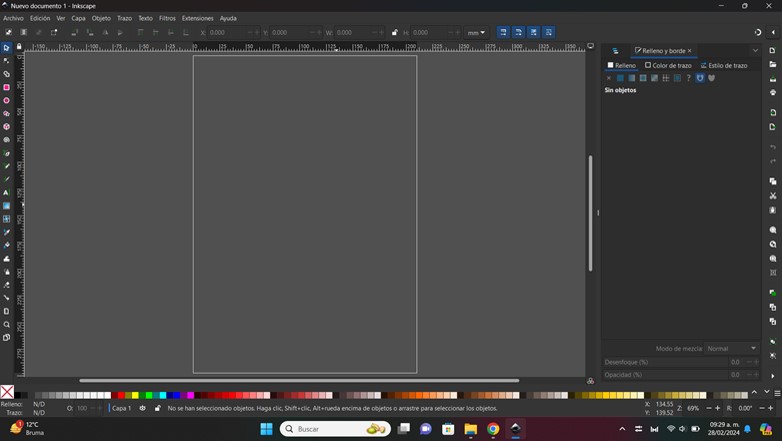 |
| To contrast Illustrator, download Inkscape software which is completely free and easy to install | We open a new workspace, and just like in other design programs, we can modify the dimensions. |
 |
 |
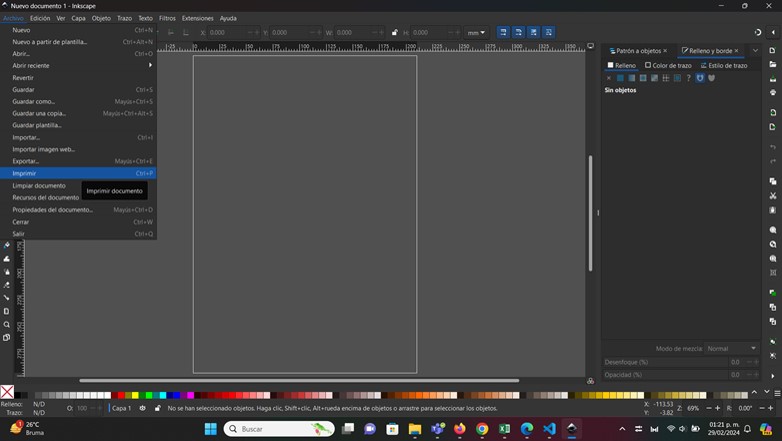
| We import an image from the main menu | And to Vectorize an image it is important to select the "Embed" option |
 |
 |
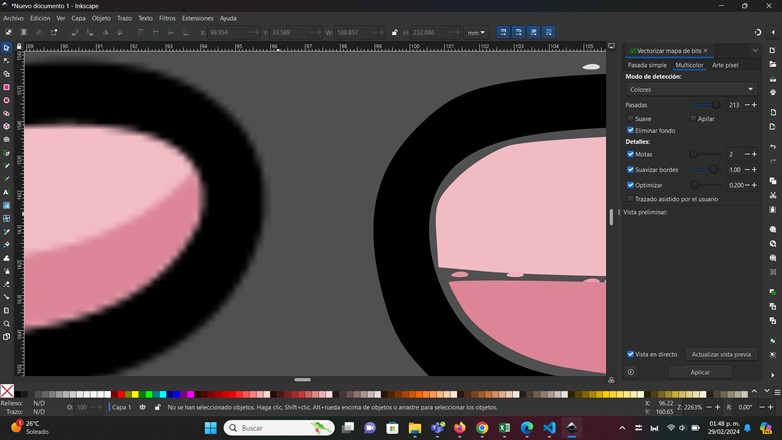
| Our image is large in size and appears to have good detail. | But when we zoom in we will realize that they are still pixels |
 |
 |
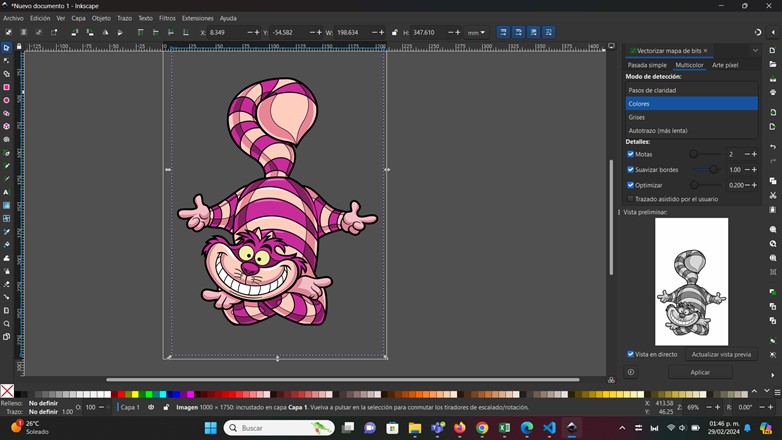
| So, we select the Stroke option in the main menu and click on "Vectorize bitmap" | A menu opens that gives me the option to change the vectorization settings which is very useful.
In this case, I used a light cut and it turned out quite well. |
 |
 |
| When we do vectorization, it clones the image. | In this first test select gray scale |
 |
 |
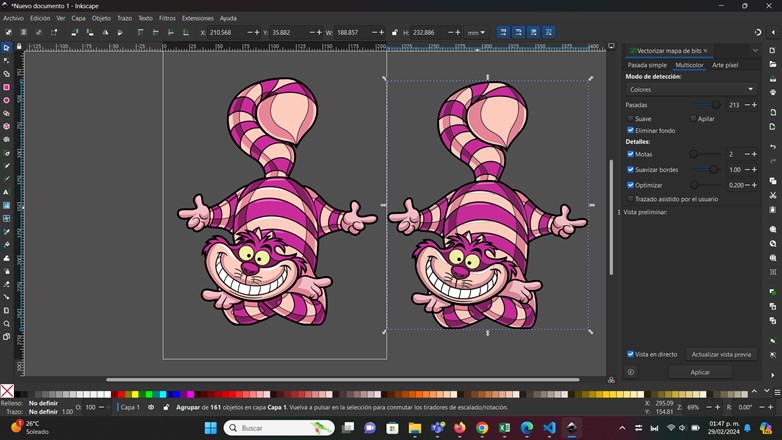
| to the second test select color | And in this image, we can differentiate the new vector |
What do you want to do?
Actually, all 2D design softwares are useful, although, I personally found Inkscape's interface more user-friendly.
And it has a big advantage over Illustrator because it is free and very easy to install.