The beginning of everything
This week all started installing the programs and defining my final project idea and of course, started to getting used to the documentation process.
First things first
Programs Installation
 - The first step was to download Visual Studio Code
Important: In my case, it was necessary to download it before GIT because the installer didnt
let me advance with the installation.
You can download HERE
 - The second step was to install GIT and I used a quick tutorial
NOTE: The tutorial is in Spanish but, it may works for you if you follow the installer clicks, step by step.
NOW, let´s practice!
This information is like a manual to replicate the exercise and remember the basic commands to create and edit my page.
You can use this "command table" to create or edit your page in CMD
| cd | To find a folder | index.html | To create the first page that of my web site |
| mkdir | To create a new folder | html:5 | To generate the basic code to all the pages |
| git init | To create a repository | git status | To know the status |
| cls | To clear the previous work (just clear, not eliminate) | git add . | To add new material to the repository |
How to insert elements in HTML
NOTE: To insert images and videos, check the file path to insert very carefully| img src="example.jpg" | To add a image | button | To insert a button |
| width | To change the size (width= "500px") | a | To insert a link with reference inside or outside the page |
| video src="example.mp4" | To insert a video | p | To write a paragraph |
| controls | To add video controls | ul | To create data lists with bullet points and "li" to insert the information of the list |
The CLONE
How to modify my page
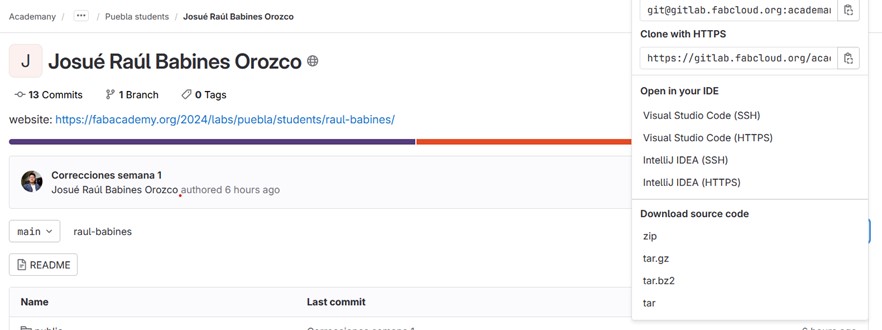
 After getting my Gitlab account, I cloned my folder to edit the content with
Visual Studio and began exploring the template elements to edit them and express my style into the page.
After getting my Gitlab account, I cloned my folder to edit the content with
Visual Studio and began exploring the template elements to edit them and express my style into the page.
To clone
- Login account (Fabcloud) Remember that username and password was sent by e-mail- click "CODE"
- Copy URl "Clone with HTTPS"
- Open CMD to find your repository folder
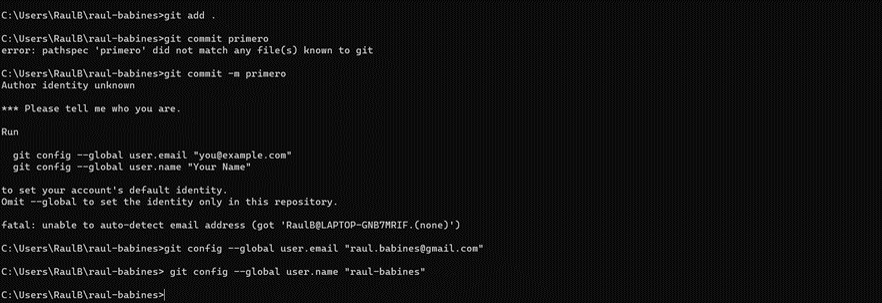
- Put the command "git clone" and paste the Url and click Enter
- Put the command "git add ." and Click Enter
- Put the command "git commit -m "write your first action here" and click Enter
- To finis, use the command "git push" and that's it!
U´re ready to edit your page
To start
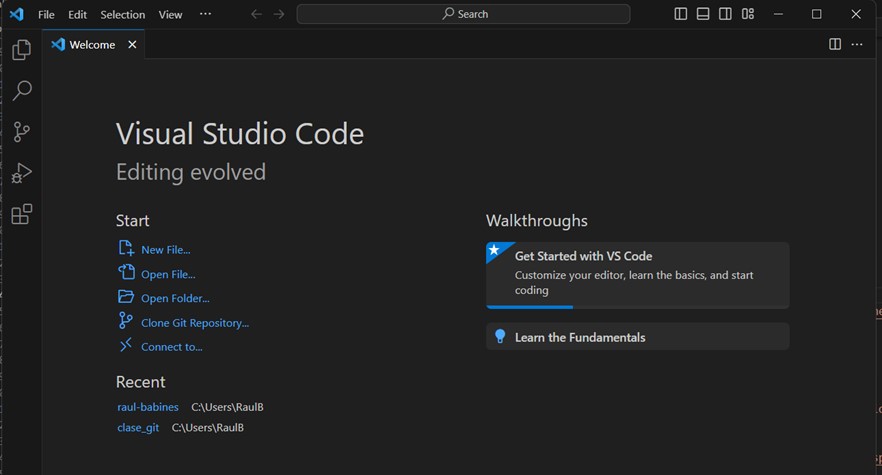
- Open cmd and enter to repository- Open Visual Studio
- In this case, i wanted open a folder
- Select the folder and a window will appear (click in "Yes, I trust the authors")
- Select file to edit the content
From now, my workspace looks like this
Actually, the site interface is user friendly
Visual Studio has a menu on the left to display all folders and files.
When you click on a section, you can view all the code that makes up page structure.
Alrigtht, were going coding !
How to add material and edit the template
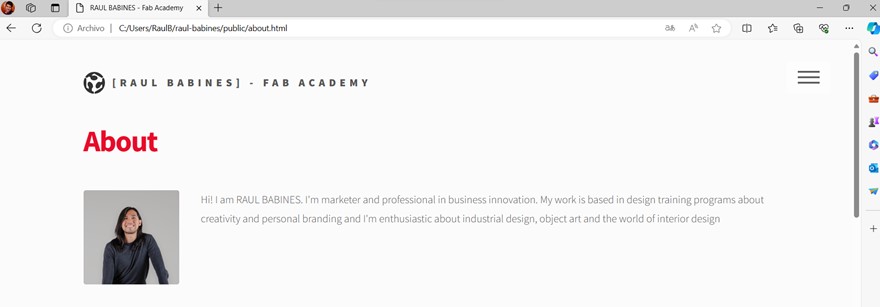
This week was a challenge, because I had never worked with code before, but over the weekend, i practiced the basic commands to edit the template that used to my page. I started with the "about me", because i wanted to show my style and personal interests.
The first thing I changed was my profile picture. And to do that, I had to locate "MAIN" section inside the "BODY" command, which indicates the beginning and the end of the body of the page.
Don´t forget

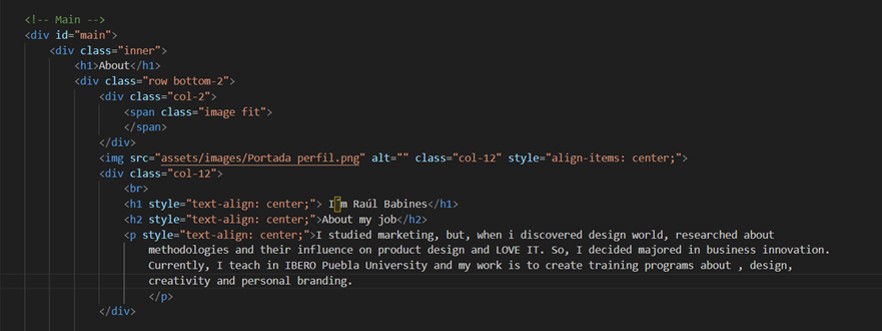
After changing my profile picture, I learned that I can align the text with the
"Style" command and the "Text-aling" option.
Example: style="text-align: center"
In addition, I discovered that you can change the images position with "Style" commandor "class" command too, but, this one is defined from the "main CSS" folder.
Important
If your image does not appear, it may be routed incorrectlyRemember to add the file location in the correct order
Example: img src="/assets/images/pic 01.jpg" alt="" width="80px"
You can also use ".." to improve the routingExample: img src="../assets/images/pic 01.jpg" alt="" width="80px"
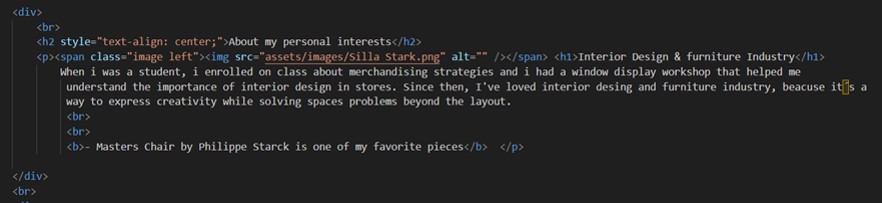
Use "div" please!
Believe me, it works
The "div" command is very useful to not mix the elements, because it creates small modules to define a section on the page.After to create this section, I used the "Span" command to give a specific format to an image. In this case, I wanted the image to be aligned next to the text.
And all the code in this section is located between the opening and closing commands of "p" to apply the style exclusively to this section
Example: span class= "image left"
CLICK to link
How to add a link
In this part, I wanted to add a link as a reference to the download page, so, I used the "a" command and instead of adding a button, I used the "b" command to change the text to bold. Also, I modified the title spacing with the "style" command and selecting the "margin" option. I used a value of 0%Example: style="margin-bottom: 0%"
The limit doesn´t exist
Well... That´s a lie
Save all images in a single folder with names that relate to the sections.If you add images or other multimedia material, don't forget that Gitlab has a limit of
10MB for each push
So, be careful
It's just a table
but it helps organize information better
Creating a table with the commands I initially learned was easier than I thought. Use the "table" command and align it to the center with the "style" command and the "text-align:center" optiontbody - To edit content
tr - defines a row in the table
td - define a cell in the table


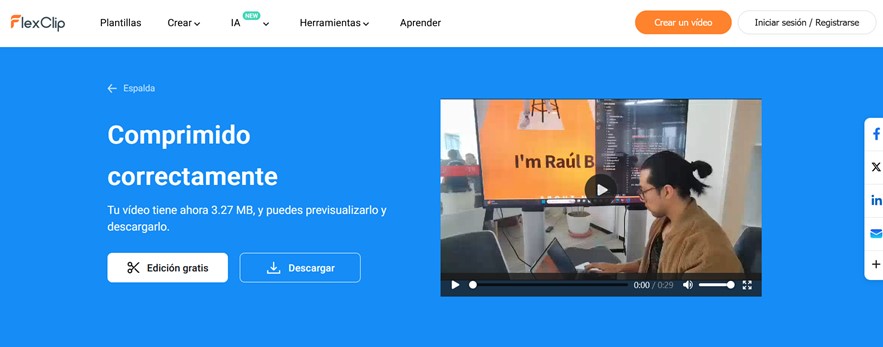
BIG mistake!
Think size doesn´t matter
I had to research how to modify the files size, beacuse to the first week i want to add any videos about my process but, on the first try, size video was to much.To reduce size
- You can use FlexclipIt´s well done, right?
I don´t know but, let´s see!
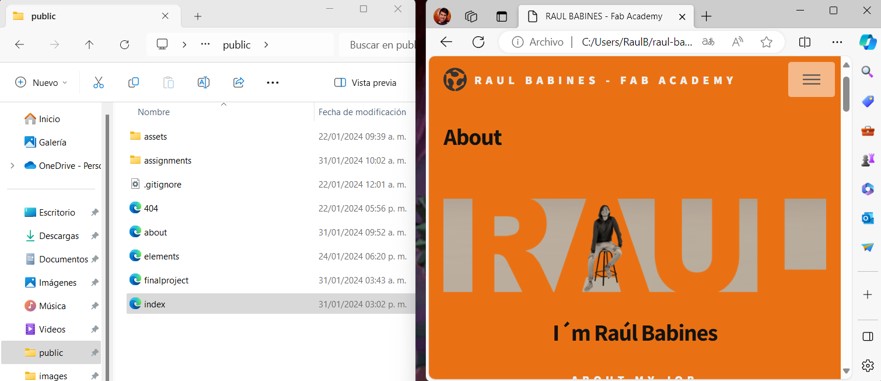
If you go to the "Public" folder you can find the shortcuts to the page sections. Open "index" to see the home page and now, when you edit the code press "Ctrl+s" to save the changes in Visual Studio and then "Ctrl+r" on the page, to see the changes in real time.That's called "local version"
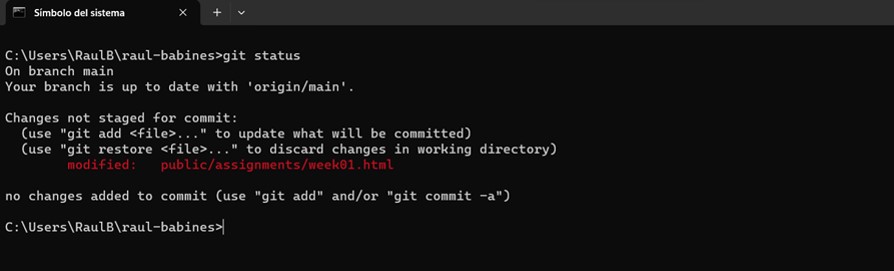
git status
What is the purpose to knowing the status?
That's simple, with the "git status" command in cmd you can display the changes in REDRemember that gitlab has a MB limit for each push, so check the status frequently
Not magic, just CSS
C'mon change color !
In the "main css" folder you will find the code that defines the style of some tags. You can change everything from the text font to the background color.In my case, I decided to change the background color and effects of some buttons.
NOTE: You can use RGB or HEX code
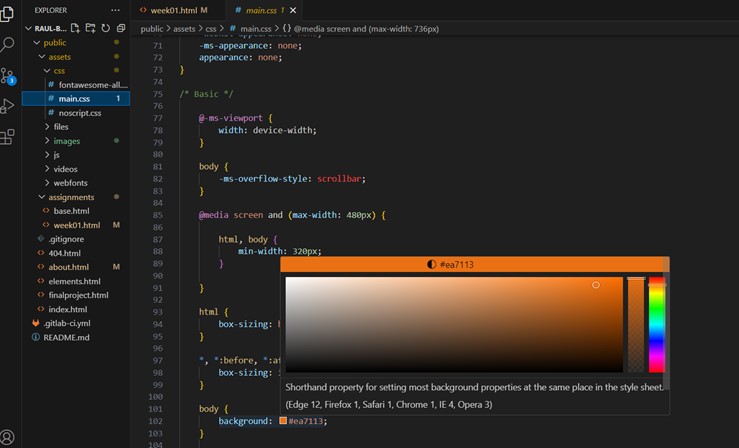
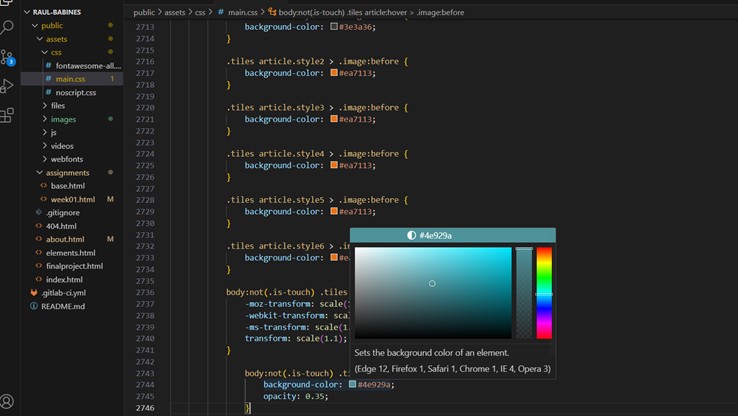
Now, principal page looks different but, I´ll continue making changes

Don´t forget
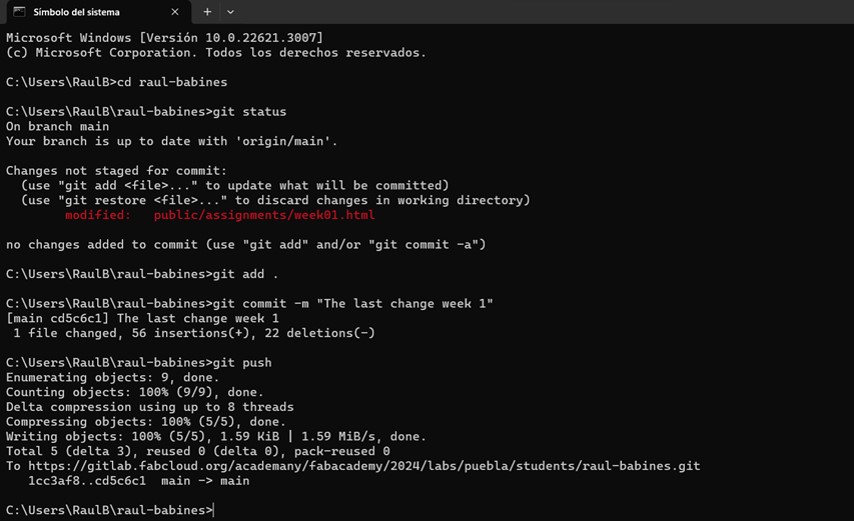
git add .
To add everything new
git commit -m "example"
To create a marker of the record the changes
git push
To save all the modifications in the cloud
This is real, this is me!
This is me editing the local version of the page