8. Electronics Production
This week we worked on the electronic design and the manufacture of a PCB.
Description of the work process of the week08
The first thing we did was download the Kicad software and then install it on the computer. Once installed we add the library that was downloaded from the git lab. Something that happened to me when I started my project was that I got a symbol loading error. I solved it by repeating the steps I did at the beginning since I had not installed the library correctly.
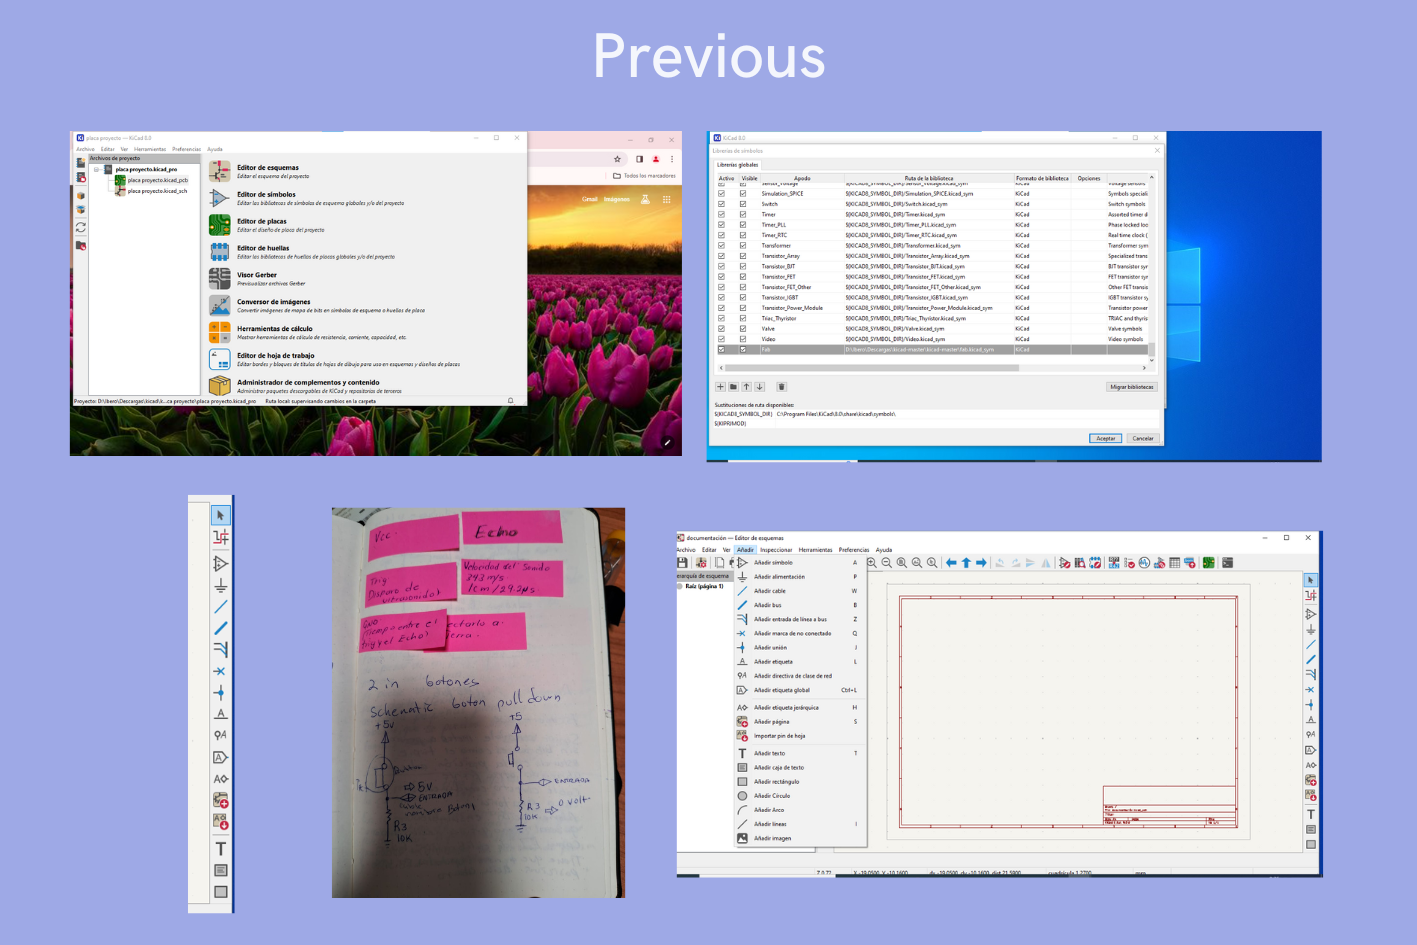
At the beginning, the idea I had in relation to my project was to make everything electronic with an H bridge, that is why to relate to all the symbols, I looked for the diagram of an H bridge and began to put the symbols, even though there were something that was still not very clear to me, that is why I went to one of my instructors and he guided me.
The first step to design my circuit in the software was to draw it on a sheet, this allowed me to just search for the symbols and add them to the KIDCAD schematic design.
Once the symbols were added, searching in the toolbar for “Add” followed by “add a symbol” that the schematic required, I began to join them with the “Add a cable” tool.
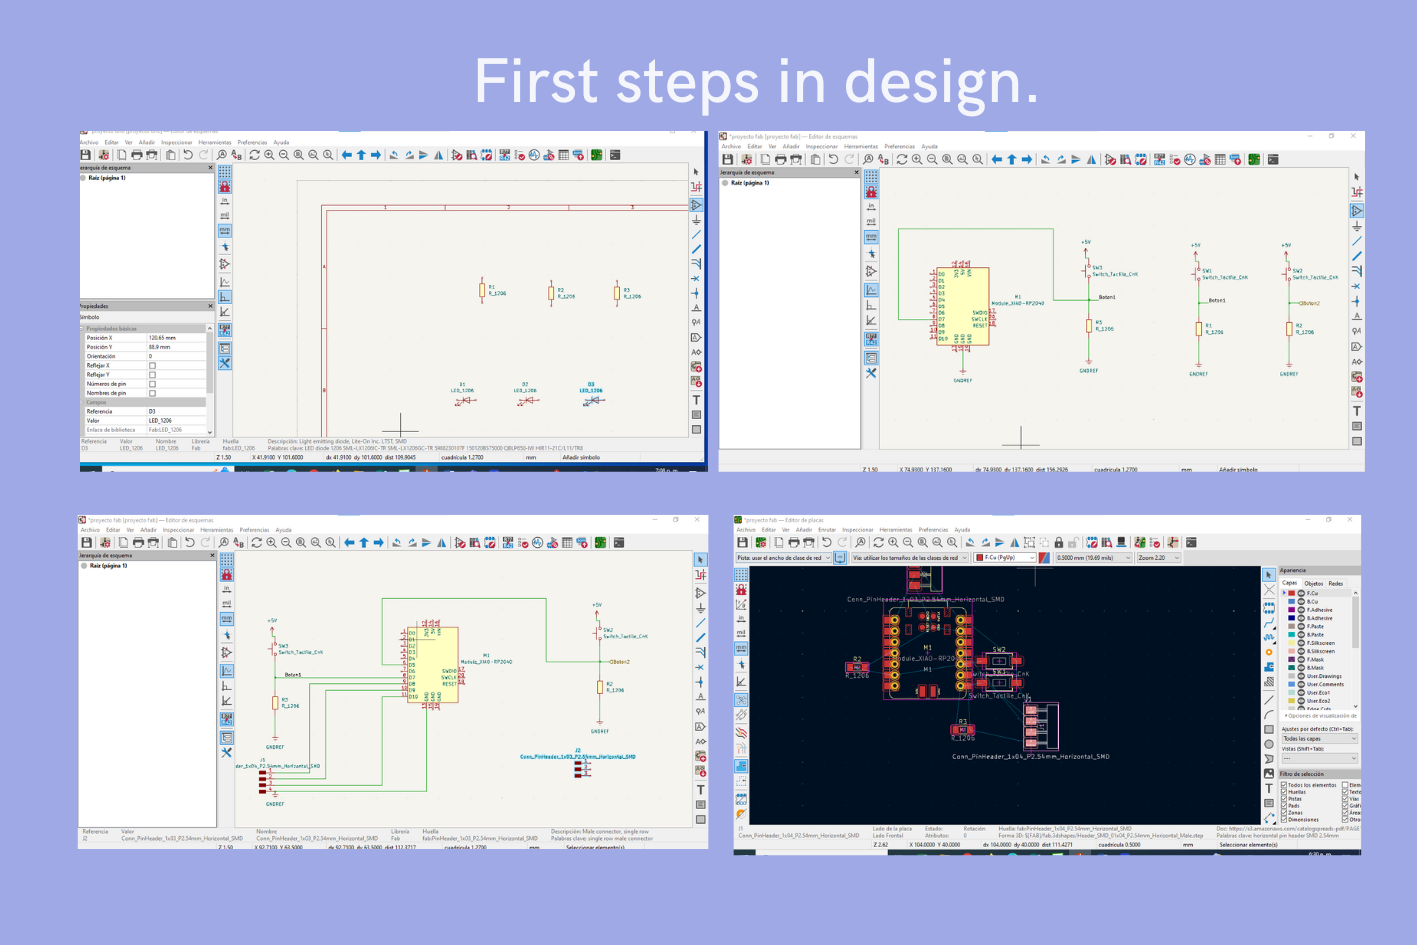
This is how I finished the scheme, but there were still some steps missing, especially the one that caused me a little more difficulty "the plate editor, and not because it was difficult to use the KIDCAD tools, but because it requires a lot of practice since in this Part of the current conductors will be made, so it is important that they do not cross each other.
After completing this part of the board design, we proceeded to download the SVG file of the schematic, which is the one we are going to cut on the ROLAND SRM20. For this part we follow the steps from week 4 to open mods and give the parameters for cut.
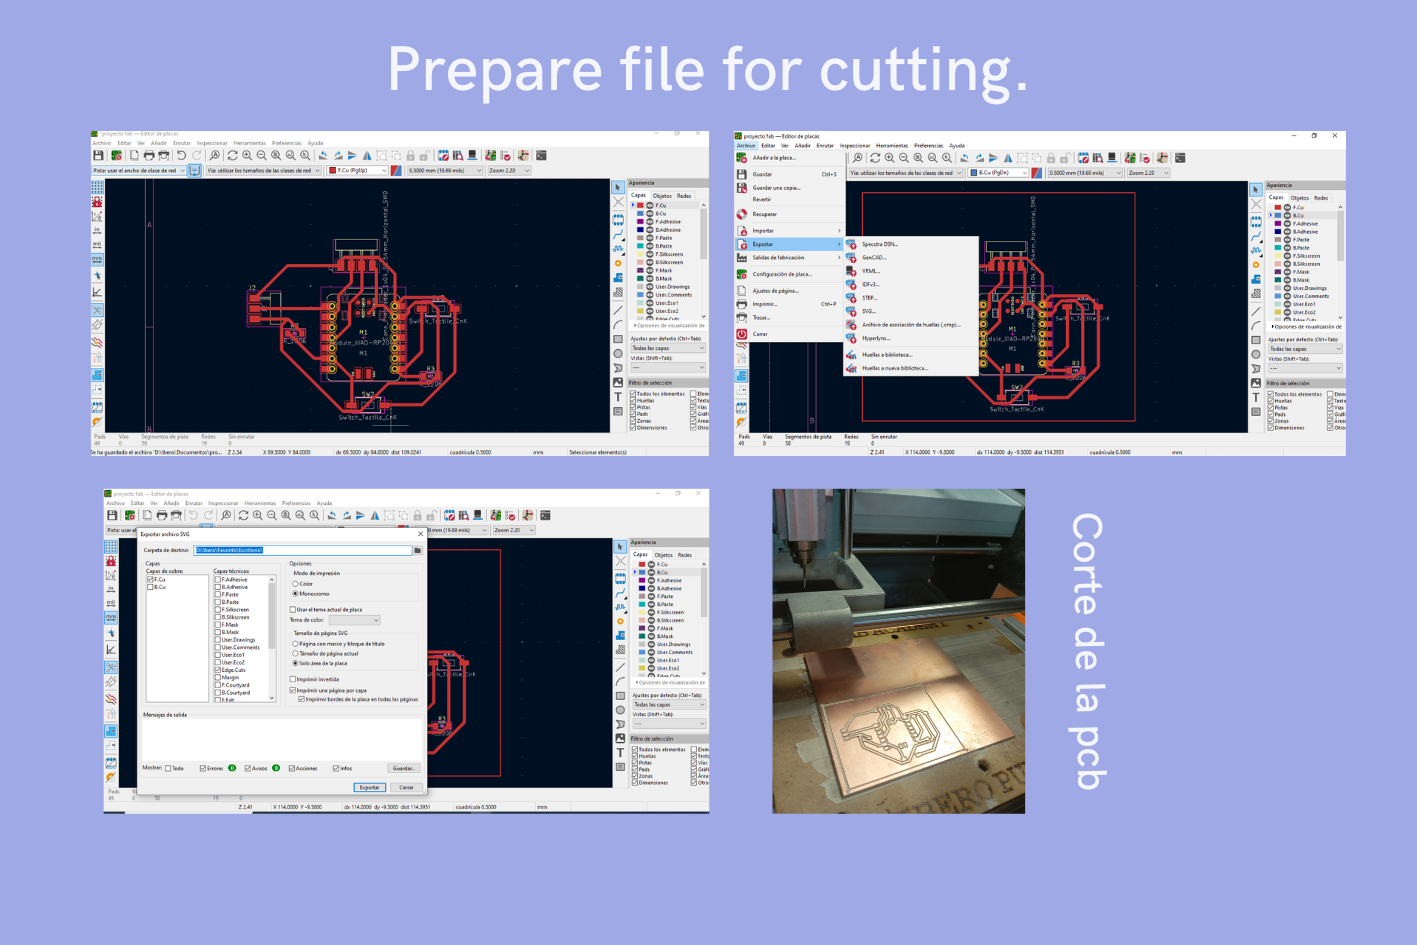
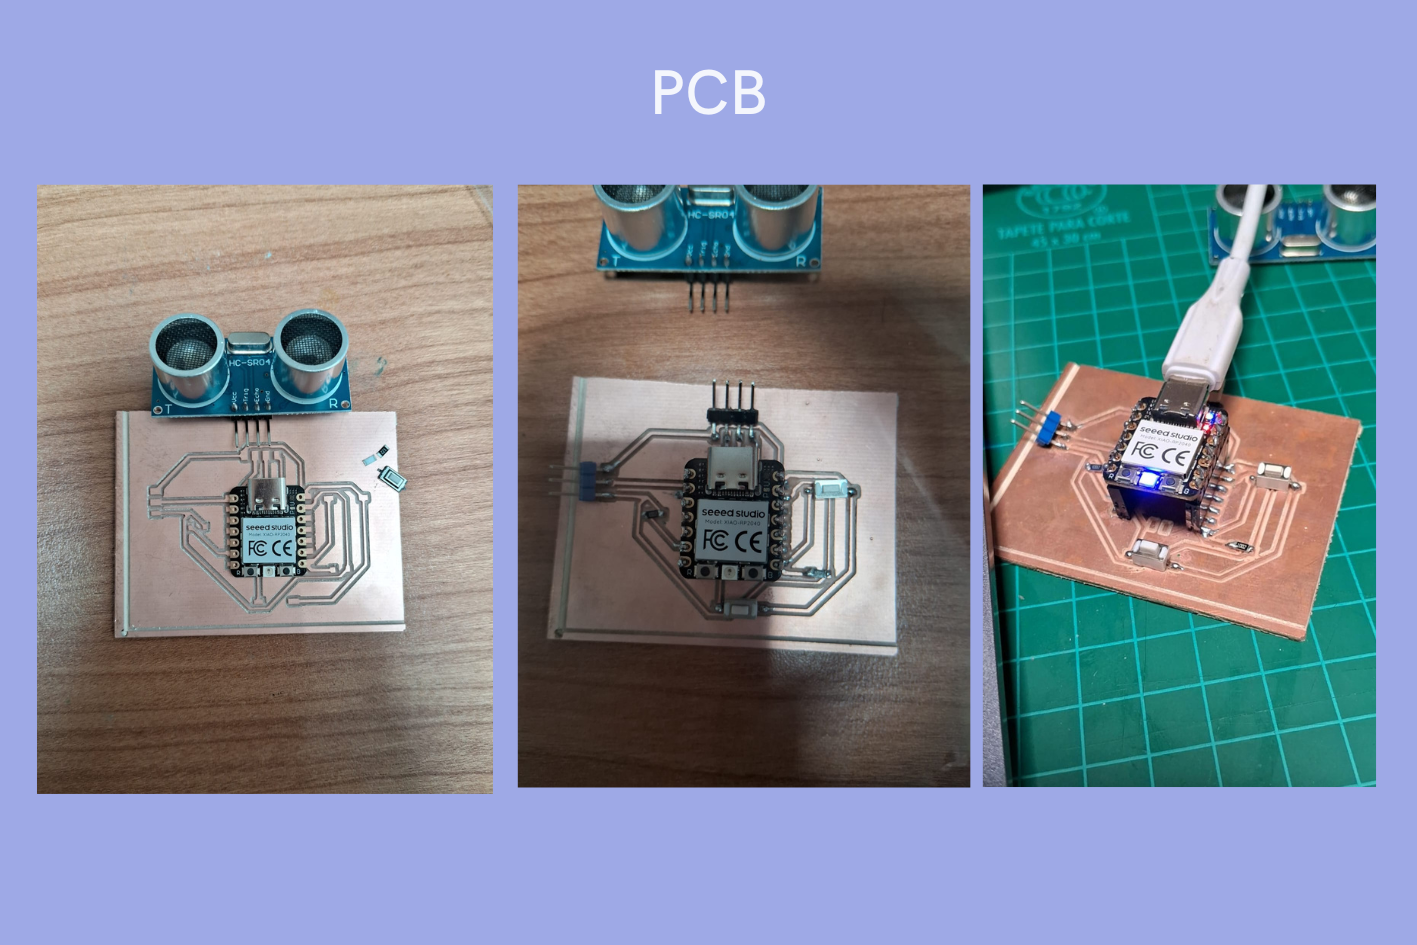
Once the board was unloaded and cut, I proceeded to solder the components. Use a bridge, for the Xiao this is something that was recommended to me and that way I can use the Xiao in another project.
- A Xiao RP2040.
- Pins: For the servomotor I will use.
- Pins: For the ultrasonic sensor.
- Resistors.
- Button.
I checked that the board was well soldered and working with a voltmeter and checking that everything was very well connected. Once I was sure that everything was fine, I decided to connect it to the Arduino to start seeing the programming.
reflection and analysis
Like all the processes of the weeks that we have carried out, this process is very meticulous, although the design of the PCB looks easy, it is not since we must follow a series of rules, especially since we are working with electrical conductors.
