Embedded Programming
Embedded Programming refers to the development of software that runs on embedded devices. These devices typically have limited resources (such as memory and processing power) and are designed to perform specific functions. Common examples of embedded devices include microcontrollers, control systems in household appliances, automotive systems, medical devices, telecommunications systems, and more.
GROUP ASSIGMENT
Xiao RP2040
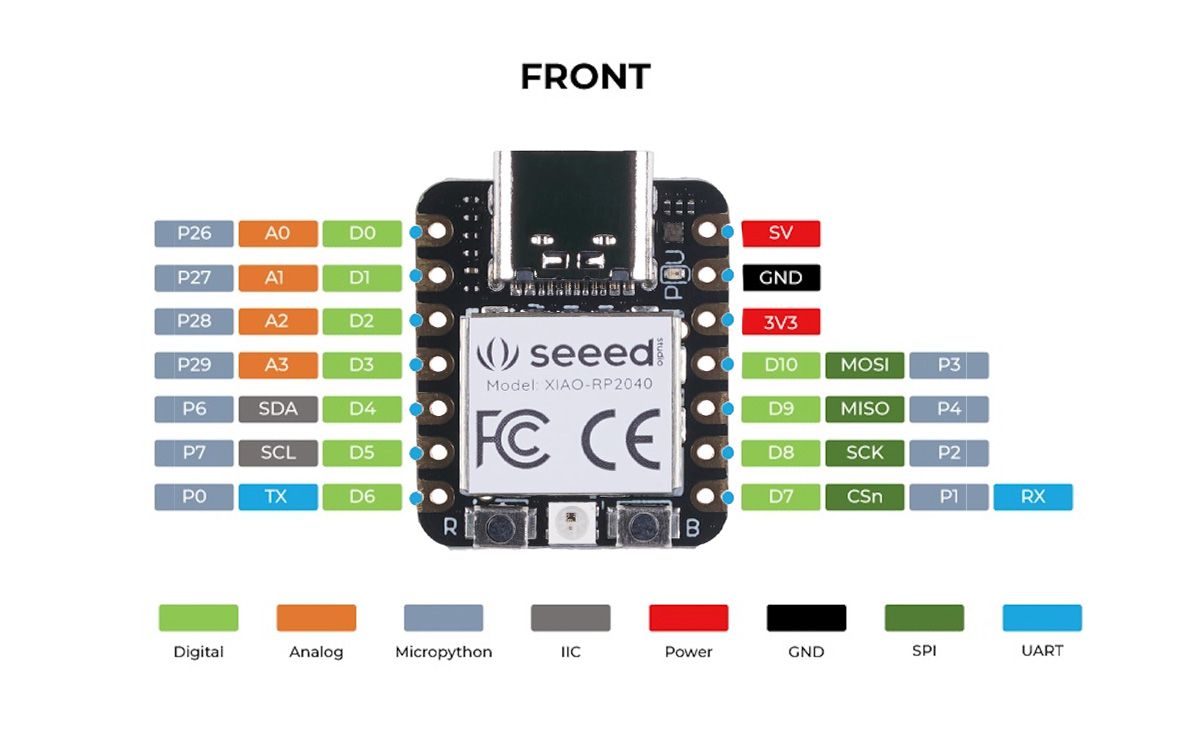
The XiaoRP2040 is a compact and powerful microcontroller board based on the Raspberry Pi RP2040 chip. It features a dual-core Arm Cortex-M0+ processor running at 133 MHz, 264KB of SRAM, and 2MB of on-board flash memory. Despite its small size, it offers a rich set of features including multiple GPIO pins, PWM, I2C, SPI, UART, and ADC interfaces.
The XiaoRP2040 is designed for projects that require a small form factor without compromising performance. It is ideal for embedded applications where space is limited, and its versatility makes it suitable for a wide range of projects, from simple sensor monitoring to complex data processing tasks.
Application in this week
In this assaignment, the XiaoRP2040 is used to control three LEDs and a buzzer. The microcontroller is responsible for sequentially turning on the LEDs and gradually increasing the buzzer's frequency, creating a distinct auditory signal for each LED. The specific tasks performed by the XiaoRP2040 in this project include:
LED Control: The XiaoRP2040 uses its GPIO pins to control the on/off state of three LEDs. Each LED is connected to a different pin on the microcontroller, allowing individual control.
Buzzer Control: The XiaoRP2040 generates different tones using the buzzer by outputting PWM signals at varying frequencies. This creates distinct sounds corresponding to each stage of the LED sequence.

Timing and Sequencing: The microcontroller manages the timing for the LEDs and buzzer, ensuring that each LED lights up for 3 seconds before moving to the next one and adjusting the buzzer's frequency accordingly.
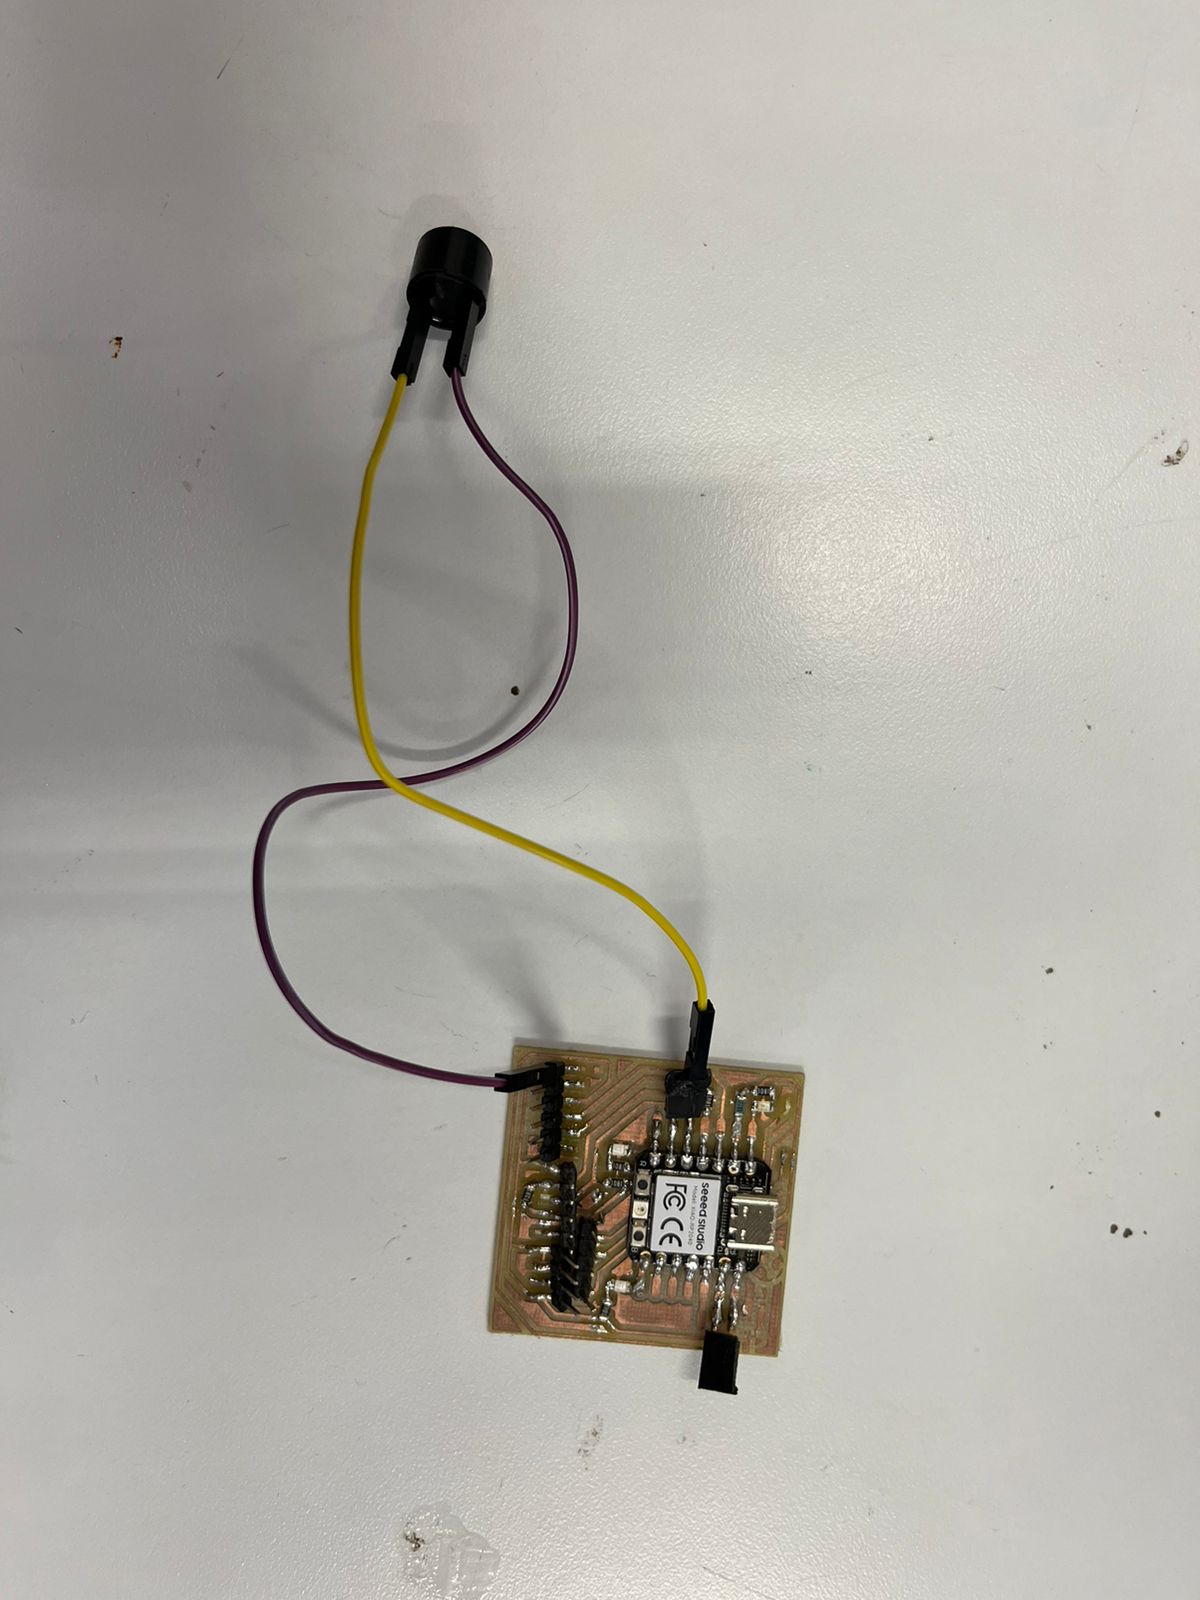
PCB and Connections
The PCB and connections used in this project are based on the assignment from Week 4, with the addition of a connection for the buzzer to the designated pin D4.
Code
ARDUINO
This is programmed using the Arduino environment, which provides an easy-to-use platform for writing and uploading code to the XiaoRP2040 microcontroller. The XiaoRP2040 communicates with connected components through its GPIO pins, controlling the state of LEDs and generating tones with a buzzer. The main idea of the code is to sequentially turn on LEDs while simultaneously increasing the frequency of the buzzer sound, creating a distinct visual and auditory sequence.
Micropython
This MicroPython script controls three LEDs and simulates a buzzer effect using a XiaoRP2040 microcontroller. Each LED is connected to a GPIO pin configured as an output, allowing individual control. Instead of PWM, the buzzer functionality is emulated using a function play_tone that toggles the buzzer pin at specified frequencies to produce tones. The main loop sequentially turns on each LED and calls play_tone with corresponding frequencies (400 Hz, 800 Hz, and 1200 Hz) for 3 seconds each, creating distinct auditory signals. After each sequence, the LEDs are turned off, and the program waits for 3 seconds before repeating the cycle. This setup demonstrates how to implement basic sound generation and LED control using straightforward GPIO operations on the XiaoRP2040, suitable for projects requiring simple audiovisual feedback without PWM capabilities. Adjustments can be made to the frequencies and durations in play_tone to customize the tone and duration of each sound signal according to specific project requirements.
Comparison of MicroPython and Arduino for LED and Buzzer Control
| Aspect | MicroPython | Arduino |
|---|---|---|
| Language | Python-based syntax, easier to learn for beginners and those familiar with Python. | C/C++-based, widely used in embedded systems programming, more low-level control. |
| Development Environment | Python-friendly IDEs like Thonny or VS Code with MicroPython support. | Arduino IDE or other compatible IDEs with Arduino libraries. |
| GPIO Control | Straightforward GPIO control using Pythonic syntax and libraries. | Direct access to GPIO pins with well-documented Arduino functions. |
| Buzzer Control | Emulation of buzzer functionality using GPIO toggling, suitable for basic sound generation. | Direct control of buzzer with built-in PWM capabilities for precise tone control. |
| Complexity | Simpler syntax and higher-level abstractions can reduce complexity. | More control at the hardware level but may require more code for similar tasks. |
| Community and Libraries | Growing community with increasing support for various platforms and libraries. | Large, established community with extensive libraries and examples. |
| Hardware Support | Expanding support for different microcontrollers and boards. | Broad range of Arduino-compatible boards and shields. |
| Learning Curve | Lower learning curve, especially for Python enthusiasts. | May have a steeper learning curve due to C/C++ syntax and concepts. |
| Flexibility | Flexibility in terms of integration with other Python-based projects and libraries. | Flexibility in hardware selection and extensive library support. |
Both MicroPython and Arduino offer powerful tools for embedded development, each with its strengths depending on the project requirements and developer's familiarity with the language and ecosystem.
The Moment of the truth
This is how the XiaoRP2040 microcontroller controls three LEDs and a buzzer. You'll see the hardware setup, including how the LEDs and buzzer are connected to the XiaoRP2040. When I power on the system, the LEDs will light up one by one every three seconds, while the buzzer will produce increasingly higher tones with each LED that lights up. This showcases the microcontroller's ability to manage both visual and auditory outputs in a synchronized manner.