My Final Project "HexaInteractive"
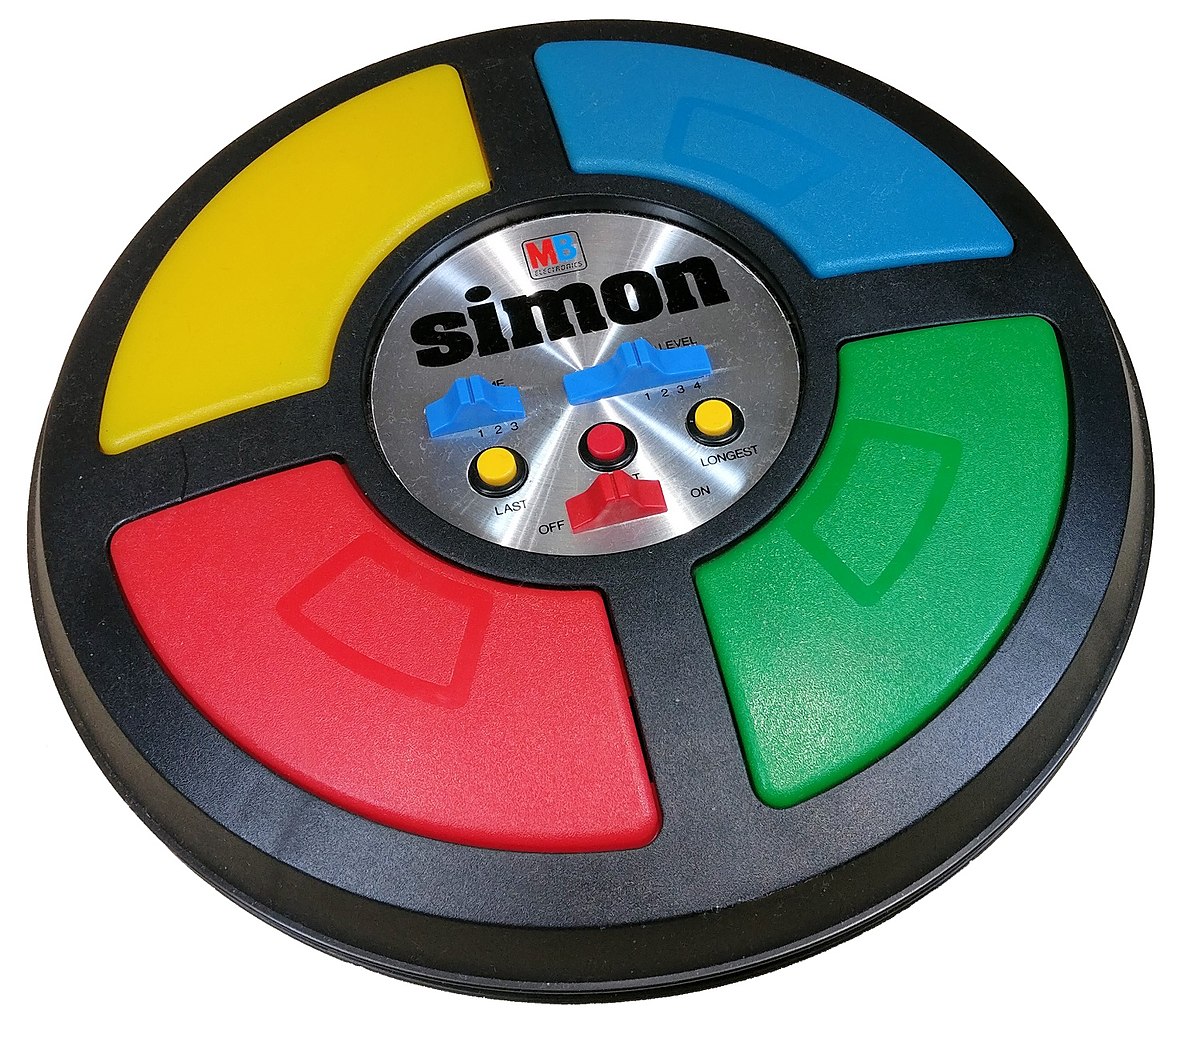
As a project idea, I drew inspiration from the classic game 'Simon.' This game involves recalling and reproducing a sequence of four lights (green, red, blue, and yellow) and sounds in the same order. My proposal is to develop a modular version of this game, allowing users to freely place the modular buttons. This flexibility enables adaptation to various activities or games without the need for them to be physically connected in a single module leaving the user put the modular buttons anywhere in a room . Furthermore, the project aims to introduce new features and customizations to enhance versatility and enjoyment. The plan also includes incorporating different games, such as reaction-based challenges and activities like running to the illuminated button. By diversifying the gaming experience, the project aims to cater to a broad audience and add excitement to the classic 'Simon' concept.
Sketch
To give me an idea of what I want my model to be, I have designed a quick sketch in a notebook of how I imagine each "module". As the course progresses, plan to make a more defined 3D model in some modeling software, such as fusion360 or AutoCAD
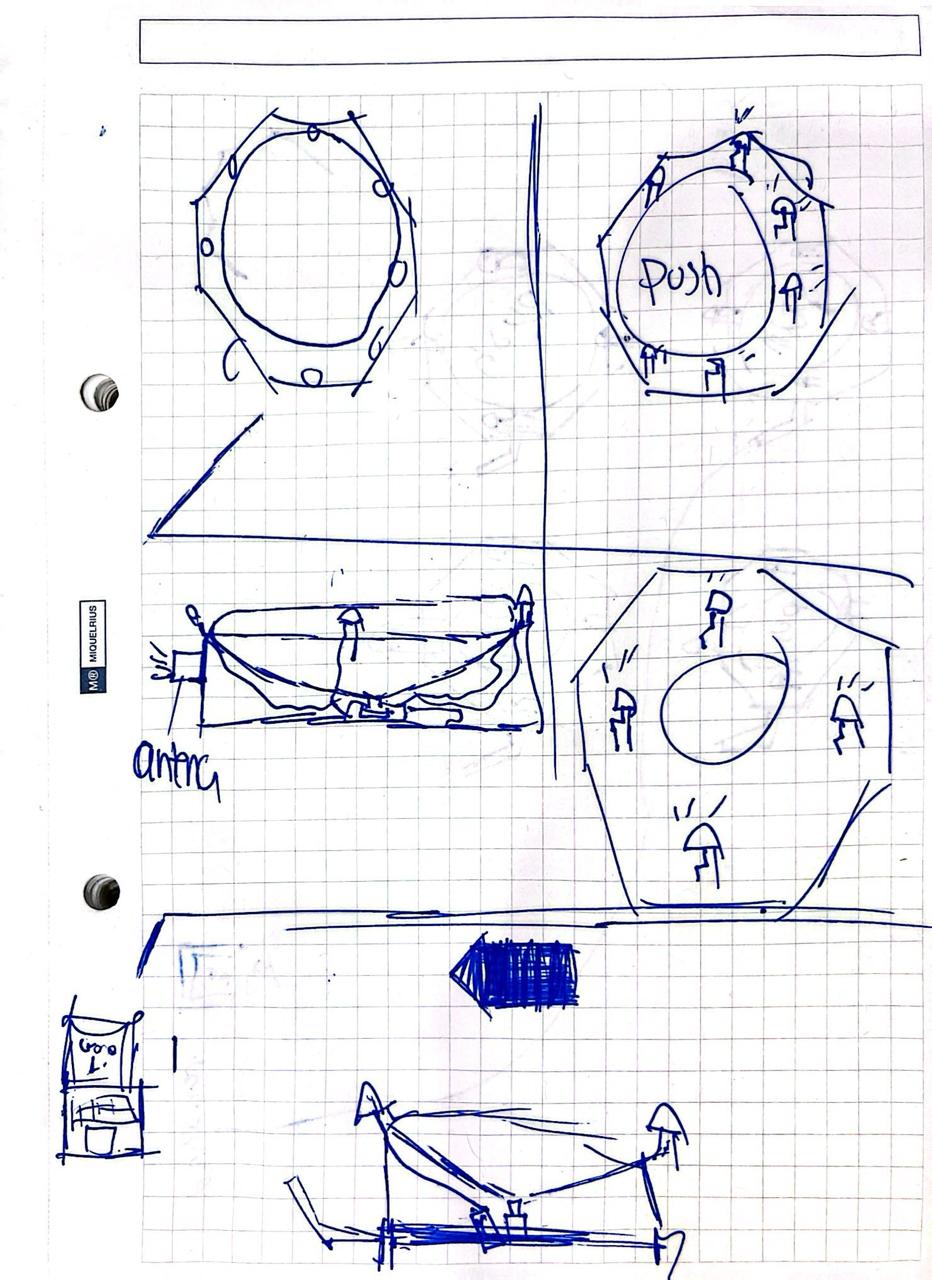
This is the sketch of one of the modules, the idea is to make 4 equal modules with the same characteristics and components, mainly consisting of the following:
- A case where the circuit will be in
- An antenna that recives the signal
- PCB
- Small LED lights located around the casing that illuminate giving the indication
- A 5 volt battery that will power the module
- A big conical acrylic button that activates a pushbutton on the PCB
3D and 2D Model
Let's start with the design
My idea is that I want something unconventional. Instead of using a circle, I think using a hexagon would be a good idea. So, we'll start designing the case in Fusion 360.
We will start by creating the walls of the button. Since it's a hexagon, it needs six walls. I made them a size that I considered optimal: 66 mm in length. It also has a hole in the center that will be used for assembling the buttons together.
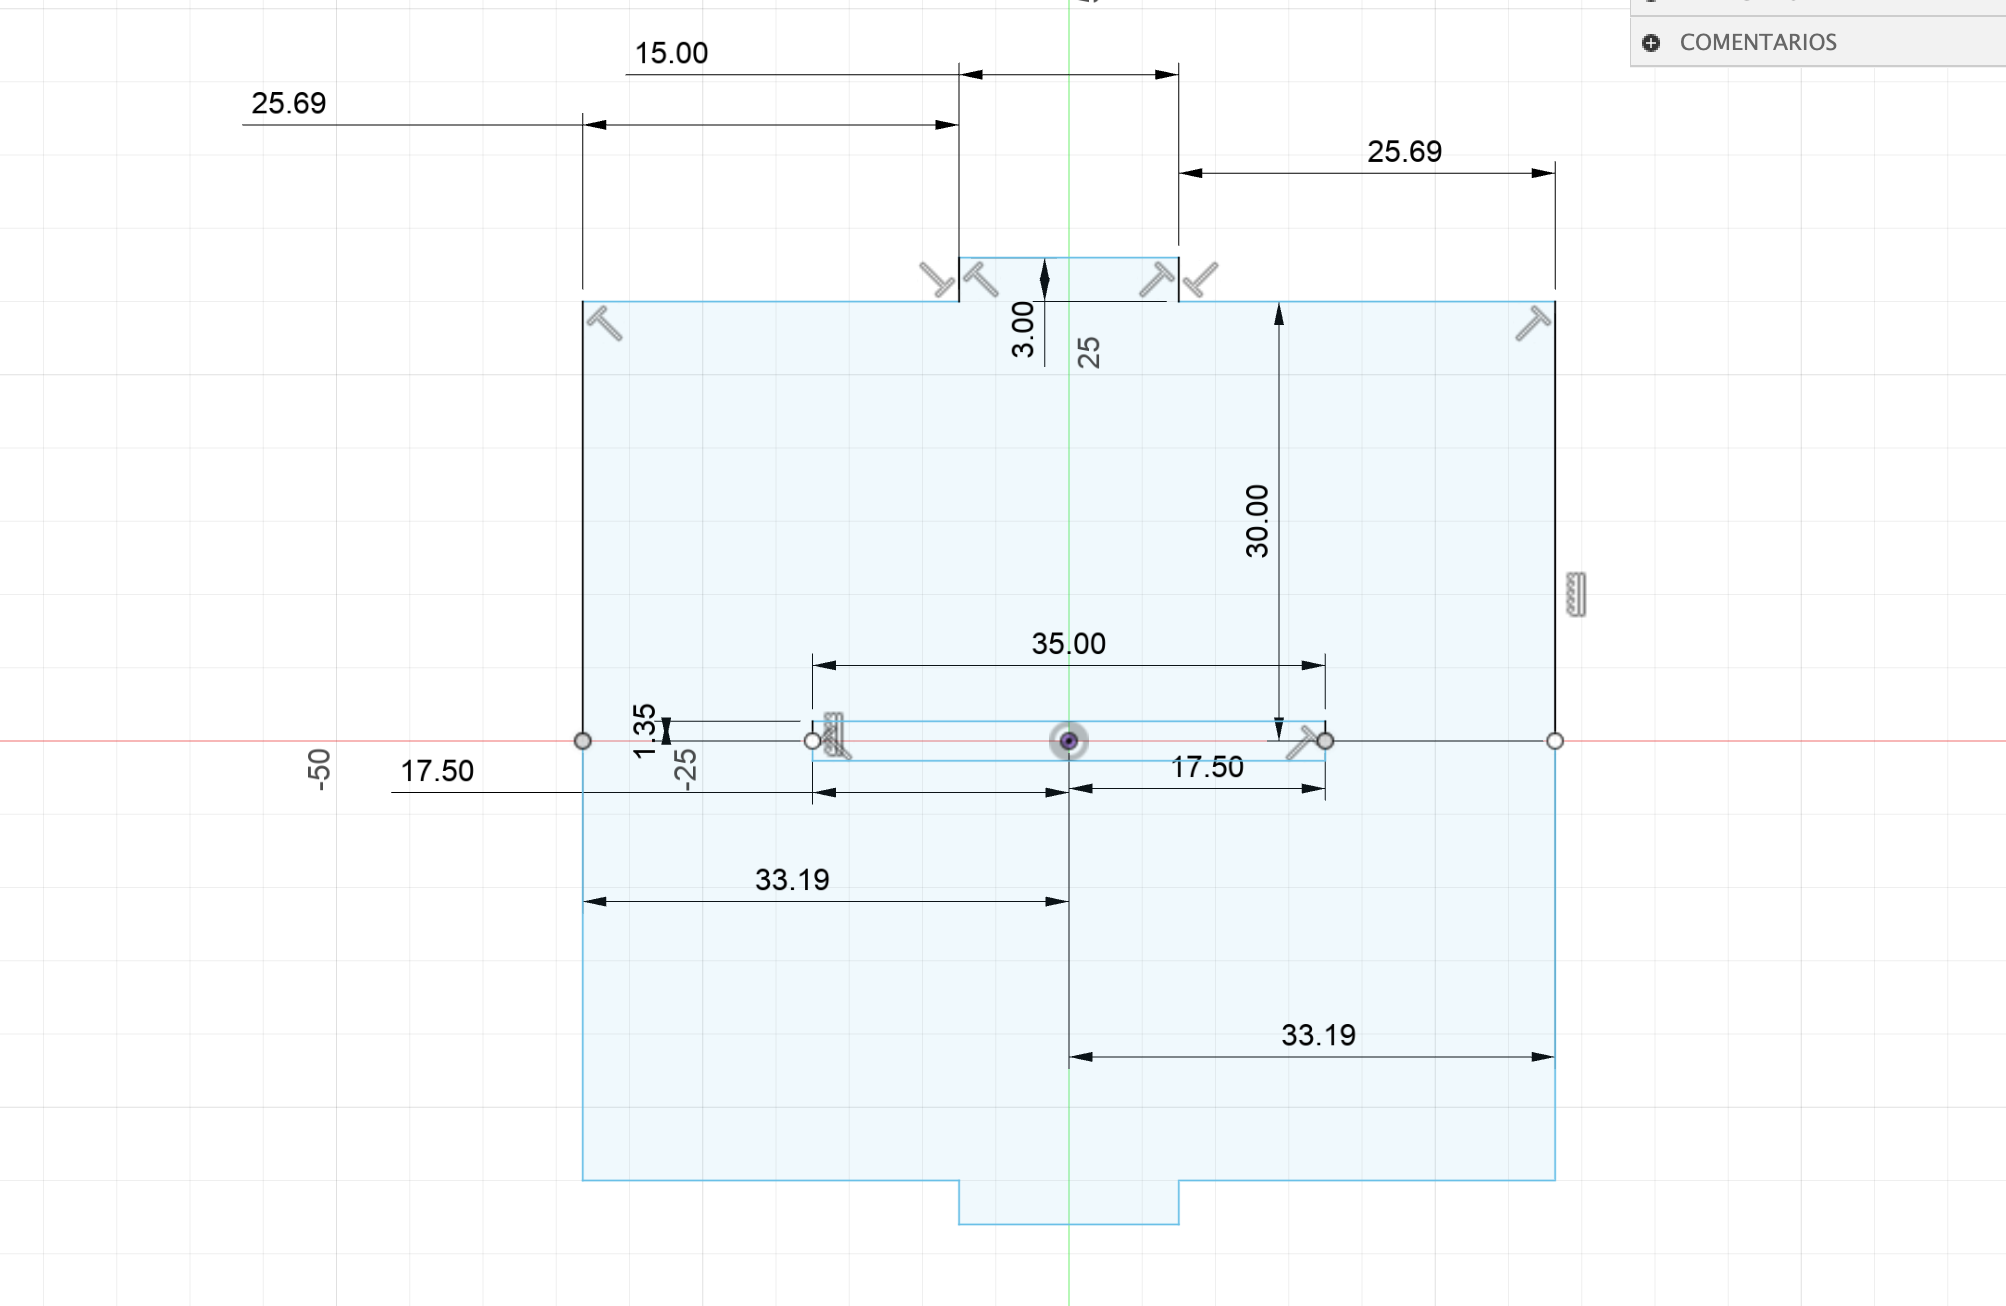
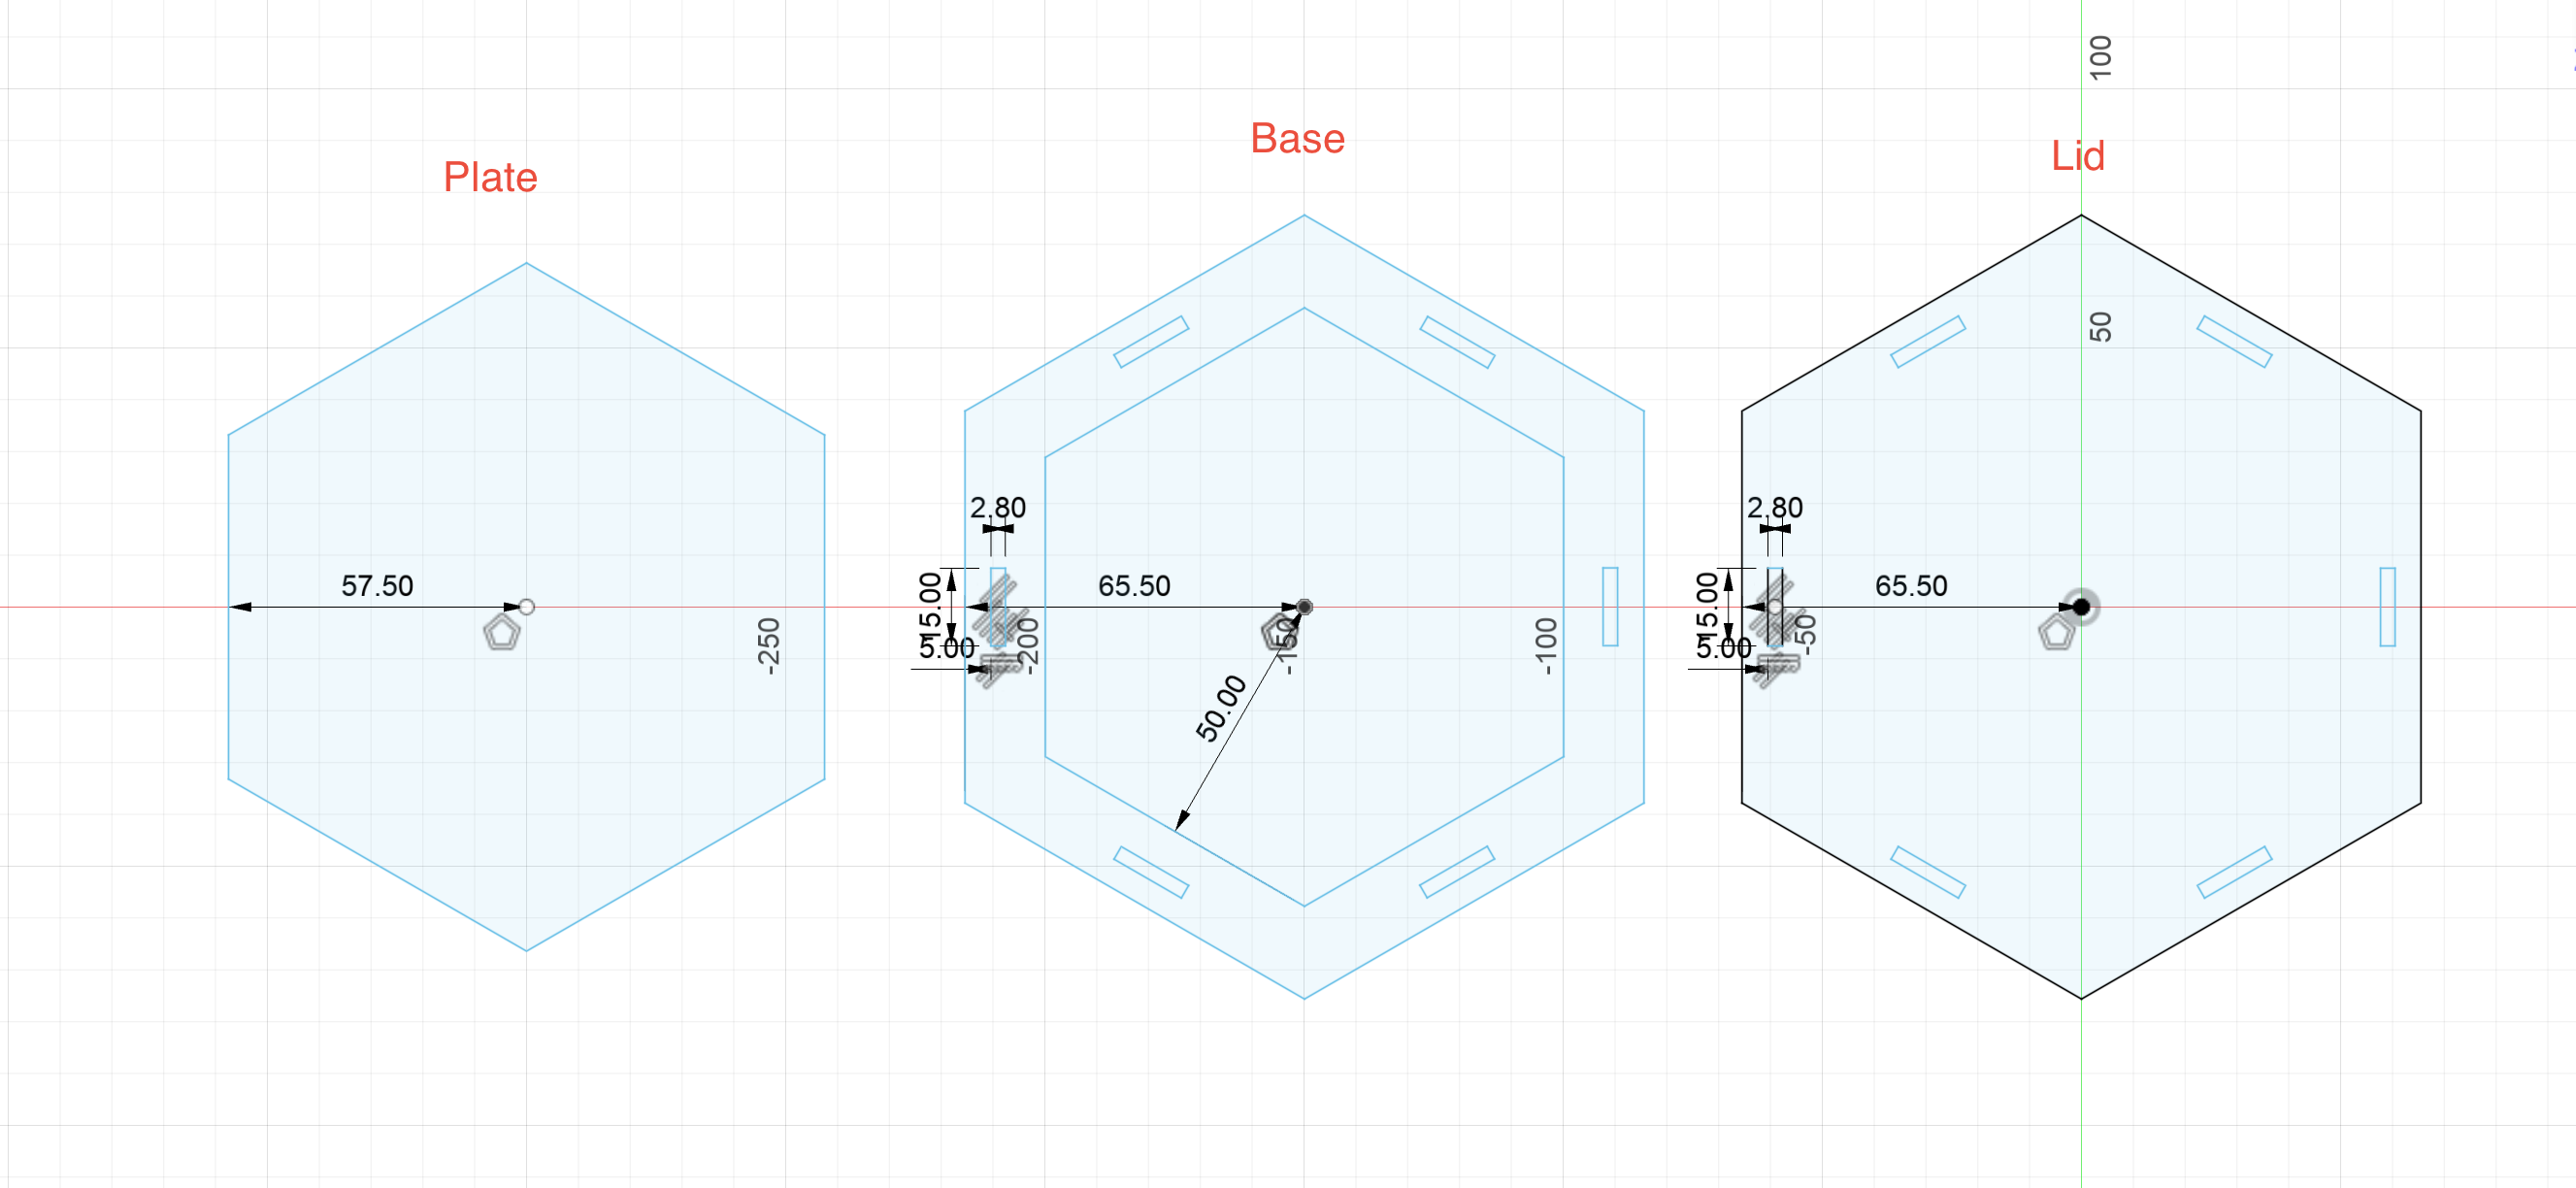
For the base, I decided to make it 131 mm in total, with 6 rectangular slots for assembling the walls. The cover is also the same size, with corresponding slots.
I made a plate that fits inside the button. This allows me to raise the PCB a bit higher if its height is insufficient.
Games
Game 1
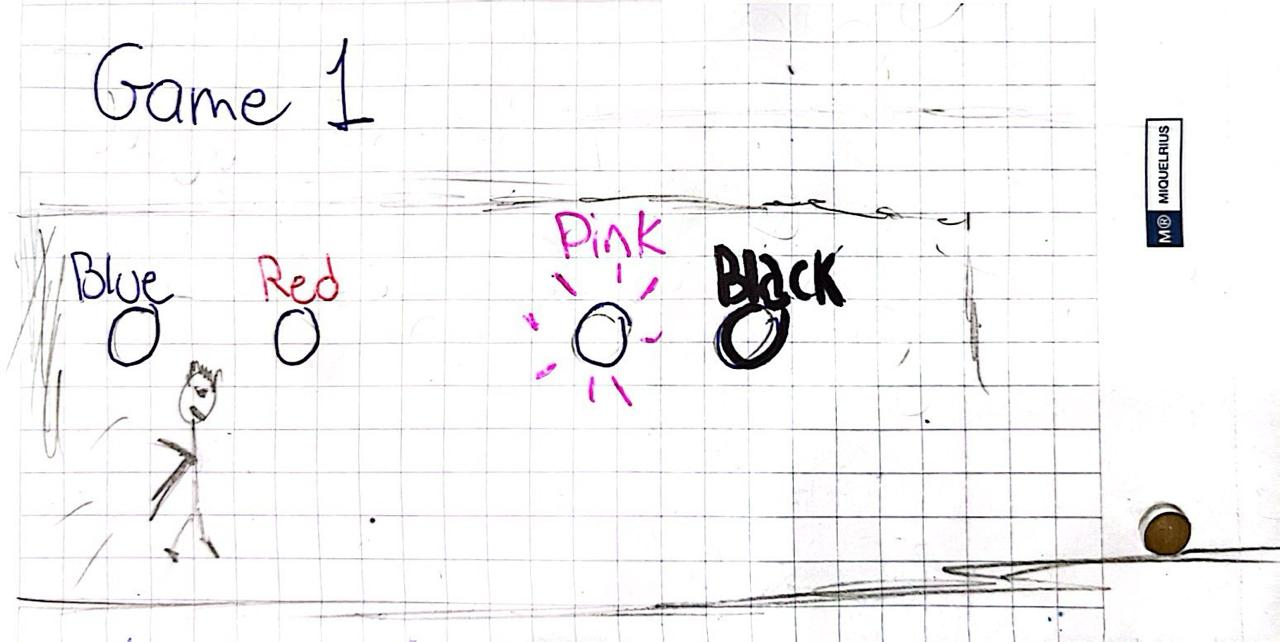
I want to take advantage of the fact that they are modular to put them wherever the user wants and with that create interactive games with the room. And for the first example game, I have the idea of putting the modules in different points of the room, in the program interface being able to choose which module to turn on and the person will have to go and press the module that is on.
Game 2
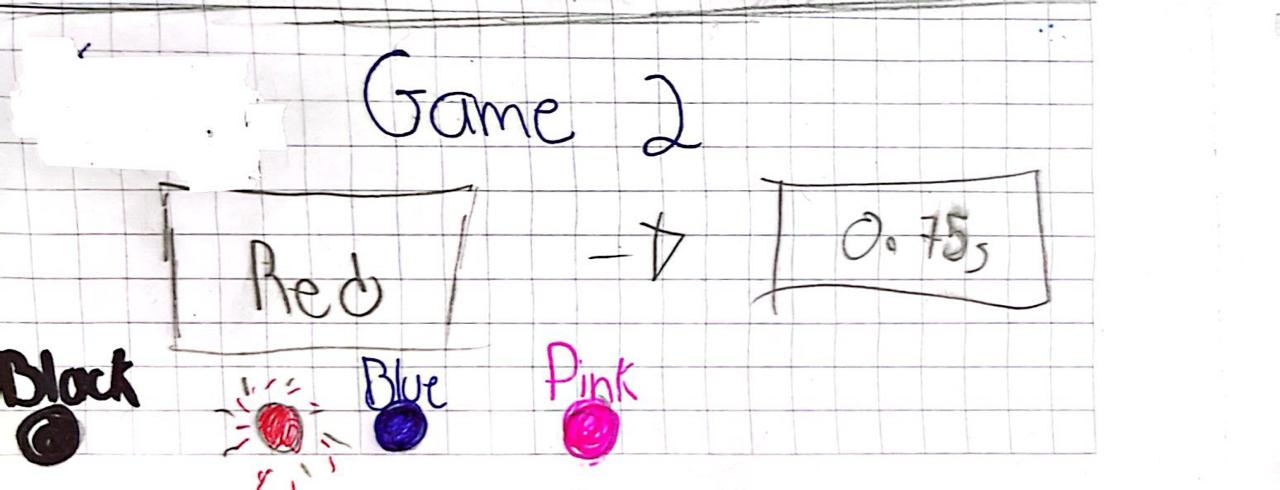
The second game focuses more on reaction, and it consists of the same 4 modular buttons. You can arrange it in the most comfortable way, where when you stretch your arm you can press the buttons.
The color of the button that has to be pressed will appear on the screen. Once pressed, your reaction time will appear on the screen.
Materials
| Qty | Description | Price | Link |
|---|---|---|---|
| 10 | Material one | 22.00 $ | https://amazon.com/testoe |
| 20 | Material two | 22.00 $ | https://amazon.com/testoe |
| 10 | Material three | 22.00 $ | https://amazon.com/testoe |
| 2 | Material four | 22.00 $ | https://amazon.com/testoe |
