3. Computer-Controlled Cutting
For this week, we were asked to perform laser cutting and vinyl cutting. For this, we will use two tools: a laser cutter and a vinyl cutter. For the laser cutter, we will have to create 3D models for cutting our materials. To facilitate our work, we were asked to make our pieces parametric, meaning that we can easily retrieve the piece without affecting its functionality. For the vinyl, a PNG image and a program like Illustrator will suffice.
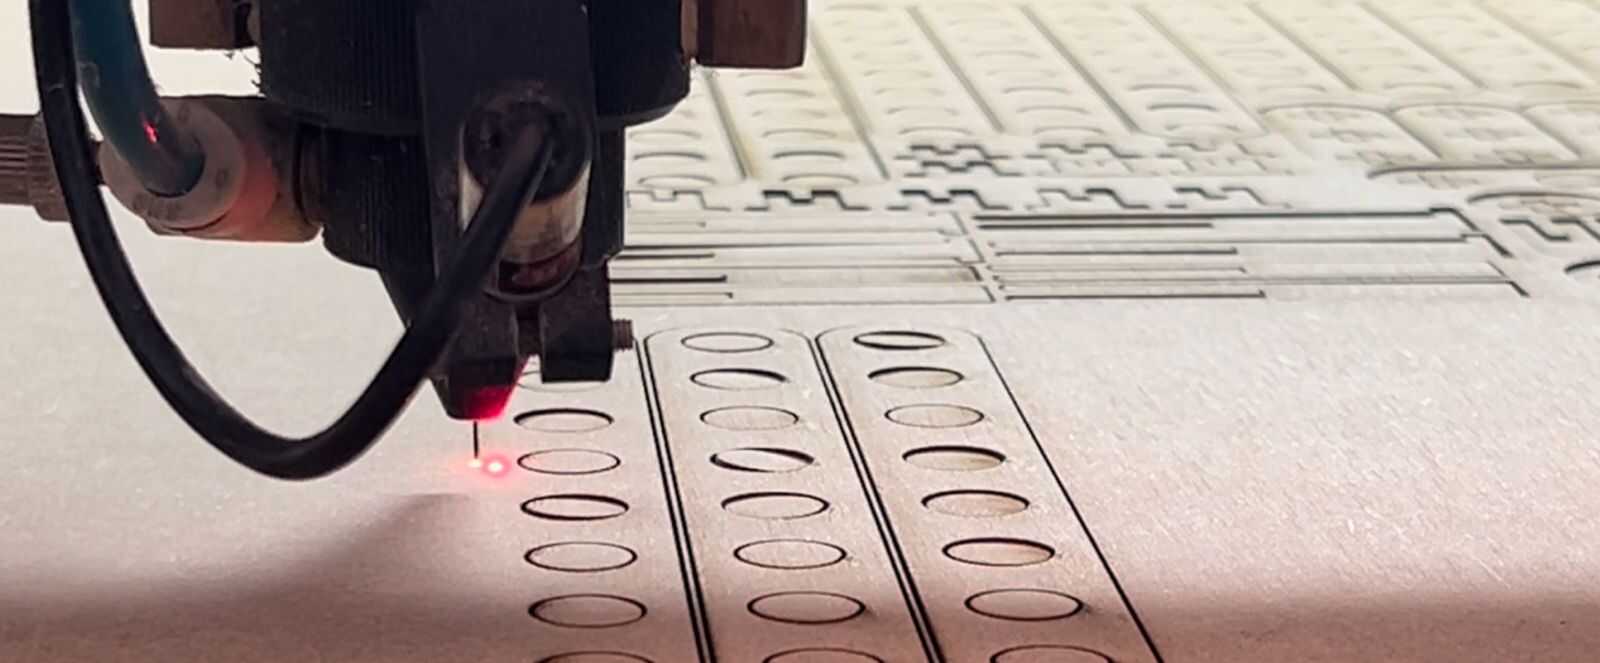
laser cutter machine
Laser cutting is a precise and efficient method for cutting materials such as 3mm thick MDF (medium-density fiberboard). It uses a high-powered laser that focuses on a very small point of the material. As the laser moves along the programmed design, it burns or vaporizes the MDF, leaving a very clean and precise cut edge. In laser cutting, a wide variety of materials and thicknesses can be used, such as MDF, acrylics, paper, etc. For more information about materials and uses of the laser cutter as well as more parameters that are used, go to our GROUP PAGE .
- Decorations: Creation of decorative and artistic elements
- Prototypes: Manufacturing of mock-ups and models for design
- Furniture: Precise components for furniture and assemblies
- Crafts: Production of handcrafted and customized pieces
Common Applications:
The most crucial aspect when using a LASER machine is its calibration. Here are the key components of a LASER machine:
- Unfocused LASER Beam: The initial source of the LASER, which is not very powerful.
- Focal Length: The distance between the lens and the focal point where the beam converges.
- Focus Lens: Concentrates the LASER beam to increase its intensity.
- Nozzle: Directs the focused LASER beam towards the material.
- Focused Beam: The concentrated beam that exits the nozzle, significantly more powerful and used for cutting.
- Focal Spot: The precise point where the LASER is most effective for cutting.
- Depth of Focus: The range over which the LASER beam remains focused.
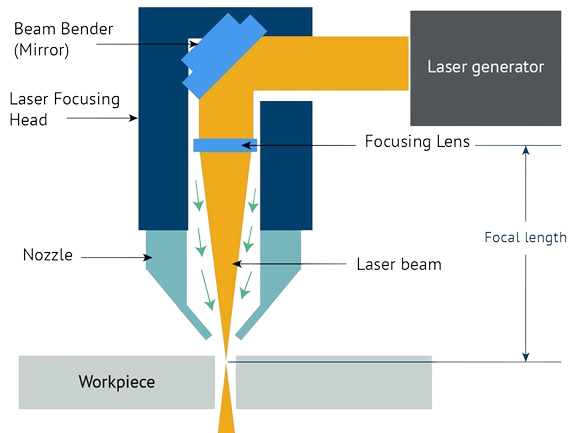
Important Tips: It is recommended to maintain a distance of 5mm between the nozzle and the material for optimal cutting performance, always wear appropriate safety gear, such as goggles, to protect your eyes from the intense light.
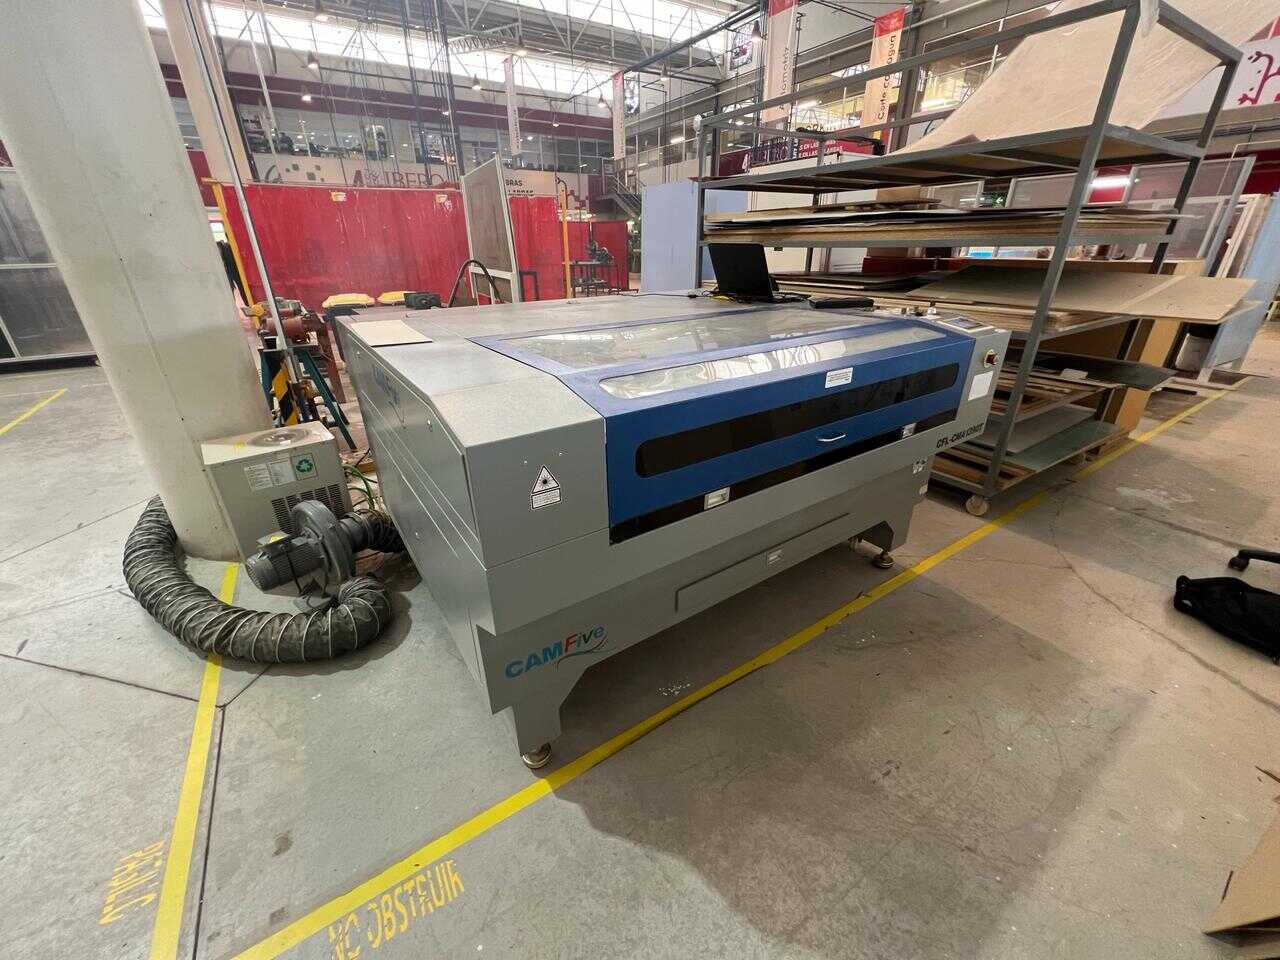
machine
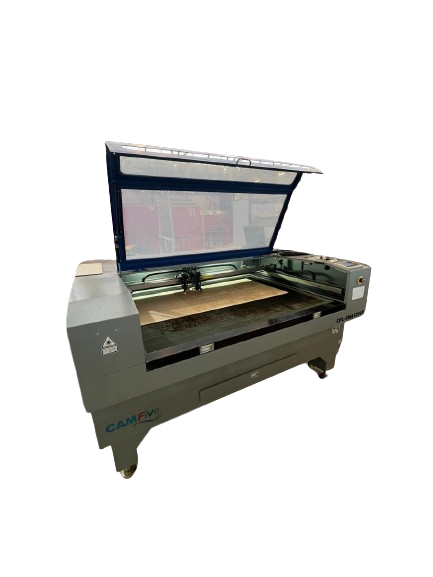
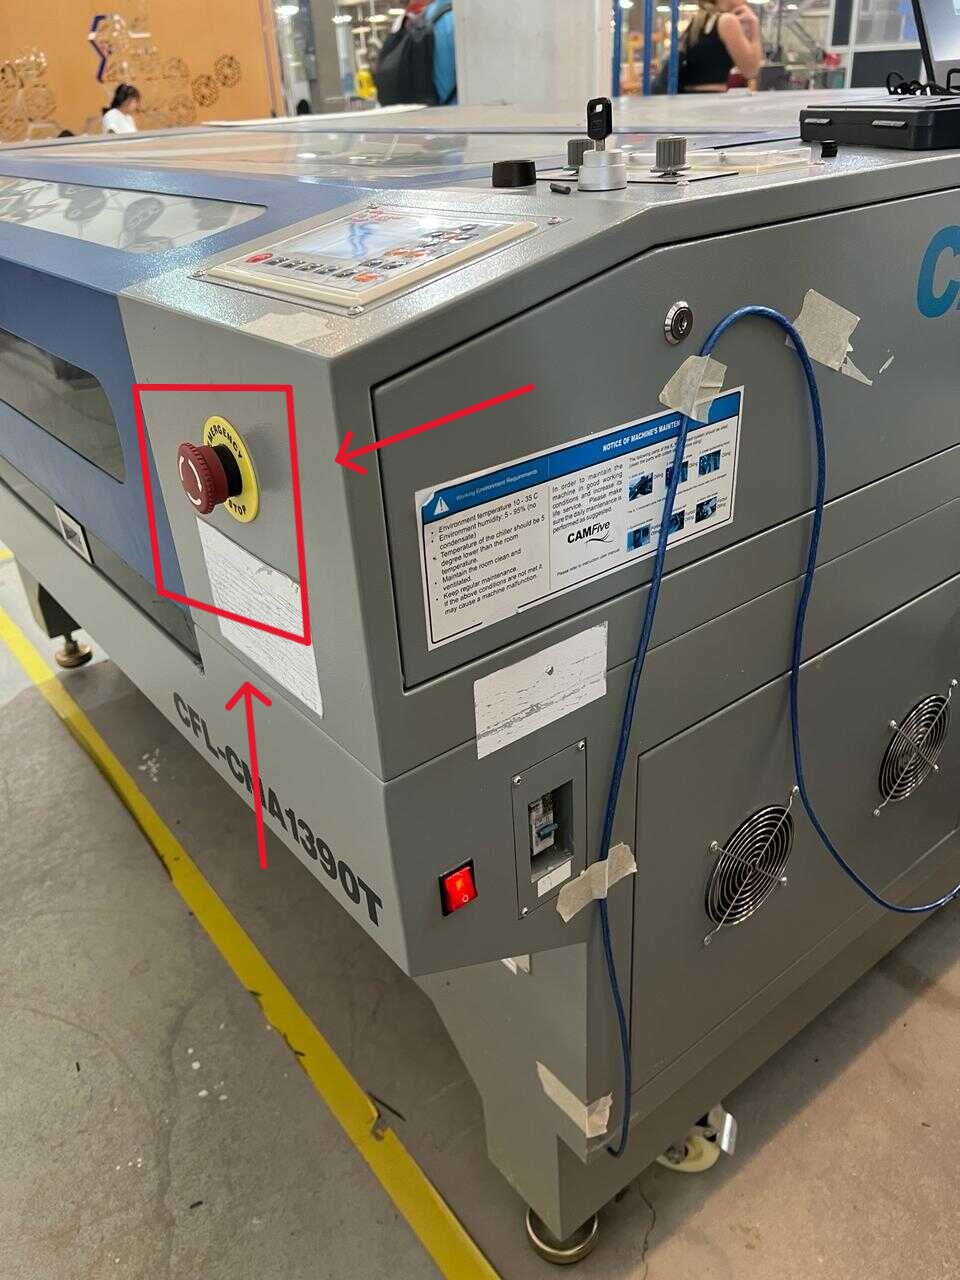
CFL-CMA1390T
- Work area: 1.30 x 0.90 meters
- Work table: Honeycomb
- Accesory: Double Tube
- Cutting speed: 0-36,000 (min/mm)
- Engraving speed: 0-64000 (min/mm)
- Power: 100 Watts
- Cutting thickness: 0-25 mm


3D DESIGN
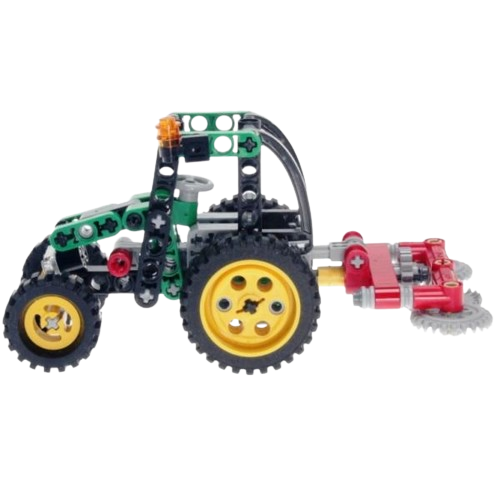
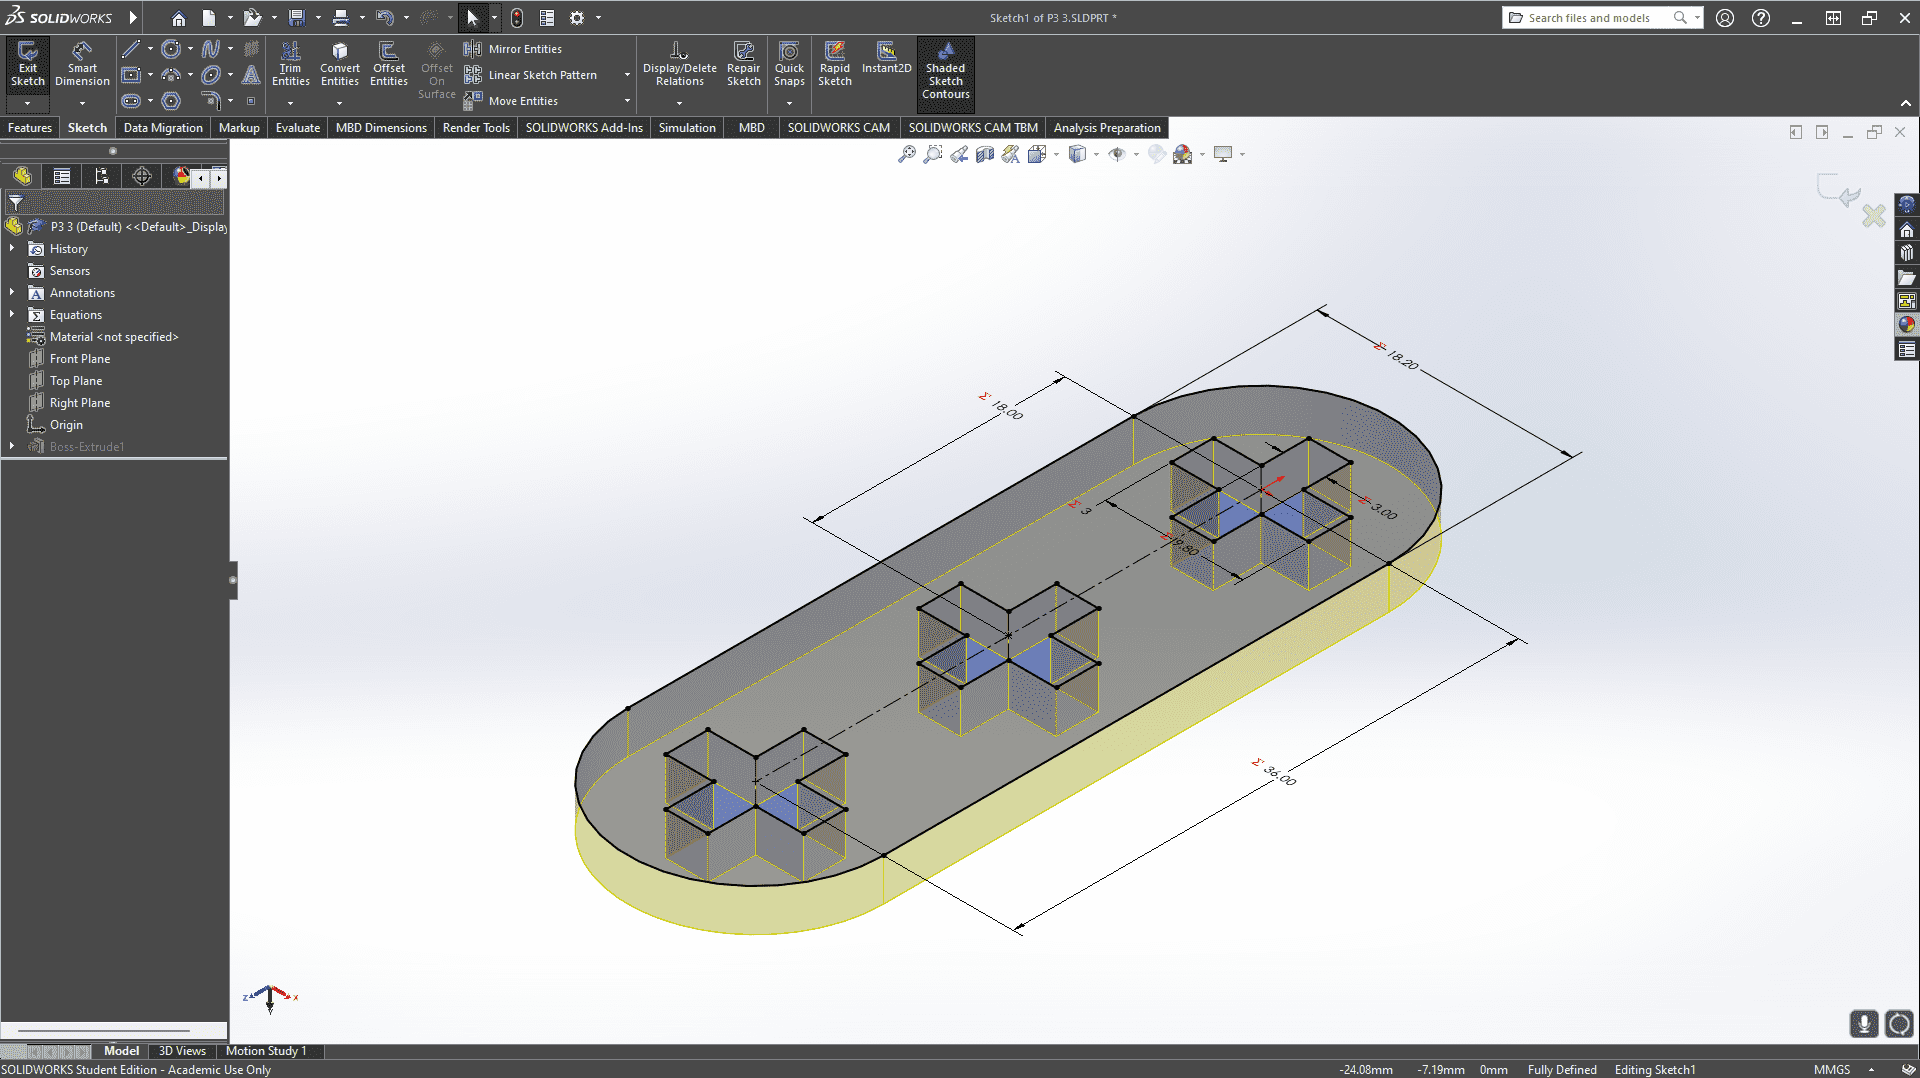
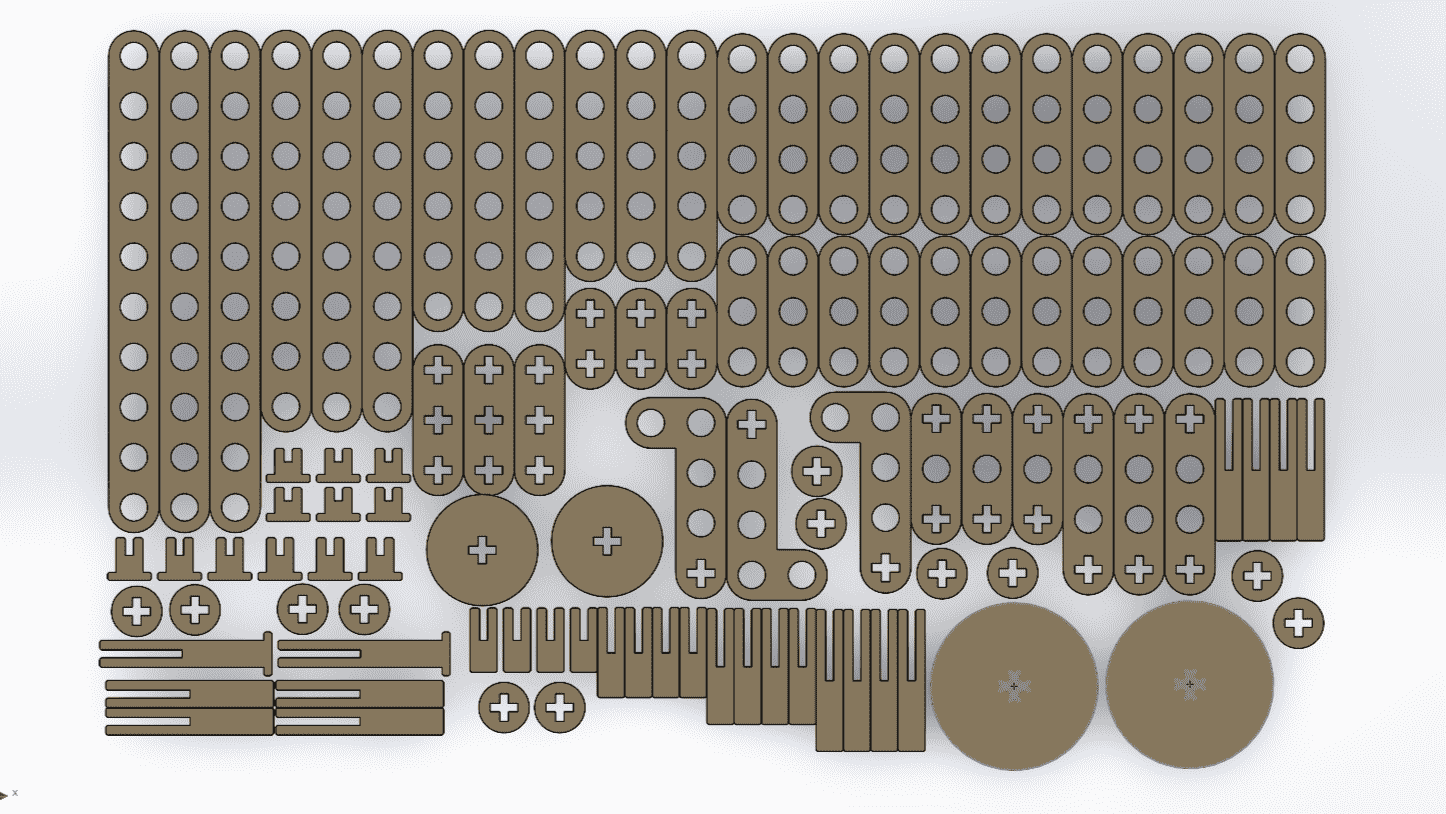
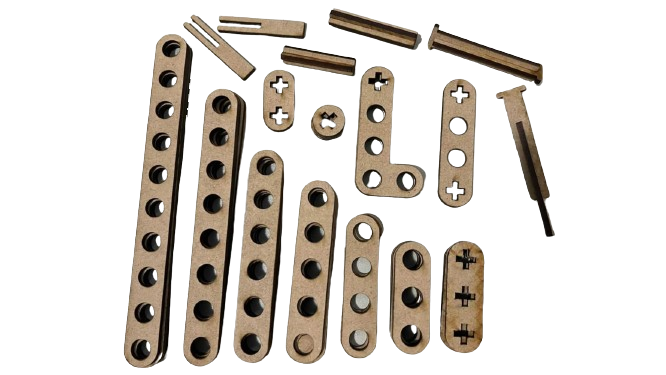
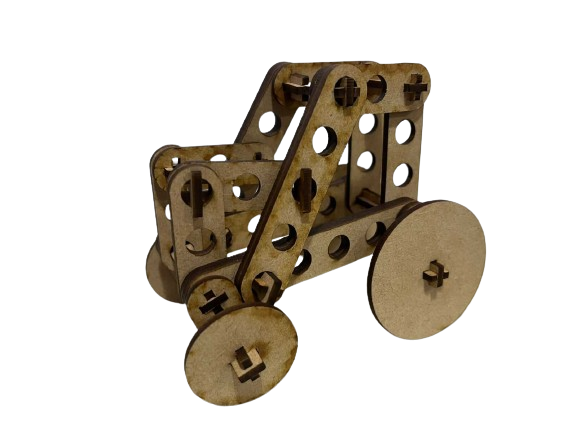
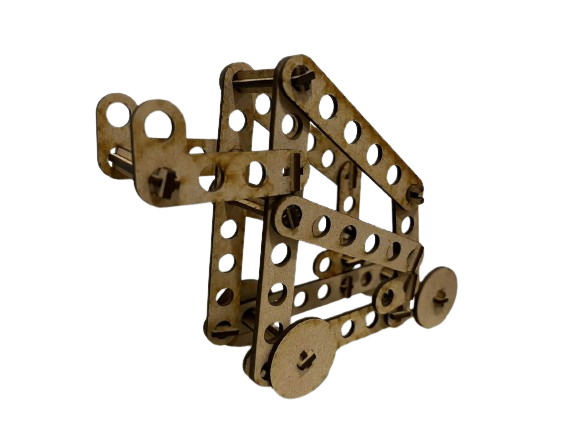
For the design process, I first needed an idea to base it on. So, after searching for a while, I decided to base it on LEGO Technic. Assembly kits that I really like and find very complete. With the laser cutting process and the shape of the material, it seemed like a very good idea for manufacturing.

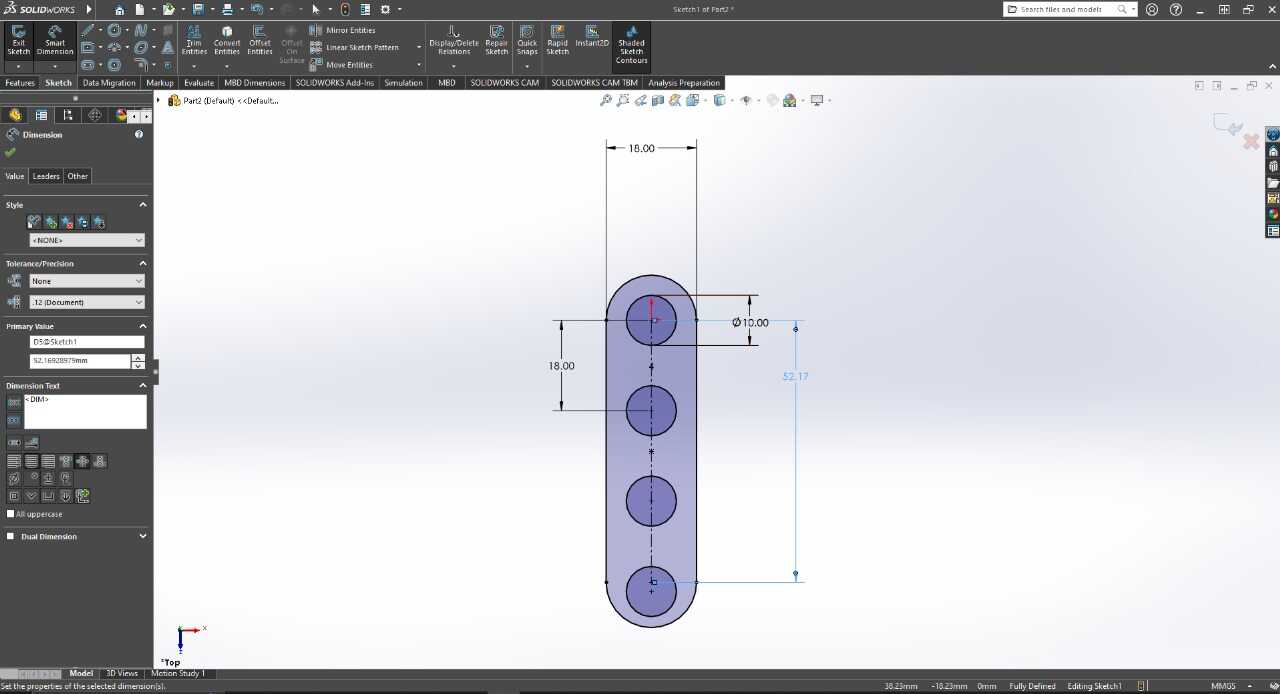
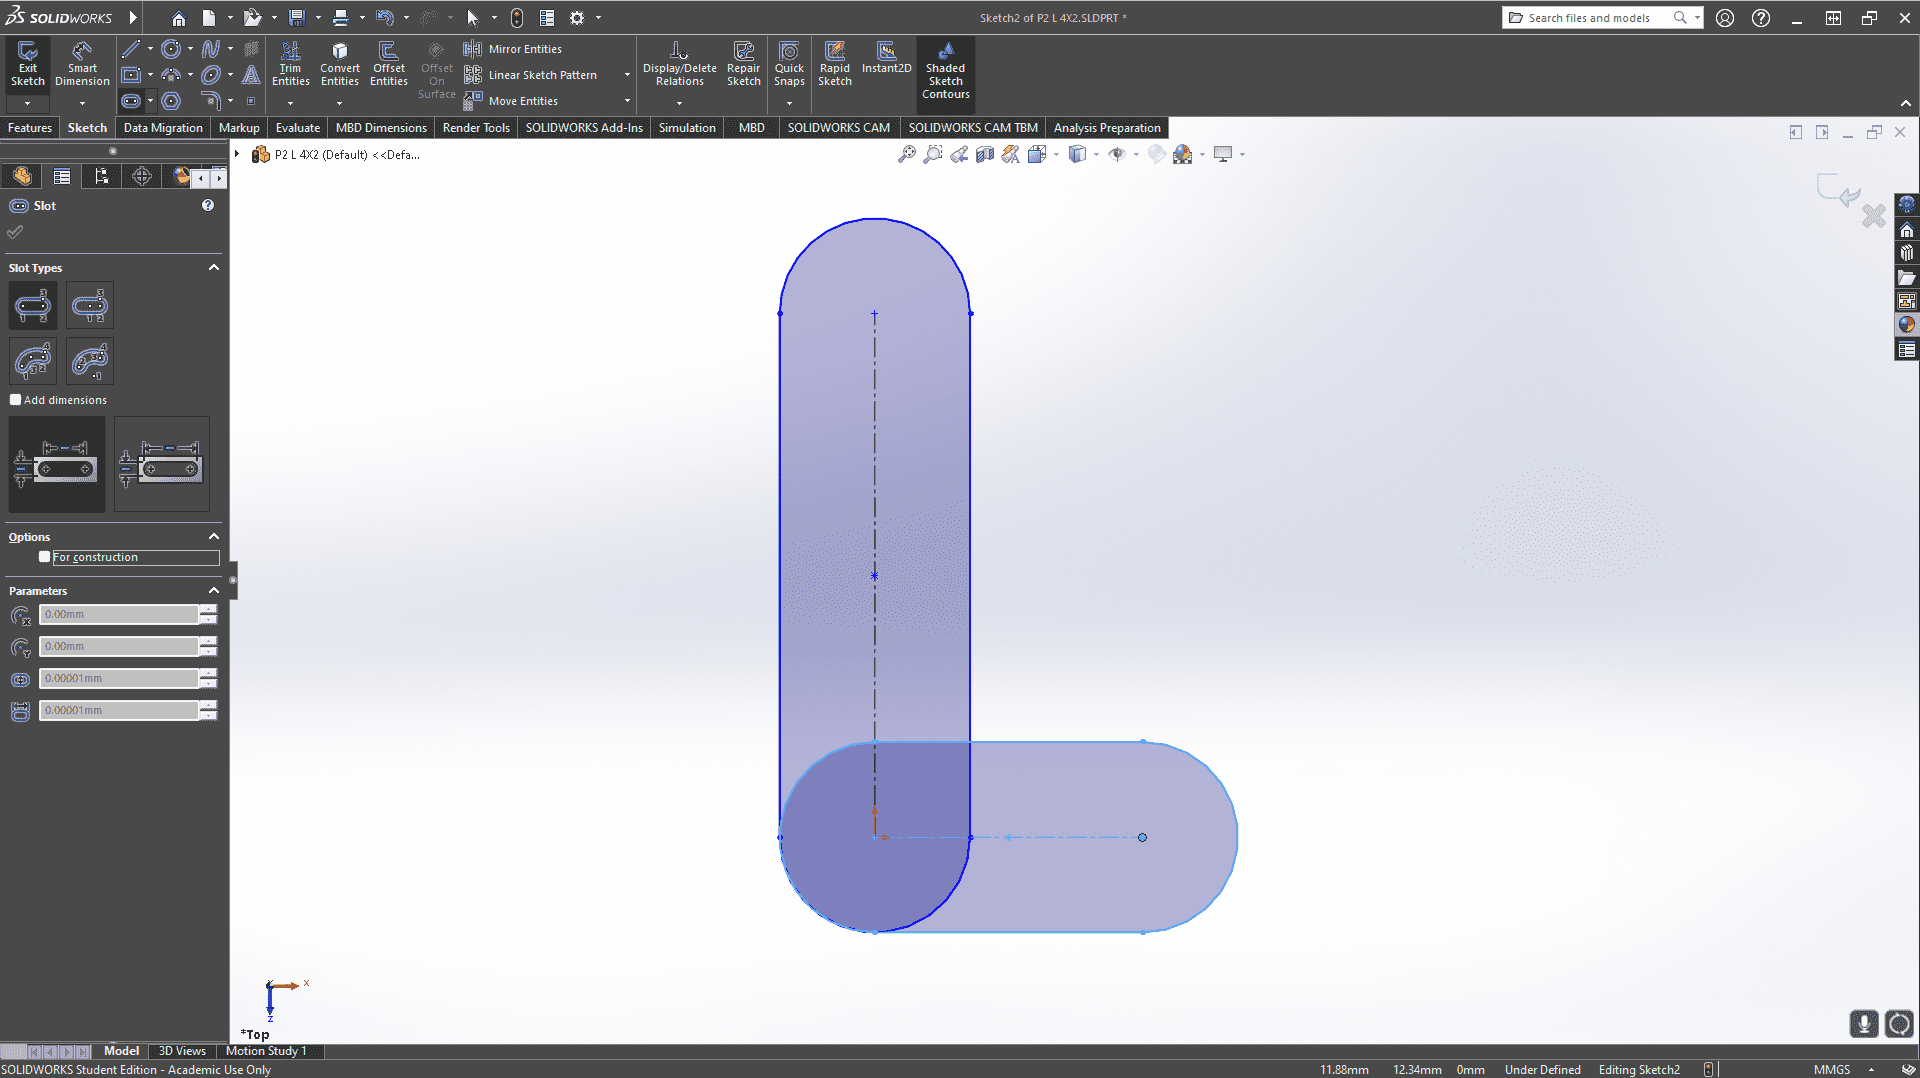
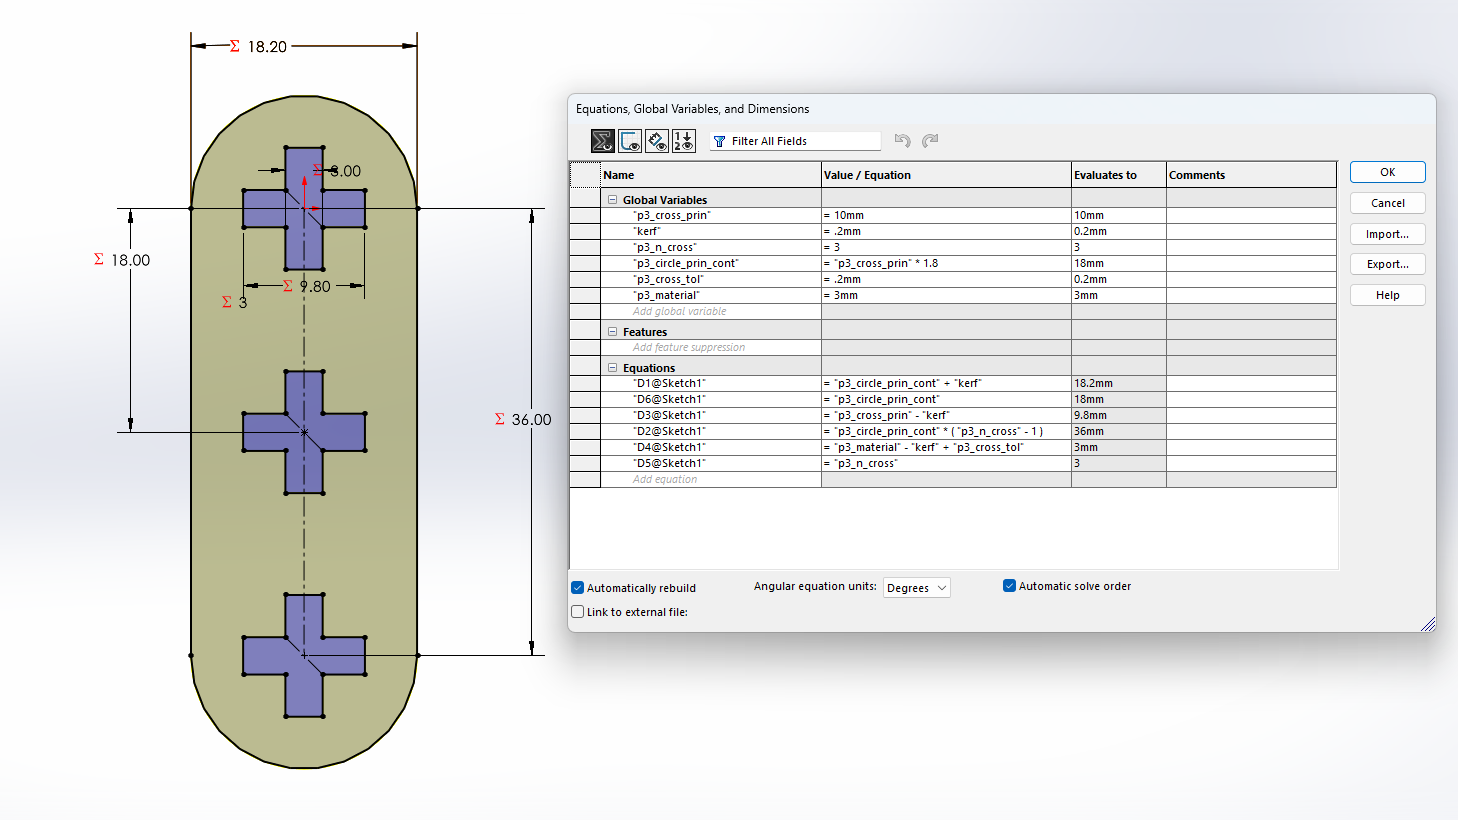
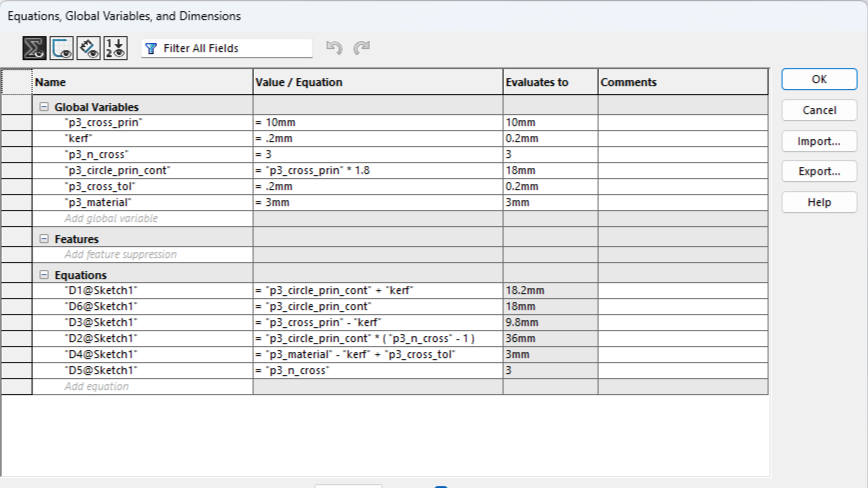
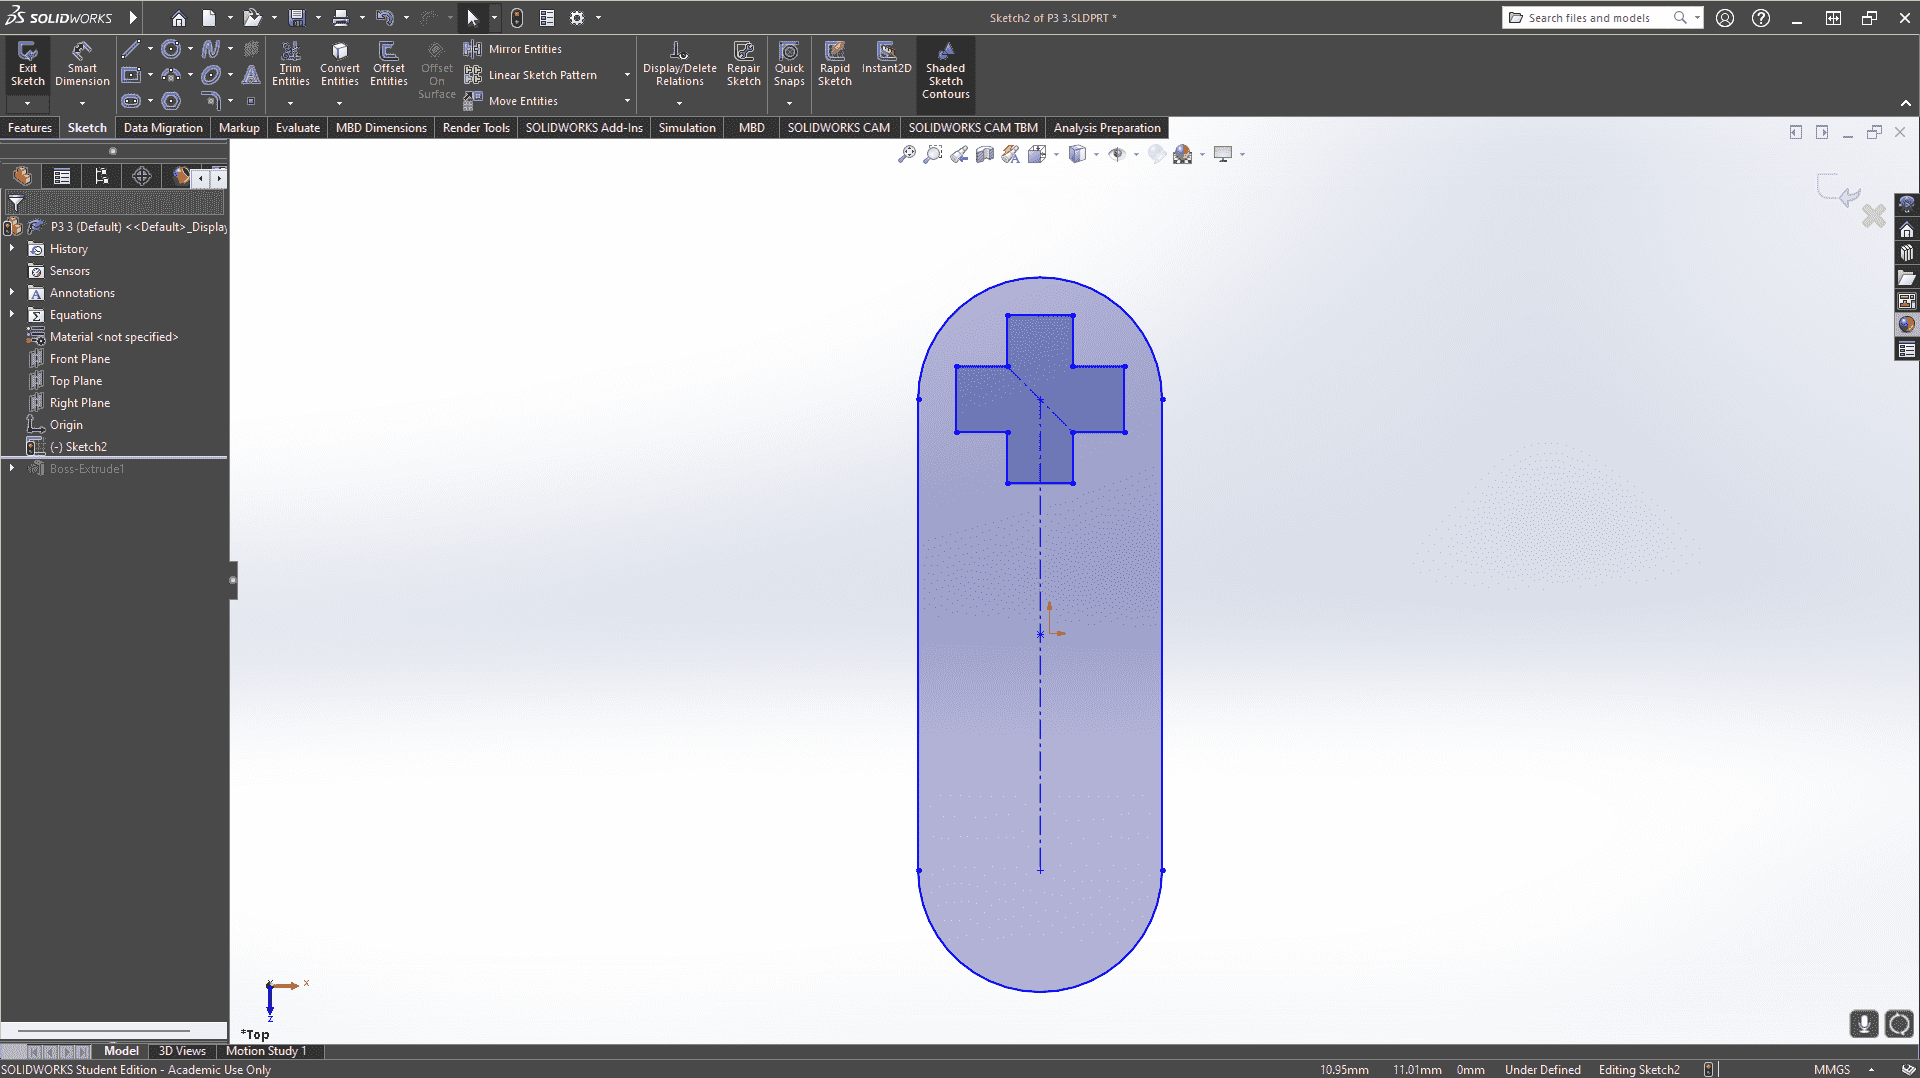
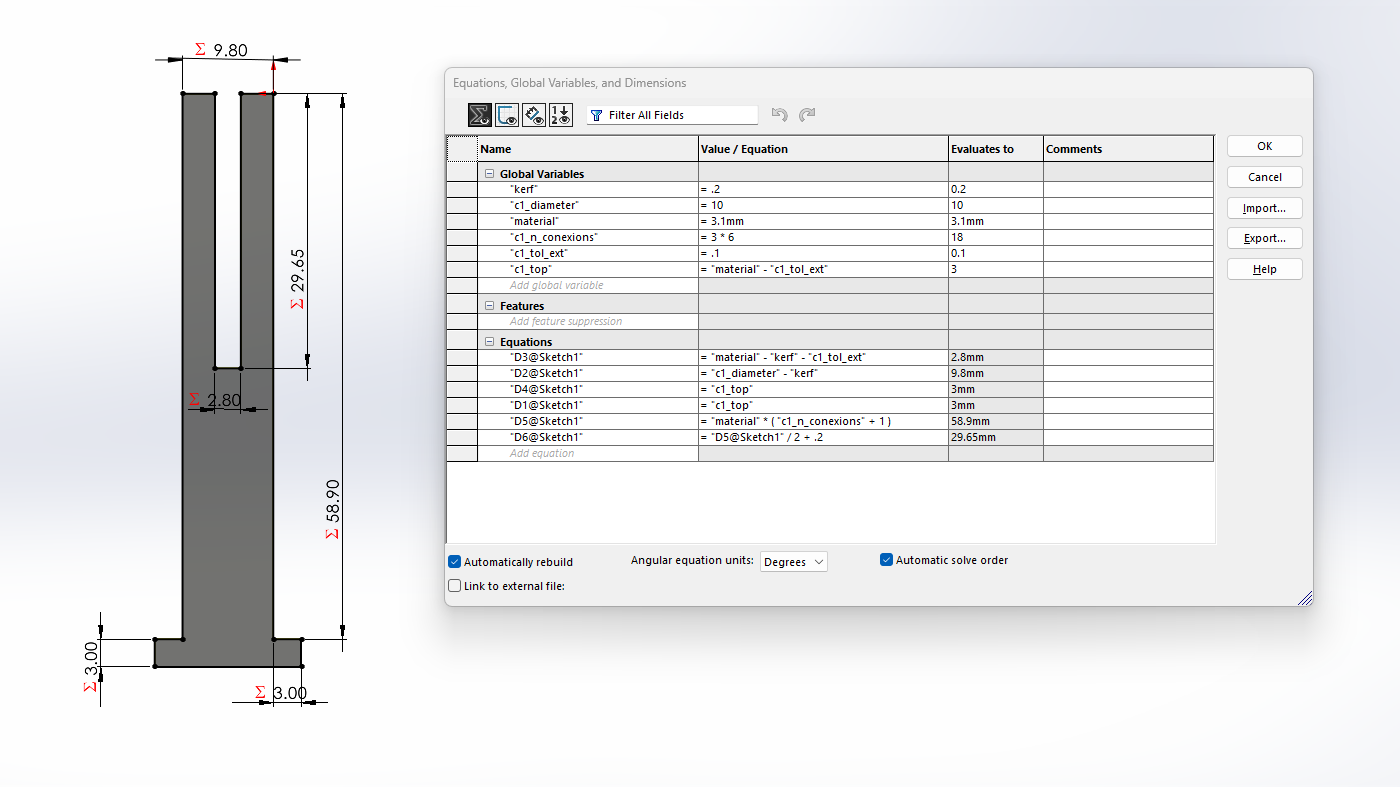
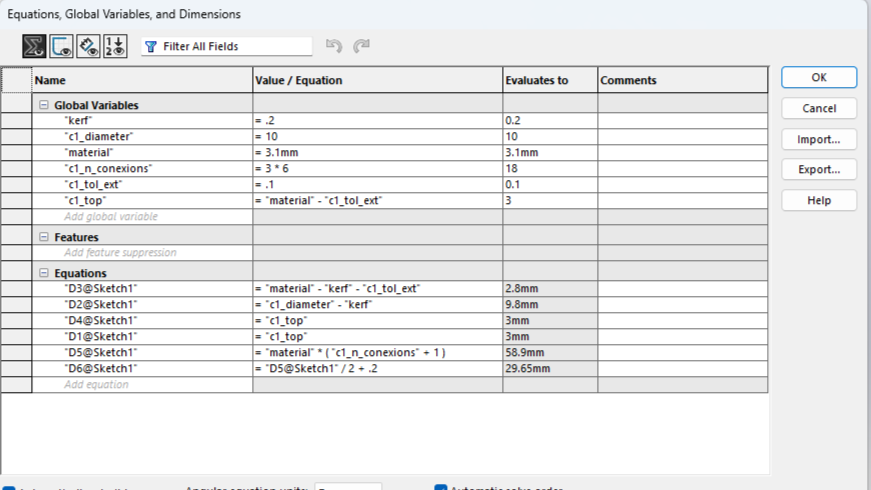
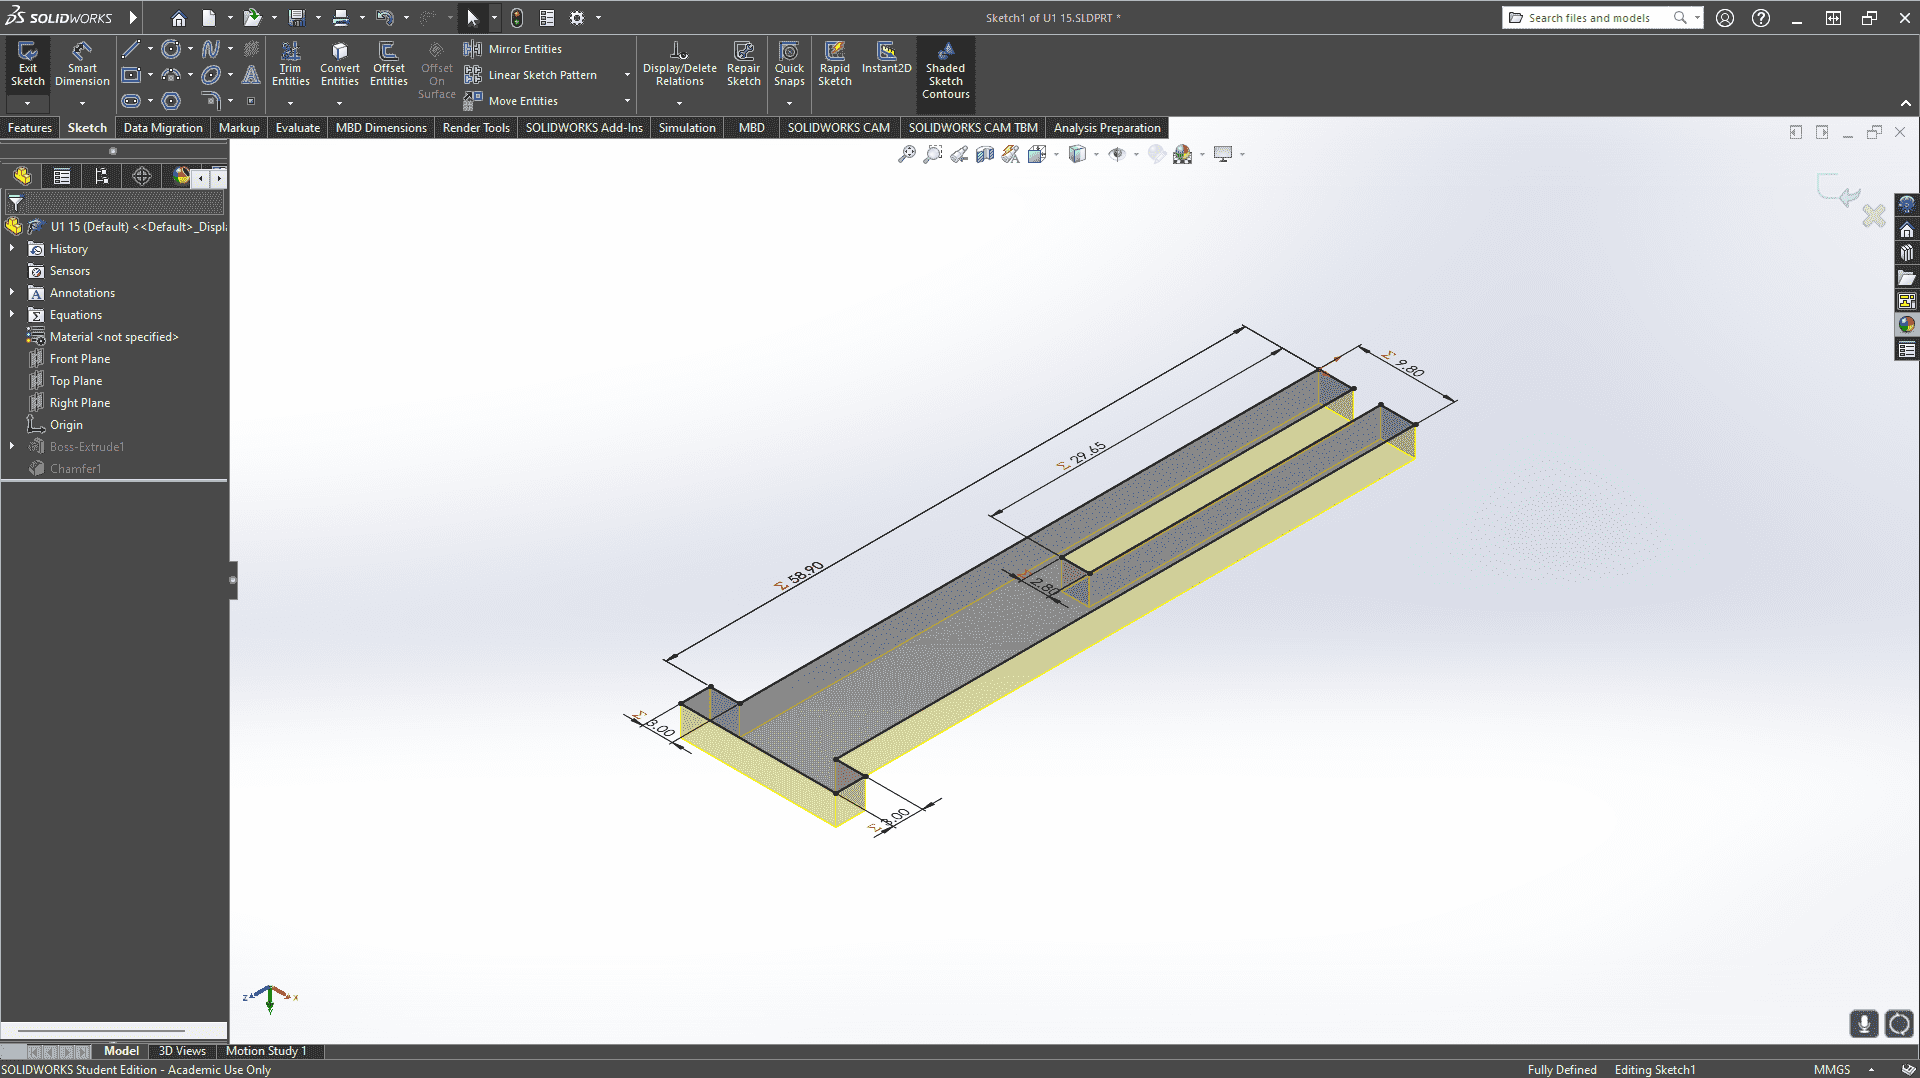
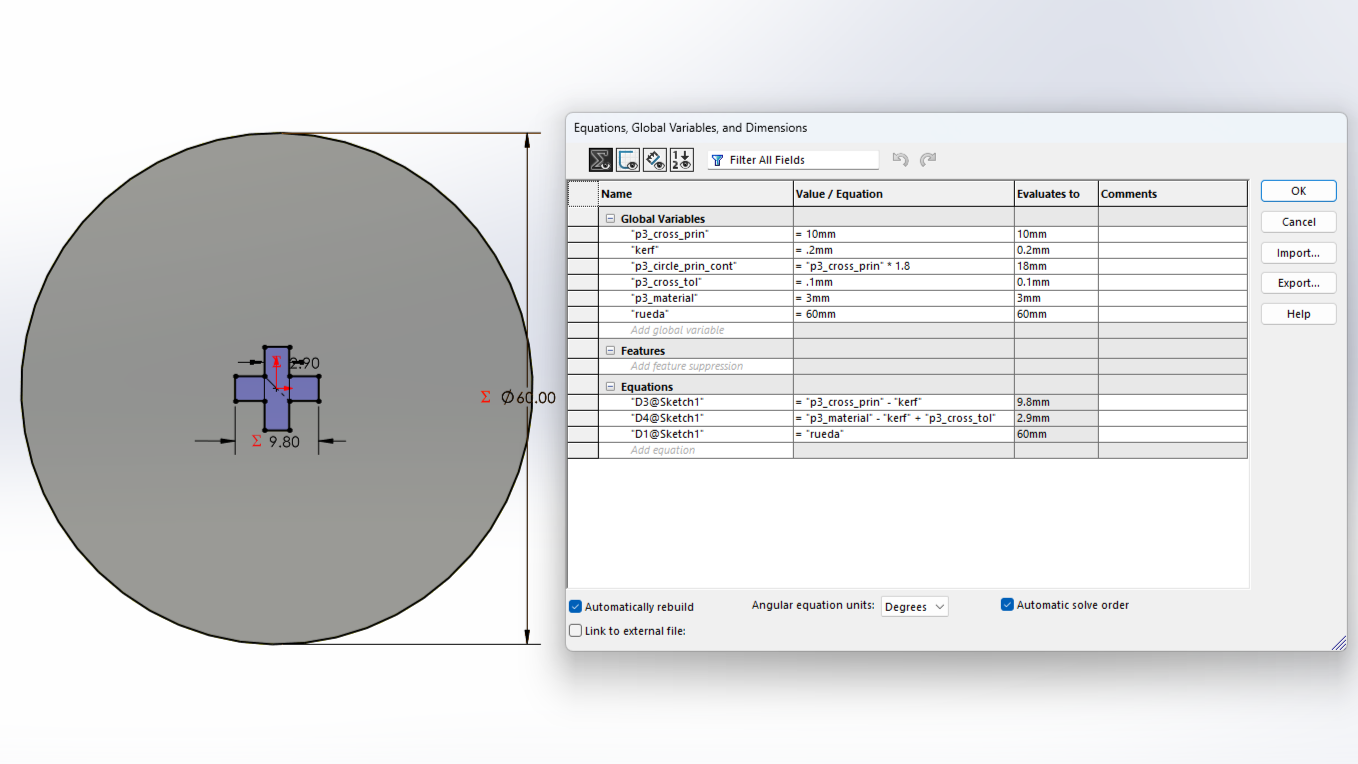
Next, I will show the process and measurements of a piece. These designs are parametric, so there is no problem scaling them and obtaining pieces of different sizes.To understand more about what it means for a piece to be parametric, visit our GROUP PAGE .
PART 1

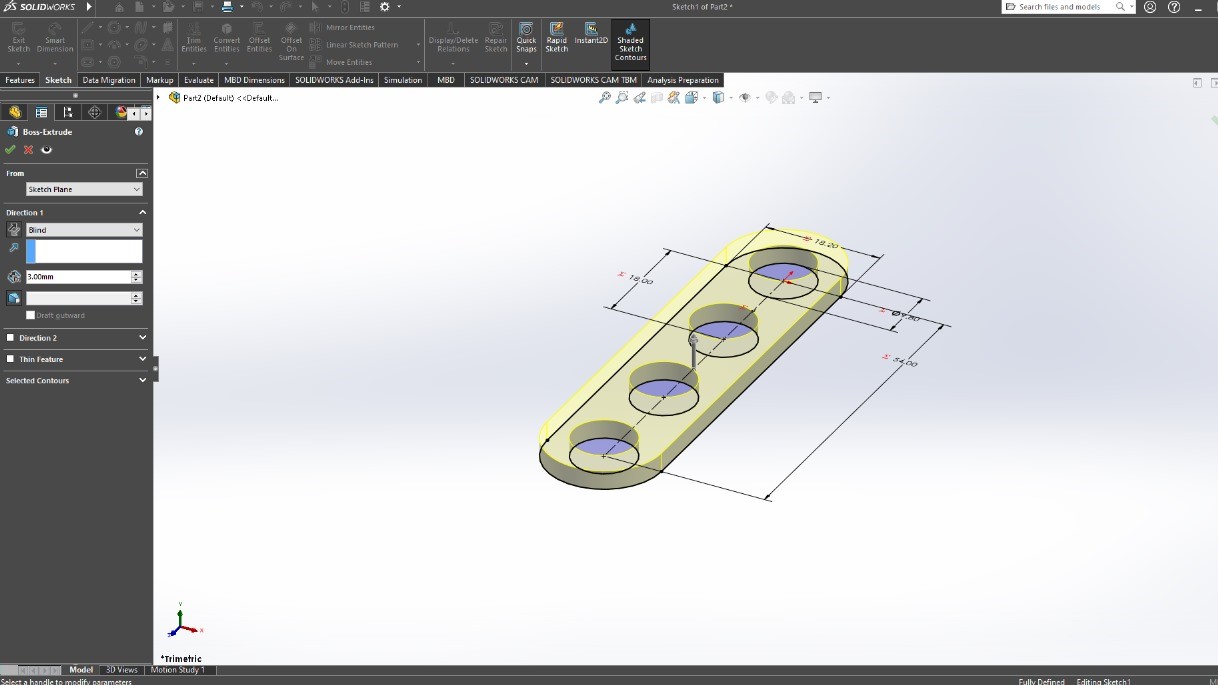
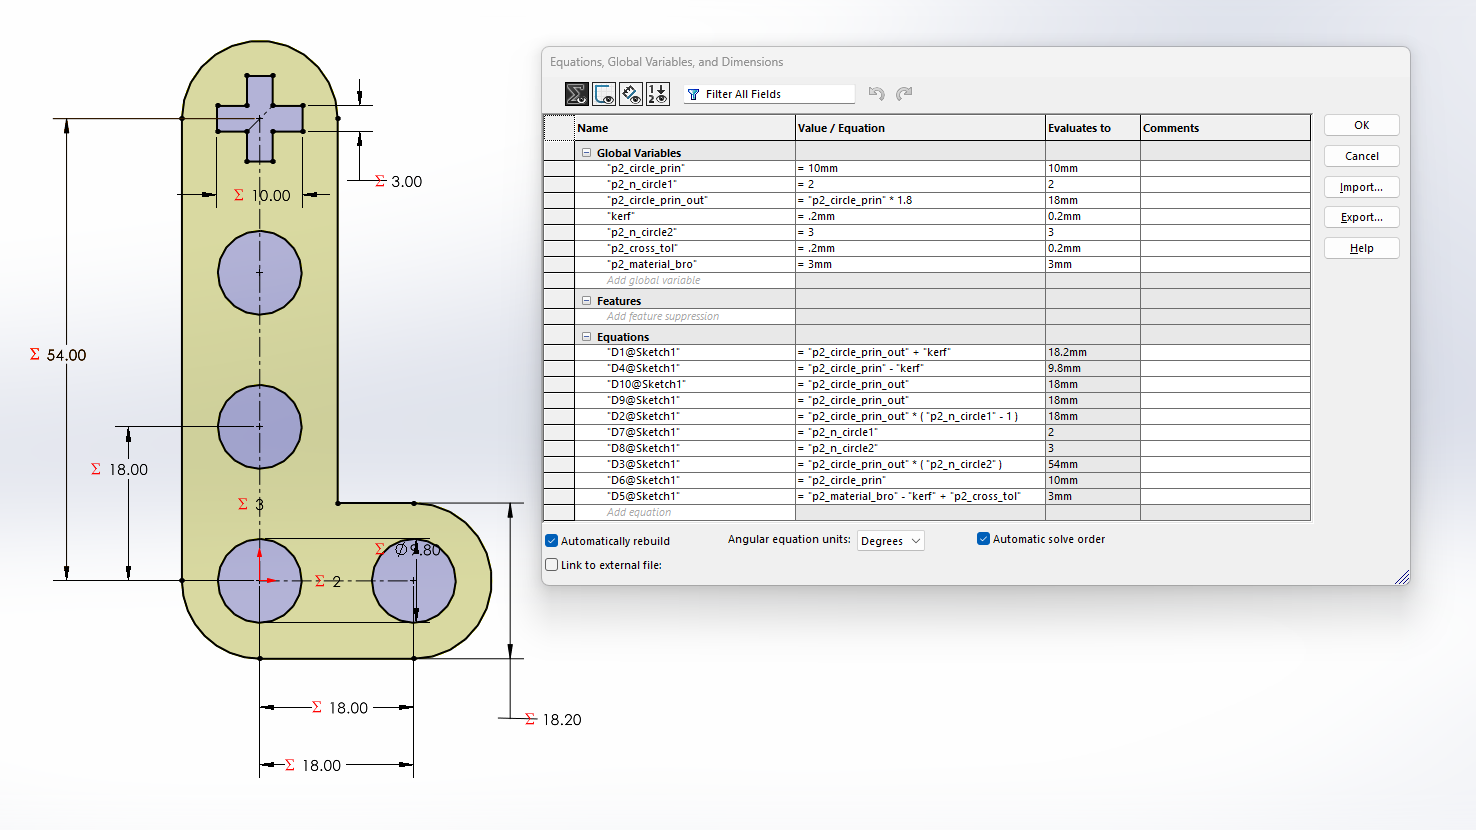
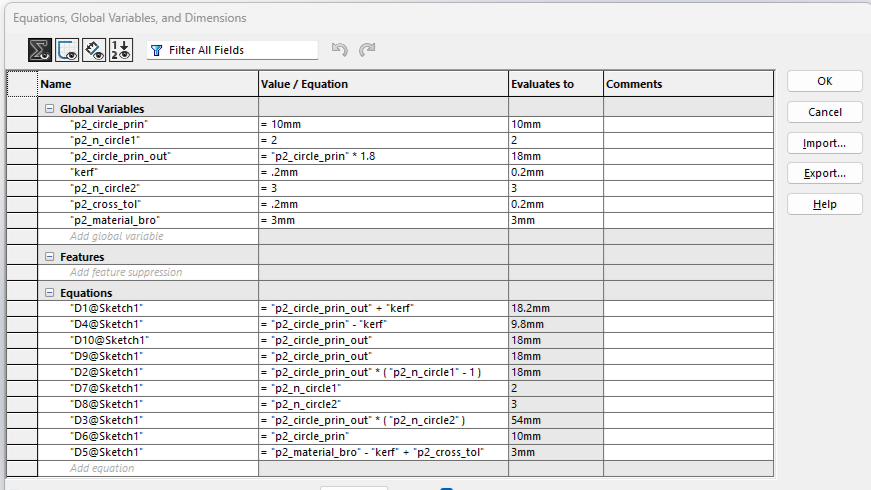
PART 2

PART 3
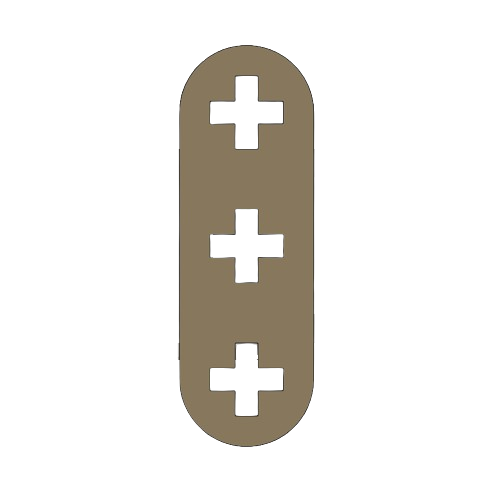
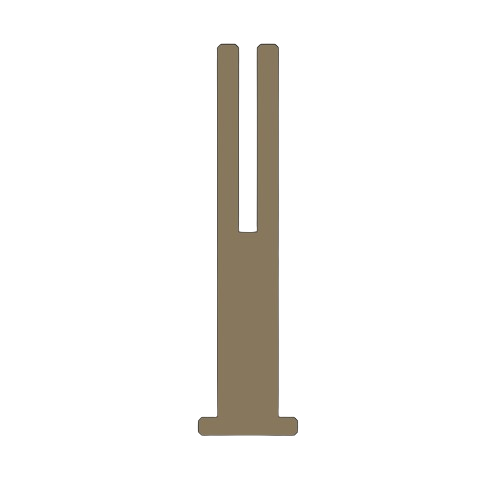
PINS
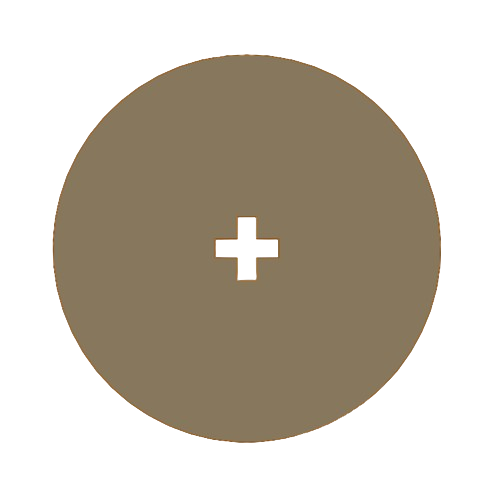
WHEEL


pattern
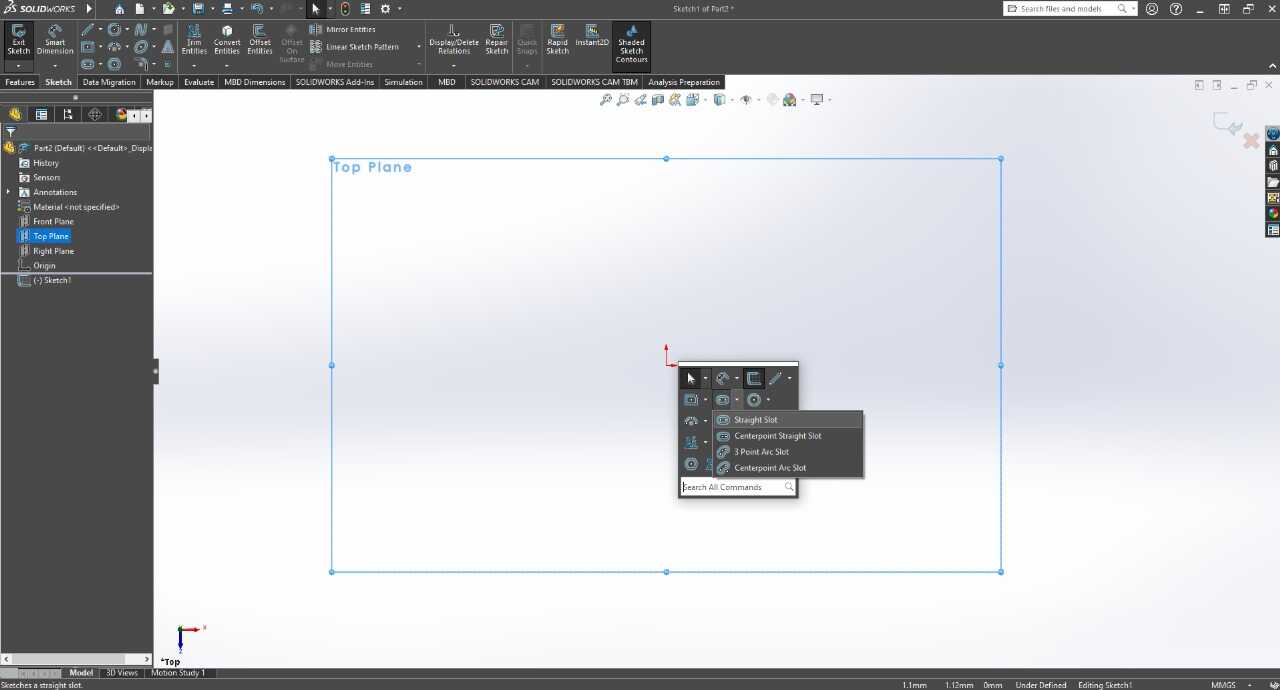
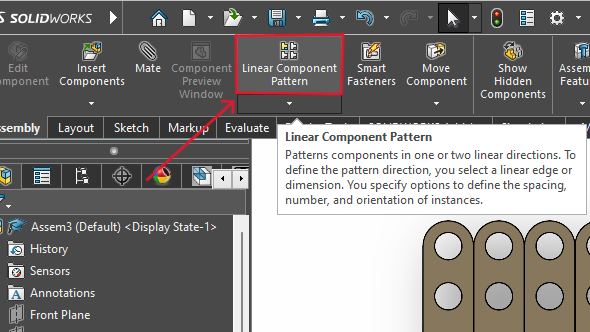
To facilitate the cutting within a SolidWorks assembly, I used the linear component pattern tool to add and duplicate several figures. I then created the DXF file that I will use for cutting.
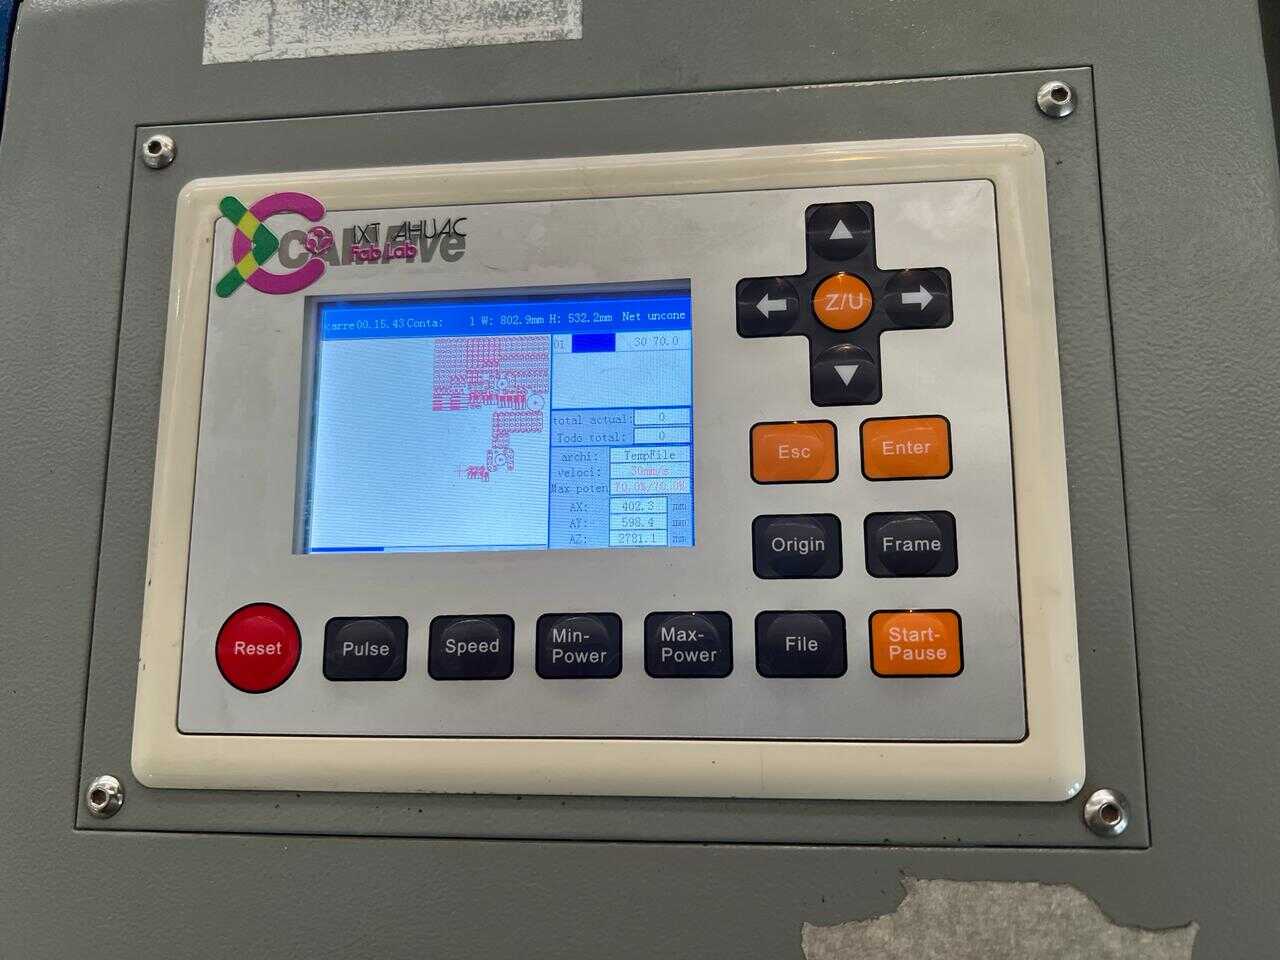
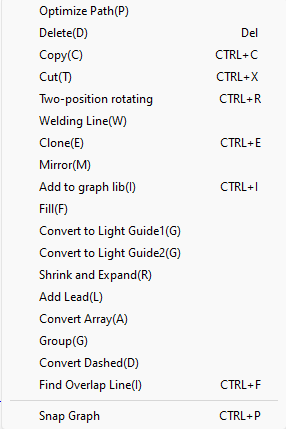
Program

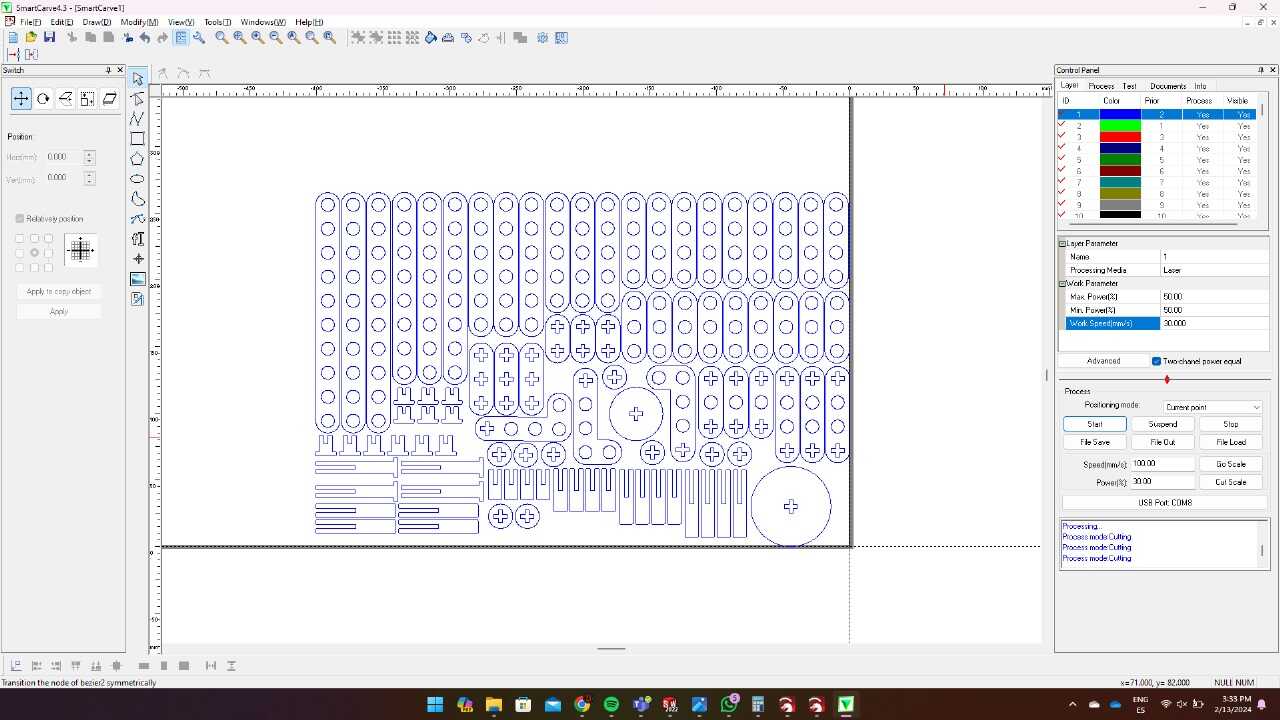
Smartcarve


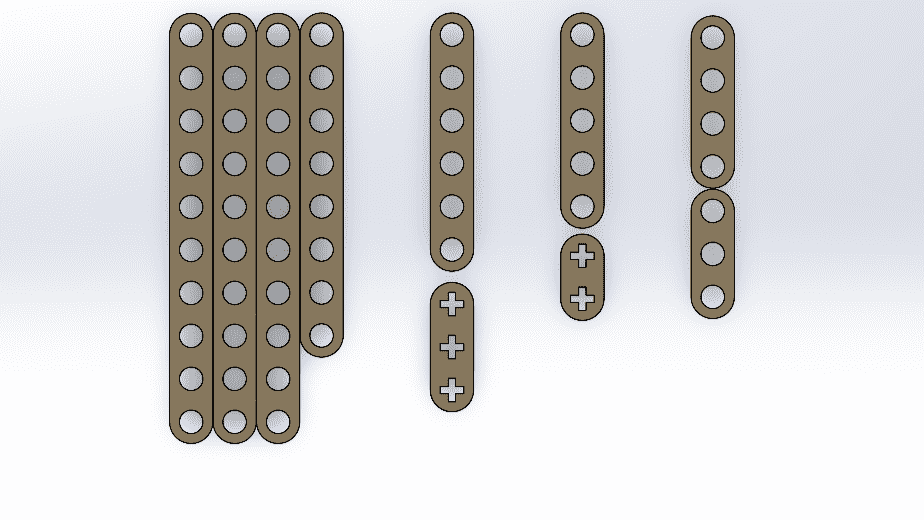
Since the pieces are parametric, I only had to change the number of holes and the piece automatically adjusted all the measurements. This way, I was able to create different pieces without taking much time. Here you can see the different pieces and sizes I made. DOWNLOAD PARTS
cut
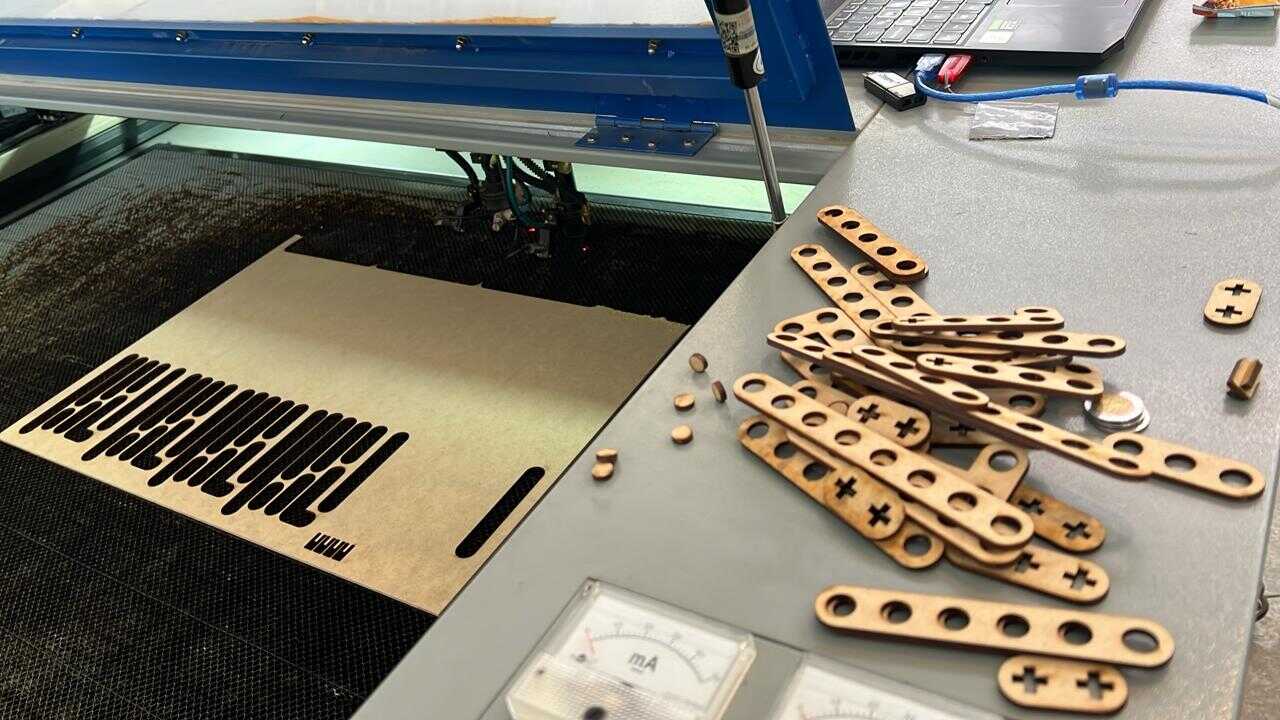
To cut my pieces, I placed an MDF board inside the laser cutter, adjusted the laser, turned on the equipment as shown earlier, and loaded my file.
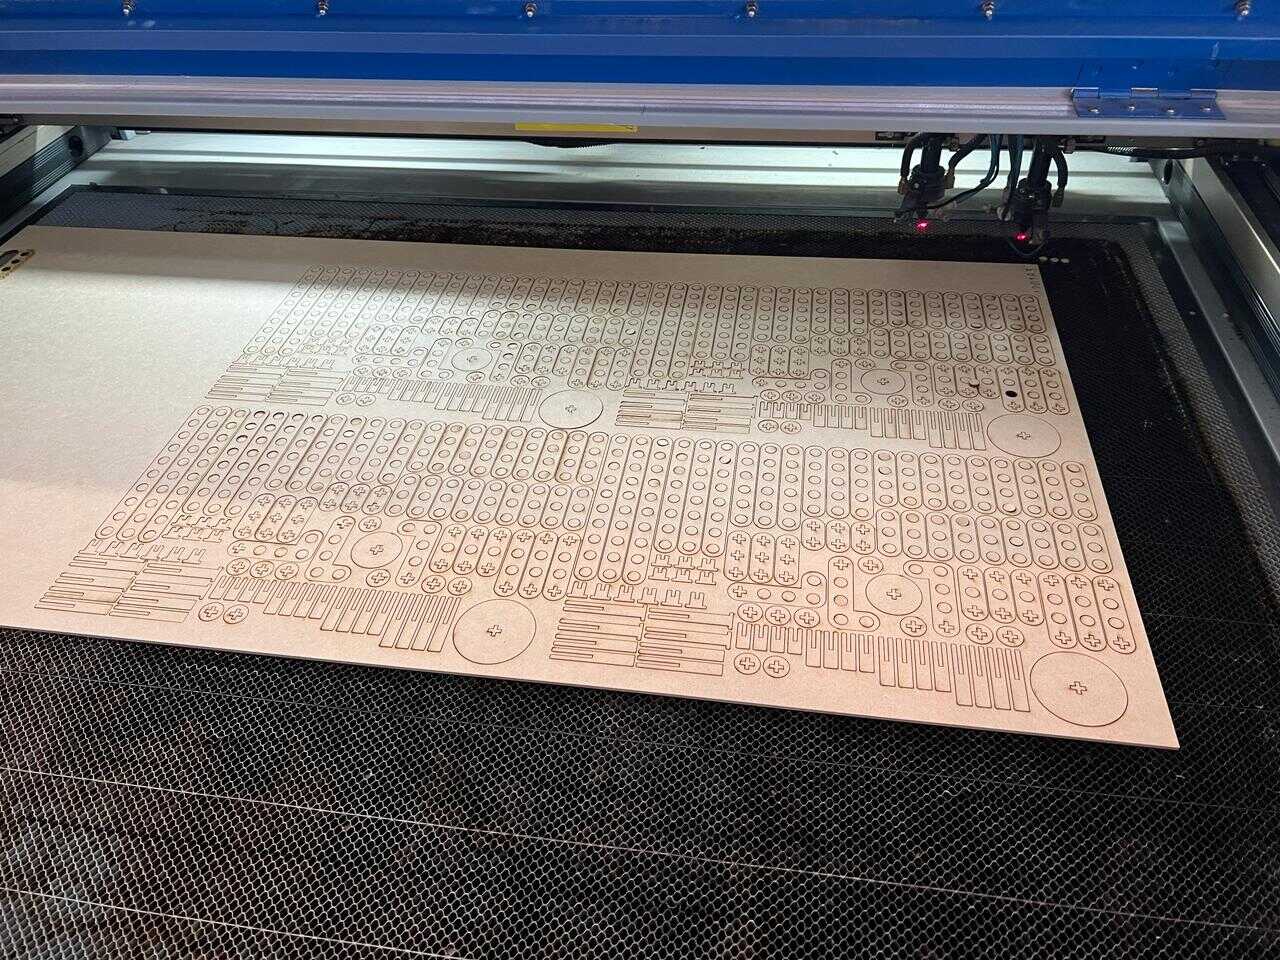
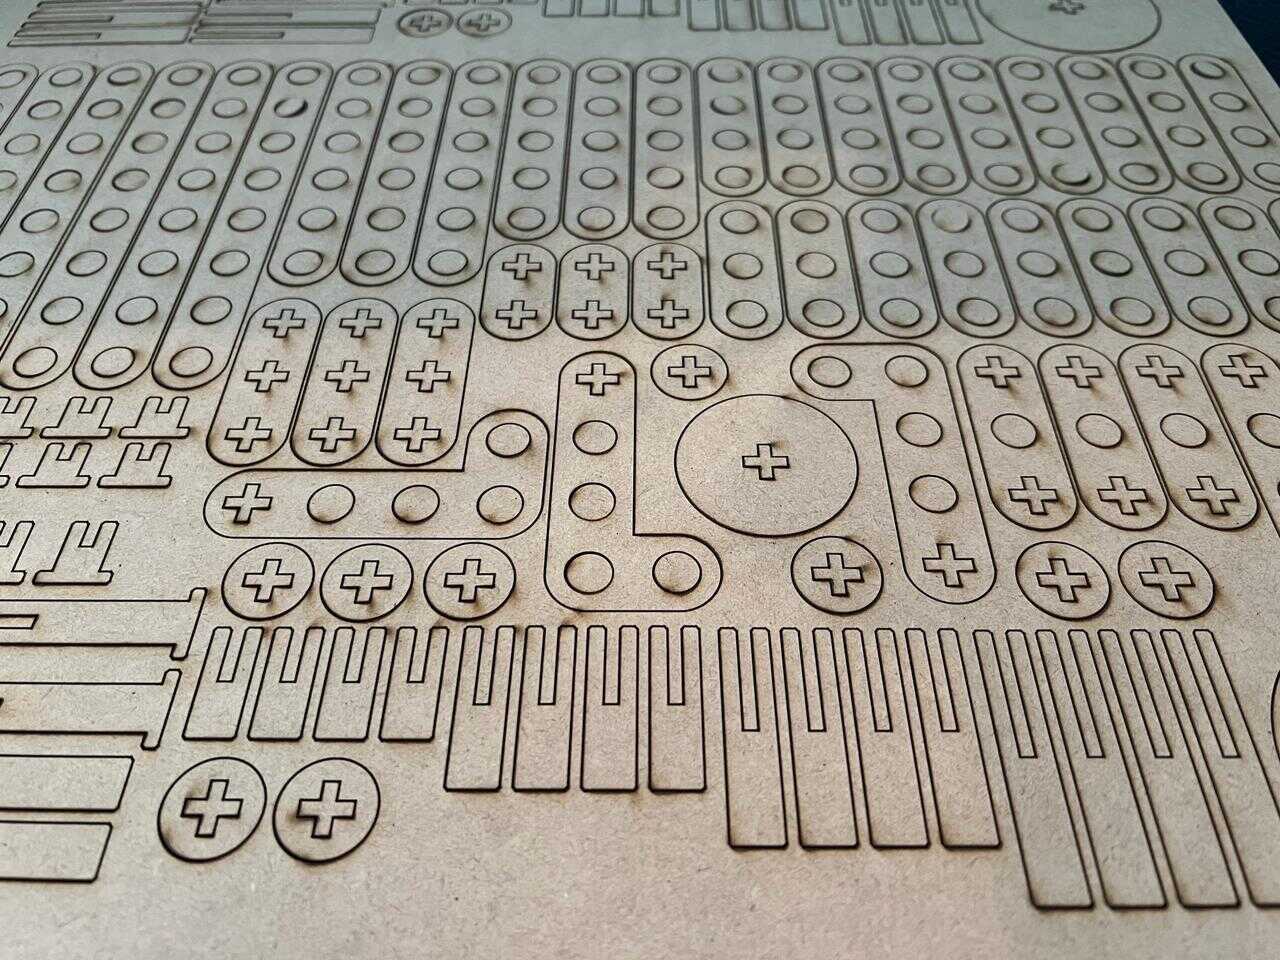

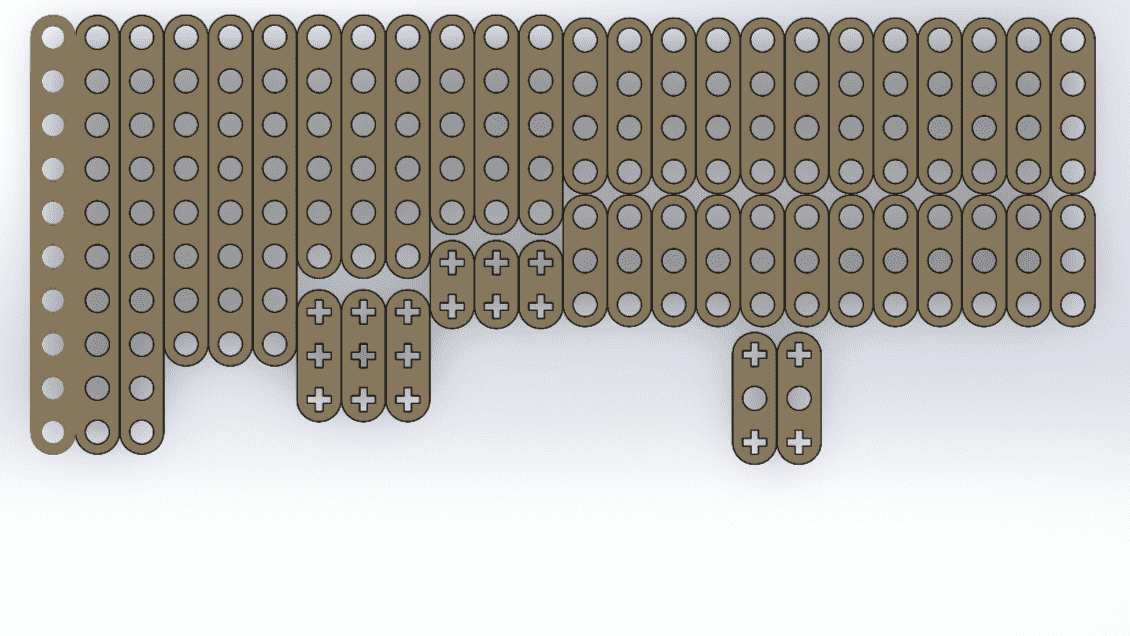
I assembled the pieces and created a template to take it to the cutting program, making it easier to arrange the pieces on the worktable for laser cutting.
FINAL RESULTS
Vinyl cutting
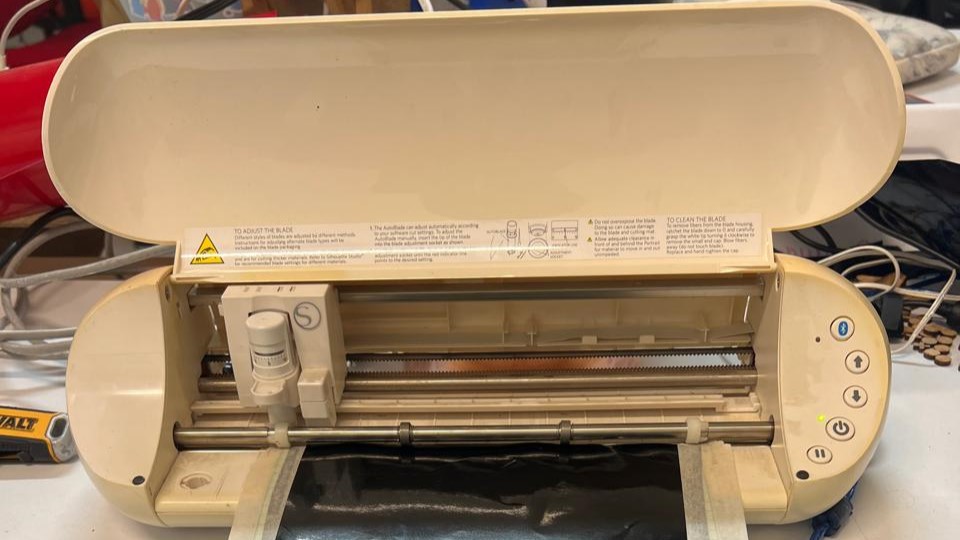
Vinyl cutting is a process in which a specialized machine, known as a vinyl cutter, is used to cut shapes, letters, or designs into adhesive vinyl sheets. This material is commonly used to make signs, decals, vehicle graphics, and other decorative or advertising applications. Vinyl cutters use a small, precise blade to follow predefined patterns, which are created in graphic design software and sent to the machine. The cutouts can be applied to various surfaces such as glass, metal, plastic, and walls.
There are several types of vinyl for cutting, each suitable for different applications:
- Adhesive vinyl: A wide range of colors and finishes, used in signs and decals.
- Heat transfer vinyl (HTV): Applied to textiles using heat.
- Reflective vinyl: For visibility in low light conditions, used in signs and workwear.
- Translucent vinyl: Allows light to pass through, ideal for backlit signs.
- Perforated vinyl: Allows visibility through, used in window and vehicle graphics.
- Static cling vinyl: Adheres without adhesive, reusable.
- Chalkboard and whiteboard vinyl: Writing and erasing surfaces, both decorative and functional.
program
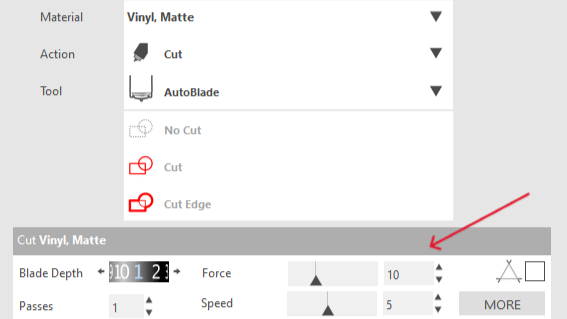
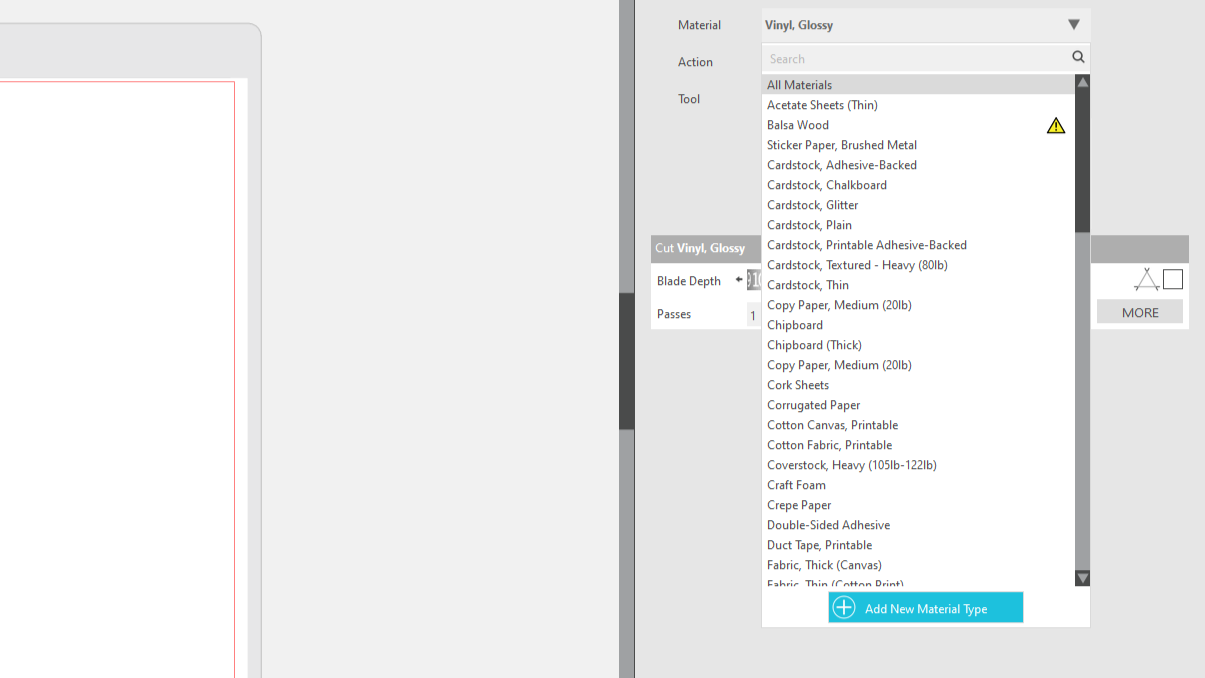
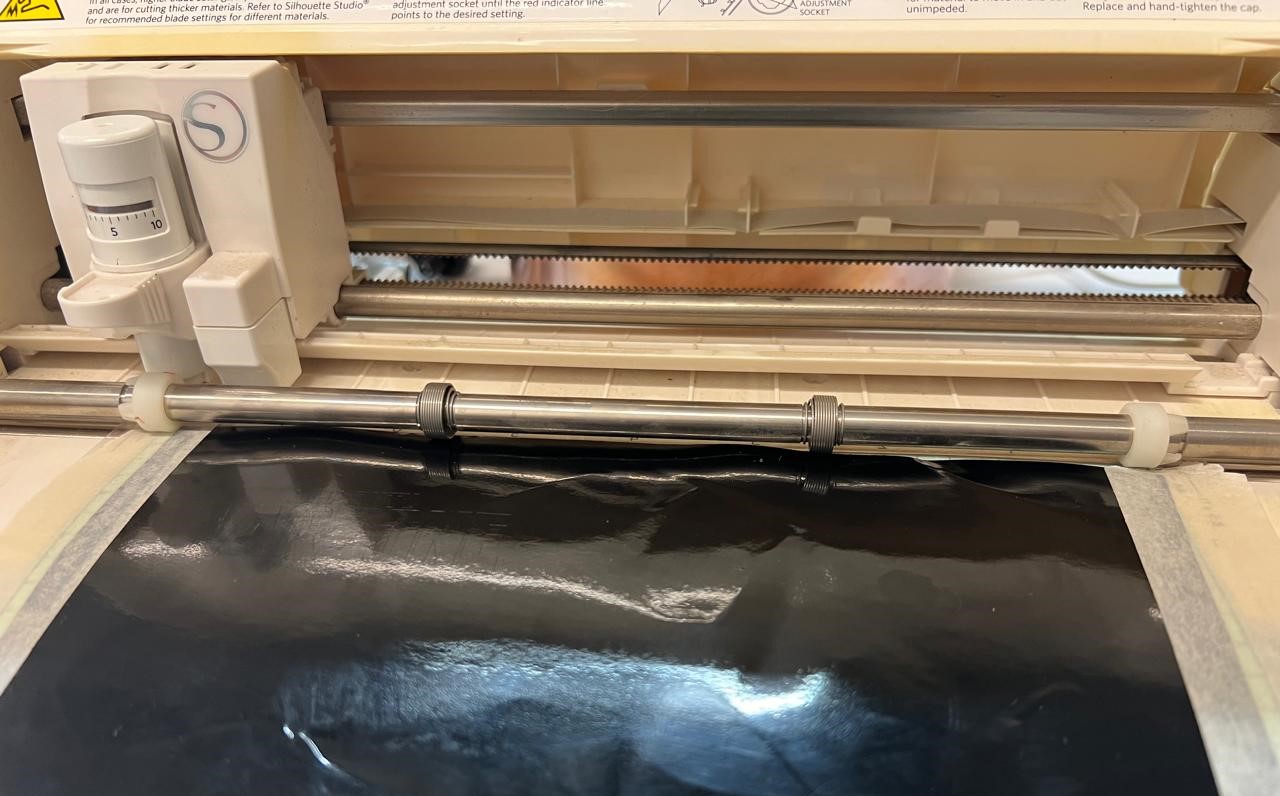
For vinyl cutting, we use the Silhouette Studio program. This program allows us to control various machines for vinyl cutting. It includes multiple tools for graphic design within the program itself. We also have the option to export files in DXF, PNG, among others. Just connect the machine, select the type of material, and send it to cut. Just like a regular printer. The cutting parameters will depend on the material you are using, but the program already includes several preloaded materials. In the case of matte vinyl, the force is 10, and the speed is 5.
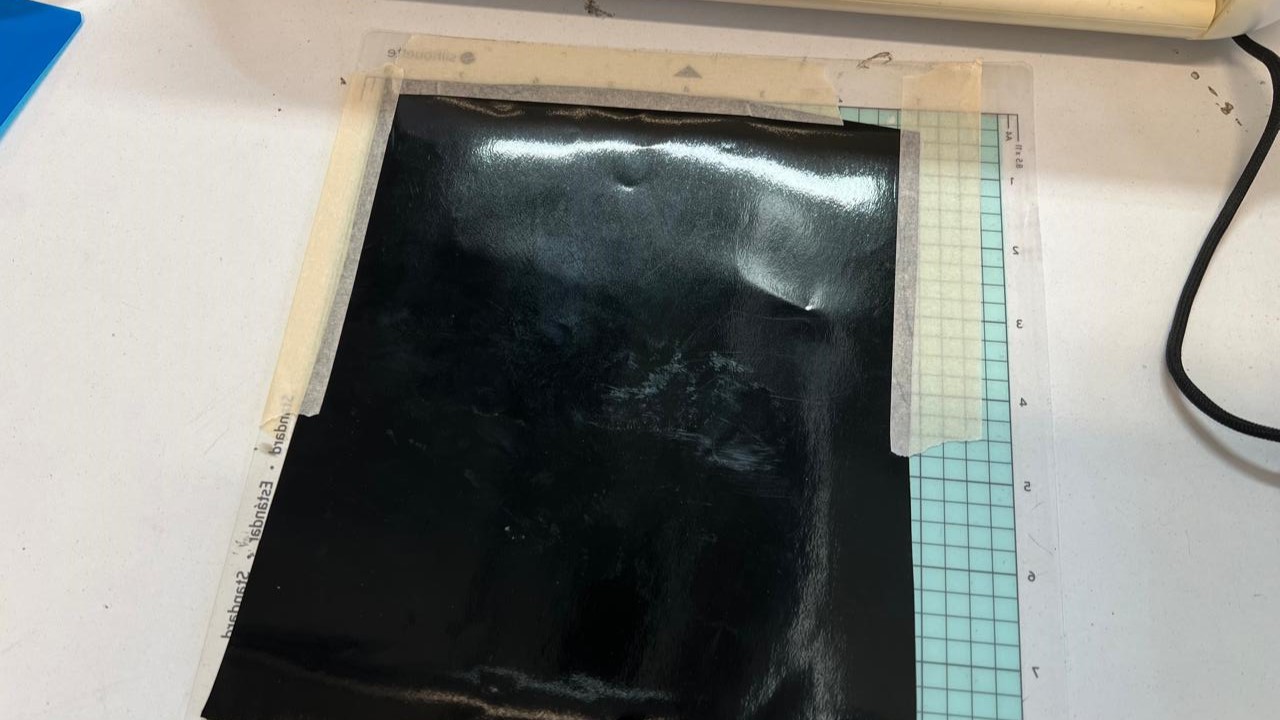
The machine has a cutting-proof template, where we will place our piece of vinyl for cutting. We will align the sheet with the marks on the printer and place it. To attach the vinyl to the cutting mat, we will use only Maskit tape to secure it at the edges.
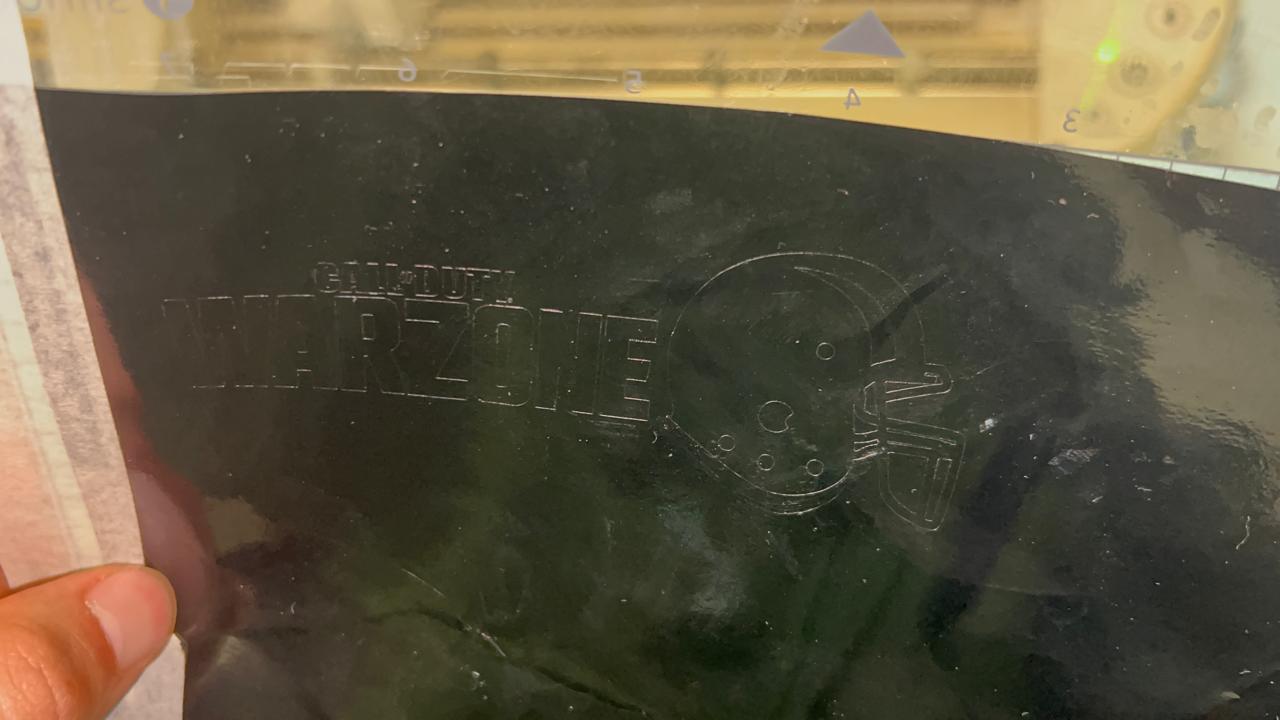
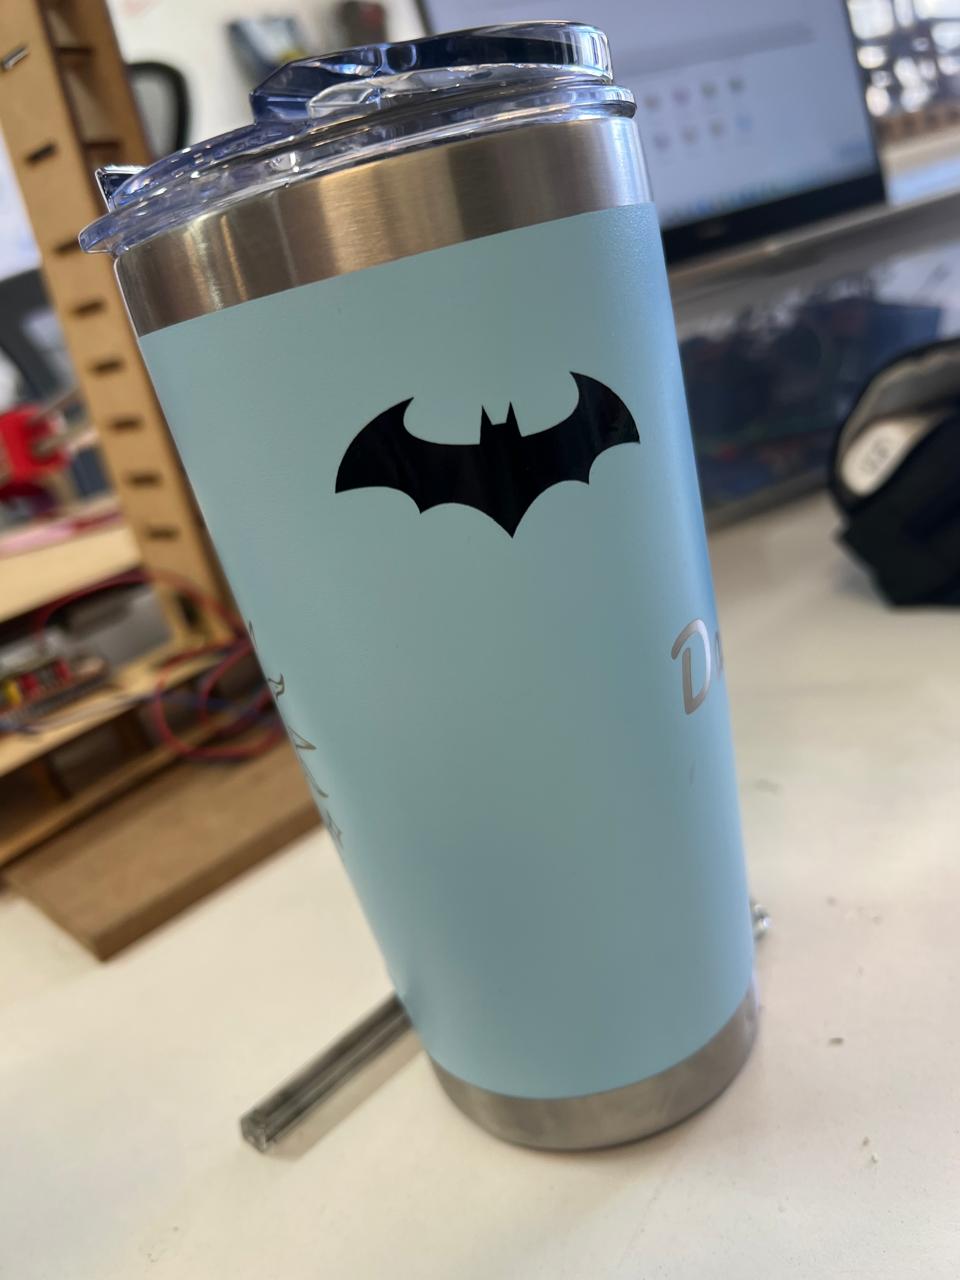
The designs I chose were sourced from the internet. They are PNG images. Here you can see the results DOWNLOAD PNG. To remove our vinyl cut from the sheet, you can use either your fingernail or a cutter to lift the design, depending on the cut.

more
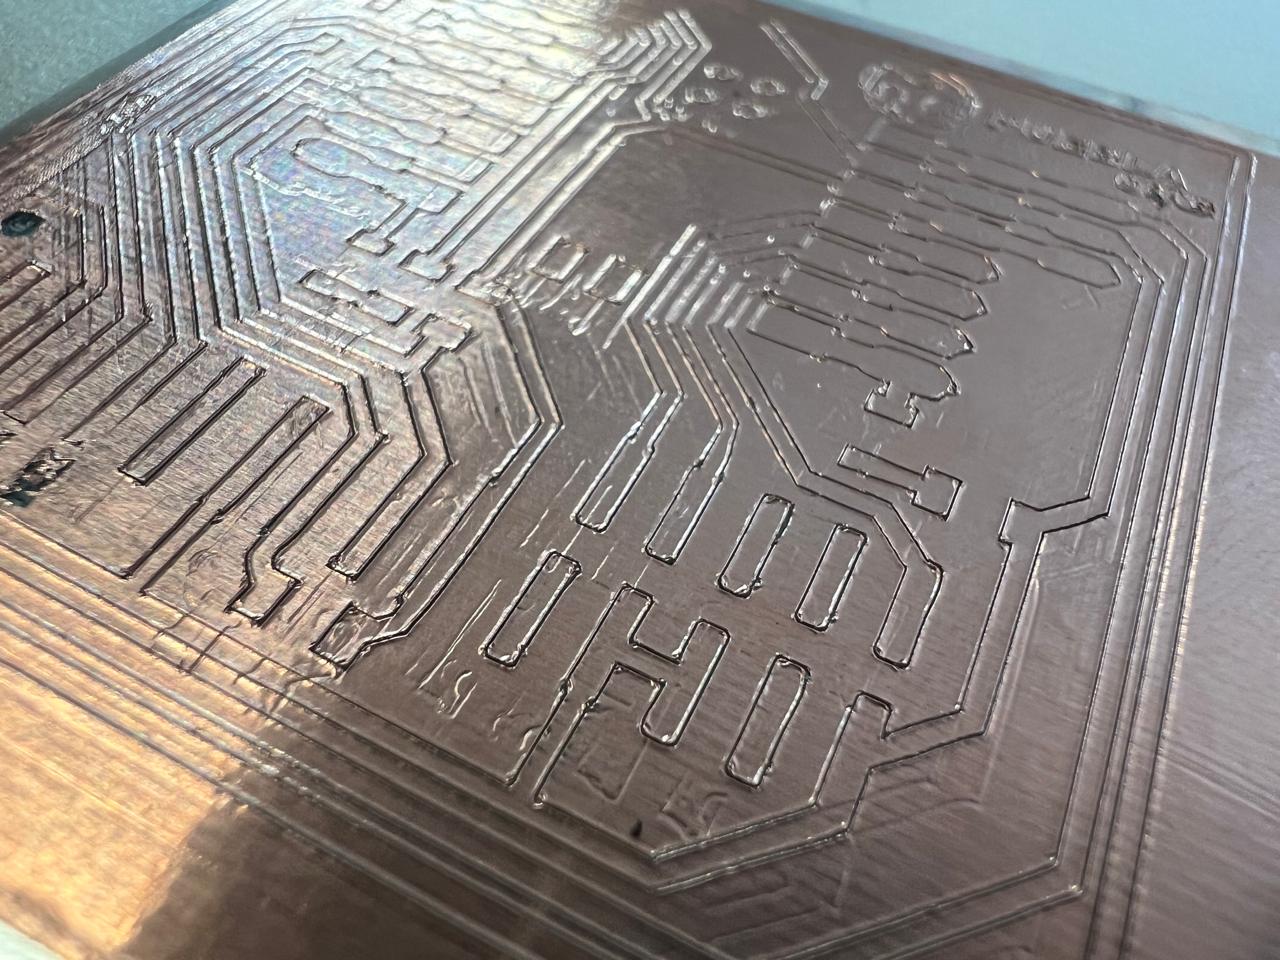
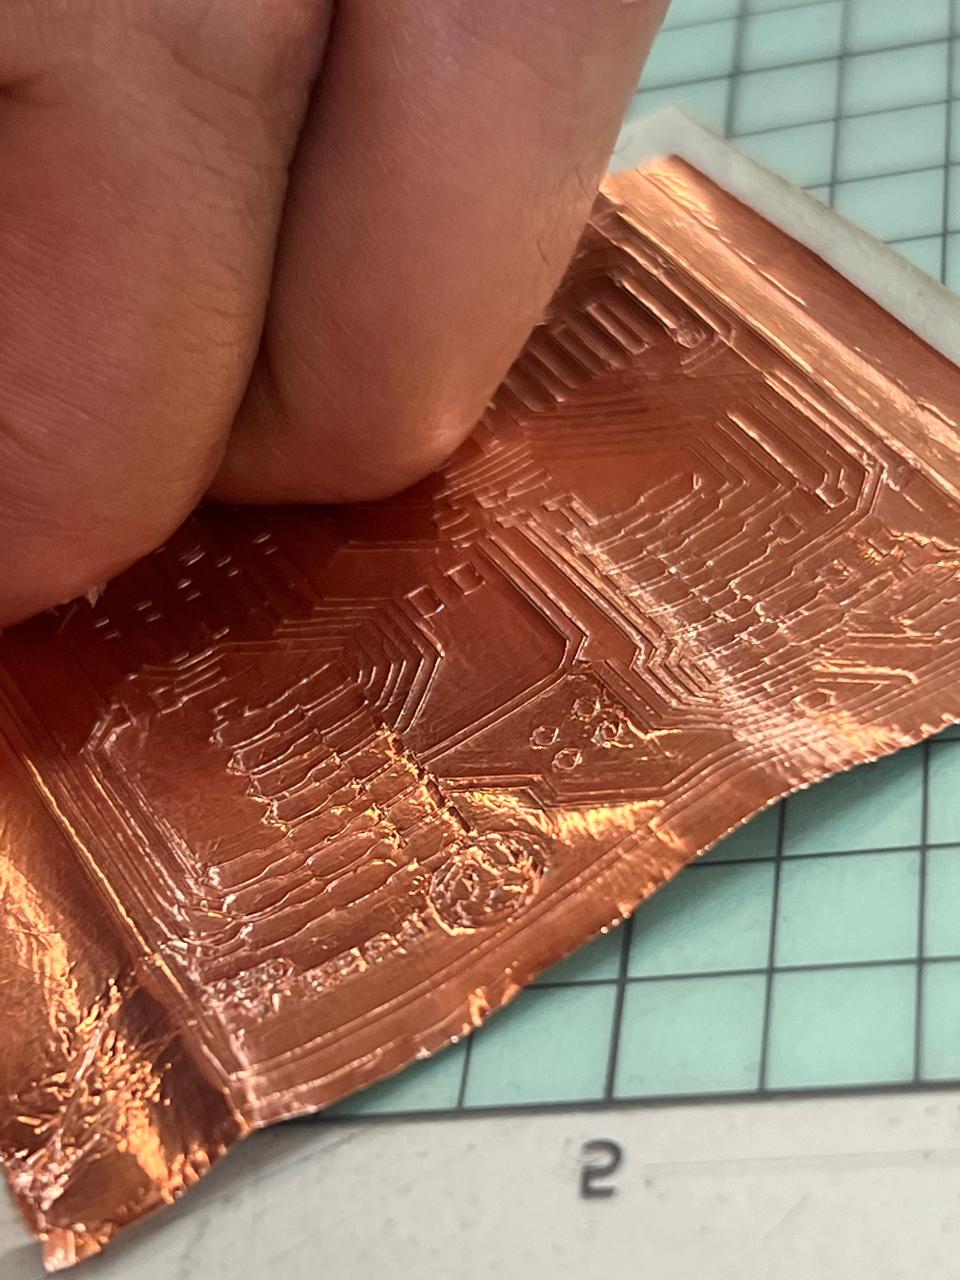
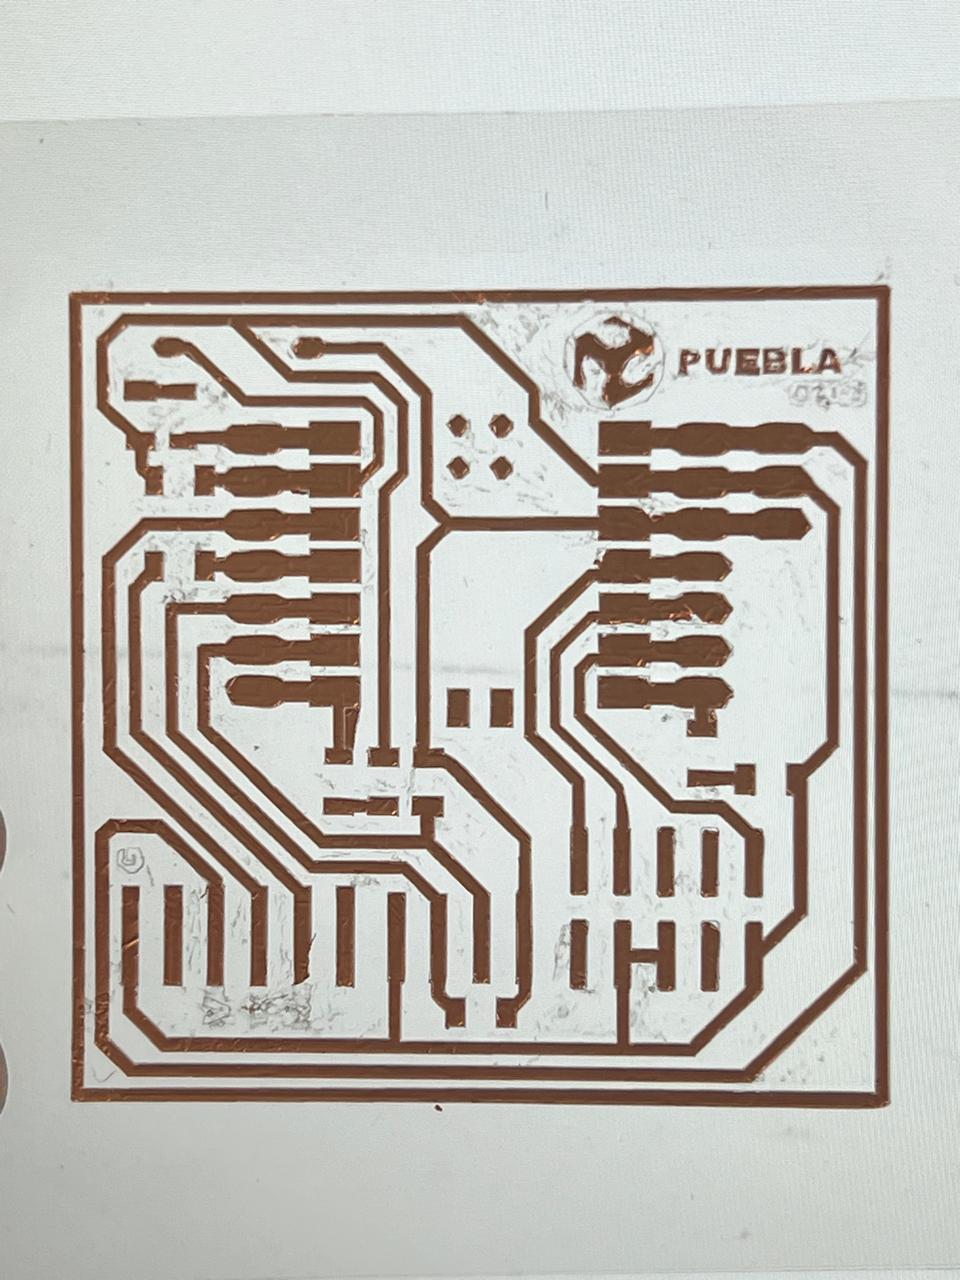
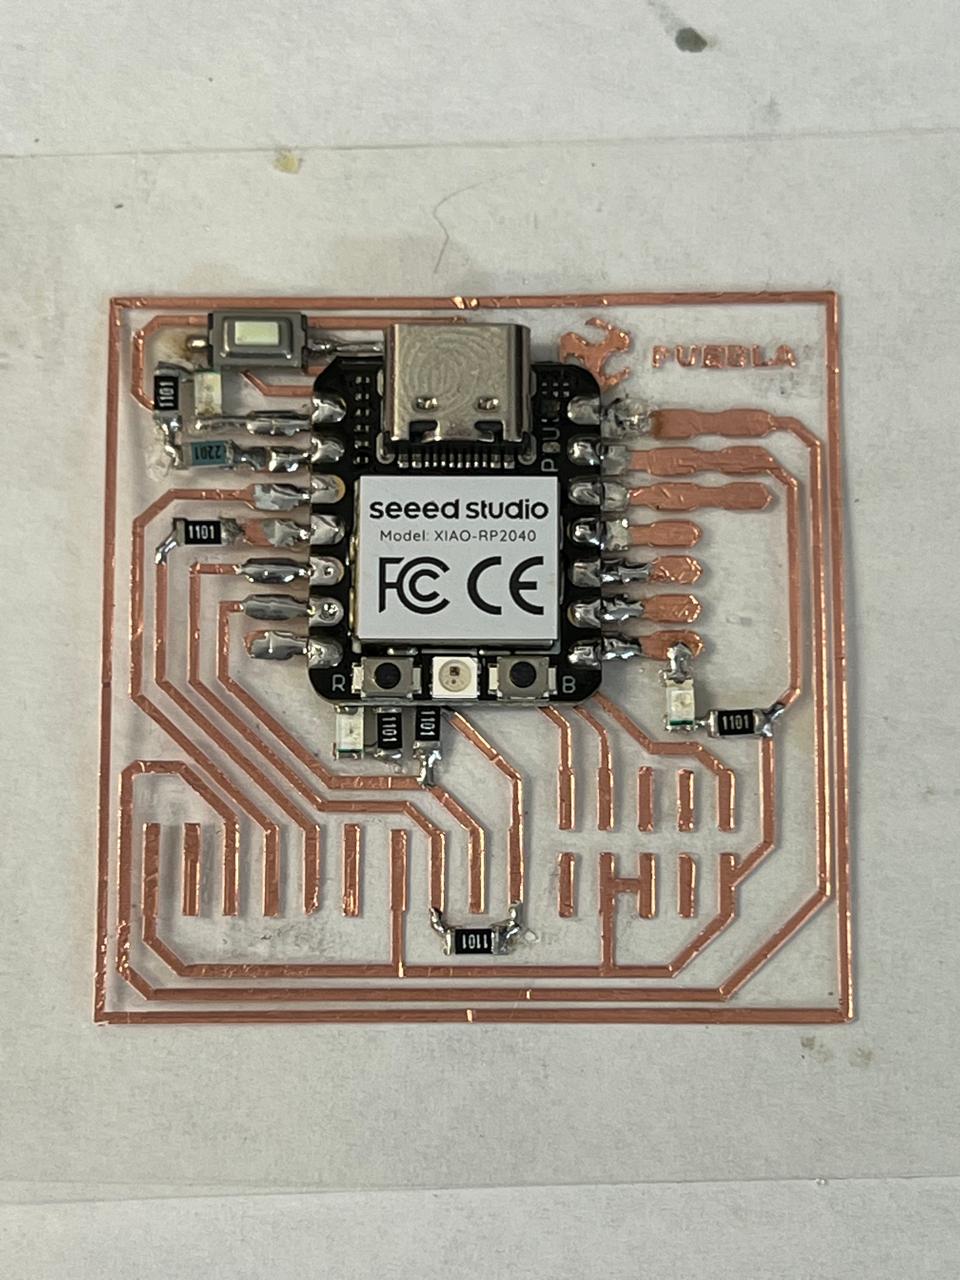
The machine is also capable of cutting copper vinyl. With this, we can manufacture flexible PCBs, as shown below.For the cutting parameters of this material, you need to use a pressure of 20 and a speed of 4.