

15. Wildcard Week/ Robotics Control
For this week´s assignment, we are learning to control a robotic arm, and program it to draw a pair of figures with high precision.
Here at Ibero Puebla, we have a robotic arm from Universal Robots, the UR5 model to be exact
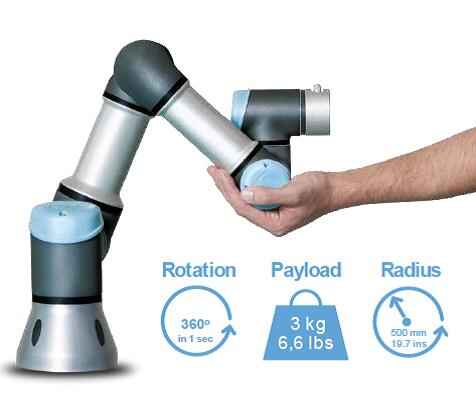
It is a very precise and starter friendly robotic arm, while also being a "Cobot", meaning it can be operated without safety risks. It has a payload capacity of 5kg and a reach of 50mm. It offers a repeatability of ±0.03 mm, making it very precise. This robotic arm is used to teach the basics of robotics here at Ibero, so we are going to learn some basics.
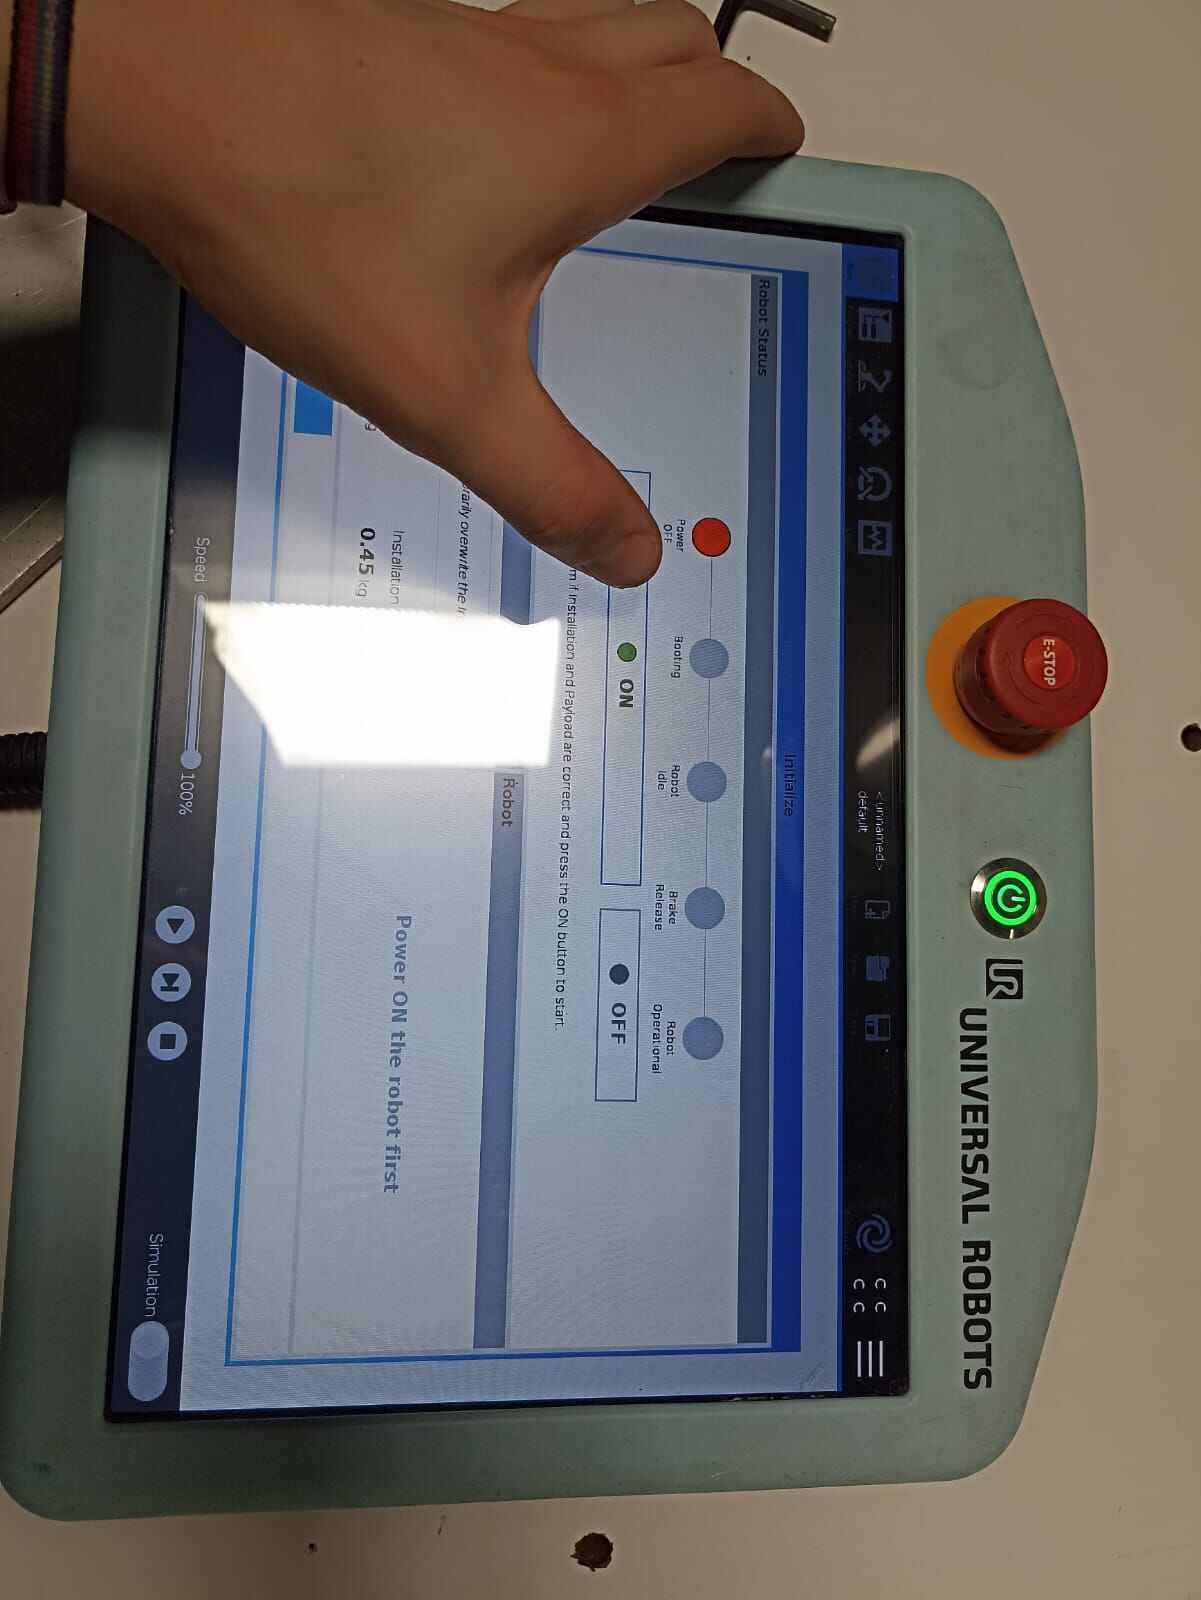
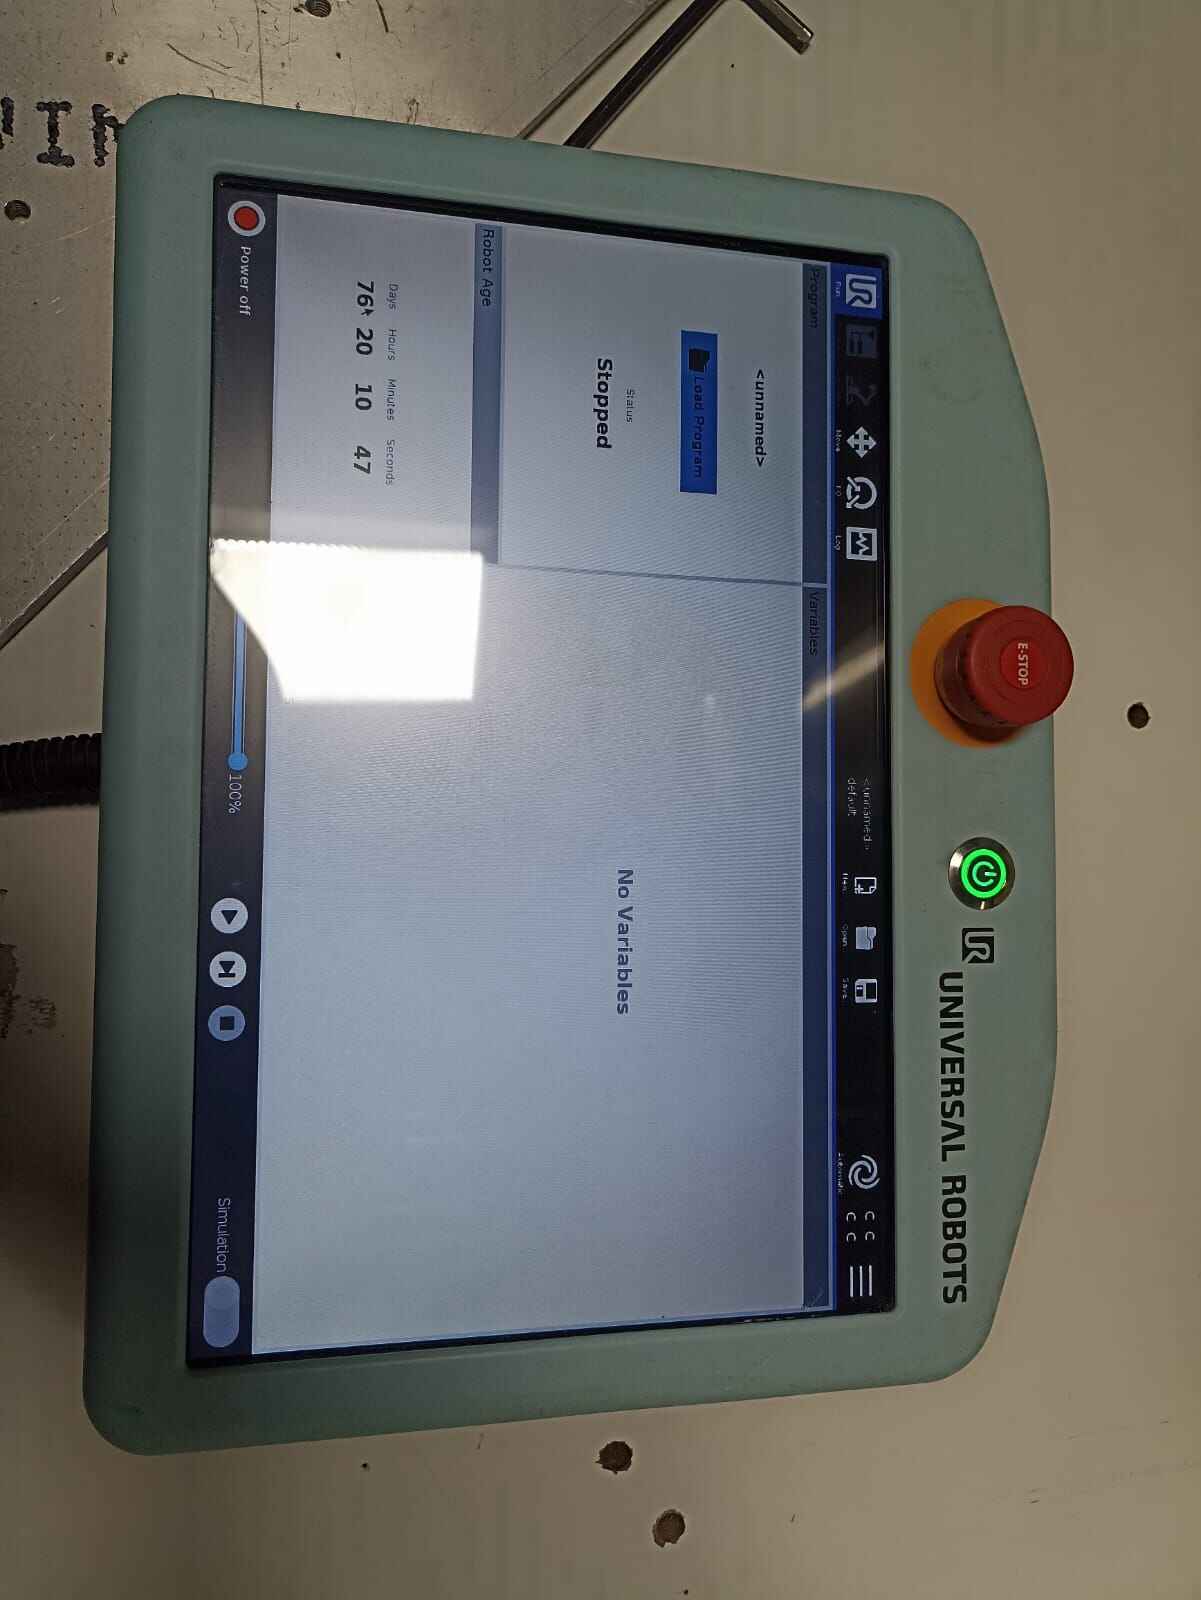
It has an external touch display that allows us to interact with it. To Start, we need to press on the ON and START buttons respectively
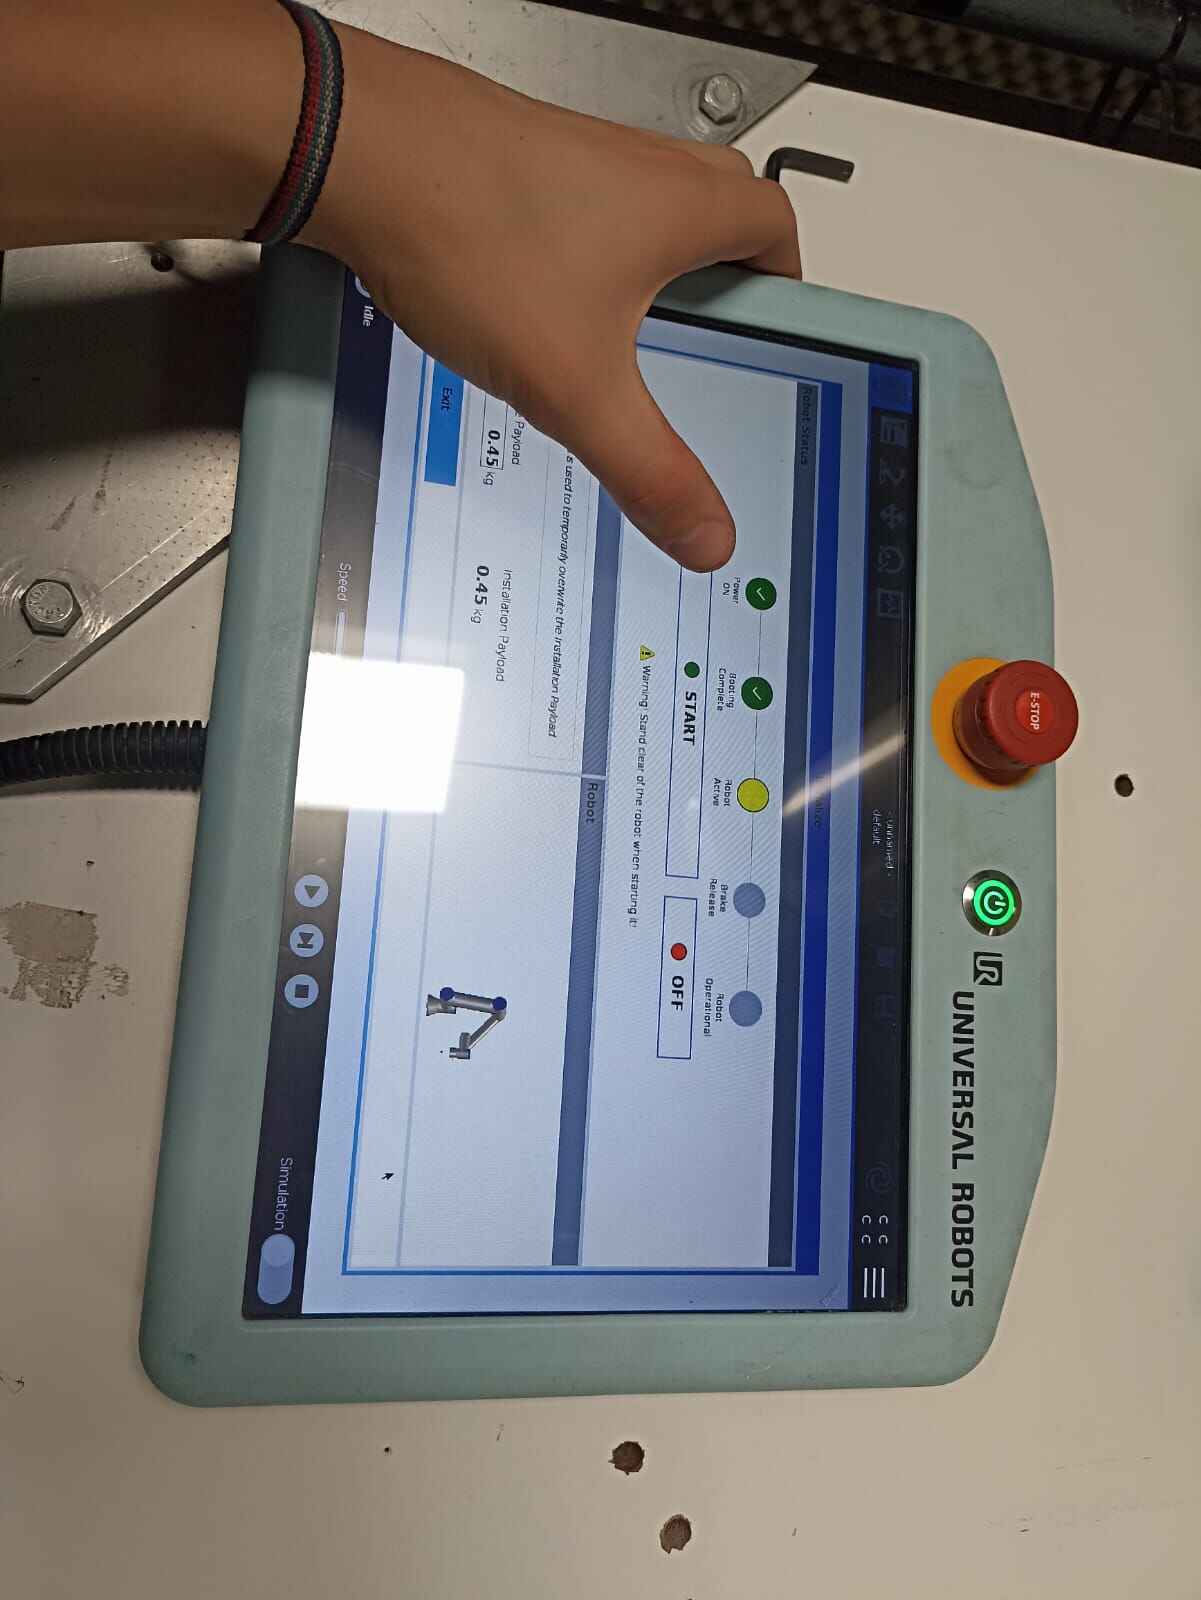
Then, select manual control
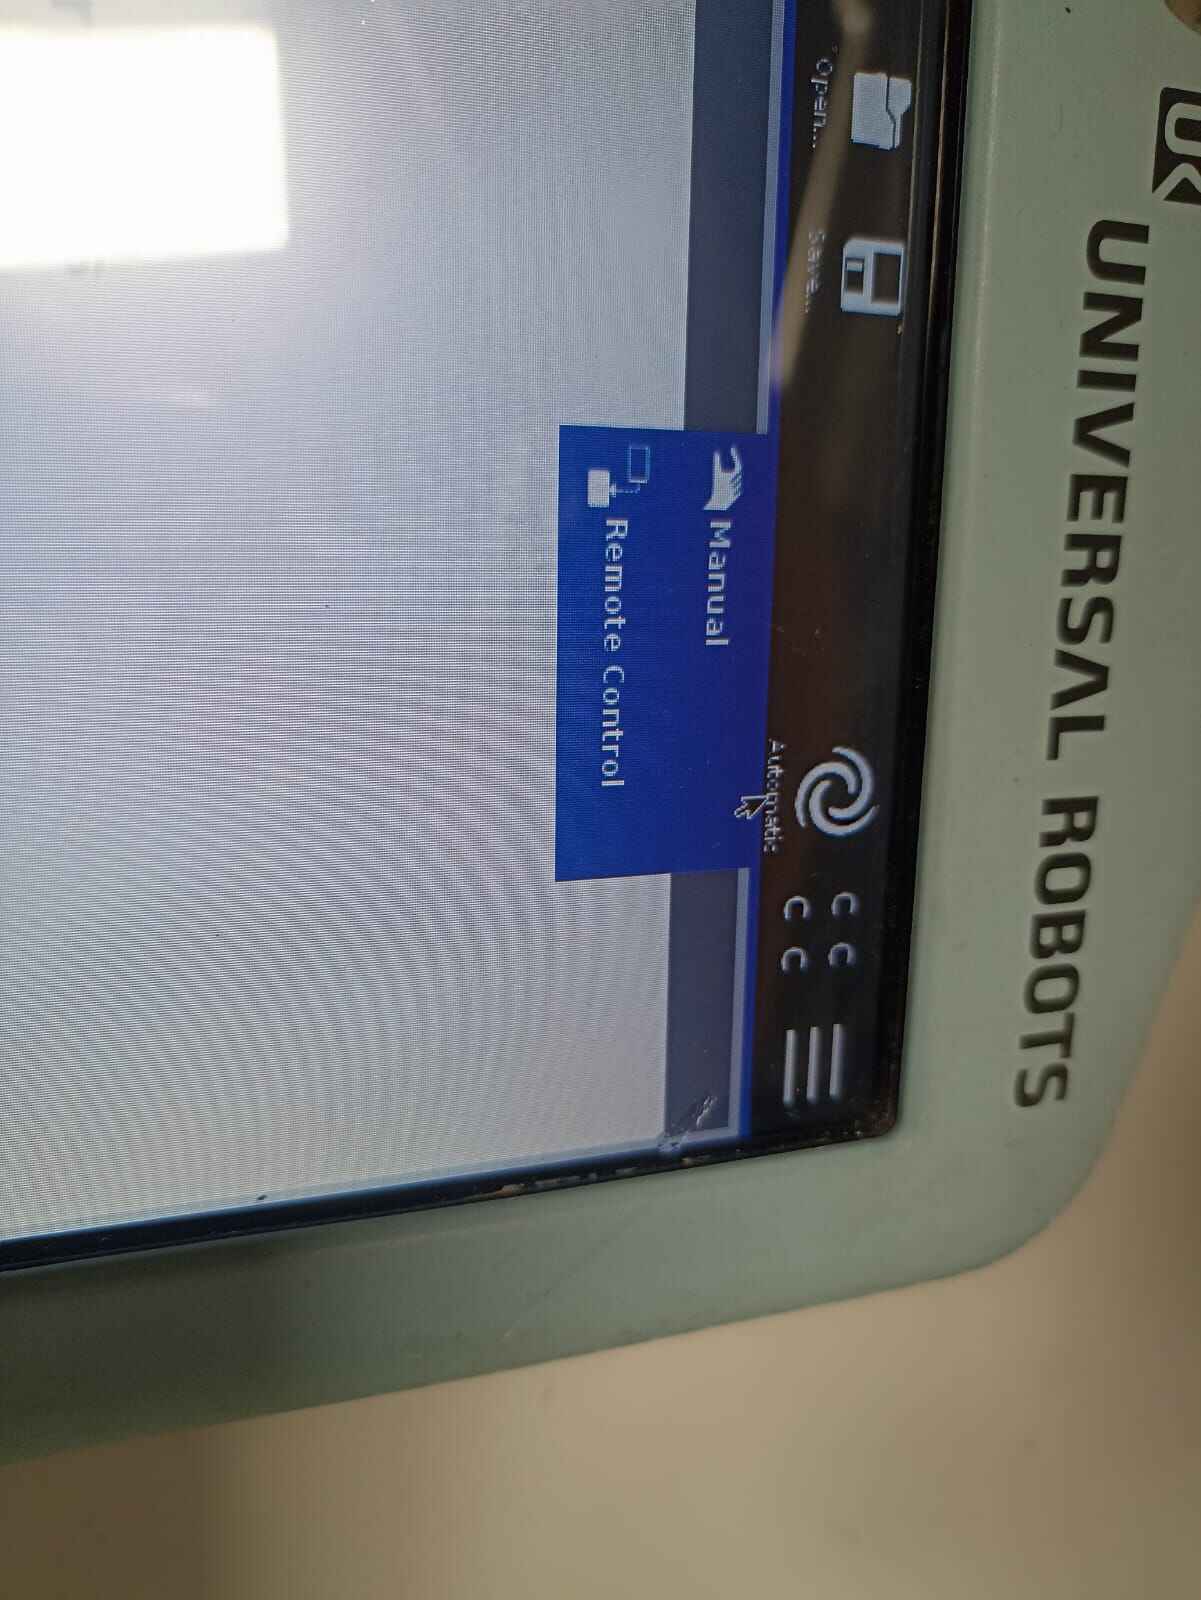
This should take us to the main interface. Although the robot can be program from the RoboDK software, I will start by programming manual coordinates.
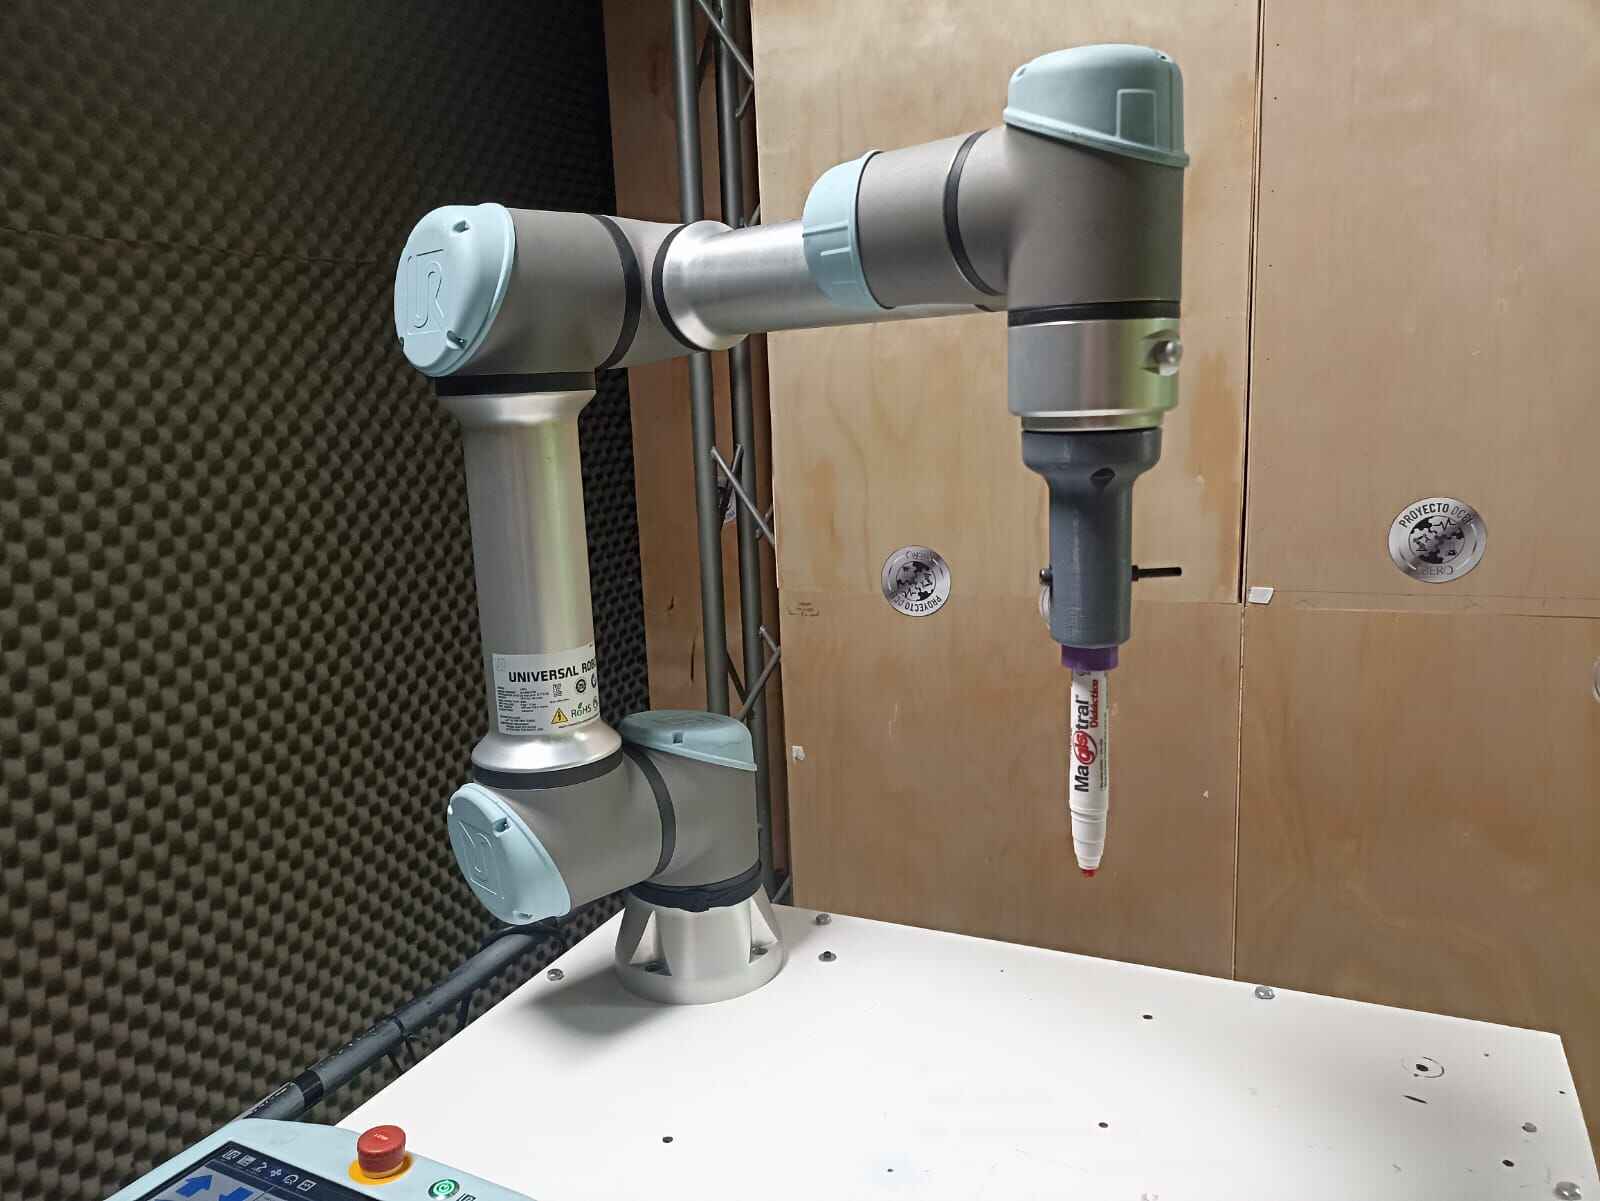
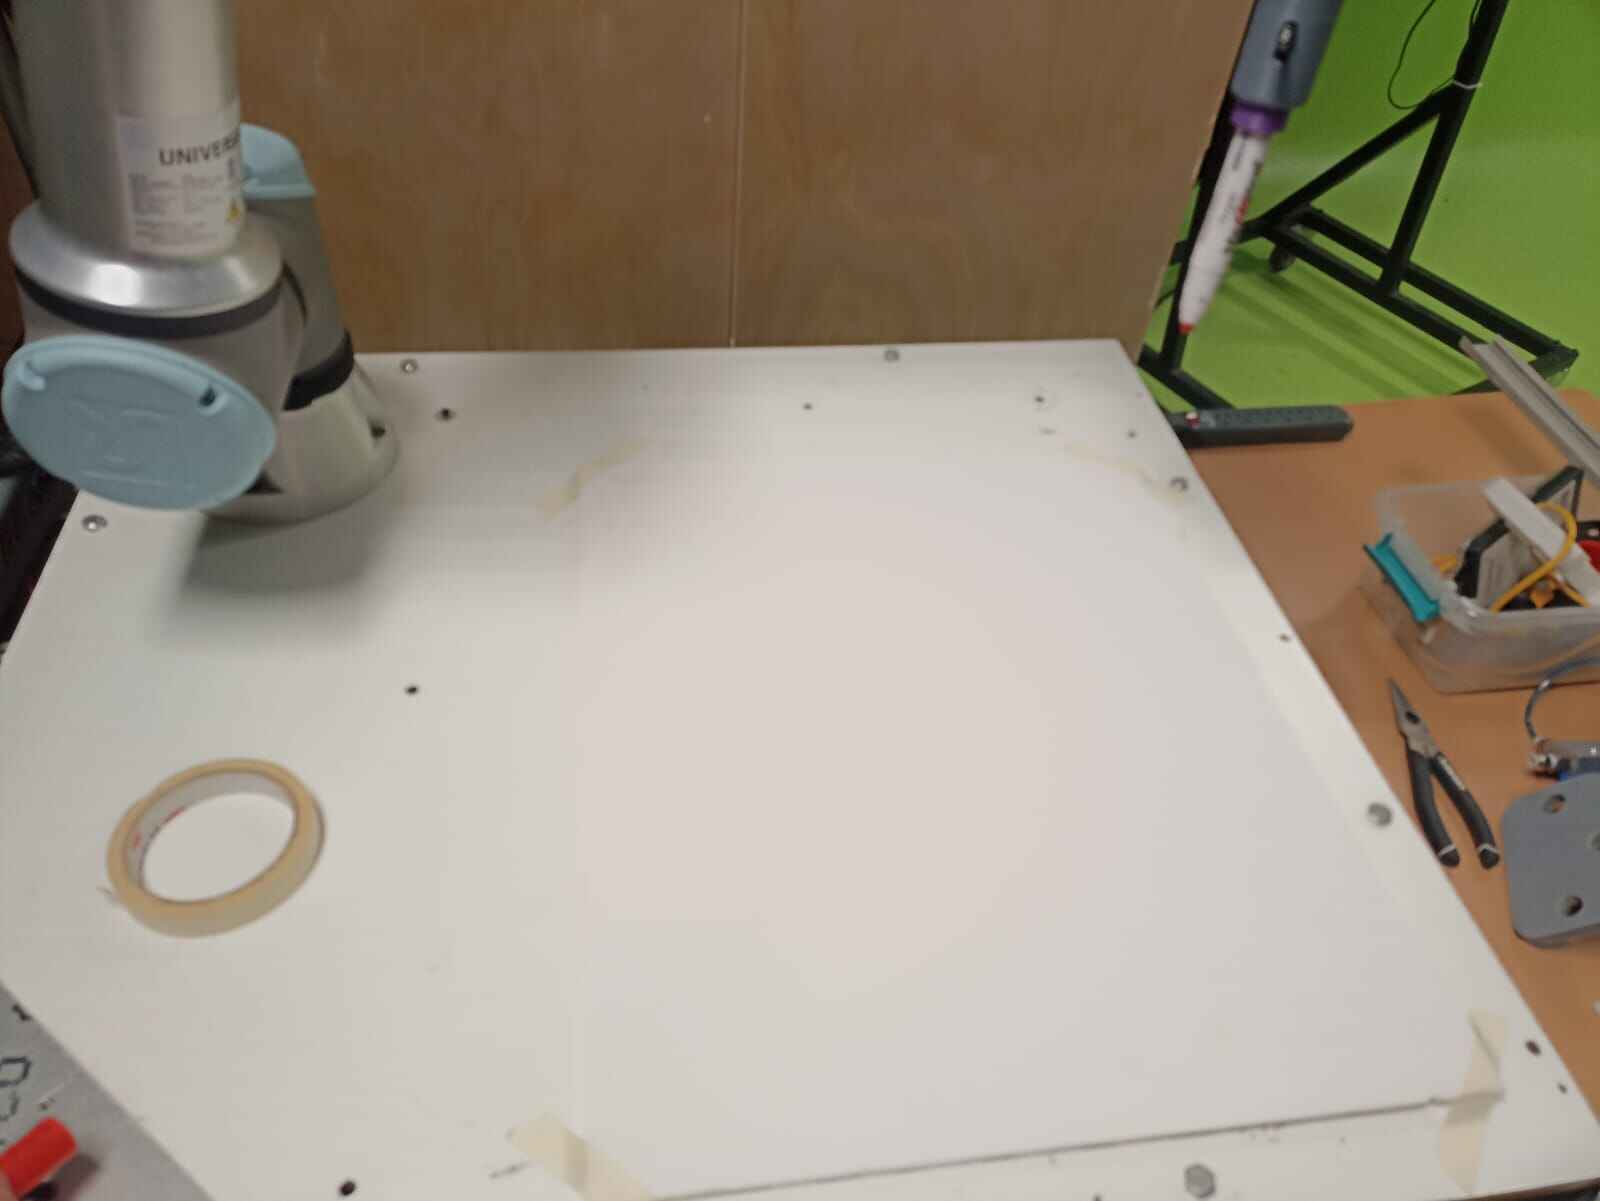
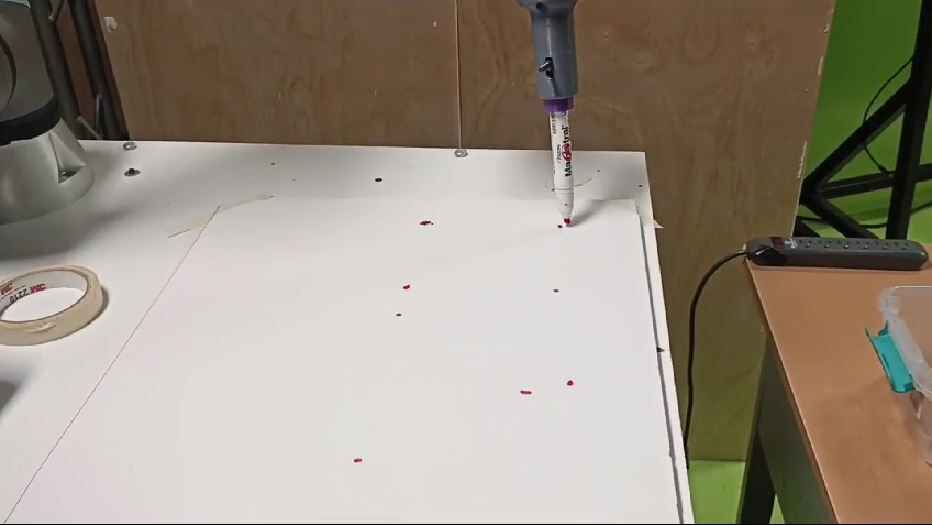
The robot has an attachment on the tip that allows it to hold markers, as seen on the first picture, so I will try to draw a square, lift the market, draw a triangle and then wave goodbye :).
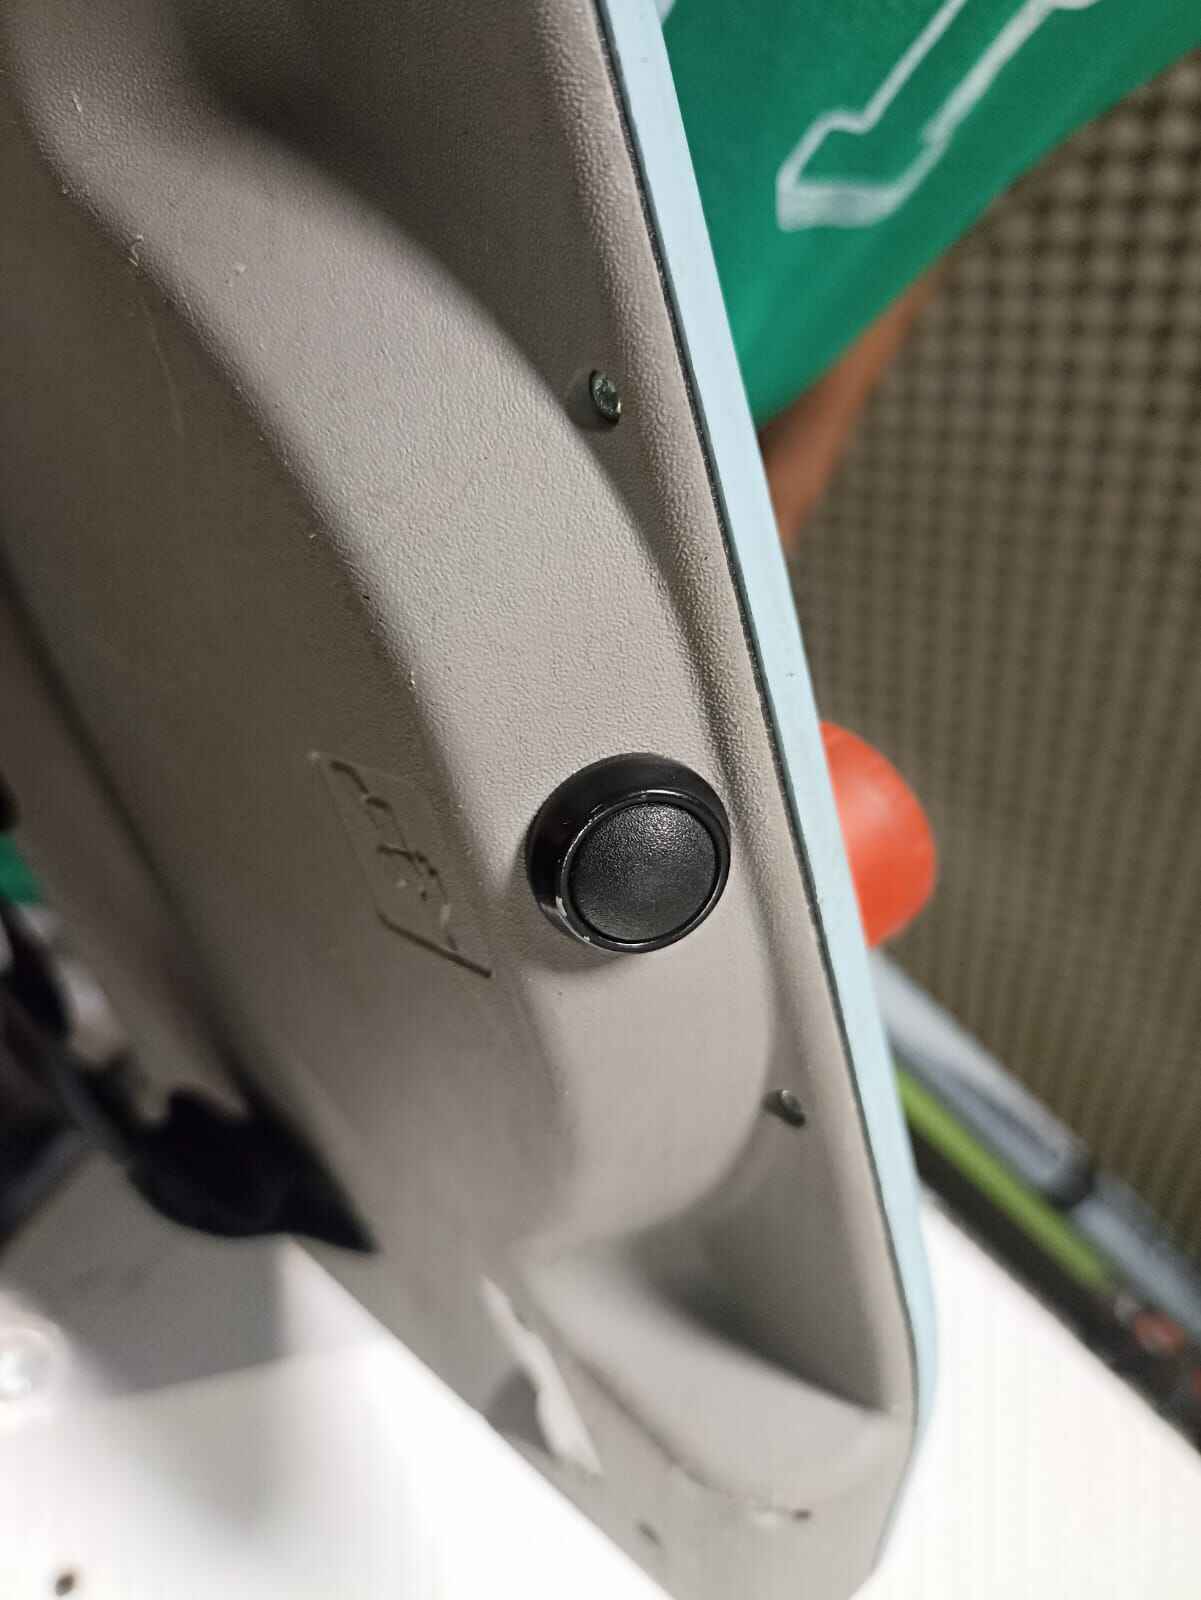
To do so, we first need to press this black button on the interaface, this will allow us to manually move the tip of the robot.
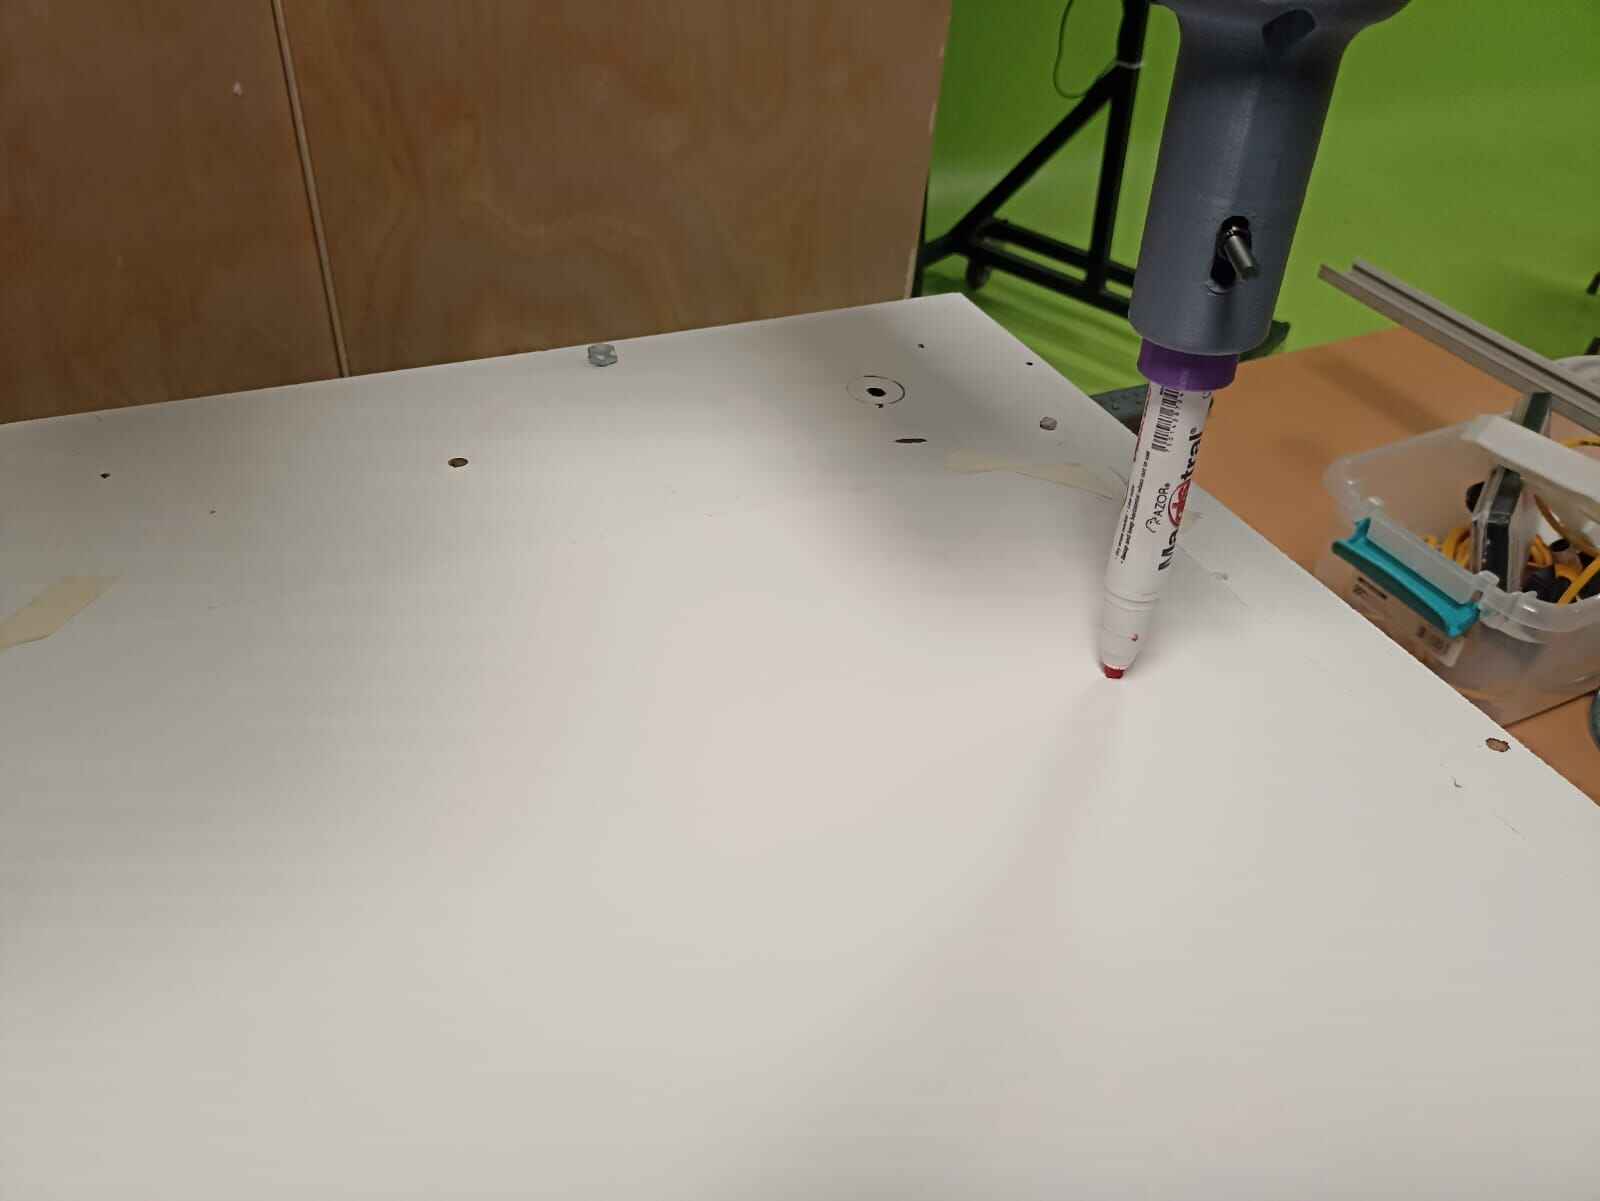
First, I´m taping a piece of foamboard to the desk to draw on it.
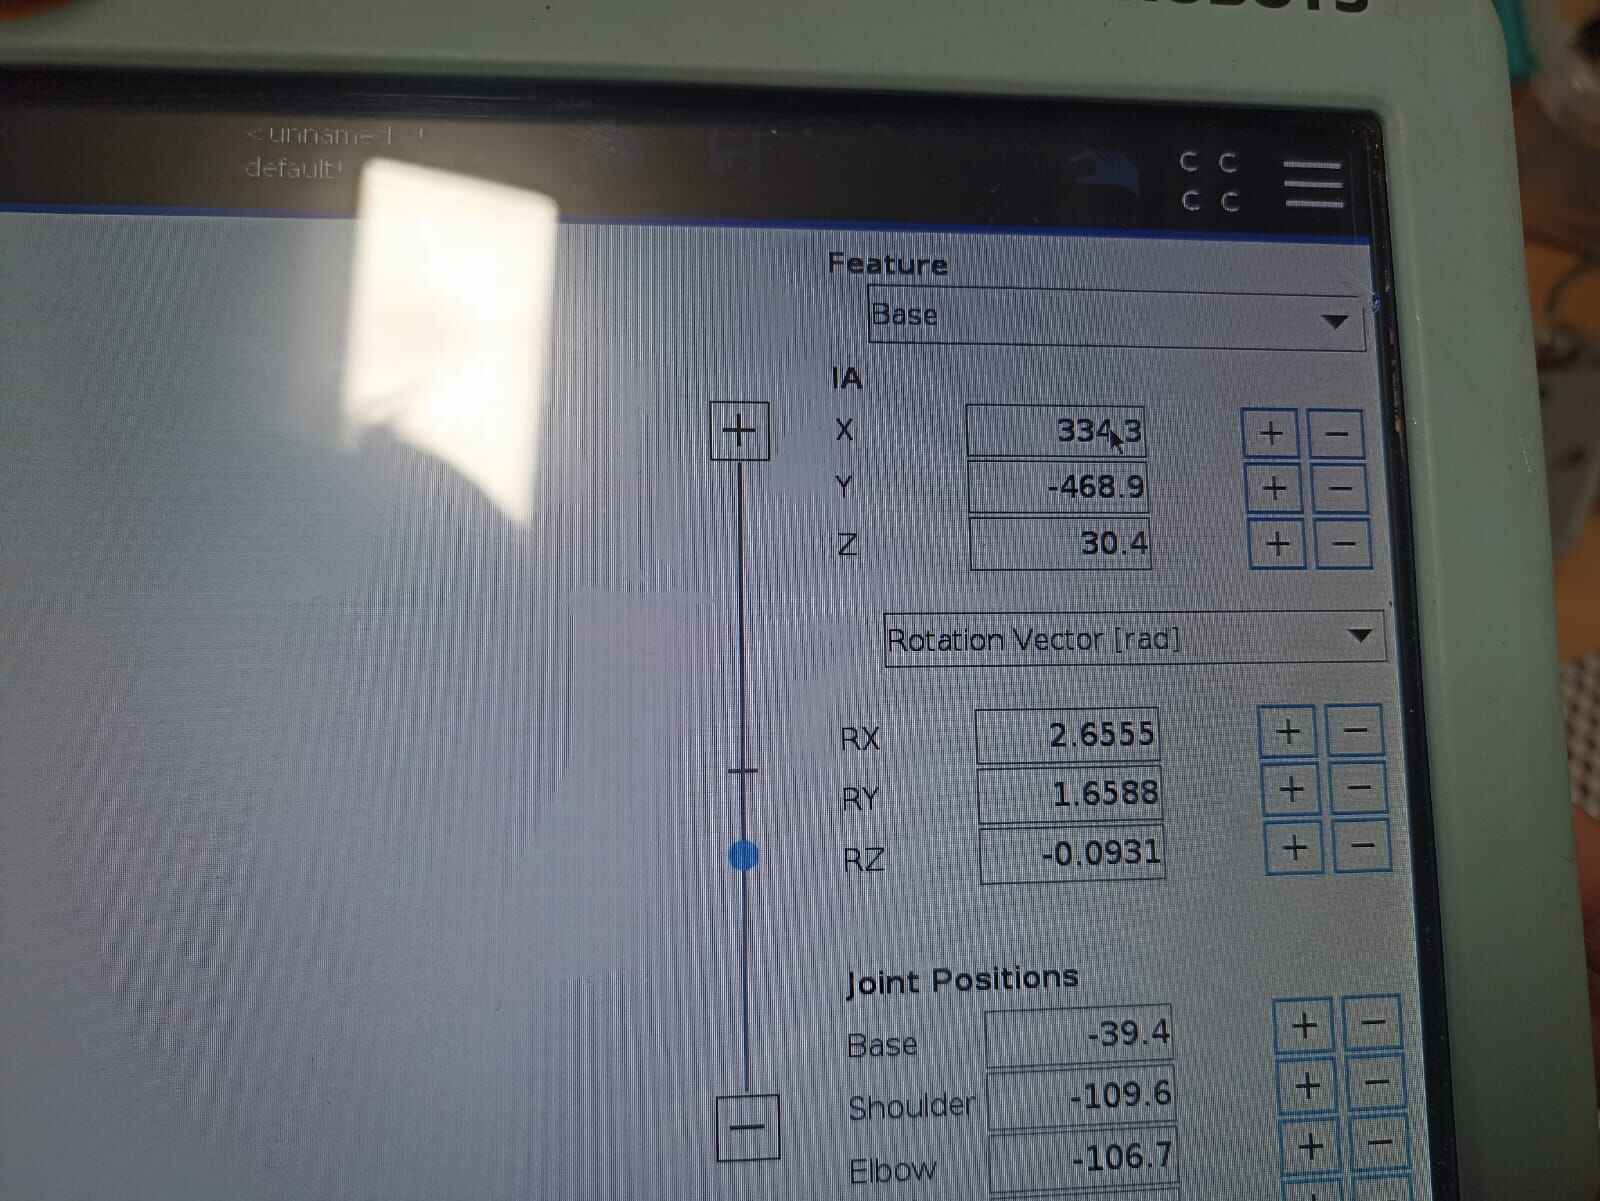
First, we need to give it a default position with the following coordinates, this will set the robot to a natural position to manipulate it.
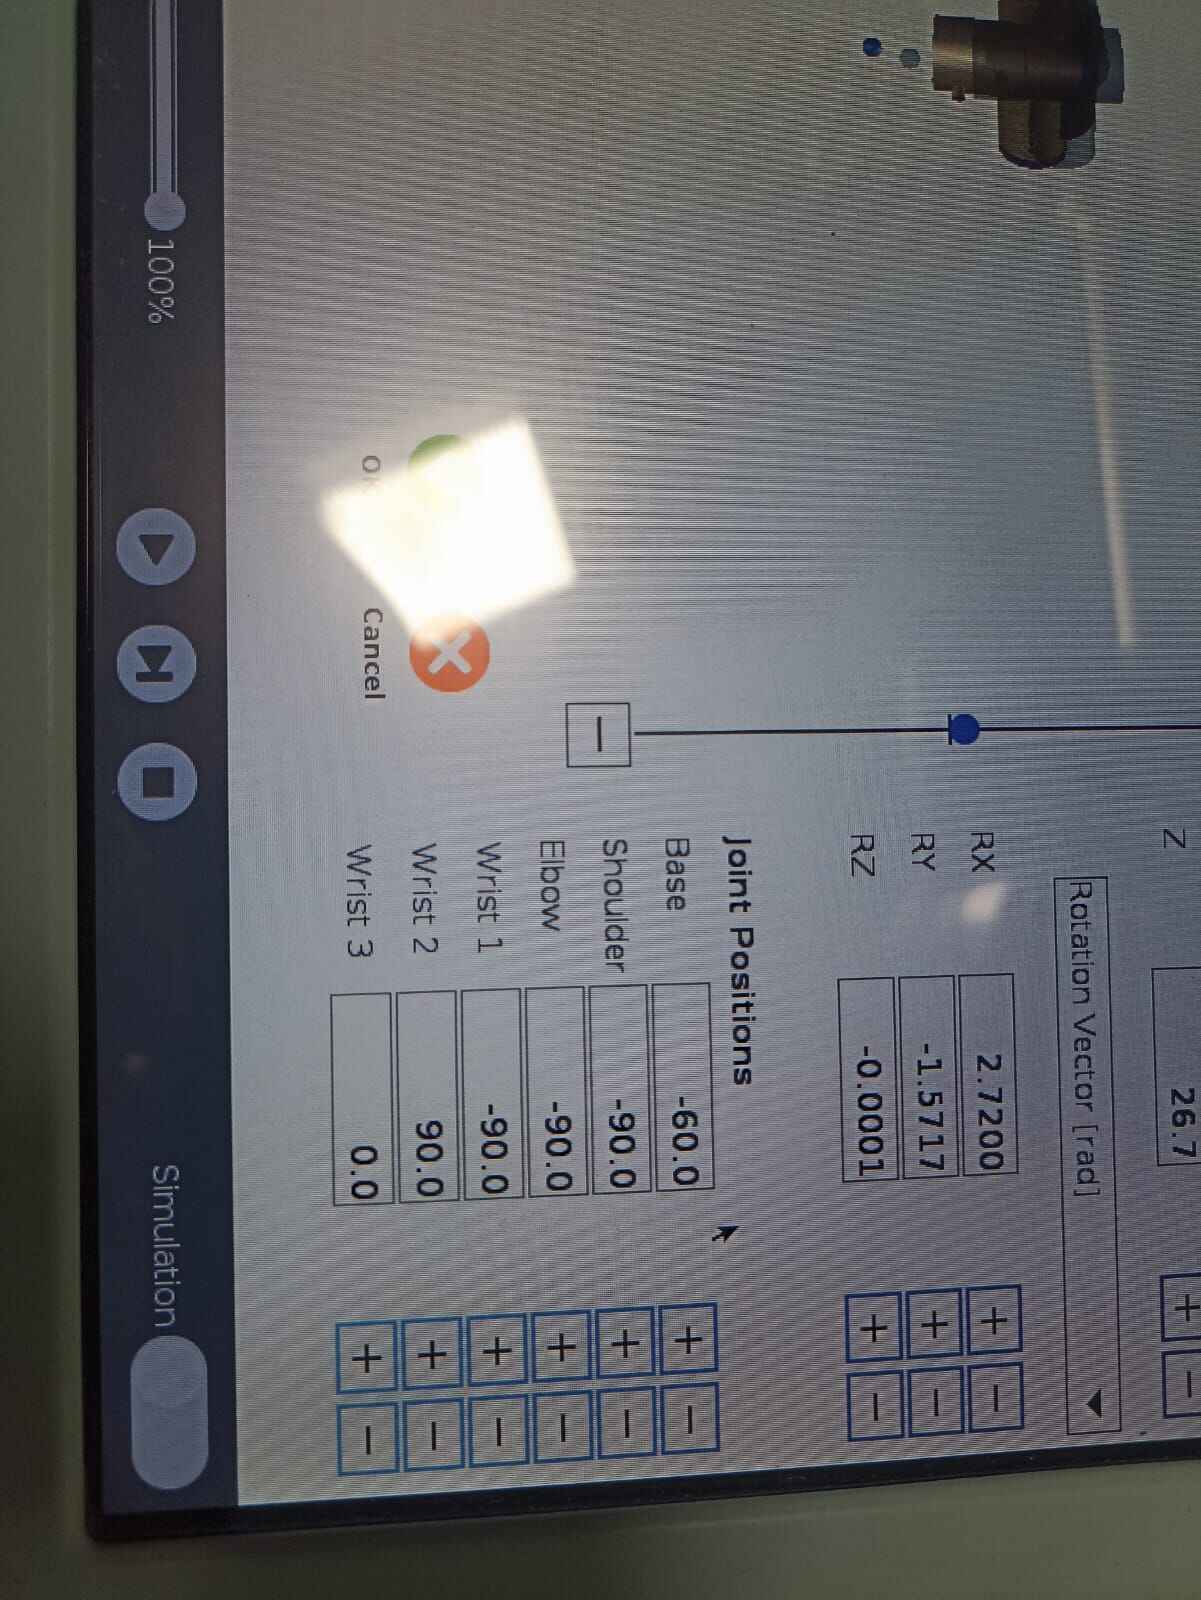
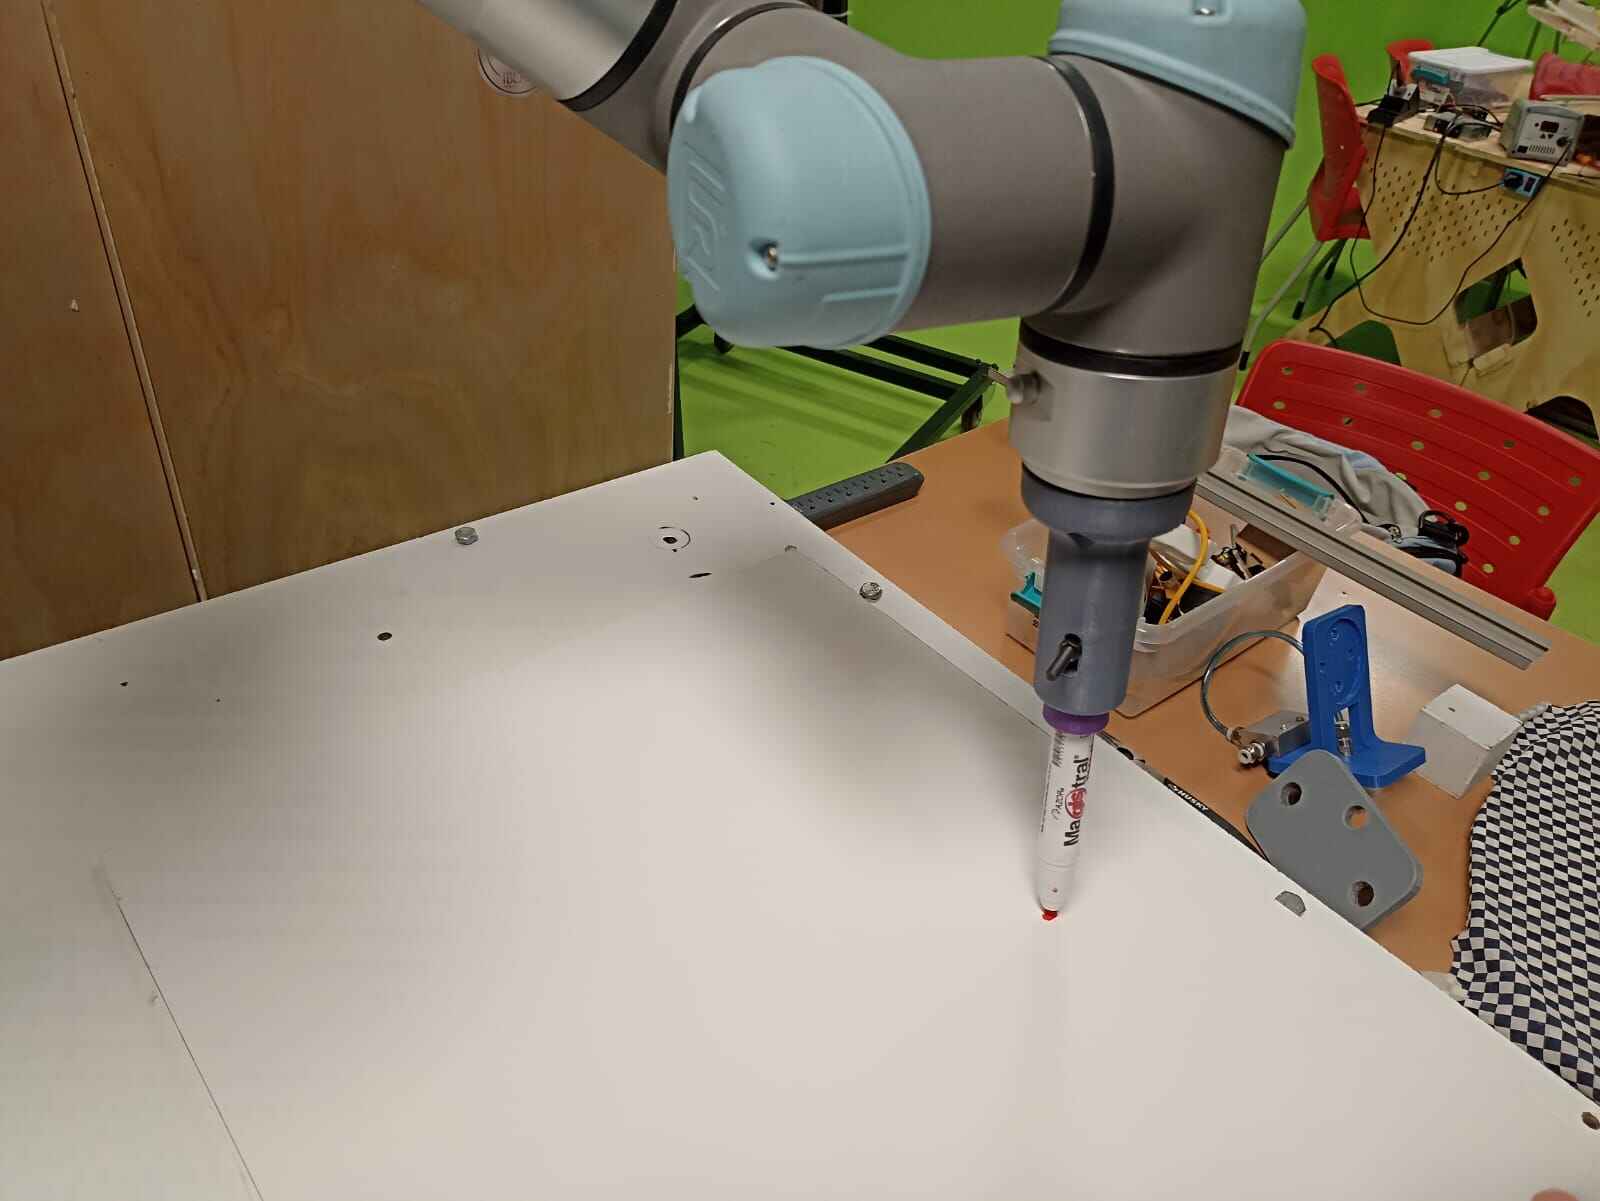
Once we have that, we move the tip of the market to where we want our first spot
If we look at the display, it should show the coordinates of that specific point, we need to save it as our first waypoint. Waypoints are memory spots that hold a specific value for each of the motors, so a specific position can be reaplicated later on with the exact same positions the robotic arm was at that moment.
Then, we move the market to the second position we want it to end up, which should be a straight line to start drawing the square
We save each waypoint to mark the path, until we have all of our points. As you will see, there are marker points on all the waypoints it should cross
So, we give it a shot!:
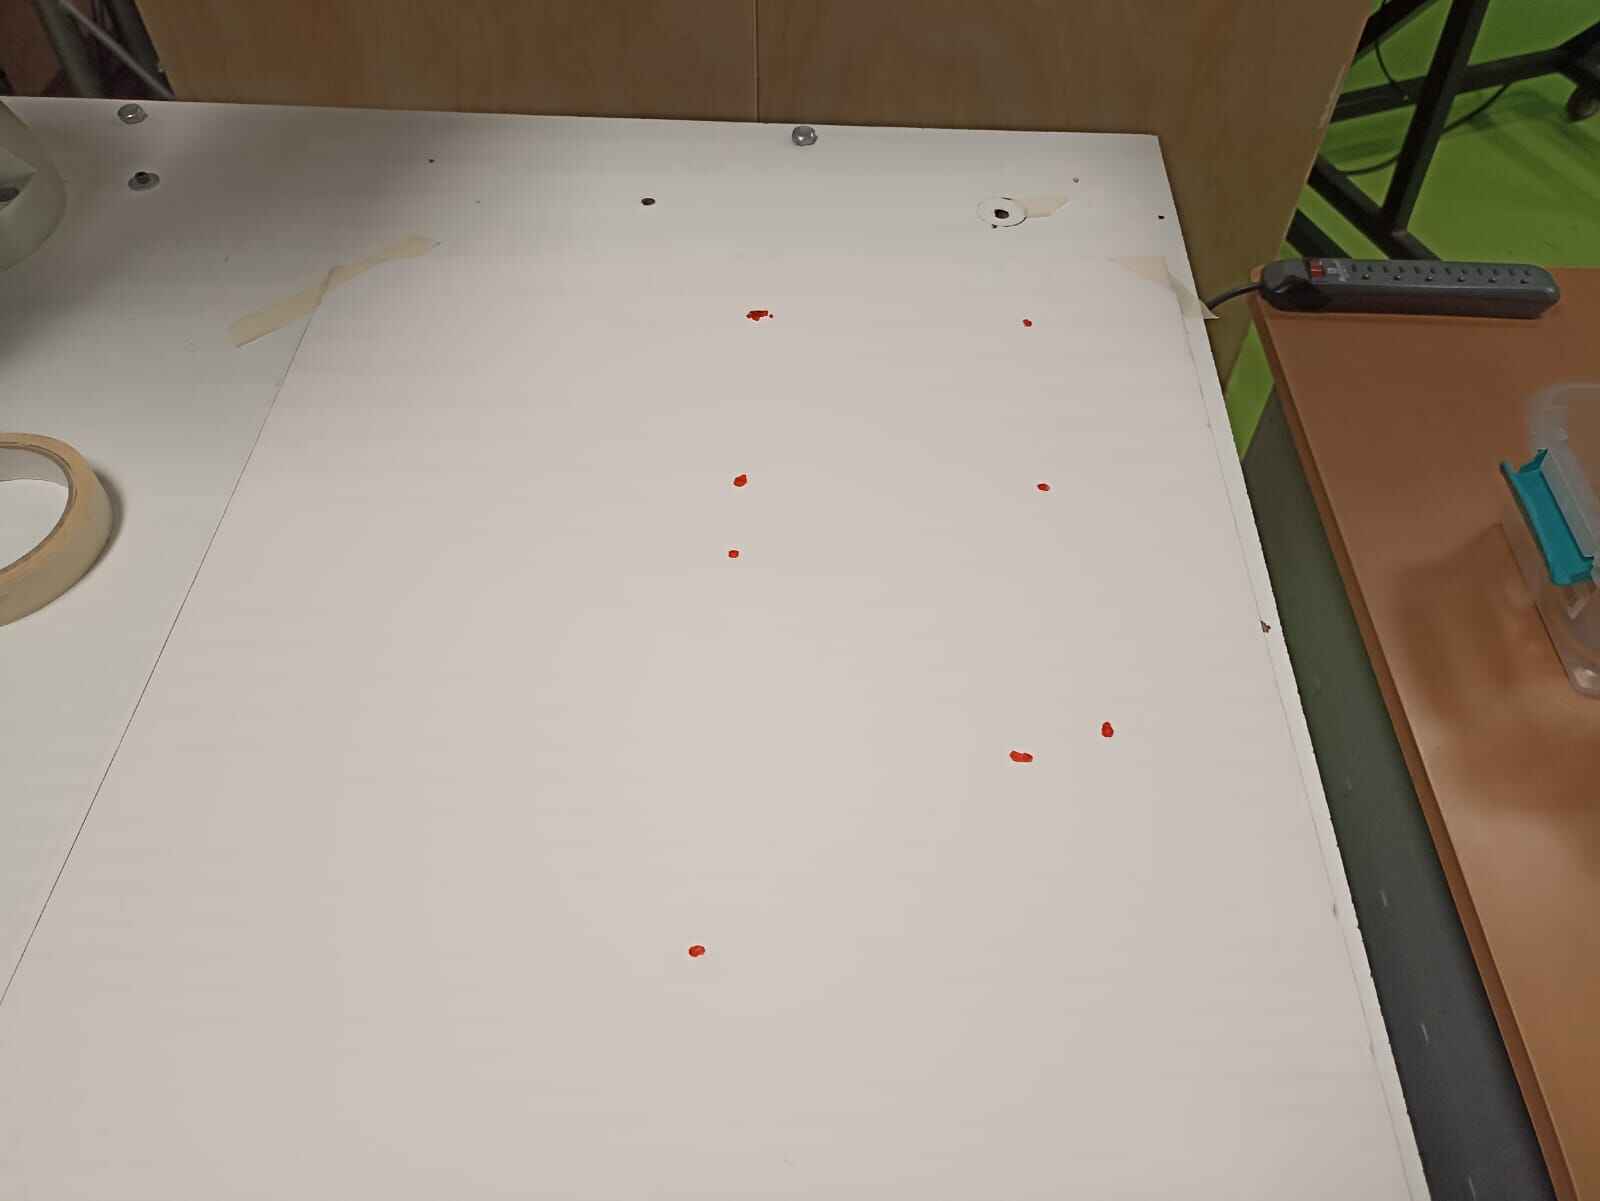
Soooo... the market went straight into the foamboard. Turns out I selected all the waypoints in the "MoveJ" configuration, when it should have been on the "MoveL" option. This for some reason changes the way the robot moves to the waypoints.
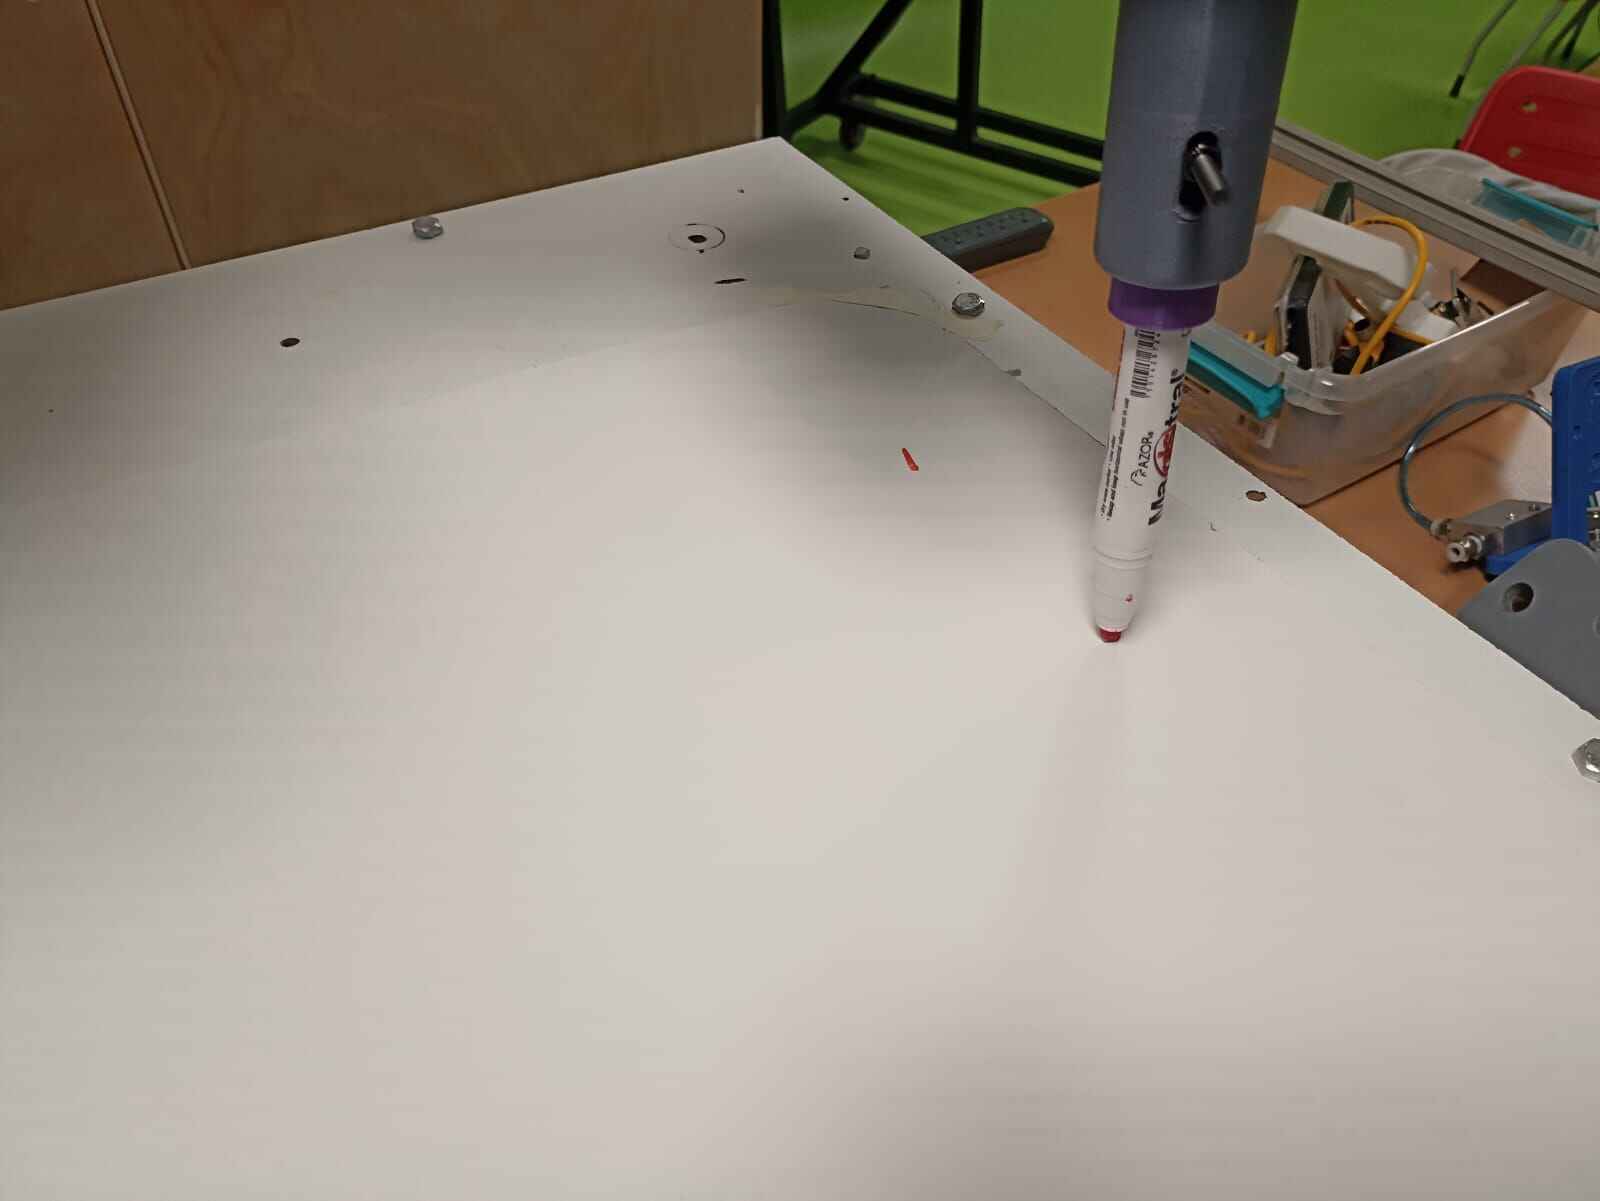
I got a new piece of foamboard and taping it to the desk
We once again mark all the points manually and select the waypoints.

And once again we have each marked point from the waypoints
So, here goes nothing, again...
There are 2 steps when sending the robot to do a routine, first is holding down the button so the robot slowly approaches the first waypoint, and then, the next ones are done automatically.
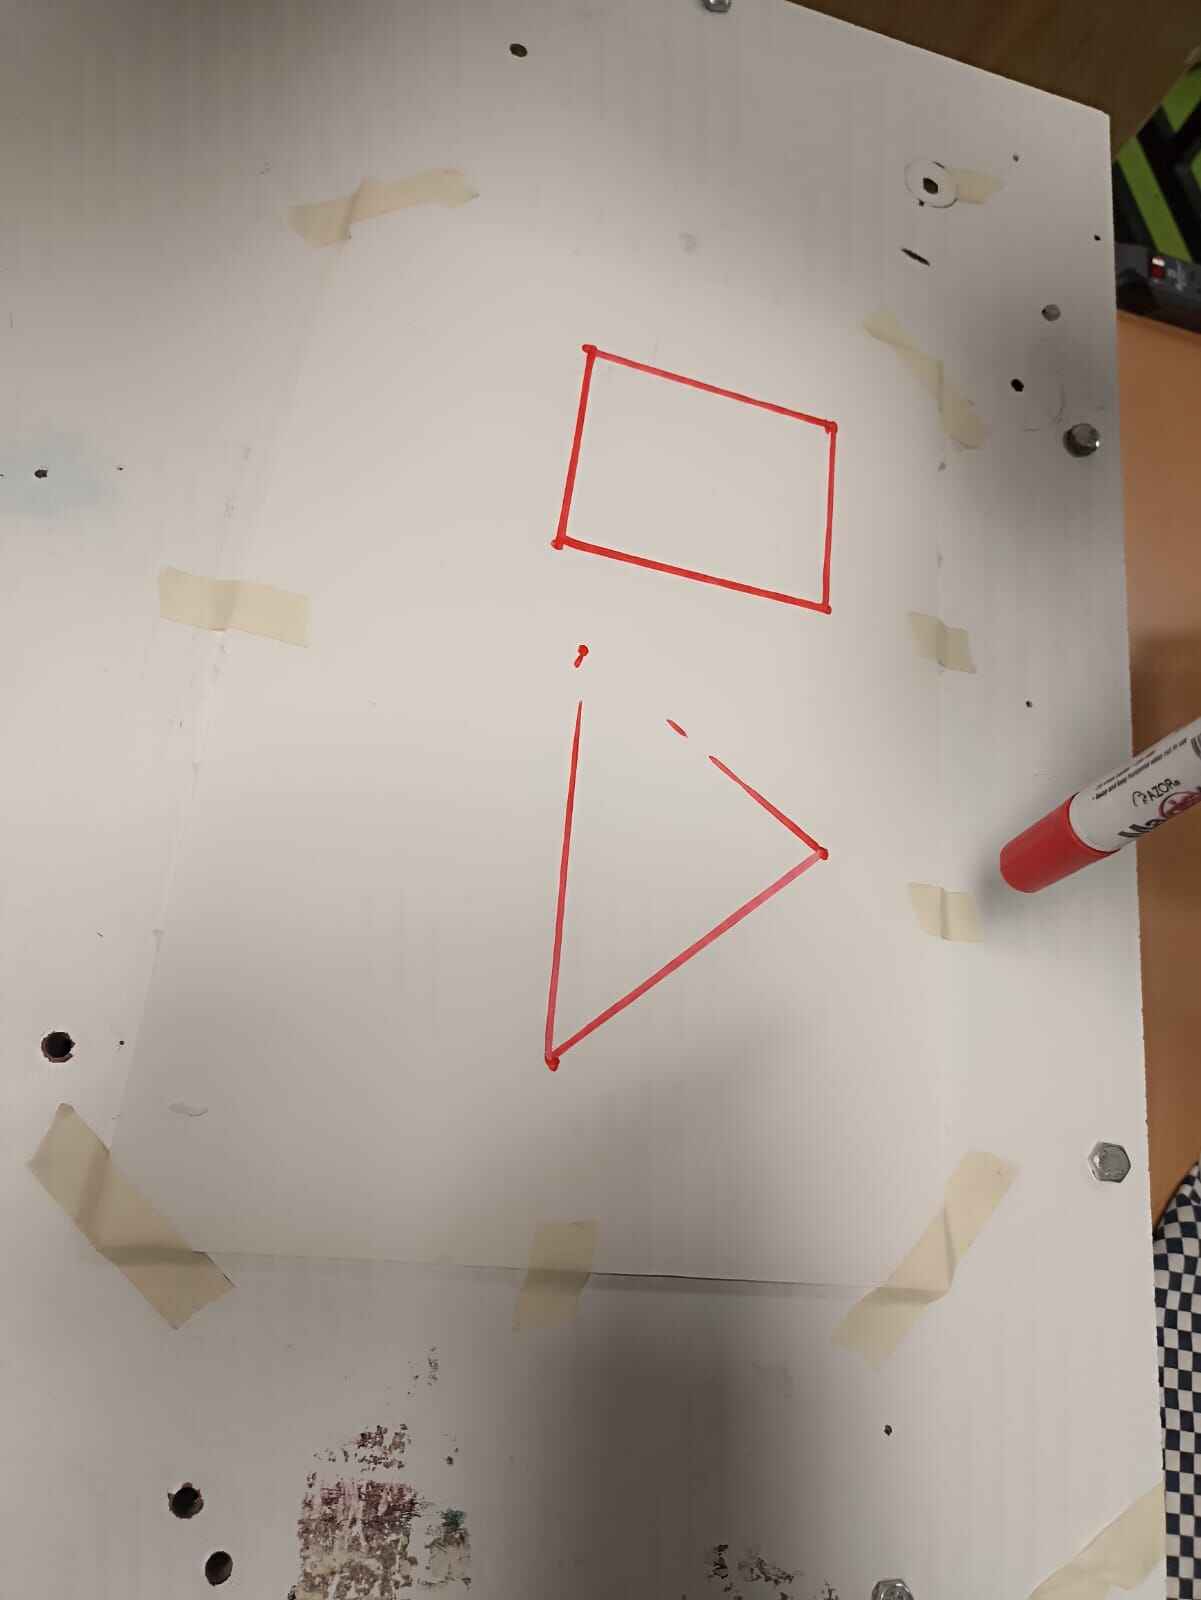
As you can see, it draw almost perfect shapes, the missing traces are probably due to the foamboard not being uniform on it´s surafce, but the shapes are there
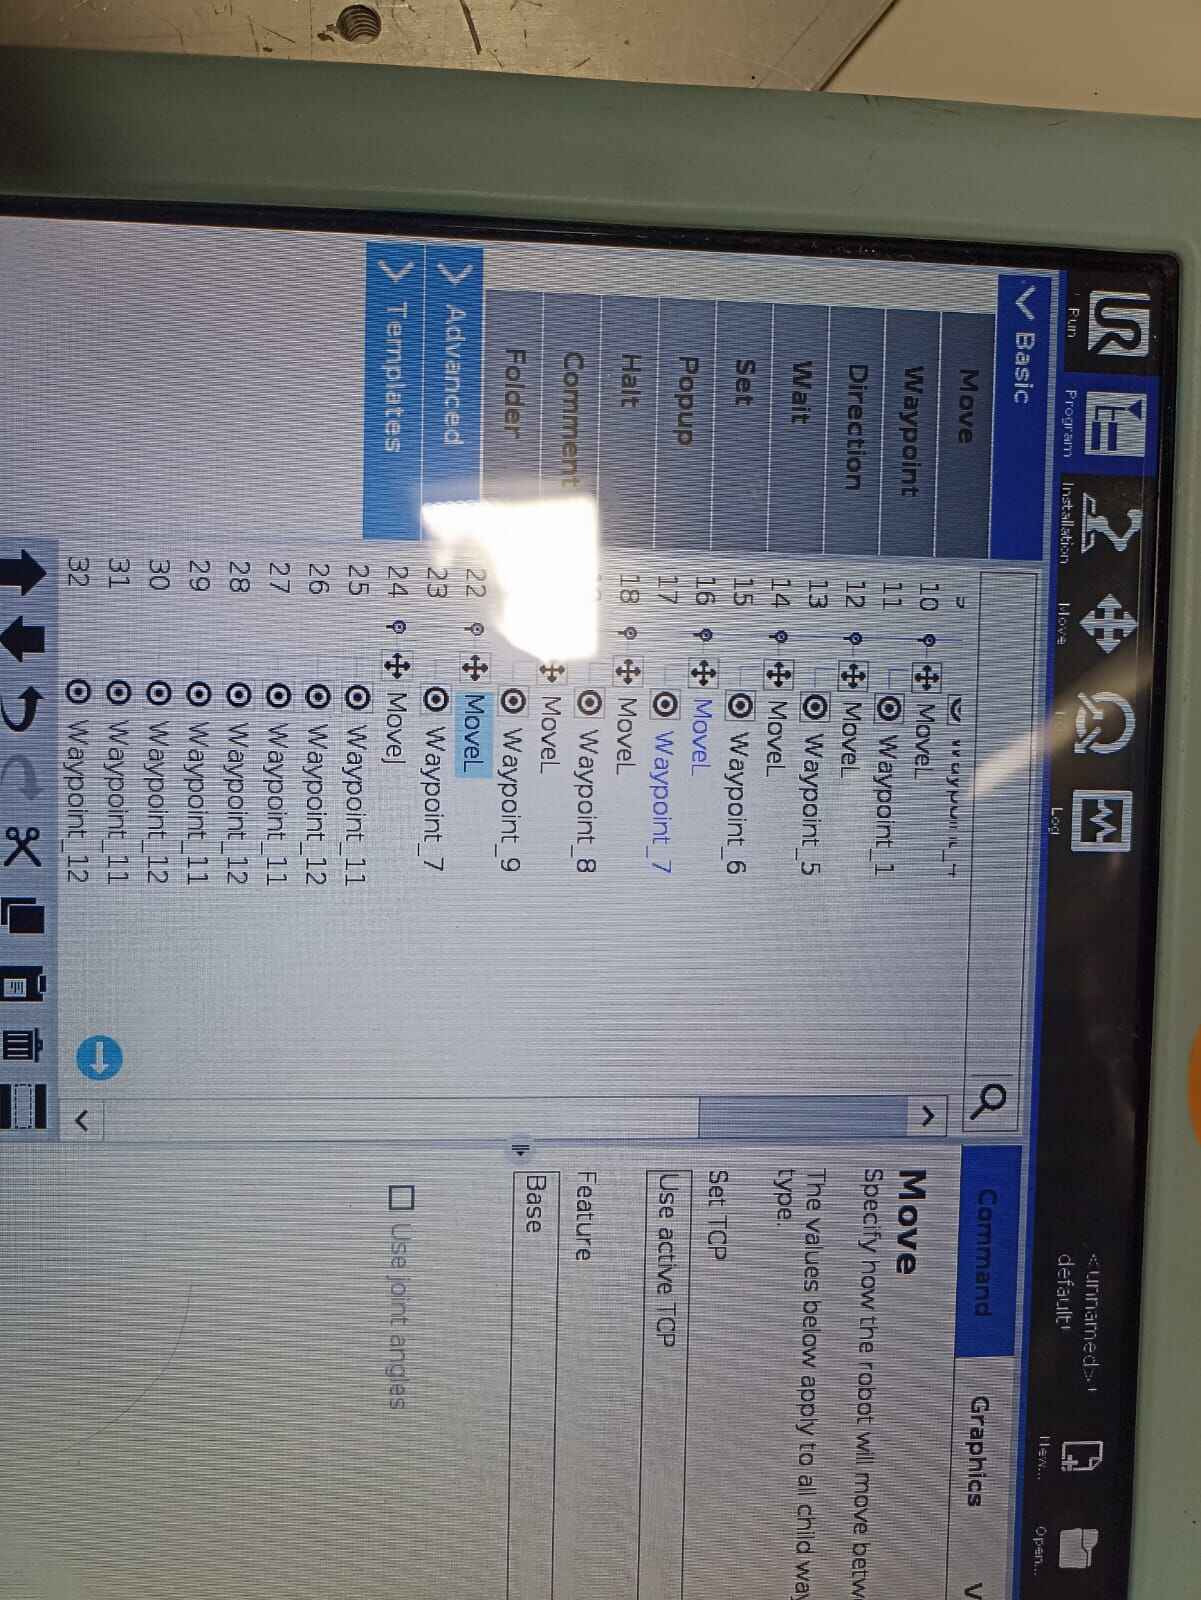
Here is what the waypoints look like:
Since the waypoints are always the same, this can be design to repeat a certain drawing or design multiple times by just chaning the drawing base.
Conclusions
I decided to do this activity for my wildcard week since robotics is something I have little to no knowledge of, even being a mechatronics student!. Even though this robots are supposed to be user friendly and have a low learning curve, it is still intimidating to work with this type of machines. Just like we saw, if there is something wrong with the code or the environment, it can easily break something or damage itself. But I think robotic arms like this have a lot of potential and learning the basics of it is a good starting point.