
3. Computer Controlled Cutting
Lasers for the win
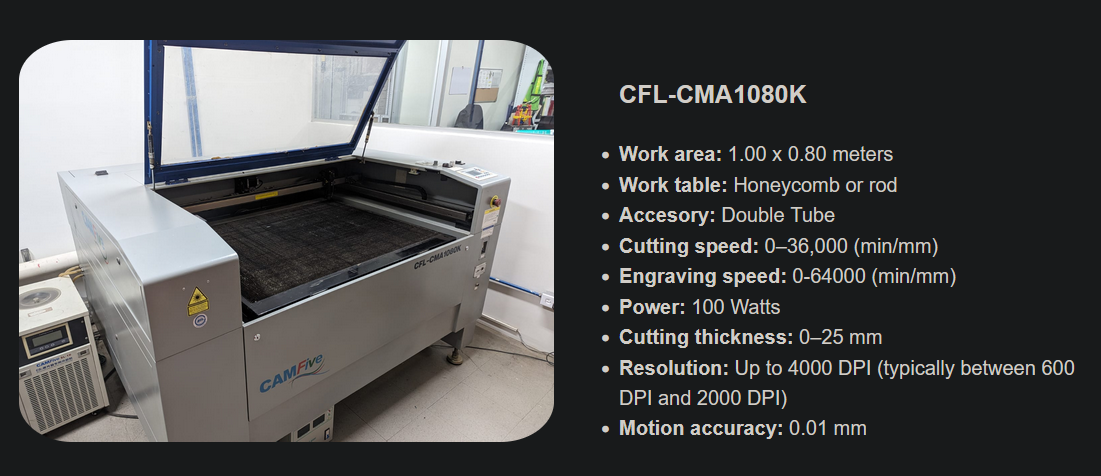
In this section we are taking a look at 2D laser cutting. Here at FabLab Ibero, we have a CFL-CMA1080K Laser cutter that we are gonna use to cut 3mm MDF into a parametric construction kit
Before we begin to sketch, we need to know the parameters and considerations to cut with a CO2 tube technology laser cutter like the one have here. The most important parameters we need to perfect to have a clean cut with no excess burning is the speed and power we set the machine to.
Our professors here at Ibero made a test board that combined all possible (acceptable) parameters, from 40-15 mm/s in speed, and 10% to 95% in power, this is the result:
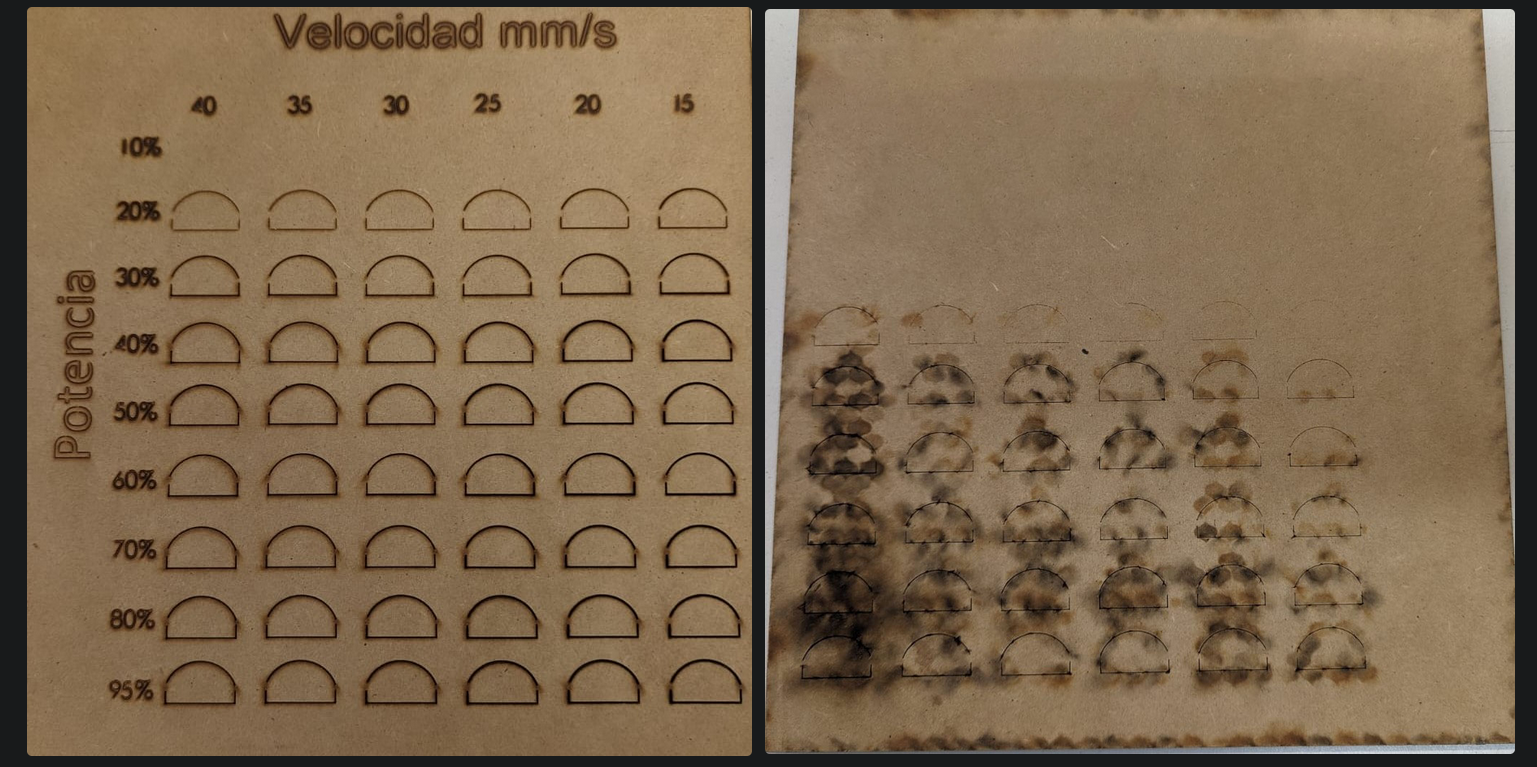
Some conclussions we can take from this example is that the laser cutter doesn´t begin to cut through until 40% power, all the previous ones were only engravings, and at 10% we don´t even get that. At lower speeds and higher power we do get cuts all the way, but as we can see, the finish is very messy as it burns a lot of the MDF and accentuates the kerf in the overall cut. Kerf is the amount of material being burnt away at the moment of the cut, we ideally want to kept to a minimum to keep our pieces as true as the original design.
That´s why we settled for 40 mm/s at 40% power for the best results.
For more information about the laser cutters and overall more information about this subject, check the: Computer Controlled Cutting Fab Ibero Puebla´s page
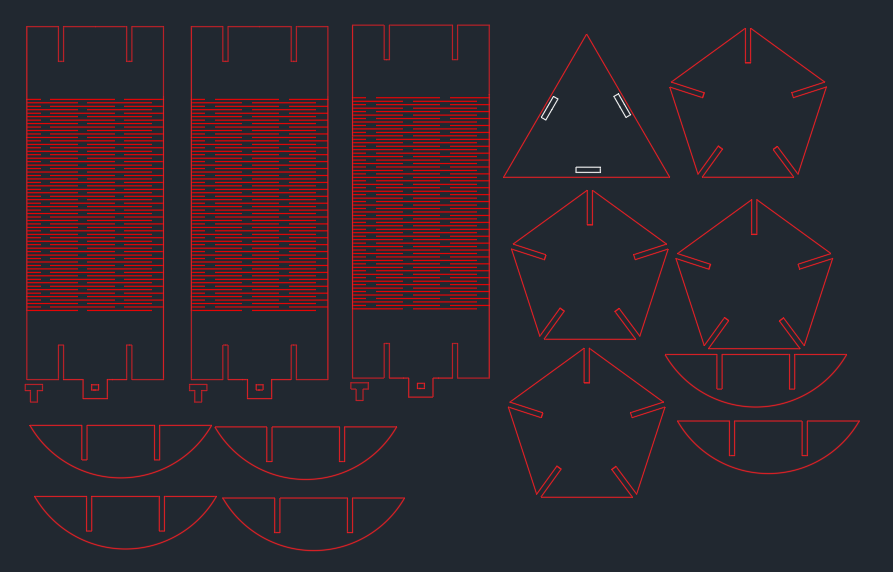
For this weeks assigment we have to do a parametric construction kit, meaning we need to cut different pieces in MDF that can interlock with each other, creating unique assemblies and configurations. But I am also going to try to do hinges (bendable parts) with laser cutting, this way we can create even more unique pieces that can adapt to diferent configurations.
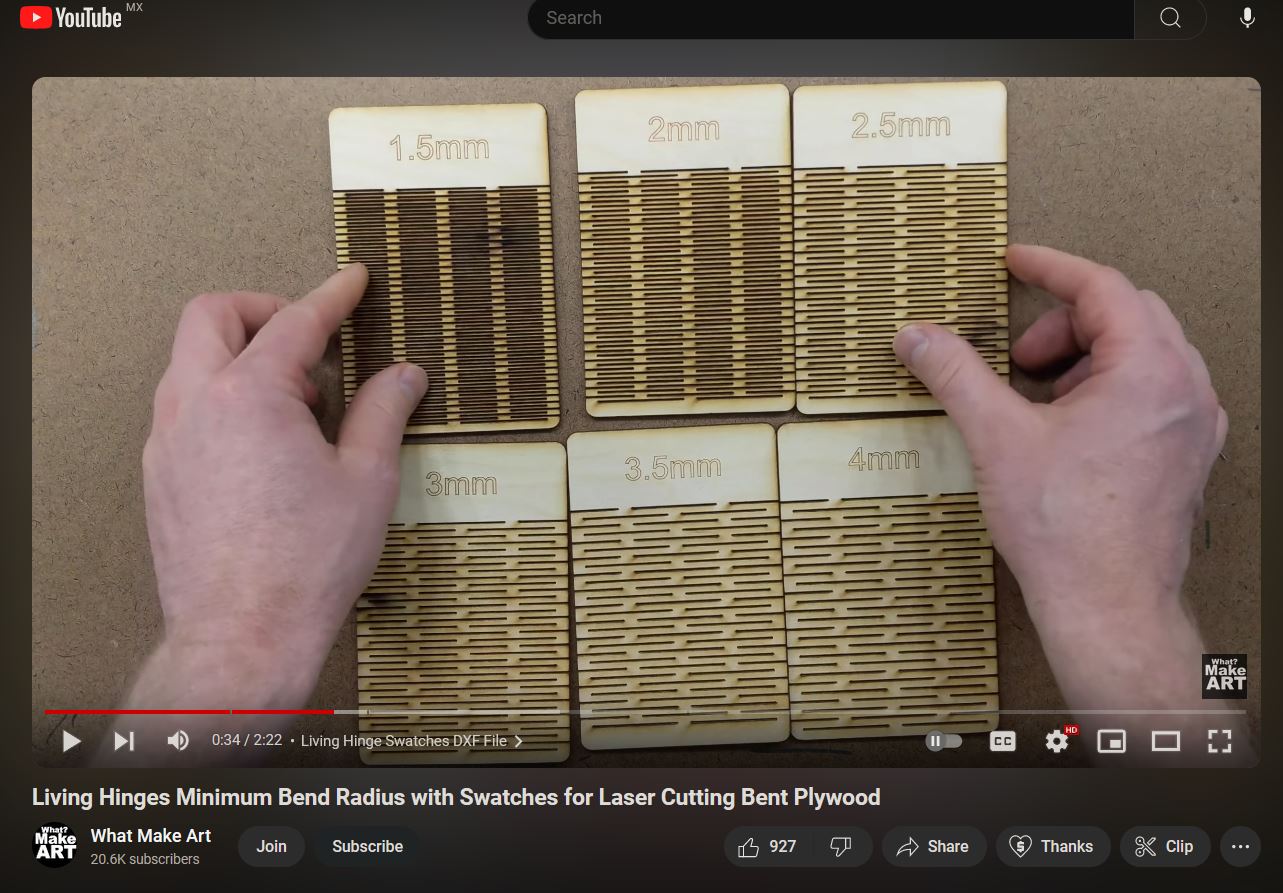
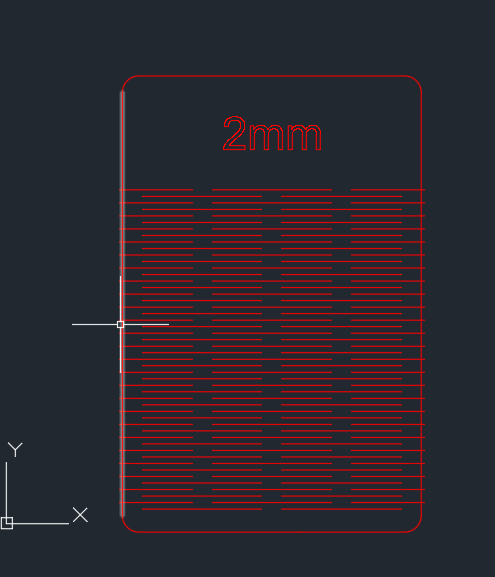
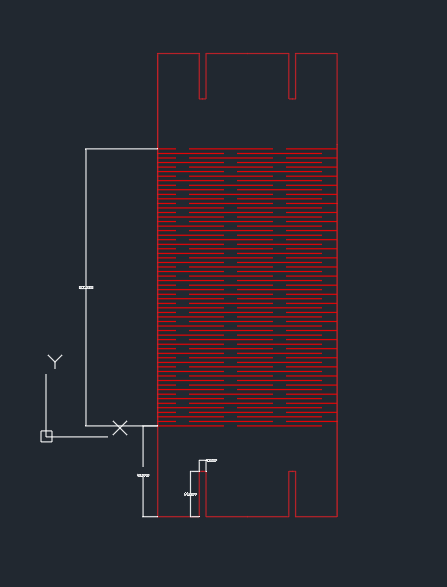
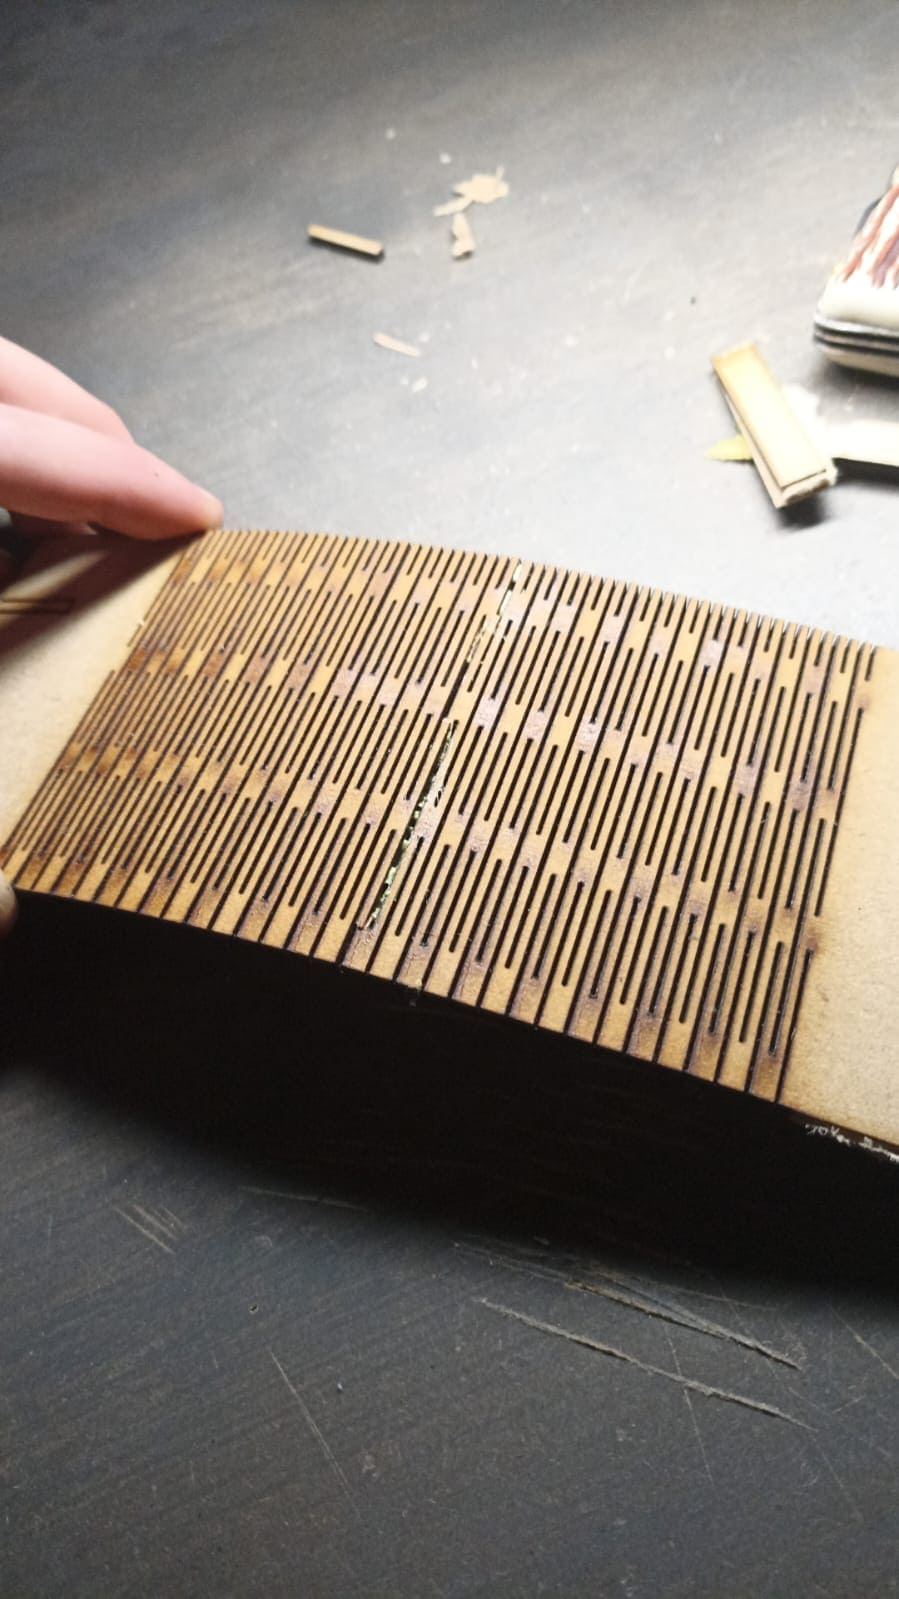
The way we do that we do very close transversal cuts at a certain distance to give the wood some flexiblity to bend at a certain angle. Although the way to design and parameterize the distance, length and overall specifications for the lines have a certain rule and formula, I want to keep it simple and simply experiment with the concept of bendable MDF, as it is something I have never done yet been wanting to for a long time. So I took a tested sample from a Youtube channel called "What Make Art" that has a couple of examples of MDF hinges. I took the 2mm version and modifiy it slightly by giving more lenght and less width to try out. I am using Autocad for this example.
Designing
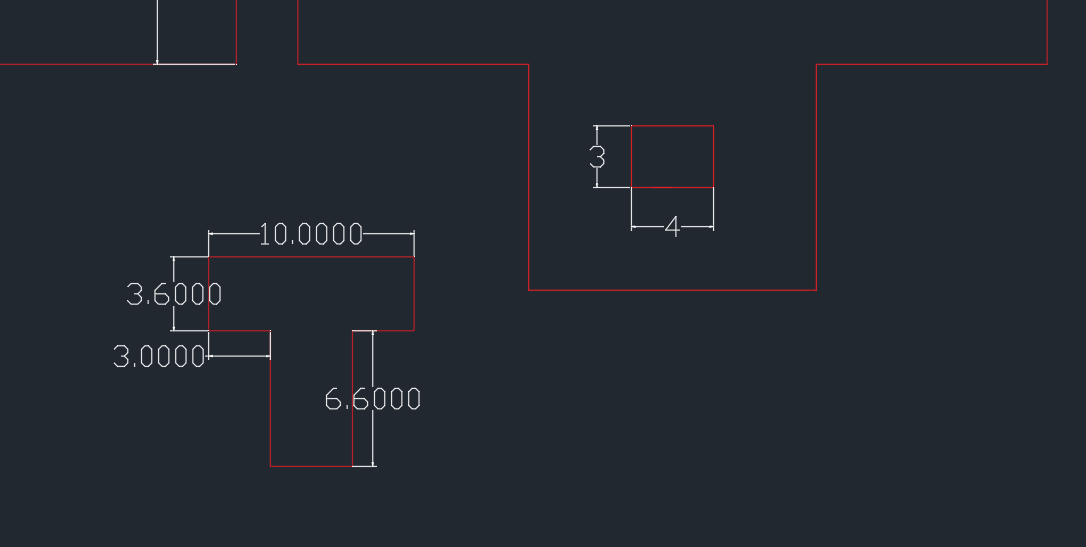
Then I also gave it dents 20mm deep and the 3mm wide of the MDF on both side to lock with other pieces
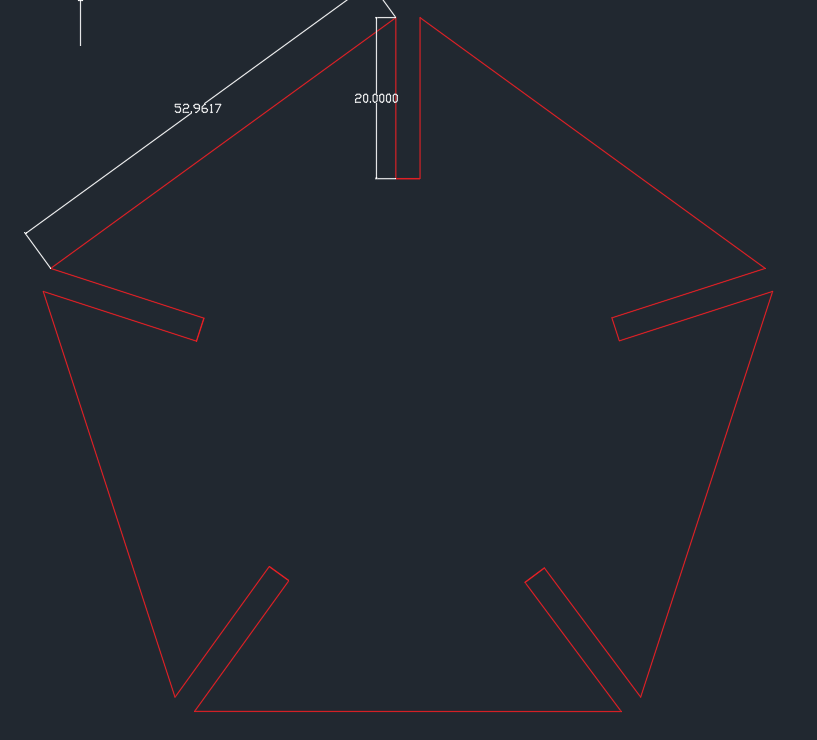
For a second piece, I did a pentagon with it´s corners dented for connections
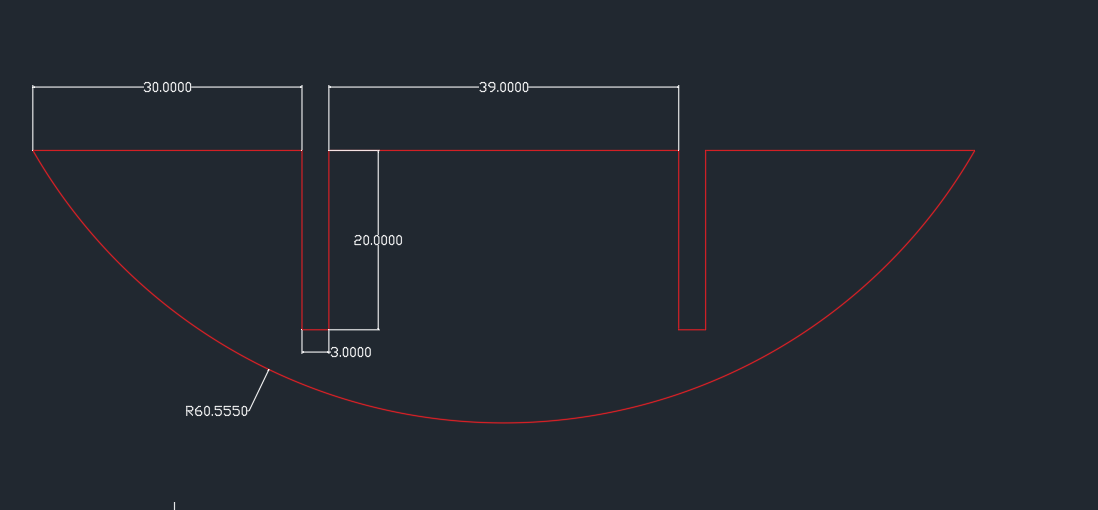
I am also trying this semicircle to play around with the build structures:
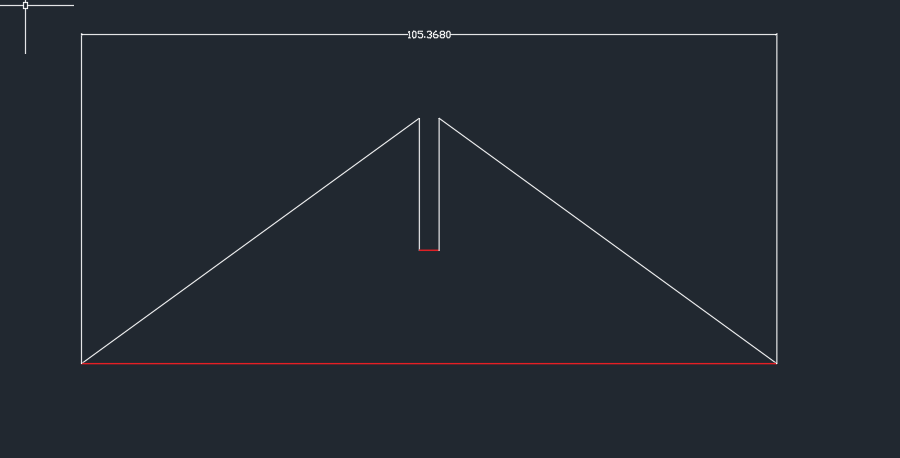
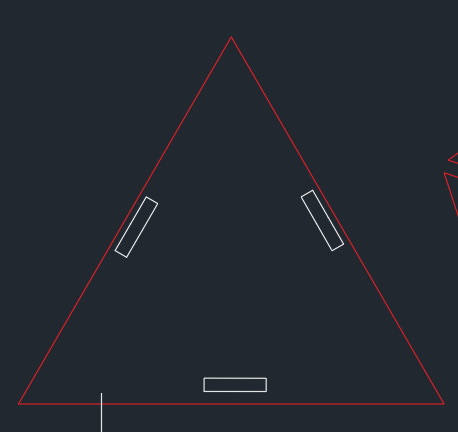
Lastly I wanted to experiment with wedge joints, so I made a triangle that could fit 3 of the bendable pieces with the wedge type connection.
Then I added the flap with it´s lock to the bottom of the bendable piece
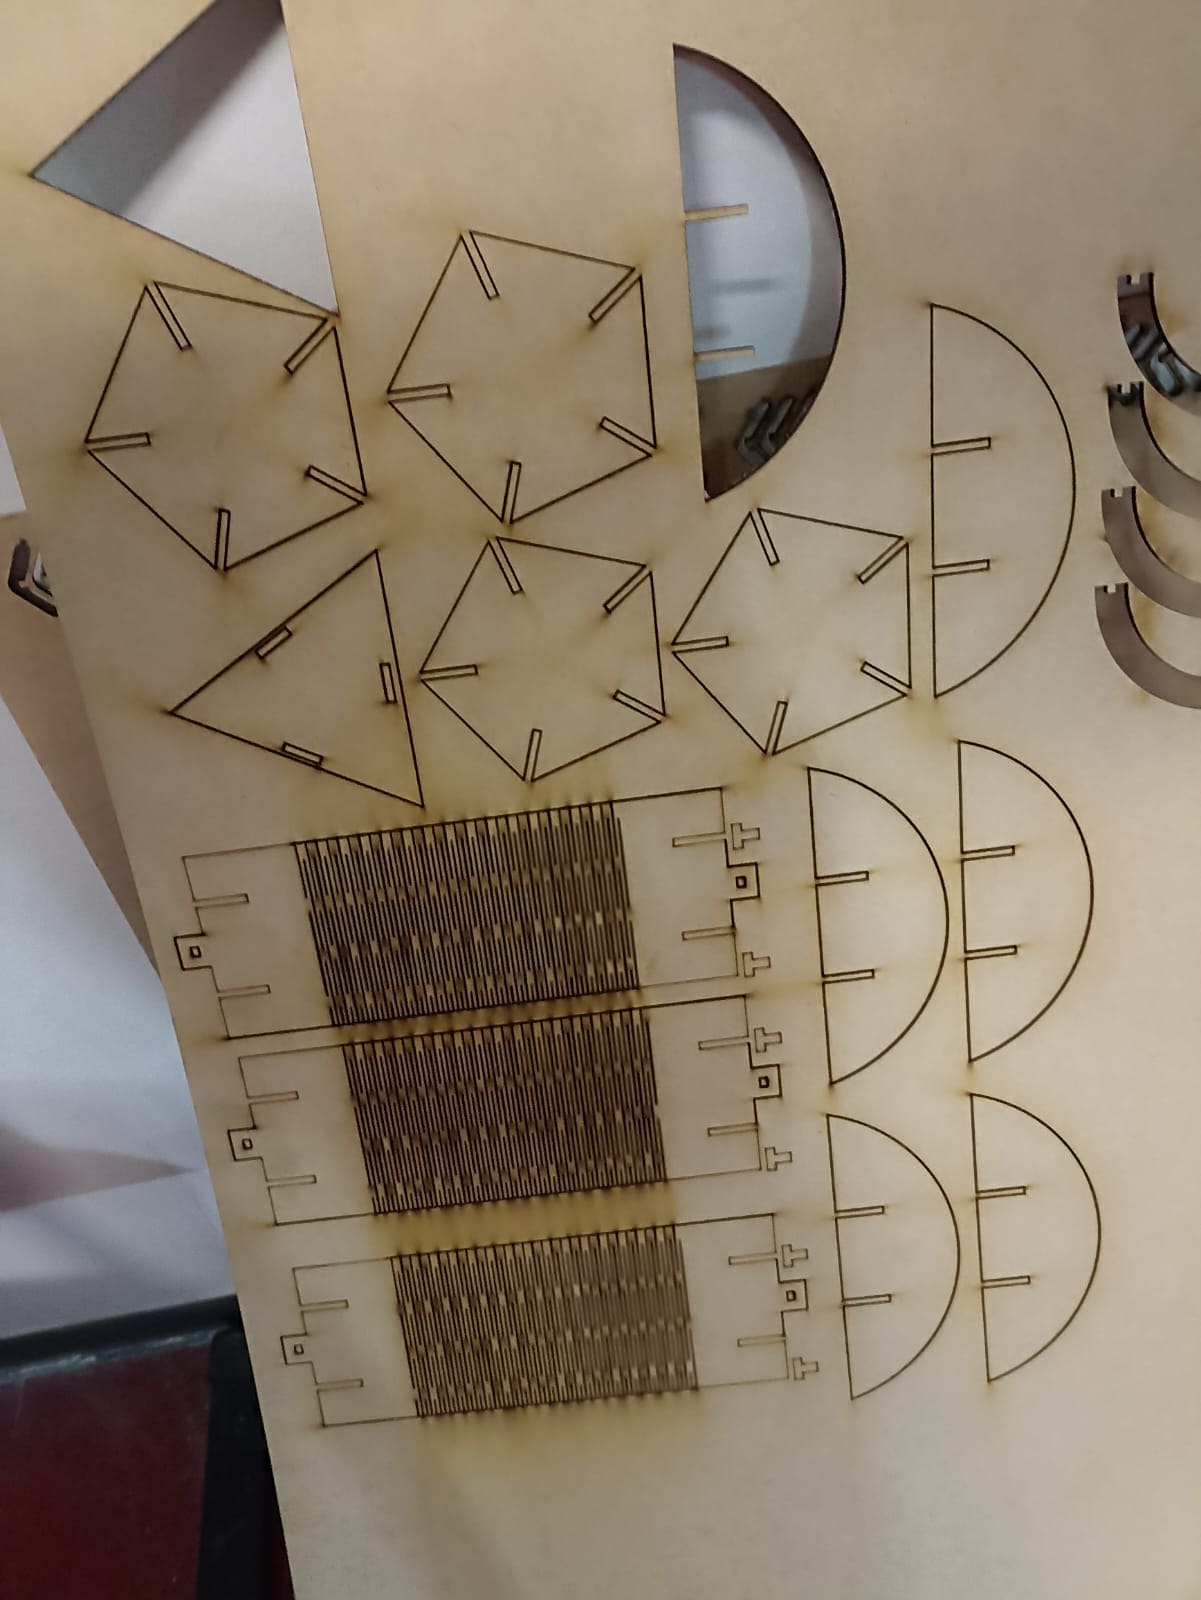
Here is the final array with all the pieces I plan to cut
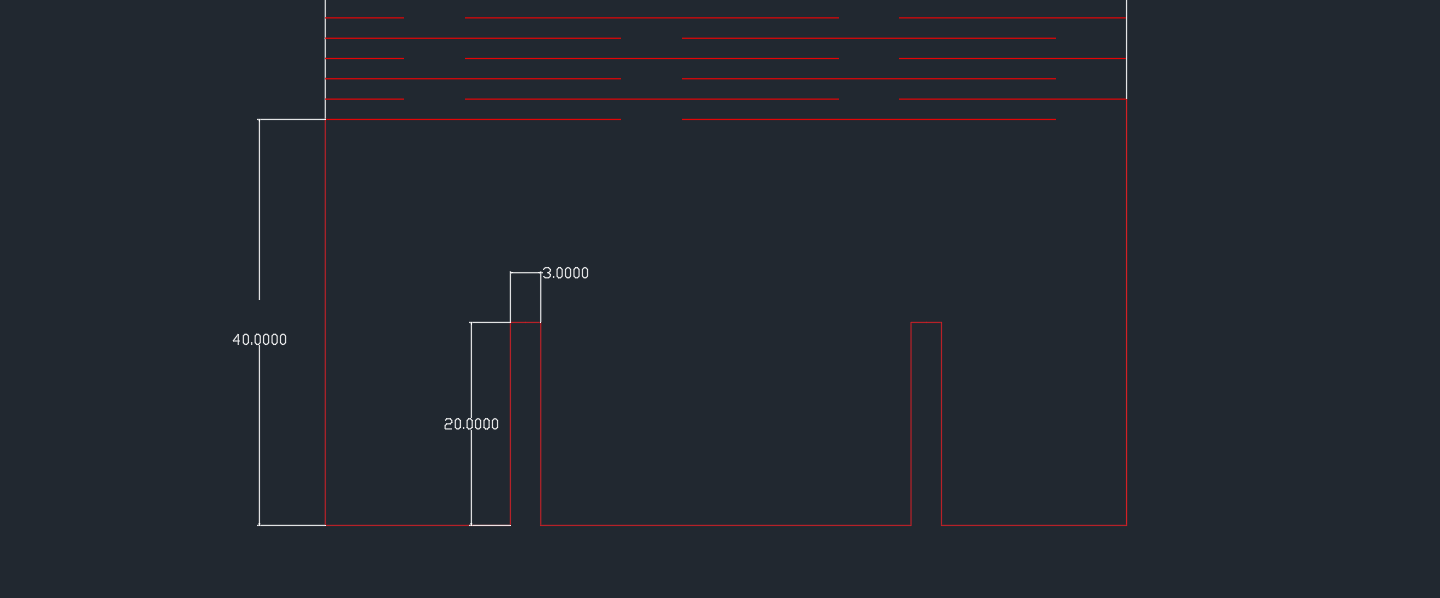
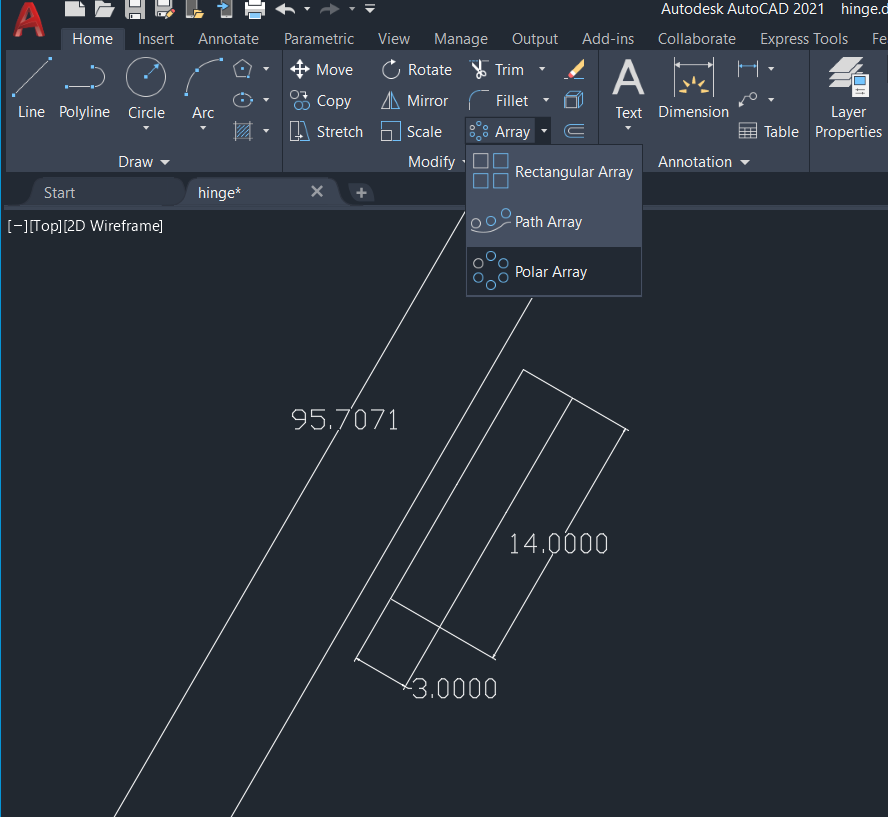
Also, these are the parameters of the cuts itself. These can be modified on the "Parametric" tab on the top menu. This way, you can select which distances you want parametrized, therefore be changed as you see fit.
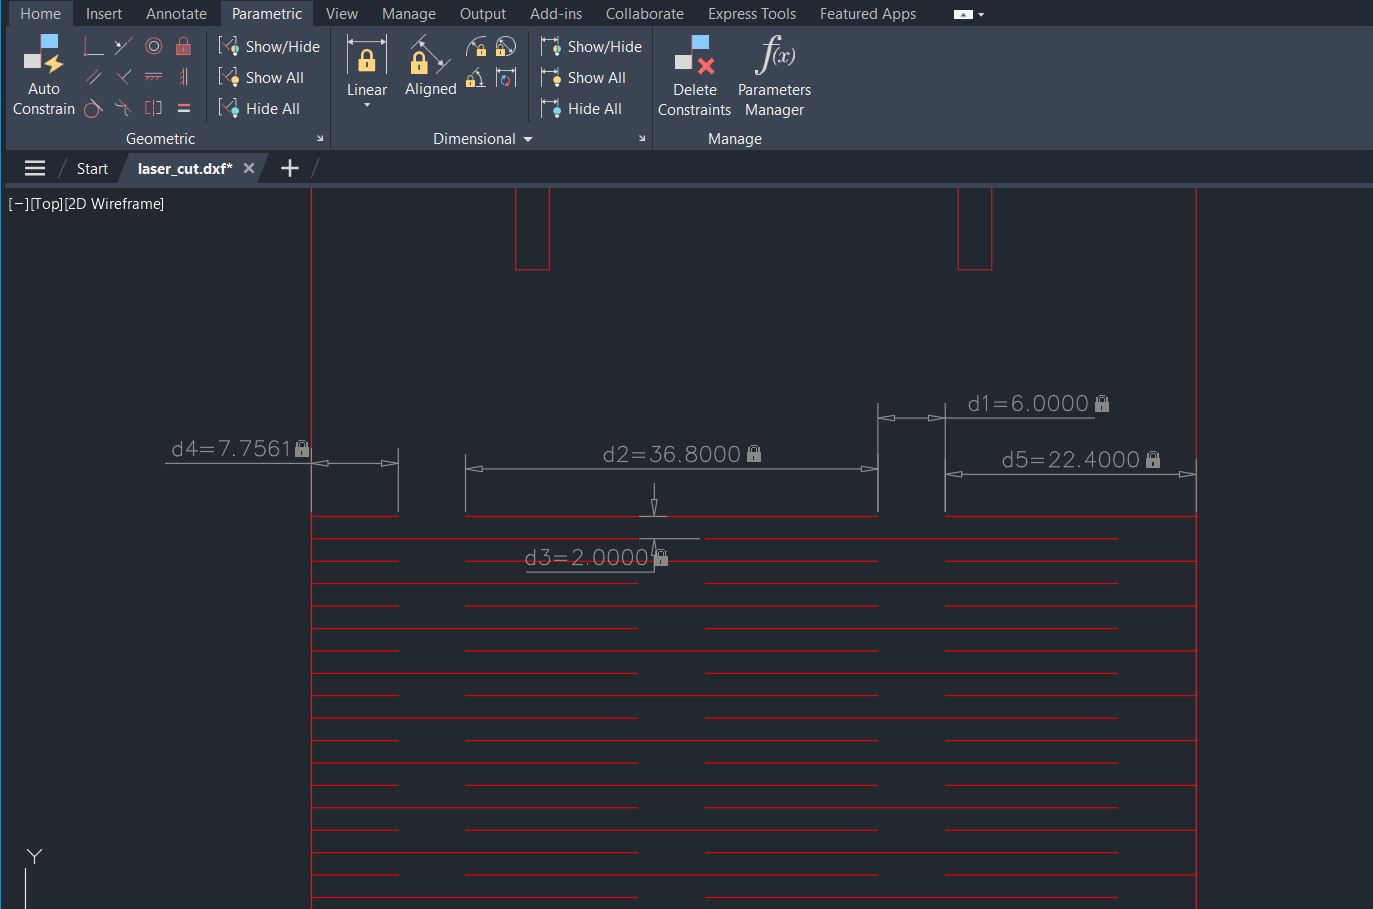
In my case, The most important parameter I could see in the video was the vertical distance between the cuts. As you saw on the screenshot above, they provide examples from 1.5mm up to 4mm. From what I´m seeing and later on testing, the closer the lines are in between them, the more flexible the piece is, but the more fragile it is, which seems like an adequate correlation.(Spoiler, some piece broke when bending).
So probably the best way to incorporate these hinges in your design would be testing different parameters in the vertical distance to see which one bends the amount you need it to, but is not as fragile as to break it over time.
You could also tinker with the horizontal distance between lines, this design has them at 6mm in between, and since that´s what the orignal design came up with, but having longer or shorter distances could compromise or improve the resistance of the material.
Sith level power: Laser cutting
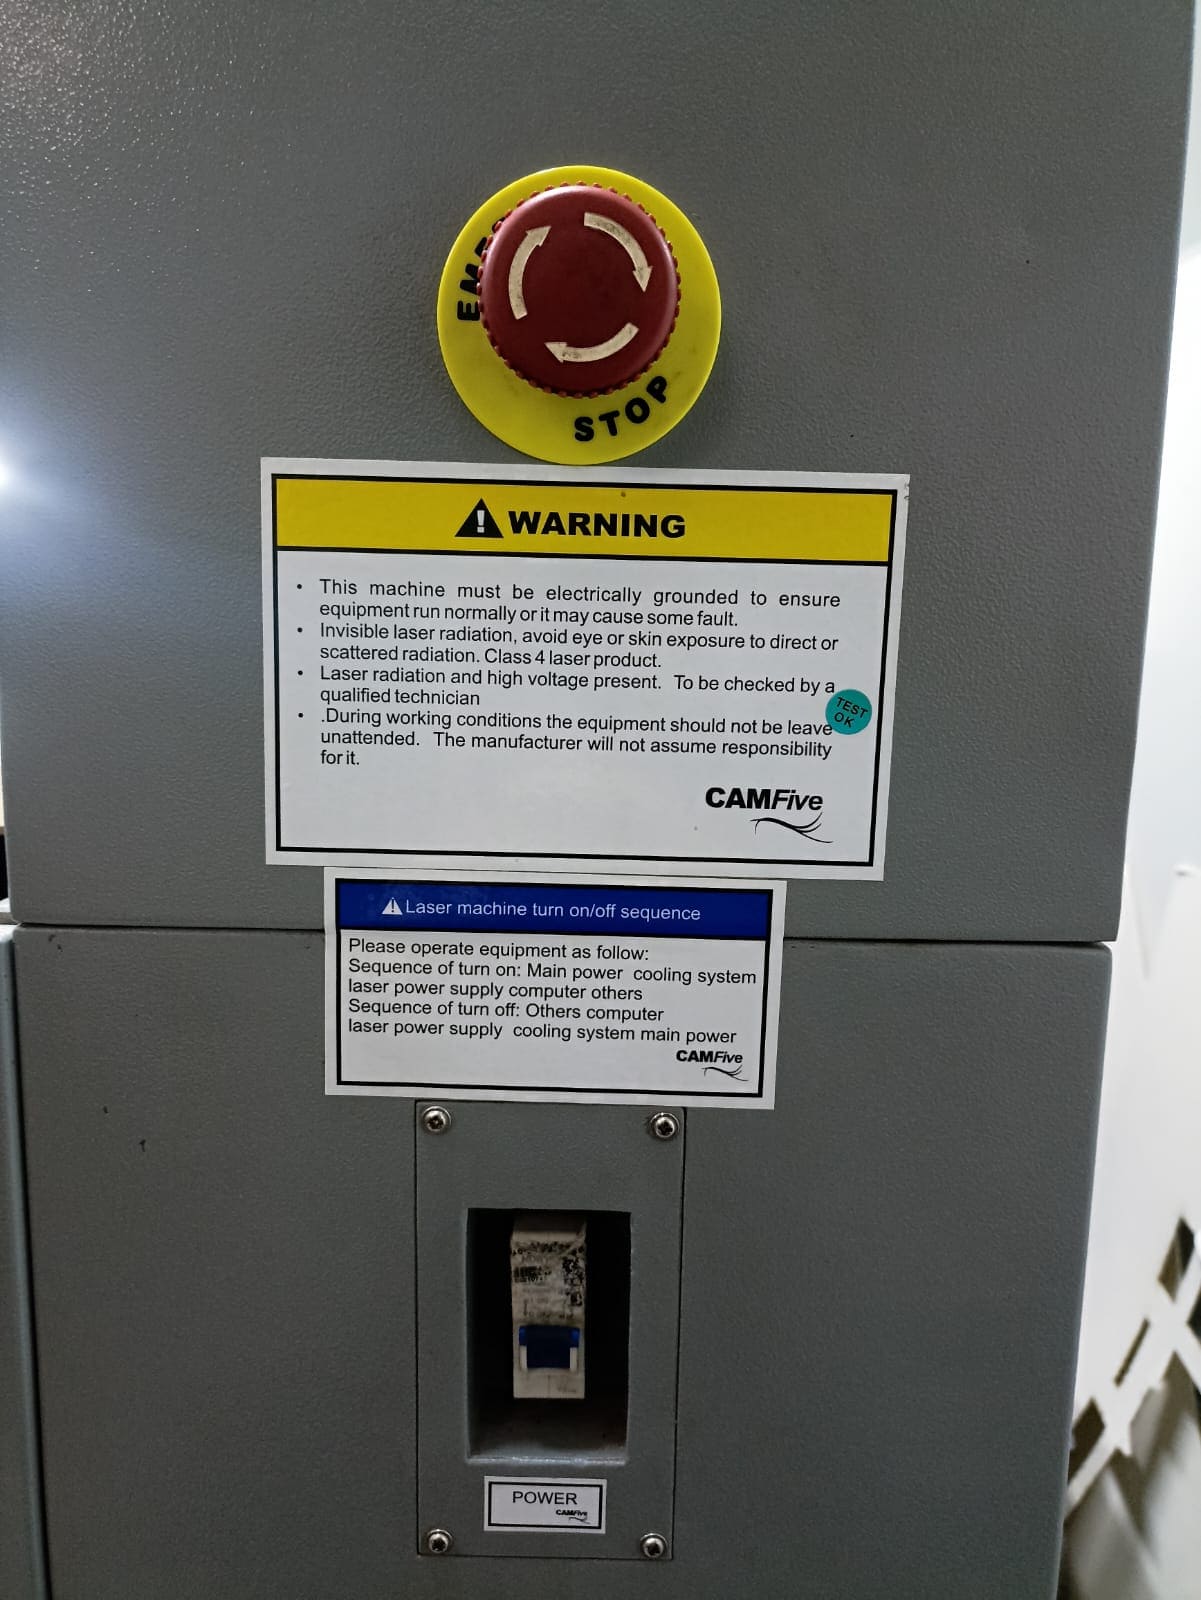
Ok, enough drawing and planning, let´s actually take a look at the laser cutter and do our actual first physical practice :). The obvious first thing we learned was starting up the machine from zero.
First, we turn on the power switch and release the emergency stop button
Second, we insert and turn the key, turn the laser knob all the way to MAX, and finally click the Laser button
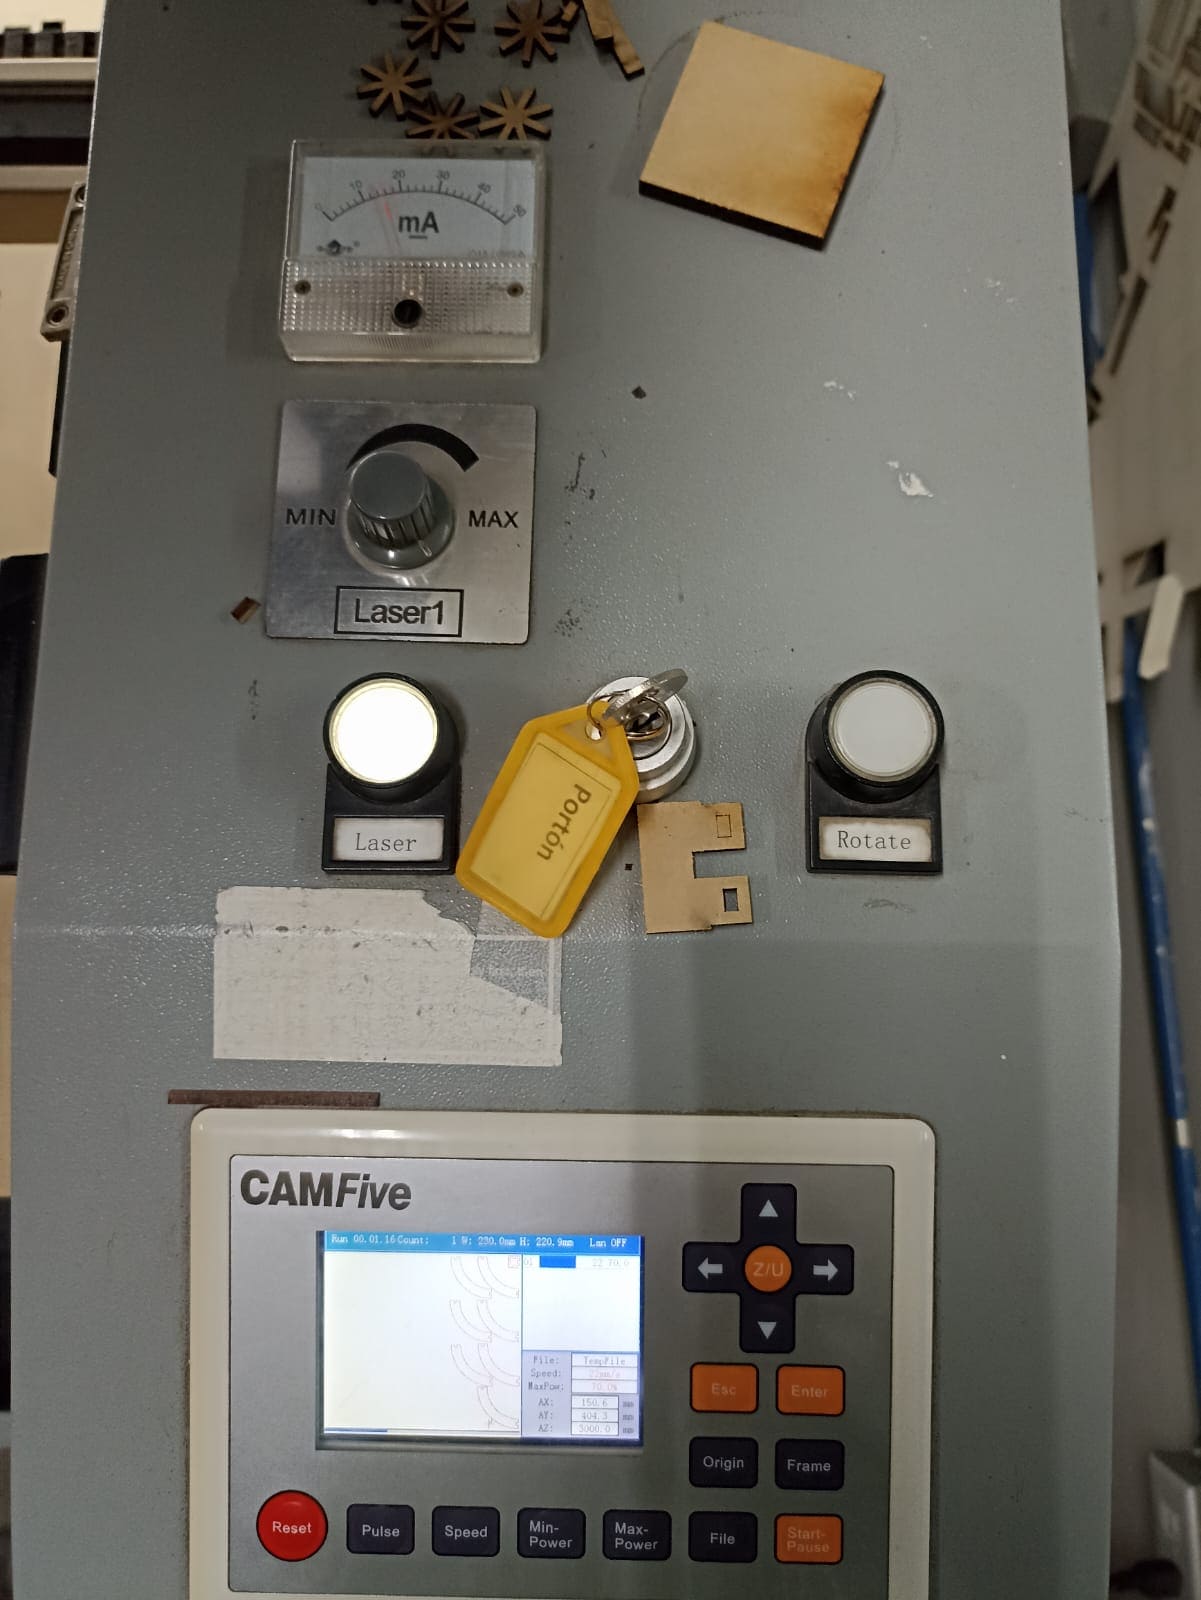
Worth noting that we should also calibrate the distance of the nozzle to the MDF, which we learned was between 5-6 mm, it was previously calibrated, but we slid a piece of 5 mm MDF underneath just the make sure the distance was the correct one. Also very important, in the picture above you can see the 4 direction buttons and a "origin" button, we use that to move the nozzle to the zero position where we want to start cutting, which in our case was the topmost right corner of the MDF, when the nozzle is in the correct place, we click the origin button to mark it.
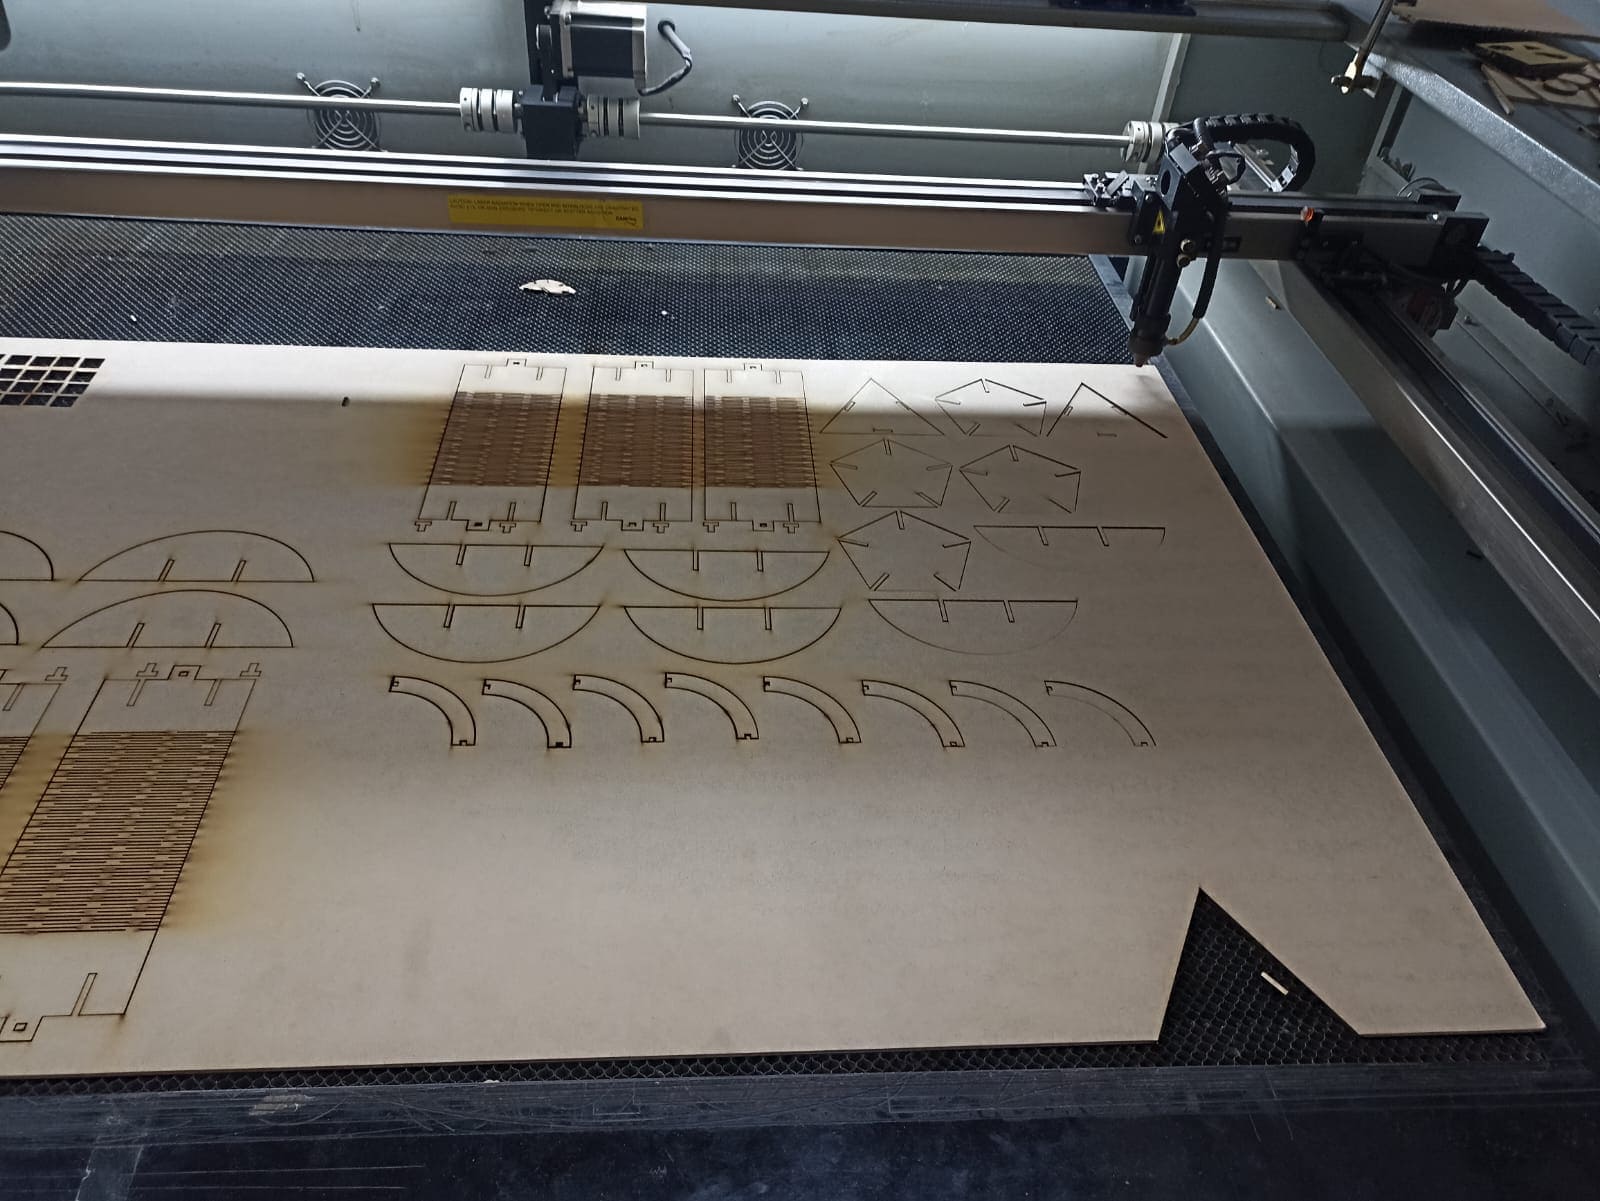
After that, we upload our DXF file into the program and set the parameters. Important: Although we had the example results given by instructors about the ideal speed and power to have a clean cut, fellow classmates were experiencing issues with the laser not cutting all the way through, so we made some adjustments to the speed and power to prevent this from happening
Our first attempt was doing 70% Max power, 60% Min Power and 22 mm/s speed
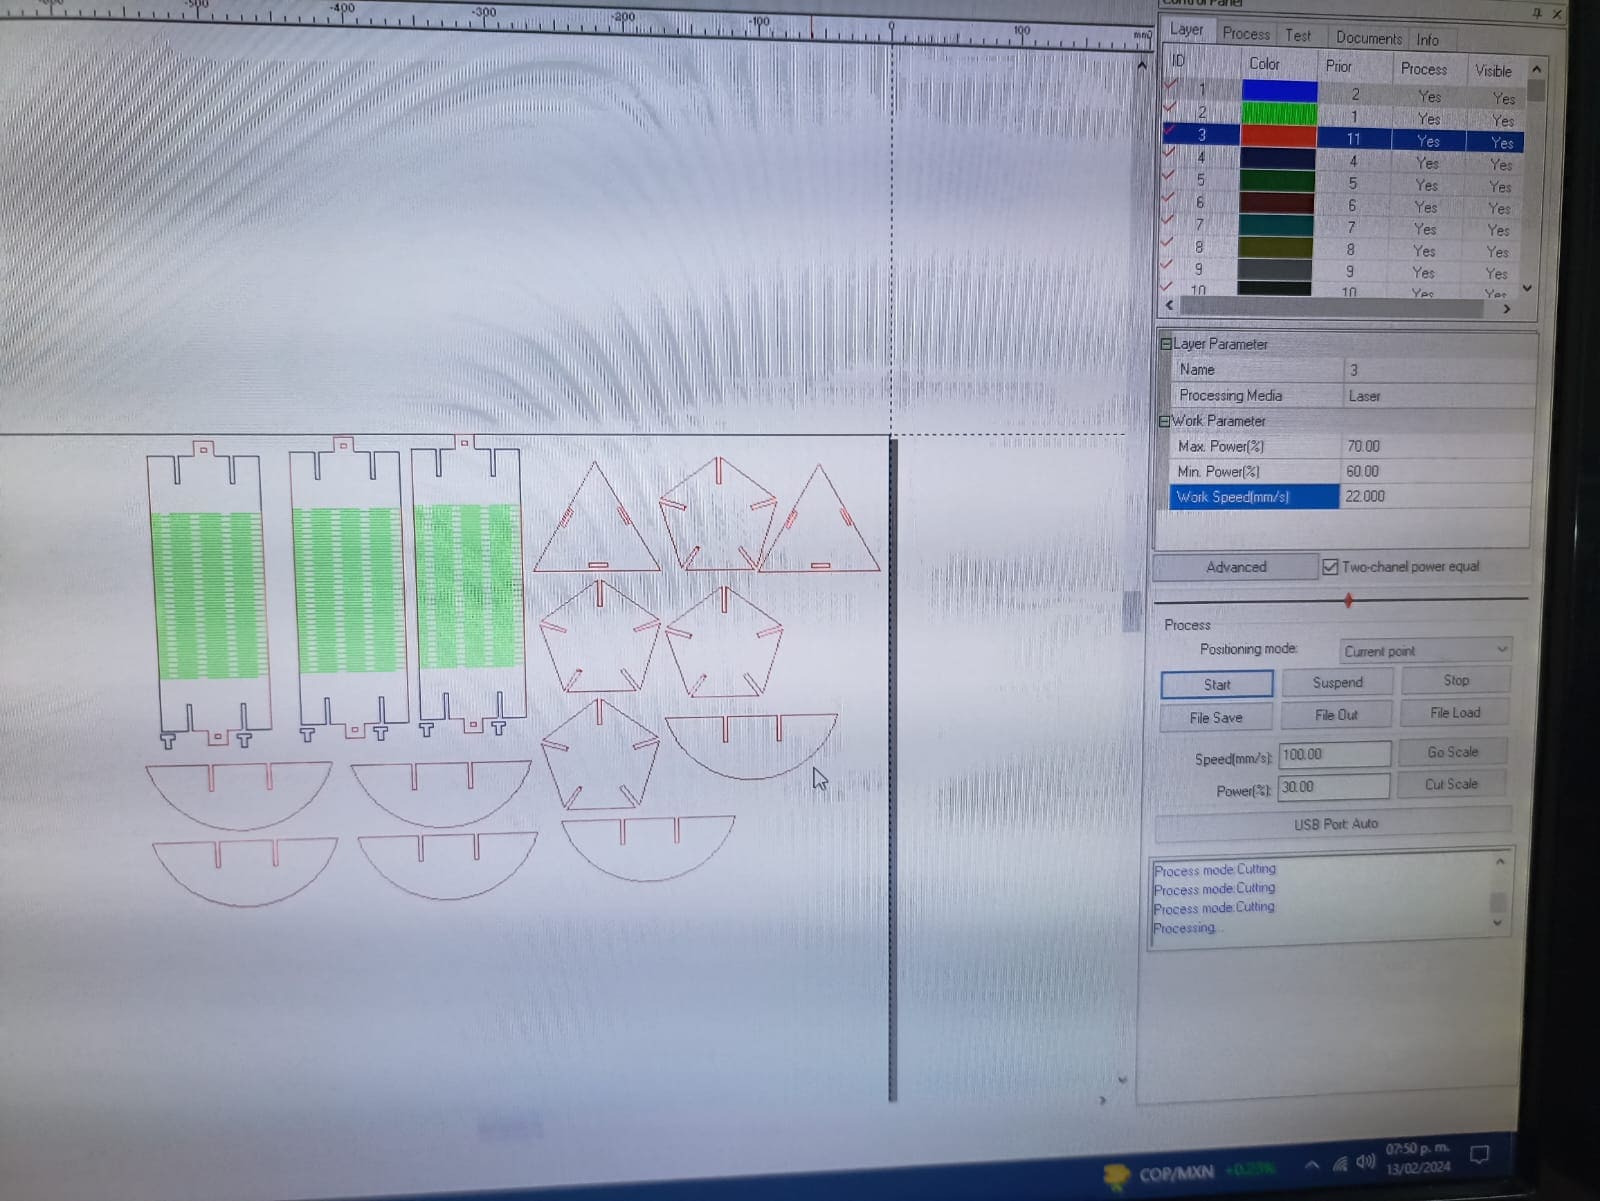
Here is the machine cutting at this parameters:
First attempt:
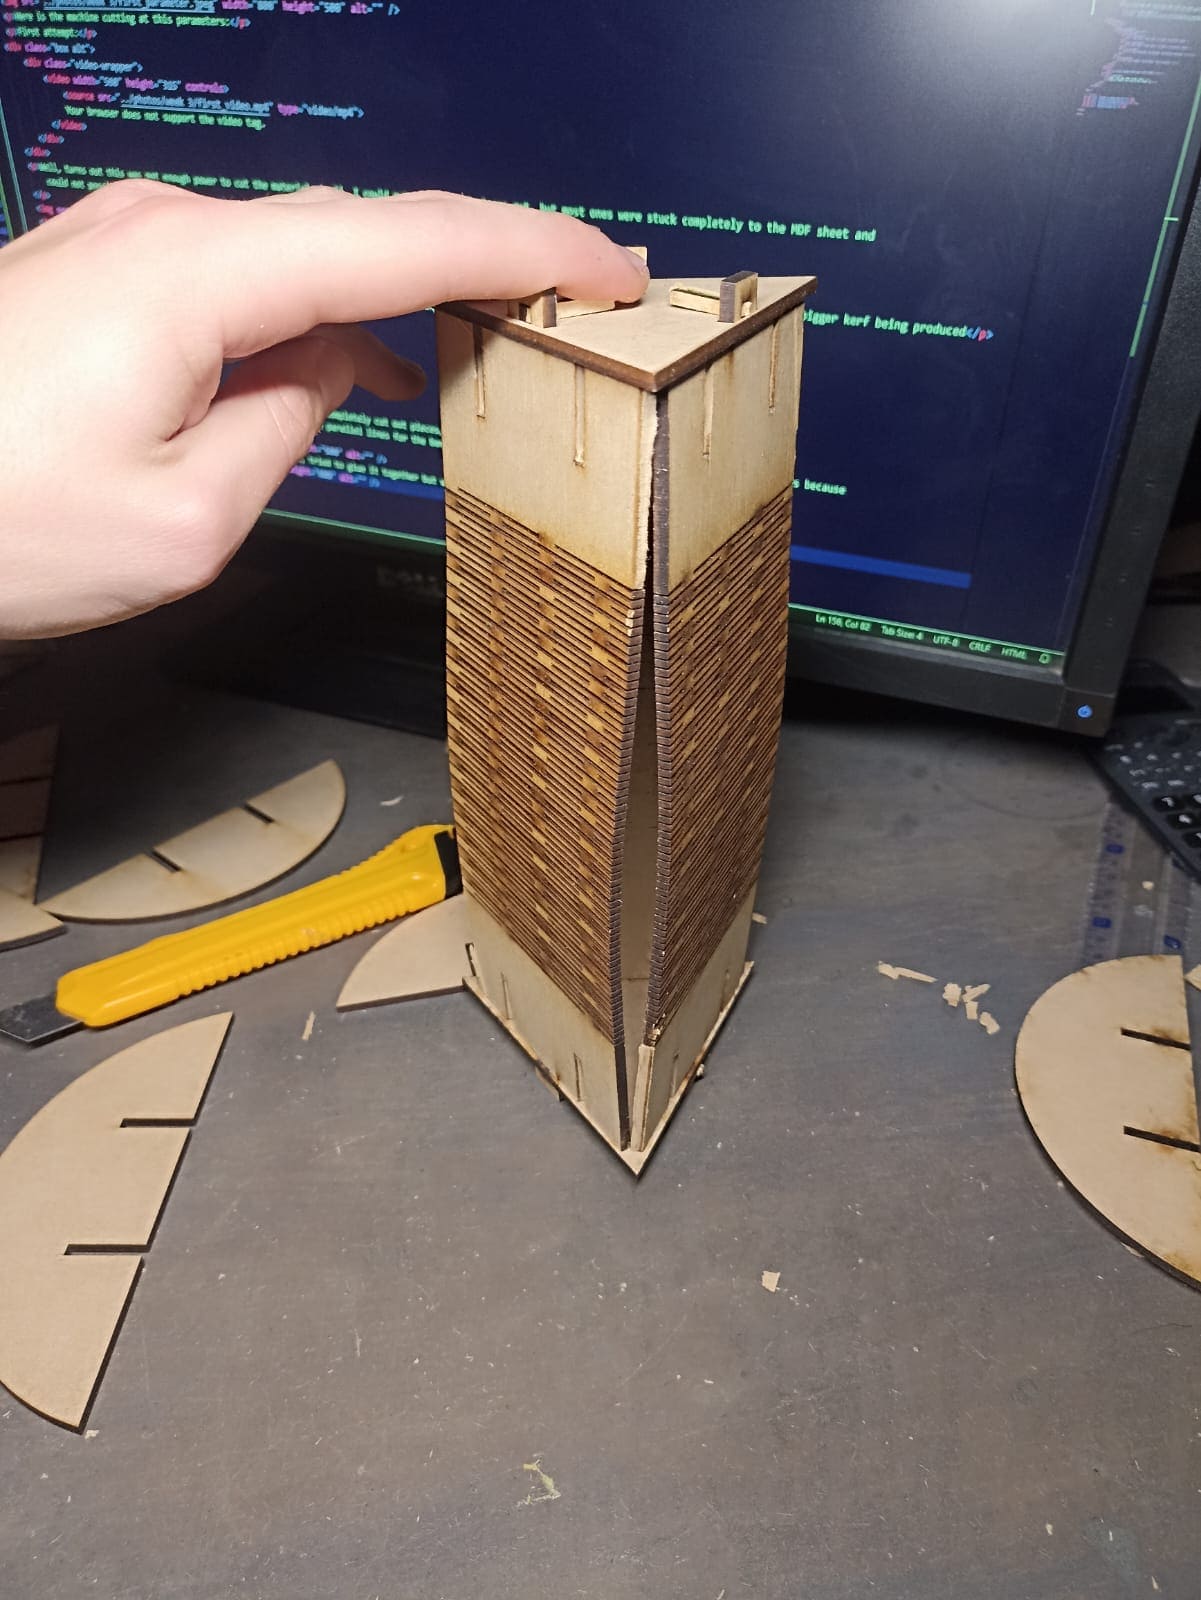
Well, turns out this was not enough power to cut the material at all, I could get a couple of pieces out, but most ones were stuck completely to the MDF sheet and could not possibly get them out :(
... Let´s try again, shall we? This time we tried a different parameter; we gave it more power and a higher speed to prevent the MDF from charing and a bigger kerf being produced
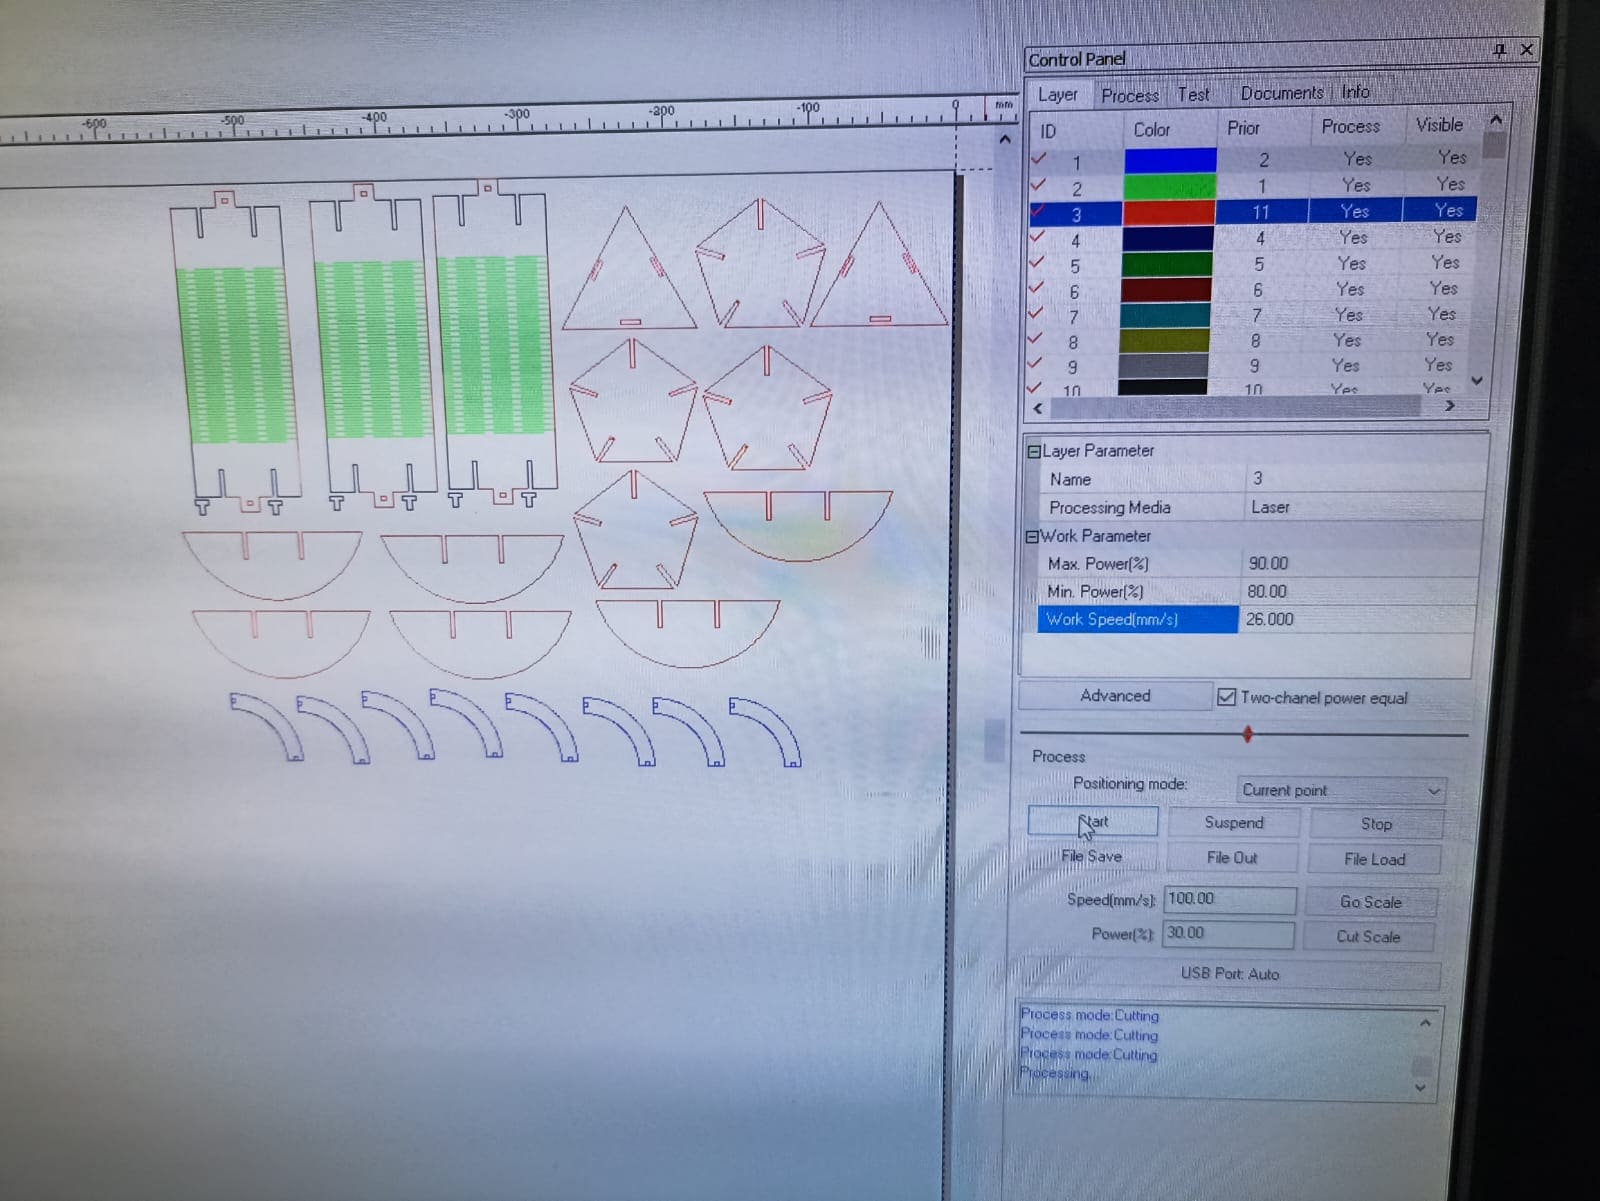
With 90% Max power, 80% Min power, and 26 mm/s speed, here we have the second cutting attempt:
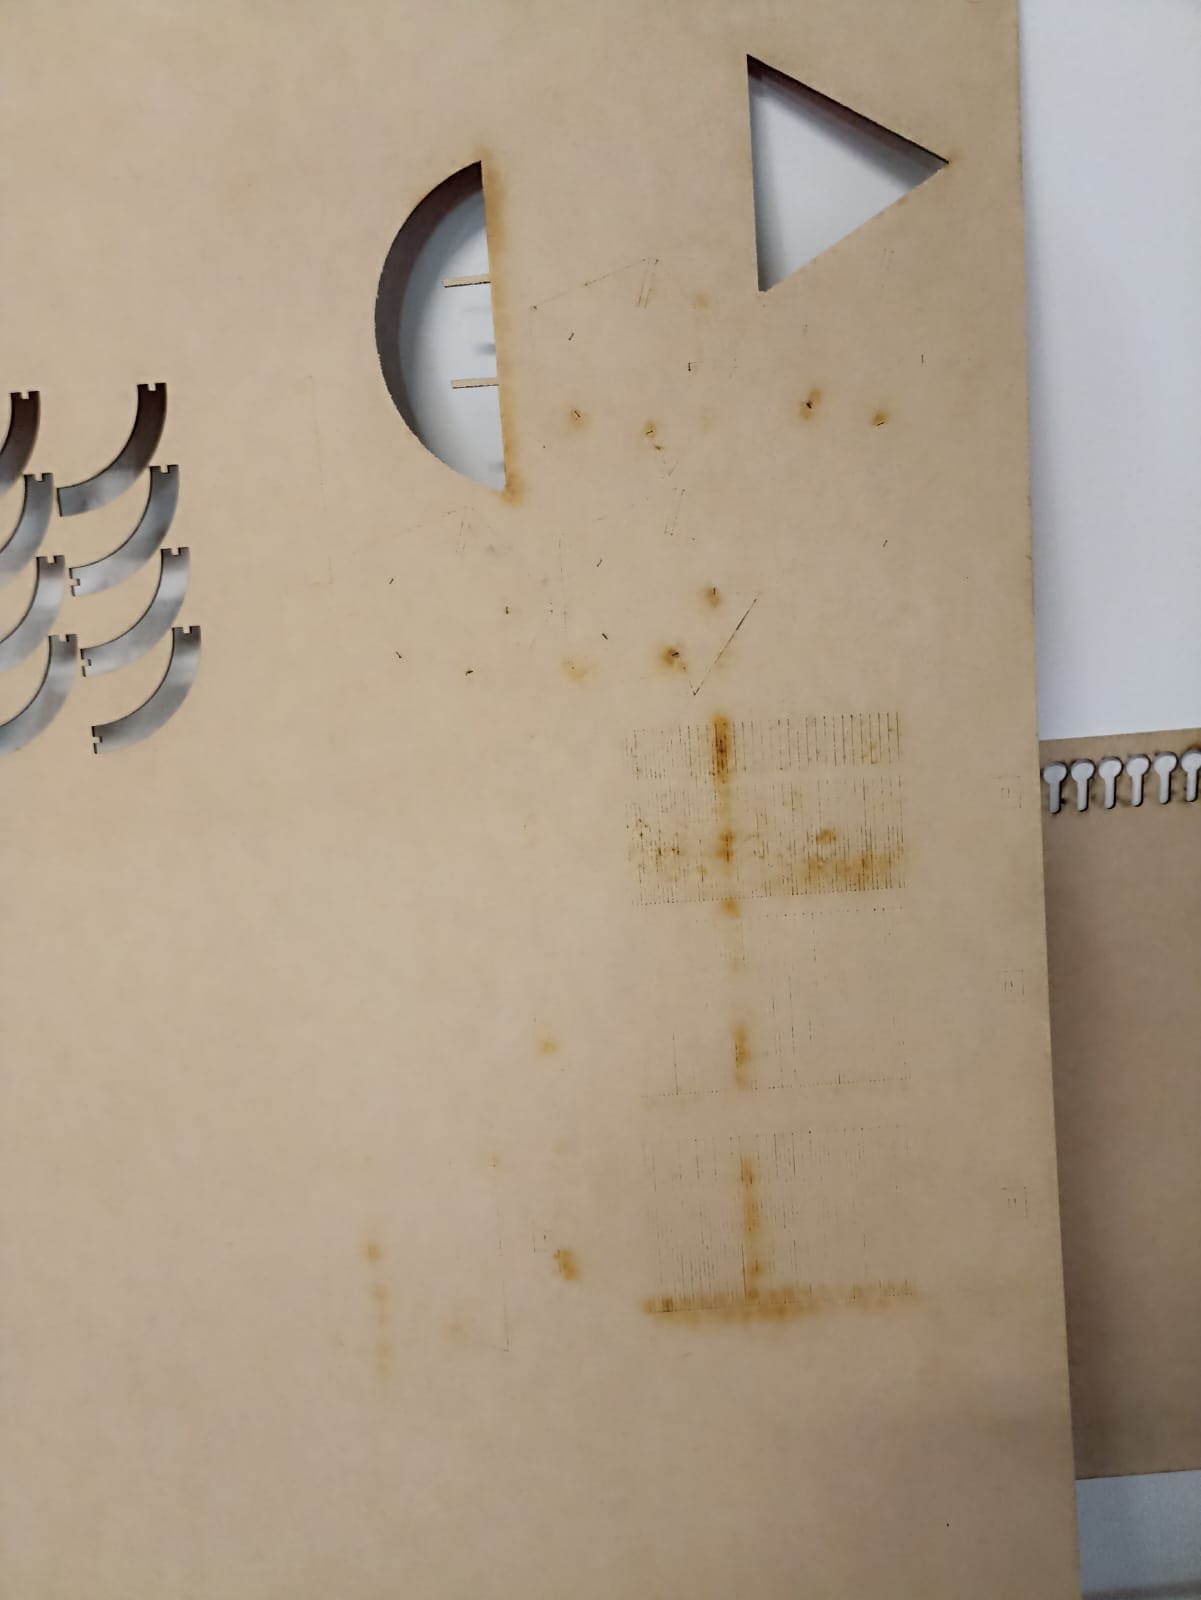
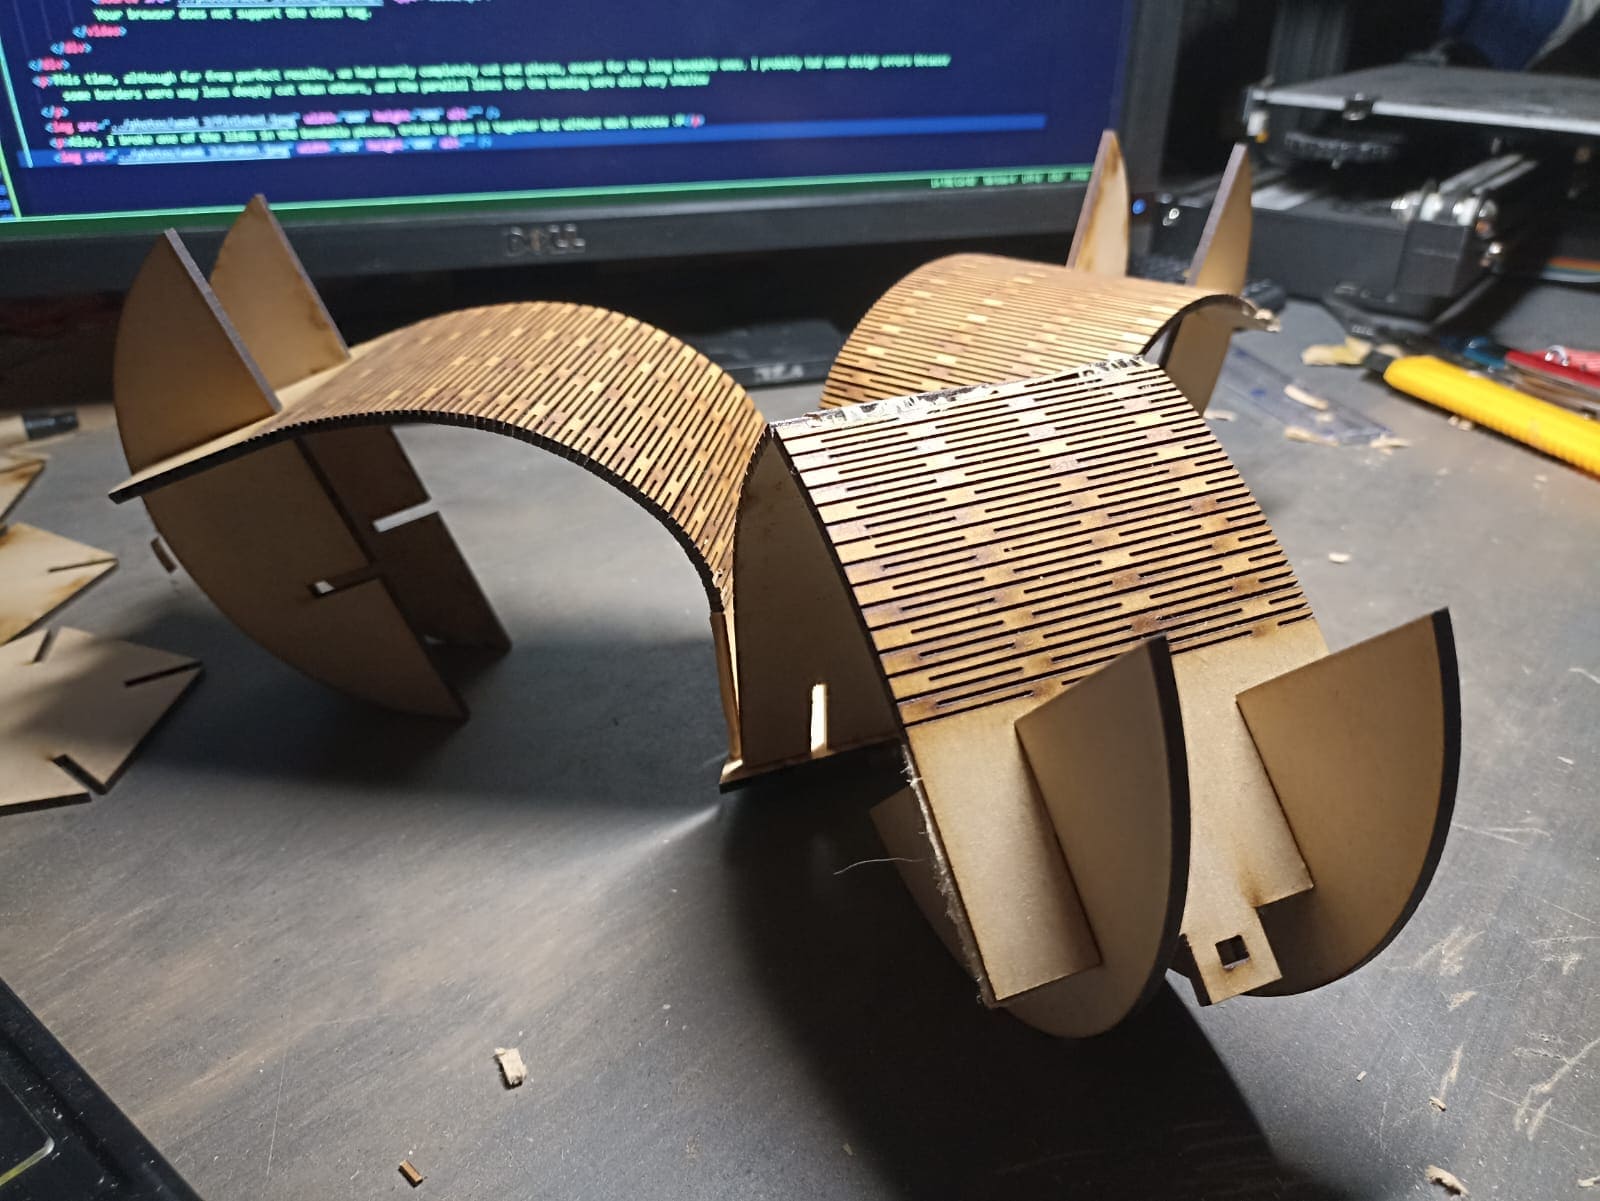
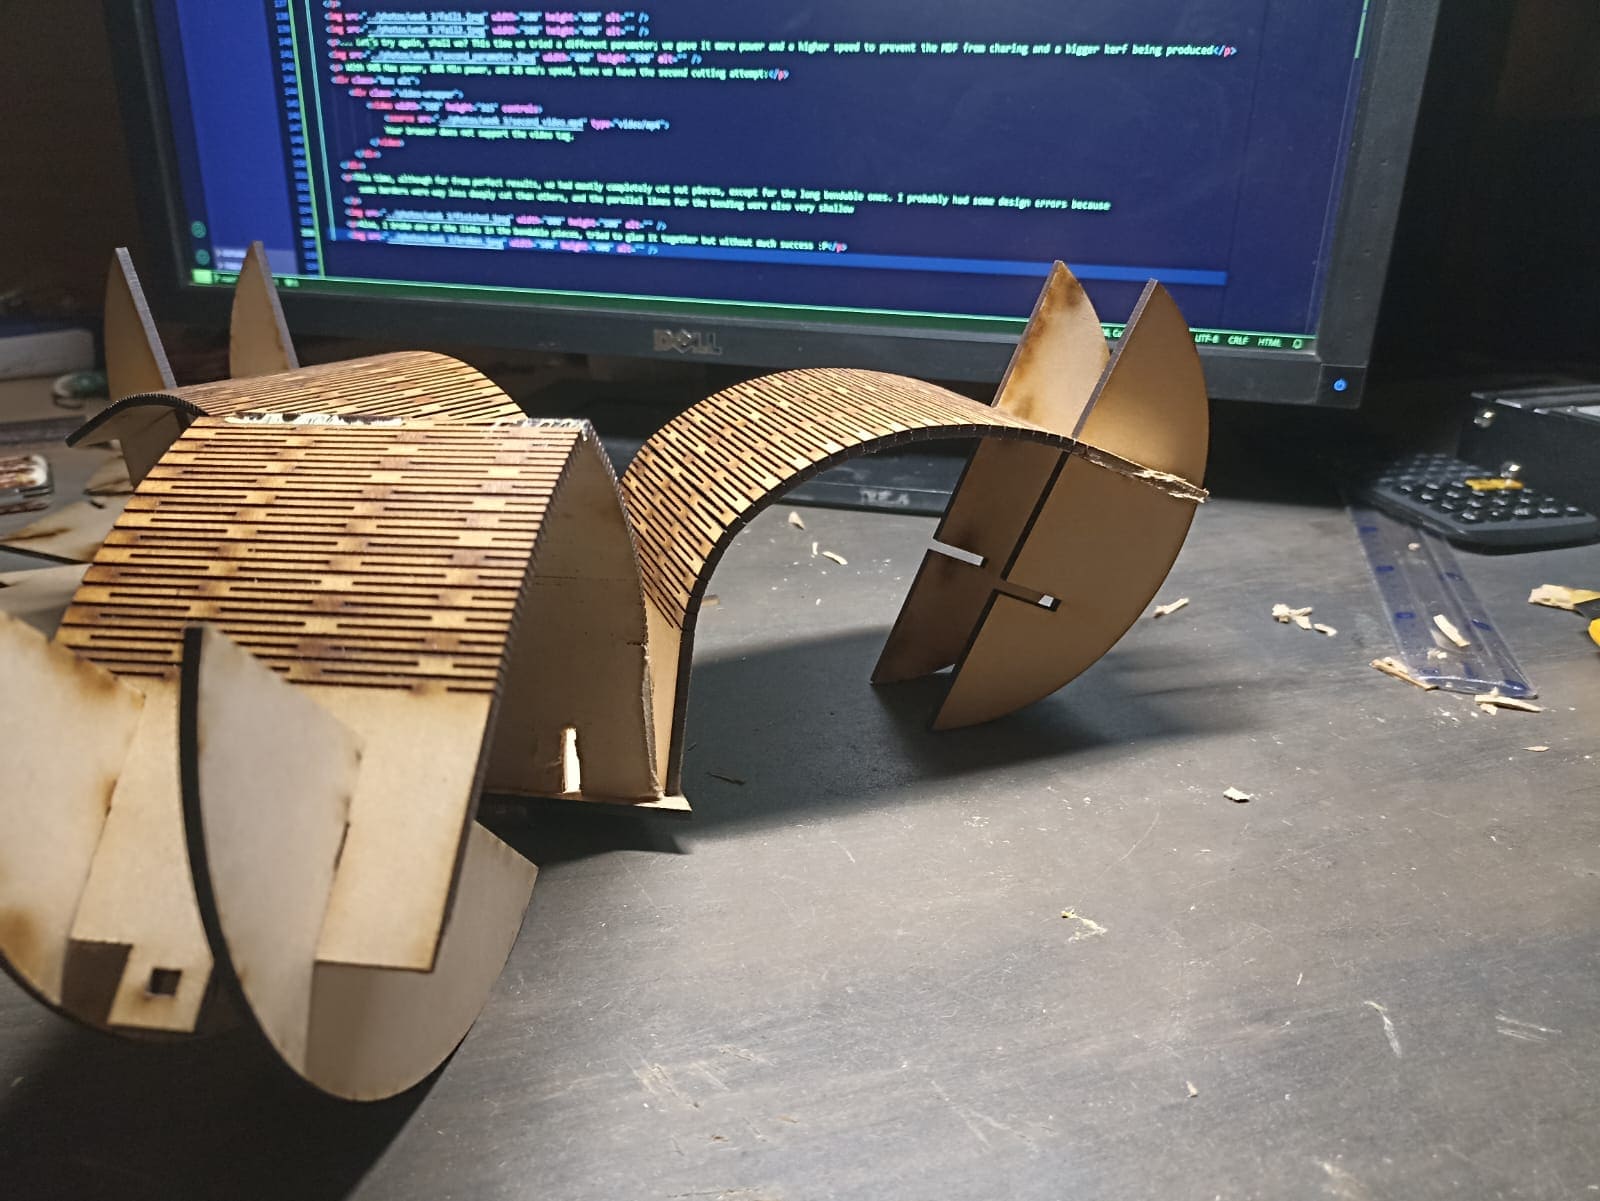
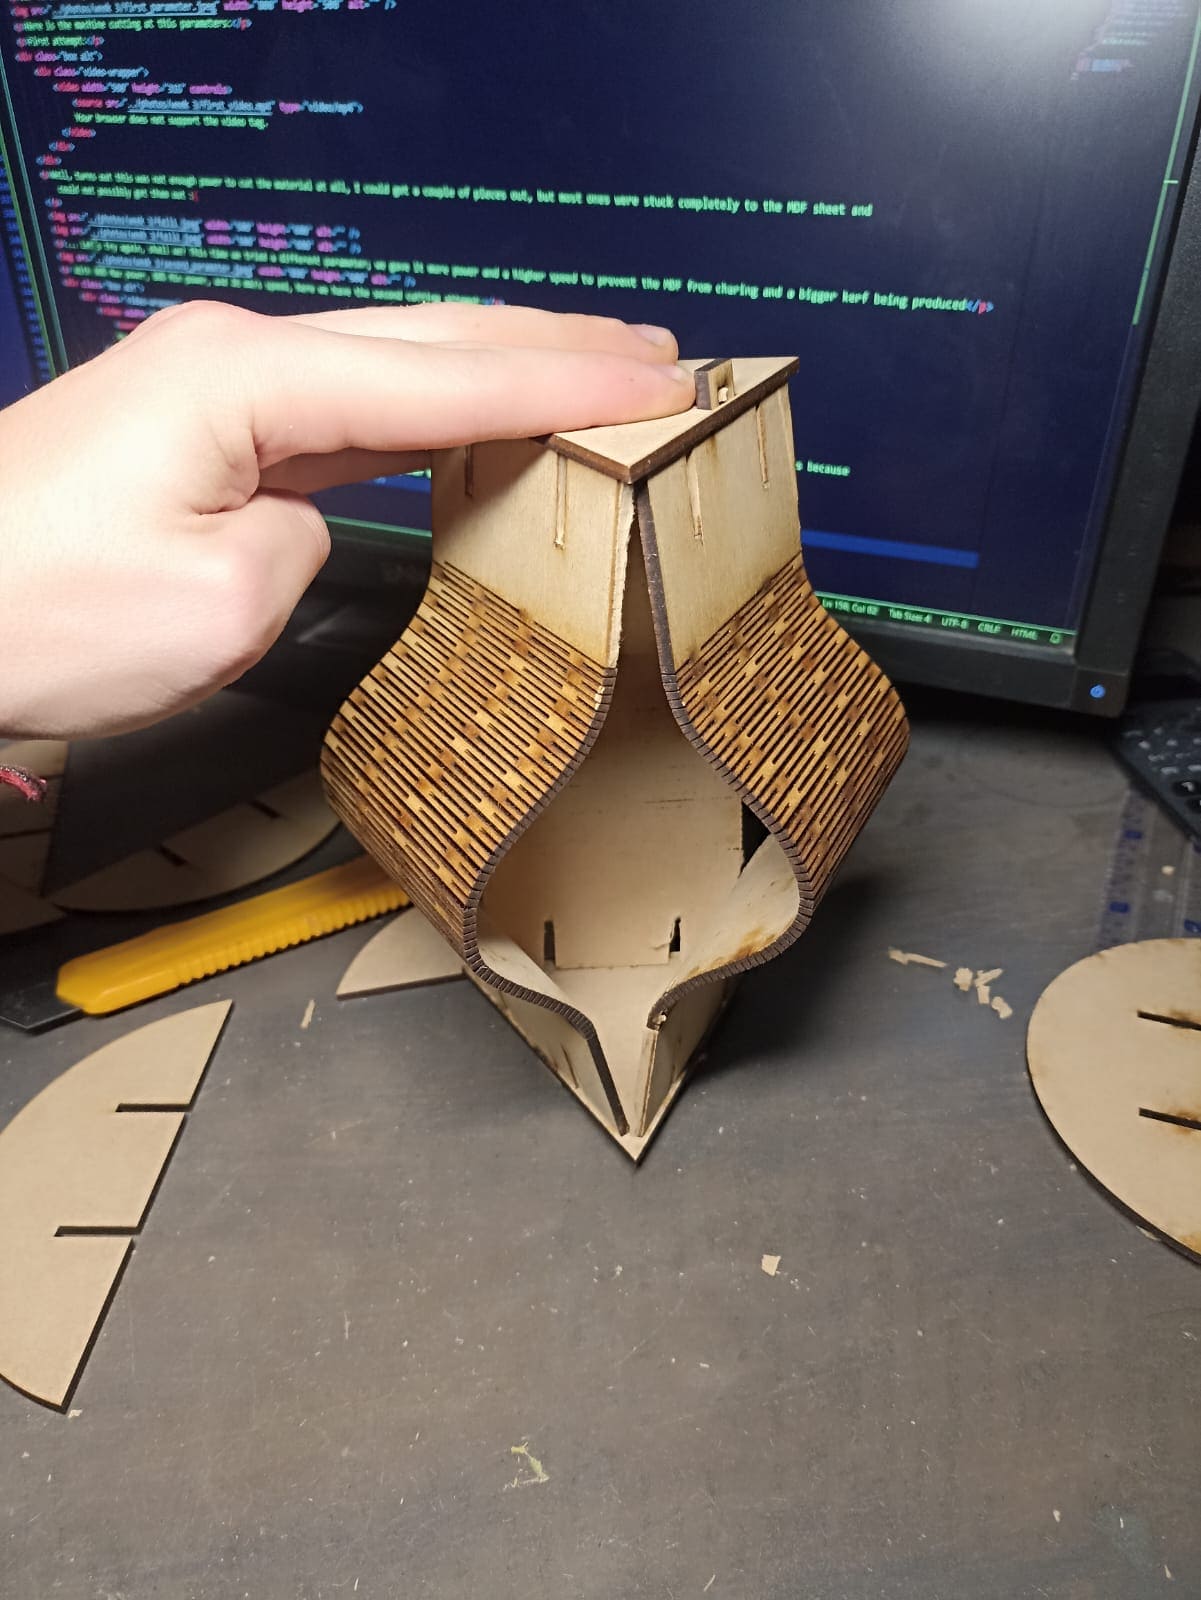
This time, although far from perfect results, we had mostly completely cut out pieces, except for the long bendable ones. I probably had some design errors because some borders were way less deeply cut than others, and the parallel lines for the bending were also very shallow
Also, I broke one of the links in the bendable pieces, tried to glue it together but without much success :P
So... Now that we have interlockable pieces, let´s build a couple of designs with them!
I could say I´m trying to represent something artsy with these designs, but being brutally honest, I just fit them the way I see the most intuitive
First assembly:
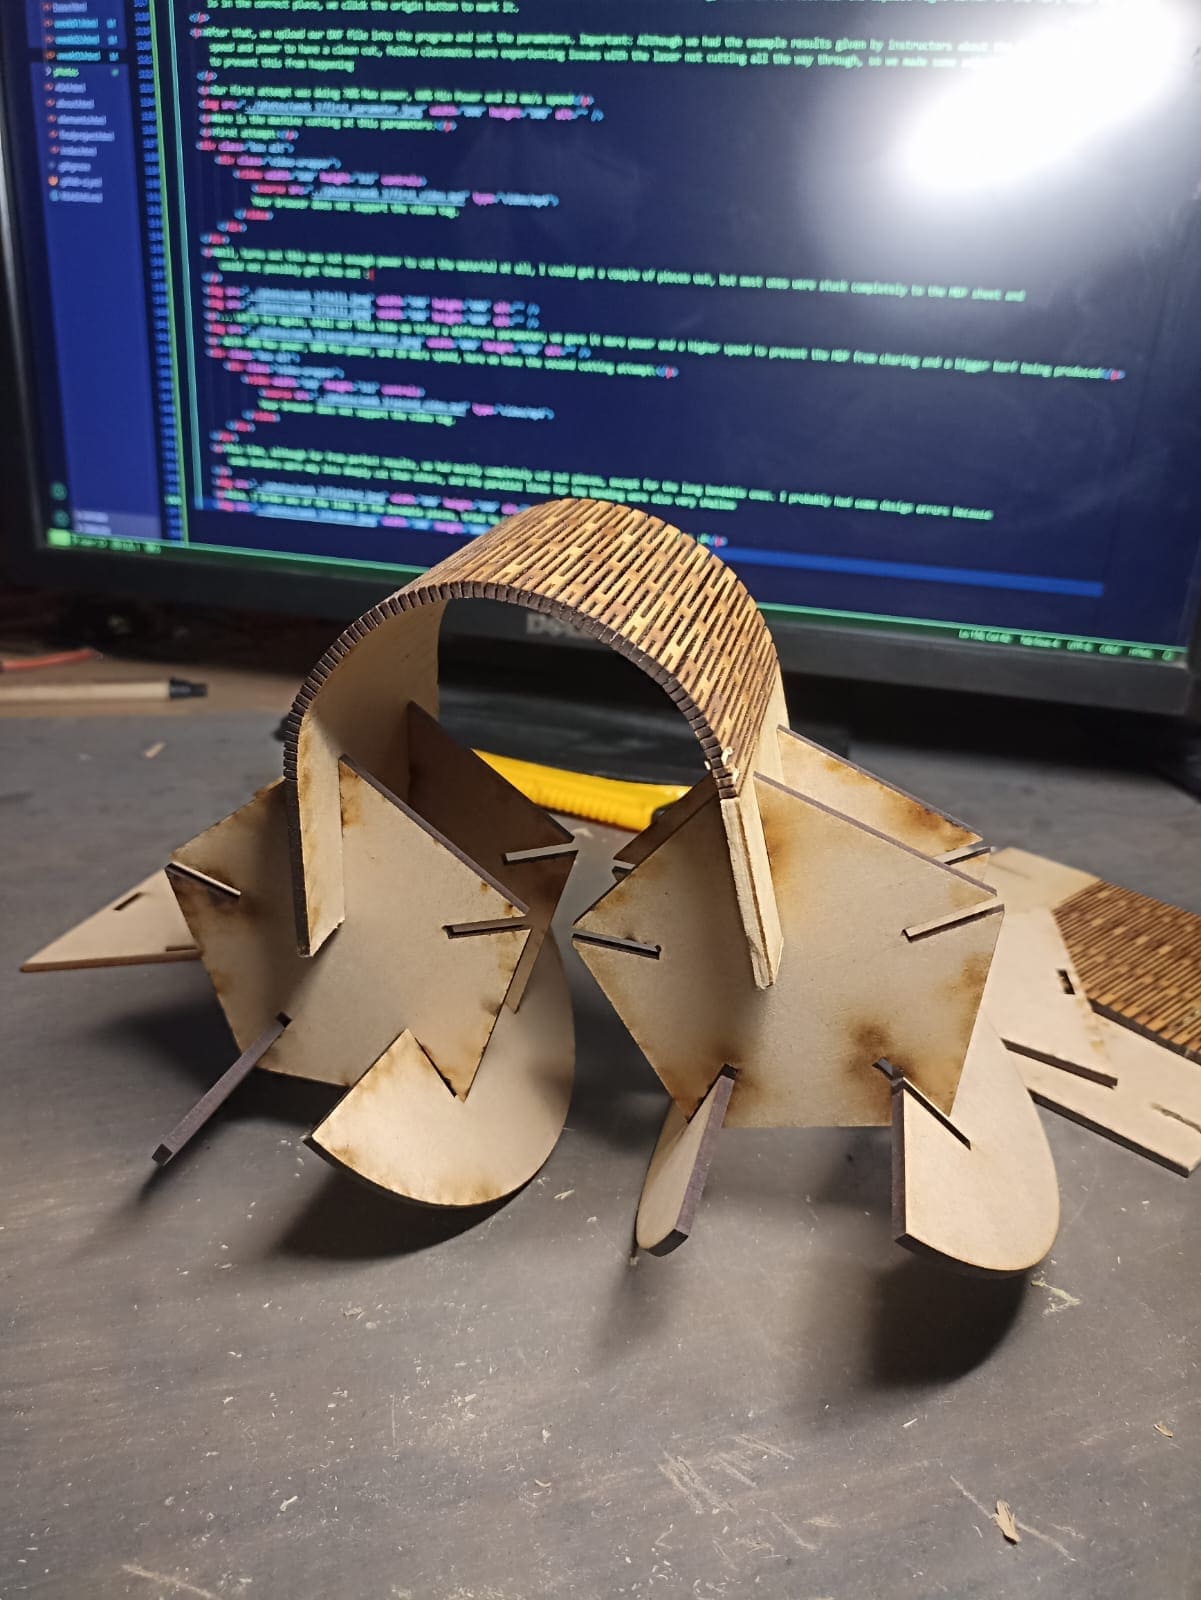
This one is very simple but also very fidgety and honestly quite fun:
This one is my personal favorite, and was my main idea behind the bendable pieces and wedge connections:
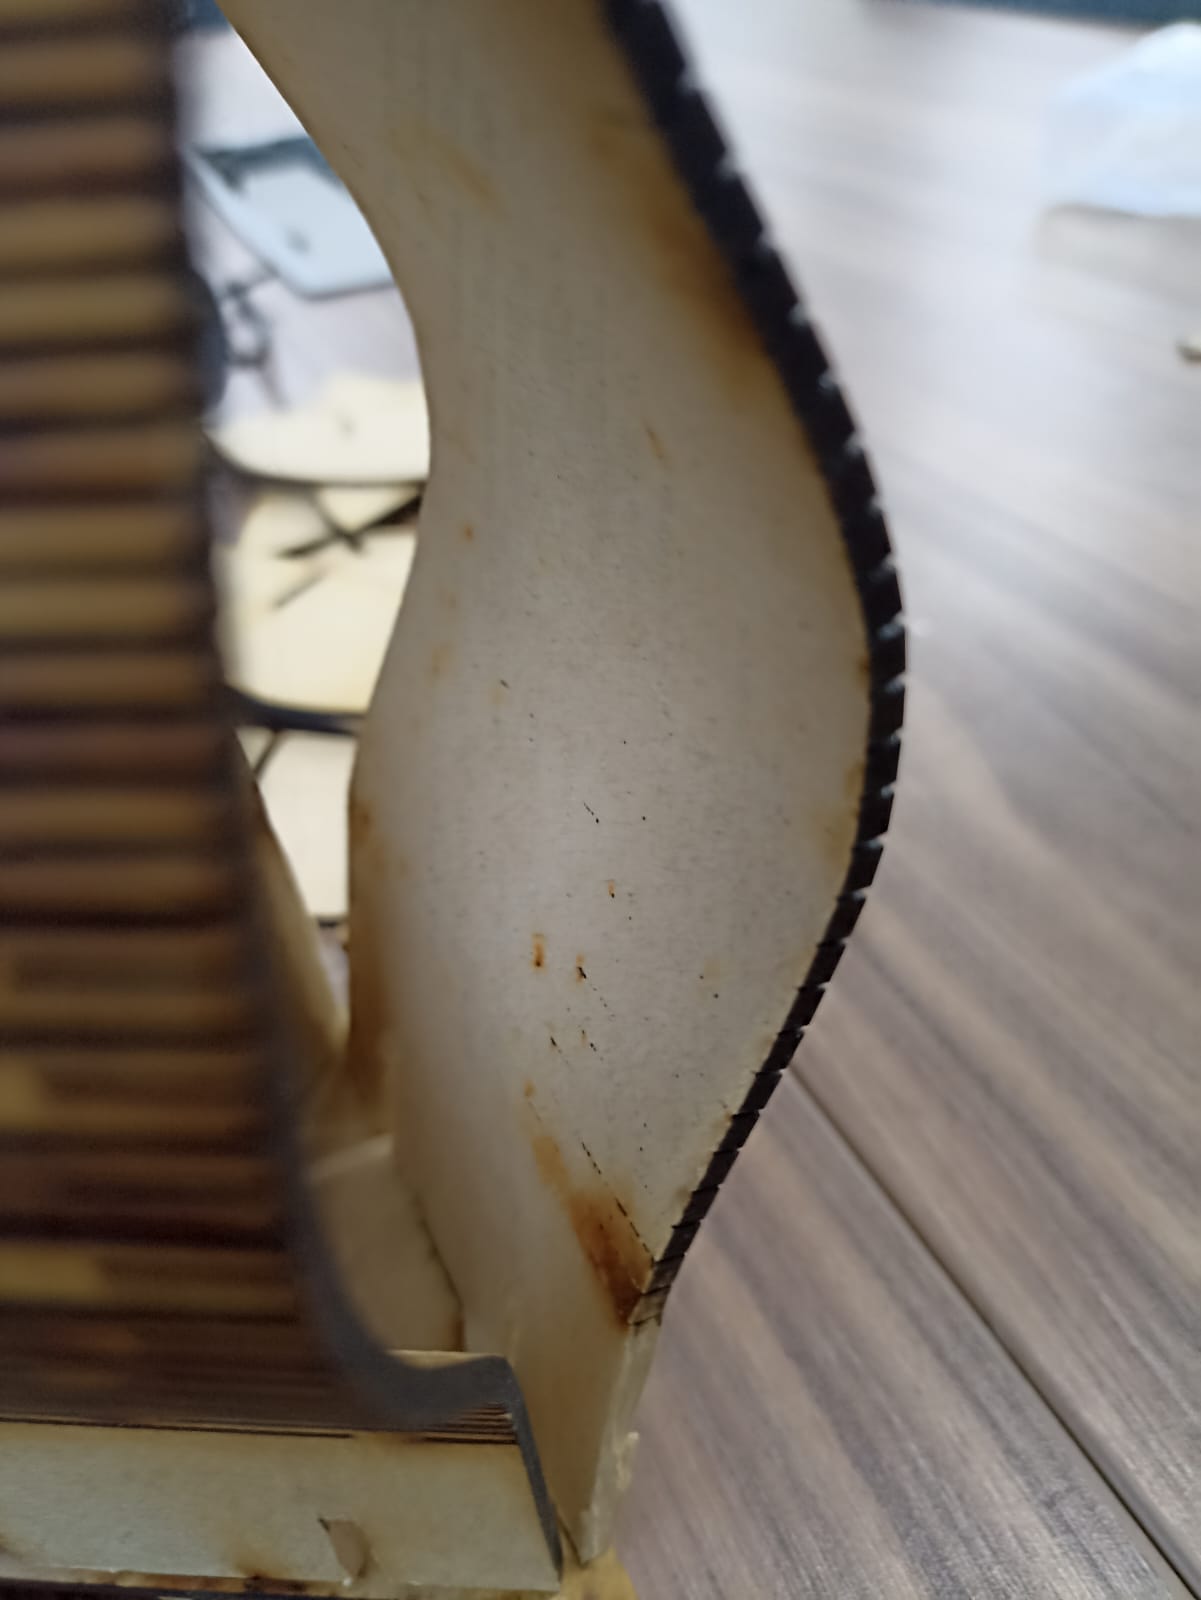
Also side note, due to the problems mentioned earlier, the transversal cuts did not go all the way through, however it was decently bendable to at least 180°+, I want to replicate this piece with full cuts to see how far it can really bend, but for a test, I really liked the results
And last one:
Let´s draw, just not with crayons...
For 2D drawing, we are using Inkscape, this software enables to draw in vector graphics, which is ideal for high detail drawings where we need to keep as high of a resolution, and distortion as low as possible. Also this is a free software and relatively intuitive to learn, so probably a good option in comparison to Adobe Ilustrator, at least for me since all my drawing and sketches are usually done in 3D softwares anyway. But there is no harm in trying I suppose.
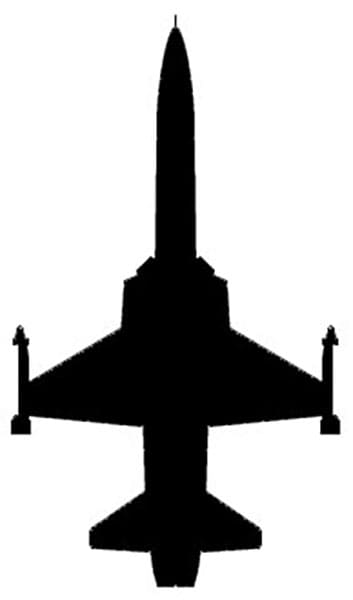
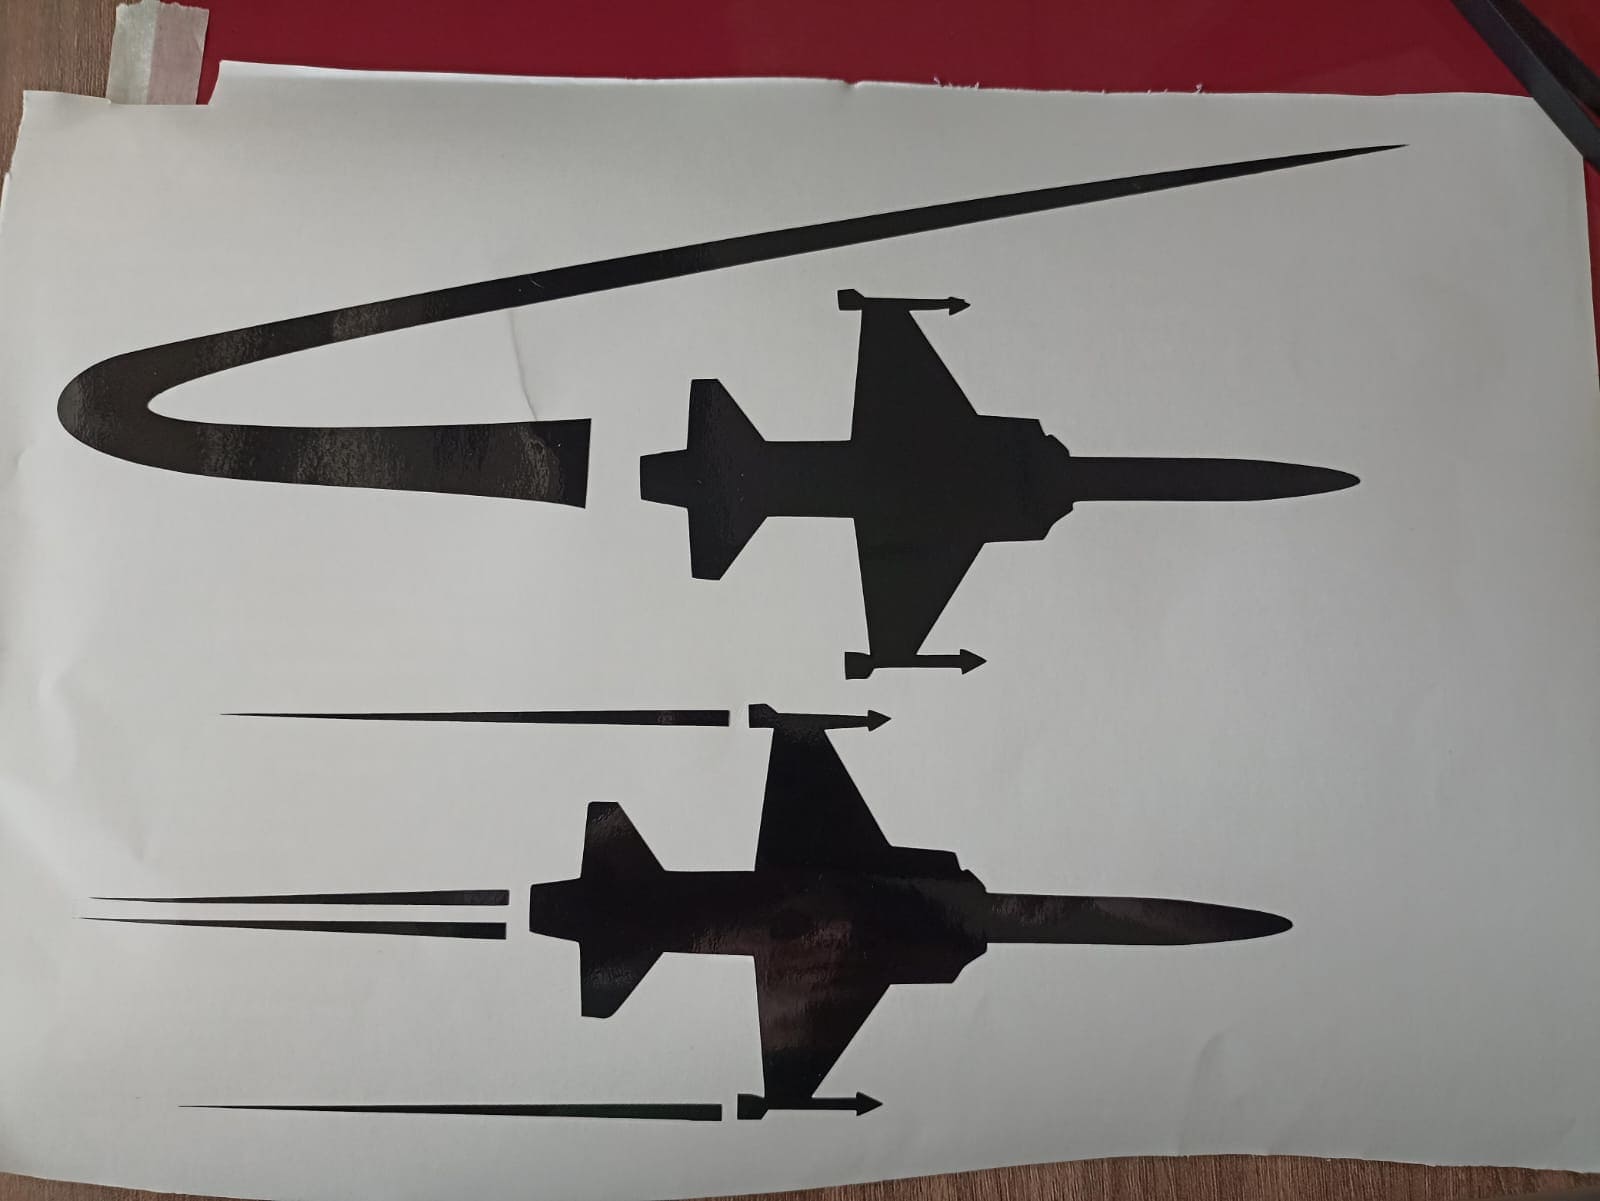
So for this practice, to accentuate my love for airplanes, I´m gonna draw a couple of F5 Tigers flying in formation. I´m using this silhouette as a base:
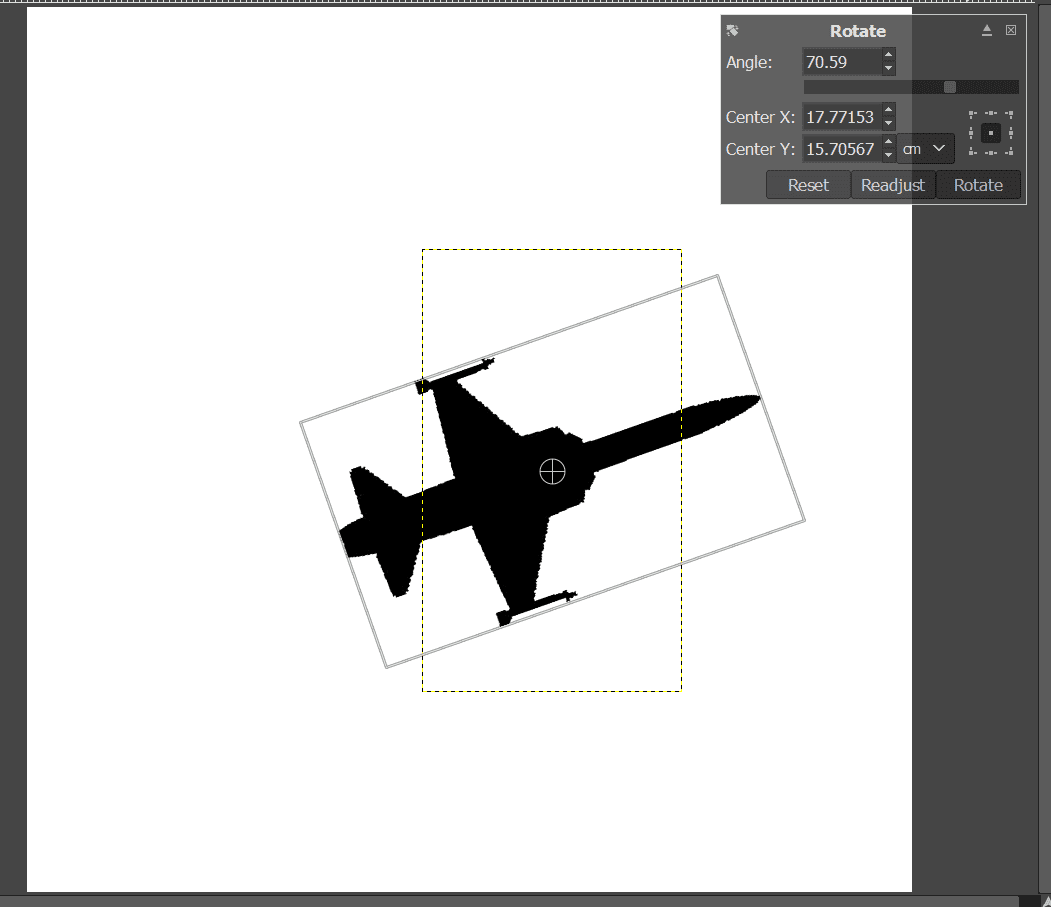
I´ll keep this quite simple aswell. The planes will be slightled rotated, and with the help of the pen tool, draw the vector lines emulating the flight path of this planes:

It is important that we save the file we want to cut as PNG, I thought it was DXF just like the laser cutter, just to find out that the software would not take my file, until a classmate pointed out my error.
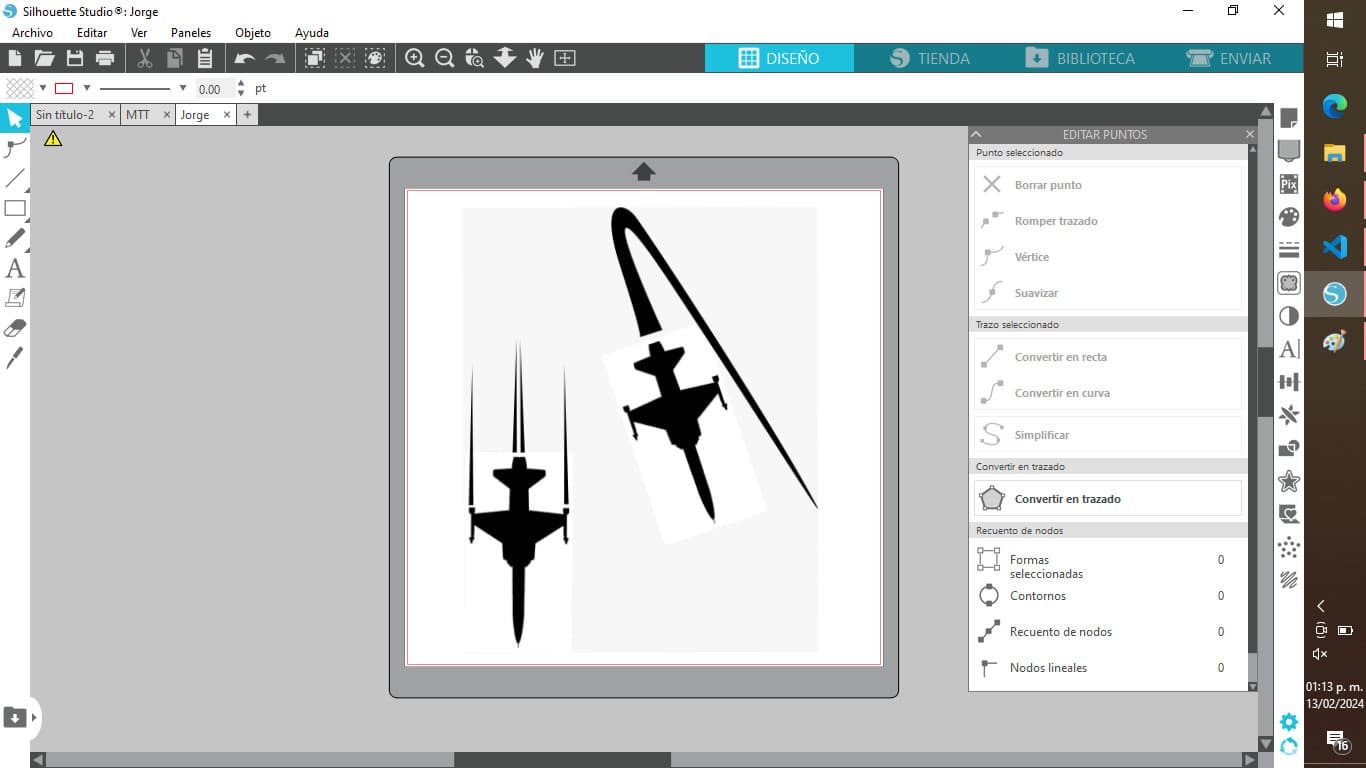
To use the laser cutter, I will be using "Silhouette Studio", we add the PNG file and it automatically selects the borders for the cut.
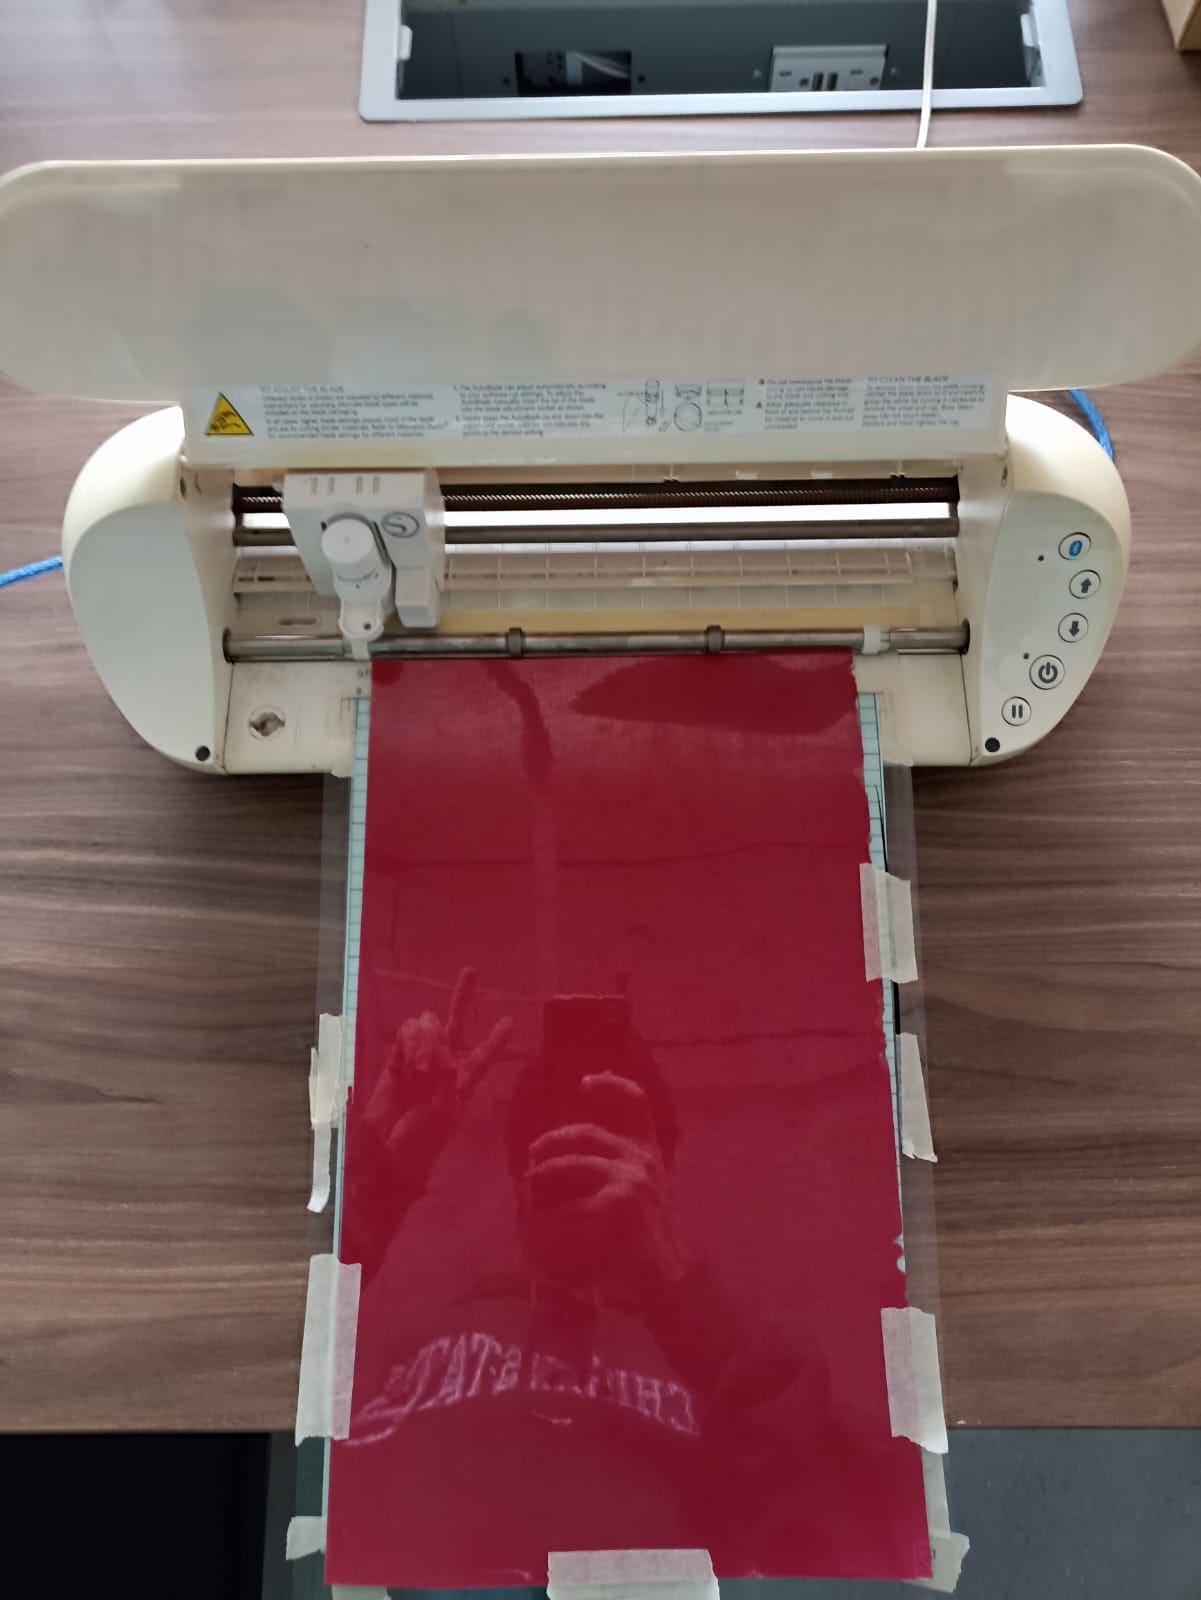
Vinyl Cutter
Now, for the actual cutter, we are using a Silhouette Portrait 2, we need to cut a piece of the vinyl the size of the board that the machine will actually cut, and paste it with masking tape to the borders
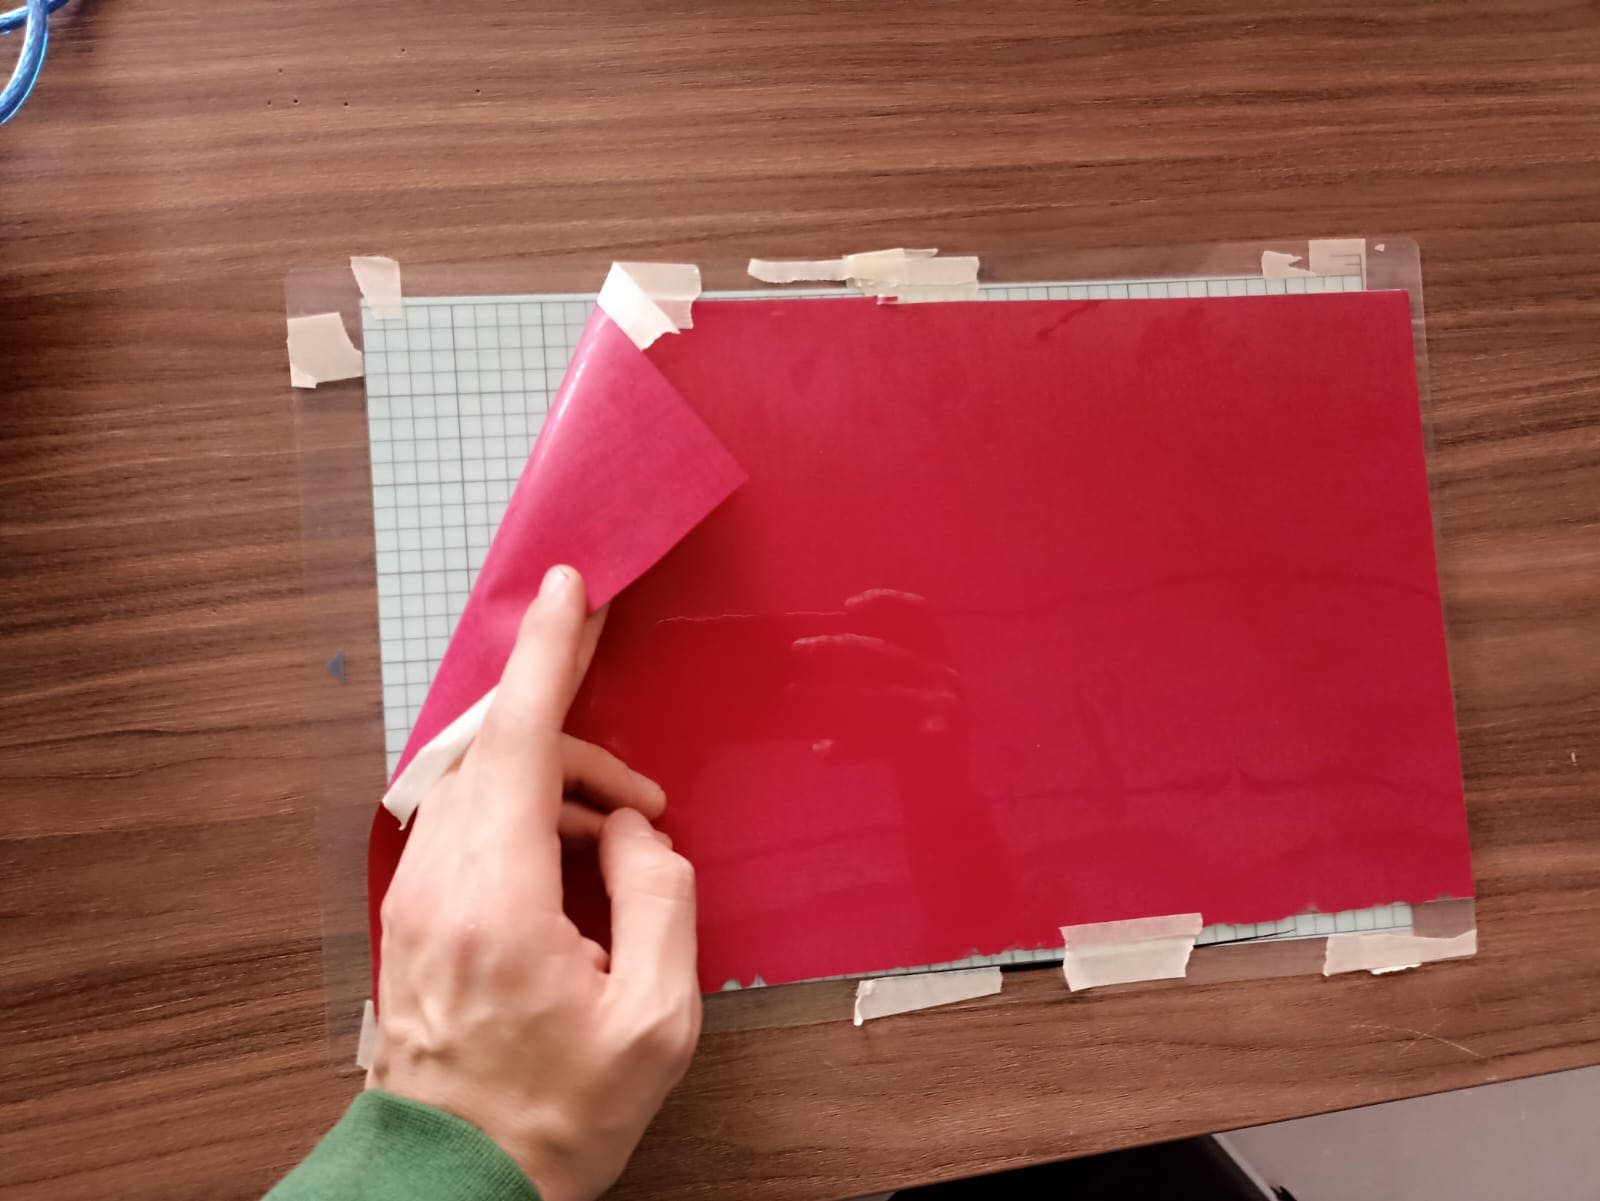
We also feed it to the machine and secure it with the rollers
Video of the vinyl cutter
After we (satisfyingly) peel off the outter layer of the vinyl pieces, we have the finished product:
This is how it looks at the back of my car :)

It is basically like putting on a sticker, make sure to clean whatever surface you´re applying your vinyl. Now, I did it free-handedly, Taking each individual piece and sticking it where I would see fit. I was satisfied with the finish, but if you want your vinyl to have an exact placement, without having to manually add each piece, you can use transfer tape. This is a very simple process of sticking your whole cut into a special sticky transparent paper, and then placing it wherever you want your finish product. Again, ideal for very detailed and precise cuts where doing it by hand would distort or ruin the pieces
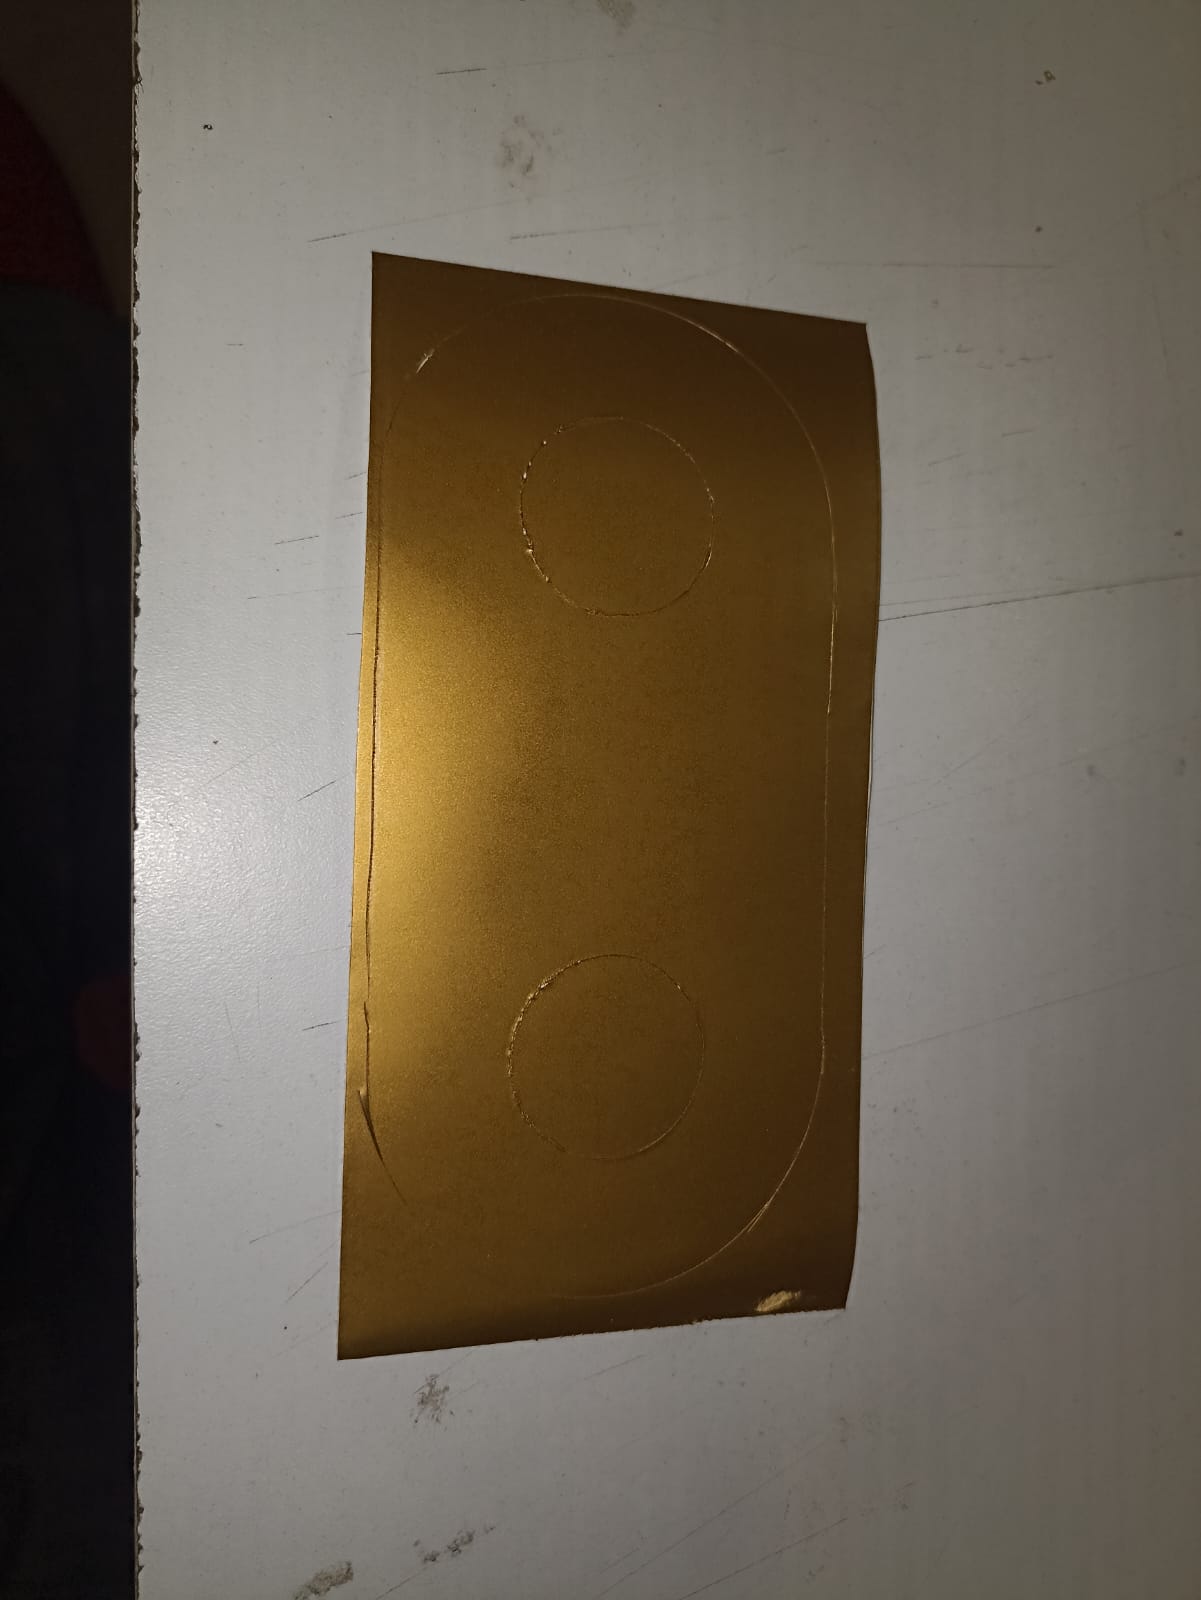
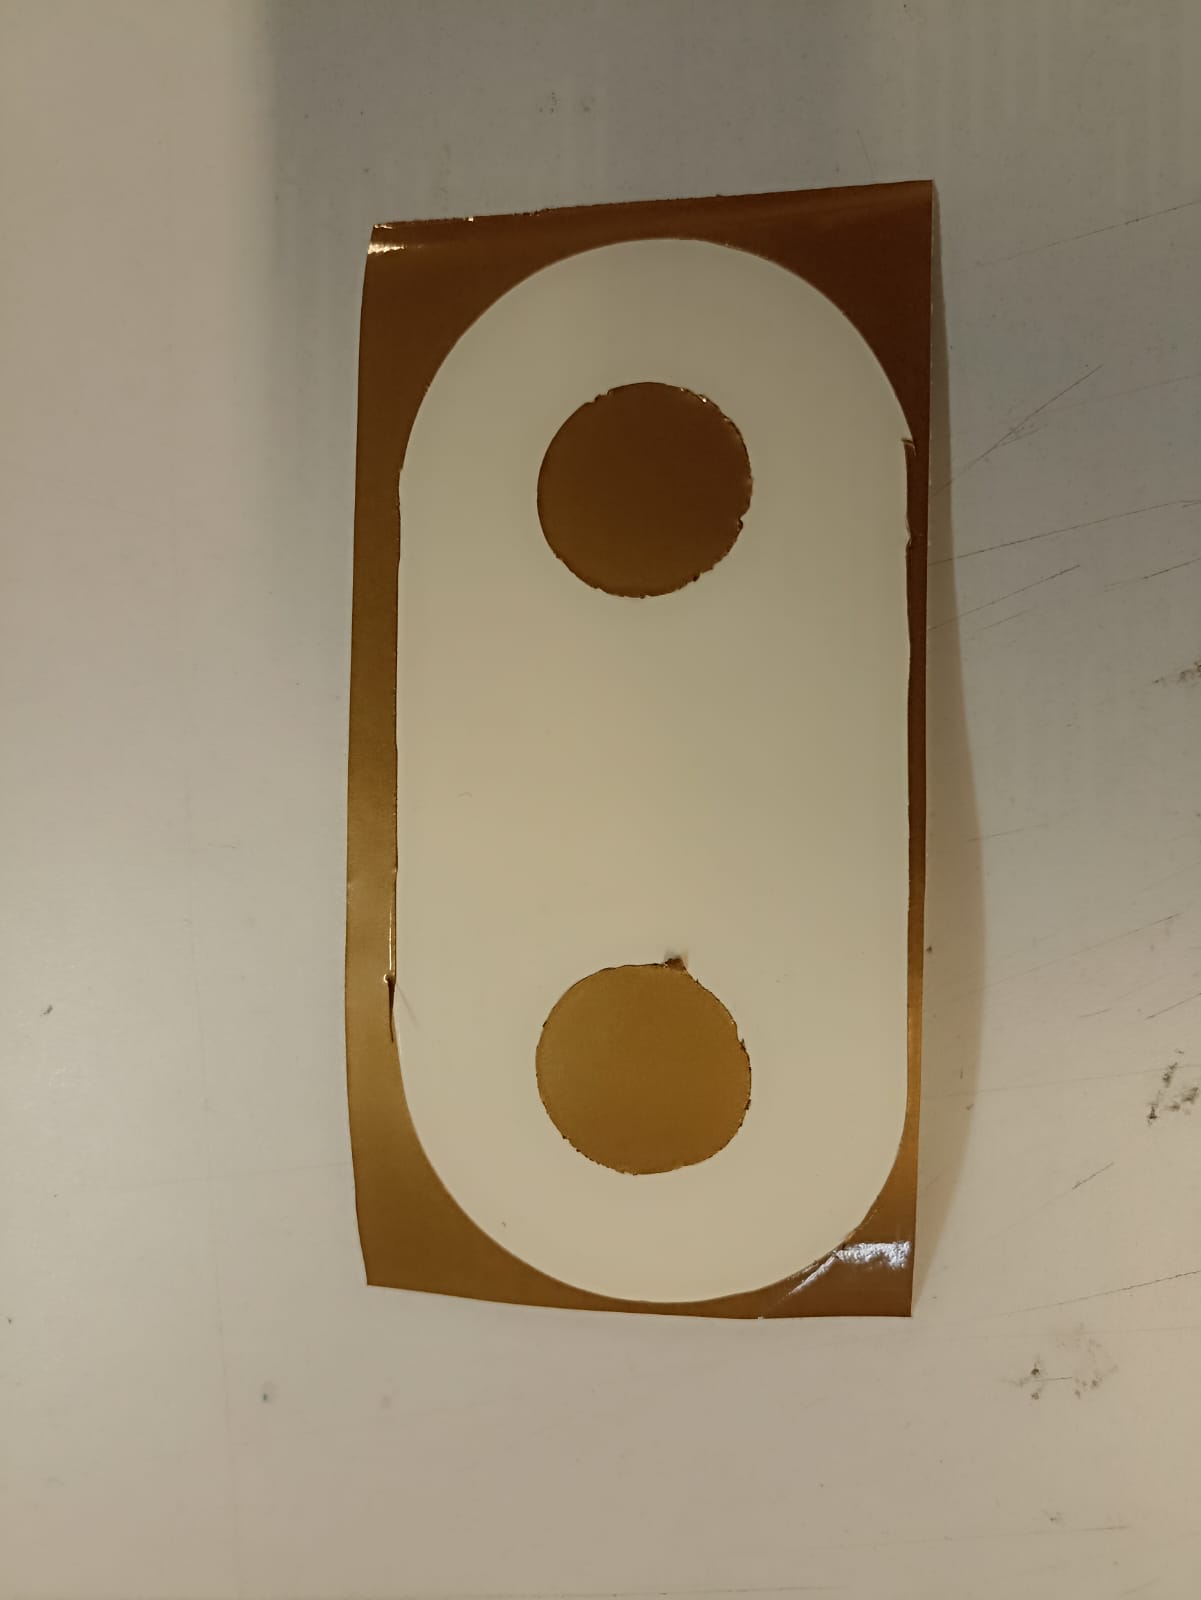
Here I took an extra piece of vinyl cut we had on the Lab, to show the process of the process transfer by hand, as you will see, it´s a very simple, straighforward process. I took the vinyl cut and placed it on a box:
When sticking vinyl pieces, whetever it´s free hand or with transfer tape, make sure to avoid trapping bubbles inside the piece by adding it starting from one end, and pressing it down until the other end, just like I did on the video. This will reduce or hopefully eliminate most bubbles that could get inside the vinyl, giving it a rough finish.
Here´s the remanining piece of the vinyl:
Conclusions
Doing bendable MDF with laser cutter was something I wanted to try for a long time but never game myself the chance. Since we had some problems with the laser cutter itself (probably being uncalibrated), we had to test with different parameters than the ones adviced, leaving us with mixed results. But having the MDF slightly bend, opens a whole lot of possibilites for building with this material. But I think, with the parameters all set, doing even more flexible pieces will be a very nice tool to keep in mind. Also vinyl cutting was easier and less time consuming than expected, and I found it as a very quick and professional way to decorate your work.