1. Project management
The bread and butter: VisualStudio Code and GitLab
Here I´ll be describing the steps I took to create my preliminar base of the website to showcase my FabAcademy work. First, we need to install both Visual Studio Code and Git on our computers. Visual Studio Code is a code editor where we will write and modify all the code that will compose the website. We can independently edit the website and its subpages, give it format, and save it for later upload to the cloud, where we can display it on the FabAcademy page. We will download it directly from the website:
VisualStudio Code
I will be usin this software since I find very appealing what it has to offer against the complexity of it. It is very customizable in terms of the themes and libraries, while also giving a nice understandable structure of your files. It also autosaves whenever I modify any part so it automatically shows any change in the local HTML assigment page, making it very efficient to edit my work.
Version Control
When working with code and constantly chaning files, we want to ensure that whatever changes we do in our work, do not go missing on accident or get deleted. That´s why tools like version control exist. These are softwares that allow users to save changes and most importantly, keep a time base track of the modifications made allowing for turn arounds in case a mistake or an error ocurrs in your saved files.
Some examples of this softwares include SVN, GNU Bazaar, Mercurial, and the one we will be using; GitLab.
GitLab is a free program that we will use as a private repository to upload our finished work from our local disk so it can be opened anywhere in case we need it, as it gets stored in the cloud. Here I'll show you how to upload your saved work into the GitLab repository.
To install GitLab you can go to this link: GitLab Download. Select your operating system, windows in my case, and then select the installer depending if your computer is 32 or 64 bit. The installer should download into your computer, then accept the customizable preferences to your liking.

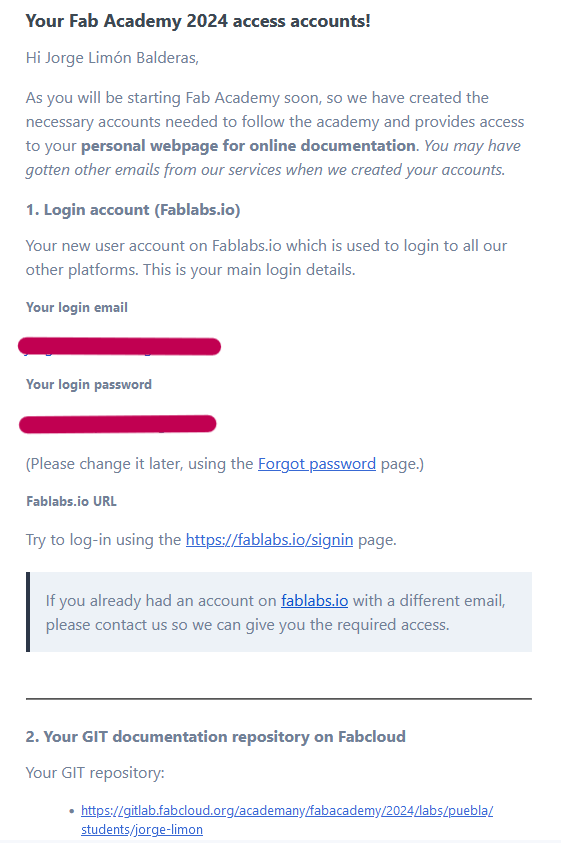
Secondly, we received an email from FabAcademy to grant us a GitLab account to upload our work to the repository alongside the rest of the students.
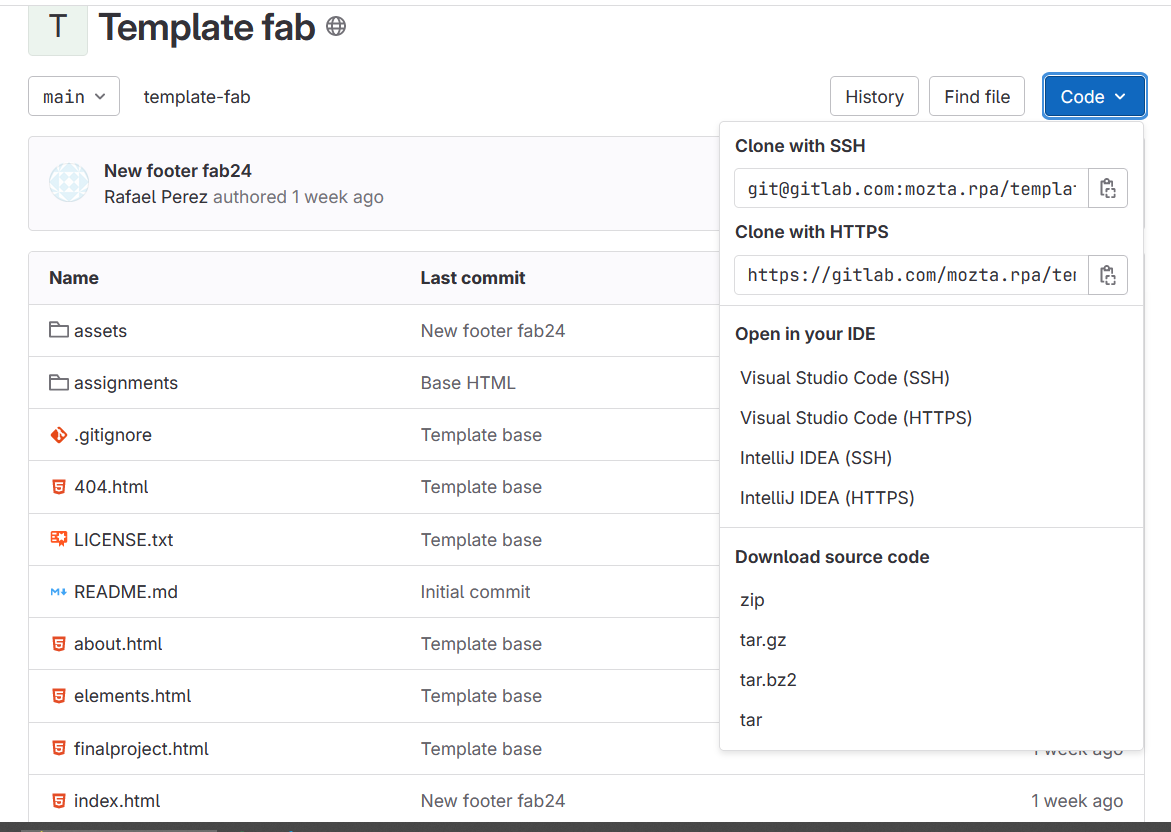
From there we download the folder as "Visual Studio Code (HTTPS)" to use as a git repository where we will add our work to later push to the server using the command "git init" inside the Git CMD app to make it a Git repository.

Now that we have that folder, we need to convert it to a Git repository. For that, we open the Git CMD app and type "cd desktop". This will direct us to all available folders on our desktop (my case is desktop since my folder is saved here, in case yours is not, type the appropriate space where it's saved). After that, we type "cd jorge-limon" (your folder's name). This will put us inside the Git repository folder where our webpage files will be saved. Lastly, type the "git init" command to make the folder an actual Git repository.

The Template Upgrade:
The format that I'm using for my FabAcademy webpage is a template given by one of our professors for us to use as a base and edit as we see fit. We directly downloaded the template from a GitLab link he sent us, where I downloaded it the same way as the previous one.
From there, we substitute the template files given by FabAcademy with the ones in the template given by our professor. This is how originally the templates looks like:
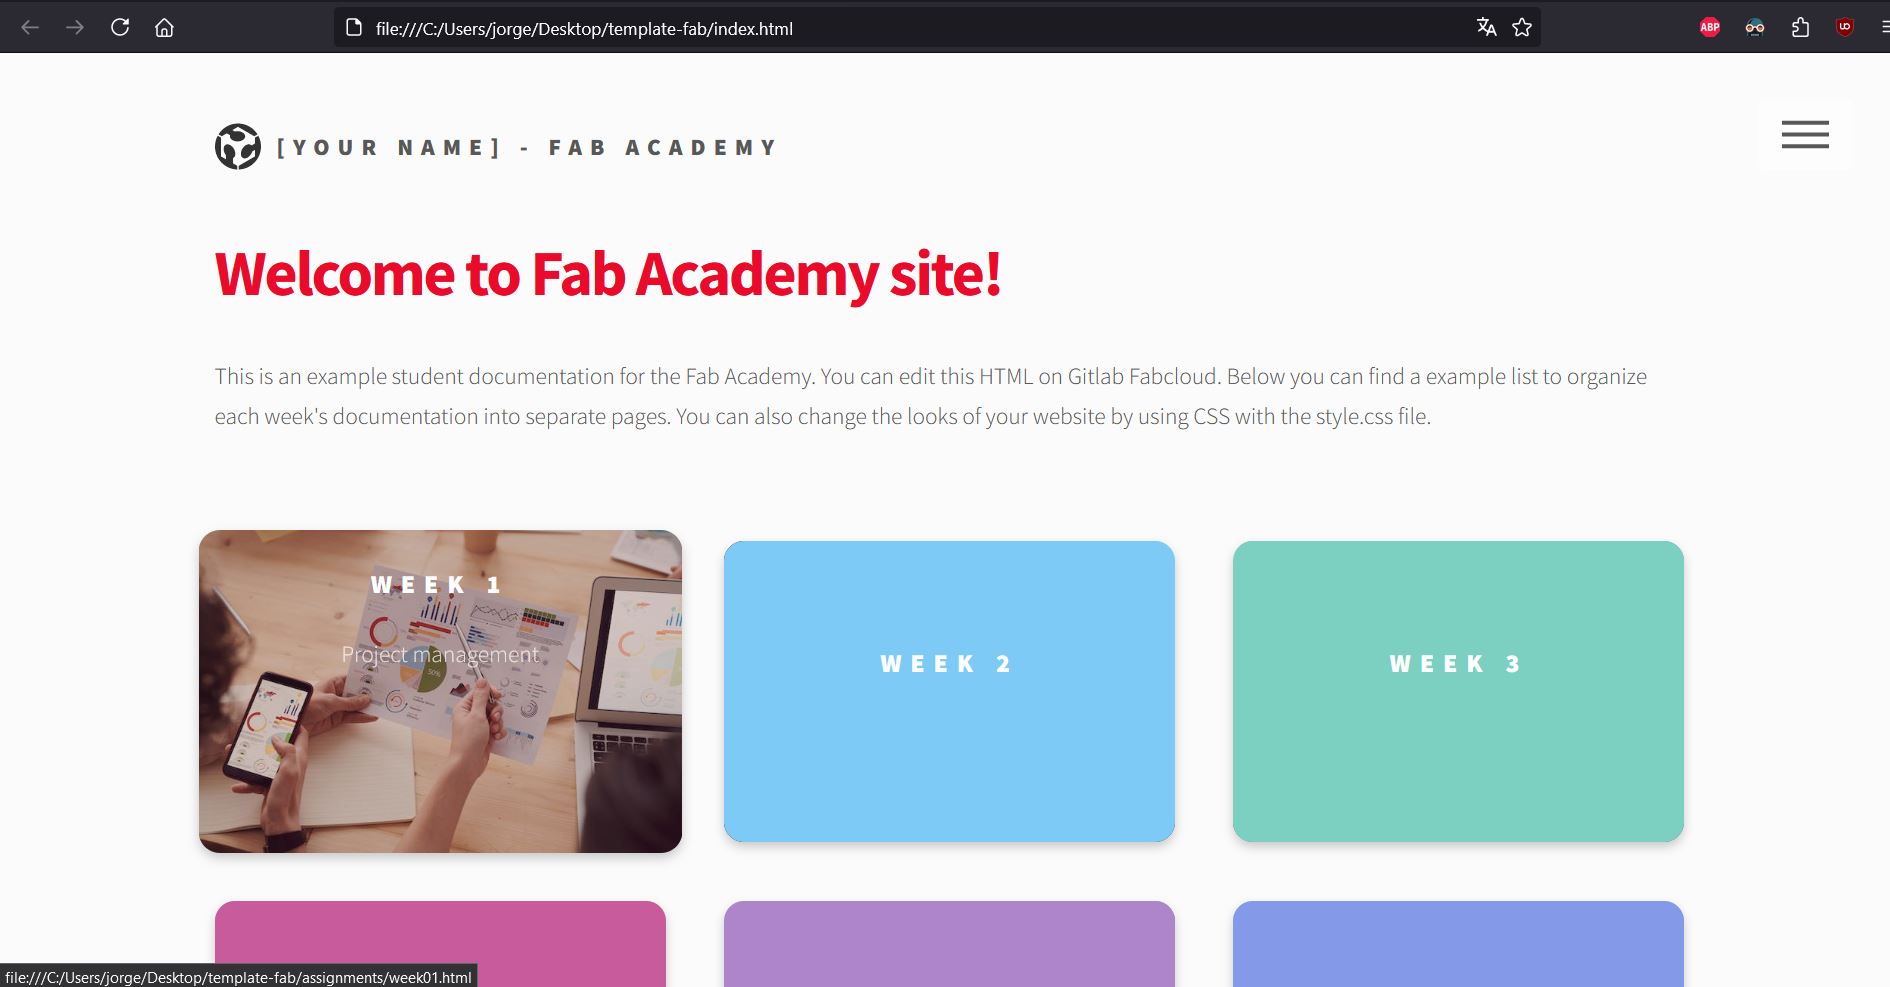
And this is how it looks like after some modifications:

Changing the whole theme of the website has been a multi step process in which I modified a multitude of settings and features to end up with the current page design I have. Although I will inevitably further modify more settings, this are in my opinion the biggest changes and the ones I recommend to modify if you want to slightly tweak your website and make it totally to your liking!
Firstly we have the font. I choose mine from Google Fonts.
Once you´re there, choose any font of your liking, I went with "Chakra Petch". Once you made your mind (trust me, it will take a while...) click on Get Font, then Get embed code. this should give you the embed code for the your HTML page. Copy and paste that code onto the top of your website´s code.
Secondly, changing the background and text color really upgrades the look of your page. This is done on the "main.css" file. This is where we modiify all of our design and features visually. Change the body background color, and then the body color.

The third most notorious thing on my website is the sidebar on your left. This organizes and separates your subtitles and makes it way easier for the reader to browse your website. I actually just copied it from this youtube video: Responsive Sidebar This again includes a lot of code in the css file and some extra code in each of your assigment pages, but I think it´s very worth it, and it only takes about an hour to get done.
GitLab Cloud upload:
The last step is to upload all of our progress to the GitLab cloud. We will do that on our repository folder, in my case it it´s called jorge-limon.
First, we neee to turn that folder into a git repository. All this commands will be done through the Git CMD App.
Here are a list of the essential commands that make all of this work:
- cd "Folder_name" : This opens the folders to get where we want to work.
- cd.. : This goes back one folder
- git init :This turns our folder into a git repository. Meaning everything inside here will be uploaded to the cloud. You can check if the folder is a repository by seeing the hidden items in your folder, if it has a .git folder, it is a repository.
- git add . : Selects all the data in the repository
- git commit -m "Version_name" : Gets all the selected data into a package and gives it a name so we can associate the changes later on
- git push : This uploads the data to the cloud
- git status : At any point in the process, use this command to see if you have selected or commited some data in that folder
With those basic commands in hand, let´s take a look at how it would look to upload something into the cloud
- cd desktop
- cd jorge-limon
- git init
- git add .
- git commit -m "Webpage Template" (We give this commit a name to help us remember the contents of the commit) .
- git push
It is important to know that in this kind of version control, we can upload up to 10 mb of data at one time. Any more data and the push won´t come through and you may come into some issues with different commits. So just weight and make sure whatever you are adding to the folder to make sure it stays under that limit.

This is a practice inside Git CMD example of pushing all files and changes to the GitLab cloud. This is an example of how the process should be; it displays all the data that Git CMD shows about the files you added, deleted, or modified.
All the changes should update in the website in a span of a couple of minutes, depending on the size of the files uploaded and the general traffic the website is experiencing
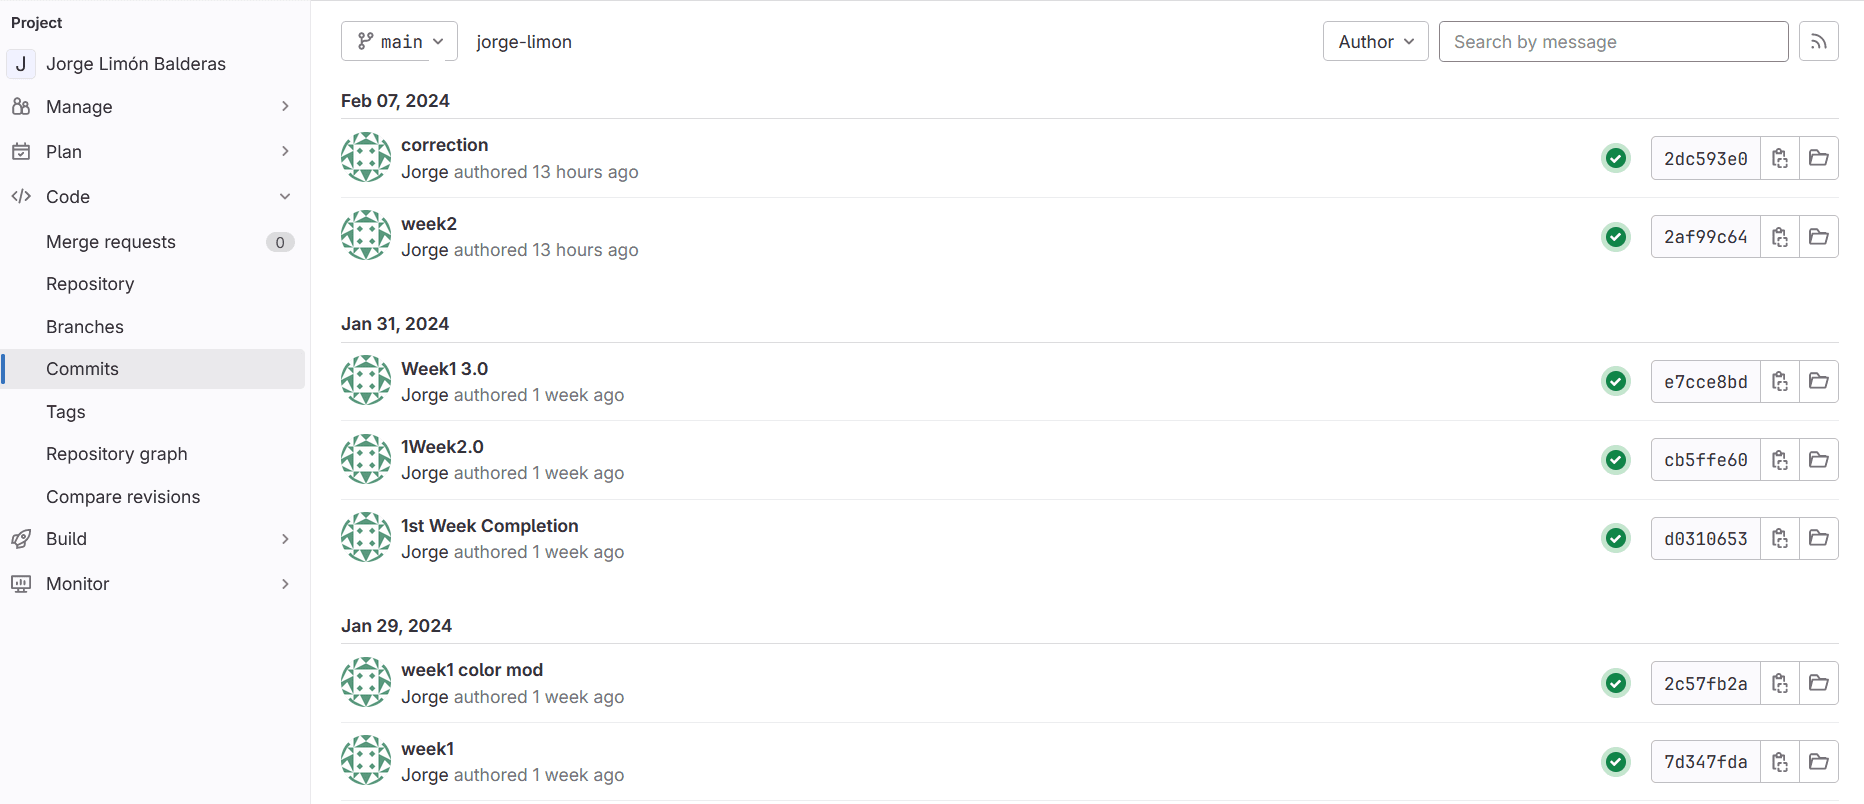
You can also check the commits you´ve made in your GitLab page under "Code-Commits".
Sketch and Planning of Final Project
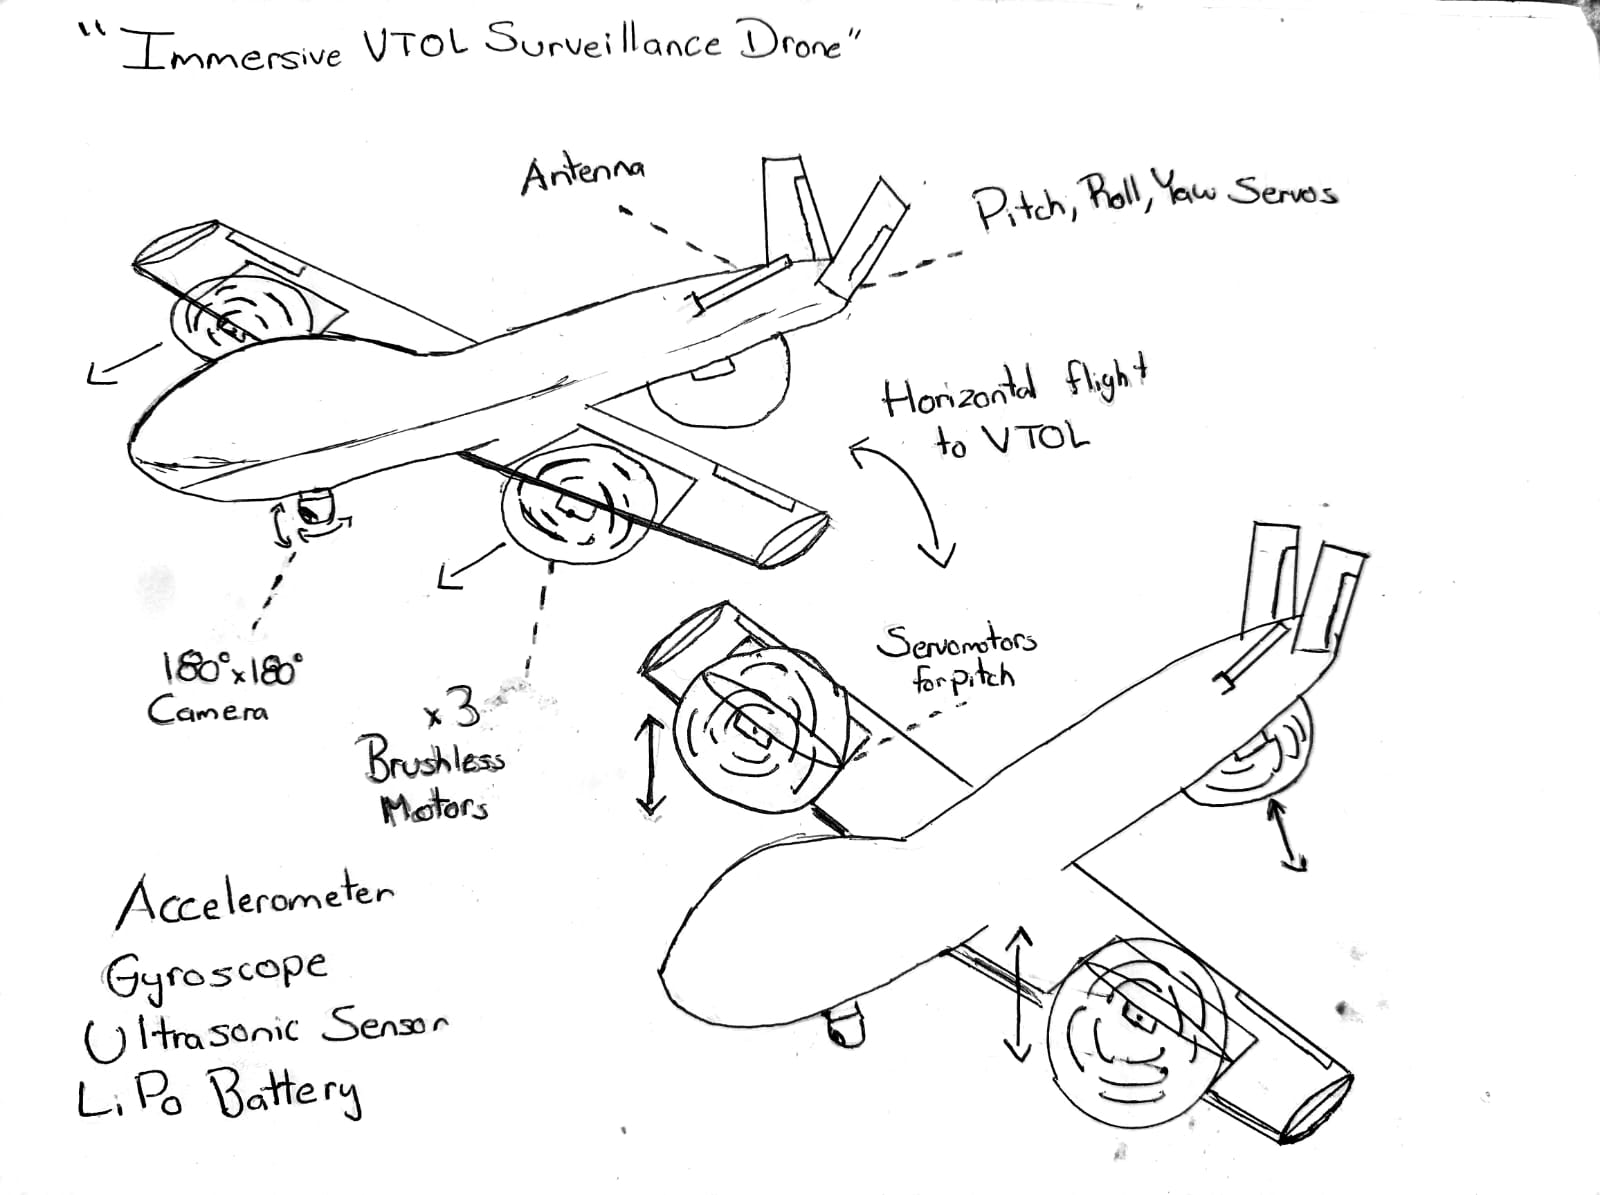
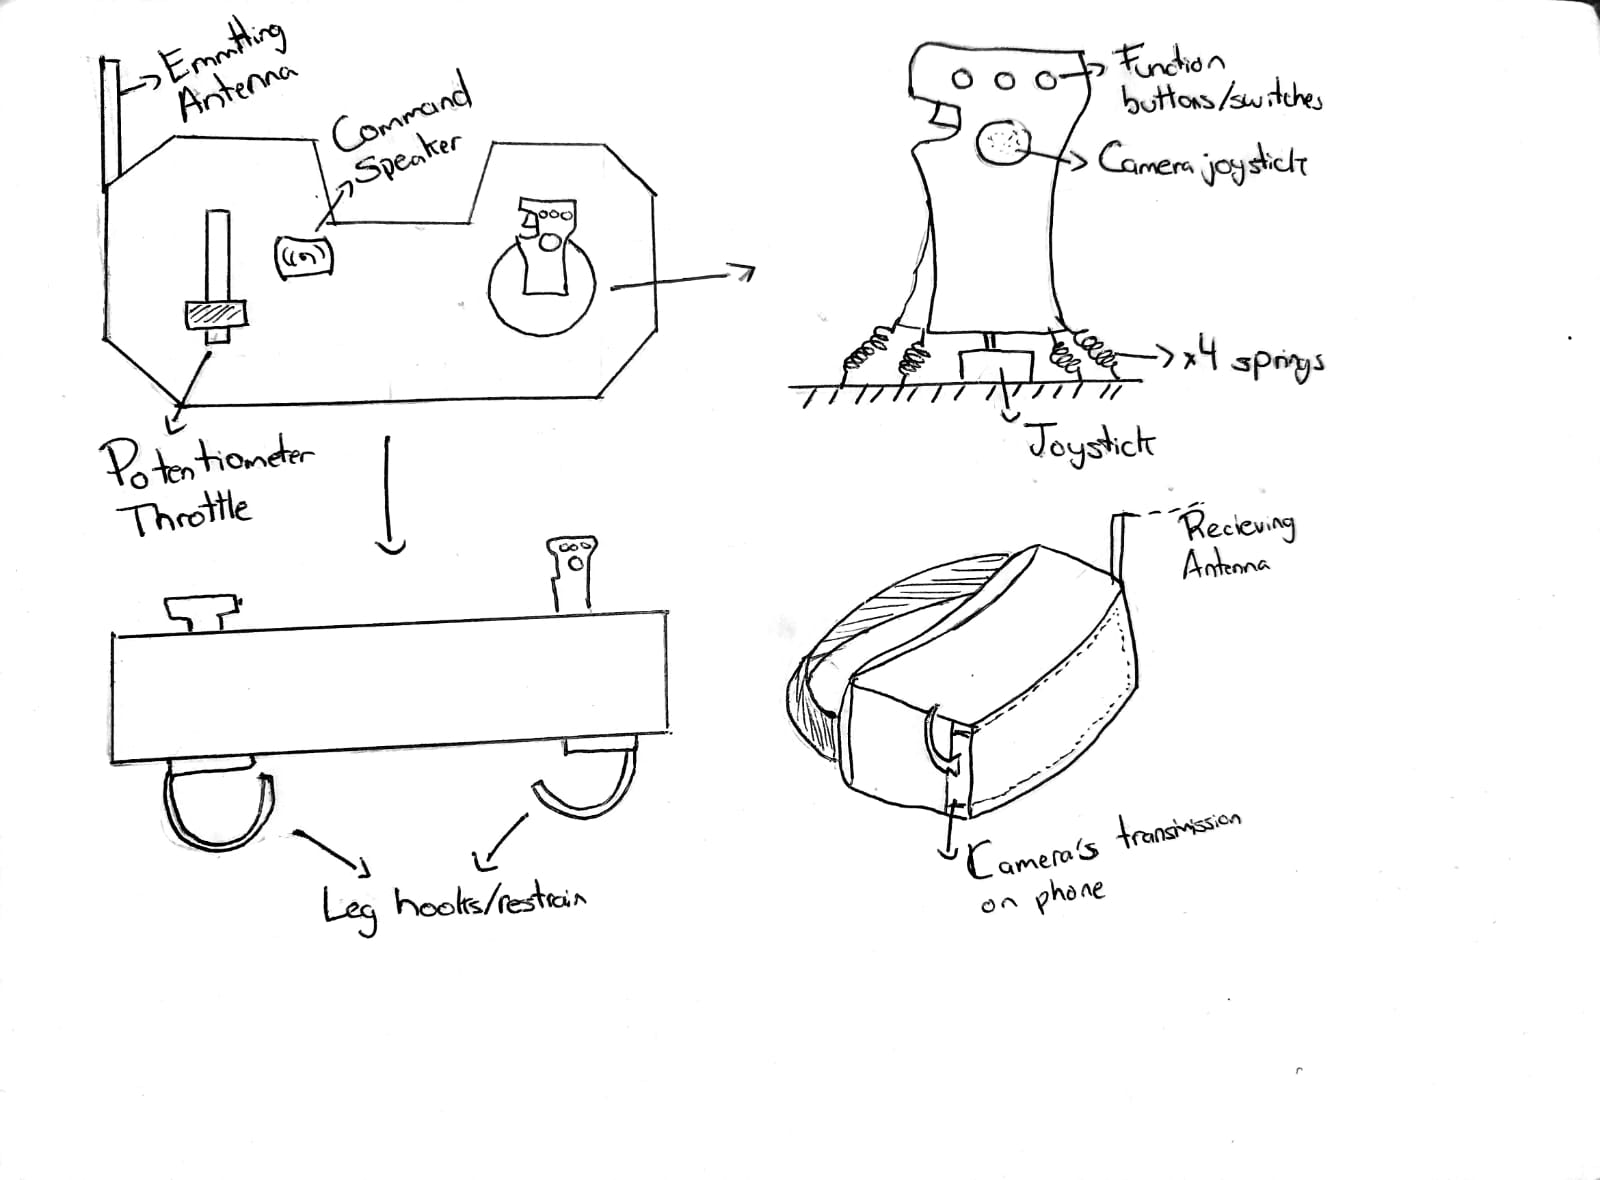
To conclude the Fab Academy course, I plan to build a VTOL capable, POV fixed wing drone along with it´s respective immersive controls. This includes a full size foot mounted joystick alongside with the throttle and general control electronics. To finish this setup with a head mounted VR setup that controls the position of the camera inside the plane to give it a fully immersive feeling.
The objective of this project is to merge the stability, hover and VTOL capabilities of a quadcopter, with the efficiency, speed and awesomeness of a fixed wing drone.
These are the rough sketches of the idea, altough it will probably change in the future:
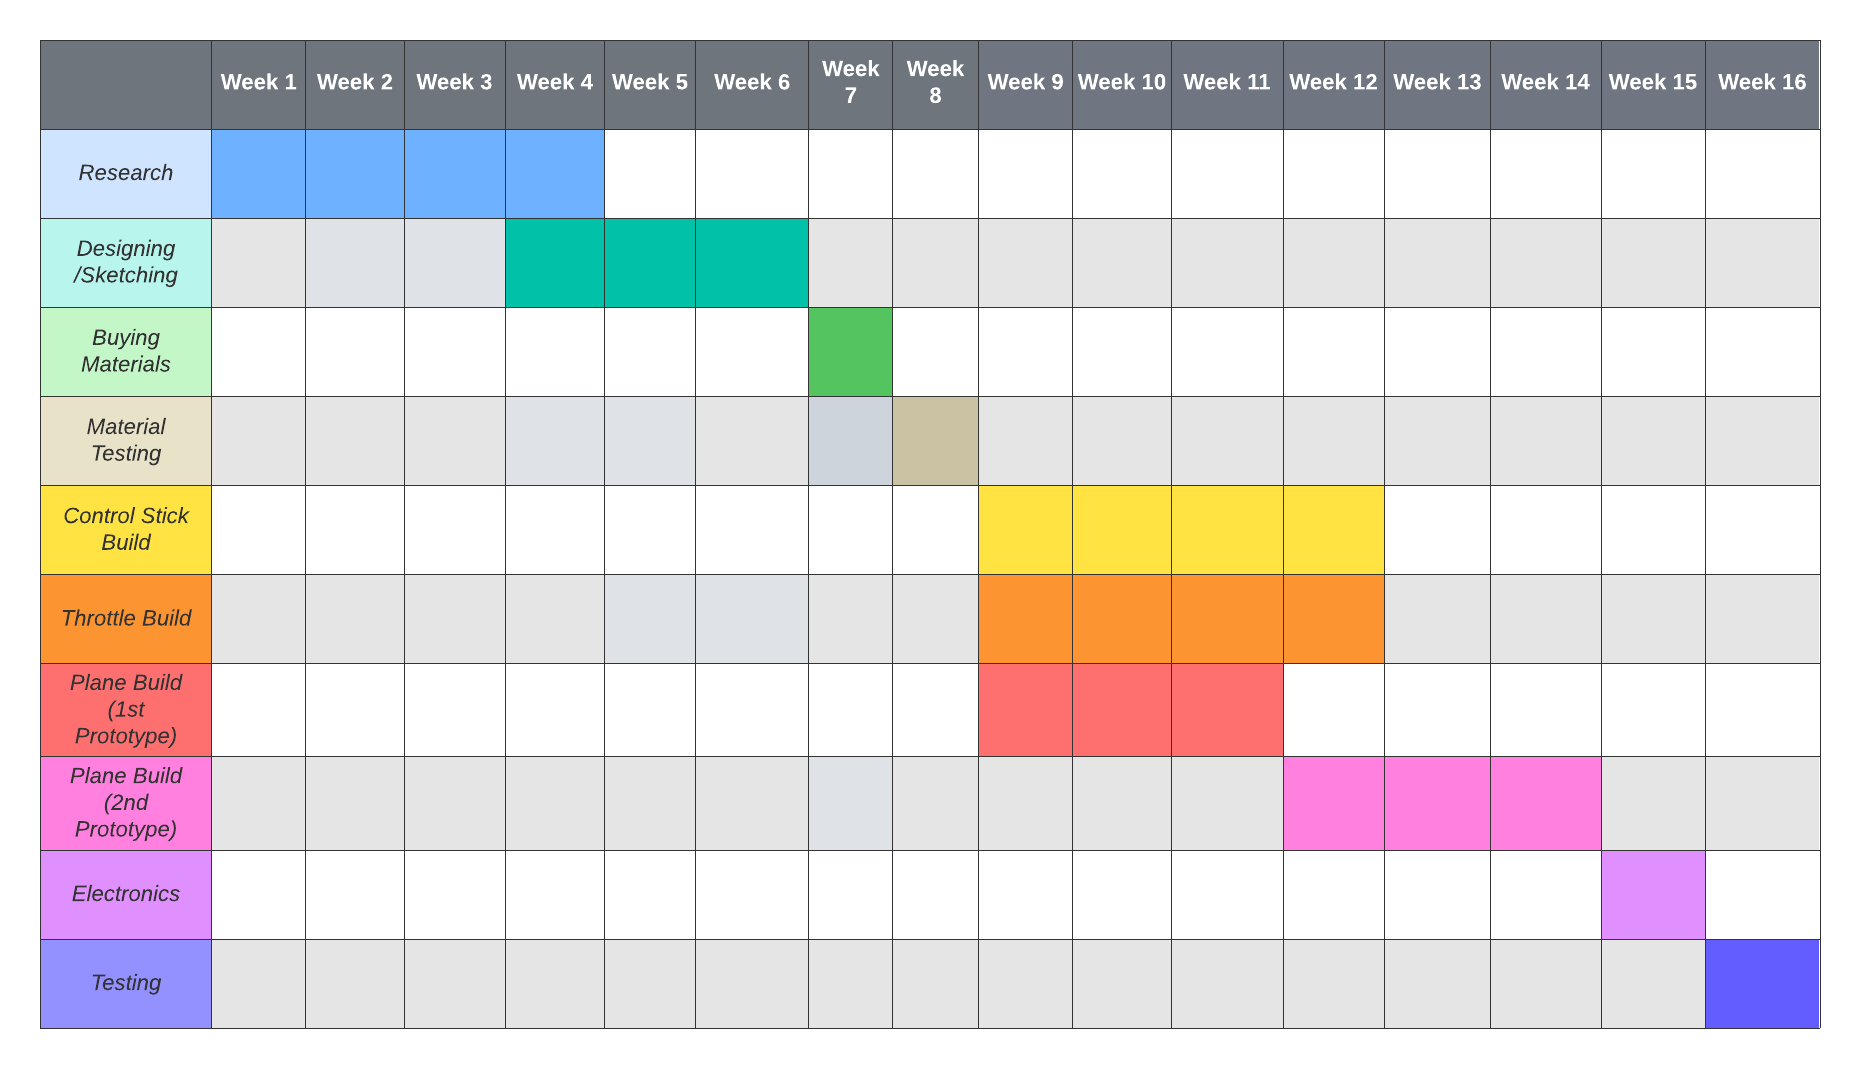
Gantt Diagram of the Project