5. 3D Scanning and Printing
On this week I worked on the basics of the 3D printing, creating a piece that is difficult to create using other tools and the basics of 3D scanning, scanning a piece and then printing it.
What do I need?
For the first part of this task, we need some essential things, like a 3D printer and a 3D modeling software. It looks simple, but to use a 3D printer, I need to know some basic things about the tolerances and how to design a functional piece for a 3D printer. All this useful information about the tolerances can be found on the group's website. For both parts of the task I will be using PLA (Polylactic Acid) as material printing.
Designing My Piece
Now that I've learned the basics about 3D printing, it is time to create a piece difficult to create in other machines. I spent a long time thinking in the main idea of my model, and after some hours, I decided to create a pyramid-shaped prison with a little ball inside of it. This is how I created my piece:
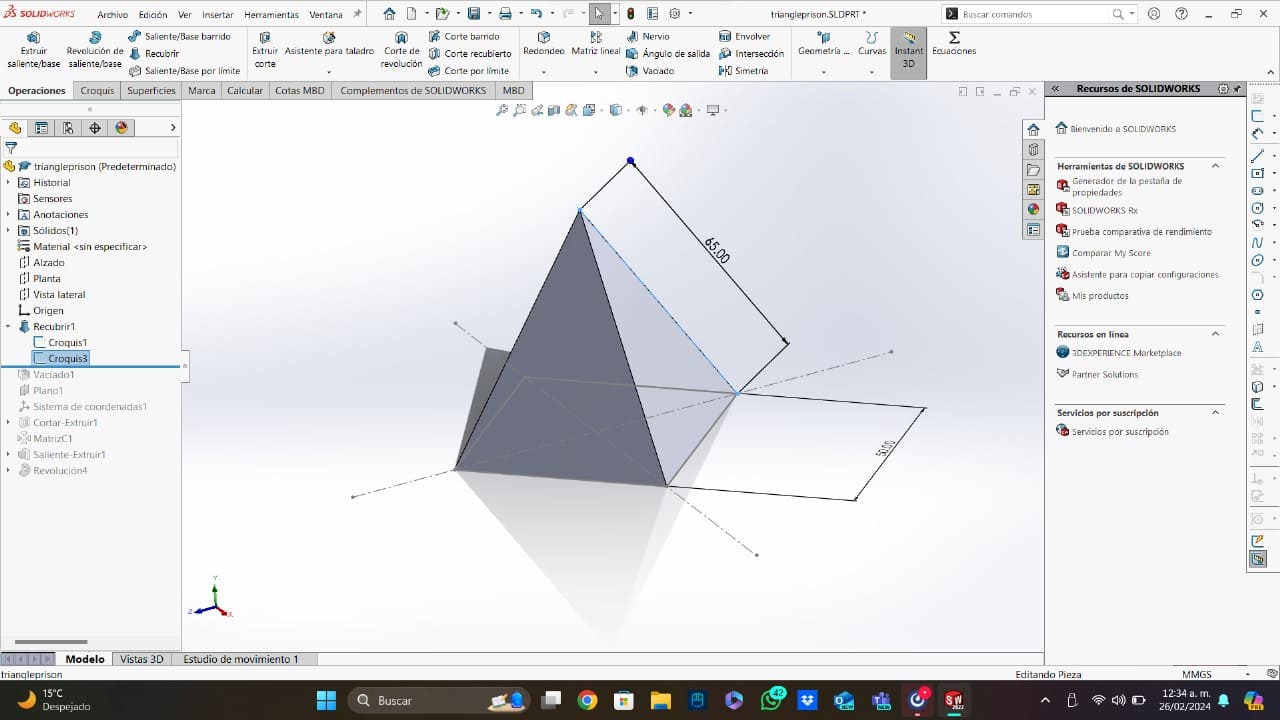
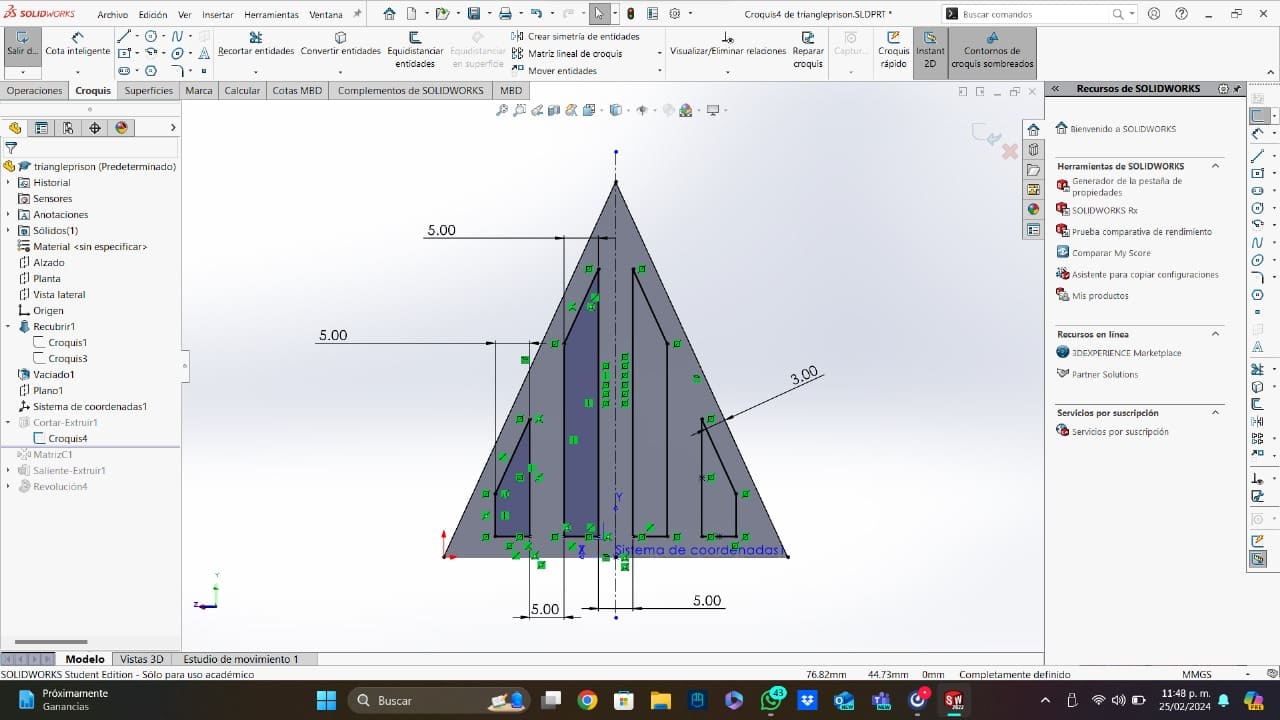
- Basic Figure: For this figure, I used a square rotated 45 degrees to have the vertices aligned with the default SolidWorks' planes. The square's sides measured 50mm, but this wasn't the last part of the figure. Without extruding the square, I put a point on the middle part of the square but in the tangent plane to the square. Whith the point, I created a construction line that goes from one vertice to the middle point I created before.
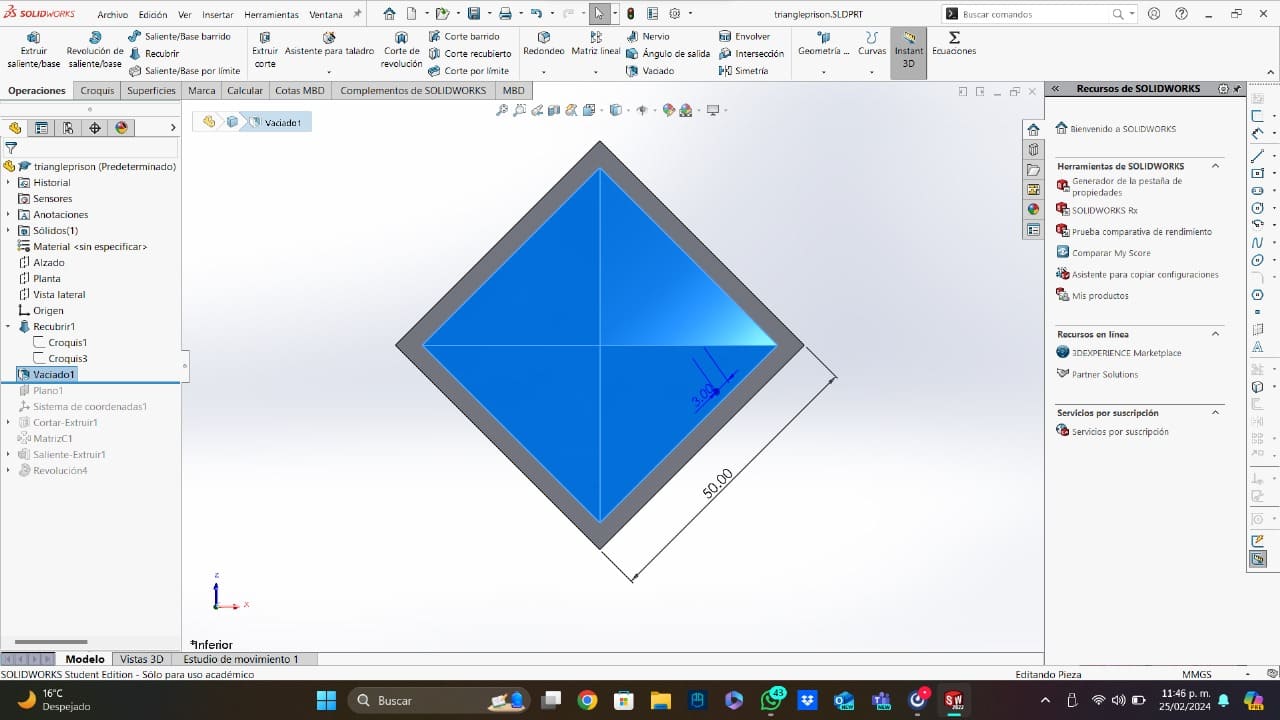
- Removing Material: Now that I had the pyramid, the next step was making it hollow, because I will create an sphere inside it. This task was really easy thanks to the "Shell" tool, with this tool, I selected the down face of the pyramid and configurate the "Shell" tool to left a 3mm wall between the hollow and the outside face of the pyramid.
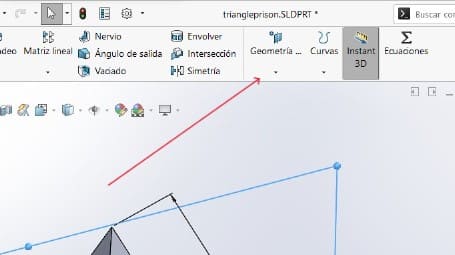
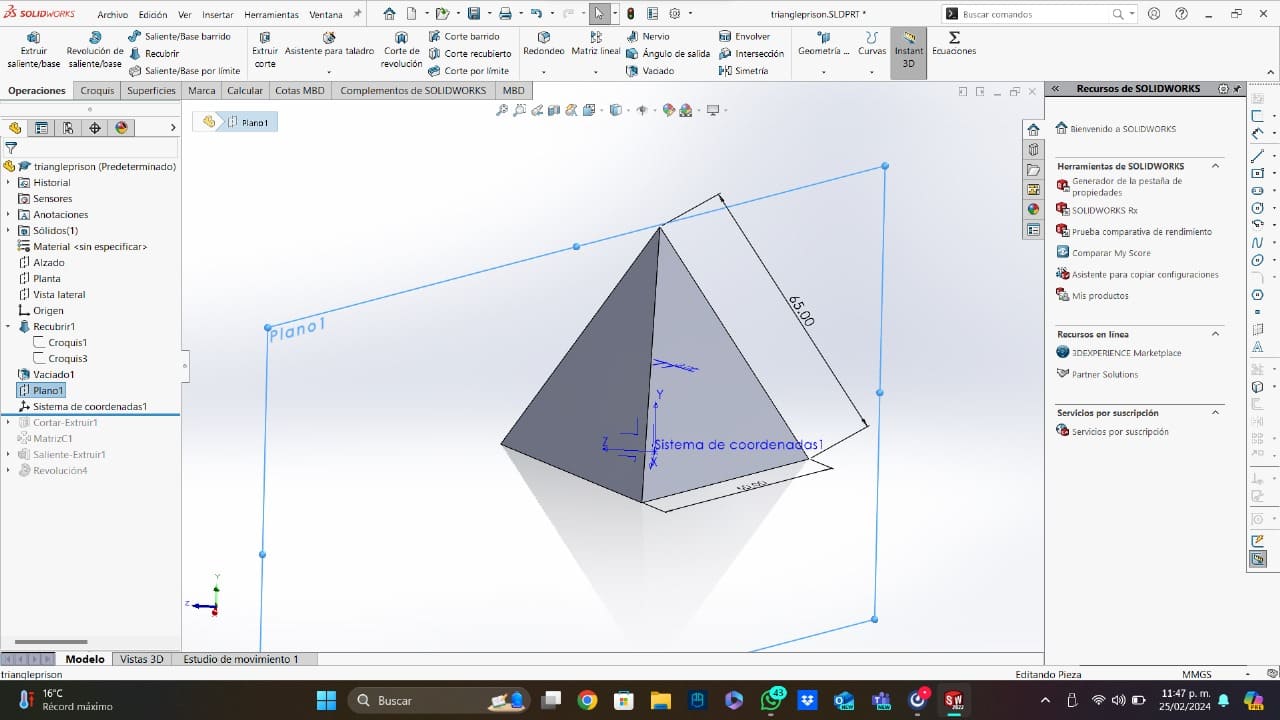
- The Plane and Axles: For the next steps, I created some useful tools that I will use on the next steps. The first tool I created, was a plane using the middle point of one of the base square sides. The other tool was the group of X, Y and Z axles, I created these axles to be able to use them like directions for some processes.
- The Bars: Now, to use the plane I created before, I got into the plane sketch to create the model of the bars that my triangle is going to have. For this sketch, I use the "Convert Entities" tool on the side face of the pyramid with the "Equidistance Entities" tool with a separation of 3mm. Then I tested the bars with some dimensions until I found a design that I liked. I pocket this sketch to create the bars.
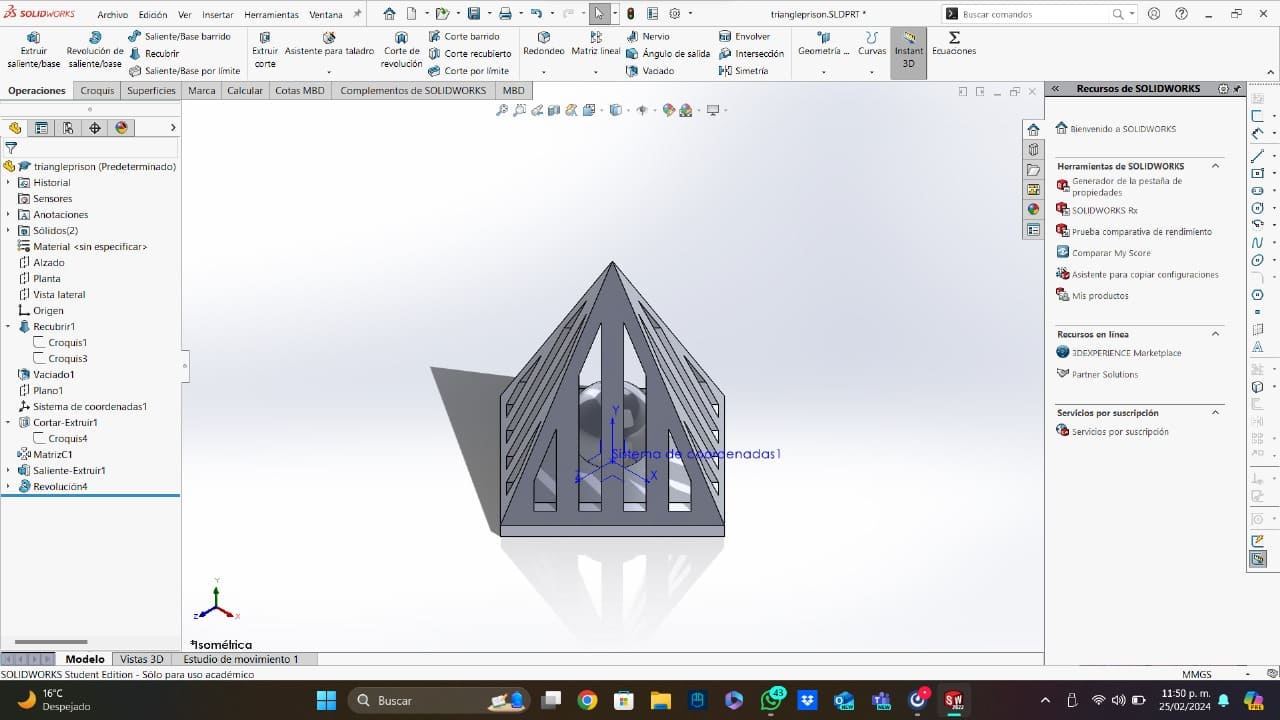
- Circular Matrix: To create the bars for the other pyramid's faces, I used a "Circular Matrix" using the Y axis as the reference direction.
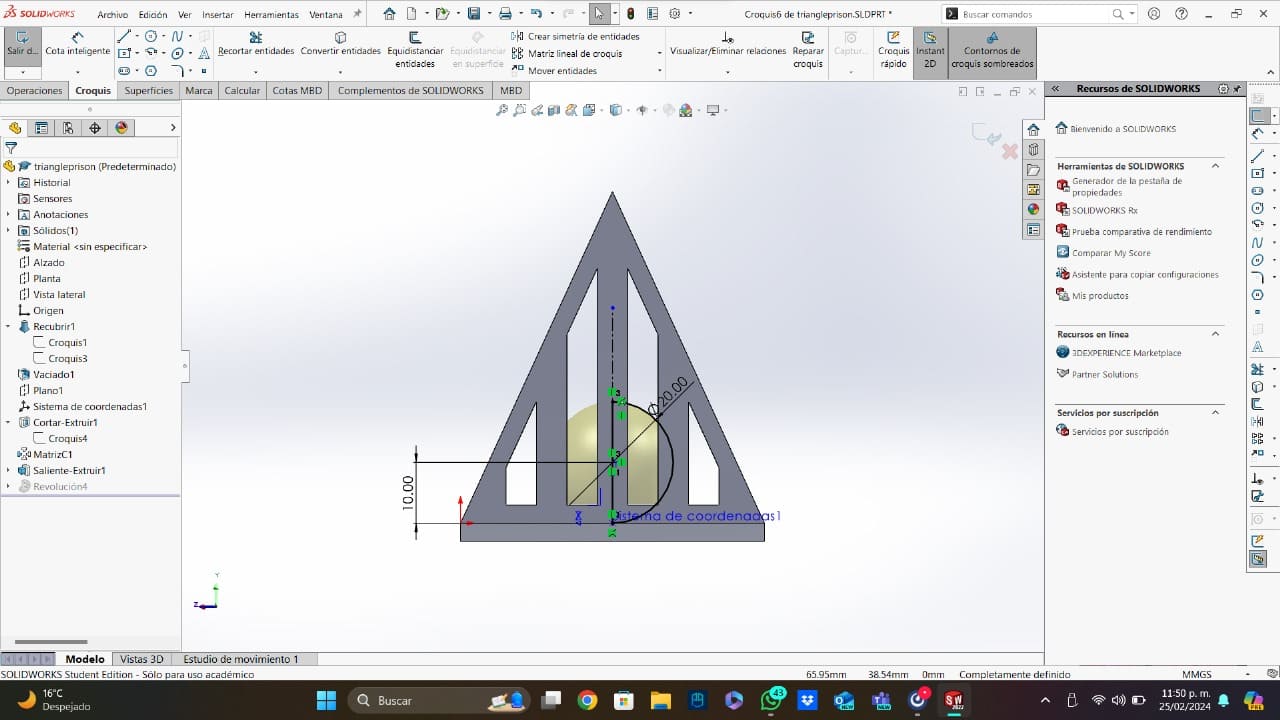
- The Inside Sphere: To finish this piece, I used again the tangent plane that I created before to create half a circle with the middle line coincident with the middle part of the square. I used the Y axis as the reference direction for the "Revolution" tool that I used on the half a circle I created before.

Time to Print
For this task, I am going to use an Ender 3 V3 SE printer. This is an interesting FDM printer that can reach very high speeds. To use a 3D printer, we will need to save our 3D design in STL format. I will combine the Ender 3 V3 SE with a PLA filament, and this is the process of using a 3D printer:
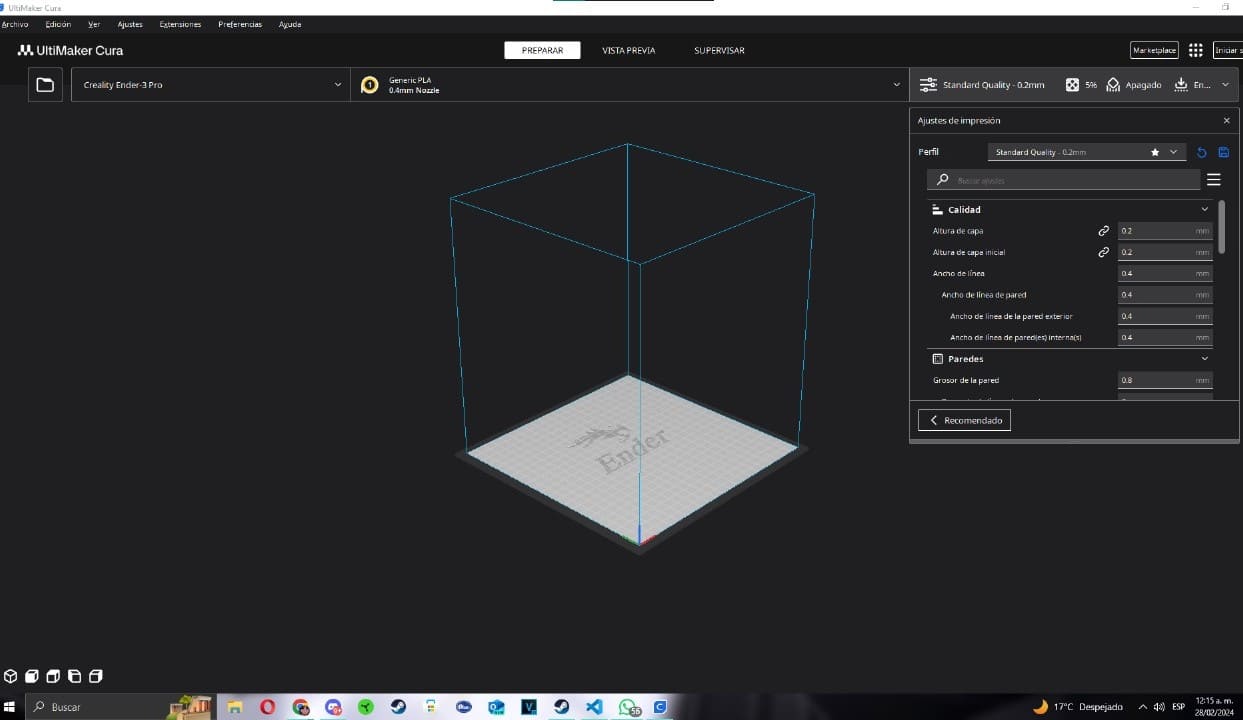
- The Software: For this printing, I will be using a software called "Ultimaker Cura". This is a free software that can be downloaded on the official website searching UltimakerCura on Google. This is how the software looks alike:
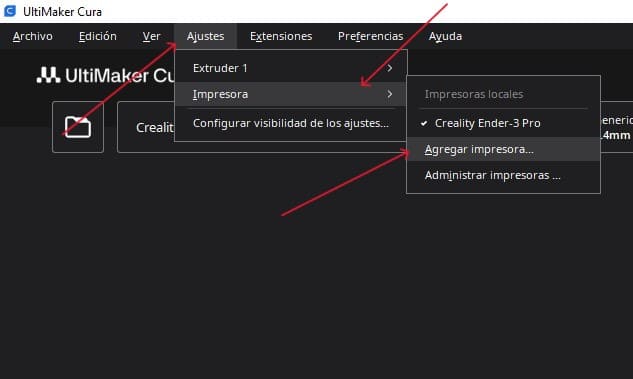
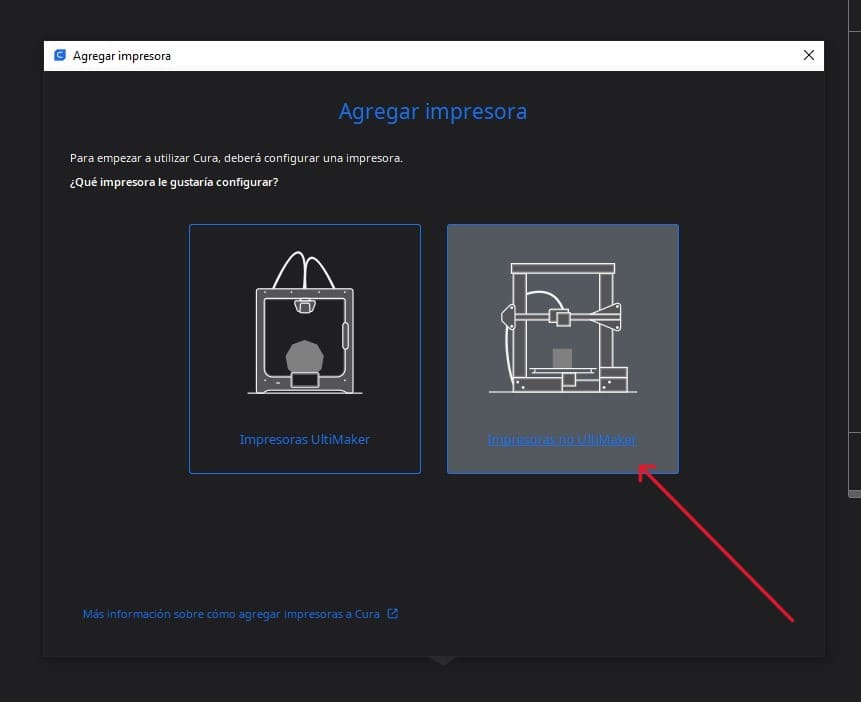
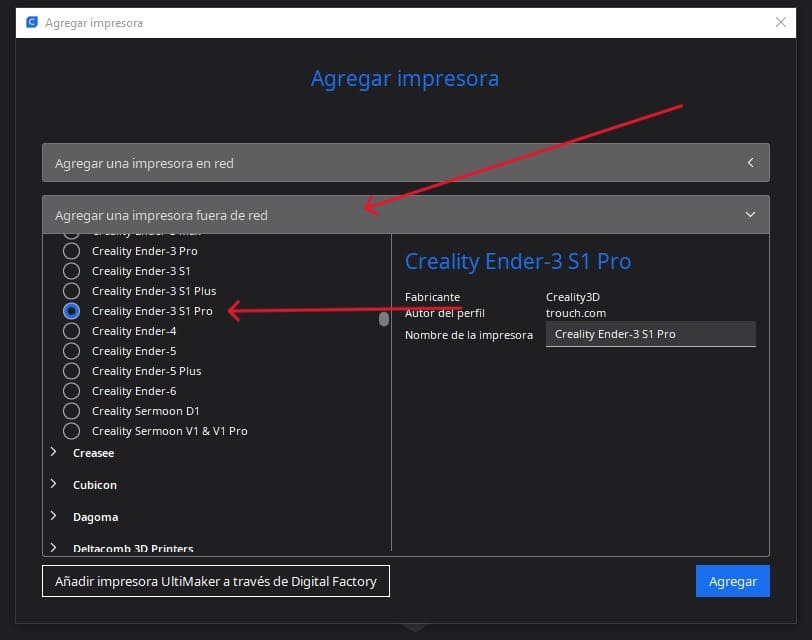
- Adding The Printer: Cura is one of the main softwares used for 3D printing, so it has a lot of different brands and printers. In this case, I am going to use the Ender 3 S1 Pro printing profile. The first thing to do on Cura is adding our printer, we can do this on the "Settings" section, then on "Printer" and finally on "Add a Printer", to finish the adding printer process, you should check your printer brand, and search it on Cura. The next screenshots show the process of adding a printer to Cura:
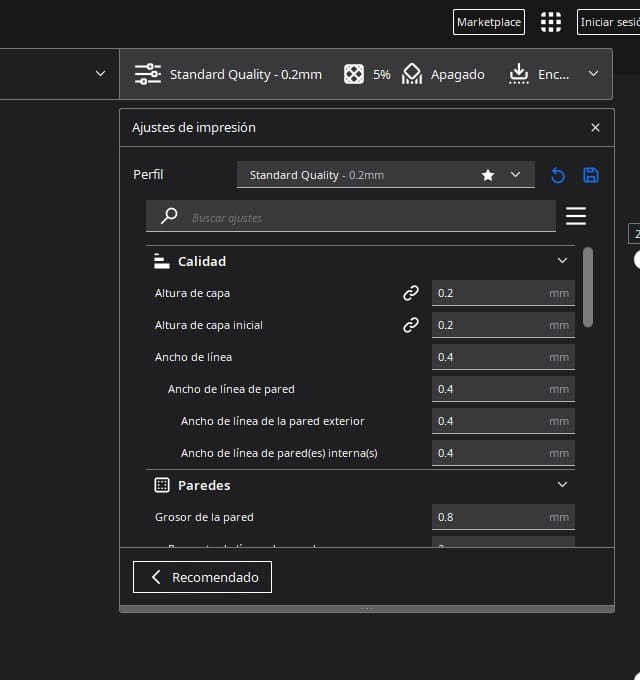
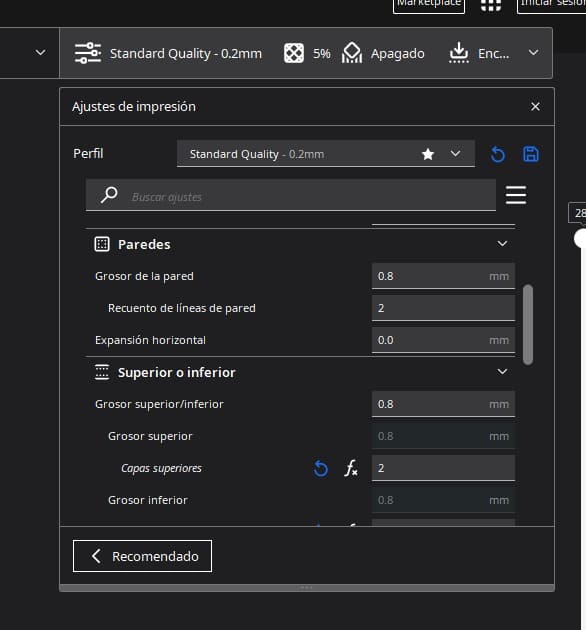
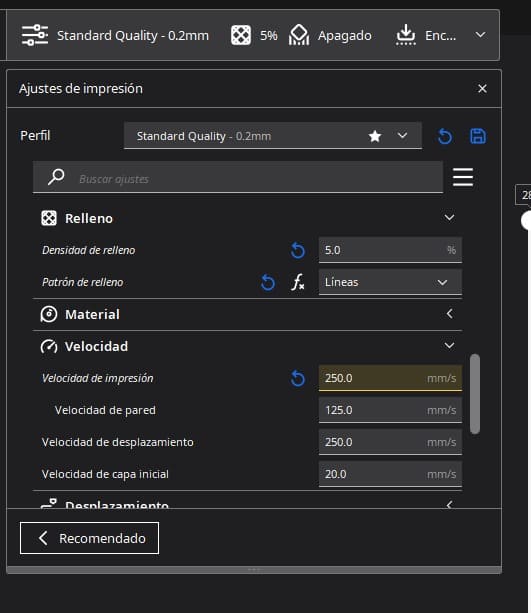
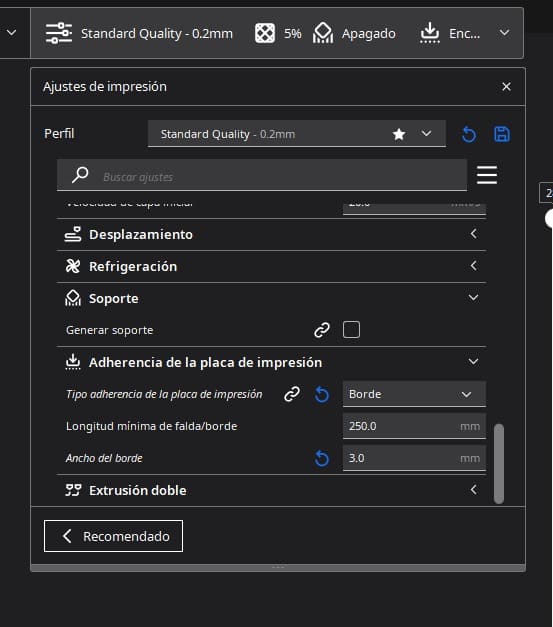
- Preparing The Model: Cura is a very complex and useful software that let us change a lot of different printing parameters. This piece lasted less than 2 hours, and I didn't use supports for the printing process, this was to avoid problems removing the supports and because based on the group website, they weren't requiered. The reason behind the walls parameters was saving some time by printing few walls (I can do this because I don't need a strong piece), the reason behind the top/bottom parameters was saving time by printing few top and bottom layers, I chose those infill parameters for saving time and material, the material parameters I used were those recommended by my evaluator for PLA material, the speed parameters I used were the ones I discovered during my time at university (these are very fast parameters that save time without losing much quality), and finally, I used a short plate adhesion just to make sure my piece was going to stay in its place during the printing process. The next screenshots show the parameters I used for my piece (this parameters are functional on the printer I used and shouldn't be used in all the printers):
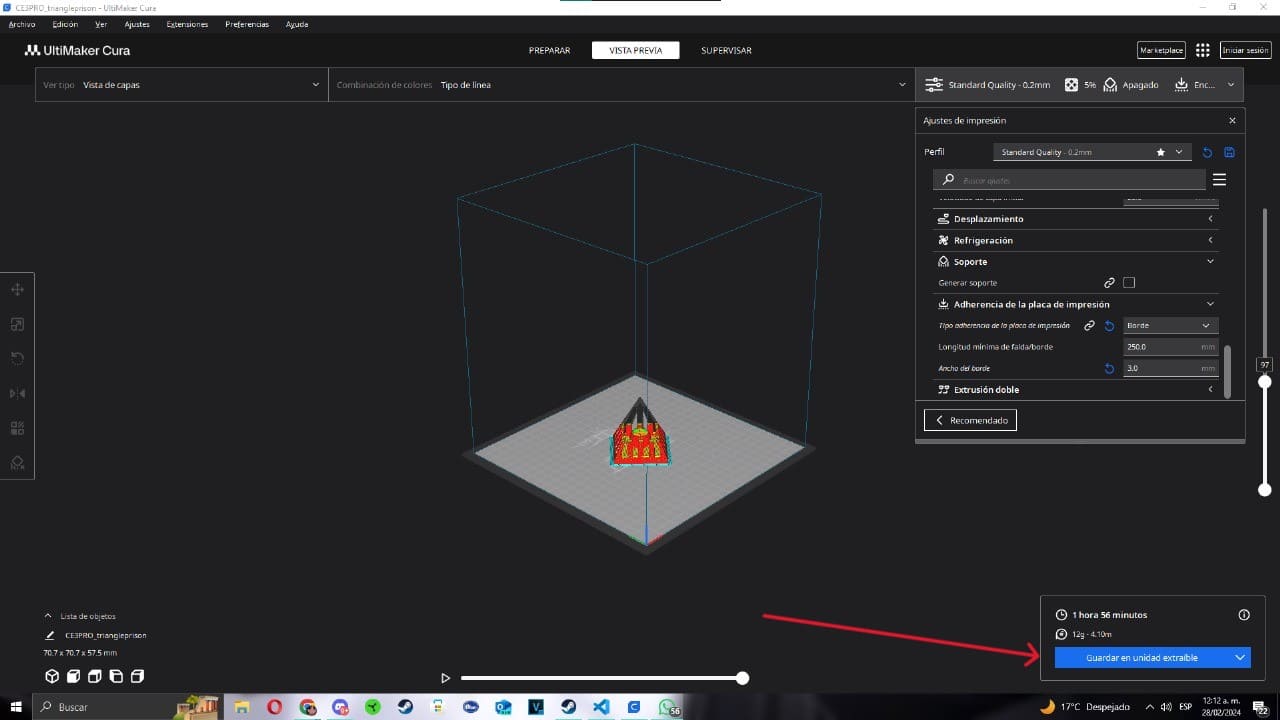
- Printing: Now that we have our piece ready, it is time to save the gcode file that cura will generate in the SD that the printer has. To generate this file, we will need to click the "Slice" button that is on the right bottom corner.
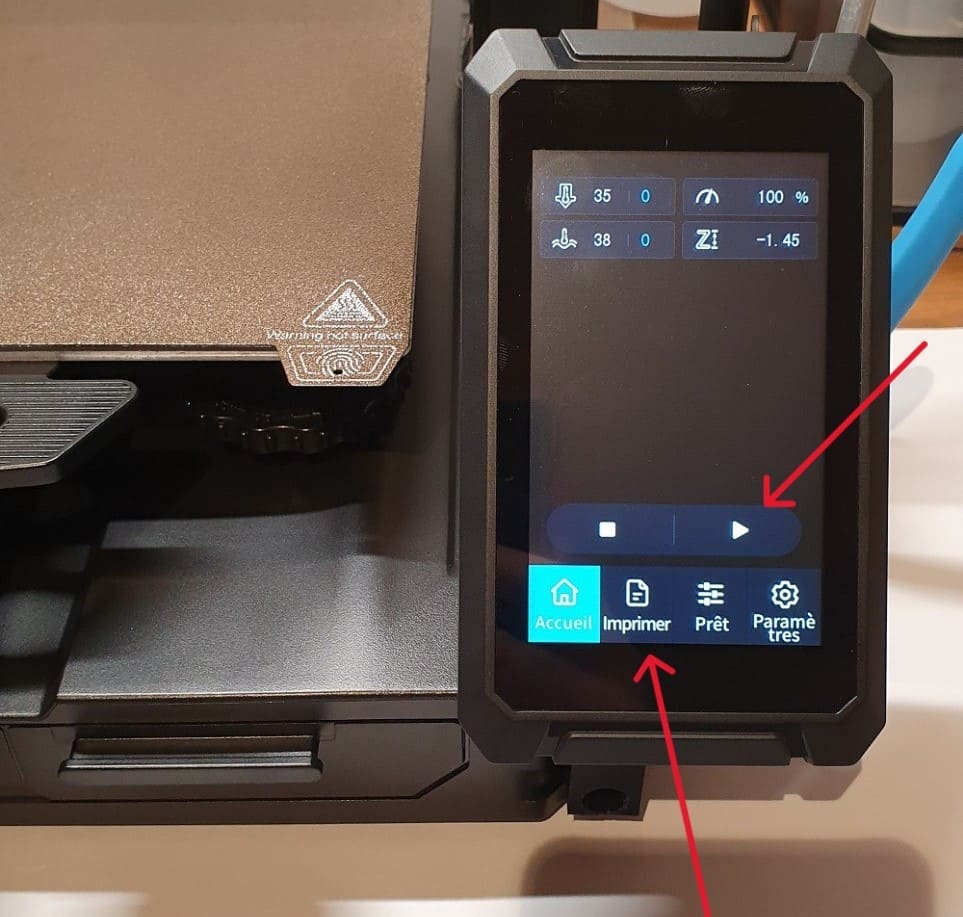
- Starting The Printing: Now that we have our file ready saved on the SD and the SD is already inside the printer, we wiil need to select the "Printing" option on the printer, then we will select the file that we just generate, and finally, we will click on the "Start" button.
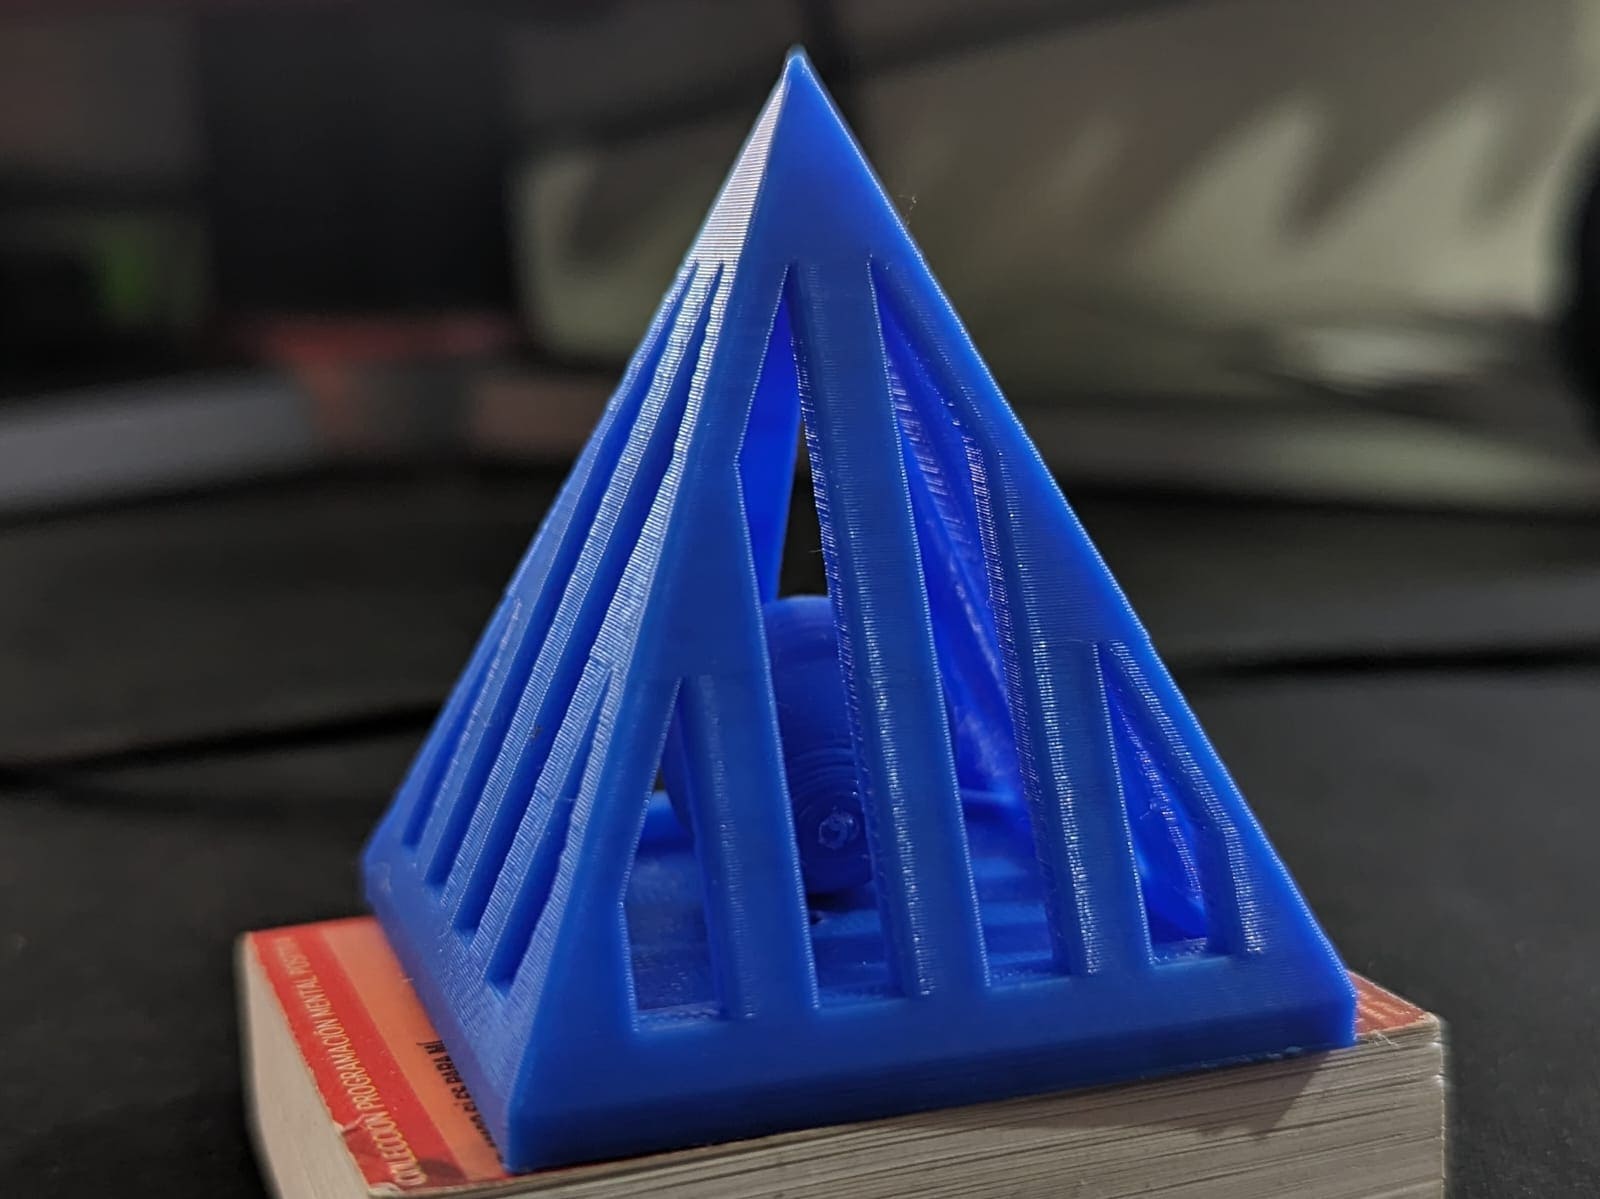
- The Piece: After some hours of waiting, this is how the final result of my piece:
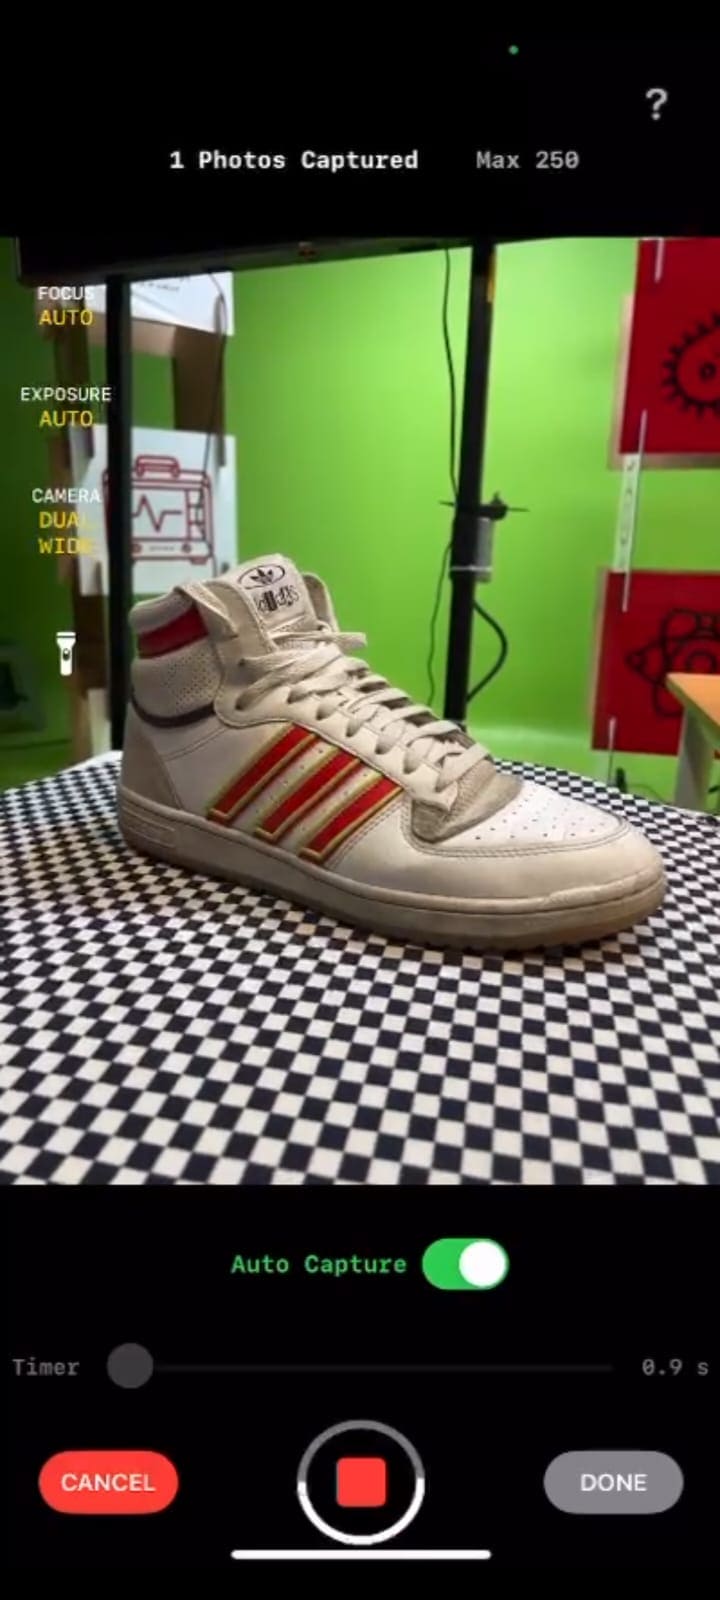
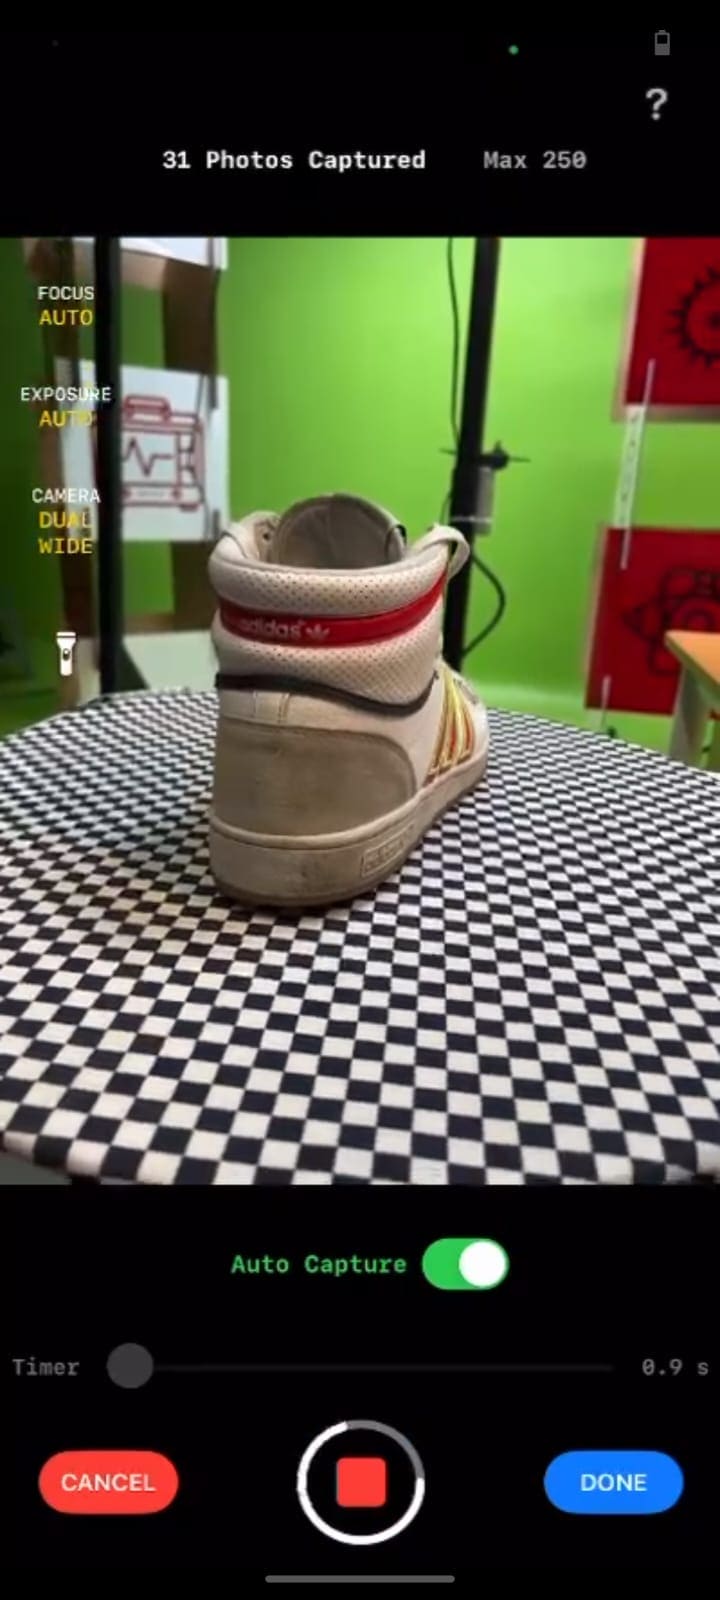
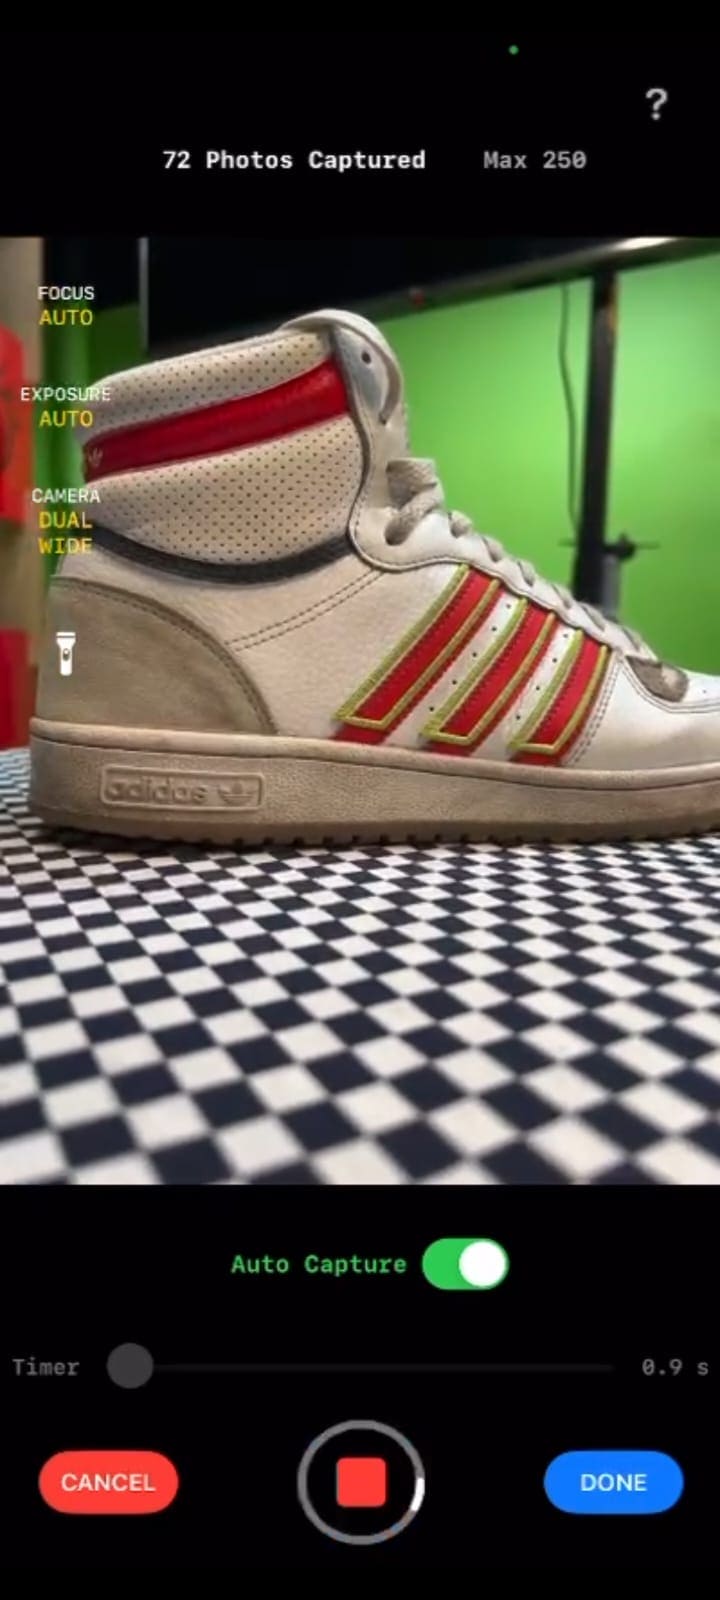
- Scanning The Sneaker: After opening the app, I turned on the "Auto Capture" option and started making photos with the red button. The photos need to be from different angles of the sneaker. To got a better result, I used a rotary table with an specific pattern to help the app on the tracking process.
- Deleting The Imperfections: After the post processing of the images, the model that the app created had some big imperfections. To delete this imperfections, the app has a "Crop" tool that can help with the imperfections.
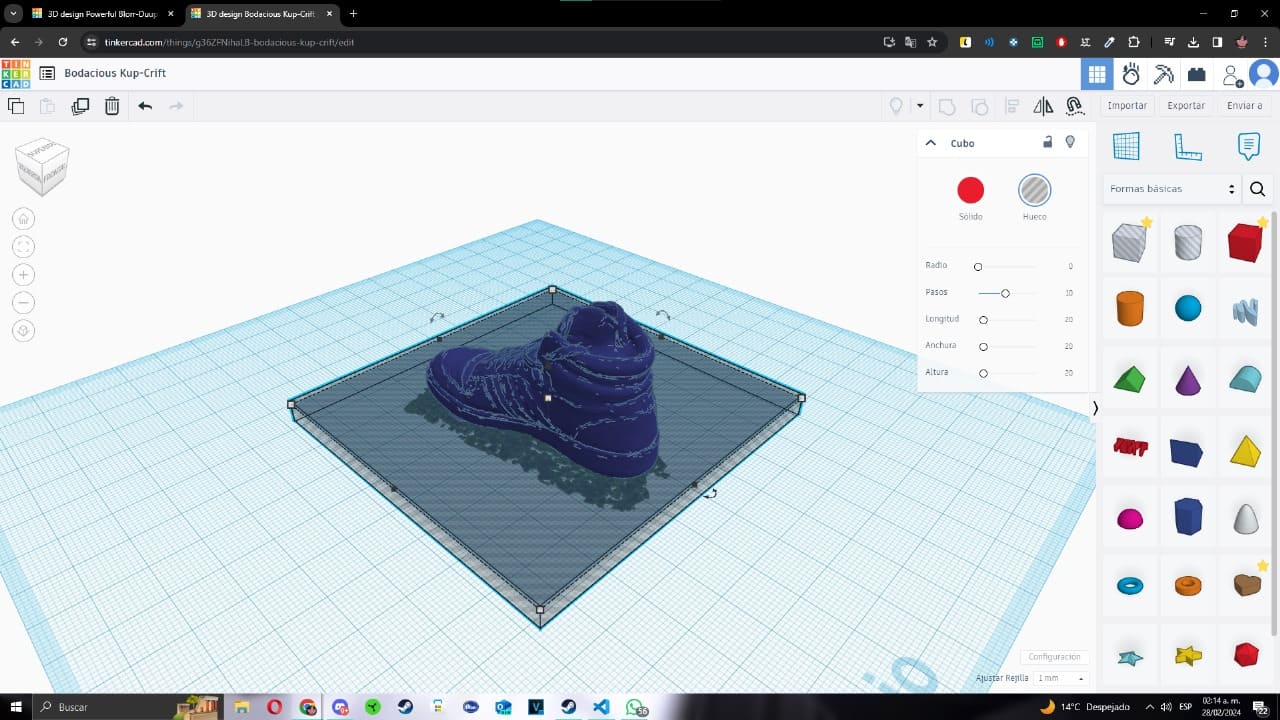
- Big Problems: After exporting the sneaker model from the app, I watched some problems to print it. The first problem was the model size, the size was very small, but this problem can be solved scaling the piece on Cura. But this was not the only problem, the model had some trash that will cause some printing problems.
- Solving The Problem: To solve the problems, I import the model to a website used for modeling called "TinkerCad". On this website, I used a rectangle to delete a 1mm layer from the bottom of the model. Doing this, I deleted the trash and the model was ready to be printed.
- Printing: For printing this model, I used basically the same parameters that I used before for the designed piece. I also used a FDM printer, but a in this case I used the Ender 3 S1 Pro printer. Thanks to this model, I needed to change the printing speed from 250mm/s to 120mm/s. The printing speed was the only parameter I changed and the printing time was 50 minutes. This the printing result:
3D Scannning
This part of the task was very simple and easy to do. In my case, I will be using a phone with a special app to scan my sneaker. One of my Fab's teacher, told me that using a phone from Apple (an iPhone) would give me better results. I have a Google Pixel phone, so I asked a friend for his phone to use it in the scanning process. The app I will be using is called "3d Scanner App" and it is only available on IOS.

I chose this app because some friends told me it was the best option for the apps the prove. To be honest, uising this app was very easy and intuitive. This is the scanning and printing process I followed:


To download the files used this week, click here.