3. Computer Controlled Cutting

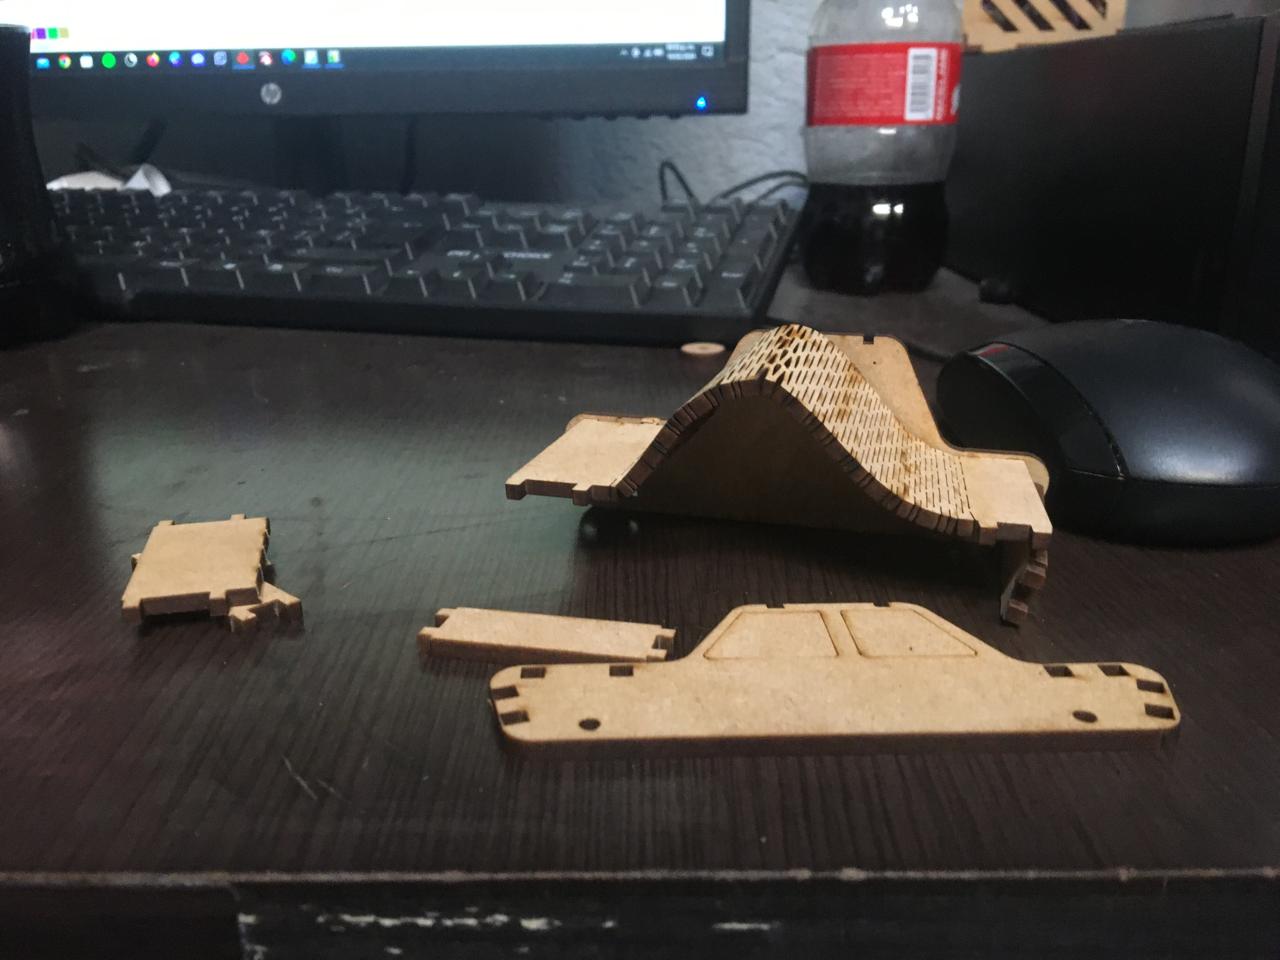
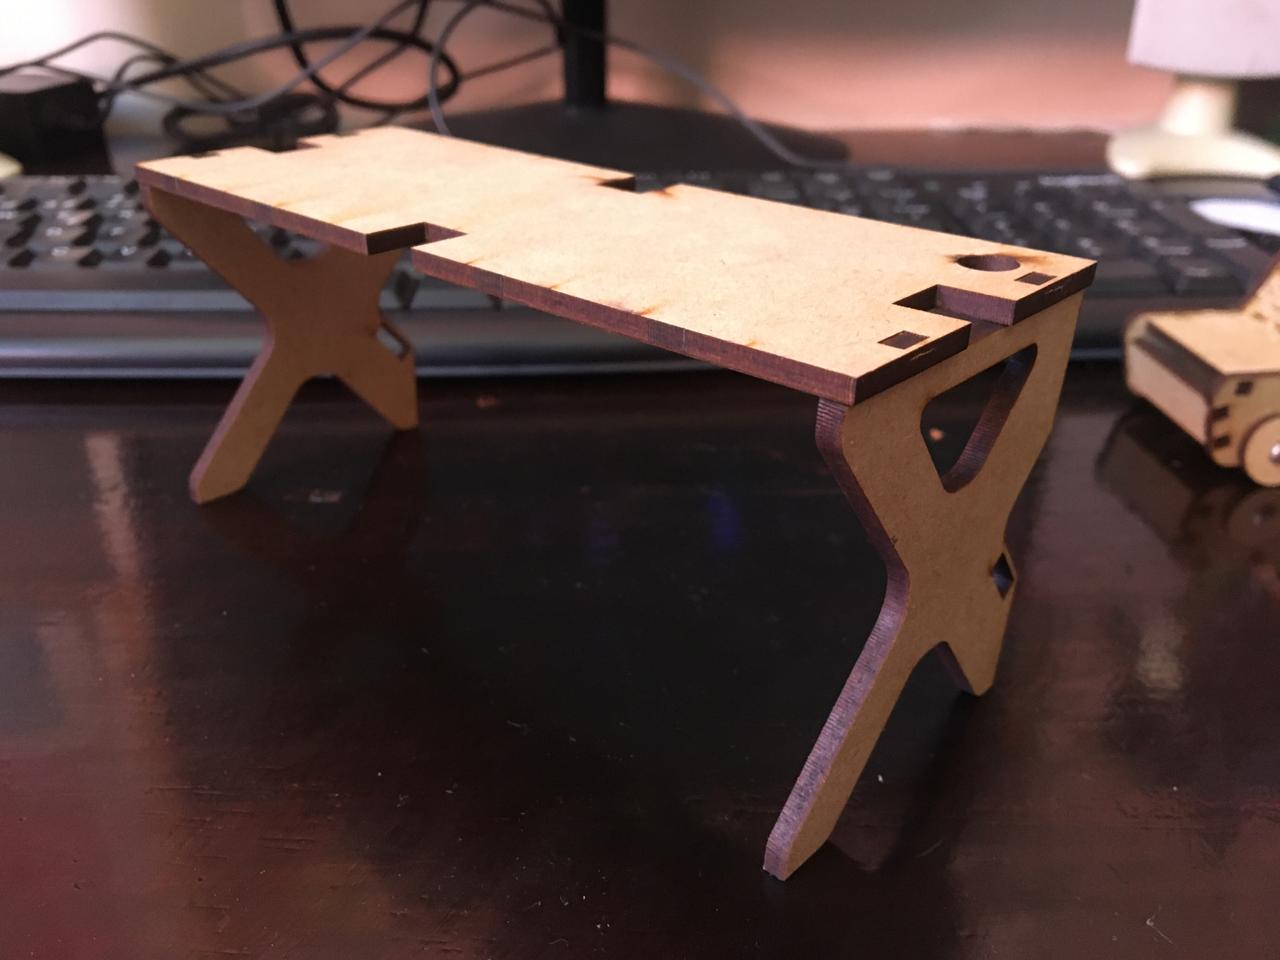
For this week the assignmentwas to make an object from various pieces of MDF laser cutted. As I have worked with this material before I wanted to try something I never did before so I made a car but the catch was to make the roof flexible. It cost me a few tries and green hairs but this is the result. It really isn't much but it was fun to use this technic. For refference on how to cut it so the press fit to fit properly and the flexible bit I used this website: Week 3 Guide Ibero Puebla Fablab
Process
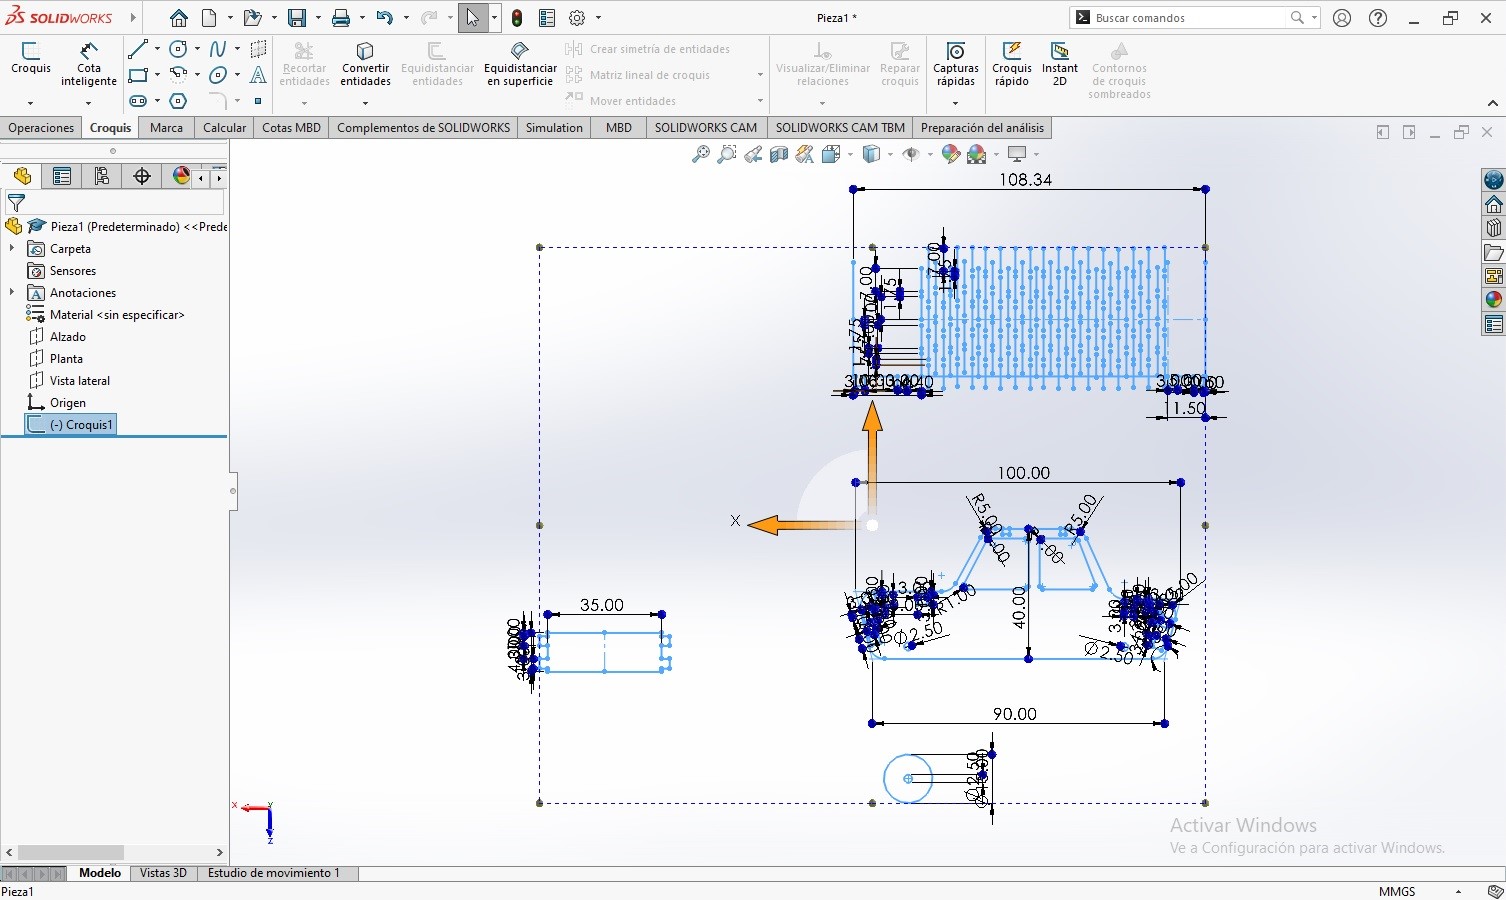
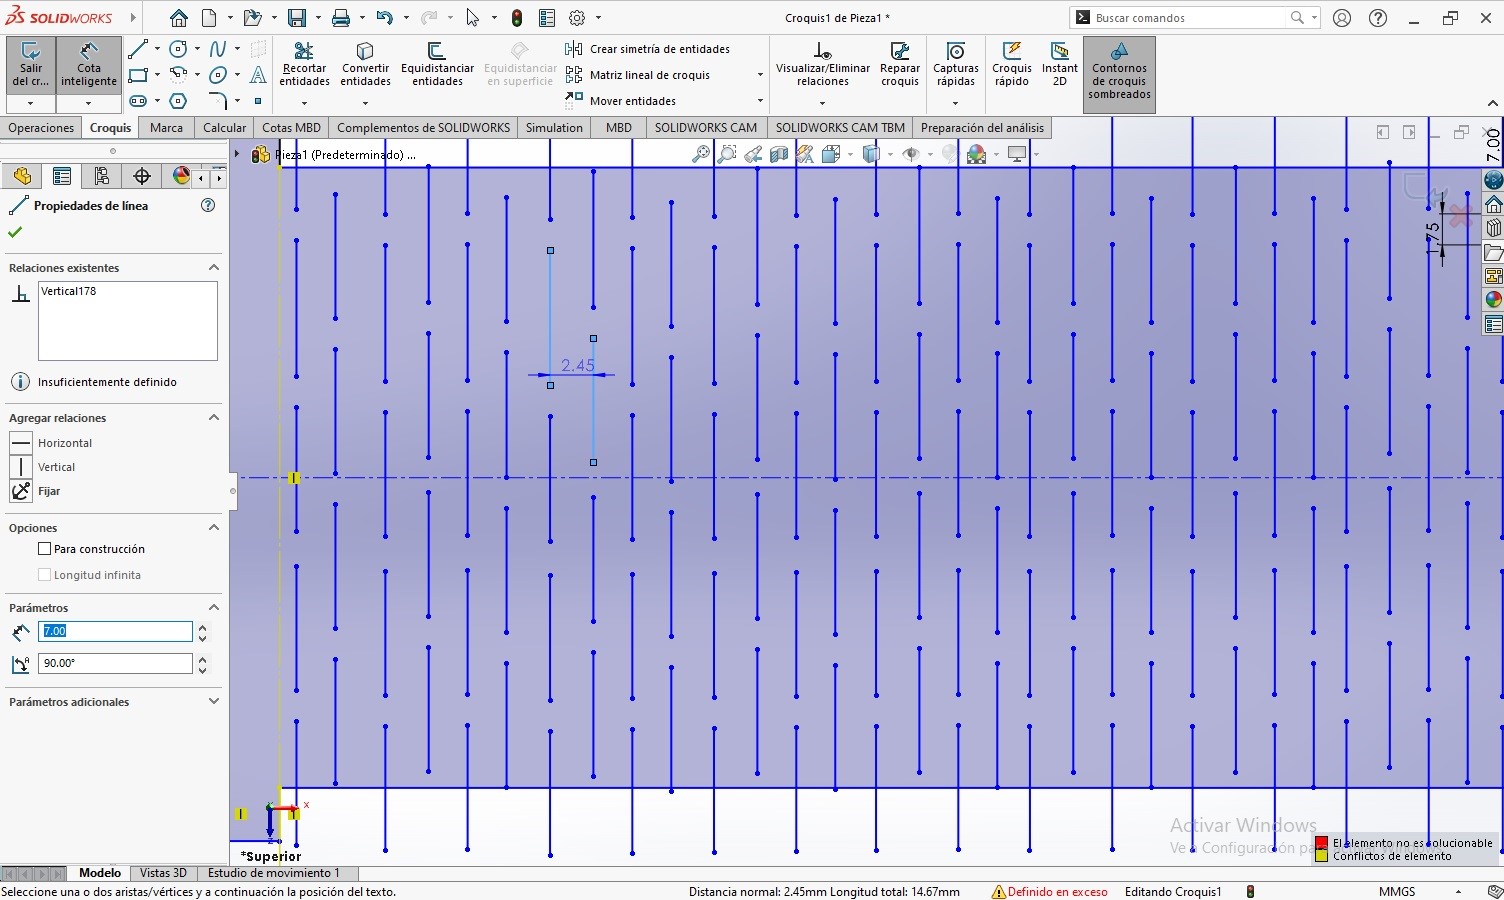
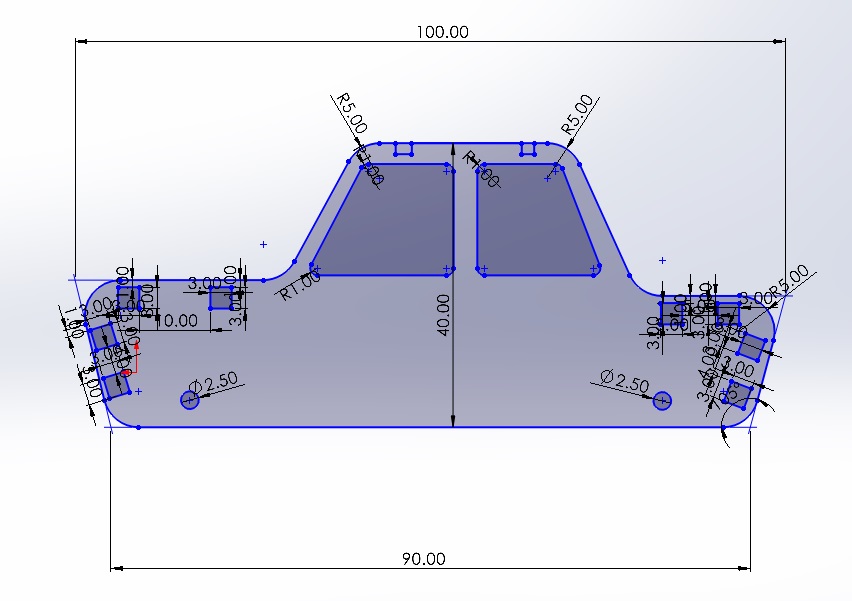
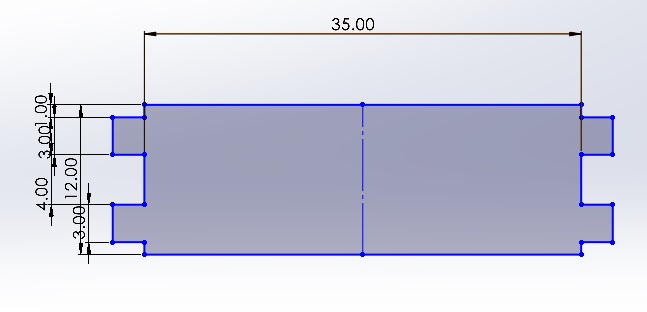
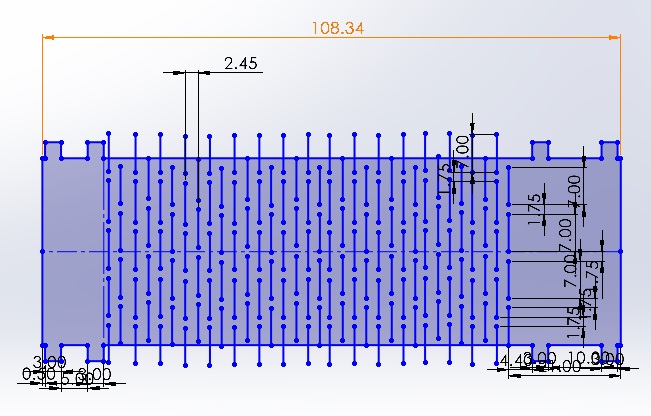
First, I designed the pieces, for this assignment I decided tu use SolidWorks because i can draw several shapes in the same archive, I drew manually the lines for the flexible part, I just drew one half of the car to just mirror it when I laser cutted it.

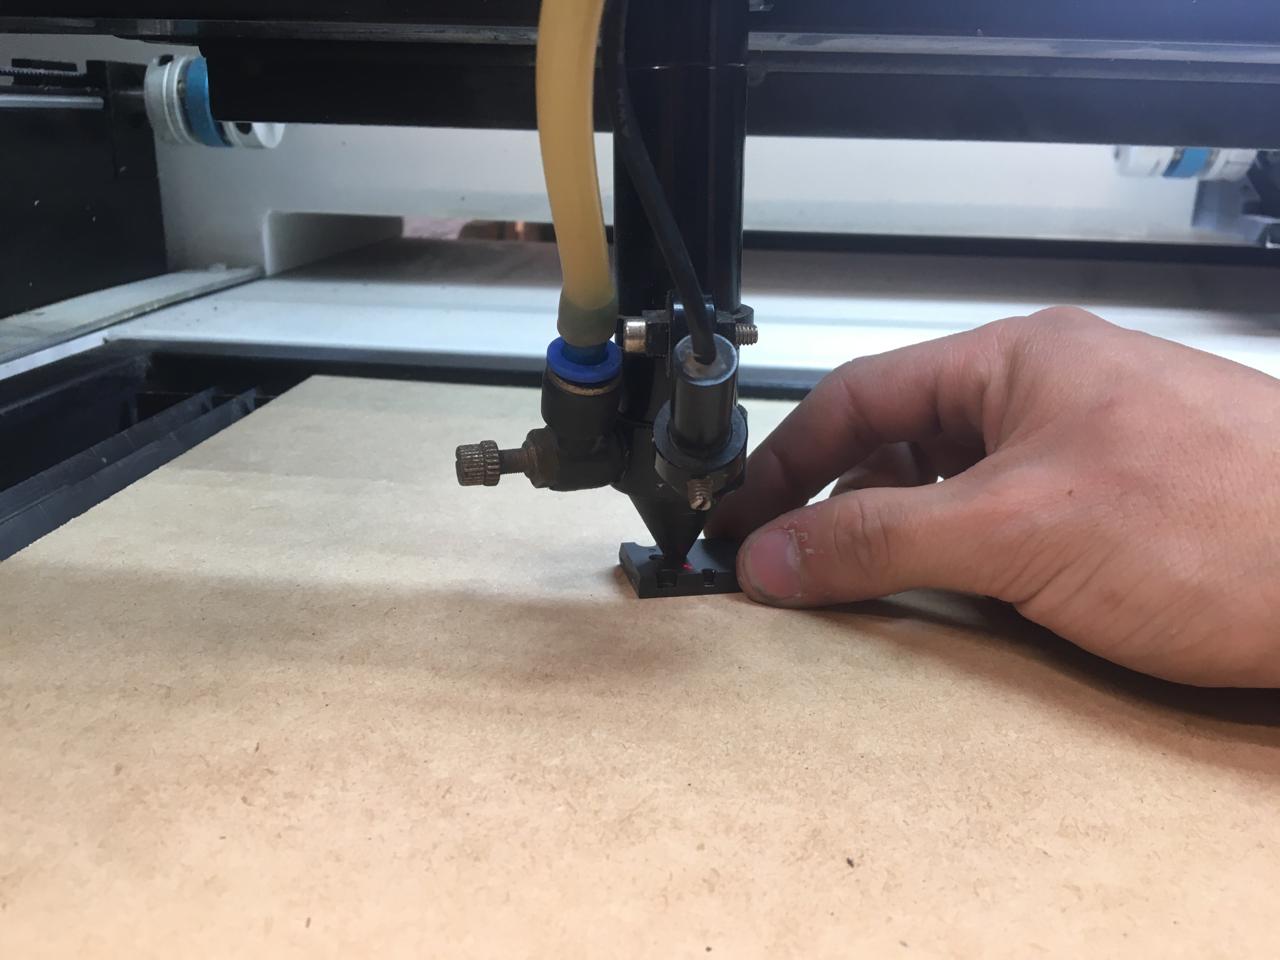
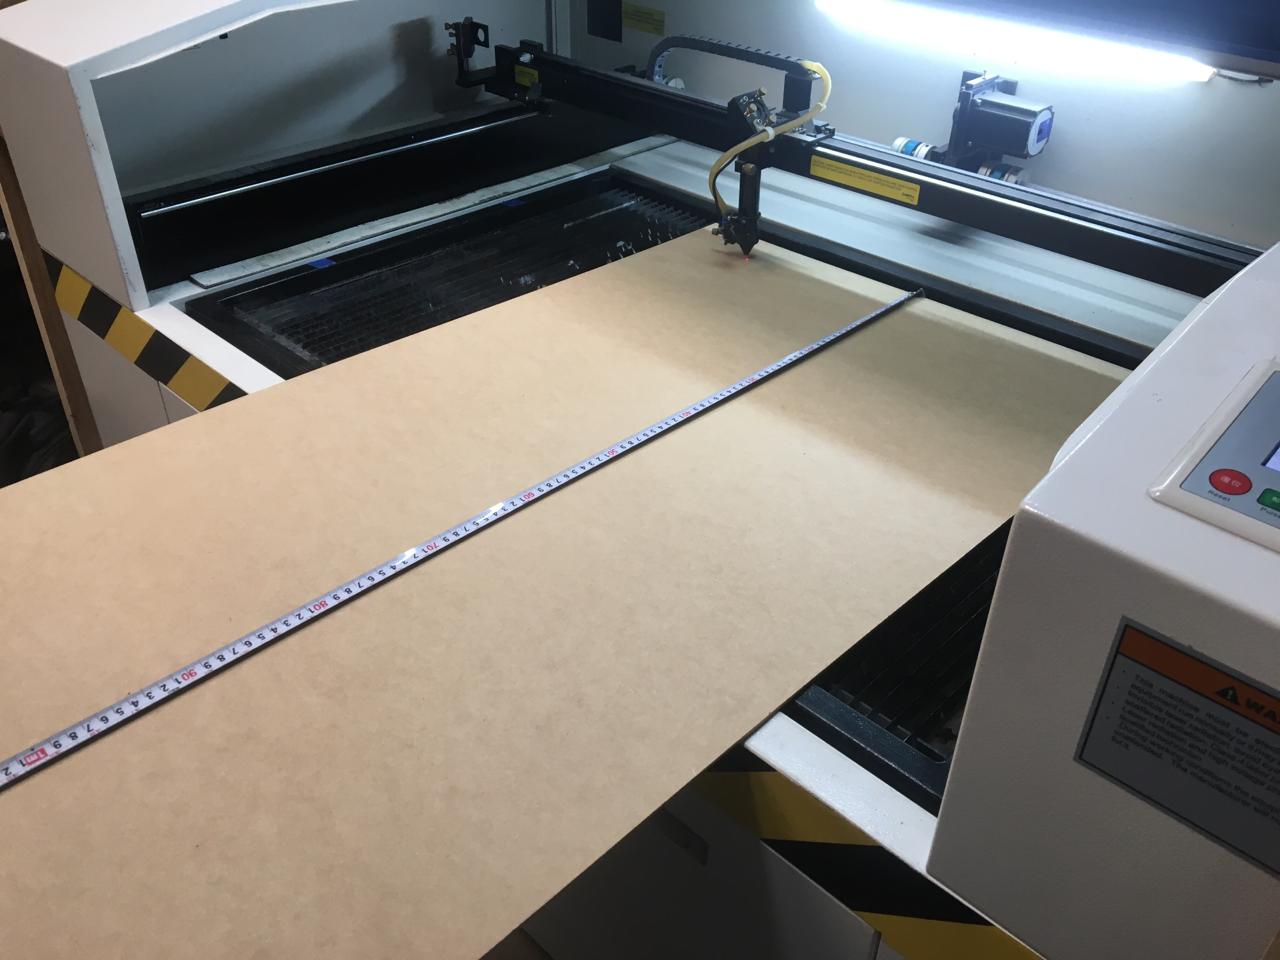
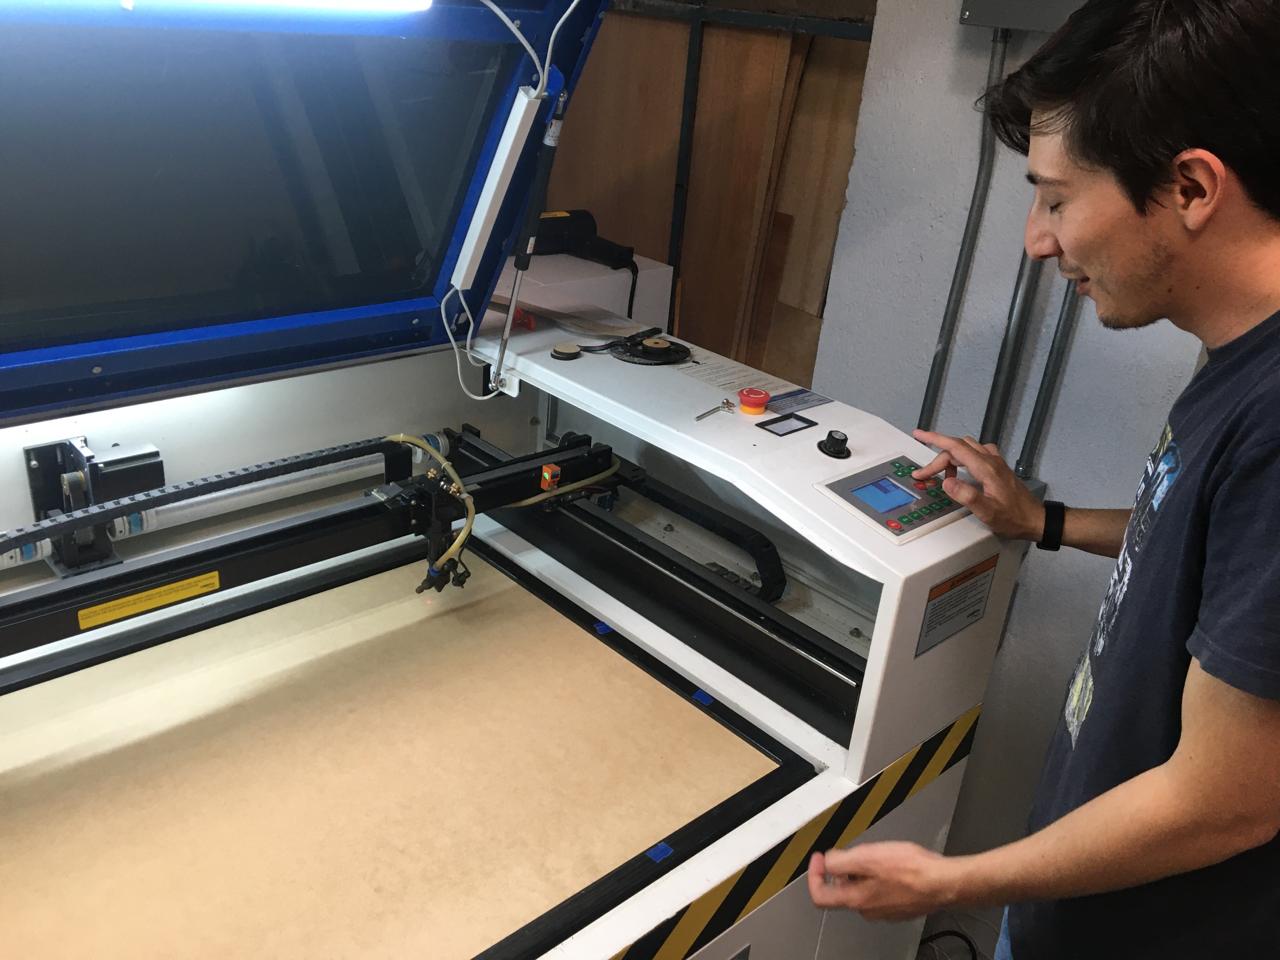
Because I didn't wanted to wait for the machine in our fablab, a friend of mine who has one offered his machine for this assignment. So I went to his workshop and there, first I calibrated the machine at exactly 5 mm with a transistor (usually this is also done with a usb). Then I manually cutted the MDF sheet for it to fit on the machine, after this I marked the origin where i wanted the machine to start cutting.

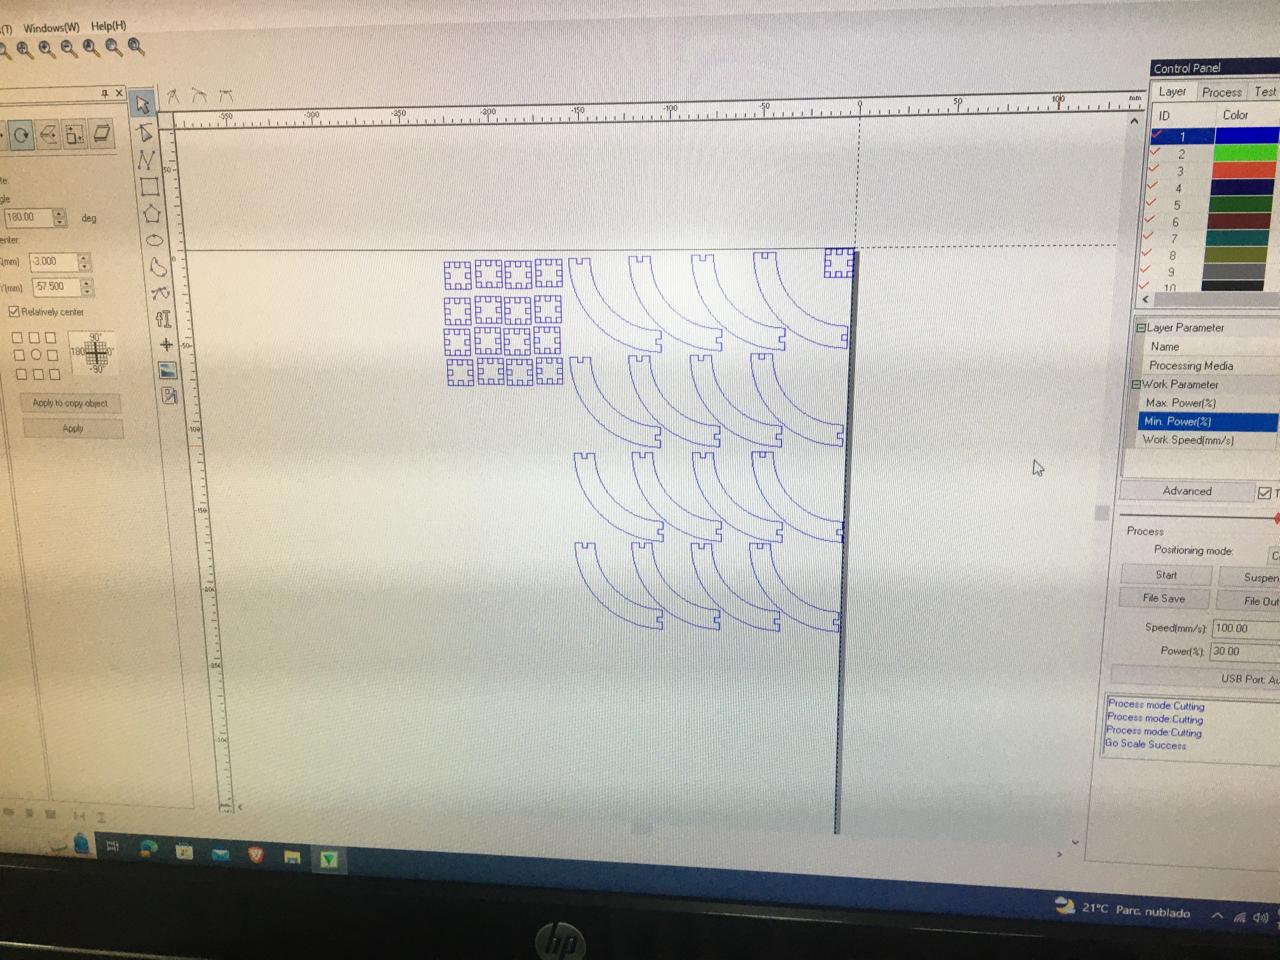
Then I started the software to send the file to the laser cutter in this case RDworks was used, there I made some adjusments to duplicate the wheels and mirror and duplicate the side and as well as lowering the intensity so the windows weren't cut through. Ater that I pressed start and the machine cutted it.
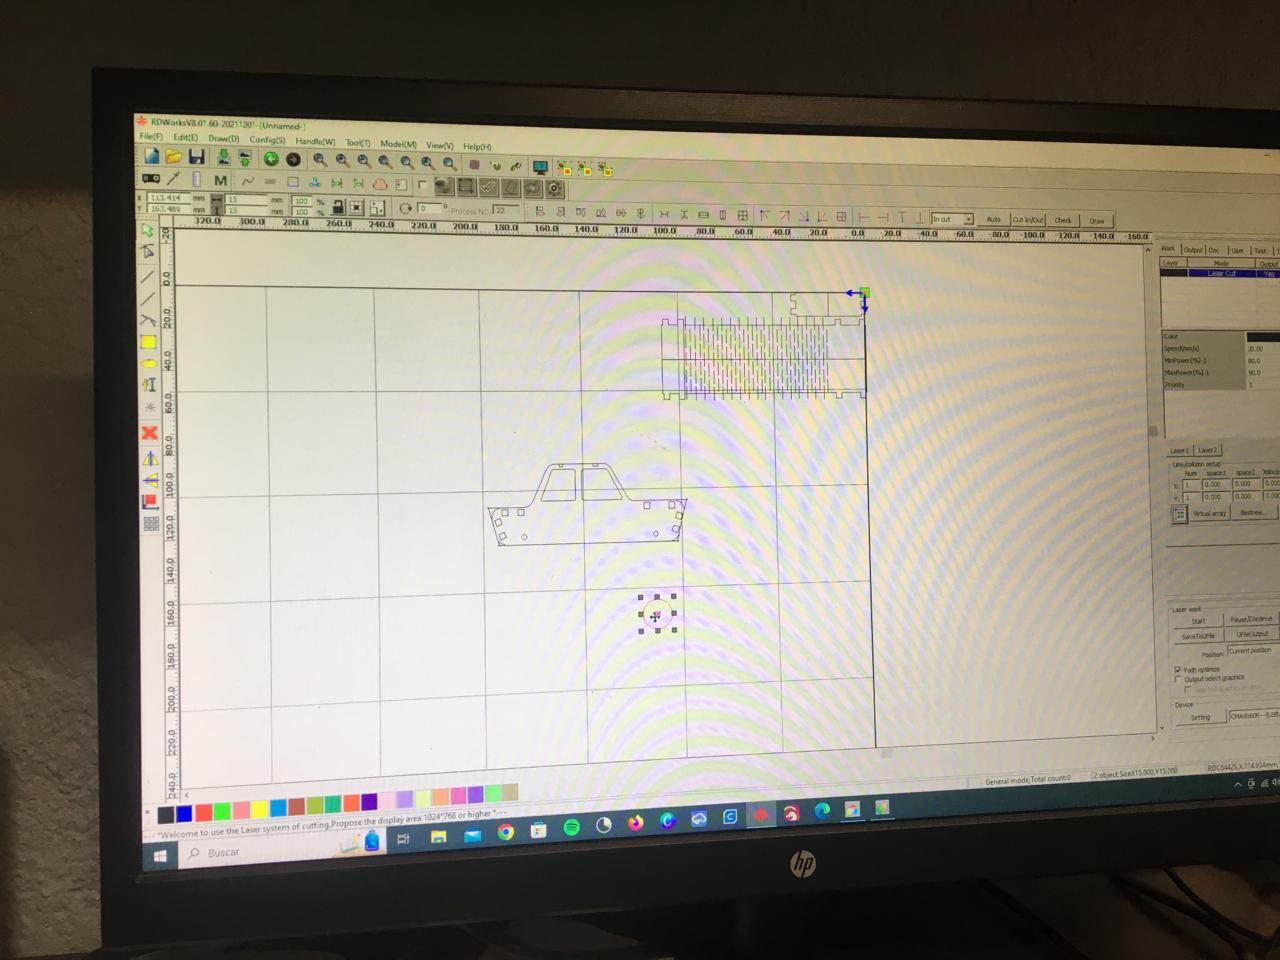

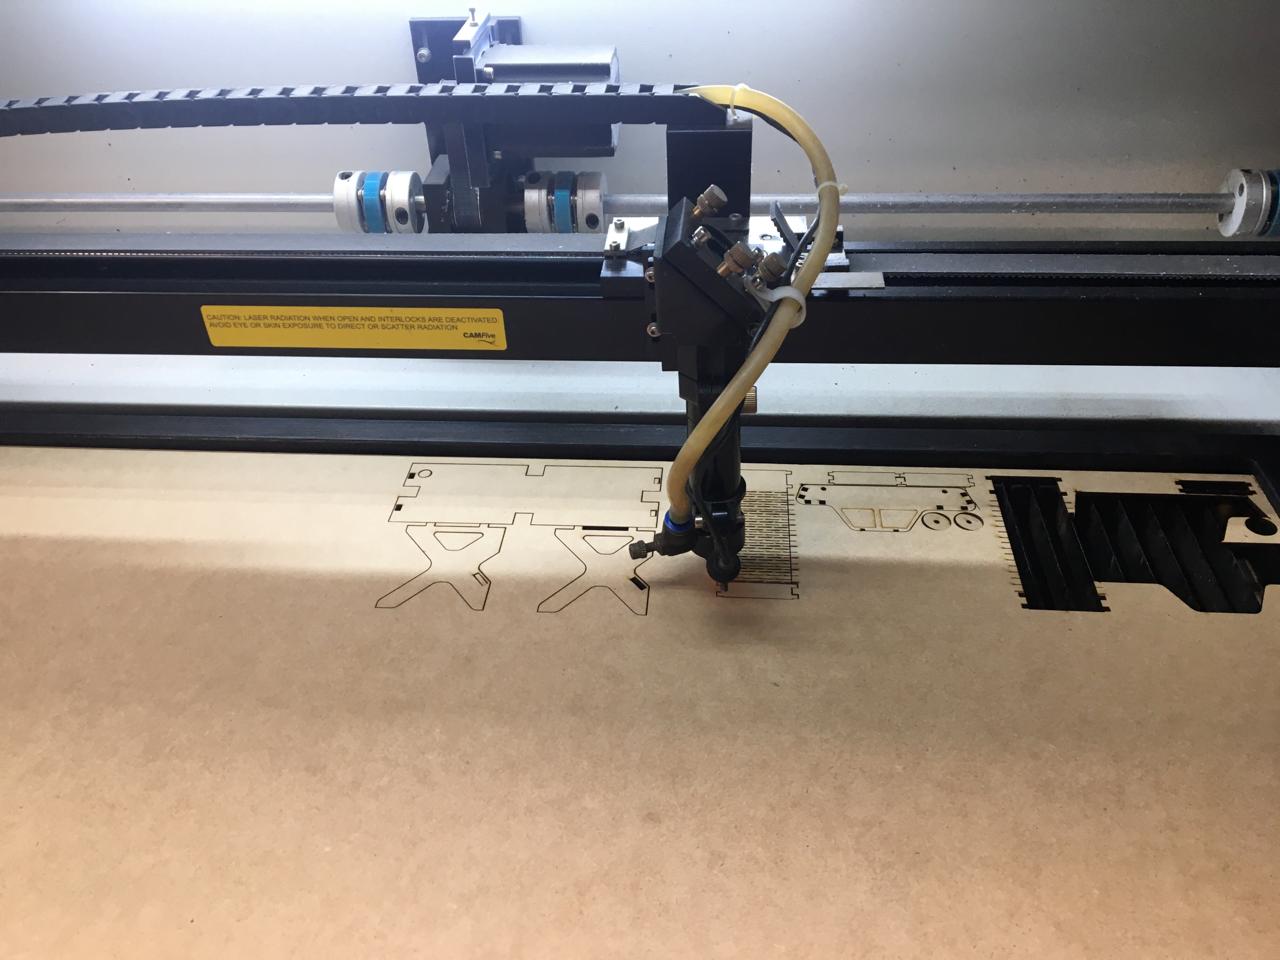
In the software the operations can be selected by color, in every operation the parameters can be selected, for example if we want to cut or engrave this are the parameters that could be used.

Finally, I took the pieces out of the cutter and assembled the car and another thing I will use for my final project, you can check it out on the page assigned to my final project. You can download the car here.
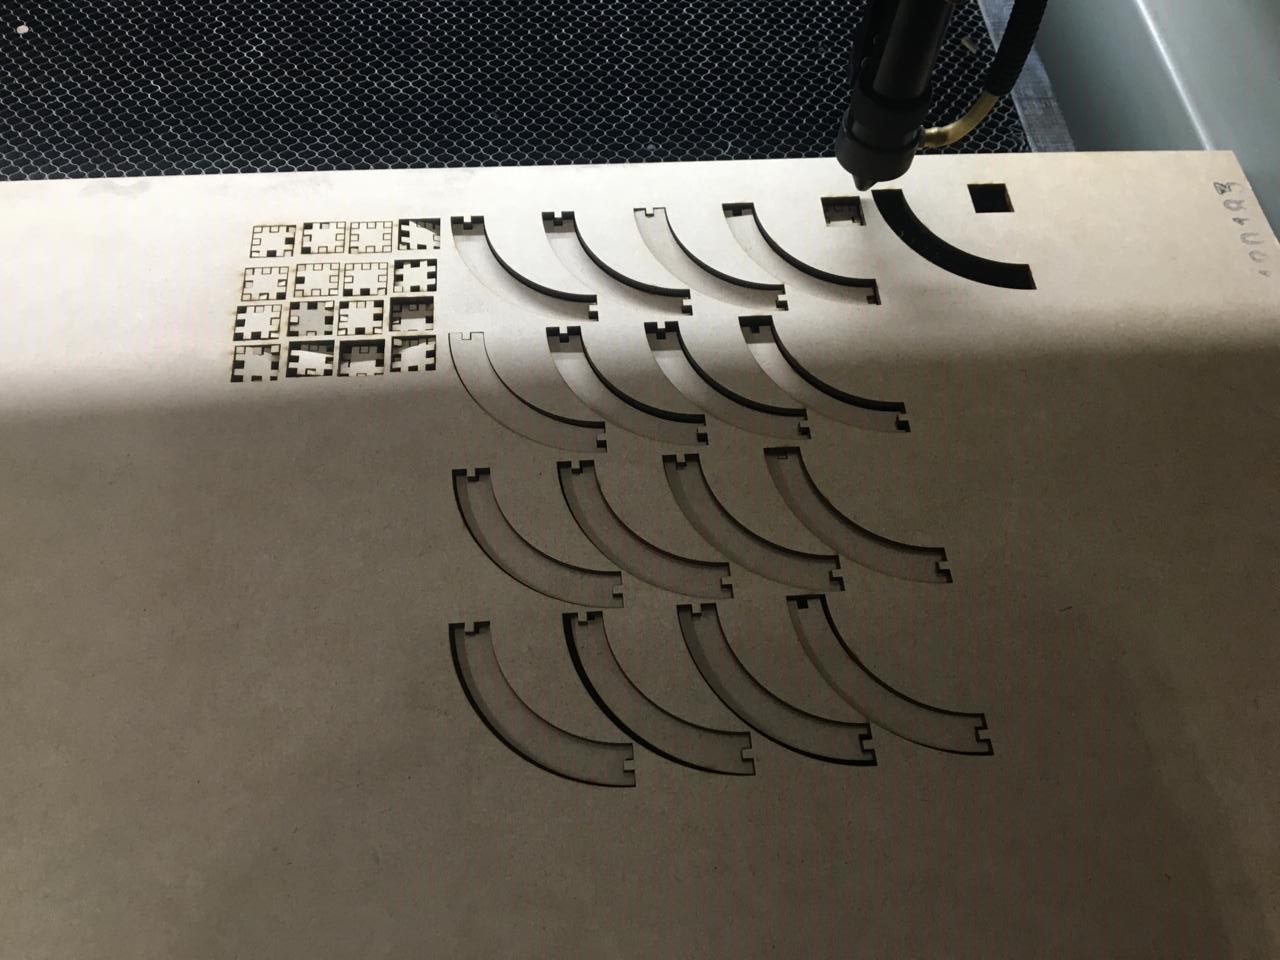
Parametric Construction Kit
For the construction kit I didn't know what to do so I looked for refferences in google until I found something that i said "I would like to have this", so I started my design for this kind of spherical kit, I cutted 24 of the square shapped and 24 of the circular ones. The process of cutting was the same I did for the car. The difference was I made it on Fusion 360 and it was wierdly difficult to export it on .DXF but in the end it worked.

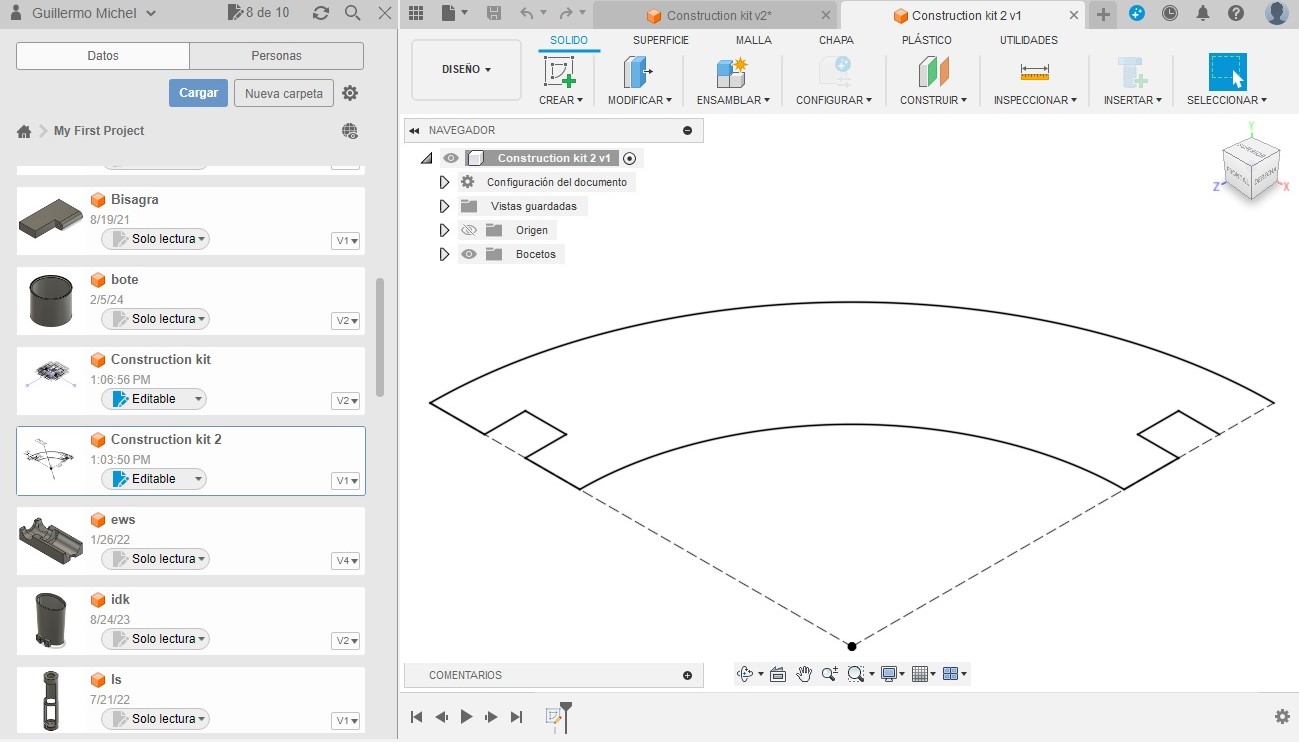
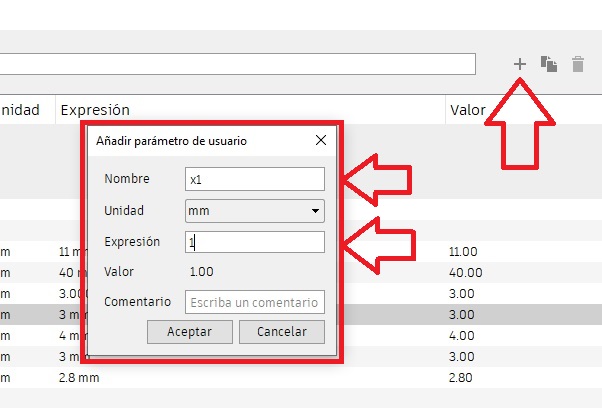
To do the parametric design, click on modify and scroll until you find parameters, there you can set parameteres for the model.

Afterwards click on the + sign on the left side of the window. This will pop a new window where you can create your own parameters for the model. First the name, then the units that you will use and finally the expression, this can be a value or a mathematical expression.
After creating and editing your parameters they will be shown as follow, to change them double click on expression and type what you want.

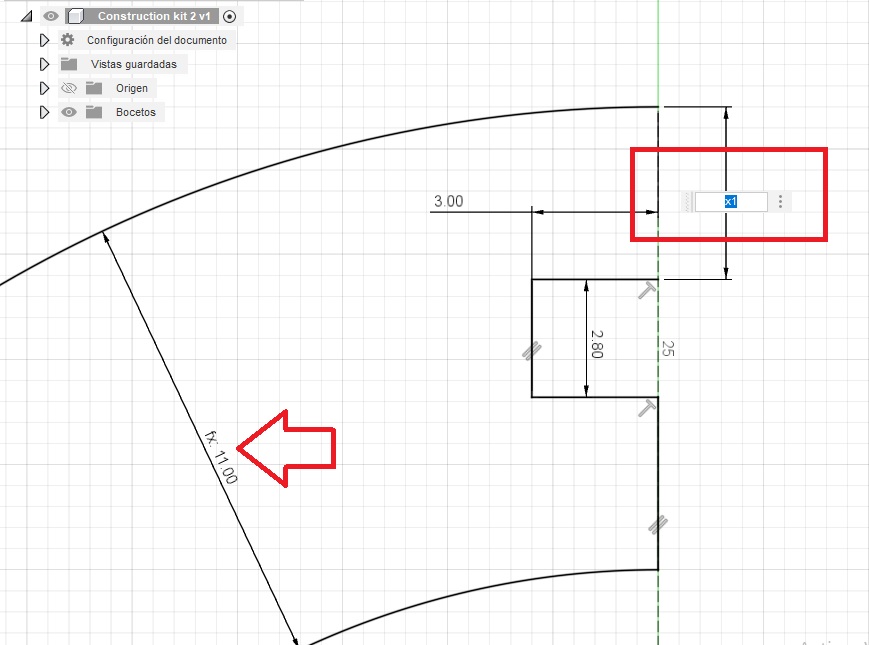
Finally when you want to use them simply type the name of the parameter when adding sketch dimensions. When a parameter is being used it will be shown as fx: and the result of whatever math expression the meassure follows. You can download the editable files by clicking here for the circular part and here for the square piece.
Finally the construction kit is cut in the same manner as the others. To download the .DXF files click here for the circular part and here for the little square piece.
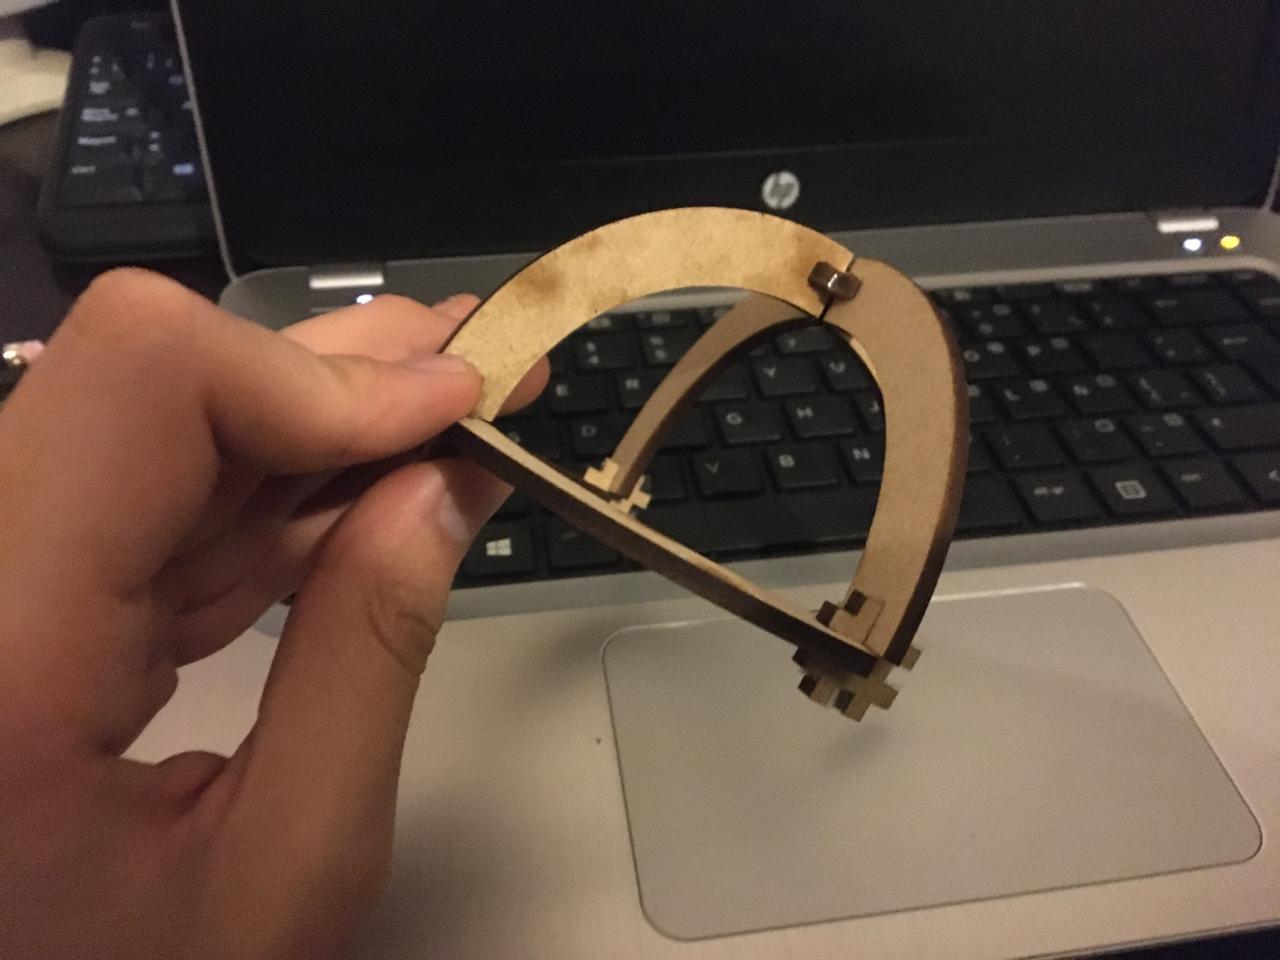
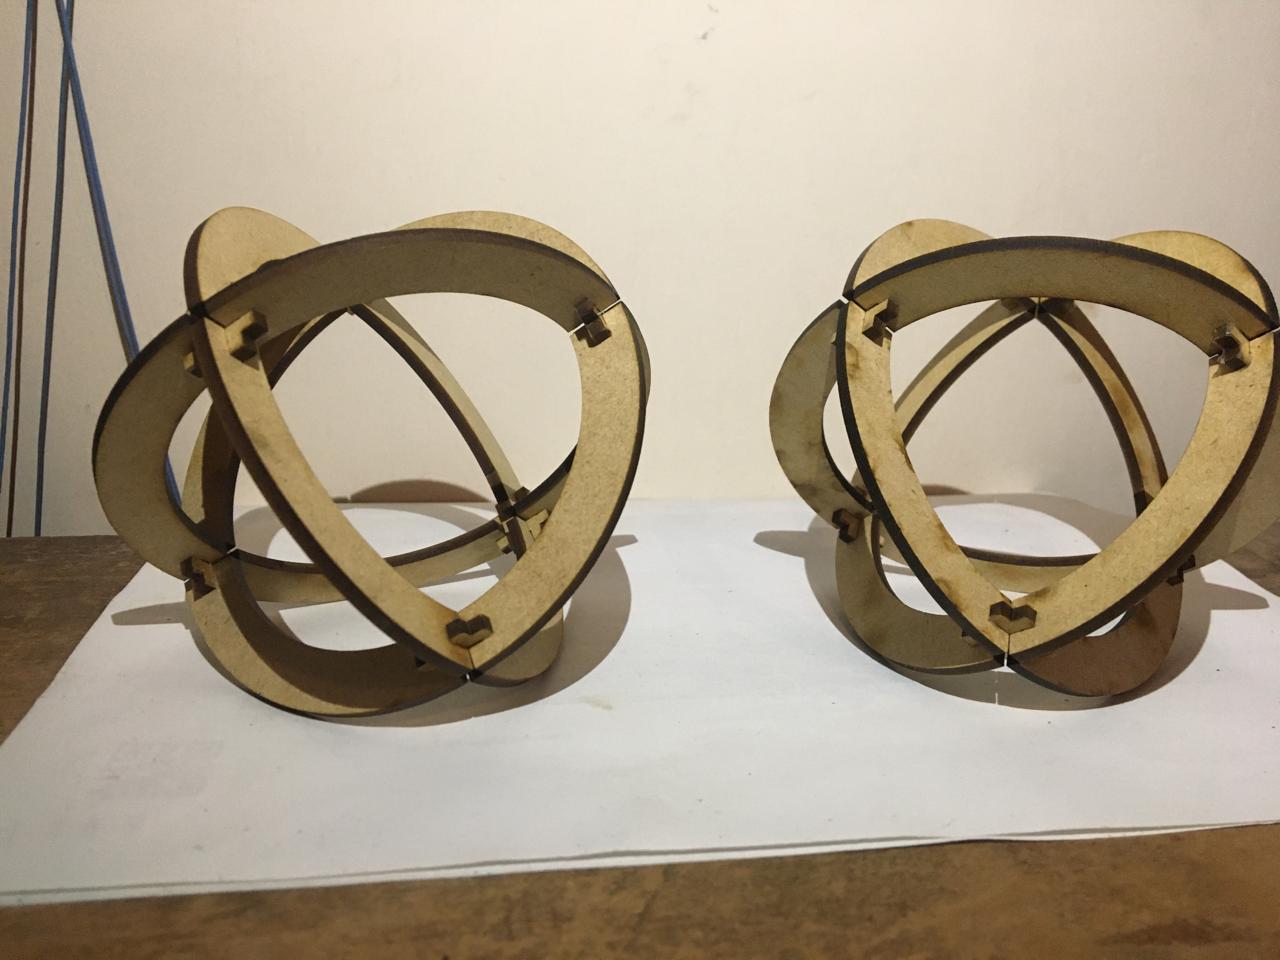
Final Assembly
In the end this is what my construction kit looks like assembled in some shapes, I think that if I play around enough I can make a lot of wierd esculptures, the press fit is quite nice even though I had to adjust it because the machine was a little uncalibrated on the left side and that messed with some of the pieces. Check it out by yourself download.


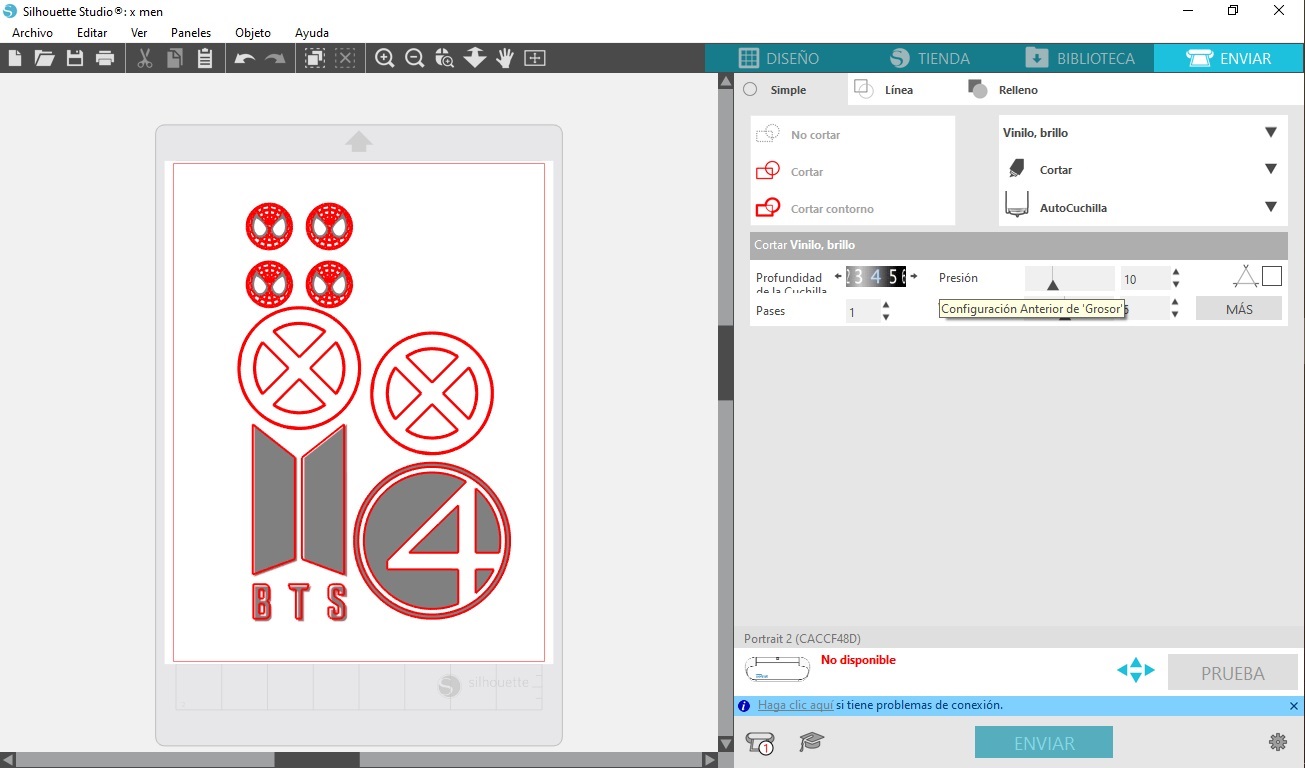
Vynil Cutting
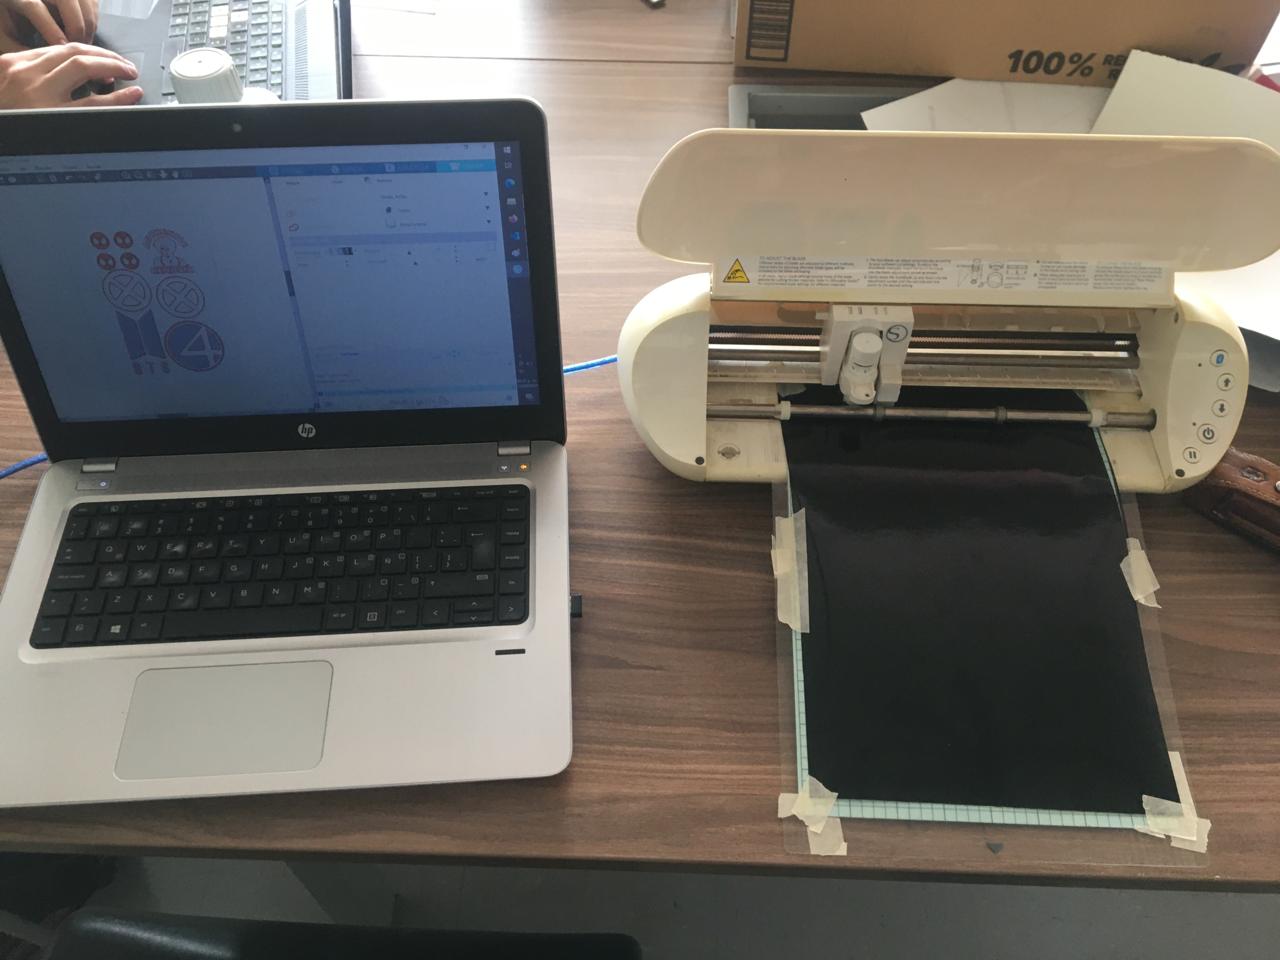
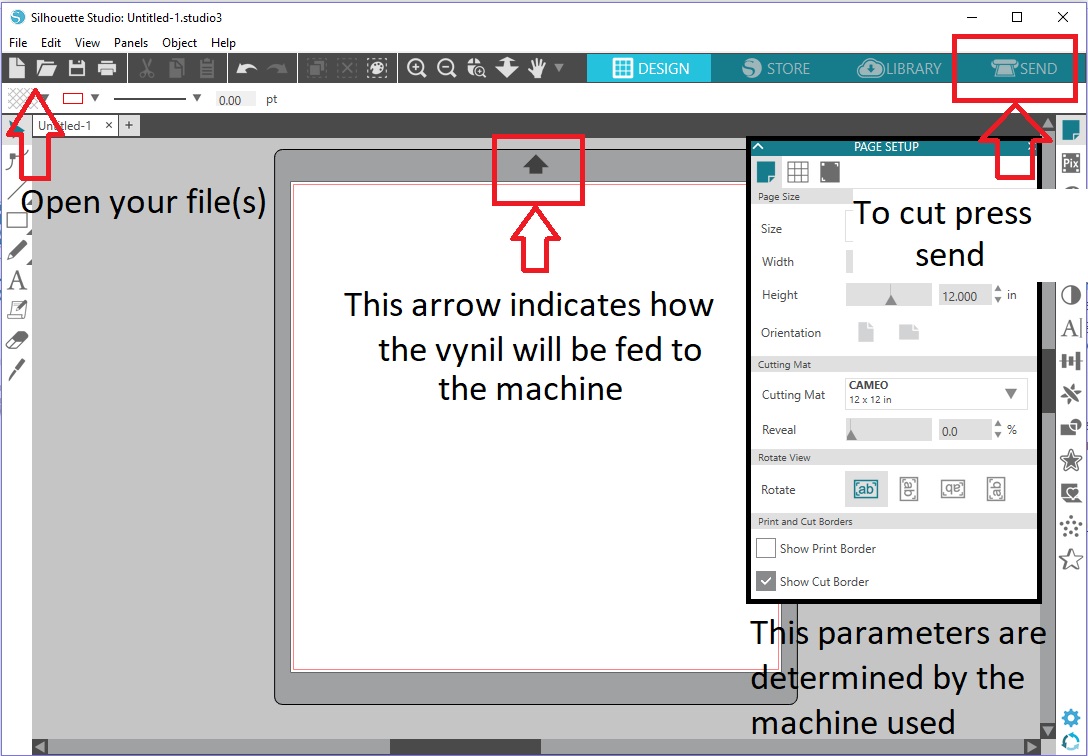
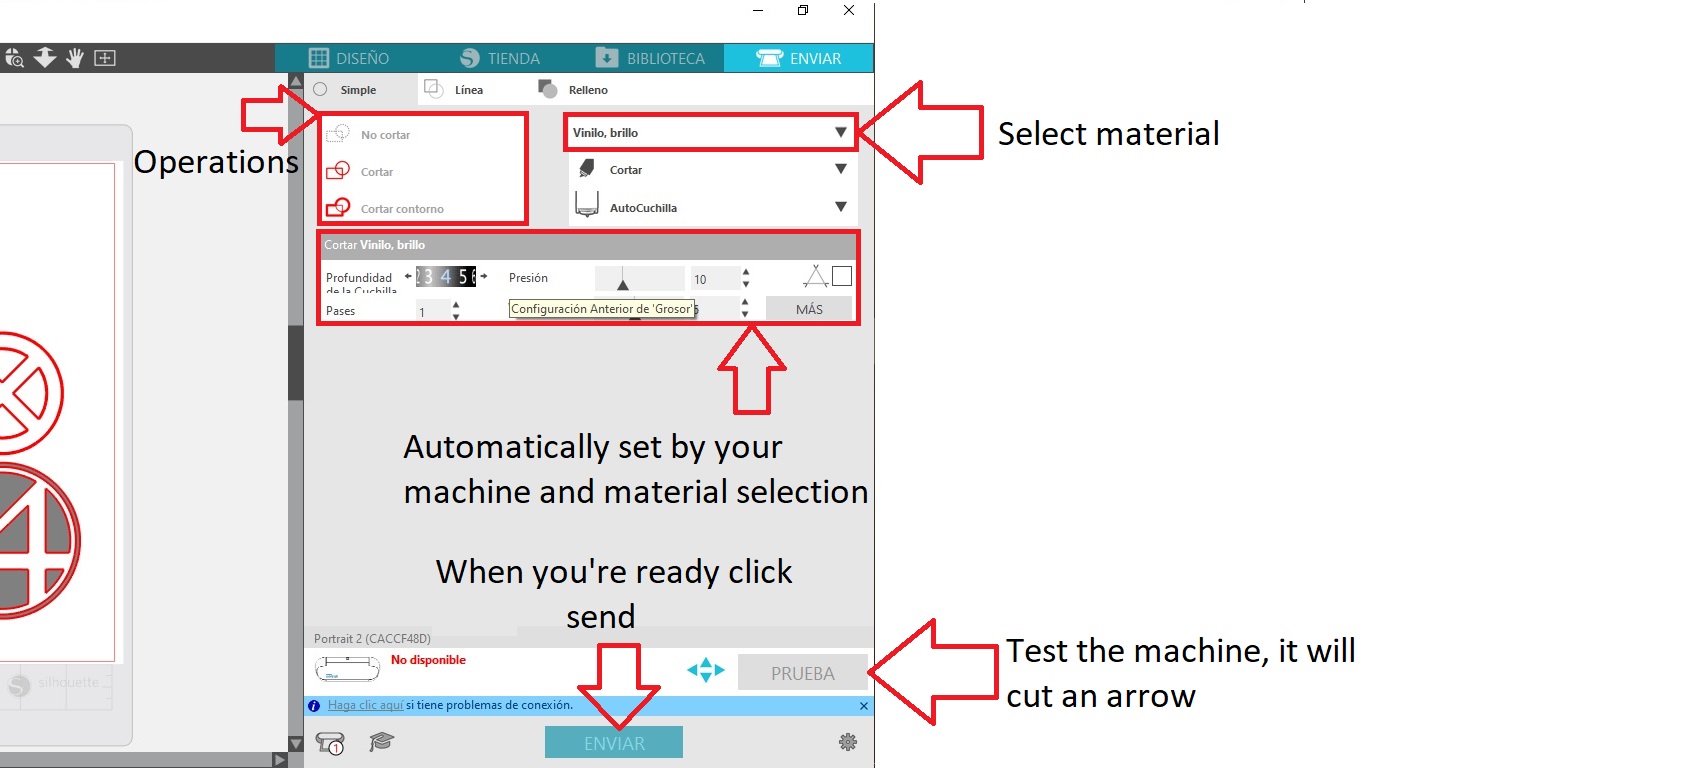
For this part I didn't know what to design so I downloaded a bunch of images on .png format and adjusted the size to cut it. I really like Marvel so I just searched for their logos. Then I openned the images on Silhoutte Studio which is the software for the vynil cutter in our Fablab, plugged my computer and started cutting, to be honest I tought it would be more difficult but it was really fun and now I kinda want to get one for my house.

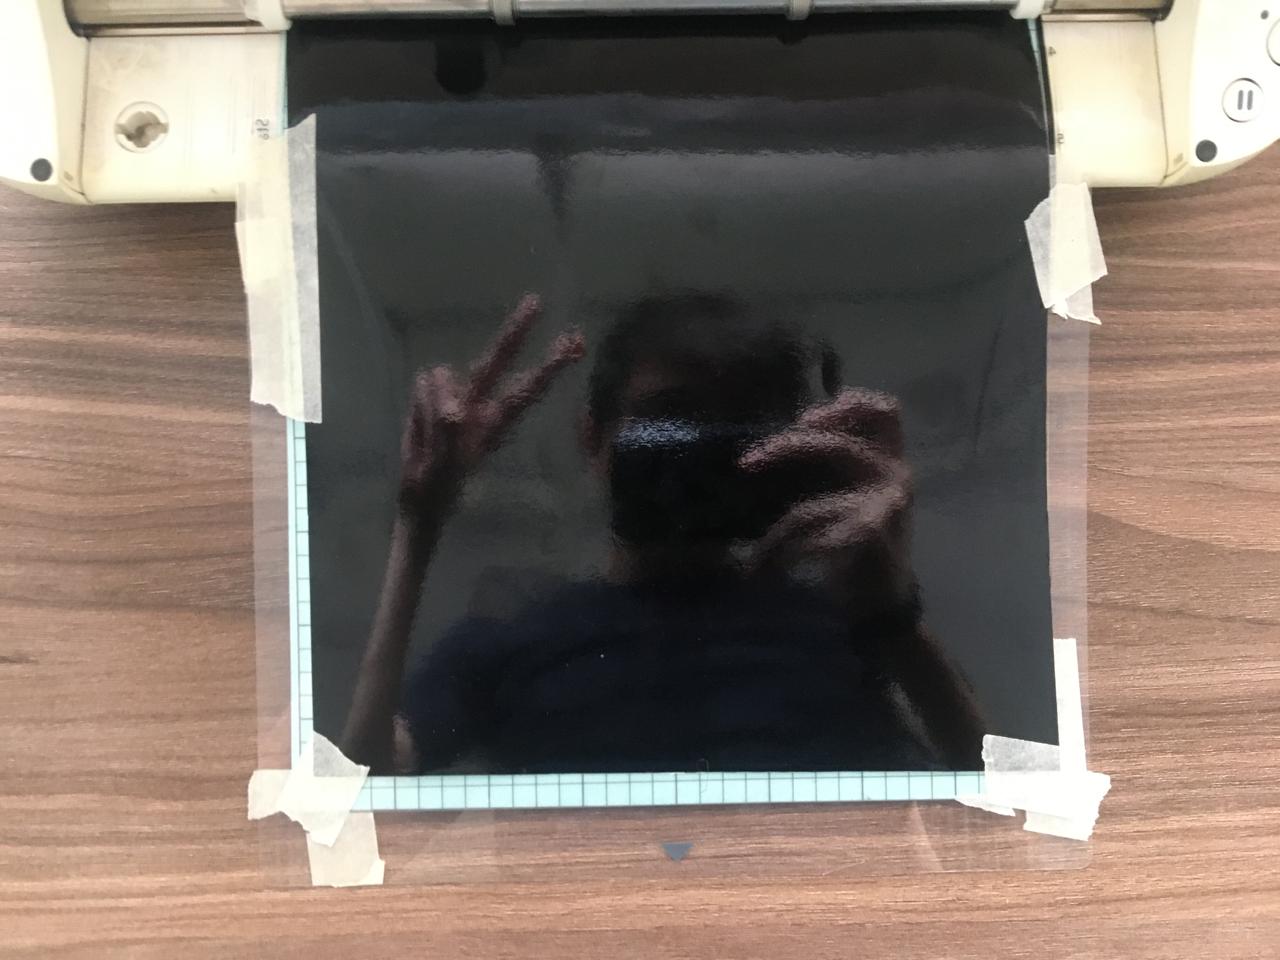


In the end I just peeled the excess off but in some cases like the fantastic four logo even the excess works really nice. I gifted many some of this to my friends because of Saint Valentine's day.