5. 3D Scanning and Printing
This week I made a design and printed it on TPU, also did the scan and print of another object on PLA. The learning outcome for this practice starts from designing the piece and considerating the reasons it has to be made under this process. In my case, this is not the first time I make something with a 3D printer, so I decided to experiment with the material and the machine.
---- The group assignment: Testing the design rules ----
3D technology is very interesting because it can create from simple to complex shapes without the intervention of complex production lines, it is versatile, so you can make built-in pieces in a mechanism and you won't need molds or extra joints. There are also multiple materials that you can use to print, the most known is PLA, but there are other plastics and resins printer-friendly, it's even possible to use ceramic and wax! So, the material of choice will depend more on the featurees that matter for your design. If you wish to learn more about the tests and technology that we used in my Fab, click here .
The basics and what I learnt
| Element | What is it? | Picture |
|---|---|---|
| ENDER 3 S1 PRO | First, I want to show you the printer! In my Fab we have some of these and I decided to use them because the process to get them ready is quicker and easier, so it is to change the material and configurate the file for the print, because it works with Ultimaker Cura That I found very intuitive, more than the software used for the SINDOH 3DWOX 1 as an example. | 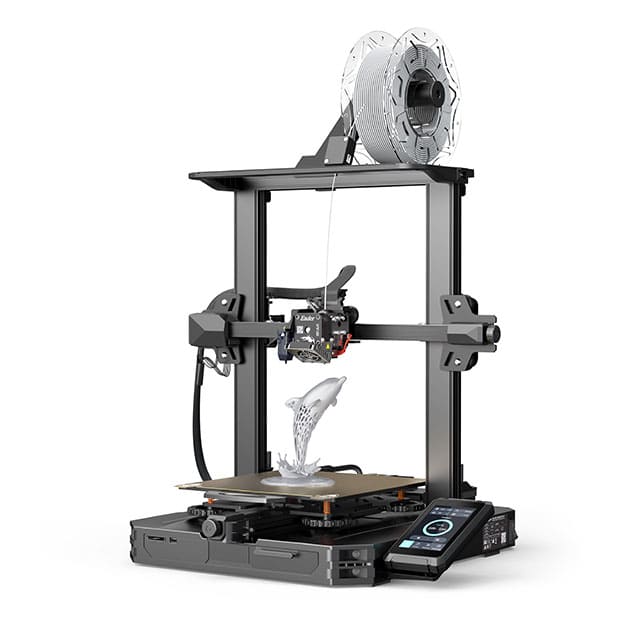 |
| Filament | These come in a roll presentation, and will be melt by the extruder of the printer. Some importan things to consider are to check the material twice before sending a print (Some may look exactly the same but be different materials) and also to check if the amount will be enough for your print. I learnt these not from my own design, but from a friend that had some trouble with her print as I was sending mine, the material you set from the printing software must match the one of your filament because the default settings may change give you trouble. |  |
| Bed temperature | Maybe it's pretty obvious, but for me it wasn't. When you send a print, you don't only need to wait for the extruder to heat, also the bed, so If your print is taking some time, probably is not wrong, just wait for the bed to reach the right temperature! | 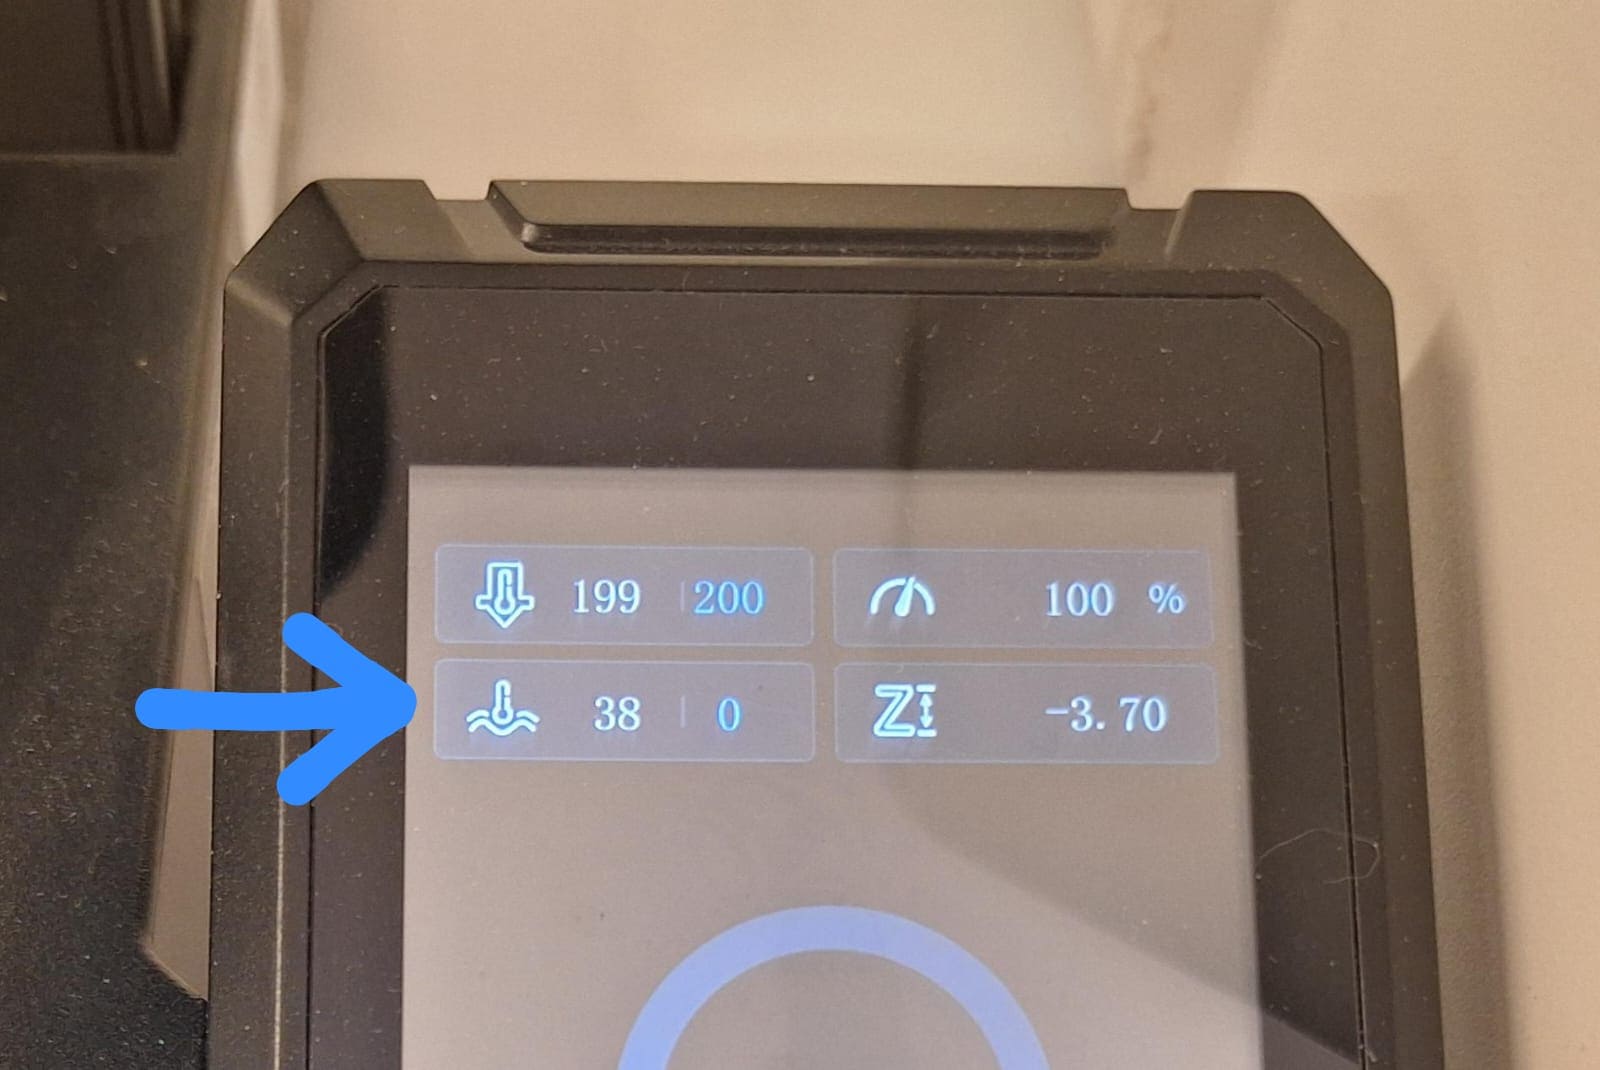 |
| Removing the piece | Avoid touching the bed directly! This is not just about the heat, but you may make it dirty from the contact of your fingers, it's better to use a spatula to remove it. Also, try not to apply too much force to detach the piece if it's still on the machine, because you may decalibrate it. It has a magnetic bed that is usually flexible and you can take away to remove the piece more comfortably. | 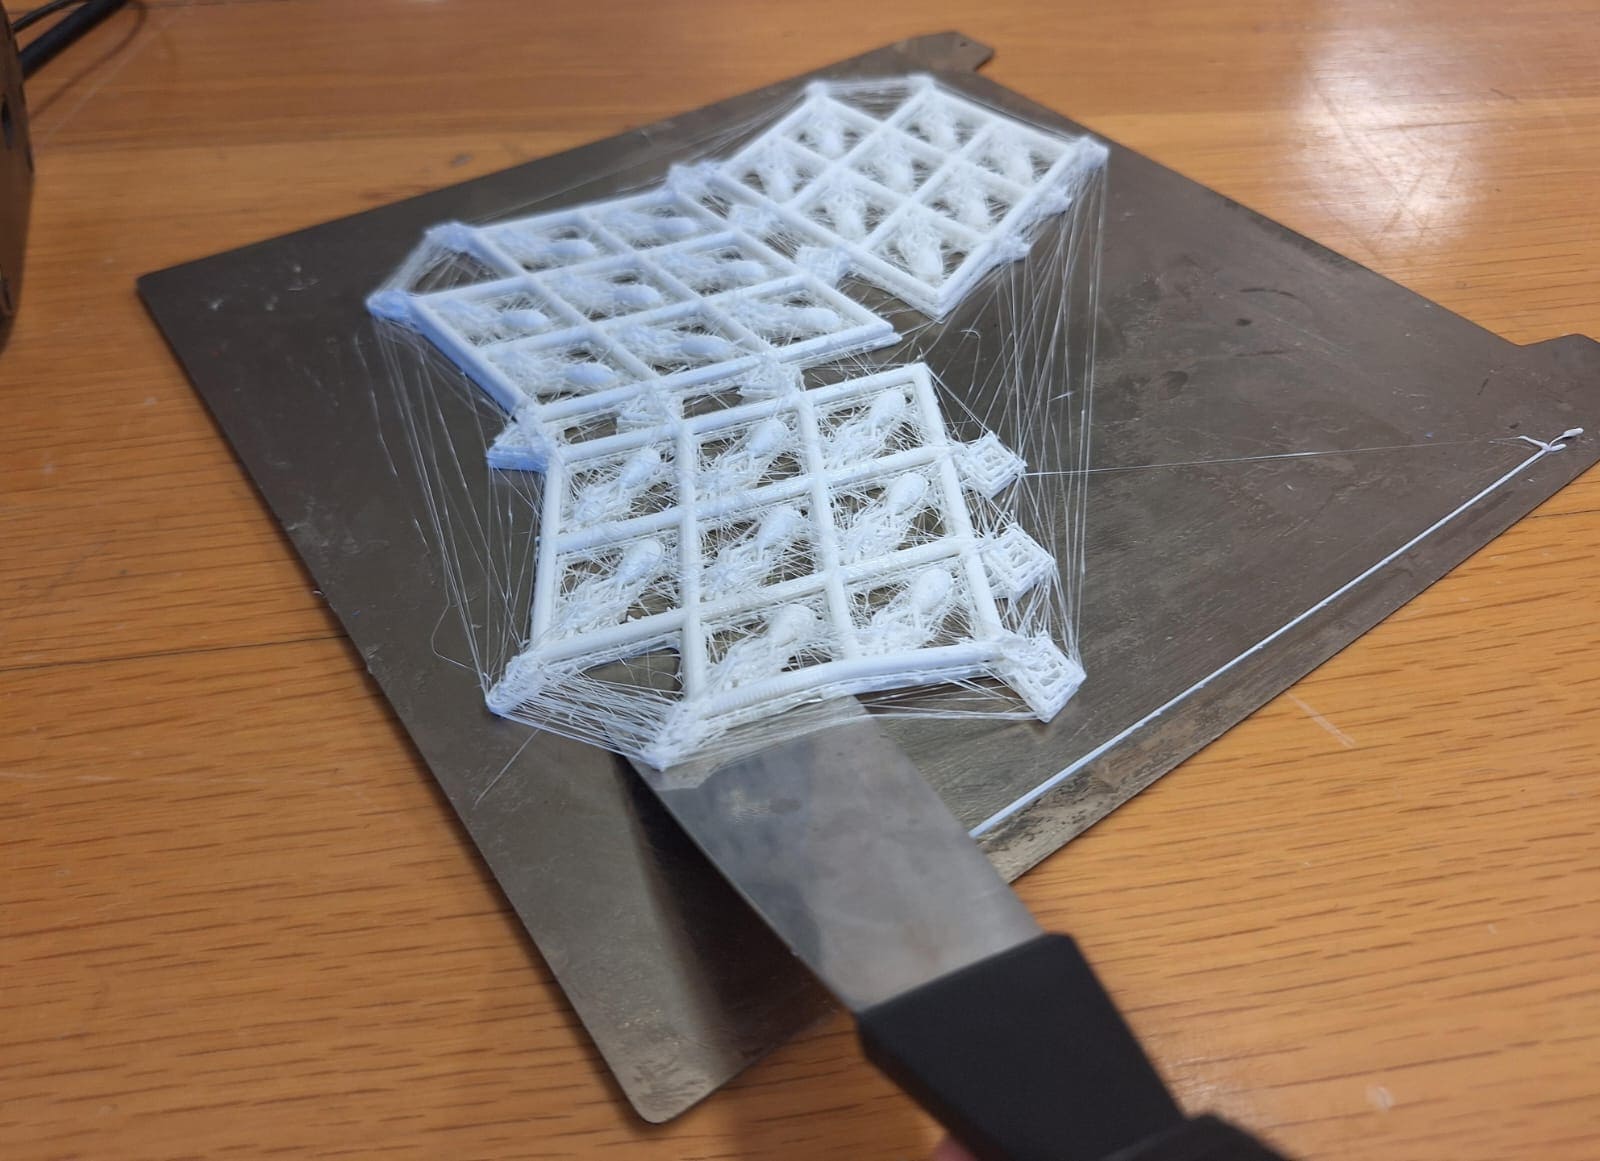 |
| Scaling | Make sure your design fits the dimensions of the bed from the beigning. It's possible to change the measures right at the software, but it will be proportional, so if you have very small parts, probably it will give you trouble. I t happened to me that I made a larger piece at first that I had to adapt. Also, when you export the file to the printing software make sure to check if it has the right measurements, because sometimes the software makes it smaller and you need to scale it to match it's real size by adding a 0 to the percentage of the size. (At least using Cura) | 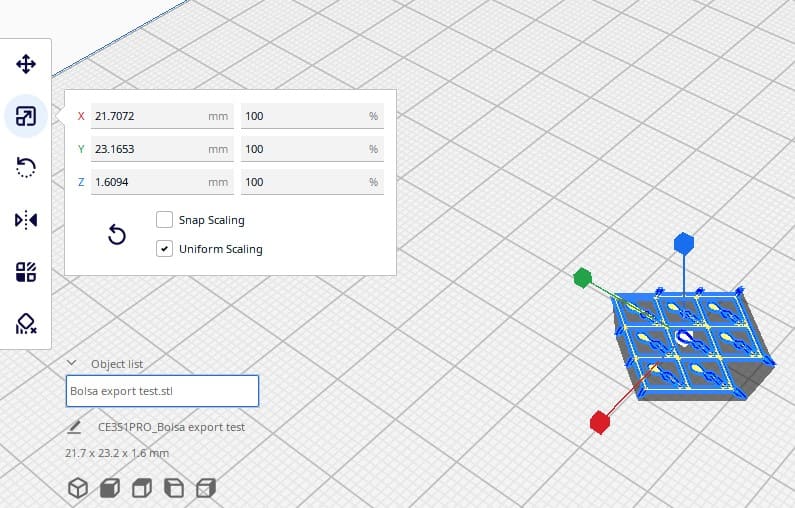 |
| Retraction | This was both: a blessing and a headache. This is an option you can turn on/off from the settings of your print, it's about if you want the extruder to stop adding material when it moves. For my piece, I had very small sections, so If I had it on, there was a chance the nozzle wouldnt finish adding enough material bedore stopping to move to the next spot. That's why I decided to turn it Off at first it felt like the right decision, even though I was told there was a chance to find a "hairy" situation. In the end it worked, but to clean it and remove the supports was a real nightmare, you will understand why down below. | 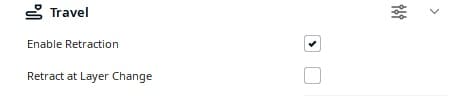 |
---- Designing a 3D model to print----
- My first step was to get some inspo from other sources. The instruction for this assignment was to make an object that wouldn't be that simple to produce with other processes. I found inspiration from Pinterest, Tiktok and Instagram. Finally, I decided that I wanted to make a structure for something related to fashion: a purse.
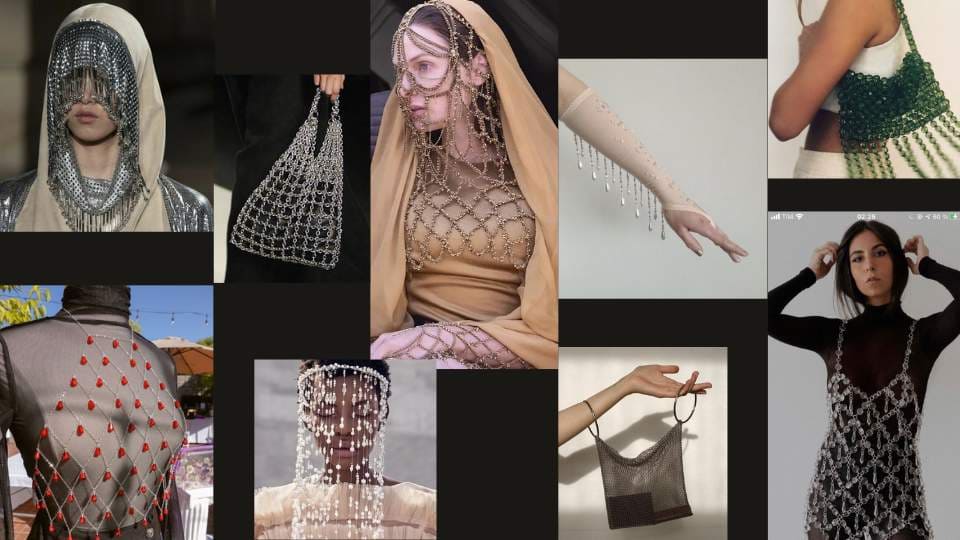
- To define the concept of my design I created a moodboard with what I liked. There I linked that the motive to make this piece would be to incorporate some chain and drops that could move. Here is my moodboard, all pictures come from Pinterest.
- Now that I had the inspo, I started to draft some ideas on paper, trying to think 2D and 3D at the same time. As a reference for what I had in mind, I thought of the chain structure for the purse as a mesh, something like people who knit do.
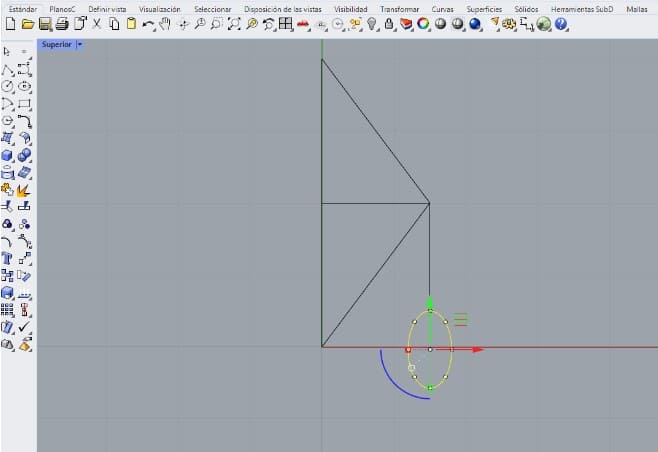
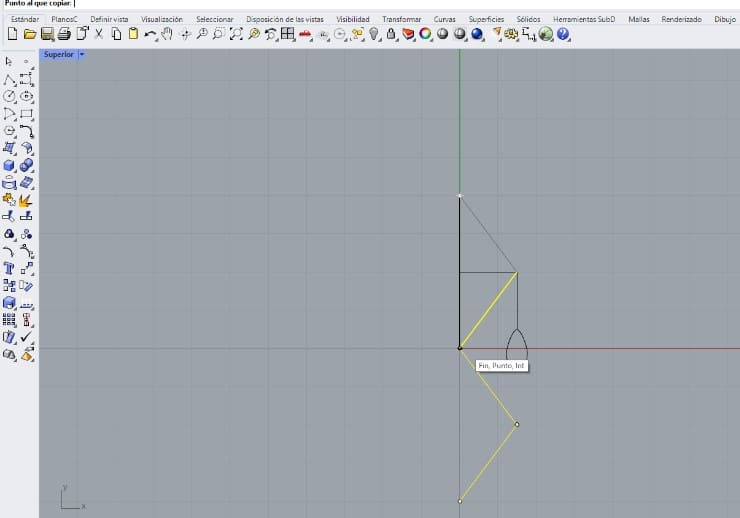
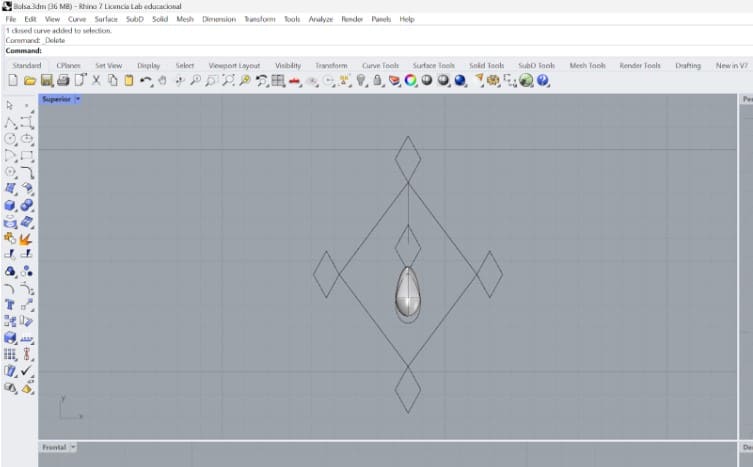
- Then I started to draw the base unit for the mesh. I thought of it as a diamond that would have drops hanging, so my first drawings were the half of a diamond and a sigle drop connected to the corner. Also, I chose to use Rhinoceros because it is the software I have more experience with.
- Once I had the lines of the diamond, I used the "copy" tool to create a duplicate below the original.
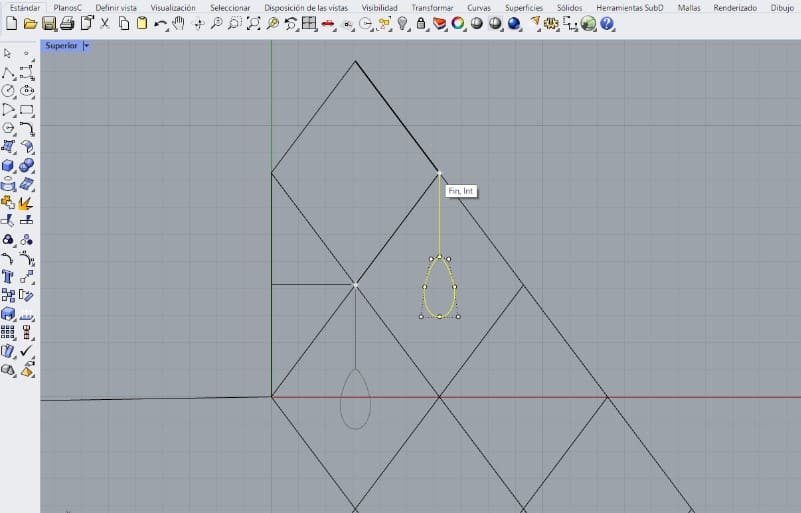
- Next, I copied more of them to make a bigger diamond shape made from the small modules, also started to copy the drops.
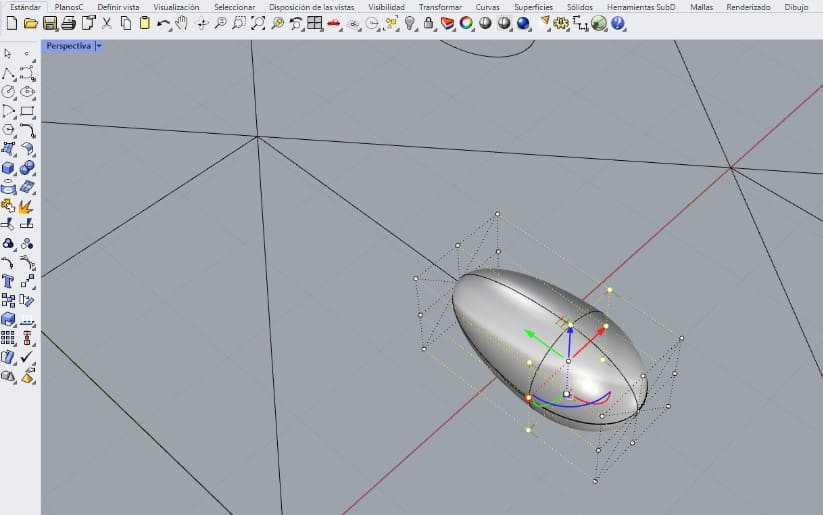
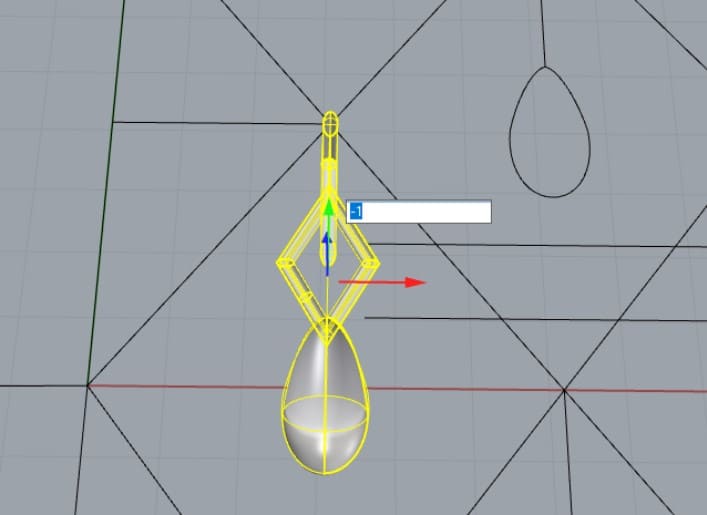
- These drawings were the base to start modeling. Now that I had them, I built spheres with the size of the drops, and used the "control points" to deform it to match the exact shape of the drop. I made only one.
- After that, I used a "dimension" tool to check the measures, I didn't want it
to be too small to avoid problems around the print.

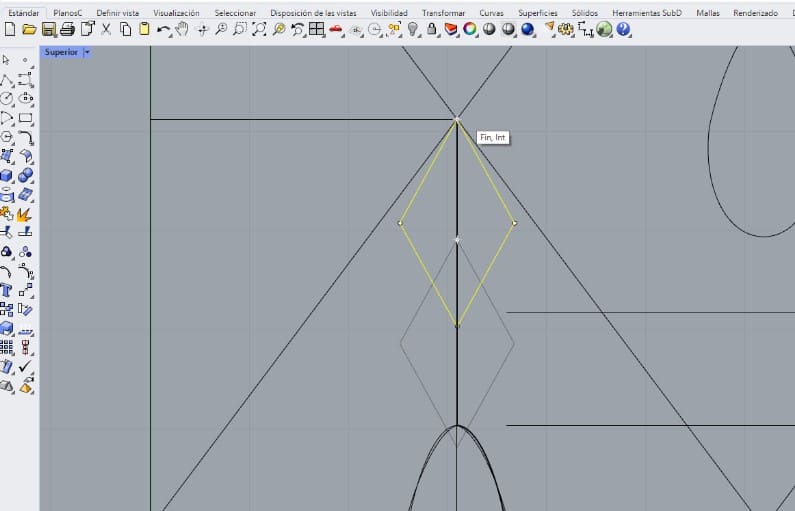
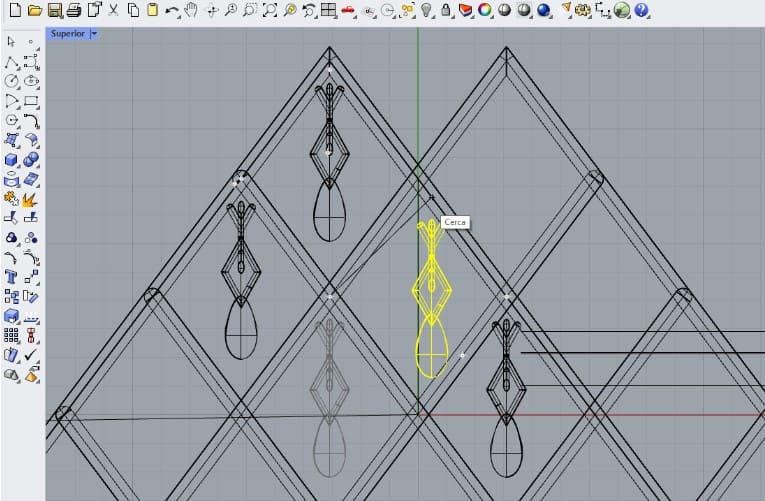
- Then I drew two more diamonds chained, I rotated the second, so it would face an opposite direction.
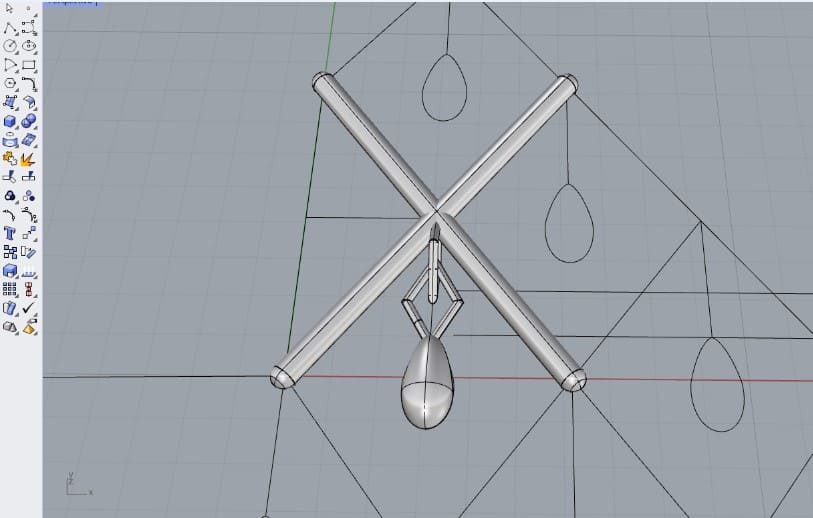
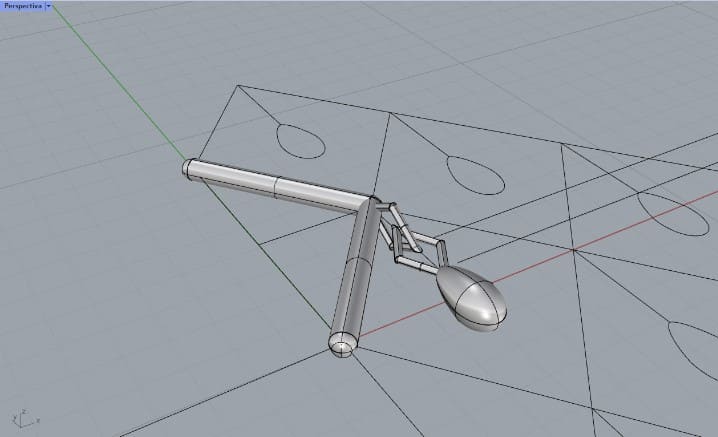
- Having the two new diamonds and the original half-diamond, I used the "pipe" tool, to make a preview of the 3D.
- I deleted the original pipe and made it again, considering a bigger area to preview the
way the drop would hang.
- Hiding the pipe, I set the separation between the two diamonds, so that they wouldnt touch and there would be enough distance for a proper print.
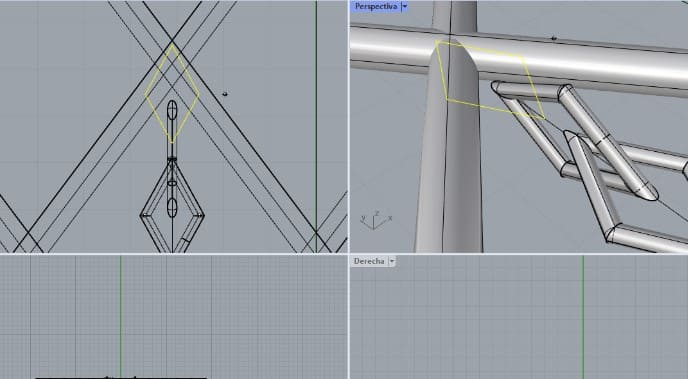
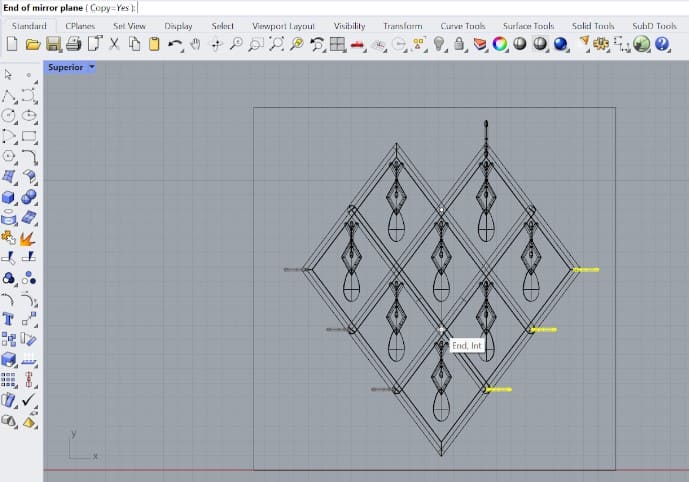
- Then, I mirrored the original lines and also used the "pipe" tool again to cover the full shape of the diamond.
- There I realized that I needed another structure to hang the chains from, so I drew half a diamond with and extruded another pipe for it.
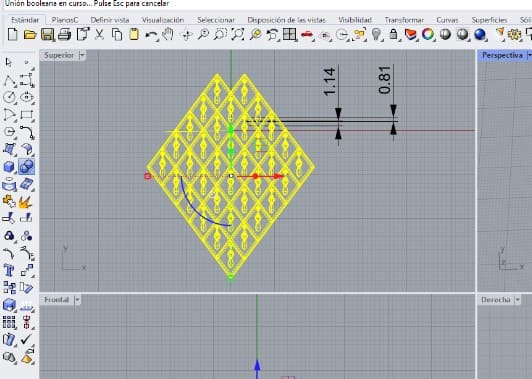
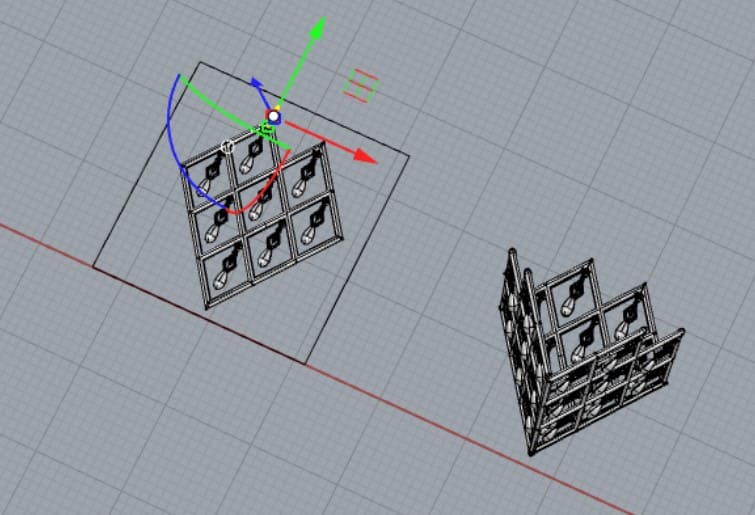
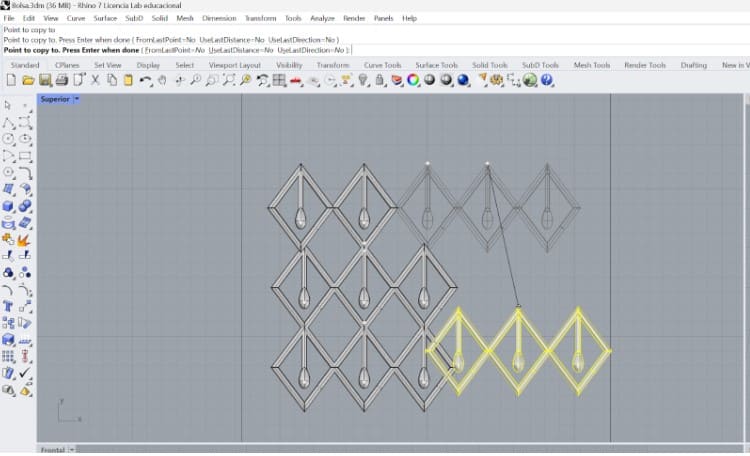
- When I had the chains and drop together, I copied them as a into all the spaces of the mesh.
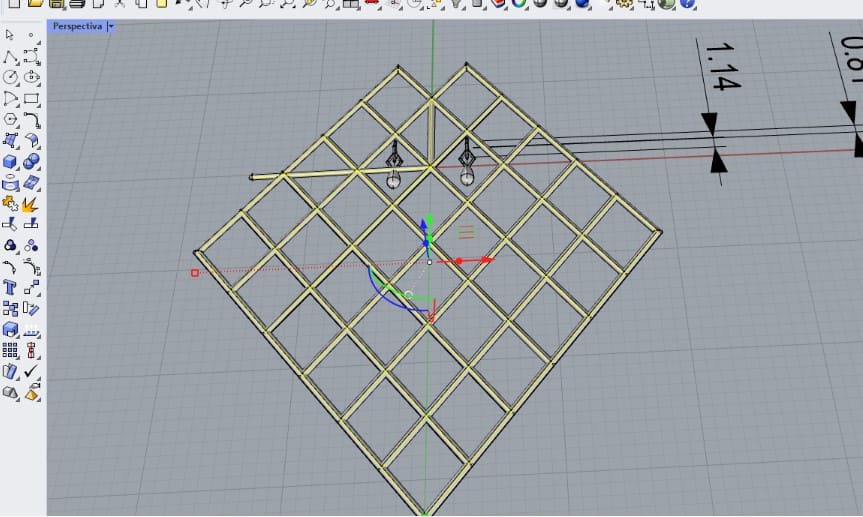
- Later, I joined them with the "boolean union" tool, so all the pipes would merge and so would do the drops to the chain. Here I realized I made a mistake about the amount of units of the mesh and the size of it: It wouldn't fit on the bed of the printer.
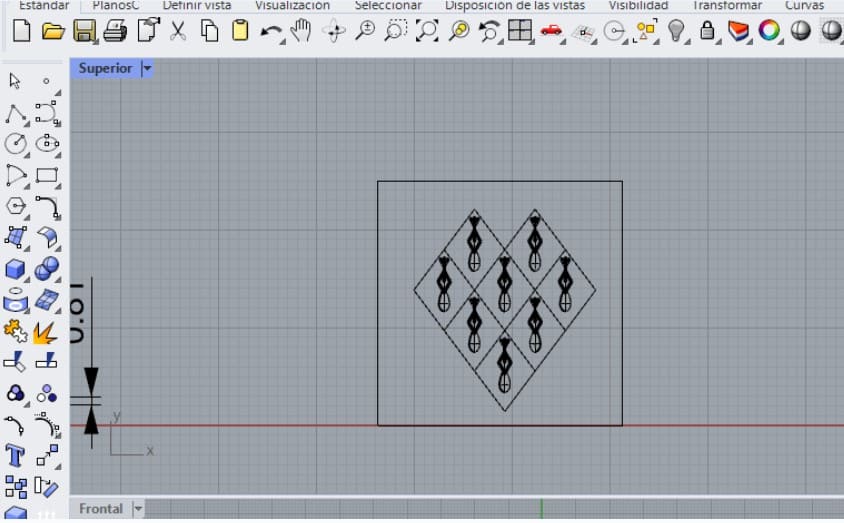
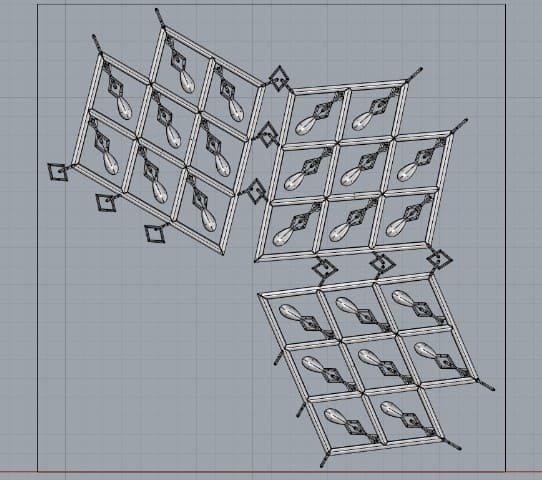
- To fix it, I used the original lines and repeated the copy and extruding process over a square that had the size of the bed of the printer, so I could verify the amount.
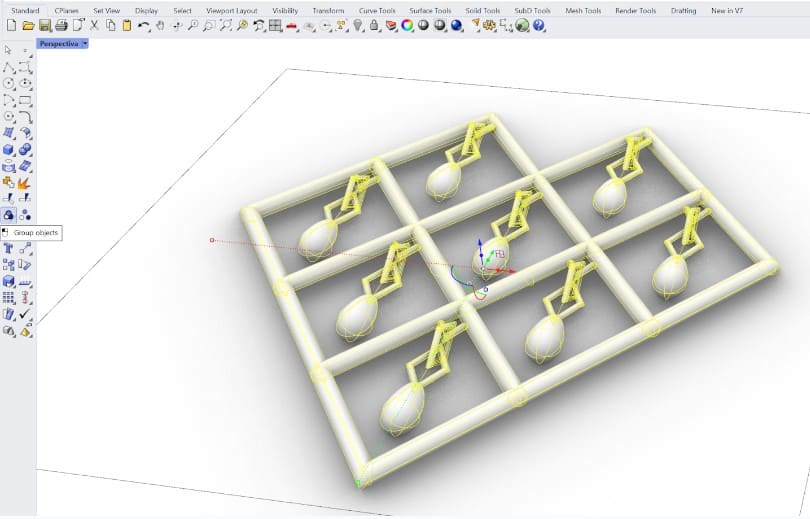
- Next I previewed it as a "render" and grouped the chains, because they were not exactly together in the model.
- Since I wanted each of these structures to represent a pannel for the purse, I made a preview of them built as the final result.
- Then I made eyelets at the edges of the pannel, so I could link them together later.
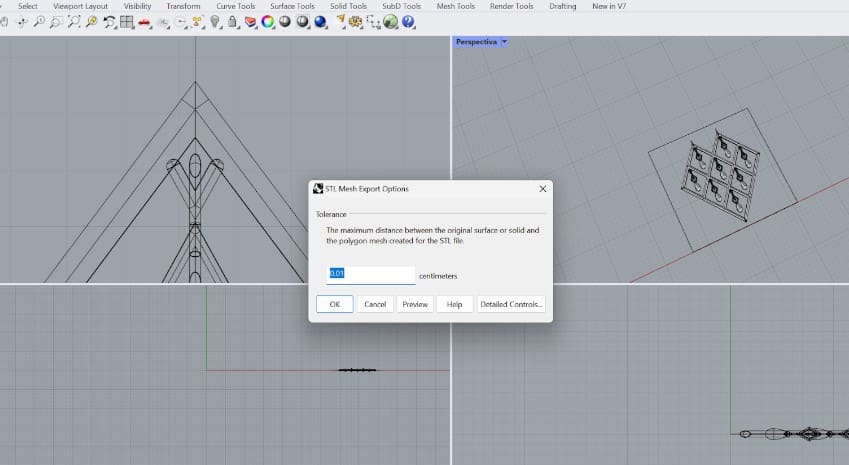
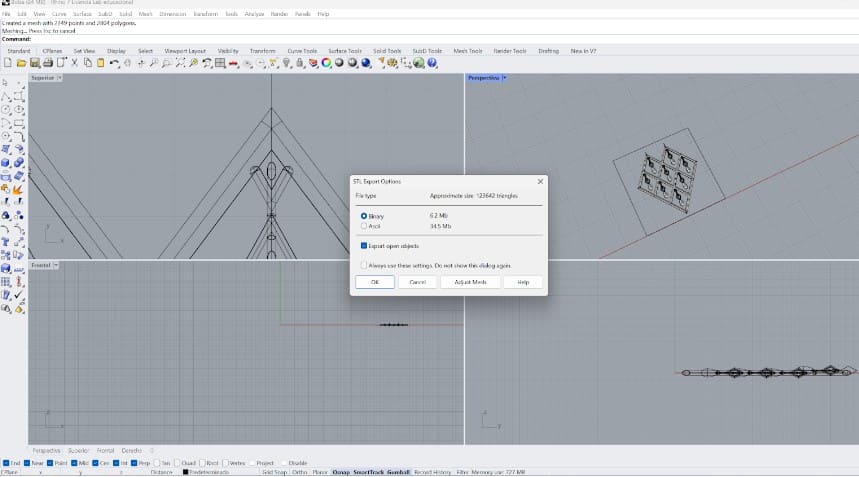
- At this point, I exported the main shape in a STL format.

---- Getting ready to print----
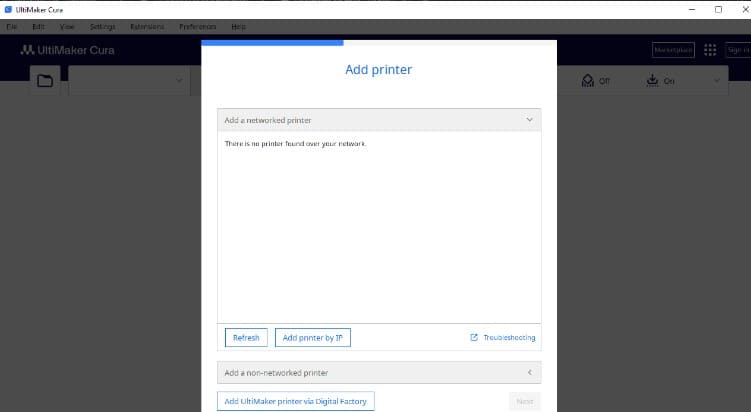
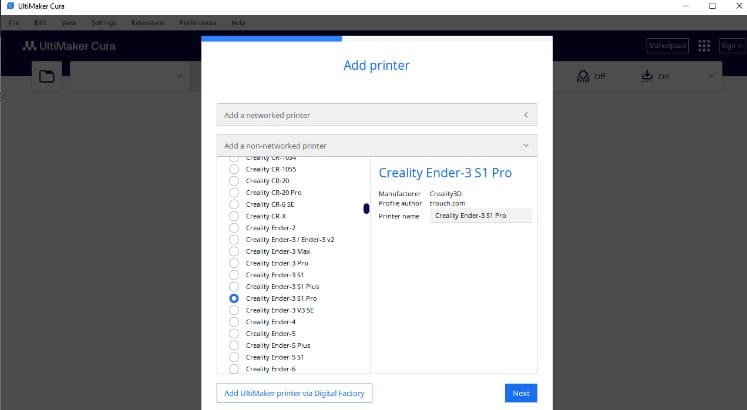
- The first thing I did was to open the software for the printer. Since I used Ultimaker Cura for the first time I had to configurate the printer by clicking on the Non Supported option. Mine was an ENDER 3 S1 PRO. You have to choose the printer in case you use a different one always.
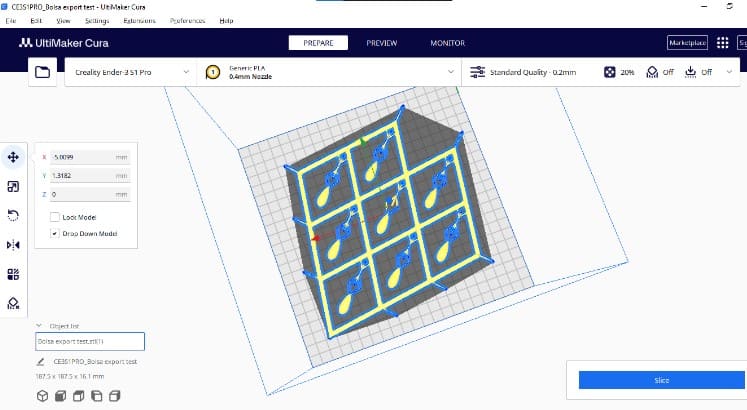
- Then I inserted my file by clicking on the folder icon, then browsing my STL file. Here I also checked the measurements I mentioned previously, I added another Zero to match the real size because at first It was too small.
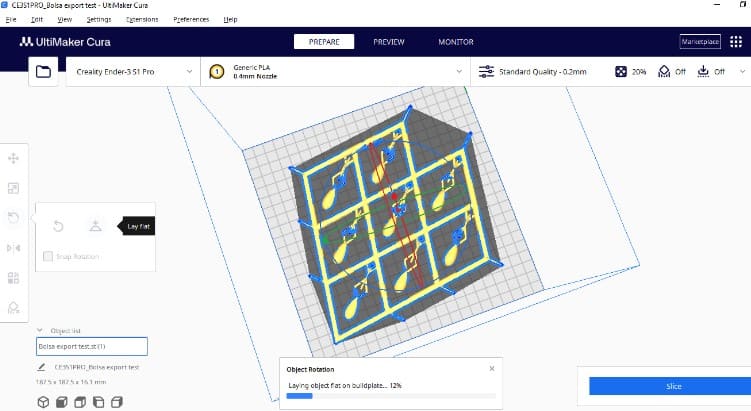
- There is also another option to make sure the object touches the bed of the printer. To use It I clicked on the rotation menu and then on the option that said lay flat
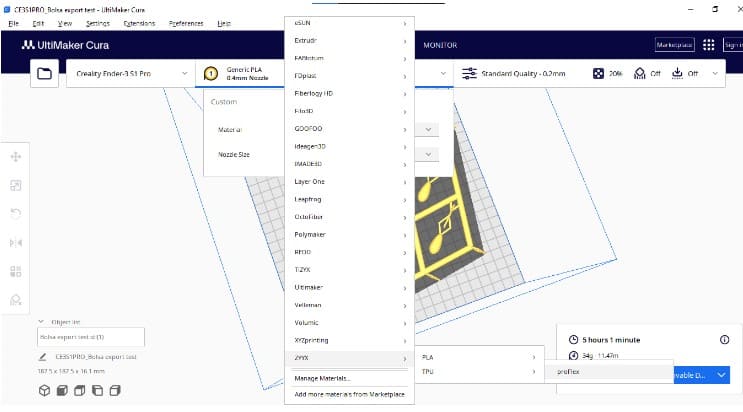
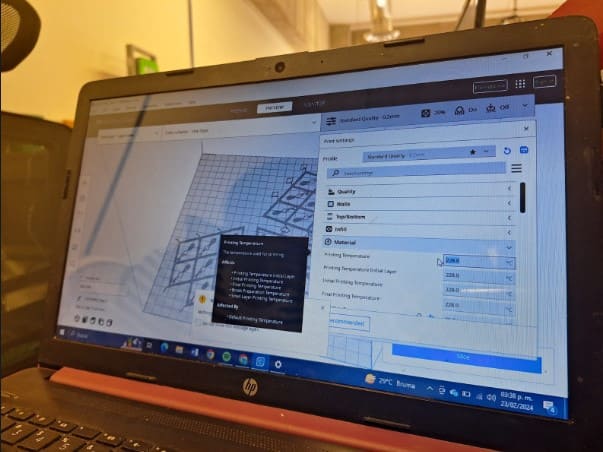
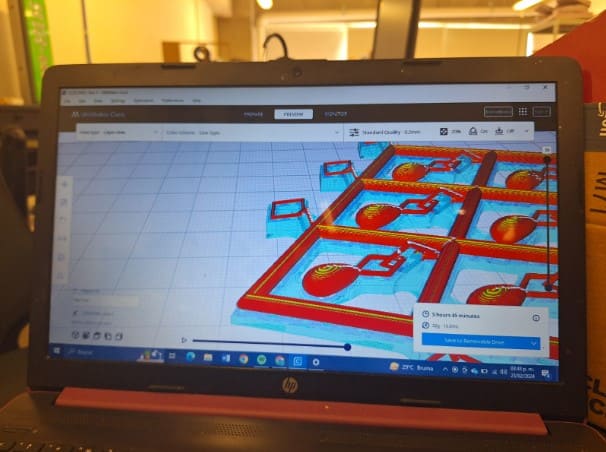
- Now it was time to slice the print to check If it was alright with the default settings. Here I had PLA as the default material, so when I clicked on slice the estimated time was not accurate for my piece, because I wanted to make it with TPU.
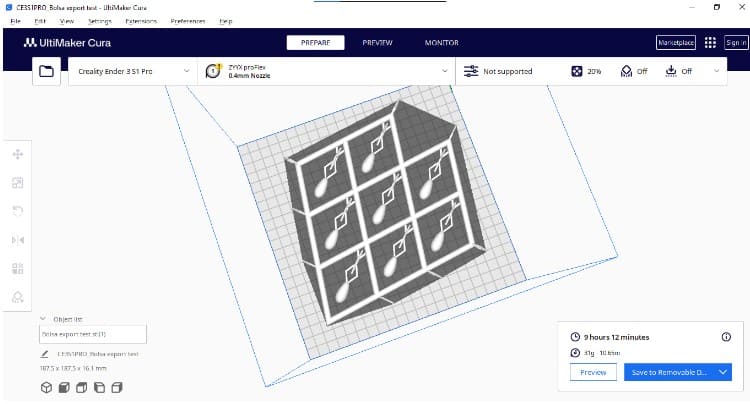
- When I opened the materials list and chose the one I actually wanted, some of my settings changed, so when I clicked on slice again it took way more time for a piece the same size. As you can see It was too much time, so I thought of an option B.
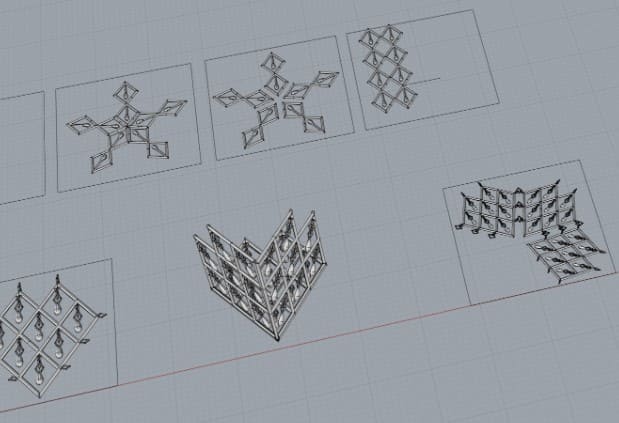
- I went back to Rhino to create simplified or easier to print versions from the original module. I copied the lines, so I could arrrange them differently by following the steps of the previous section once again.
- Here you can see some of the variatios of the final shape to print. Spoiler: I didn't like, nor use any of these in the end.
- Finally I thought of the design again: I wanted 3 pannel modules, but It would be too much time If I printed them separately. So, I decided to resize the original pannel, add the other two and link them from the start with a new chain. I would only need to link manually the outer edges.
- There is a picture comparing the size of my experiments and also the final version that I printed. These are the last adjustments I made on Rhino, from now on I only modified the file from Cura.
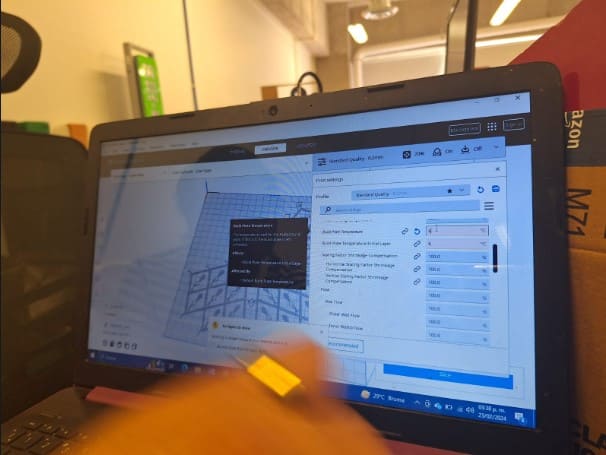
- Opening this new version on cura I was afraid of it taking too long, but I started to play with the settings on the right corner. Some of the most important were related to the infill percentage and shape, the supports shape and thickness, the extrusion temperature and the retraction I mentioned at the beginning.
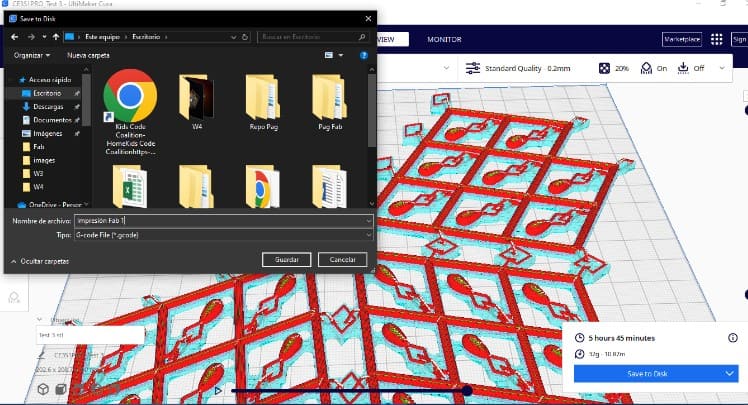
- Considering that my last slice had the same estimate time for the three modules as the original time for a single module, I decided it was ready to print. To save it you may keep the file on your computer, but the ENDER3 uses a SD card, so I saved it in both places. The exporting file is a G-Code File


---- Time to print ----
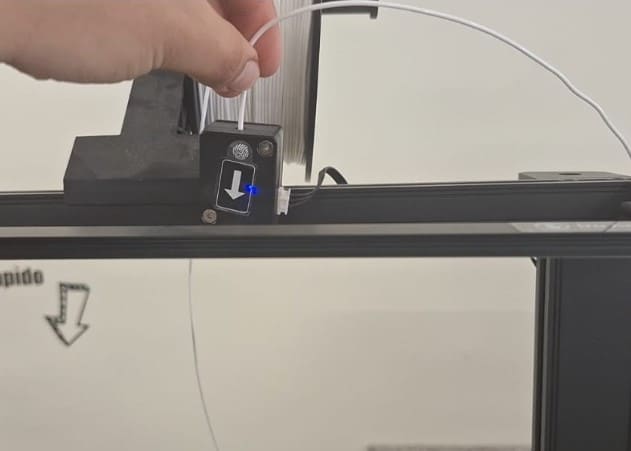
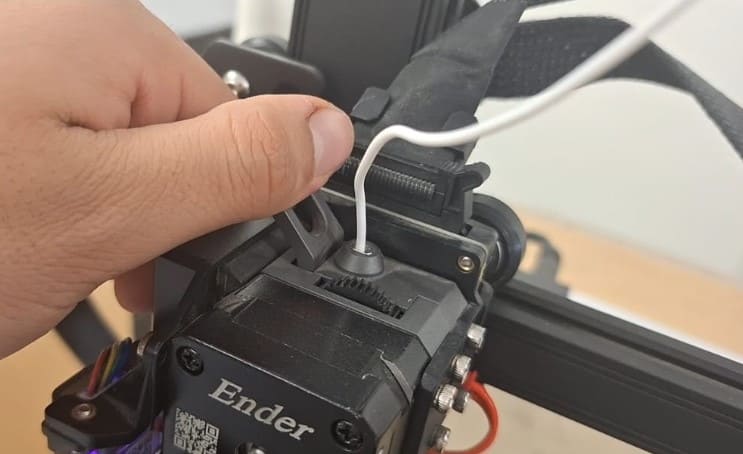
- To prepare the printer, the first thing I did was to change the filament. It had a PLA one and I wanted TPU. First I put the roll on its place and took the material through two nozzles.
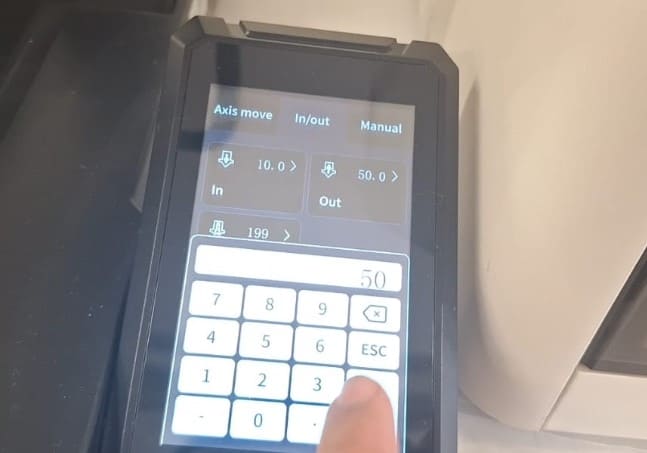
- 2. Then I used the controls pannel to bring the filament to the extruder itself. It has an In-Out option that can pull or push out the material with the distance you set in millimeters.
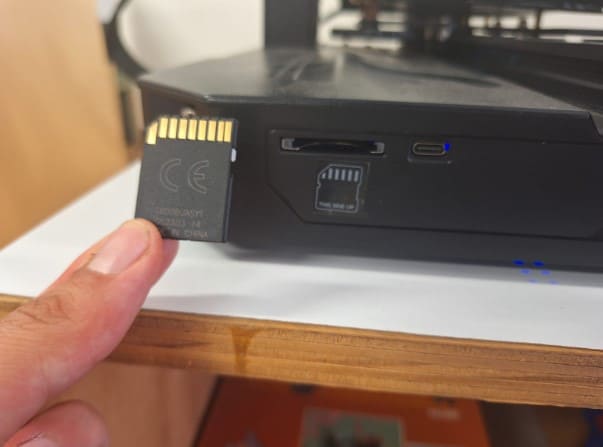
- Then It was time to add the SD Card with the file. Make sure you place it carefully because it is delicate and there's a chance you may be putting it the wrong way up.
- Now I used the "print" option on the control pannel. There you can
see al the G-code files saved to the SD Card. Mine was called "Bolsa Ivanna"
since it was a purse.

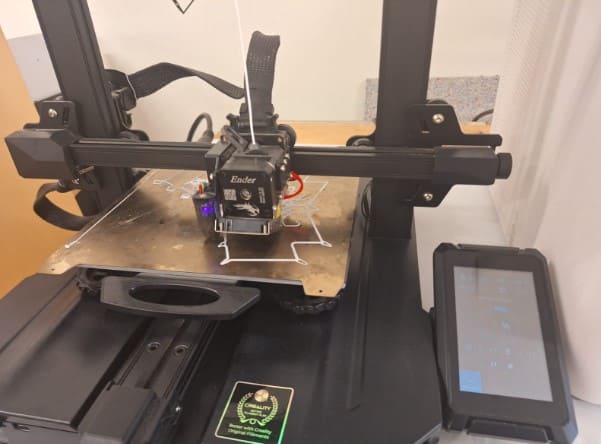
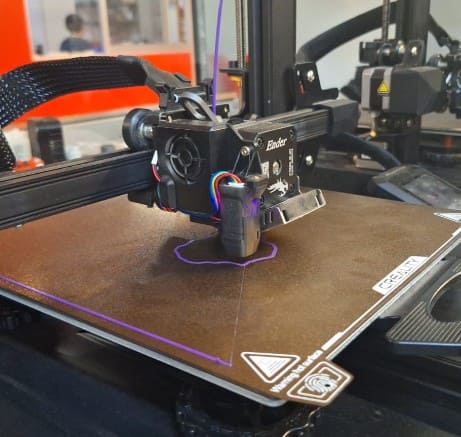
- Then I clicked on the Play option to start the print. It's very important to chech how it goes at least for the first layer.
- I stayed watching for about an hour, then I had to leave, but it went smoothly.
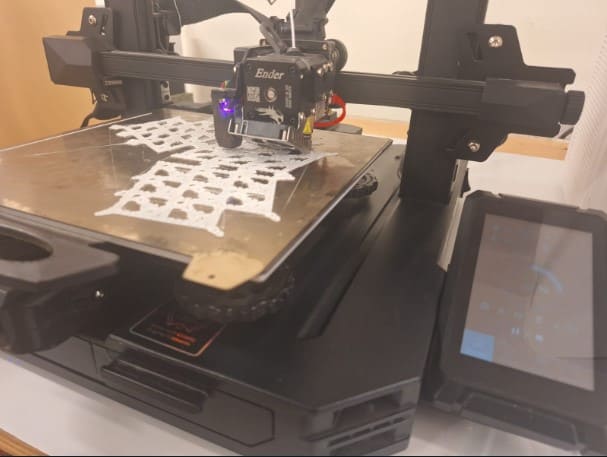
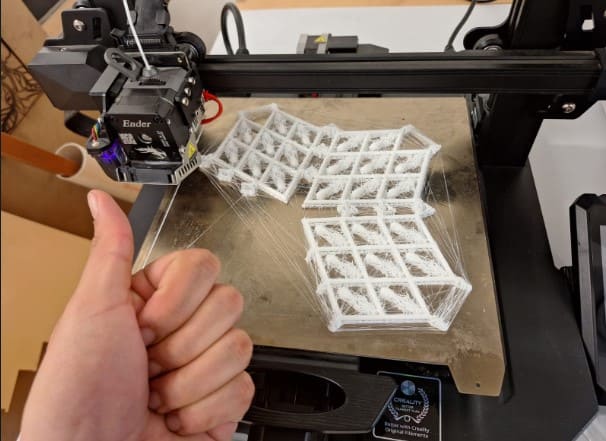
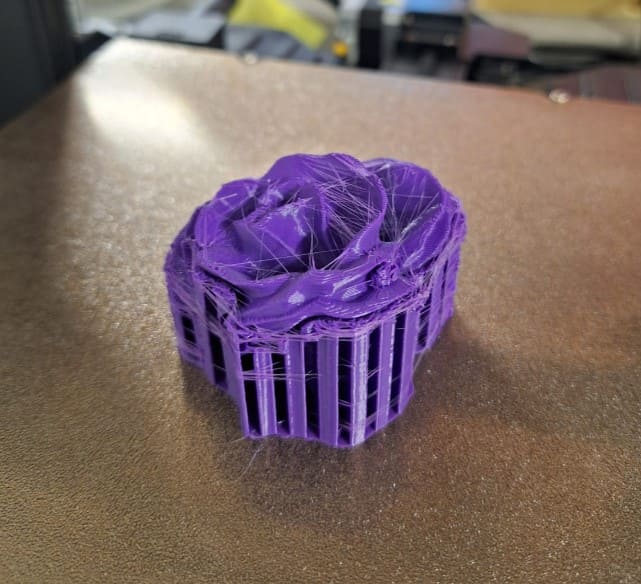
- The next morning I came to pick it up, It had worked without major issues! But from this picture you can see why I regret a bit turning the retraction off.
- I removed it from the bed using a spatula. This is how it looks fully detached but with the supports still.
-
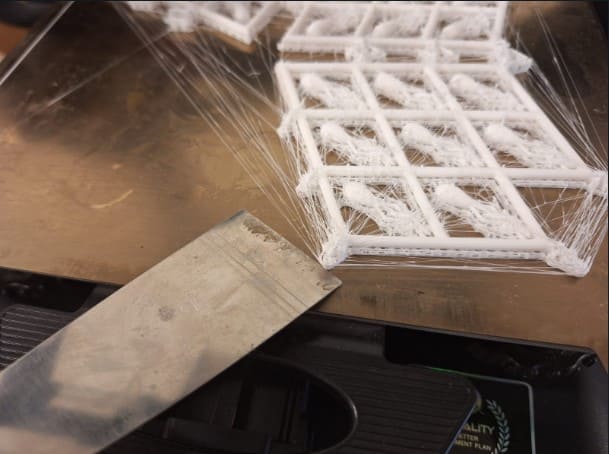
A lot of prints require supports, that can be easier or harder to remove according to the settings you had for the file. I found some trouble to remove mine because they were almos the same thick as some parts of my piece. I started to remove them with small scissors.

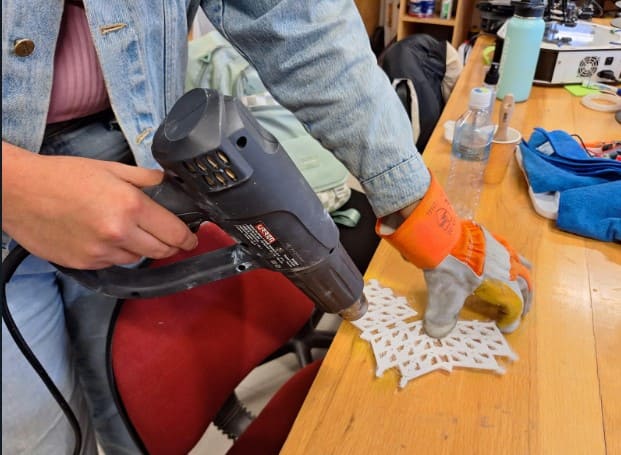
- As that was too slow, I decided to take a heat gun and try to melt or at
least soften the material. I stopped very quickly, because it started to melt
more than what I wanted.
- Then I decided to go back to the scisorss, and even though it was a sloww
process it
worked a lot better. I also commited some mistakes, so some of the drops got cut
off
from the piece. (Thankfully I could repair it later).
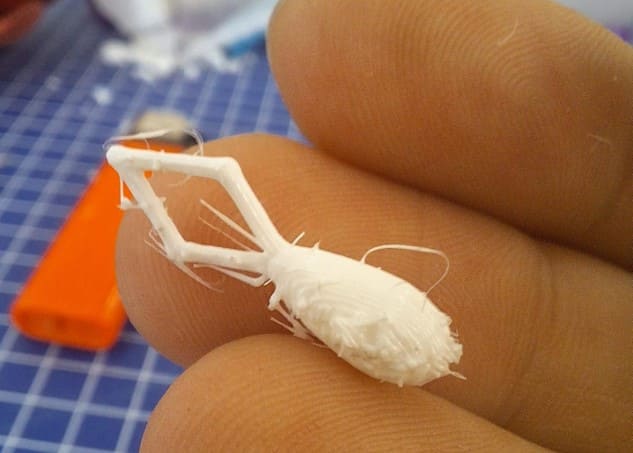
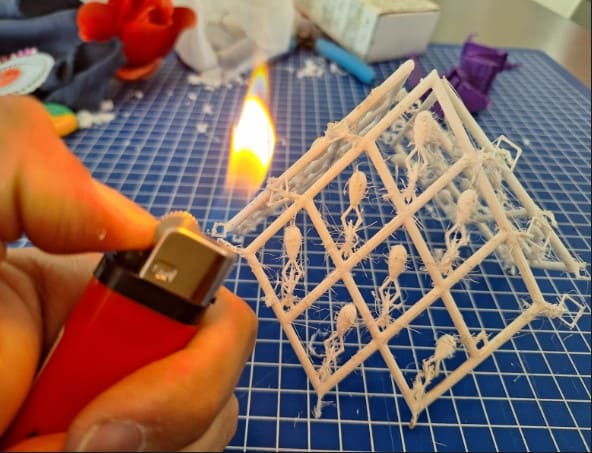
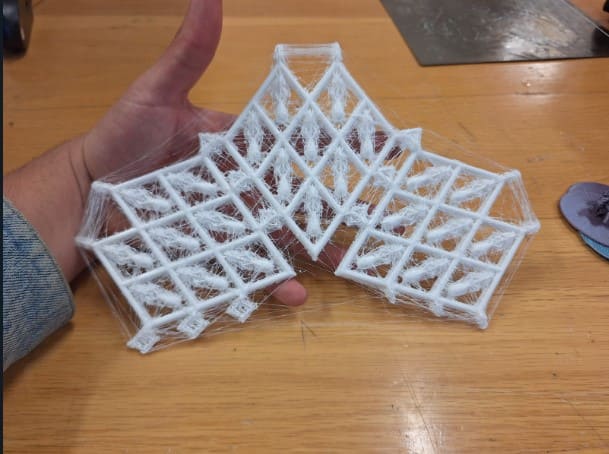
- As I call it, my piece was a little "hairy", so I tried heat once more,
but this
time using a lighter. First I tested it on the support and then I would pass it
quickly
to avoid damaging the piece or melting more than what I wanted.
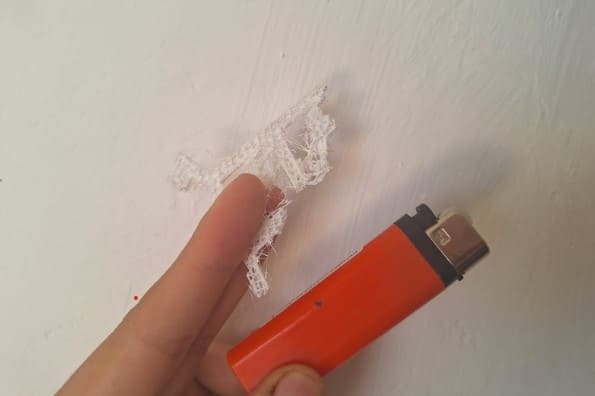
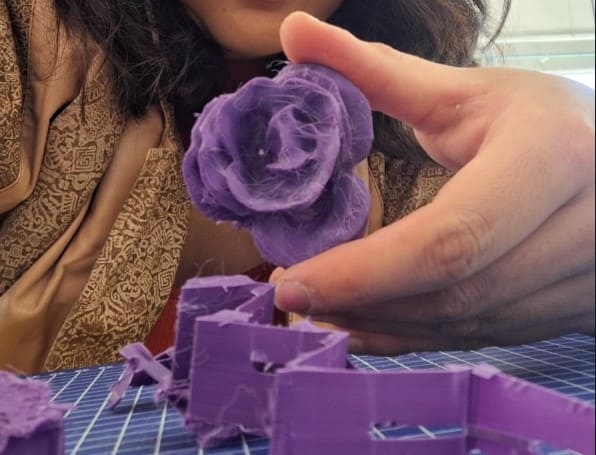
- It worked much better, here you can see a comparison between one that recieved
the
lighter treatment (left) and other that didn't. In the end I passed the flame
around
most of the piece, I also took advantage of it to melt and repair some of the
drops that
I cut by accident. It wasn't that smooth, either that fast, but It worked
better.

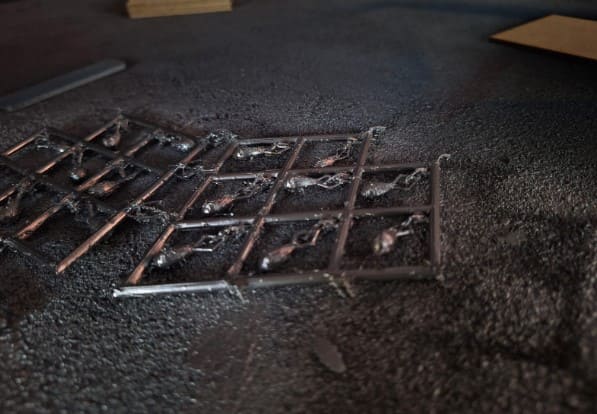
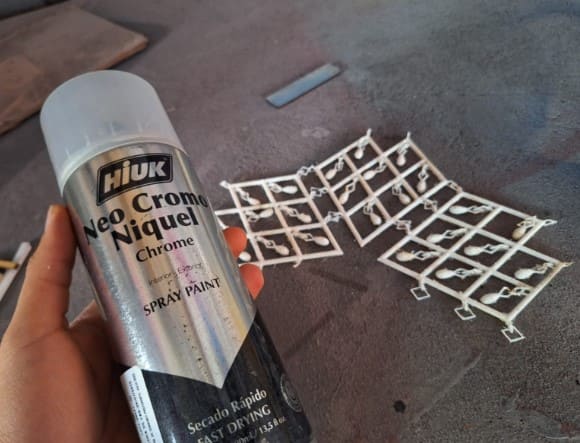
- Then I took it for a paint coat . I really pictured it as a
metalic-looking thing, so I
used chrome paint.
- Here the actual print was ready, but I decided to make the structure of my bag.
The
first thing I did was to draw some patterns on paper based on the main shape of
the
print.

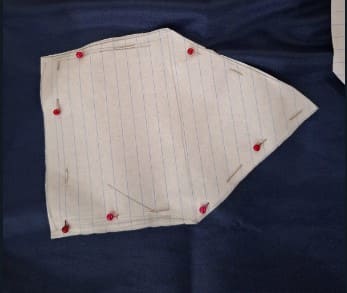
- Then I took some pins to attach it to the fabric I would be using and
cut it.
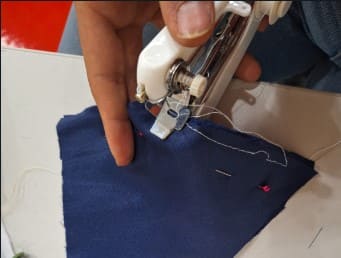
- The final step was to sew the fabric together with a portable sewing machine
(because I
don't really know how to use a real one, lol). Here I also conected the
eyeletsof the
print using the lighter technique.
- To improve the final look, I added some chains to the closed eyelets and used them as a handle. Next time I'll try to print these chains myself too.
---- Post-Production ----
Final Result!
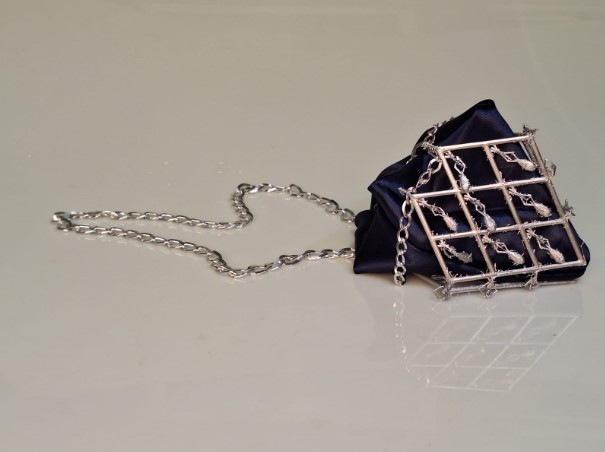
Description for Image 1
---- 3DM Print File ----
Download 3DM Print File
---- Scanning an object ----
-
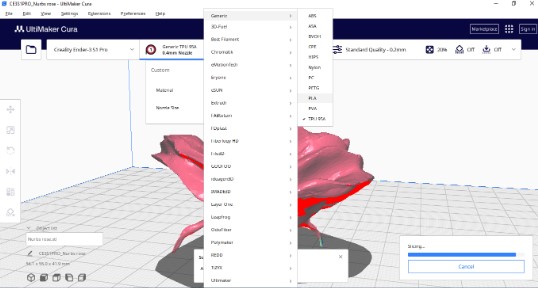
The first step to scan was to check the app or machine I would use for this process and also to pick an object.In my case I used the app of Polycam and a rose as my object. Polycam's interface looks this way:
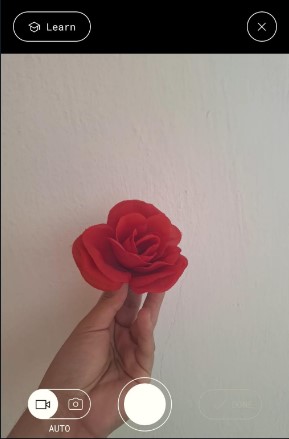
- Opening the camera option, it allows you to take pictures or record video of the object,
I'd rather recommend the video option, because it takes more angles than single shots.
- The app works reacting to motion, so it knows where is the object in space and captures
different sides of it. I've heard that in some cases you can simply rotate the object,
but in my case I needed to rotate myself around for the app to take pics.

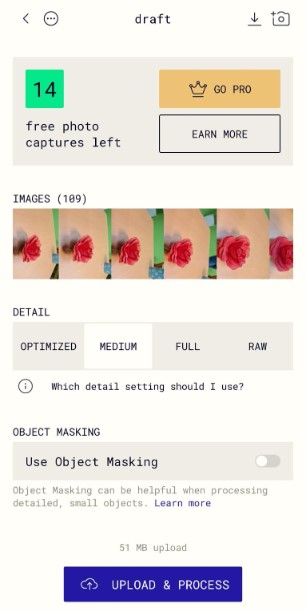
- Once I took the pictures, my scan showed information I gave to the app, as the
amount of images it had. And also allowed me to set preferences to process them together
for my model. Polycam has many options to choose from, but some are premium.
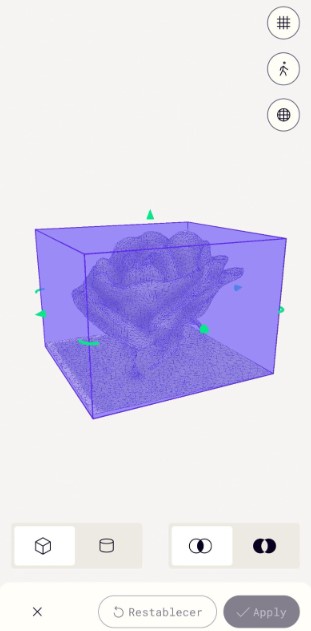
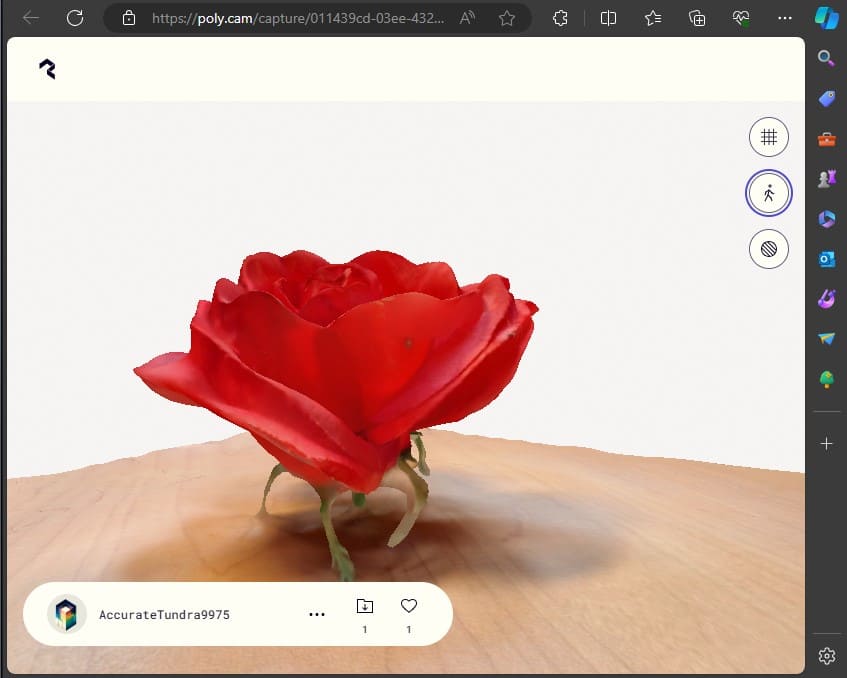
- After letting my model process, It appeared in the 3D way, which I could rotate, zoom in
and drag. It also includes different options to visualize it as a mesh, solid or with
the original appeareance.
- Here I also could modify the size of the scan and chop some spaces from the ground.
- To save it, Polycam keeps the model on the cloud, so you can open it on your computer.
It's important to say that I didn't create an account, but if you do, you'll have access
to different features as a free trial. Even so, It's possible to share files without
being signed up.
- From the computer version, I clicked on download, so I had all the options and
details about my file.
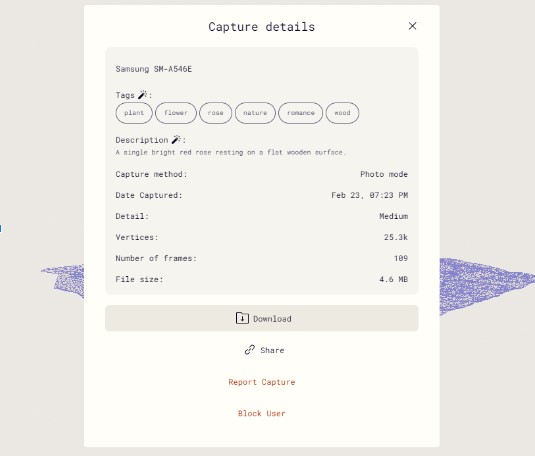
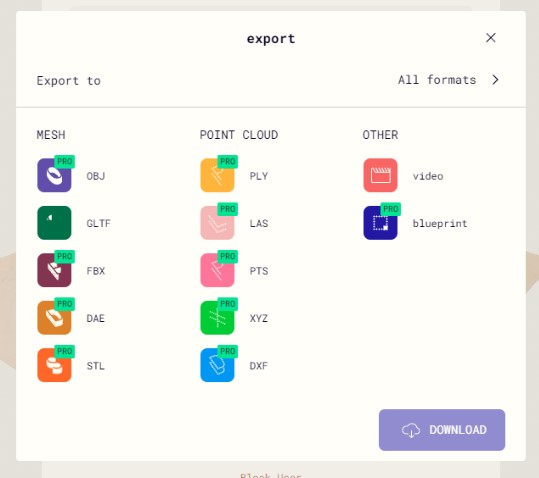
- It popped out a menu with different download options, but the only one that was free
had the GLTF format, so that's the one I used.
cut it.
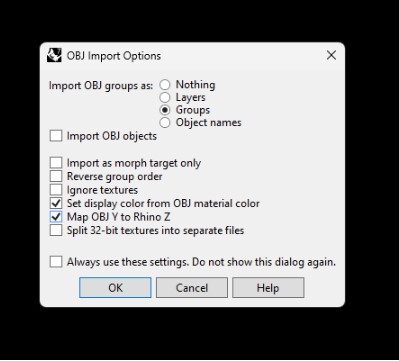
- I wanted to use a converter to turn my GLTF to OBJ, there is an online
free website, if you need it here it is .

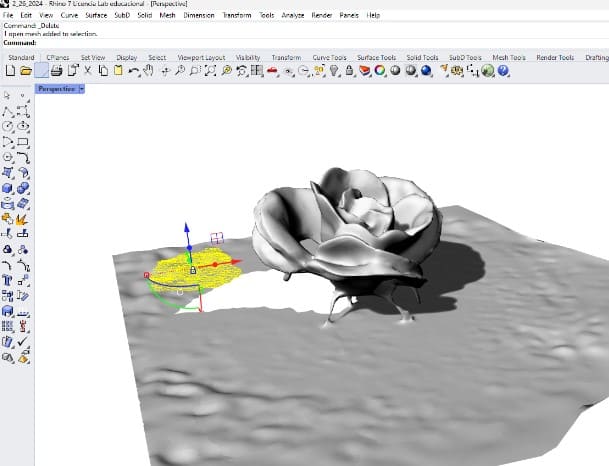
- Then, I opened it with Rhino, there were some configurations to do, but it opened
just fine as a mesh.

- Then I made some changes to the model, as remove the ground. To do so, I broke te mesh
and erased piece by piece.
- Here I also tried to close some openings the model had. First I made this by trying to
merge it with booleans but it didn't work. Then I noticed there are different
options for meshes and used them.

- I noticed that to close it, I could use patches, but when I exported it to the
3D printing software It didn't show, but since the model was closed still, I let it
slide.

- To set it for printing I used the default settings for PLA and used Zig-Zag
supports.
- I used another ENDER 3 S1 PRO, so the settings to put the file and print are
above, in the "Time to print" section. The print took 3 hours 46 minutes to
finish.

- I stayed to watch the first layer, but then I left and came back to pick it up next
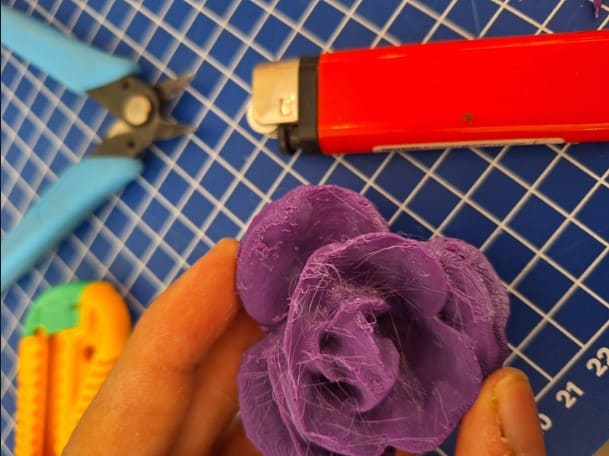
morning.There I noticed something: I forgot to turn on the retraction for this
one, so it looked a little hairy again.
- For this piece's post-production, I also used the lighter to burn the threads of
material and a cutter and tweezers to remove the supports.
Final Result of the printed scan!
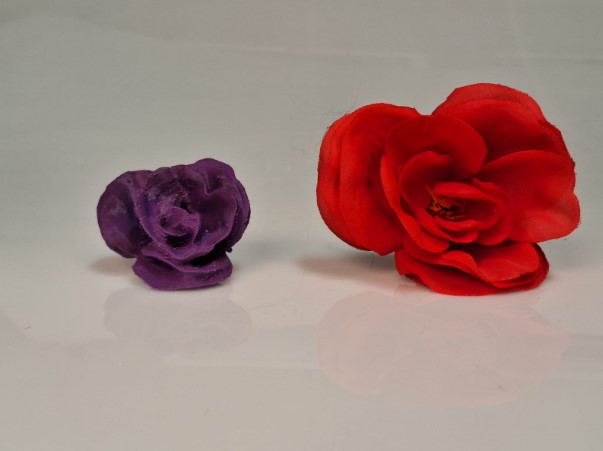
Description for Image 1