WEEK 12
MOLDING AND CASTING
For this week I tried making molds. Molds allow you to produce the same part several times in less time than it would take a single mold. Depending on the material you are working with, the mold material can change. There will always be variations of this type depending on the end result you are looking for. For example, in ceramics it is common to use plaster molds, because they allow you to absorb the moisture from the slip quickly, resulting in the piece after the mold can still be worked on, if it were plastic it would probably take longer even than it would take to make the piece without a mold (just saying, I'm not sure). In the case of plastic parts, the molds are usually made of steel, as they must withstand the hot molten plastic without deforming. You can see our group assignent here.
DESIGN
-
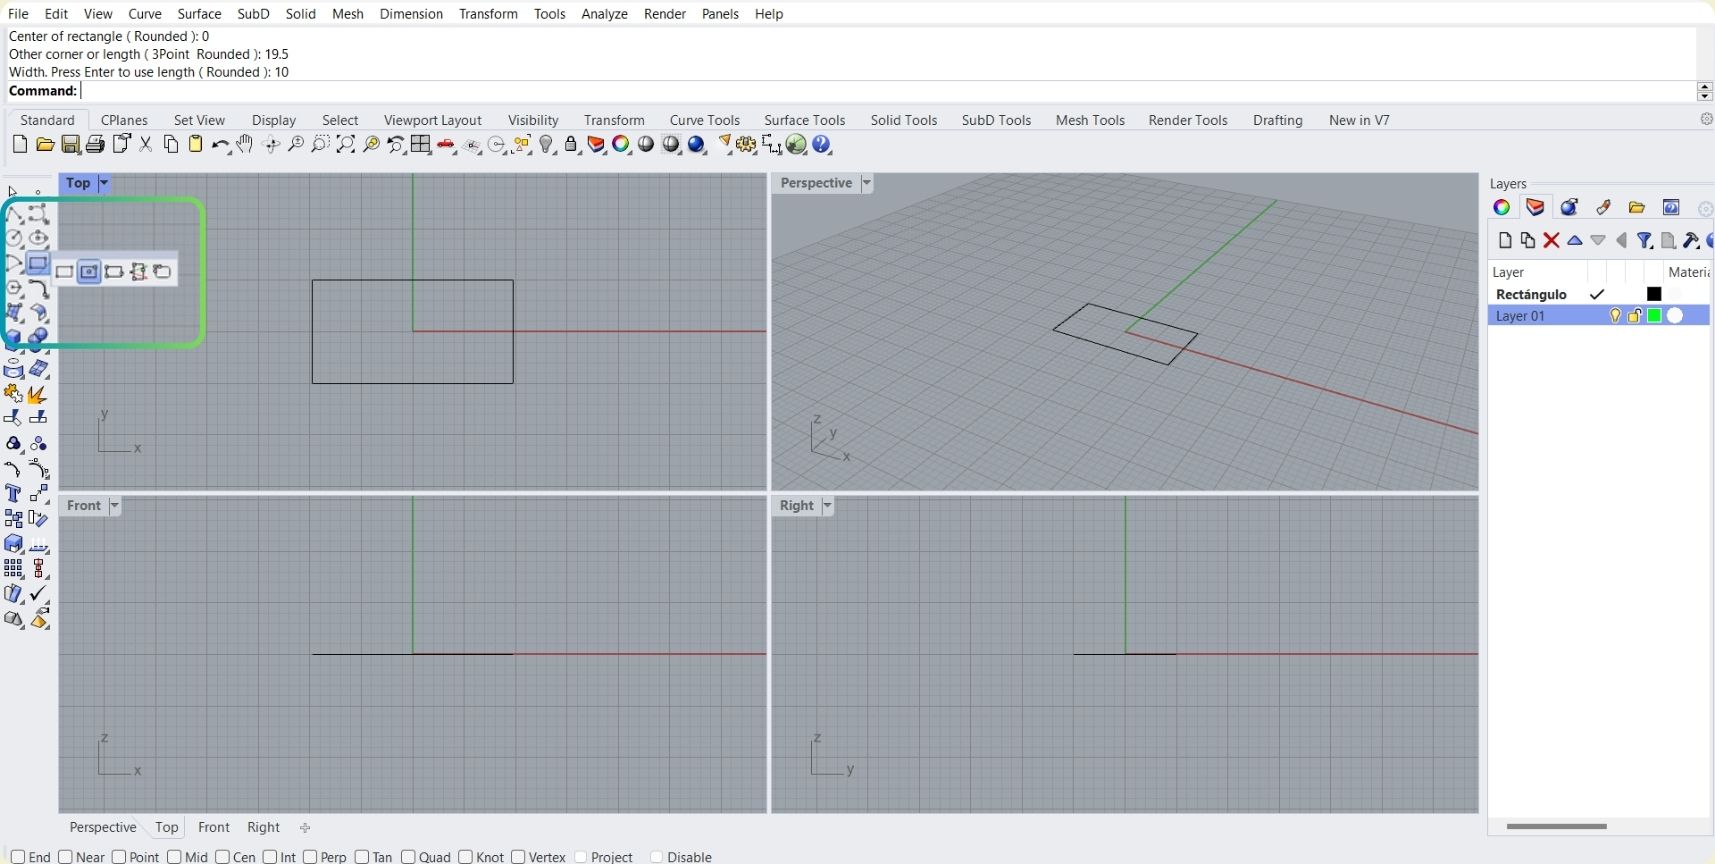
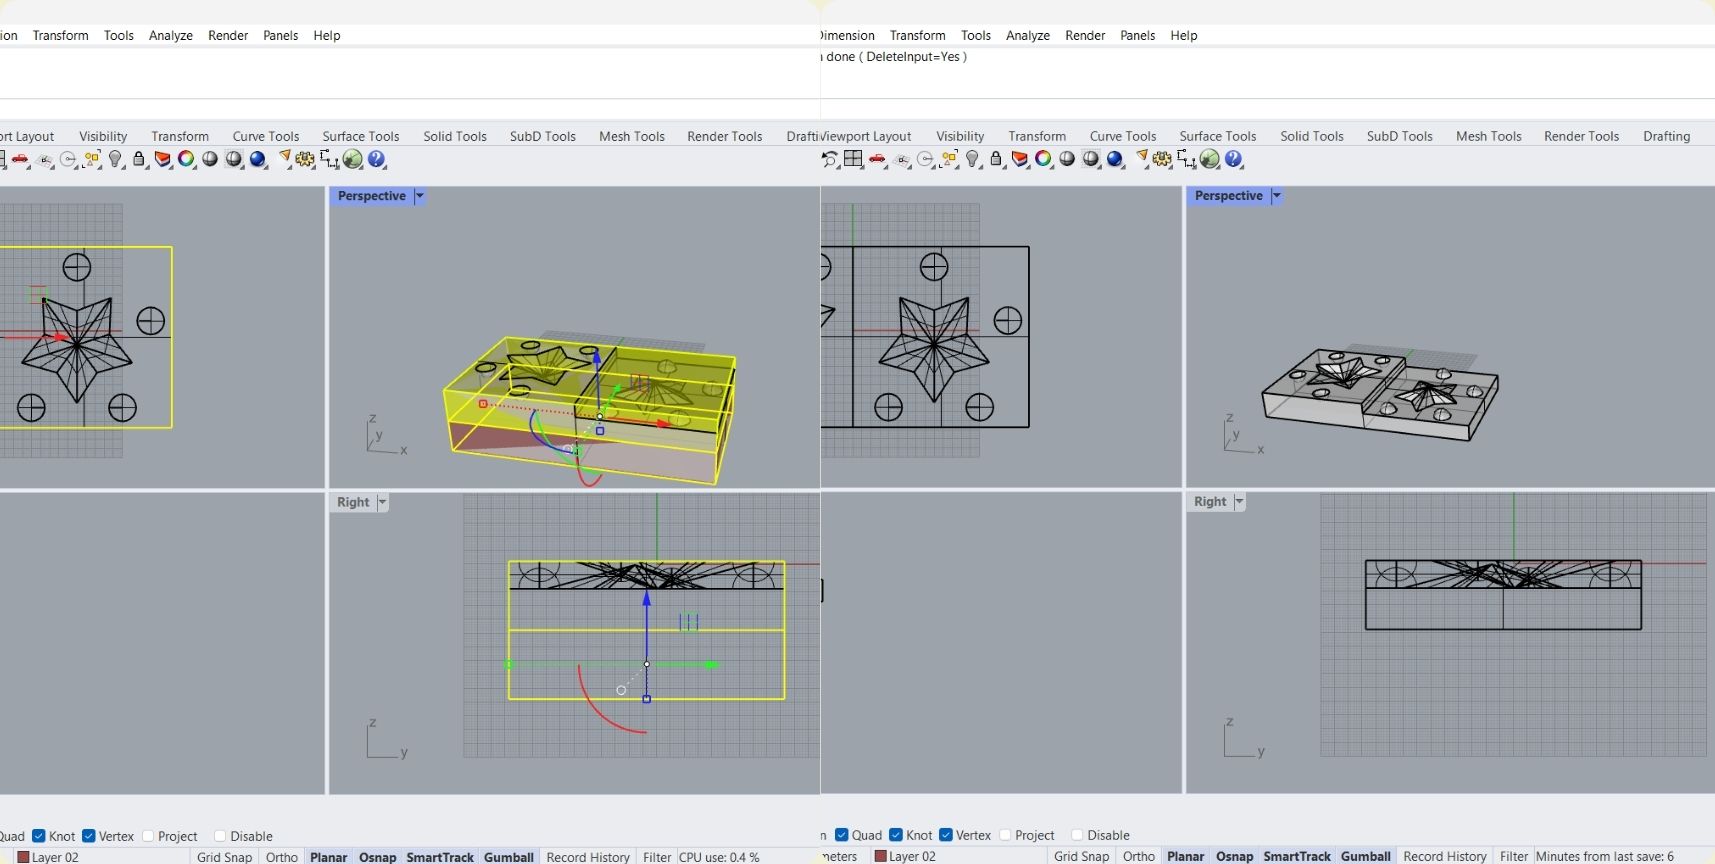
The first thing I did was to dimension the space to make the piece, because its size would be conditioned to the foam rectangle I had (at first I considered making it in foam and not in wax). And although there are larger foam blocks, or they can be glued, this week I did not have much time available, so I worked with what I had.
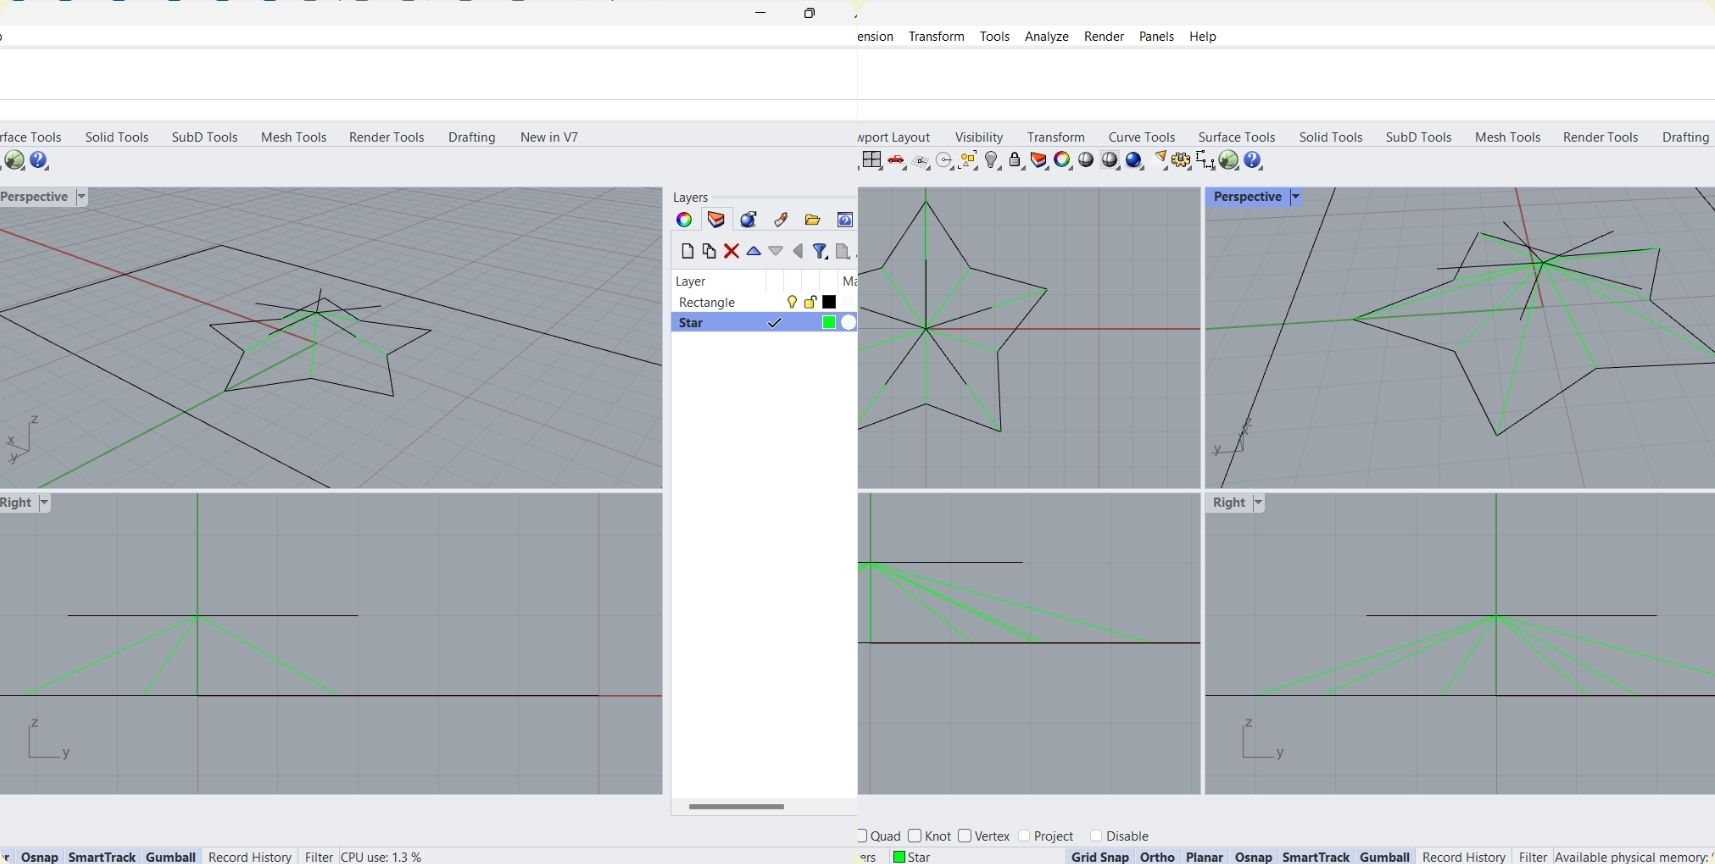
I then made a rectangle from the center (0) of 19.5*10*5 mm (My mistake not to do it from the beginning in cm, then I had to scale it, but it is very easy to do with the scale tool) immovable base for reference.
-
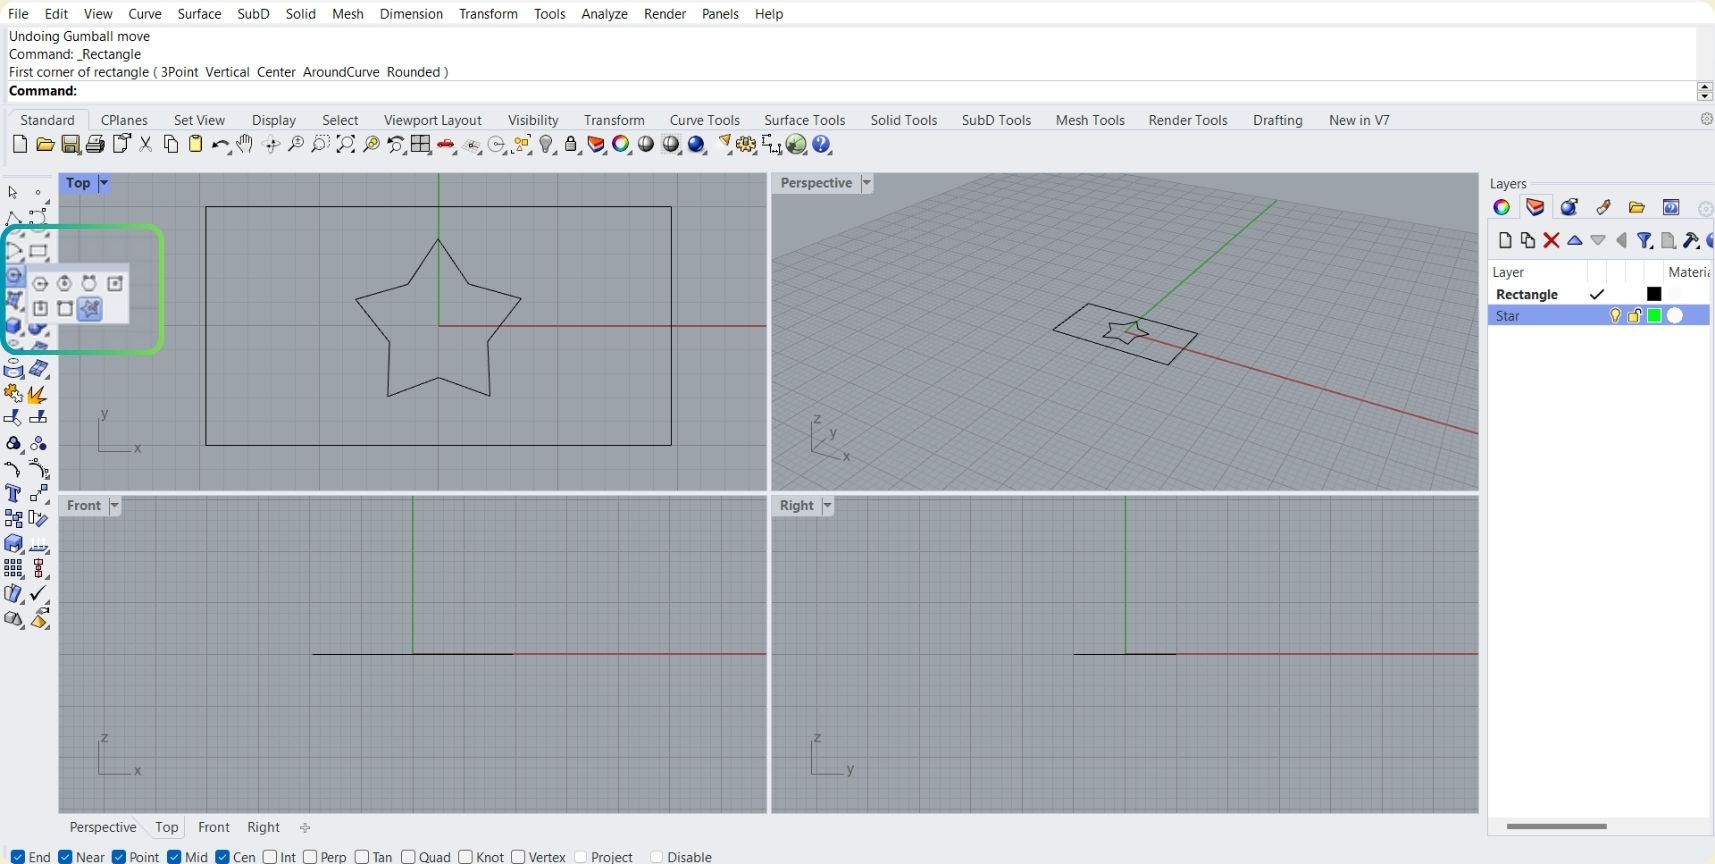
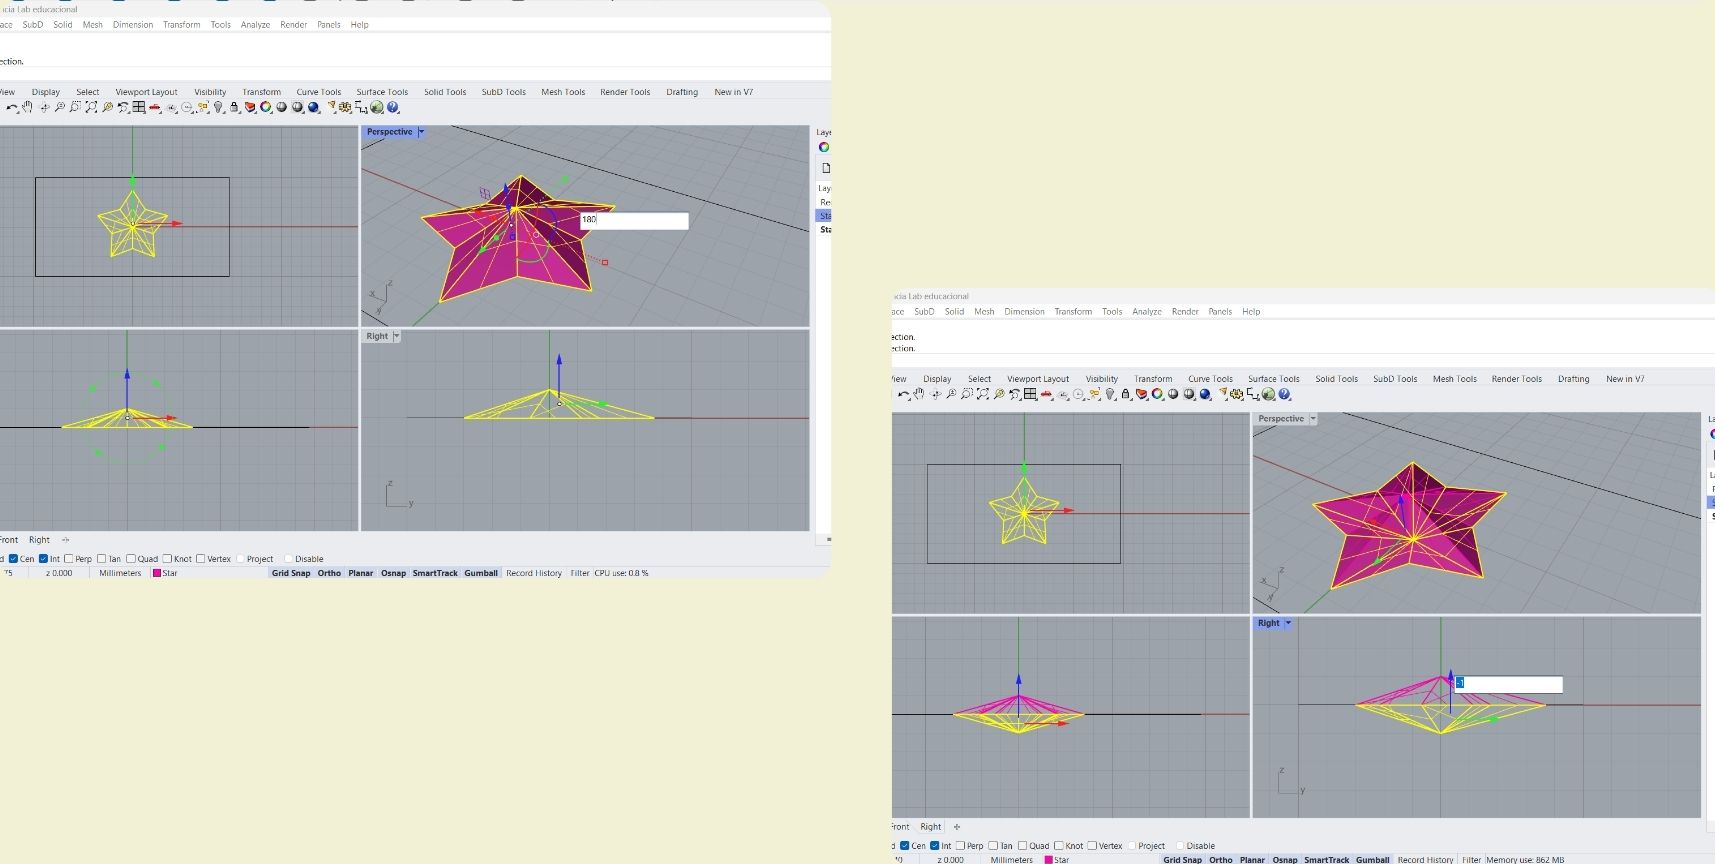
I then drew a star polygon of 3.7 mm radius and 5 sides.
-
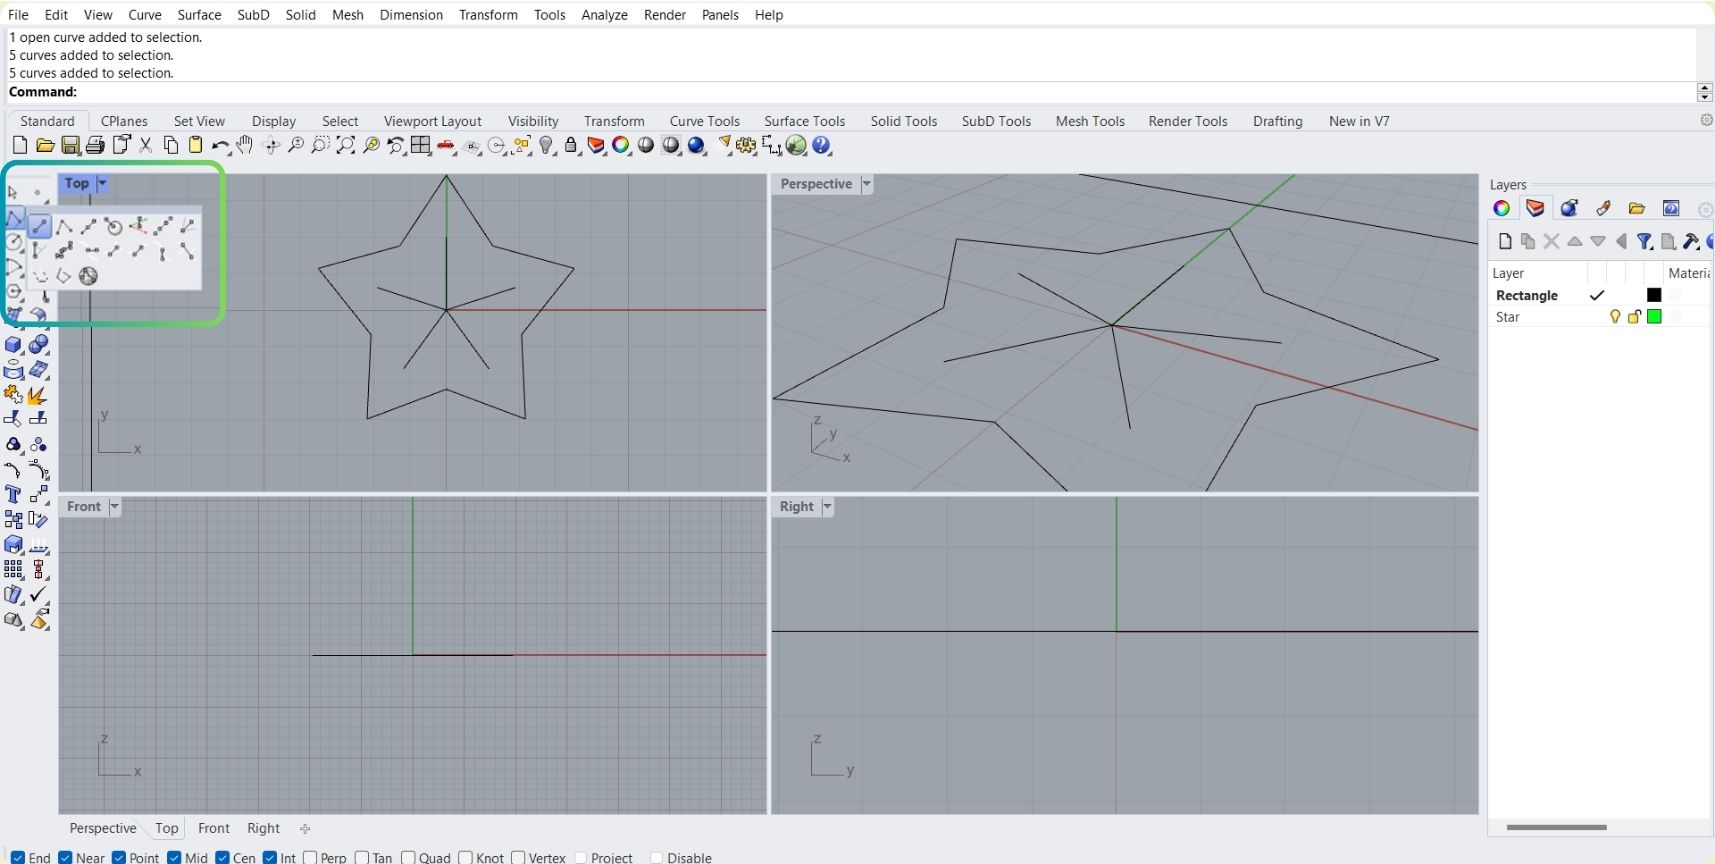
Following that, as I wanted the star to extrude upwards, I made five lines starting from the center to the peaks of the star.
-
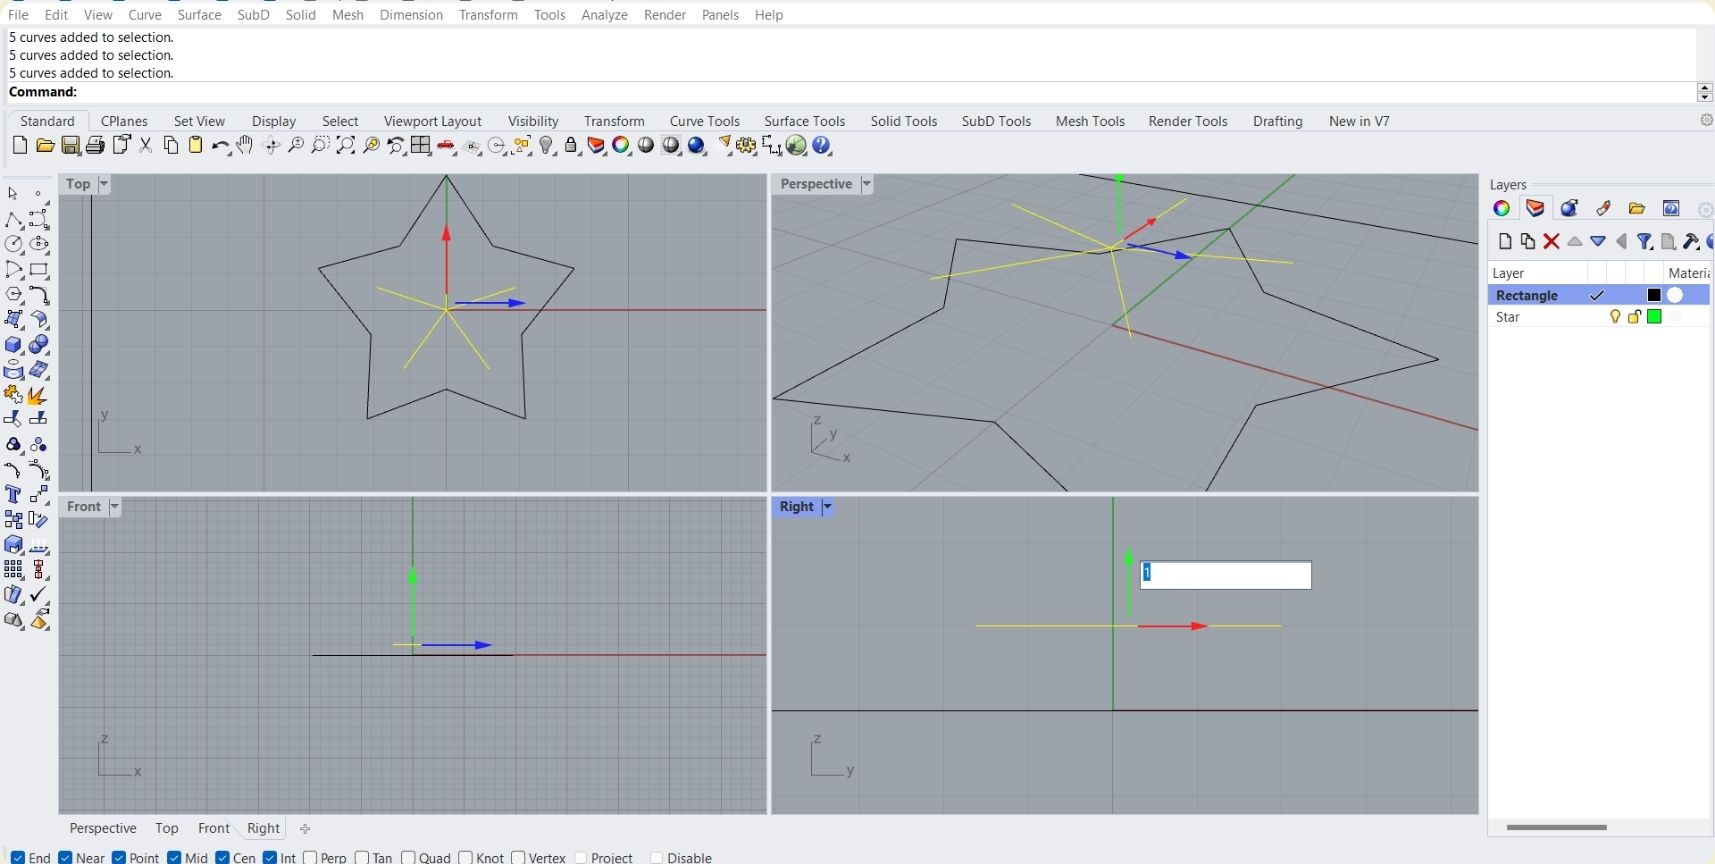
From there I moved them up 1 to have an immovable base for reference.
-
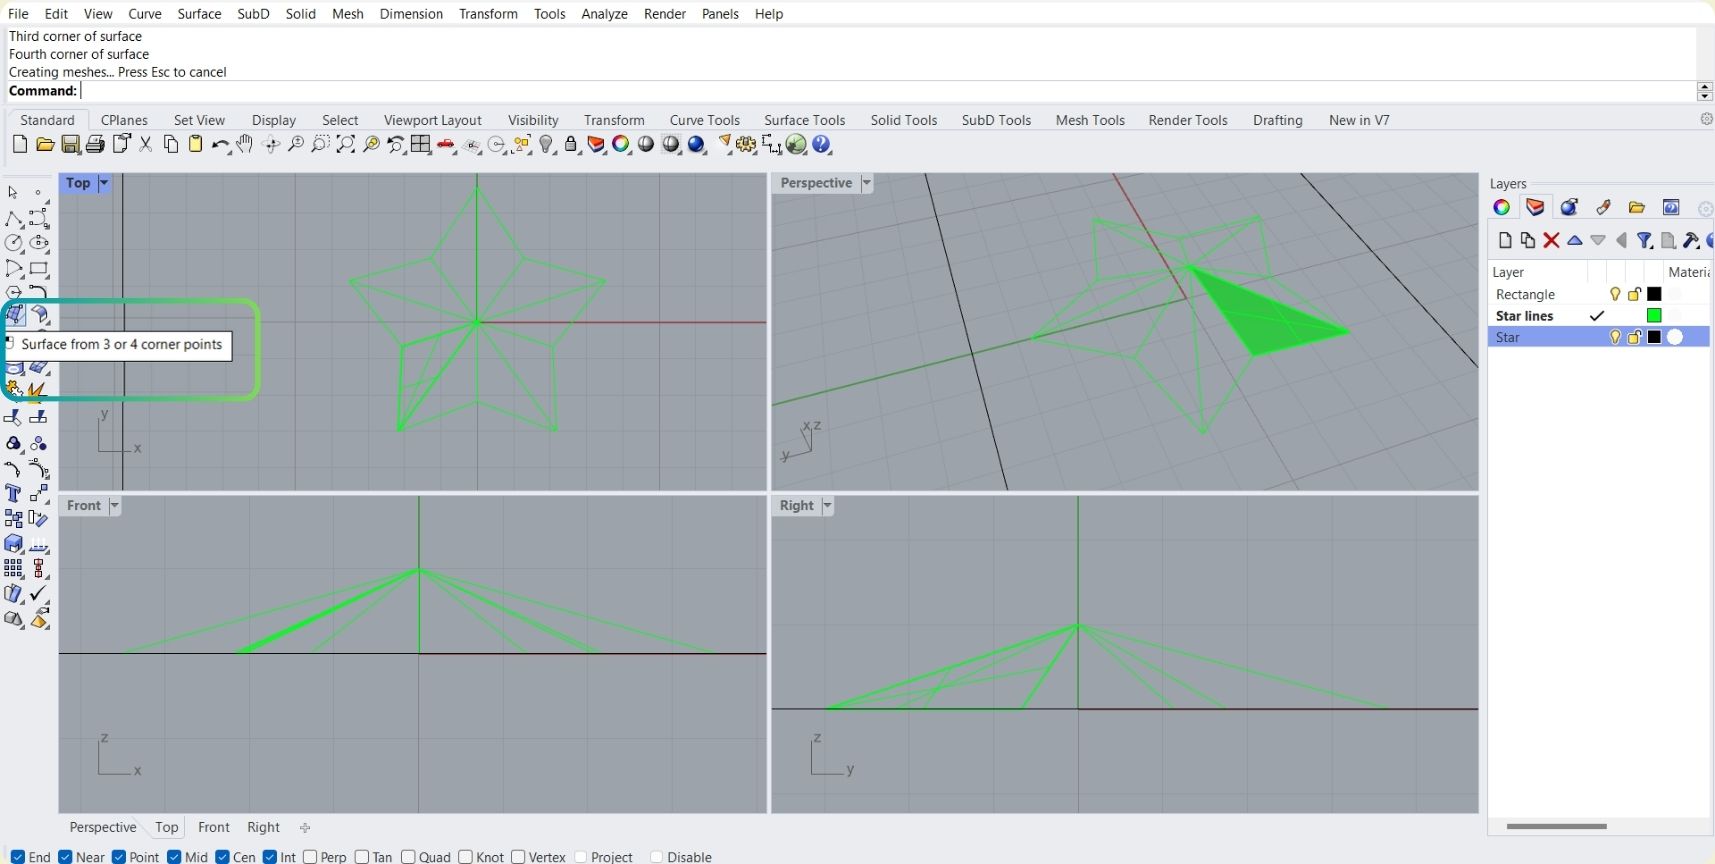
In a new layer I began to join the center of the upper base with the edges of the base below.
-
Next I used the Surface from 3 or 4 corner points tool to create the surfaces of the star touching only the corners.
-
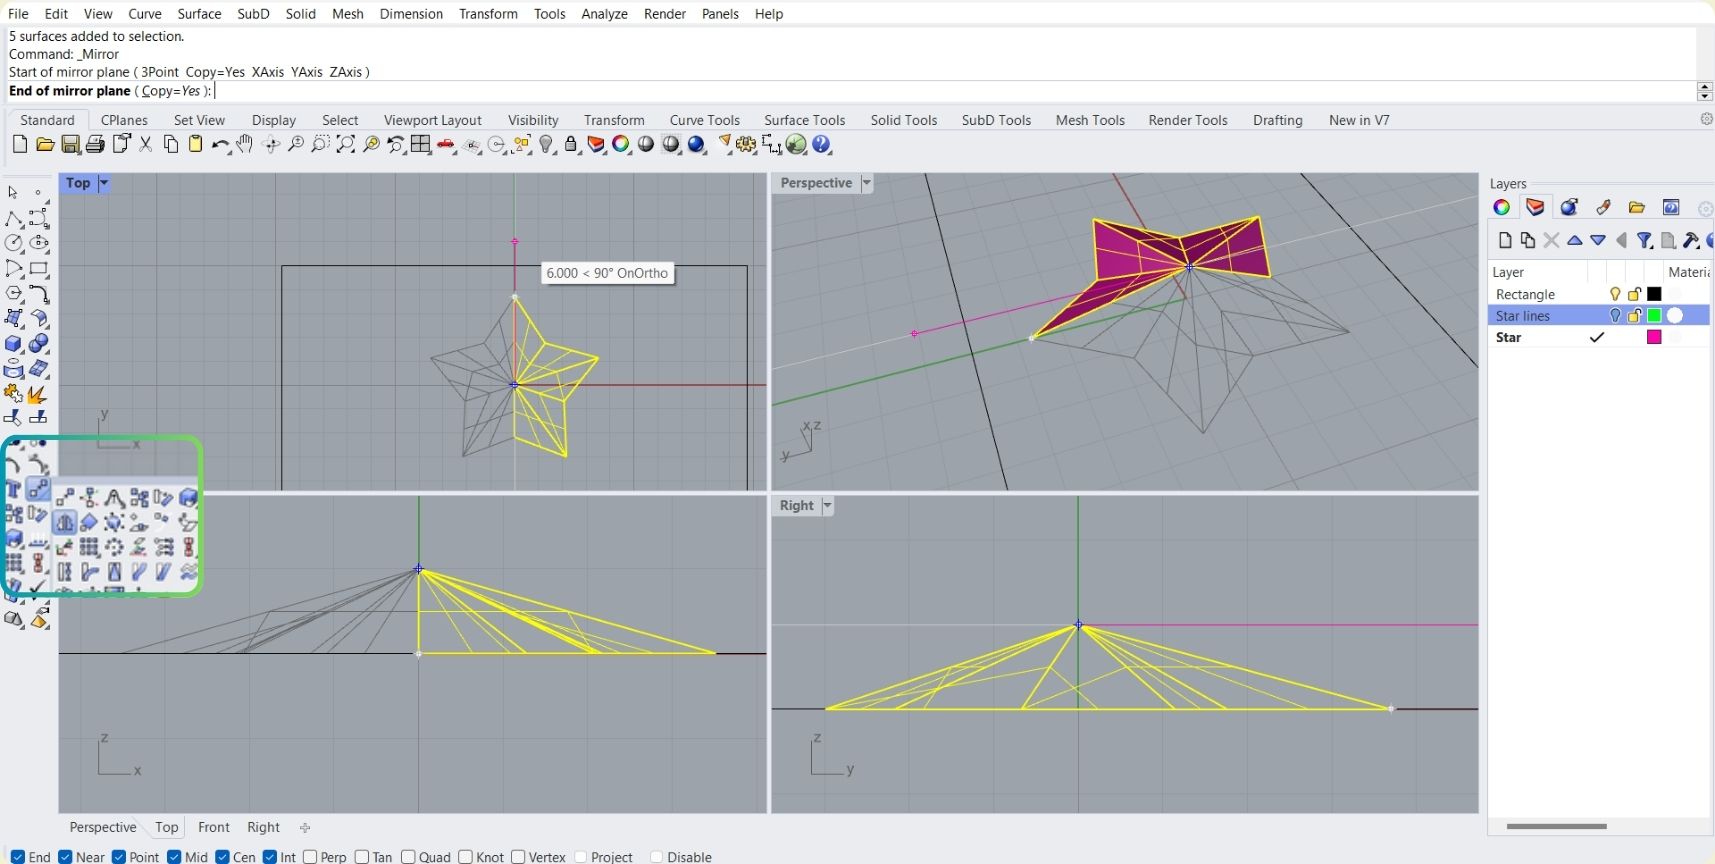
It is enough to have half of it, then just apply a mirror of the surfaces and have it complete.
-
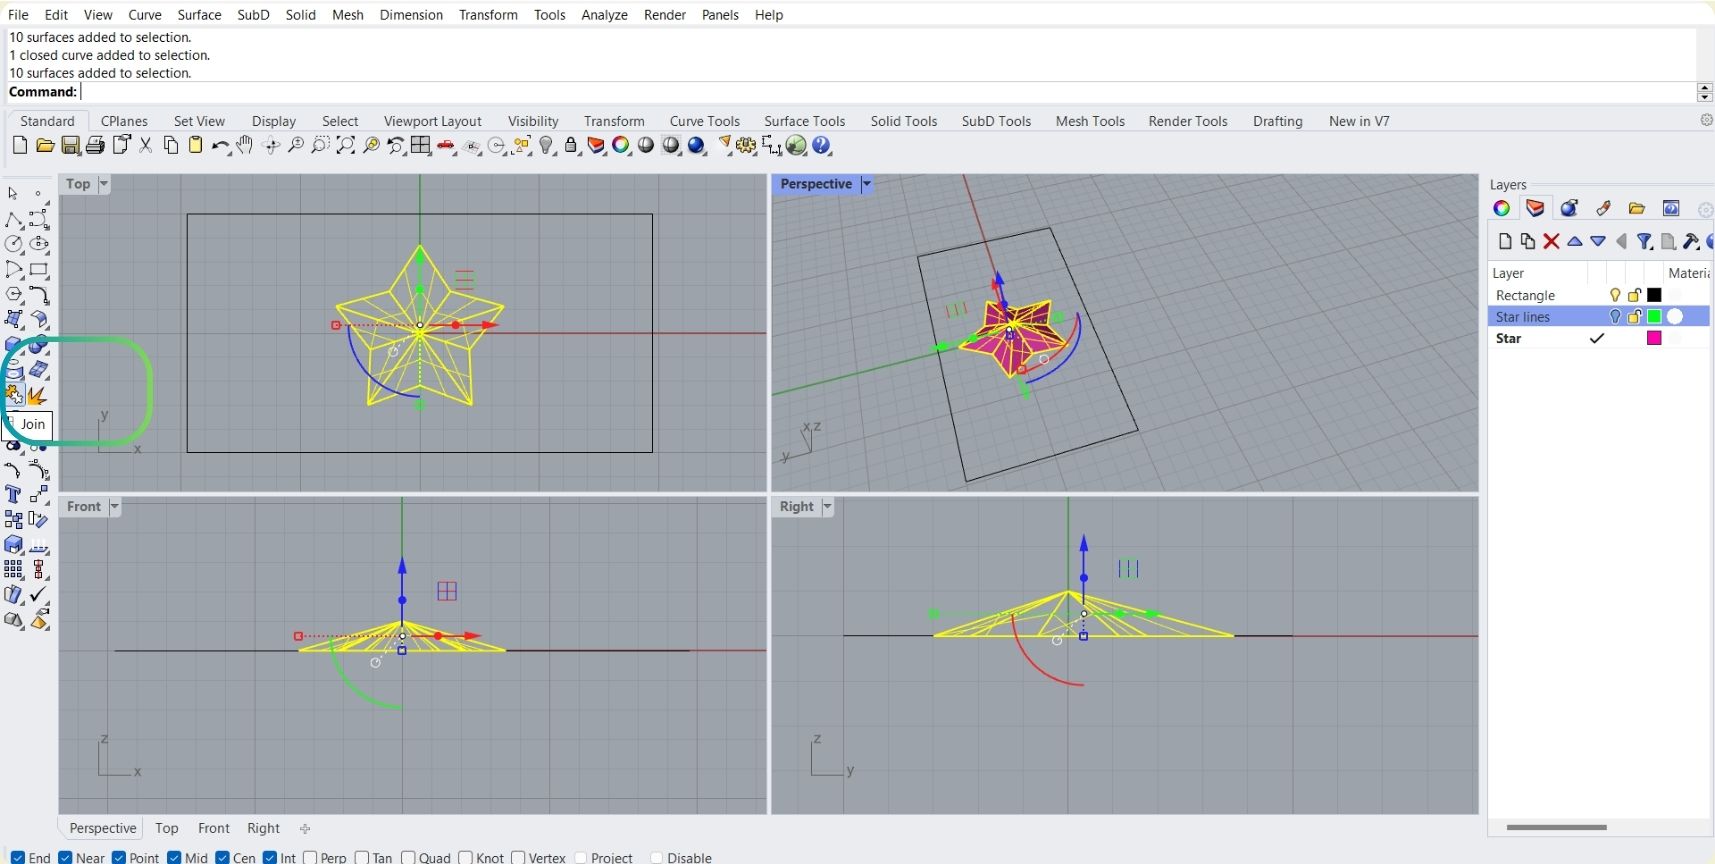
When they were ready, I joined them with join.
-
Then I copied that surface to rotate it 180° and then have the complete star.
-
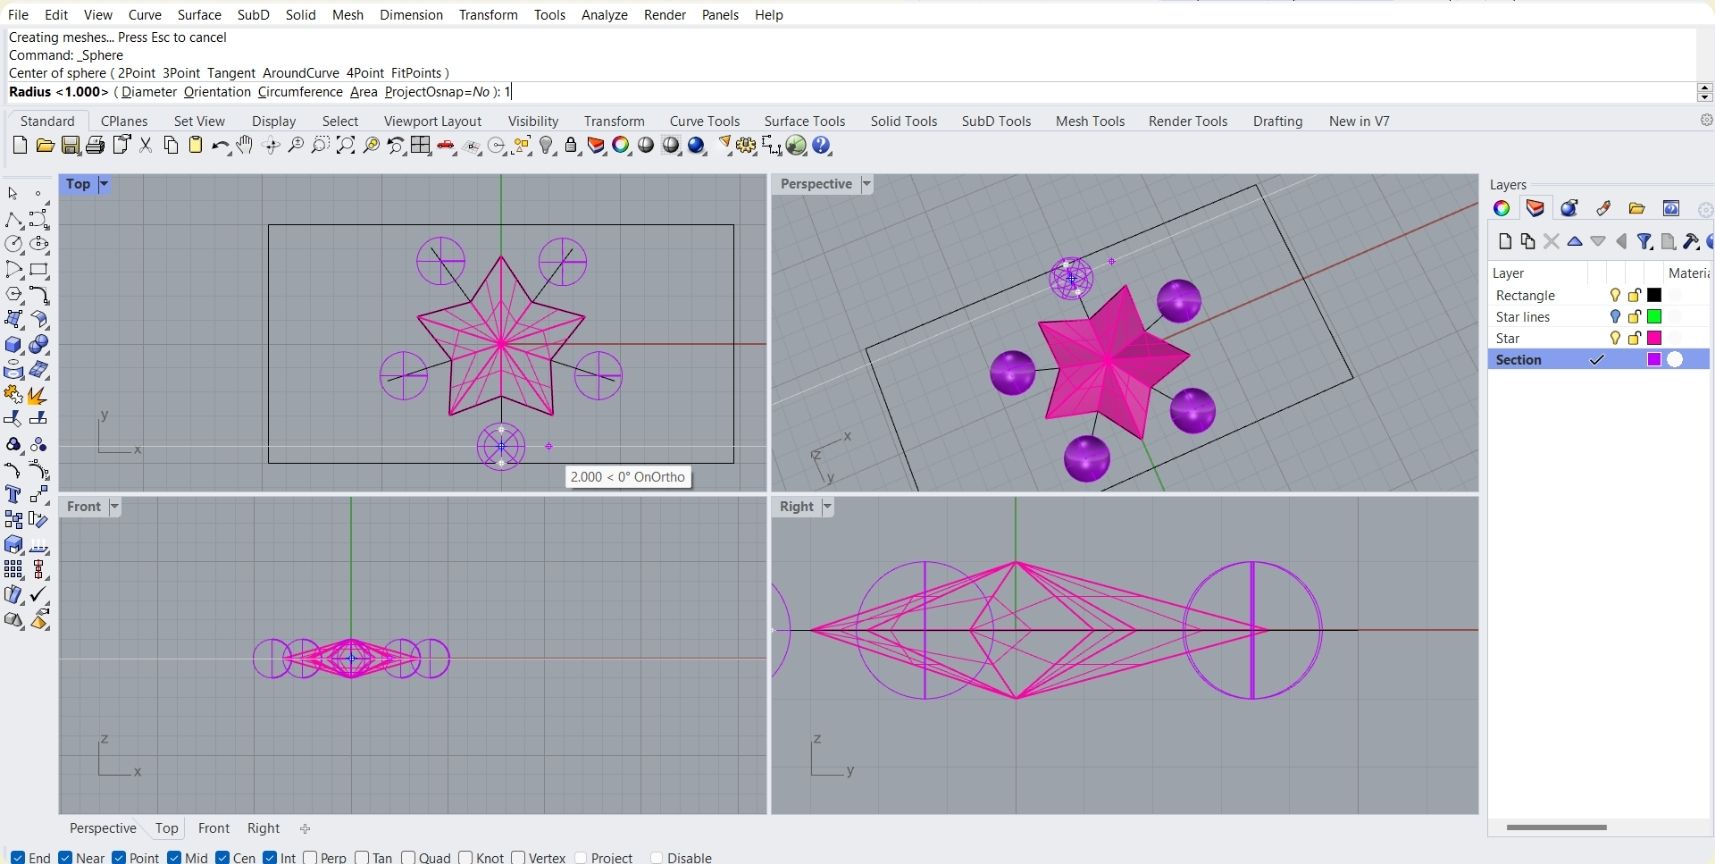
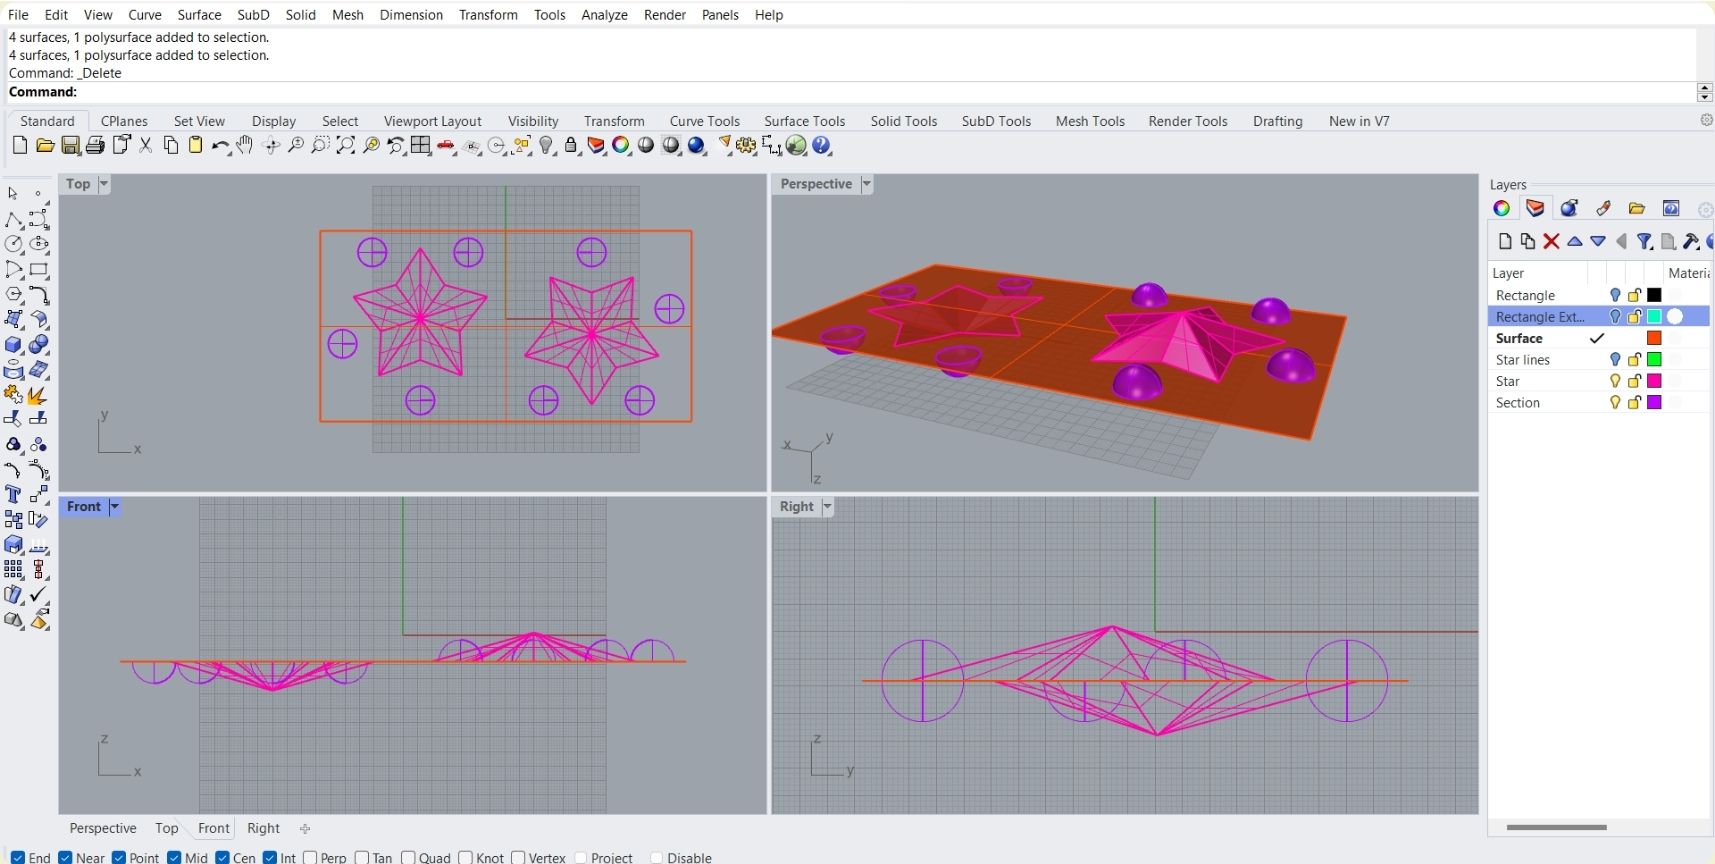
I arranged 5 spheres to start evaluating how the piece would be unmolded.
-
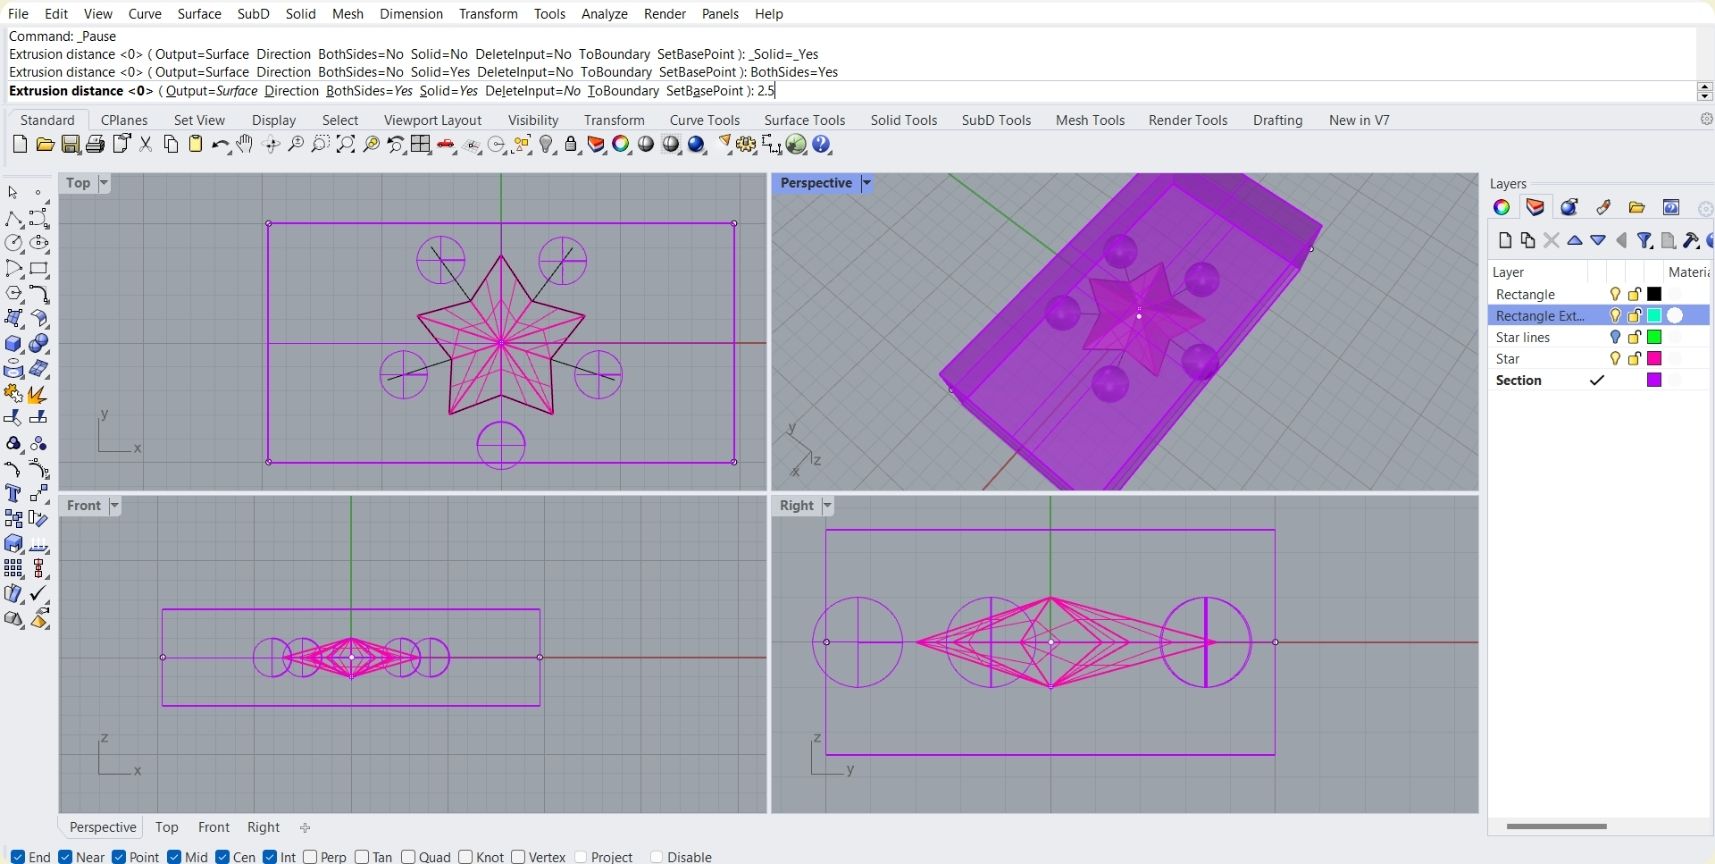
The next thing I did was to extrude the area of the block I was planning to work with, to calculate the height of my piece in negative and positive.
-
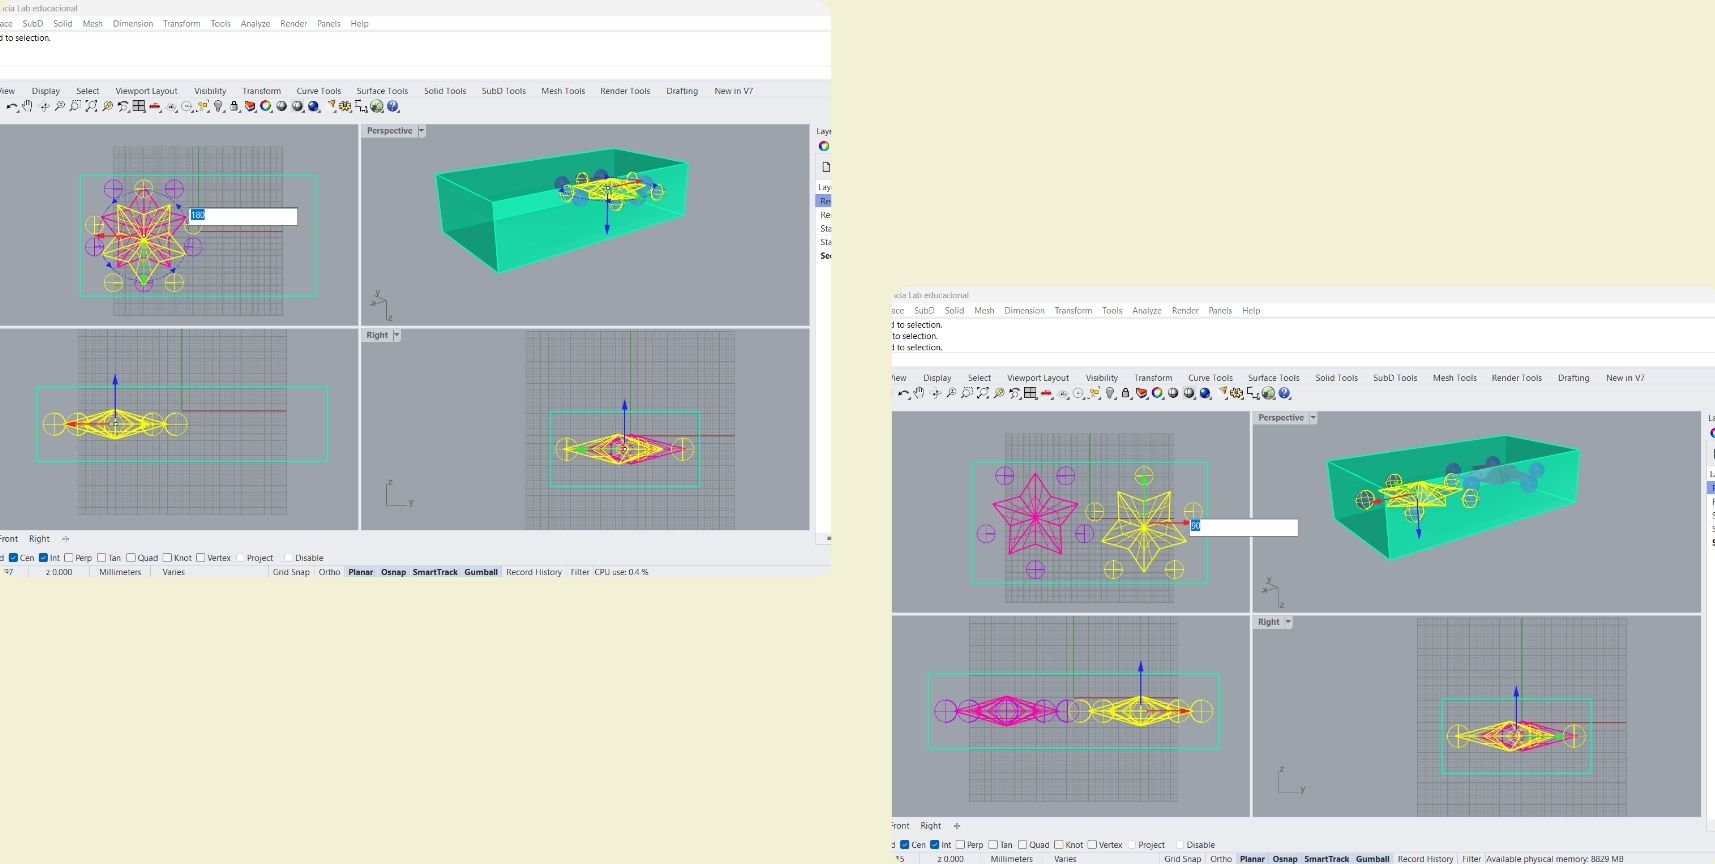
The next step was to move everything to one side, so I could copy and paste the whole star again, in order to have the positive and negative of it. That is, I didn't make a mold for the mold, what I was planning to do was to make the mold as such so that the pieces would come out of it.
-
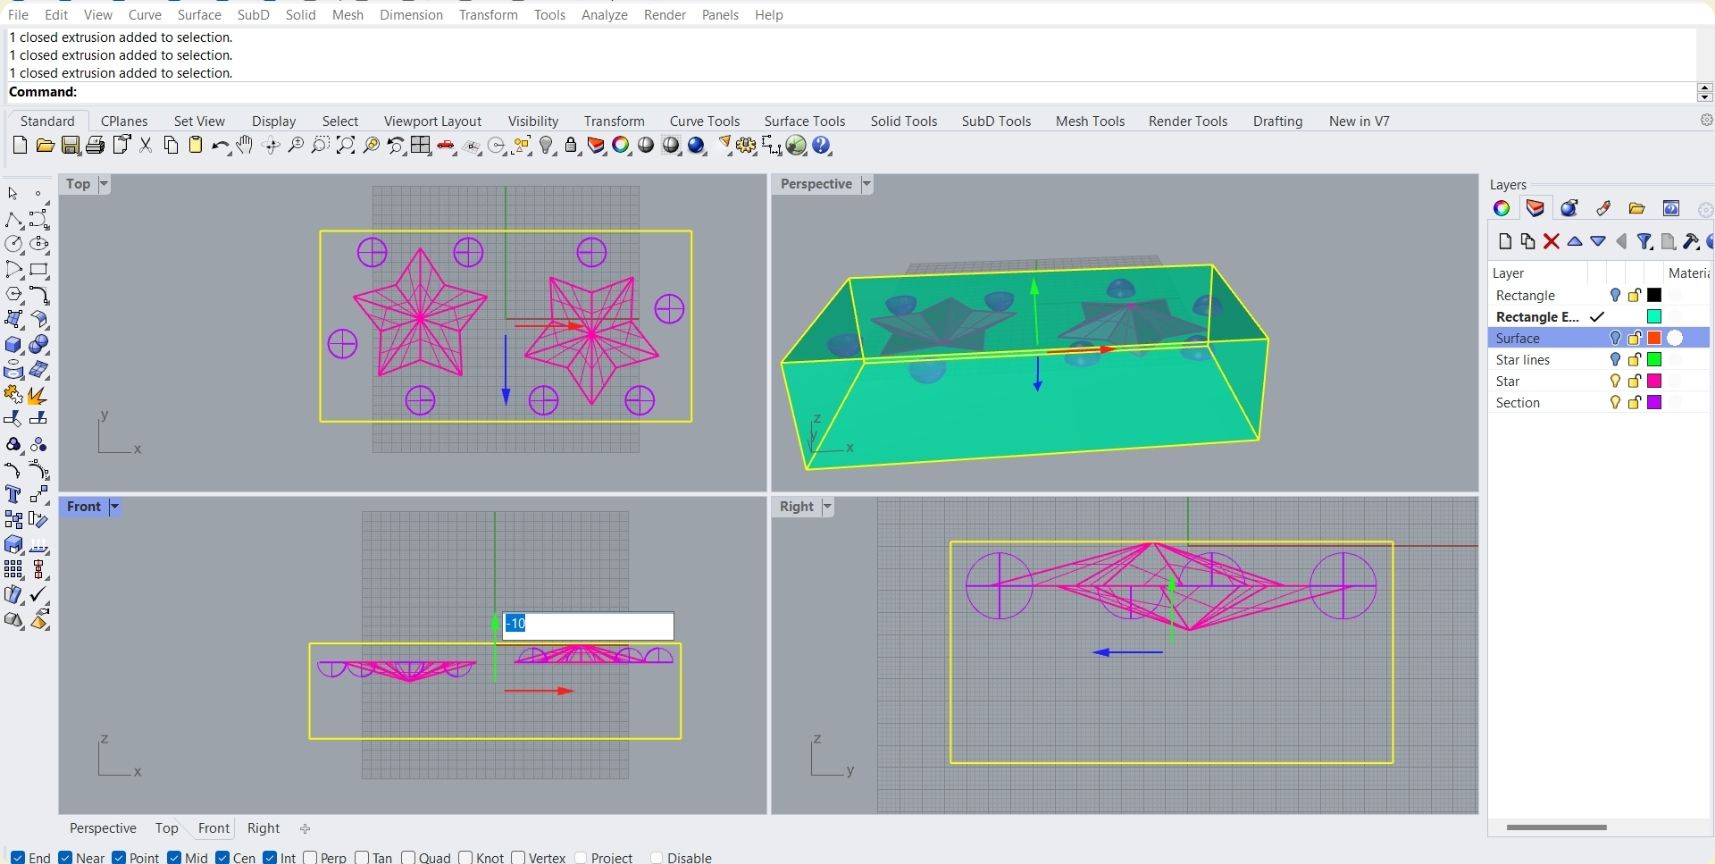
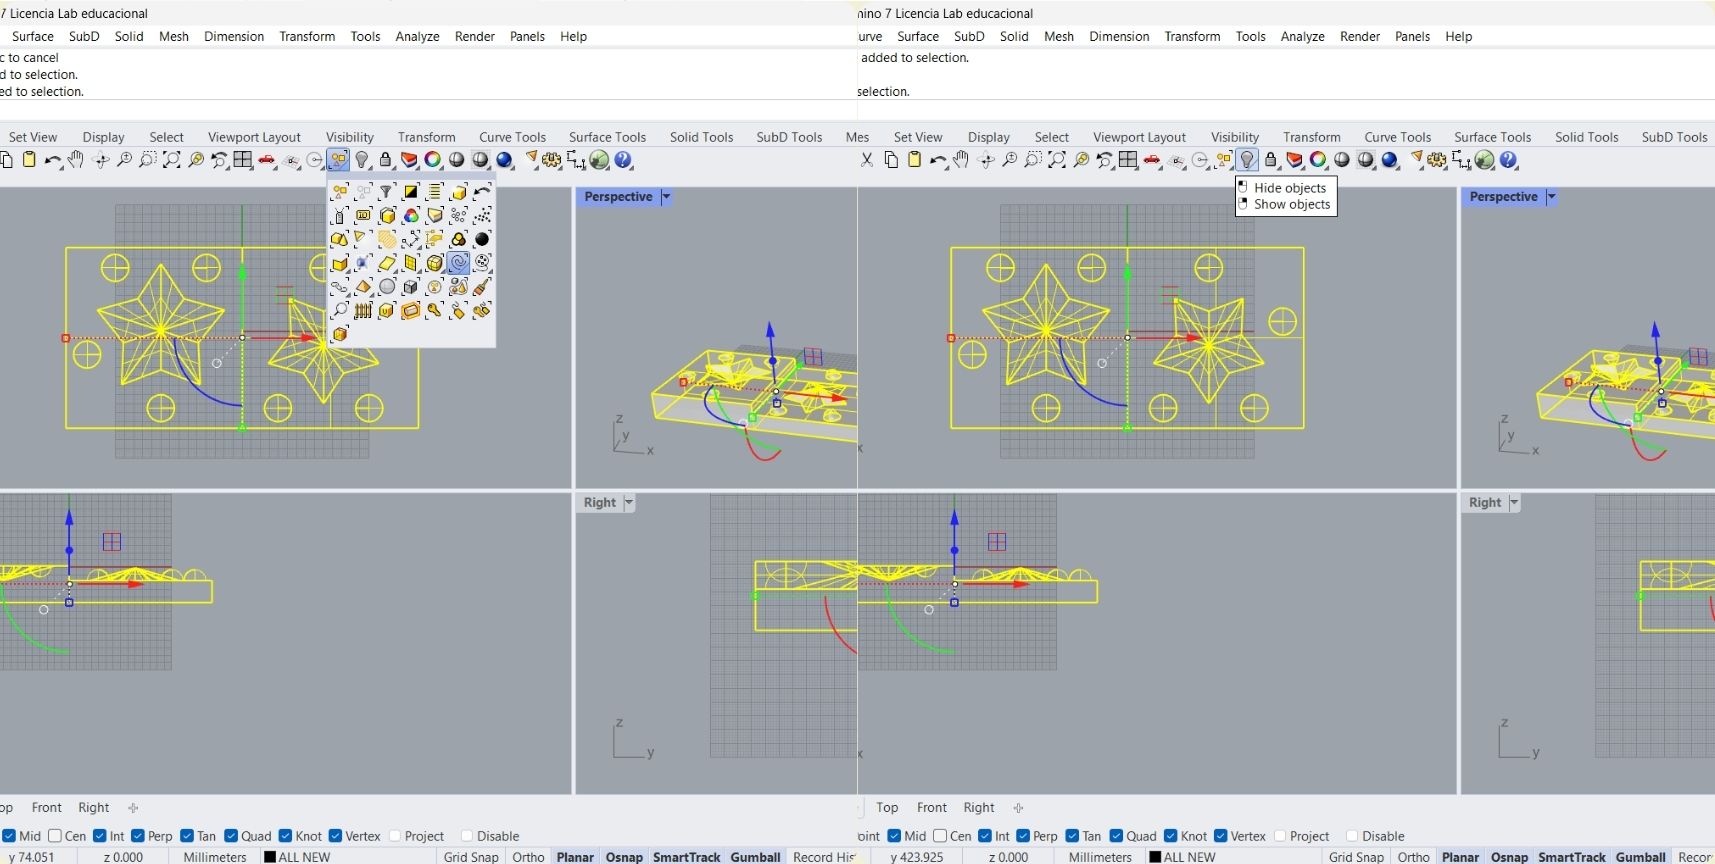
In order not to get confused I hid the rectangular extrusion and I kept one side up to accommodate the stars. Here you can see that I finally had 4 circles per star, because I was going to cut it in half and it was not going to be enough. As you can see in the photo below, in this part you can already see that I split one of the stars to serve as the 2nd part of the mold.
-
I recreated the extrusion representing the block I was going to work on.
-
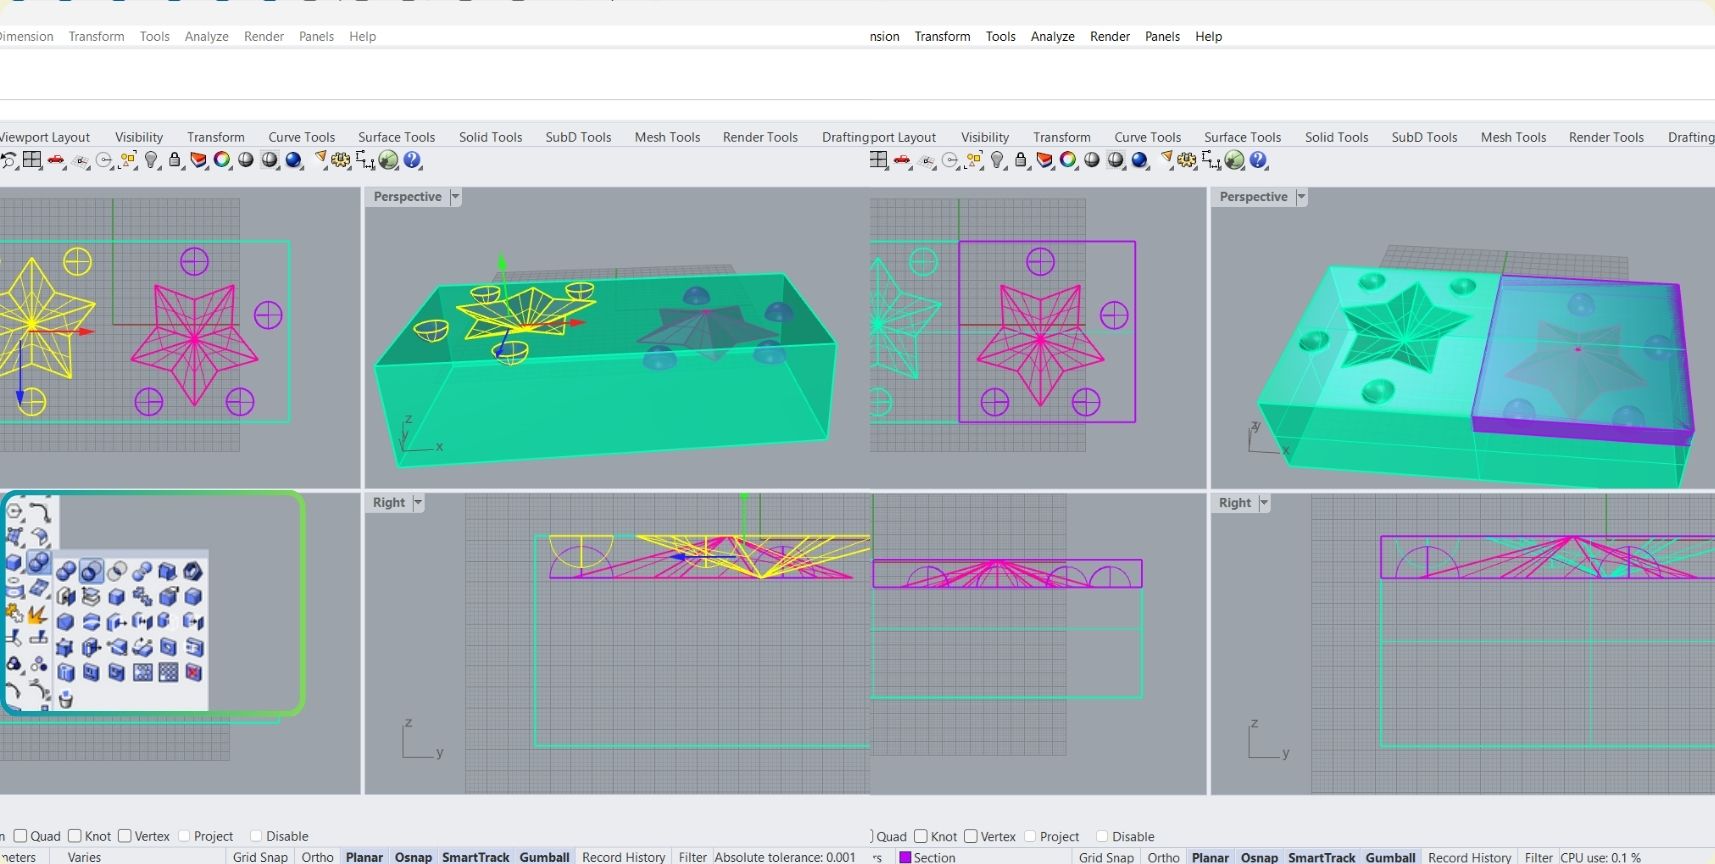
And the next steps I did with the help of the Boolean difference tool to extract what I didn't need from the stars.
-
Then I realized that the extrusion was too much, so I ended up cutting the model in half, and for that I used two other extrusions.
-
To avoid unwanted curves when exporting the part, I first selected everything, indicated that I wanted to keep only the curves selected and then hid them with the tool that looks like a light bulb.
-
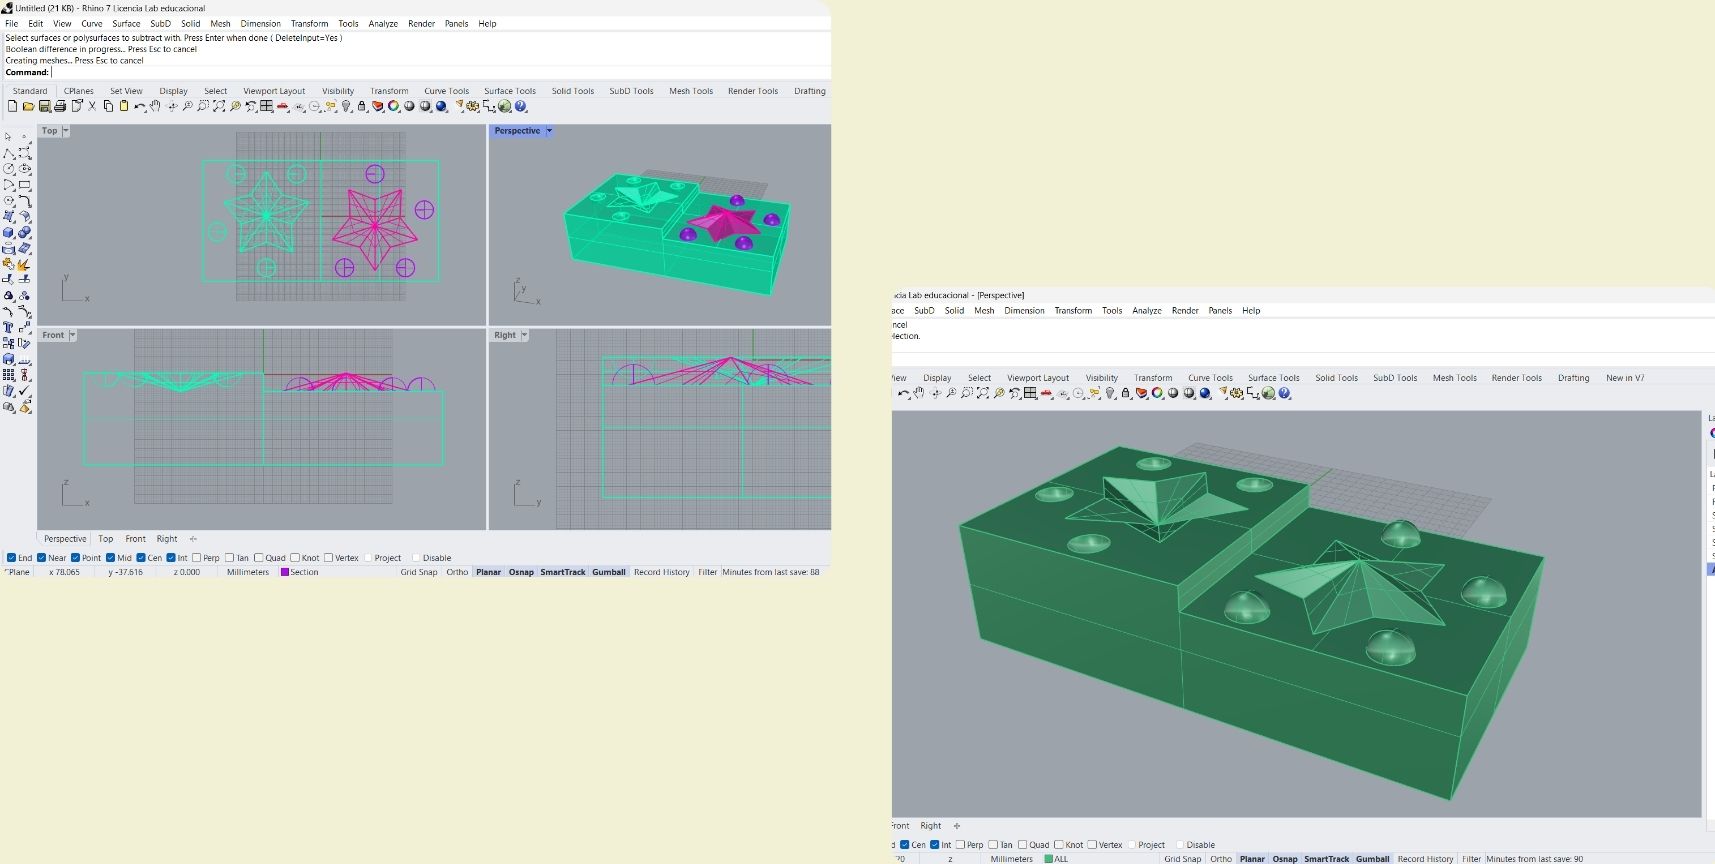
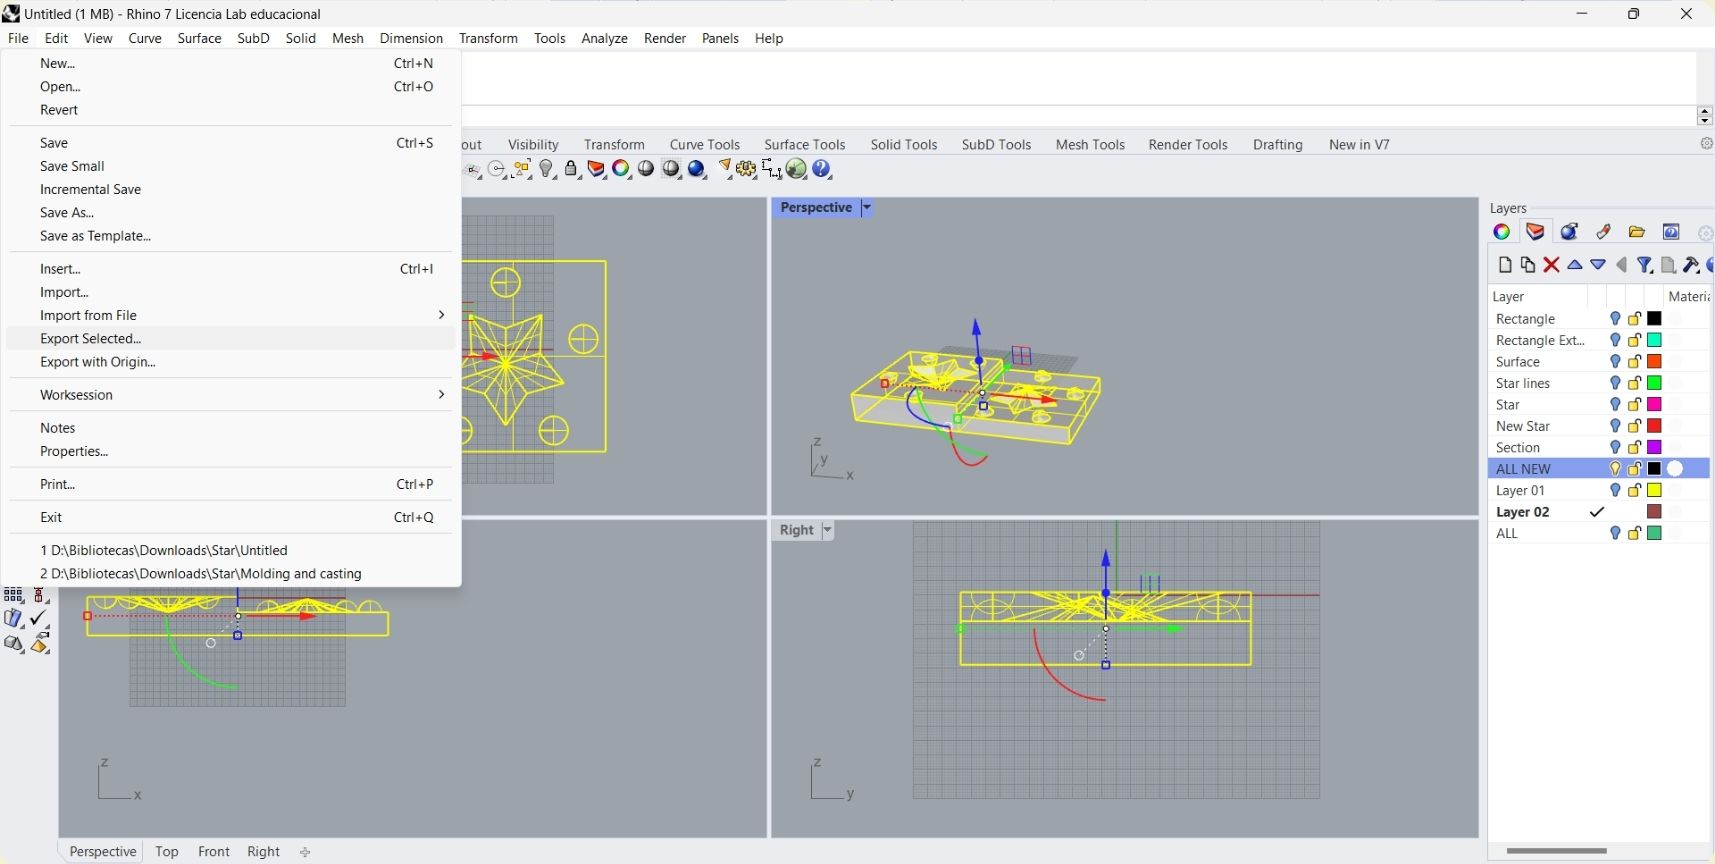
Finally, I selected the whole solid, and exported it as STL.
-
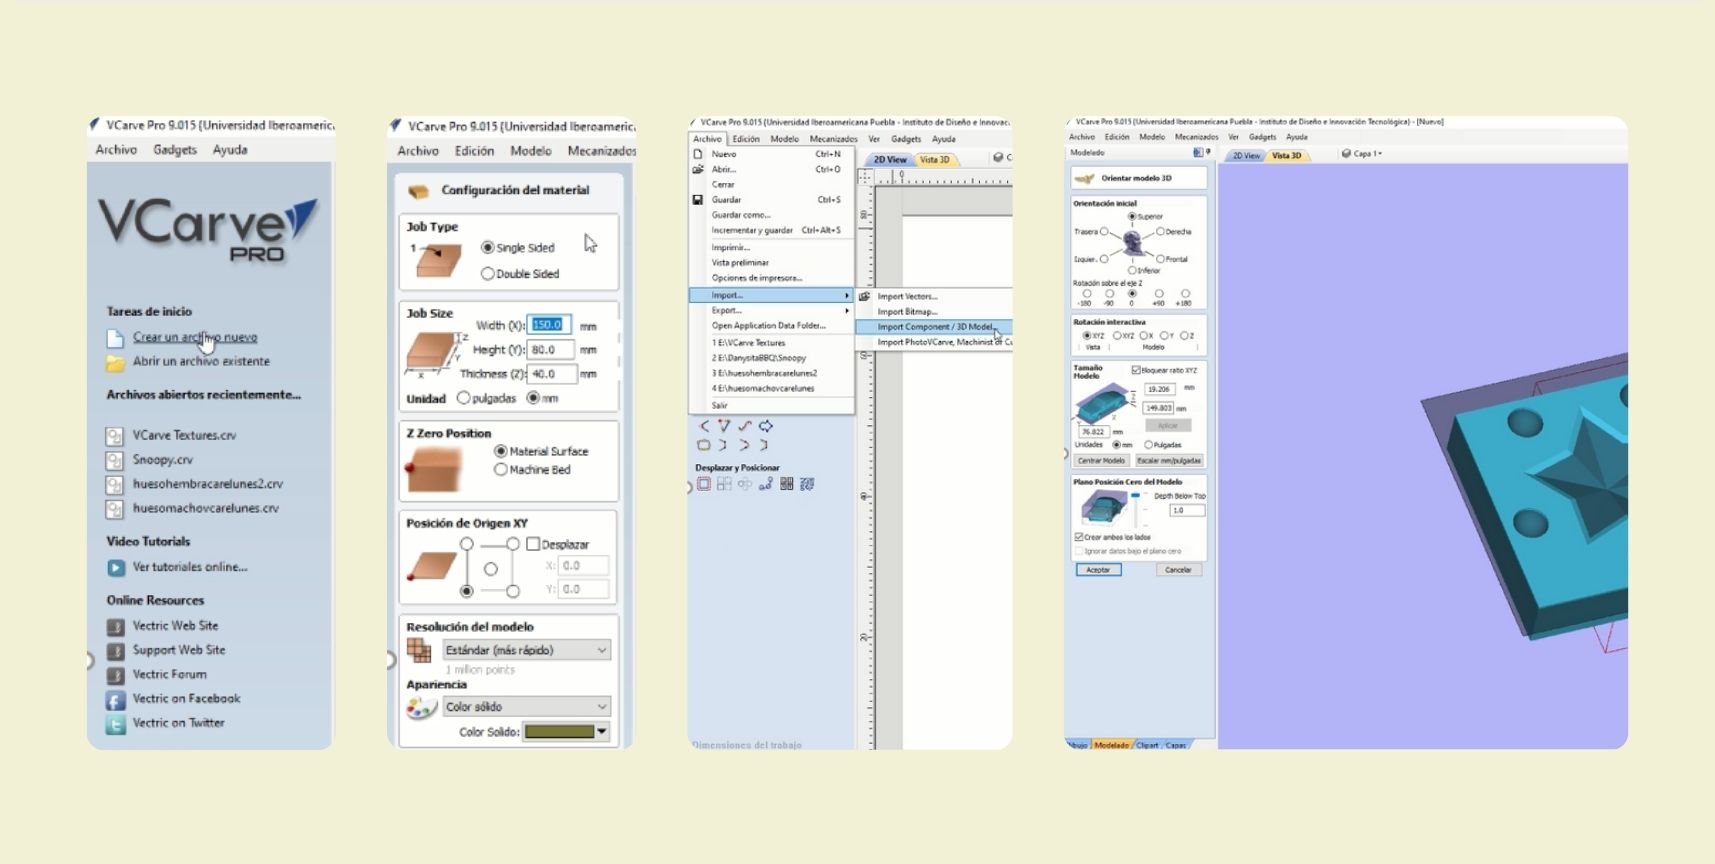
The first thing is to create a new file, where the dimensions of the wax block I used are indicated. It is very important to save the configuration in which you put these measures, because if it is a rectangular piece, you have to take this into account to accommodate the piece in the cutting area, depending on whether X or Y is the longest part of the piece. Once ready, the STL model is imported and placed inside the area that was formed according to the previous configuration.
-
I adjusted the orientation and zero position of the model. Although my model was less high than the work area, it didn't matter because there wasn't going to be very deep drilling either.
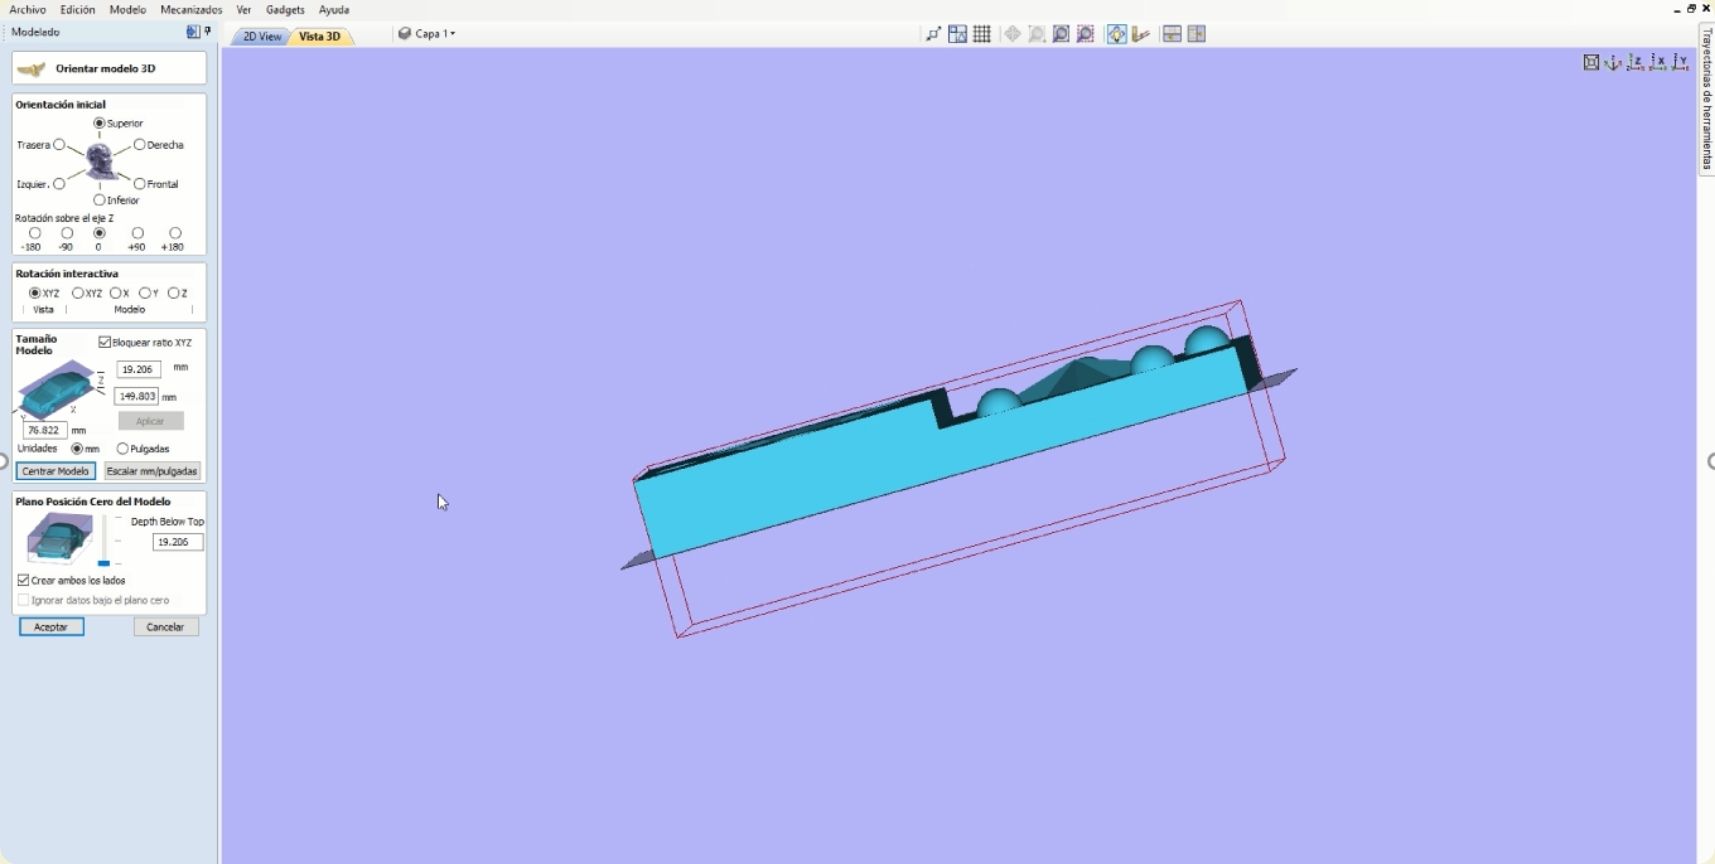
-
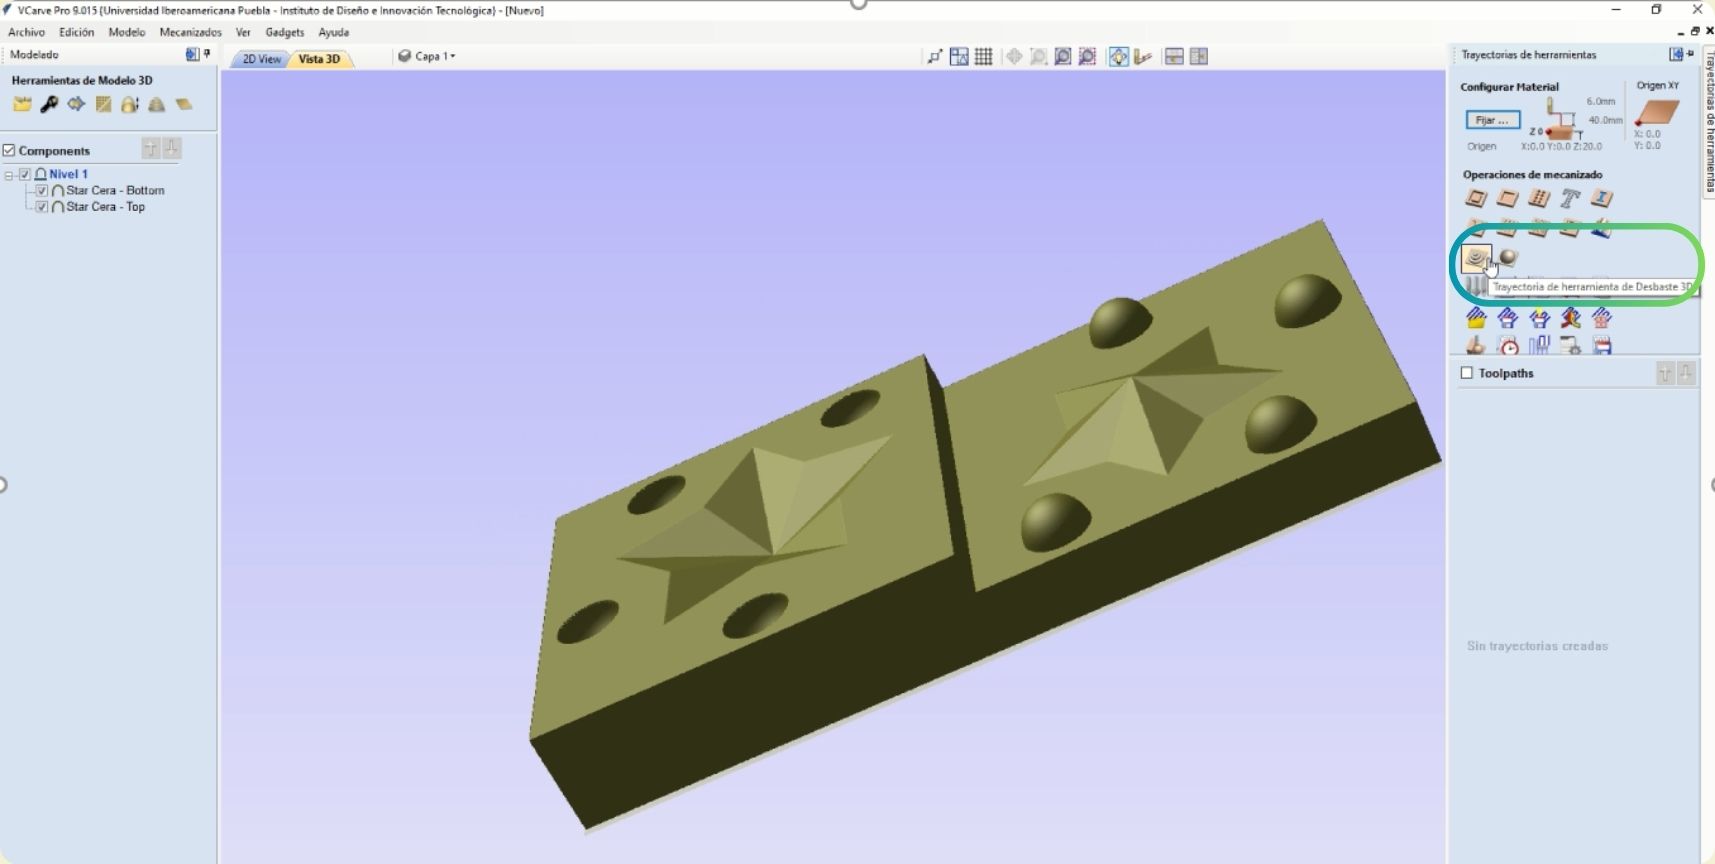
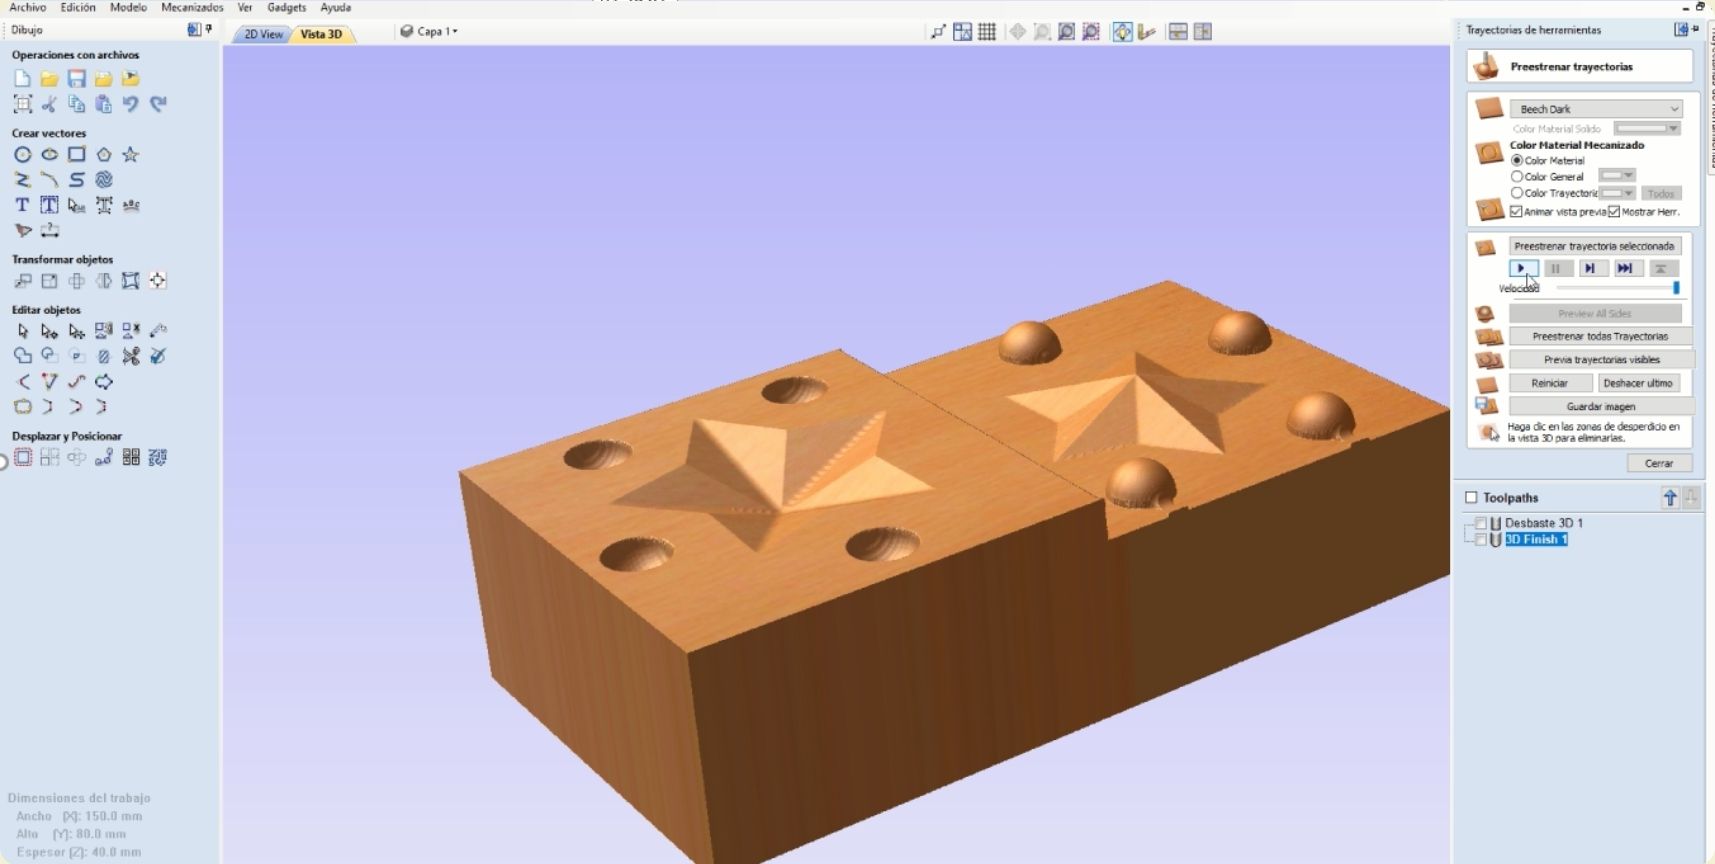
The next step is to start by setting up the 3D roughing tool path.
-
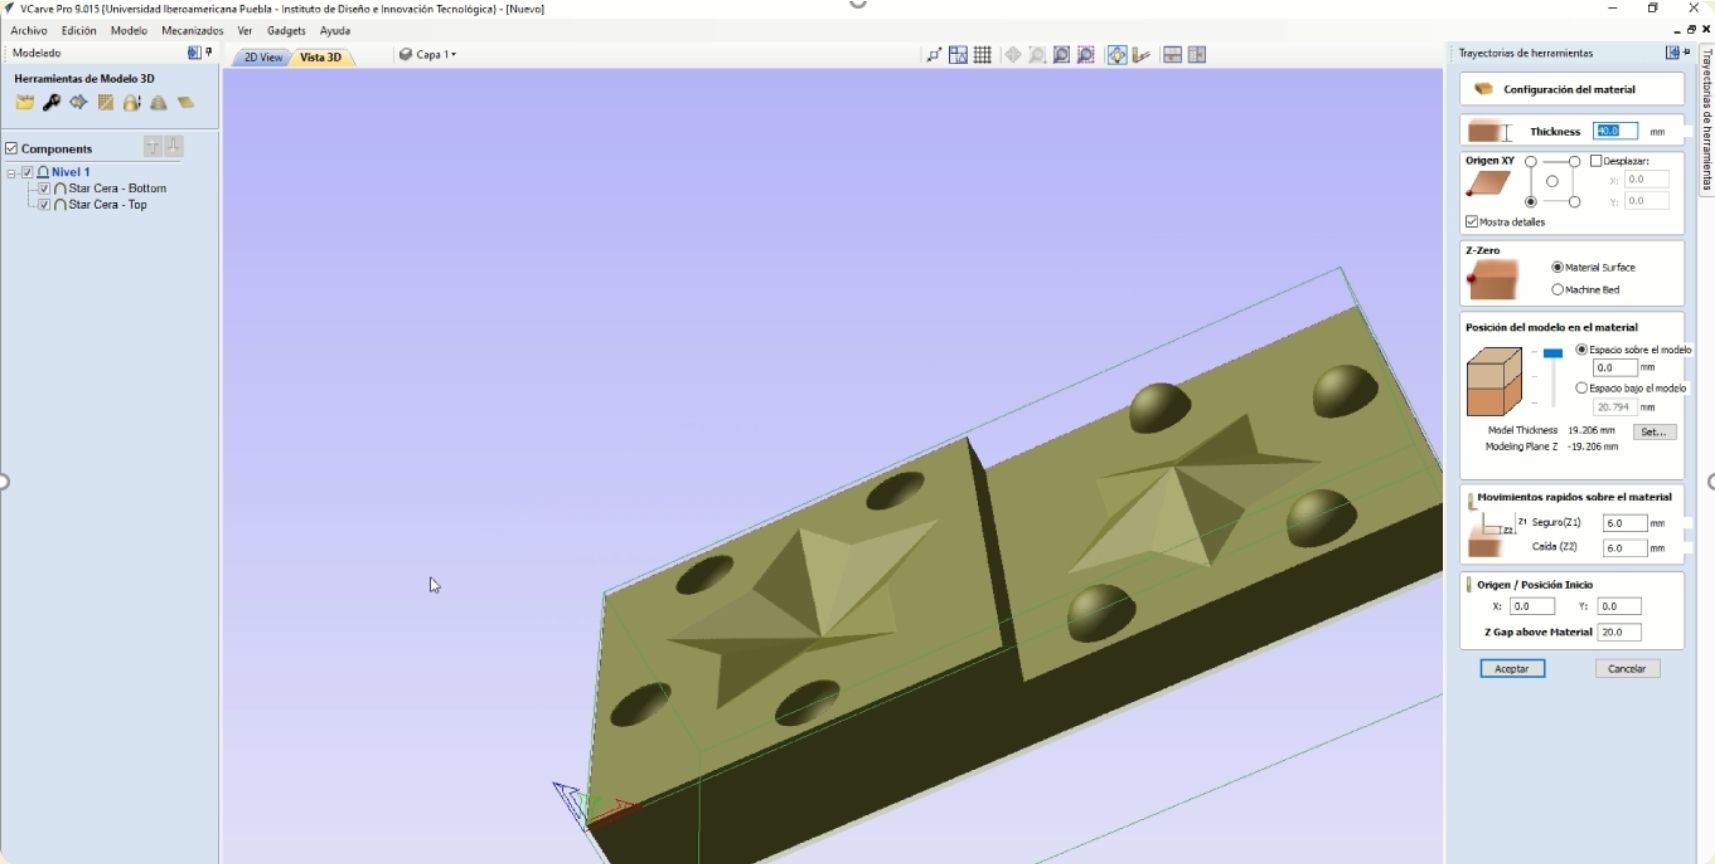
We keep the displayed settings of the material and hit accept.
-
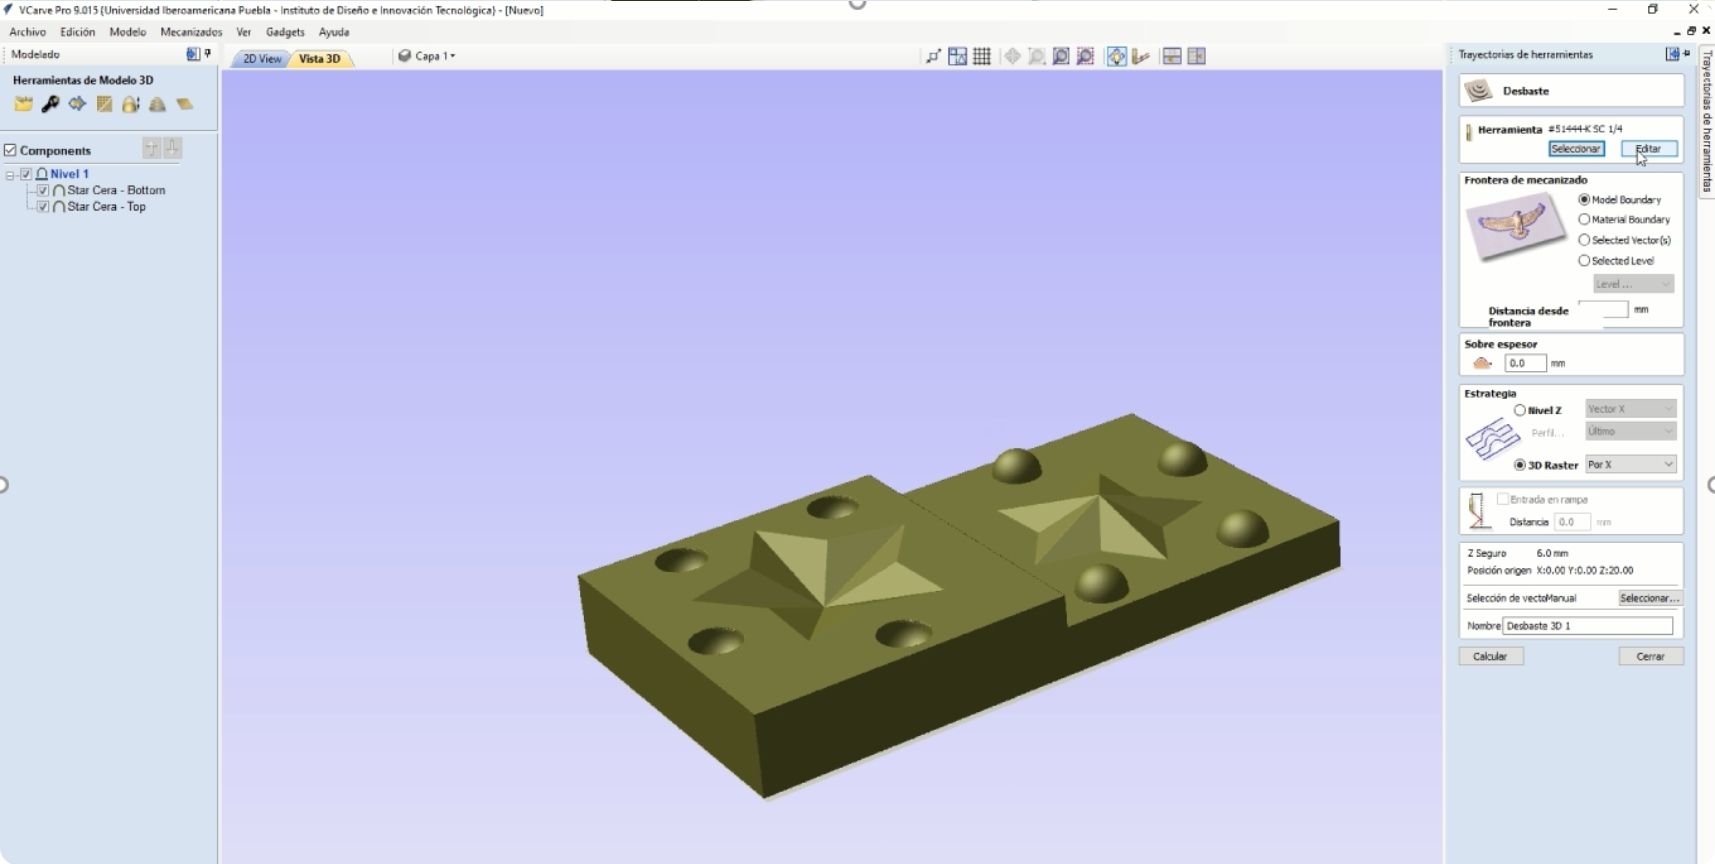
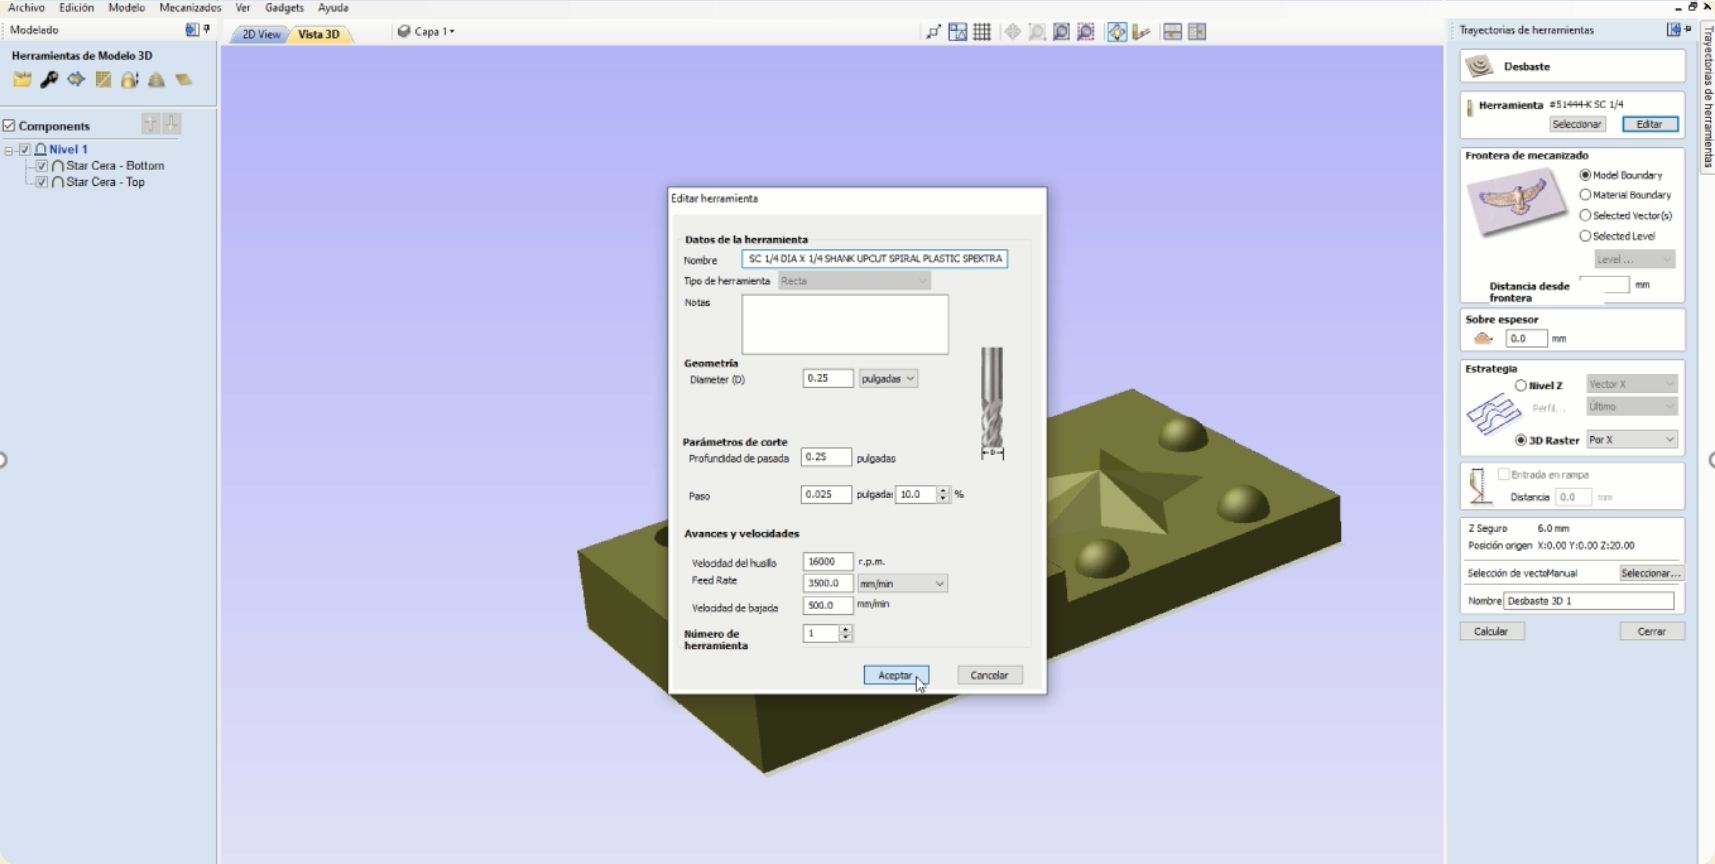
And then you can edit the roughing tool. This part is important, always keep in mind the tool to use and the material to use.
-
These were the settings for my ¼ roughing tool, keeping in mind that what the material I was going to work on was wax, so the speed could go faster.
-
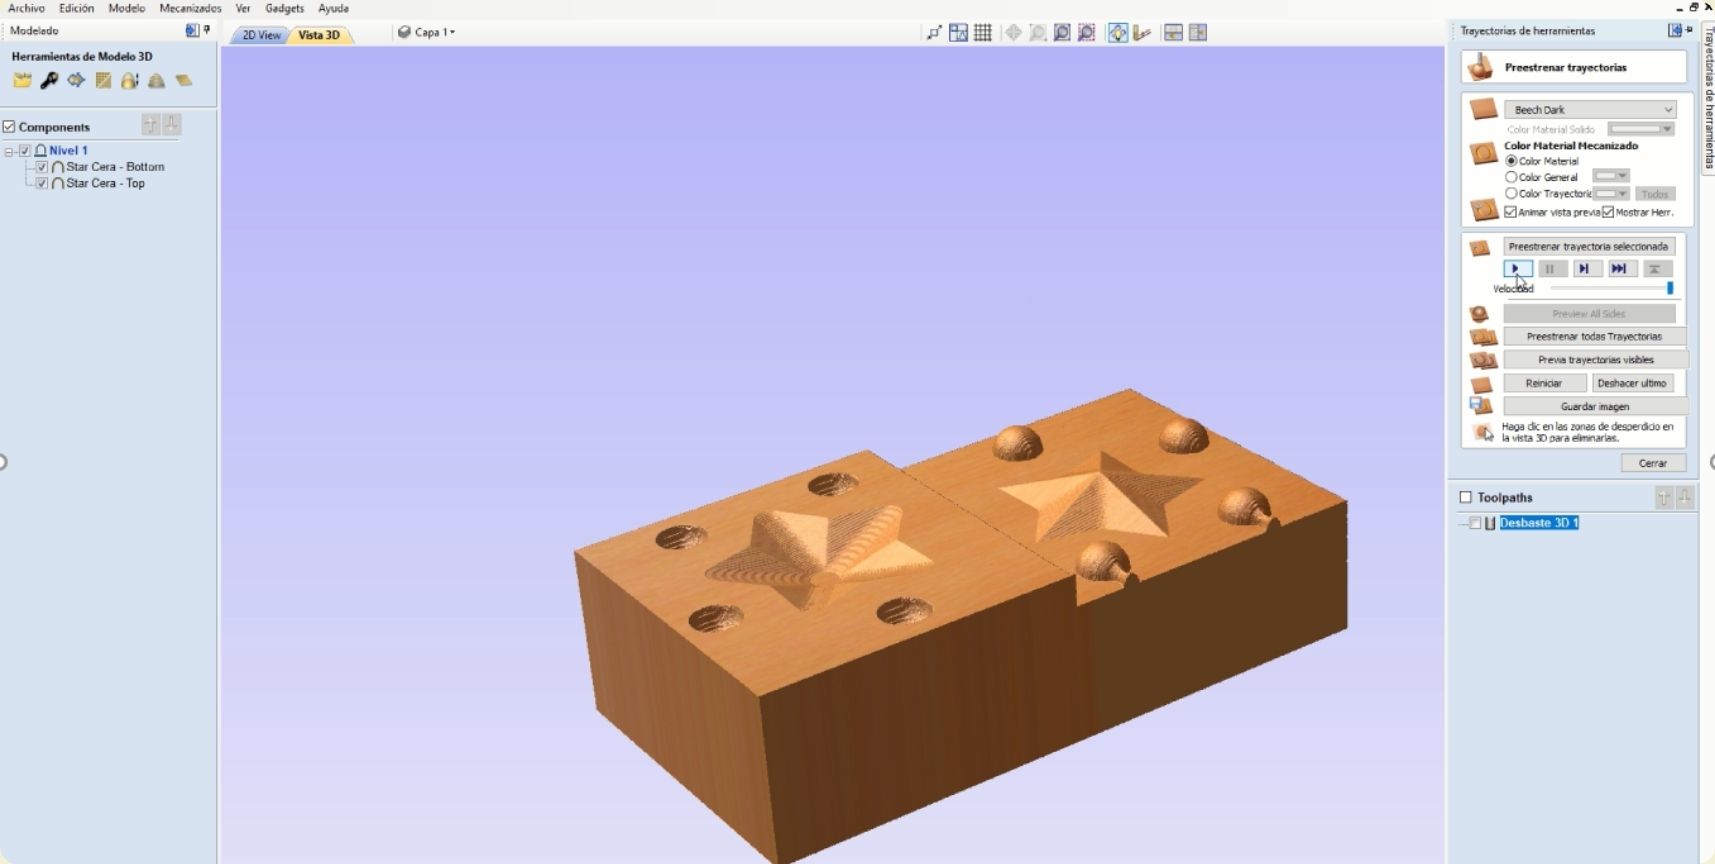
After setting up each tool you can see a preview of the job. These are usually very faithful to what the machine does afterwards.
-
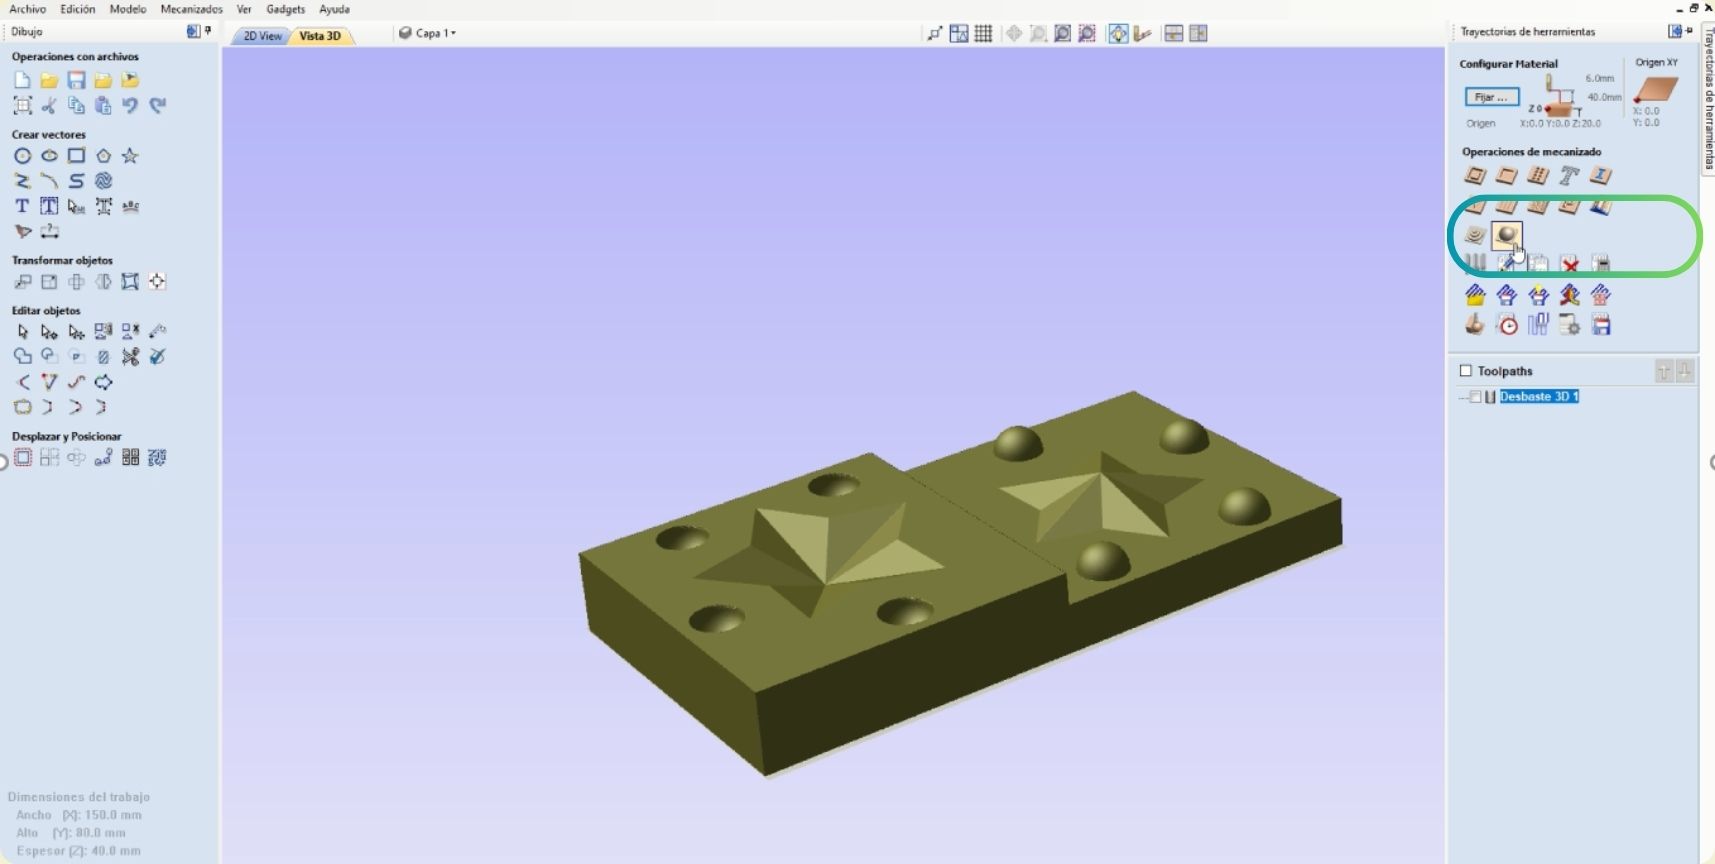
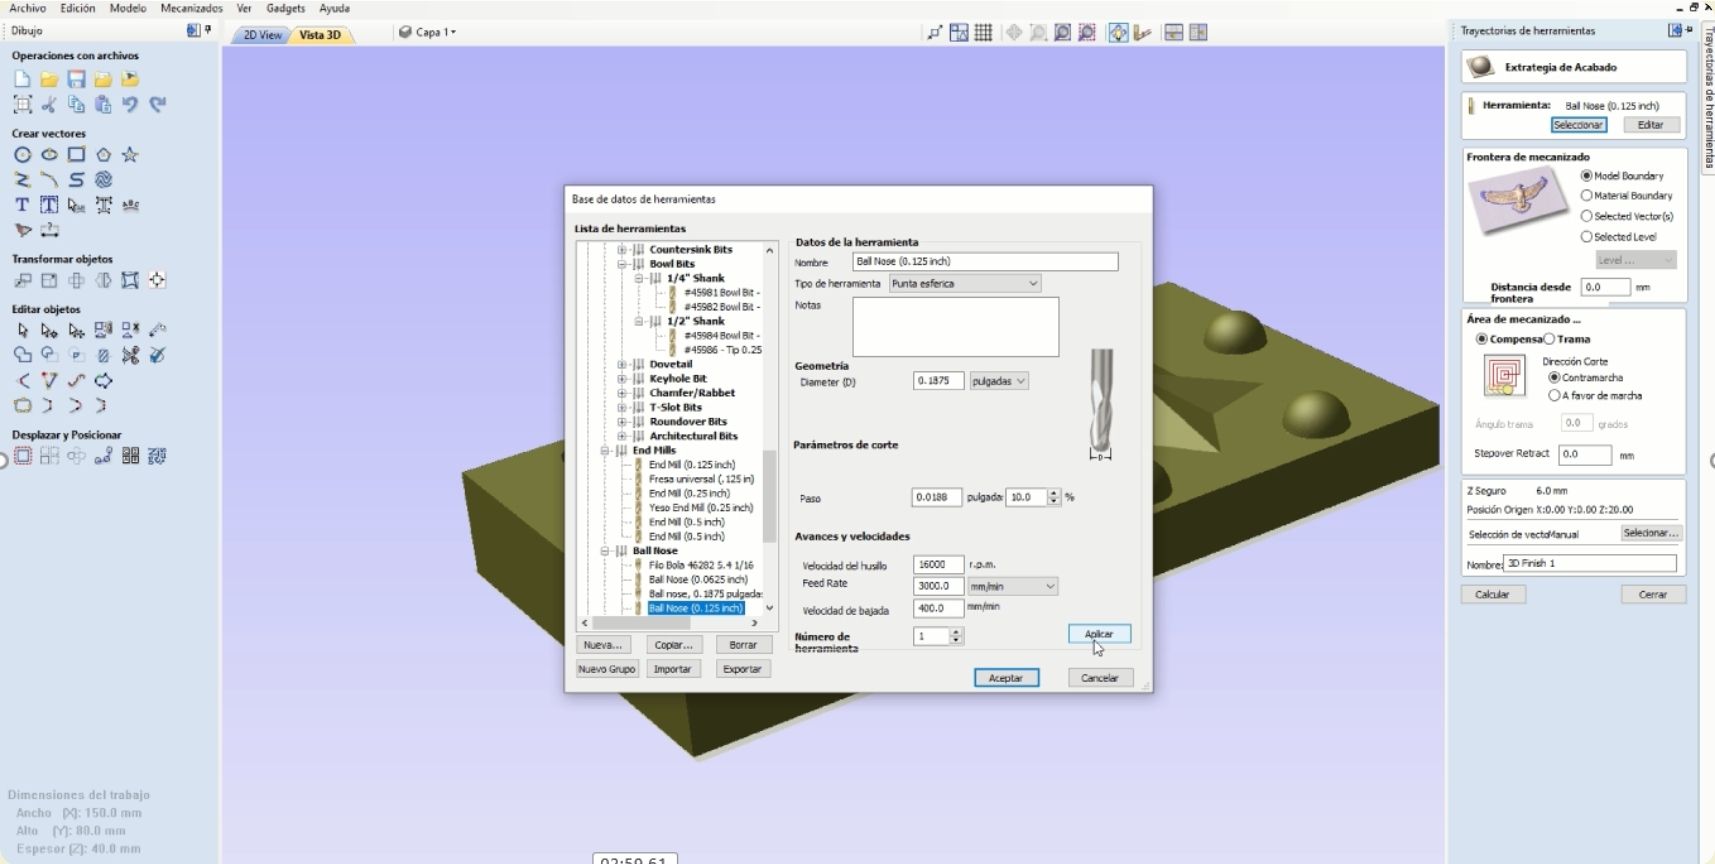
Next to set up was the finishing tool.
-
For the configuration of this tool I kept the following parameters. Something important is that you must click on apply before accepting to save the settings of each tool perfectly.
-
This is the preview after finishing.
-
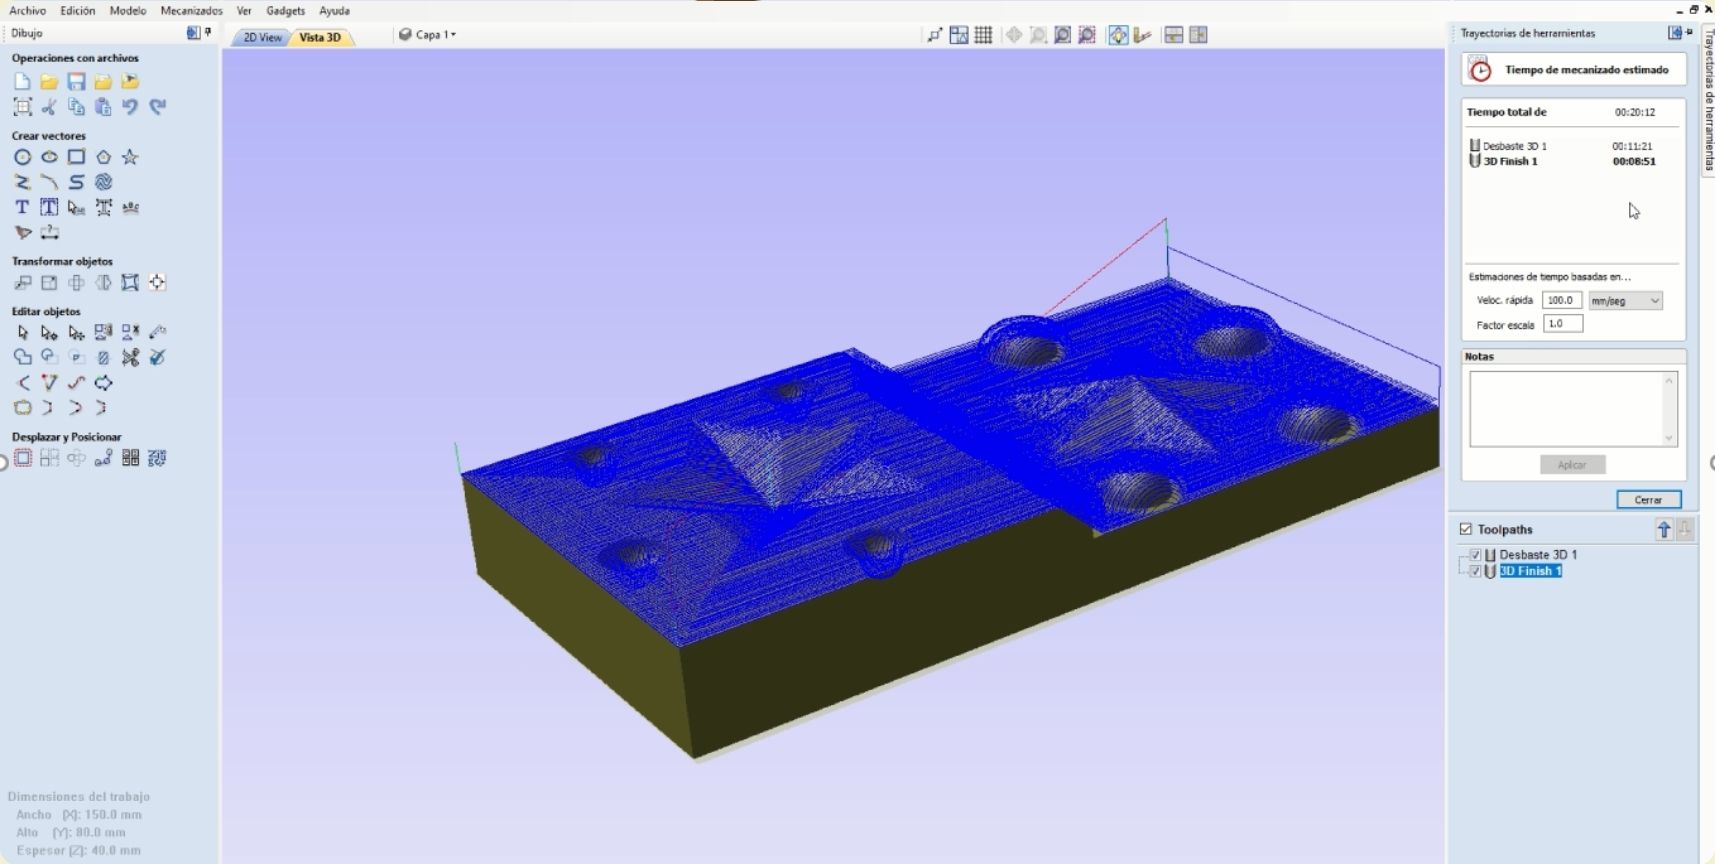
Before finishing it remains to see the time it will take to cut, which in my case was quite fast.
-
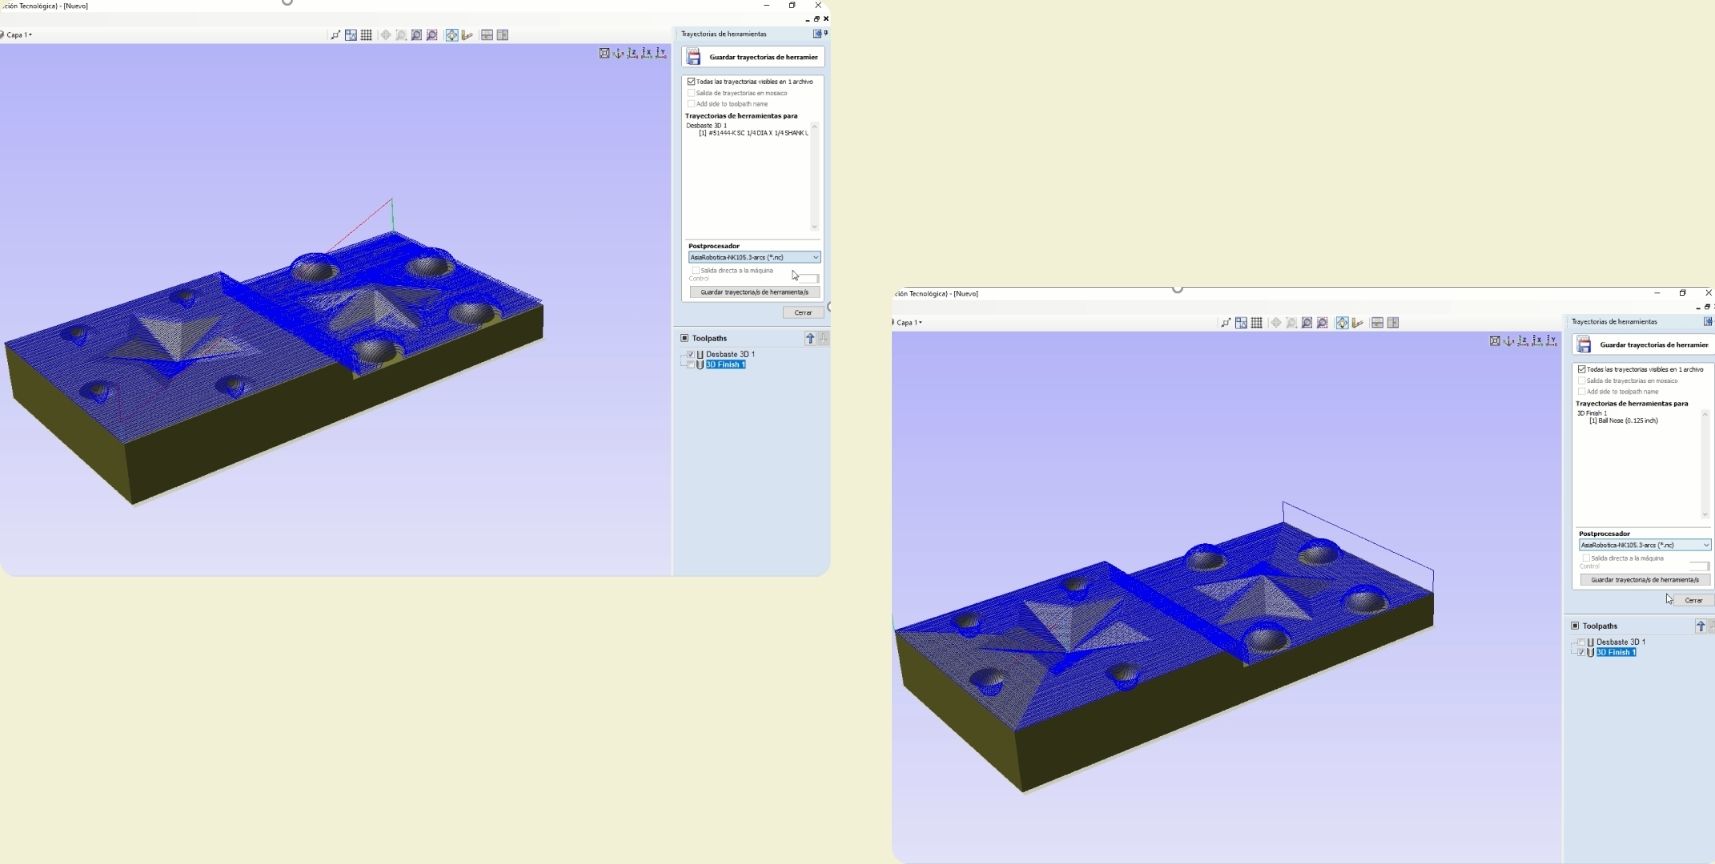
The files must be saved separately, roughing and finishing as two different files.
-
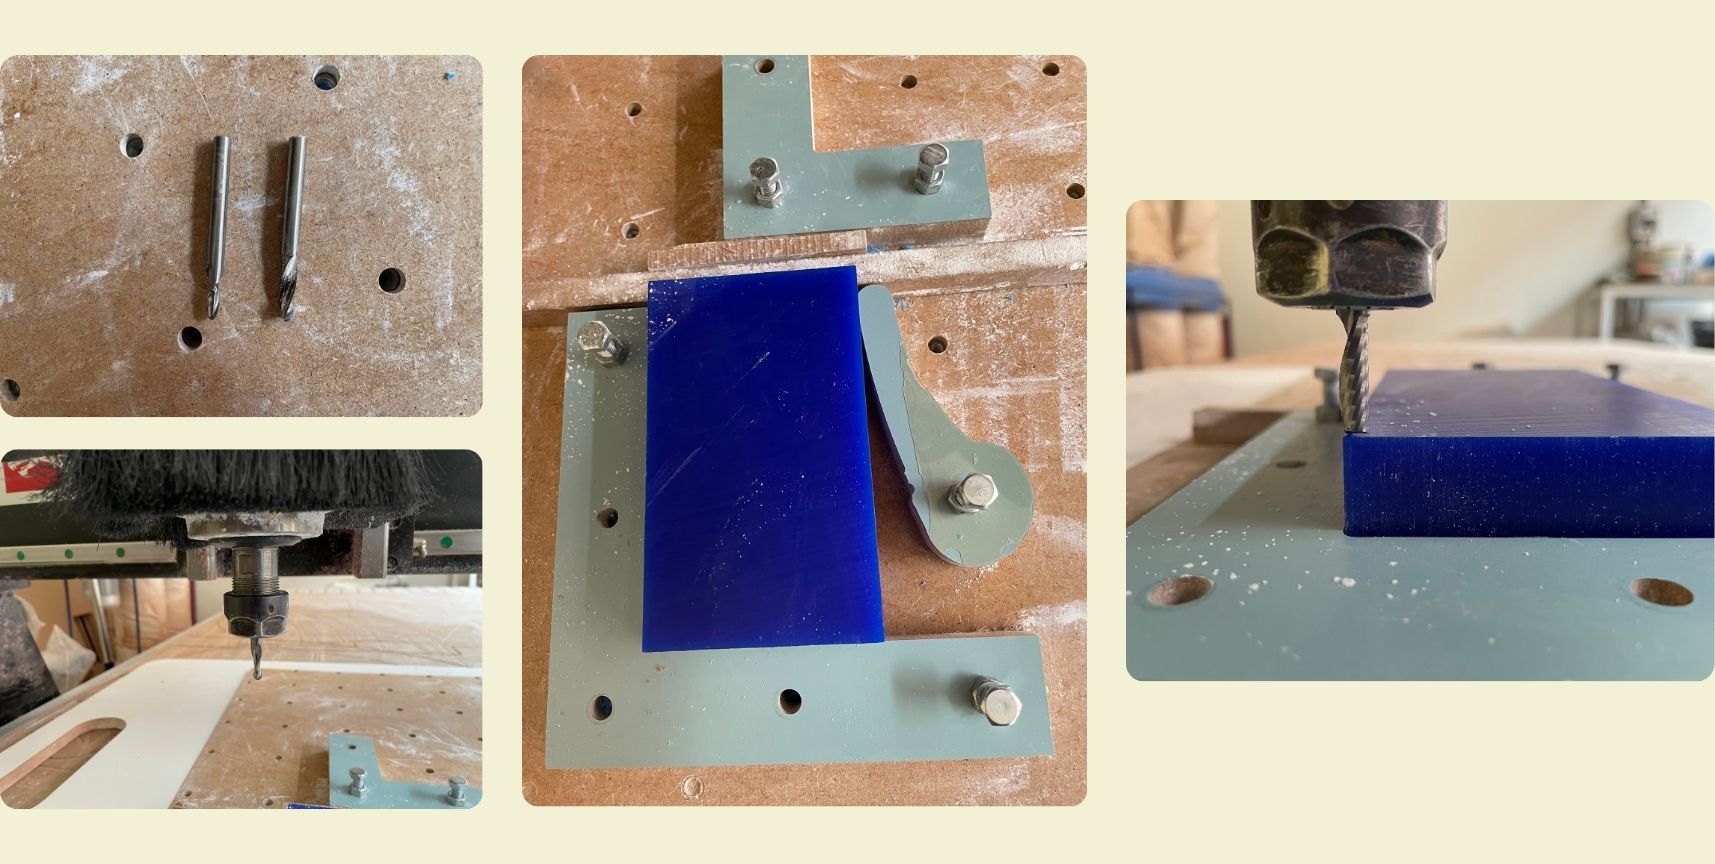
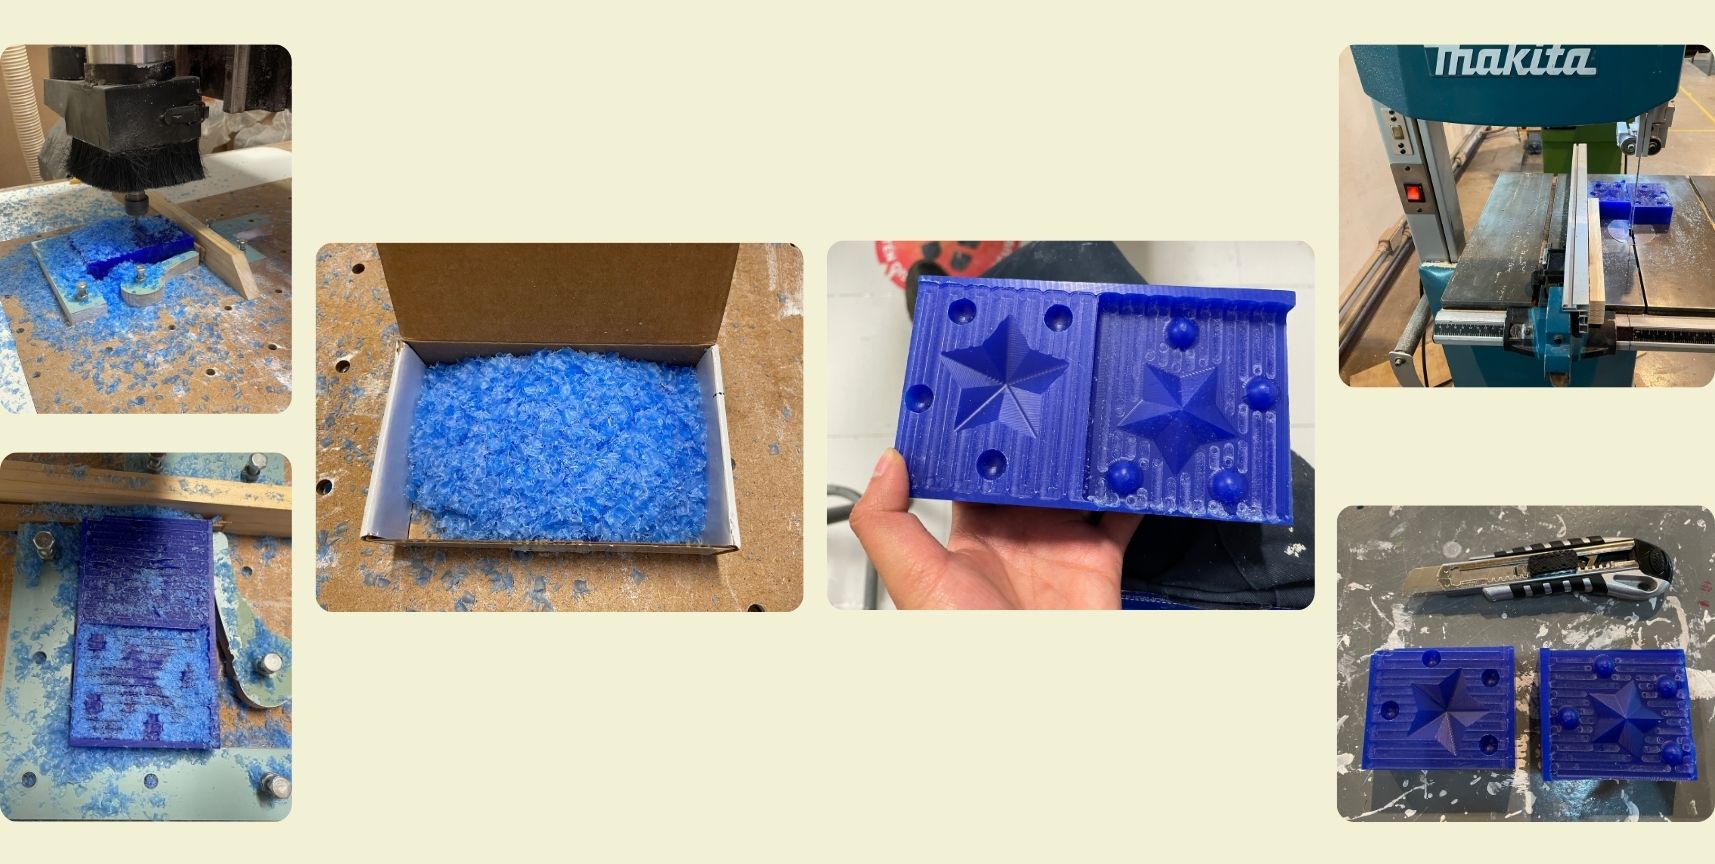
First of all, it is essential to have at hand the tools to be used, both the roughing and finishing tools, these must protrude 2 cm more than the maximum depth at which they will be cutting. And finally, it is also important to have the work material in the position in which it was configured. In the university we have a cam bed that allows adjusting the work material with the help of nuts so that it does not move.
-
When you turn on the machine, you have to let it move to the home point it asks for in the beginning, and after that you can start moving in all three axes. Once ready, the XY axes are saved first. To save the Z axis, click at the same time on Shift and XY=0. Then look for the first roughing file in the documents by clicking on the white key next to XY=0. In this case, as they were saved on a USB, I first looked in the USB, and with the number 1 key I copied it to the machine, and then I hit Play on the green key and it started cutting.

-
It is very important to start cutting at a maximum speed of 30, after the machine starts working you can increase the speed to 100%. Here are some clips.
-
Do not forget to change the tools between each cutting file. Here is a little video while I was changing the tool.
-
After each cut I collected the leftover wax, as it can be re-melted later, and no material should be wasted. The finish looked pretty good, however, in order to use my mold I still had to cut it in half and remove the excess from one of the walls.
-
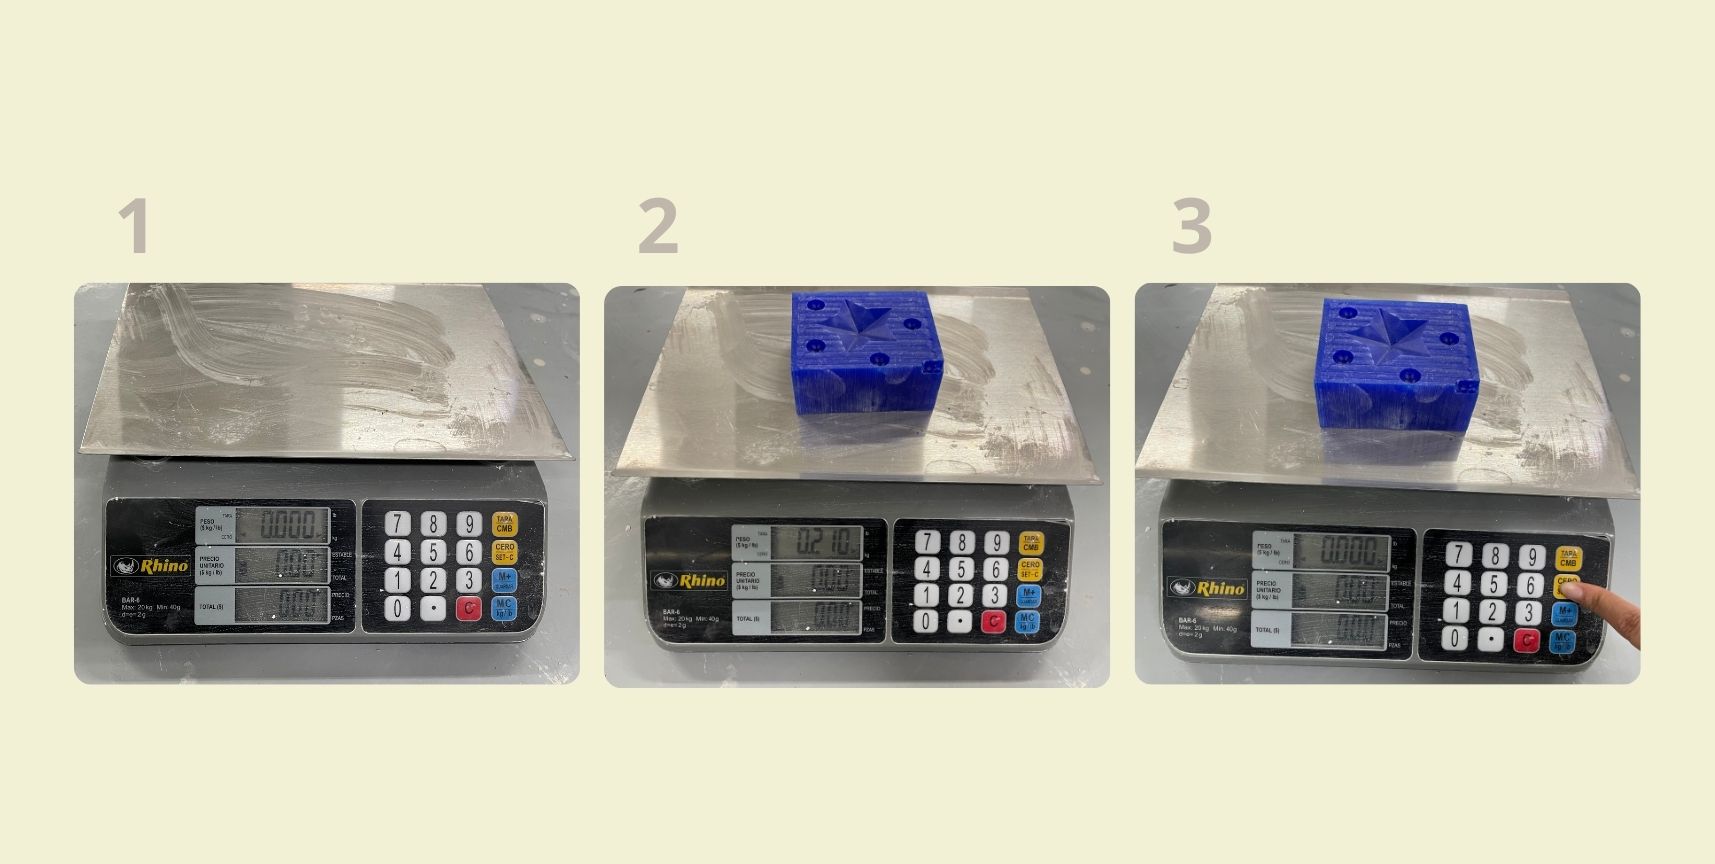
The next step was to calculate the volume of material I would use. First I started by weighing water, then pellets, but finally I realized that my piece was too small, and my mixture would be too little.
-
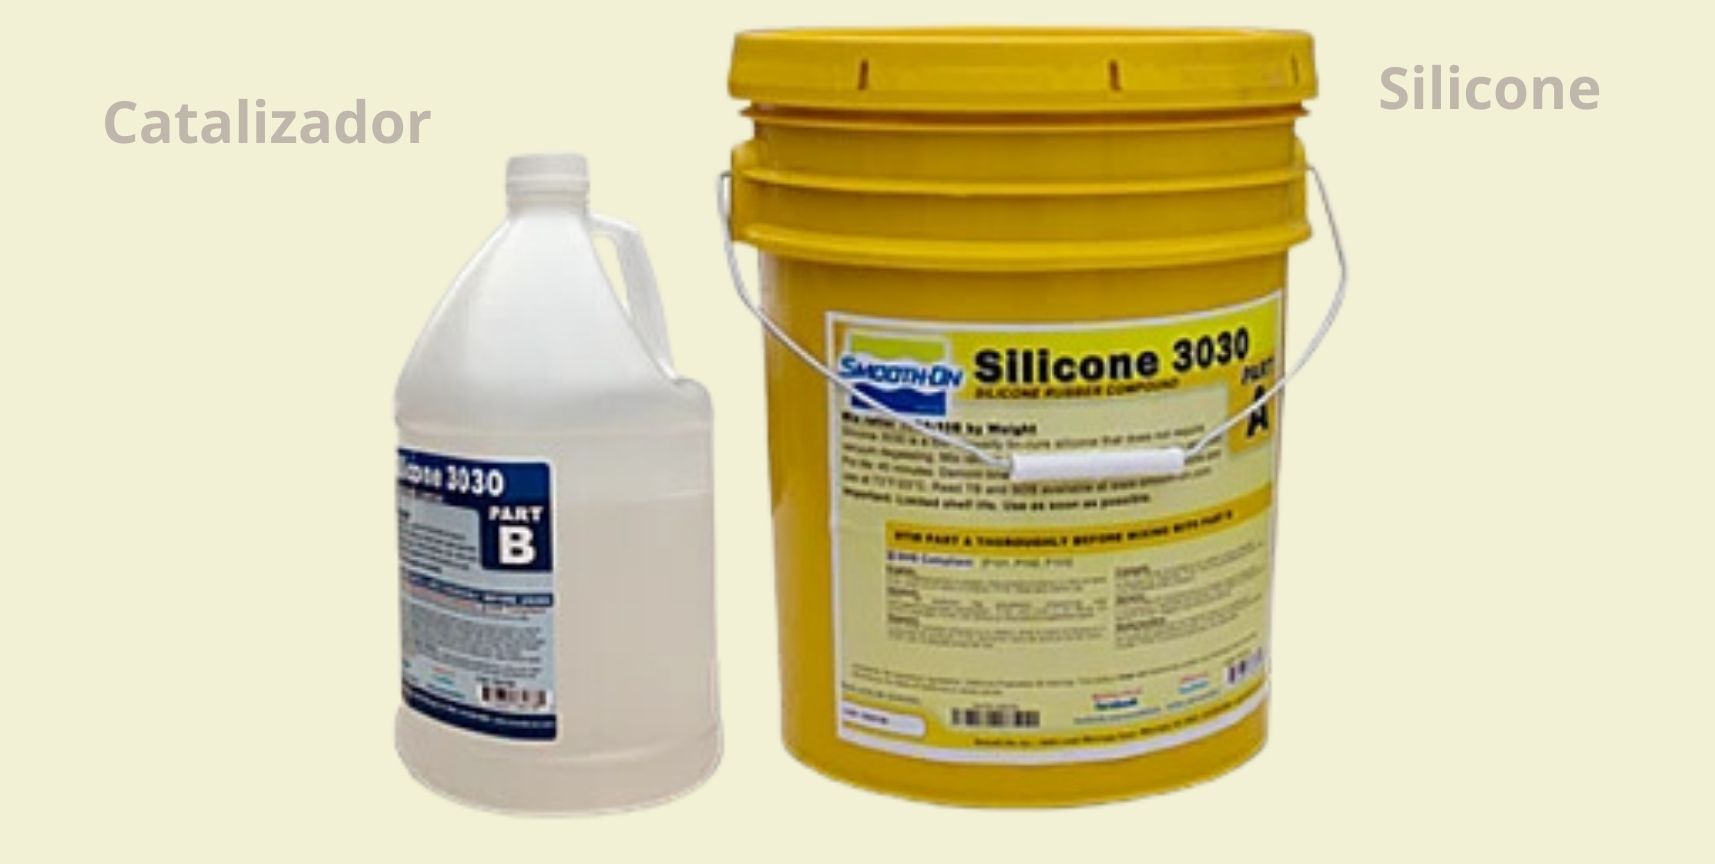
For the part I used Smooth ON 3030 silicone from the Mold Max™ 30 series, whose formulation for use is as follows: for every 90% silicone you must add 10% catalyst, and it takes 24 hours to dry.
-
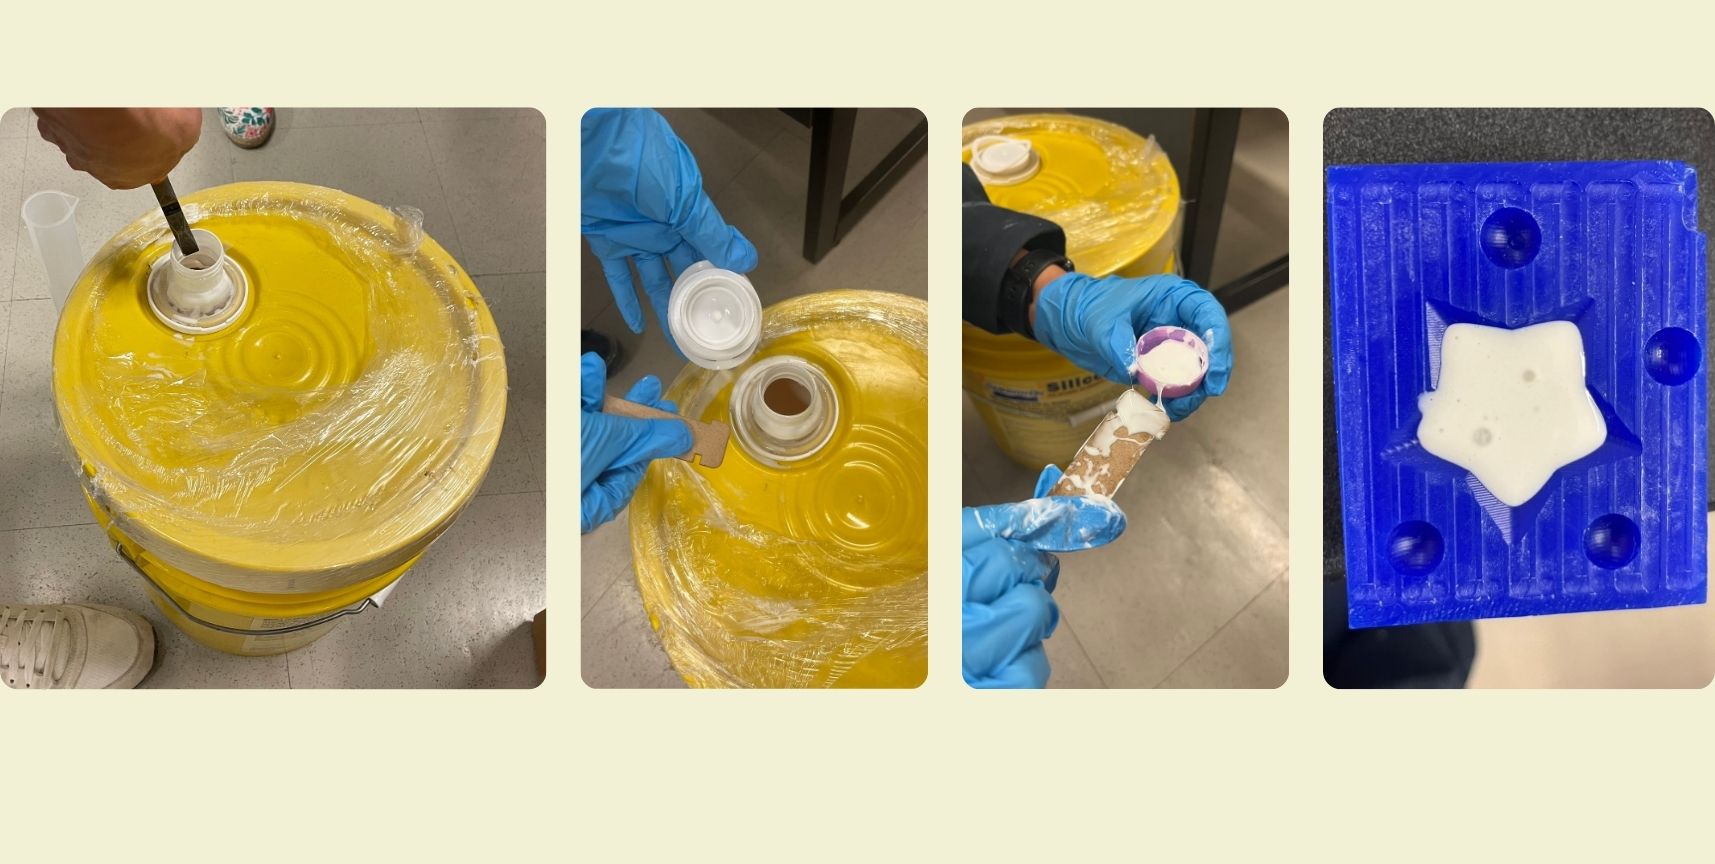
For the mixture (which was very little) I used nitrile gloves to protect my hands during the process, this material does not react with the drying of the silicone unlike latex. I stirred everything with the help of a piece of MDF and a small lid.
-
Although it was a very small piece, I was afraid of miscalculating the amounts of product in practice, as it was really too little product for my piece, however, it came out without any problems.
-
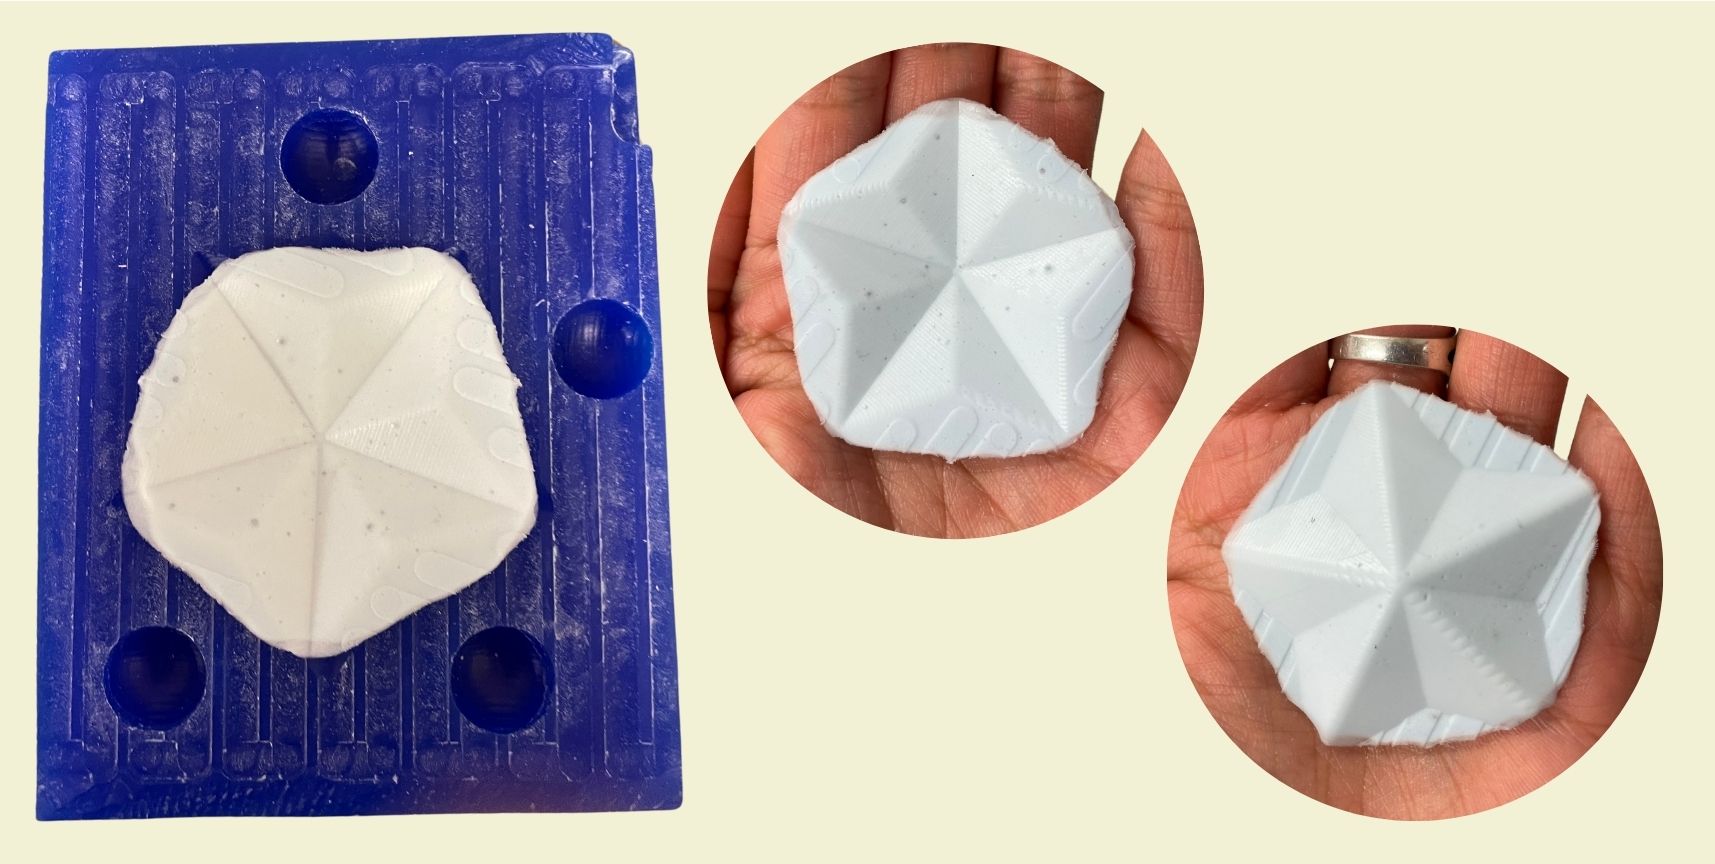
This is the final result of the piece, my plan is to glue two little stars on the edges to have a three-dimensional silicone one, and instead of an anti-stress ball this can be an anti-stress star.
}
Configuring in VCarve!
Preparing the cutting area
Conclusion
I had never made a mold in this way before, until now I had had experience with molds for ceramics, however, making them is quite a time consuming process, as you have to prepare the final piece, be it 3D printing, etc. And after that you have to invest time in making boxes and plaster mixes... a long process, which doesn't always go well. But that's for ceramics, I was thinking about the infinity of things I could do with this method, and is that, although now I made the mold to optimize my times, I also think it's quite interesting to machine the mold of the final piece mold. In my next project I plan to make the mold for a candle.
Files
- Star Model___STL
- Star Model___Rhinoceros