My Territory, My Rules!
Architecture
In embedded programming, "architecture" refers to the core design and structure of a microcontroller or processor, including its instruction set. This foundational blueprint dictates the internal design, computational performance, and component communication. Various architectures cater to specific needs, balancing factors like power consumption, processing power, ease of programming, and peripheral availability. Each architecture, from the low-power, simple-to-program AVR to the high-performance ARM Cortex families and the open-source versatility of RISC-V, offers a unique set of advantages for applications ranging from hobbyist projects to advanced IoT devices and high-performance embedded systems.
Here are a list of architectures found in the different chips found in FabLab Puebla:
| Architecture | Main Applications | Microcontrollers |
|---|---|---|
| AVR (8-bit) | Hobbyist projects, Simple embedded systems | ATmega328, ATmega32u4, ATtiny45, ATtiny44, ATtiny412, ATtiny1614 |
| ARM Cortex-M0+ | Low power applications, IoT devices, Wearables | SAMD21, RP2040 |
| RISC-V (32-bit) | IoT, Educational purposes, Research projects | ESP-32C3 |
| Xtensa (LX6/LX7) | Connected devices, Smart home, Audio processing | ESP32-S3, ESP32-WROOM |
| Tensilica L106 (32-bit) | IoT, Budget Wi-Fi projects | ESP8266 |
| ARM Cortex-M4F | High-performance embedded systems, Industrial control, Advanced IoT devices | Nucleo-L432KC, nRF52840 |
You can see more info in this week's Group Assignment.
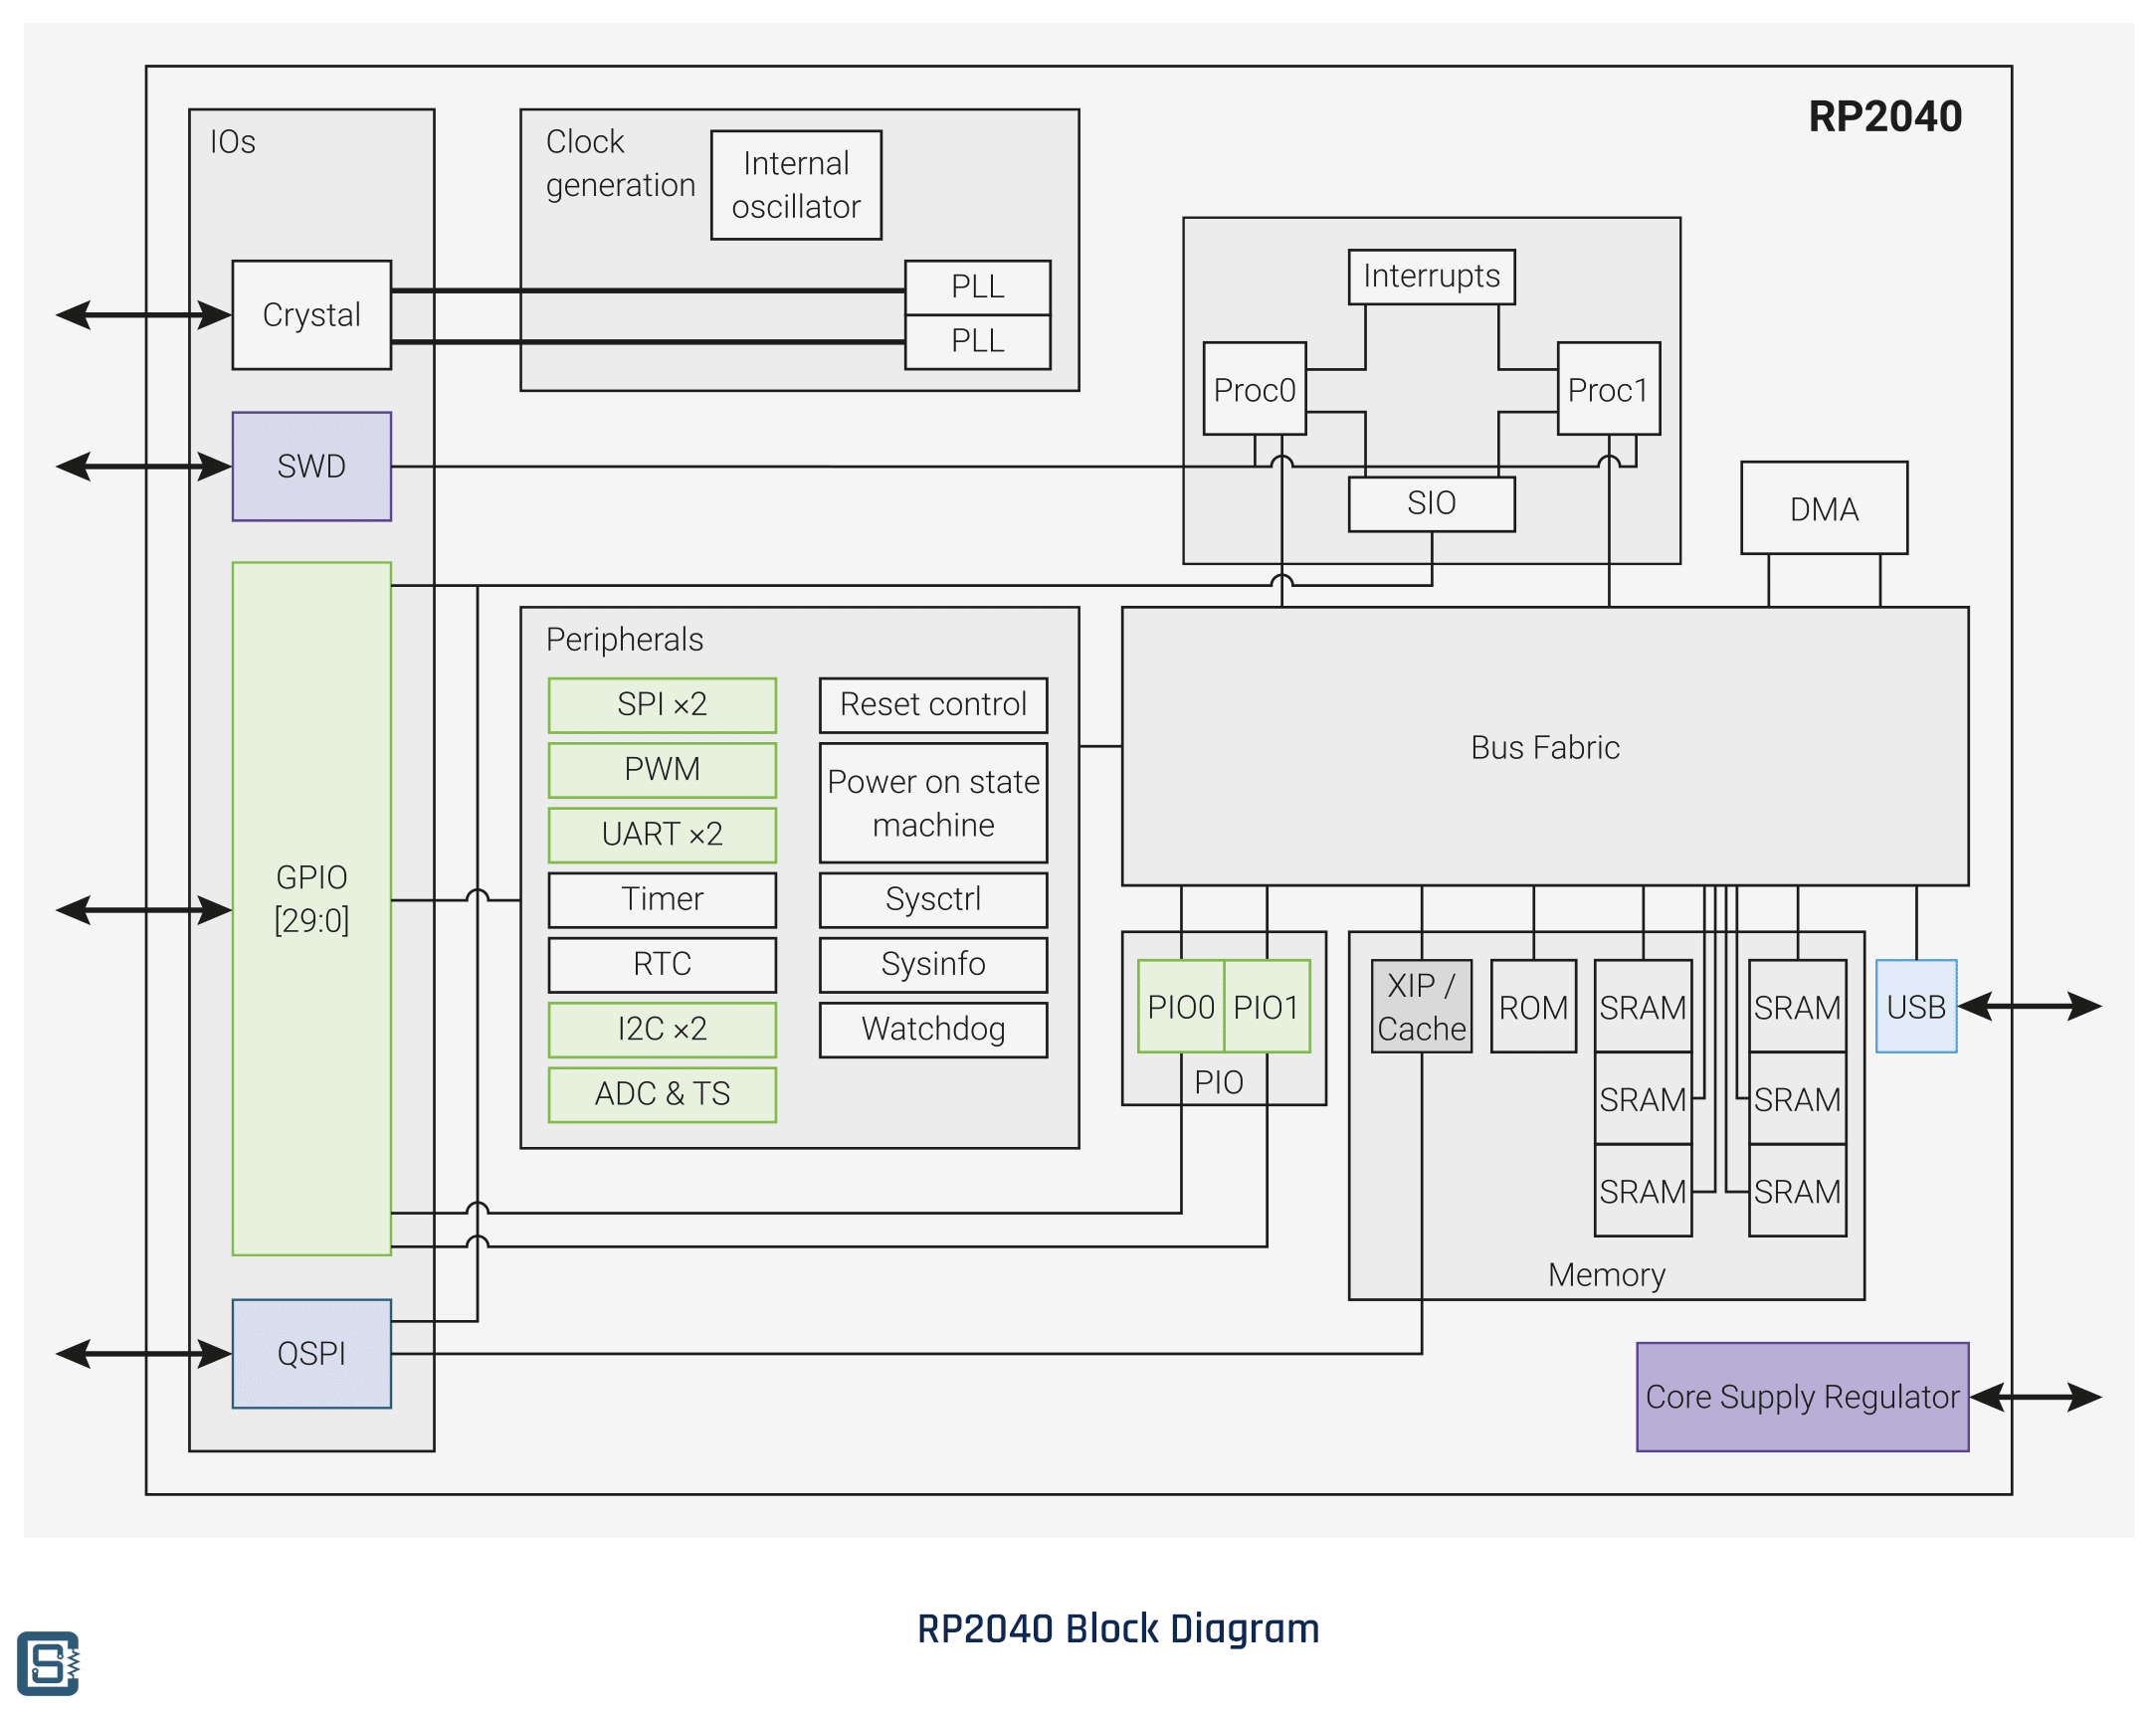
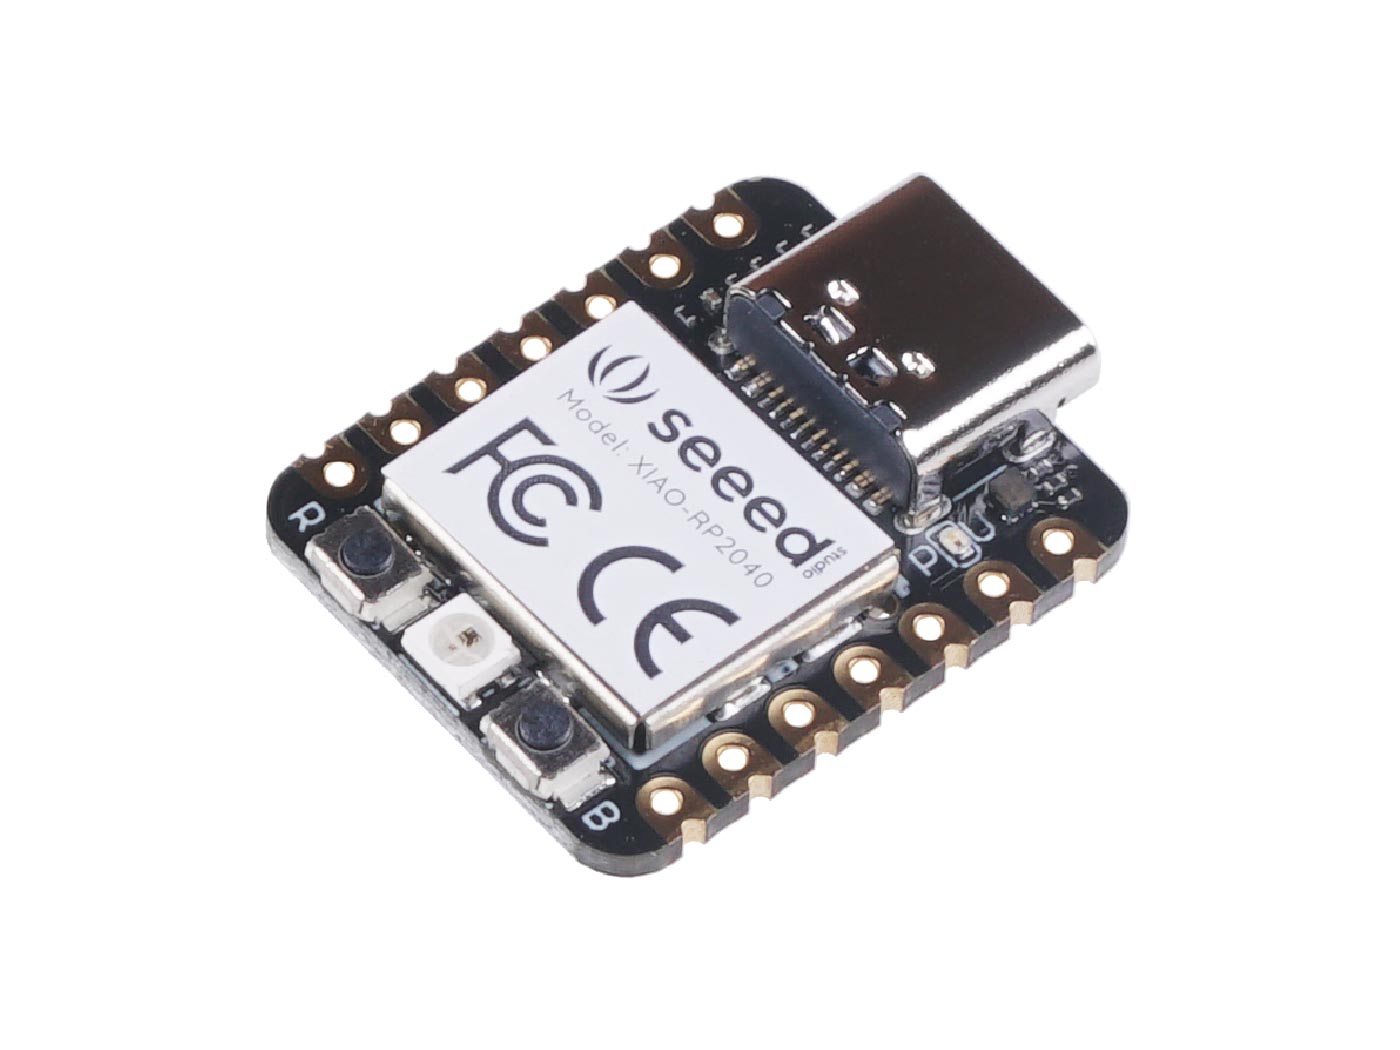
The BEAST called the XIAO RP2040
I've been documenting my experience with the Xiao RP2040, a microcontroller that has been integral to my recent embedded programming projects. It's built around a robust dual-core ARM Cortex-M0+ CPU, and what impresses me most is its clocking capability of up to 133 MHz. The 32-bit architecture ensures smooth processing, and with 264KB of SRAM plus 2MB of Flash memory, it has ample space for my applications.
Equipped with 30 GPIO pins, the Xiao RP2040 offers extensive connectivity options for a range of components. Programming this microcontroller is a breeze; its USB mass-storage boot mode allows for efficient drag-and-drop programming, which saves me considerable time.
Despite the absence of built-in Bluetooth and WiFi, its standout feature for me is the 8 Programmable I/O (PIO) state machines. These expand its functionality by supporting custom peripheral interfaces. This level of customization is invaluable for my more complex designs, allowing me to explore innovative interfacing options.
Here is a summary of the technical data:
| Features | RP2040 |
|---|---|
| CPU | Dual-core ARM Cortex-M0+ |
| Clock speed | Up to 133 MHz |
| Bit depth | 32-bit |
| Storage | 264KB of SRAM, and 2MB of on-board Flash memory |
| I/O pins | 30 GPIO pins |
| Power | 1.8V - 5.5V |
| Dimensions | 20x17.5x3.5 mm |
| How to program | USB mass-storage boot mode, drag-and-drop programming |
| Special Functions | USB 1.1 Host/Device, 8 Programmable I/O (PIO) state machines |
The following image serves as a visual guide to the Xiao RP2040 microcontroller's pin layout.
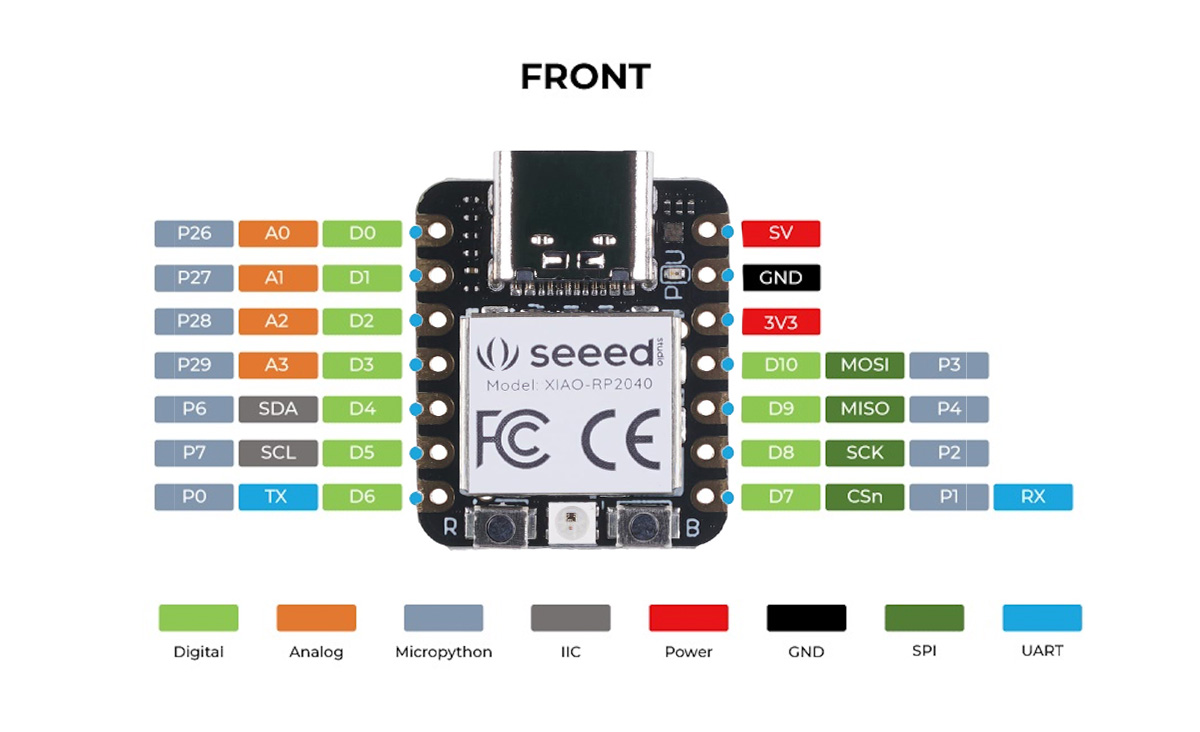
It shows a combination of digital and analog pins, alongside specific pins designated for power (SV, GND, 3V3), communication protocols like I2C (SDA and SCL), SPI (MOSI, MISO, SCK, CSn), and UART (TX, RX). The color-coding provides a quick reference to understand each pin's role, for instance, green for digital, orange for analog, and blue for SPI. It's a clear visual guide that aids in connecting peripherals and designing embedded systems with this versatile microcontroller.
Xiao's datasheet:
A datasheet is an essential document summarizing a product's technical aspects, such as a microcontroller. It includes an overview, detailed specifications, and connection information, allowing engineers to integrate the component into broader systems effectively. Datasheets typically list average or typical values, ranges, and nominal values for various parameters. For coding-related components, relevant source code might be appended. I examined the datasheet for the Xiao RP2040 microcontroller, which provides such detailed information necessary for utilizing this component in electronic designs.
Here is the datasheet:
Loading code into the Xiao
Loading code onto the Xiao RP2040 is a straightforward process:
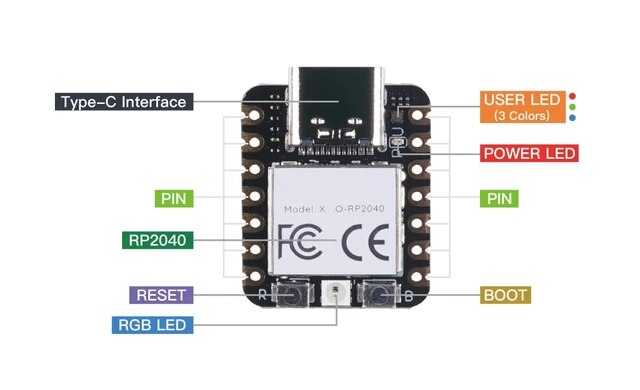
- Connect the Xiao RP2040 Type-C interface to your computer using a USB C cable.
- Enter bootloader mode by pressing and releasing the boot button. The onboard LED should pulse, indicating it's in bootloader mode.
- The Xiao RP2040 will appear as a removable disk on your computer.
- Drag and drop the compiled firmware (usually a .uf2 file) onto the RP2040. It will automatically flash the new firmware and reboot.
- If necessary, open your code editor or integrated development environment (IDE) to access serial output or debug.
Program your PCB
Two different IDE's, Arduino and CircuitPython.
Arduino
The Arduino Integrated Development Environment (IDE) is a versatile and cross-platform tool, available for Windows, macOS, and Linux systems.
Created in Java, it's primarily used to program Arduino-compatible boards. Moreover, its extensibility through third-party cores allows for programming a variety of other microcontroller boards. The IDE, offering a transparent look into its build through its GNU General Public License, version 2 release, accommodates C and C++ programming with specific syntax and structure requirements tailored to embedded systems.
CircuitPython
Expanding to CircuitPython, it stands as a unique iteration of Python designed for programming microcontrollers.
This branch of Python prioritizes ease of use and swift deployment, making it particularly suitable for educational purposes and rapid prototyping. It provides a Pythonic approach to interacting with hardware, allowing developers and hobbyists to control microcontrollers and process electronic signals directly with Python code. This accessibility is instrumental in broadening the scope of who can engage with embedded programming, thus democratizing the field.
To compare Arduino and CircuitPython IDEs, I wrote simple scripts in each environment. The Arduino language breaks down into functions, variables, constants, and structure, while CircuitPython, an iteration of Python, brings its own style and libraries for microcontroller programming.
Arduino's digital and analog I/O functions—like digitalRead(), digitalWrite(), and analogRead()—allow for fine control over hardware pins. It's straightforward, with a focus on direct pin manipulation.
In contrast, CircuitPython expresses hardware control in a more Pythonic syntax. It abstracts some lower-level details, emphasizing ease and readability, which sometimes comes at the expense of granular control that you have with an environment like Atmel Studio.
Both IDEs cater to different needs: Arduino is ideal for projects requiring precise control and is great for learning embedded fundamentals, while CircuitPython shines in rapid development and ease of use.
Catch that LIGHT!!!
The game's concept is simple yet engaging—hold the button until the correct LED is lit, then tap again to confirm your capture!. With just one button, three LEDs, and the Xiao RP2040, I had to engineer a way to maximize the use of these limited resources. The button serves as the trigger, while each LED represents a different state or level in the game.
Catch The White LED:
In Arduino, I created "Catch the White," where the player's reflexes are tested against the white LED's illumination.
Using Arduino, I could directly manipulate the hardware registers, which allowed for granular control over the LED states and button debouncing. The procedural nature of Arduino meant that the loop function cycled through checks and LED updates with simplicity at the core of its operations.
This code snippet demonstrates how to set up and play a simple game using an Arduino board and a NeoPixel LED. It includes initializing game variables and hardware setup in the setup() function, such as configuring button pins and LED pins, and turning on the NeoPixel strip with an initial color. The loop() function contains the game logic, where LEDs light up randomly, and the player must press the button when the target LED is lit. The game increases in difficulty as the player progresses. Functions like showNeoPixelColor() and Wheel() are used to change the NeoPixel's color to indicate game status or create effects. This code efficiently uses basic digital I/O operations, timing functions, and NeoPixel control to create an interactive game.
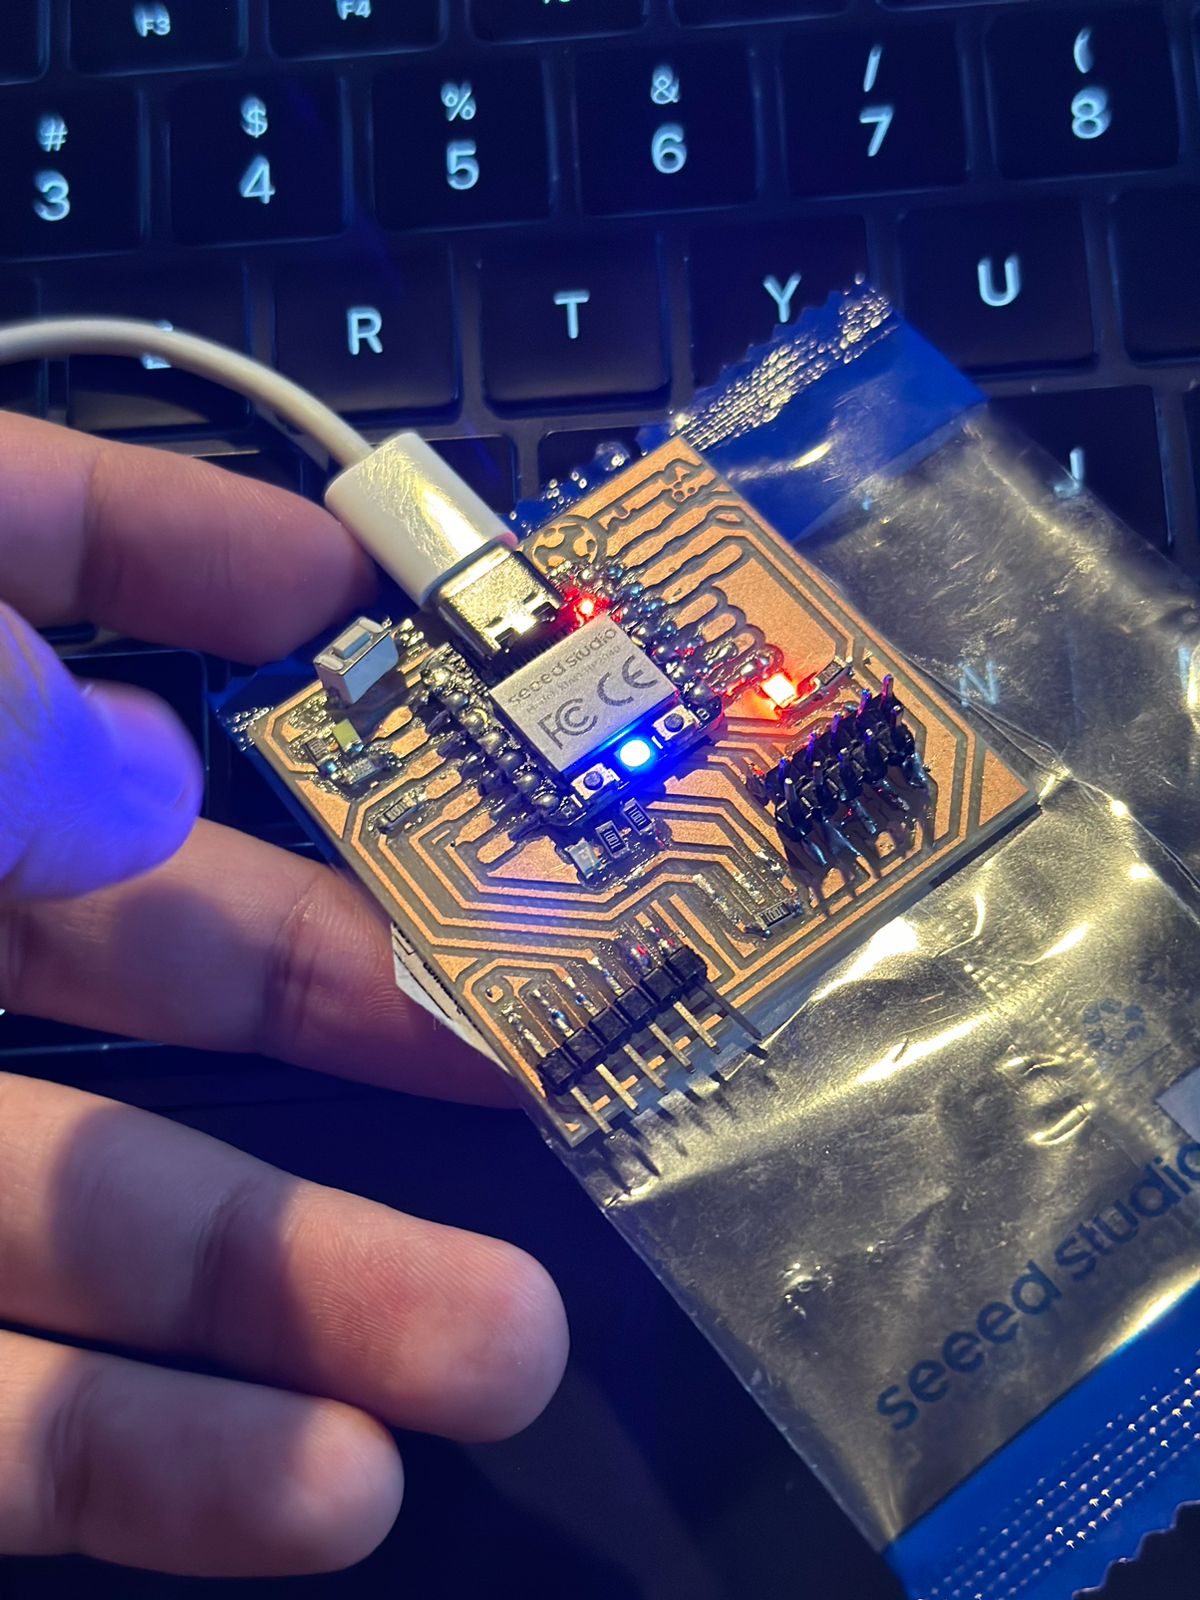
But David! How do I know it is working?
Well my friend, I am glad you asked! Just check that the NEOPIXEL is blue and you are all set to start playing this reaction game!
Here is a demonstration of how the game works with the Arduino code (please ignore how bad my reaction is, I was tired lol):
Catch The Green LED:
Conversely, "Catch the Green" in CircuitPython added a new challenge.
Transitioning to CircuitPython introduced complexity. The pin assignments and interactions required an object-oriented approach. I had to spend additional time understanding the syntax nuances and how they translated into the physical responses of the LEDs and the button.
This code integrates CircuitPython to control LEDs and a NeoPixel for a game. It initializes a button and LED pins, setting the button for input with a pull-up resistor and LEDs for output. The game logic in the loop waits for the button press to illuminate a random LED, checking if the correct LED (target) is pressed. If successful, it cycles the NeoPixel through colors, indicating a win, and increases the difficulty. Incorrect presses reset the game with a red NeoPixel. The wheel function generates RGB colors for visual feedback, showcasing user interaction and programmatic control over hardware.
But David! How do I know it is working?
Just like the Arduino version, check that the NEOPIXEL is blue and you are all set to start playing this reaction game!
Here is a demonstration of how the game works with the CircuitPython code (Now I did have good reaction lol):
Conclusion
This project illuminated the versatility of CircuitPython and Arduino in creating interactive hardware games, showcasing the utility and accessibility of both platforms. Through developing "Catch the Light," I encountered and overcame challenges inherent in limited hardware scenarios, enhancing my understanding of both programming environments. The experience underlined the importance of syntax familiarity in CircuitPython and efficient control with Arduino, enriching my skills in embedded systems design and interactive programming.
The Files:
Below you can find the download links for all of the files from this week.