Week 13: Molding and Casting
Overview
This week I entered the magical world of molding and casting. And by magical, I mean sticky, smelly, and surprisingly rewarding. The goal was to design a mold and cast something from it. I may or may not have taken the scenic (lazy) route for the modeling part, but hey—no one said you had to reinvent the mold.
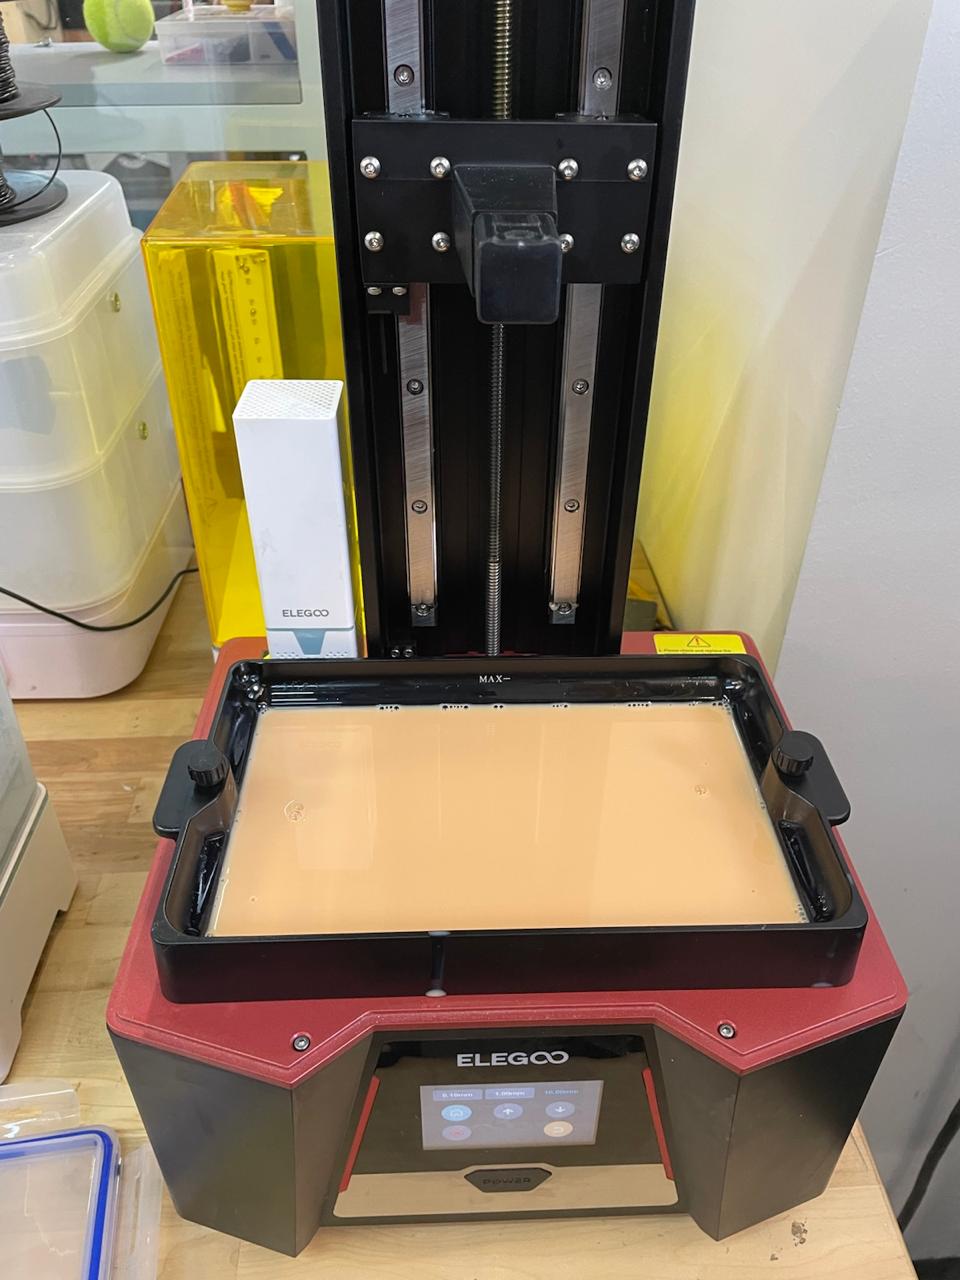
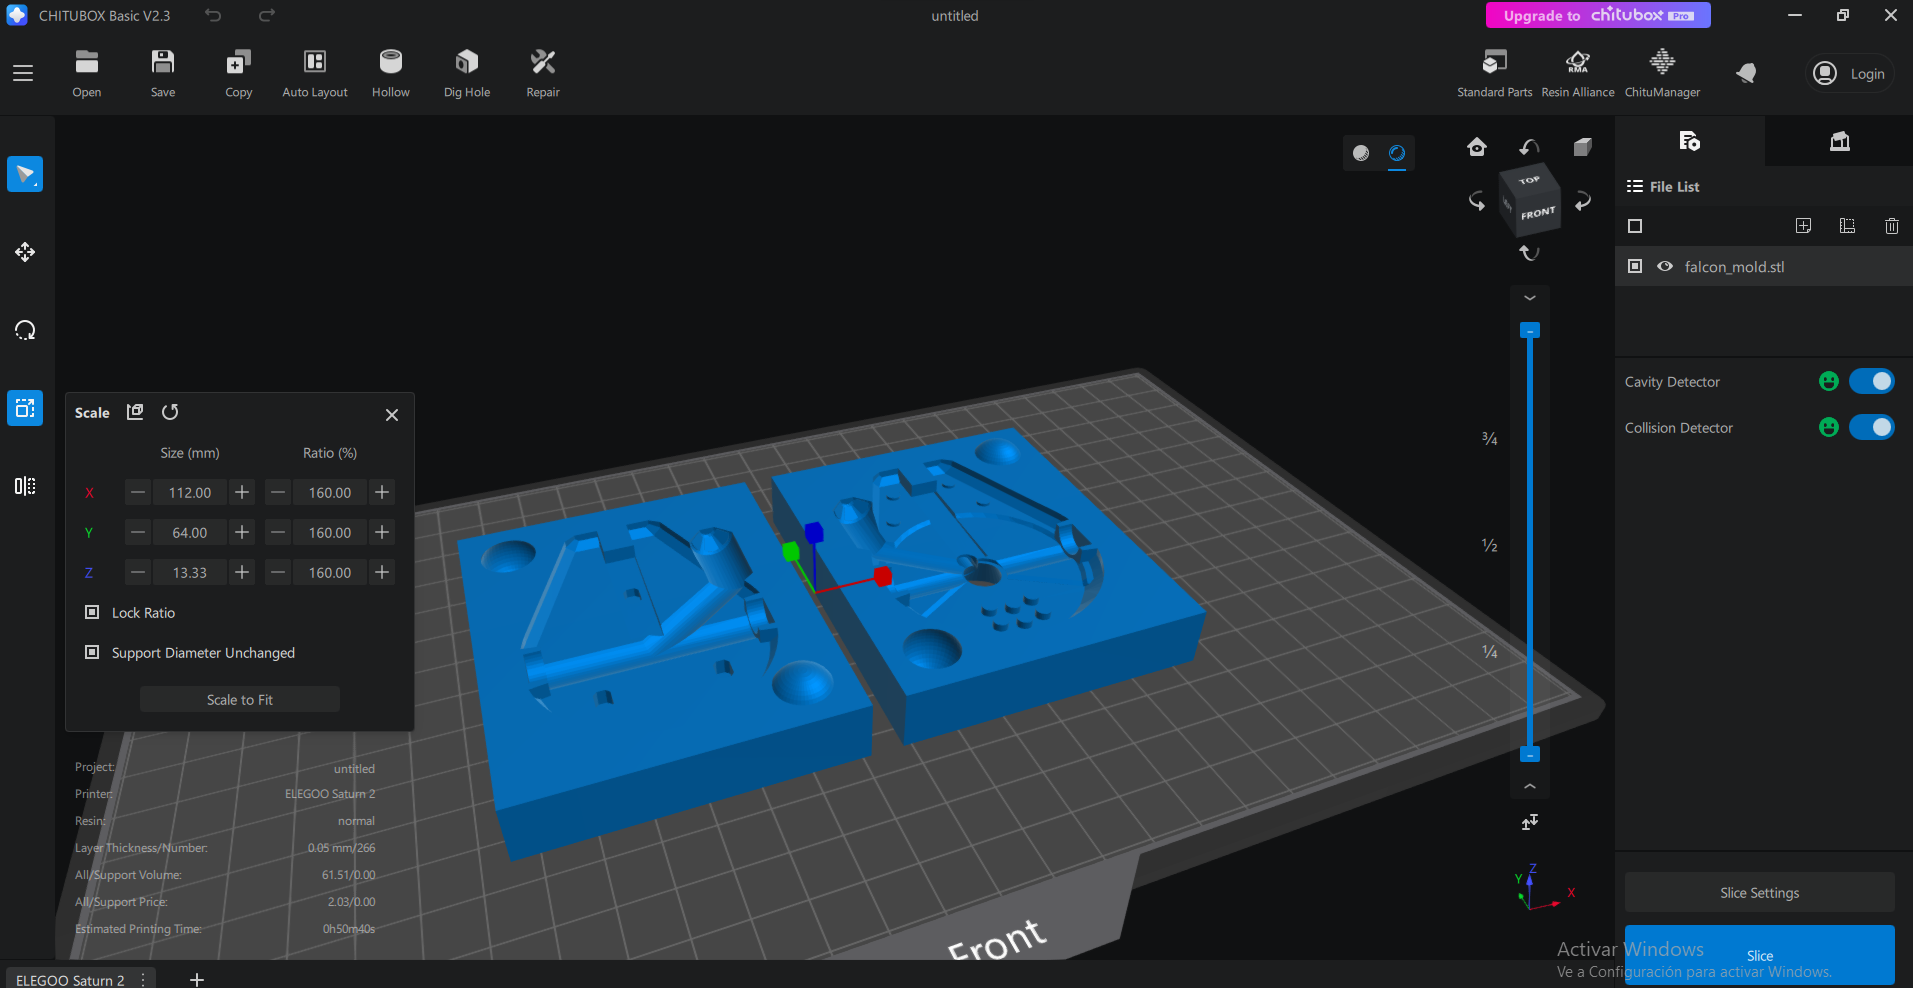
Instead of going the usual wax milling route, I went full sci-fi and used the Elegoo Saturn 2, an absolute beast of a resin printer with 8K resolution—because if you're going to make a mold, make it look like it came off a Star Destroyer. To prepare the model for printing, I used Chitubox (a slicer that sounds like a kaiju and sometimes acts like one), which actually made slicing pretty painless.
This was my first time doing resin mold printing, and I gotta say: I get the hype now. The details were sharp, the finish was smooth, and the whole process felt like cheating in the best way. From slicing to curing, it was surprisingly straightforward. Except the silicone part. That... that had opinions.


Checklist
- ✅ Linked to the group assignment page and reflected on your individual page what you have learned
- ✅ Reviewed the safety data sheets for each of your molding and casting materials, then made and compared test casts with each of them
- ✅ Documented how you designed and created your 3D mold, including machine settings
- ✅ Ensured your mold has smooth surface finish, that does not show the production process (by postprocessing if necessary)
- ✅ Shown how you safely made your mold and cast the parts
- ✅ Described problems and how you fixed them
- ✅ Included your design files and ‘hero shot’ of the mold and the final object
Group Assignment
For the group assignment, we followed the experimental saga documented on the Puebla lab's Week 13 page, where molding and casting became both science and performance art. We compared two approaches for making molds: good old subtractive wax milling, and the futuristic goo-slinging method using Anycubic High-Speed UV Resin.
Here’s how the two contenders stacked up:
| Method | Pros | Cons |
|---|---|---|
| Milled Wax Mold |
- Extremely smooth surface finish (chef-level) - No need for curing or post-processing - Great dimensional precision |
- Limited geometry (no undercuts, sorry) - Requires roughing & finishing passes - Dust, noise, and toolpath babysitting |
| Anycubic High-Speed UV Resin |
- Great for complex or organic shapes - Faster layer times with this resin - High detail retention and fine features |
- Brittle finish and some layer lines - Needs IPA bath + UV curing - Can be fragile if wall thickness is too low |
What did I learn? That 3D printing with UV resin is a gateway drug to molding addiction. It was my first time using this process, and I honestly didn’t expect it to be this good. The quality, ease of printing complex geometry (hello Millennium Falcon), and relatively low pain threshold made it the obvious choice for my project. Wax milling is great… if you’re sculpting a soap bar, not a starship.
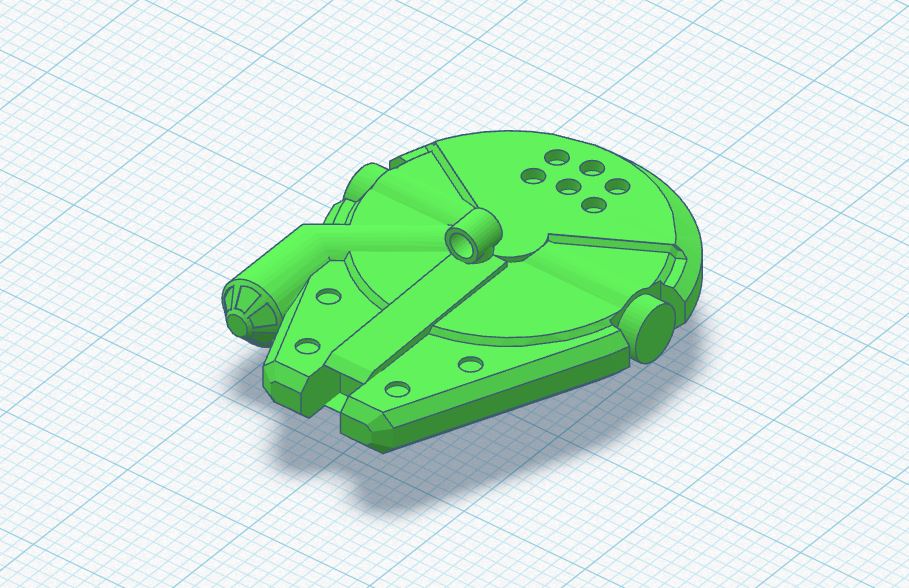
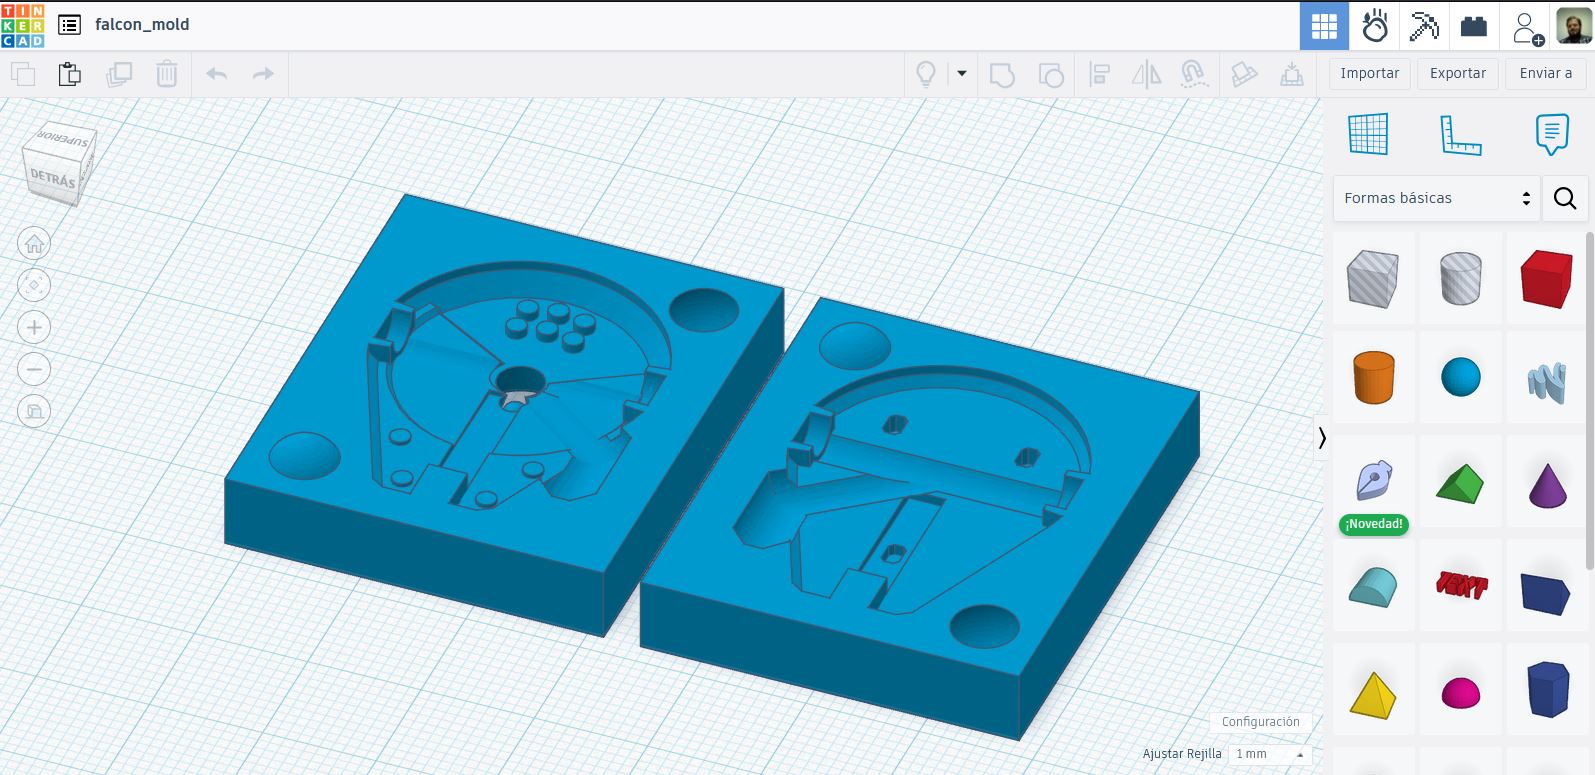
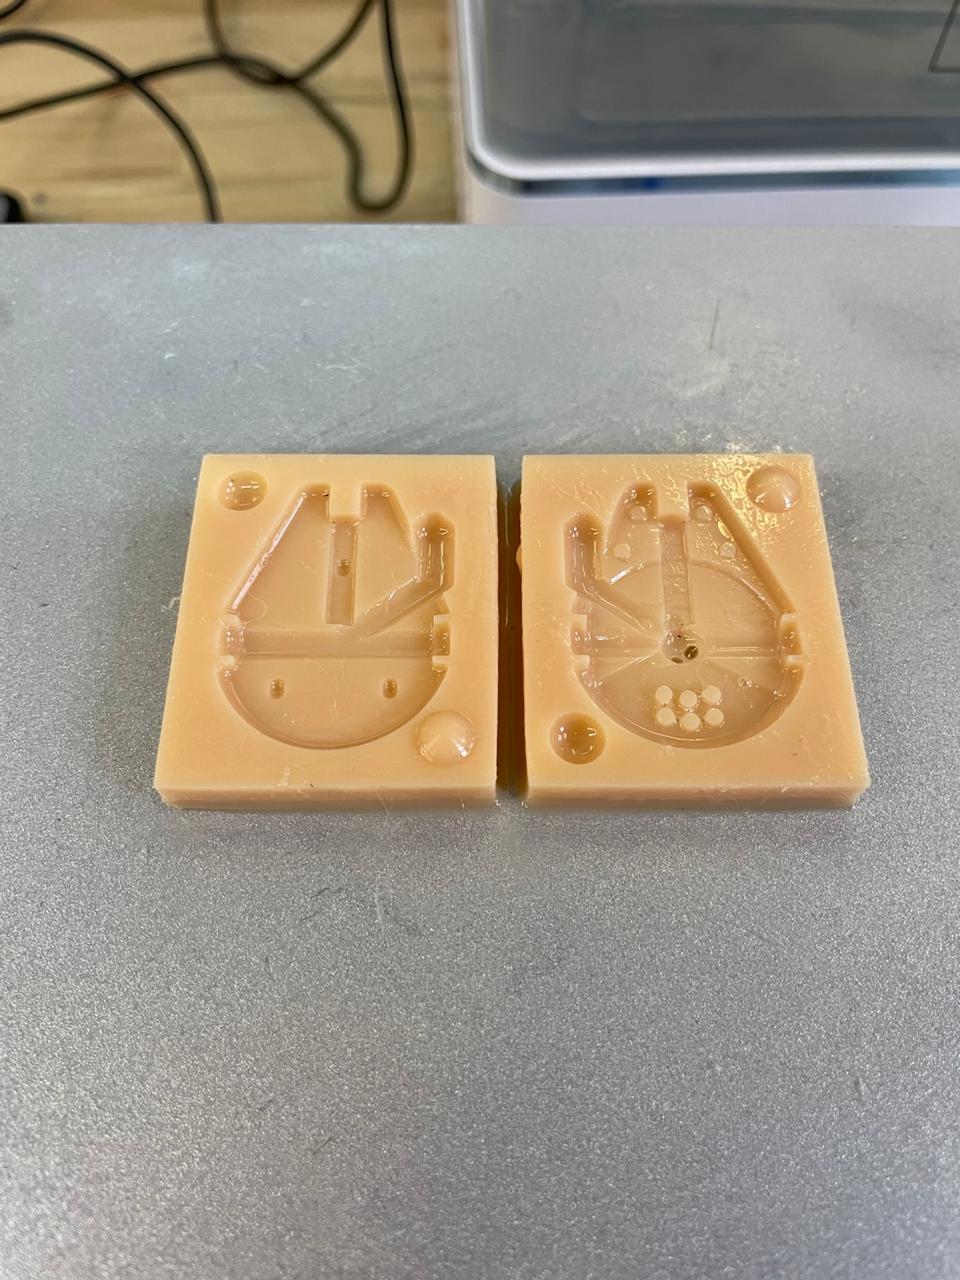
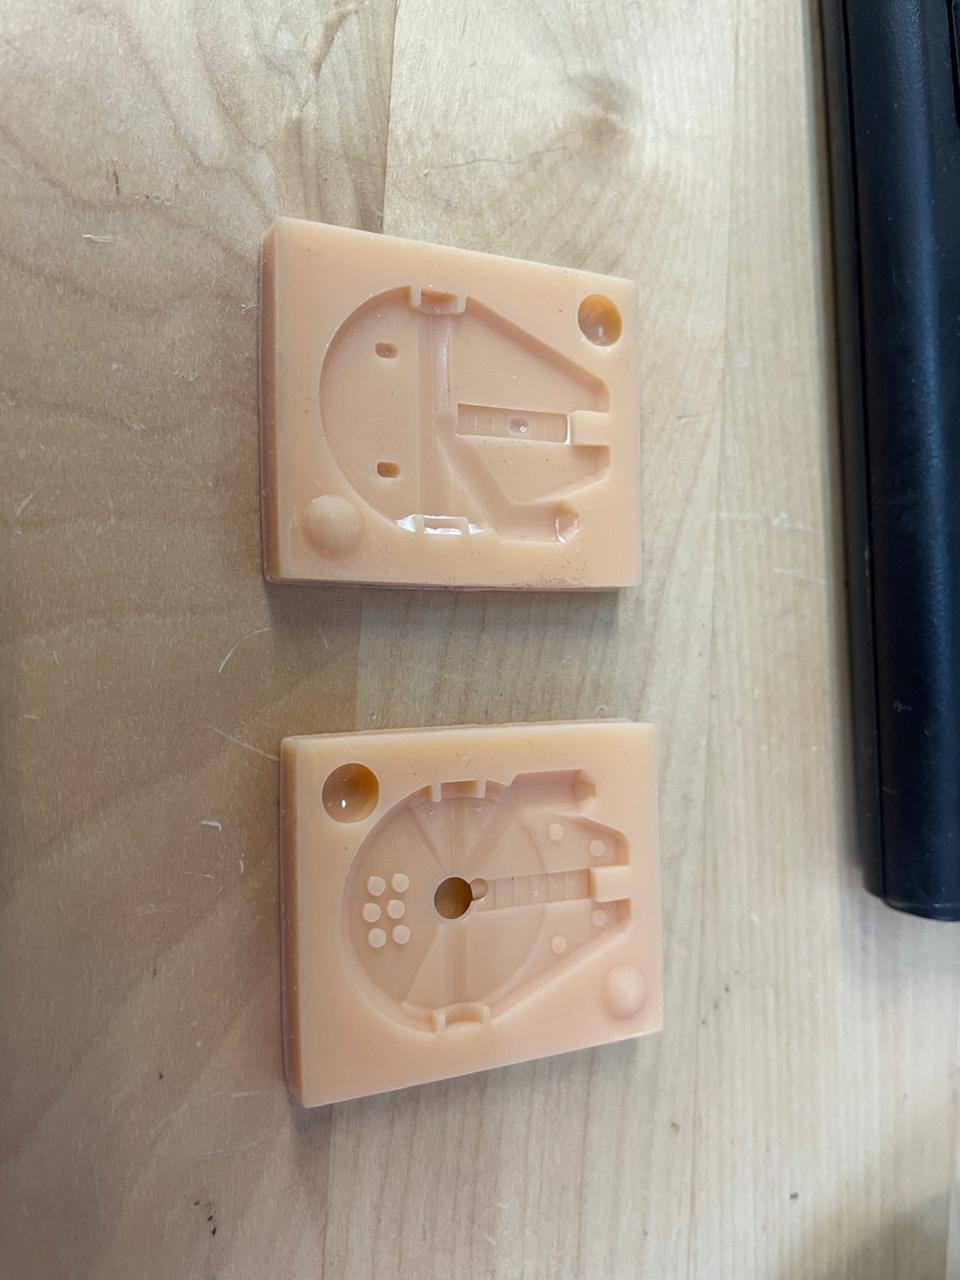
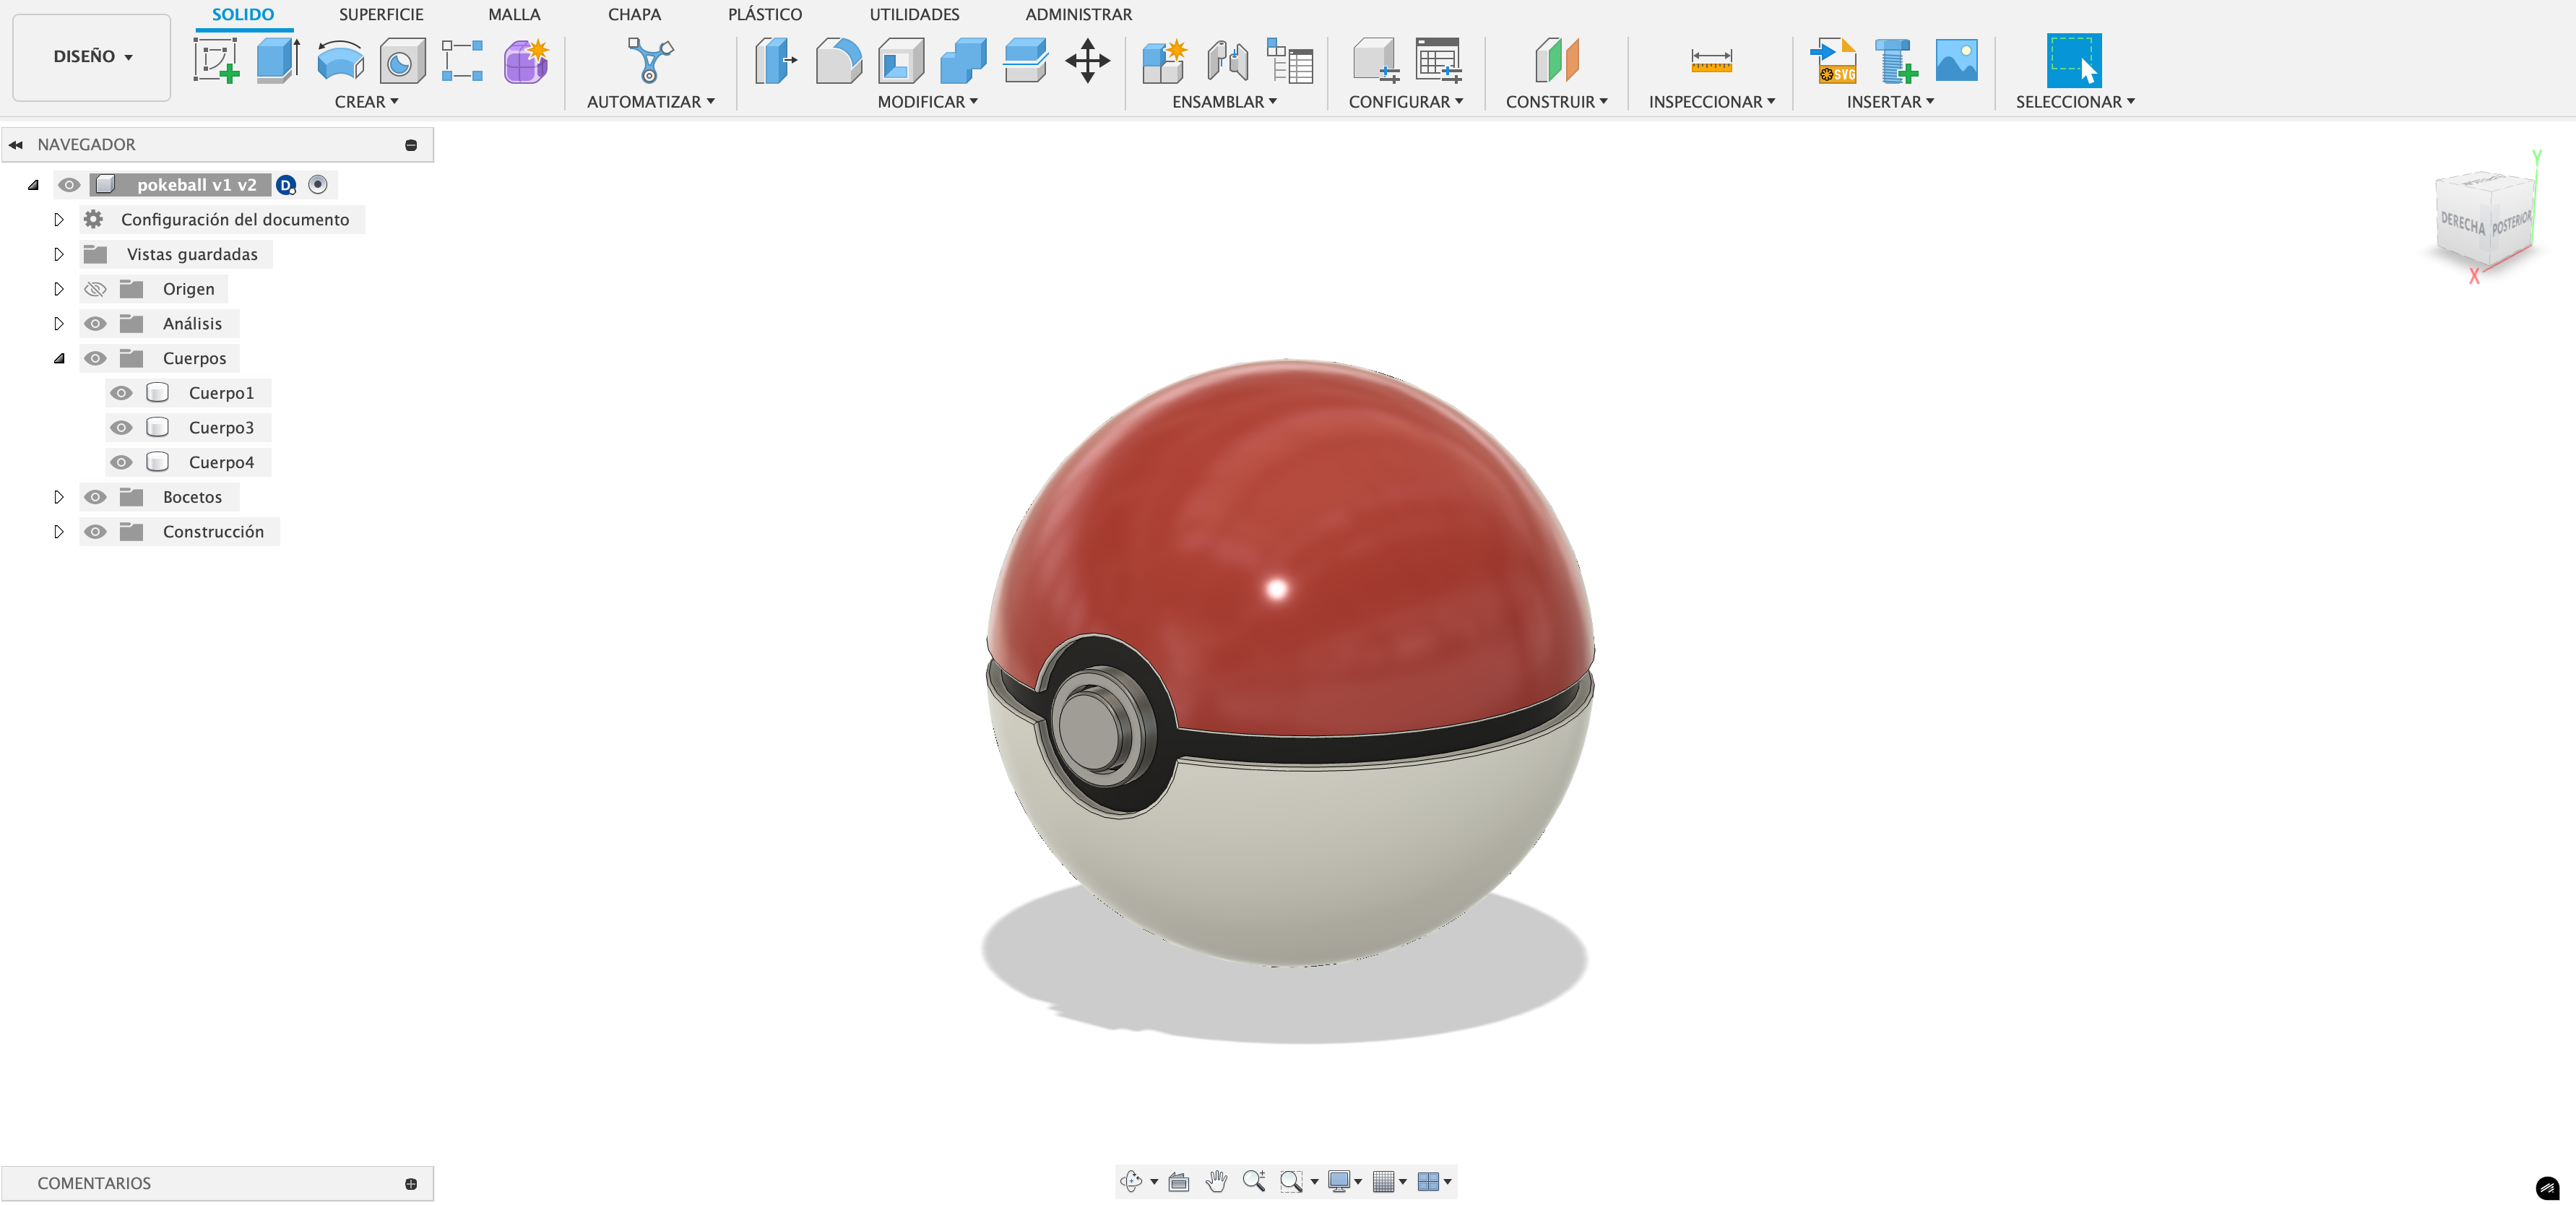
The Millennium Falcom
I started with the Millennium Falcon, because if you're going to mold something, might as well make it iconic. I found an awesome model on GrabCAD, made by someone way more talented than me, so full credit goes to this legend.

Designing the Mold
I used Tinkercad (don’t judge me, it works) to make the negative mold. It’s molding week, not sculpt-your-own-masterpiece week.
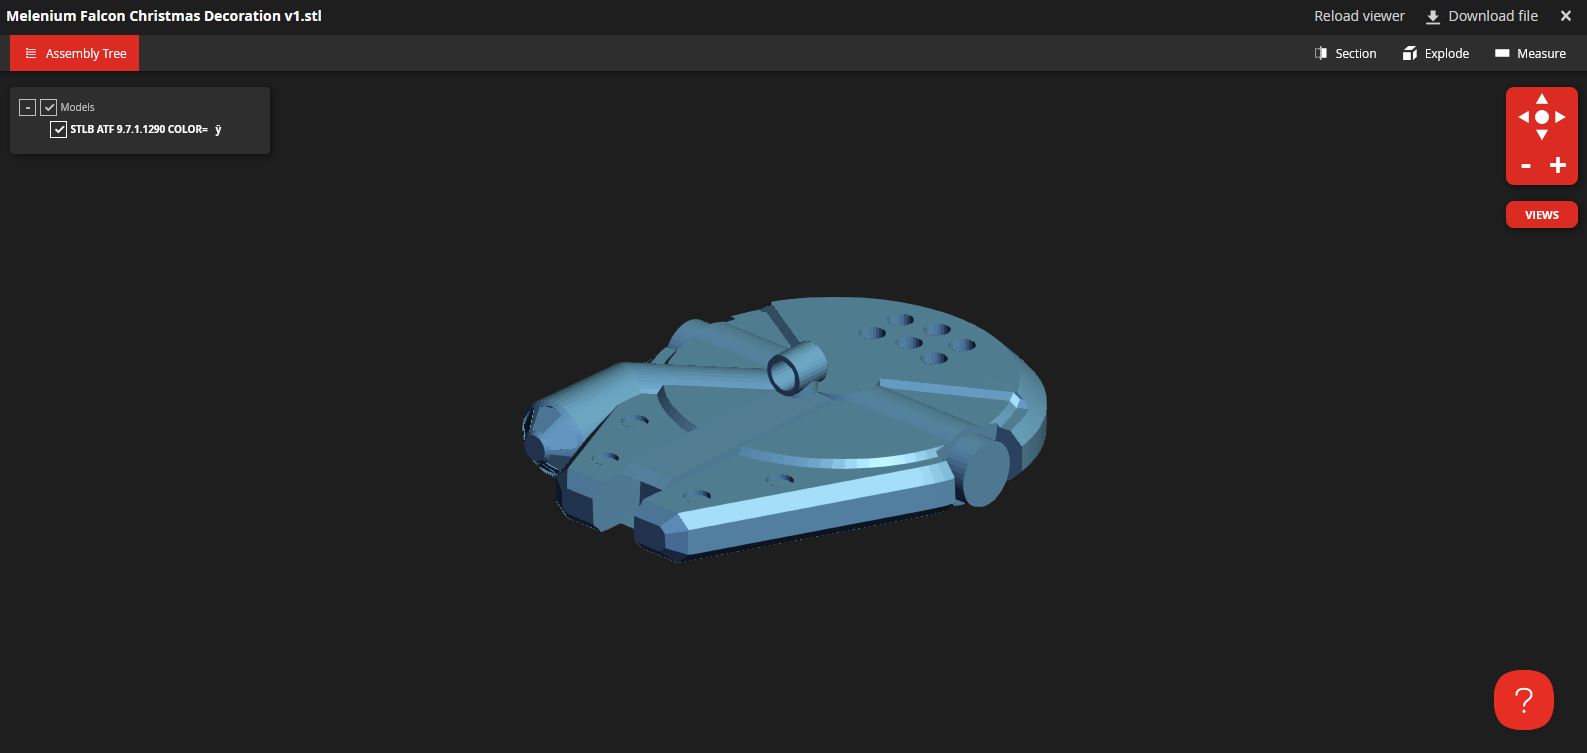
Tinkercad is great if you enjoy minimal control, weird UX decisions, and the subtle art of creative swearing. The model I used was the Millennium Falcon from this excellent GrabCAD source. All credits to the original creator, because I definitely didn’t model that beauty from scratch.
Here’s the step-by-step of turning it into a mold. Because Tinkercad tried to fight me at every click—but I won.
Step 1: Import the Falcon
Start by importing the STL file of the Millennium Falcon into Tinkercad. Hope your browser doesn’t crash, because apparently that model is thicc.
Step 2: Create a Cube
Place a cube and center it so that the Falcon is half-buried like some galactic fossil. This block will become half of the mold.
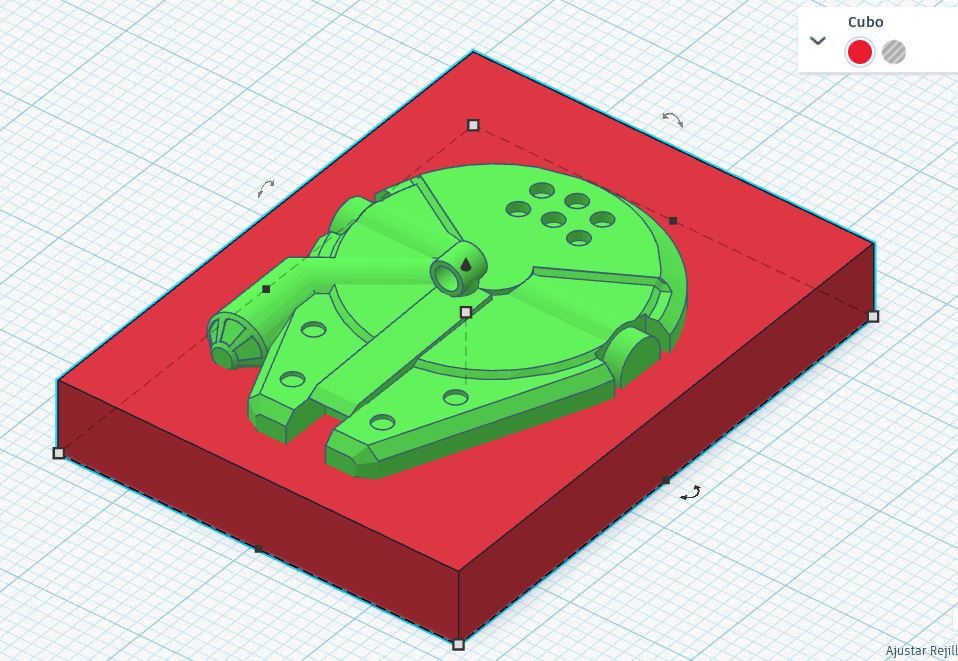
Step 3: Mirror and Clone
Mirror the block to prepare the second half of the mold. Then clone the Falcon and place it precisely where the original was. Welcome to symmetry hell.
Step 4: Set Falcon as Cutting Tool
Now make the Falcon a cutting shape by setting it to "hole" (not solid). Because in Tinkercad, turning things translucent magically makes them subtractive. Sure.

Step 5: Group and Subtract
Group the Falcon (as a hole) with the cube to subtract it. Voilà! You now have half of a mold. Repeat for the other half using the clone. Double the Falcon, double the effort.
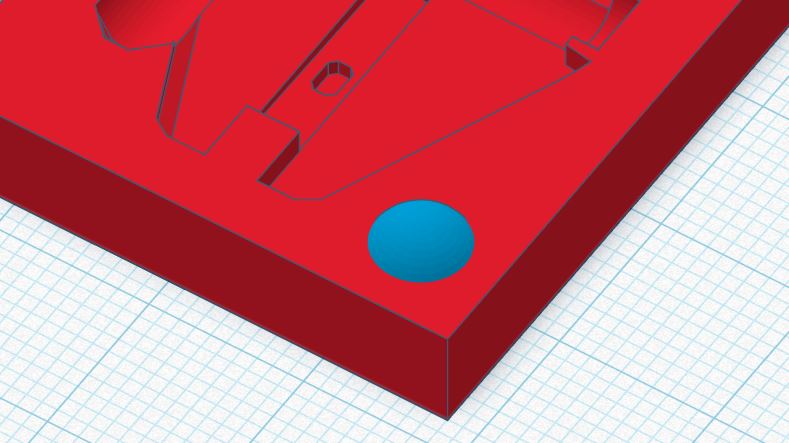
Step 6: Add Alignment Guides
I added small spheres as alignment pins to ensure the two parts snap together perfectly. These were also set as holes and grouped the same way. Because otherwise, good luck aligning anything in the real world.
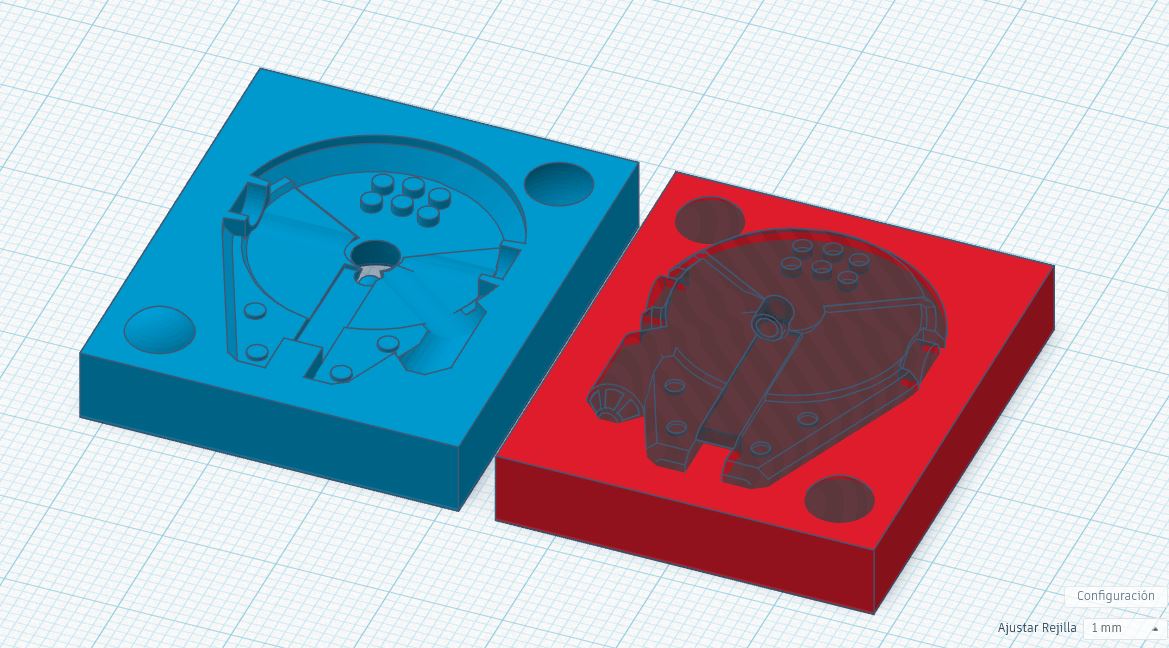
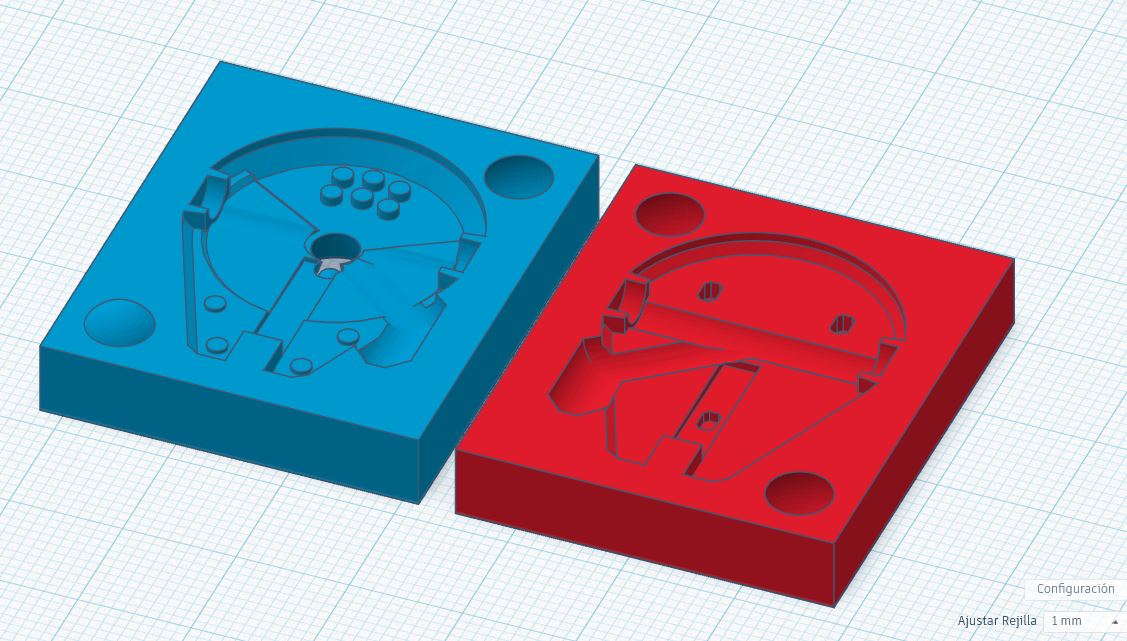
Final result: two mold halves with alignment pins and full Falcon detail. Tinkercad didn’t make it easy, but it worked. Ish.
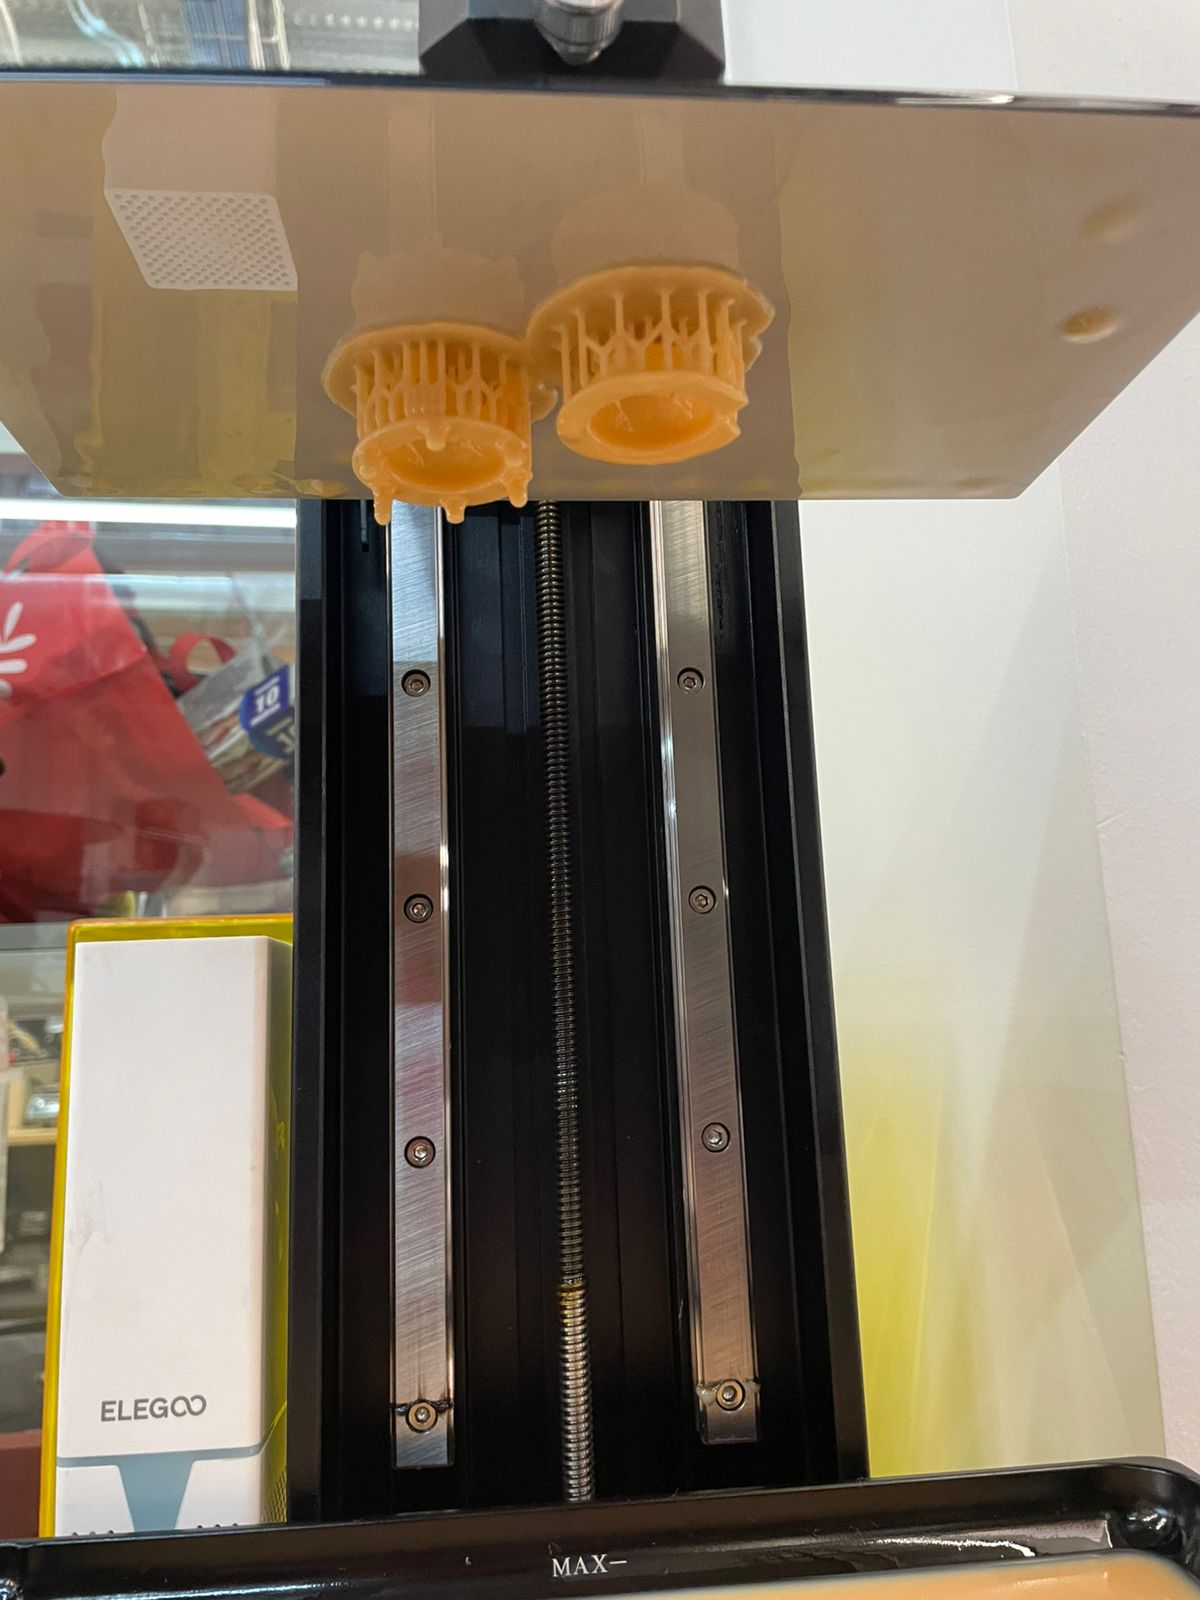
3D Printing the Mold
With the Tinkercad mold exported and ready to print, I turned to the Elegoo Saturn 2—the 8K overkill machine I didn’t know I needed until I saw my mold come out with more detail than my face. The slicer of choice: Chitubox. Not because it’s amazing, but because the Saturn 2 only speaks CTB format and Chitubox speaks CTB. End of story.
Step 1: Import the STL into Chitubox
You launch Chitubox, it opens like it's about to ruin your day, and you drop your STL in like a hopeful fool. The Falcon mold was in.
Step 2: Rotate and Place
I placed both halves flat on the build plate. No tilt, no supports, just raw defiance. It printed beautifully, which either means I got lucky or the resin gods smiled that day.
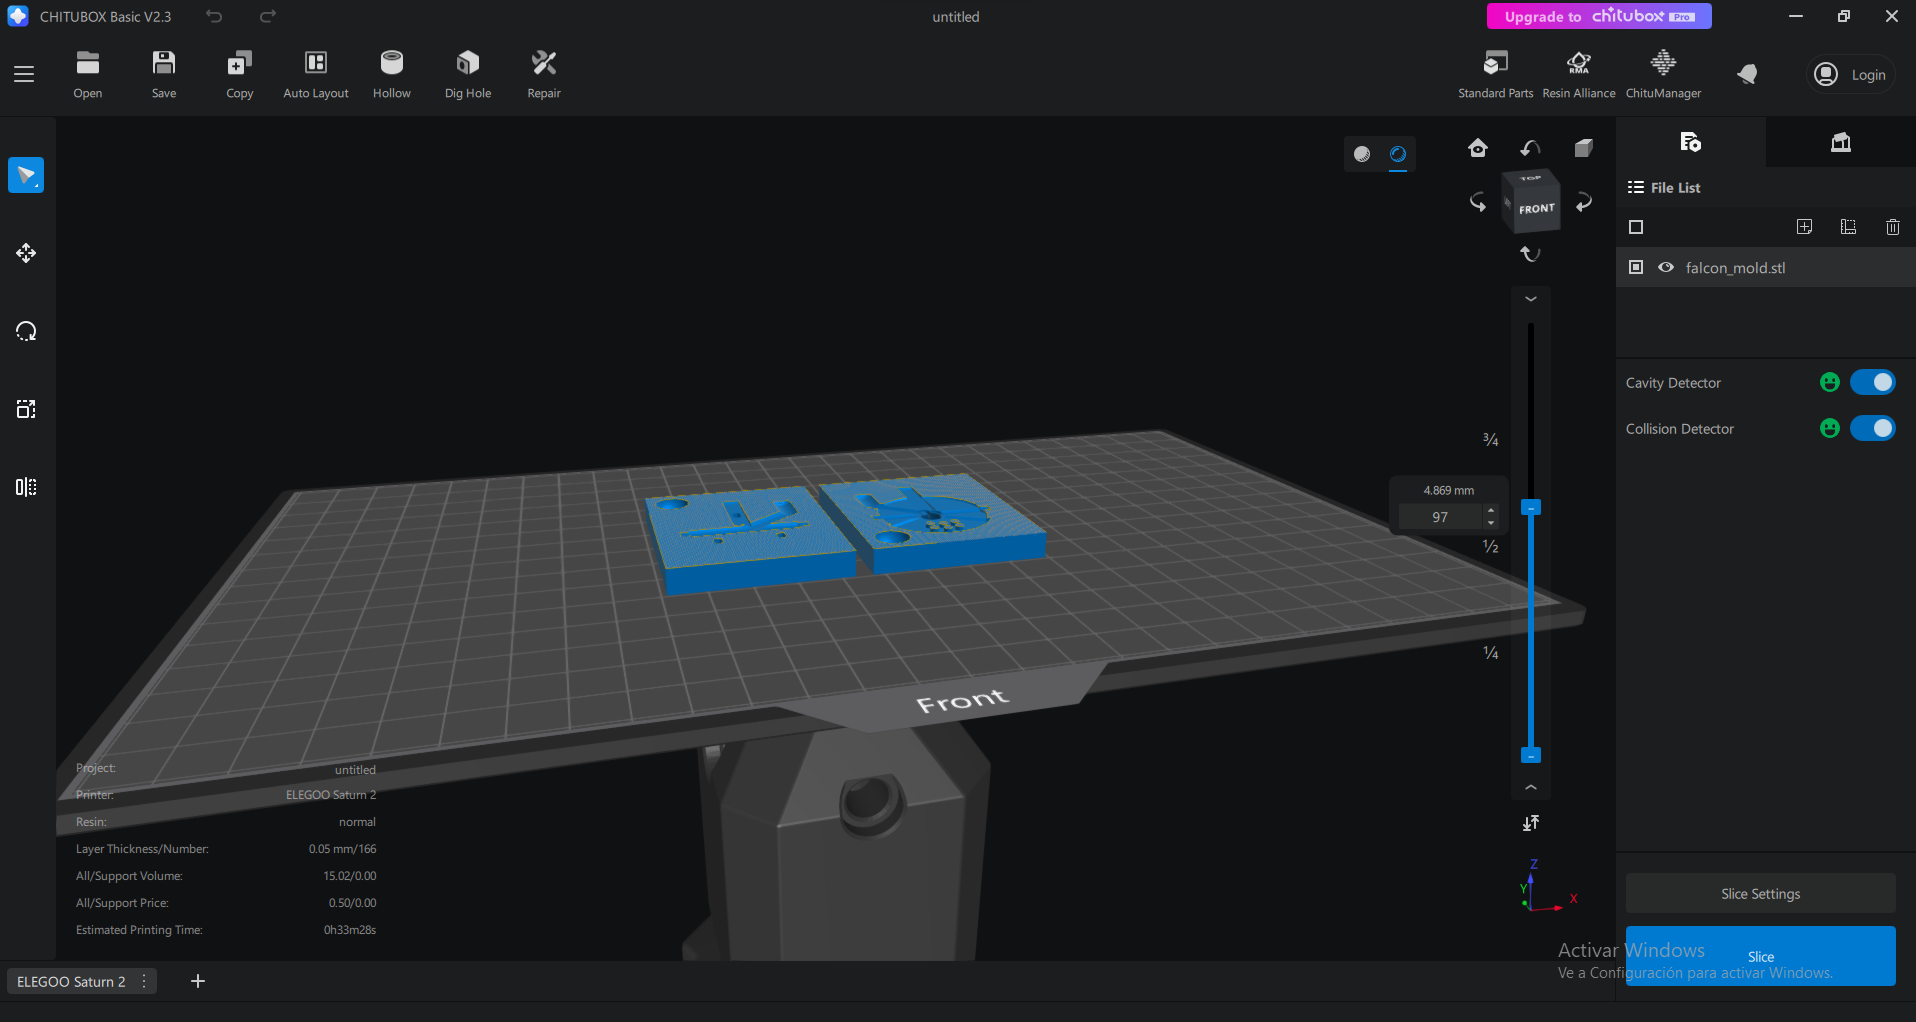
Step 3: Slice and Check for Islands
I sliced it and Chitubox asked if I wanted to check for islands. I said yes, even though I have no idea what they are. Ghost pixels? Floating bits of doom? Whatever.
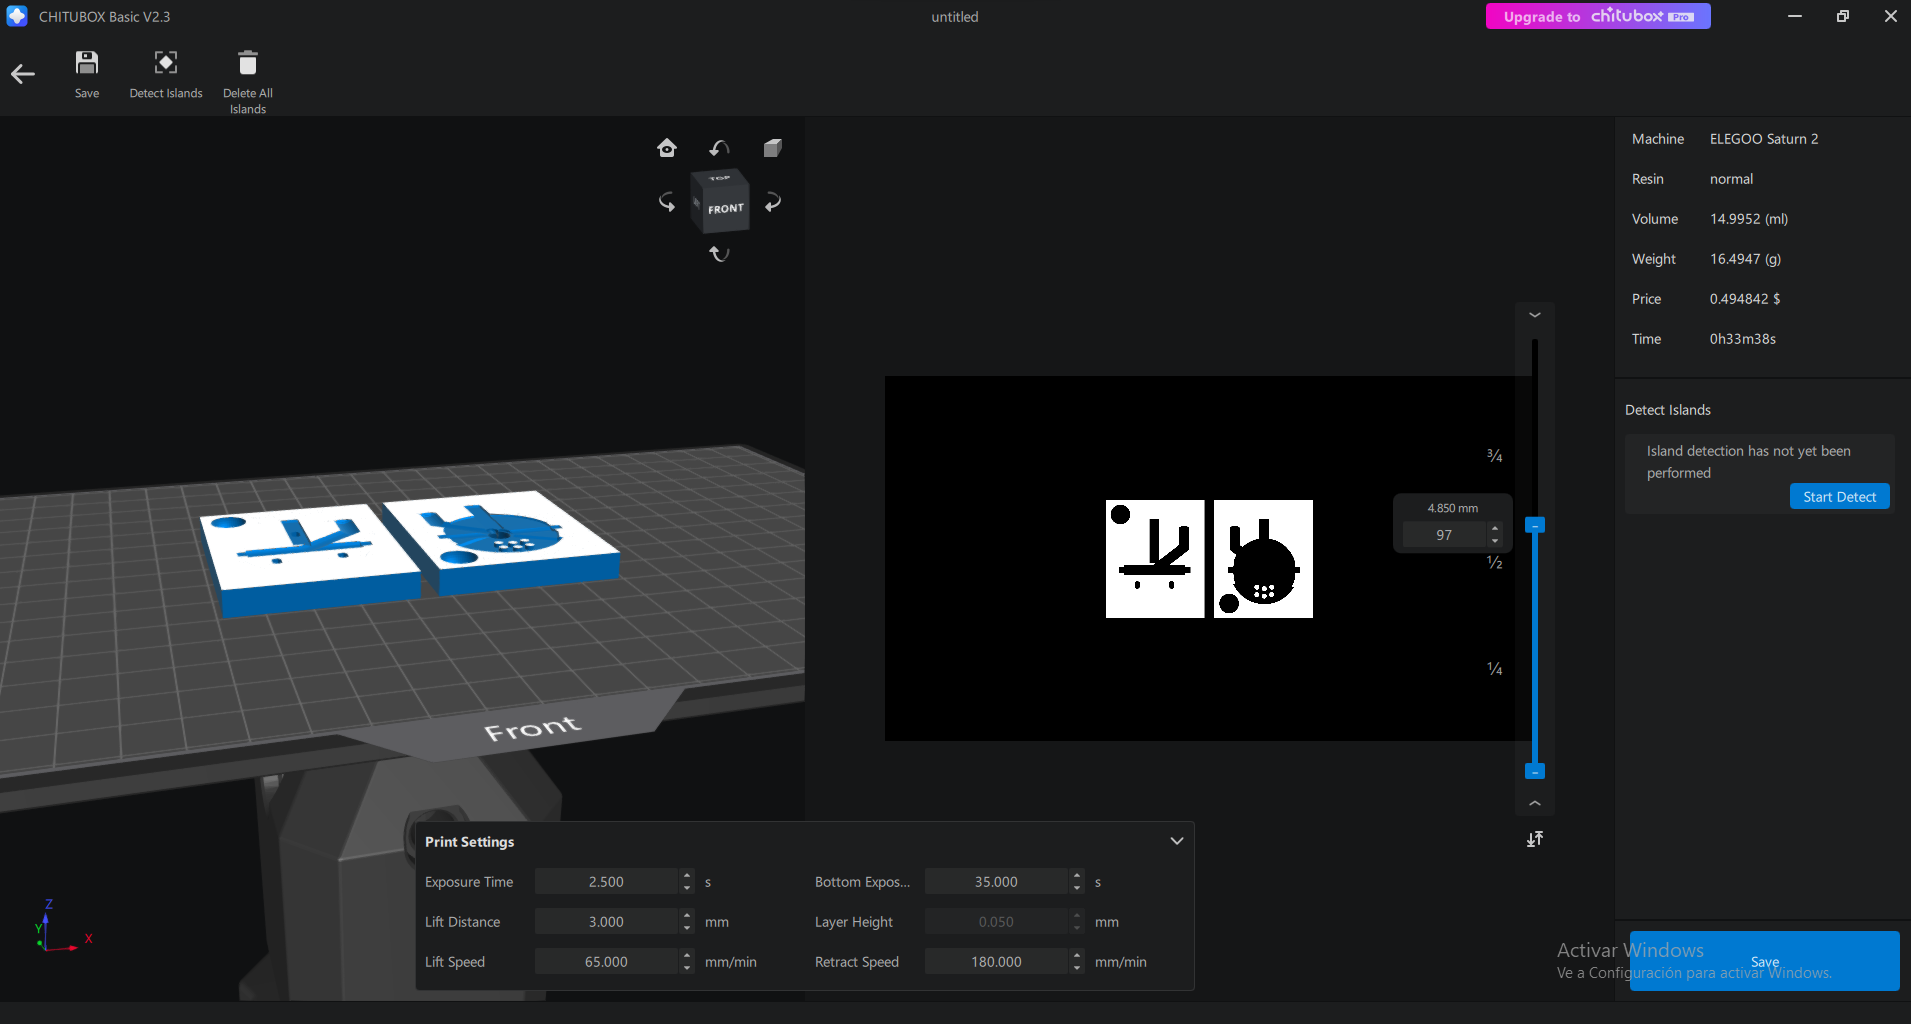
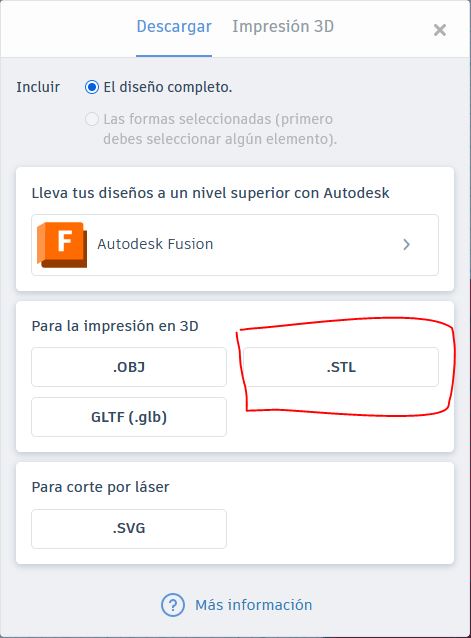
Step 4: Save as CTB
Exported the file in .ctb format—because the Saturn 2 will throw a tantrum if you give it anything else. No fancy formats, just CTB or GTFO.
Step 5: Send to the Printer and Hit Print
I copied the file to USB, plugged it into the Saturn 2, poured the magical resin juice into the tank, and pressed “print.” Then I prayed to the resin spirits.
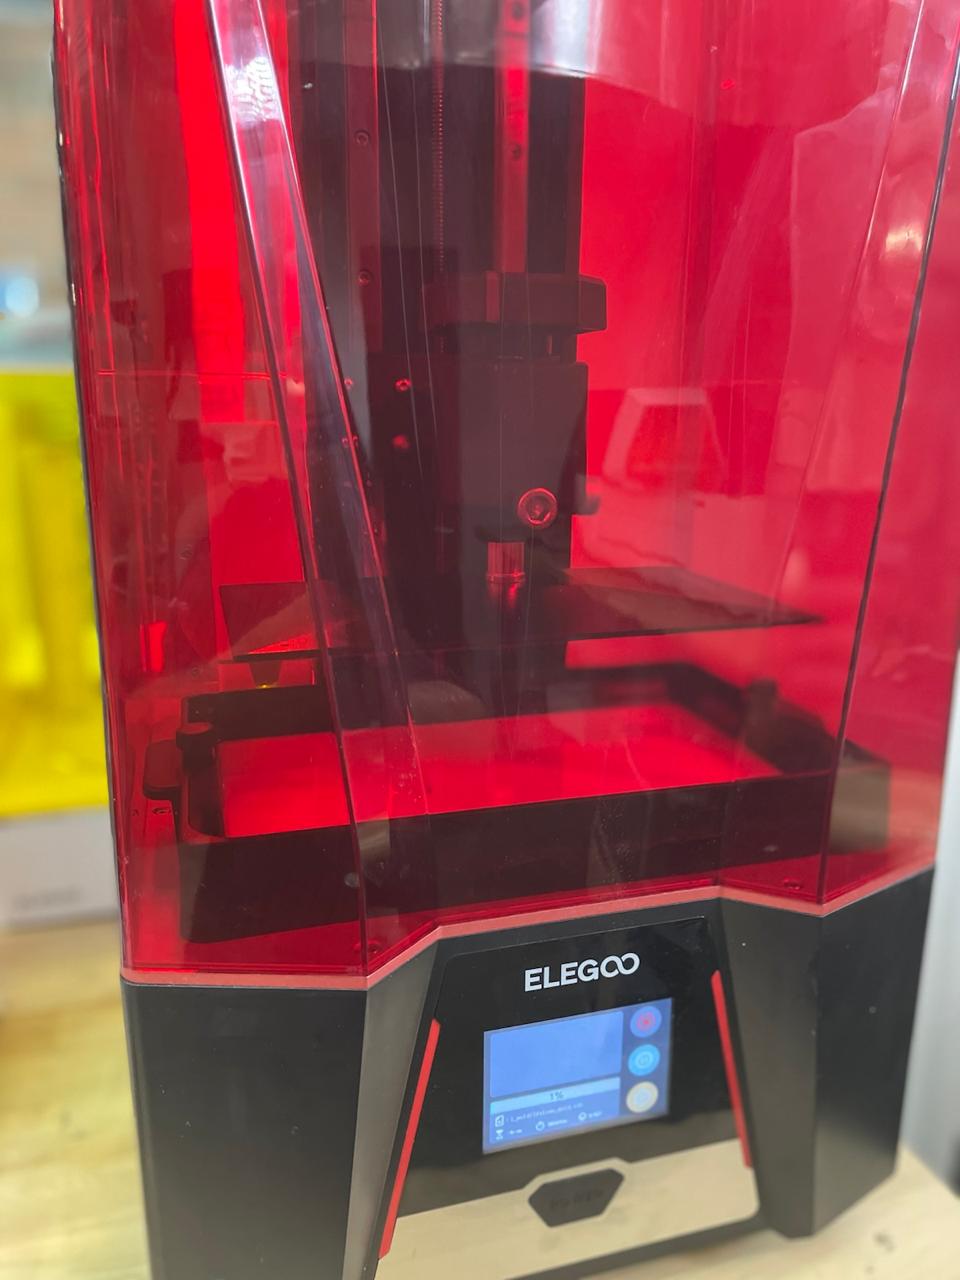
Look, resin printing is gross. Sticky. Toxic. Smells like regret and chemical warfare. But the results? Incredible. Wear gloves, wear a mask, don’t lick the tank, and you’ll survive. Probably.
So yes, printing with resin is a hassle. But if you're going to be scared of a little toxicity, why even live? Just do it safely and enjoy your smooth, glorious, high-res mold.
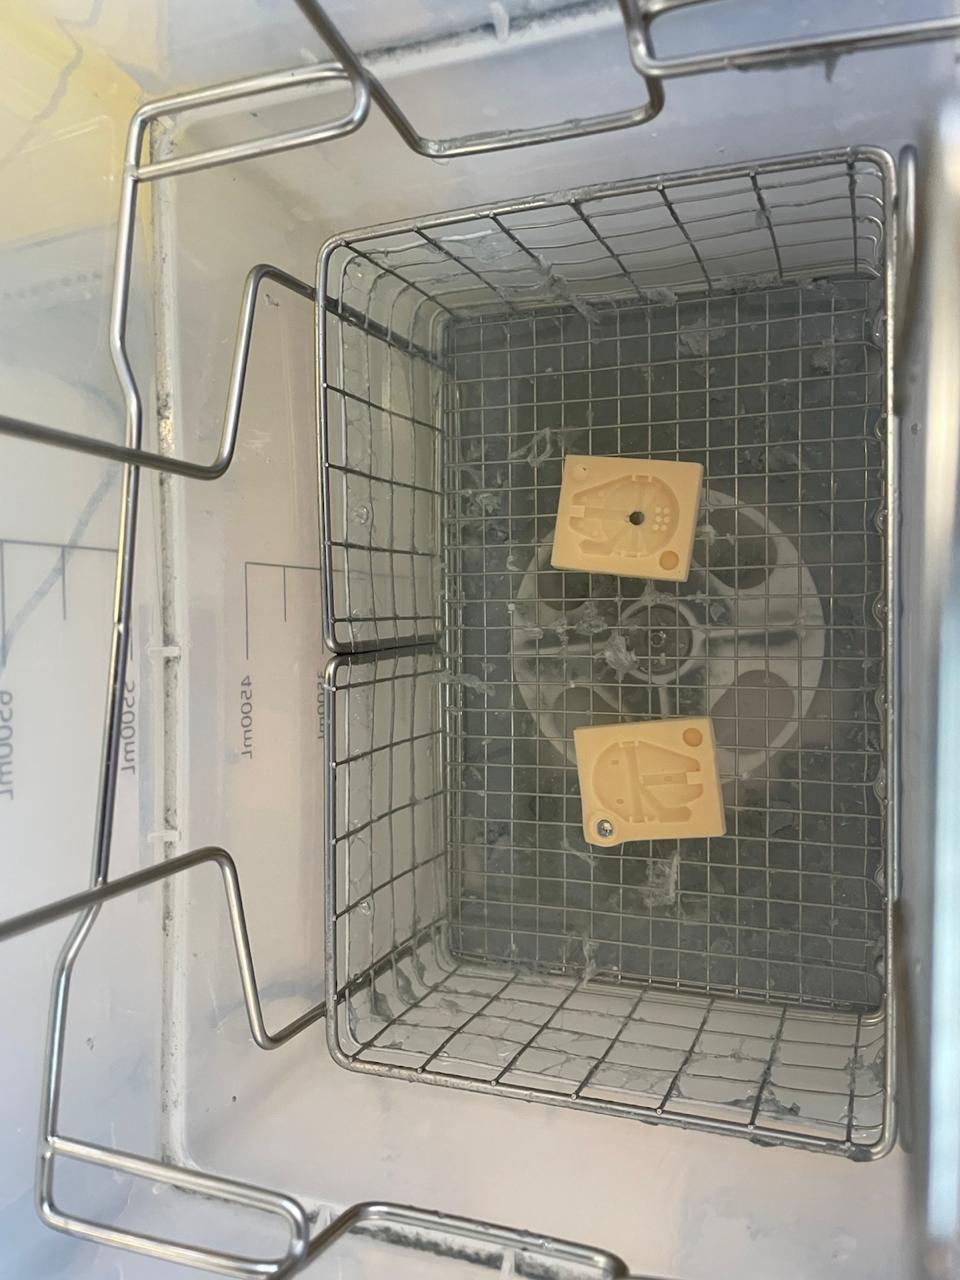
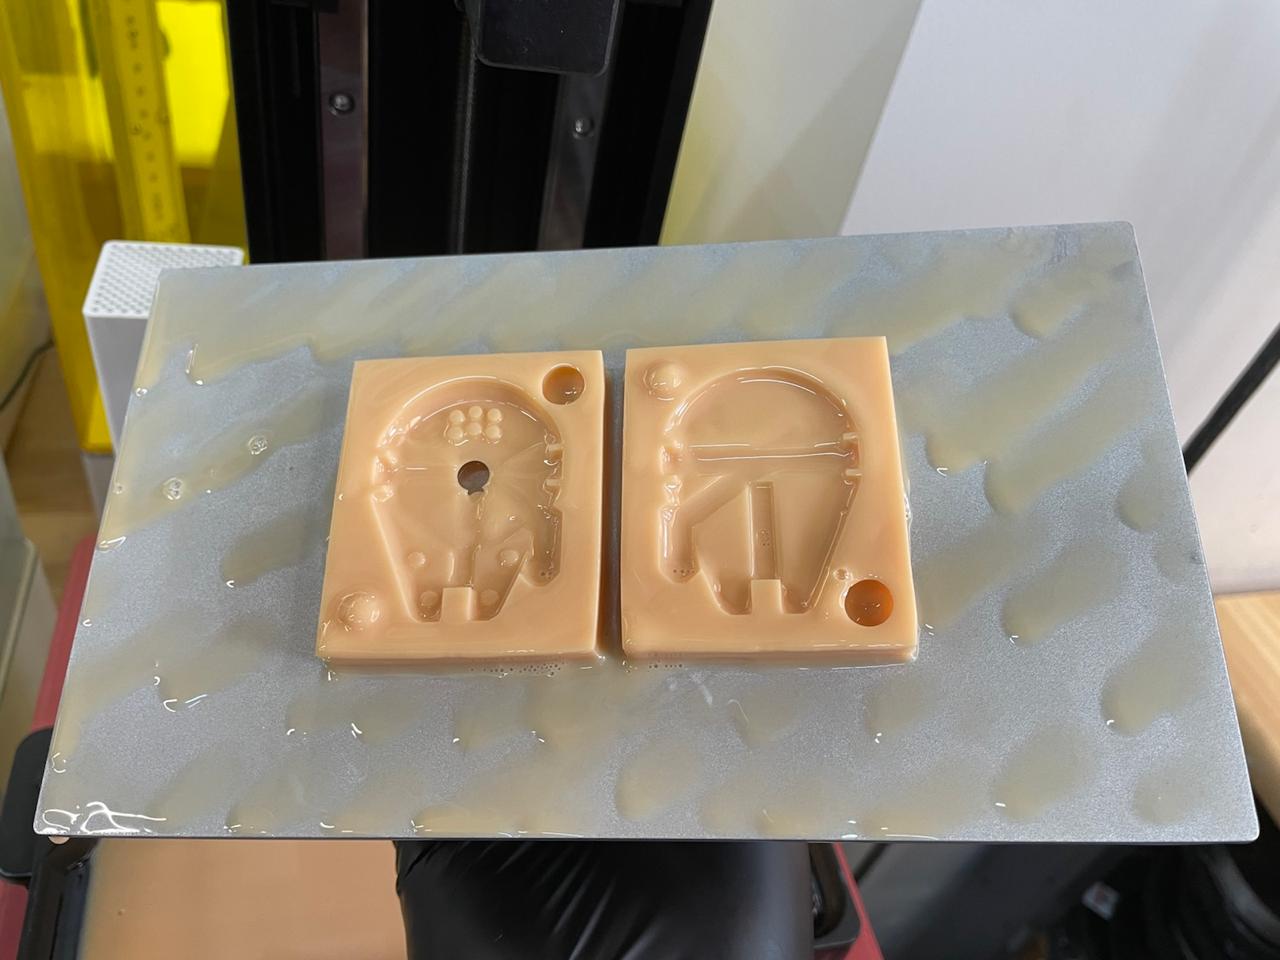
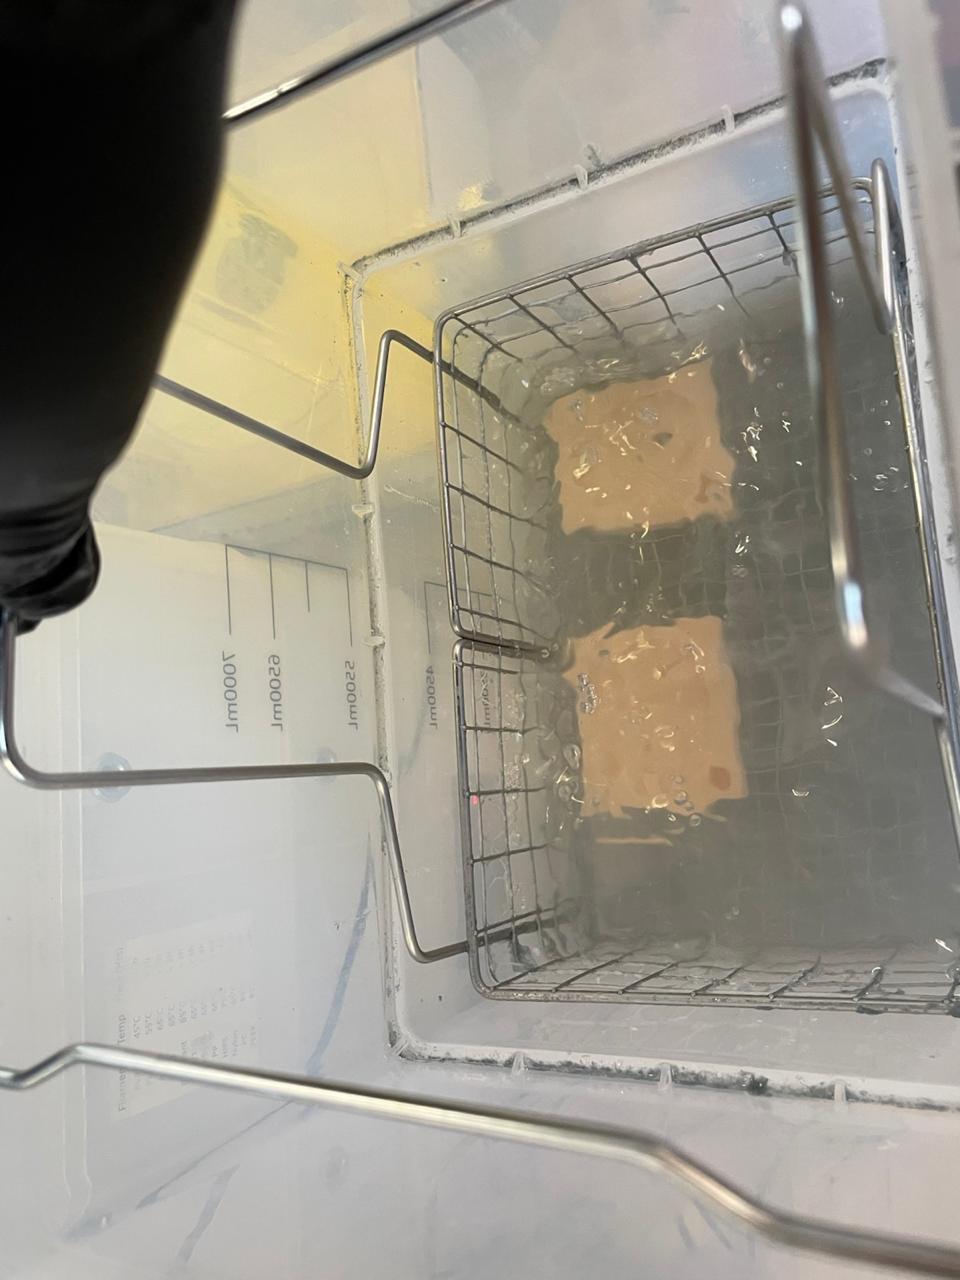
Step 6: Post-Print Alcohol Bath
Once the Saturn 2 finished its sticky ritual, it was time for the classic isopropyl alcohol bath. Not the kind of bath you enjoy with candles and music—this one’s strictly for washing off uncured resin, and absolutely not for drinking. I know it looks fancy, but it’s not your 12-year-old scotch.
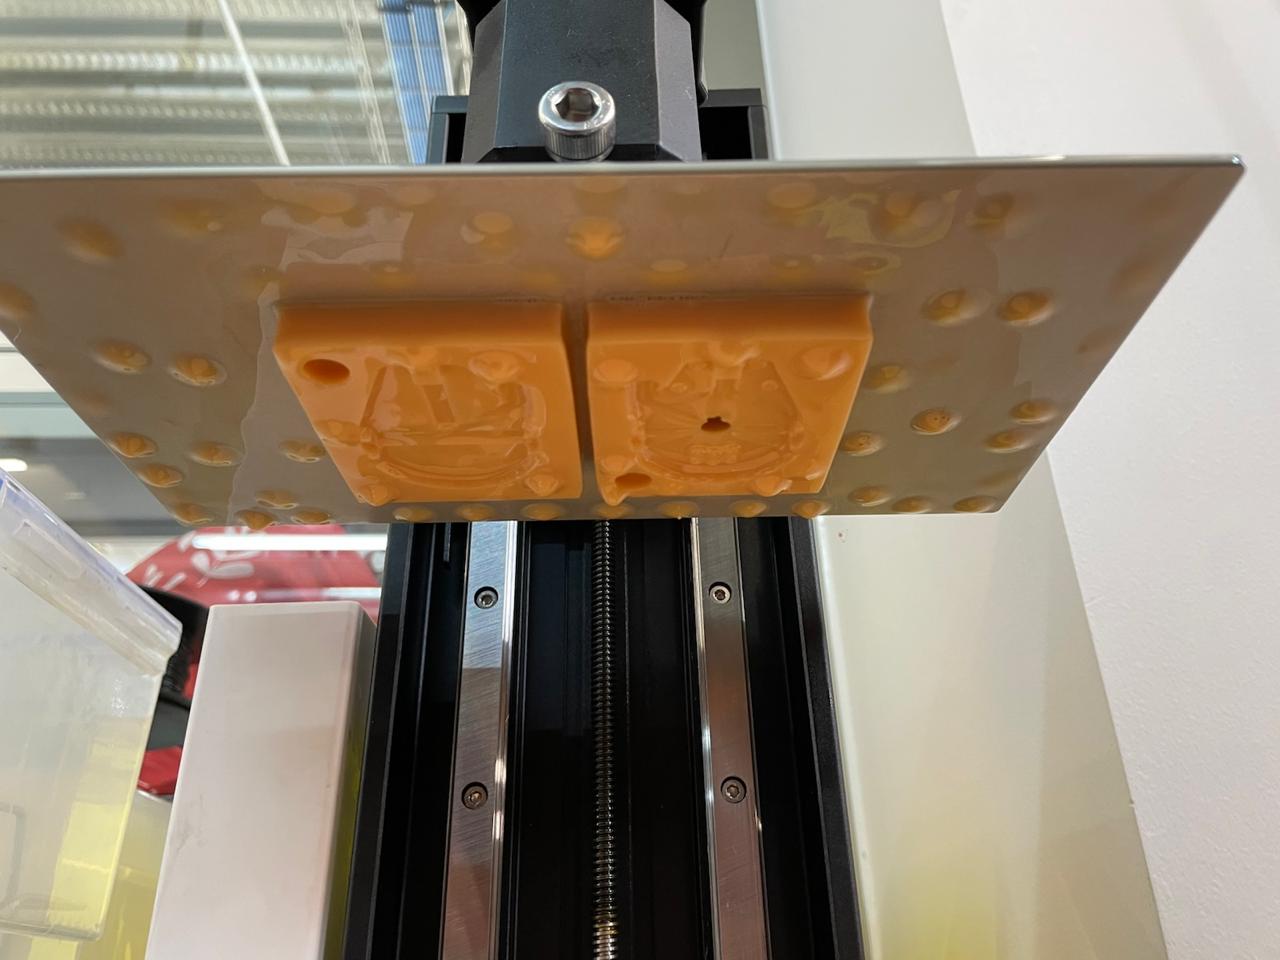
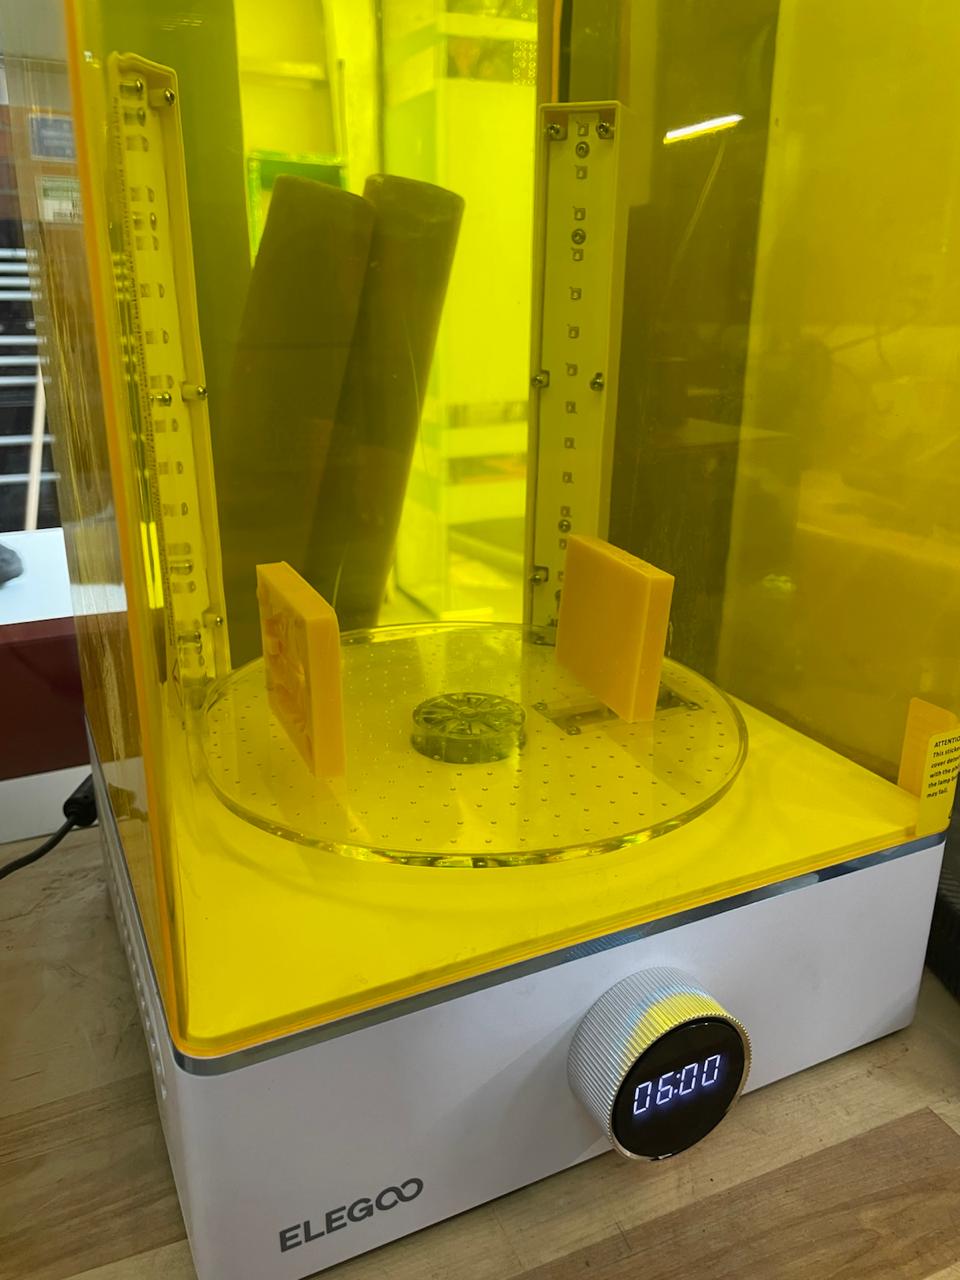
Step 7: UV Curing
After its chemical spa day, the mold goes under a mini sun. A.k.a. a UV curing station—because apparently letting it sunbathe next to your plants isn't “scientific” enough. My station even rotates the piece for max tanning. Very influencer behavior.
The result? A smooth, crisp mold that feels like plastic magic. And yes, all fingers remained attached in the process.
This mold was actually my first try with resin printing. I was skeptical and didn’t want to waste much time (or sanity), so I went small and cautious. Good thing the Saturn 2 delivered—it printed in less than 40 minutes and came out crisp and smooth. That’s when I knew: this works.
So I did what any rational human does—I scaled the model directly in Chitubox and repeated the entire process: slice, print, wash, cure. Same workflow, just bigger and better. No surprises, no failures, just a high-res win.
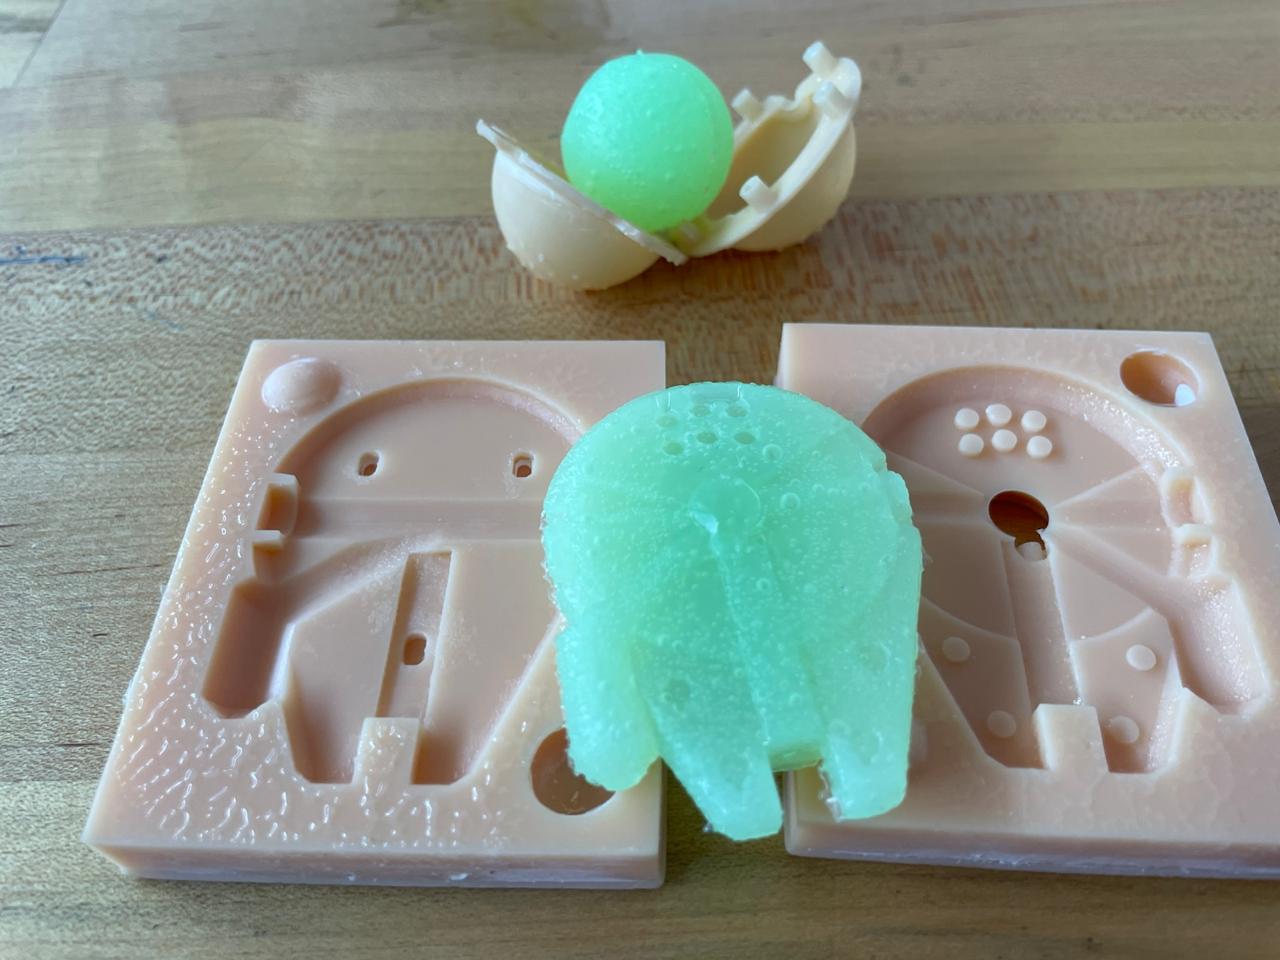
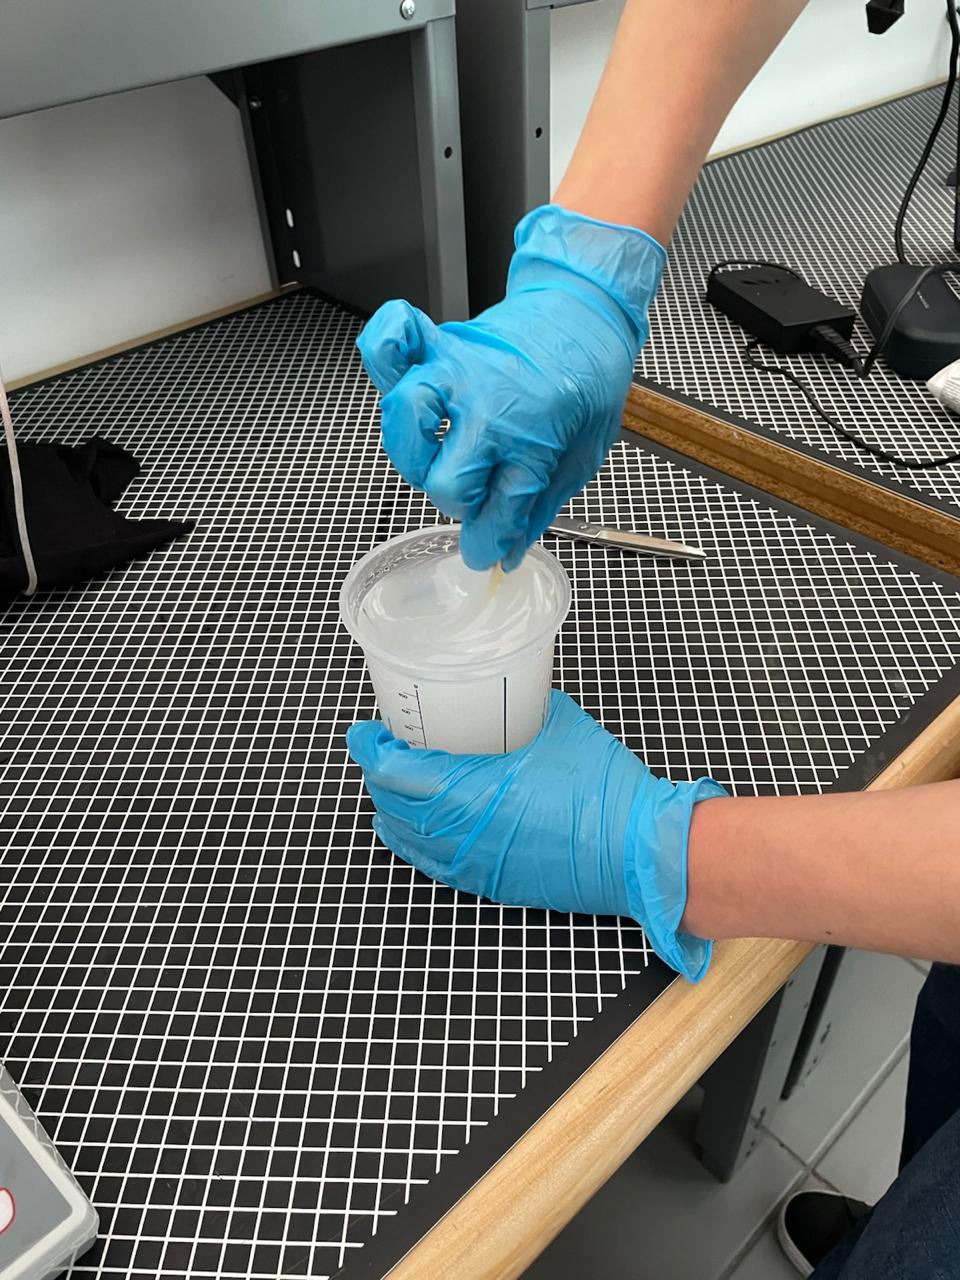
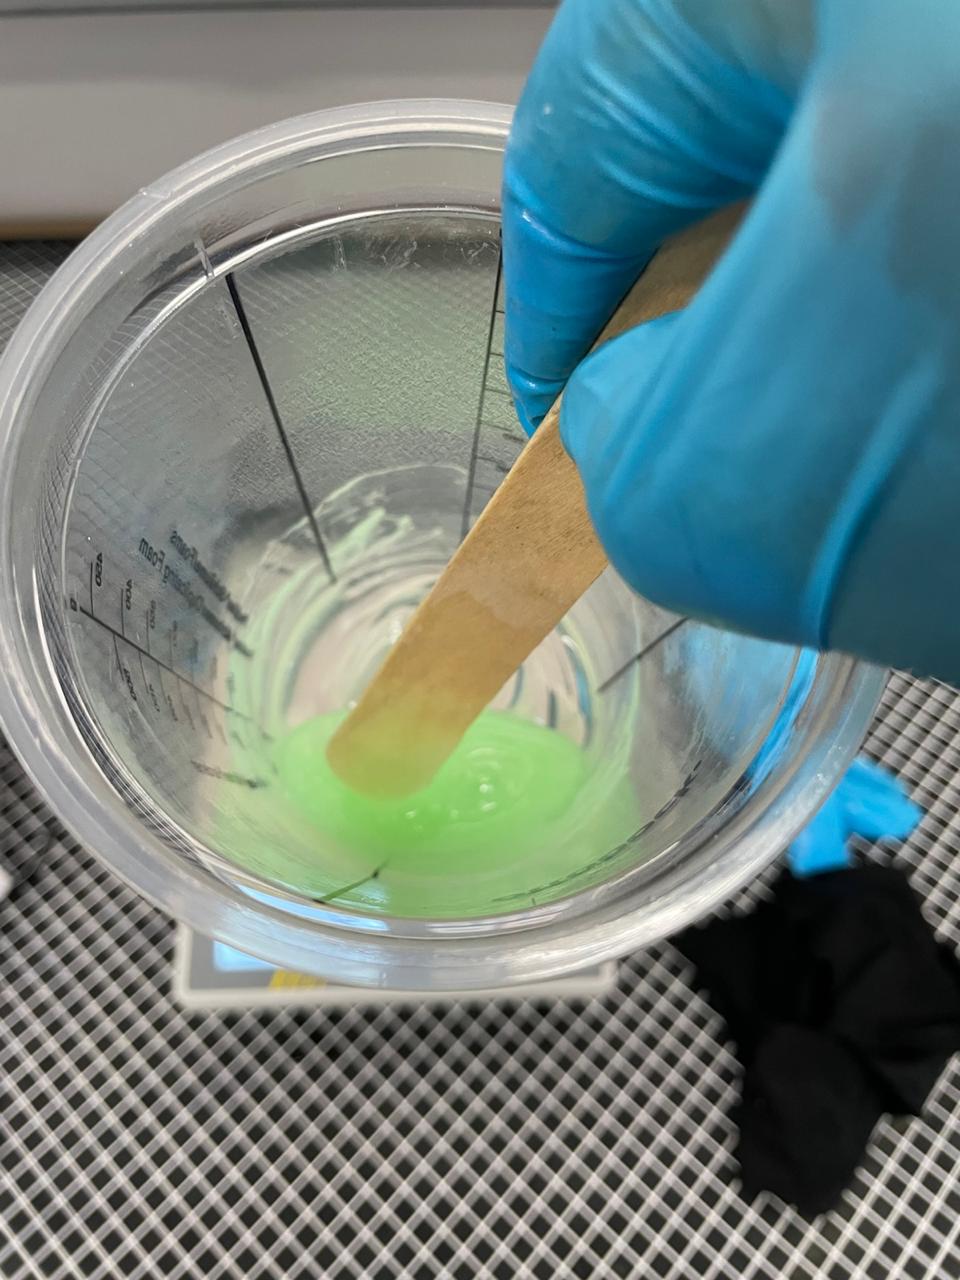
Casting the Mold
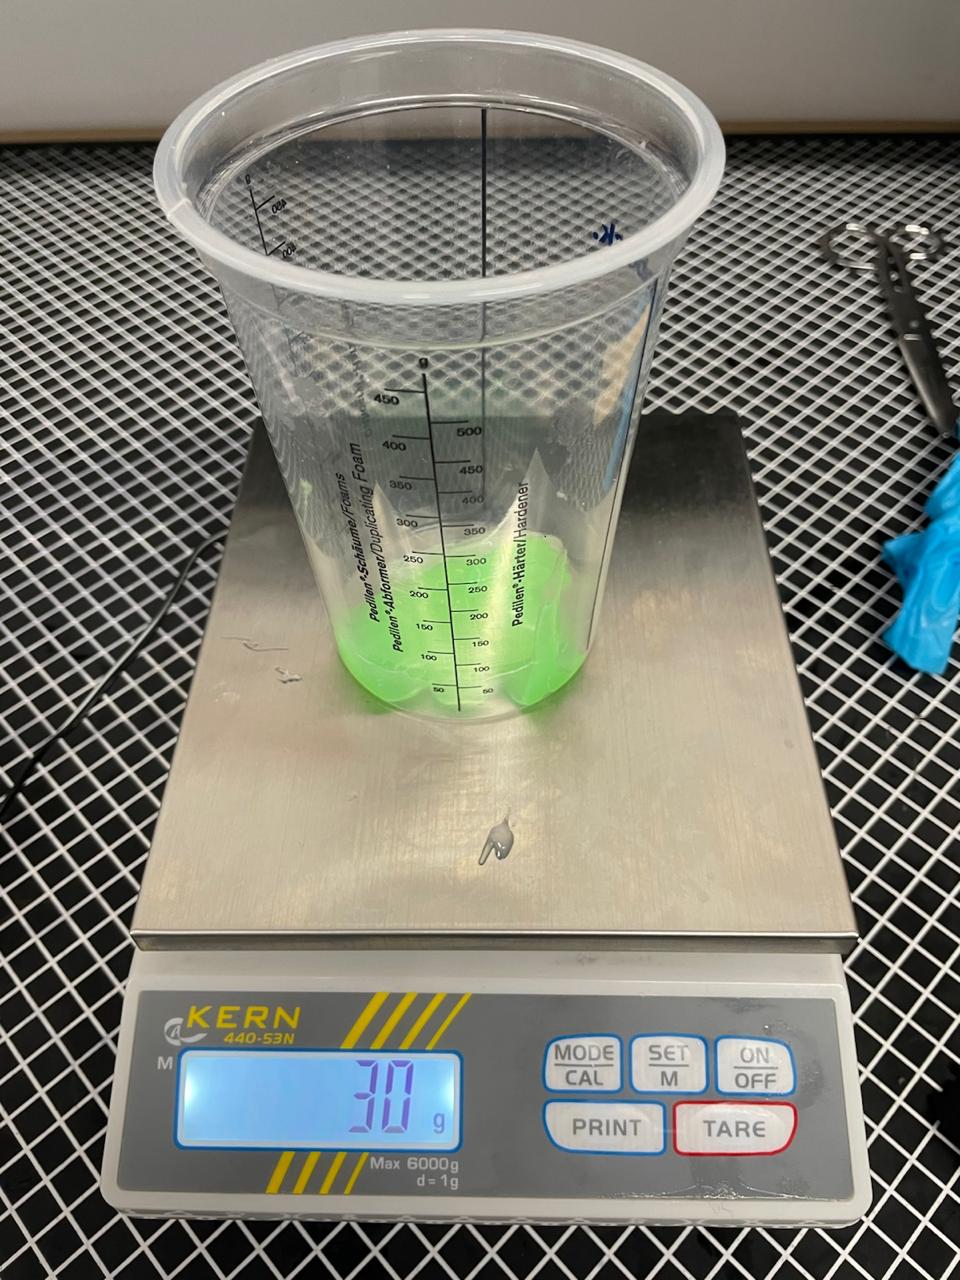
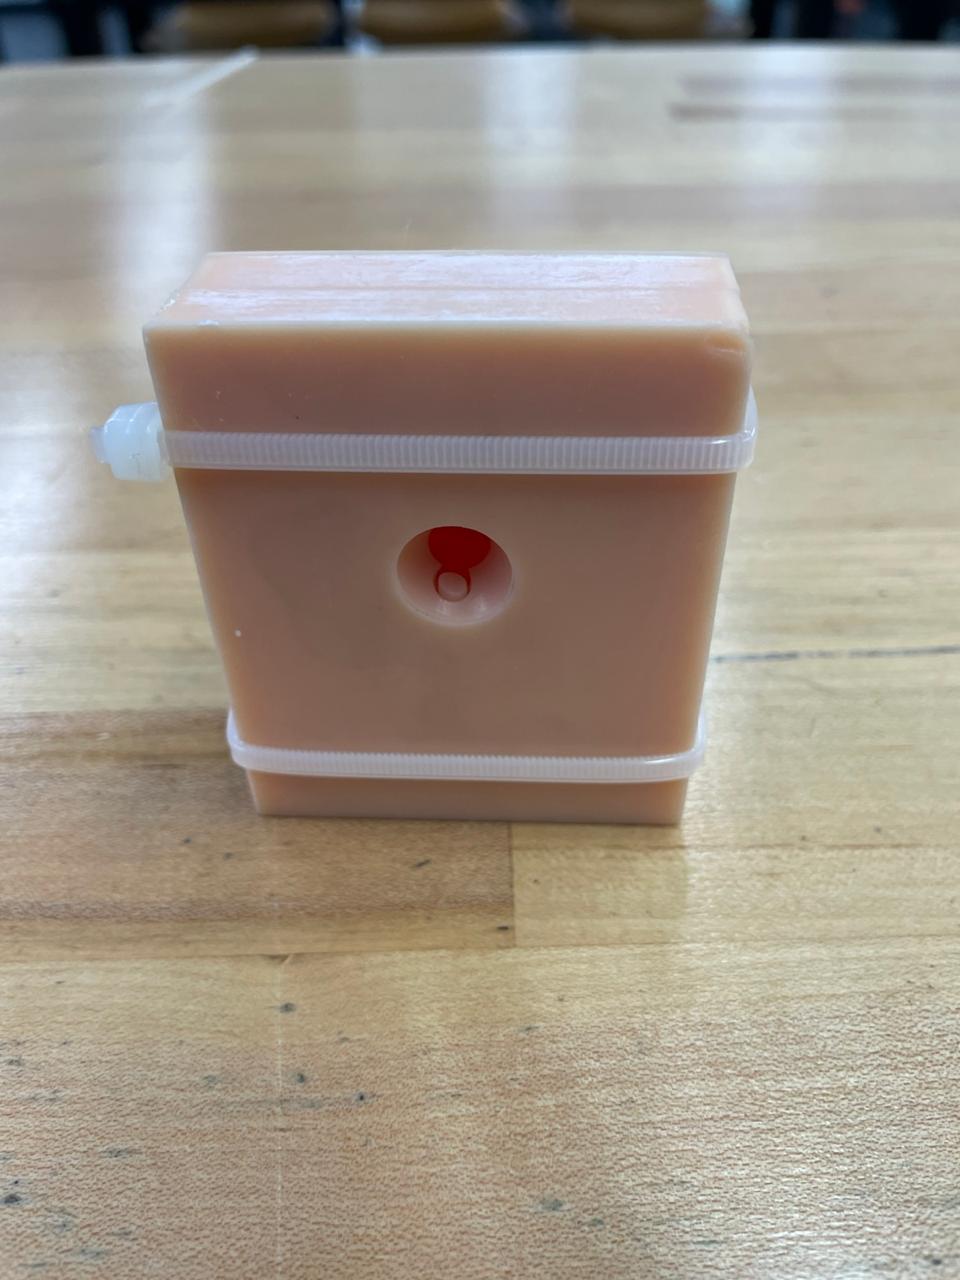
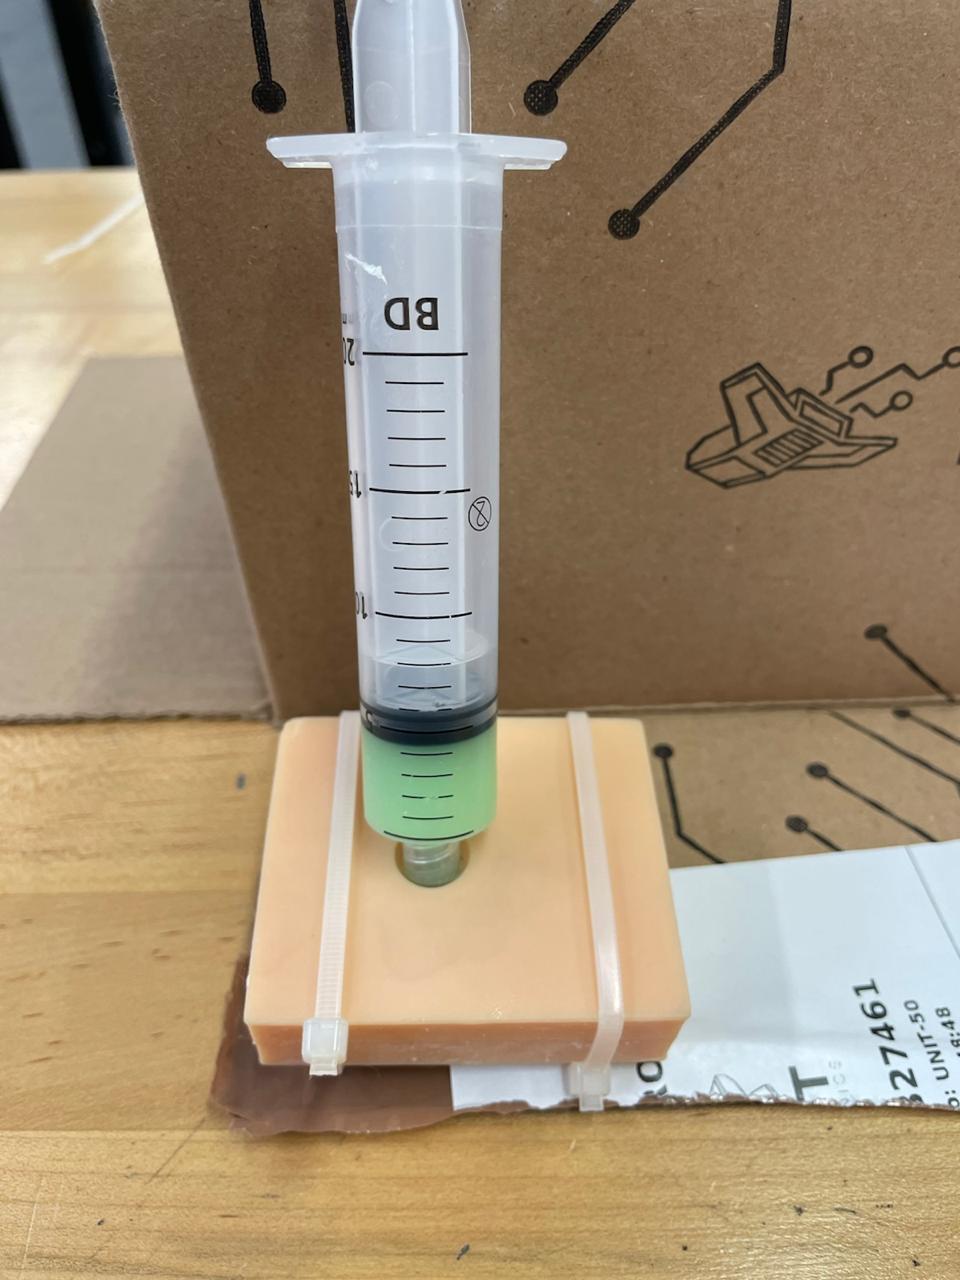
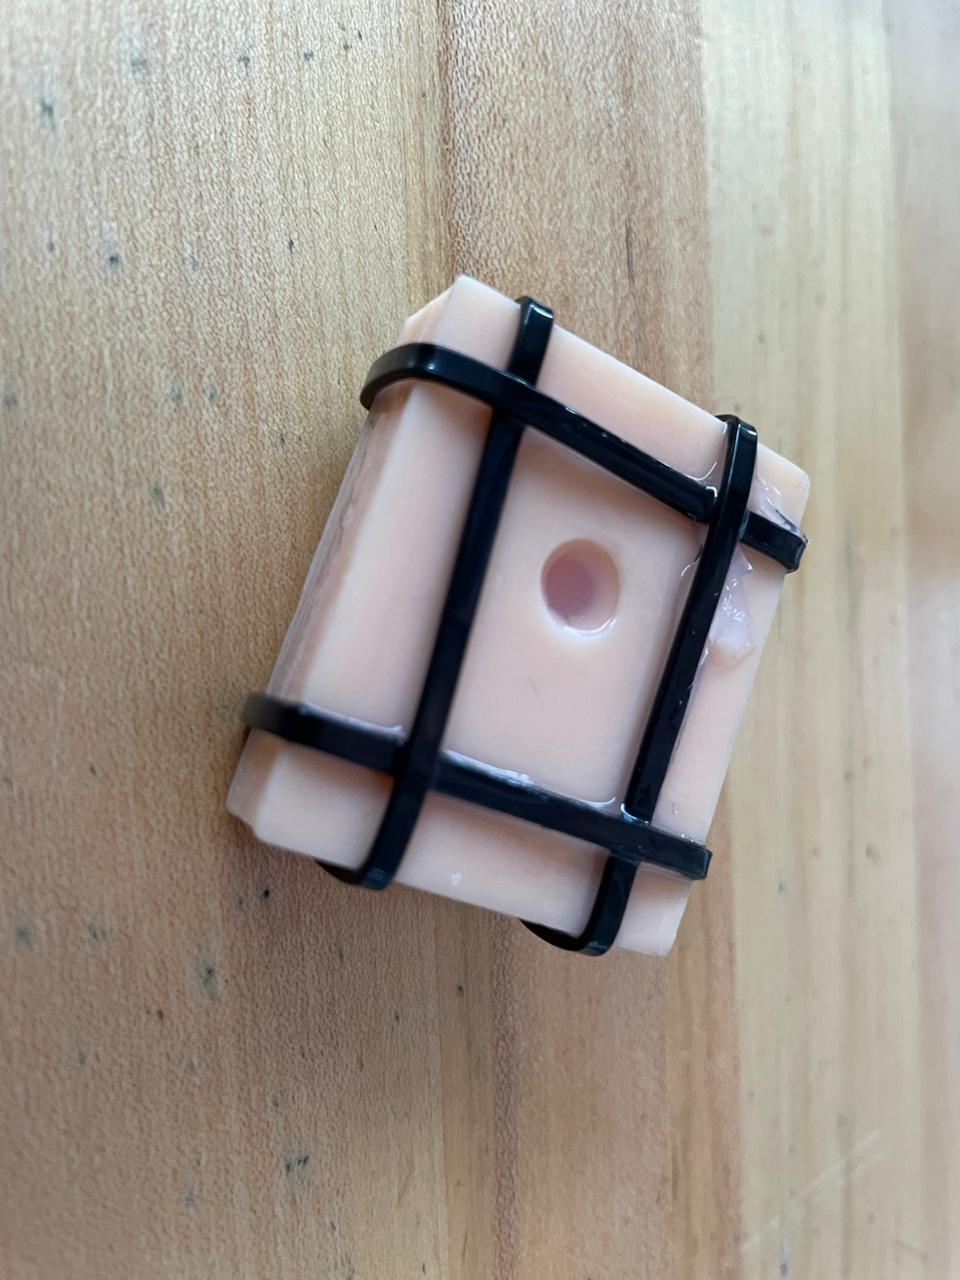
After printing and curing came the messy, squishy part: casting with silicone. My toolkit? Two printed mold halves, a syringe full of silicone, zip ties for clamping, and—let’s be honest—a dangerous amount of hope.

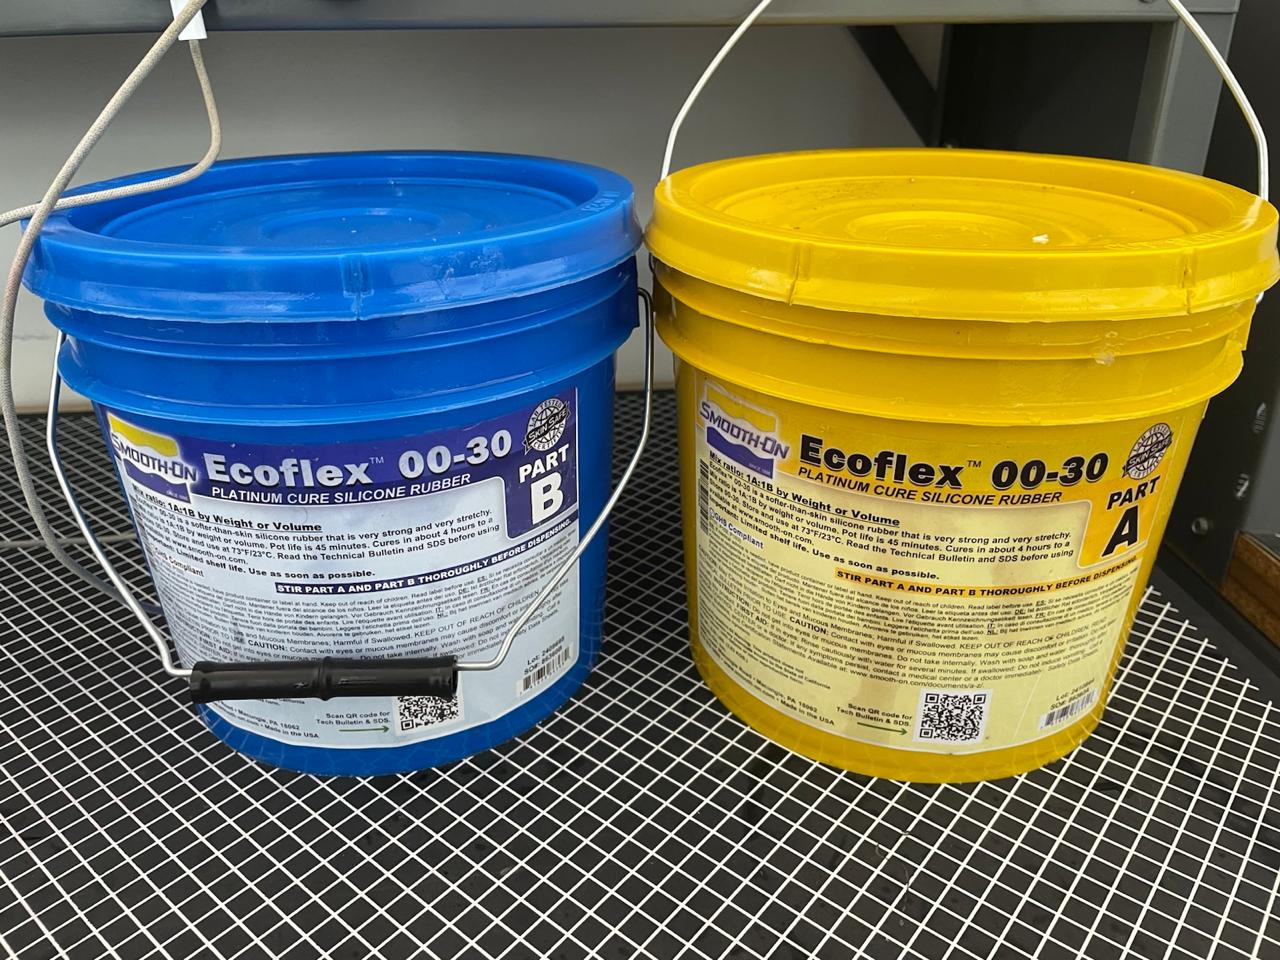
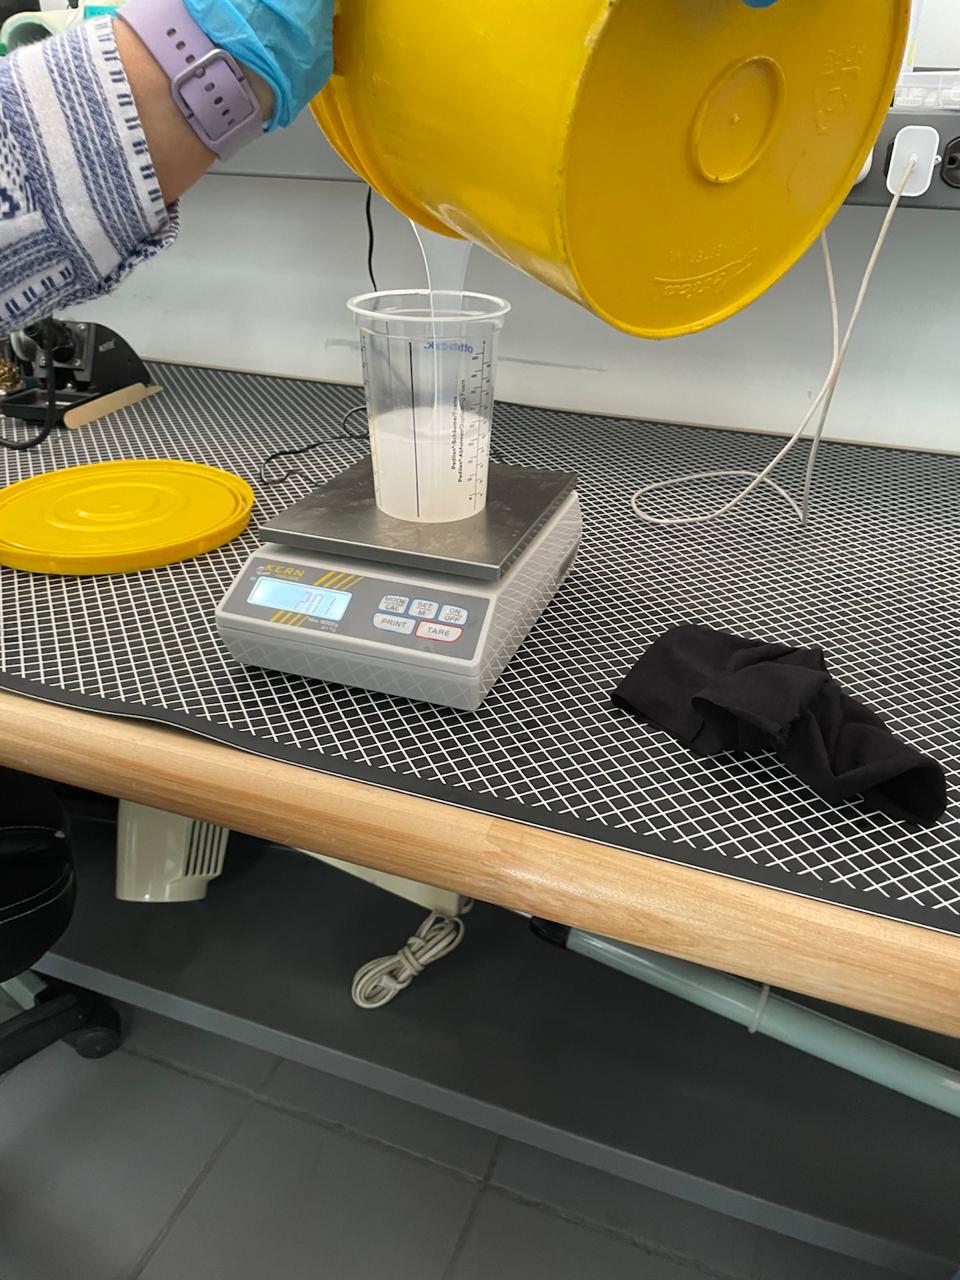
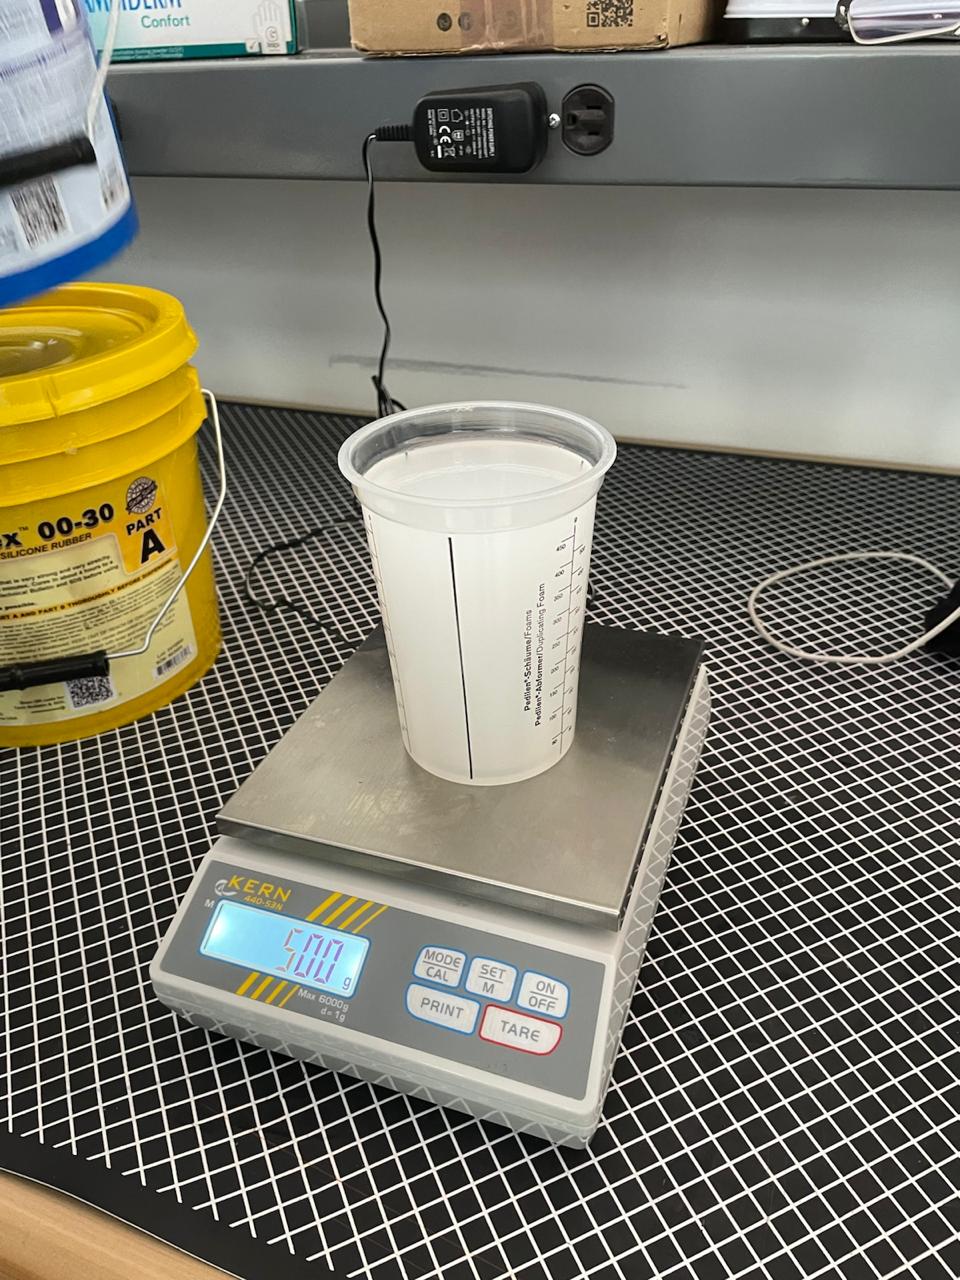
For the small mold, I used Ecoflex 00-30. Why? Because I had it lying around and thought, “how bad can it be?” Well, pretty bad actually. Turns out Ecoflex isn’t really meant for rigid mold casting, and if I’d read more than the toxic warning label, I might’ve figured that out ahead of time. But hey—science (and stubbornness).
My co-workers where mixing some Ecoflex so I borrowed some for my small mold.
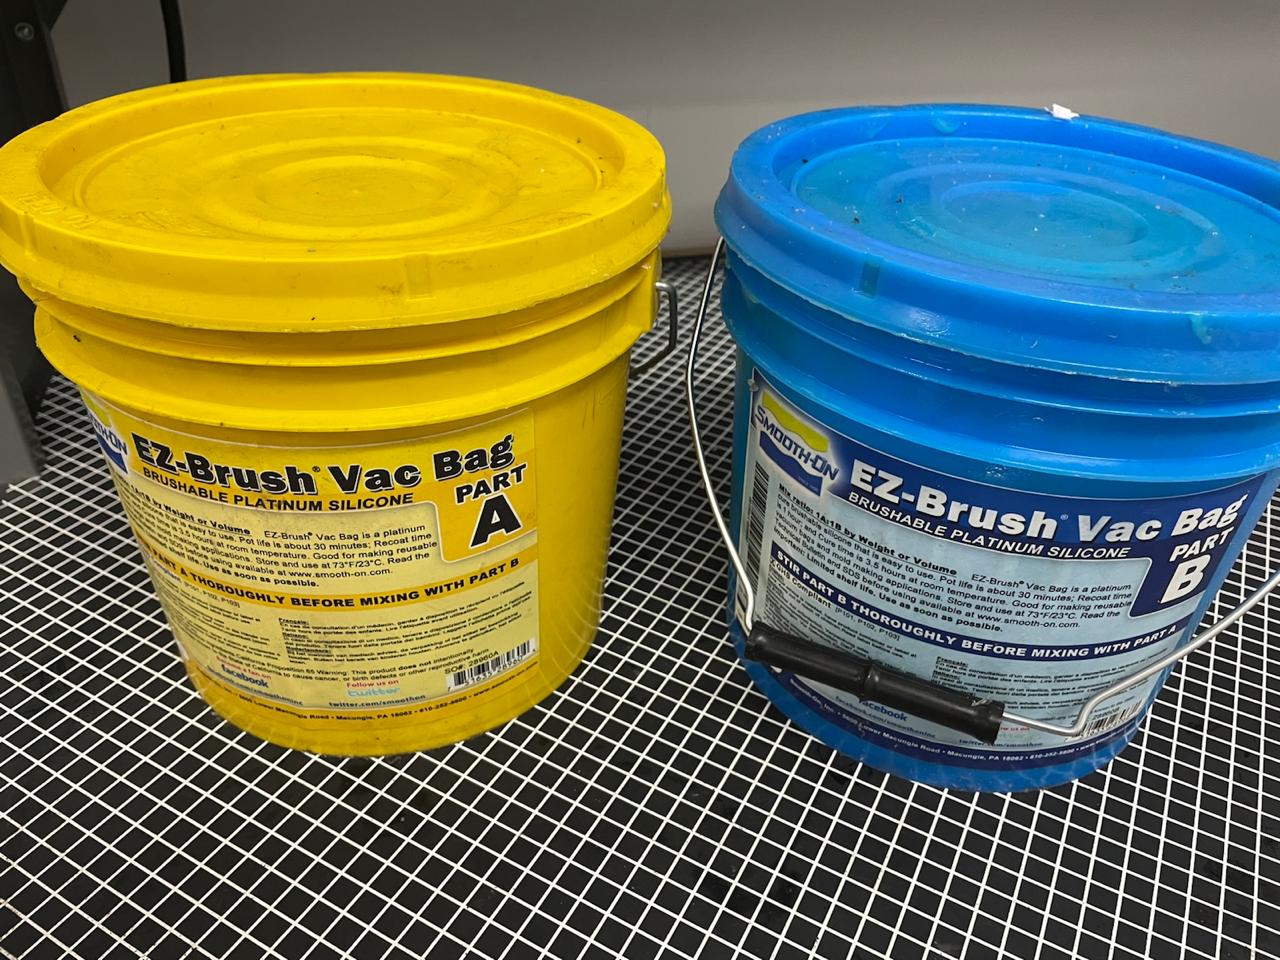
For the large mold, I brought out the good stuff: EZ-Brush Vac Bag silicone from Smooth-On. This green beauty is usually used for industrial vacuum bagging—like molding boats or wind turbine parts. I’m clearly not making yachts, but I’ve used this silicone before to make vacuum bags, so I knew how it behaved. Spoiler: it’s amazing.
I left both molds overnight like a responsible adult. The next day, the verdict was in:
- Ecoflex 00-30: Nope. Still soft, weird, and sad. Not recommended for this use unless you want to demold disappointment.
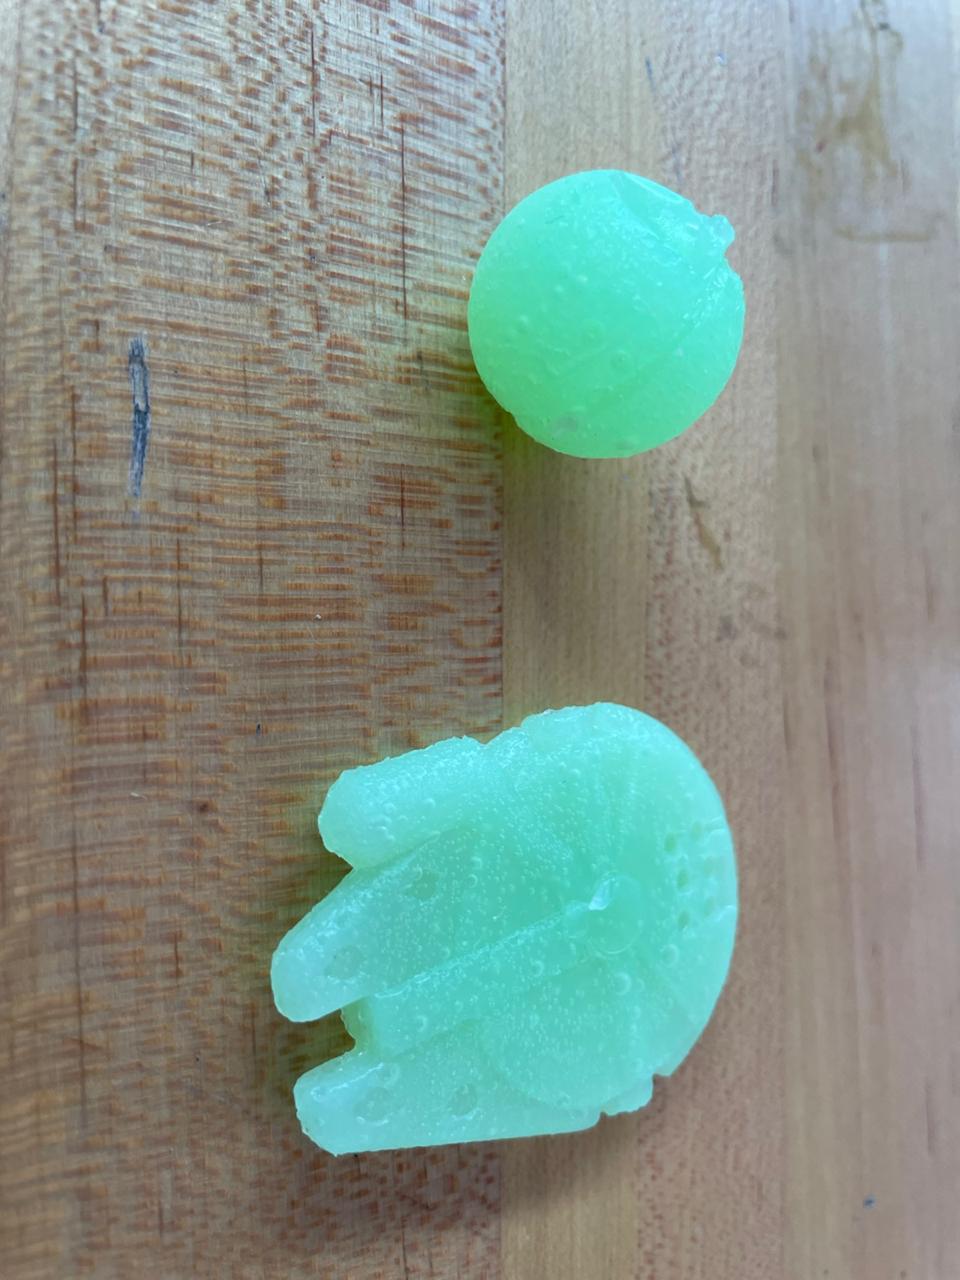
- Vac Bag Silicone: Chef's kiss. Full detail, perfect finish, and sturdy like it actually wanted to succeed.
Moral of the story? Read the damn instructions. Or don’t, and enjoy the thrill of experimental failure. Either way, use silicone you trust—not just the one that was on your shelf looking innocent.
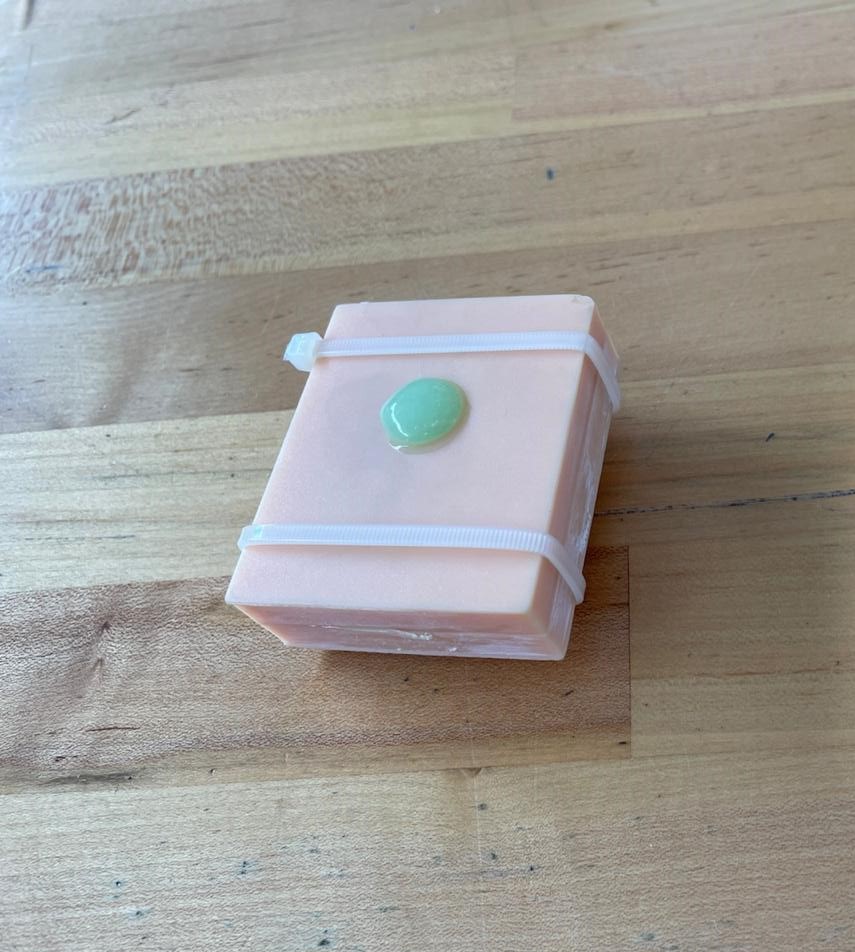
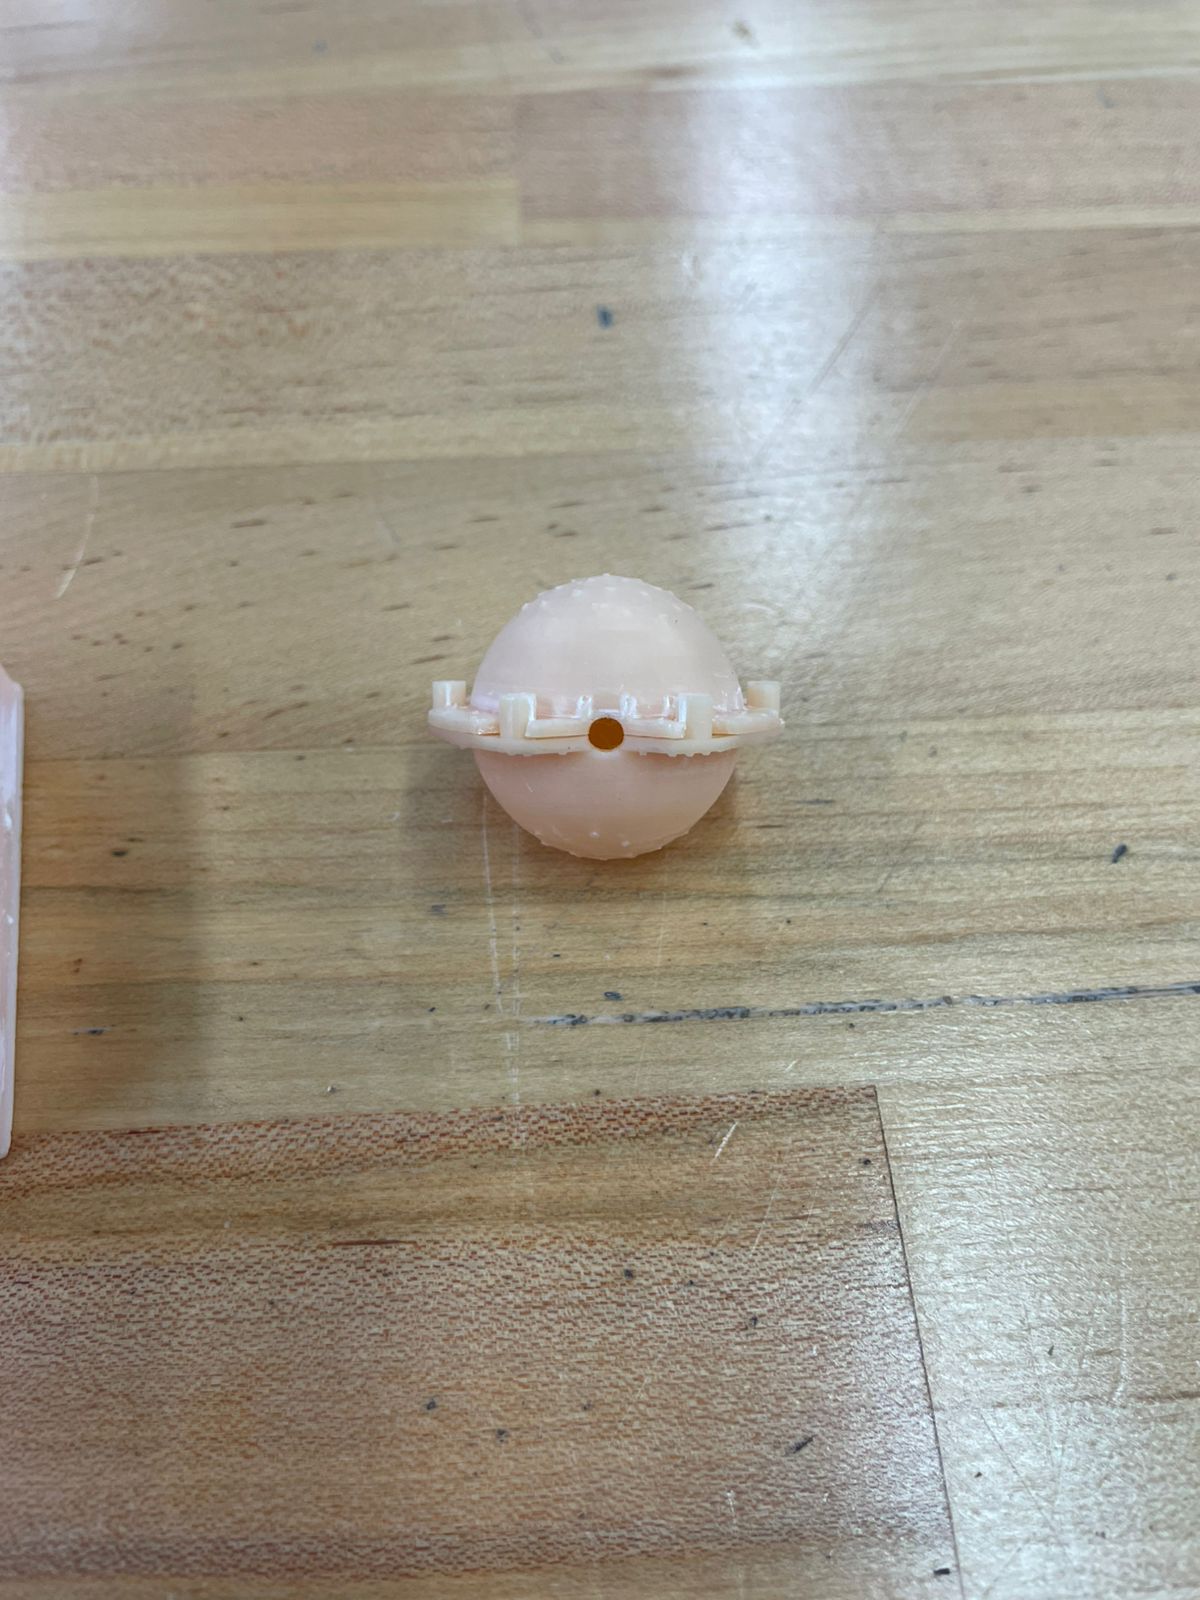
Bonus: Pokéball Mold
As a side quest (because molding one sci-fi icon wasn’t enough), I decided to make a Pokéball mold. The idea? Test another molding approach, this time using Fusion 360 and a clean, minimalist design. Also: prove that snap-fit molds can work—no zip ties, no screws, just good old geometry.
Step 1: Open the Pokéball F3D into Fusion 360
Credit goes to this hero from GrabCAD: Pokéball Model. I opened the Fusion file and got to work. Unlike Tinkercad, Fusion360 didn’t make me cry.
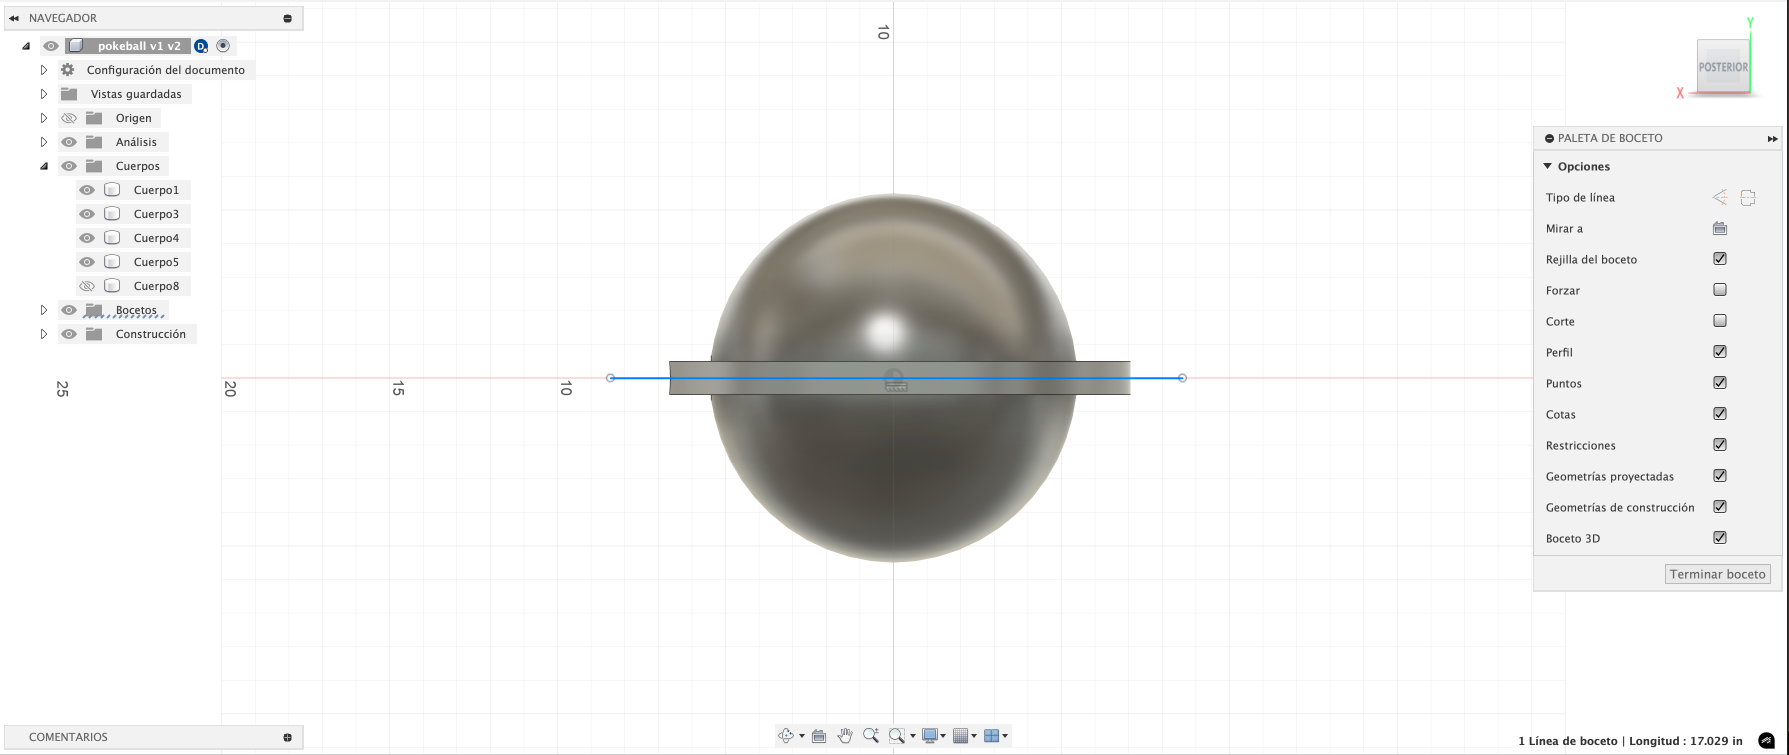
Step 2: Revolve to Minimize Material
Since I wasn’t planning to cast a life-size Pokéball army, I optimized the shape to use the least amount of resin possible. A simple revolve got the job done. Tiny mold, big ambition.
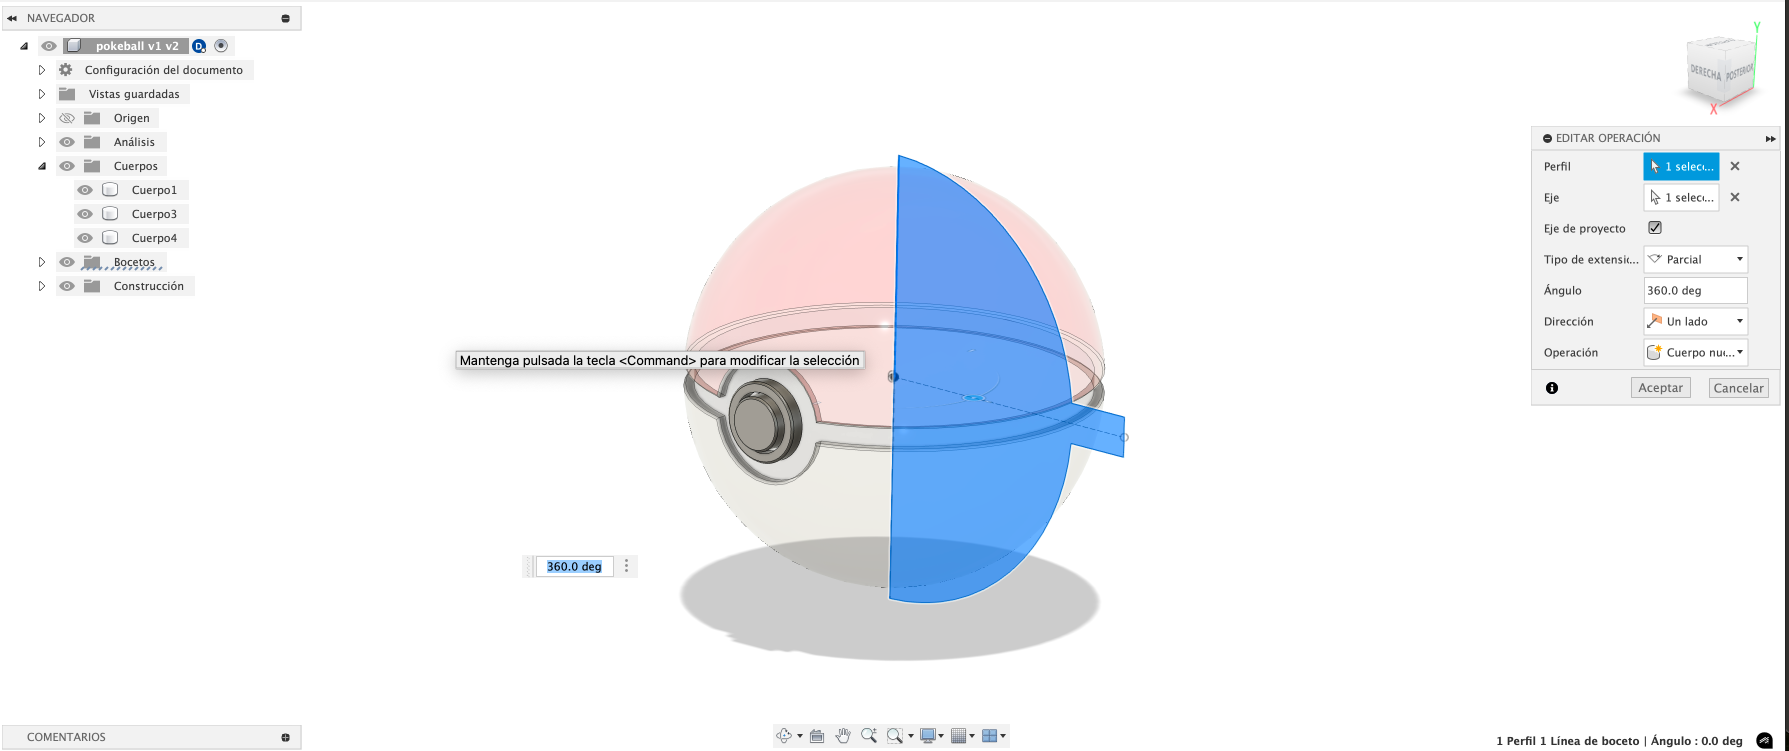
Step 3: Cut Line and Boolean Separation
I added a cut plane right through the middle and used Boolean operations to split the model into two mold halves. Fusion made this ridiculously easy. Unlike some tools I won’t name again... (looking at you, Tinkercad).
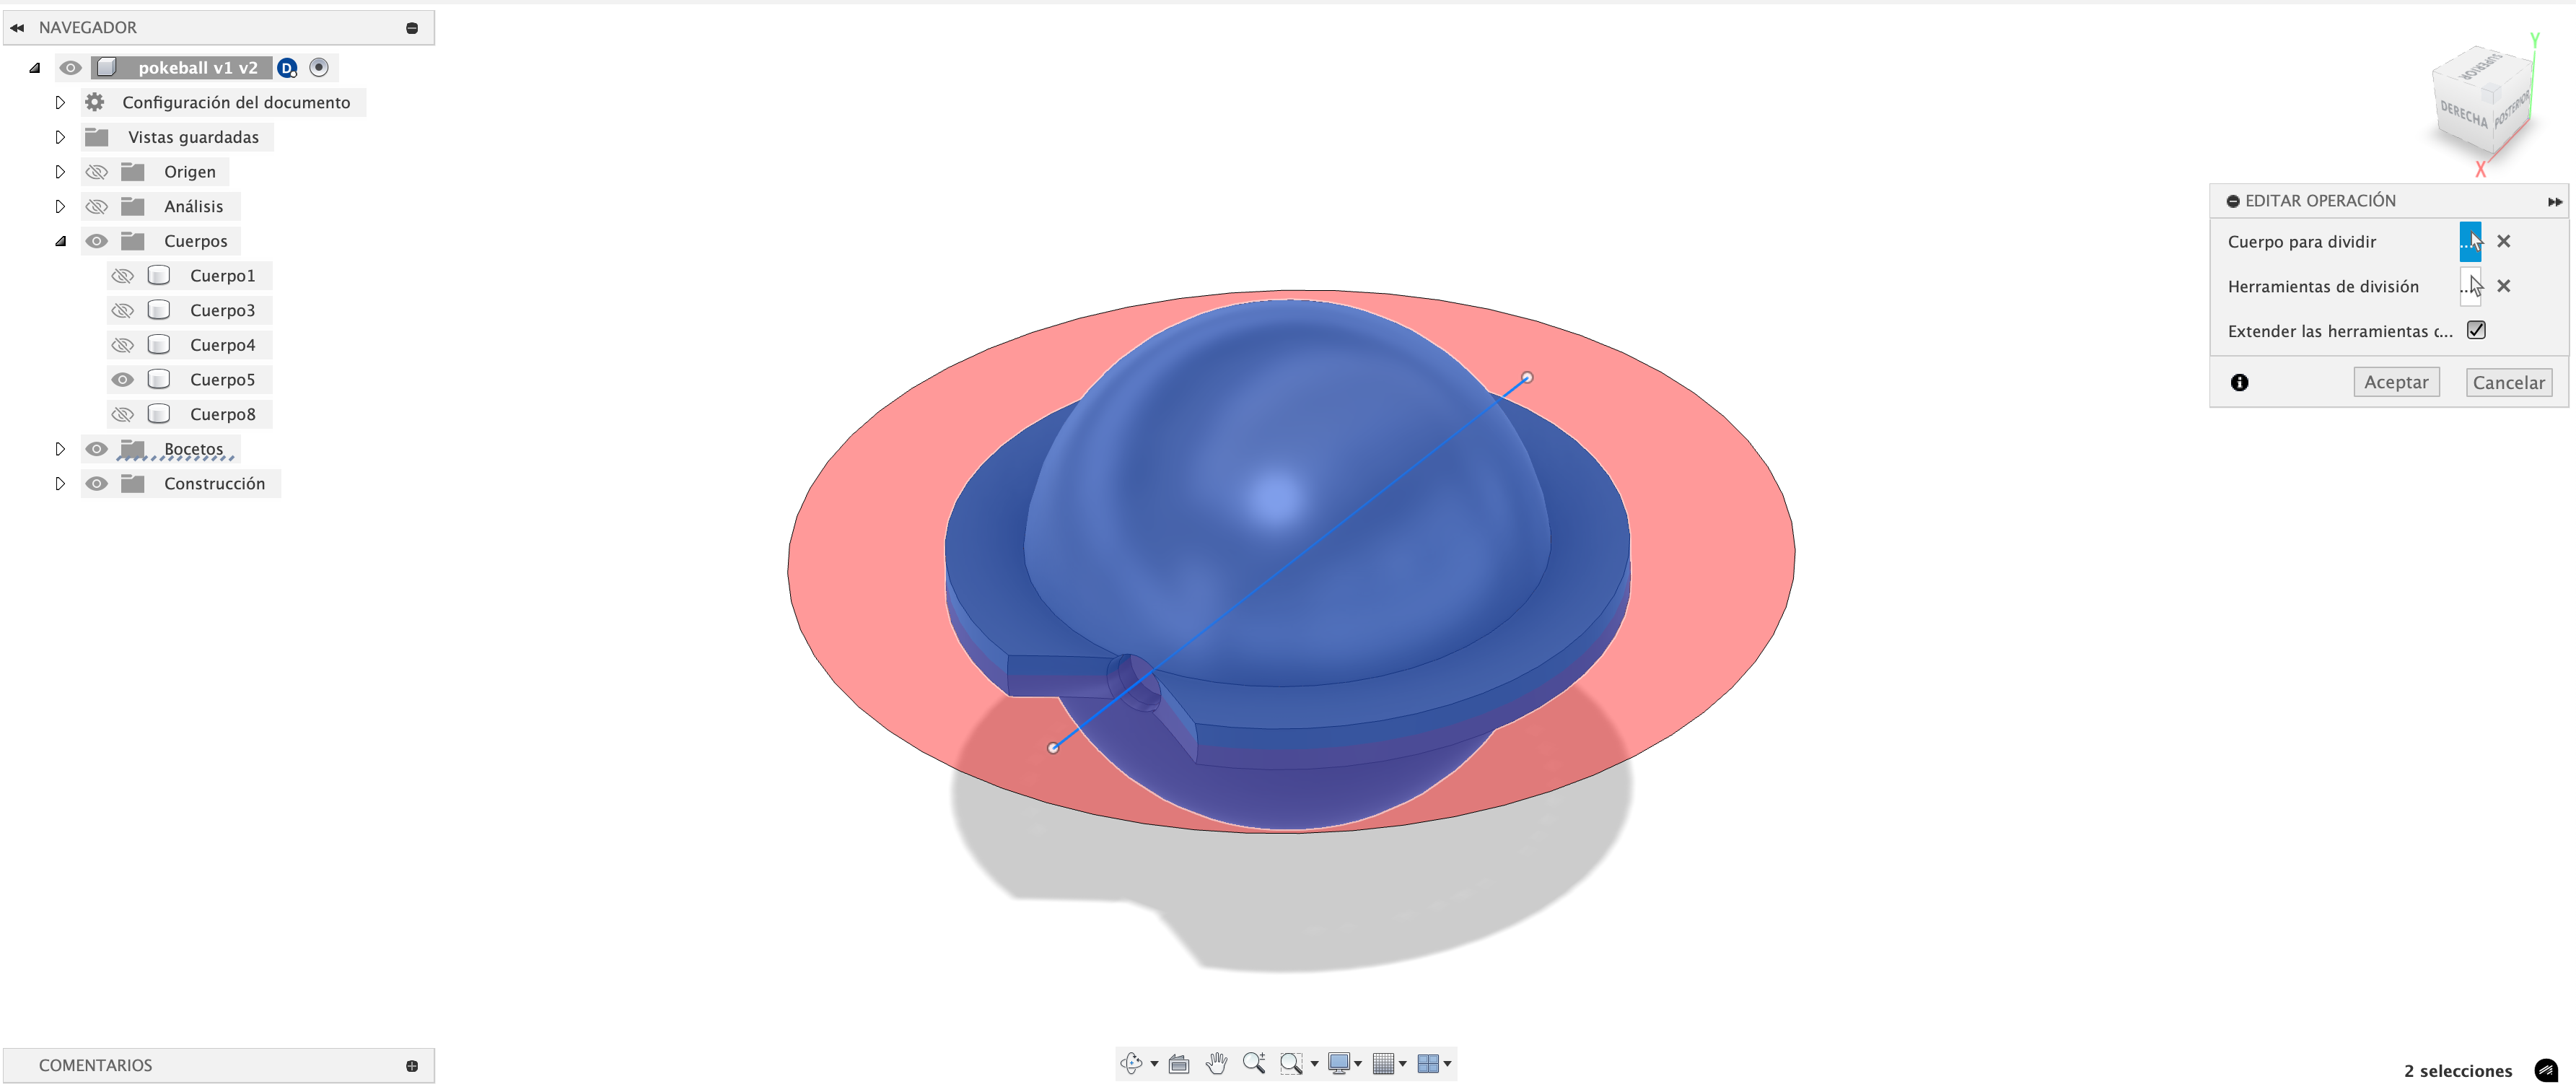
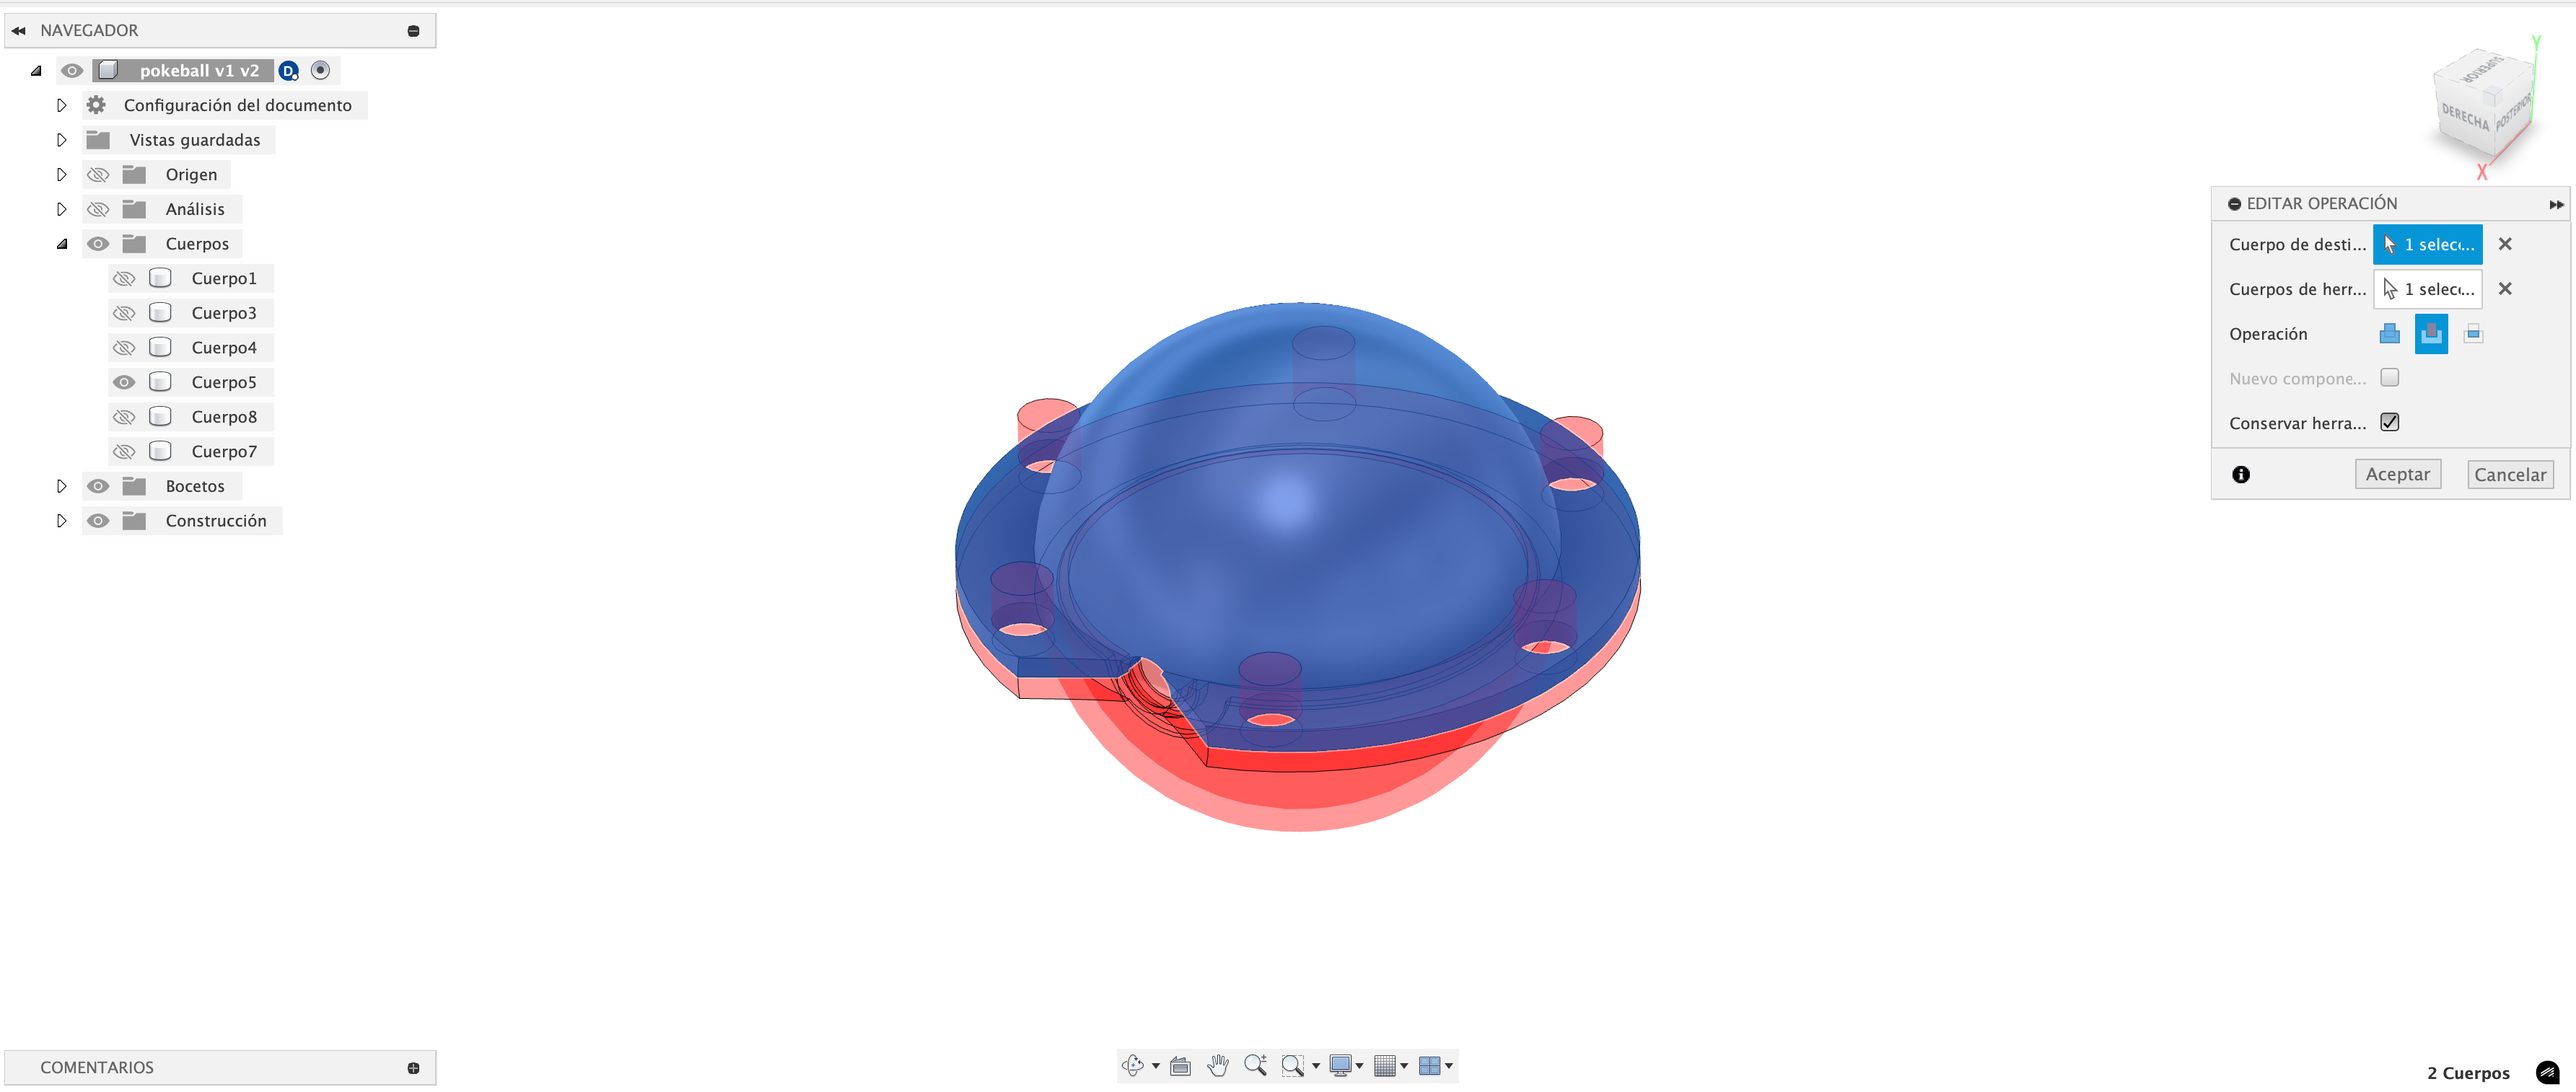
Step 4: Add Snap-Fit Posts
I added some small pegs so the two mold halves would snap together. No zip ties, no bolts, no desperation—just a nice satisfying click. Simple mold, but this was the clever part.

Step 5: Slice in Chitubox (with Creepy Supports)
I sliced the model in Chitubox and added supports this time—those weird spider-leg-looking things that haunt your dreams but save your prints. You know the ones.
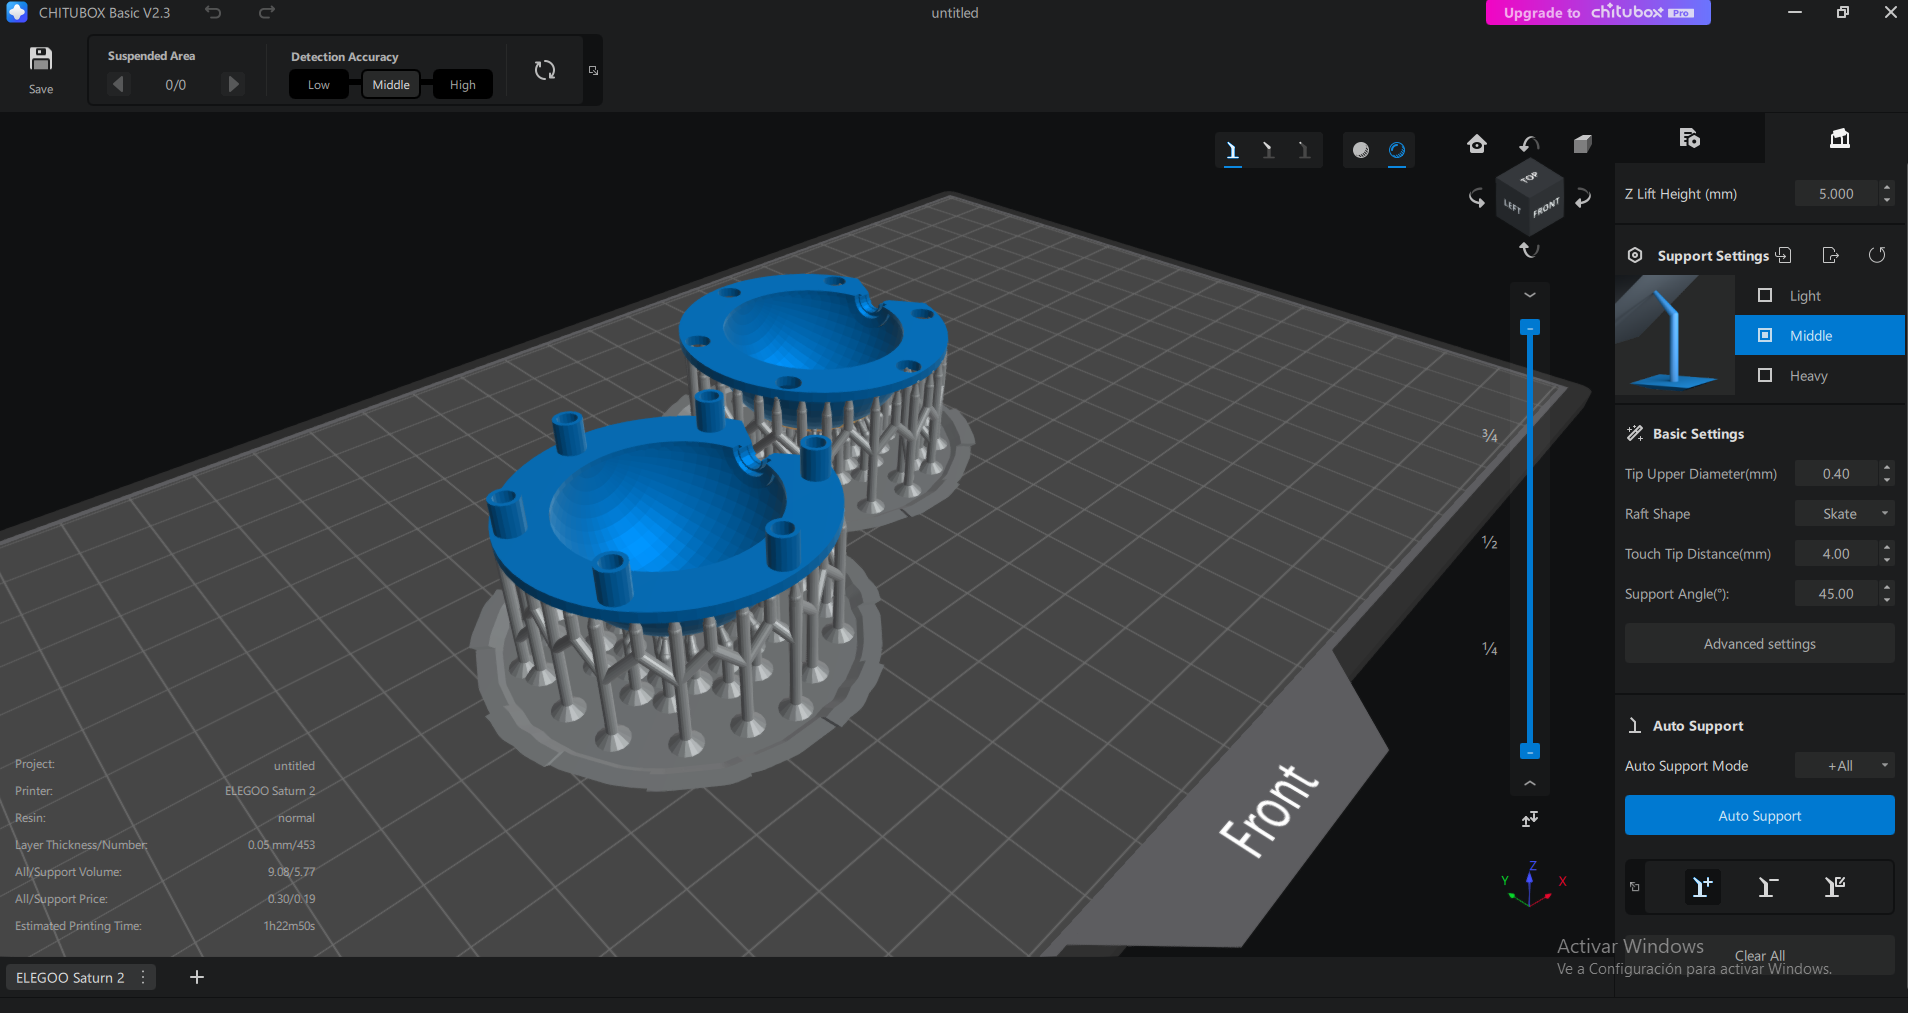
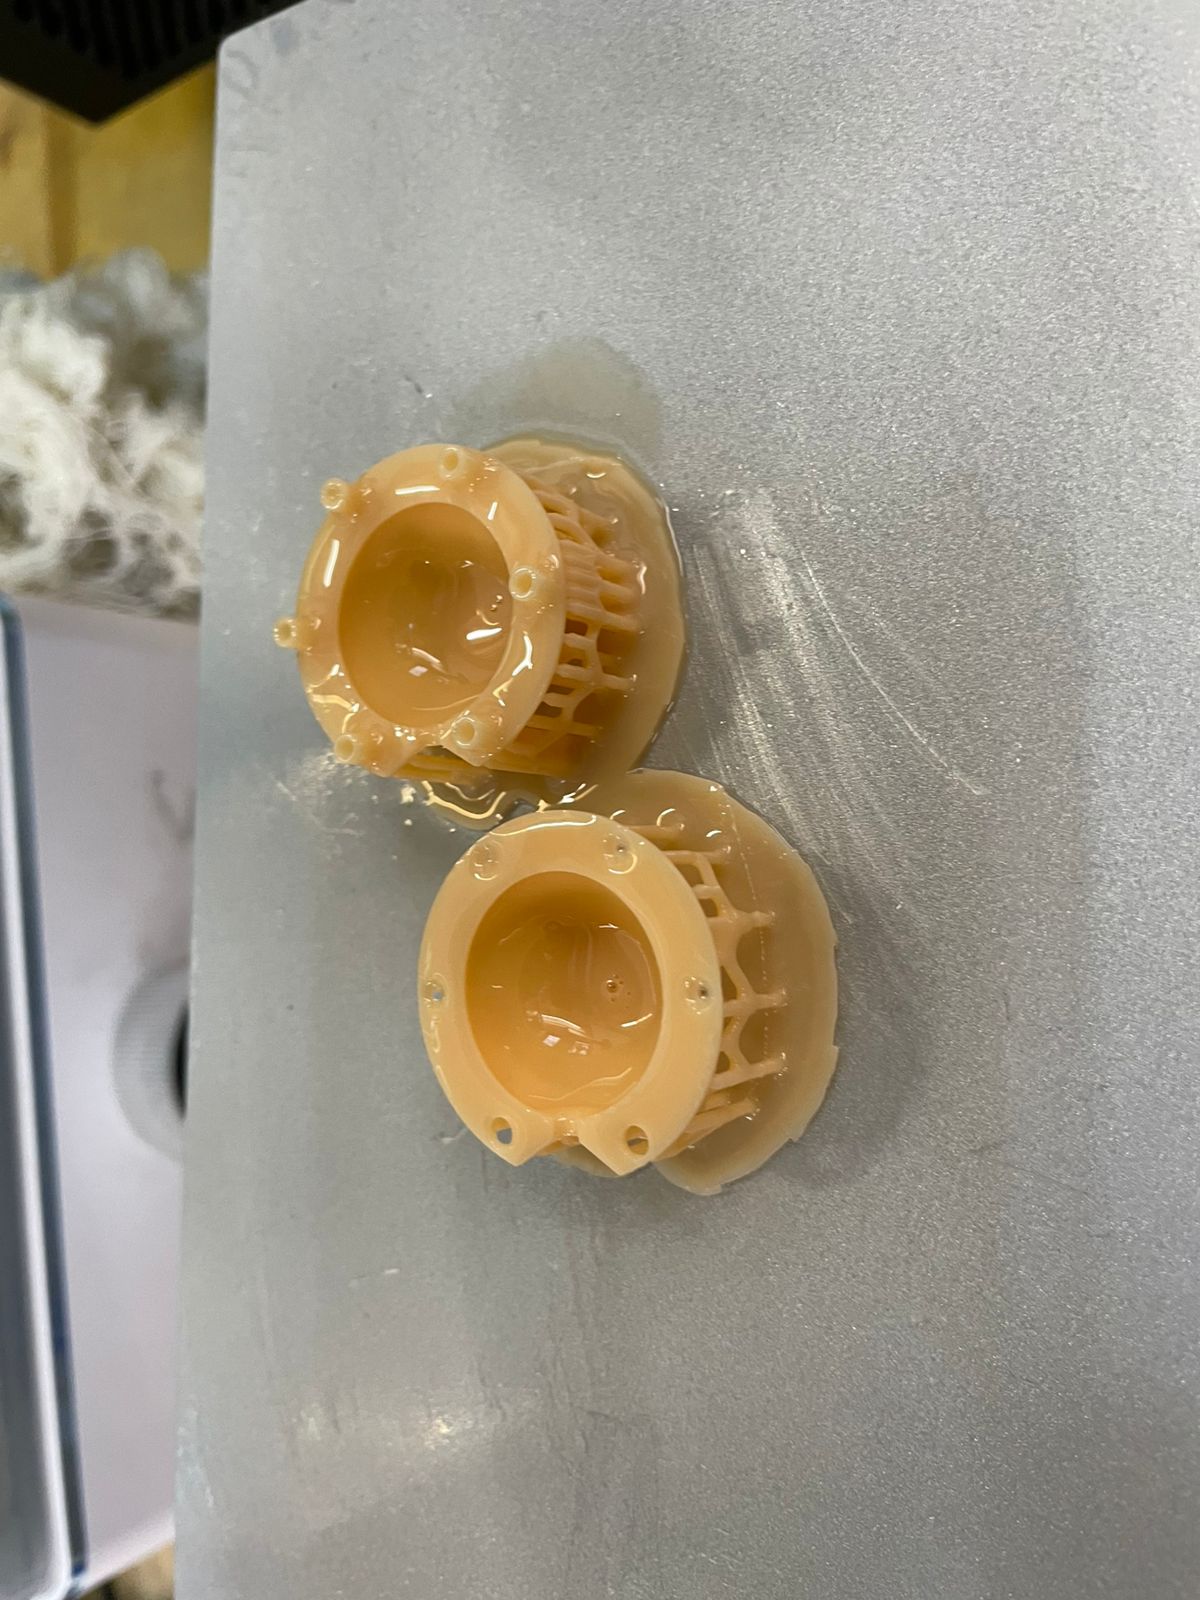
Step 6: Print, Clean, and Cure
Printed on the Saturn 2 (of course), then the standard IPA bath and UV bake. No surprises here, just a smooth process and lots of sticky gloves.

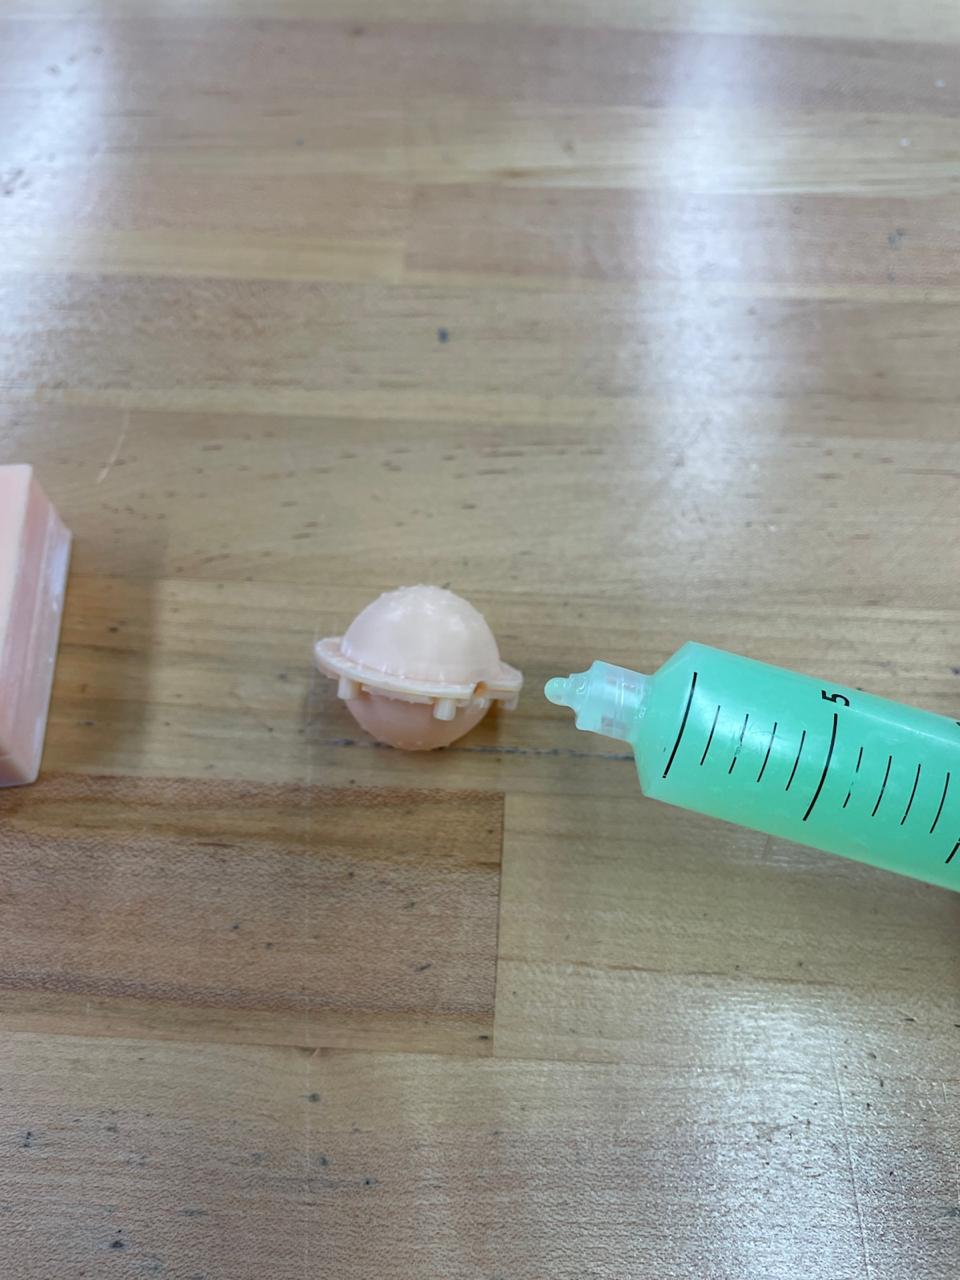
Step 7: Cast with Vac-Bag Silicone
I reused the same green Vac-Bag silicone I used for the big Falcon mold. Poured it into the snapped-together Pokéball mold and let it cure. The result? A teeny Pokéball with working alignment and no assembly trauma.
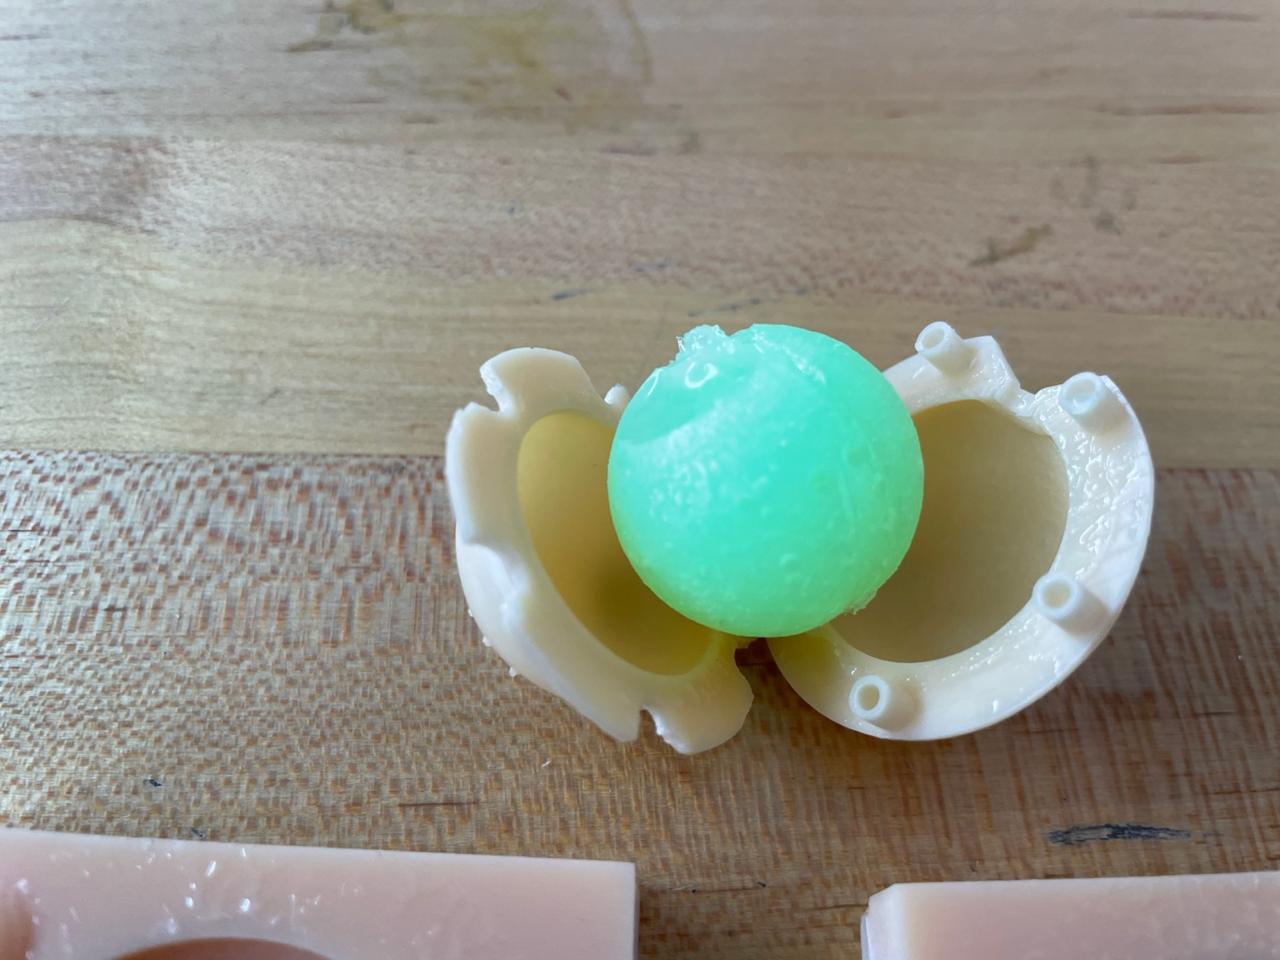
Sure, it was small and some details didn’t shine through, but this was a concept mold: simple, efficient, and designed to snap without screws or zip ties. For future versions I’ll make it bigger, but as a test of design workflow (Fusion > print > snap > pour > done), it worked great.
Problems and Fixes
Nothing ever goes perfectly when you mix lasers, chemicals, and 3D printers, but here's what I ran into—and how I either solved it, ignored it, or swore at it until it went away:
- Ecoflex 00-30 was a bad idea: It’s great for soft body casting, not rigid molds. Had I read more than the warning label, I could’ve saved time. But no regrets—had to test it to believe it.
- Pokéball was too small: Looked cute but lost most of the detail. Next version will be scaled up for visual clarity and better casting flow. Still, the snap-fit alignment was a win.
- Tinkercad trauma: Yes, it worked, but it felt like digging a tunnel with a spoon. Should've used Fusion360 from the start, but hey, showing range (and stubbornness).
- Resin printing is messy: Gloves, IPA, UV lamps—it’s a full ritual. But once you get past the “this might kill me” part, the results are gorgeous.
- Snap-fit casting worked better than expected: No zip ties, no bolts, no clamps. Just a beautiful, pressure-fit design that stayed together and cured properly. A small engineering win to close the week.
Overall, I learned that mold design is part art, part chemistry, and part stubborn refusal to give up. Also: always read the datasheet. Always.
Hero Shot
Behold, the sci-fi shrine. Green goo, laser printing, and just enough chaos to make it FabAcademy-worthy.