Interface and application programming
Throughout the 14th week of this FabAcademy course, we'll delve into using interfaces and application programming, alongside both group and individual assignments.
For the group task, the objective is to Compare as many tool options as possible. Document your findings on the group work page and reflect on your individual page what you learned.
Meanwhile, the individual assignment entails Writing an application that interfaces a user with input and/or output device(s) on a board that you made.
Group assignment week 14
What is an interface?
An interface is a point of interaction between a system and its users, where the exchange of information, data, or commands takes place. It can take various forms, such as a touch screen, a keyboard, a mouse, a control panel, or any other means that allows communication between the user and the system. The interface facilitates the operation of the system by providing an intuitive and accessible way for users to interact with it.
QT creator
Qt is a cross-platform application framework used for developing software applications with graphical user interfaces.
Qt is known for its versatility, efficiency, and ease of use, making it popular among developers for creating applications in industries such as automotive, medical, gaming, and more. It supports multiple programming languages, including C++, Python, JavaScript, and others, and offers features such as signal-slot connections, model-view-controller architecture, and extensive support for internationalization and localization.
My interface
After having Neil's class where they taught us various tools to create interfaces and how we can program them, our instructor Rafael shared with us how we can use the Qt application to create the interface. The application is very intuitive, as it is very simple. The first thing we did was to download this application. You can find the link for its download here.
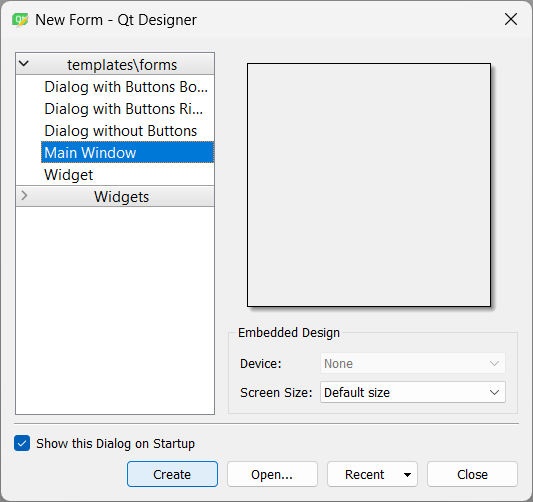
After downloading the application, we enter it and follow the next sequence of commands. We select Main Window/Create; in the following image, you can see the window that appears better and the buttons that need to be pressed for its correct use to start creating the application.
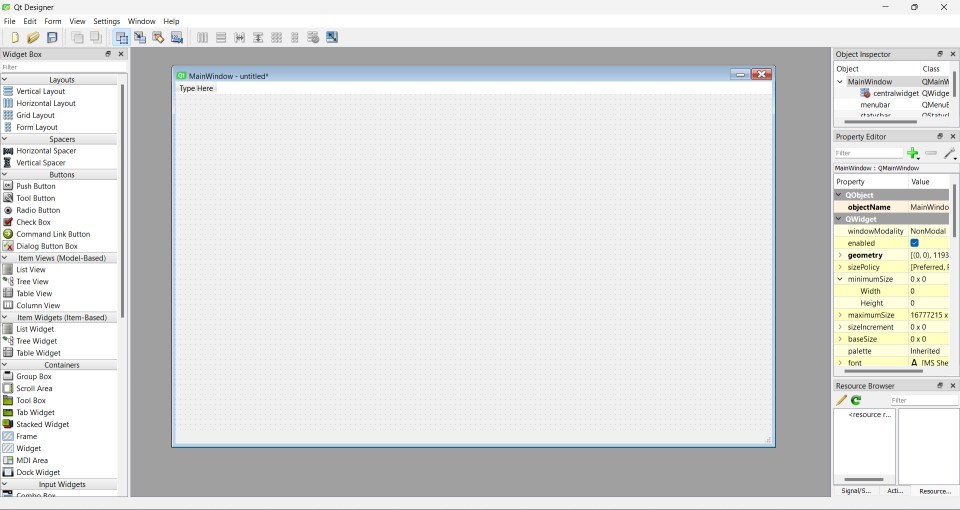
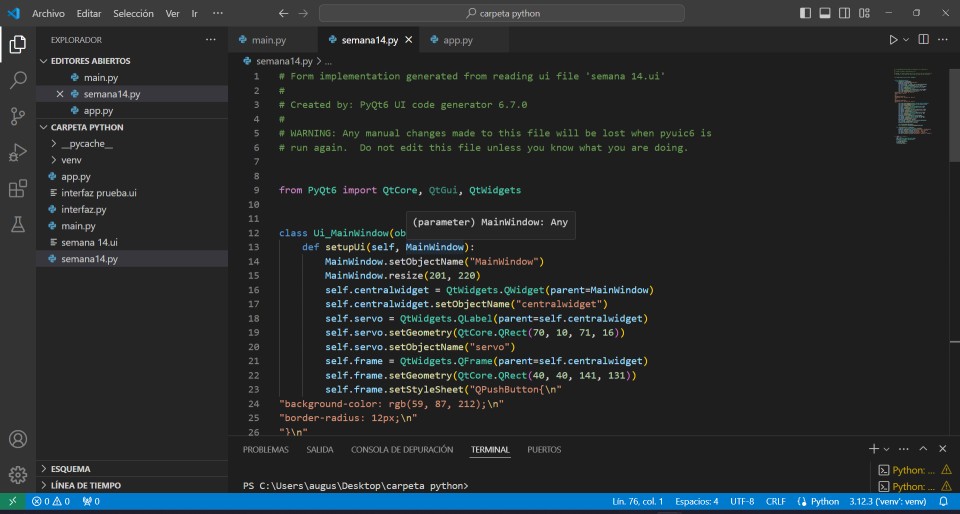
Having completed the previous step, a window will be created as shown in the following image. In that window, we will be able to design the interface correctly. On the left side of the screen, you can see the tools that we can use to create the application. Some of the tools that I will use to create the interface are buttons and text lines, which are found in the Button and Display Widgets sections, respectively. And on the right side, we find the options to be able to modify the application while we are working on it. One of these options is the name of certain objects, such as the name of the buttons. This is going to be very important to be able to develop the programming of the interface.
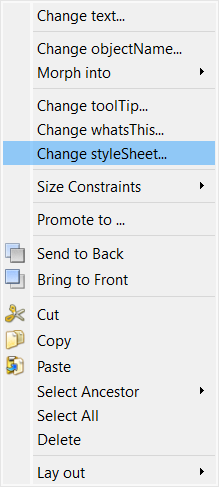
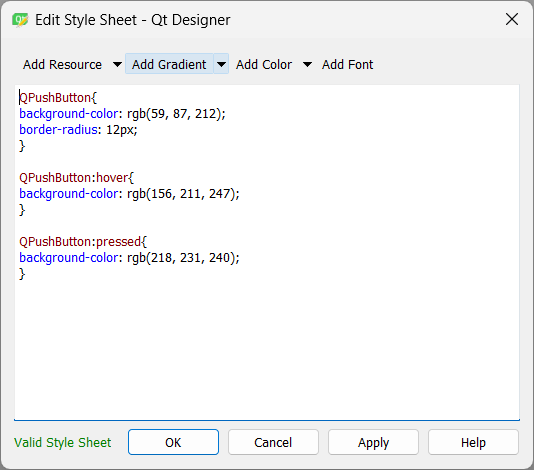
Once you have designed the interface as you desired, there are interesting options to modify at the moment of running the interface. We can access these options by right-clicking on the object we want to modify, in my case, it was the buttons, and then clicking on Change styleSheet. The following image shows how you can access this part.
Inside the window it directs you to, there's a C code compiler; in this section, you can add some design settings to the buttons. The first modification I made was to define that all the buttons in the interface will have a blue background and rounded corners with a radius of 12 pixels. The second one was to define that when the mouse cursor is placed over a button, its background color will change to a lighter shade of blue. The last modification was that when the user presses a button, its background color will change to a very light shade of blue to visually indicate that it has been pressed.
At the end of all these changes, we save them, and our interface should be to our liking. For example, mine ended up like this. Then we save the file.
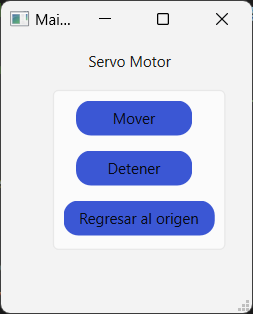
Note: Mover = Move, Detener = Stop, Regresar al origen = Return to origin.
Application programming
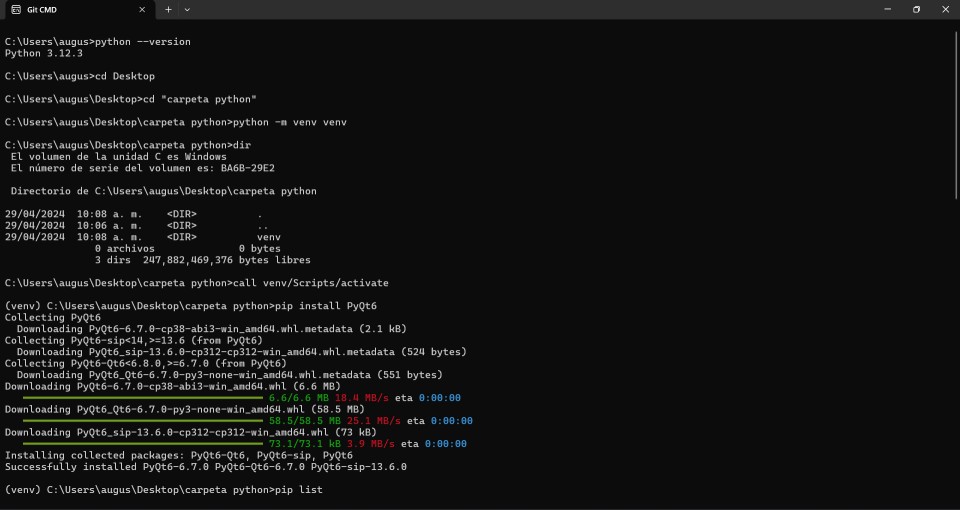
For this part, it's necessary to install the Python interpreter to facilitate communication between the interface and the code. The first step is to install Python; you can find the link to install it here.
Now it is important to create a new folder where you can put all the thing about This programer, for example libreries and other kind of things. The first thing is create a virtual space. This are all the steps that I´ve made to create one and to porgram in Python.
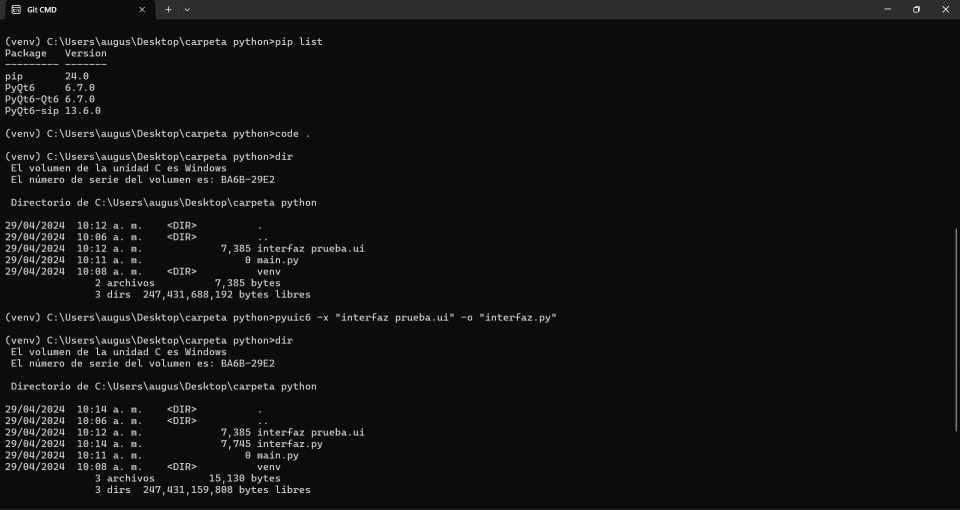
Now we open our Visual Studio Code compiler with commands so that the folders we have saved in .py appear. There is a significant difference between the .ui and .py formats, as in the latter, the code is significantly reduced, and we only call the interface we created using "import." At this point, it should look something like this.
Complete Interface Code
Using the "import" function
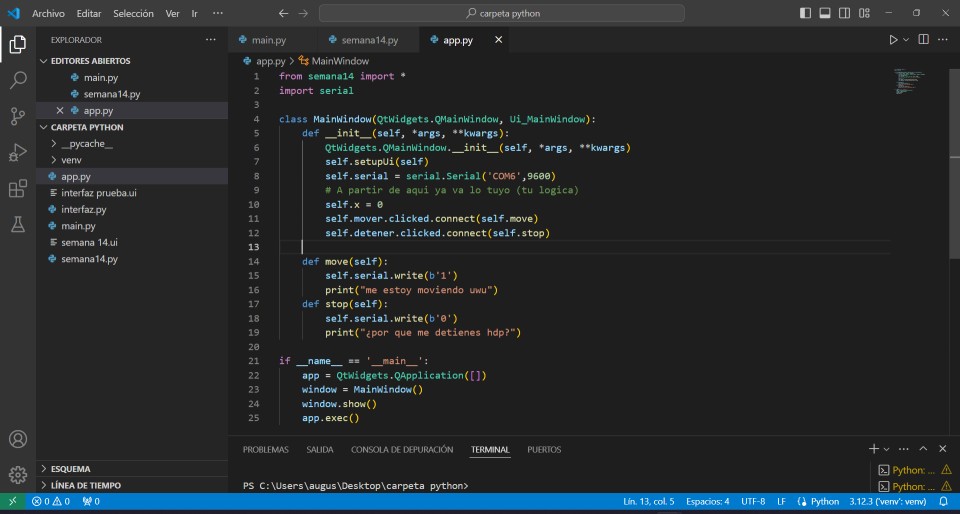
Now it's time to start creating the code to communicate the interface with the action we want to perform. In my case, what my interface does is move a servo motor, stop it, and return it to its original position. Here are the codes I used to bring the interface to life and to enable interaction with it.
Python Code
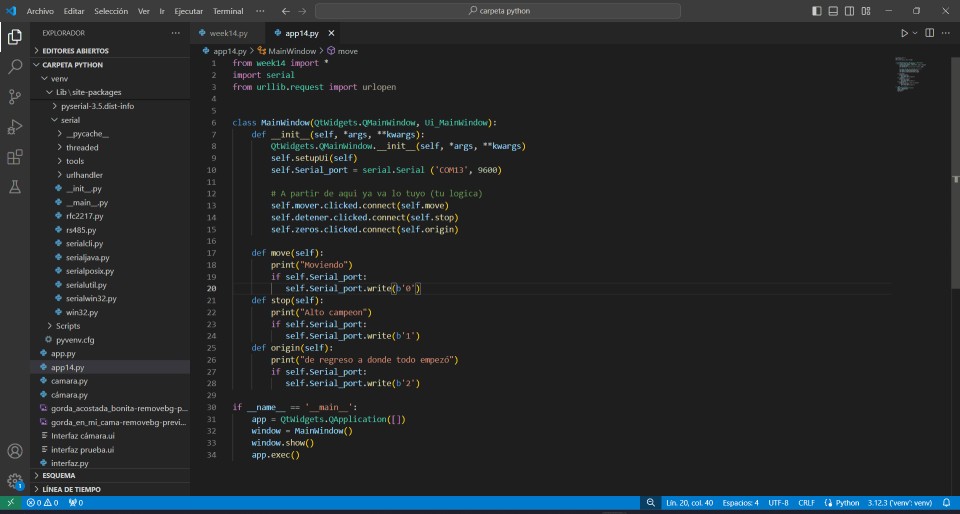
This code defines a graphical user interface application that communicates with a device via a serial port. Upon initialization, the serial port ('COM13' at 9600 baud) is configured. The buttons are connected to methods that send specific commands ('0', '1', and '2') to the device through the serial port. The application runs by displaying the window with the buttons.
C++ code

Initially, this code sets up serial communication and connects the servo to pin D0. In the main loop, it reads commands from the serial port: '0' moves the servo from 0 to 180 degrees, '1' stops the servo movement, and '2' stops the servo and resets it to the 0-degree position.
Interface working
Problems
| I couldn't export my interface from .ui to .py. | I asked my colleague Erick Guevara for help to teach me how to do it correctly. |
| Issues communicating the interface with the C++ code. | My colleague Olaf helped me set up the codes properly so that the interface would work correctly. |
| The interface wouldn't load despite the codes being correct. | I had to close the Arduino IDE serial monitor because I couldn't have two serial monitors active at the same time. |