3D Scanning and Printing
During this fifth week of the Fab Academy course you will be working with 3D printing and 3D scanning. As was done last week, there’s a group assignment and an individual assignment.
For group assignment we need to Test the design rules for your 3D printer(s) and document your work on the group work page and reflect on your individual page what you learned about characteristics of your printer(s).
Group assignment week 5
And for the individual assignment I need to design and 3D print an object (small, few cm3, limited by printer time) that could not be easily made subtractively and 3D scan an object (and optionally print it).
What is a 3D pinter?
A 3D printer is a type of additive manufacturing technology that creates three-dimensional objects by depositing successive layers of material, typically plastic, metal, or composite materials, based on a digital 3D model.
3D printing has different advantages such as: Creating complex geometries, efficient manufacturing, low material waste, fast creation of parts and light materials. But one of its inconveniences are: poor accuracy, part quality, production volume and size of printing.
All 3D printers are different, but all do their work perfectly, some may have a better resolution with some material and another with another or one that is special for a material.
Materials for 3D printing
PLA
PLA is rigid, has good strength, and provides good print quality. It is suitable for a wide range of applications and is ideal for printing decorative objects, prototypes, and parts not subjected to loads or high temperatures.
ABS
It is a tough and durable plastic with good impact resistance. ABS is more difficult to print than PLA as it requires a higher extrusion temperature and can have warping issues if not using a heated print bed or a closed chamber system.
PETG
PETG combines the characteristics of PLA and ABS, offering good strength, durability, and ease of printing. It is more flexible than PLA and ABS, and has good chemical resistance. PETG is suitable for a wide variety of applications, including resistant parts, packaging, and functional objects.
NYLON
Nylon is a strong and durable material that offers high tensile and impact resistance. Nylon requires a printer with specific features, such as a heated print bed and a closed chamber.
TPU
An elastic and flexible material used in 3D printing. It is characterized by its ability to deform and return to its original shape repeatedly without damage.
Supports
| Structure | They resemble trees with branches that support the model. | They are denser and more solid structures that are placed under the protruding parts of the model. |
| Ease of Removal | They are easier to remove after printing as they have fewer points of contact with the model and can be removed with less effort. | They may be more difficult to remove, especially in complex models, due to their denser, interlaced structure. |
| Surface quality | They usually result in better surface quality in areas where they are removed, as there are fewer marks and residues. | Can leave marks on the model's surface where they're removed, requiring more post-processing work to smooth out. |
| Strength and Stability | Provide adequate support for most models and may be more stable in certain cases. | Offer greater strength and stability overall, especially for large or complex models. |
SINDOH 3DWOX 1
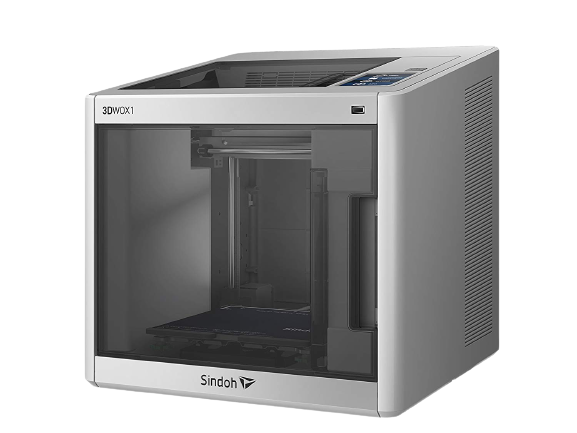
The 3D printer I used for this assignment of the week was a SIDOH 3DWOX 1, I used this as its software to send a file to print is very simple and easy to understand. These are some of the features.
- Printing Technology: FDM
- Build Volume: 210 x 200 x 195 mm
- Printing Speed: 200 mm/s
- XY resolution: Not Given
- Layer Height: 0.05 - 0.4 mm
- Nozzle Temperature: Up to 270° C
- Supported Materials: PLA, ABS, PETG, ASA
3D Modeling
For 3D printing I decided to make a ball that is trapped in a box. I made this design because it is very difficult to do it by other means such as laser cutting, the 3D software that I used to make the part was SolidWorks.
Note: The units of measurement I will be using are millimeters (mm)
The first thing I did to make the figure was to draw a square of 50x50 mm and extrude it with a volume of 50 mm, leaving a perfect square.
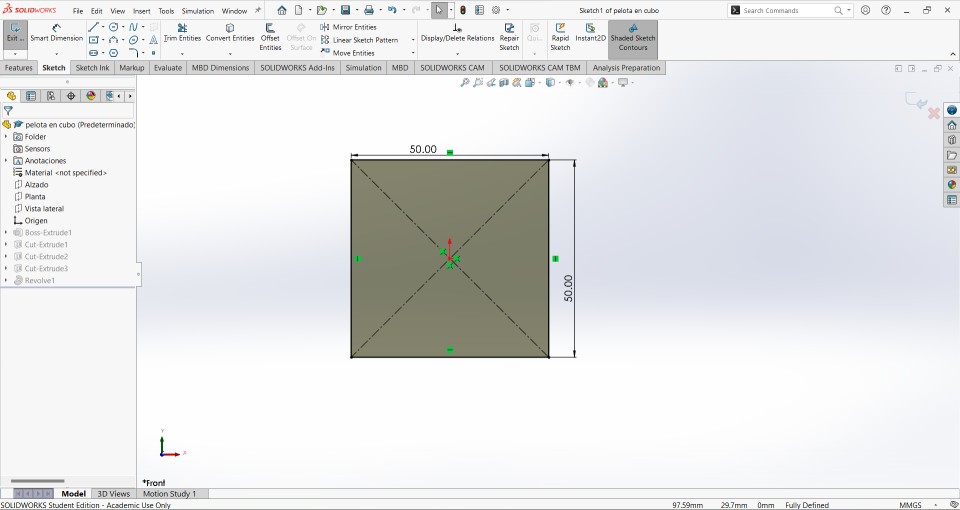
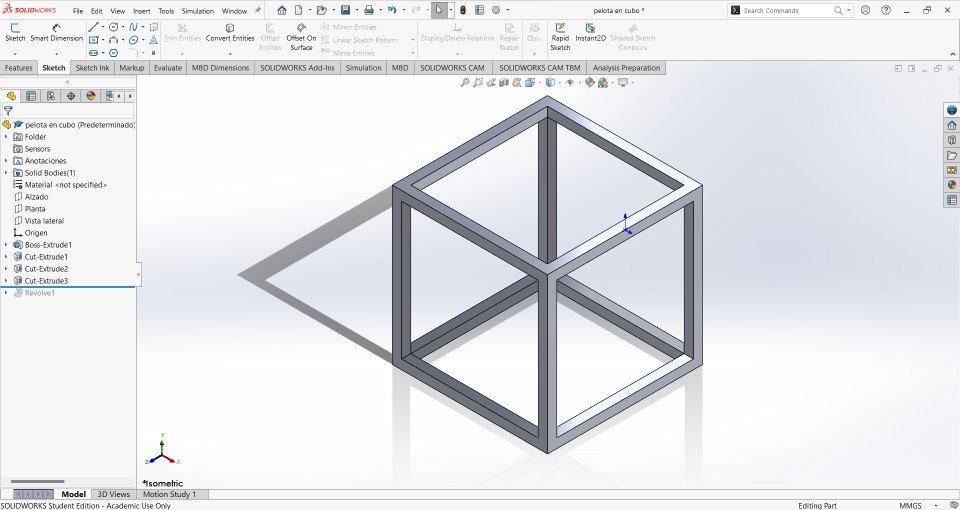
The next thing I did was make an equidistanced cut to 10mm from the vertices of the cube, I did this for the 6 faces of the cube.
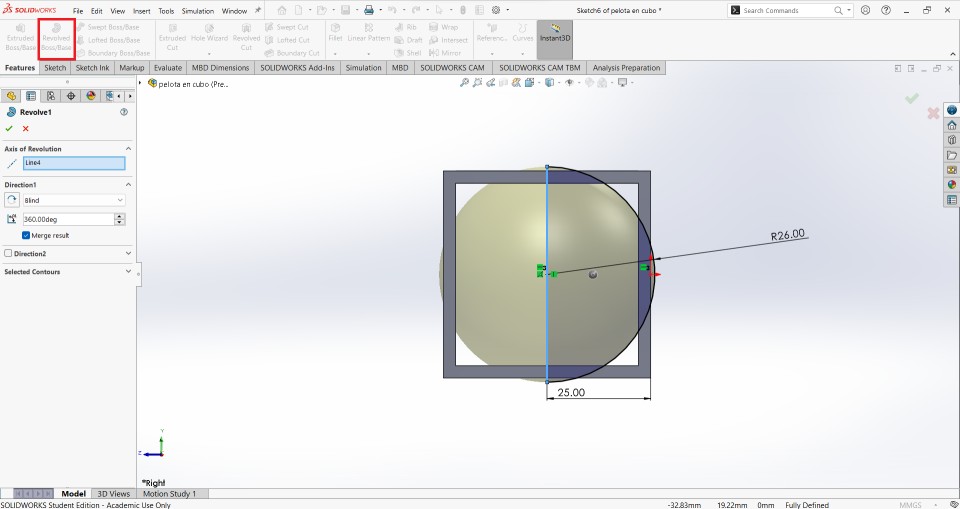
Now, the most important step is to make a plane inside the previously cut cube, this is done to be able to draw the ball in. The design of the ball was 26 mm radius at a distance from the center of the ball to a 25 mm edge.
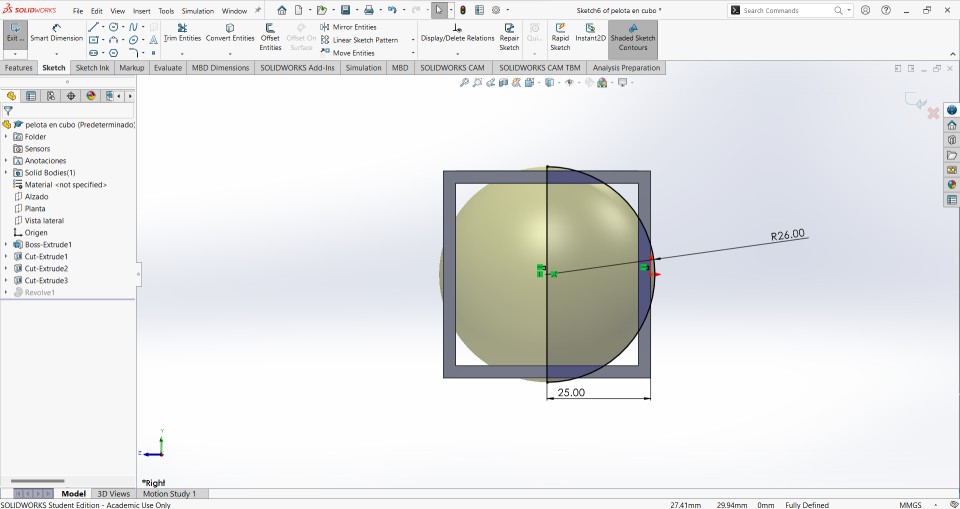
With the help of the revolved tool the ball will take shape and will stay inside the cube.
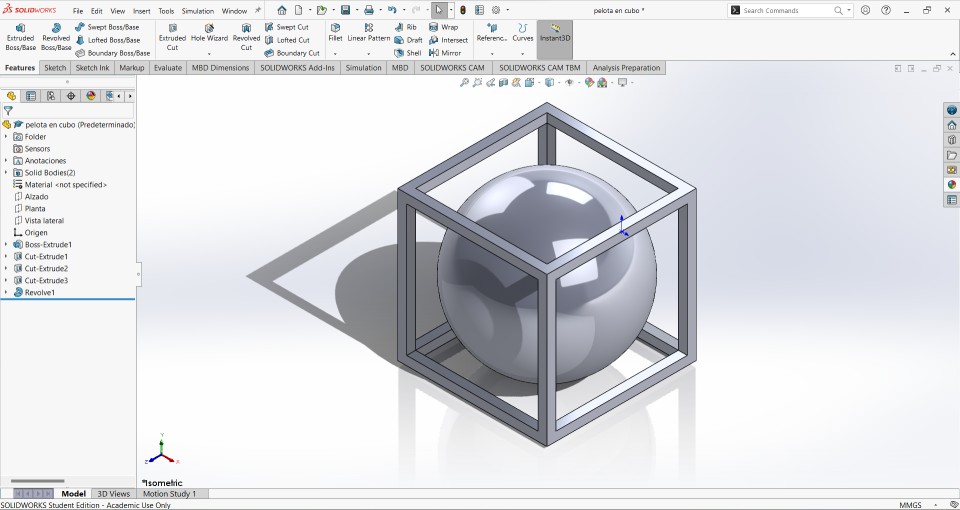
This is how the piece should look.
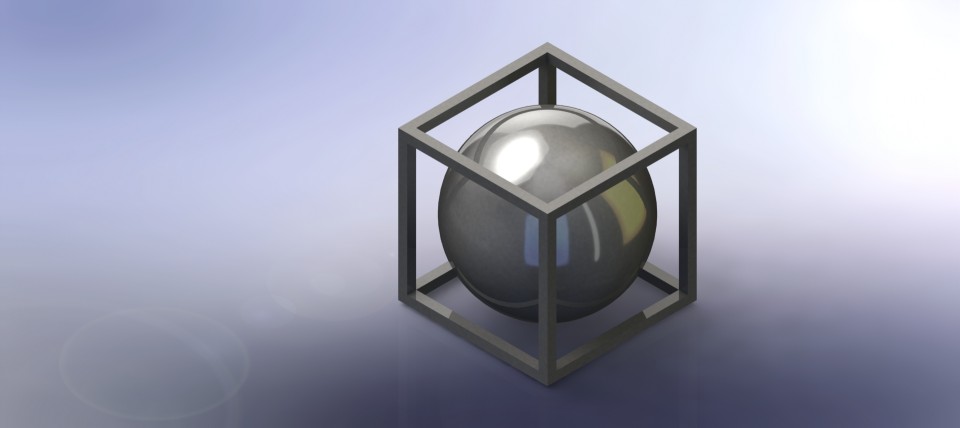
This is how the final piece looks with a rendering.
Now, It's time to save the part as STL file
Here you can download the file
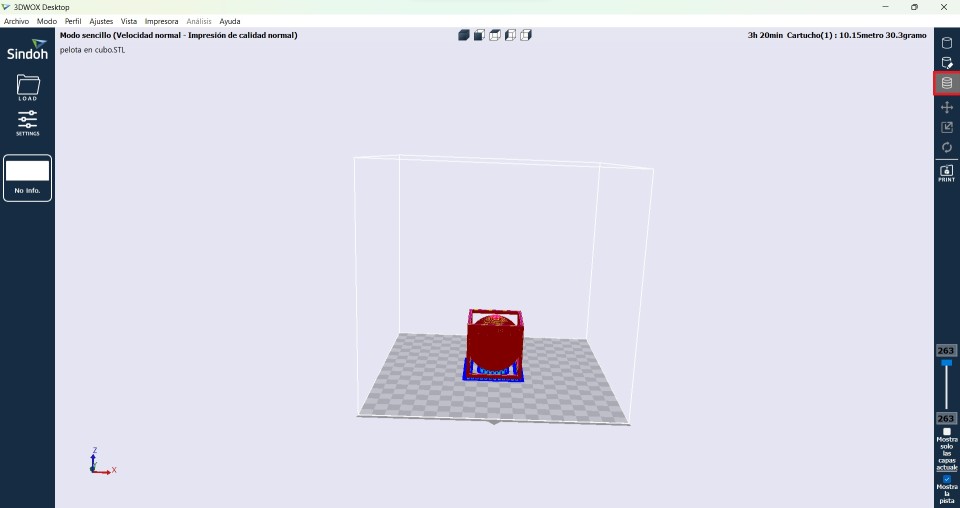
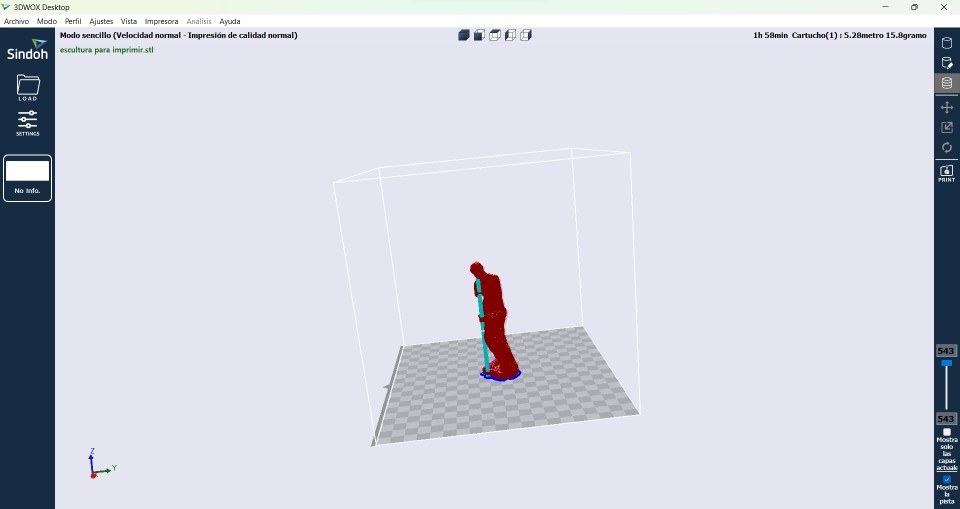
With the design already done it is time to pass it to the 3DWOX Desktop program in STL format to get the .gcode file
Here you can download the software of the printer.
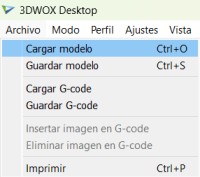
Steps to modify a file in 3DWOX software
1.- upload the file
2.- go to the settings section

3.- we select the option of only touch the bed
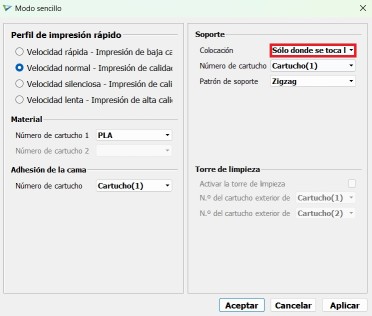
4.- Using the tool in red box we can see how the printing process would be along with the time it will take
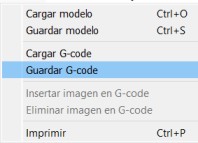
5.- Save the file as .gcode
Using the 3D Printer
1.- Insert the USB
.jpg)
2.- Select the file you want to print
.jpg)
3.- Start Printing
.jpg)
3D printing
This is the result of the 3D printing
.jpg)
Video printing
3D Scanning
A 3D scan is the process of capturing the three-dimensional shape and appearance of a physical object using special devices called 3D scanners. These devices use different technologies, such as lasers, structured light or photogrammetry, to record the geometry and texture of an object from multiple angles and generate an accurate digital representation in three dimensions.
With the help of 3D scanning it is possible to digitize objects that would be difficult to design through some program, apart from that, it would not look like the original model because in some cases you do not have the exact measurements. But with this tool this would not be a problem since, it would be using the same object with its unique characteristics, apart from being scaled in digital.
EinScan-SP
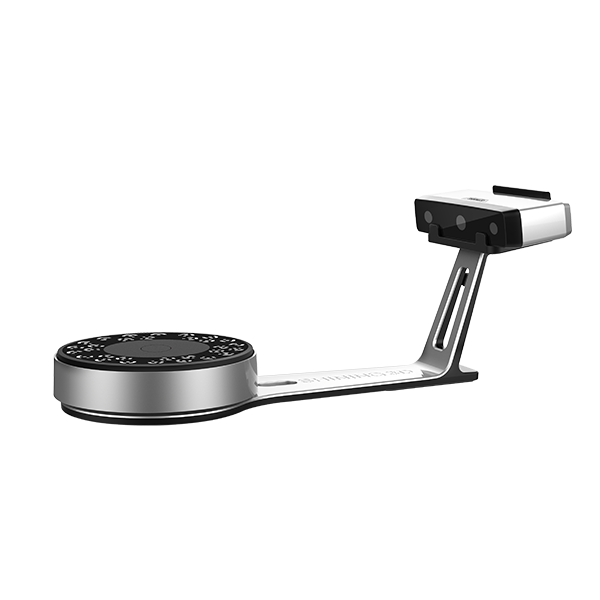
The scanner that I used for this task was EinScan-SP with its respective program to be able to do scanning. These are some of the features.
- High fidelity certified by an accuracy calibration process
- Faster 3D scanning
- High resolution 3D modeling accessible to professional users
- Meets the demands for high-quality 3D modeling in reverse engineering and design
Steps to use the EinsScan-SP
1.- First calibrate the scanner
.jpg)
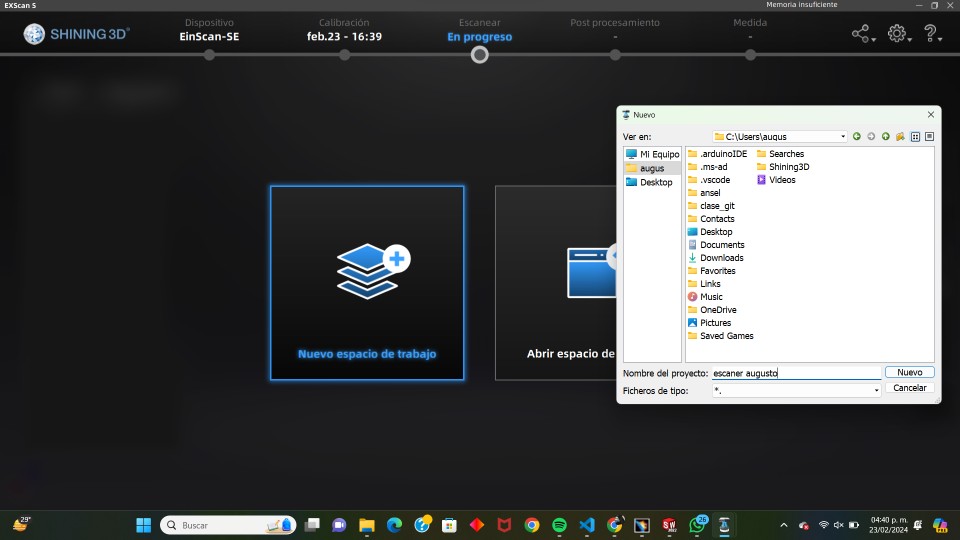
2.- Create a new project
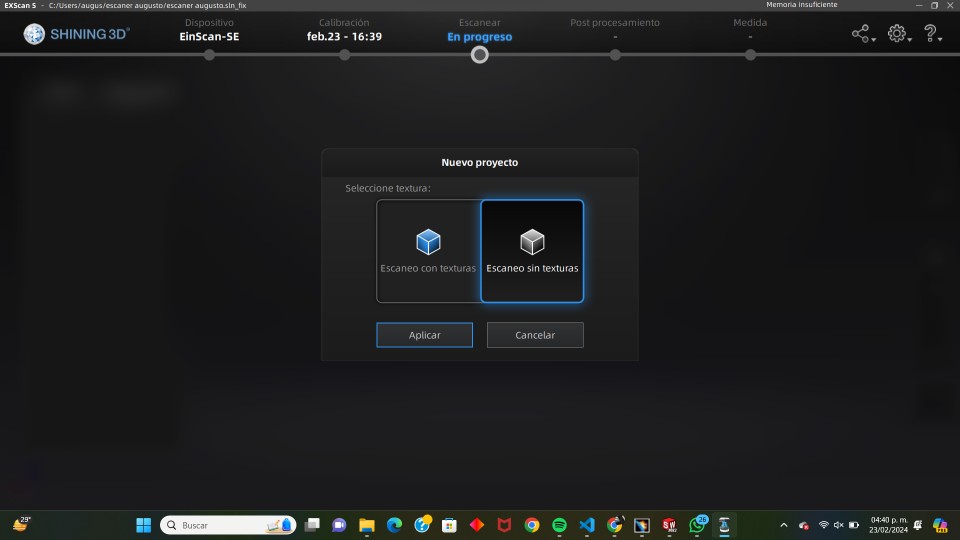
3.- Select scan without textures
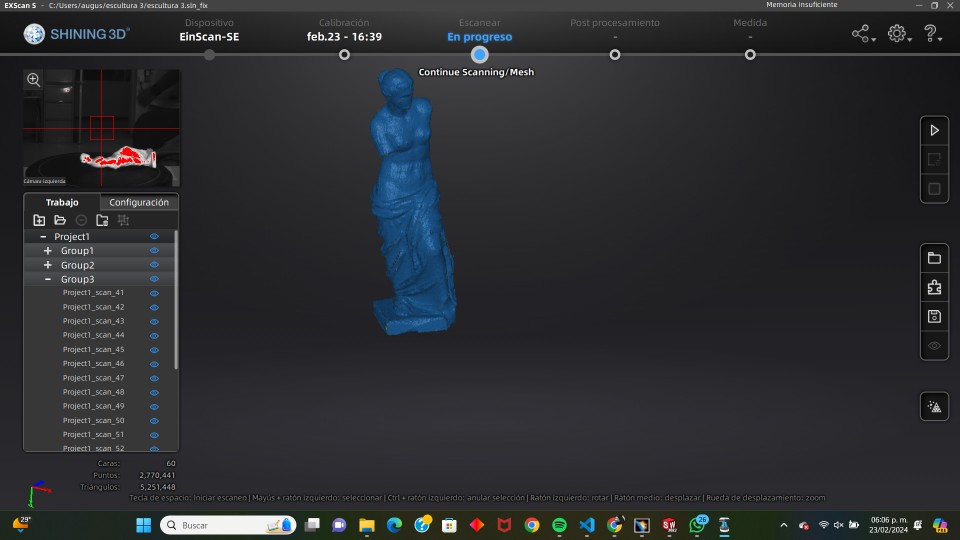
4.- put the part in the rain where it will be scanned
.jpg)
5.- finished scanning
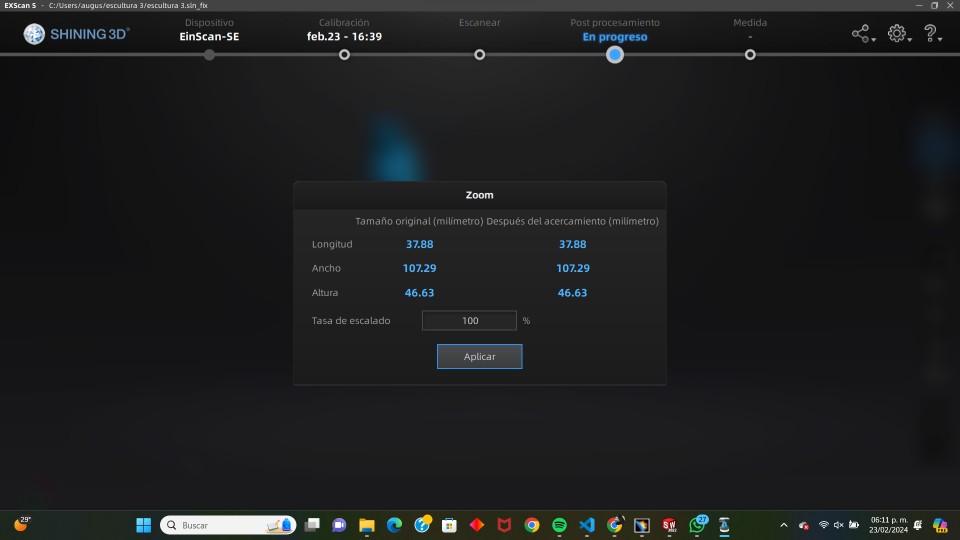
6.- save the file in stl format
Printing the model of the scan
Using the same program that I use to print the first piece, I will reuse it for this scan and proceed to print it. Following the steps used in the last piece, this is how the piece would look to be sent to print.
After 2 hours of printing the part, this is how the final result was.
.jpg)
Removing the supports, this is the result of 3D printing.
.jpg)
The results were not as expected for this printing, this due to the type of support that had the figure and unfortunately these support can not be changed in this printer so I will change 3D printer to get a different result. The printer I’m going to use is going to be an ENDER 3 S1 PRO.
ENDER 3 S1 PRO
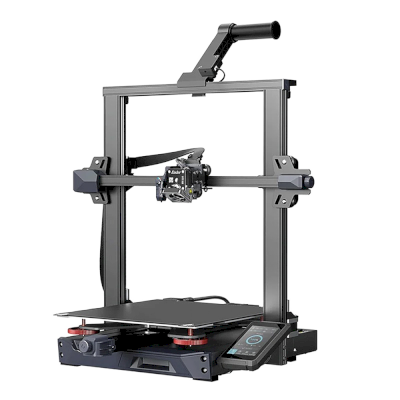
- Printing Technology: FDM
- Build Volume: 220 x 220 x 270 mm
- Printing Speed:150 mm/s
- XY resolution: 0.1 mm
- Layer Height: 0.05 - 0.4 mm
- Nozzle Temperature: Up to 300° C
- Supported Materials: PLA, ABS, PETG, TPU, PA, WOOD
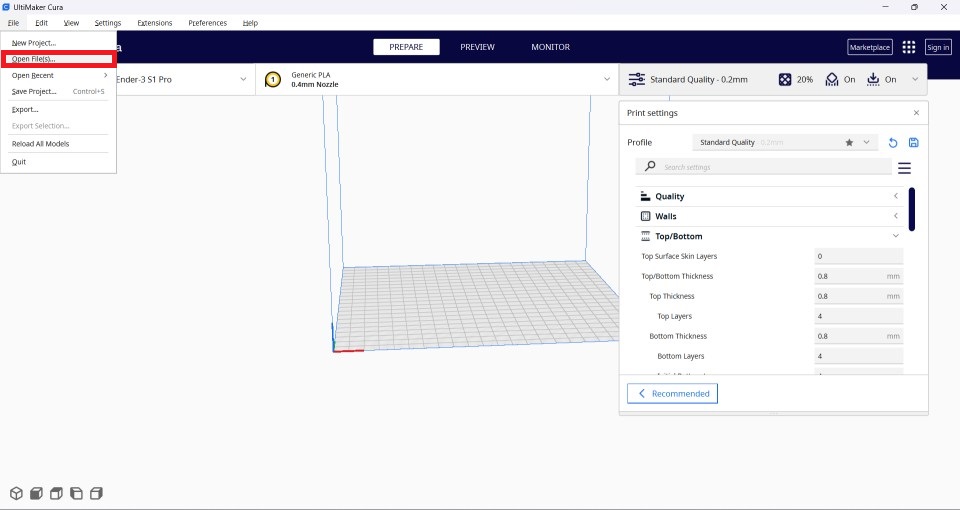
The printing process is a little different from the 3DWOX, in this you have to use the Ultimaker Cura program to generate the supports you want, the speed of printing, the temperature of the bed, the filling of the part, etc.
To start using UltiMaker Cura we need to open the file that we want to print in . STL file, it is important that it be in this file since it is the only one that you can open in the program.
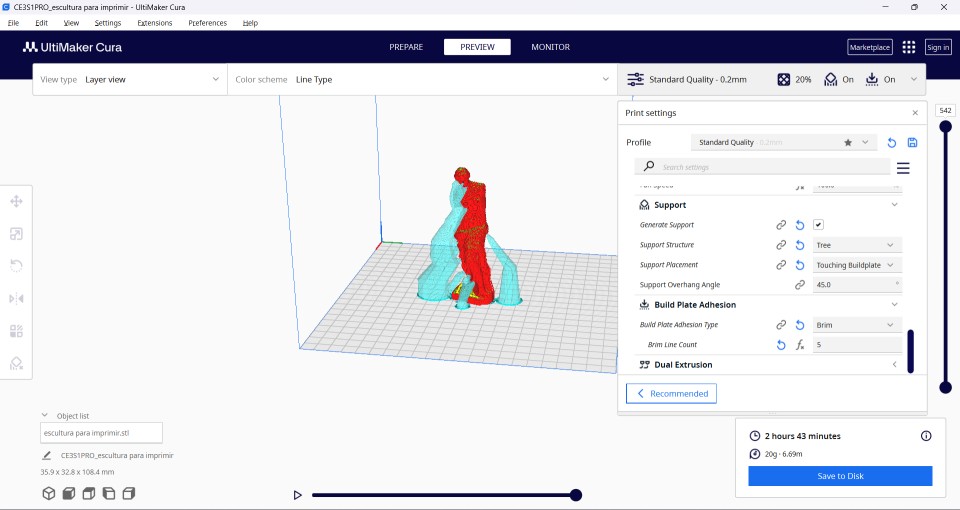
The only changes I made were:
- Temperature of printing: 210 °C
- Build plate temperature: 65 °C
- Print speed: 60 mm/s
- Support structure: Tree
- Build plate adhesion type: Brim
After opening the file that we are going to print and making the modifications that we are going to make it is time to click on Slice and later on preview. This is how you should see the figure to print it.
Now I just have to save it to the SD memory that the printer has and send it to print.
This is the ender printing
After almost 3 hours of printing, this is the result of printing.
.jpg)
.jpg)