12. Molding and Casting
Another creative week that really caught me by surprise, the tasks for this week are: in Group Review the safety data sheets for the molding and casting materials, make and compare casts and resin printing vs milling moulds; Individually: Design a mould around the process you’ll be using, with a smooth surface finish, and use it to cast parts.
This was a fun week, with the exception of the long queues produced by the complex finish needed. some partners finish took around 5 hours, making the schedule one of the issues of the week, the other time consuming section was the silicone negative mould that lasted many hours without an oven treatment.
From the Group Assignmemnt: link
Silicone full Datasheet: link
Datasheet of the materials
| Mold Material | Reproduce the finest details | Design Rules | Pros | Contra | Release agent | Cost | Time |
|---|---|---|---|---|---|---|---|
| Milled Wax | Yes | Only positive angles for machining |
|
|
Does not need | ++ | 1:54 |
Silicone important Information resume
| Section | Information |
|---|---|
| 4 - First Aid Measures | |
| Inhalation | Remove source of contamination, move victim to fresh air, give artificial respiration if needed, contact physician immediately. |
| Eye Contact | Flush eyes with plenty of water, seek medical attention if irritation persists. |
| Skin Contact | Wash thoroughly with soap and water. |
| Ingestion | Do not induce vomiting unless instructed by a physician, never give anything by mouth to an unconscious person. |
| Symptoms/Effects | None known. |
| After First Aid | Get appropriate medical support. |
| 5 - Fire-Fighting Measures | |
| Extinguishing Media | Water Fog, Dry Chemical, Carbon Dioxide Foam. |
| Special Hazards | None known. |
| Firefighter Advice | Use water spray to cool surfaces, shut off fuel to fire, use SCBA with full-face piece. |
| 6 - Accidental Release Measures | |
| Personal Precautions | Only properly protected personnel should remain in spill area, dike and contain spill. |
| Environmental Precautions | Prevent spill from entering sewers or waterways, use barriers like sand or earth. |
| Containment/Cleanup | Use protective gear, dike and contain spill, absorb or scrape into suitable container, wash area with dilute ammonia solution. |
| 7 - Handling and Storage | |
| Safe Handling | Use good housekeeping, wash hands after use, avoid contact with eyes, skin, and clothing, do not breathe vapors or mists. |
| Safe Storage | Store in cool, dry, well-ventilated place, away from heat, direct sunlight, and strong oxidizers. Keep containers sealed when not in use. |
| Specific End Use(s) | Precautions for room temperature handling, additional precautions for elevated temperatures or spray applications. |
| 8 - Exposure Controls / Personal Protection | |
| Control Parameters | None defined. |
| Respiratory Protection | Not normally required with adequate ventilation. |
| Hand Protection | Wear liquid-tight gloves (butyl rubber, neoprene, PVC). |
| Eye Protection | Safety glasses with side shields (OSHA 29 CFR 1910.133, EN166). |
| Other Protection | Provide eye bath and safety shower, additional protective clothing not normally required. |
| Comments | Practice good personal hygiene, especially before eating, drinking, smoking, or applying cosmetics. |
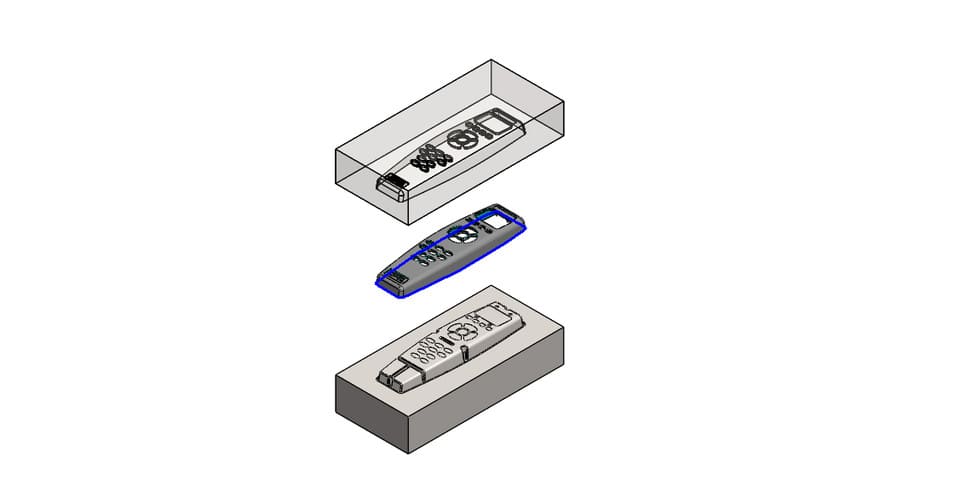
Why a 3D mould
When you need to fabricate any piece, you can make a mould of it to get a faster manufacturing process. The easy way is to make a piece and then make a mould of it, but the way we are doing it here at the fabacademy is by creating a 3D object and then making the mould for it, depending on the casting material you plan to use, the way you are placing the figure in the 'box'.
Positive and negative moulds
-
If your plan is to directly cast the material in the mould, you make a female one where the material will take the shape and that will be your final piece, if you plan to cast a material that is not directly compatible with the 3d or milling mould make a male part to cast a stronger material to make the mould and then cast in that one.
In my case, i want to use a wax block for the milling process, if i plan to cast a hot material it's extremely probable that the wax will diform, so i'm creating a positive mould in the wax block, and then casting silicone in it to create the final mould, in other words the negative one.
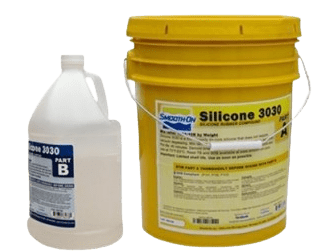
We used the Smooth-On Silicone 3030 as it gives smooth finishs, it's easy to apply just following the 10 raw silicone to 1 catalyst rule, then mix them for 5 minutes in a cartoon cup and pour delicately.
It's recommended to wait for a day long for the silicon to completely cure in rooom temperature.
Always clean your hands after interacting with the pre-cured mould.

Creating the 3D mould
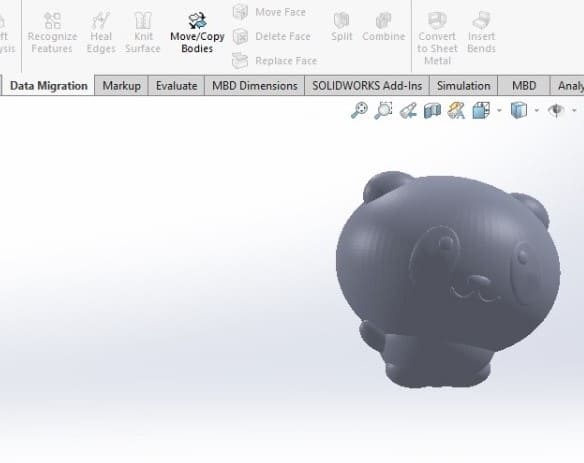
Using the move/copy bodies tool from the data migration section and the scale tool from the mould tools, i imported a .stl that i wanted to creat a mould from. solid works have tools to easily make a mould from a piece however this not applies to complex pieces with a high number of triangles or that doesn't have a plane surface, that's why i have created manually the mould, including a pouring cup and an air flow hole, also the mould needs to have a simple fit mechanism and keep in consideration the minimum milling size (depending on the tool used).
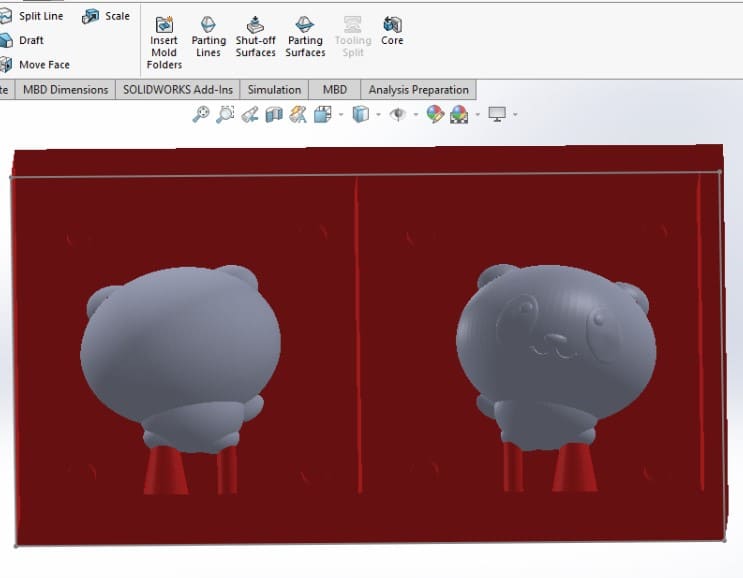
Then in Tinkercad i removed the lower exceded parts of the pandas.
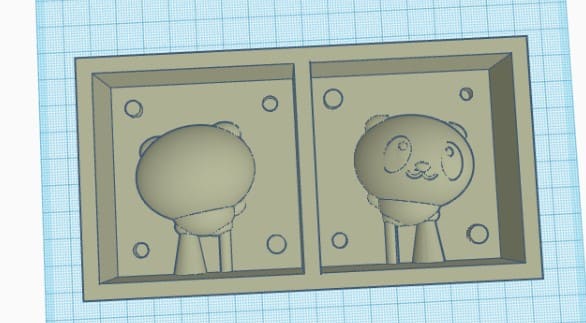
-
solidwork and final files:
The next decision was to see whether to do it at the cnc or wait for the roland mini mill, at the end i made the 2 post-processing files.
Vcarve Pro
We use the v carve pro v.9 for the function to work with 3d objets like .stl and .obj because the previous versions doesn't have it.
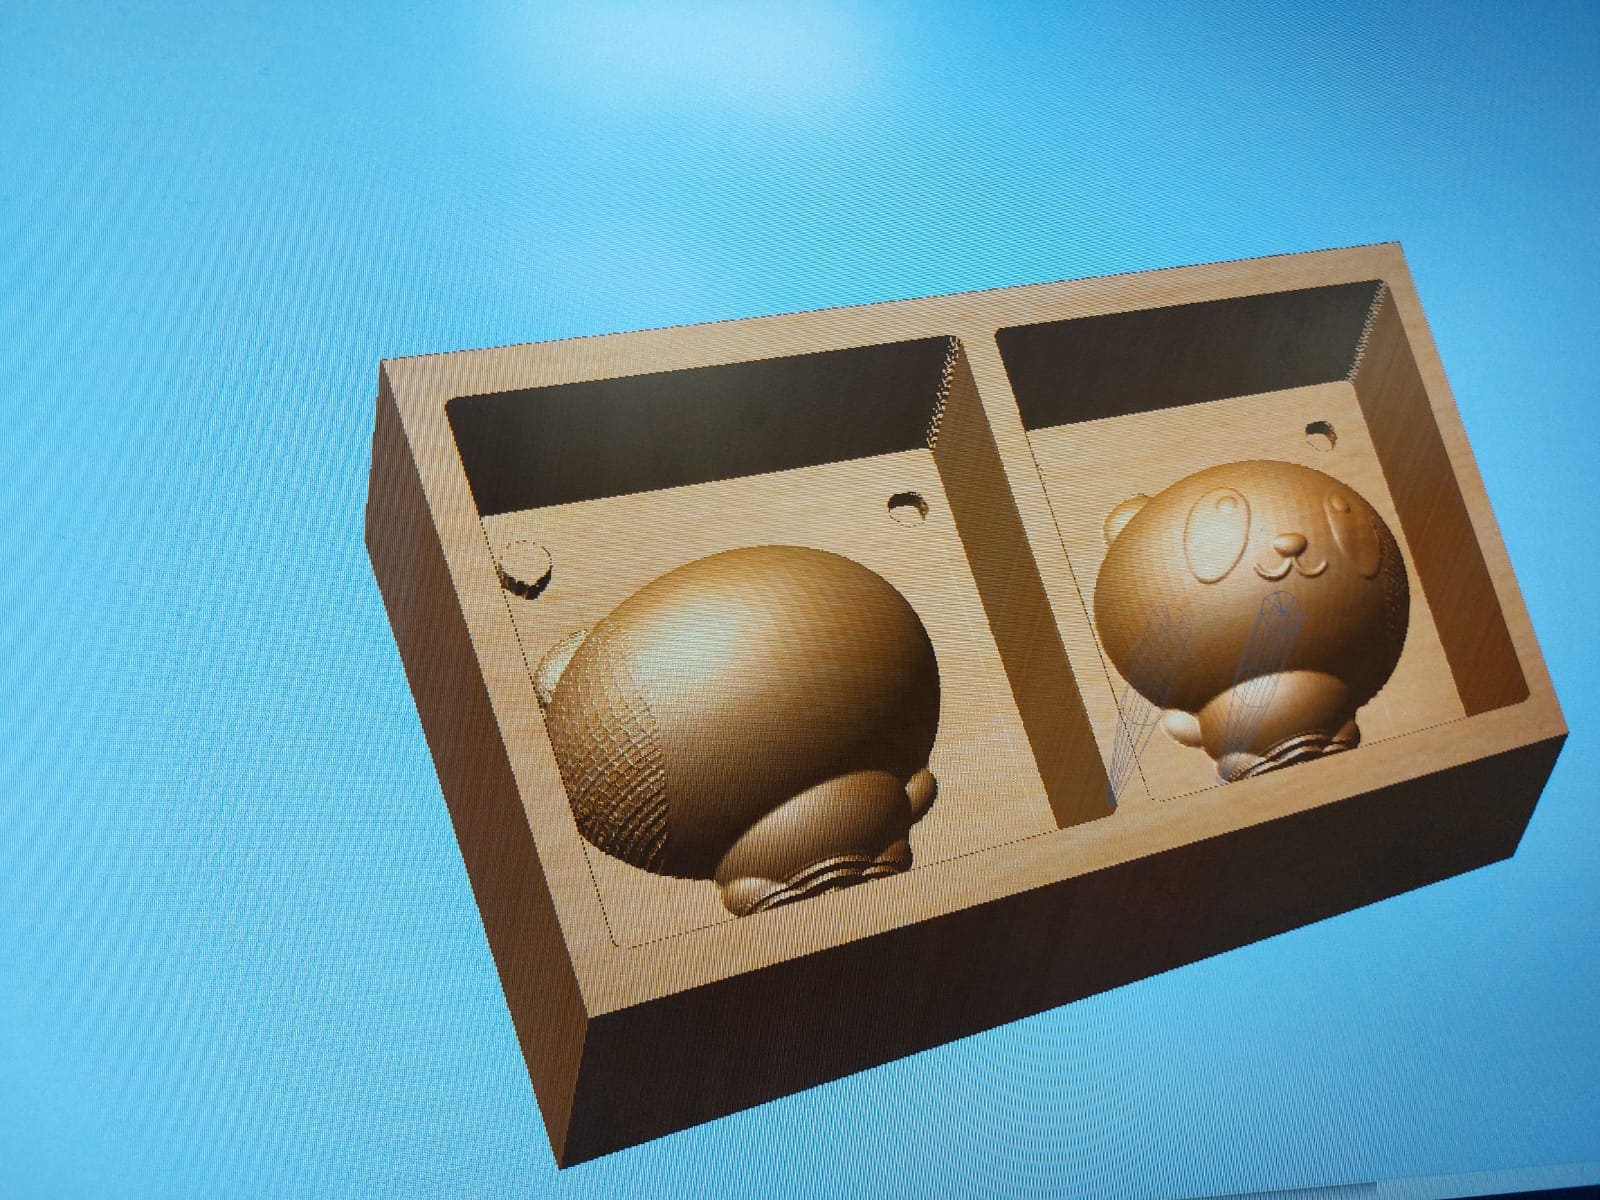
If your design is horizontal keep the meassures of the wax as in the first image, if vertical alternate the x and y coordinate, then go the third row in the tools section, those are designed for the 3D rough and finish, when clicked you need to set the thickness, origin, z position, the initial position or first move, and the amount of drop, depending in the size of your tool spiral, a little less for security reasons for each Mill or ball tool.
Preview from the Vcarve Pro
SRP PLAYER
As the mini mill is smaller use the 65% of the total model, then a set of options will show deppending on the mould, you will probably need to add your tools in the tools tab, in the 3rd step click on edit and correct the tool you will use for the operations and specify the amount of cut, now you might set enough workplace, have in onsideration that this software has the option to use many tools some of them need to enter from the side of the wax, that's why the big requirements shown, allign on top and create the toolpath, in last step you can get the files or go straight to the cut, keep in mind that the origin of this piece will be on the center not in the inferior left.
Because the machining times were so high, even with established times there were several mishaps, so I ended up using the Roland, with a reduced size for the tool to arrive that also transform the mould because there was room to make a mould on the top and the bottom.
I don't exactly know why but, the srp player suddenly stopped while making the preview and during the milling process, to fix it you can output the cuts as documents to upload to the classic v-panel for rm-20 they come out individually for you to change the tool.
Roland RM-20 working
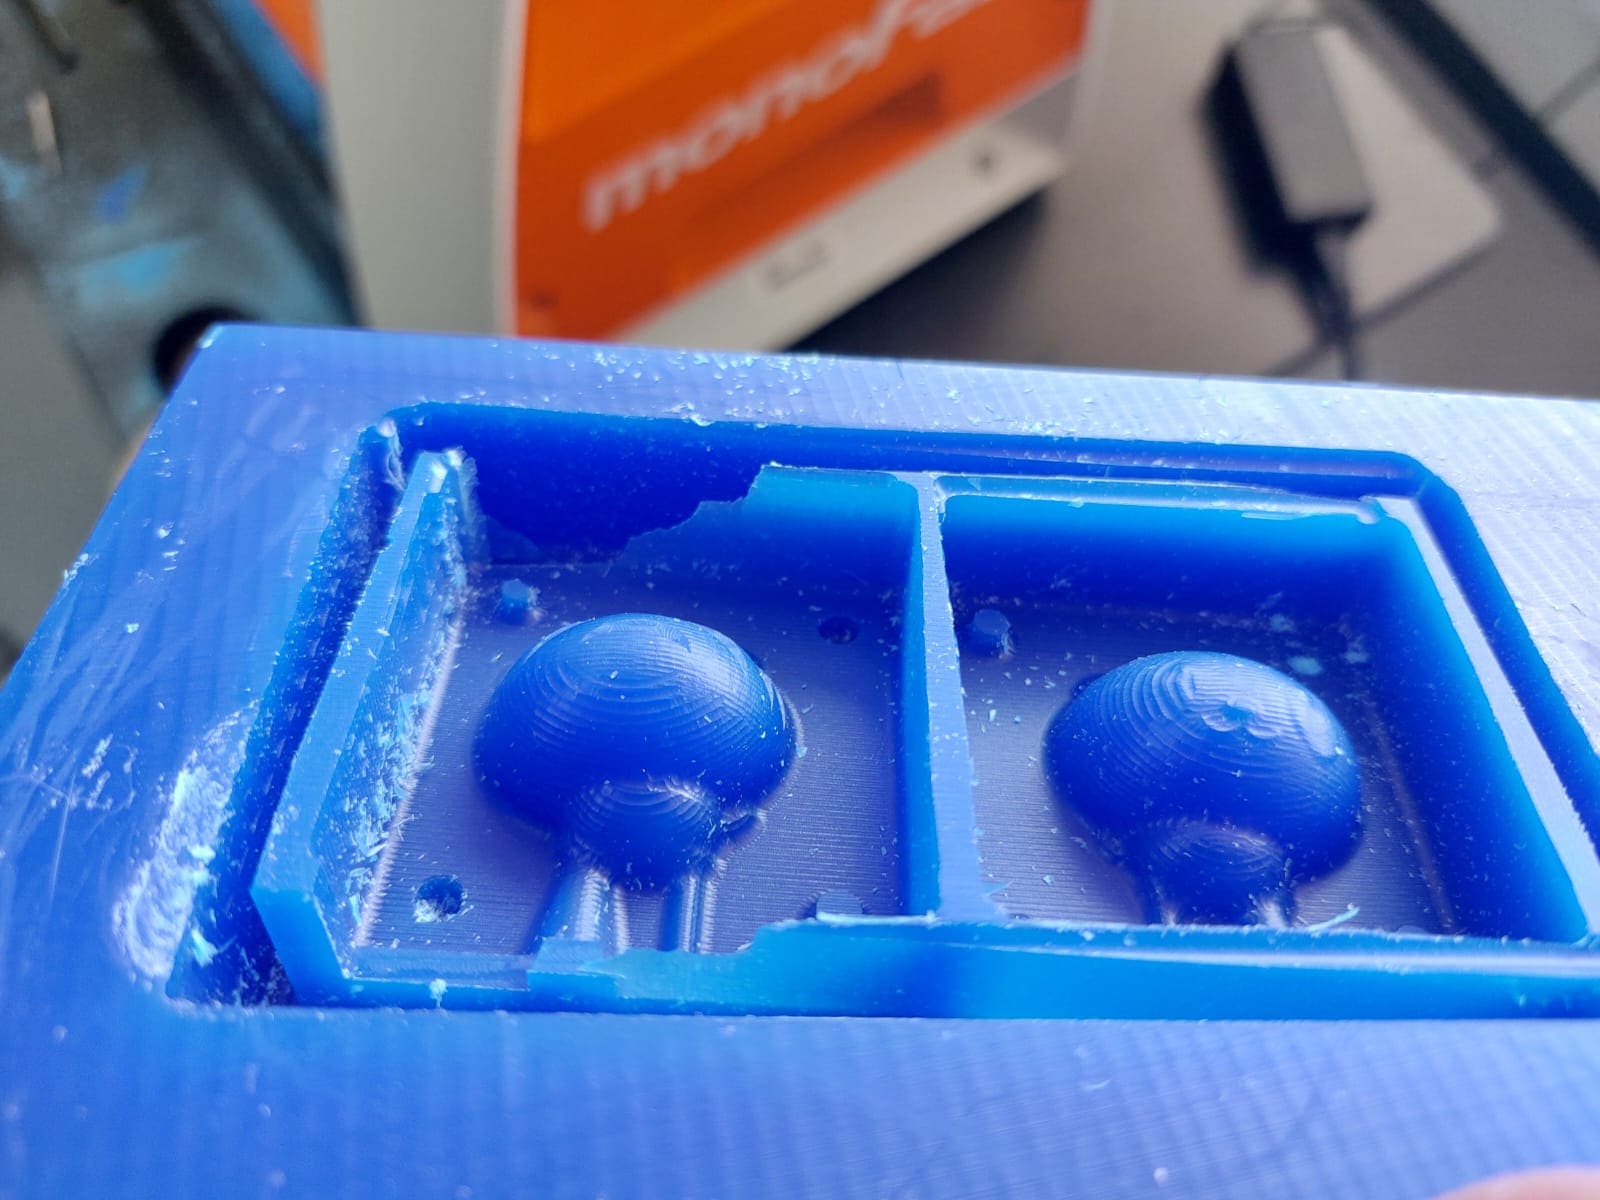
-
A fab classmate by mistake moved my mould before the finish began so I had to try prepositional, but unfortunately it was a bit unaligned and lowered the walls very much to the point that they broke.
The good thing is that the finish resulted quite well and only needed to add a more silicone to fill the shores, also the milling left few remains in the unions, that with the help of a screwdriver went away.
-
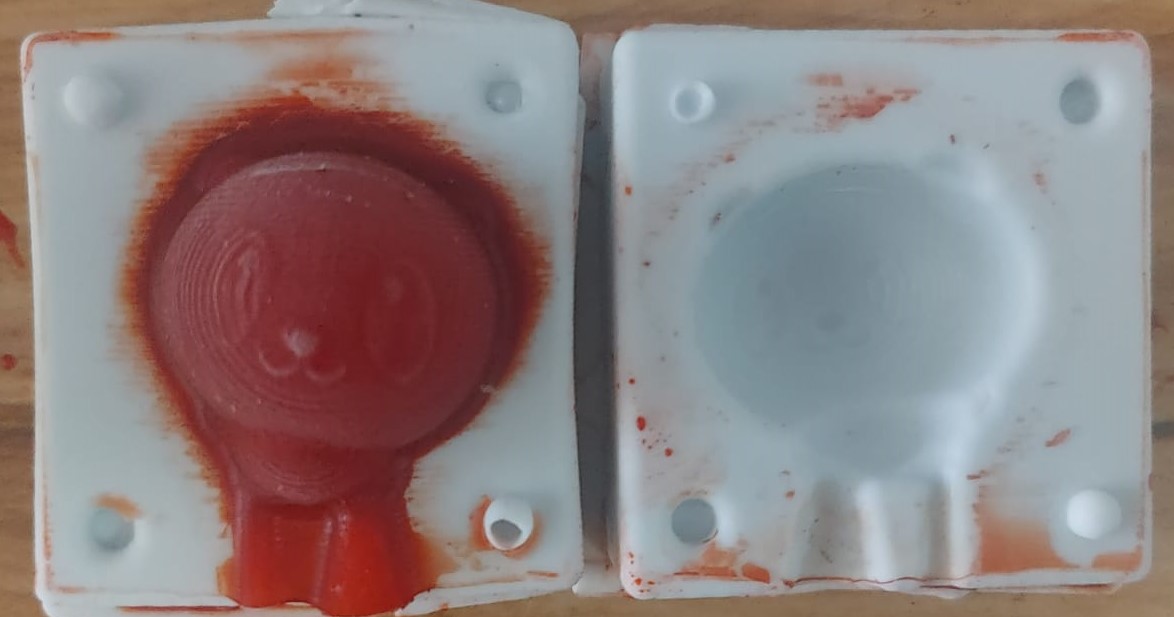
Casting in the cast
As the obvious steps i filled the wax mould with the silicone, wait a day for it to cure, remove it and using scissors cutted the extra material, saw that both parts can enter again in the mould and the wax one stills recastable if one of the silicone ones want to broke, with this silicone mould i can cast many materials that need to get above the 70°C, for now with the limited time i filled it with water and get almost a perfectly rounded circle helpping me with some rubbers to keep them fix.
When i get enough time i want to cast some resin as the mold can handle almost all the temperatures.
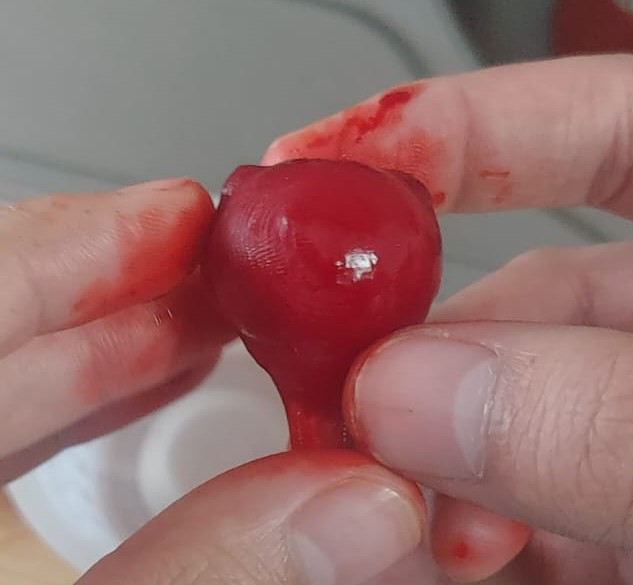
Trying to get a better cast
the first time I did the cast just with water and the mold was not appreciated so well, I saw that some colleagues used gelatine and were of better "resolution", i tried to do it, but because my mould is a two piece for one cast the gelatine split, so i passed to red colored ice.
Final reflection
The process of creating molds within digital manufacturing seemed fascinating to me, it always seemed something very complex to create molds but we have two ways by means of milling and resin printing to create pieces with perfect finishes, really following some rules you can make a very high quality mold for any piece, although the wax block may seem a bit expensive at first if you plan to make many pieces you can do what I do of making a positive mold and with a silicone emptying if it comes to break you do not worry at all.