5. 3D Scanning and printing
Previously, I WAS LATE IN WEEK 3--what a terrible decision! Well, this week we'll learn about the hobby of mechatronics, 3D printing, the parameters needed and time saving hacks. In addition, 3D scanning with its own various methods.
First time making something 3d printed
-
3D print
Wall thickness:Choosing a good wall thicknes helps saving material and giving resistance to the piece.
-
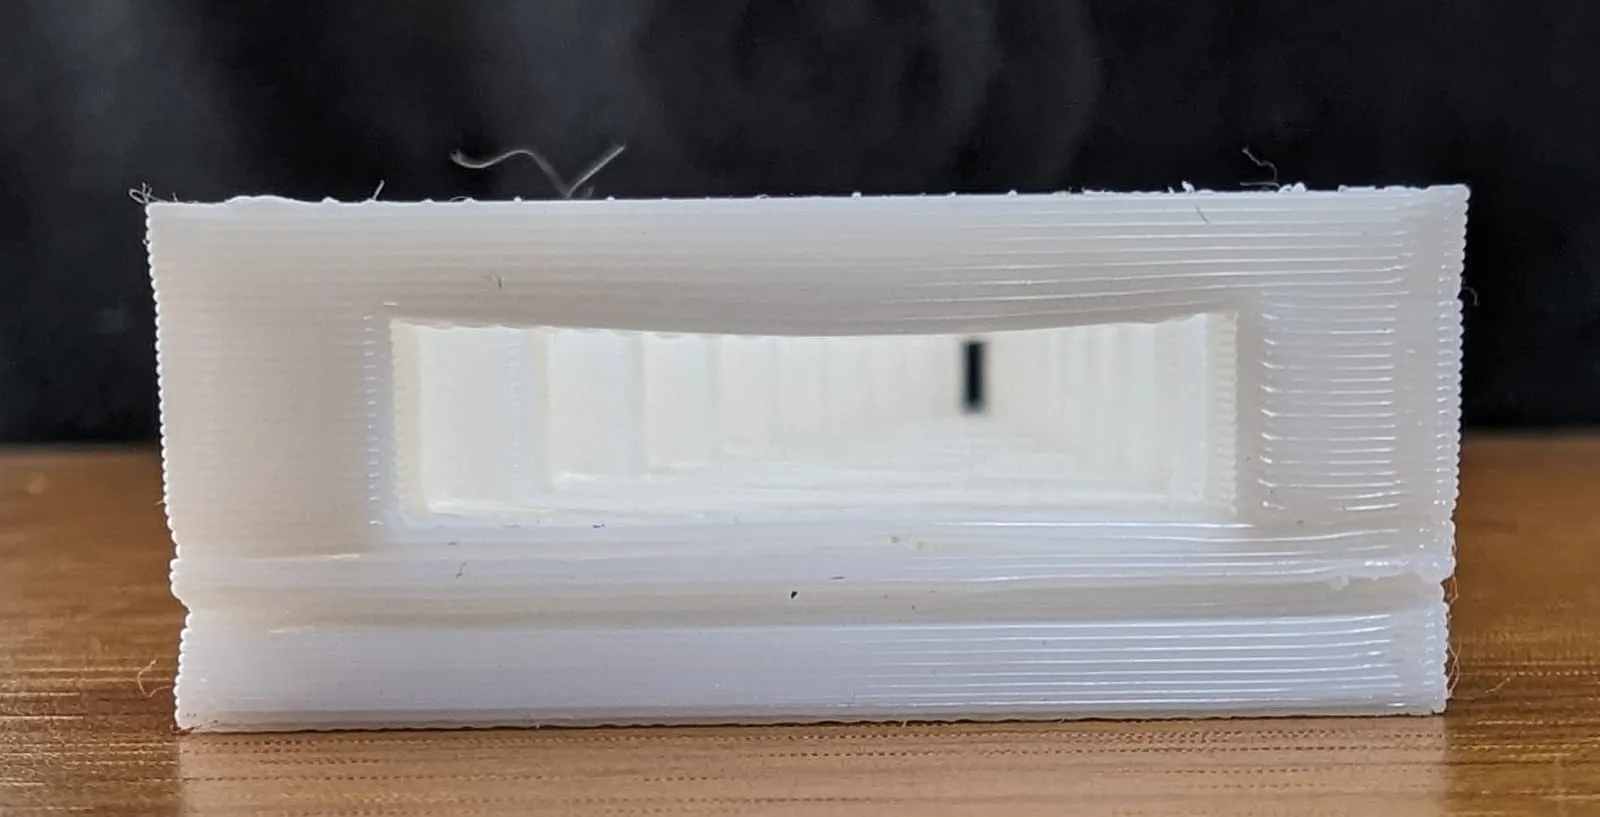
Bridging: This is the capability of the material to make bridges without the need of supports.
-
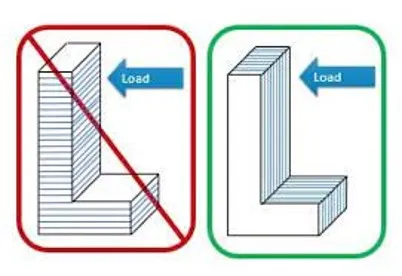
Anisotropy: Always is good to design and print being conscious of the direction of the load applied to the object.
-
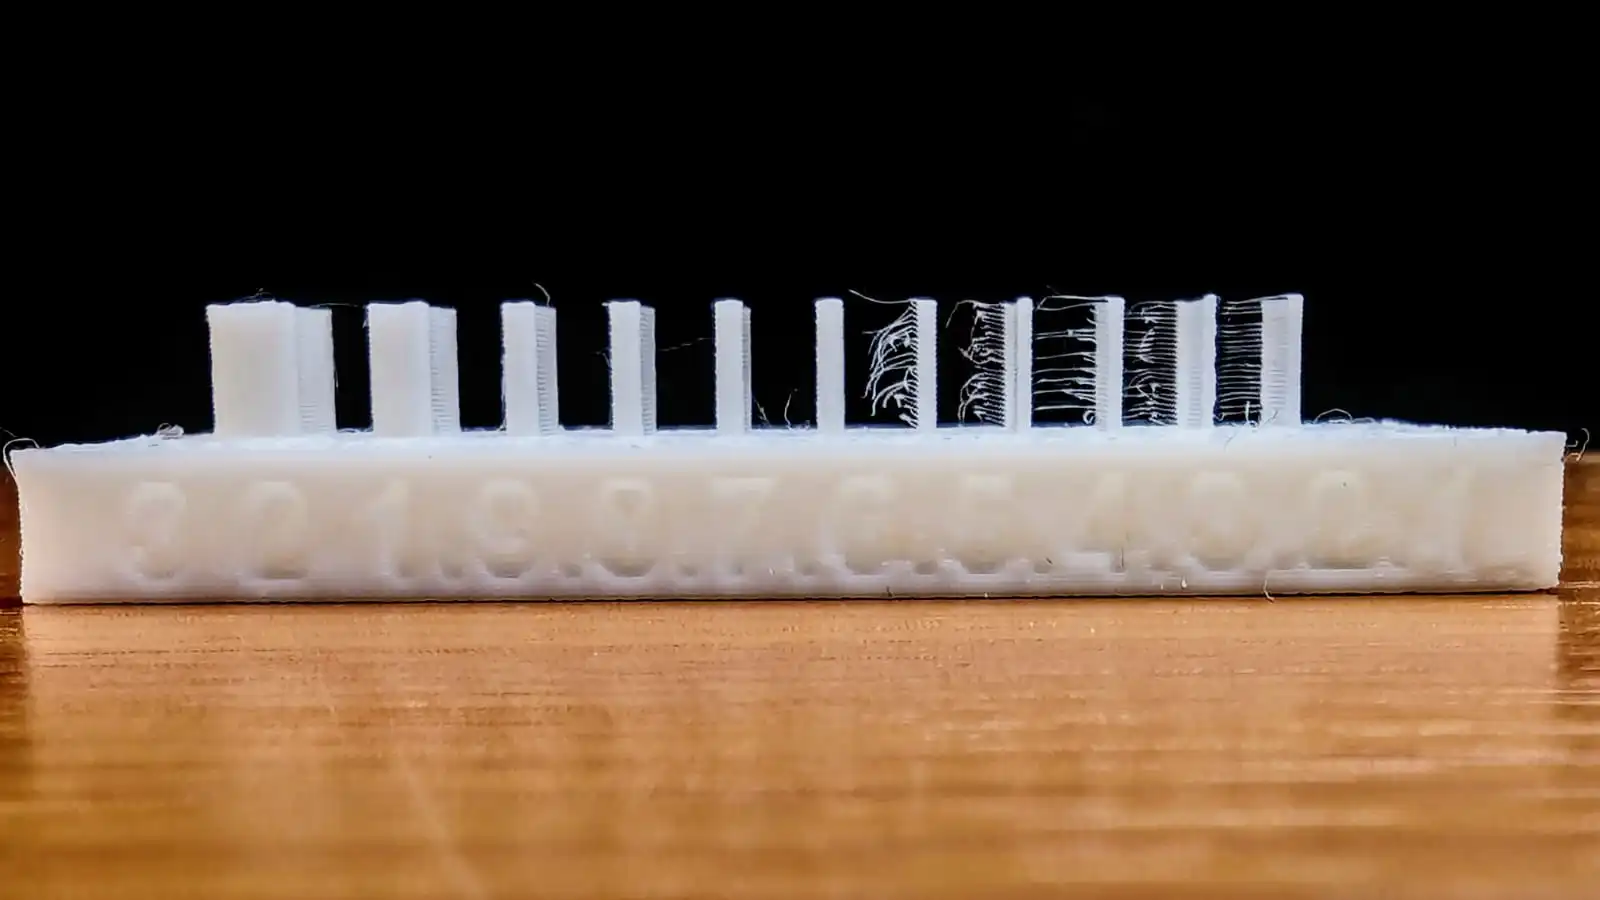
Clearence: This is the amount of space between the lines in your design, below .2 mm the lines will stick together.
-
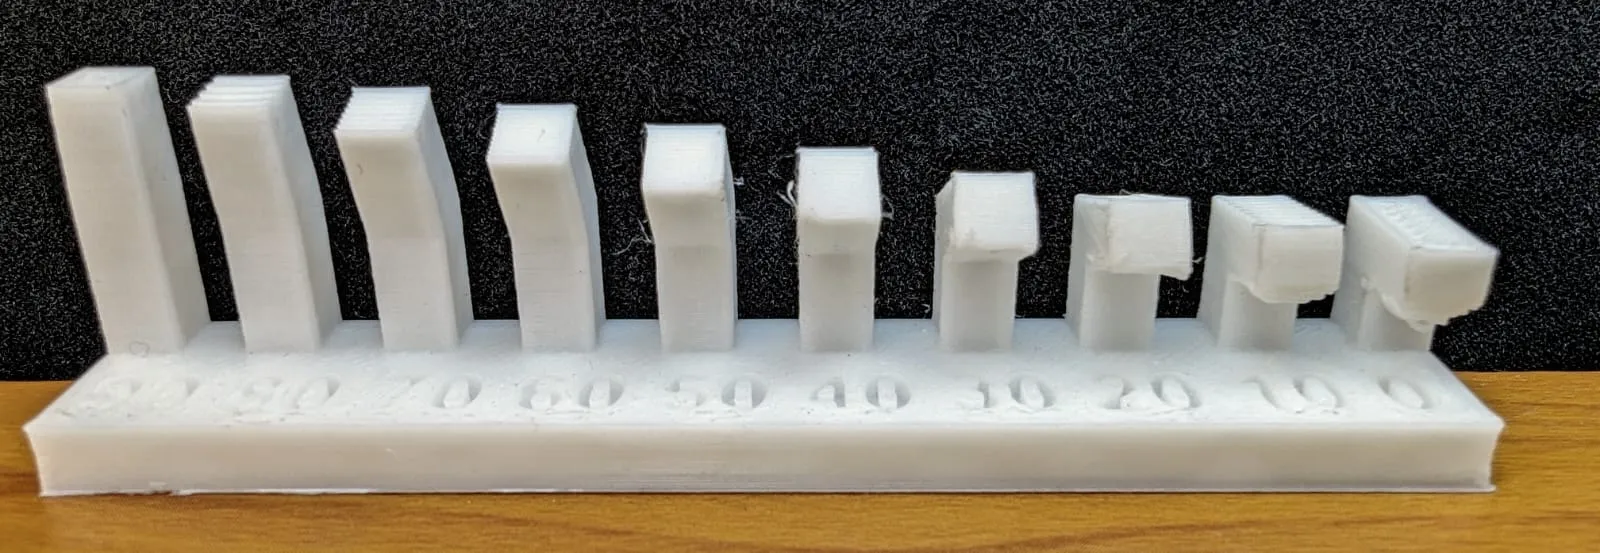
Printing Angle : The angle at which a feature can be printed without support. Angles up to 45 degrees are often manageable.
-
Overhang: This 3D print concept makes you build so that you avoid having overhangs as much as possible.
-
Infill : The inside of a 3D print is called infill, and it can be adjusted in terms of density 0% is hollow while 100% completely solid.
-
Infill Patterns: Ranging from simple lines to more complex geometric shapes, infill patterns can affect a parts strength, weight, print time, and even flexibility.
-
design rules

-
How do they print?
FDM

It heats up plastic filaments and squirts them out to layer up and make your object. It’s the most common type, super versatile, and great for prototyping and functional parts.
DLP
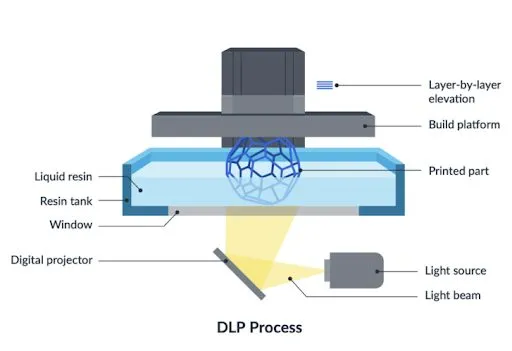
DLP is similar to SLA but uses a digital light projector to flash a single image of each layer all at once. It’s faster because it cures whole layers instead of drawing them out with a laser.
-
The 3d print exclusive Software
In order to 3d print you will need to pass your items through a "slicer" as the name indicates this program slice your objects to print them by layers and pre-set the printer.
There's an unique software for each manufacturer, for the ender 3 Cura-Ultimaker, and for the 3dwox1 software needed Sindoh_3D_Wox.
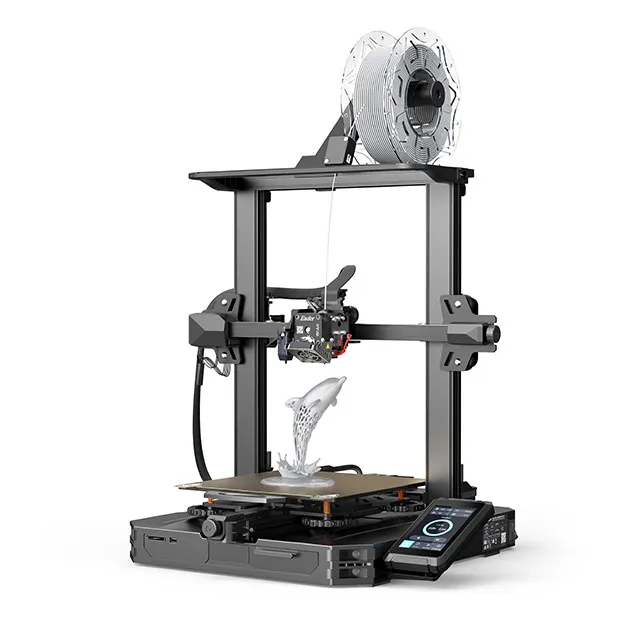
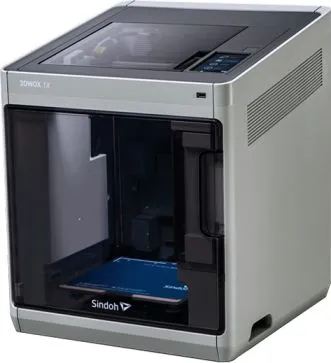
The FDM 3d printers i've used this week
Ender 3 S1
- Build Volume: 220 x 220 x 270 mm
- Printing Speed: 150 mm/s
- Layer Height: 0.05 - 0.4 mm
- Nozzle Temperature: Up to 300° C
- Supported Materials: PLA, ABS, PETG, TPU, PA, WOOD
3dwox1
- Build Volume: 210 x 200 x 195 mm
- Printing Speed: 200 mm/s
- Layer Height: 0.05 - 0.4 mm
- Nozzle Temperature: Up to 270° C
- Supported Materials: PLA, ABS, PETG, ASA
The full version of the group assigment: Week 5 at Fab-Puebla
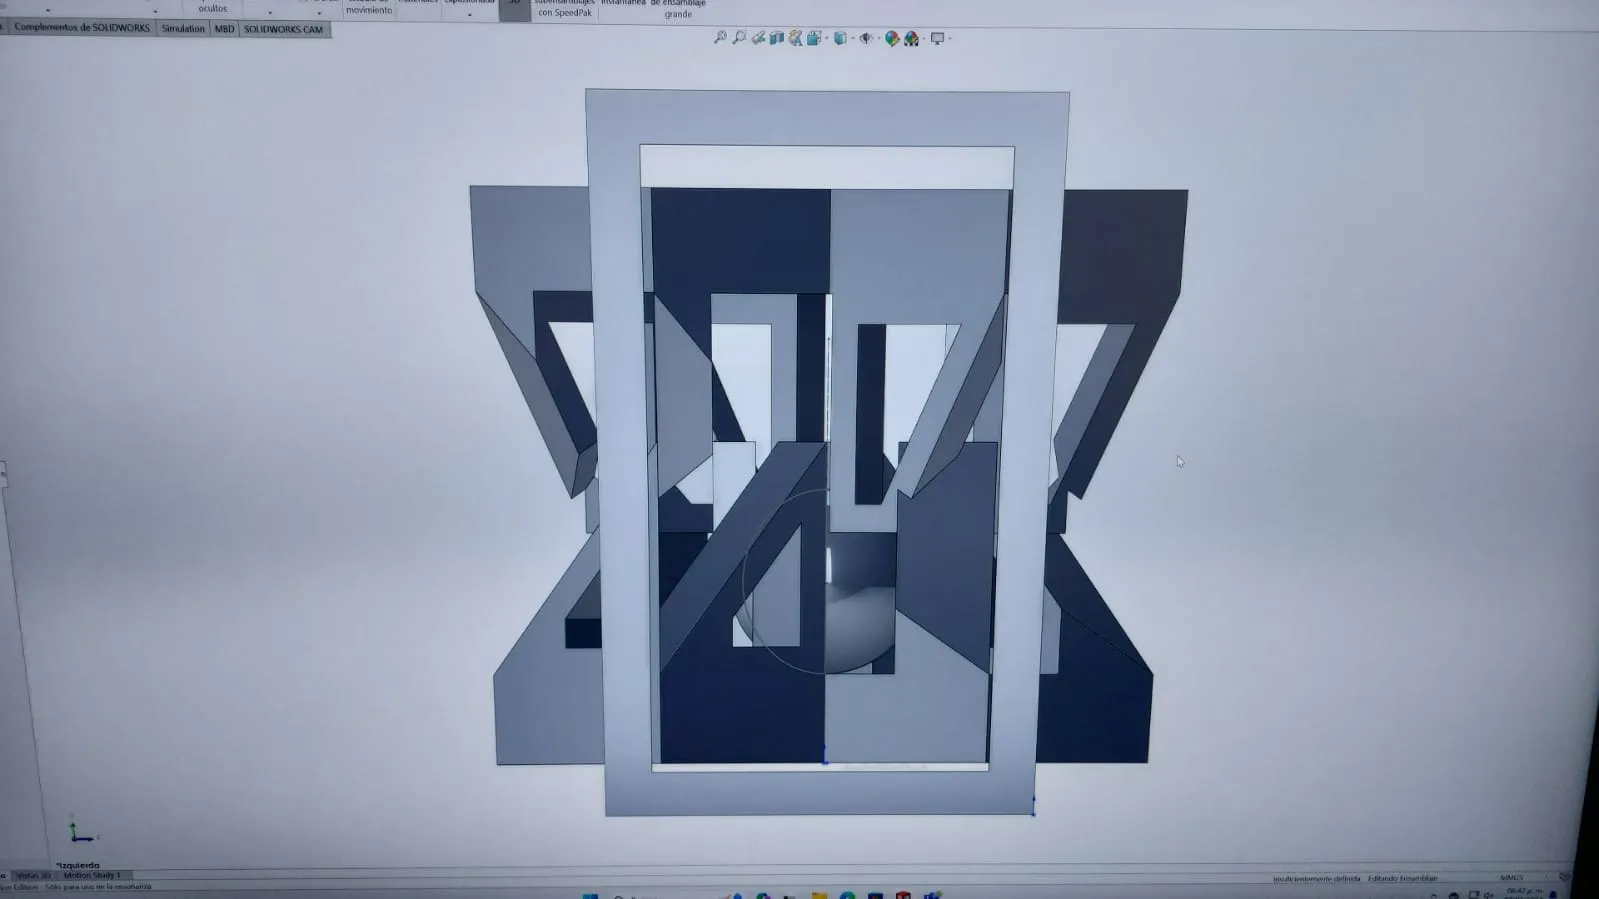
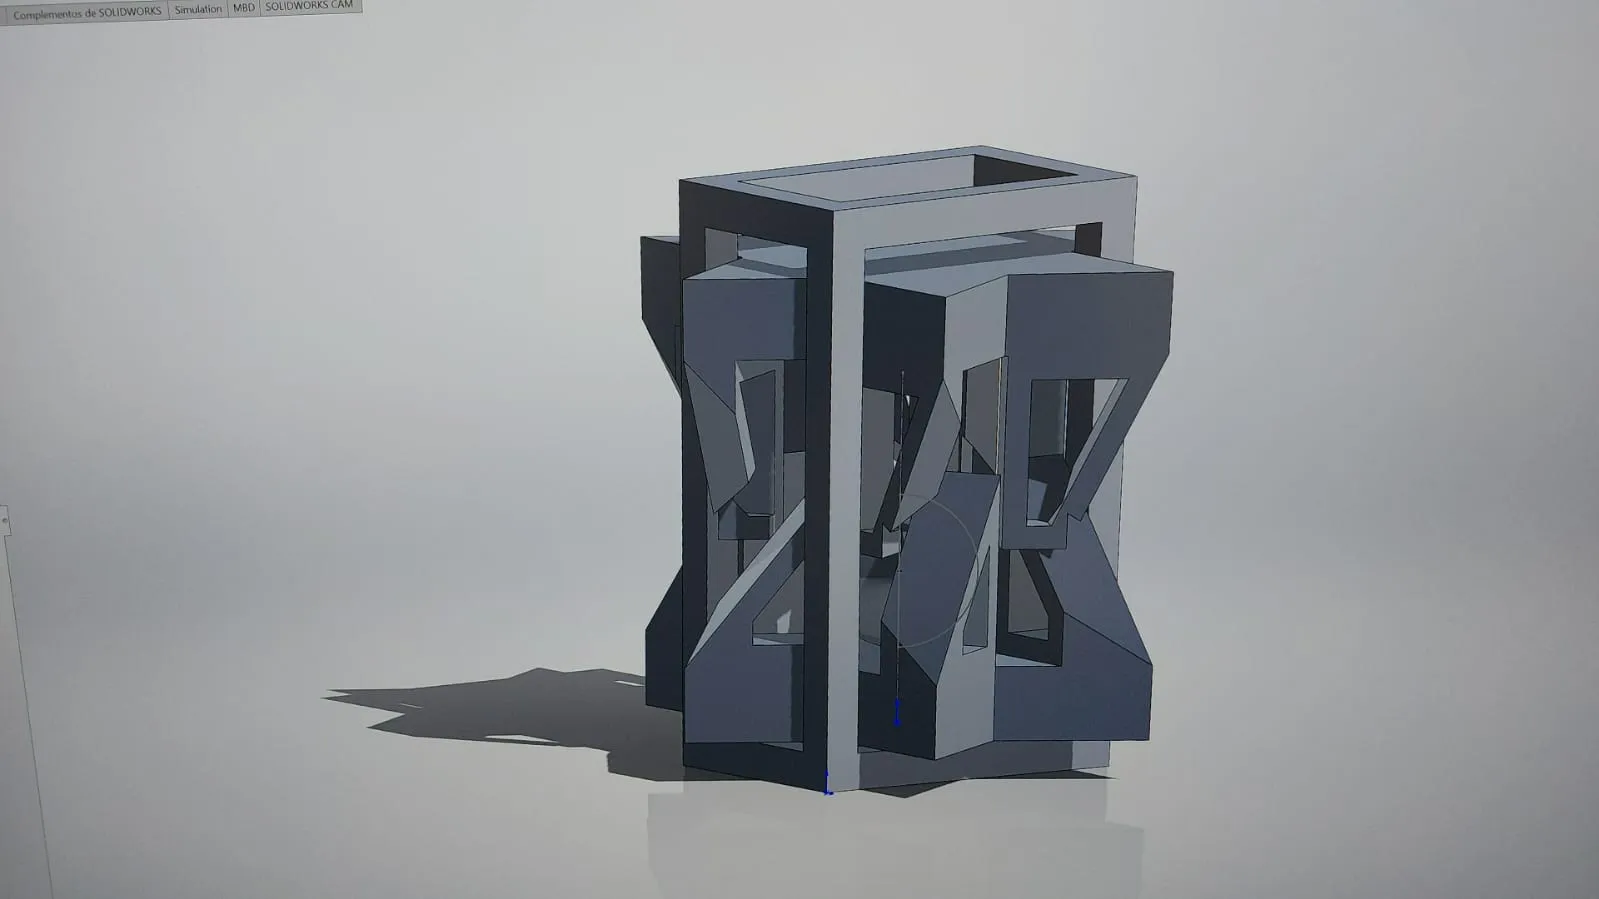
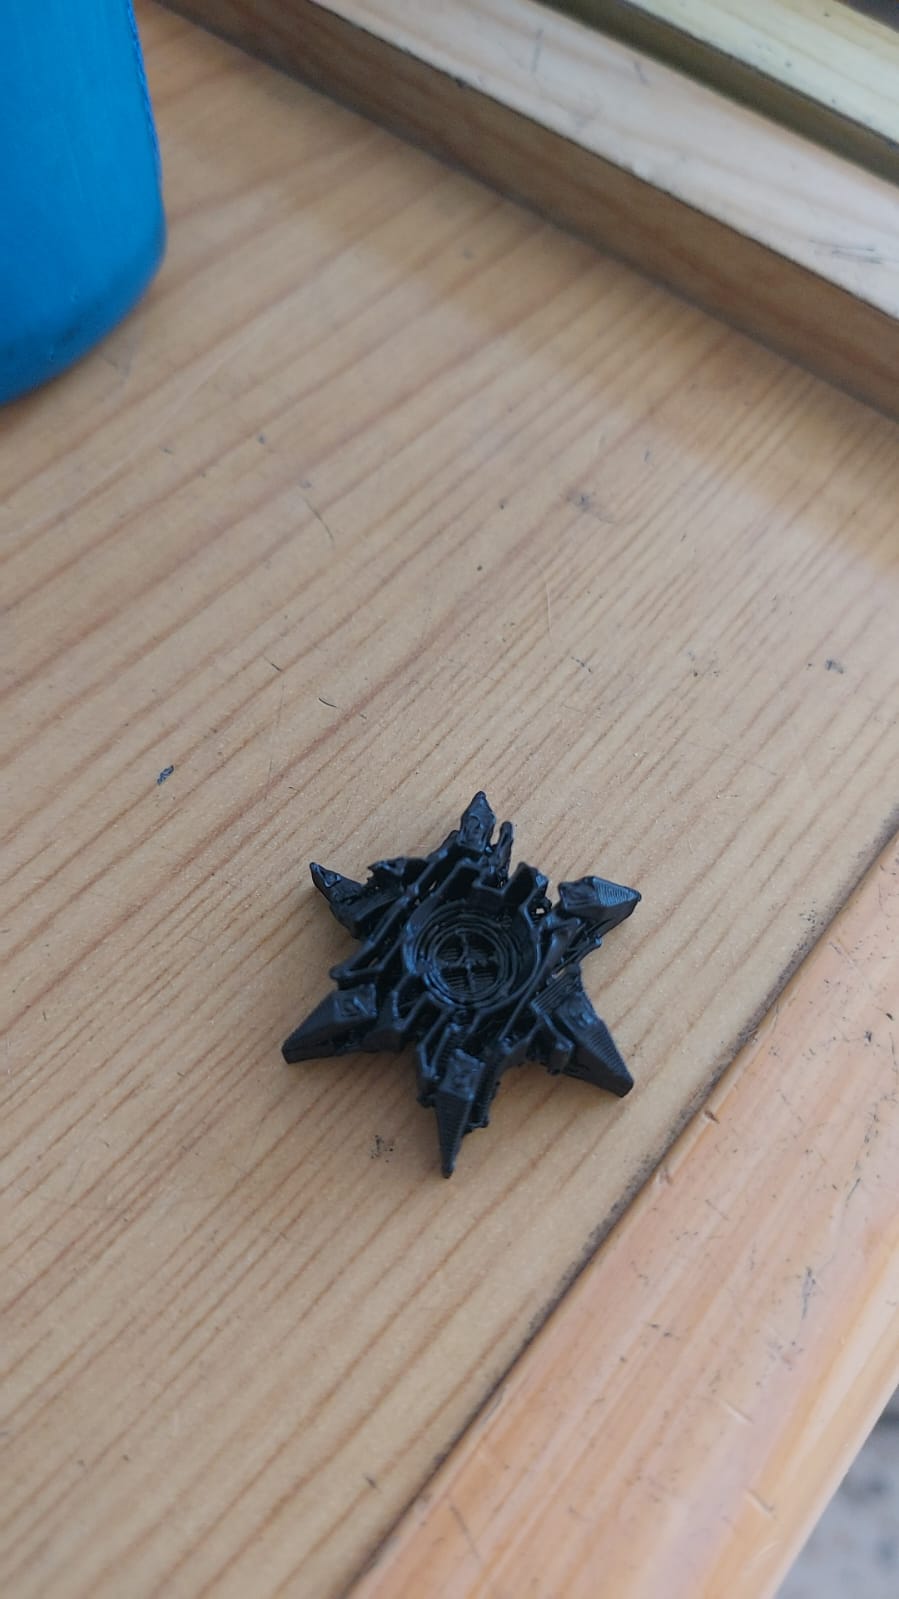
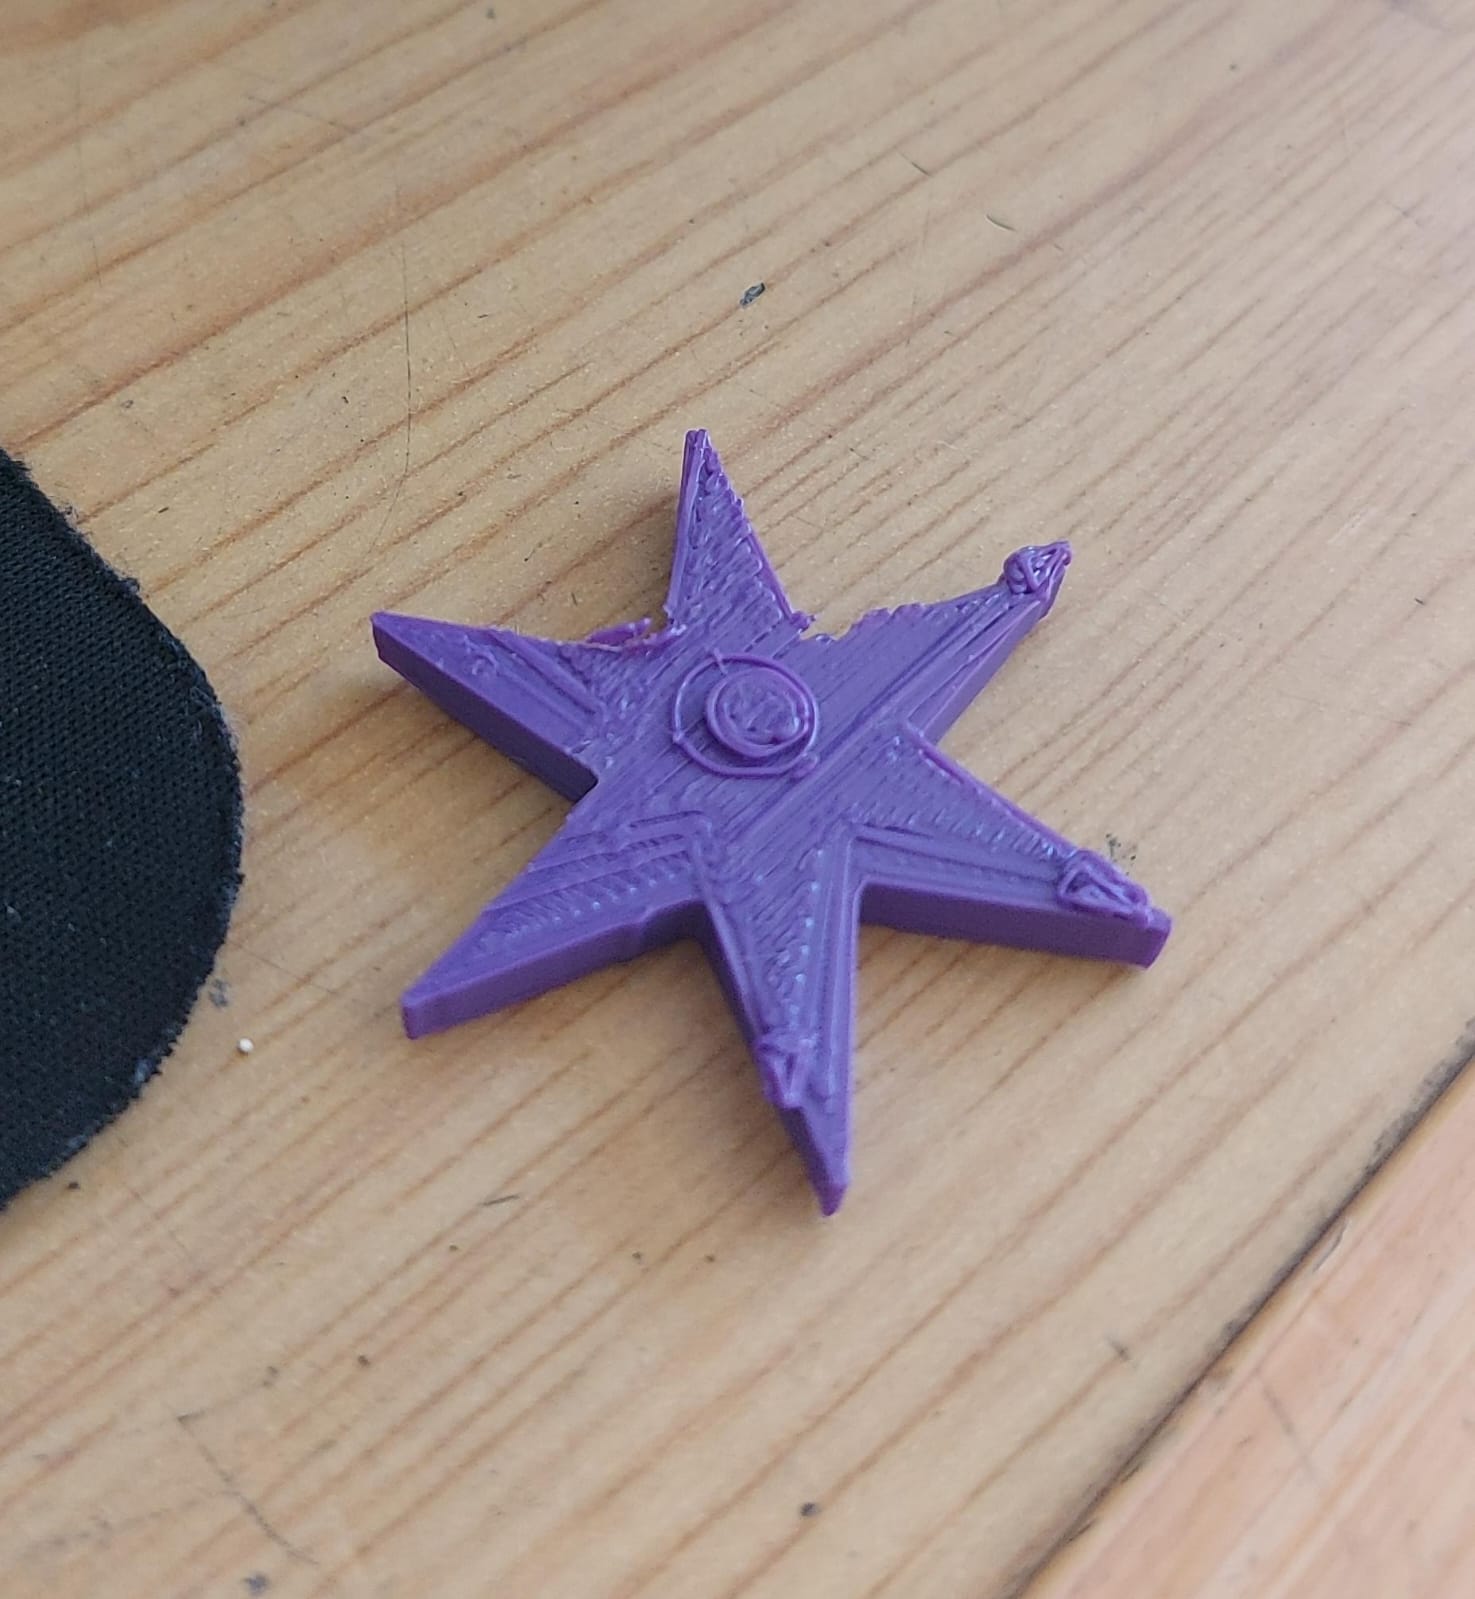
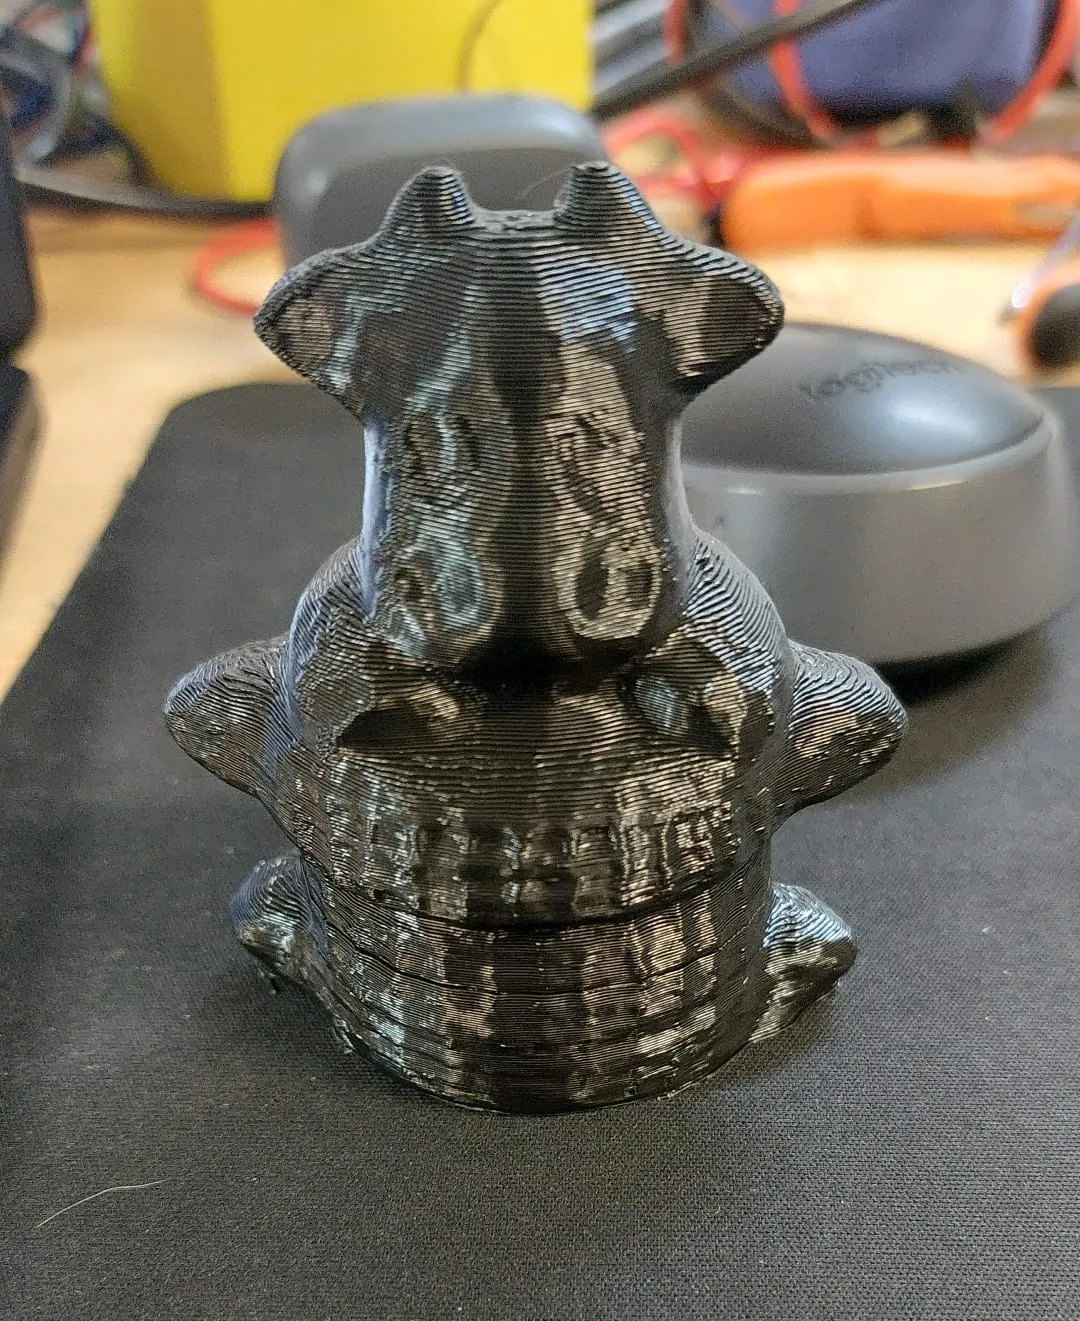
Designing my piece
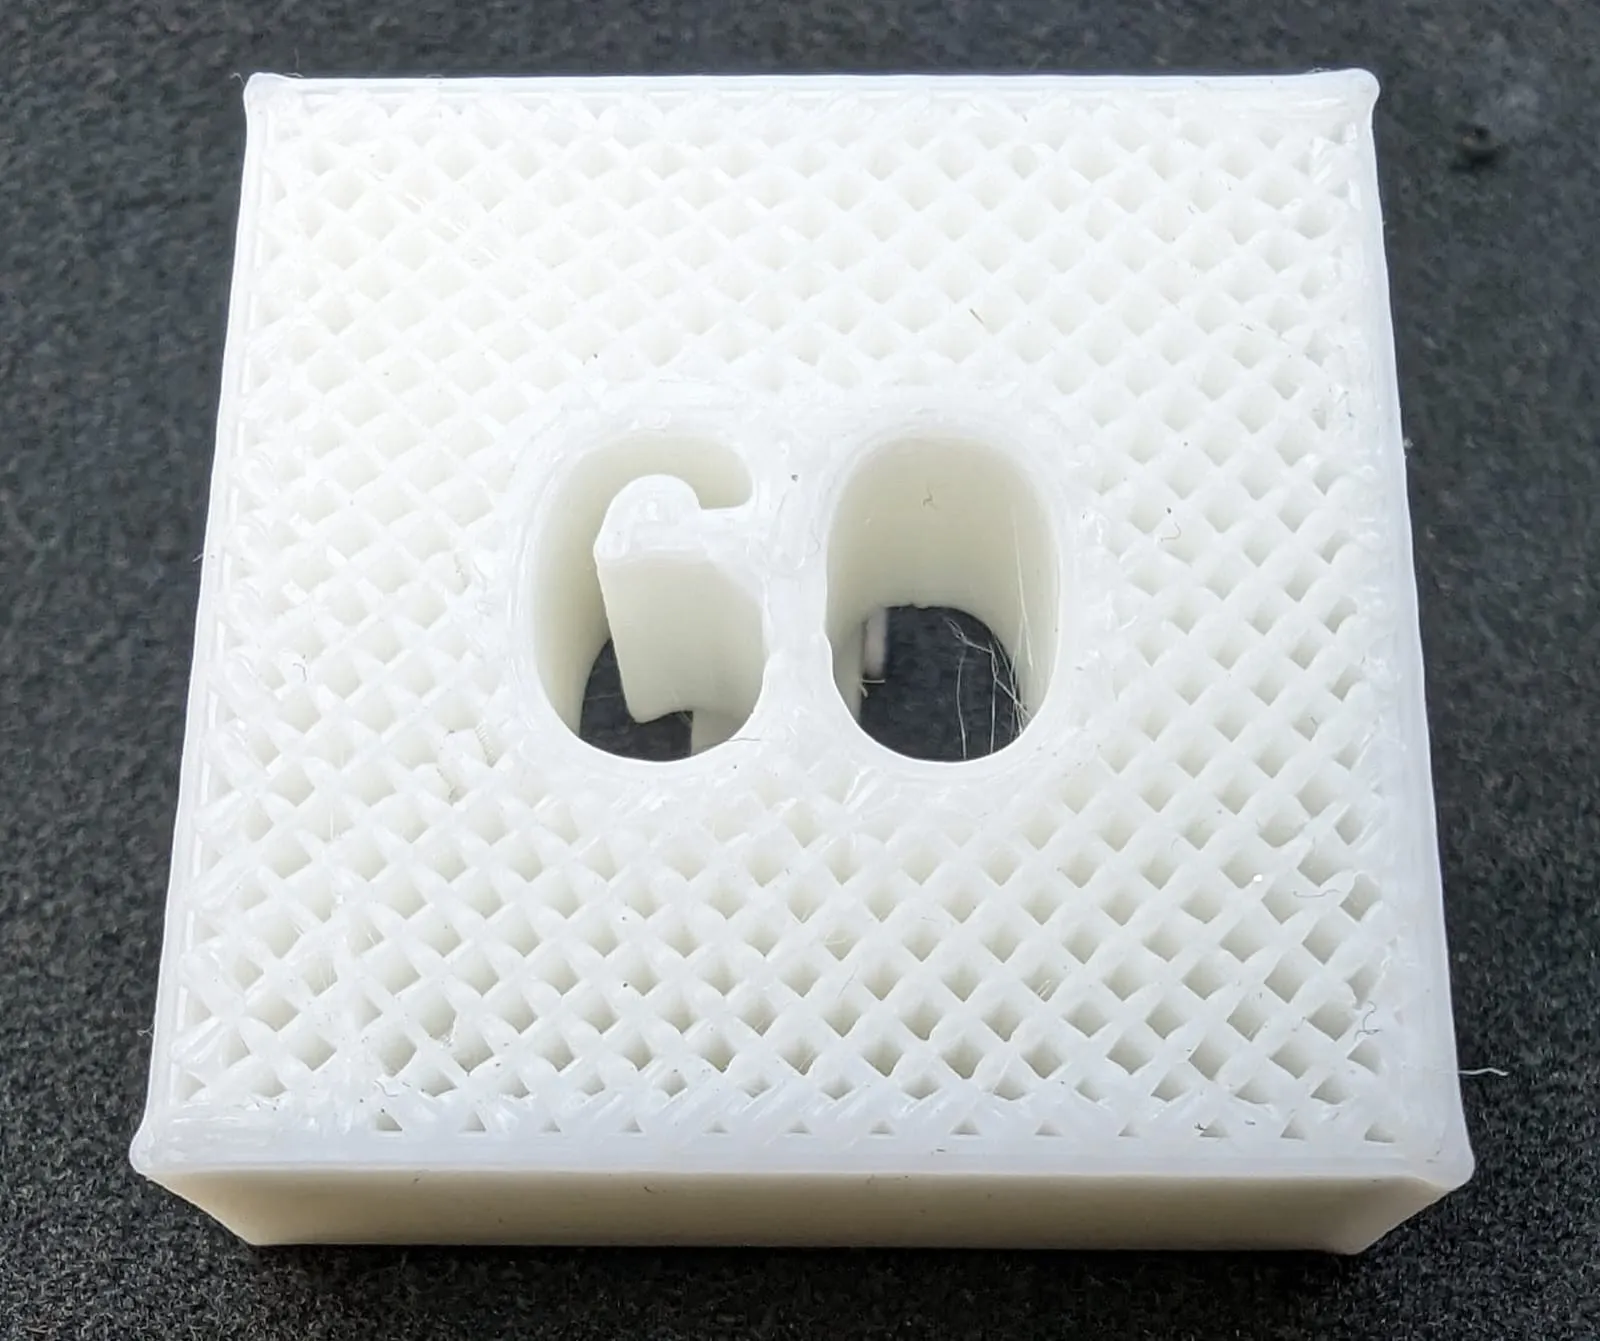
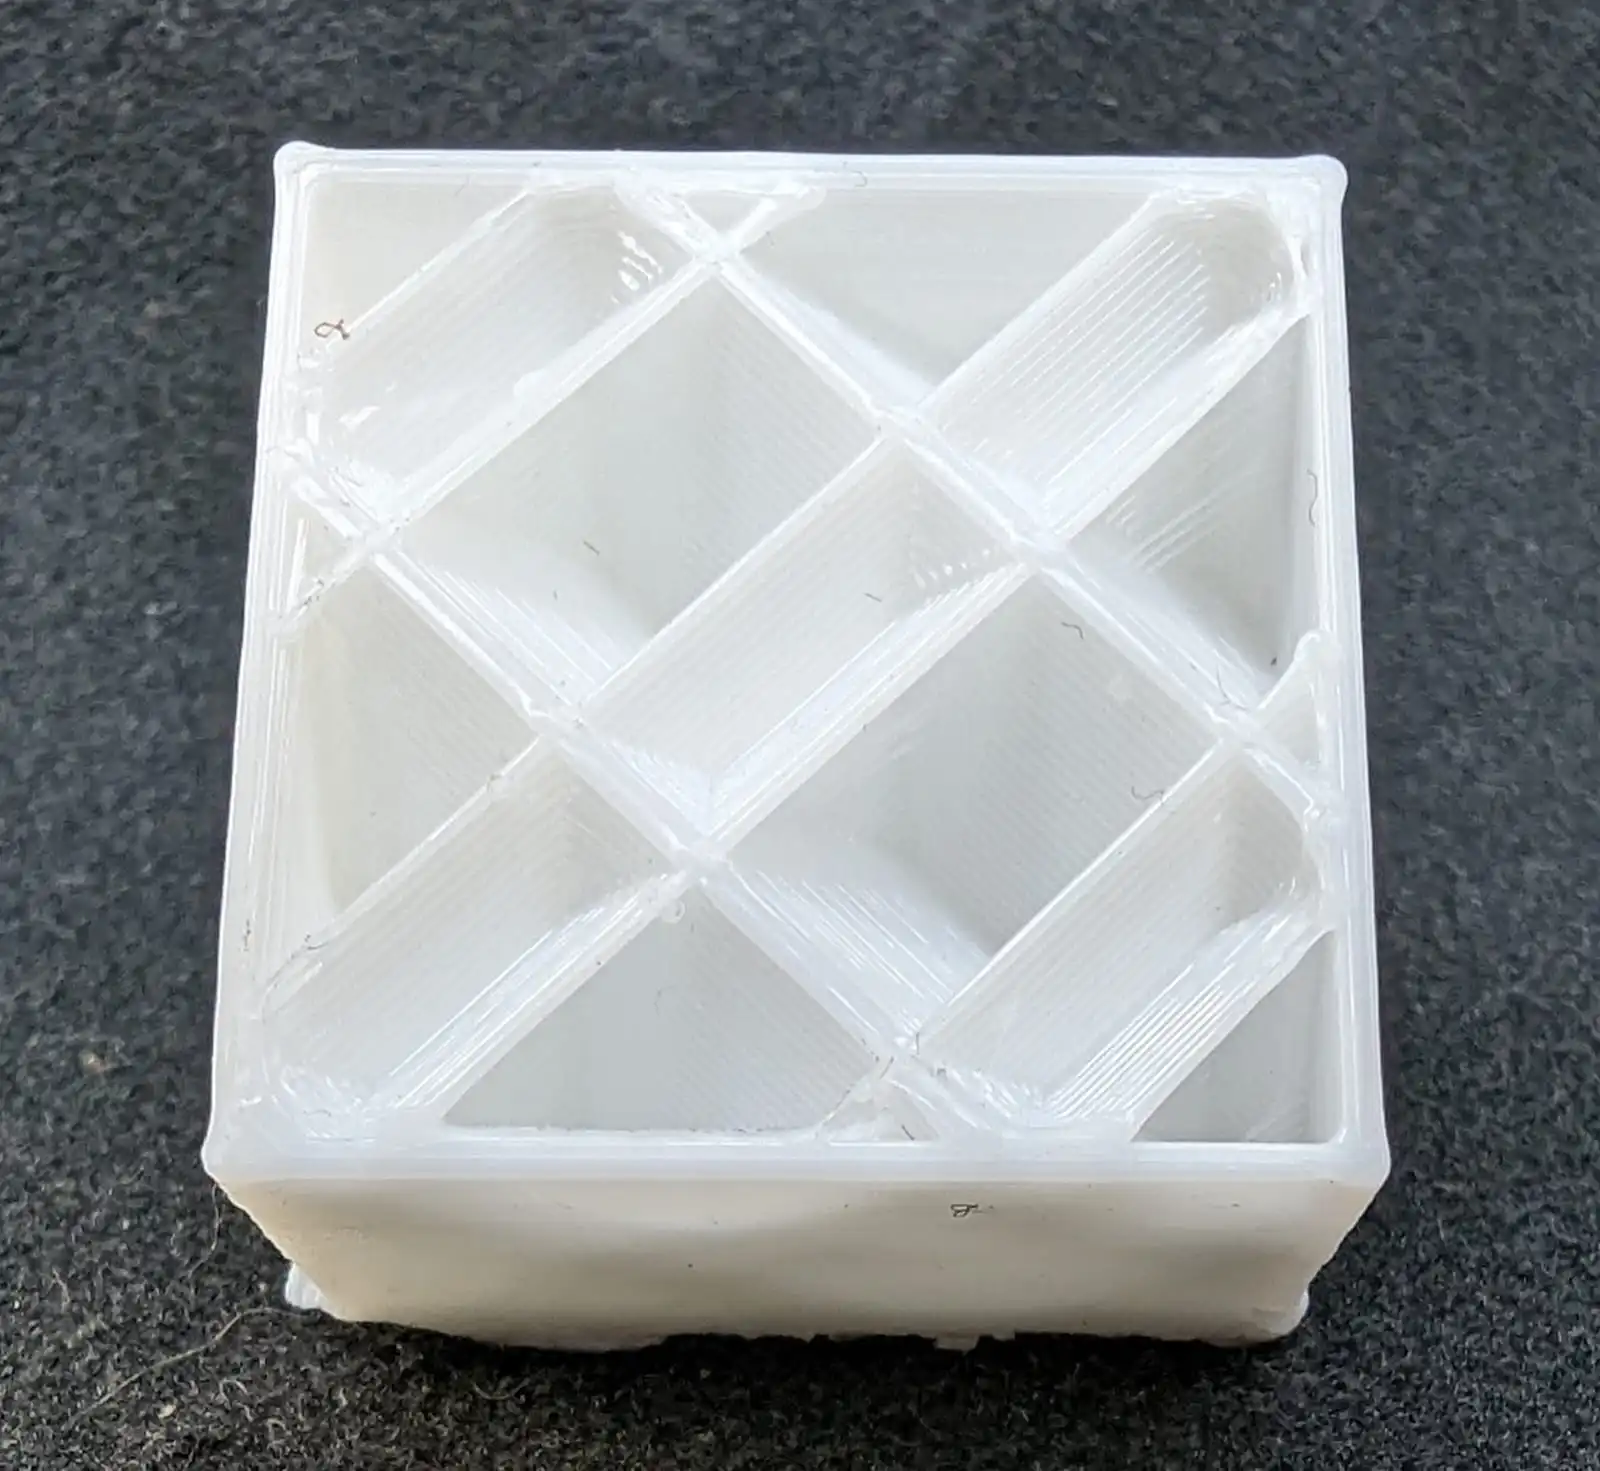
The goal of this week in addition to understanding concepts when designing for 3d printing is also to think about objects that cannot be made by other subtractive methods, basically when you have an object that has inside another object and you need to manufacture it in a single piece, to do so I will use solidworks, I have the idea of making a figure/toys for my cat so that the material used will be pla, as it is not toxic.
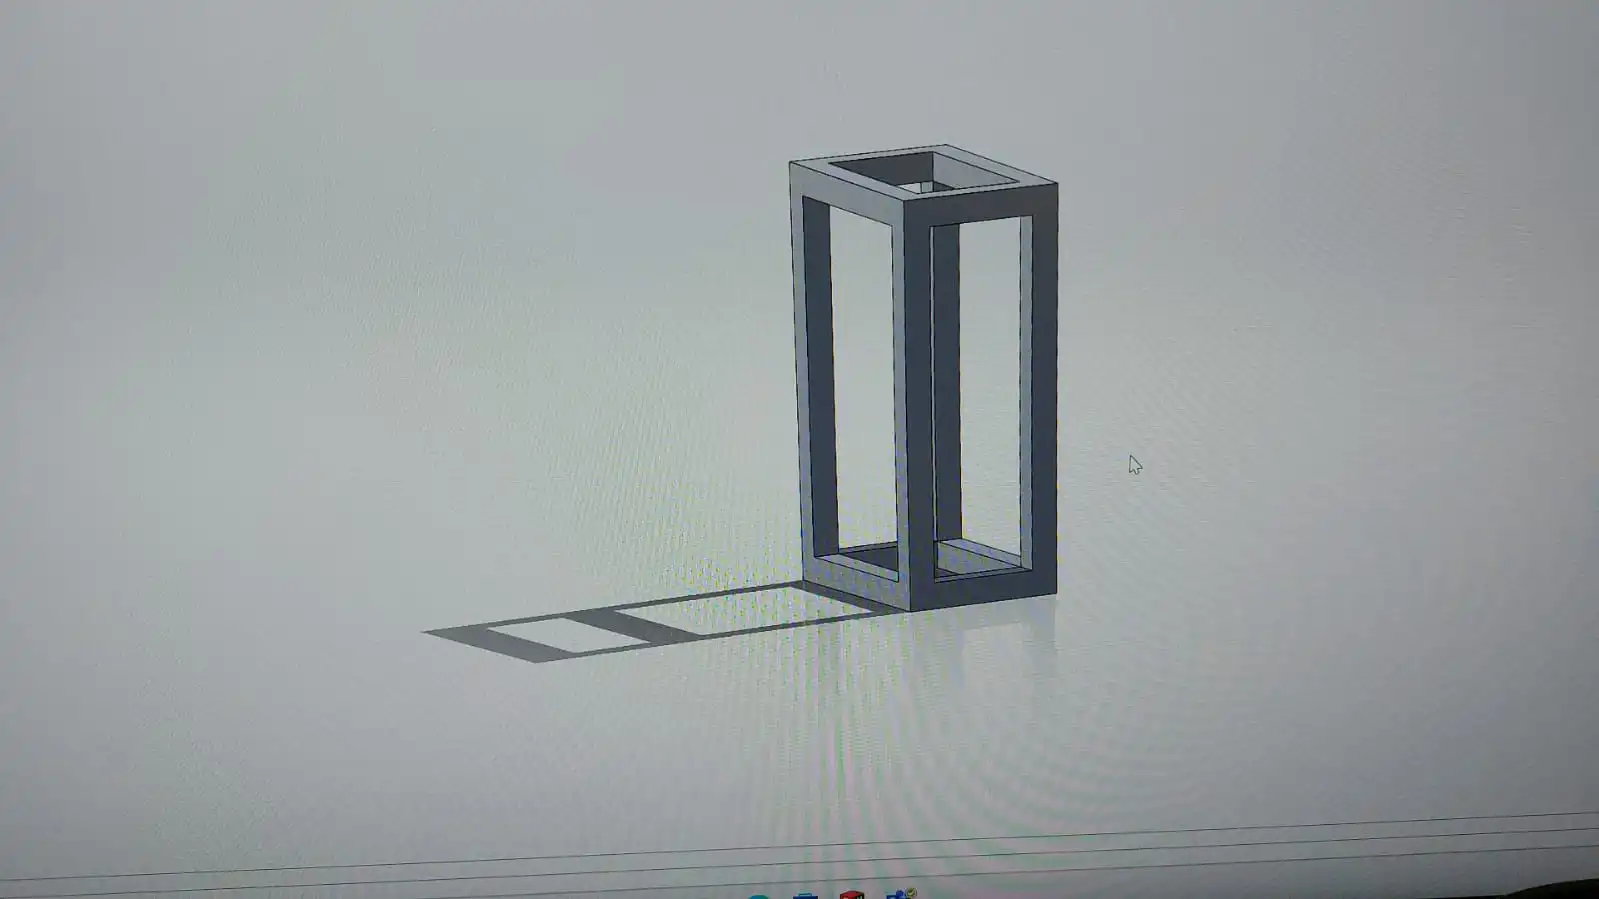
To create the piece, I had two things in mind, to make it of the minimum size to then be able to scale it to larger if so desired, but not less since by the rules of 3D printing would end up joining several faces.
-
Example image:
To build the base, create a diamond shape and use a circular pattern, then extrude it to 2mm, then use an offset of 30 mm for the top, created the lower teeth and made an offseat but now of the tooth at 2mm to do hollow and not break with the minimum, after using circular patterns but now in its operations state for each tip of the star, do almost the same above only having in mind to left a margin of 0.2 mm to prevent it from sticking with the piece below, always not surpassing the maximum angles so that it does not deform the piece due to the overhang, and for last created the ball in the center. Then save it all in a prism to keep the piece in place.
Download links:
First the two pieces The main part and the Rectangular Prism. Then in solidworks file type The assembly, at last that assembly converted to 3MF for printing.
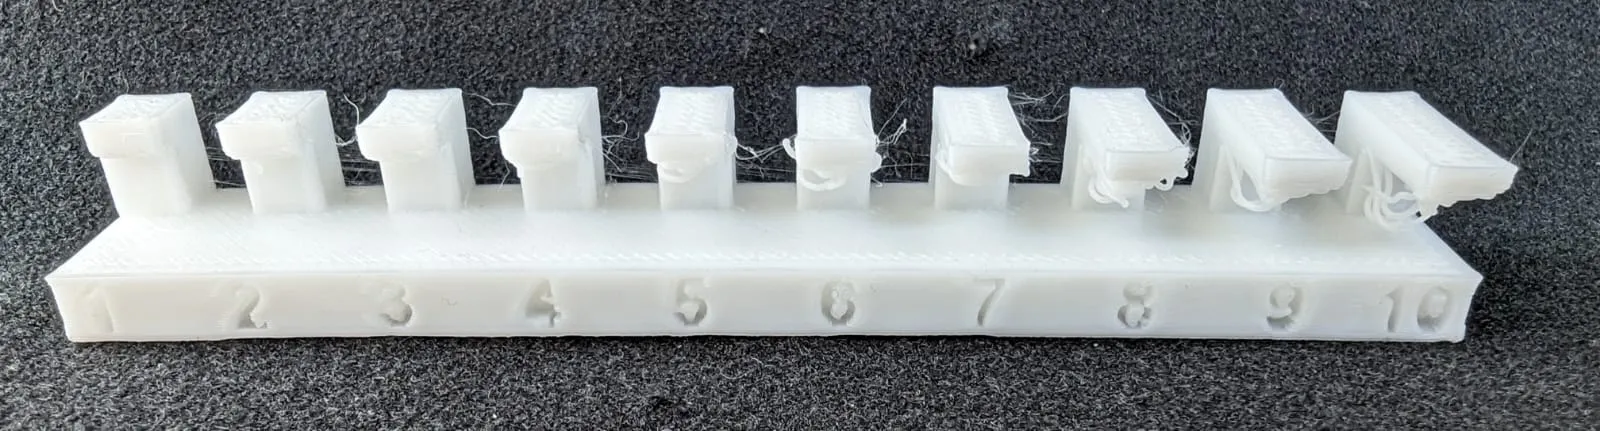
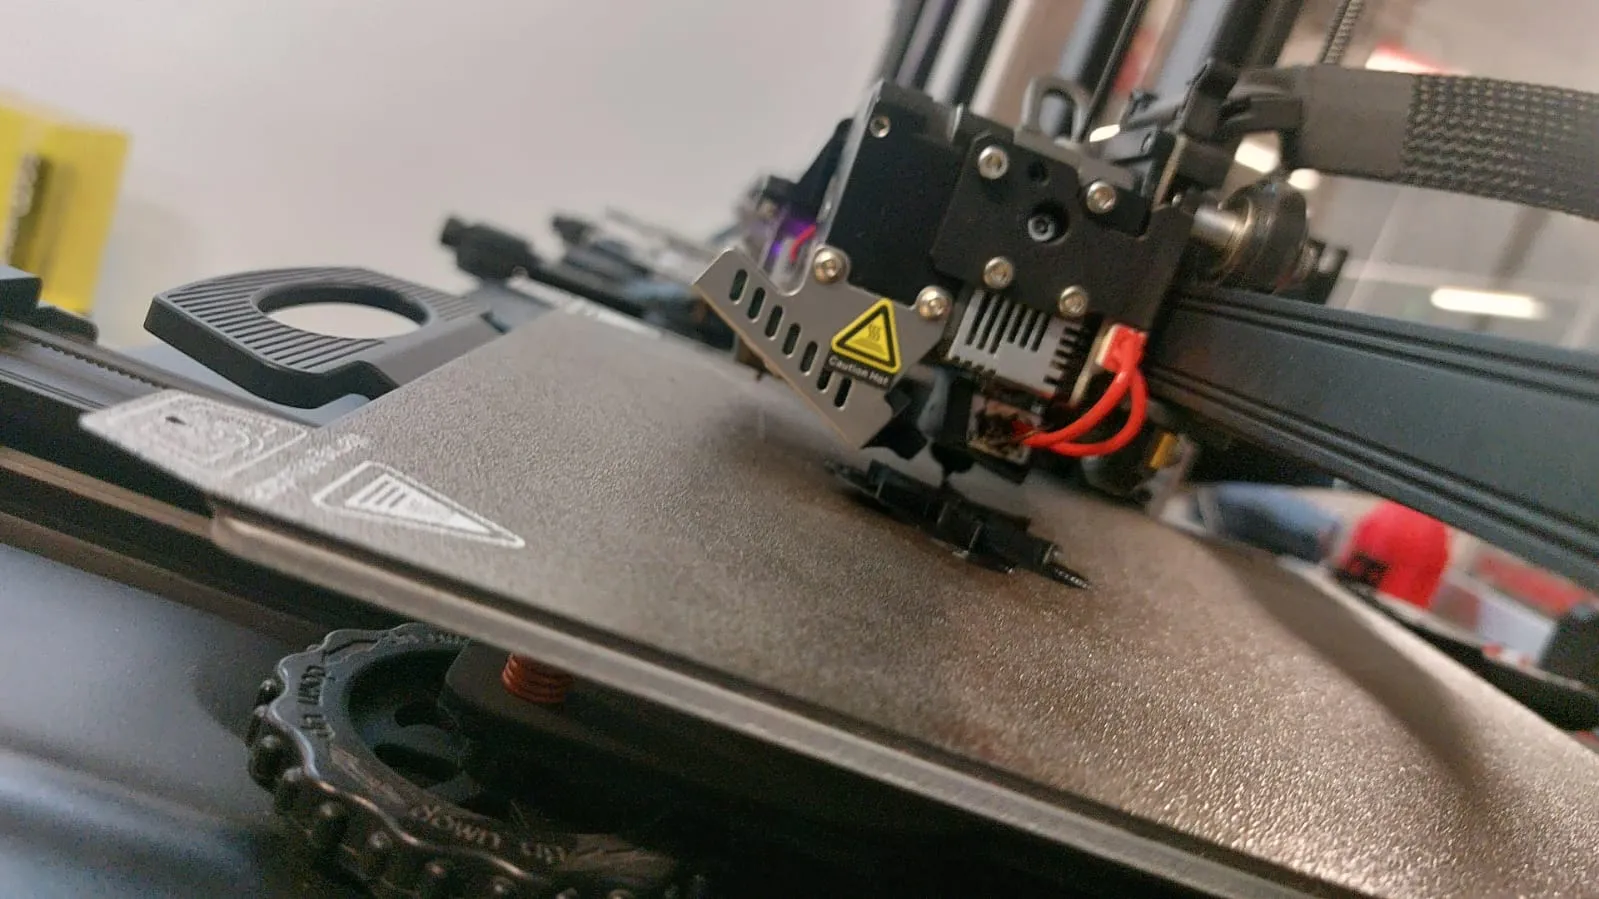
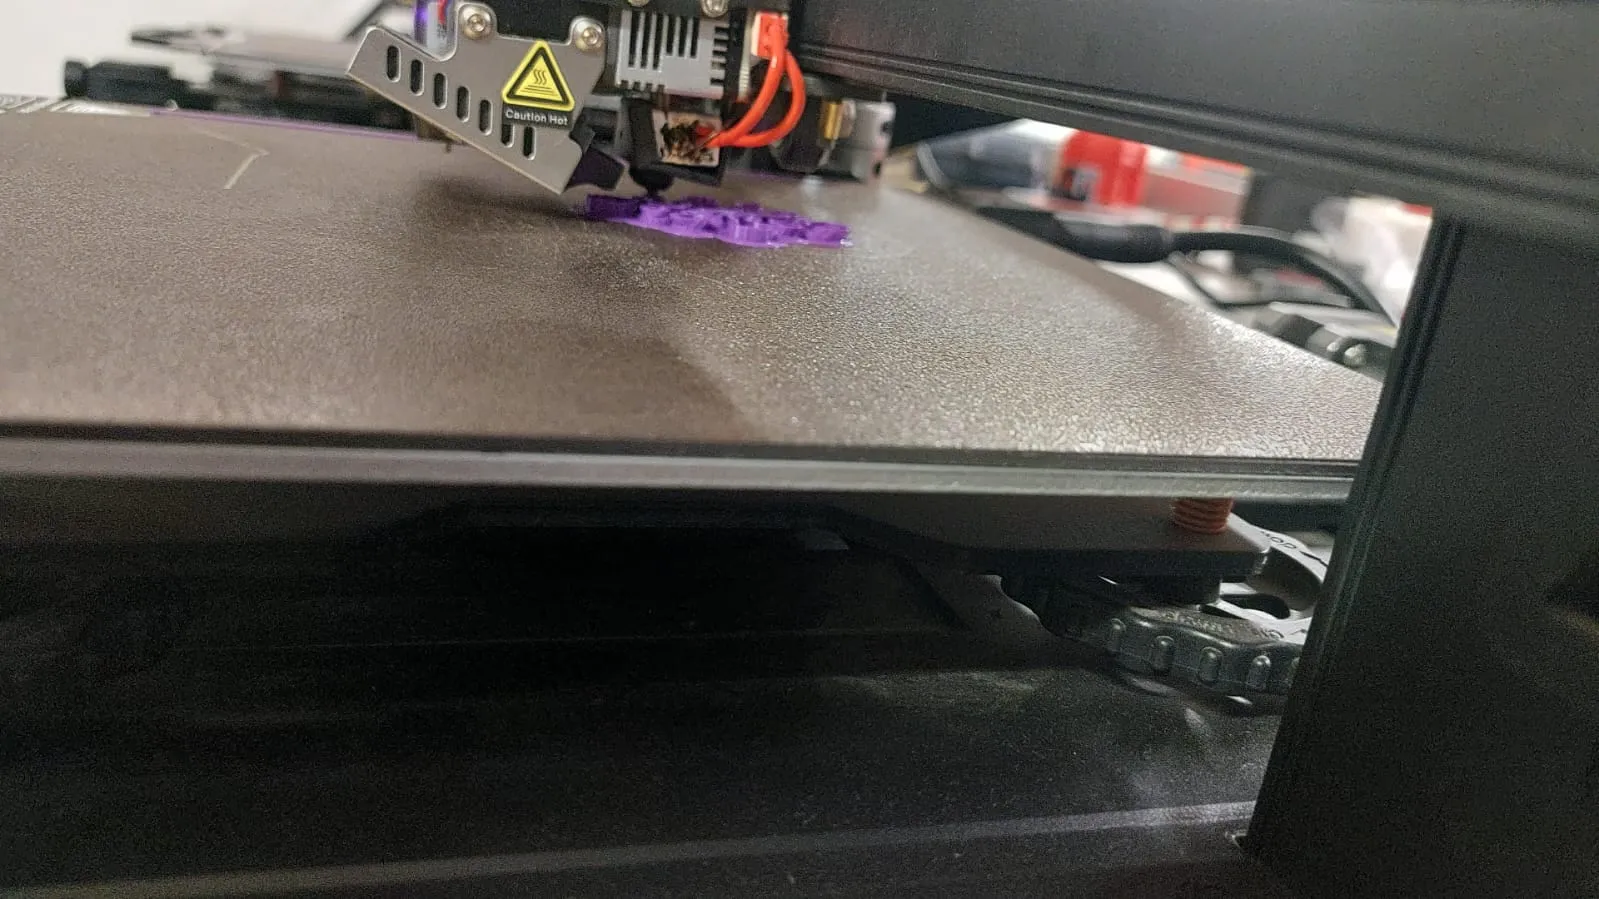
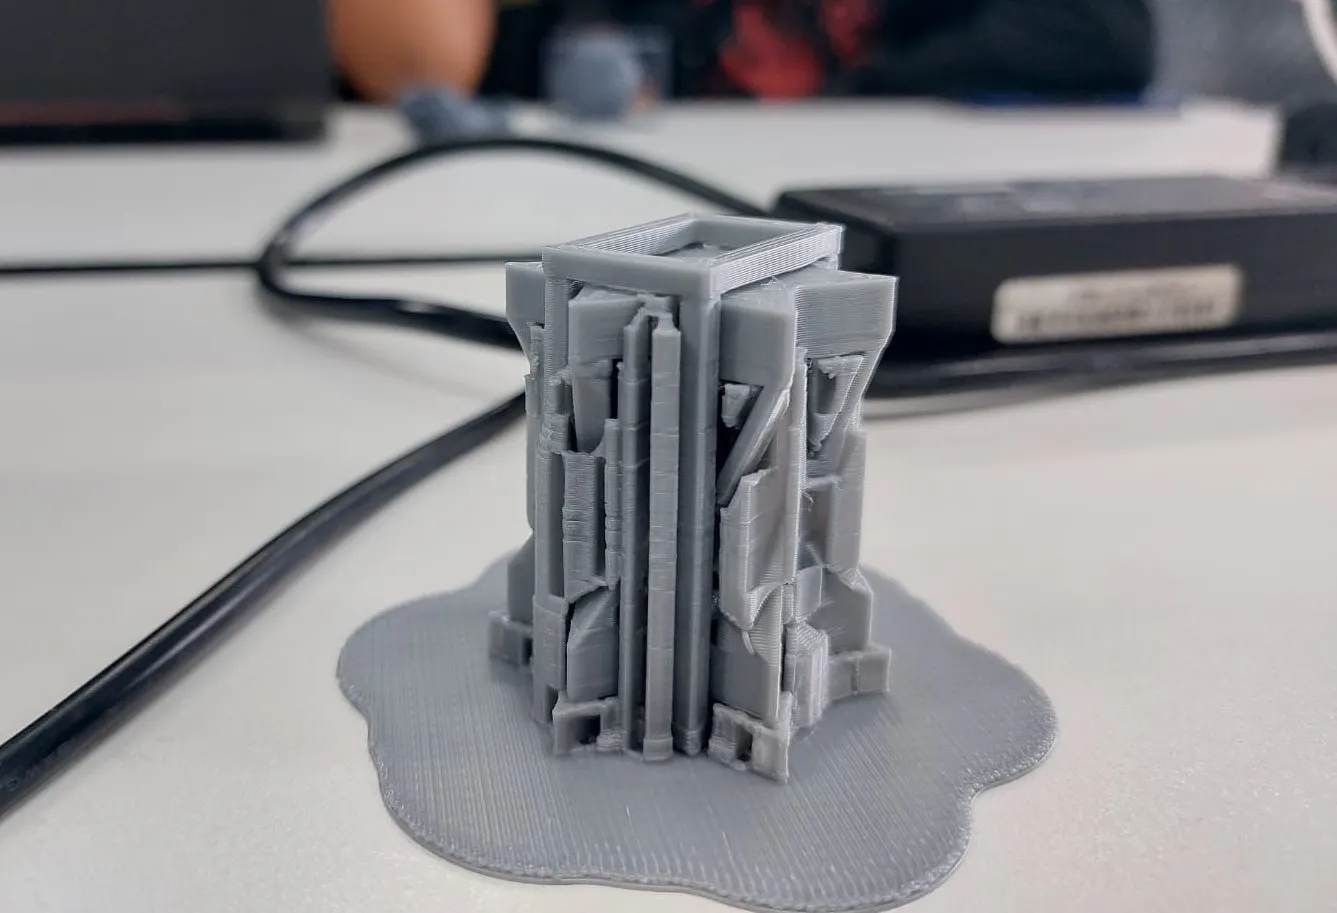
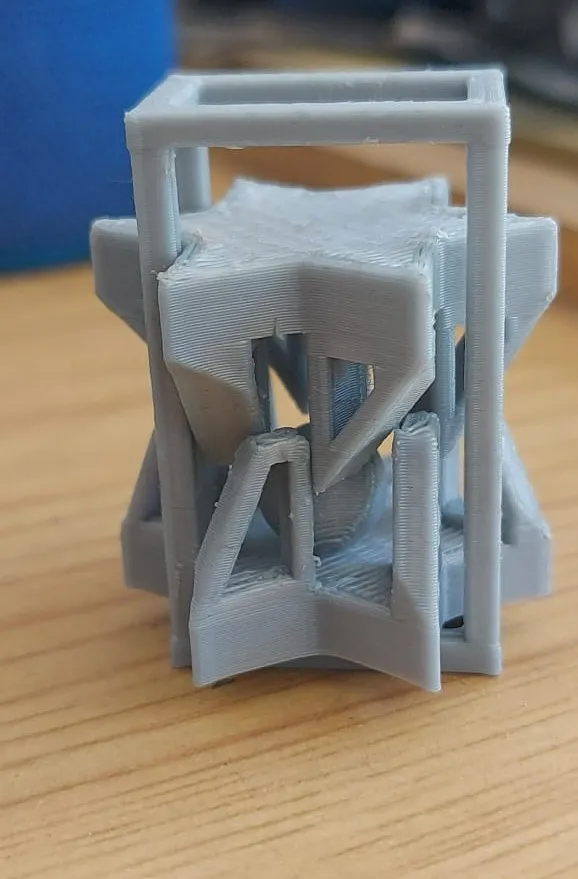
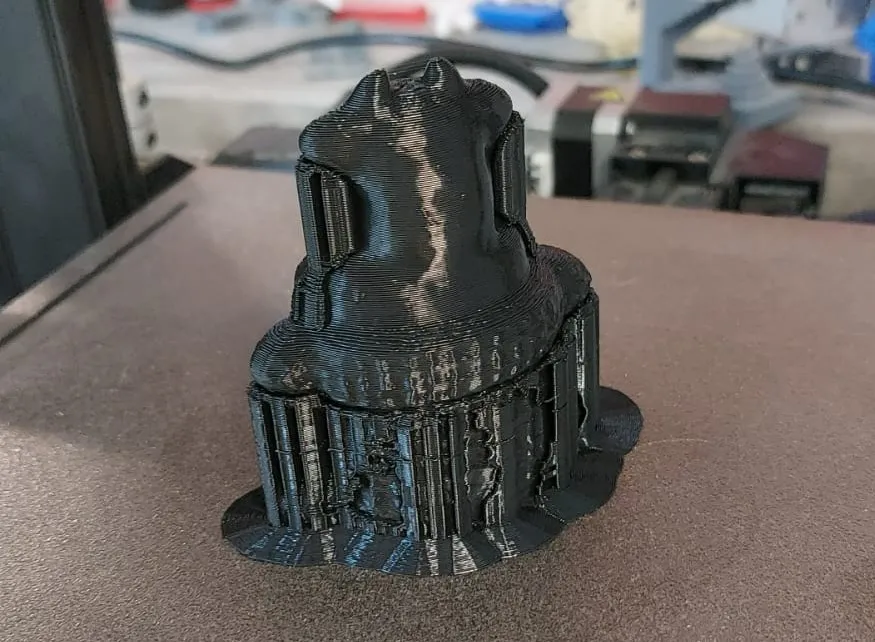
Printing the piece
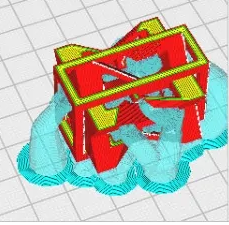
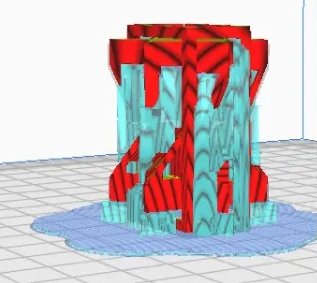
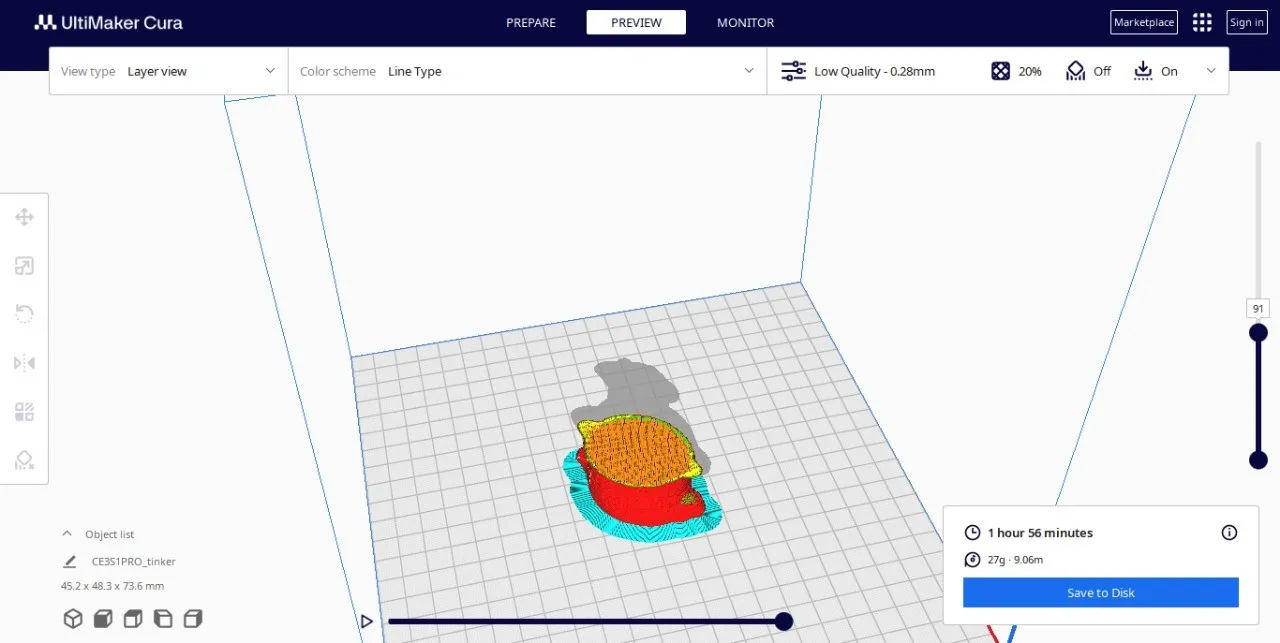
Within the Ultimaker cura software select the model of the ender 3 s1 Pro and then configure the following parameters within the advanced settings: Walls, Upper and lower layer, density and pattern of the filling, the material not because that is configured in the machine along with the temperature and thickness that the extruder allows and the quality of the material, speed, supports and bed, so that the piece comes out well after changing the support and the adhesive bed.
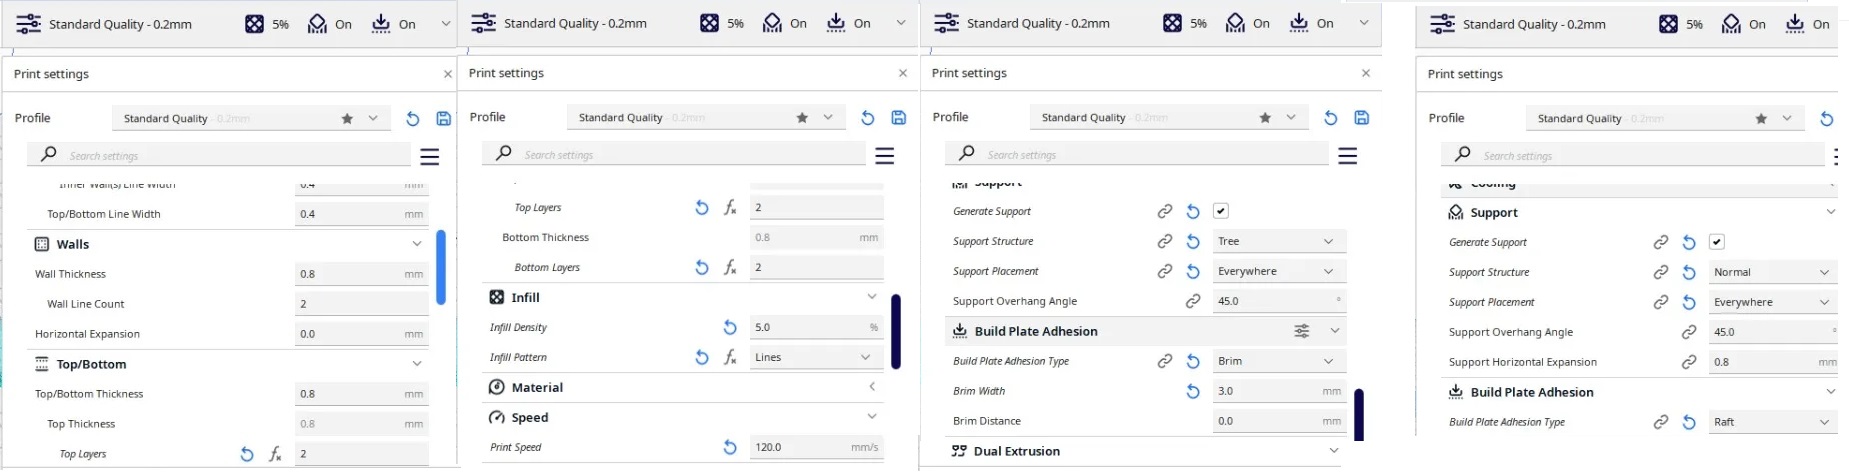
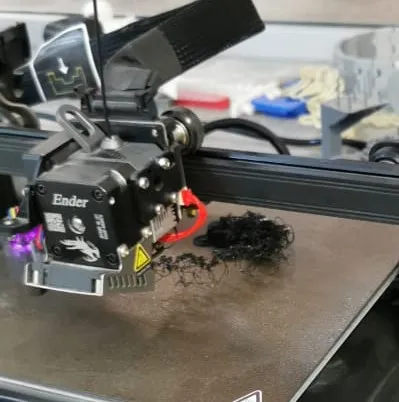
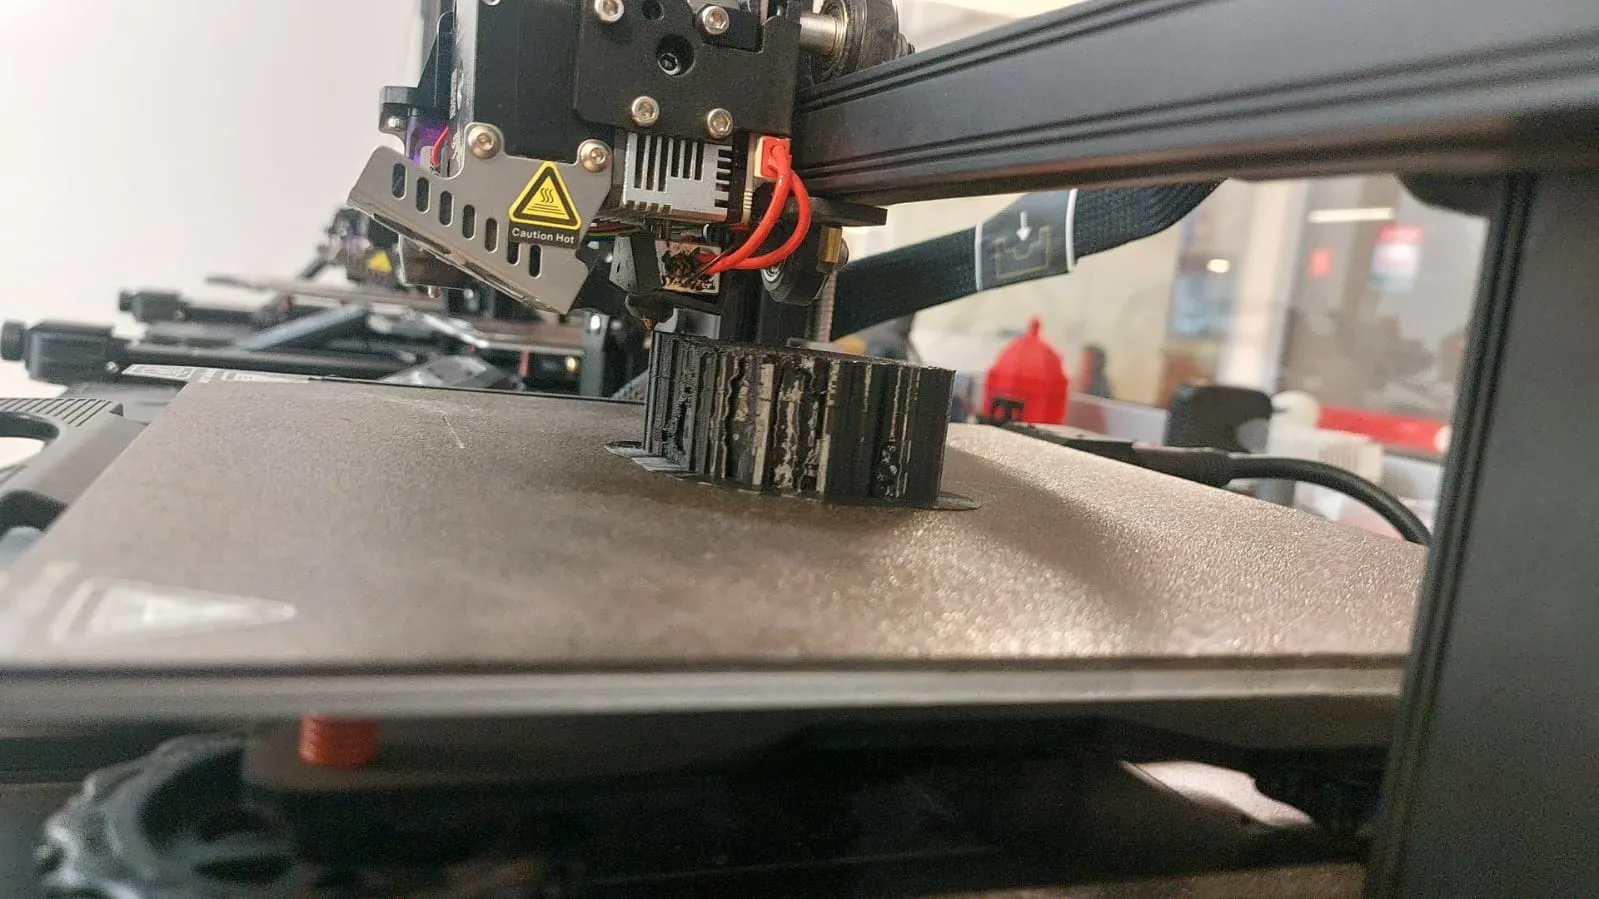
For the second attempt I tried changing the printing angle and the tree-type support since in the previous case it seemed to me that the supports and the piece fusioned, also it was another day same material, different color.
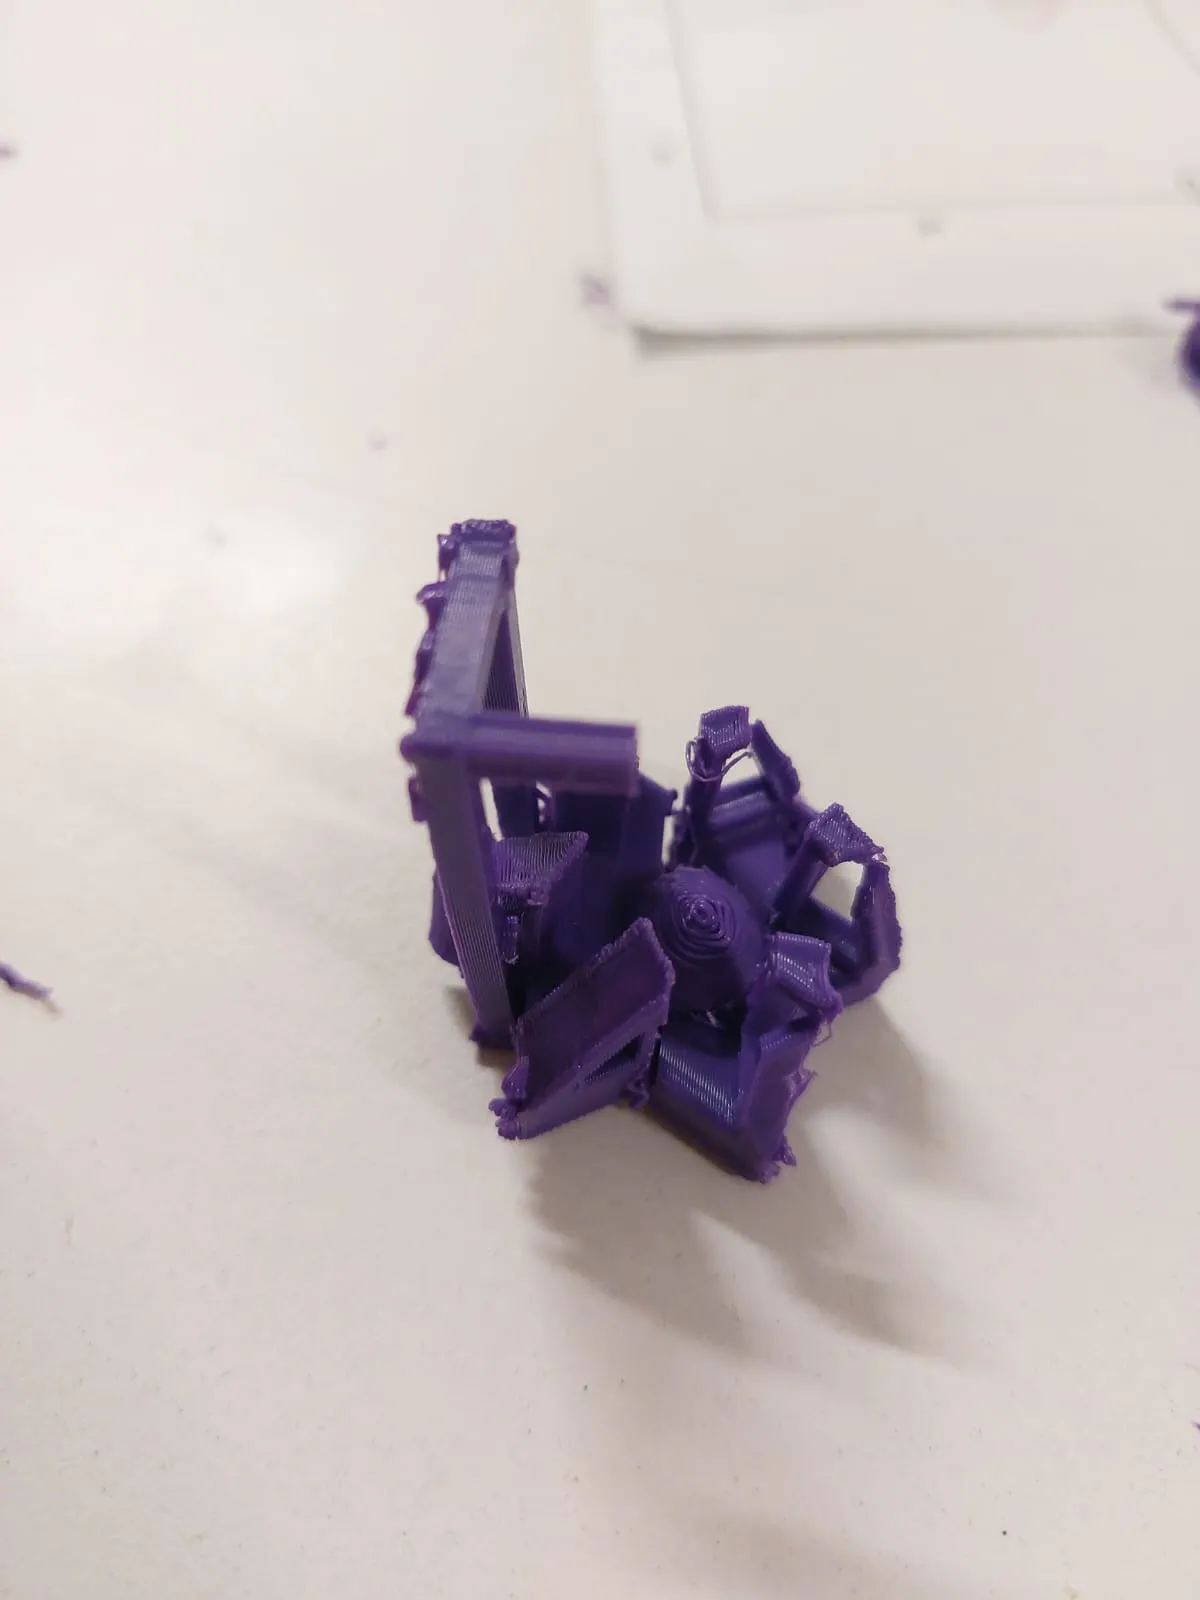
Maybe the angle wasn't a very good idea, or maybe it was the supports, changed the angle and reduced the complexity of the piece a little.
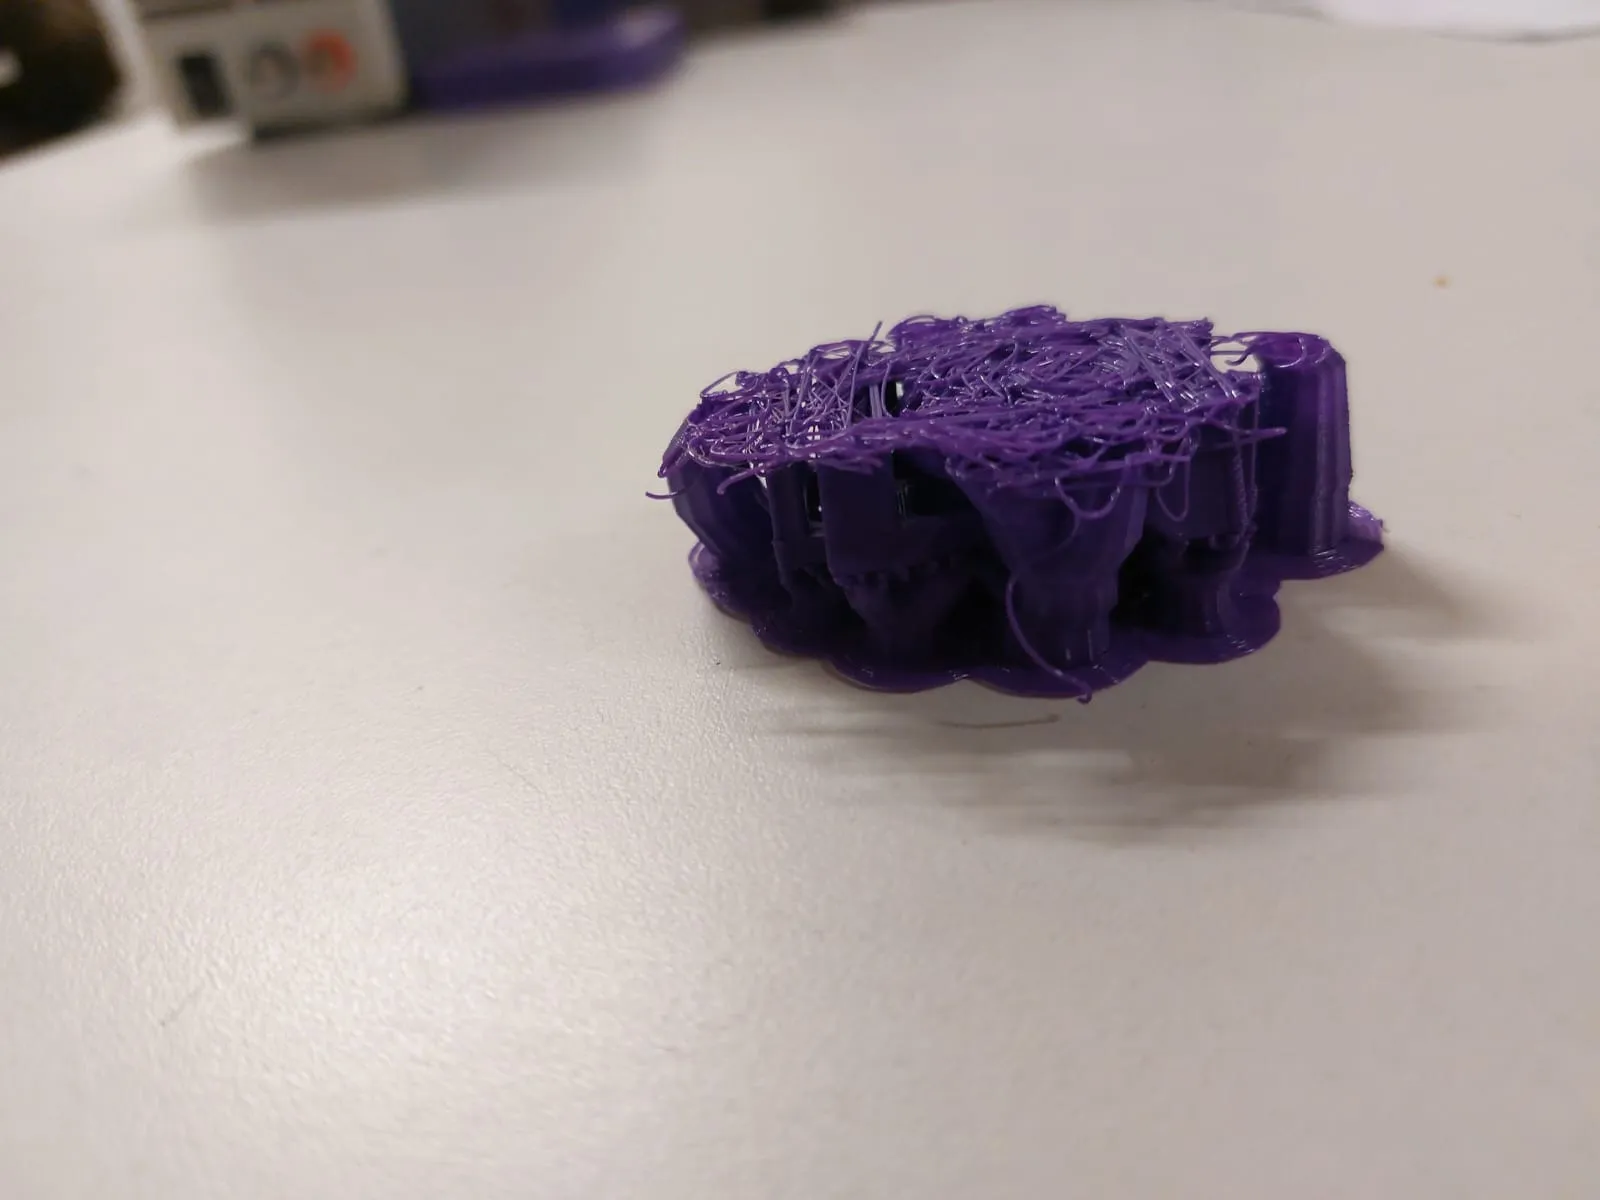
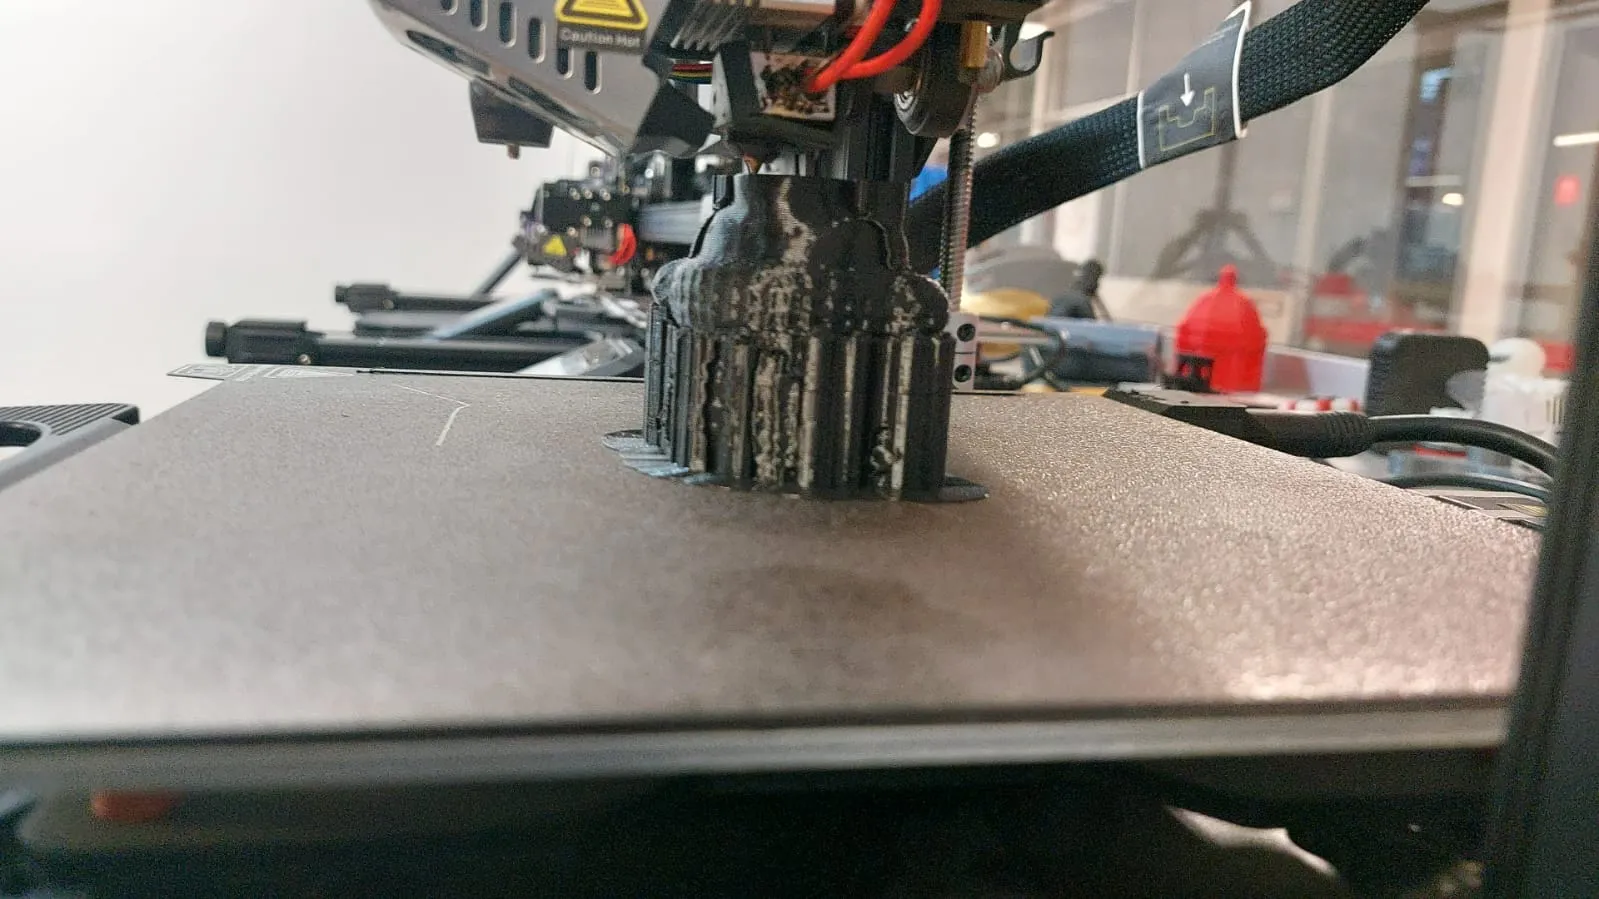
Luckily for the last attempt it was enough to change the previous configuration of the bed so that it remained sticky and the supports as the tree moved it.
3D Scanning
There's various methods to scan, from really professional ones that use laser, digitalizer, confocal, and opacity techniques. To the cheapest and most accessible one, photogrammetry: this method can be as simple as using your phone as a camera and different special applications. These applications may be completely free, come with a free trial, have limited functions, have extremely long queue times, or have an initial price tag. They also differ in pricing and capabilities within the phone model or OS.
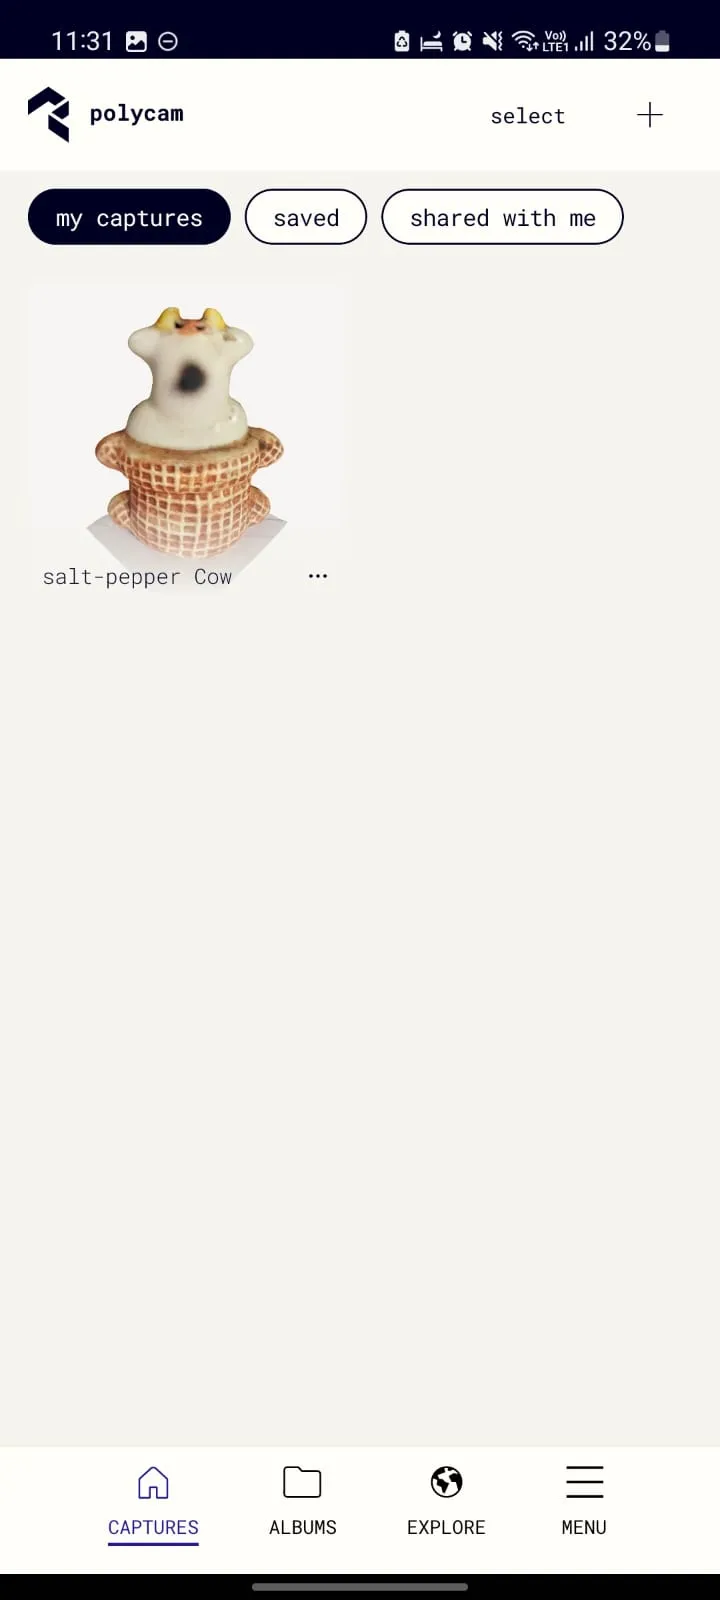
3D Scanning apps i've used in this week assigment
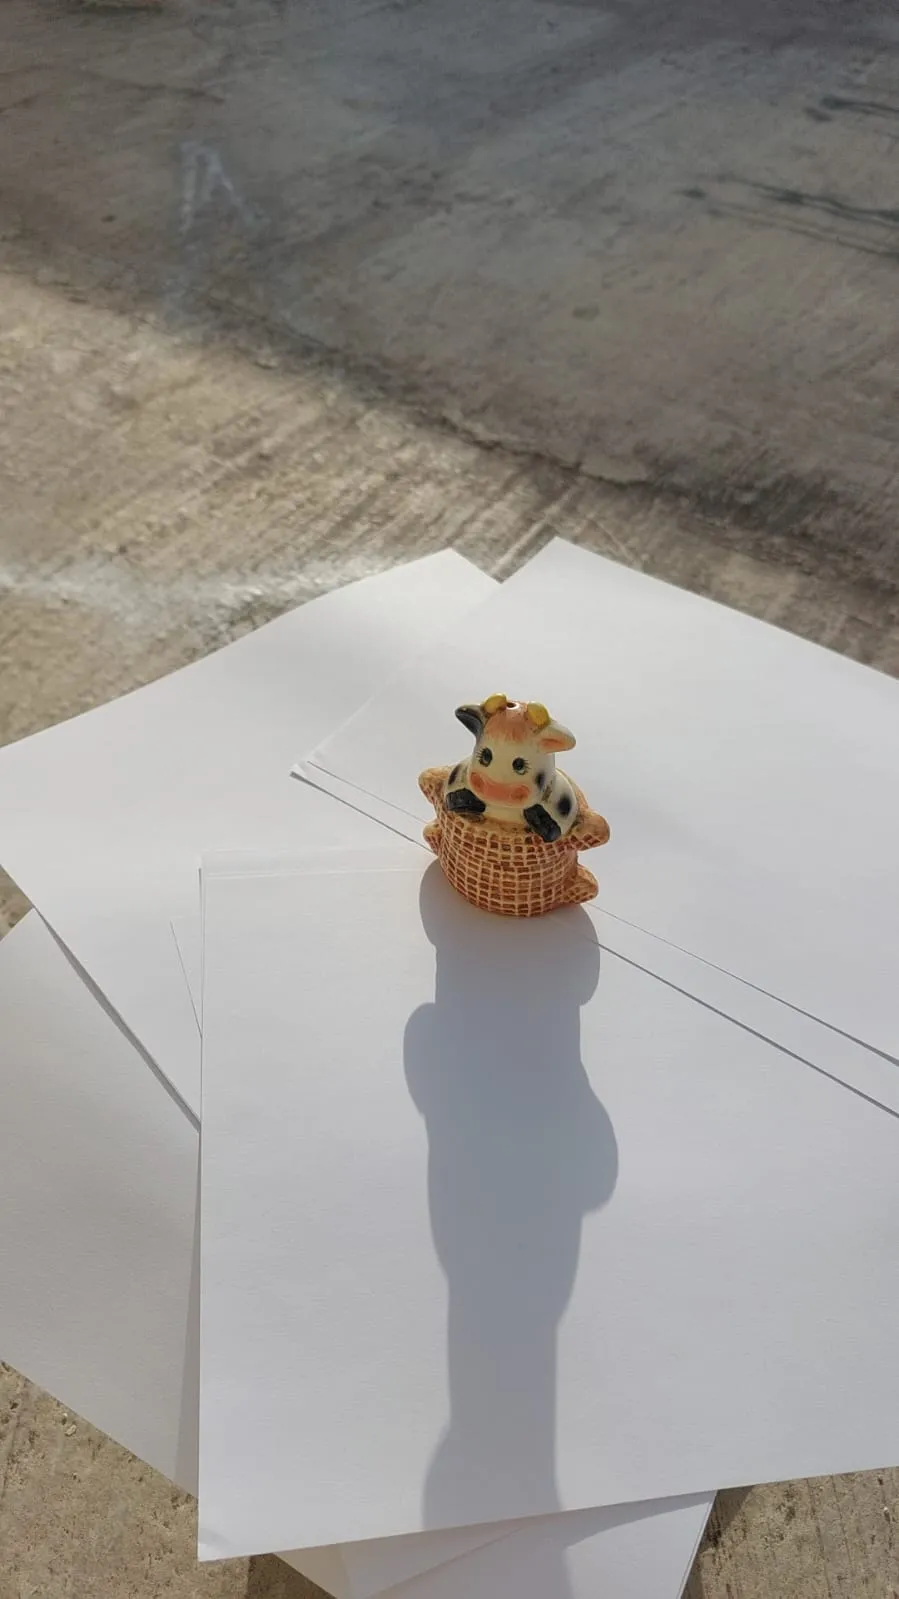
This method requires some prior preparation: a good lighting in the photo area, a flat background or pattern and depending on the app you will have to move or not the object during the process. To perform the scanning just go to the app and generate a video or group of photos that point to the object from all directions and angles that you can, always keeping a similar distance.
-
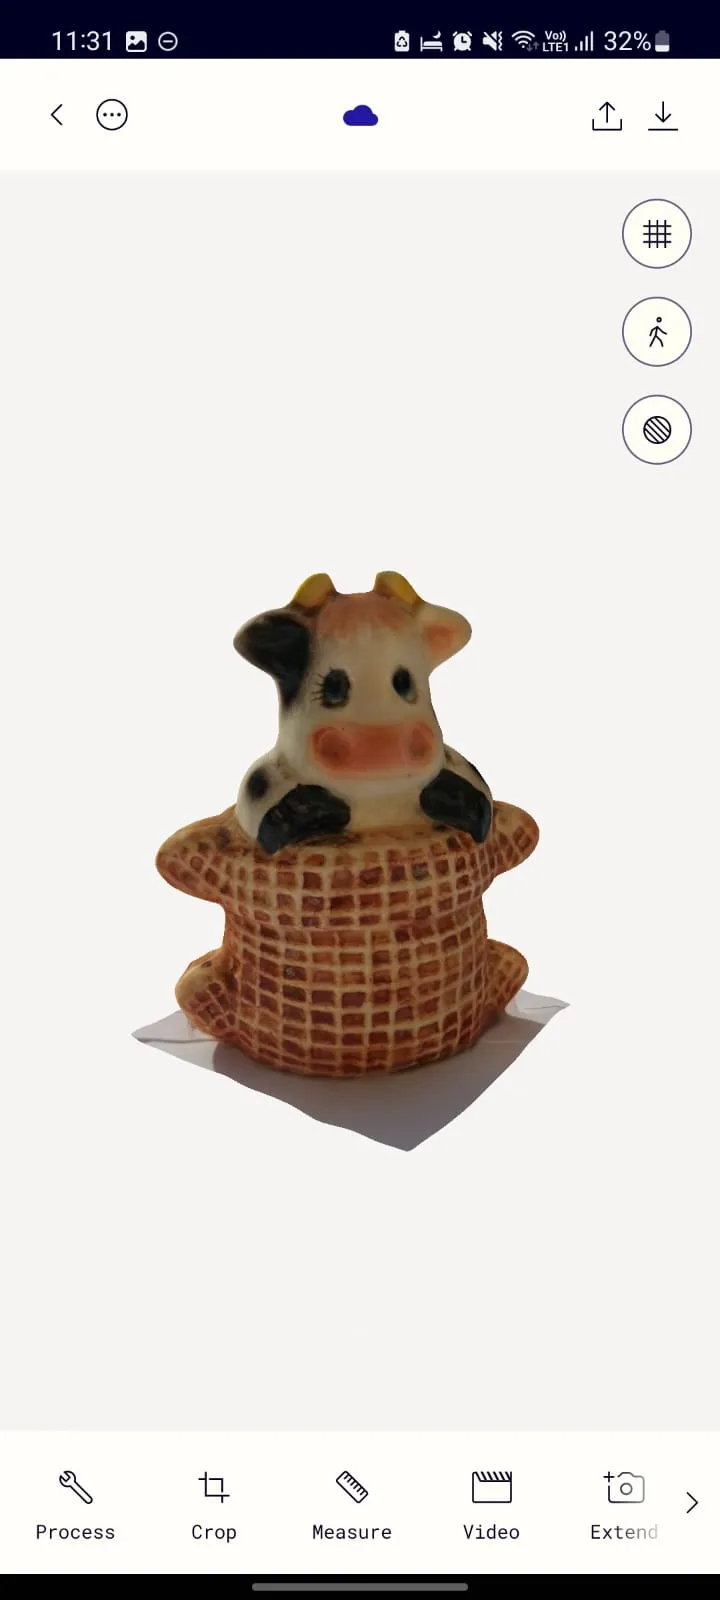
Polycam
One or the most popular app in the app store either for android or apple, this app gave me extraordinary results and the interface seemed user-friendly to me, the only catch is the port method, almost all the export methods are pay-walled.
App interface
3D model
-
MagiScan
This app was easy to use at the start, it makes the scan easy for you, but, there's a little big problem, the time required for you getting your scan being a free to use user is about 25 days. If you want to know the results just pay!.
App interface

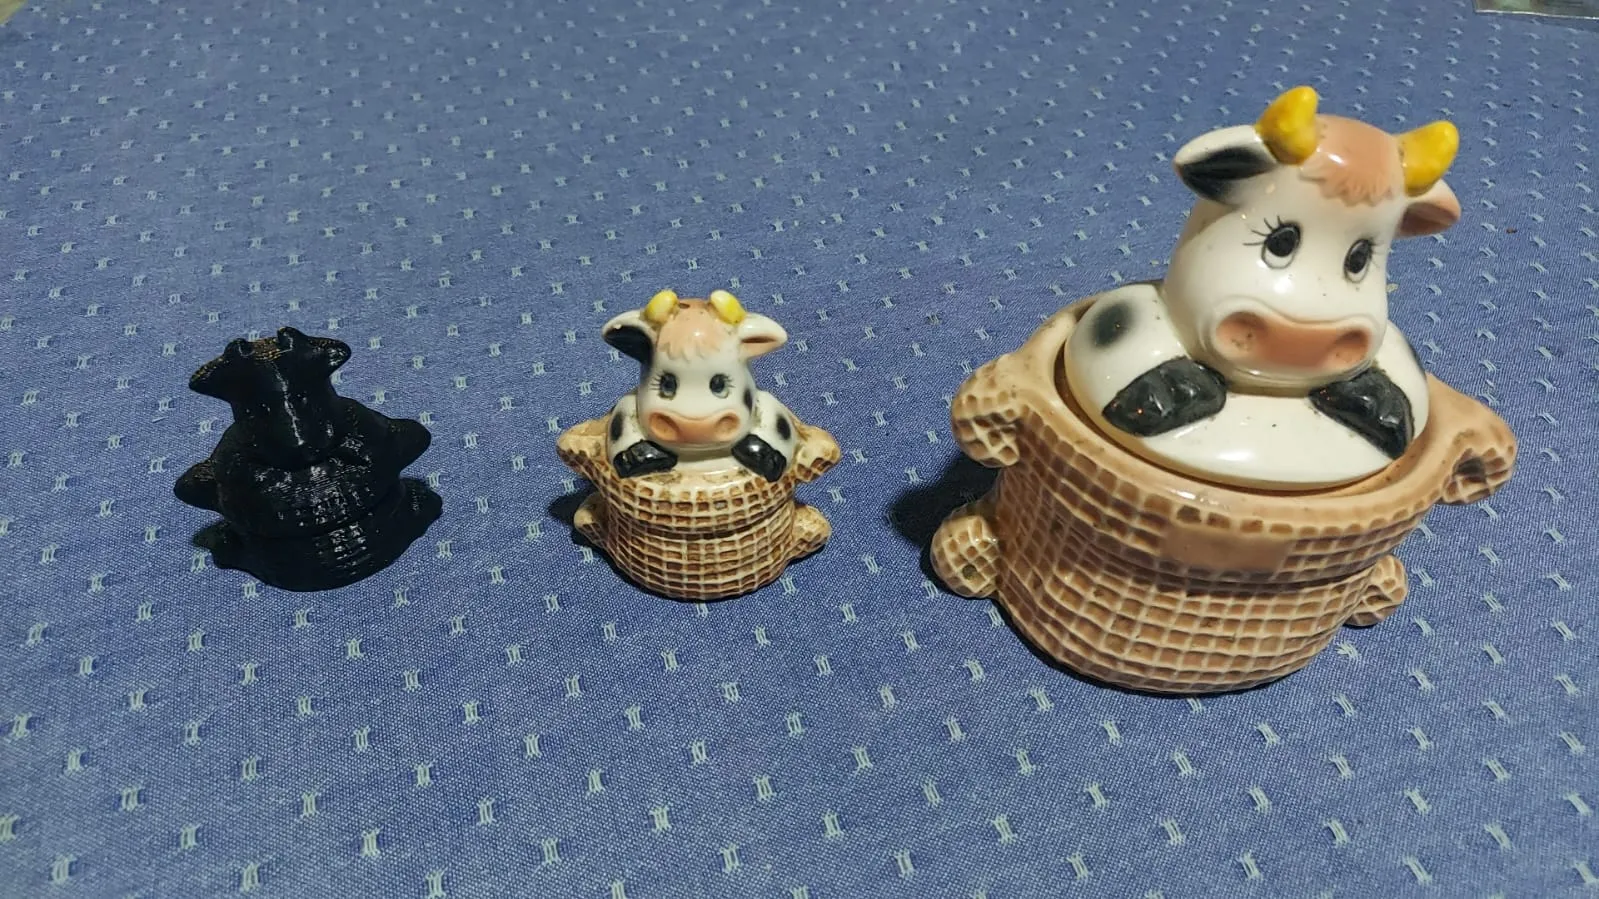
Using the place left, Object to print:
Clearly the winner for this 3D print issssss: POLYCAM!
The only thing left is to remove the base with undesired junk using the online software tinkercad, a blank square with a merge operation to go.

-

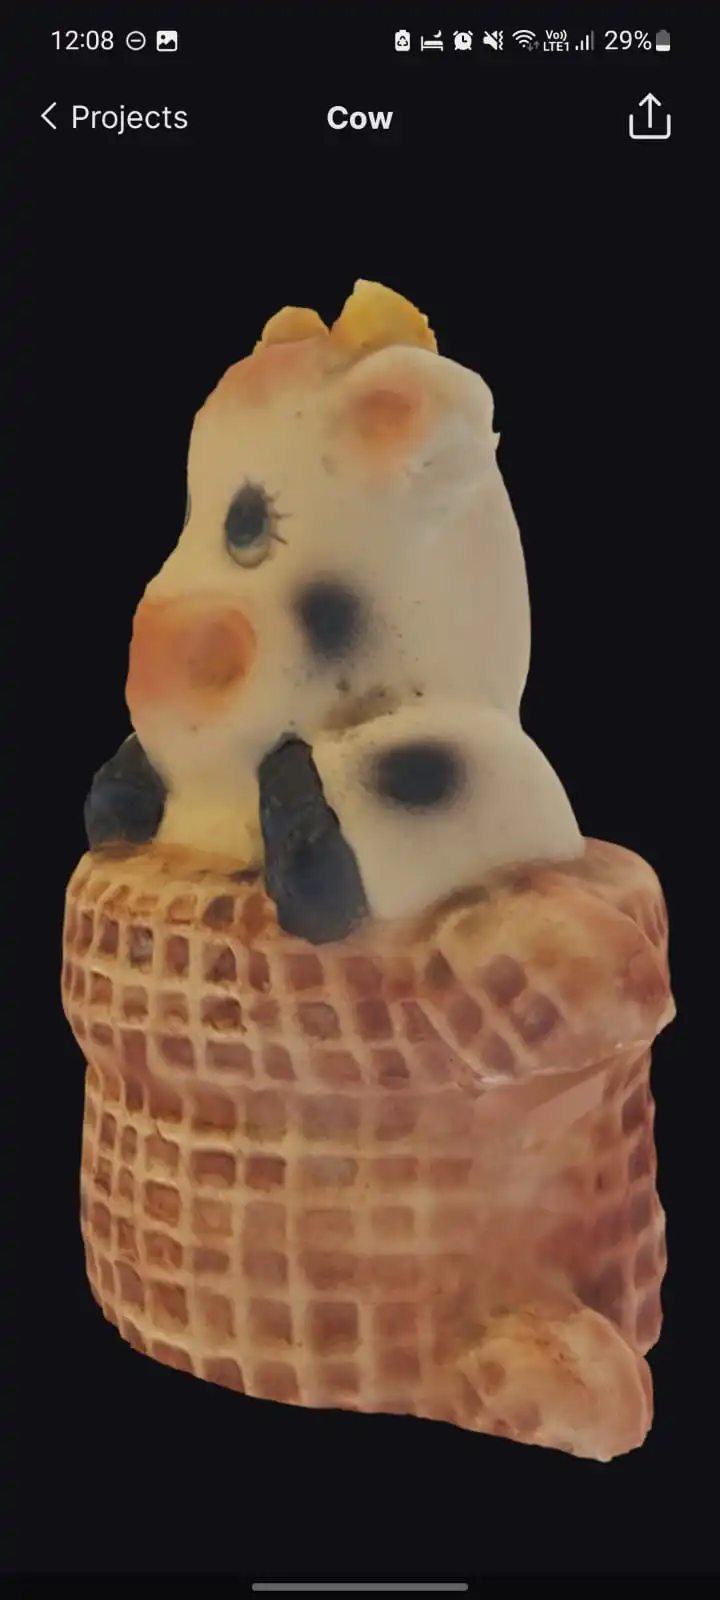
Reality Scan
Made or distributed by Epic Games this 3D scan software let you export to all the types of 3D you can imagine, the exported documents are a little behind the polyscan ones but, if you will not 3D print, they fit better in virtual enviroments.
App interface

3D model
What remains is to load the Cow 3D file from the .zip to the Cura sotware, curate the parameters for a faster 3D print and see results!.
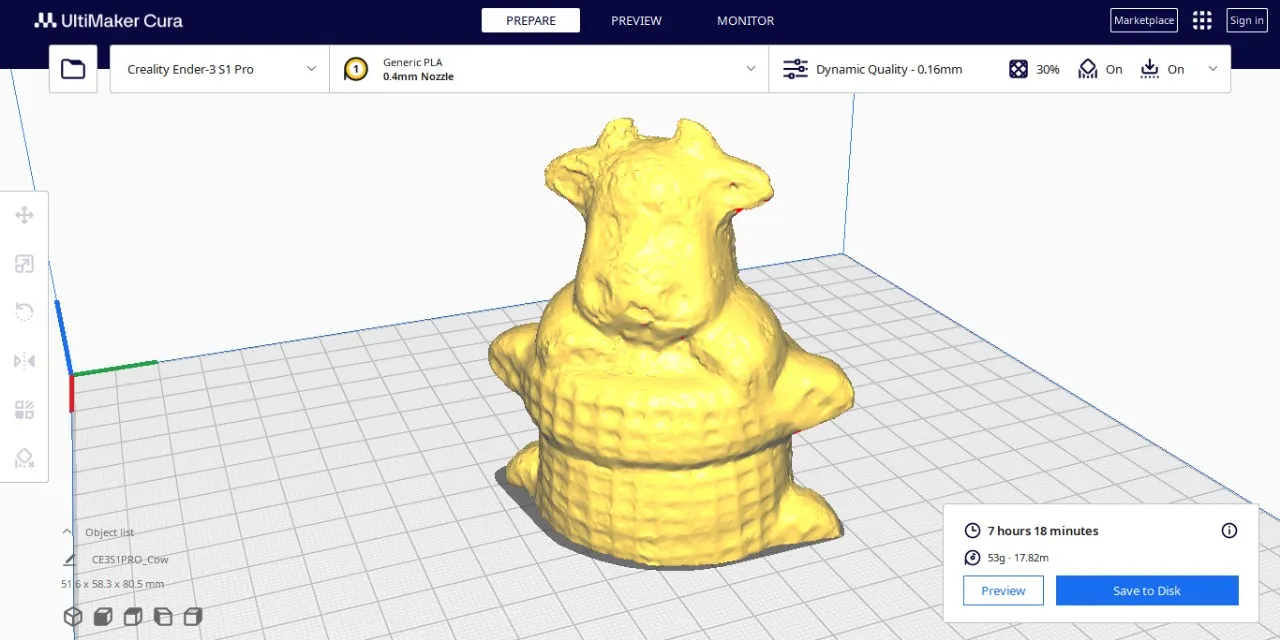
50% 75% 100%
Output
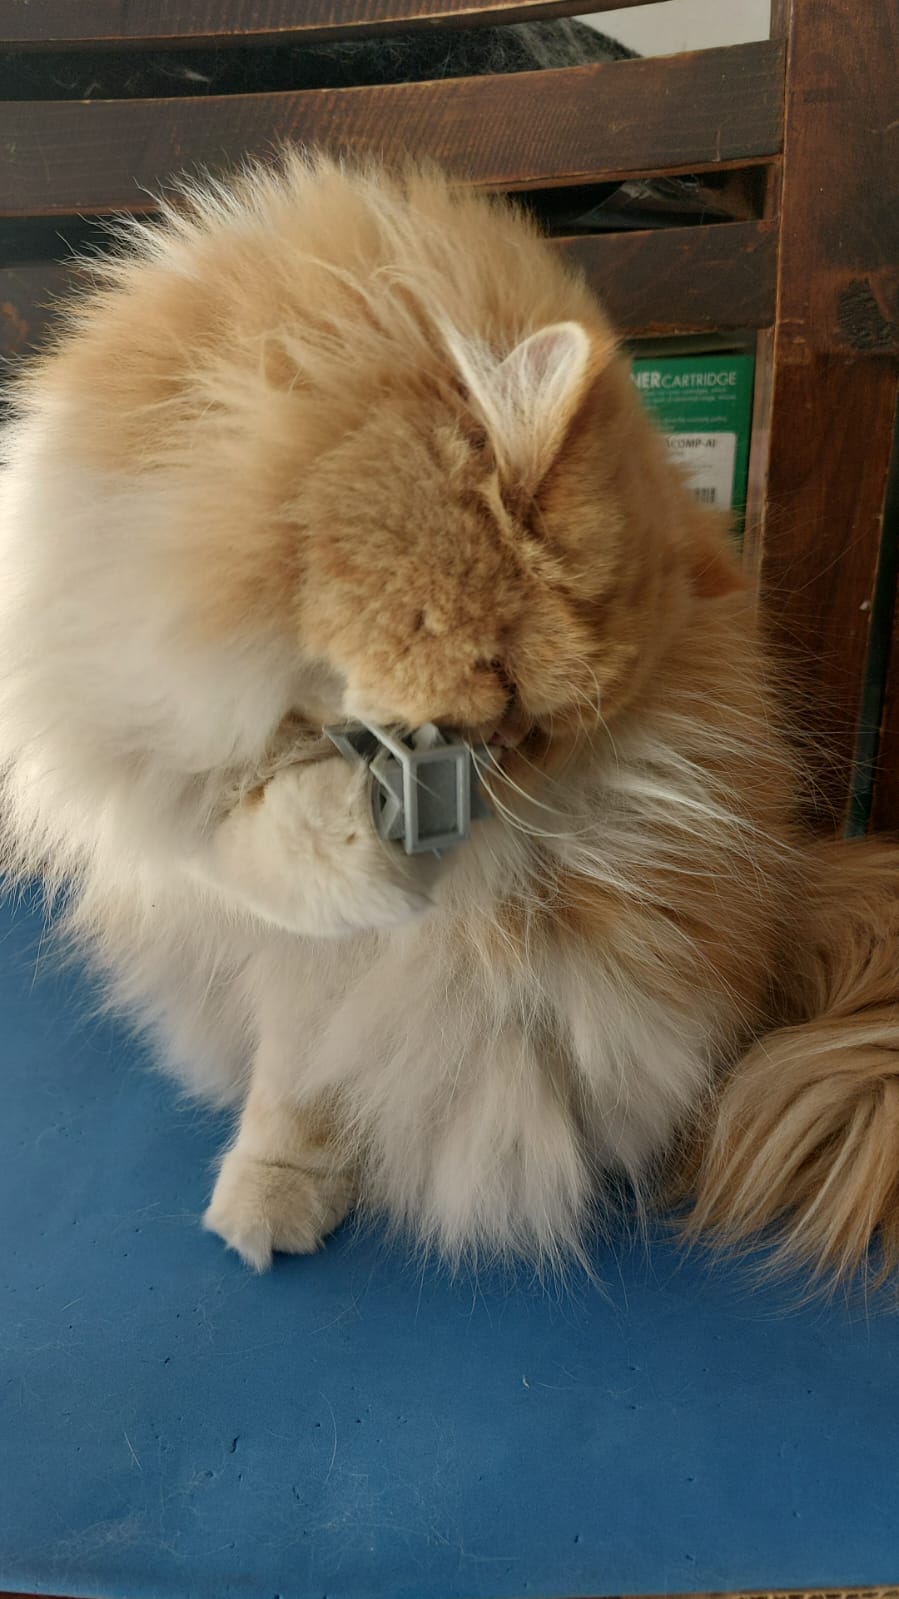
The scan method is an obvious time-saver technique, the results are pretty good even without using scan specialised tech, you should be aware of the quality and measures of the piece, because at least with my phone they lack in getting the true size of the object.
It seems that my cat like it.
Final reflection
3D printing has too many variables that can result in your print not coming out right the first time, either from the design or the settings in your trusted slicer, but at least in the tests I performed I realized that for the ender 3 s1 pro model in puebla, since it also depends on the heat and humidity of the room if the piece measured more than 2 centimeters at least a skirt bed will always be necessary, the tree supports are easier to remove but depending on the figure they can greatly increase the printing time, as for the design I had a small error in the first version of my design that left a floating square, that alone is enough for it to go wrong since that extrusion will stick to the tip and from the tip to an unwanted place and then the piece no longer comes out, so you do not have to be so careless when designing for 3D printing and follow the rules mentioned above.