Interface and Application Programming
For this week's assignment, I created an interface using QT Designer. Then, I converted this interface into Python code to integrate it with external components. In my project, I utilized a DHT11 sensor to capture real-time data, which was displayed within the interface.

Designing the inteface
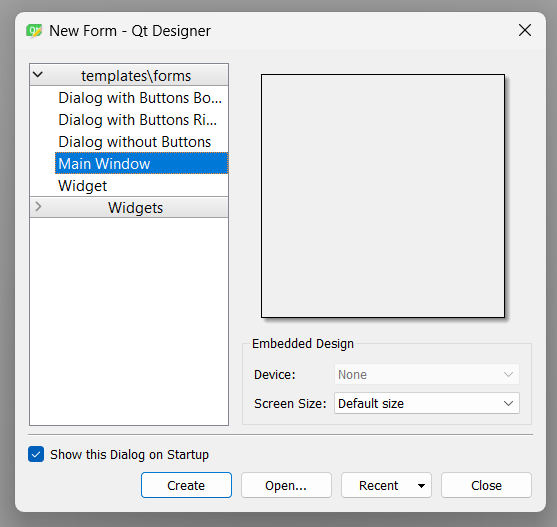
As I mentioned, I opted for QT because it's the platform I learned and found most user-friendly. Upon opening the app, you'll encounter a wizard-like interface offering various options, including creating a new interface. It's advisable to stick with the default settings and simply click on "create" to proceed.
Afterward, you'll see a blank canvas where you can select and drag any elements you need for your interface. In my case, I utilized Labels and the LCD Number from the Display Widgets menu. However, feel free to add any other elements that suit your project requirements.
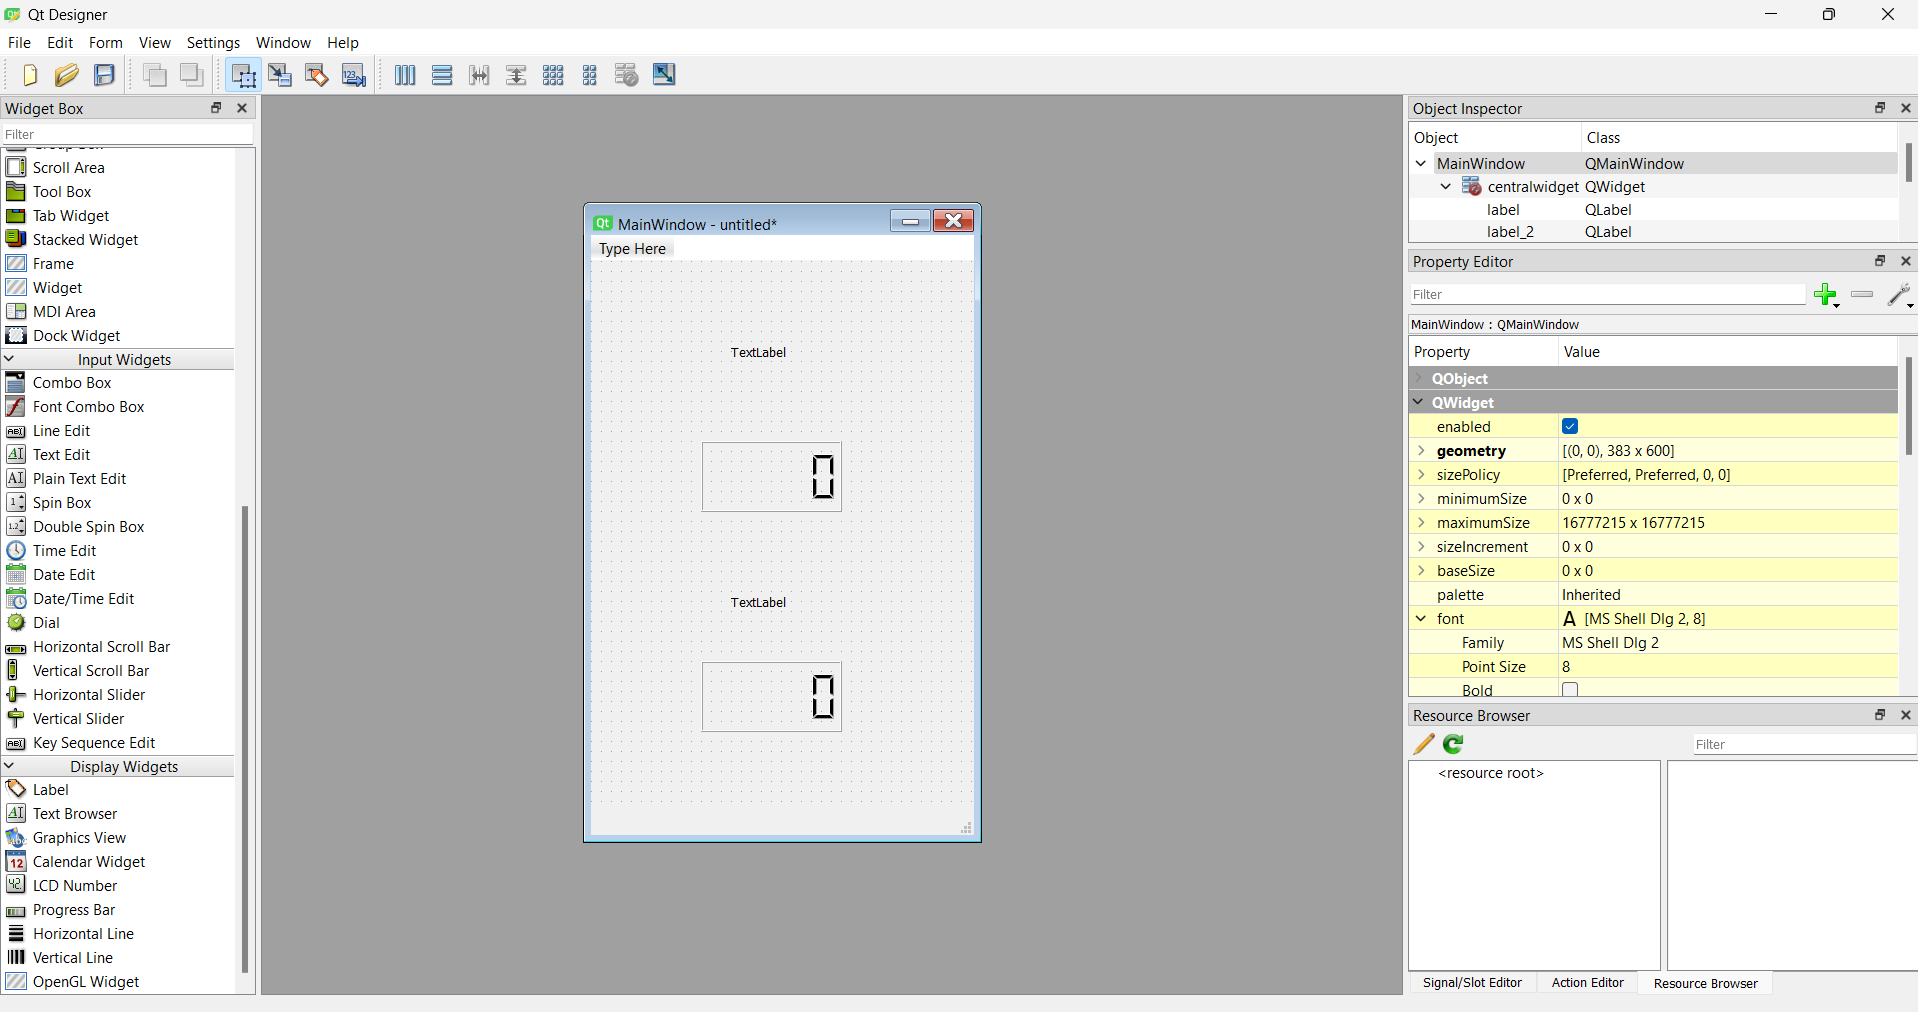
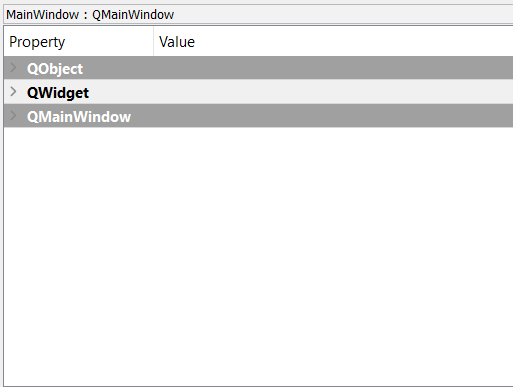
After selecting an element, you can further personalize it using the properties panel on the right side. If no specific element is selected, you'll see three main properties: QObject, QWidget, and QMainWindow. QObject is simply the name of the element, so you usually work with QWidget and QMainWindow properties for functionality and aesthetics. The QWidget section lets you adjust the appearance, such as colors, size, and shape. Feel free to customize these settings to suit your preferences.
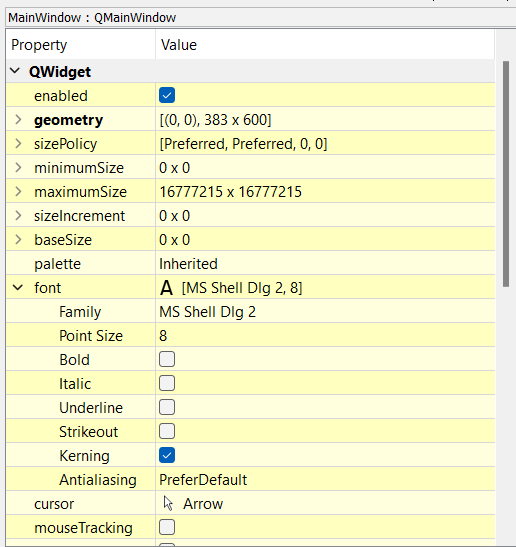
To personalize the object, click on the QWidget option, where you'll find a variety of settings to customize. The main options I typically use include minimumSize and maximumSize, which allow you to set the minimum and maximum size, respectively. Another useful option is the palette, where you can choose different colors for various elements like WindowText, Button, Light, Midlight, Text, ButtonText, and more. Additionally, the font option offers various settings such as family, point size, bold, italic, underline, and more. Feel free to adjust these settings according to your preferences.
Another way to personalize the object is by right-clicking on it and selecting the "Change
styleSheet" option. This will open a window where you can customize the appearance using a
code-like format. However, if you prefer a more visual approach, you can click on the options
at the top of the window, which include "Add resource," "Add gradient," "Add color," and
"Font." This allows you to adjust the style using intuitive visual controls.
For example, to change the background color, start by selecting the "Change styleSheet" option.
Next, click on the triangle next to the "Add Color" option. Then, choose "background-color."
You'll see a range of basic colors, but you can also add custom colors. Additionally, you
can use RGBA values ranging from 0 to 255, hexadecimal values, or personalize it further
using the color palette located in the top right corner.
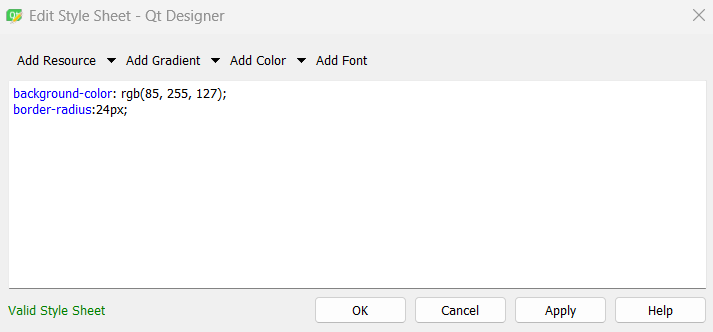

This menu offers numerous possibilities. You can adjust the corner radius of the label
display, change the color of the text, modify the font, and explore many other options to
customize your interface.
After customizing your interface to your liking, save it in a folder of your choice. It
will be saved as a .ui file. To effectively use the interface, it's recommended to
convert it to Python language.
Converting the interface
To utilize the interface, it needs to be converted to Python code. There are various methods
to achieve this conversion from .ui to .py format. One commonly used method is using a tool
called pyuic6.
To use pyuic6, start by creating a folder that contains the interface file, or navigate to the
folder where the interface is located. It's advisable to create a virtual environment in that
folder. A virtual environment allows you to install libraries needed for your project with
specific versions, without affecting other projects that might use different versions of the
same libraries.
Once you've located the folder, open your Command Prompt (CMD) and navigate to your main folder
using the cd command. To create a virtual environment, use the command
python -m venv Example_VI. This will create the virtual environment, but it still
needs to be activated. To activate it, use the command
.\Example_VI\Scripts\activate. If everything is done correctly, you will see the
name of your virtual environment in brackets at the beginning of the command line.
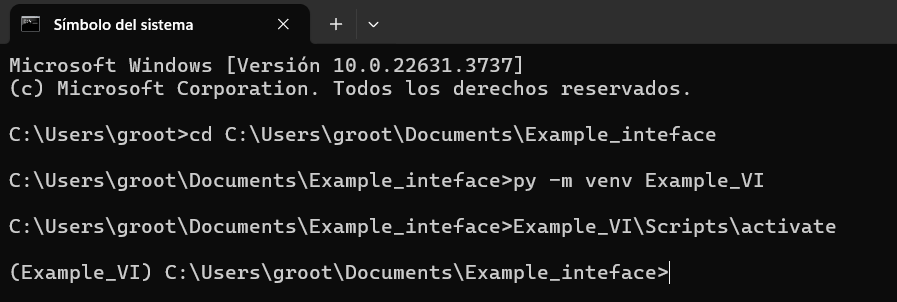
Now that you have created the virtual environment, it's time to download the necessary libraries.
In my case, I used PyQt6 and pyserial. PyQt6 is required to convert the interface from .ui to .py
so it can be usable, and pyserial is necessary to communicate with the Arduino sketch that reads
the sensor data and sends it to the interface. To install these libraries, type the following
commands in the CMD with the virtual environment active: pip install PyQt6 and
pip install pyserial
Note: If you want to check the libaries that you already install, type the following
command pip list
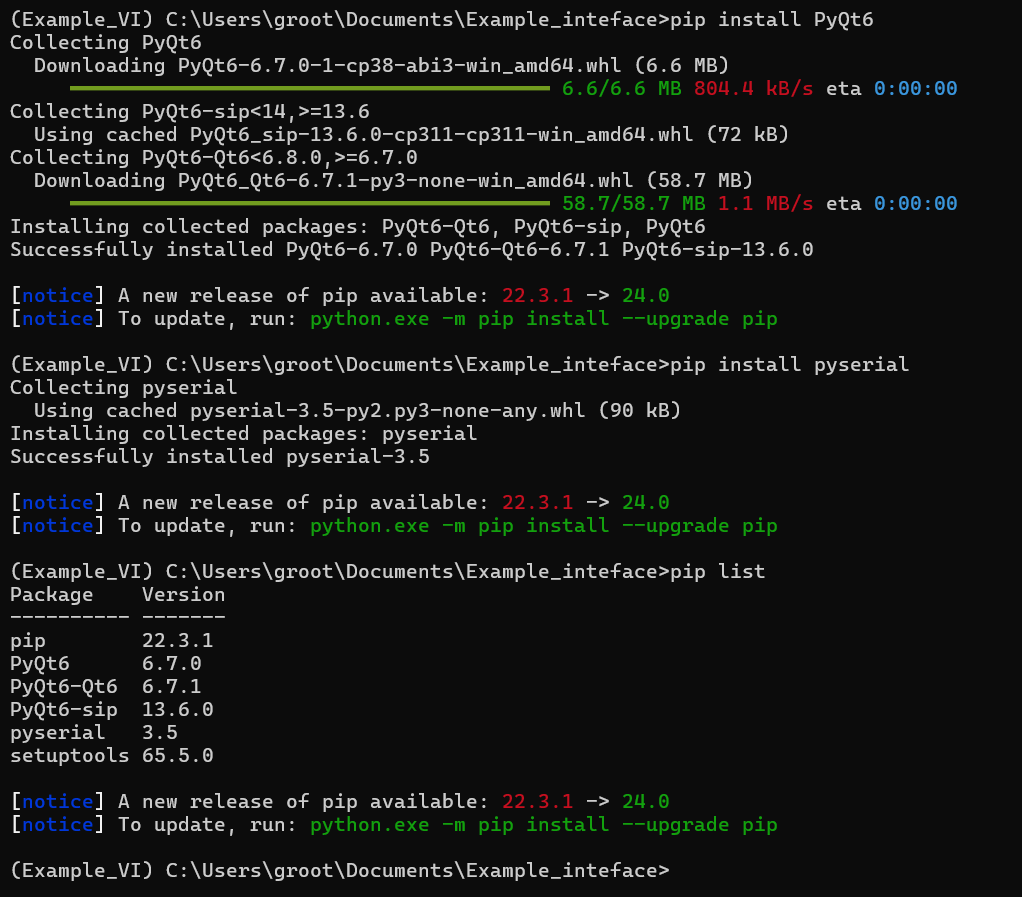
After installing the necessary libraries, it's time to convert the interface into Python code.
You can do this by typing the following command in the Command Prompt:
pyuic6 -x Interface_example.ui -o Interface_final.py
This command converts the .ui file to a .py file. You can also change the name of the output
file by adjusting the file names in the command.

Using the interface
After installing the necessary libraries, it's time to make the interface interactive. You can
do this by creating another .py file that links to the interface by importing it with a library.
For example: from EX_INTERFACE_NAME import * Then, add the corresponding code to
make the interface functional. Note that the following example is the code I made for my
interface. You can edit it to suit your needs by adding the desired logic after the comment:
# Add your custom logic here
Now that the interface has logic and is functional, it's time to test it. First, upload your code to the board using Arduino or any other IDE you prefer. I use Arduino because it's the easiest for me. I'll provide my Arduino code below. Then save your .py code.
Then in your CMD type the following command: python EX_INTERFACE.py, you should see
your interface work like mine. See the video from below to see the actual interface working.
