Networking and Communications
This week we focus on networks and communications.
The assignment was:
- individual assignment: Design, build and connect wired or wireless node(s) with network or bus addresses and a local interface
- Group assignment: send a message between two projects.
Group Assignment
For this assignment I worked with my colleague Maria Angela Mejia, she will use a servo motor in her project and I will use an infrared sensor in my project.
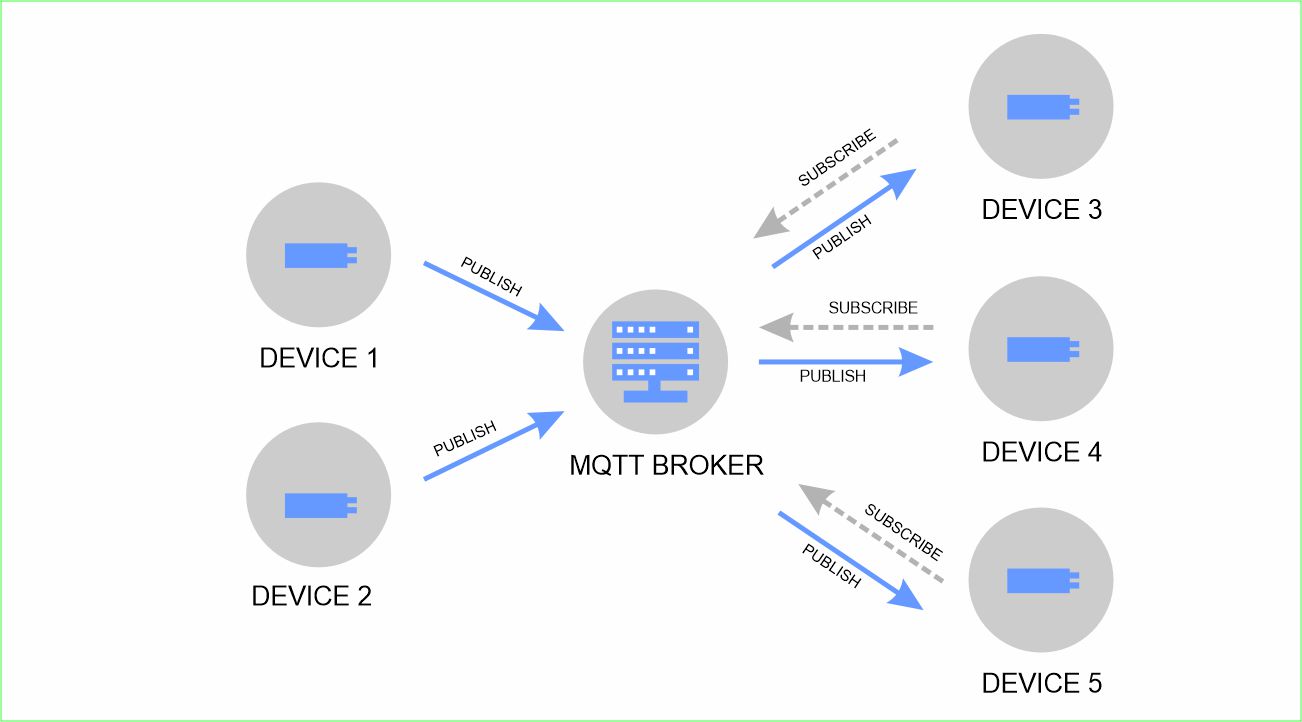
We thought we could make an interesting remote connection between our devices using the MQTT protocol.
We start by choosing the mqtt application that we are going to use.
We start by choosing the MQTTX application. You can visit their website to start using it.
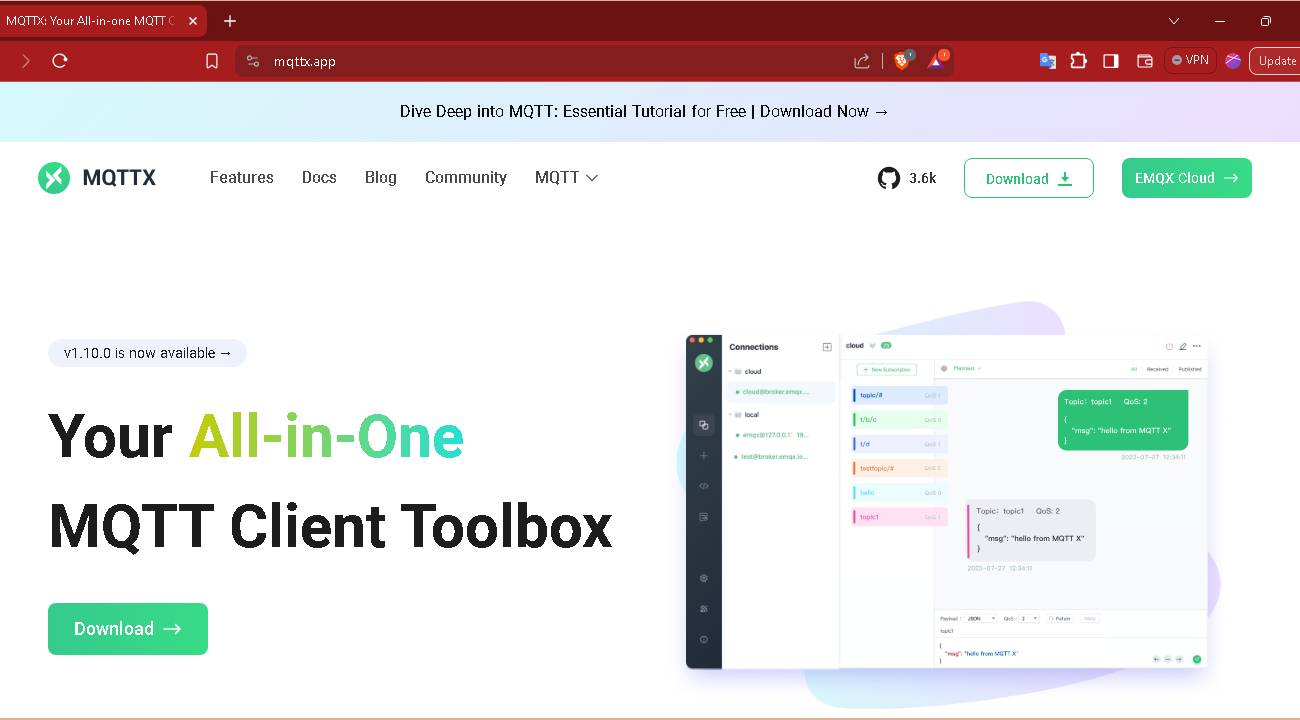
MQTTX is an open-source, cross-platform MQTT 5.0 desktop client initially developed by EMQ, which can run on macOS, Linux, and Windows.
The user interface (UI) of MQTTX adopts a chat-based layout, simplifying operational logic. It enables users to establish multiple MQTT connections, thereby facilitating swift testing of MQTT/MQTTS connections, as well as message subscription and publication.
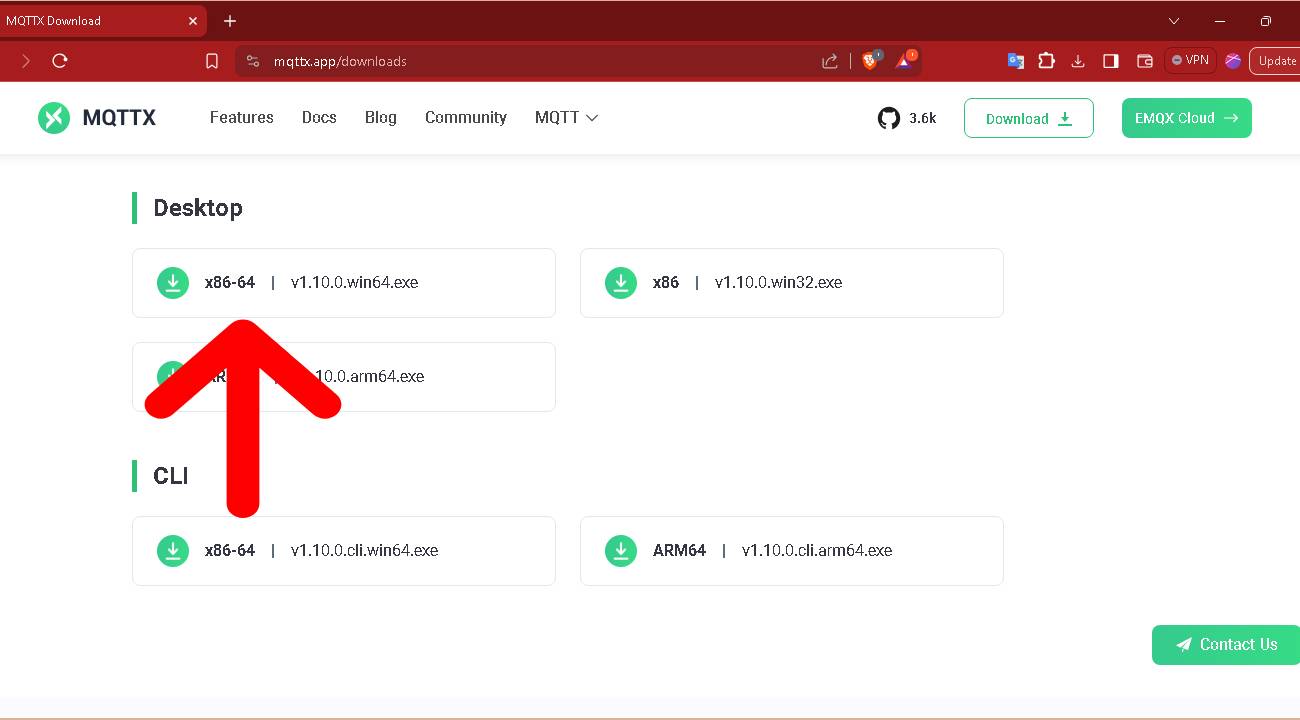
We begin to download the application.

We select the software according to our operating system and install it using the default configuration.
In my case I use Windows and install X86-64
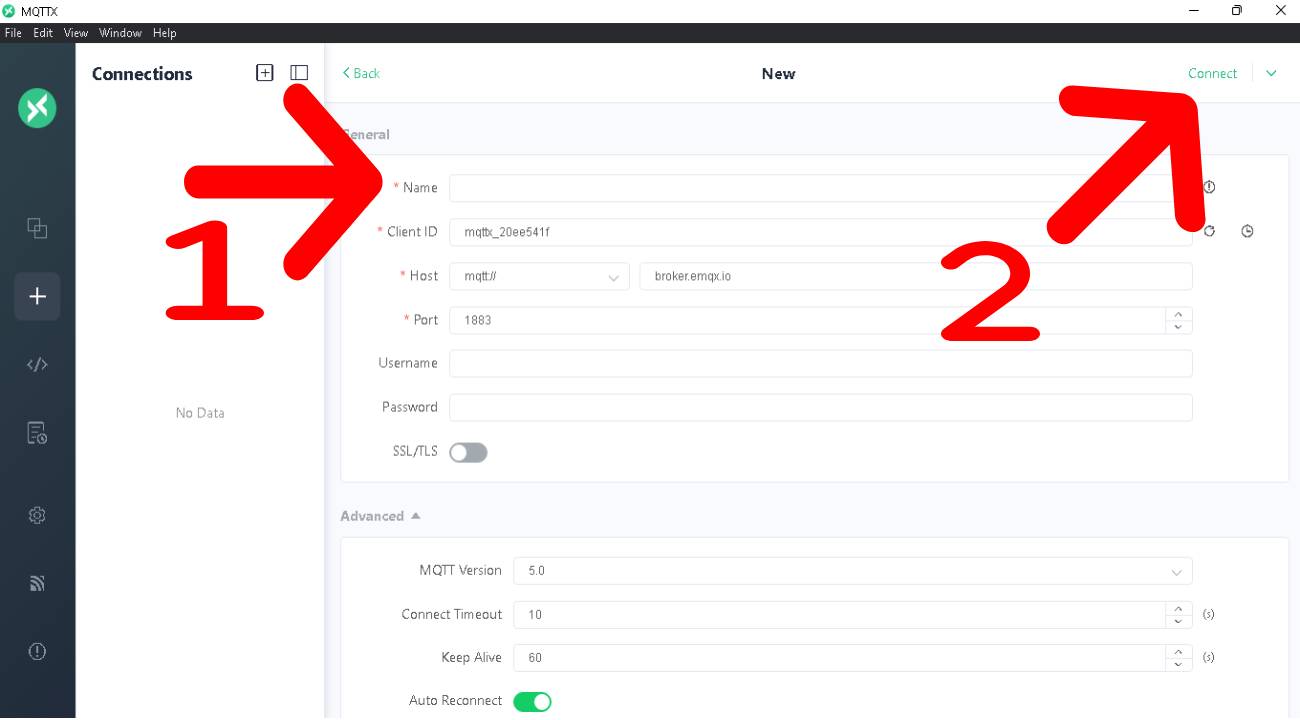
Once the application is installed, we open it and create a new connection.
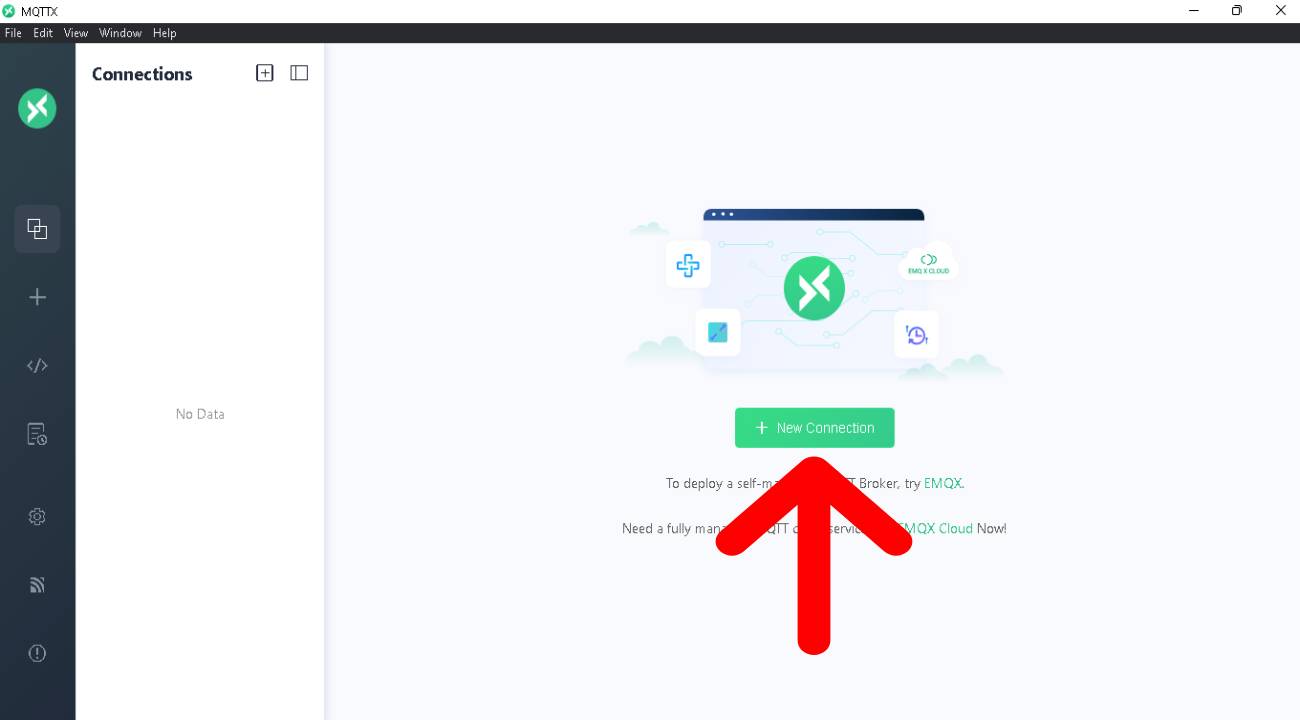
1. We must give our connection a name, this field is required.
We can leave all other fields by default.
2. Once the name has been set, we proceed to connect it.
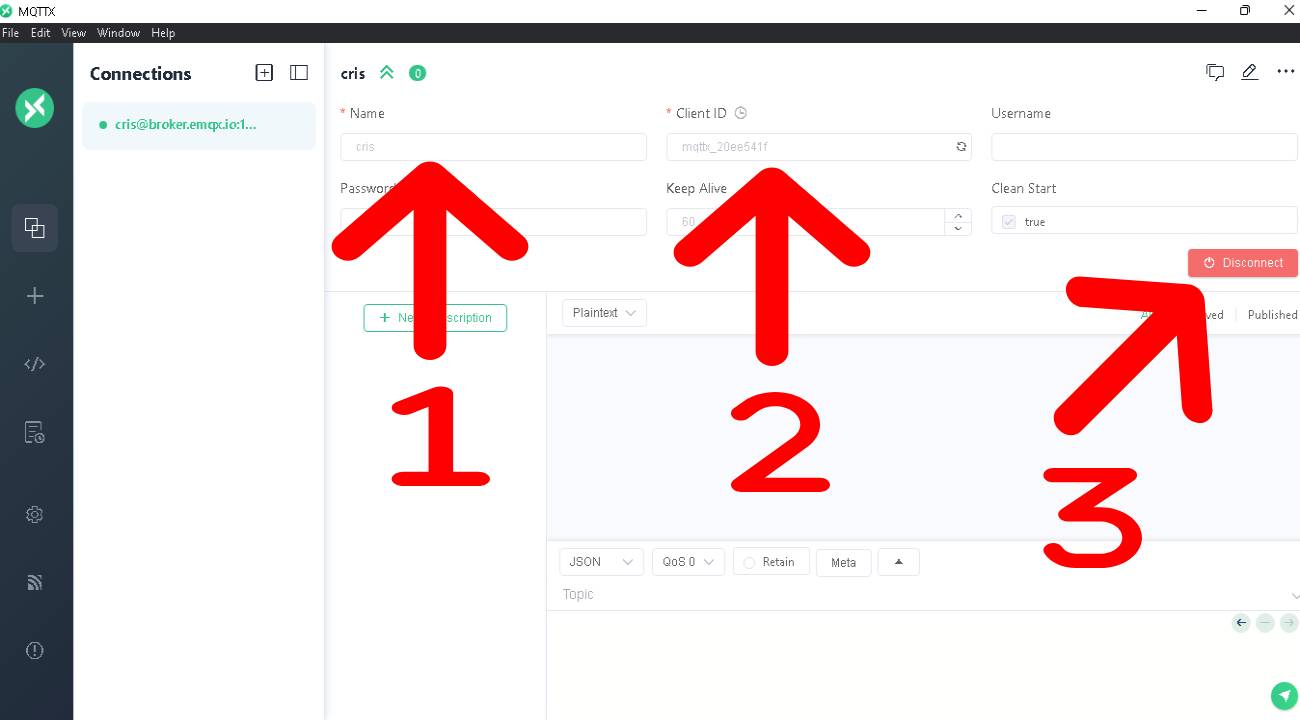
We will see that when we connect it will show us:
1. The name of the connection we assumed.
2. Client ID.
3. the button to disconnect.
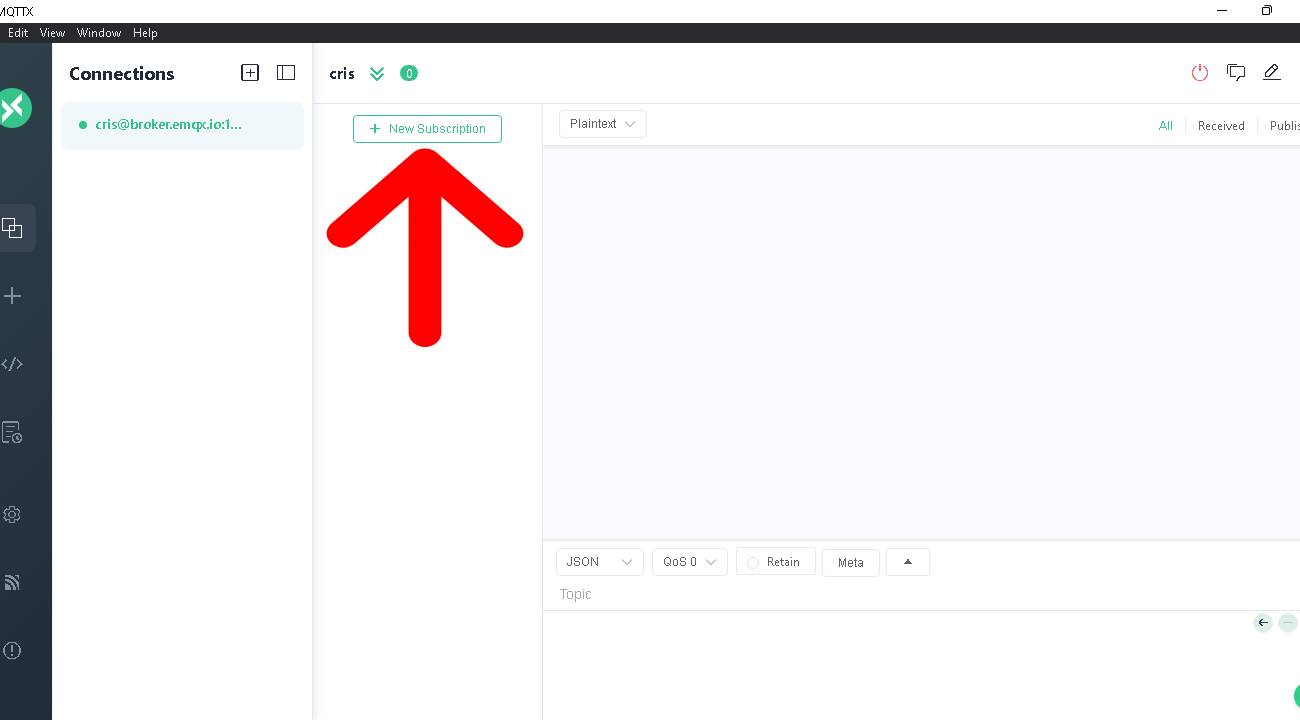
Now that we are connected, we will be prompted to add a new subscription.
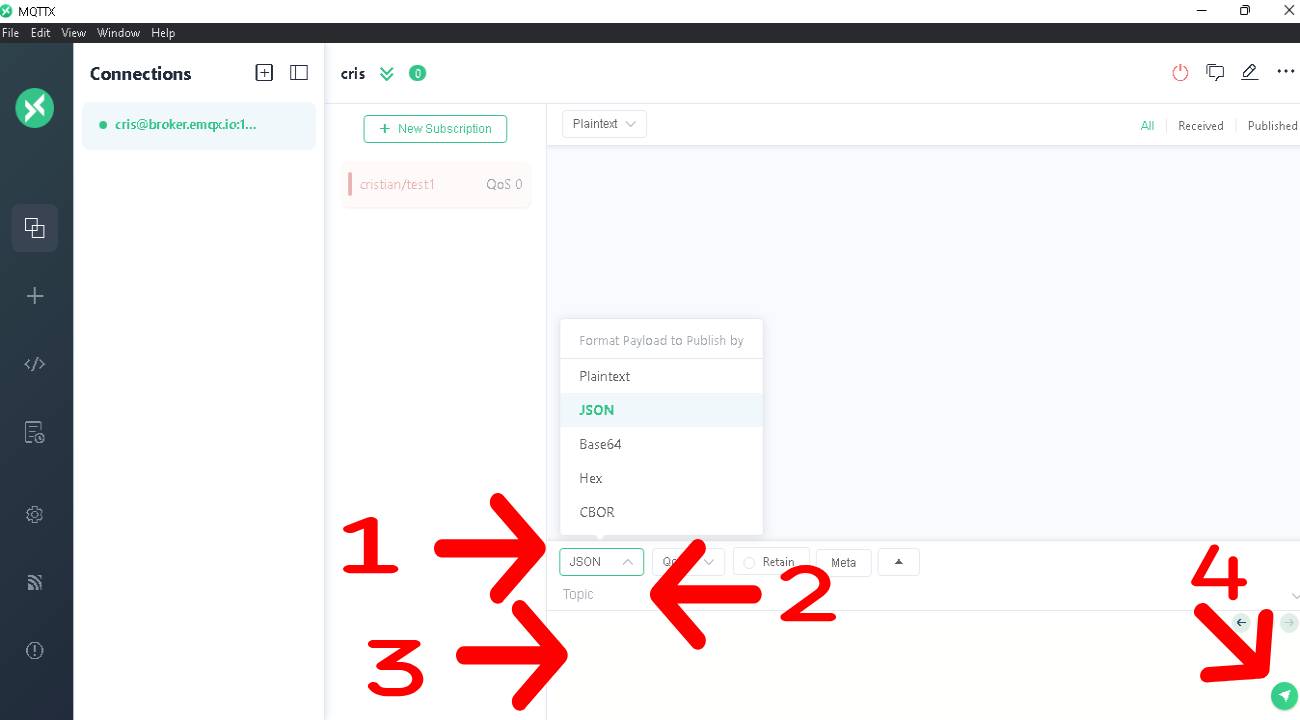
1. Now we must create a mandatory topic. In this exercise we will use: cristian/test1
We can leave the other fields by default.
2. we confirm

In order to publish we must:
1. select the type of data that we are going to send.
2. Write the Topic in which we want to publish.
3. Write the message.
4. Publish.
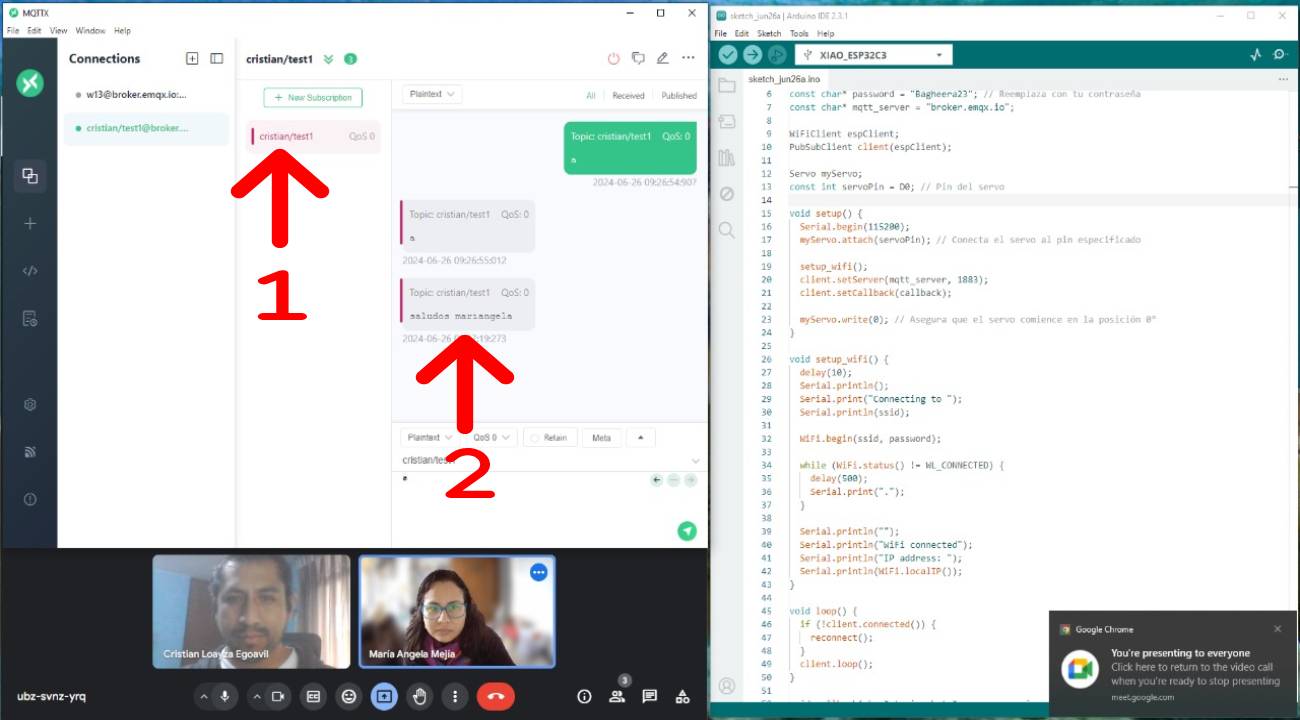
My colleague Maria Angela Mejia followed the same steps:
1. Added a subscription to the same topic cristian/test1.
2. received a welcome message in Spanish that says "Greetings Maria Angela"
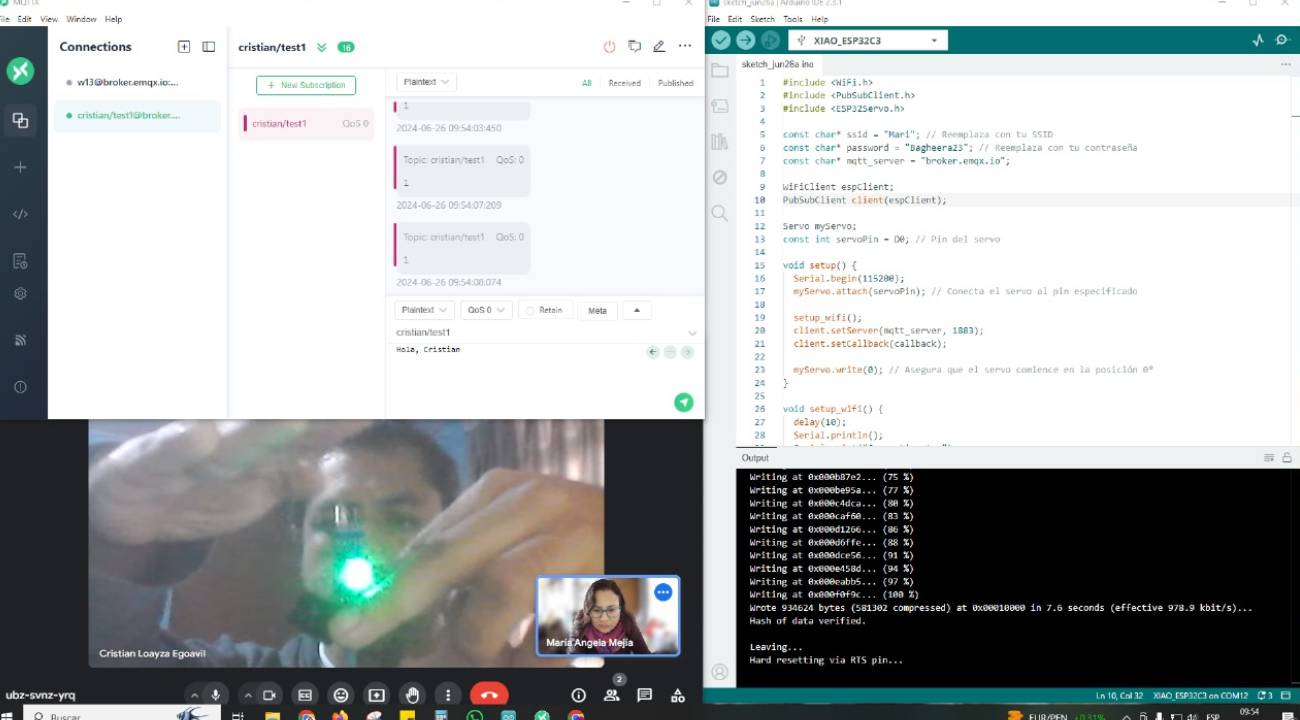
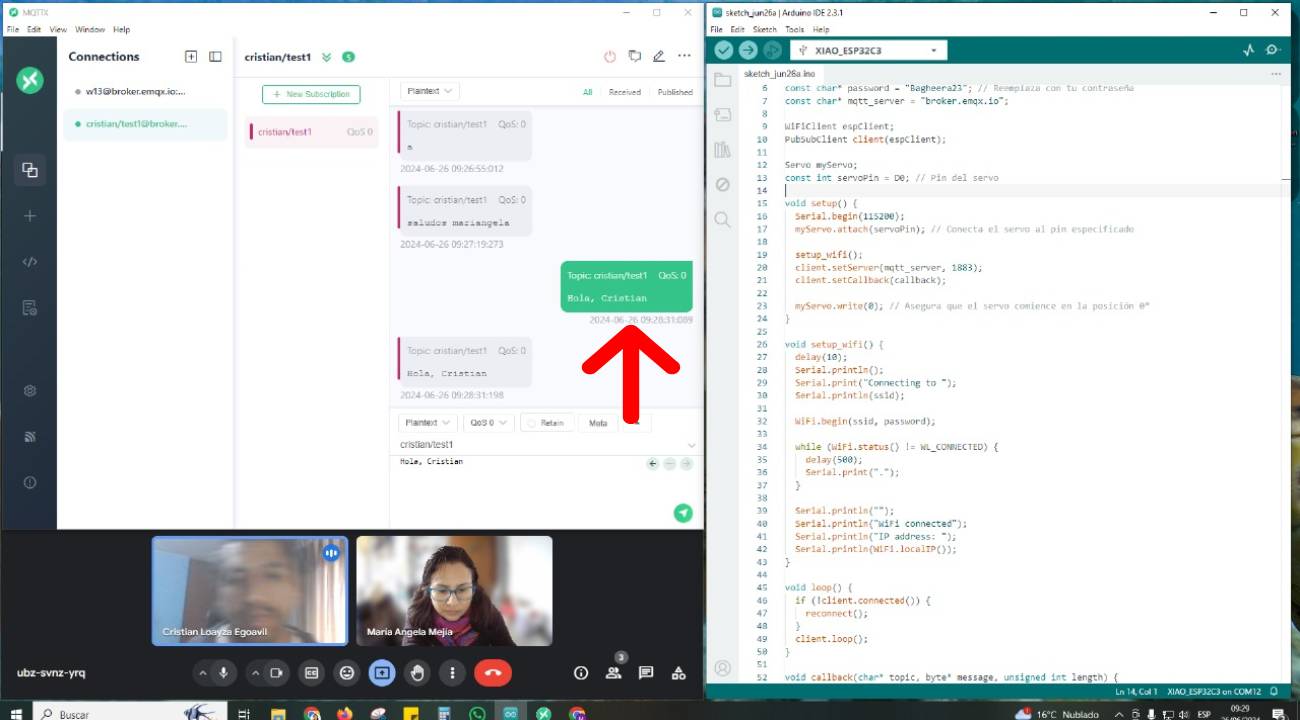
My colleague Maria Angela Mejia responds with a message in Spanish that says: "hello Cristian." With this message we confirm the two-way communication through the mqtt protocol, each one being in a different place in the city of Lima.
It is time to test the connection of the infrared sensor and the servo motor, I will write code in Arduino for the operation of the infrared sensor and Maria Angela will write code in Arduino for the servo motor.
When the infrared sensor detects an object, it will send a signal for the micro servo motor to rotate 90° and return to its place.

We write the code in Arduino and make sure to install the PubSubClient library, we will use the Xiao ESP32C3 microcontroller.
We will connect to the broker to publish the information collected by the infrared sensor and we will send the number "1" as a published message.
    #include <WiFi.h>
    #include <PubSubClient.h>

    const char* ssid = "MOVISTAR_0CD0"; // Replace with your SSID
    const char* password = "6pN5745BmUSLphq"; // Replace with your password
    const char* mqtt_server = "broker.emqx.io";

    WiFiClient espClient;
    PubSubClient client(espClient);

    const int sensorPin = D8; // Infrared sensor Pin

    void setup() {
        Serial.begin(115200);
        pinMode(sensorPin, INPUT);

        setup_wifi();
        client.setServer(mqtt_server, 1883);
    }

    void setup_wifi() {
        delay(10);
        Serial.println();
        Serial.print("Connecting to ");
        Serial.println(ssid);

        WiFi.begin(ssid, password);

        while (WiFi.status() != WL_CONNECTED) {
        delay(500);
        Serial.print(".");
        }

        Serial.println("");
        Serial.println("WiFi connected");
        Serial.println("IP address: ");
        Serial.println(WiFi.localIP());
    }

    void loop() {
        if (!client.connected()) {
        reconnect();
        }
        client.loop();

        int sensorState = digitalRead(sensorPin);
        if (sensorState == HIGH) {
        Serial.println("Object detected");
        client.publish("cristian/test1", "1");
        delay(1000); // Wait to avoid multiple quick posts
        }
    }

    void reconnect() {
        while (!client.connected()) {
        Serial.print("Attempting MQTT connection...");
        if (client.connect("ESP32Client")) {
            Serial.println("connected");
        } else {
            Serial.print("failed, rc=");
            Serial.print(client.state());
            Serial.println(" try again in 5 seconds");
            delay(5000);
        }
        }
    }
In Arduino we upload the code to the XIAO ESP32C3 microcontroller and connect to the Wi-Fi network.
The connection result was satisfactory and we are ready to publish a message when the sensor captures a signal.

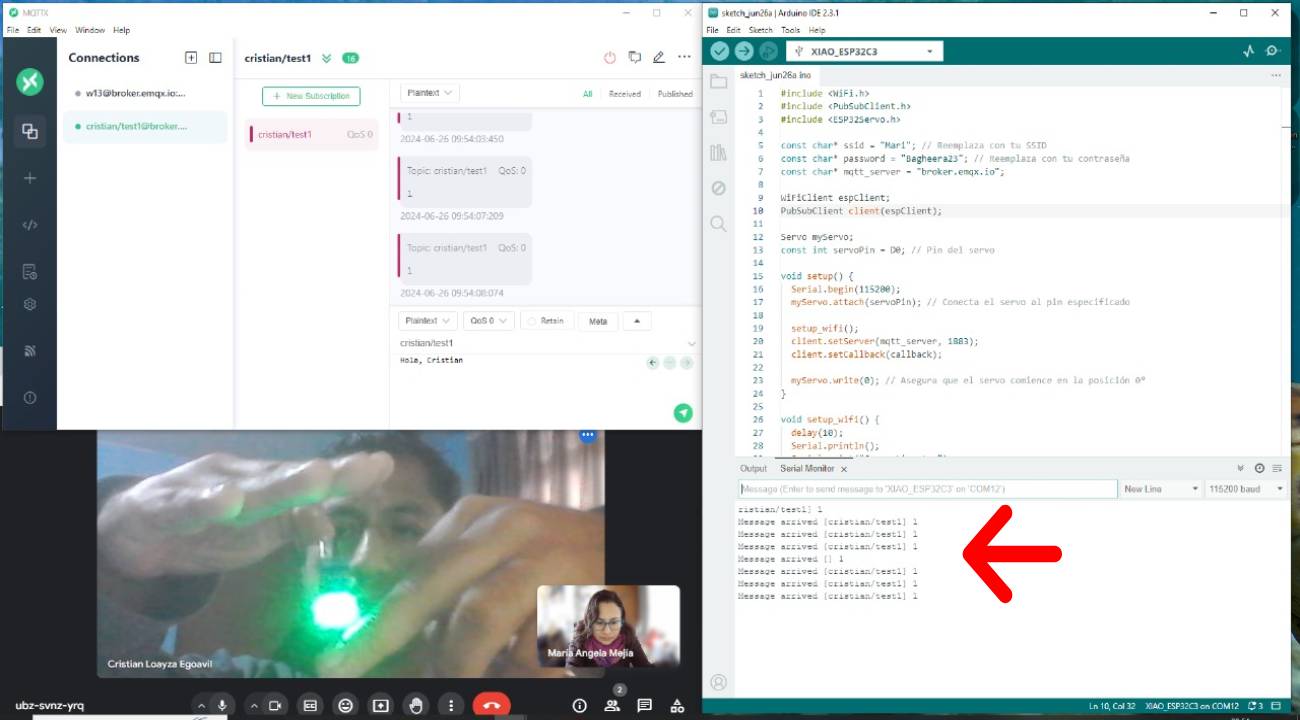
Prueba del sensor infrarojo con el microcontrolador XIAO ESP32C3, cada vez que detecta un objeto se enciende la luz LED verde y envia una señal "1".
As we can see, we performed the object detection test, published the message and it was received successfully, causing the servo motor to rotate 90° and return to its place.
Final result, the servomotor moves after receiving the published signal via MQTT protocol using MQTTX....how cool!!!...
What I learned?
- It doesn't matter where you are as long as there is an internet signal you can control devices in different parts of the world.
- The importance of this communication protocol for the Internet of Things IOT.
- There are many mqtt services, we must see which one serves our needs.
- you can control a large number of devices.
- The services of this protocol are increasingly more practical to use and not much programming knowledge is needed.
Individual Assignment
For this assignment we will carry out wireless communication via WiFi between two nodes, for this we must understand how the different communication protocols involved work: WiFi protocol, IP protocol, MQTT protocol.
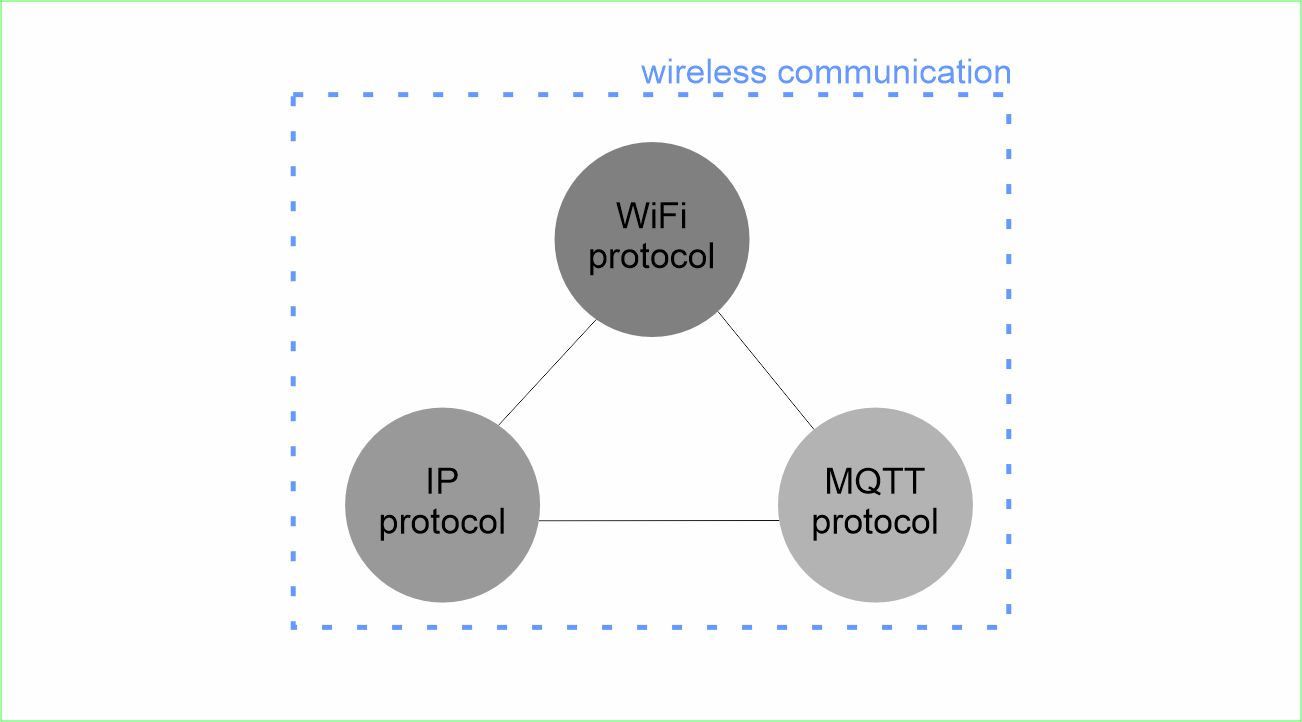
1. WiFi Protocol: It is the protocol that allows devices to connect to a local network wirelessly.
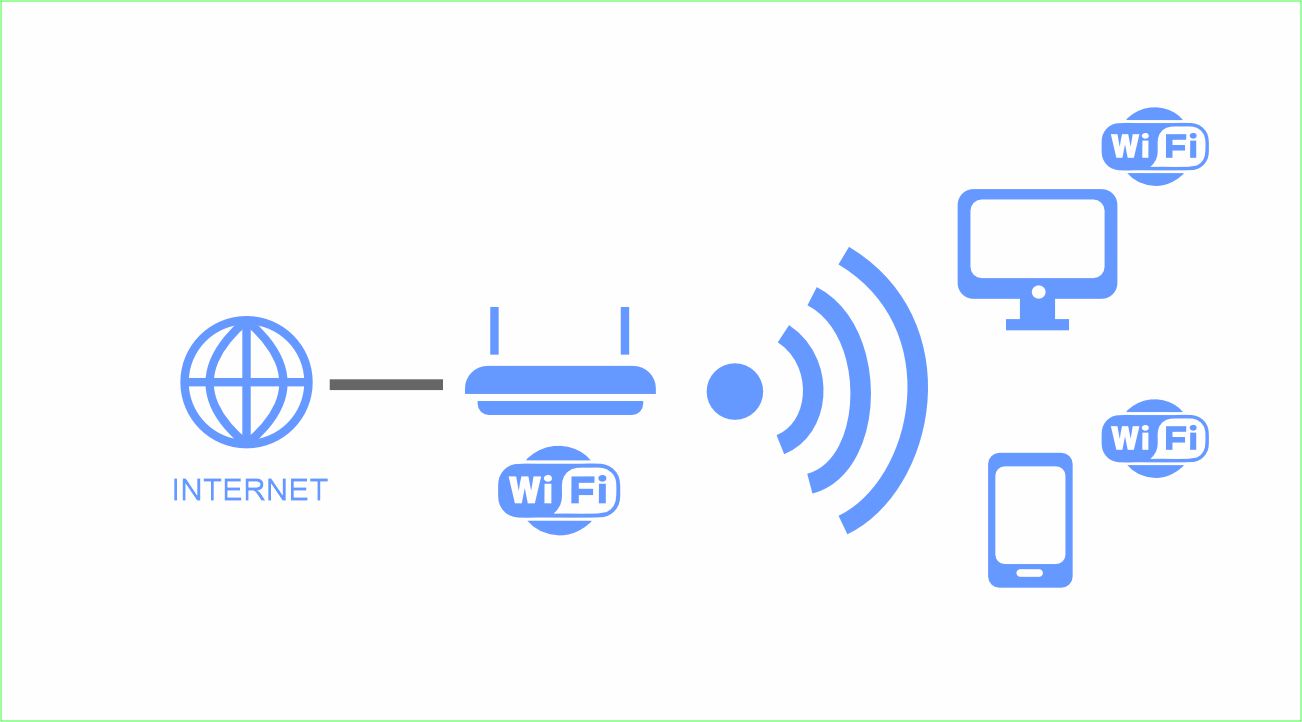
2. IP Protocol: Each device connected to the WiFi network receives a unique IP address, which acts as its identifier on the network.
This allows devices to find and communicate with each other efficiently.

3. MQTT Protocol: Facilitates communication between devices through a central broker, allowing the publication and subscription of messages from any location with an Internet connection.
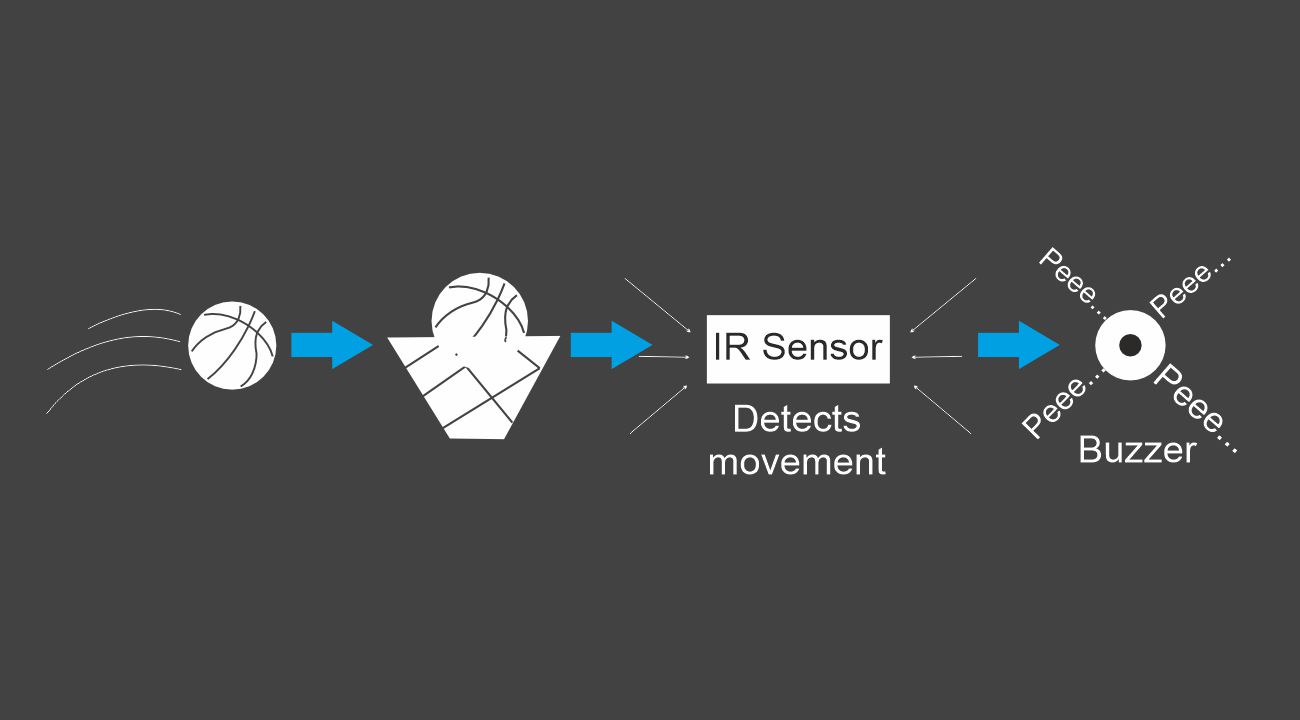
In my final project I will use an infrared sensor as input and a buzzer as output so that every time the infrared sensor detects an object (a basketball that enters through the hoop) the buzzer sounds indicating that points must be scored.
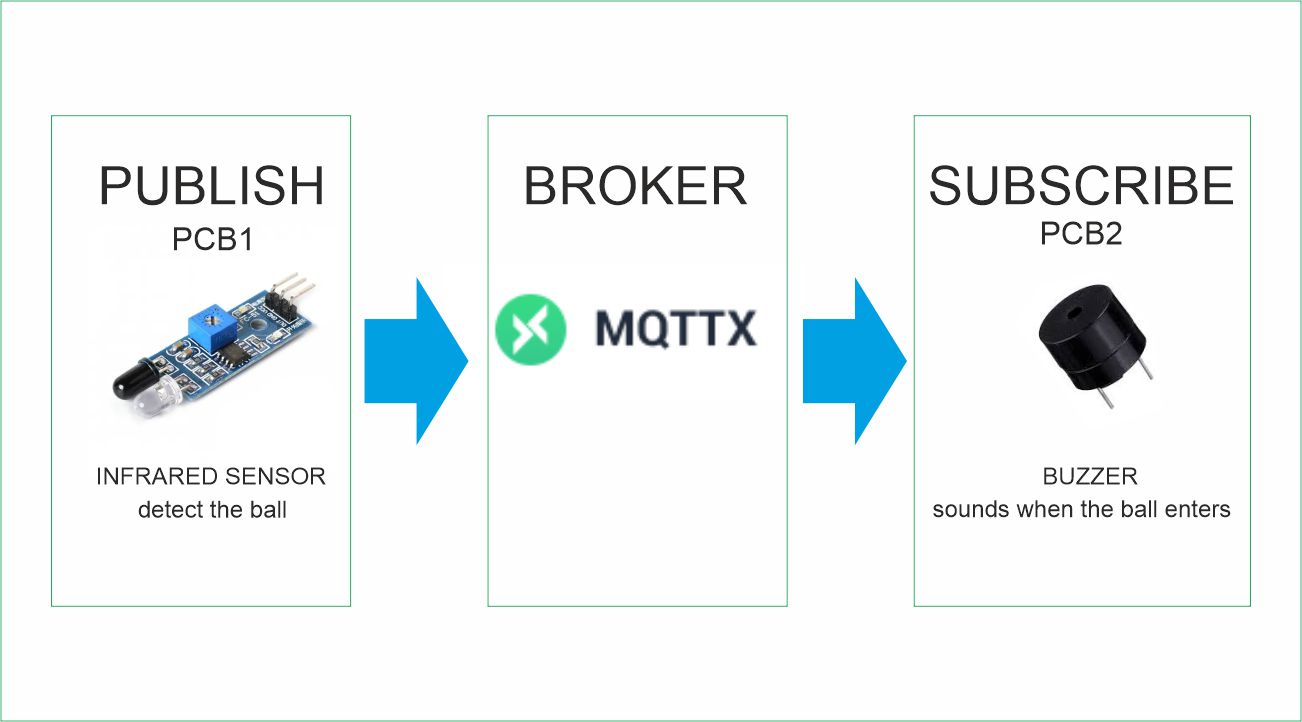
Now that we understand what protocols are involved in this assignment, I will use a Wi-Fi connection to send a communication message from PCB1 that has the infrared sensor through the MQTT communication protocol to PCB2 that has the buzzer.
PCB1 and PCB2

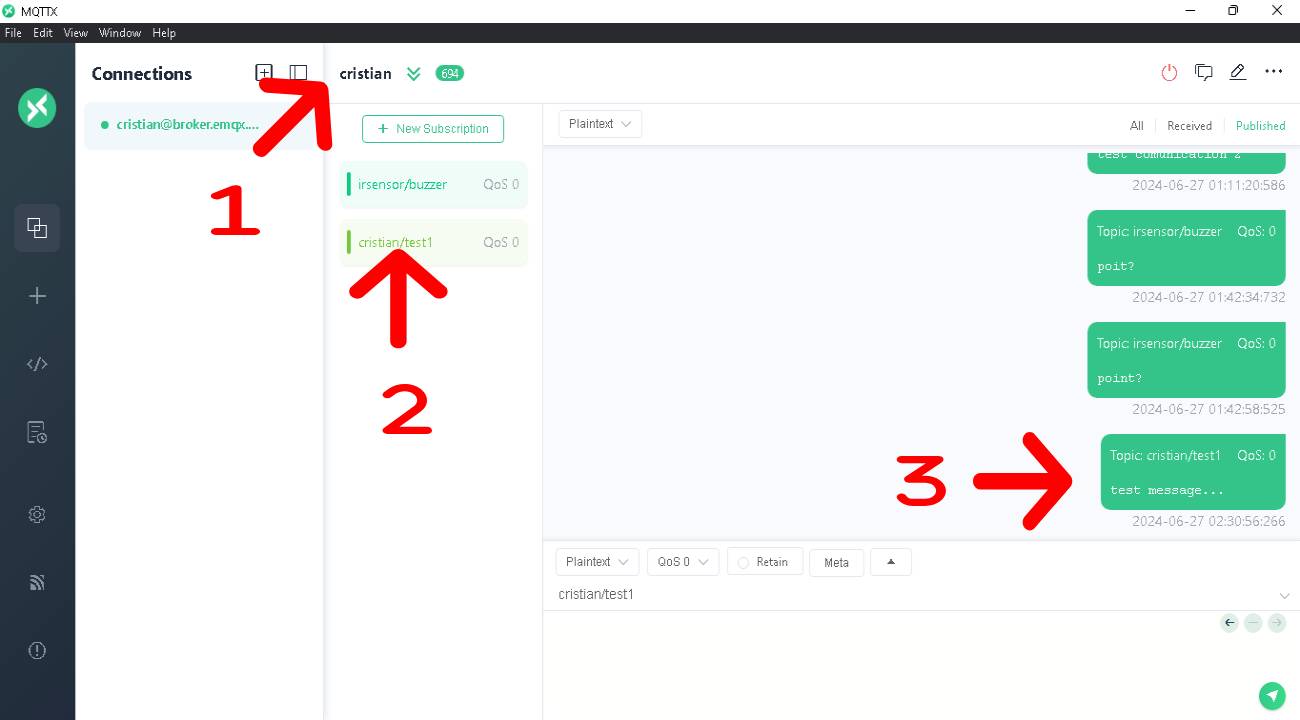
In the MQTTX application that we installed earlier we added on computer 1:
1. A new connection called cristian which is where we will connect PCB1 with the infrared sensor.
2. We added a topic called cristian/test1.
3. We write a test message "test message".
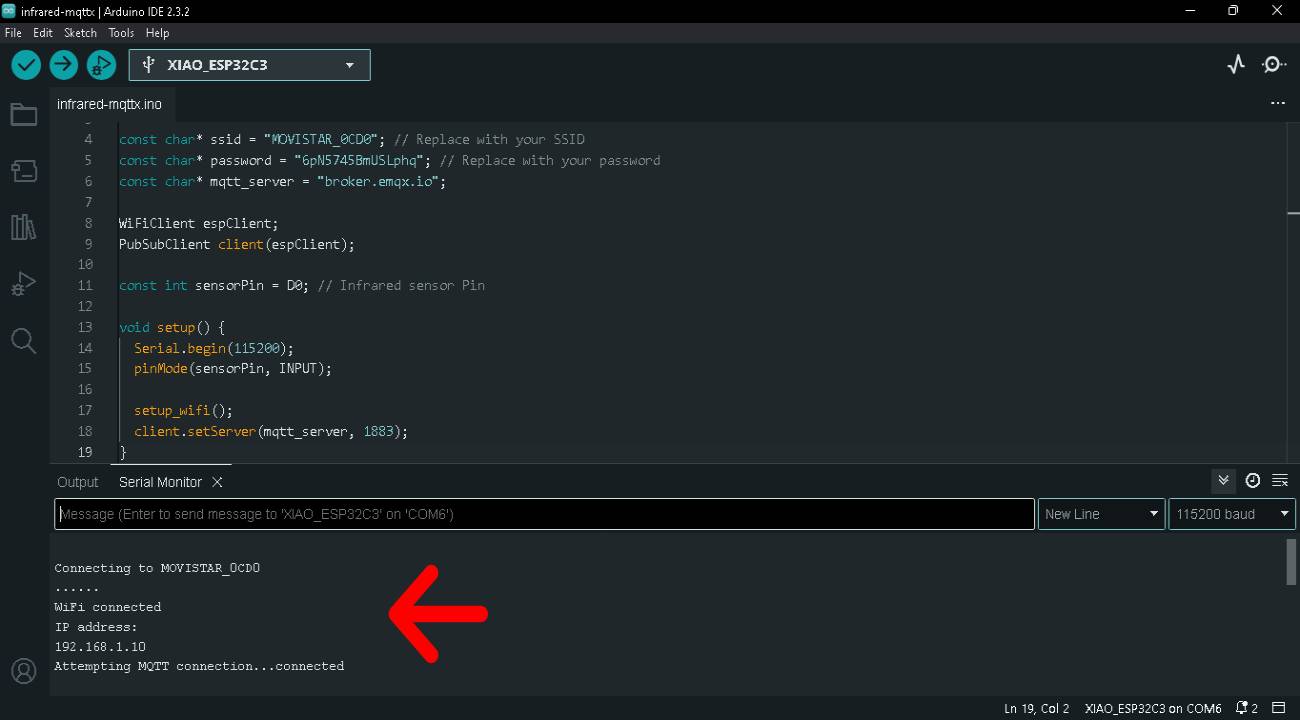
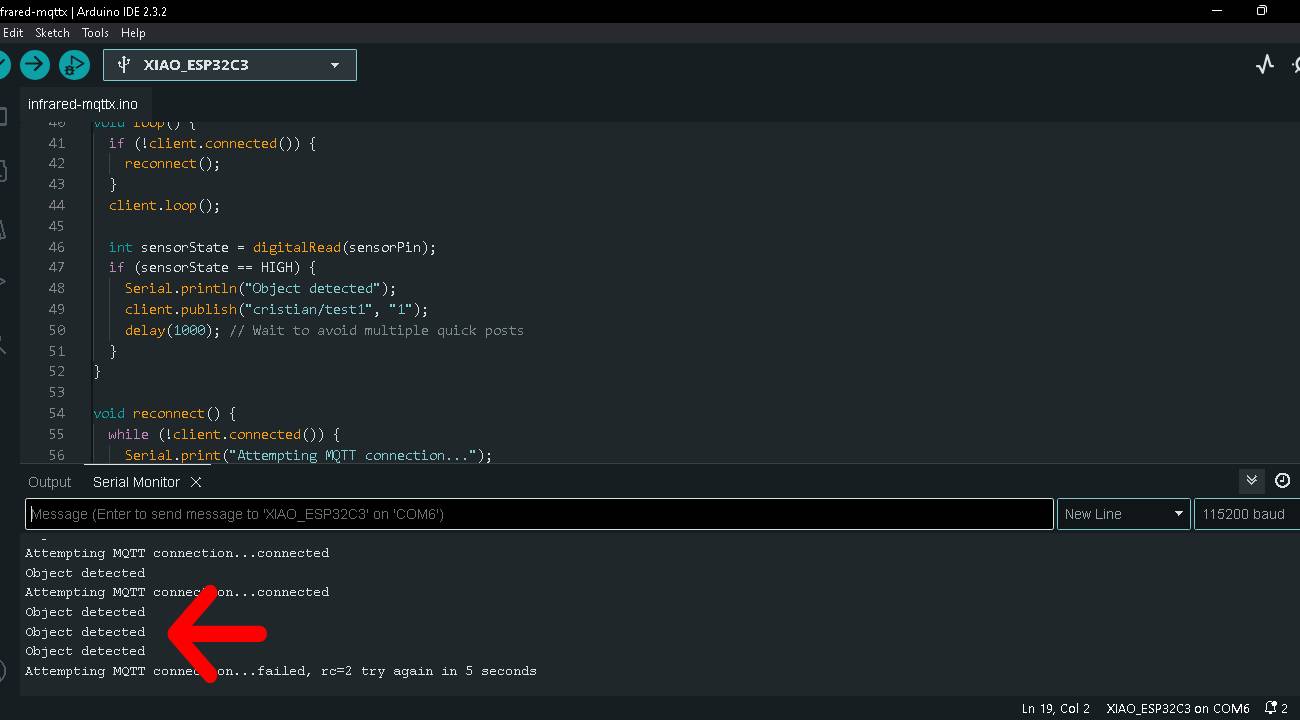
In Arduino we write the code for PCB1 where the infrared sensor will be.
        #include <WiFi.h>
        #include <PubSubClient.h>

        const char* ssid = "MOVISTAR_0CD0"; // Replace with your SSID
        const char* password = "6pN5745BmUSLphq"; // Replace with your password
        const char* mqtt_server = "broker.emqx.io";

        WiFiClient espClient;
        PubSubClient client(espClient);

        const int sensorPin = D0; // Infrared sensor Pin

        void setup() {
            Serial.begin(115200);
            pinMode(sensorPin, INPUT);

            setup_wifi();
            client.setServer(mqtt_server, 1883);
        }

        void setup_wifi() {
            delay(10);
            Serial.println();
            Serial.print("Connecting to ");
            Serial.println(ssid);

            WiFi.begin(ssid, password);

            while (WiFi.status() != WL_CONNECTED) {
            delay(500);
            Serial.print(".");
            }

            Serial.println("");
            Serial.println("WiFi connected");
            Serial.println("IP address: ");
            Serial.println(WiFi.localIP());
        }

        void loop() {
            if (!client.connected()) {
            reconnect();
            }
            client.loop();

            int sensorState = digitalRead(sensorPin);
            if (sensorState == HIGH) {
            Serial.println("Object detected");
            client.publish("cristian/test1", "1");
            delay(1000); // Wait to avoid multiple quick posts
            }
        }

        void reconnect() {
            while (!client.connected()) {
            Serial.print("Attempting MQTT connection...");
            if (client.connect("ESP32Client")) {
                Serial.println("connected");
            } else {
                Serial.print("failed, rc=");
                Serial.print(client.state());
                Serial.println(" try again in 5 seconds");
                delay(5000);
            }
            }
        }
We upload the code to the XIAO ESP32C3 microcontroller and connect to the Wi-Fi network, now we can publish the sensor detection.
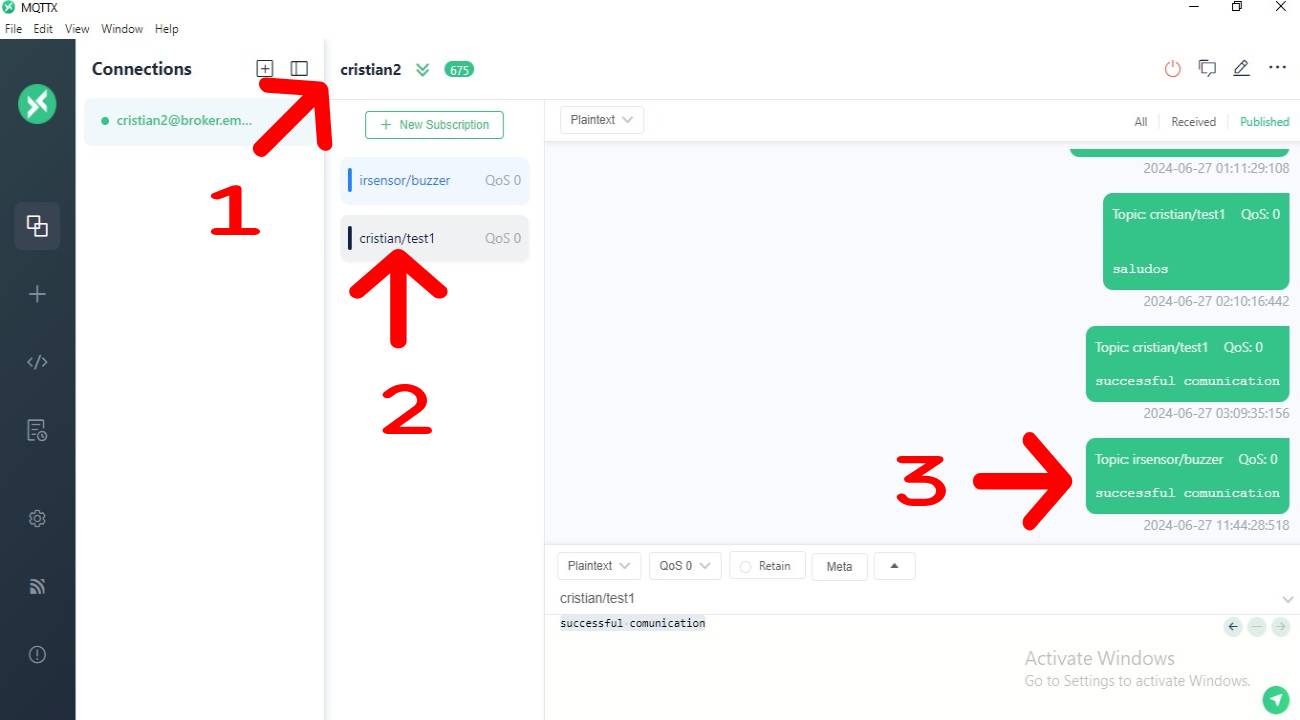
In the MQTTX application that we installed earlier we added on computer 2:
1. A new connection called cristian2 which is where we will connect PCB2 with the buzzer.
2. We added a topic called cristian/test1.
3. We write a test message "successful comunication".
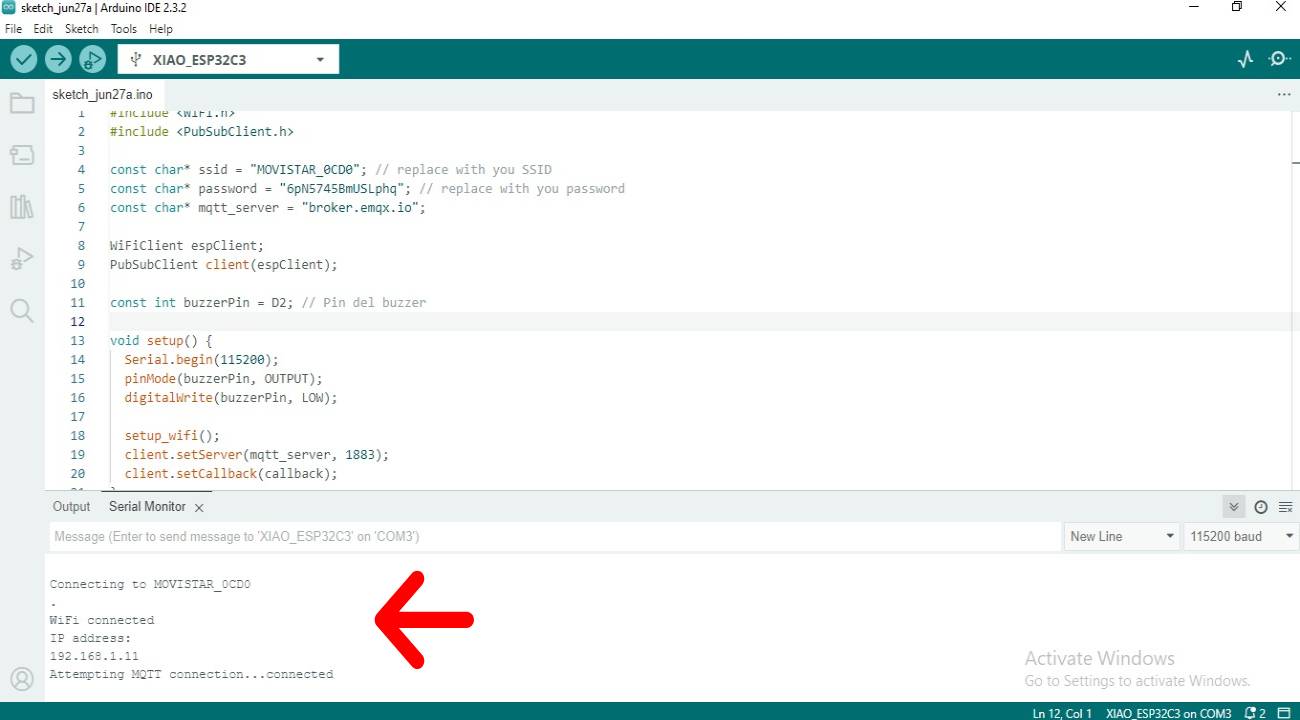
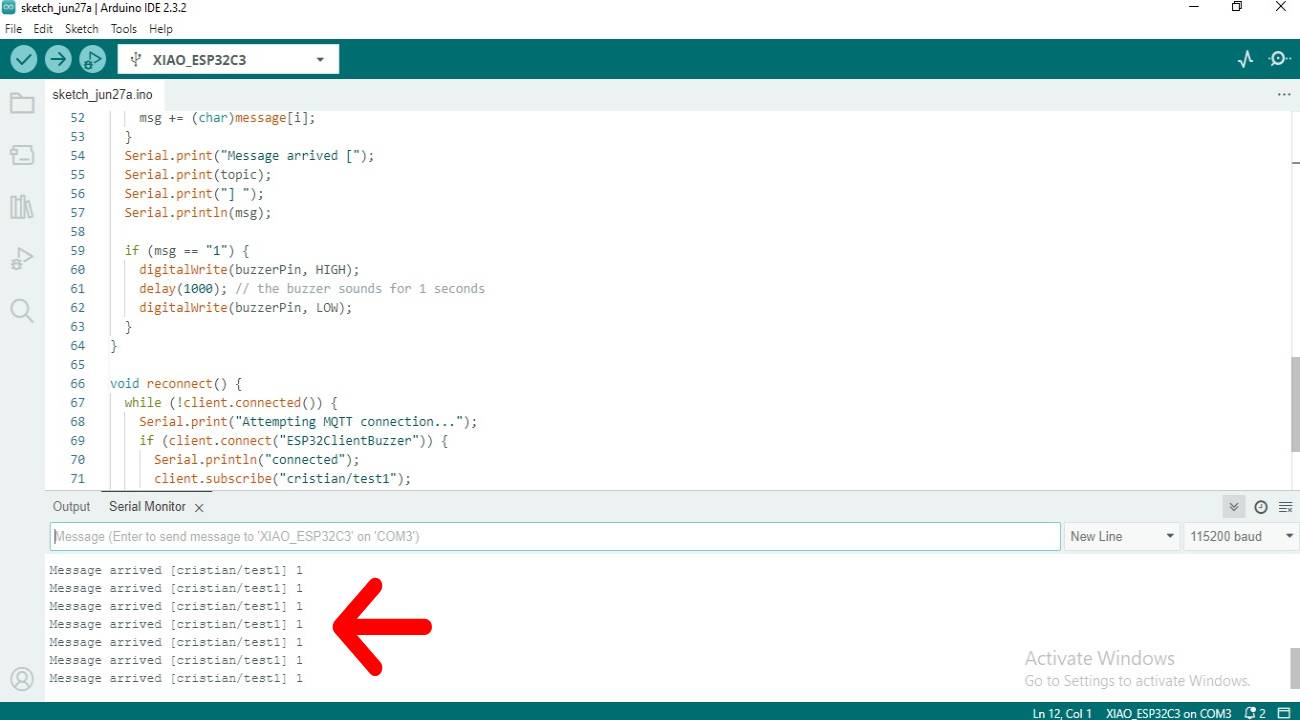
In Arduino we write the code for PCB2 where the buzzer will be.
    #include <WiFi.h>
    #include <PubSubClient.h>

    const char* ssid = "MOVISTAR_0CD0"; // replace with you SSID
    const char* password = "6pN5745BmUSLphq"; // replace with you password
    const char* mqtt_server = "broker.emqx.io";

    WiFiClient espClient;
    PubSubClient client(espClient);

    const int buzzerPin = D2; // Pin del buzzer

    void setup() {
        Serial.begin(115200);
        pinMode(buzzerPin, OUTPUT);
        digitalWrite(buzzerPin, LOW);

        setup_wifi();
        client.setServer(mqtt_server, 1883);
        client.setCallback(callback);
    }

    void setup_wifi() {
        delay(10);
        Serial.println();
        Serial.print("Connecting to ");
        Serial.println(ssid);

        WiFi.begin(ssid, password);

        while (WiFi.status() != WL_CONNECTED) {
        delay(500);
        Serial.print(".");
        }

        Serial.println("");
        Serial.println("WiFi connected");
        Serial.println("IP address: ");
        Serial.println(WiFi.localIP());
    }

    void loop() {
        if (!client.connected()) {
        reconnect();
        }
        client.loop();
    }

    void callback(char* topic, byte* message, unsigned int length) {
        String msg;
        for (int i = 0; i < length; i++) {
        msg += (char)message[i];
        }
        Serial.print("Message arrived [");
        Serial.print(topic);
        Serial.print("] ");
        Serial.println(msg);

        if (msg == "1") {
        digitalWrite(buzzerPin, HIGH);
        delay(1000); // the buzzer sounds for 1 seconds
        digitalWrite(buzzerPin, LOW);
        }
    }

    void reconnect() {
        while (!client.connected()) {
        Serial.print("Attempting MQTT connection...");
        if (client.connect("ESP32ClientBuzzer")) {
            Serial.println("connected");
            client.subscribe("cristian/test1");
        } else {
            Serial.print("failed, rc=");
            Serial.print(client.state());
            Serial.println(" try again in 5 seconds");
            delay(5000);
        }
        }
    }
We upload the code to the XIAO ESP32C3 microcontroller and connect to the Wi-Fi network.
In the serial port of PCB1 we can display the message "object detected" and the publication "1" is being sent.
In the serial port of PCB2 we can display the message "Message arrived [cristian/test1] 1" which will activate and sound the buzzer.
Final result:
- Wireless communication was achieved between two PCB boards using XIAO ESP32C3 microcontrollers using the MQTT communication protocol.
- Is incredible...
What I learned?
- An unstable network does not help the devices to function properly.
- You can be connected to different networks while it is essential to be connected to the same topic.
- There is no limit on the number of people subscribed to the topic.
- They can be published in different formats such as JSON, plain text, etc.
Download files
Here we can find and download the design original files