Input Devices
This week we focus on the the wonderful field of input devices.
The assignment was:
group assignment: probe an input device's analog levels and digital signals.
individual assignment: measure something add a sensor to a microcontroller board that you have designed and read it.
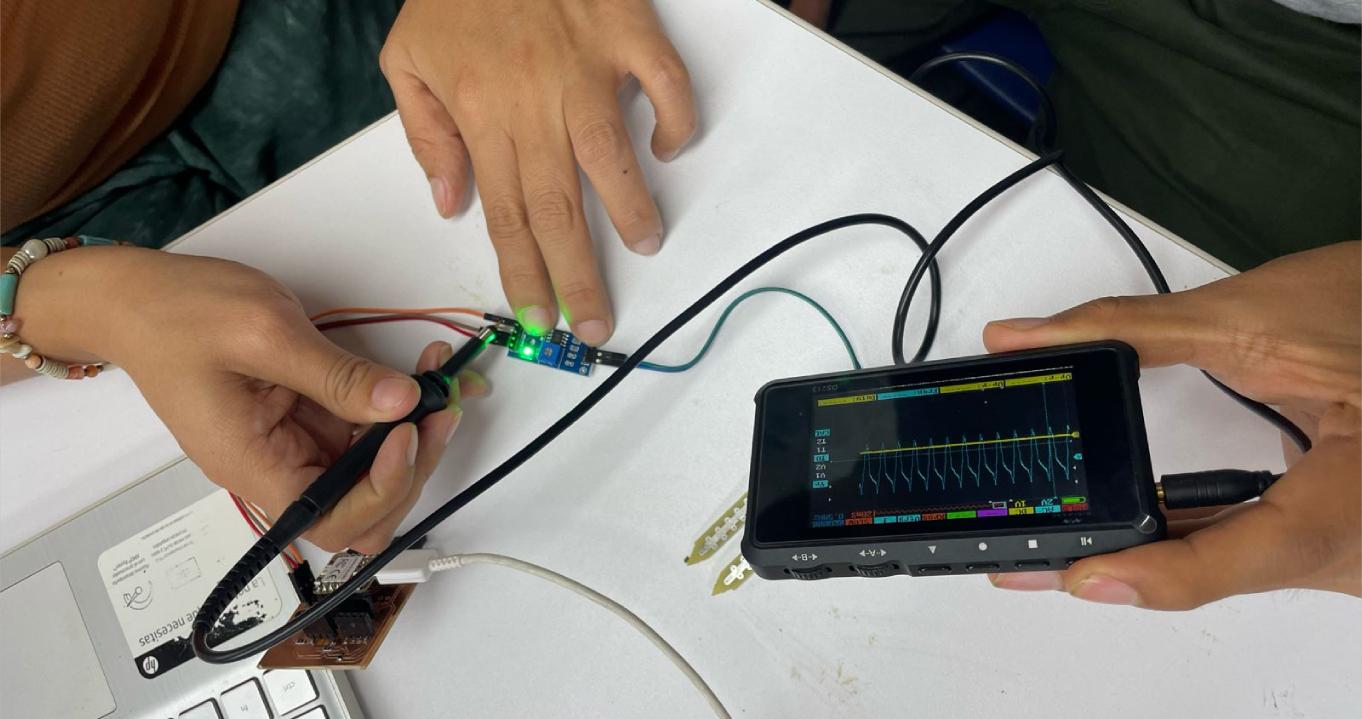
Group assignment
For this assignment we visited the Fab Lab of the Cientifica del Sur University.
The sensor we used for the tests was the FC-28 soil moisture sensor
You can see the complete documentation on the group's web page

What did I learn?
The moisture sensor can read the amount of moisture present in the surrounding soil.
The sensor uses two probes to pass current through the ground.
The values obtained are low when there is water in the soil and high when the soil is dry.
Sensor values range from 0 to 1023.
Individual assignment
For this assignment we will connect the KY-038 sensor microphone module
Principle:
The KY-038 Microphone Sensor allows you to detect any type of sound through the electret condenser microphone (EC).
It includes a potentiometer with which you can adjust the sensitivity of the sensor.
Amplifies the electrical signal coming from the microphone.
The output information can be analog and/or digital.

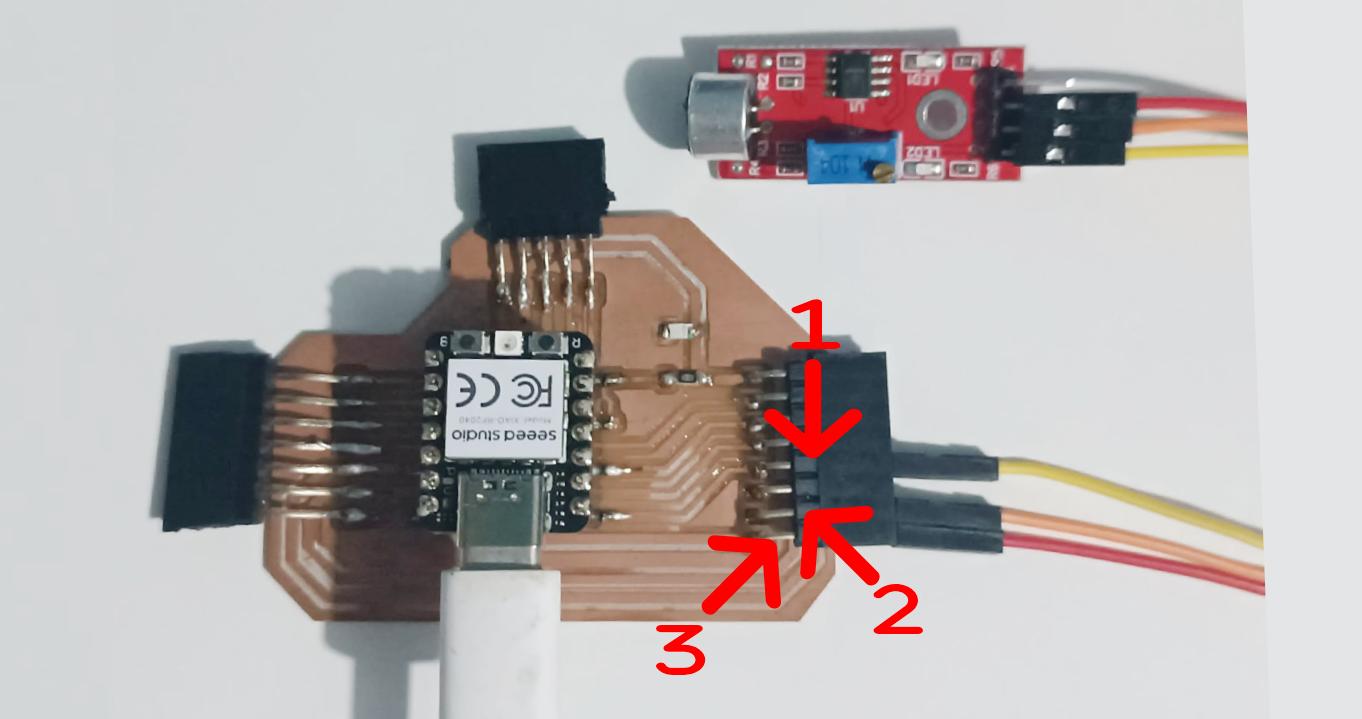
This is the basic connection of Ky-038 module to xiao rp2040 microcontroller:
1. analog signal, we will use the yellow jumper wire.
2. GND, we will use the orange jumper wire.
3. 5V, we will use the red jumper wire.

On my "crisduino" PCB board we connect:
1. A0, on the analog pin with the yellow jumper wire.
2. GND. on the gnd pin with the orange jumper wire.
3. 5V, on the power pin with the red jumper wire.
To program the sensor input reading we will use Arduino IDE.
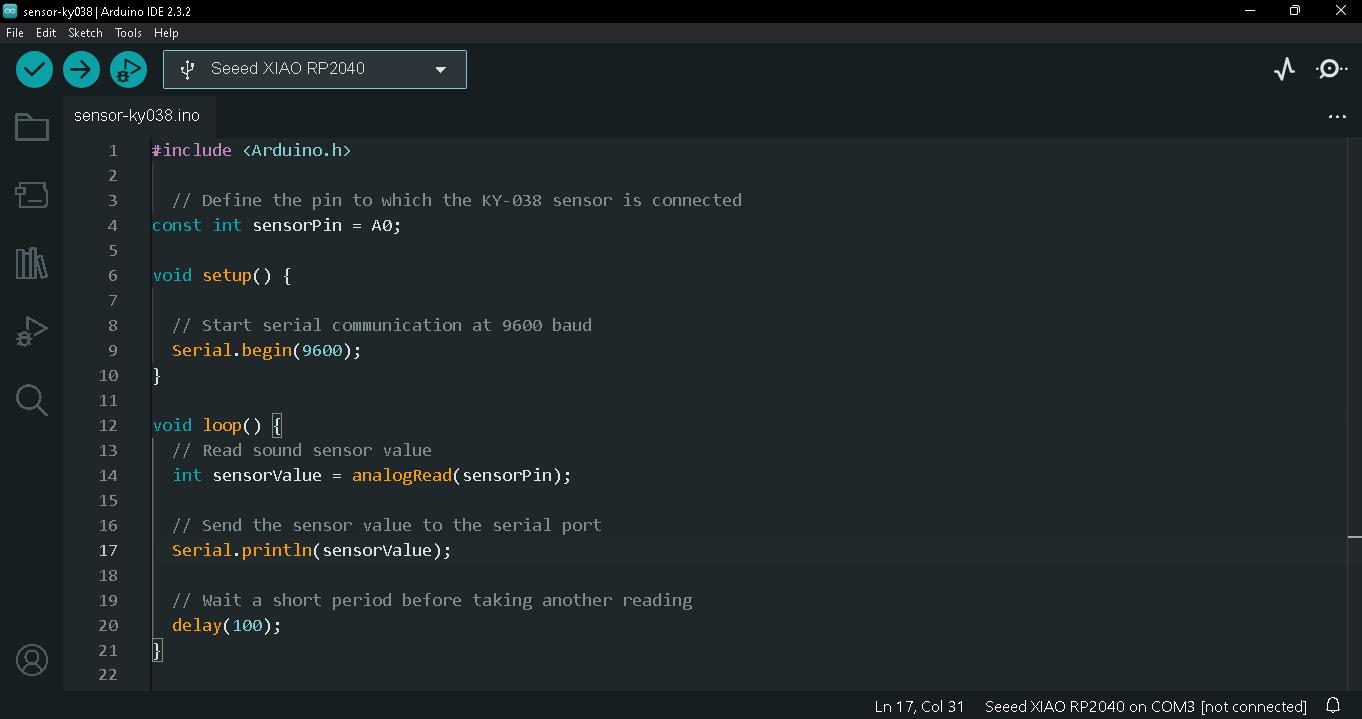
This is the programming code.
            #include <Arduino.h>

            // Define the pin to which the KY-038 sensor is connected
            const int sensorPin = A0;

            void setup() {

            // Start serial communication at 9600 baud
            Serial.begin(9600);
            }

            void loop() {
            // Read sound sensor value
            int sensorValue = analogRead(sensorPin);

            // Send the sensor value to the serial port
            Serial.println(sensorValue);

            // Wait a short period before taking another reading
            delay(100);
            }
First test with ambient audio.
1. lines of code.
2. reading on the serial monitor.
3. graphic reading.
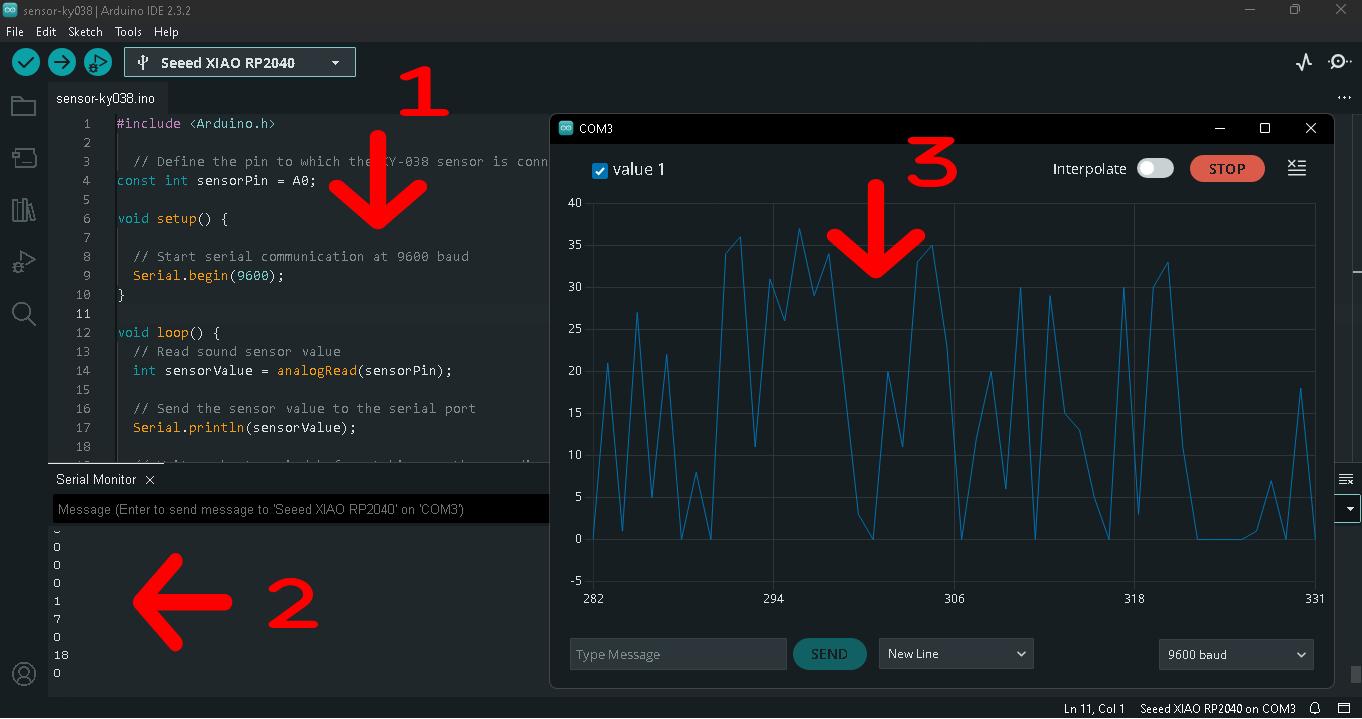
First test with ambient audio.
First test with ambient audio.Fortunately, I have not had any problems or inconveniences in viewing the communication.
final test with the System Of A Down - Toxicity
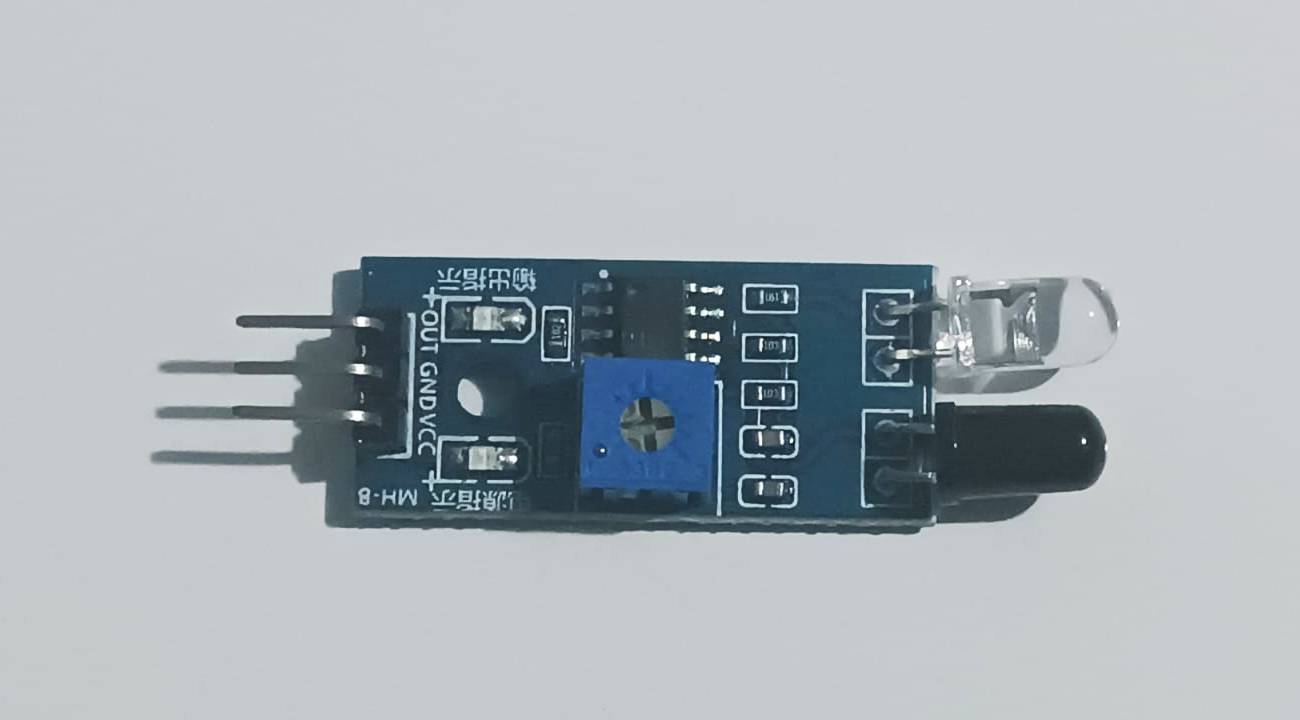
Now we will try an infrared sensor as an input device.
Principle:
The operating principle of an infrared (IR) sensor is based on the emission and detection of infrared light to detect objects or measure distances.
Connection diagram.
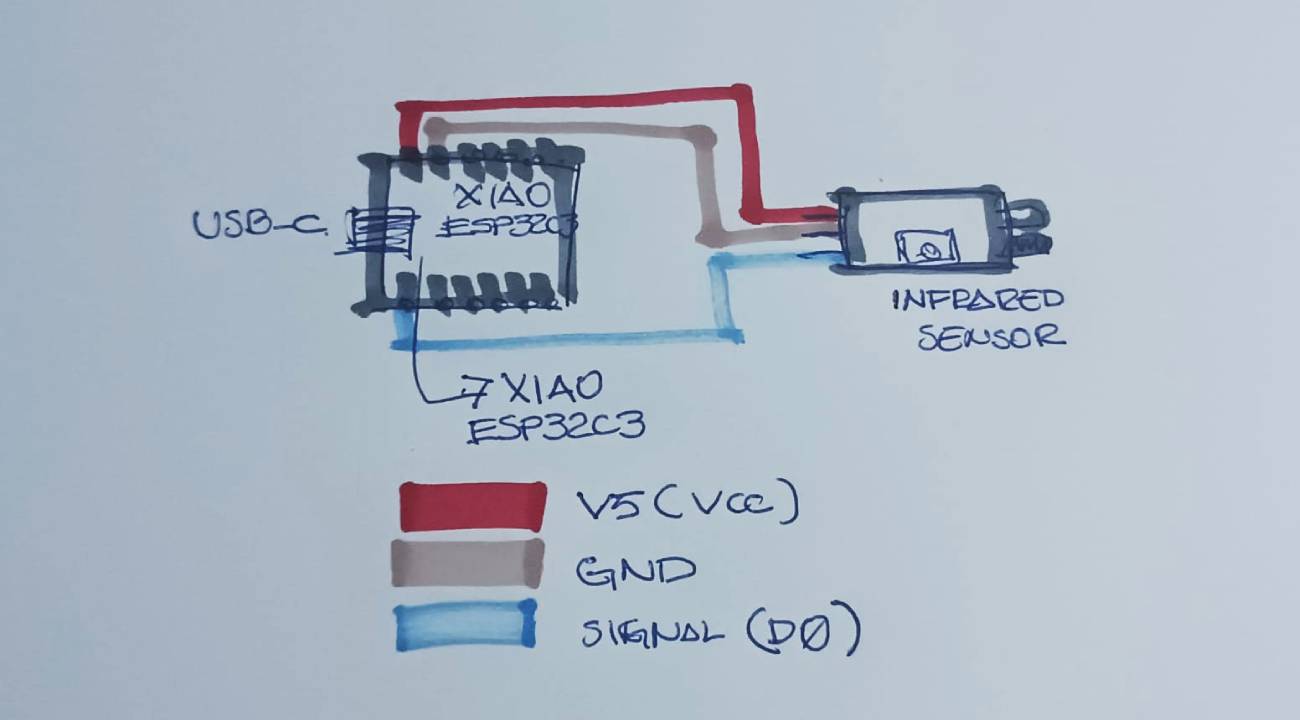
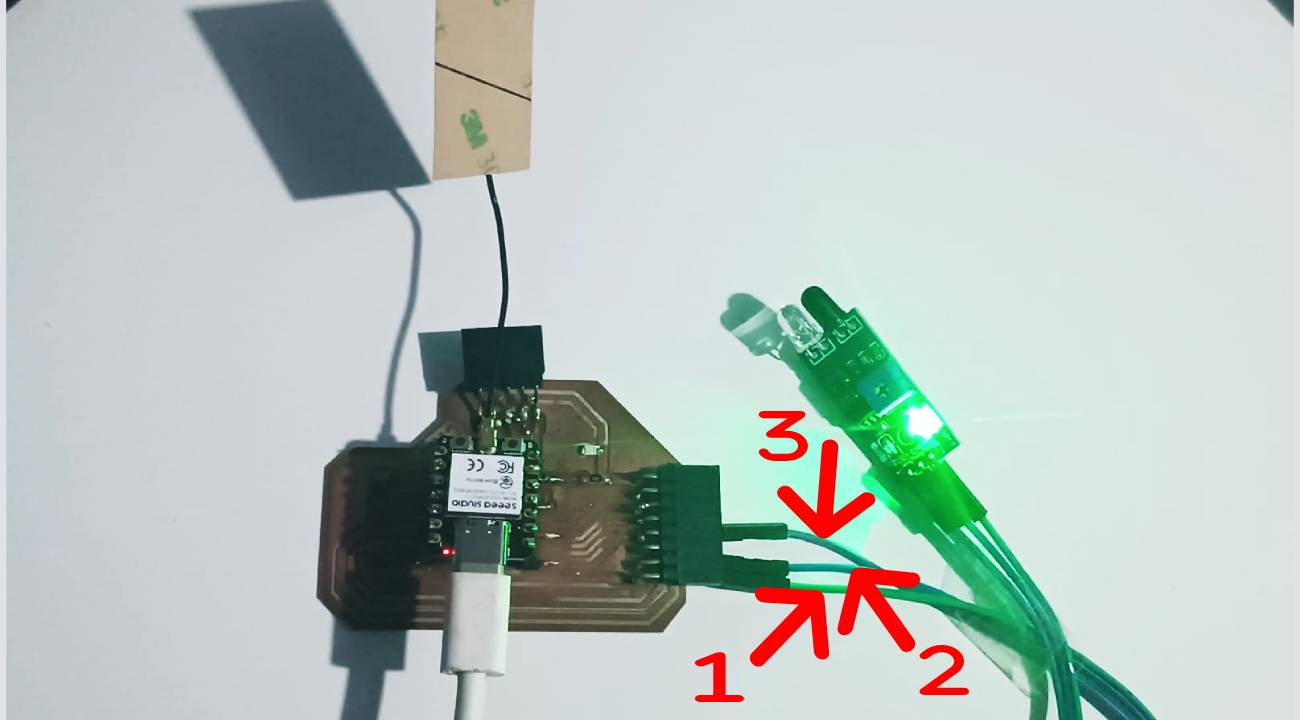
On my "crisduino" PCB board we connect:
1. D0
2. GND
3. 5V (VCC)
Now we will write the code in Arduino for the infrared sensor and be able to display the graph.
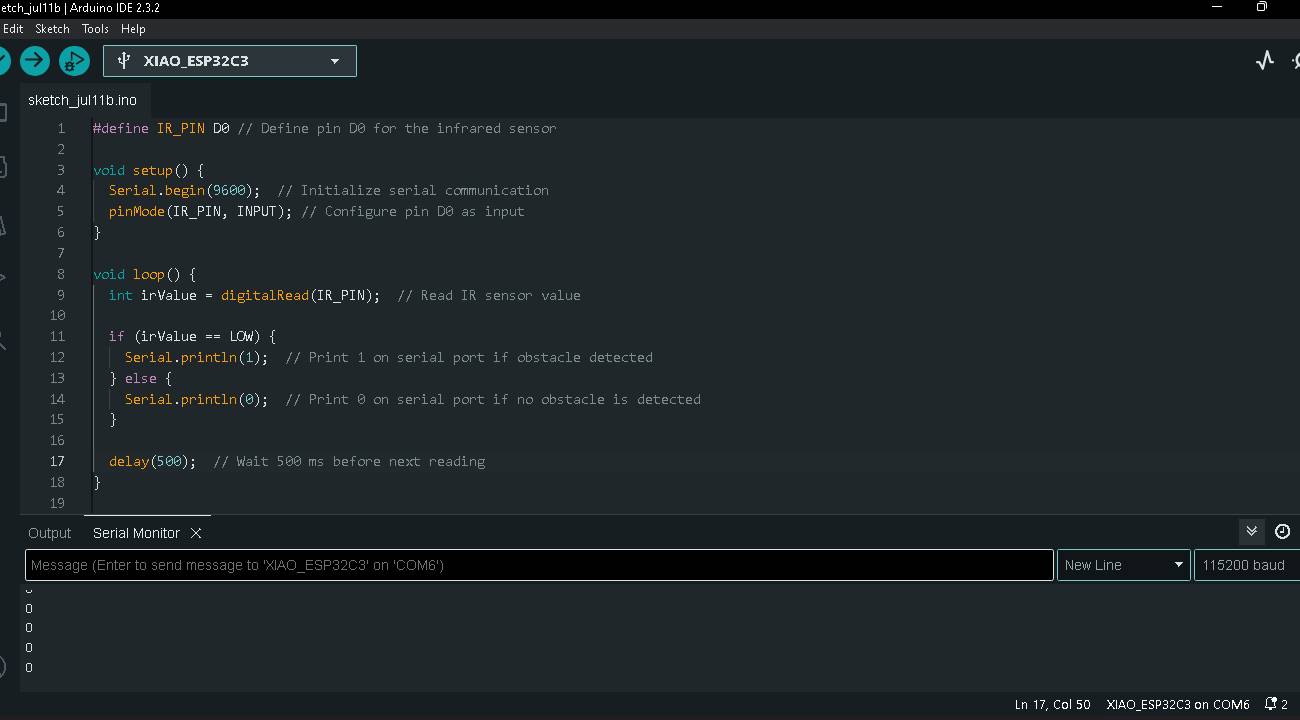
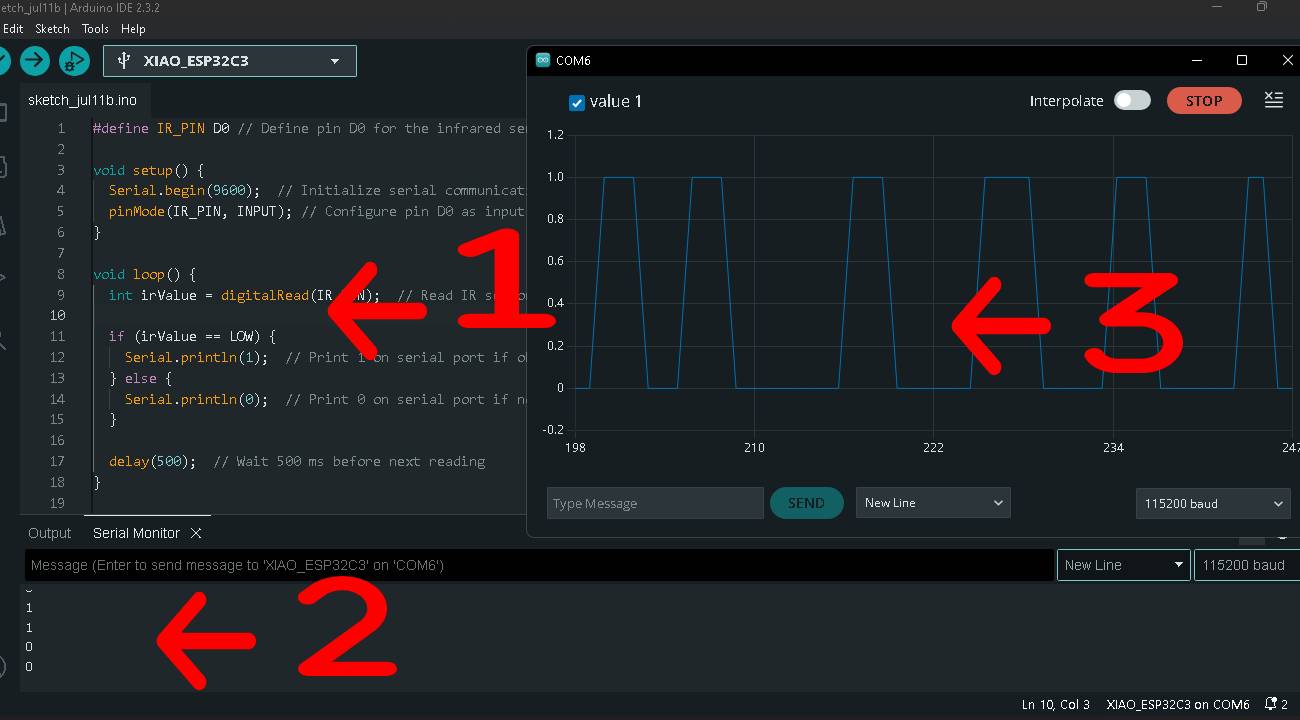
This is the programming code.
            #define IR_PIN D0 // Define pin D0 for the infrared sensor

            void setup() {
                Serial.begin(9600);  // Initialize serial communication
                pinMode(IR_PIN, INPUT); // Configure pin D0 as input
            }

            void loop() {
                int irValue = digitalRead(IR_PIN);  // Read IR sensor value

                if (irValue == LOW) {
                Serial.println(1);  // Print 1 on serial port if obstacle detected
                } else {
                Serial.println(0);  // Print 0 on serial port if no obstacle is detected
                }

                delay(500);  // Wait 500 ms before next reading
            }
Obstacle detection test.
1. lines of code.
2. reading on the serial monitor.
3. graphic reading, serial plotter
Final Obstacle Detection Test. and graph visualization.
Final Obstacle Detection Test. and graph visualization.