3D printing, also known as additive manufacturing, is a revolutionary technology that enables the creation of three-dimensional objects layer by layer from a digital model.
Unlike traditional subtractive manufacturing methods that involve cutting away material from a solid block, 3D printing builds objects by adding material gradually, often using plastic filament, resin, metal powder, or other materials.
This process allows for the production of complex geometries and intricate designs with high precision and customization.
3D printing has applications across various industries, including aerospace, automotive, healthcare, architecture, and consumer products, revolutionizing prototyping, manufacturing, and product development processes.
FDM
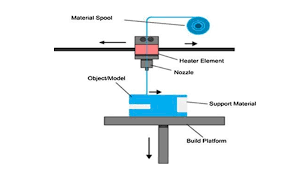
FDM (Fused Deposition Modeling) printing is a popular type of 3D printing technology that utilizes a thermoplastic filament, typically ABS or PLA, as the printing material.
In FDM printing, the filament is melted and extruded through a heated nozzle onto a build platform layer by layer according to a digital design.
As each layer is deposited, it fuses with the previous layers, gradually building up the object.
Original Prusa i3 MK3
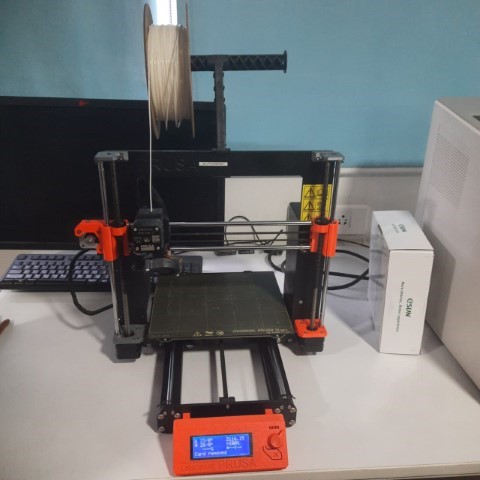
The Original Prusa i3 MK3 is a flagship 3D printer developed by Prusa Research, known for its reliability, innovation, and exceptional print quality.
It builds upon the success of its predecessors with numerous upgrades and features. The MK3 boasts a robust frame, a removable magnetic heated bed with automatic bed leveling, and a filament sensor for uninterrupted printing.
Its advanced Trinamic drivers and silent operation make it suitable for home and professional environments.
The MK3 supports various filament materials and features a user-friendly interface.
With its open-source design and continuous updates, the Original Prusa i3 MK3 remains a top choice among 3D printing enthusiasts worldwide.
Prusa Slicer
PrusaSlicer is a cutting-edge slicing software designed for Prusa 3D printers, offering a seamless user experience and advanced customization options.
With its intuitive interface, users can easily adjust slicing parameters such as layer height, print speed, and support structures. The software also incorporates features like automatic bed leveling and variable layer height for optimal print quality. PrusaSlicer's versatility extends to advanced functionalities like sequential printing and scripting capabilities, catering to both novice and experienced users.
Regular updates and strong community support ensure that PrusaSlicer remains a top choice for 3D printing enthusiasts seeking high-quality prints and efficient workflows.
Filament
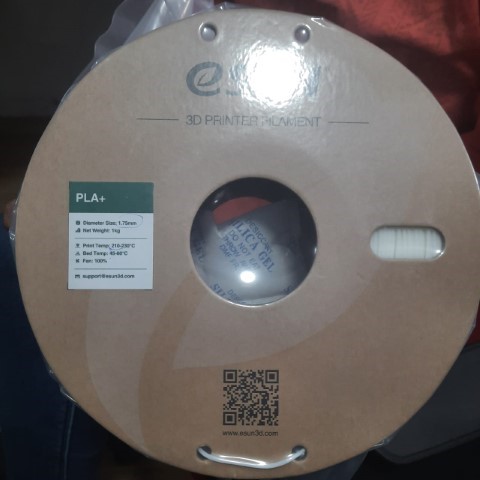
PLA (Polylactic Acid) filament is a popular choice in 3D printing due to its ease of use, low warping, and environmental friendliness.
Derived from renewable resources, PLA is biodegradable and emits minimal fumes during printing, making it safe for indoor use.
With a low printing temperature of 180-220°C, PLA adheres well to print beds and produces smooth prints with minimal visible layer lines.
Available in various colors and formulations, including specialty variants, PLA offers versatility for a wide range of printing applications.
Its combination of user-friendliness, eco-friendliness, and aesthetic appeal makes PLA filament a preferred option for many 3D printing enthusiasts.
SLA
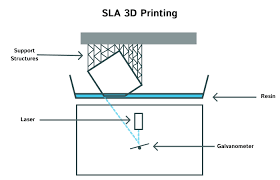
SLA, or Stereolithography, is a 3D printing process that uses a UV laser to solidify liquid photopolymer resin layer by layer.
This technology produces high-resolution objects with intricate details and smooth surfaces.
Each layer is cured by the laser as it traces the object's pattern on the resin surface.
Support structures may be required for overhangs and are removed after printing. Post-processing involves cleaning and curing the printed object.
SLA is popular for prototyping and small to medium-sized part production in industries requiring precision and fine surface finishes.
It revolutionizes manufacturing with its ability to create complex geometries with exceptional accuracy.
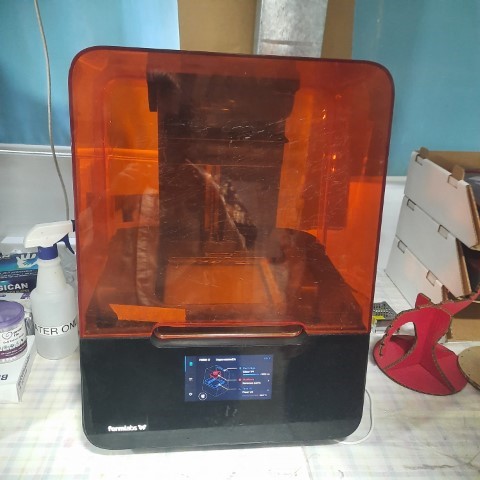
FormLabs Form 3+
Formlabs is a leading manufacturer of professional-grade 3D printers, resin materials, and software solutions.
Their printers utilize Stereolithography (SLA) and Digital Light Processing (DLP) technologies to produce high-resolution, detailed 3D prints with smooth surface finishes. Formlabs printers are widely used in industries such as engineering, healthcare, jewelry, and manufacturing for prototyping, product development, and production applications. Formlabs offers a range of 3D printers, including the Form 3, Form 3B (specifically designed for biocompatible printing), and Form 3L (large format). Additionally, Formlabs provides a variety of resin materials in different colors and properties to meet diverse printing needs.
Their user-friendly software, PreForm, enables efficient preparation and slicing of 3D models for printing.
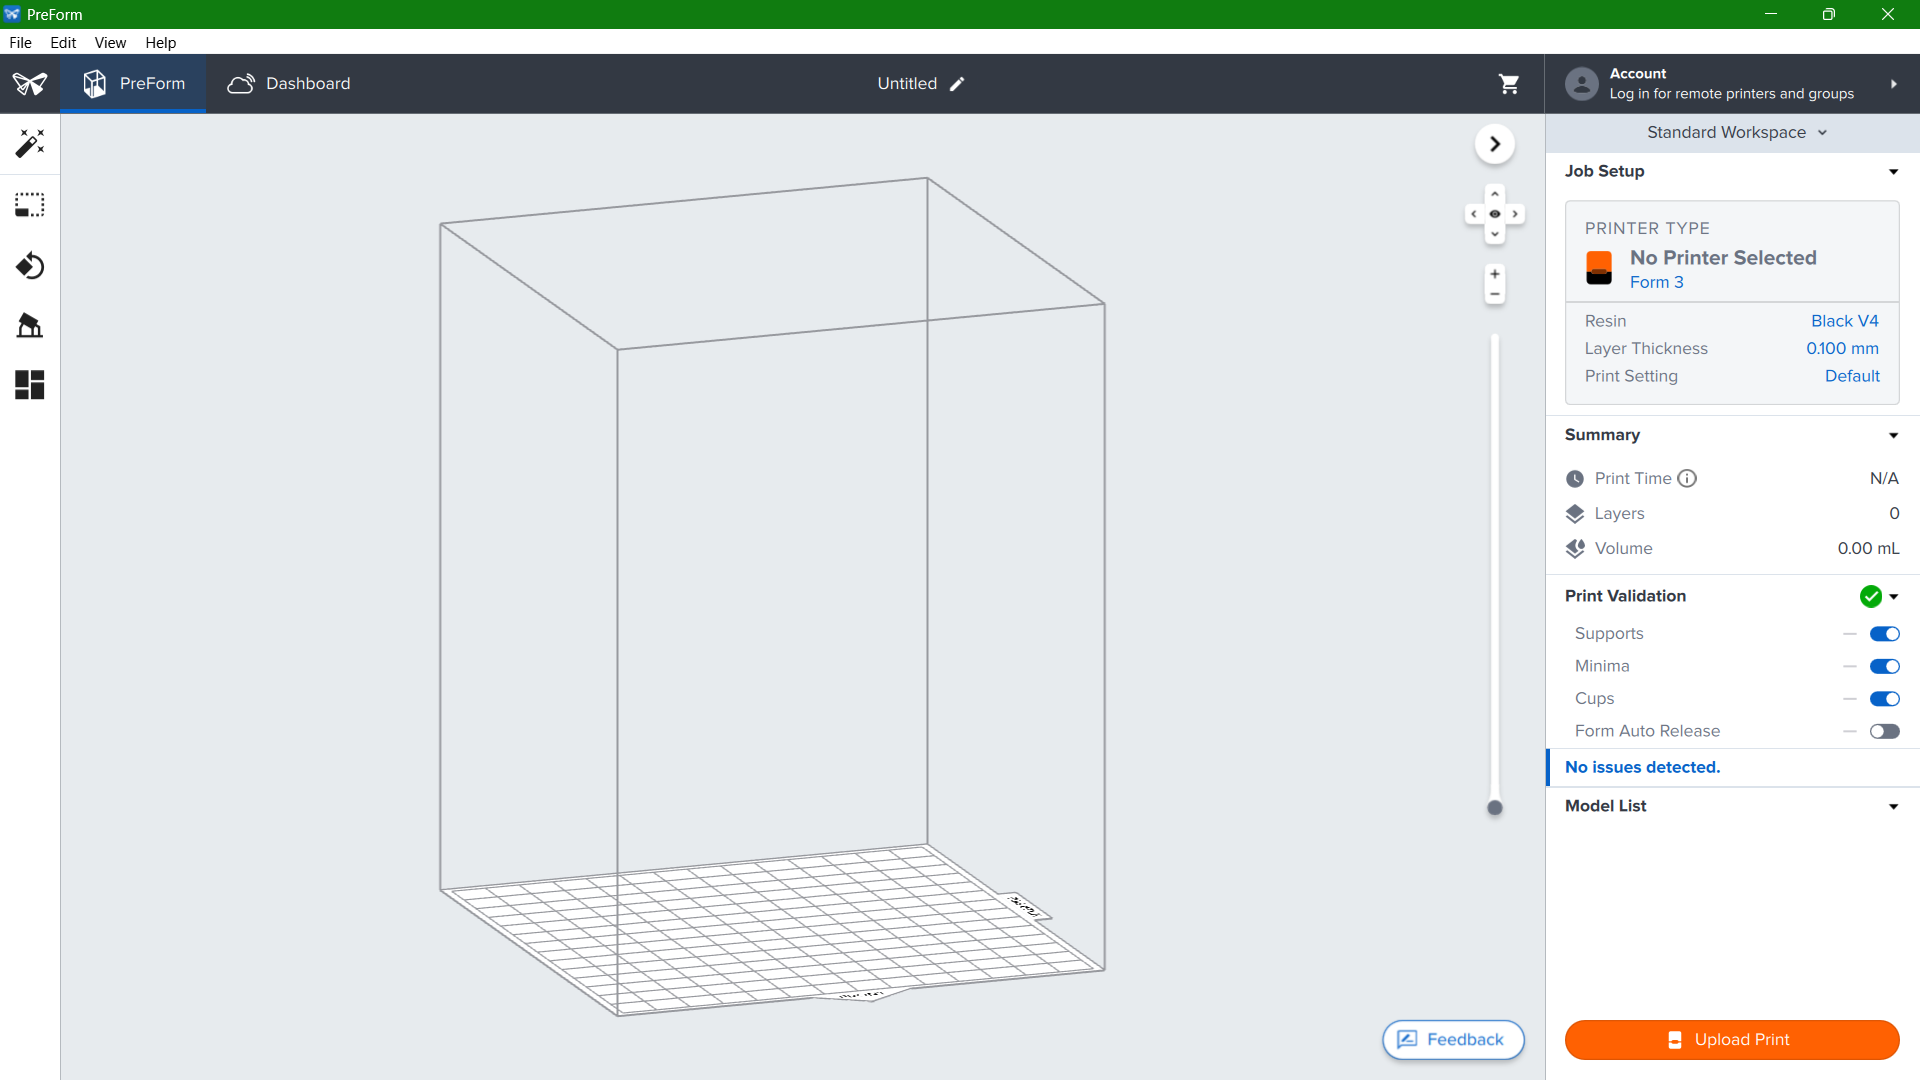
PreForm
PreForm Slicer, developed by Formlabs, streamlines 3D printing for Formlabs' SLA printers.
It imports models, allowing users to orient, scale, and position them.
The software slices models into layers and generates toolpaths.
Automatic support generation aids complex prints, and settings like layer thickness can be adjusted.
Users preview each layer and analyze printability before sending jobs directly to the Formlabs printer.
PreForm optimizes workflow for SLA printing, offering intuitive tools for efficient model preparation, slicing, support generation, and print management, facilitating high-quality prints with minimal hassle.
Resin
In SLA and DLP printing, liquid photopolymer resin is used instead of filament.
This resin is photosensitive and solidifies when exposed to certain wavelengths of light, typically UV light.
The printer uses a laser or a light projector to selectively cure the resin layer by layer, building the 3D object
3D Designing
Fusion 360 is a powerful CAD/CAM software widely used for 3D designing and modeling, including applications for 3D printing. With Fusion 360, users can create complex 3D models using parametric modeling techniques, sculpting tools, and assembly features.
Its intuitive interface and extensive library of tools make it suitable for both beginners and advanced users.
Fusion 360 also offers advanced features such as simulation, rendering, and collaboration tools, enhancing the design process.
Once the design is complete, Fusion 360 provides tools for preparing models for 3D printing, including mesh repair, slicing, and export to common file formats compatible with 3D printers.
First Design
To learn how to use the 3D printer our instructor asked us to design a small structure. So I referred a tutorial and designed a tiny pencil holder.
I extruded a circle of 30mm diameter to make it a cylinder, I applied shell of 1 mm, and then I used slot and rotated it. Then I used cut tool on the cylinder.
Next, I applied circular pattern on the slot.
For 3D printing, I used Save as Mesh option.
Next, I exported it as STL file.
Hexagon Chainmail
Hexagon chainmail refers to a type of chainmail pattern composed of interconnected hexagonal shapes.
In traditional chainmail, metal rings are linked together to form a protective mesh fabric used in armor, clothing, or decorative purposes.
The hexagon chainmail pattern arranges these rings in a hexagonal lattice, creating a visually appealing and flexible structure.
This pattern offers improved mobility and coverage compared to other chainmail patterns.
While historically made from metal rings, modern versions of hexagon chainmail can also be created using 3D printing or other fabrication techniques, offering versatility in design and application.
I made a hexagon, extruded it and added a torous of the given diameter.
Then I rotated the torous to a certain angle since this is were the joints will come in.
I applied circular pattern and made 2 copies. So now there are 3 torous kept at the mid-point of the edge of each hexagon.
Next task is to create the link which will join thorugh the torous. So I extruded the circle and after creating an offset plane thorugh the surface of extruded circles and drew a bigger circle and extrude that.
Using rectangular pattern I made 4 copies of the design in two directions to get a chainmail.
I changed the appearance to ABS white to get an idea of the chainmail after it will be printed.
Then I exported the STL file of this design.
Lotus
To try out SLA printing in Formlabs, I designed a lotus.
First a revolved a spline and then I drew a rectangle and another spline to cut it out and get the petal.
So, after getting a petal I drew a construction line at 70 degrees so I could use circular pattern and get the flower shape.
So here's the intial lotus shape I have got. Next, I'll be repeating the steps for all layers of petals but in difeerent angles.
Here's the second layer
Here's the third layer
I added the pistil of the lotus. Then I exported the STL file of it.
3D Printing
Since all STL files are exported from Fusion 360, next step is to 3D print all the designs
First step is to set up the slicing software, select Original Prusa i3 MK3 after downloading it and select the filament as Esun PLA.
This plater appears and we can drag and drop STL files onto the plater
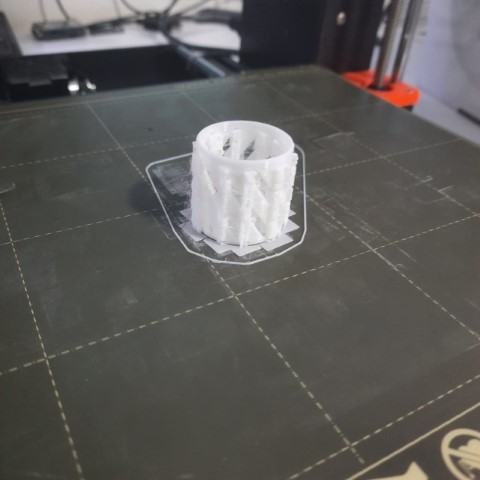
First, I placed the small test design I made to familiarise myself with the 3D printing process.
Since I was 3D printing with my FAB mates, support was added everywhere even though my design didn't require any support. The G-code was exported into the SD card for 3D printing.
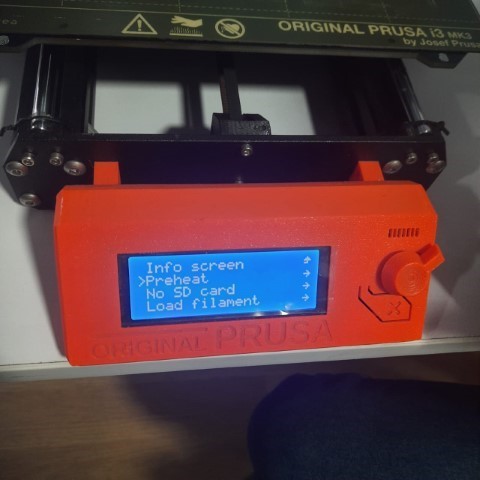
This is the interface of our 3D printer. No SD card is added.
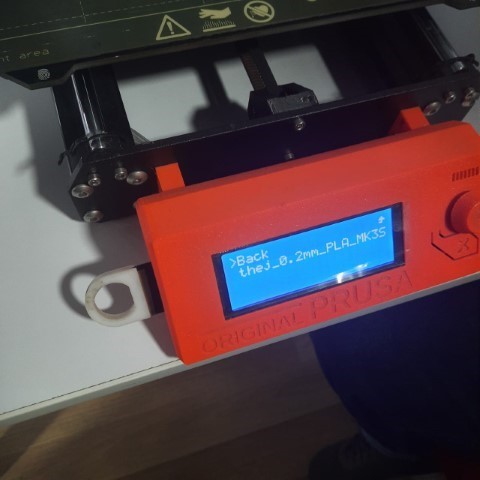
SD card was added. It showed sorting files and then showed my file. I selected it by turning the knob and pressing it.
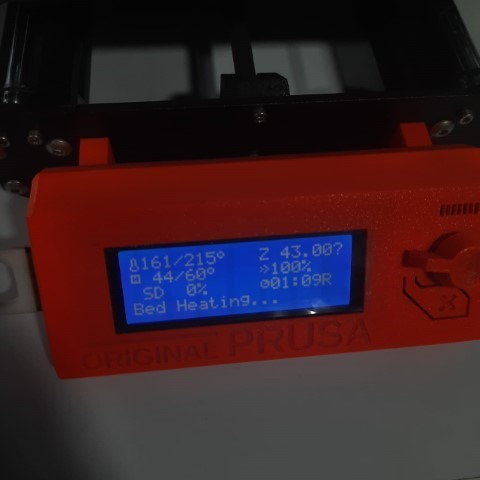
3D printing has started.
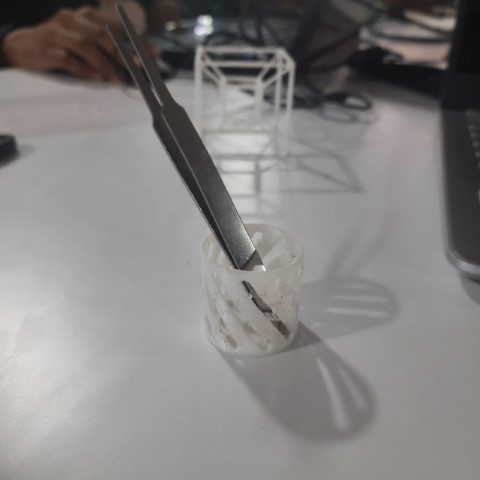
Here's the 3D printed mini pencil case.
I realised the importance of giving minimum support because it was really had to take it out from the design.
My nails almost broke.
So here's my first 3D printed design. I put tweezer inside since it was a mini holder.
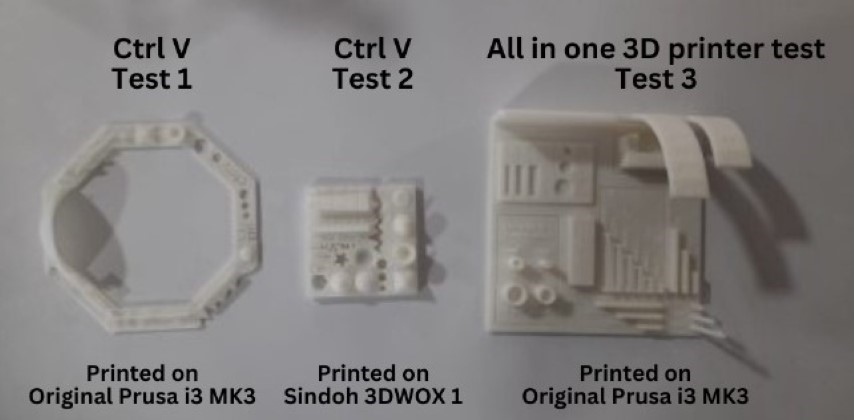
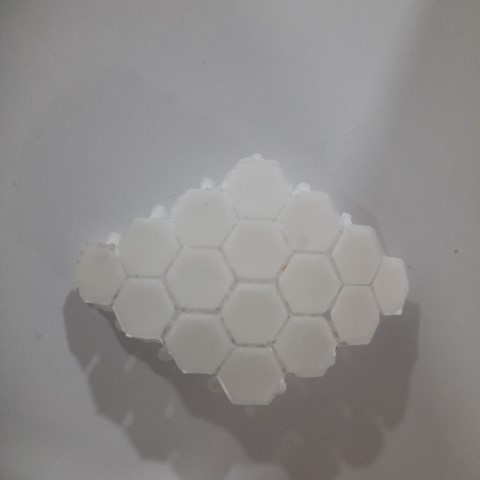
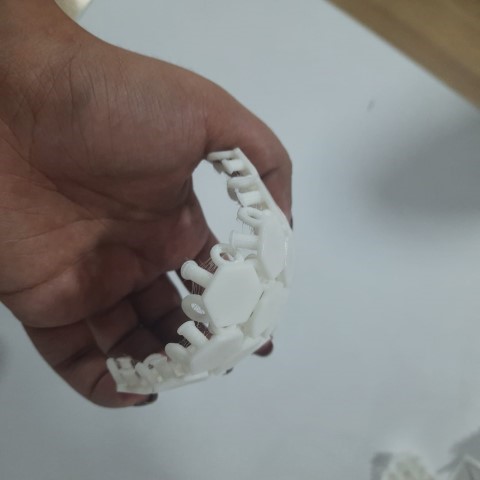
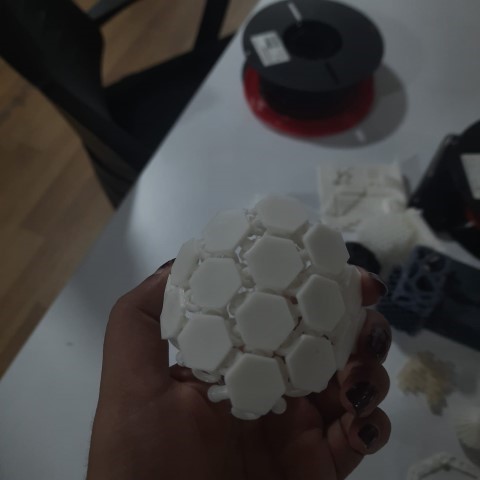
I repeated the same steps for hexagonal chainmail for 3D printing and got this.
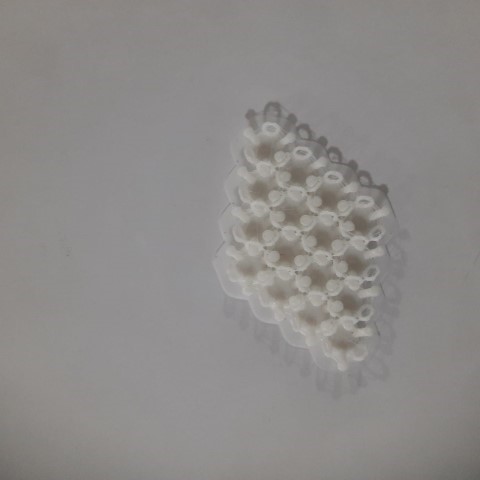
The links were weak so I changed the torous diameter and I scaled it up to 150% in prusa slicer and gave it for printing.
This is the newly printed chainmail and you can see the comparison here.
This was very flexible. I'm happy with the result.
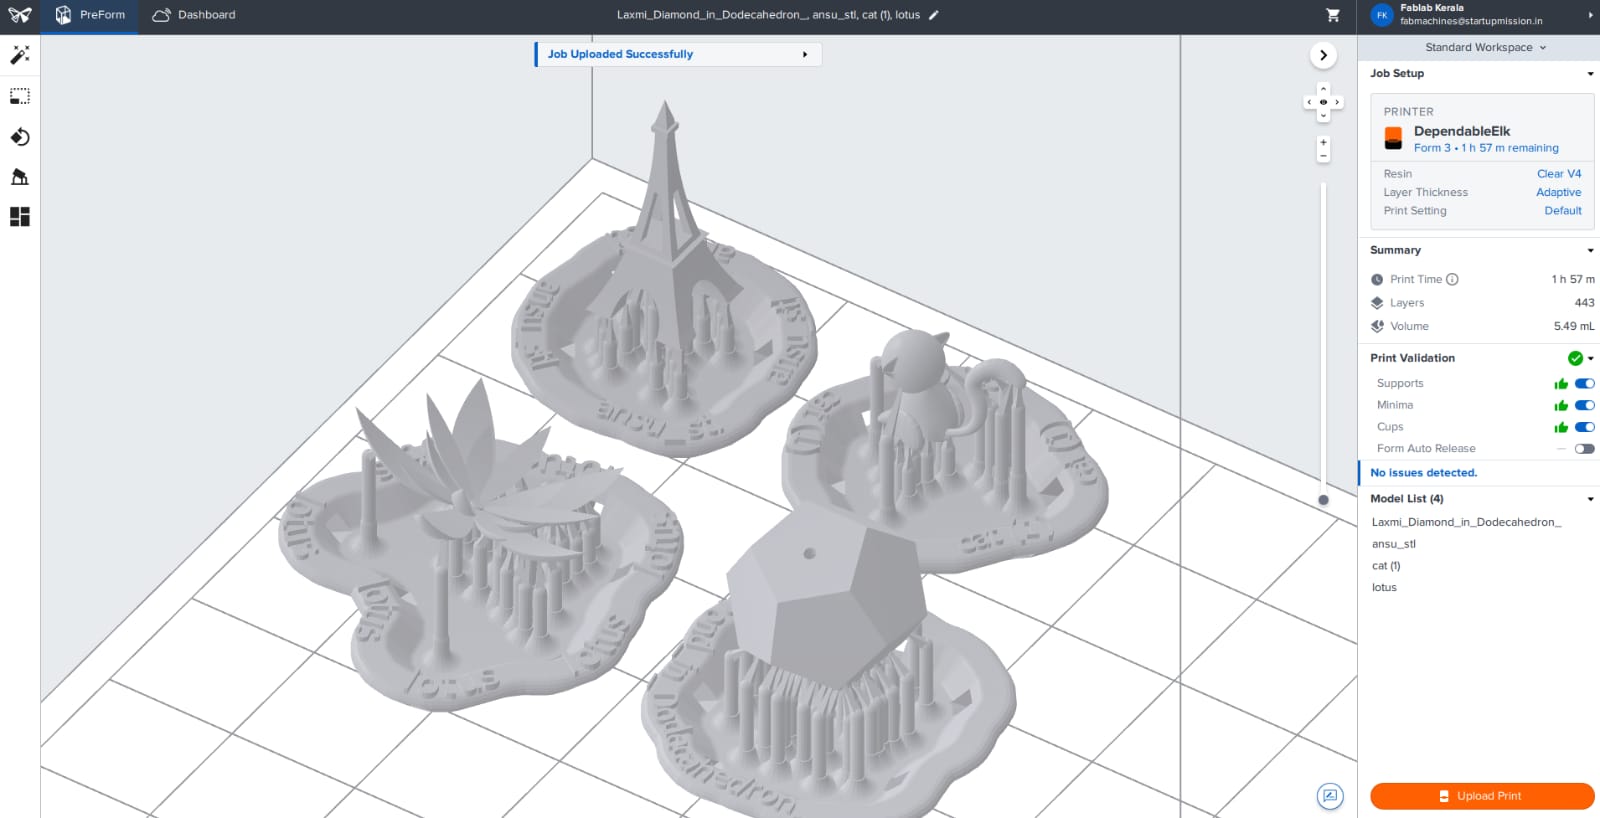
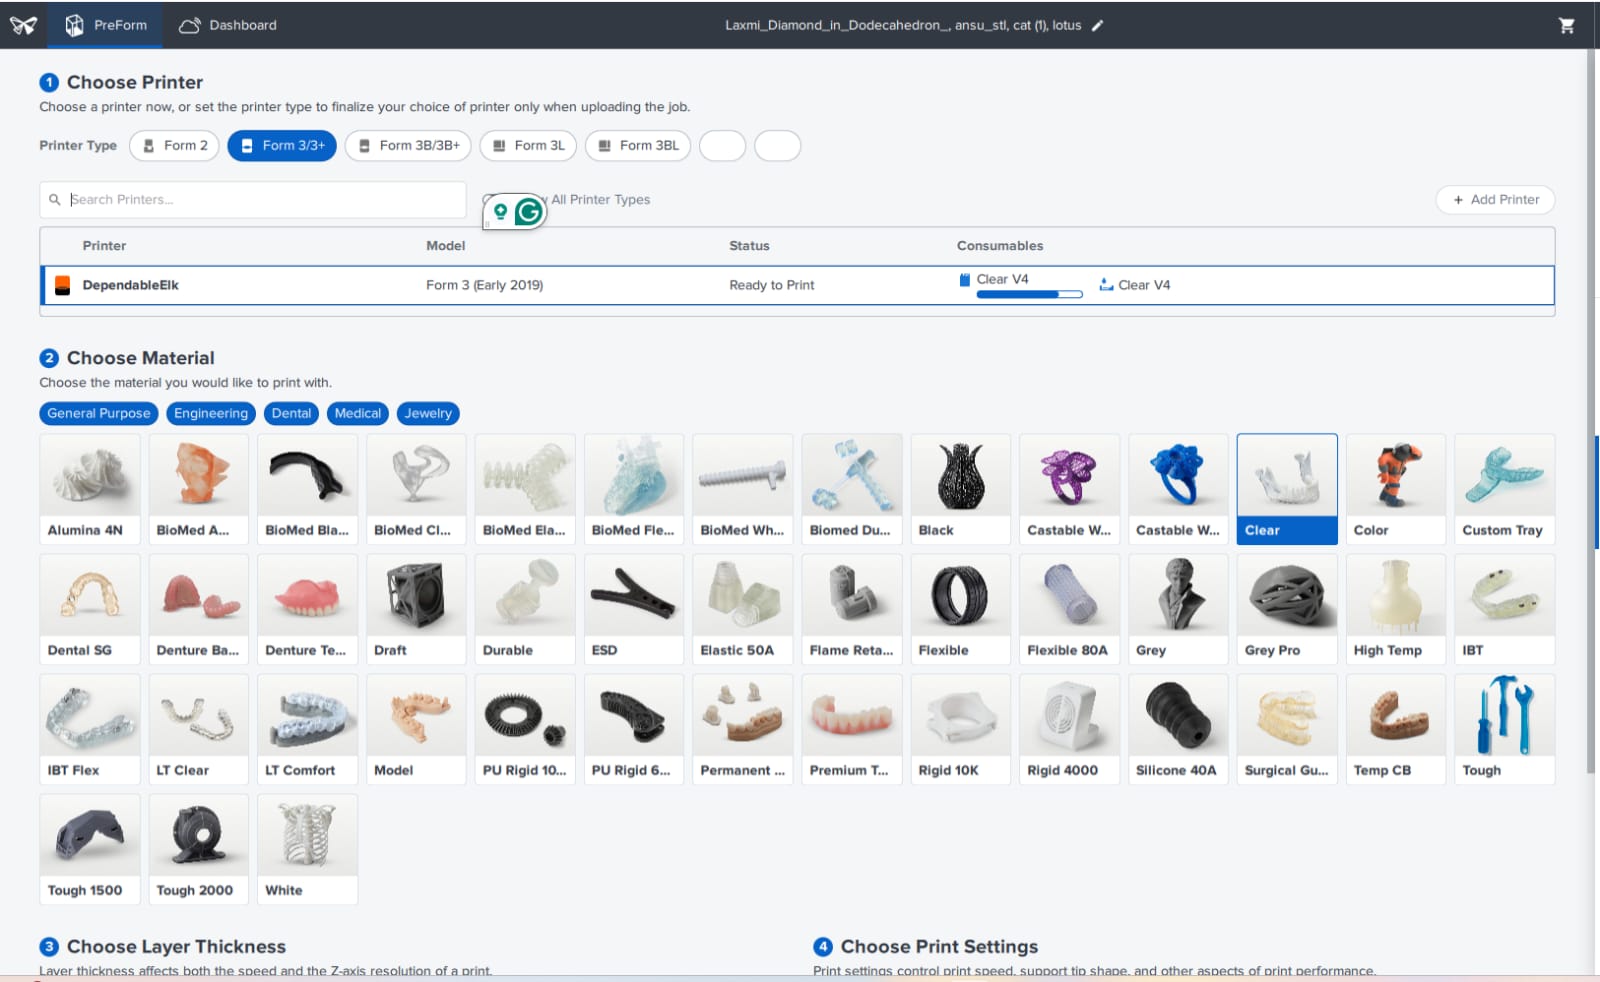
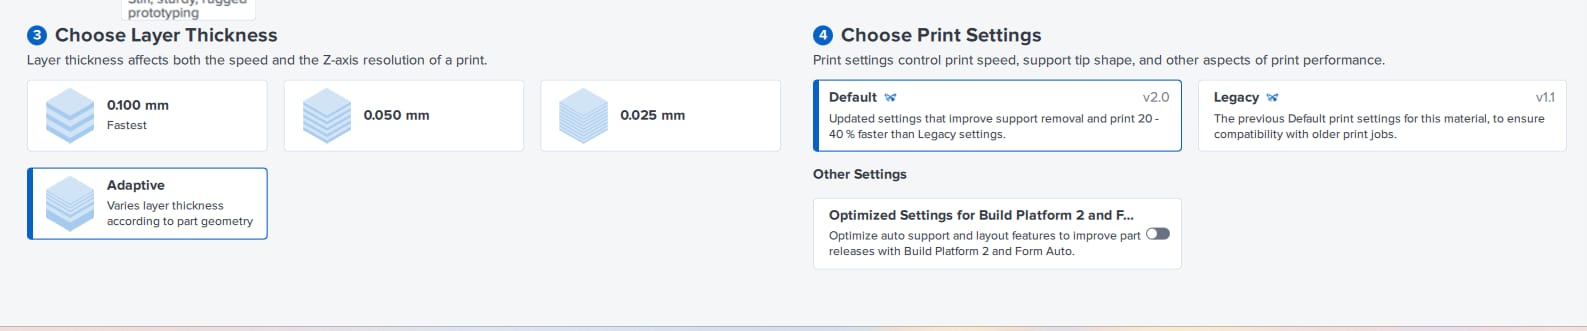
For SLA in FormLabs, my lotus design was added with my FAB mates as you can see here.
Material is chosen as clear and layer thickness is adaptive.
Printing started in FormLabs
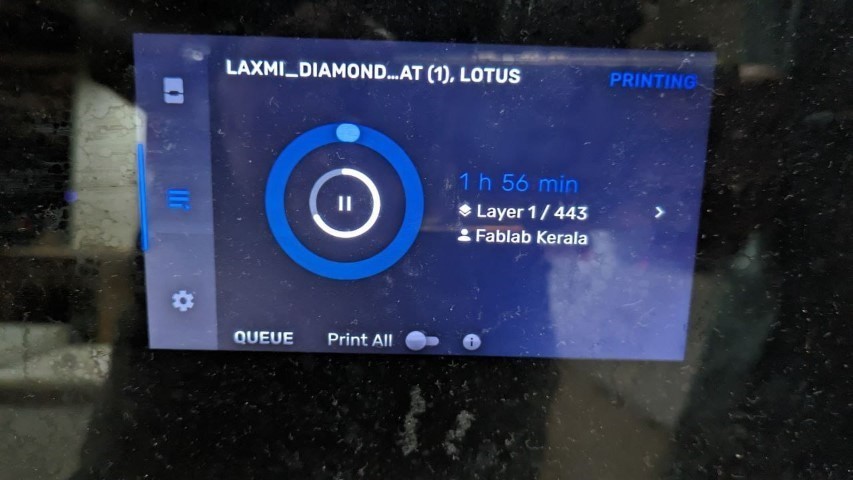
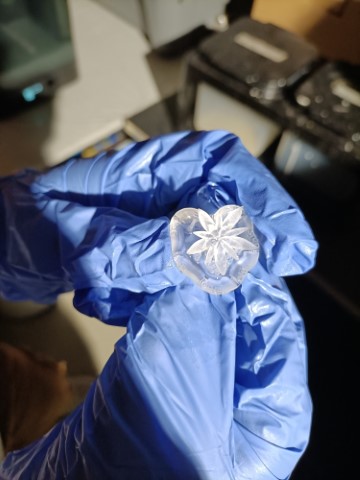
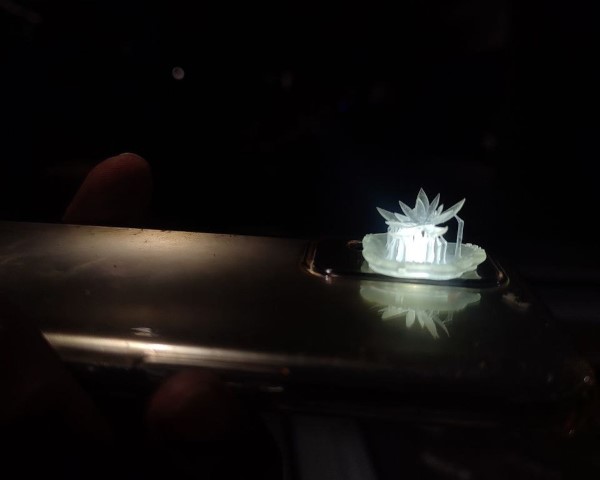
Printing is done. You can see it here.
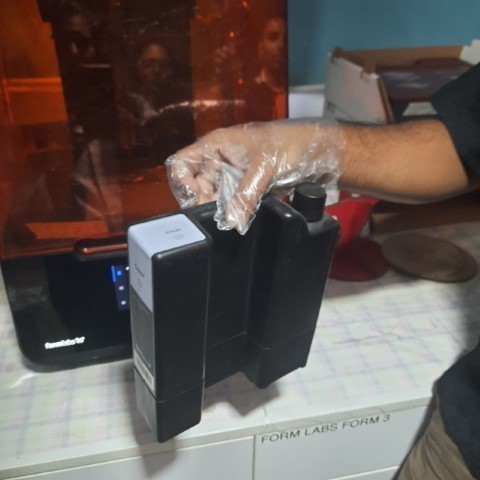
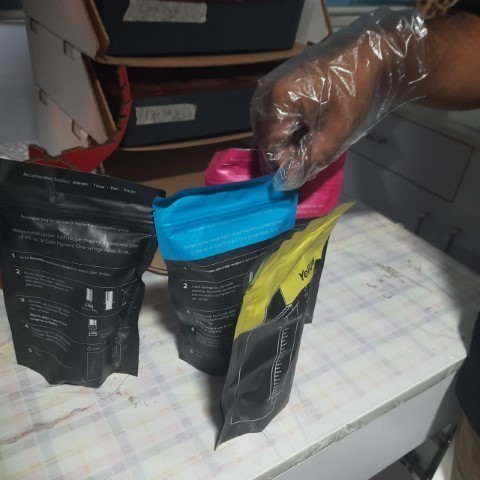
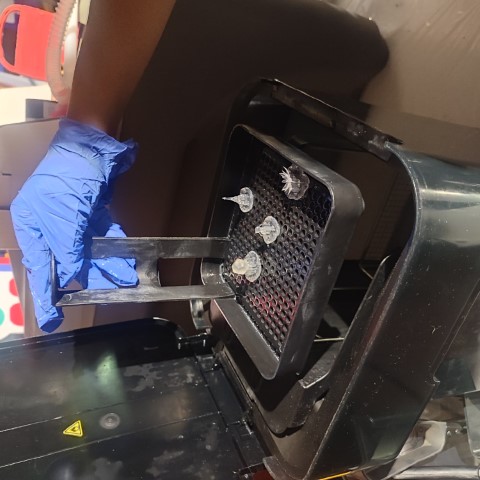
We took it out wearing gloves since resin is toxic. It looked like crystals and it was so shiny.
Next step is to take it out of the bed using pry tool.
Then it should be washed to remove any excess resin that may still be on the surface.
This can be done using isopropyl alcohol (IPA) or specialized resin cleaning solutions.
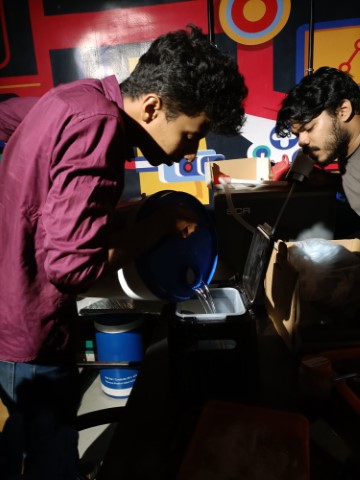
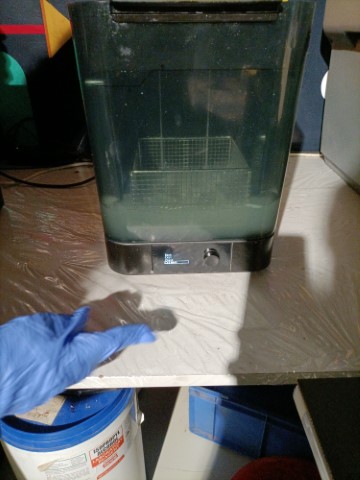
Then we wash off the resin from the print by putting it in Isopropyl (IP) bath.
This is step 1 and it is mostly manual.
Lot of resin has been removed.
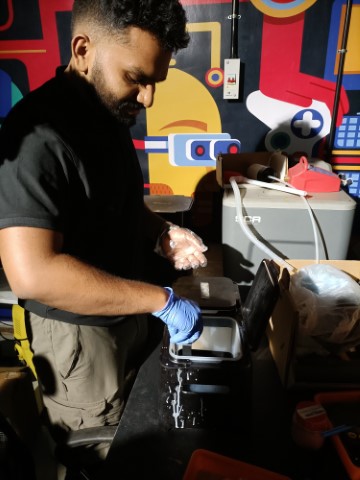
We have one more step for washing using a Form Wash machine, place the print inside, add isopropyl alcohol, set the wash time, start the cycle, inspect for remaining resin, dry thoroughly, then proceed to curing.
This ensures clean, ready-to-use prints for post-processing.
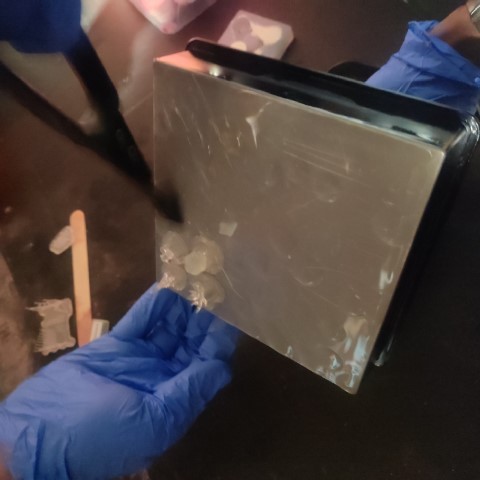
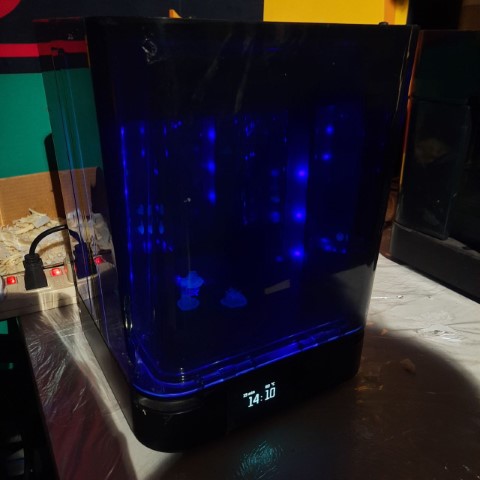
Formlabs provides their own UV curing chamber designed specifically for their resins.
The print is placed inside the chamber, and UV light is used to cure the resin completely.
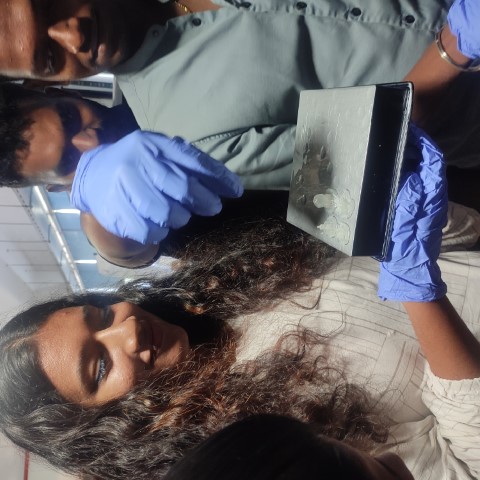
Here's the final result
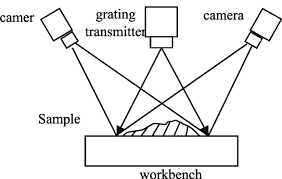
3D Scanning
3D scanning captures real-world objects' shape and appearance by emitting energy onto them, then recording their response. Processed data forms a digital 3D model, often a mesh, for various applications like visualization, manufacturing, and cultural preservation.
It finds uses in engineering, healthcare, archaeology, and entertainment industries.
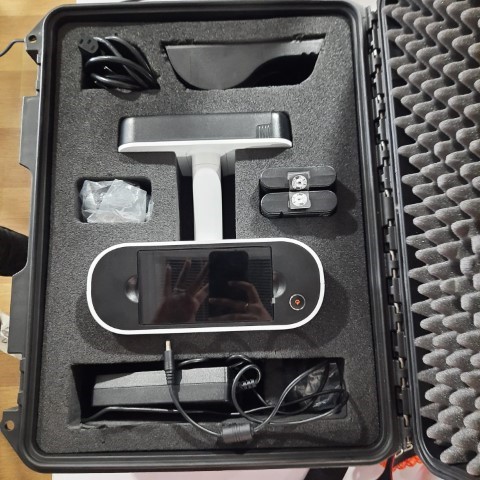
Artec Leo
Artec Leo is a handheld 3D scanner known for its portability and ease of use. It features onboard processing, wireless operation, and a built-in touchscreen for real-time scanning feedback.
Leo offers high-resolution color scanning and is suitable for capturing objects of various sizes, making it popular in industries like design, engineering, and entertainment.
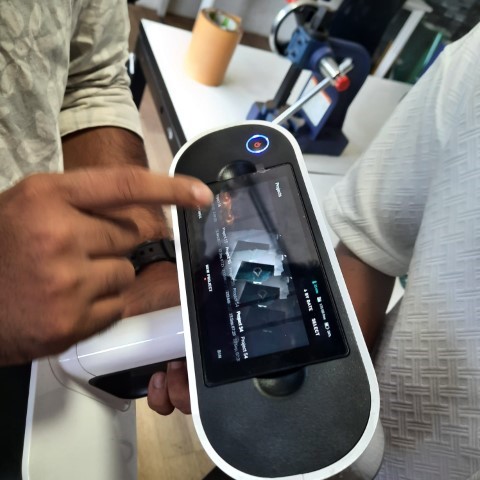
We were familiarised with the 3D scanning process by our instructor.
He showed us how to scan an object, how to remove base and the meaning of all colours in the scans.
Green means all information has been received, orange means enough information and red shows no information.
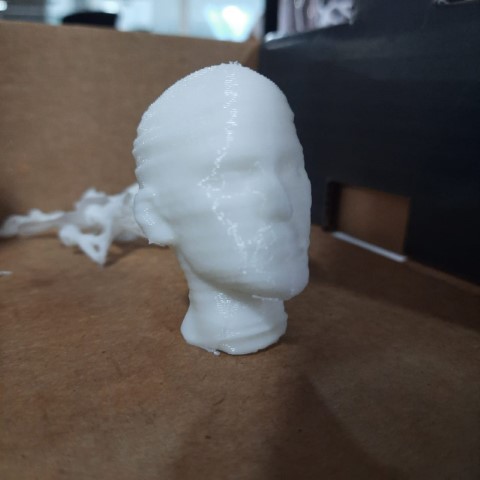
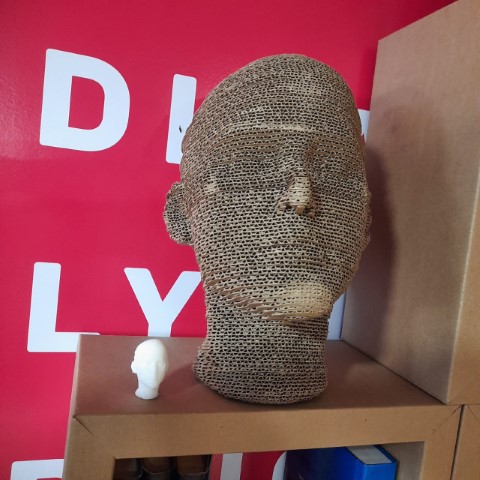
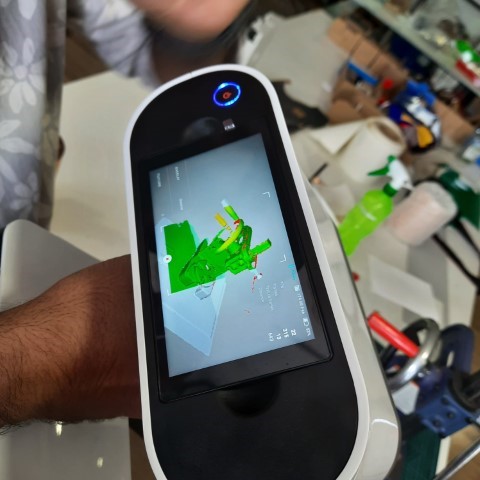
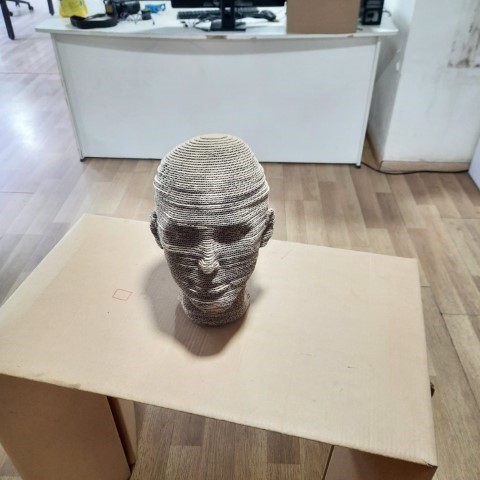
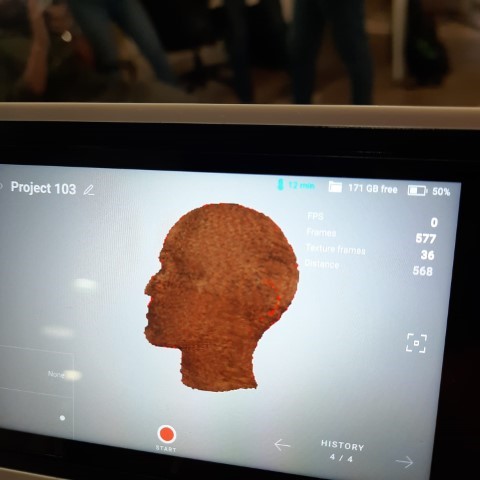
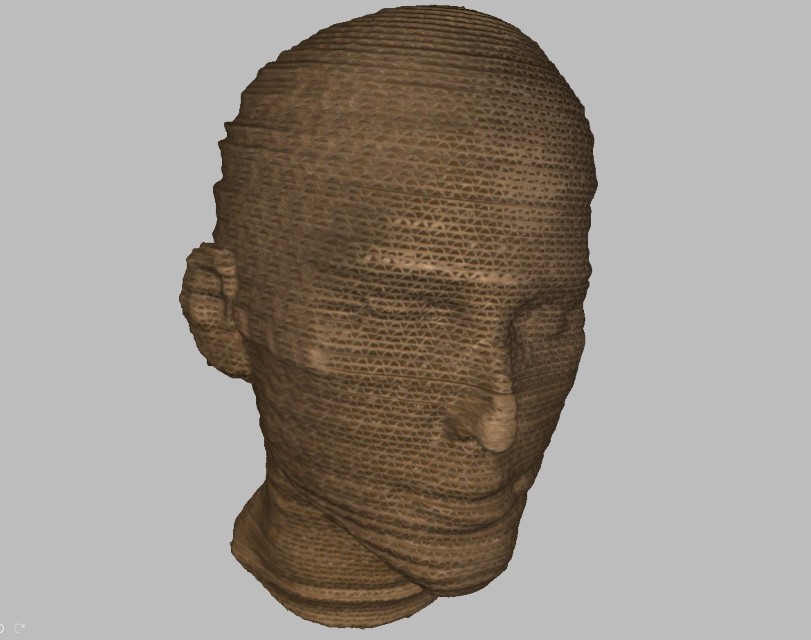
To 3D scan, I chose this cardboard layering of a head. Since it was all solid body with same colour, I figured it would be easier to post process it without much difficulties.
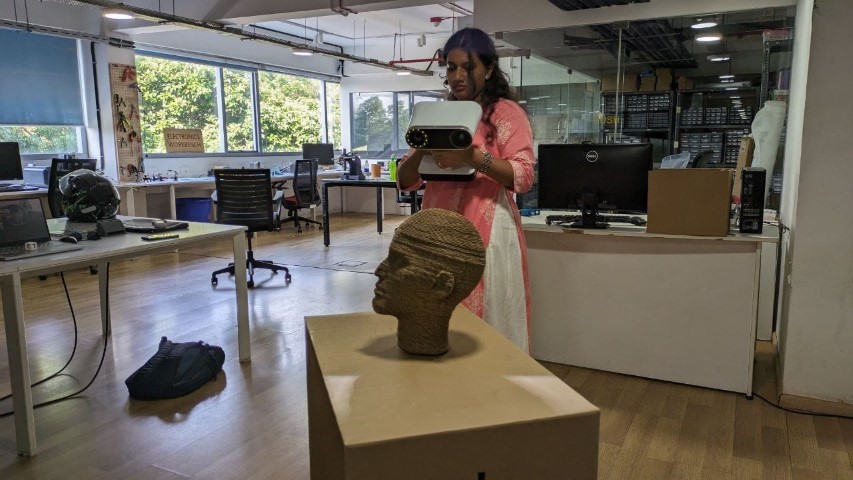
Here is me 3D scanning the head. I took three scans in total because the bottom of the head and the neck regio was shown red.
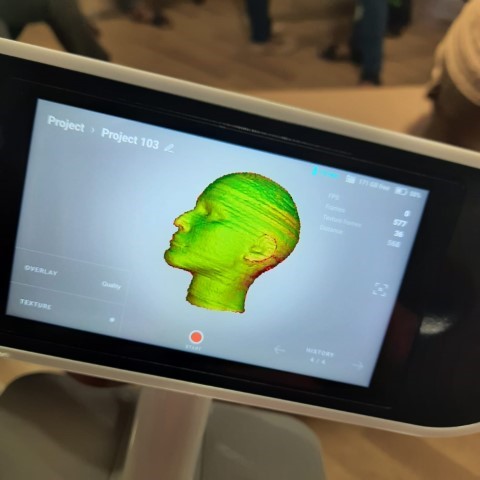
So this the scan of the head, it looks all okay.
This is when I added the texture to the scan. It looks just like the head.
Post processing using Artec Studio
Artec Studio is post-processing software for Artec 3D scanners.
It aligns scans, edits meshes, applies textures, and enables measurements.
Users can export final 3D models in various formats.
It integrates seamlessly with other tools, streamlining workflows for industries like manufacturing, healthcare, and entertainment.
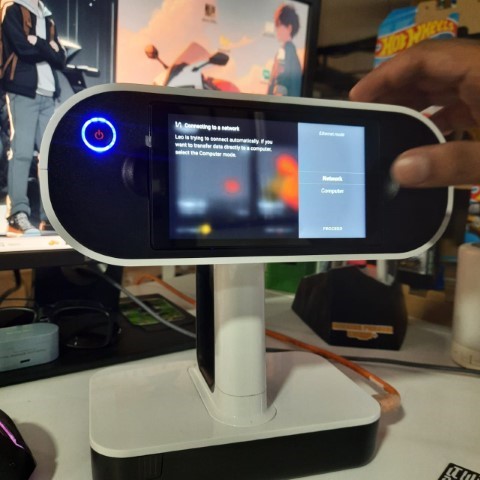
For post-processing, connect the scanner to the pc using LAN cable for faster transfer.
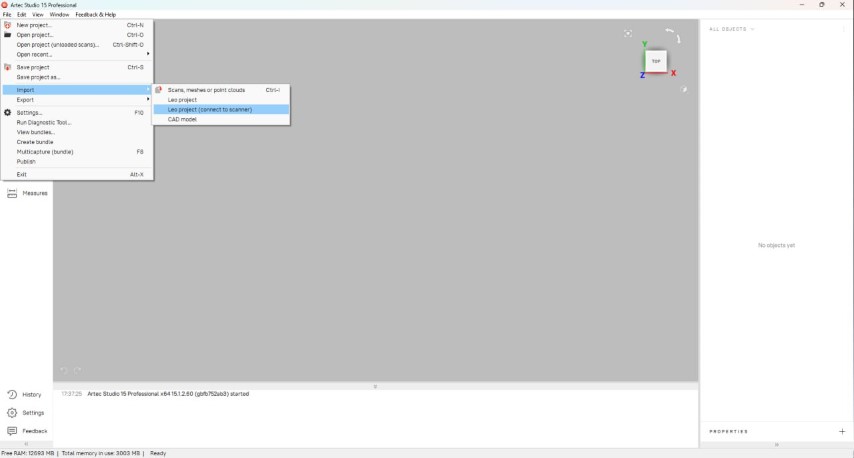
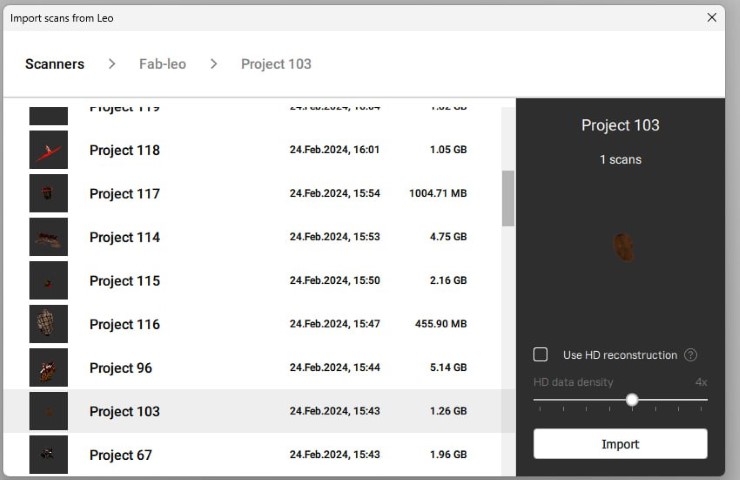
Open Artec Studion>File>Import>Leo Project (connect to scanner)
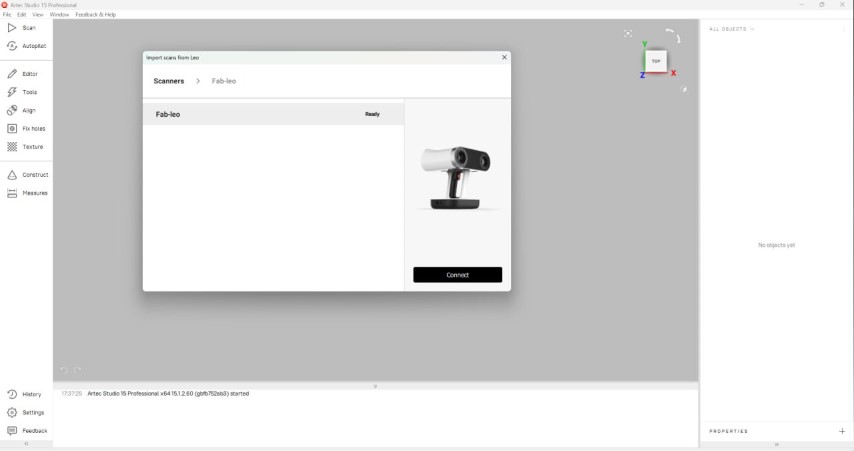
Connect to Fab Leo
I imported my scan which was project 103
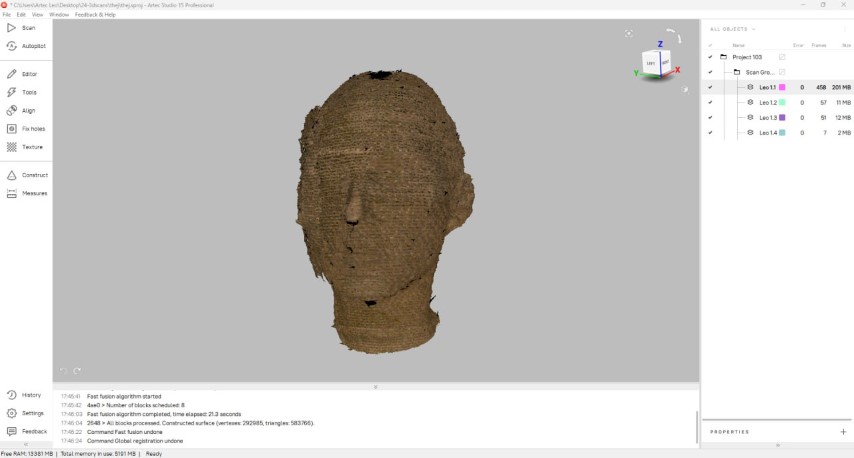
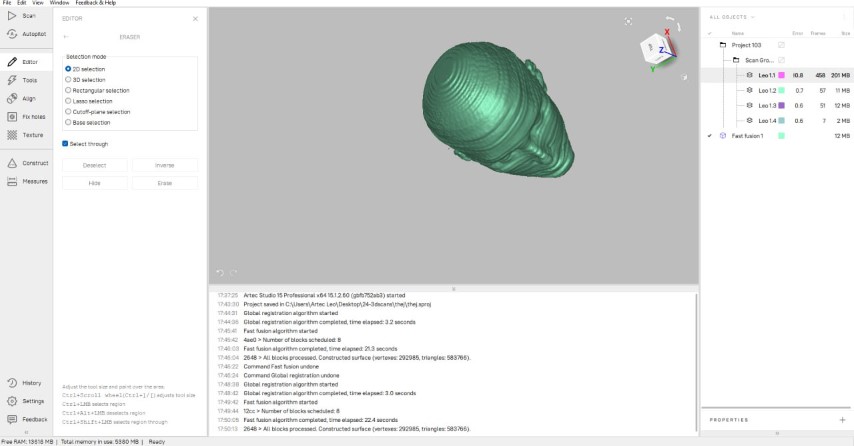
This is my scan. There are a lot of holes and double layers of scan. I have to correct all of this.
So, first step is to apply global registration
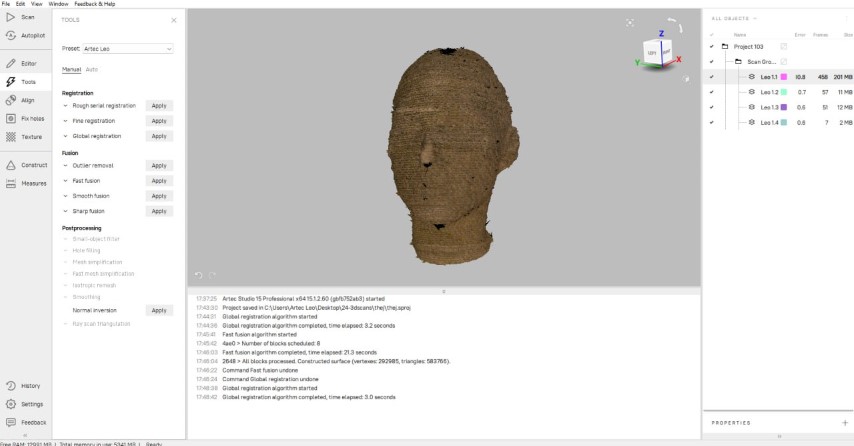
Next apply fast fusion to get this.
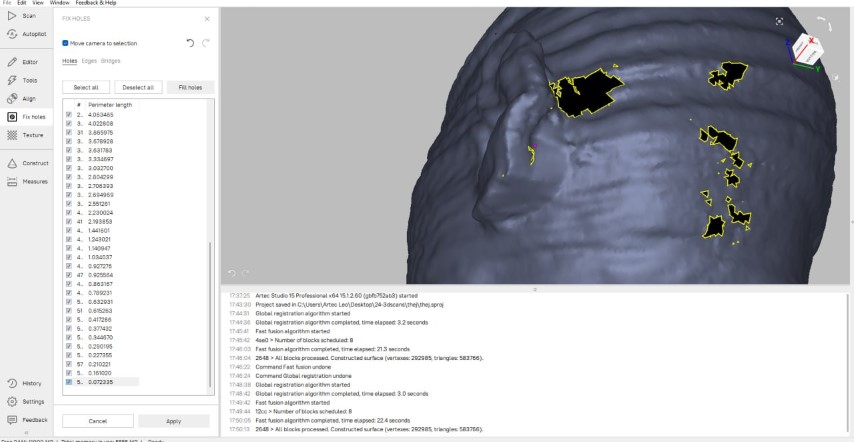
I used eraser tool to erase out the unwanted particles in the scan.
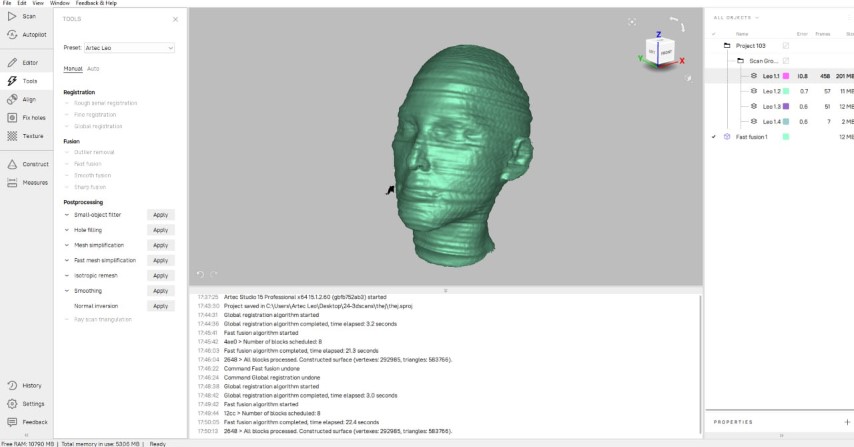
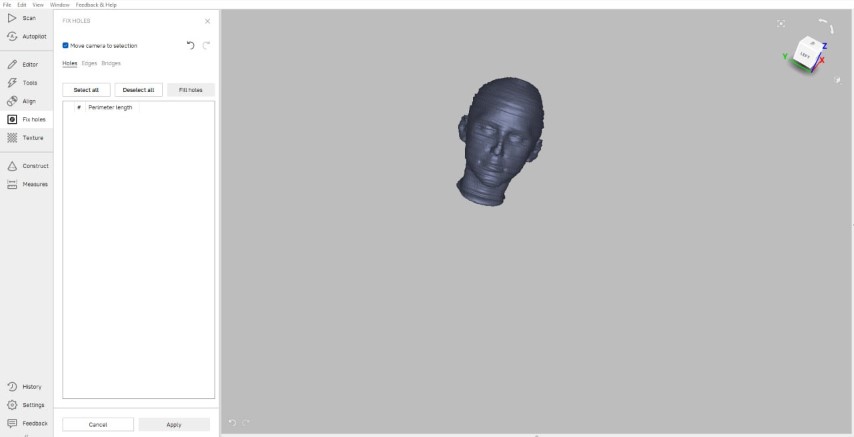
Next I took fix holes option and selected all holes to fill them.
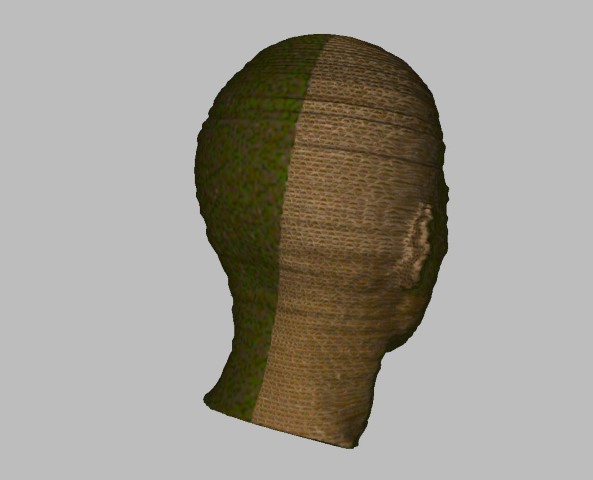
Next, I applied texture to the scan to get the original model.
After choosing a couple of textures and seeing the result, I got the best texture.
Then, I exported it as an Obj file for 3D printing and opened it in prusa slicer, scaled it down and gave organic support and sliced it.
I exported the G-code and gave it for 3D printing.
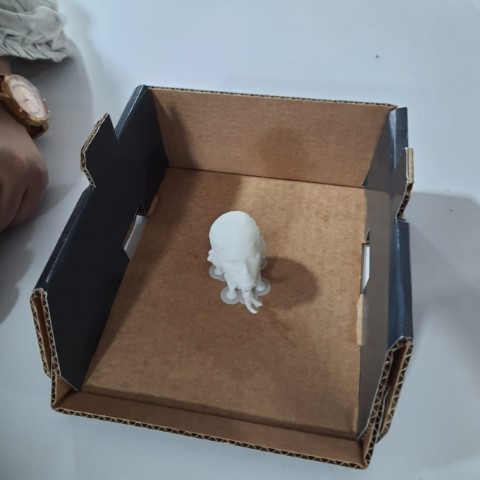
So here's the printed head with its support.
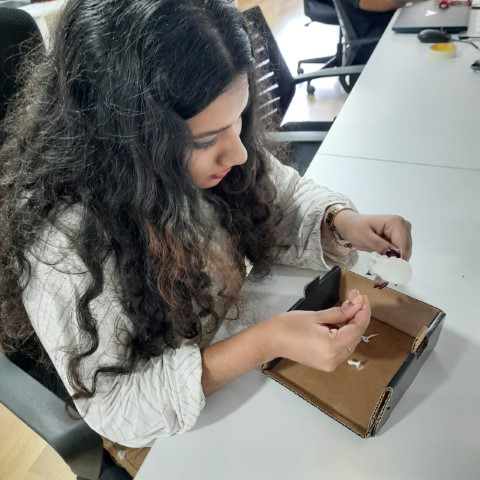
So here's me trying to remove tree support. I used tools to remove it although intially I used my hands. (Its bad idea if you have nail polish)

.png)
.png)
.png)
.png)
.png)
.png)
.png)
.png)
.png)
.png)
.png)
.png)
.png)
.png)
.png)
.png)
.png)
.png)
.png)
.png)
.png)


.png)