Computer Controlled Machining
Tasks for this Week
1.Individual assignment:To create a large-scale object, such as one that measures meters, the process typically involves designing, milling, and assembling various components.
2.Group assignment: Lab's safety training & Test runout, alignment, fixturing, speeds, feeds, materials,and toolpaths for your machine
Computer Controlled Machining
Computer numerical control (CNC) machining, a technique in manufacturing, employs computerized software and hardware to direct cutting tool movements, shaping materials into desired products. CNC machines are versatile, capable of accurately cutting, drilling, and milling various materials like wood, metal, plastics, and composites. The software facilitates the creation of intricate designs, ensuring precise replication by the machine.
This assignment delves into the realm of CNC by embarking on a project to create something substantial. Through this process, we aim to grasp the capabilities of the machine and explore its potential.
Design
I took inspiration from a chair design by sculptural shell chair by Portuguese Designer Branca Lisboa and modelled my version of it on Fusion 360
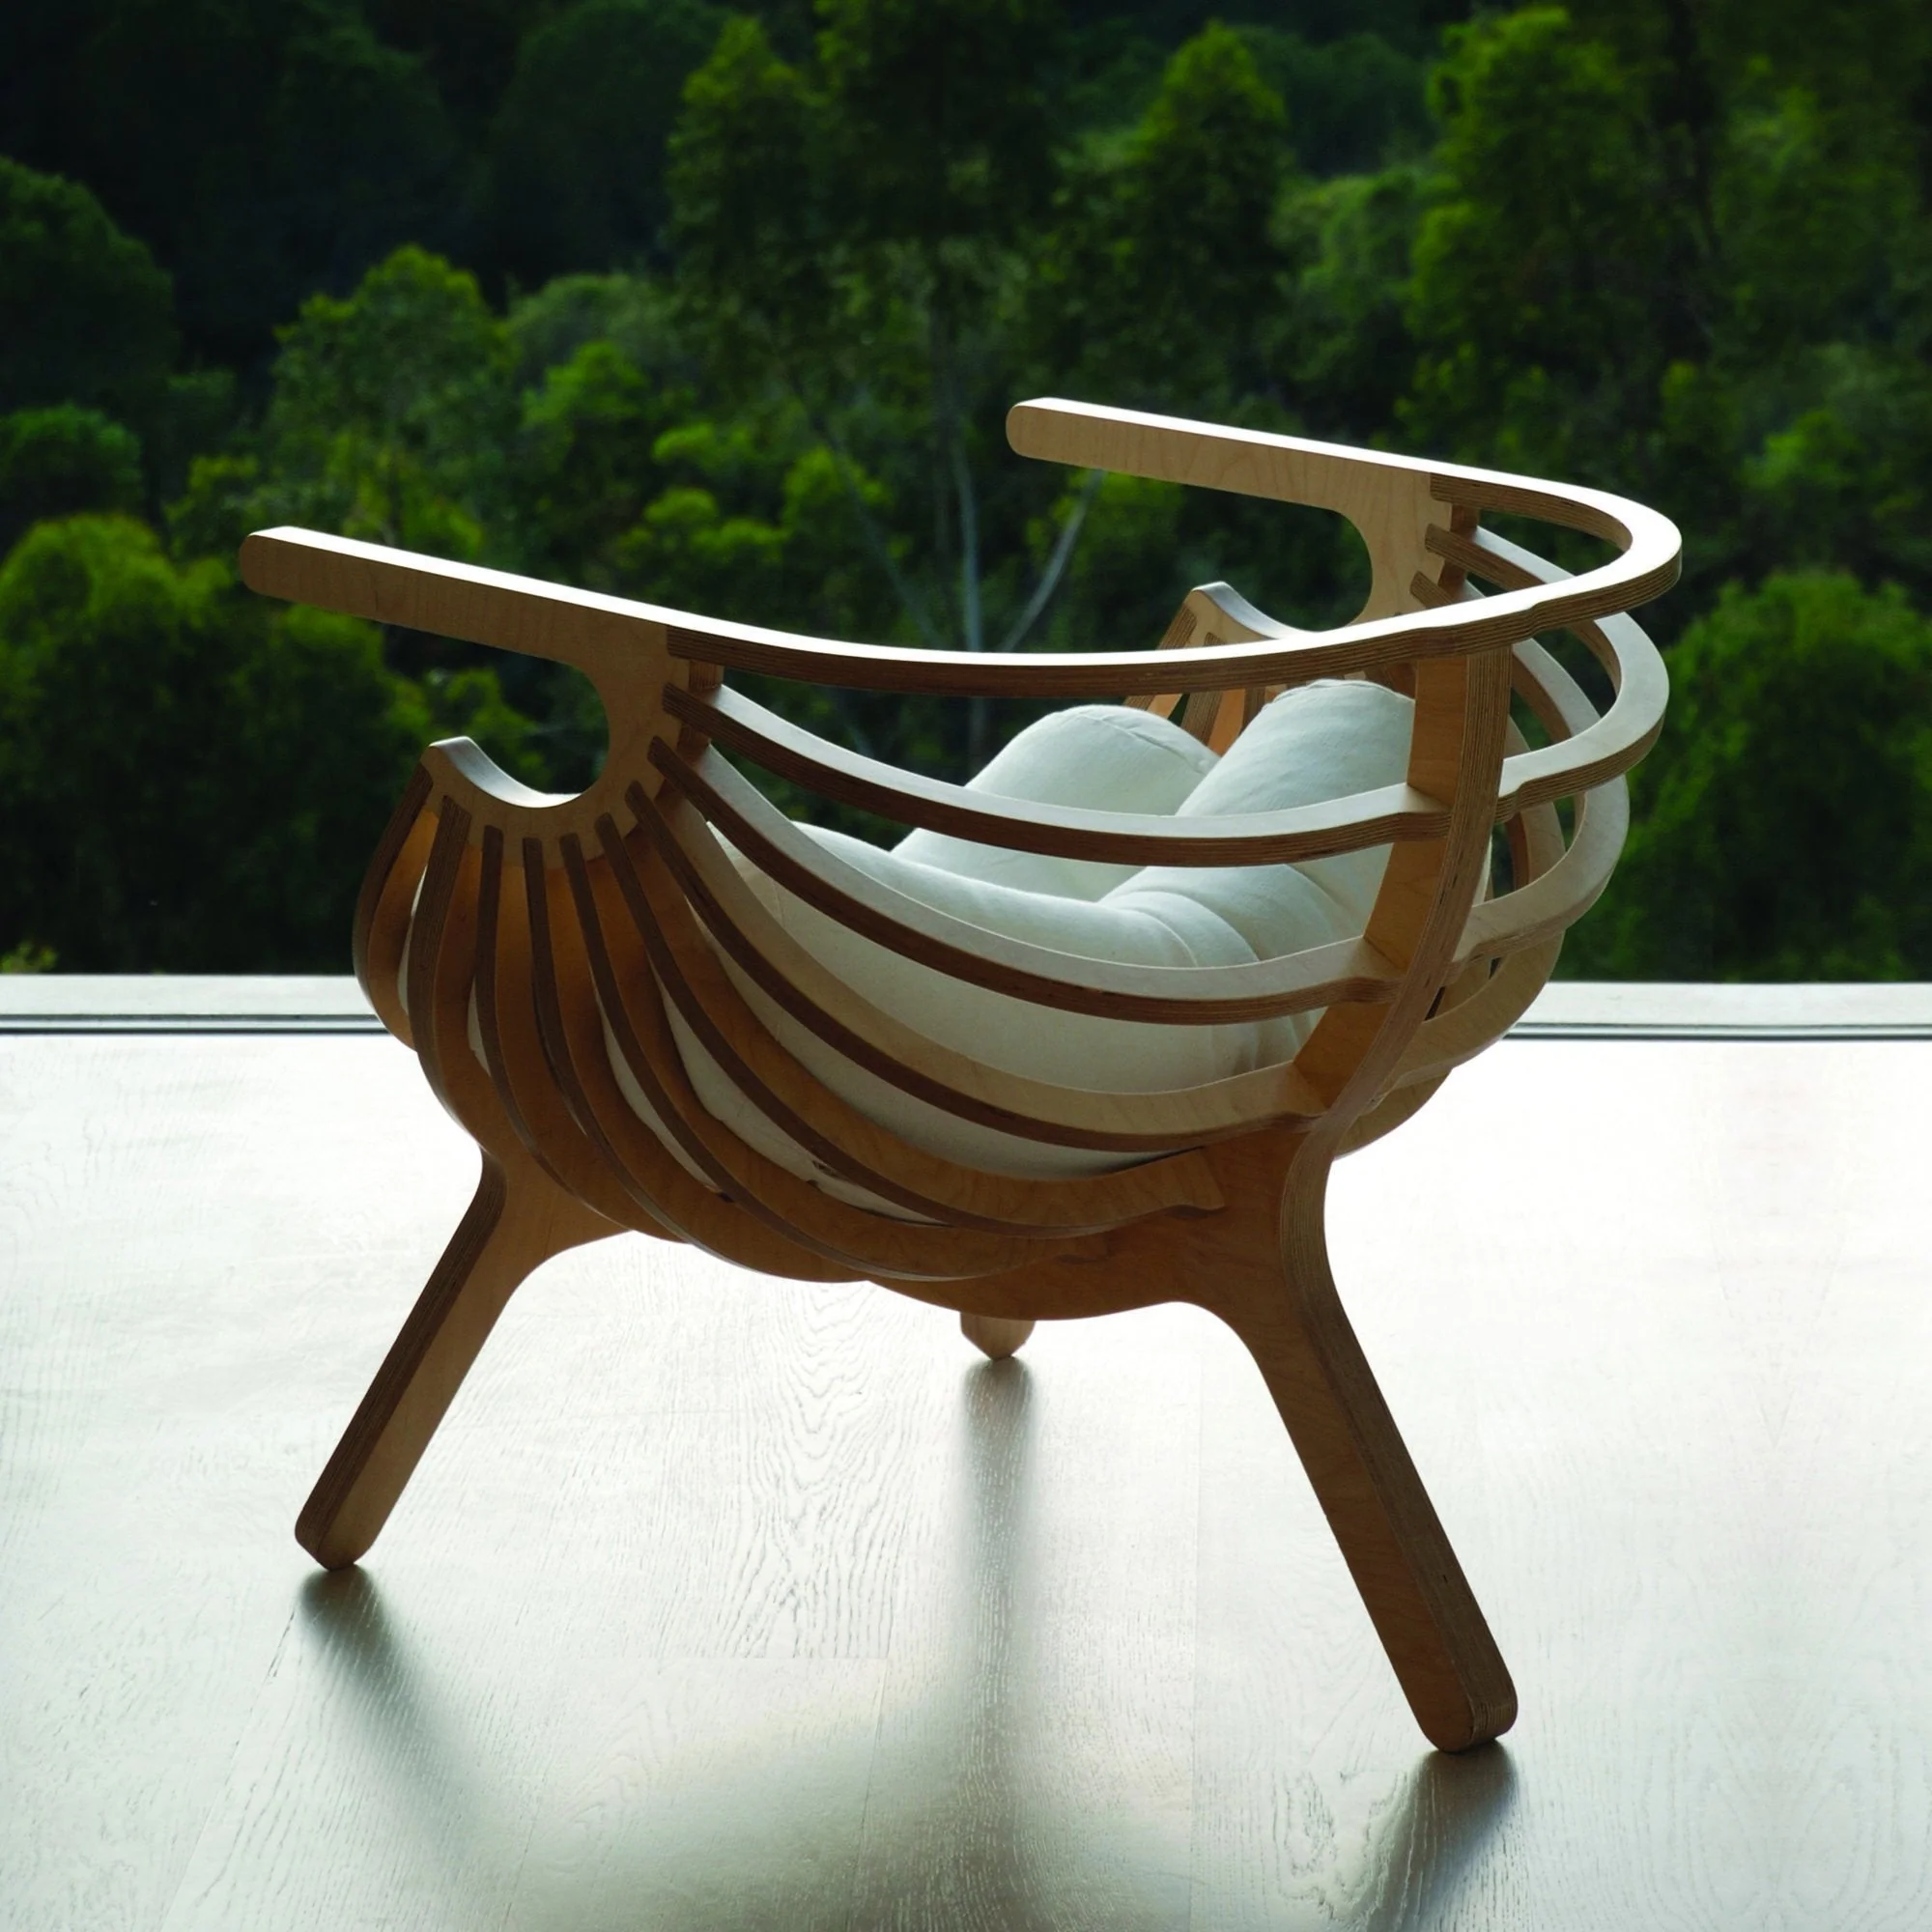
I began the design process by focusing on the chair's backbone and armrests, each crafted as semicircular components connected by another semicircular piece. The remaining nine pieces form the chair's main body. The frontal legs are affixed to the spine and positioned at an inclined angle.
Initially, I designed the backbone of the structure
.png)
.png)
.png)
After designing the components, i have started to assemble each
.png)
.png)
After assembling, i have gotten this results
.png)
Then i draw a hand rest sketch and assemble it into the chair
.png)
.png)
Finally given the proper appearance of wooden color, i got the results
.png)
Then i arranged the design into a flat pattern.Using Modify --- Arrange
.png)
Dog bone
Dog bone is a woodcutting technique employed to craft precise and seamless joints between two wood pieces. This method entails carving out a small notch or groove at the end of one piece to perfectly accommodate the shape of the other, resulting in a flush and sturdy joint.
In Fusion 360, achieving dog bone is facilitated through the integration of a plugin. This can be easily accessed via a GitHub page featuring Fusion 360 add-in scripts designed to expedite the creation of dog bones with minimal effort. By harnessing this plugin, what would otherwise be a laborious and time-consuming process is streamlined, significantly reducing the time and energy required to produce precise joints in woodworking projects.
I used the Fusion plugin Nifty Dogbone for this purpose.
.png)
After giving dogbone
.png)
Zund cutting a scaled model
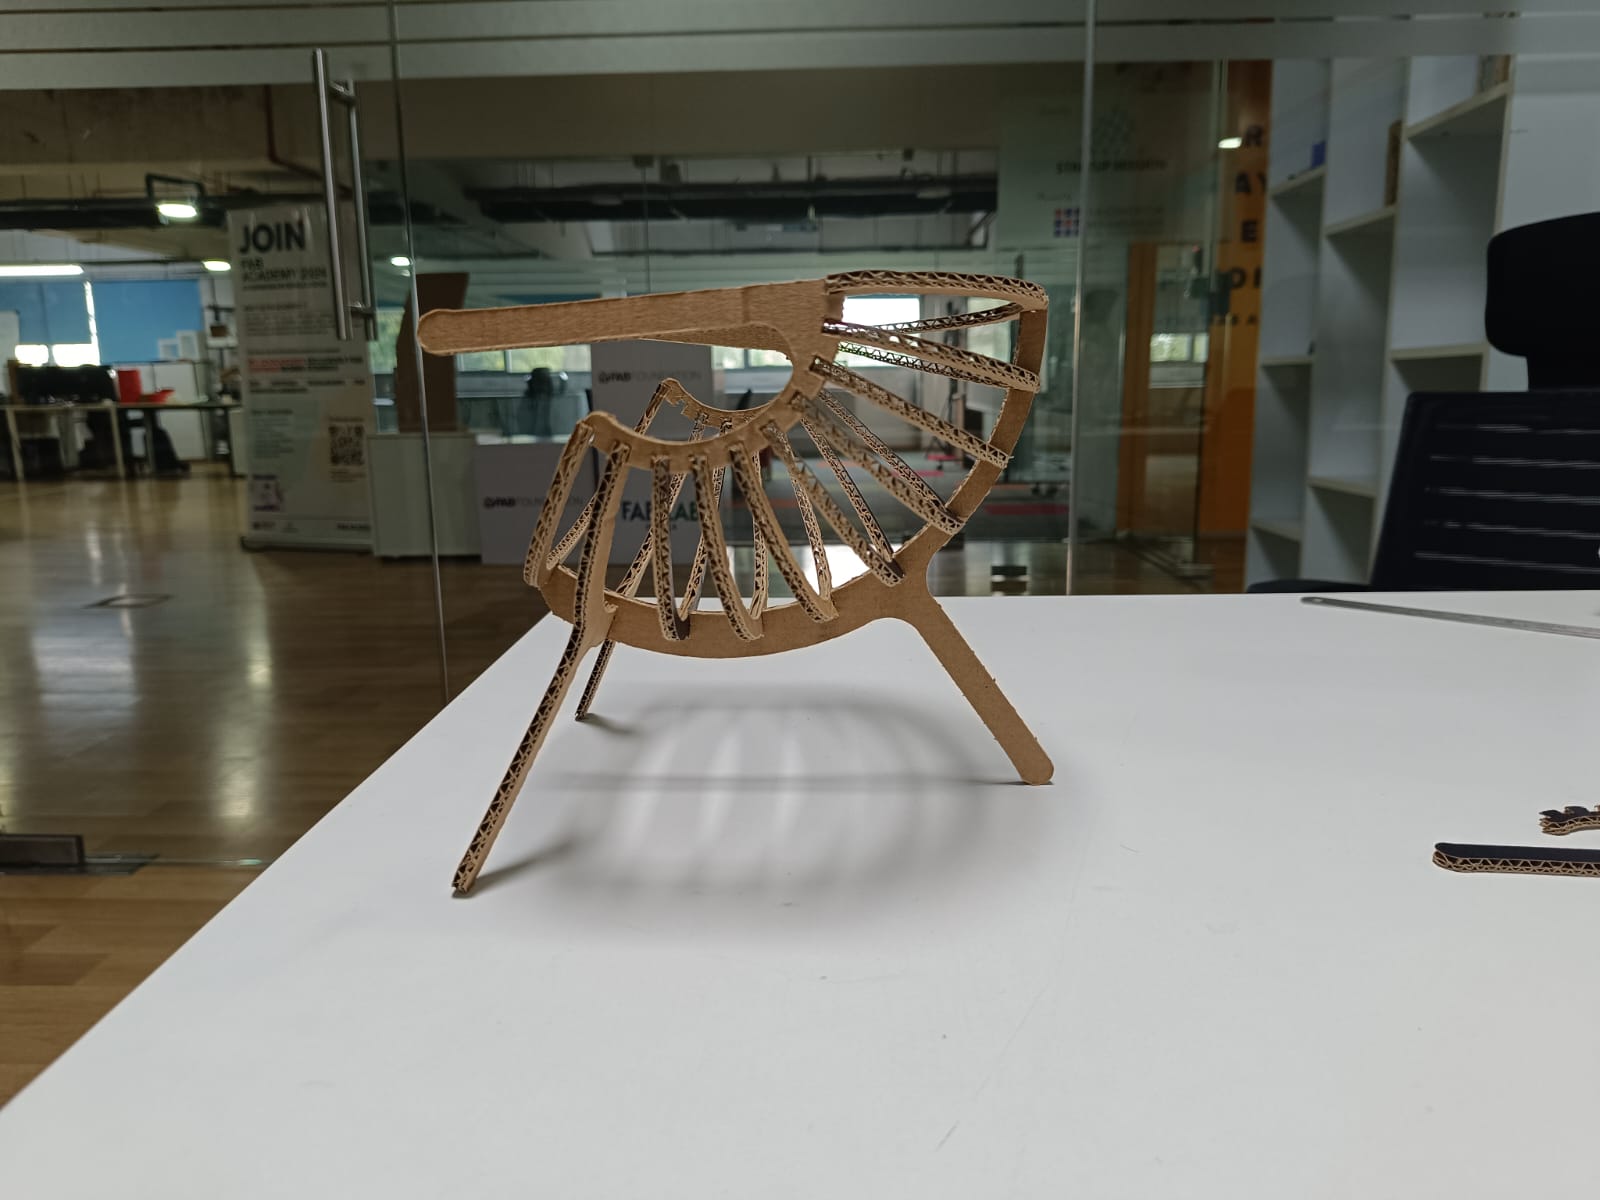
It is recommended to create a cardboard prototype before cutting the actual plywood to ensure accuracy and avoid any mistakes in the original design. I utilized the scaling tool in Zund Cut Editor to adjust the size of the existing projected .dxf file.
.png)
.png)
Subsequently, I have gathered together to achieve this wonderful outcome.
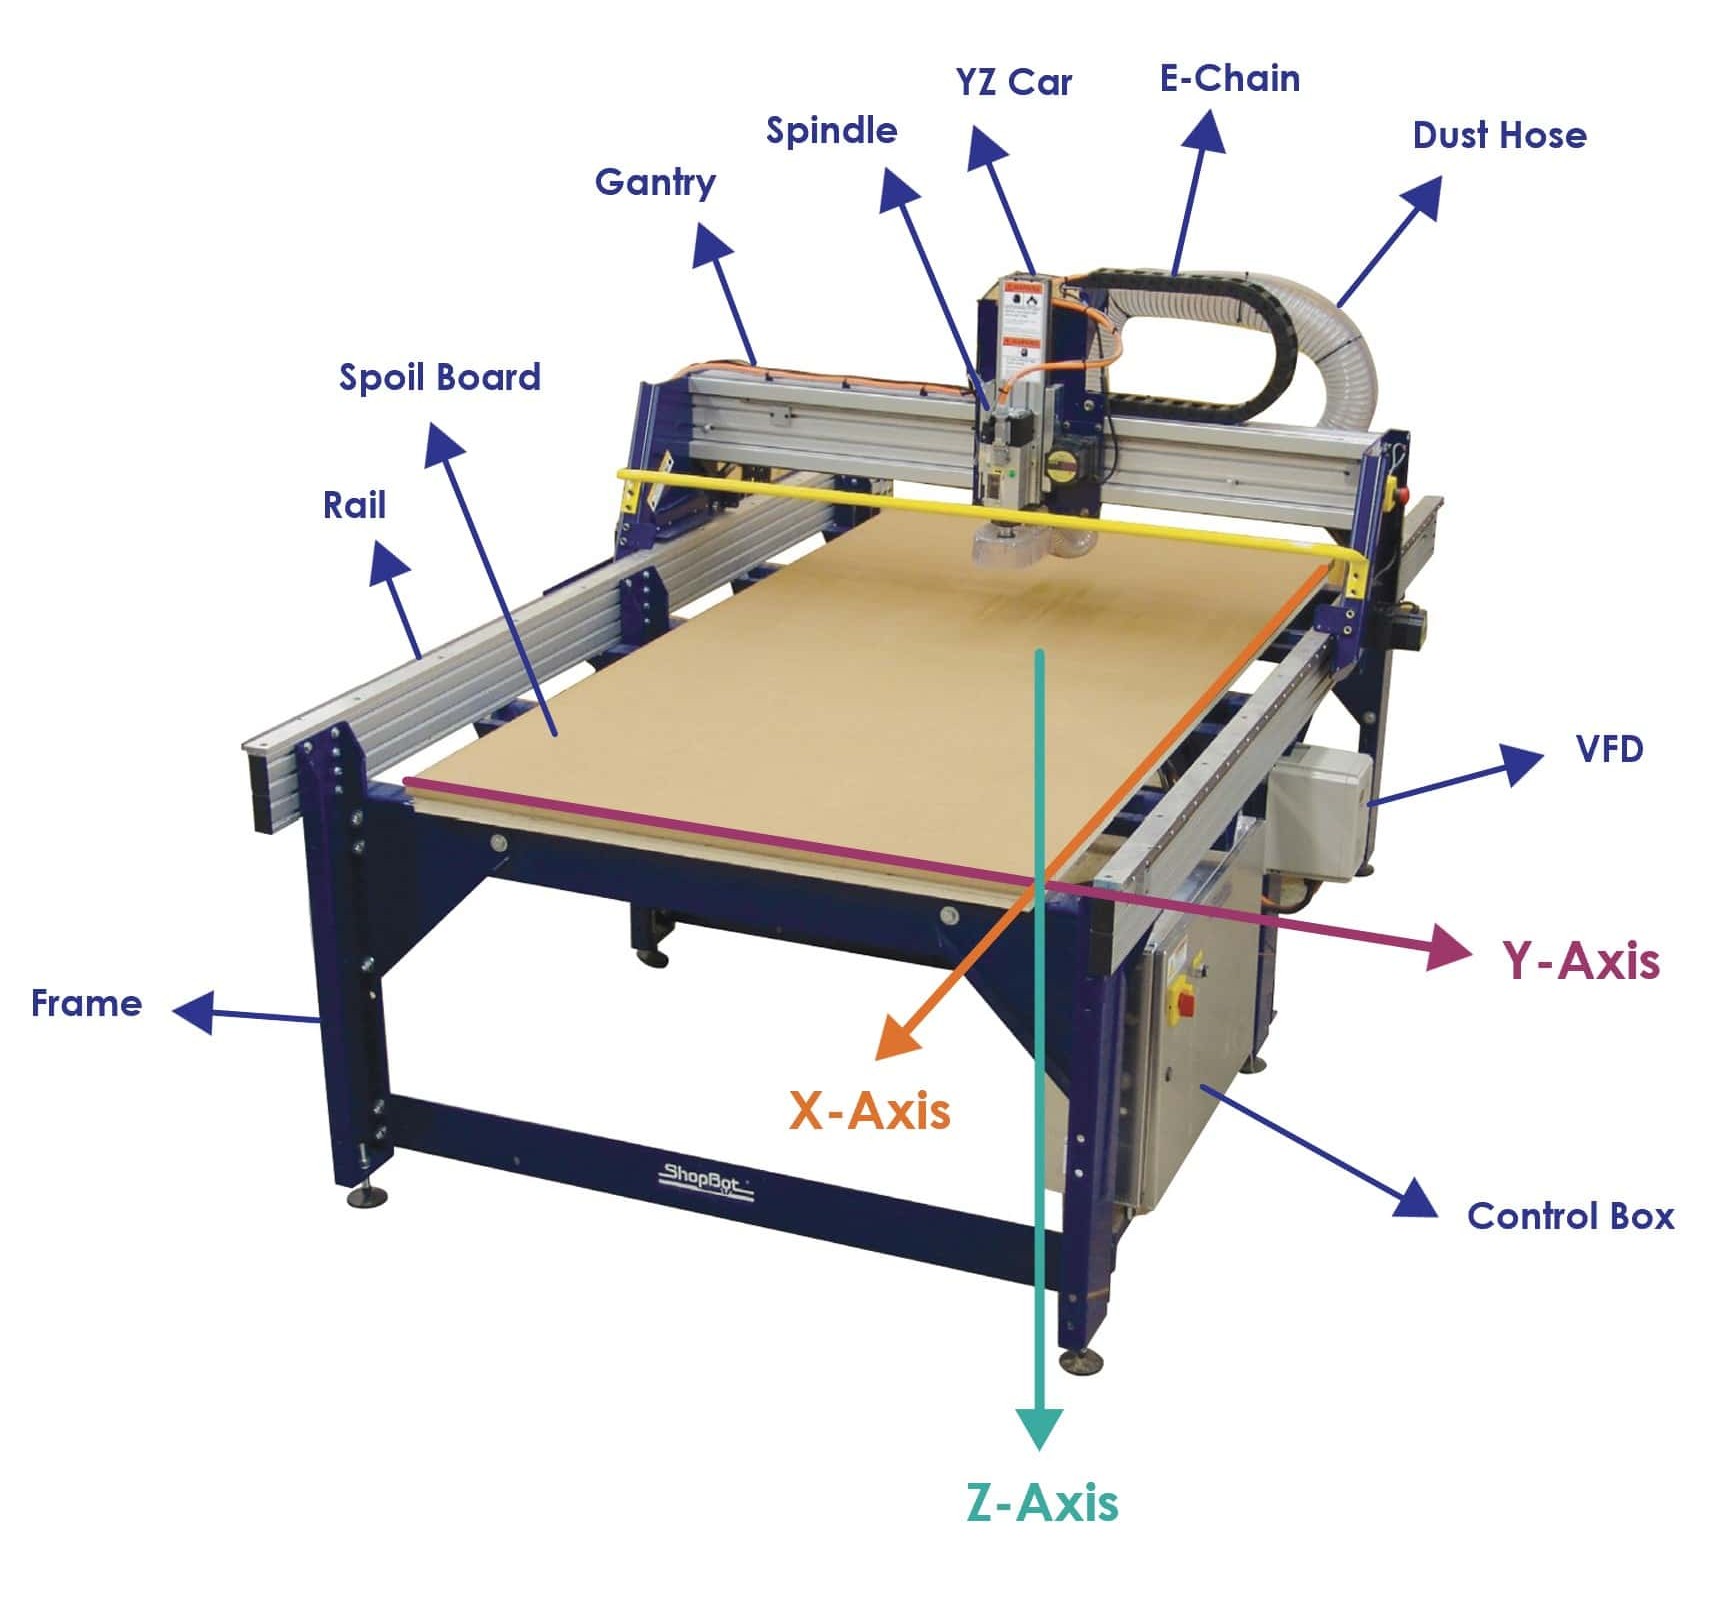
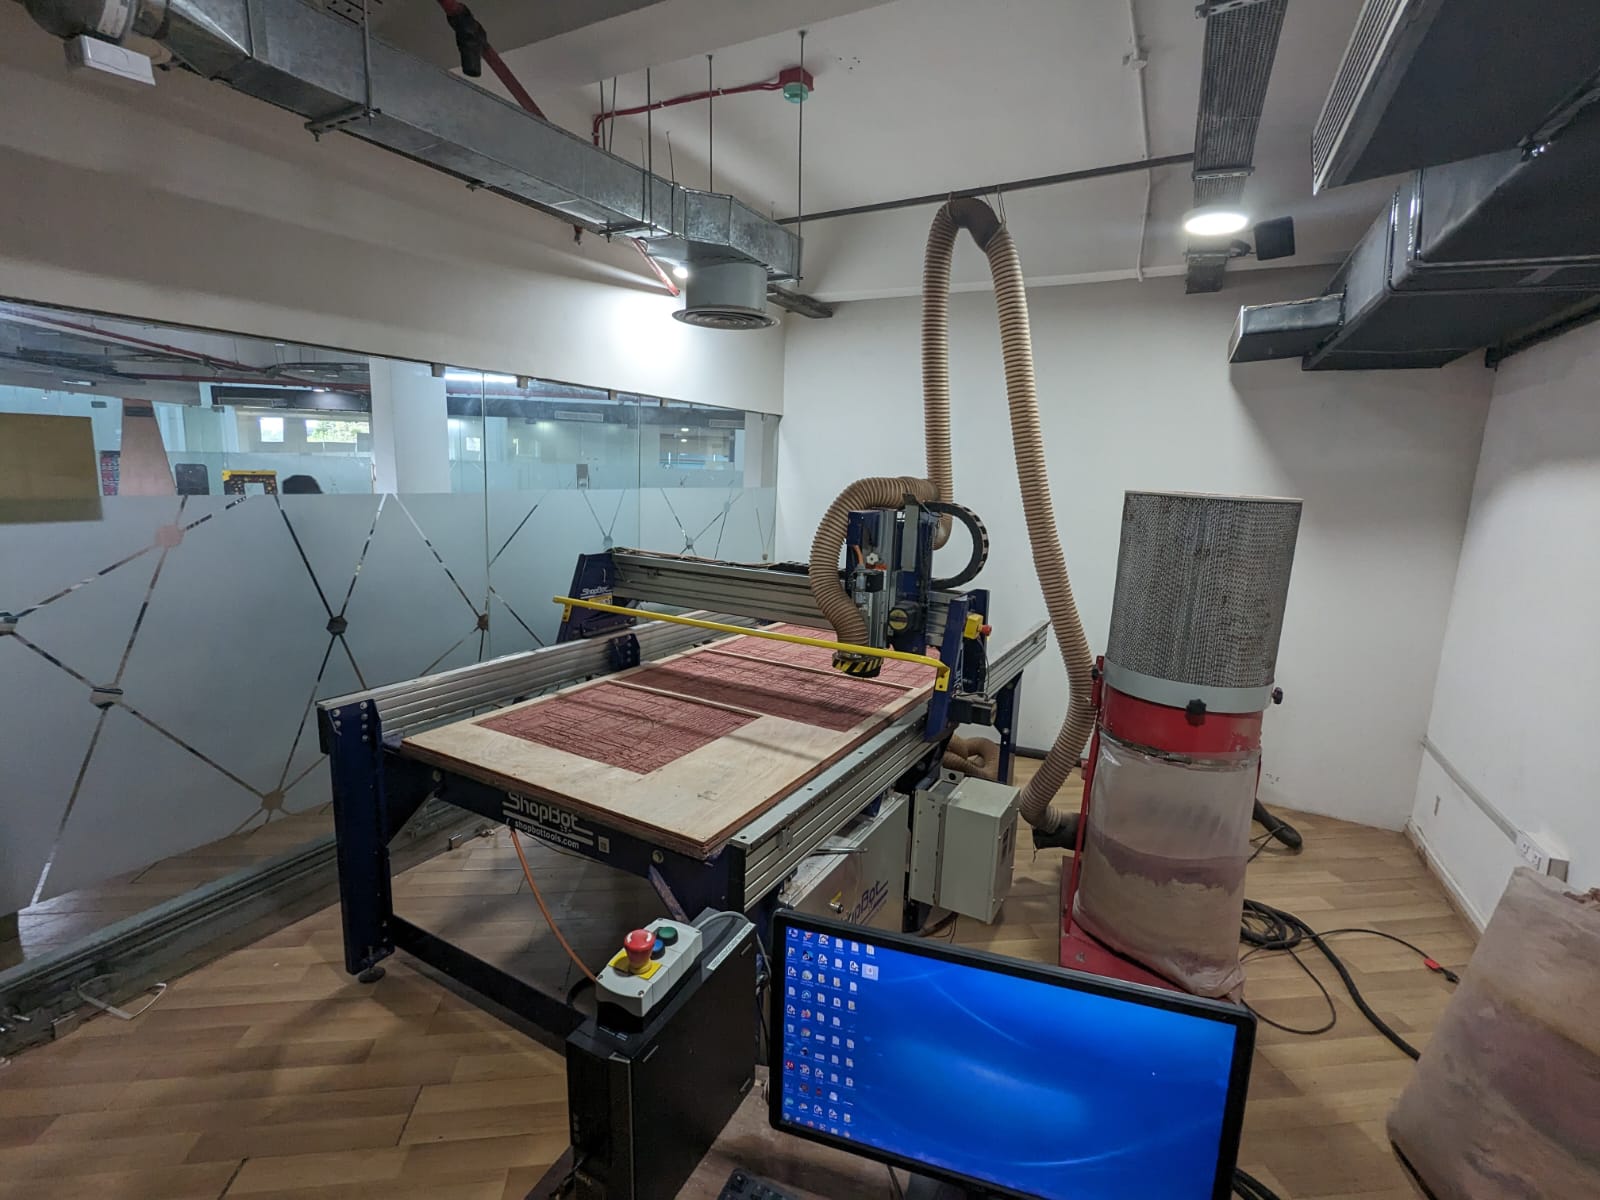
Shopbot CNC
Our lab is equipped with a ShopBot CNC machine, renowned for its accessibility and flexibility in woodworking, prototyping, and various manufacturing tasks. Known for its user-friendly software, ShopBot CNC machines offer seamless integration with popular CAD/CAM programs, enabling users to effortlessly design and transmit projects directly to the machine for precision cutting. With customizable features and intuitive controls, ShopBot CNC machines provide a dependable and cost-effective solution for beginners and seasoned professionals alike venturing into CNC machining.
V Carve
V Carve is a software application used for creating and preparing designs specifically for CNC (Computer Numerical Control) routing machines. It allows users to design intricate 2D and 3D models, generate toolpaths, and simulate the machining process. V Carve software is commonly utilized in woodworking, signage, and other industries that involve CNC routing and engraving.
Once I had the .dxf file, I saved it onto a USB flash drive and subsequently transferred it to the PC that is connected to the Shopbot.
Problems Faced and How I Overcame the Problems
Issue with ShopBot CNC and Solution
Our ShopBot CNC experienced a malfunction due to a damaged MOSFET in the Z-axis. This issue raised concerns about completing our CNC week projects on time. After discussing the problem with my instructors, they suggested using the Zünd digital cutter as an alternative.
Adjustments and Solution Implementation
The Zünd digital cutter has the capability to mill plywood up to 13 mm in thickness. To accommodate this, I adjusted my design to 12 mm, which aligns with the available plywood stock in our inventory.
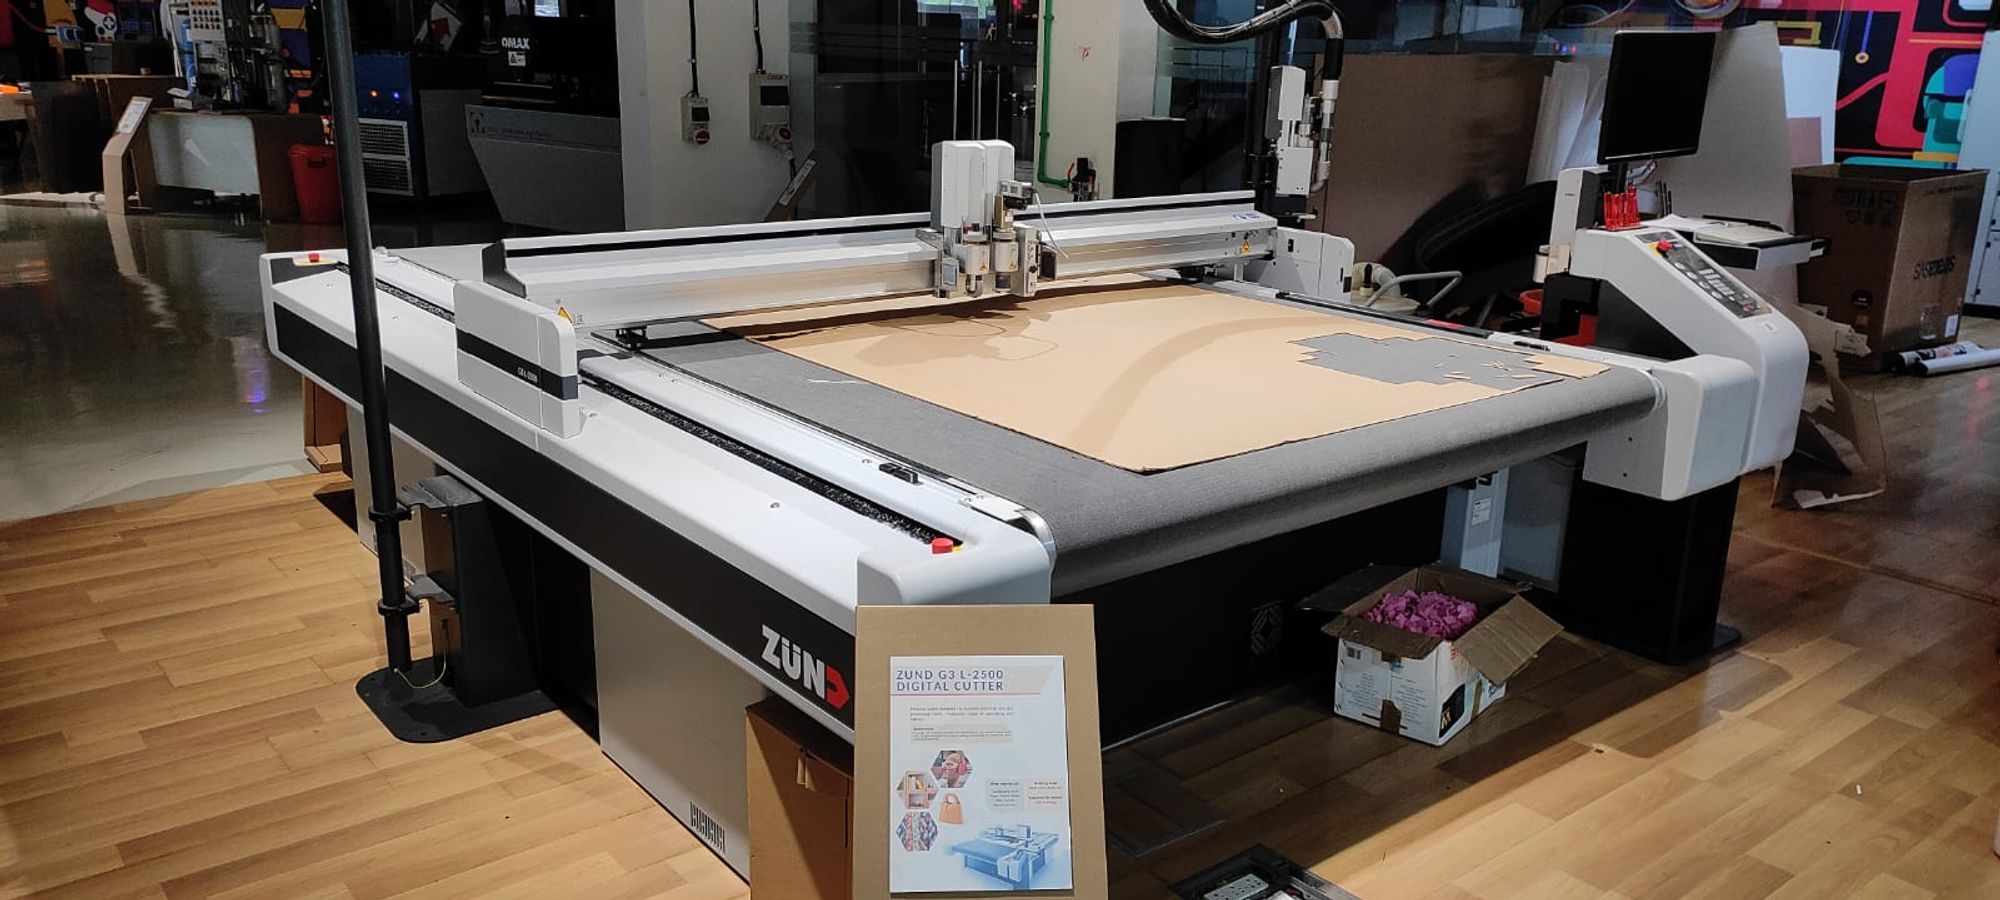
Cutting in Zund
The Zund G3 L - 2500 is a highly advanced cutting system that offers exceptional precision and versatility. It is widely recognized as a top-of-the-line solution for various industries, including packaging, signage, textile, and industrial manufacturing.
Drill Tool (DT): Used for drilling & routing holes in various materials with precision so i need to use this tool
The machine's versatility is further enhanced by its modular design, which enables easy customization and integration of additional tools and modules based on specific production needs. This flexibility ensures that the Zund G3 L - 2500 can adapt to a variety of applications and workflows.
Moreover, the Zund G3 L - 2500 incorporates advanced automation features, such as automated tool changes, material handling, and workflow optimization, which significantly increase productivity and efficiency. The machine is also equipped with user-friendly software that streamlines the design-to-production process, making it accessible to both experienced professionals and newcomers.
Machine and Software Setup
To operate the Zund, you will use three software programs: Cut Editor, Cut Queue, and Cut Centre.
- Cut Editor: This software is used for designing and creating your cutting files. It allows you to import or create designs, set up cut paths, and define cutting parameters.
- Cut Queue: This program manages and organizes your cutting jobs. It functions as a job queue, enabling you to schedule and prioritize various cutting tasks.
- Cut Centre: This is the central hub for overseeing the entire cutting production workflow.
The photo below provides an overview of the Zund control panel.
.jpg)
I have imported my design in Zund Cut editor
.png)
I added the “route” operation as machine step
.png)
choose 6mm bit for routing
.png)
Then i selected the material “ Plywood” and given thickness “12mm” Zund has a limitation of 13 mm plywood thickness machining.
.png)
Then send to cut queue
Open Cut Queue software
.png)
Send the files to Cut Center and opened in Cut center
In cut Center i have choosn the MDF underlay for protecting the bed
.png)
Then i have selected the parameters for routing operations
Router Speed -31000 rpm
Speed Lowering-40 mm/s
Multipass depth -2mm
.png)
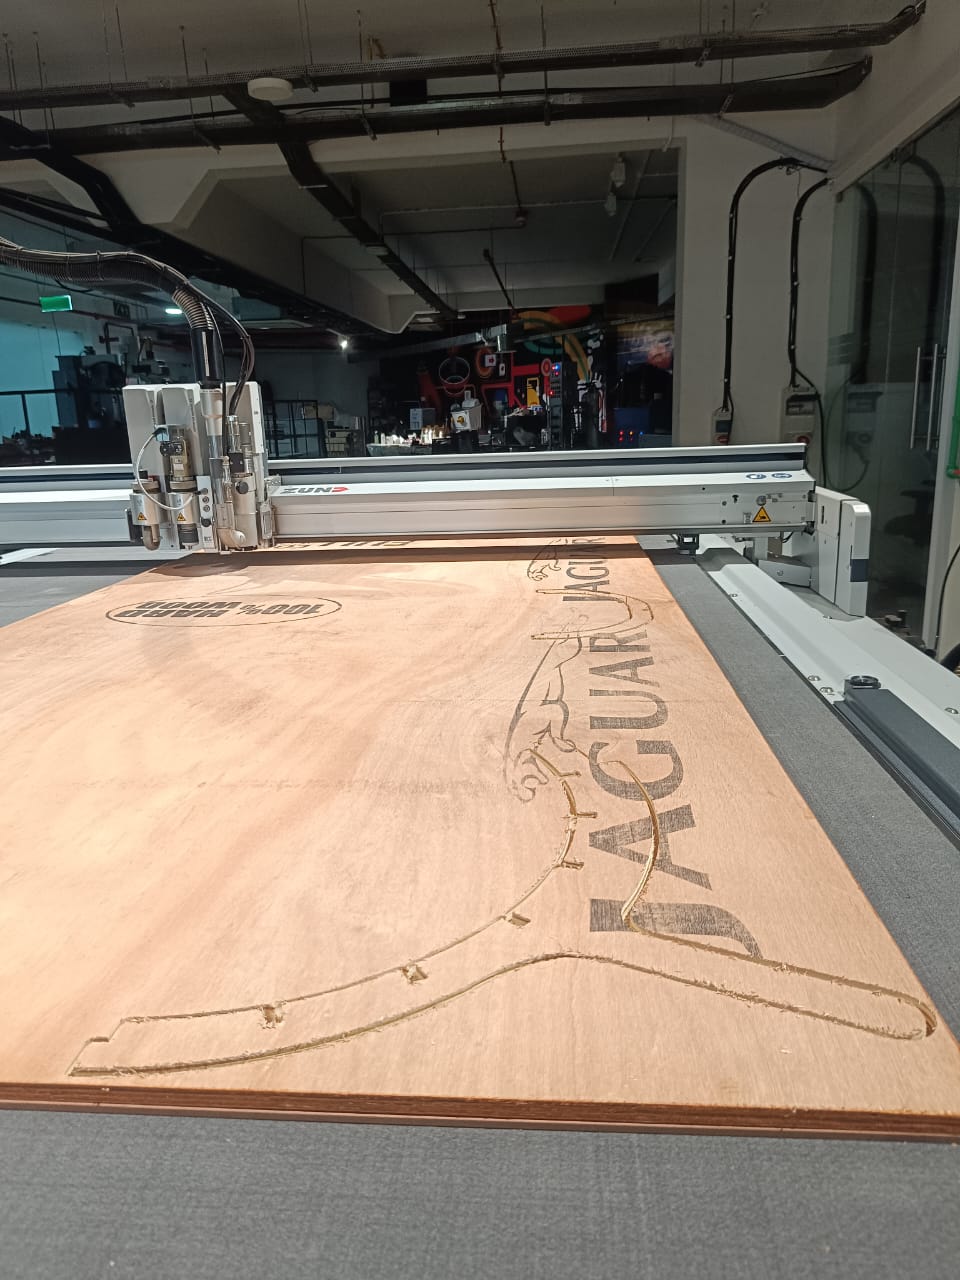
Then i have started the machining process
Post process
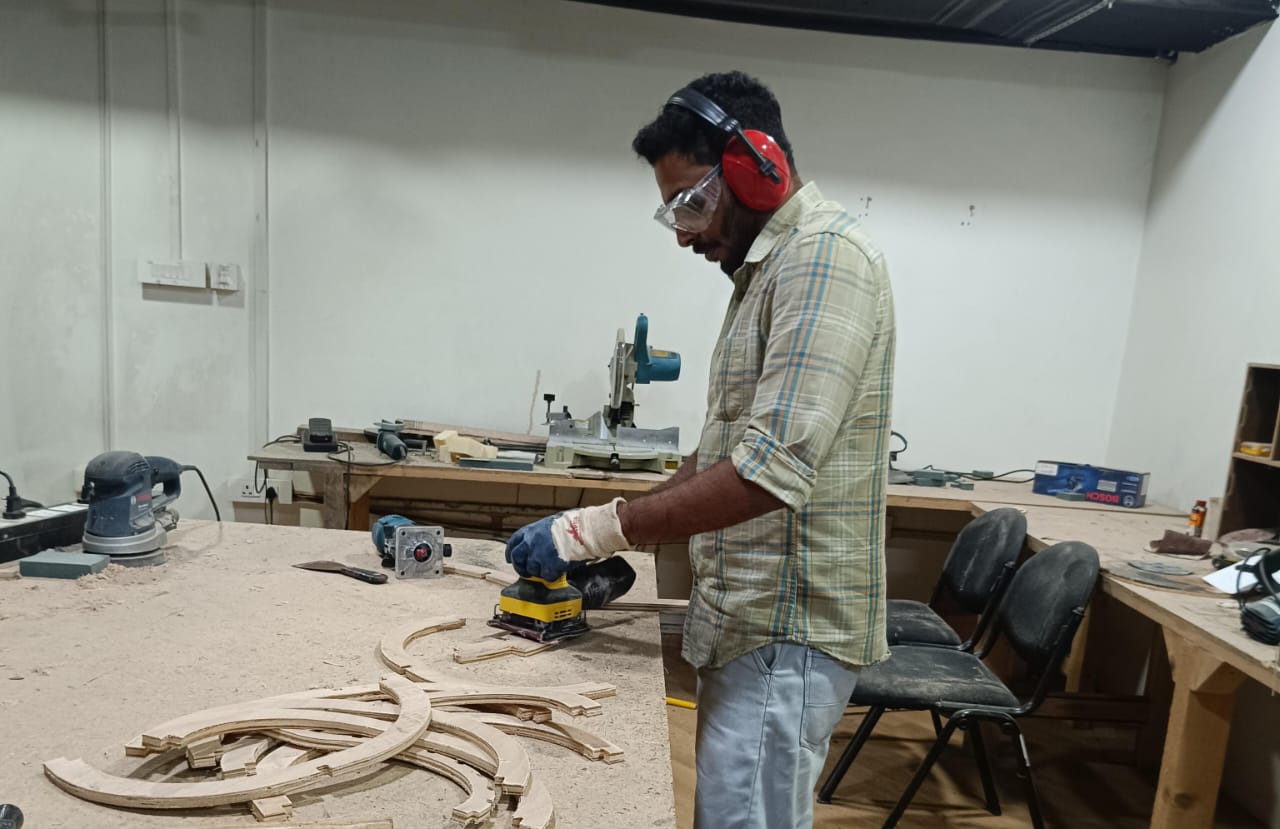
I utilized a mallet, hammer, and with the help of my friends and instructors i joined components together. Then, I used a sander to sand the sides for a smooth finish.
I got the perfect snapfit for my chair
.jpeg)
Final Result
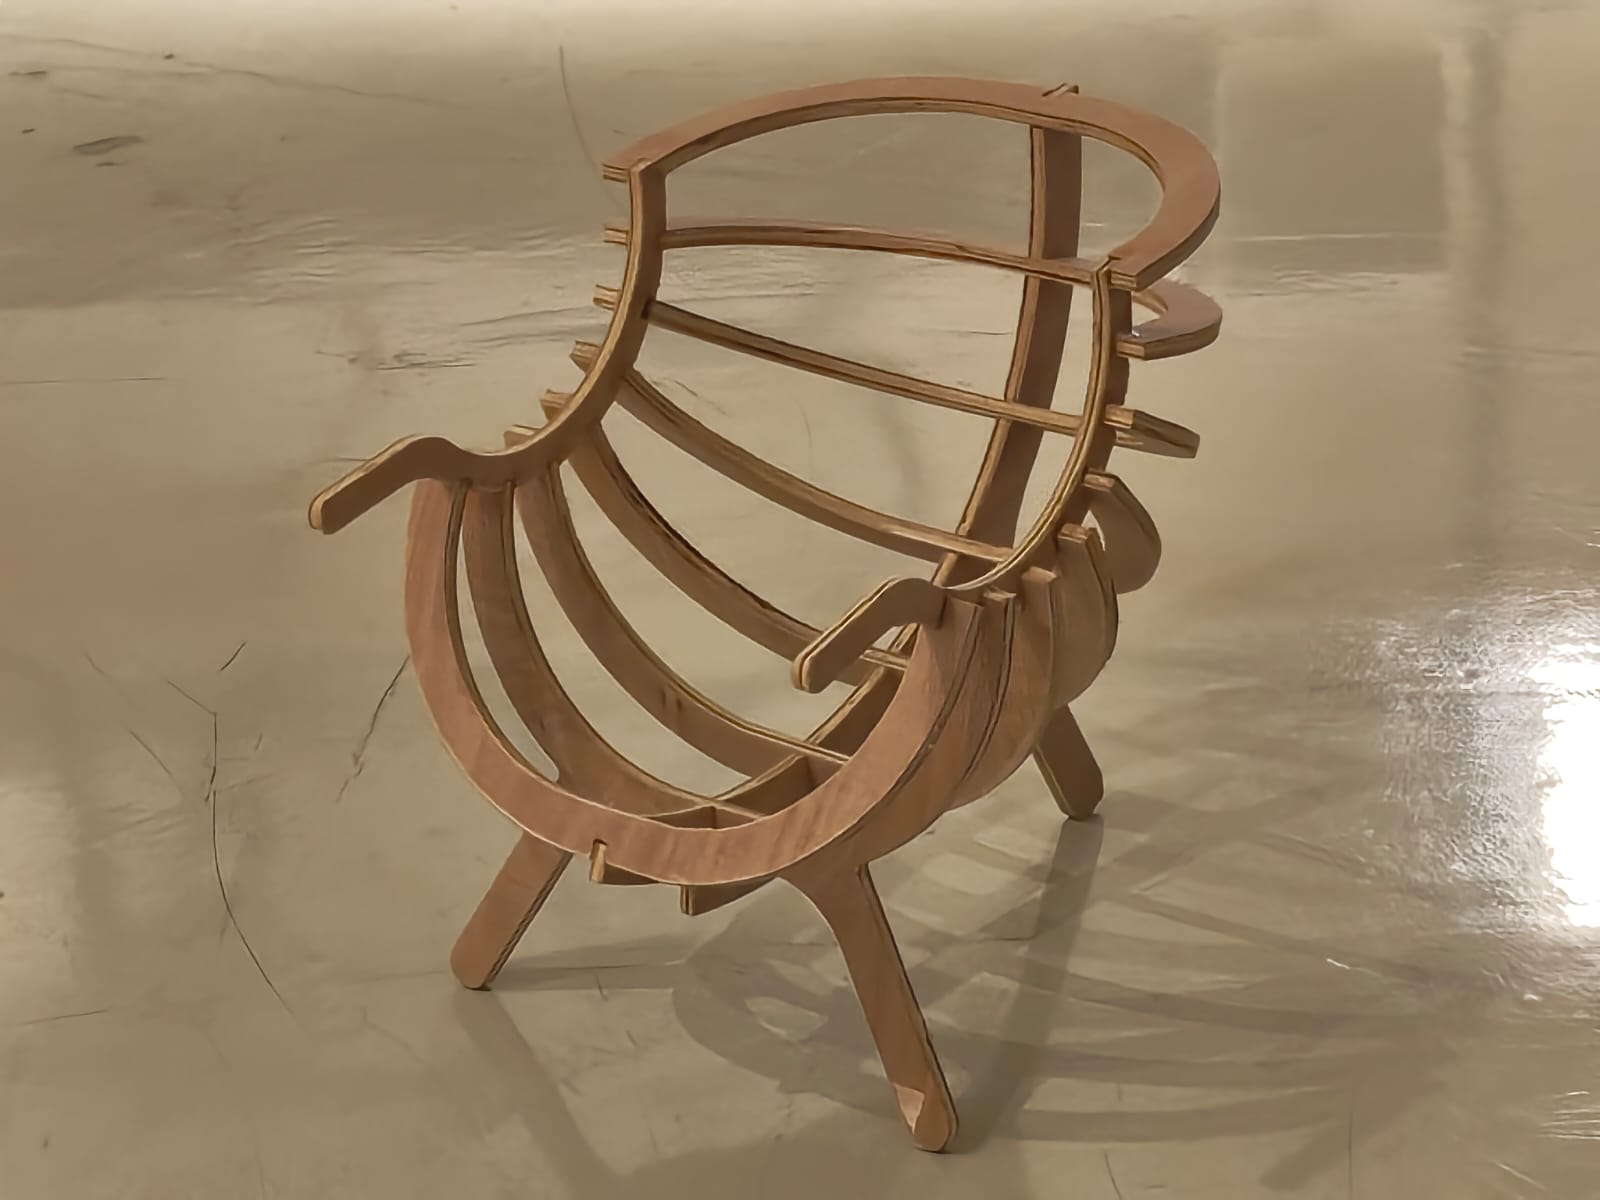
Since i have reduced the material thickness to 12 mm , I am afraid to sit on this. But it gives fabulous, classy furniture look.
Group Assignment
This week's group assingment was to do the lab's safety training and to test the runout, alignment, fixturing, speeds, feeds, materials and toolpaths for the machine in our lab. We milled out a plywood test piece with various features mentioned in the group assignment.
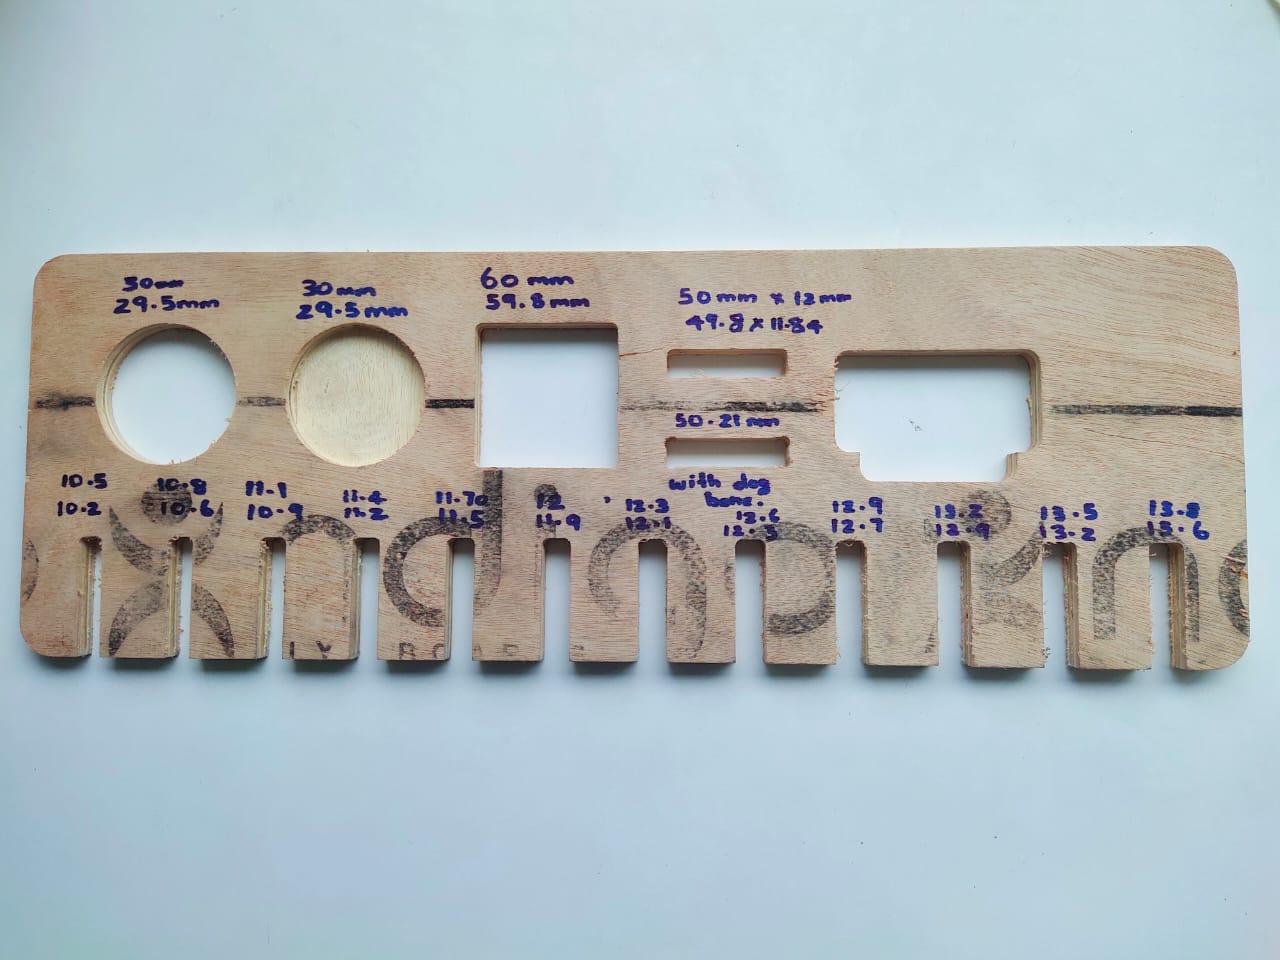
For further details, click on the link : Group Assignment-Week 7