4.embedded_programming
Heroshot
Overview
Professor Neil Gershenfeld delivered a lecture on embedded system programming, introducing core concepts, development environments, and debugging techniques. He began with an overview of major processor families such as AVR, ARM, and RISC-V, and discussed commonly used programming languages including C, Rust, and Python. He also introduced essential development tools like GCC, Arduino IDE, and VS Code, and explained communication protocols such as USB and UART. Neil analyzed the trade-offs between different systems in terms of performance, cost, power consumption, and ease of use. To apply these concepts, he encouraged students to research various processors, compare development environments, integrate input/output devices into their boards, and experiment with multiple programming languages to find the best fit for their projects.(Transcription and summary generation by Notta)
Assignment
group assignment:
compare the performance and development workflows for other architectures
individual assignment:
WorkFlow
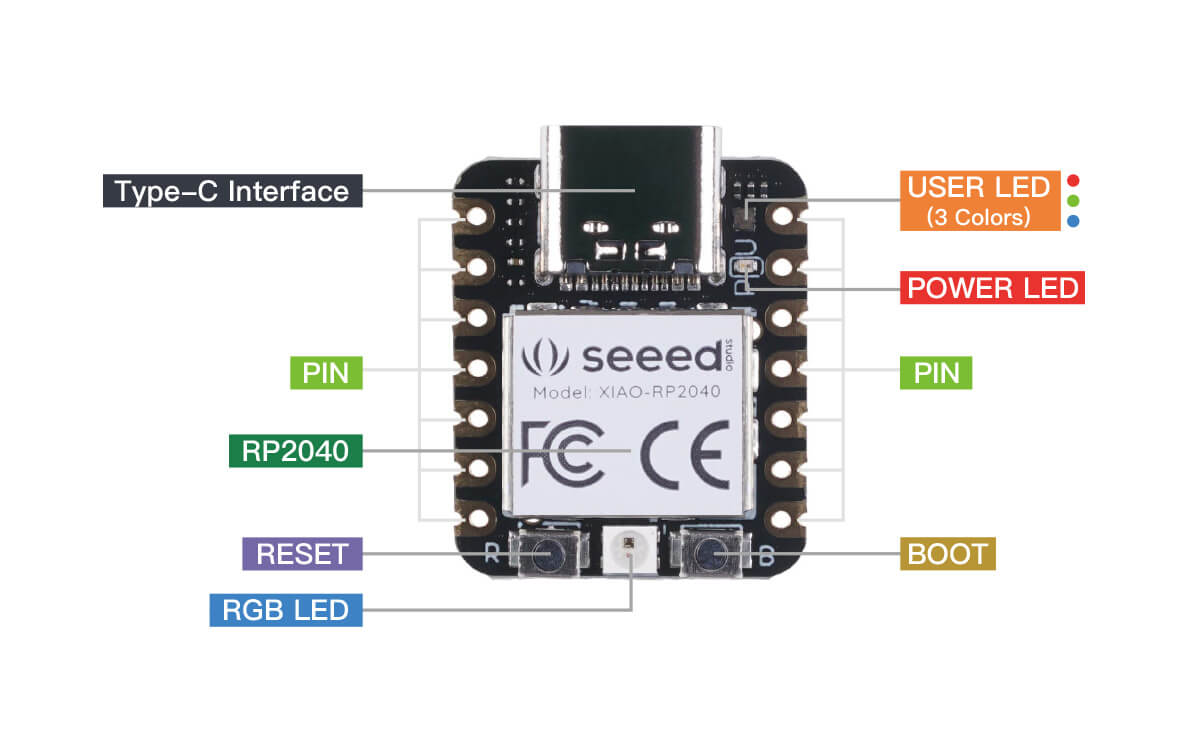
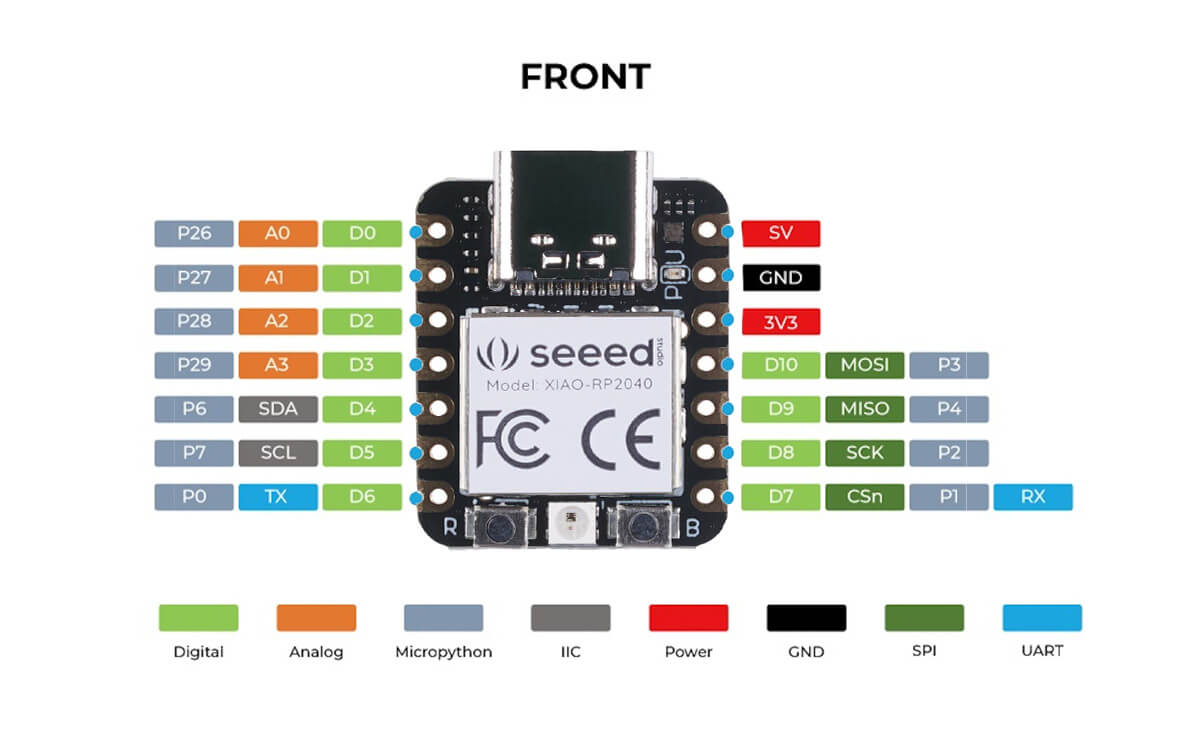
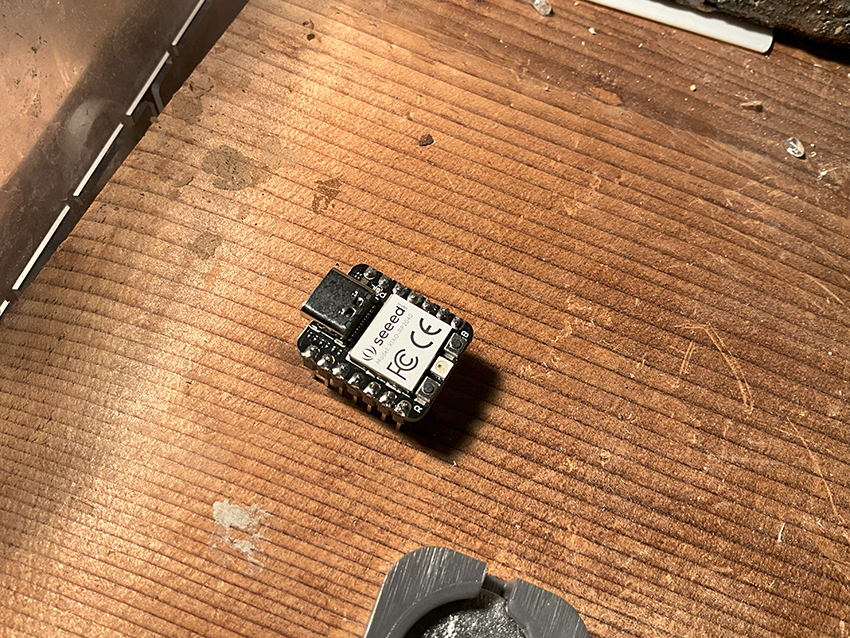
Seeed Studio XIAO RP2040
specifications
| Item | Value |
|---|---|
| CPU | Dual-core ARM Cortex M0+ processor up to 133MHz |
| Flash Memory | 2MB |
| SRAM | 264KB |
| Digital I/O Pins | 11 |
| Analog I/O Pins | 4 |
| PWM Pins | 11 |
| I2C interface | 1 |
| SPI interface | 1 |
| UART interface | 1 |
| Power supply and downloading interface | Type-C |
| Power | 3.3V/5V DC |
| Dimensions | 20×17.5×3.5mm |
Solder the Seeed Studio XIAO RP2040 body and pin headers using a gas soldering iron (GP-510SET) with a (GP-510RT-2.4C) tip.
Gas soldering irons are convenient because they are cordless and do not require electricity.
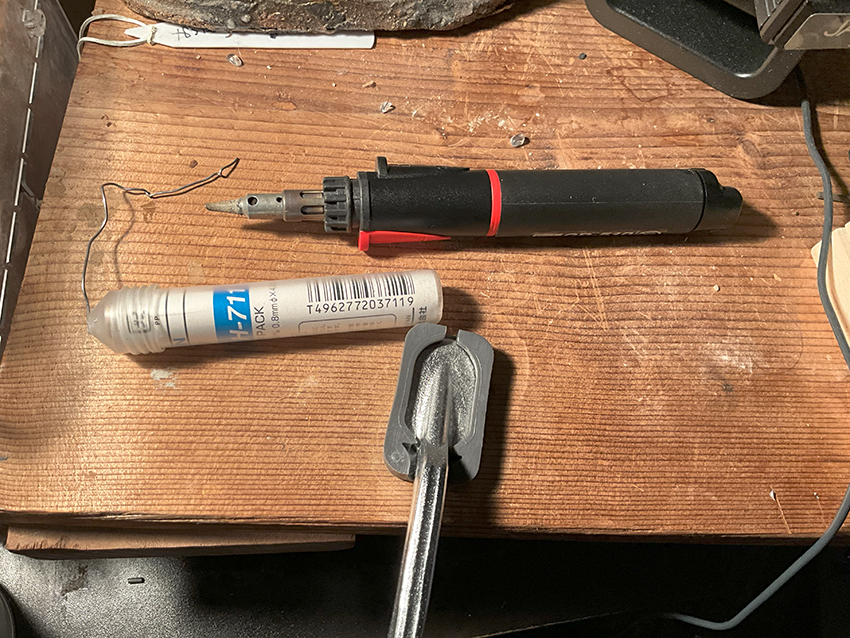
Solder using lead-free solder and a gas soldering iron.
Solder the pin headers to the Seeed Studio XIAO without touching adjacent pins.
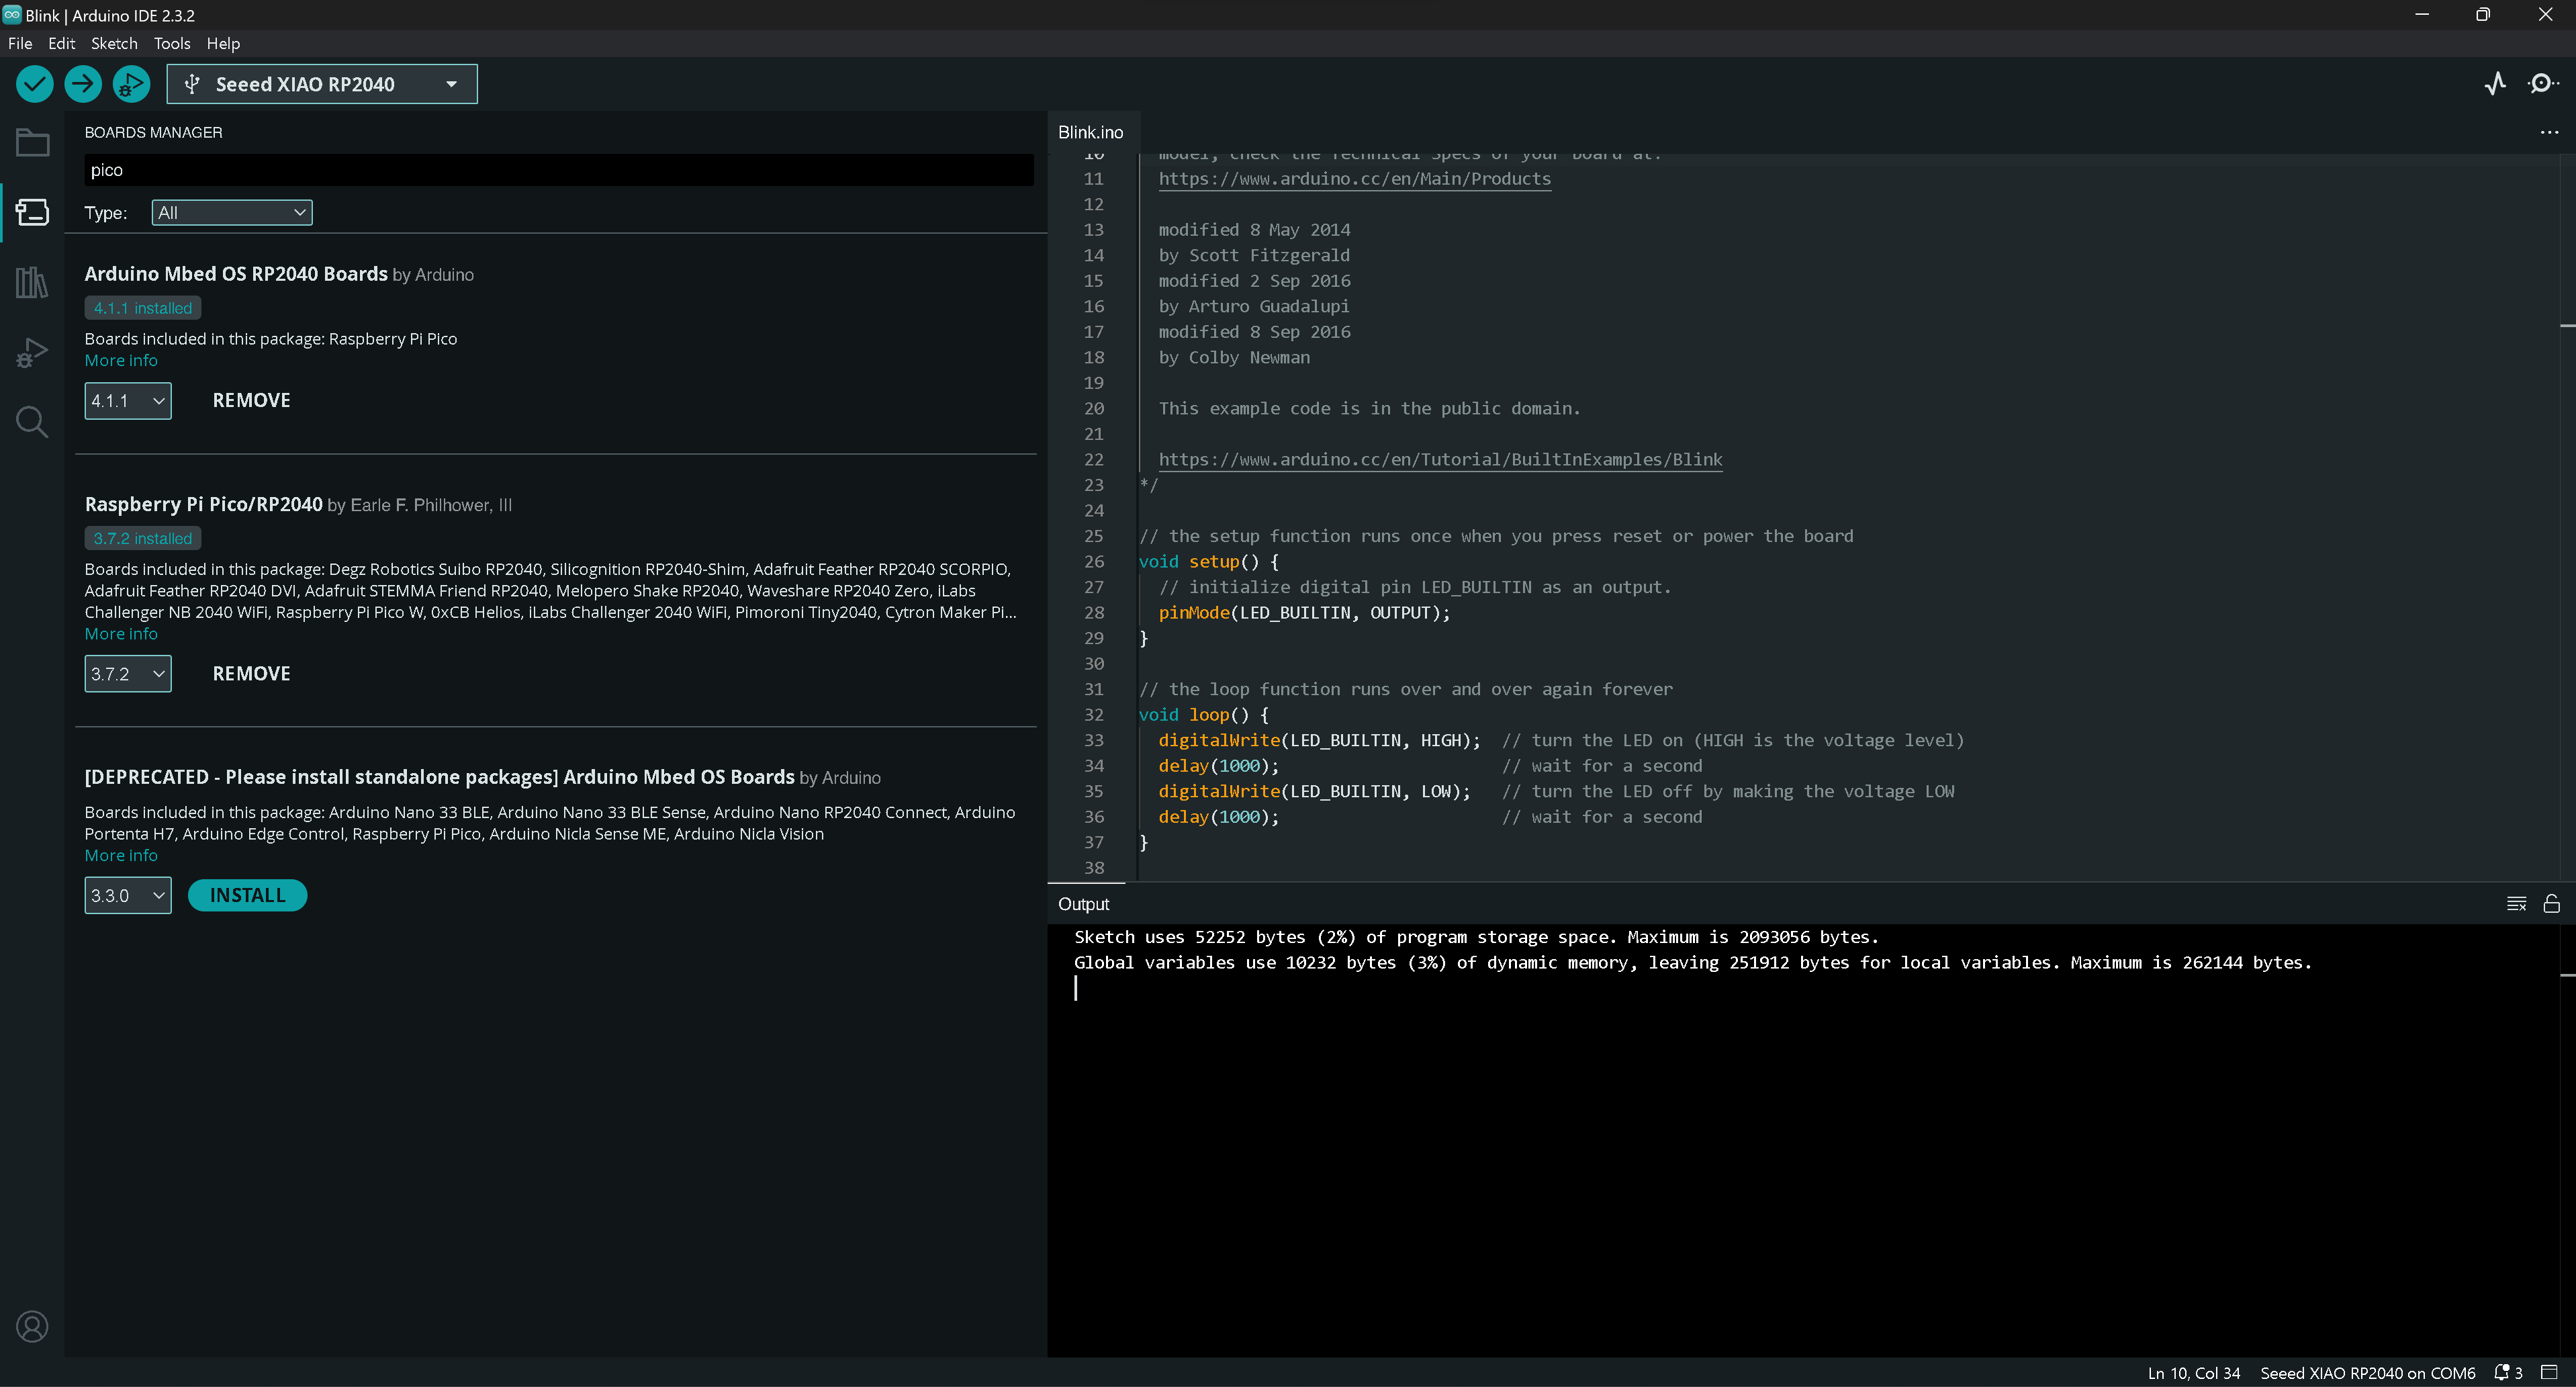
Use the Arduino IDE to bake the program into Seed Studio.
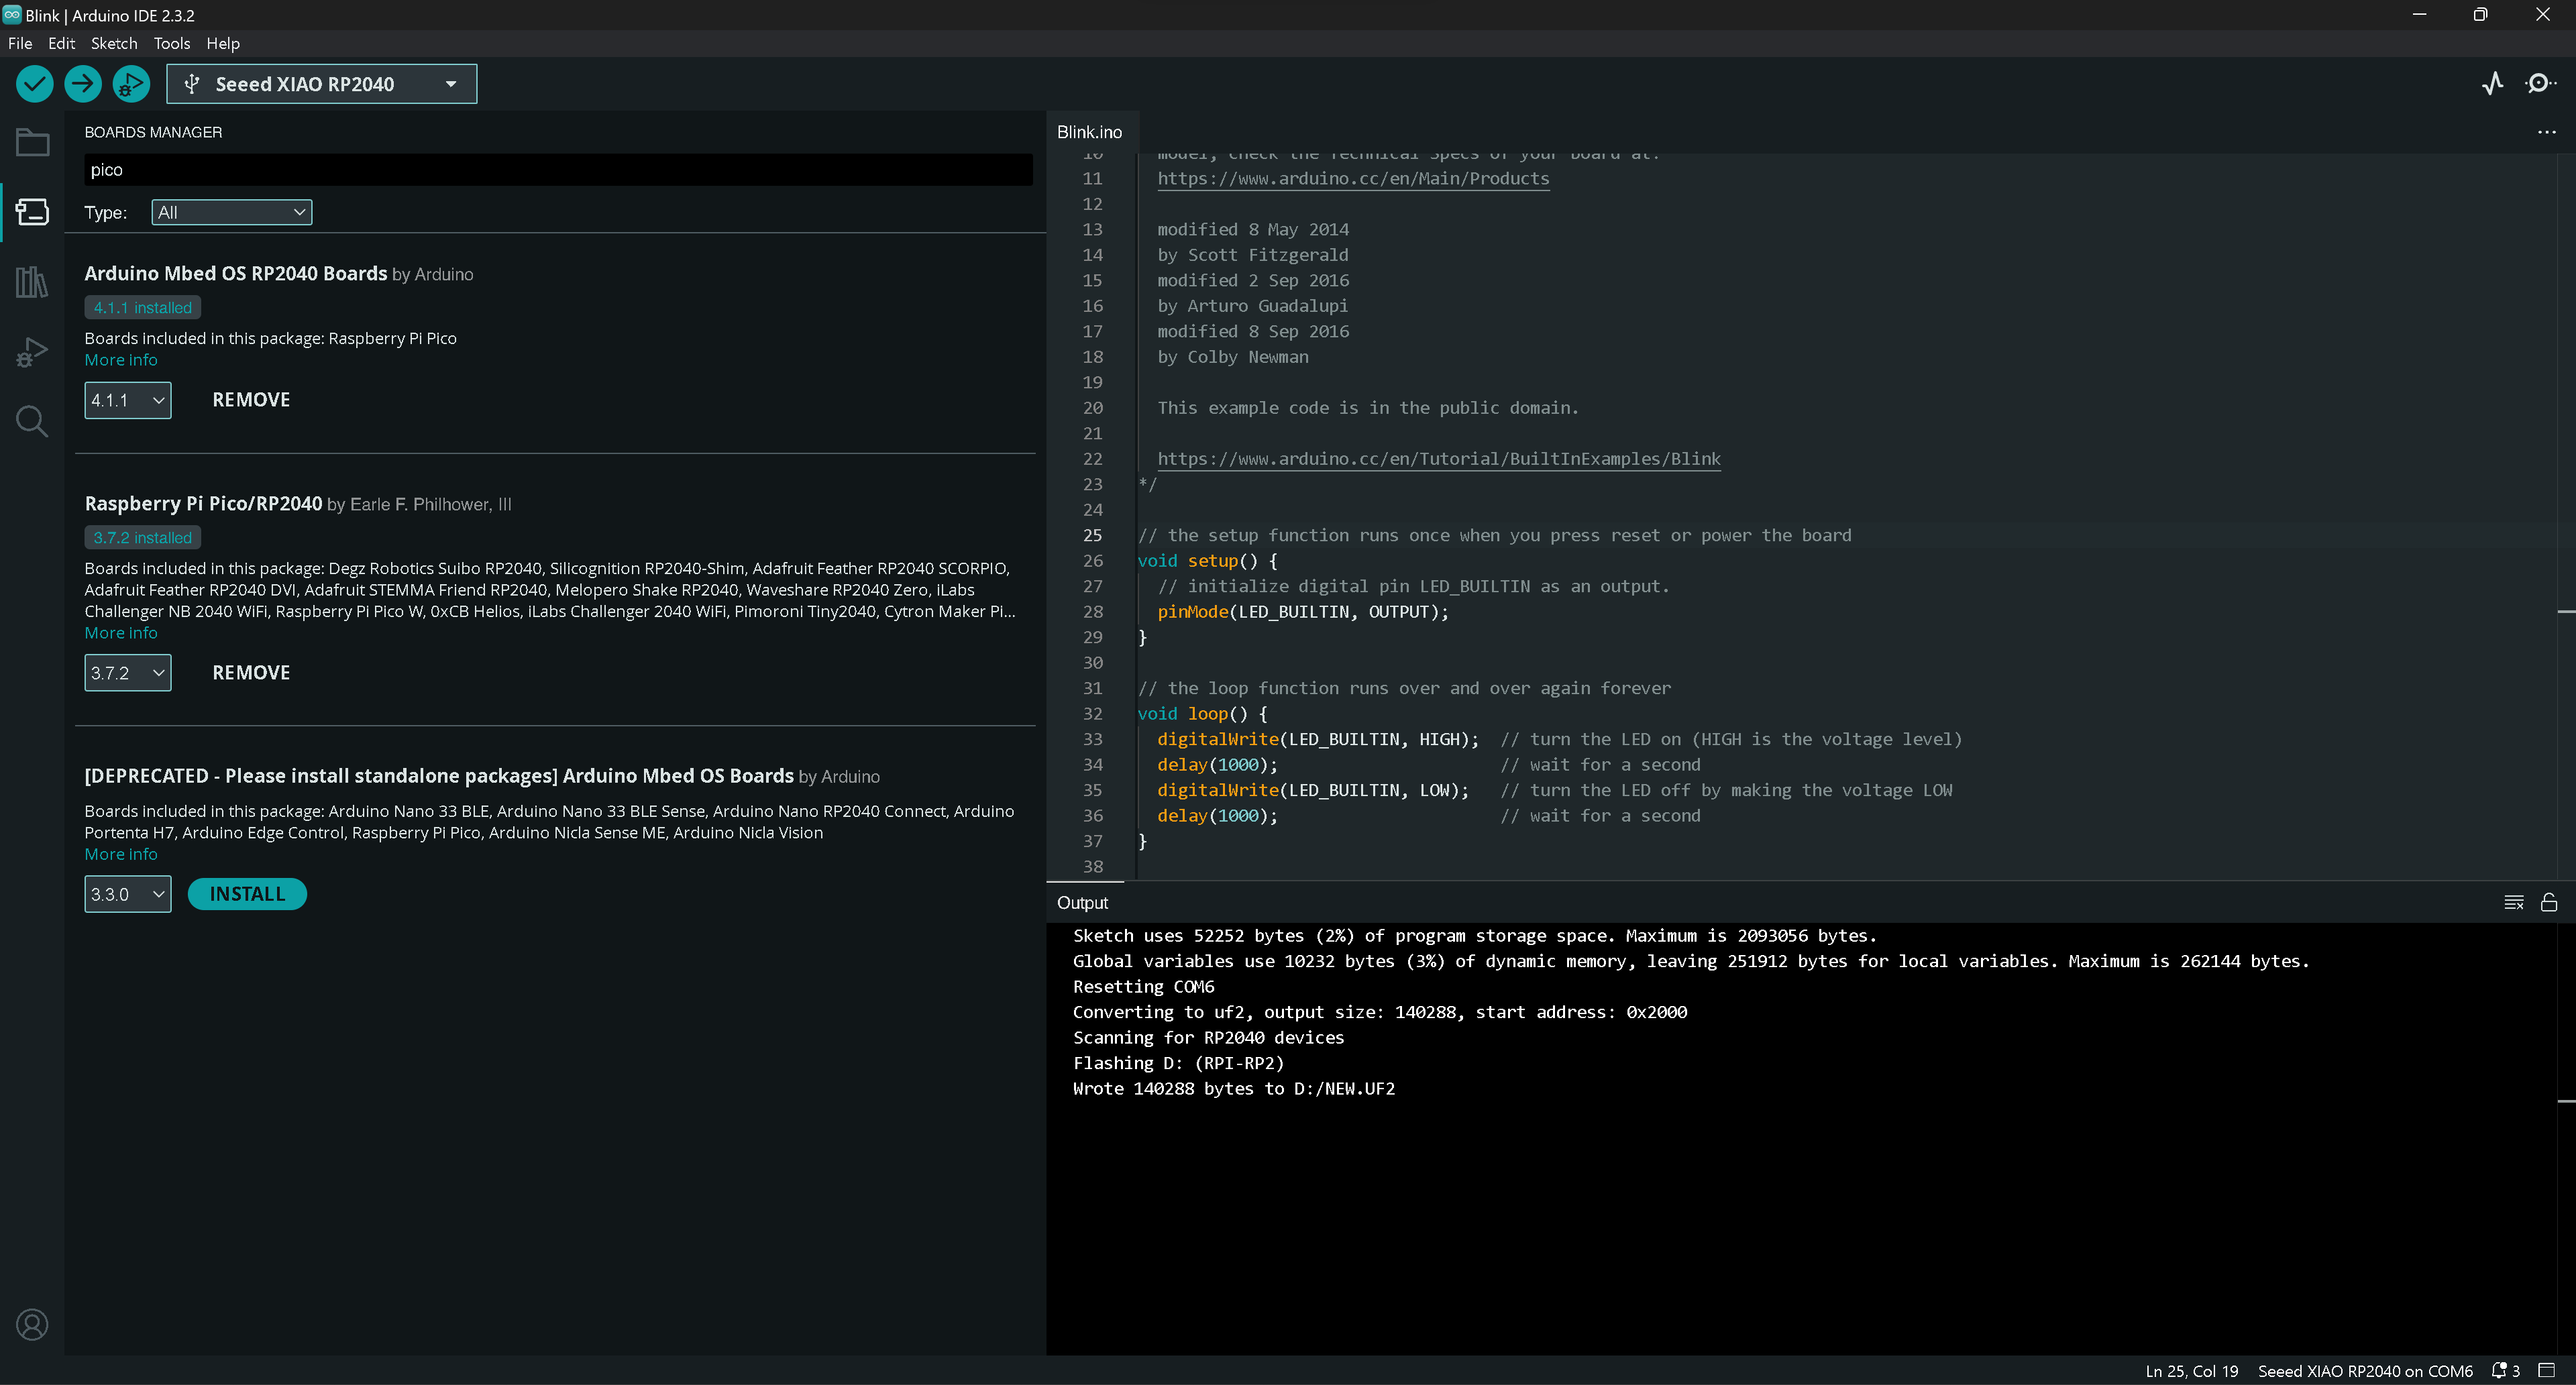
Let's try the famous L-chica programming: I set delay(1000) and generated a code that blinks repeatedly every second.
I took a video of the actual flashing.
Micro:bit v1
specifications
| BBC Micro:bit | V1 | V2 |
|---|---|---|
| Processor | Nordic nRF51822 | Nordic nRF52833 |
| Flash memory | 256 KB | 512 KB |
| RAM | 16KB | 128KB |
| Speed | 16 MHz | 64 MHz |
| Bluetooth | Bluetooth 4.0 | Bluetooth 5.1 with Bluetooth Low Energy (BLE) |
| Radio communication | 2.4 GHz radio (80 channels) | 2.4 GHz radio (80 channels) |
| Buttons | Two programmable (A and B) and one system (reset) | Two programmable (A and B) and one system (power/reset) |
| On/off switch | None | Press and hold the rear power button |
| Touchpad | None | Touch-sensitive logo |
| Microphone | None | Onboard Knowles SPU0410LR5H-QB-7 MEMS microphone (with LED indicator) |
| Display | 5x5 programmable LED matrix (25 LEDs in total) | 5x5 programmable LED matrix (25 LEDs in total) |
| Speaker | None | Onboard JIANGSU HUANENG MLT-8530 (up to 80 dB) |
| Motion sensor and compass | LSM303AGR | LSM303AGR |
| Temperature sensor | On-board temperature sensor | On-core NRF52 |
| Edge connector | 25 pins | 25 pins |
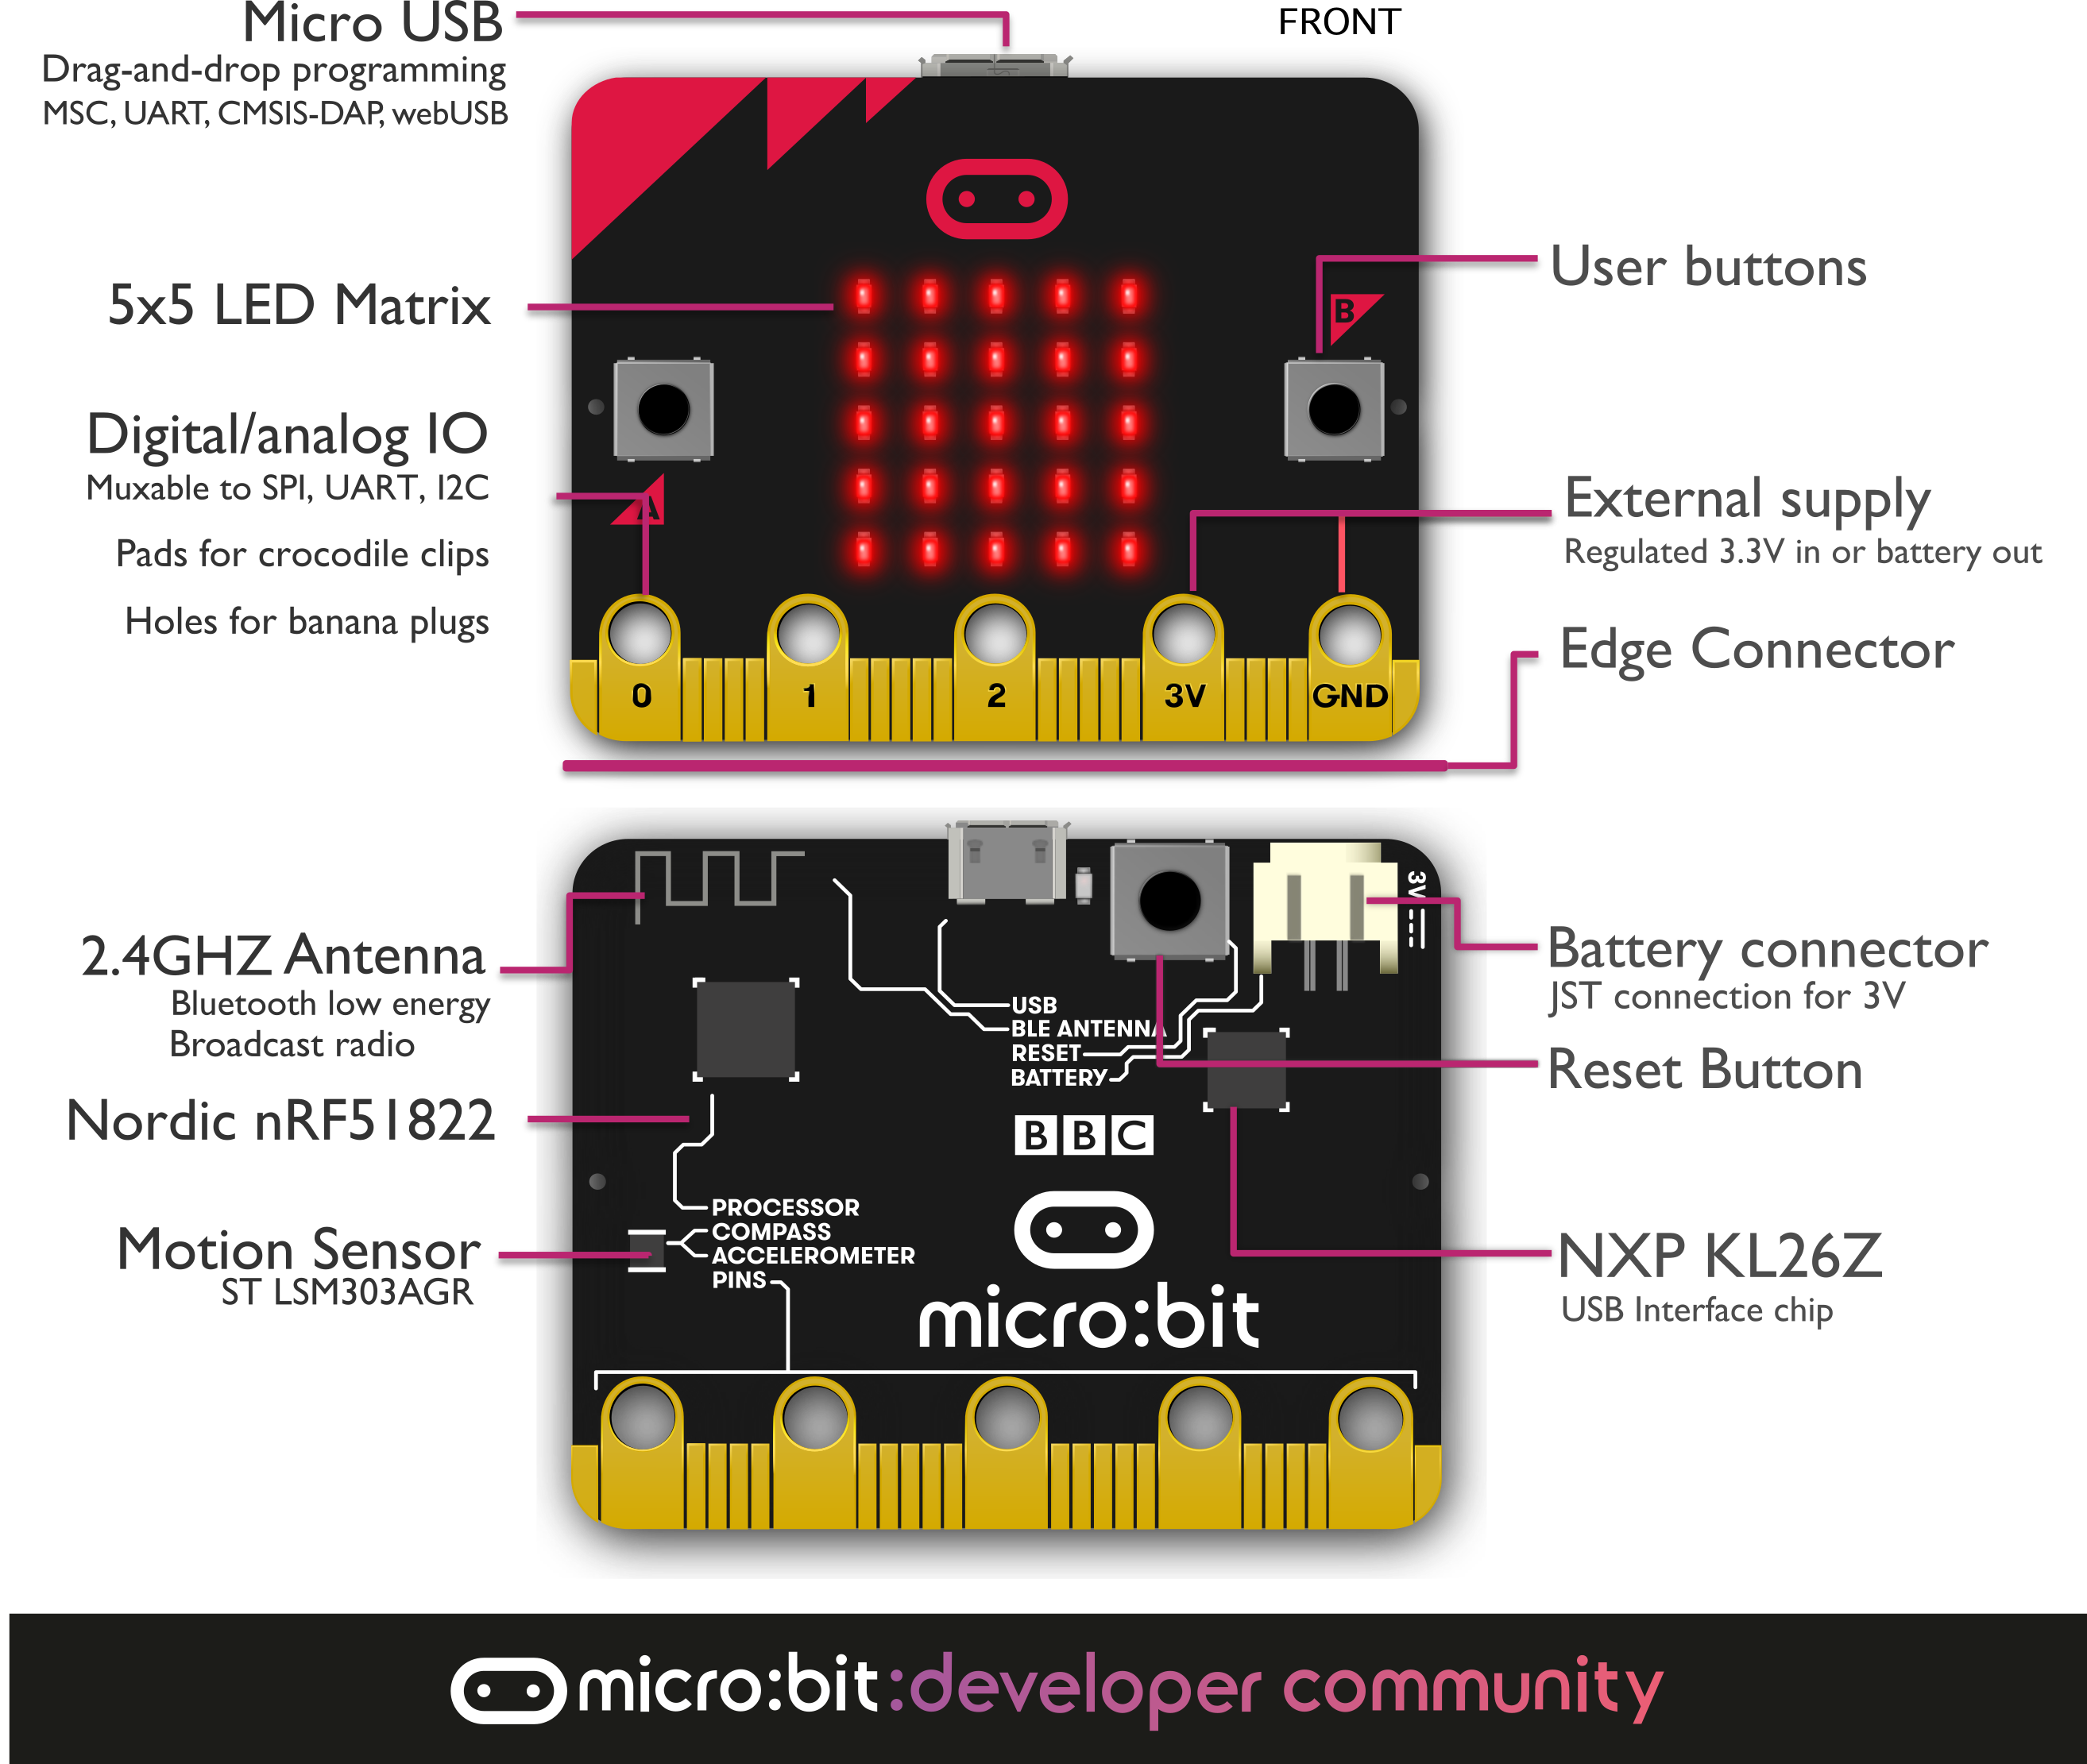
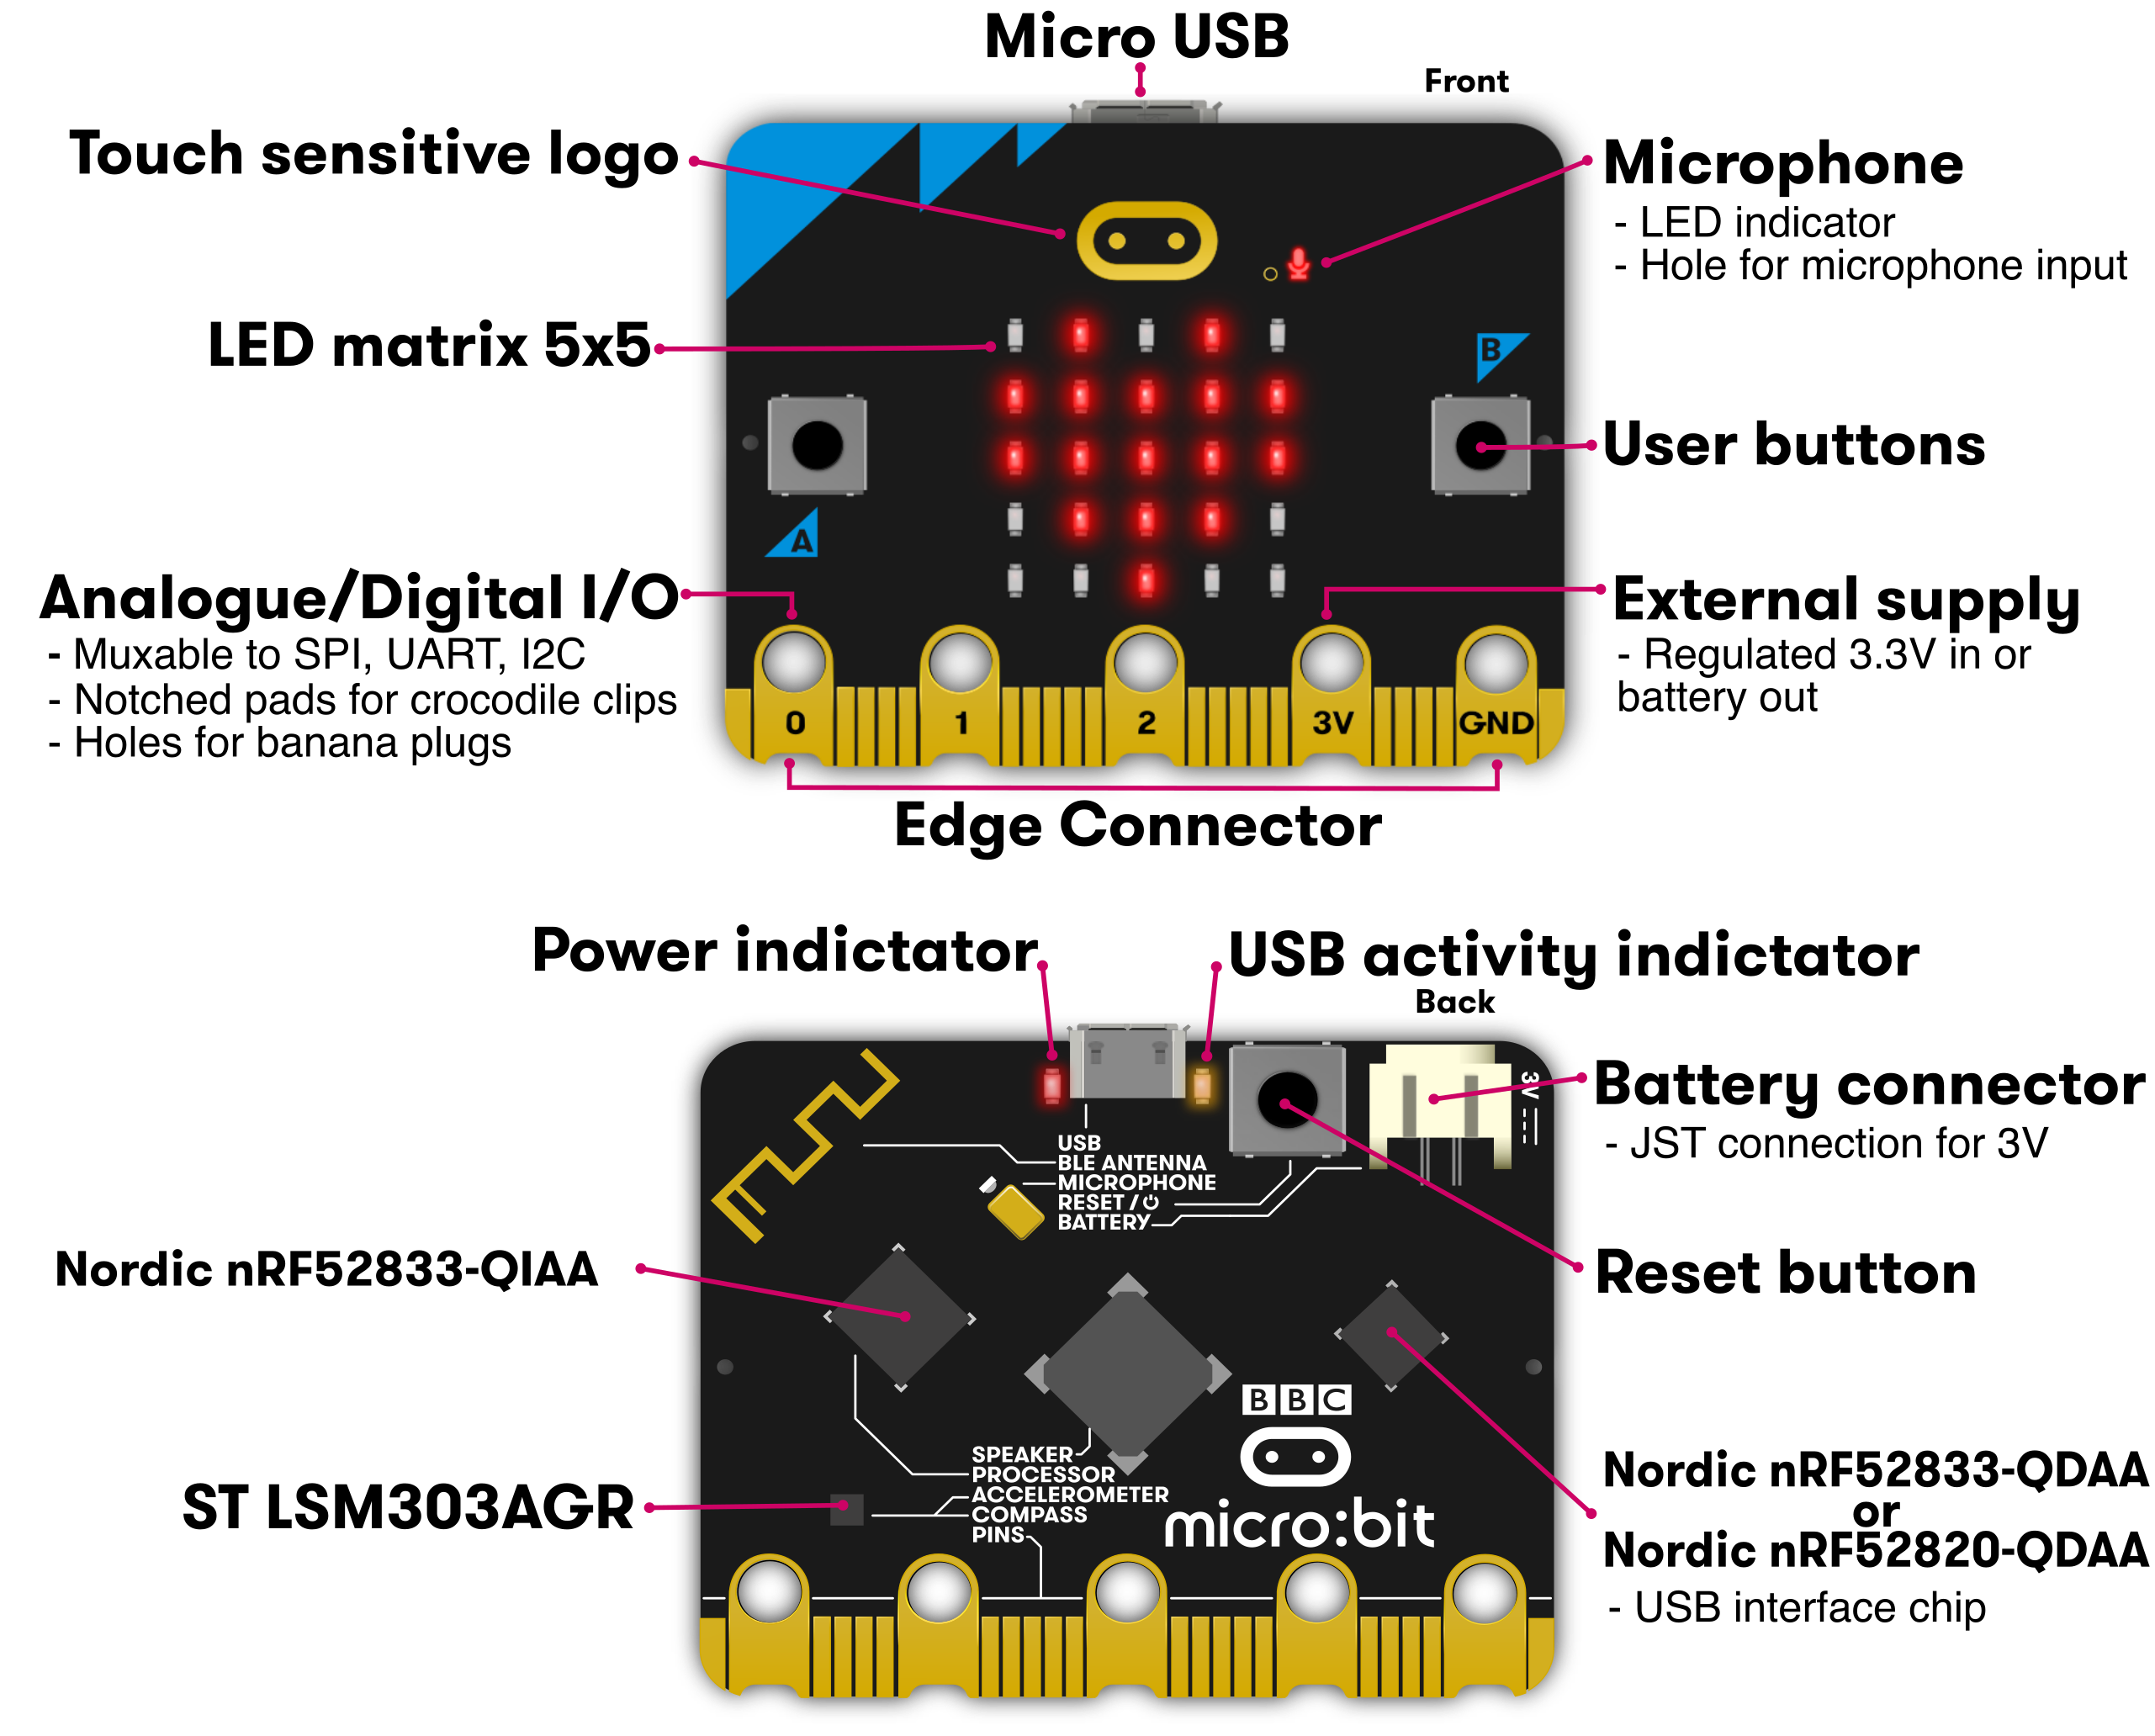
A table comparing Micro:bit v1 and v2 specs was created. It can be understood that the new v2 model has significantly improved performance.
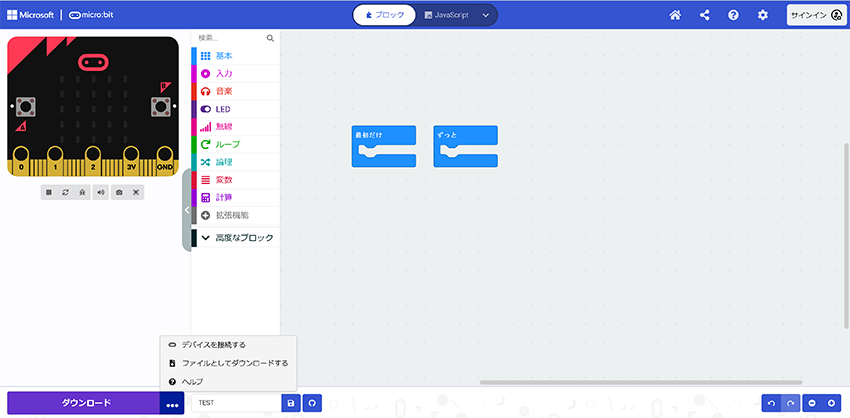
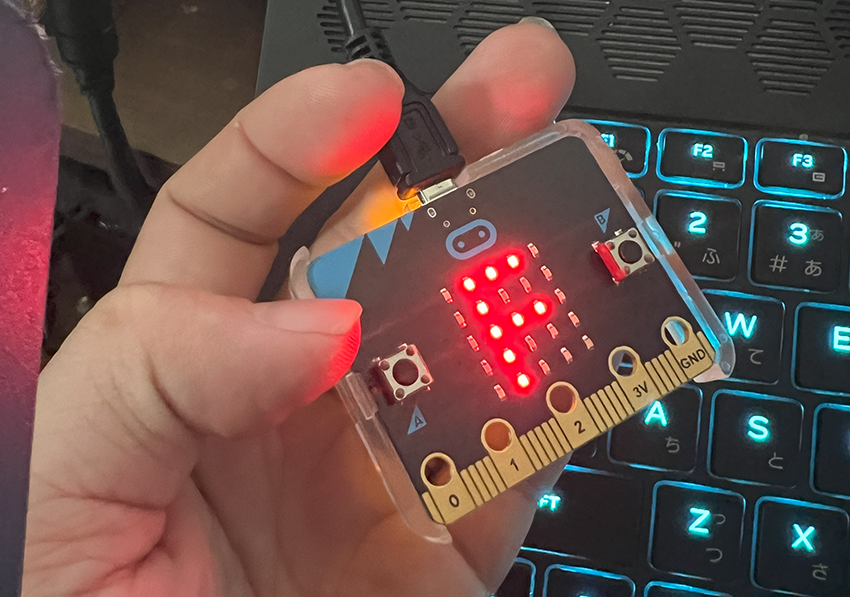
Micro:bit is designed to be easy to use for a wide range of users and can be coded in the browser. It also employs block programming so that even non-programmers can code.
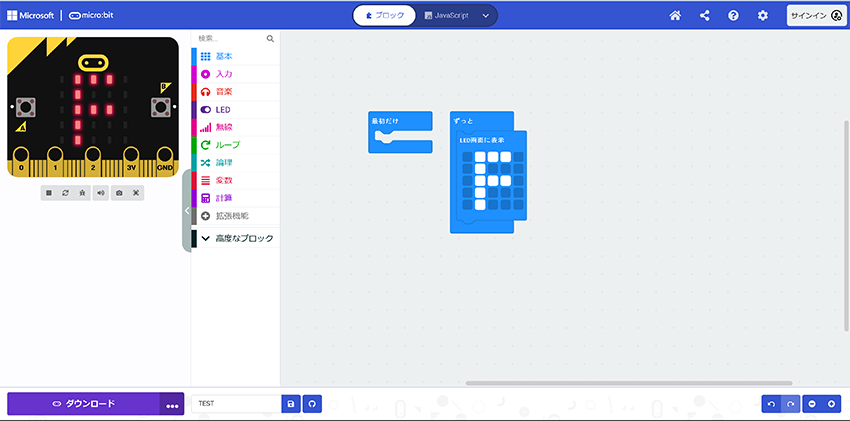
Since an LED display is included directly with the unit, I used it to generate the code to display F.
I was able to successfully display F.