05 - 3D Scanning & Printing
From Hand Craft to Digital Fabrication: A Croaking Frog
3D printing or also called additive manufacturing has revolutionized traditional approaches for (rapid) prototyping. Instead of removing material to generate a certain product, additive manufacturing adds material together to shape the part. There are many different techniques, e.g. fused deposition modeling (FDM), stereolithography, powder bed fusion and many more.
In combination with 3D printing, 3D scanning real-world objects opens up new possibilities, e.g. to turn physical things into digital models for duplication or with modifications, adjustments, or enhancements.
To explore the possibilities of 3D scanning and printing, this week's assignment were:
- Group Assignment
- Test the design rules for your 3D printer(s)
- Individual Assignment
- Design and 3D print an object (small, few cm3, limited by printer time) that could not be made subtractively
- 3D scan an object (and optionally print it)
Group Assignment
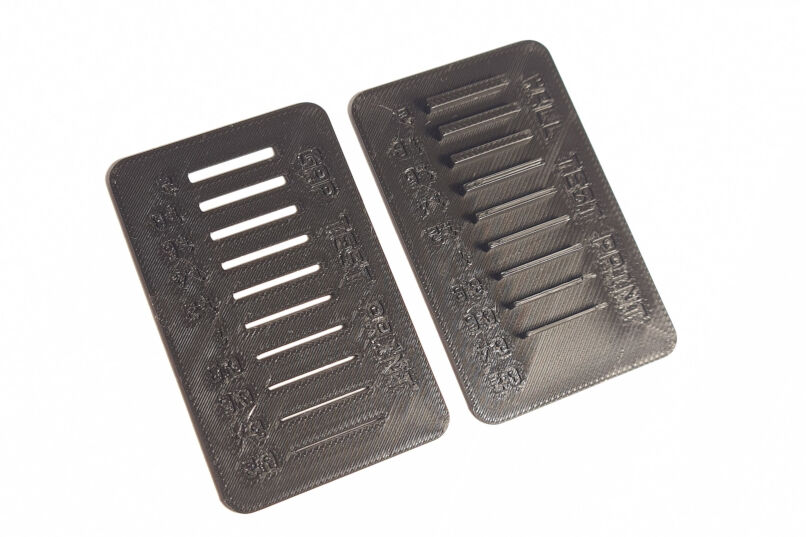
The documentation of the group assignment is hosted on a different website. You can find it here. For it, we characterized the design rules for the Ultimaker S5 and Prusa i3 MKS3+ printers. I honestly did not learn a lot, only that the software to slice the print for Prusa printers, Prusa Slicer, apparently has a built-in compensator for the growth and shrinkage of the prints. Other than that, I was familiar with all steps as I have years of experience with 3D printers of various brands, namely the Prusa i3 MKS3+, Prusa Mini, Ultimaker S5, Ultimaker 2, Bambu Lab X1 Carbon, Creality Ender-3 and the Makerbot Replicator, however, FDM technology only.
My personal favorite until about a year ago was the Prusa i3 MKS3+ as it is easily repaired, comparably cheap and achieves a high print quality. In contrast, Ultimakers are very expensive and are not easily repaired and Creality Enders need a lot of maintenance to achieve good quality but are less expensive, similar to the Makerbot printer.
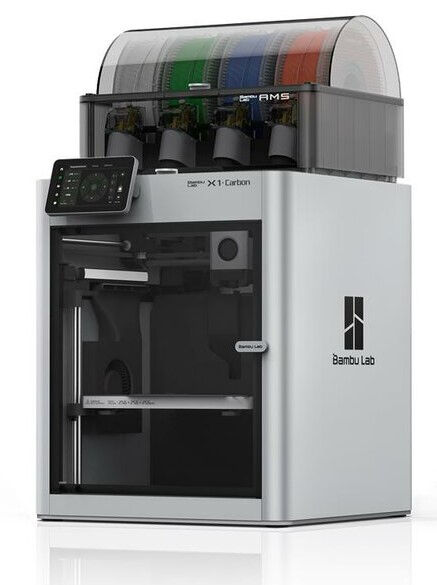
However, about a year ago, I purchased a 3D printer, namely the Bambu Lab X1 Carbon. Online, I only have seen very good reviews and I really liked the network feature, i.e. that your computer and the 3D printer only have to have access to WiFi and then you can print basically from all over the world. So far, I really must admit, the printer is (almost) flawless, easy maintenance (if any at all) and superior quality for an acceptable price.
I decided to accomplish my 3D printing part of the individual assignment on my personal 3D printer. As it is good practice to characterize the design rules before printing anything and just out of interest, I performed the same tests that we did in the group assignment for the Ultimaker S5 and the Prusa i3 MKS3+ on my personal 3D printer. This also allows me to quantify and compare the superior quality of prints on the Bambu Lab X1 Carbon to the other printers.
Configuration of Print Settings for Bambu Lab X1C
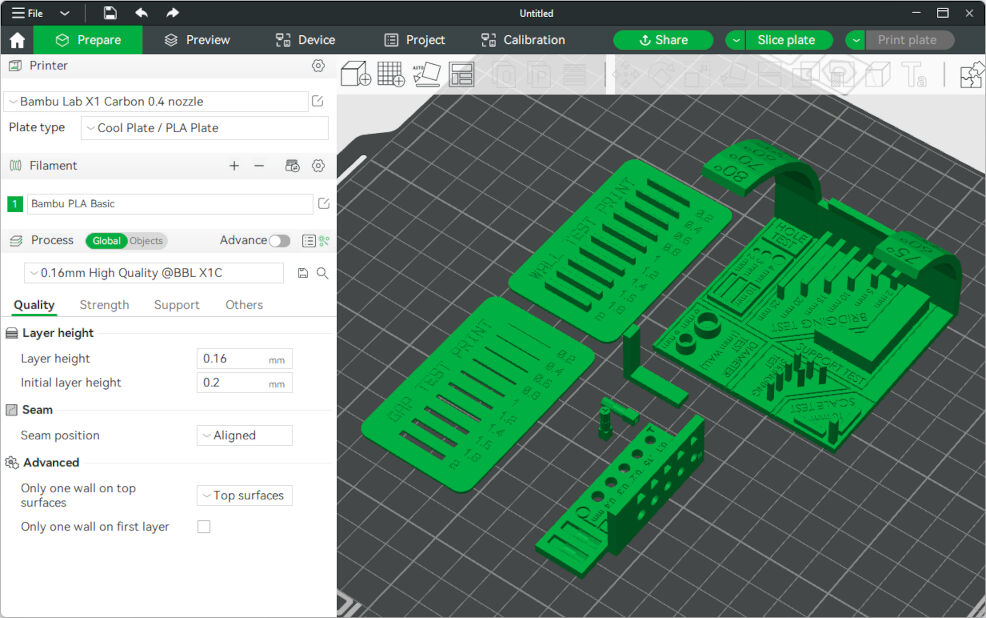
Before starting the actual test prints, I had to configure the settings of the print in the software Bambu Studio. For this, I opened the software and signed into the account that is also logged in on the 3D printer. Next, I chose the right printer, nozzle and plate type, namely the Bambu Lab X1 Carbon with its 0.4 nozzle and the "Cool Plate/PLA Plate". For the filament, I chose the Bambu PLA Basic Black that was loaded in the third slot of the material station.
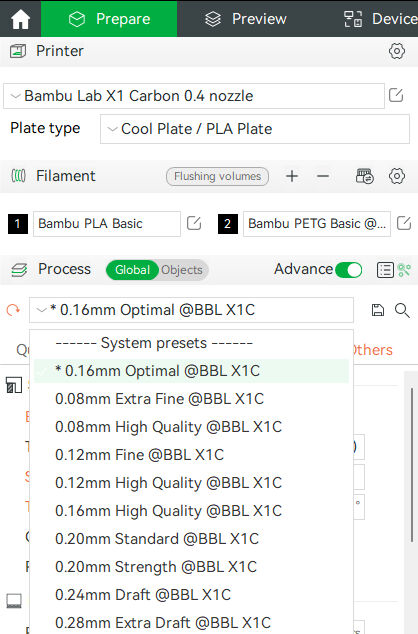
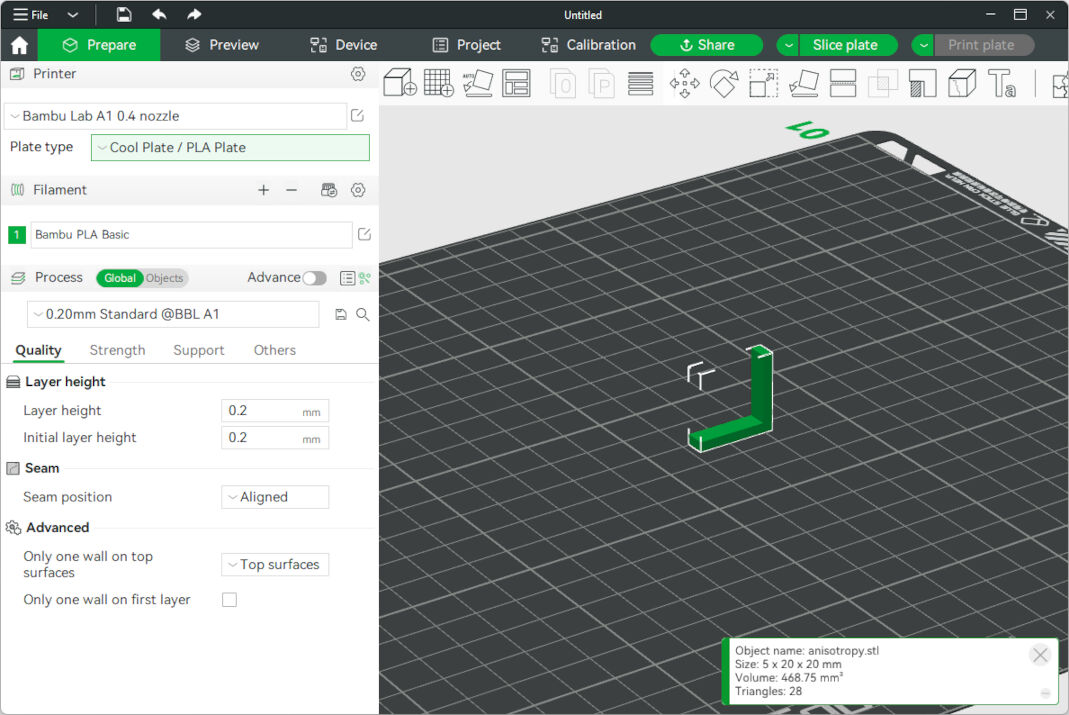
Lastly, I had to chose the process settings. There are a couple of different profiles available with layer heights varying between 0.08 mm and 0.28 mm. Because we chose a profile with a layer height of 0.2 mm for the group assignment and because it is named to be the standard, I started printing a test piece with this profile, the exact name being "0.20mm Standard @BBL X1C". The test piece is a small "L"-shaped print that is used to characterize the anisotropy of the print and is downloaded from here. I dragged and dropped it into the "Prepare" tab of the slicer. In the image below, you can see how it looked.
Next, I clicked on "Slice plate" in the top right, which switched to the "Preview" tab. Here, the software shows the results of the slicing, i.e. each layer with the different line types. Here, I just checked whether the slicing was done as I expected as this can illuminate potential faults of the position and orientation of the piece. Lastly, I pressed on "Print plate" which opened a small dialog in the front where I had to confirm that I chose the right printer. Here, I pressed send and after a while opened the "Device" tab where I can monitor the print process.
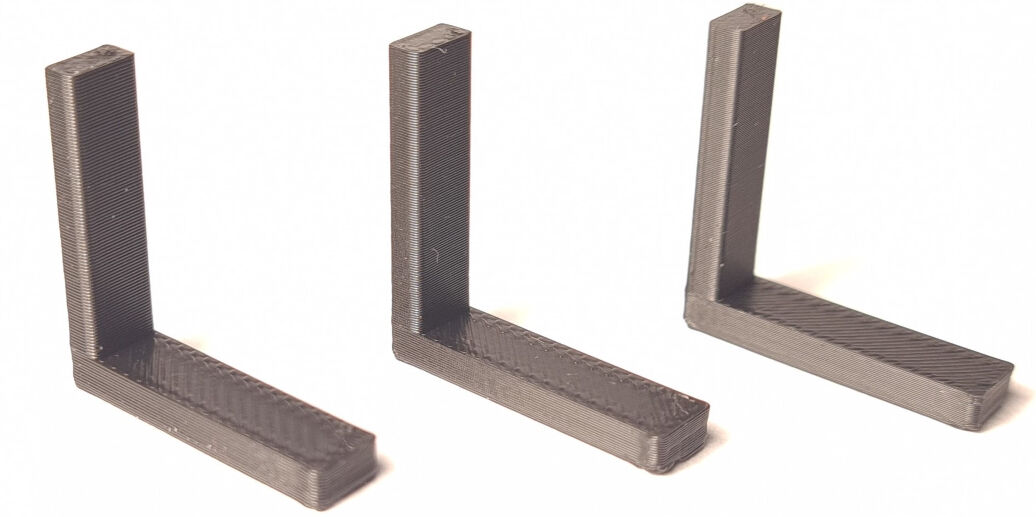
After the print was finished, I evaluated the resolution of the print with its layer height. However, I was not really satisfied as the layers were quite prominent. Therefore, I repeated the process with the profiles "0.16mm Optimal @BBL X1C" and "0.12mm High Quality @BBL X1C".
As you can see in the image above, the layer for the print with the smallest layer height are barely visible. However, for the print with the largest layer height, the layers are quite prominent. Therefore, I chose the profile "0.16mm Optimal @BBL X1C" for the test prints and the prints for my individual assignment.
Having found my preferred settings, I proceeded to print the actual test pieces. For this, I dragged and dropped all files for testing the design rules on the plate in the "Preview" tab. The files included an all-in-one, a tolerance, an anisotropy and a gap width/wall thickness test piece. Lastly, I started the print with the "0.16mm Optimal @BBL X1C" profile following the steps described above.
All-In-One Test
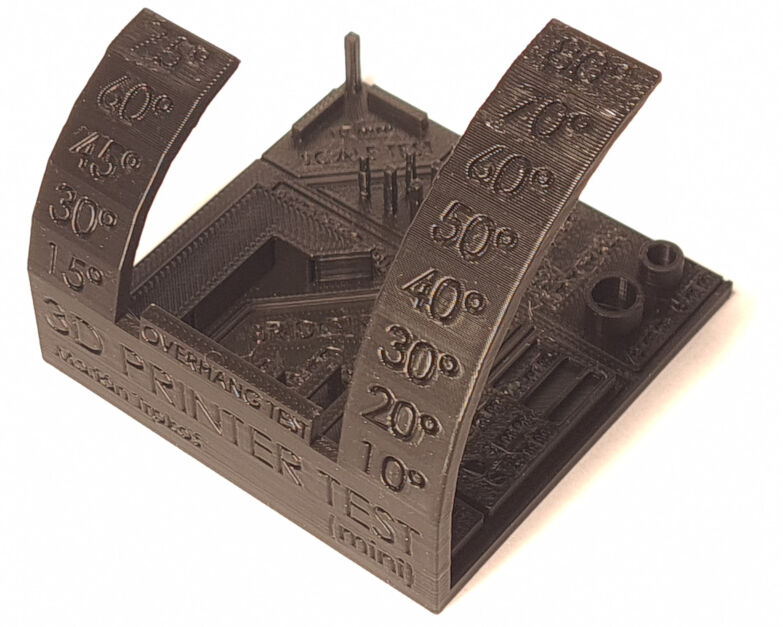
One of the test pieces includes a set of various test, including overhang, bridging, growing and shrinking and stringing.
Overhang Test
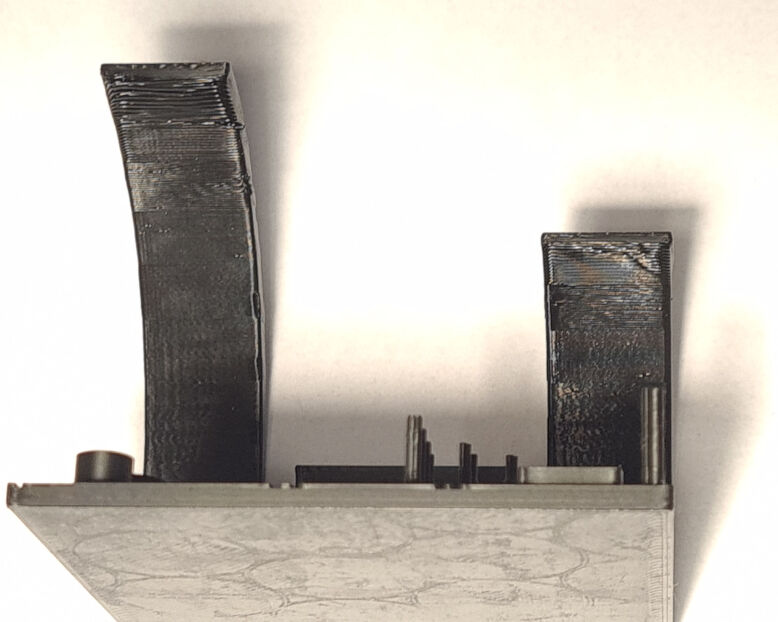
To characterize the maximum angle that can be printed without support, various different test can be conducted. Here, the test is achieved by printing a slope with increasing angles. At an angle of 70°, the upper surface begins to degrade. However, this can be due to slicing and its low resolution for flat surfaces. The view from underneath reveals that only for angles higher or equal to 75°, i.e. for the last angle of each slope, the overhang begins to degrade.
Bridging Test
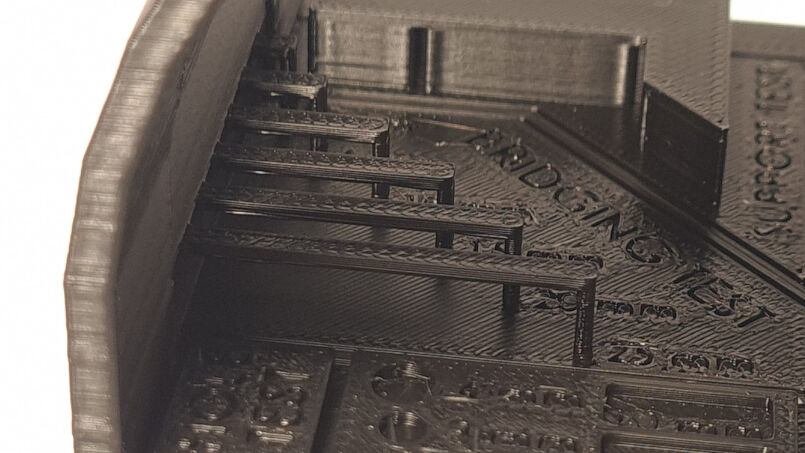
The results of the bridging really surprised me. All bridges printed really well. The worst is obviously the bridge spanning the largest distance, i.e. 25mmm, but even for this, the bridge only shows a slight hint of sagging. However, in my opinion, this is negligible as the bulge is really small.
Growth/Shrinkage Test
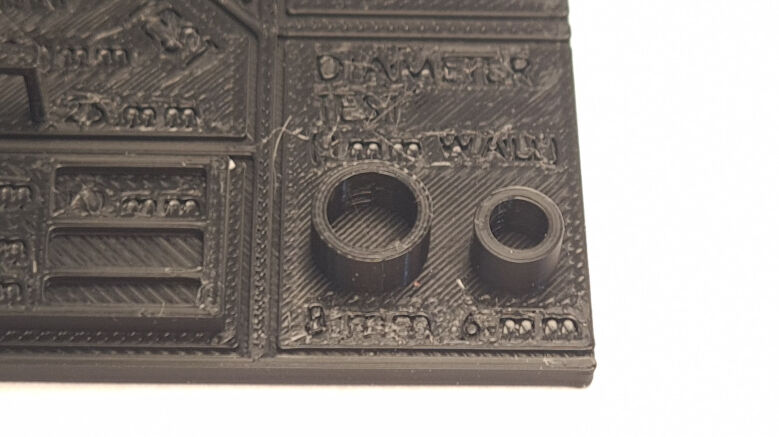
The inside and outside dimension for the hollow cylinders were measured using a calliper. In theory, outer dimensions grow and inner dimensions shrink. However, some slicer software already compensate for this by offsetting the machine path. This is presumably also present for the slicer Bambu Studio as all dimensions shrank. Here, outer dimensions decreased by about 0.105 mm and inner by 0.18 mm.
| Cylinder | Outer ⌀, design | Outer ⌀, print | Inner ⌀, design | Inner ⌀, print |
|---|---|---|---|---|
| Left (large) | 8.00 mm | 7.91 mm | 6.00 mm | 5.83 mm |
| Right (small) | 6.00 mm | 5.90 mm | 4.00 mm | 3.81 mm |
Stringing Test
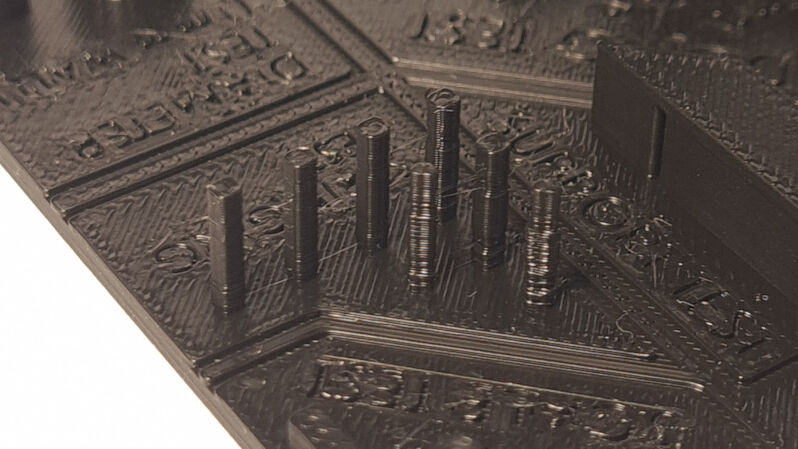
Stringing is almost not present. In the bottom of the print, only few strings between the towers are present. They are however so thin that they detach as soon as somebody touches them.
Tolerance Test
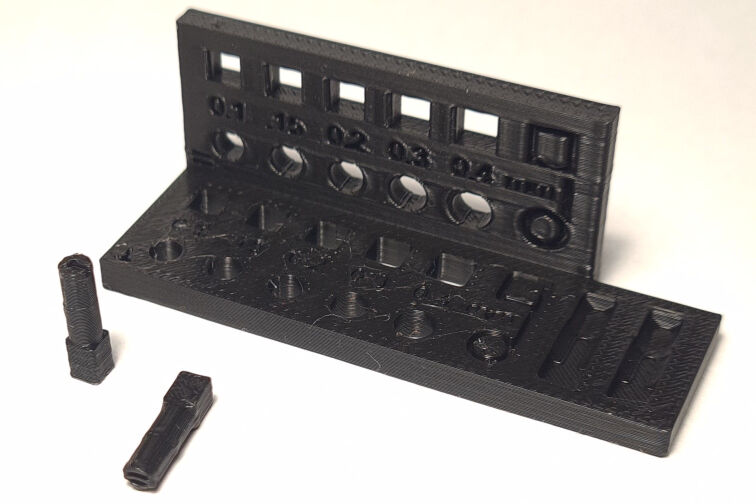
The tolerances were tested by printing a grid with circlular and square holes with different tolerances between 0.1 and 0.4 mm, positioned horizontally and vertically. Additionally, the print includes two pegs with a circular and a square side, which are printed horizontally and vertically as well. By inserting either side into the holes, the tolerances can be determined.
However due to the compensation of growth and shrinkage, the circular and square sides of the pegs fit in all holes.
Hence, the tolerance of the fits is below 0.1 mm. Additionally, no elephant feet occurred for the pegs.
Anisotropy Test
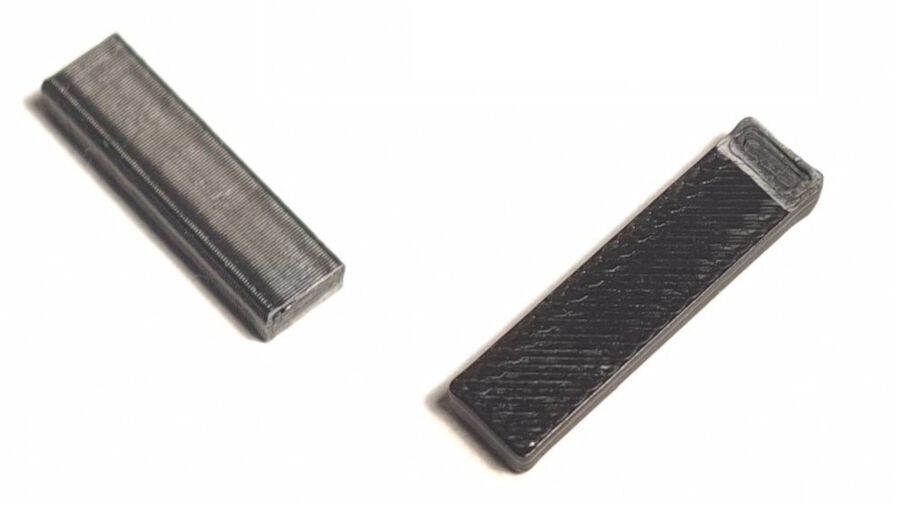
The anisotropy test went as expected. Due to the FDM method of additive manufacturing, the prints are prone to delamination, i.e. breaking apart between layers or even filament paths. Breaking the printed test piece reveals the same behavior for this print.
Gap Width and Wall Thickness Test
Printing the test pieces with different gap widths and wall thicknesses reveals that all gap widths are printed according to the design. Even the smallest width with 0.2 mm was printed.
This is not true for the walls. Here, the wall with a thickness of 0.2 mm was not printed, only the others that had a larger thickness. This is potentially due to the nozzle size of 0.4 mm. Everything below and equal its size is not even transferred to the sliced file and hence not printed.
Comparison of 3D Printers
As I initially suspected, the print quality of the Bambu Lab X1 Carbon is really high. It automatically compensates the growth and shrinkage of outer and inner dimensions, respectively. Furthermore, no elephant feet were visible, in contrast to the Ultimaker S5. Compared to it, overhang prints, bridging and stringing are better.
Additionally, one aspect that has not been considered so far is print time. For the Bambu Lab X1 Carbon, printing all pieces in one print only took 2.5 hours. In contrast, the all-in-one test alone took 2.5 hours on the Ultimaker. Hence, in my eyes, the Bambu Lab X1 Carbon is superior to the Ultimaker S5 in all aspects.
Individual Assignment
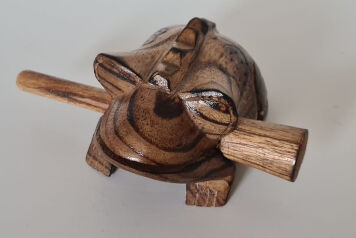
For the individual assignment, I wanted to combine the two parts, where I have to scan an object and to 3D print something that cannot be made subtractively. I also wanted to stay within the theme of previous assignments, namely "frogs". I was really happy, when I found a wooden croaking frog at home, which was a gift from a dear friend of mine from Bali!
More precisely, I wanted to scan the body of the frog and simultaneously model the stick. Then, I will have to do some mesh editing to adjust the shape, especially the hollow part inside of the frog's body. Lastly, I can 3D print the frog and the stick.
Even though, the croaking from is made out of a single piece of wood and therefore was manufactured subtractively, the frog was manufactured by hand, i.e. wood carving. Here, the inner part of the frog was scraped out with a knife which however left the inside surface finish at a really rough stage. Manufacturing the frog digitally with subtractive methods like a CNC mill is therefore at least advanced if not impossible. It would need all six axes and even then milling out the inner part of the frogs body would be limited to an area that can be reached through the holes on both sides of the frog, where the stick is inserted through. Hence, to fully fulfil the requirements of the assignment for 3D printing, namely that the printed part can not be manufactured subtractively, I designed the hollow part of the frog's body "extra" hollow such that no milling bit could reach all places.
3D Scanning the Frog's Body
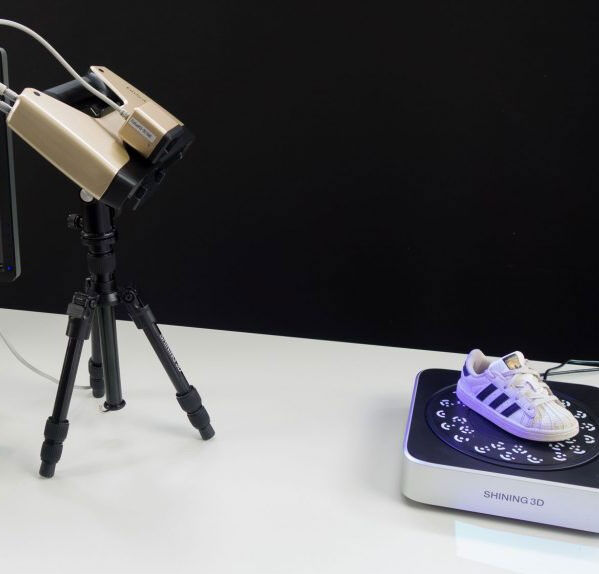
For 3D scanning, I used the EinScan Pro+. It projects structured light onto the surface of an 3D object and captures images of it that are analyzed to generate point clouds from it. In the post-processing the point clouds are converted into triangles to generate volumetric data. For a better performance, it can be used in combination with a turntable.
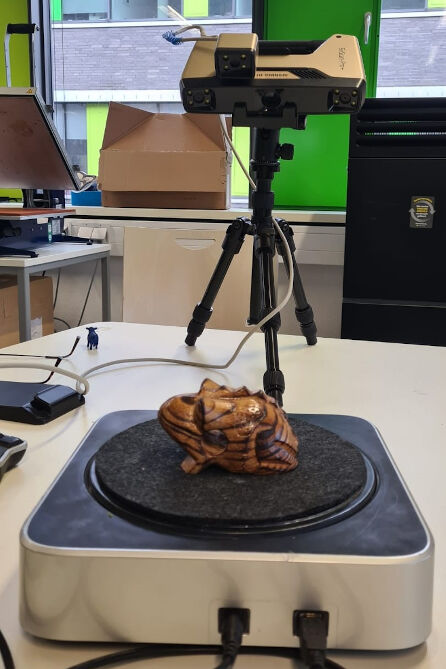
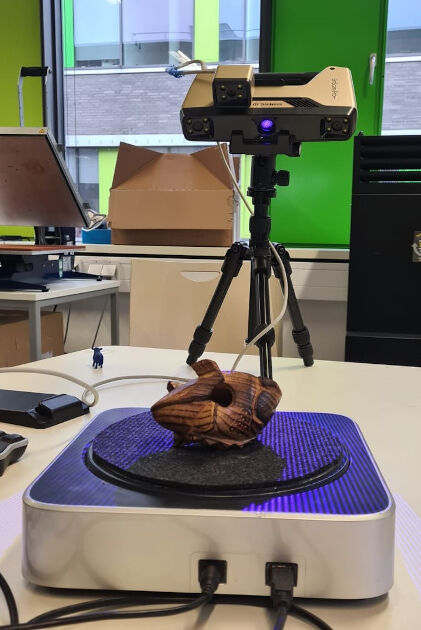
Before using the scanner, it has to be assembled. For this, the camera with color vision was firstly mounted on the scanner that incorporates two monochrome cameras and the light emitting projector between them. Then, the scanner was mounted onto a tripod. Both the scanner and the turntable were furthermore connected to a computer and connected to a power source. Then, the cross of the emitted light which marks the very middle is centered on the middle of the turntable. Lastly, on the computer, the software "EinScan Pro Series" was started.
The scanning process itself is then prepared, conducted and terminated in the software. As a first step, the right scanner is chosen, here the EinScan Pro+. Secondly, a calibration has to be conducted. This included to move the scanner in a handheld position from a close to a more distant position to a calibration target. This firstly layed flat on the ground, and was then placed vertically in a stand to angle it slightly. The second, third, fourth and fifth step of the calibration was then conducted with the calibration target positioned to the front, left, back and right, respectively. In case the calibration was successful, the program shows this in a dialog along with a calibration deviation measure. Next, the white balance is calibrated with the "true white" being the white surface on the back of the calibration target. With the calibration being complete, the initial setup is restored.
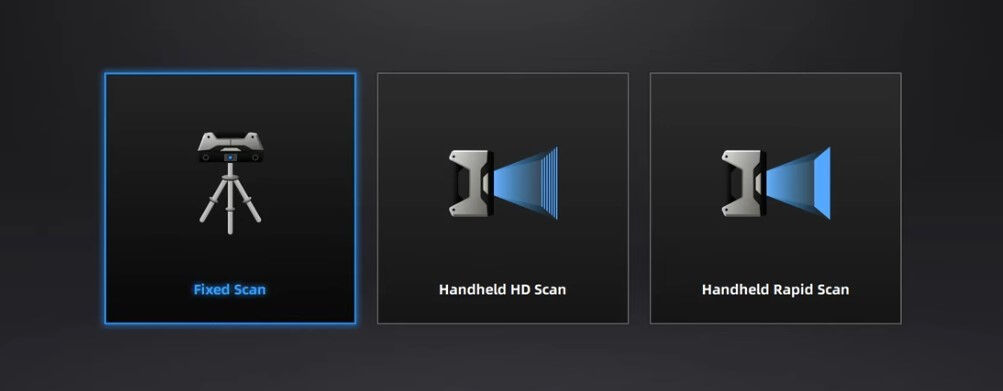
As a third step, the mode has to be selected. As I want to use the turntable, I selected the "Fixed Mode", where the scanner is fixed on the tripod and the turntable turns the object by a known degree. Other modes are handheld modes.
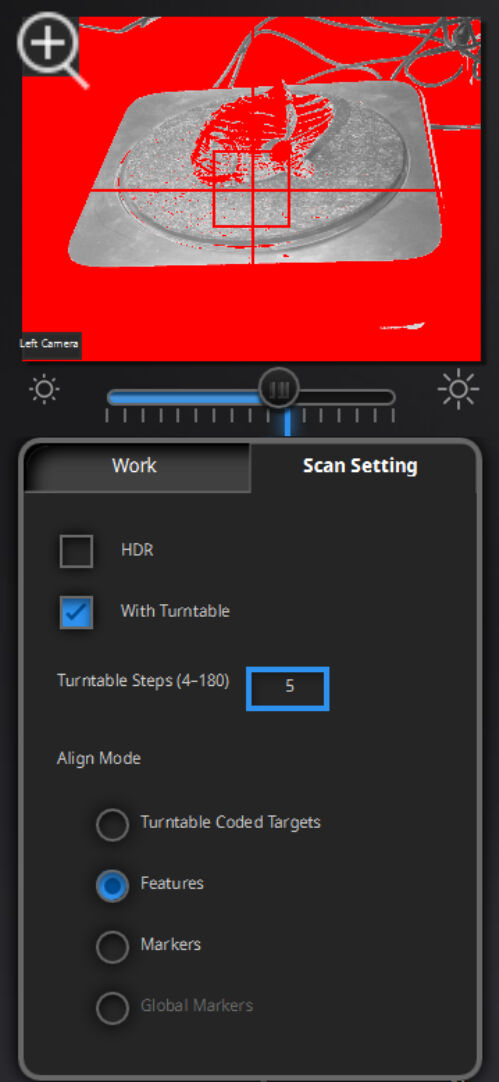
After these three steps, the setup is completed, and the scanning can start. In the beginning of the fourth step "Scan", a folder for a "New Work" to save the data has the be specified. Then, it can be chosen between a textured and a not textured scan, where I chose the former. After clicking "Apply", the scanning settings can be adjusted. Here, I selected "With Turntable" with initially six steps and "Features" for the align mode. In this mode, it recognizes features like the shape and texture to align multiple scans to a single point cloud. Lastly, I set the brightness of the image to a relatively high level of about 80% as the frog is made out of partially dark wood. In the image above the settings, it can be checked whether the object is recognized as the recognized parts are shown in red.
With the settings being done, I covered the turntable and its markers with a dark felt and placed the body of the frog in the middle of it. Then, I started the first scan. However, with only one scan, scanning the whole object is far from being done and additional scans have to be taken. For these, I varied the brightness between 50% and 100% and the number of steps between four and seven, alternating between even and uneven numbers. This process involves a lot of intuition and even more experience and I was lucky my instructor helped me out.
After about ten scans with varying brightness and steps, I placed the frog on the side to also capture its belly. In this position, I took another about 10 scans to complete the scanning. Luckily, I never had to align the generated points manually as the software apparently had enough features for orientation.
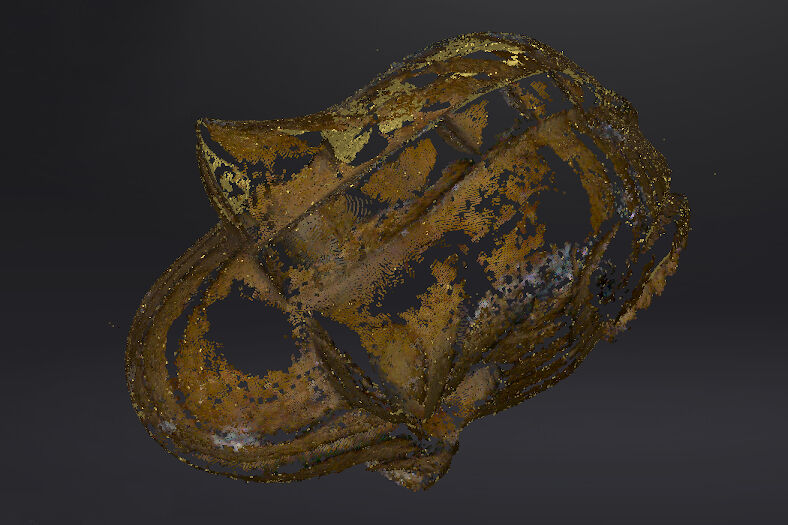
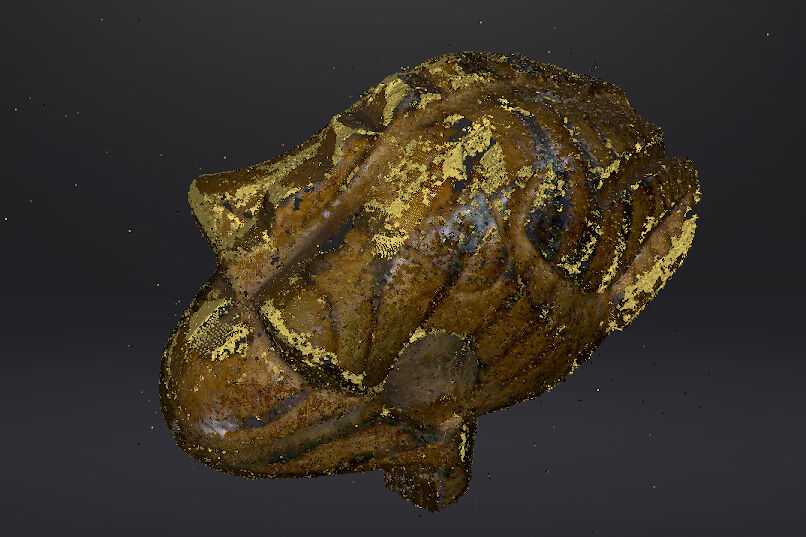
With several scanning processed, the point could visible in the software increased drastically in size. After the first scan, about a hundred thousand points were detected. In contrast, after all scans, the model consisted of more than two million points.
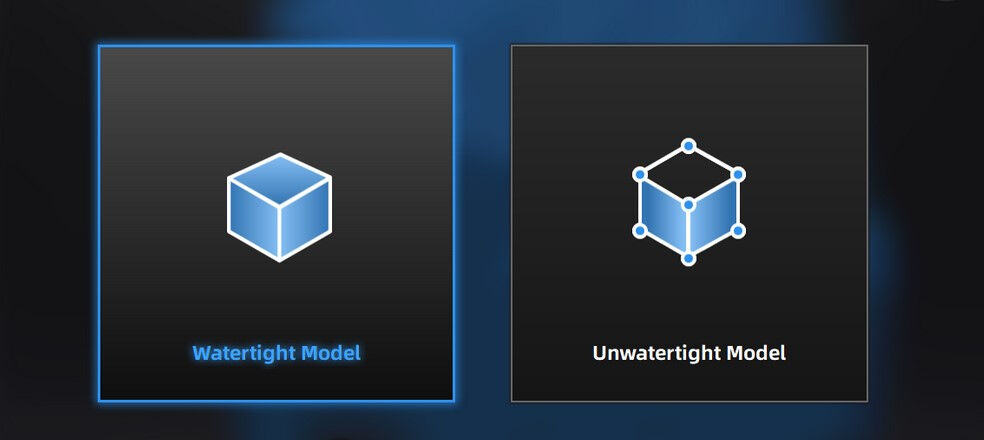
After having generated a sufficient amount of points, the post-processing is started as a fifth step. Here, it can be chosen, whether to generate a "watertight" or "unwatertight" model. In CAD, this means whether the shape of an object is closed or has holes. The former would then be a volumetric model and the latter a surface or shell model. However, I did not want to bother with fixing holes and therefore selected to generate a watertight model
Additionally, it is asked how much detail should be included. The more detail, the larger the file size. I did not really mind that, so I clicked on "High Detail".
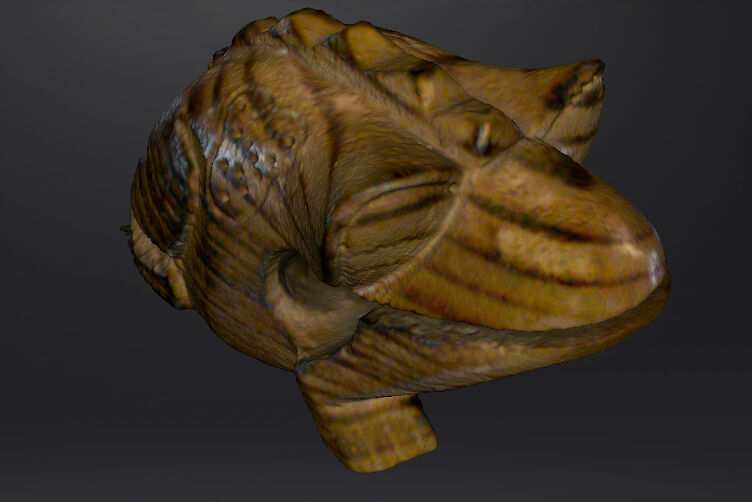
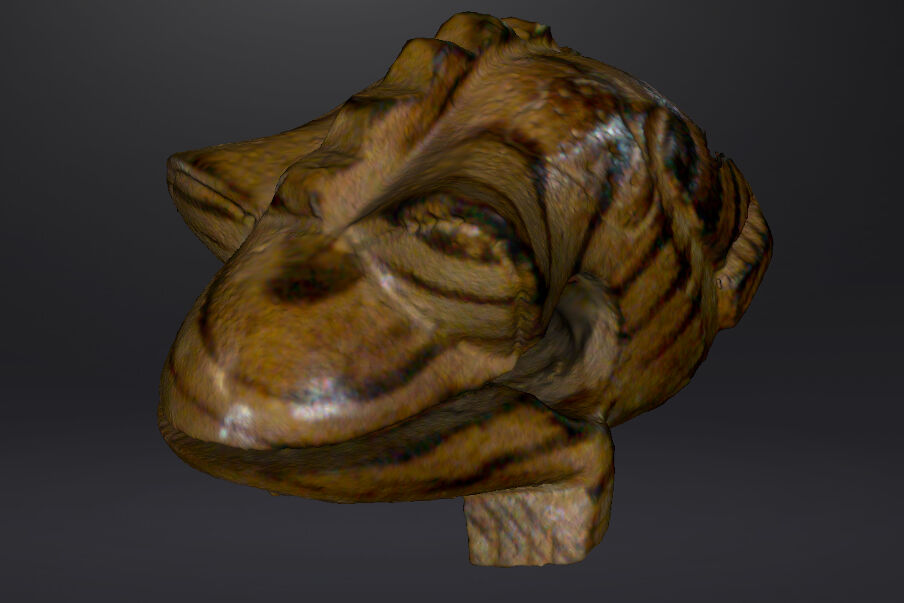
Then, a bar appeared to show the progress of loading the model, more precisely of "Meshing Data". Once it was finished, a model of the frog appeared where the holes, that were visible in the scan, disappeared. This model now consisted of a mesh. Additionally, the texture of the model was also already mapped onto the object showing a beautiful wooden croaking frog.
Lastly, I exported the model as an .stl file by clicking on the "Save Model" button on the right, specifying the name and location and lastly pressing "Save".
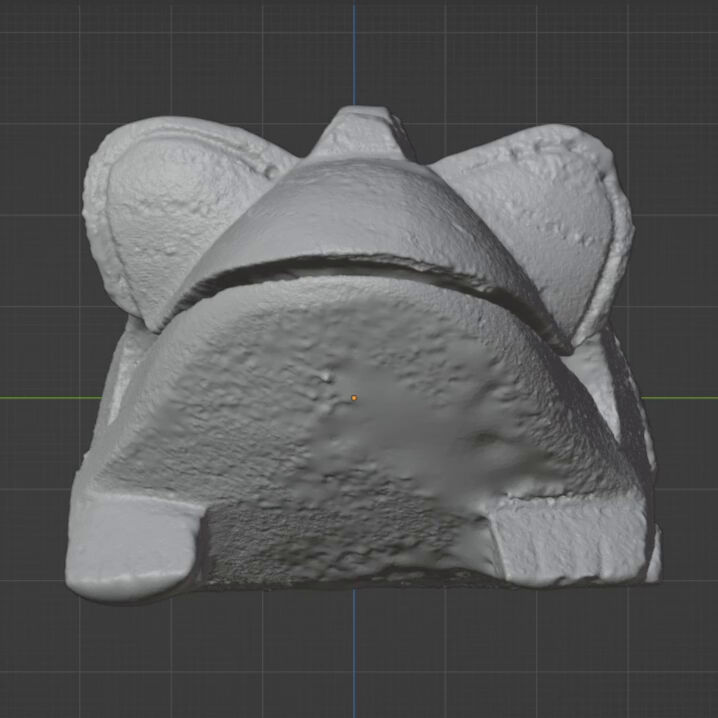
I was really impressed by the detail the 3D scanner was able to capture. It did not only recognize a small imprint on both sides of the body, but also created a cylindrical hole going from side to side. Nevertheless, it was not able to capture the inside of the hollow body. Additionally, the jaws were joined. These aspects, I will have to care for during mesh editing.
Modelling the Stick
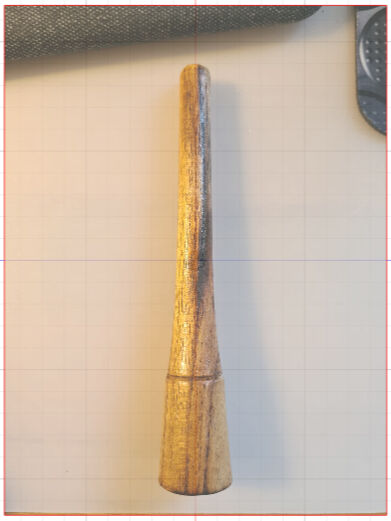
My plan for modelling the stick was simple: I take a picture of the stick from the side, import it into an engineering CAD software, i.e. Fusion 360, then use a spline tool to trace the edge on one side and use this as a profile to revolve it around its symmetry axis.
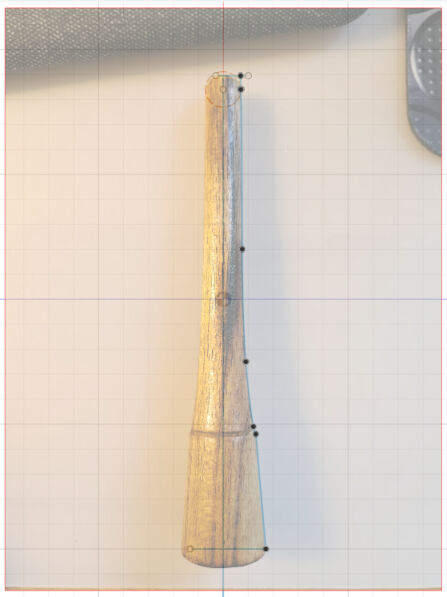
I started by taking a photo with my phone which I saved on my computer. In Fusion 360, I created a new file and clicked on Insert > Canvas. This opened a dialog, where I selected the previously taken photo of the stick and clicked on XZ-plane to place it on that plane.
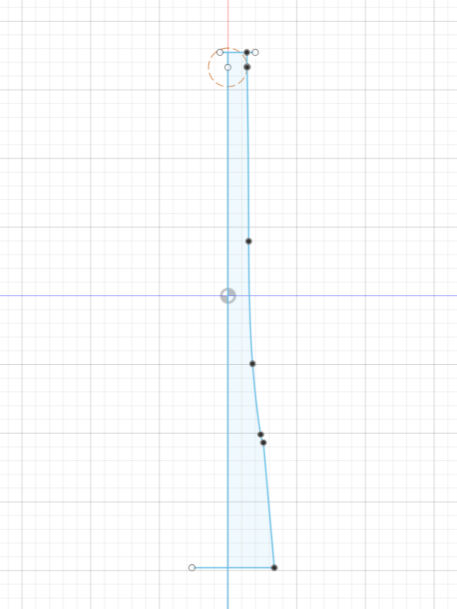
Then, I added a sketch on the same plane and traced the right edge of the stick with the "Fit Point Spline" tool. In the top and the bottom of the edge, I placed horizontal lines to close the profile on both sides. Furthermore, I created a vertical line on the symmetry axis of the stick by means of a circle. With the vertical line, the profile was fully closed.
After finishing the sketch, I let the profile revolve around the symmetry axis by firstly selecting the closed area and secondly the line on the symmetry axis. With a revolution of 360°, this created the complete shape of the stick.
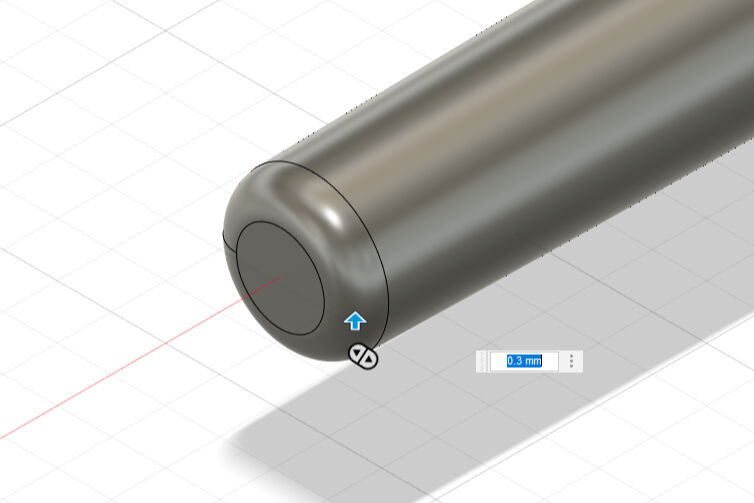
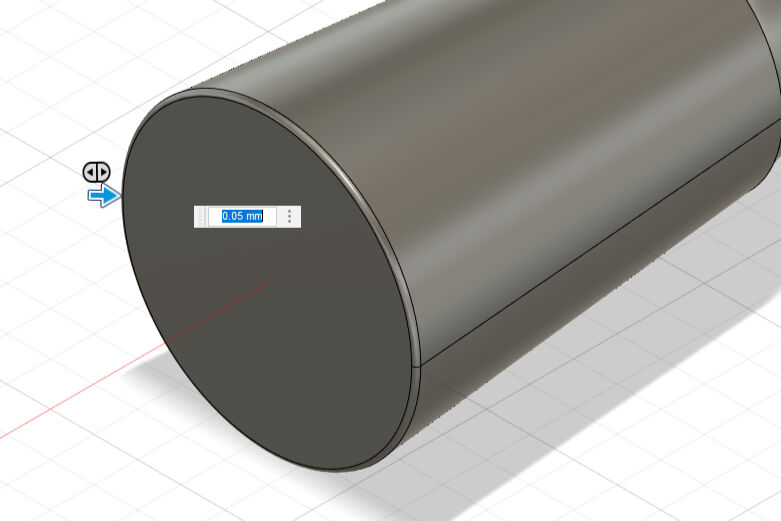
Also, I added a fillet on the small end with a radius of 0.3 mm and in the bottom with 0.05 mm.
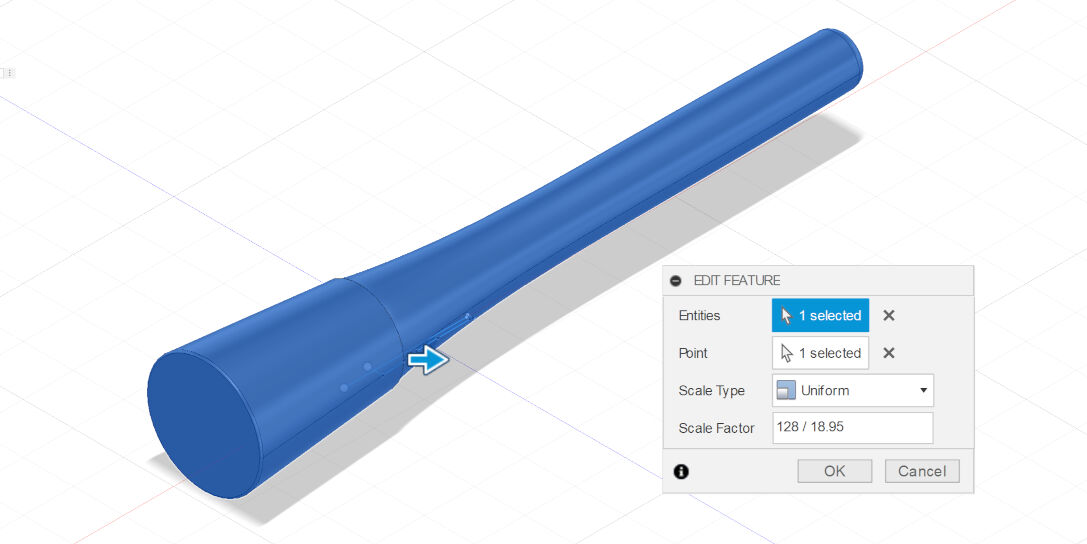
To finish the part, I had to scale the part the real size of the stick, which measured 128.0 mm length-wise. The stick modelled in Fusion however only had a length of 18.95 mm which I obtained by clicking on "Inspect" and selecting the flat faces of both ends. Therefore, to obtain the real length of the stick, I had to scale the modelled stick with a factor of 128.0/18.95. I did this, by pressing on Modify > Scale, selecting the stick and inputting the correct factor.
Lastly, I exported this part as an .stl file via File > 3D Print. This opened a dialog, where I specified that I want to export the object of the stick, selected the format to be STL and the units to be millimeters and un-ticked the box of "Send to 3D Print Utility". After pressing "OK", I saved the .stl with a specified the name and location on my computer.
Mesh Editing of the Body in Blender
After the scan of the croaking frog's body was exported, I edited the mesh with Blender. I have worked with Blender previously to create an organic 3D model of cells. By this, I got to know that Blender is incredibly powerful and has almost infinite tools. However, this is also why I do not use it often as this overwhelms me. Nevertheless, for mesh editing, importing an .stl file with such many data points into an engineering CAD software, like Fusion 360 for example, takes extensive time to compute and instead, Blender needs reasonable time and even allows for organic mesh editing.
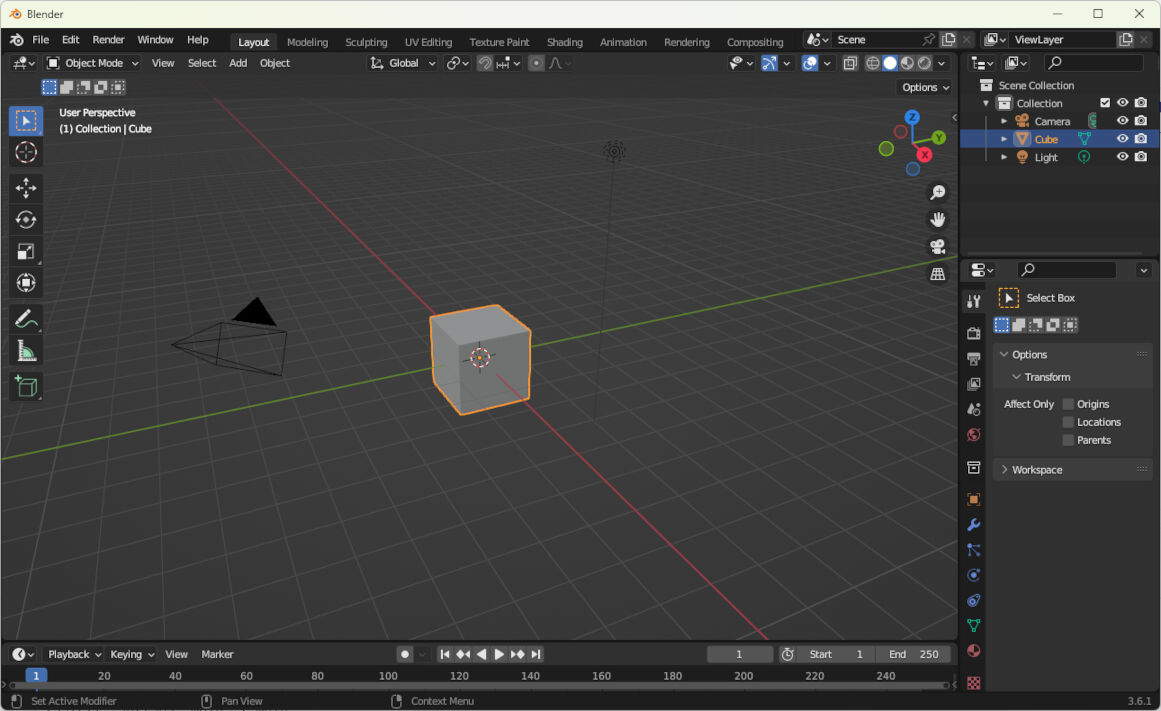
In the beginning however, I had to refresh my skills with Blender and this is why I watched this tutorial on YouTube about the edit mode. Then, I opened Blender which initially shows a default project that contains a cube, a camera and a light source.
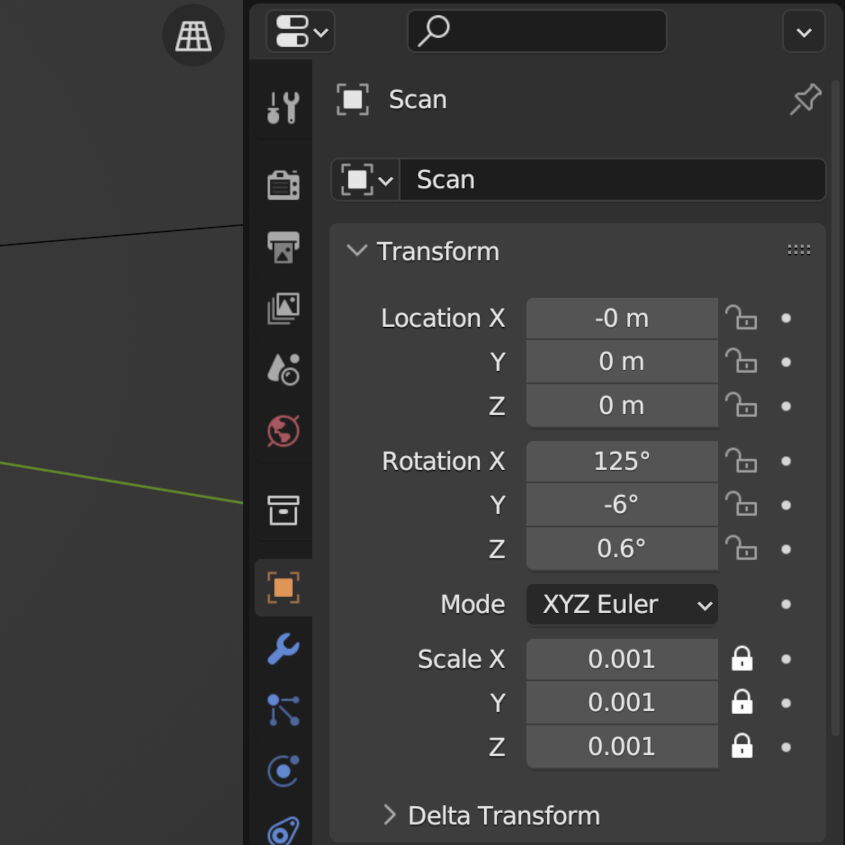
I deleted these three object by selecting all with pressing the key "A" and then pressing the delete key. I imported the .stl file of the scan via File > Import > Stl (.stl). It took a while to load the data as the .stl file contains relatively many triangles. Then, I switched the mode from "Object Mode" to "Edit Mode" in the top left and transformed the mesh of the loaded .stl file by moving and rotating the object. For this, I used the keys "G" and "R" in combination with one of the keys "X", "Y" or "Z" to specify the axis of movement or the axis of rotation, respectively. The final distance and rotation are shown in the images.
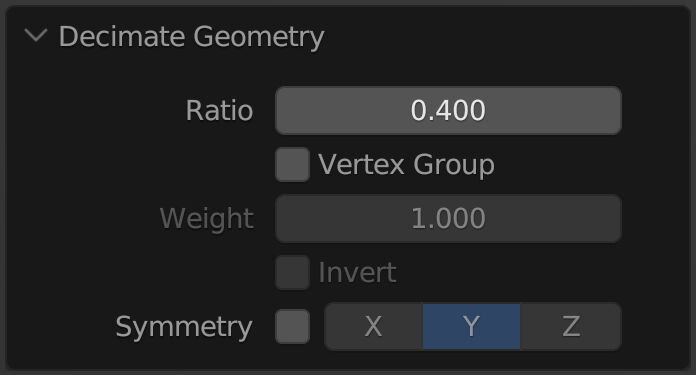
Next, I reduced the number of triangles of the mesh with Mesh > Clean Up > Decimate Geometry. This opened a small dialog in the bottom left corner, where I specified the ratio to be 0.4 to reduce the number of faces from 100% to 40%.
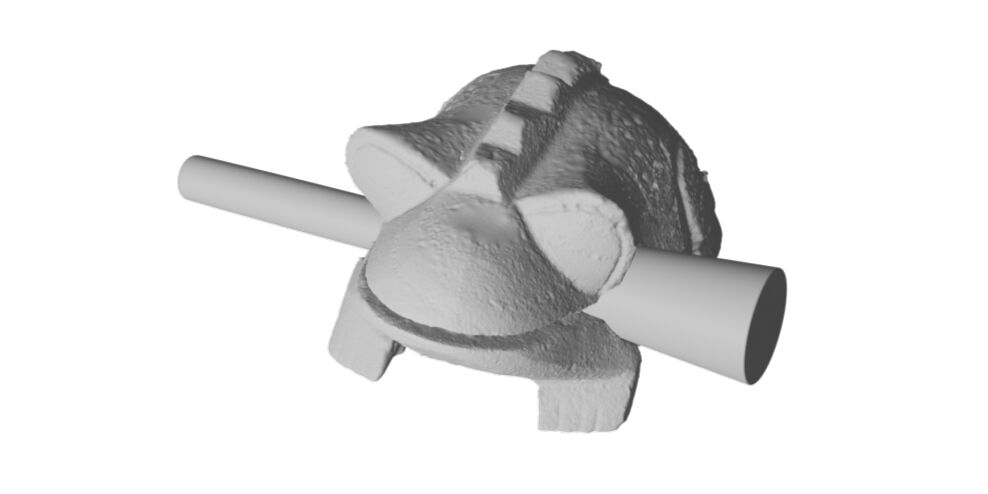
After preparing the mesh of the scanned frog like this, I started editing it. The first edit concerned the inside of the frog, which is in reality hollow to achieve the croaking sound. The scan however did not make the body hollow but instead only had a cylindrical hole at the position where the stick traverses the body. The second edit aimed for splitting the jaw of the frog which the scan also did not achieve. Third, I made the bottom of the frog planar. Lastly, I rendered an image of the 3D model including the previously modelled stick.
Creating a Hollow Body
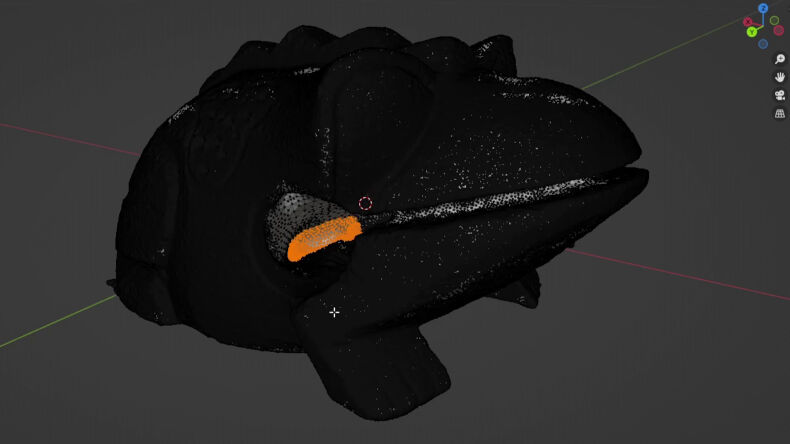
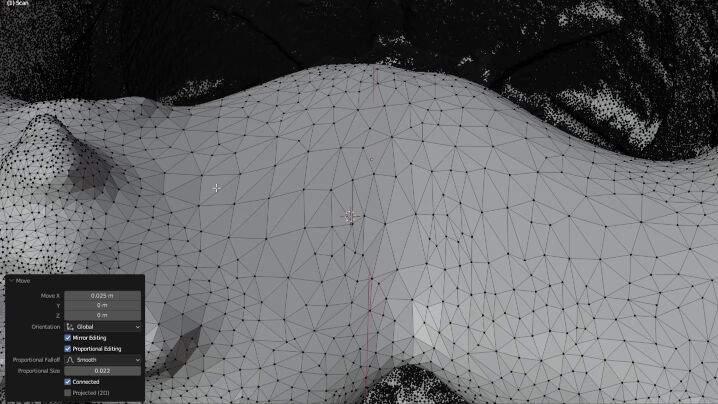
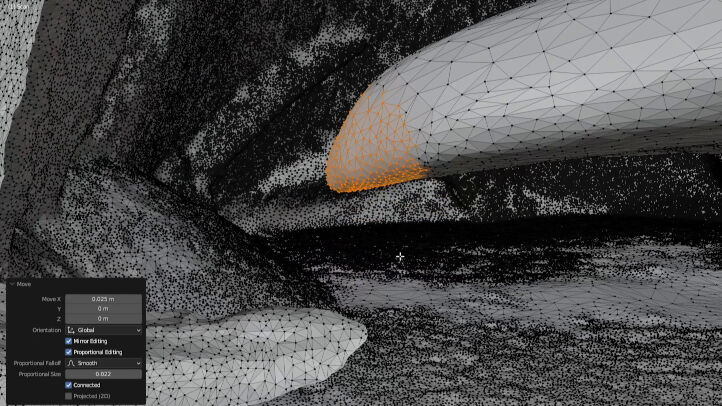
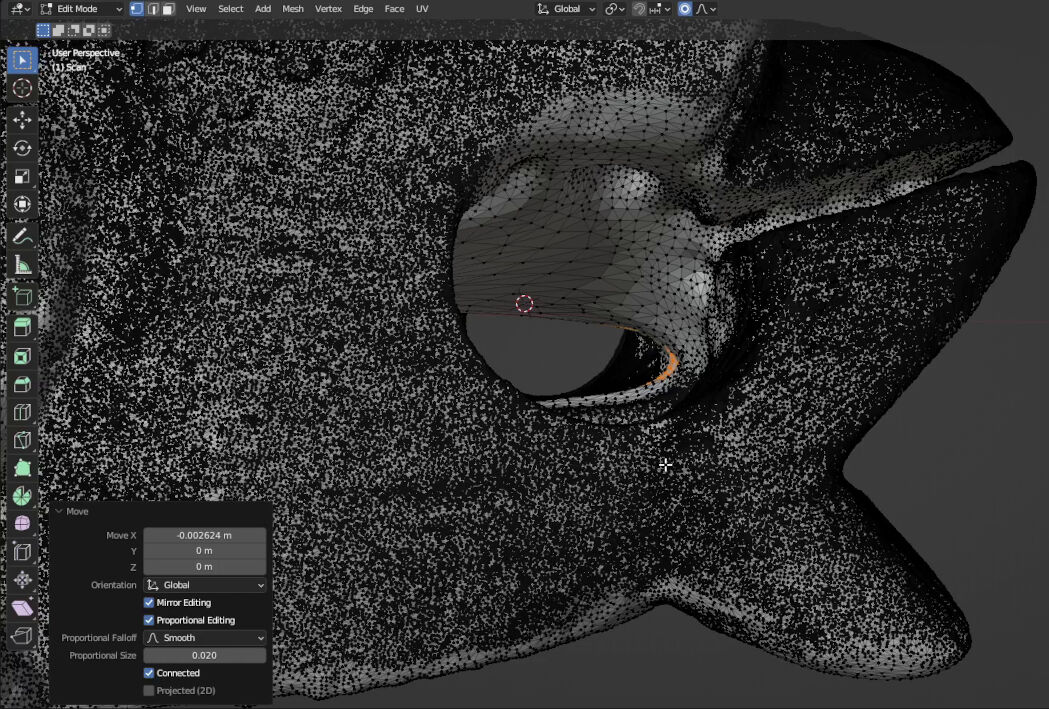
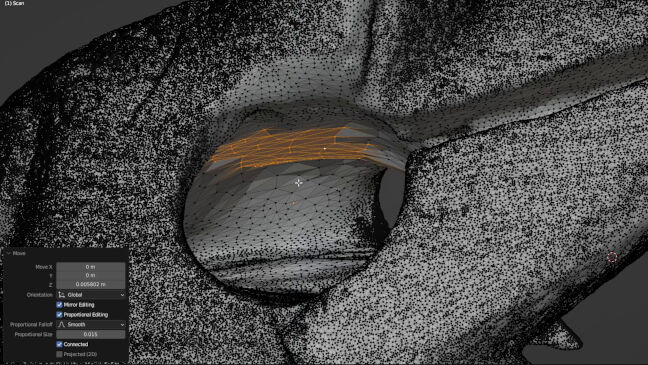
Hollowing out the body was achieved in three steps. Firstly, the vertices in the middle of the cylindrical hole that are directed towards the end of the body were moved towards the end. Secondly, the vertices in the front of the hole are moved slightly to the front and lastly, the vertices in the middle of the generated hole on the roof are moved to the top.
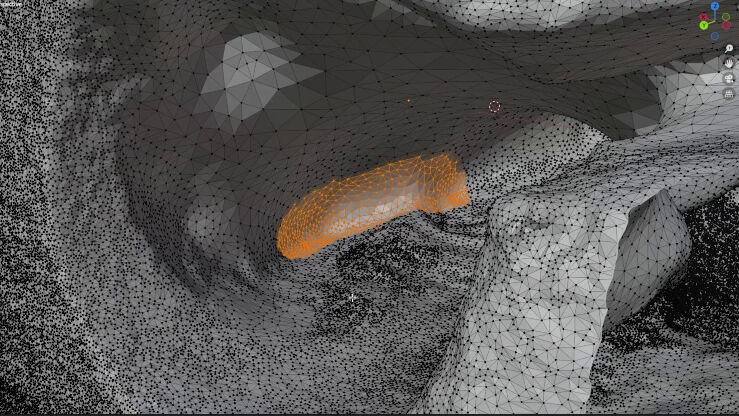
I started with the first edit by selecting the desired vertices. Here, I firstly clicked on one vertex to select it and then used the lasso selection tool by pressing the control key and using the right mouse button to draw the lasso around the desired vertices. In cases where I selected to many vertices, I subtracted them from the selected set via pressing Shift + Ctrl and the right mouse button while moving the cursor around the vertices. While doing the selection, it helped a lot that in a perspective view zooming in clips the front faces and vertices. This allows to see the inner part of the mesh.
After I selected the desired vertices, it was time for moving them further to the back. This was achieved by pressing "G" and then "X". Moving the mouse then moves the selected vertices along the x-axis. Here, I observed that simply moving the creates spikes. Therefore, I searched online for a method of smoothening the movement. Here, I found this tutorial on YouTube that achieved this feature by moving not only the vertices but also the surrounding ones according to a defined function. Hence, I followed the steps.
Fo generating a smooth shape during moving vertices, I clicked on the circular symbol in the top of the page to turn on the "Proportional Editing". In the dropdown menu, I selected to only affect connected points with a "smooth", gaussian-like function. Additionally, in the very bottom of the dropdown, the user can specify the "Proportional Size", i.e. the radius of the effect, which I set to 0.022 m, so 2.2 cm. When moving, this radius can also be adjusted using the wheel of the mouse.
With these settings, I repeated moving the selected vertices along the x-axis. During this, I noticed that it also opens a dialog in the bottom left of the page. In there, I set the movement in x direction to 0.025 m, i.e. 2.5 cm.
As a second step to create a hollow body, vertices in the front part of the cylindrical hole are moved to the front. Here, I in principle followed the same steps again. I selected the desired vertices with the lasso selection tool and moved them to the front by pressing first "G" and then "X". Here, the total distance moved was about 2.6mm with a proportional size of 2 cm.
As a last step to create the hollow body, vertices on the roof of the hole were moved further up. I again selected the desired vertices and then moved them along the z-axis by first pressing "G" and then "Z". They were moved up by 5.8 mm with a proportional size of 1.5 cm.
Splitting the Jaws
After finishing to make the body of the frog hollow, I had to make a second edit of the mesh, namely splitting the jaws apart. I suspected there must be some way of subtracting a mesh from the other but was not sure how to do it. Hence, I watched other tutorials and finally found this video, where a boolean operator was used.
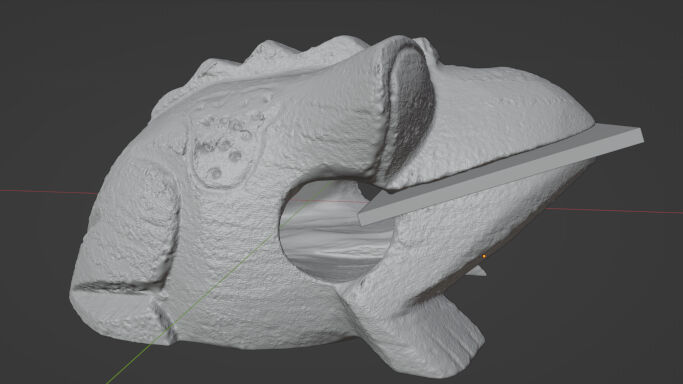
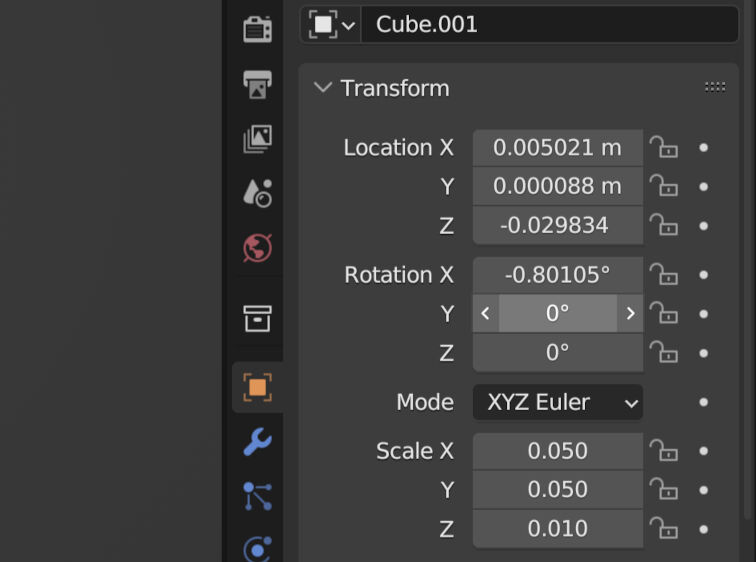
In order to apply such an operator, I first had to create a mesh that I wanted to subtract from the frog, namely in the shape of a flat cube that fits between the jaws. For this, I added a cube in the object mode via Add > Mesh > Cube. In the edit mode, I transformed the cube to sit exactly between the jaws of the frog by using the transform parameter shown in the image. Again, I used the key shortcuts for moving and rotating the cube.
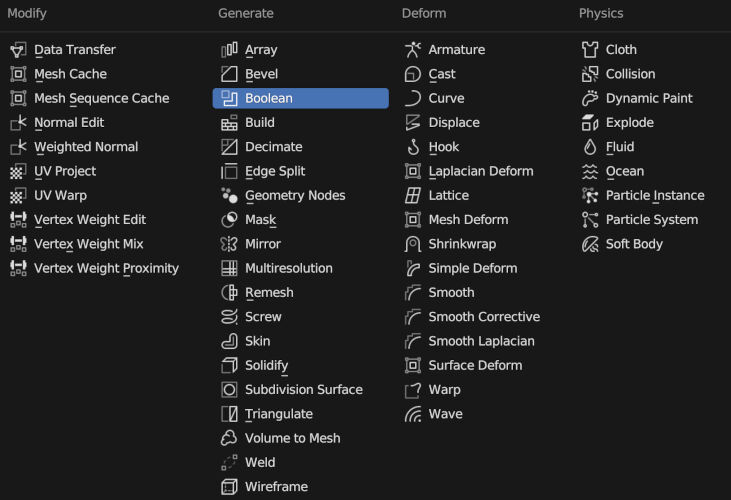
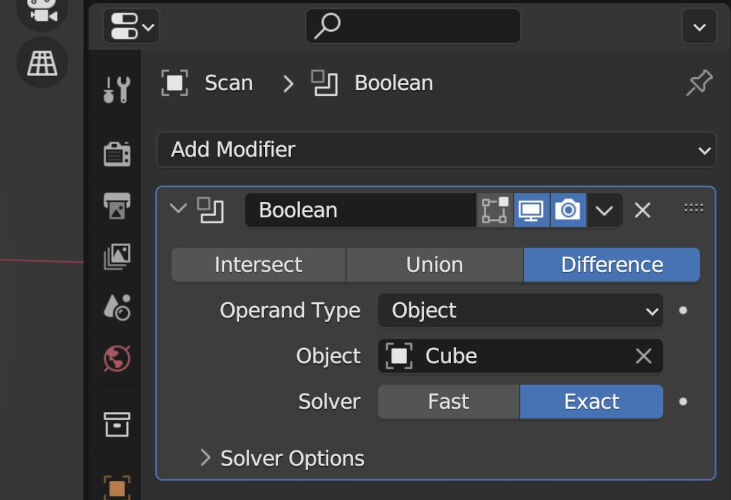
After that, I applied the boolean operator. For this, I went back to the object mode and selected the frog's mesh. Then, I toggled the "Modifiers" tab on the right with a blue wrench icon and added the "Boolean" operator.
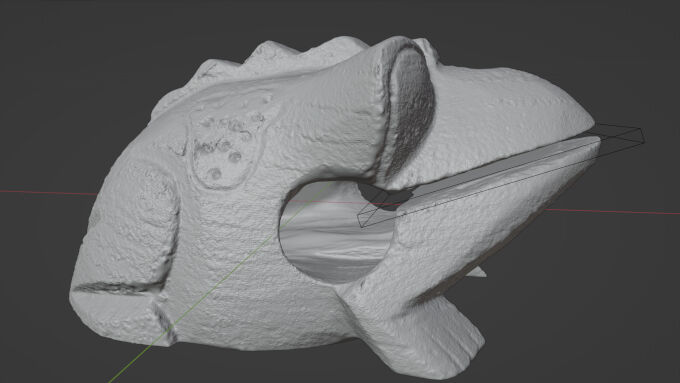
For the boolean operator, I selected the "Difference" operation, where the target mesh is subtracted from the modified mesh. As, I selected the cube with the name "Cube", I subtracted it from the frog's mesh.
Lastly, to check what I have done, I selected the cube and switched to the "Object" tab just above the "Modifiers" tab. Under "Viewport Display", I selected the object to be displayed as "Wire" turning the cube into a wiremodel. As I was happy with how it went, I proceeded with the next mesh edit.
Creating a Planar Base
The last edit of the mesh is very similar to the previous one. In principle, I followed the same steps to create a planar base as for splitting the jaws.
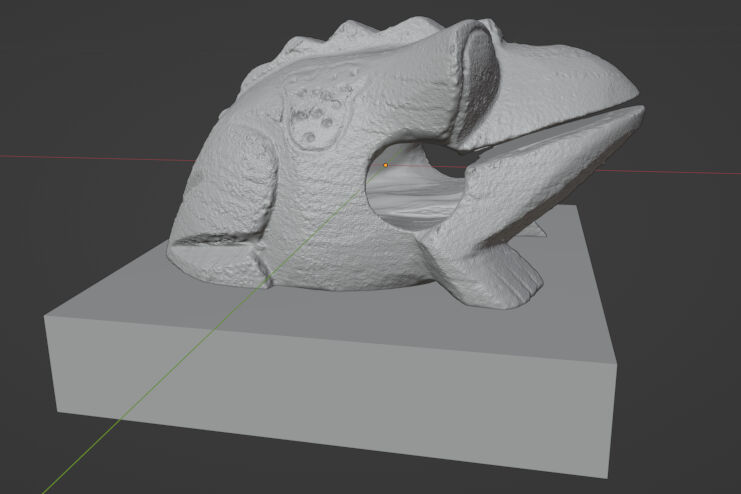
Again, I started with adding a cube, this time called "Cube.001". I transformed it in the edit mode such that the frog appears to sit on it. Here, I also used the key shortcuts for moving and rotating the cube to achieve the transform parameters as shown in the image.
After that, I also applied a boolean operator. Here, instead of using the first cube, I selected "Cube.001" as an object to subtract from the frog's mesh.
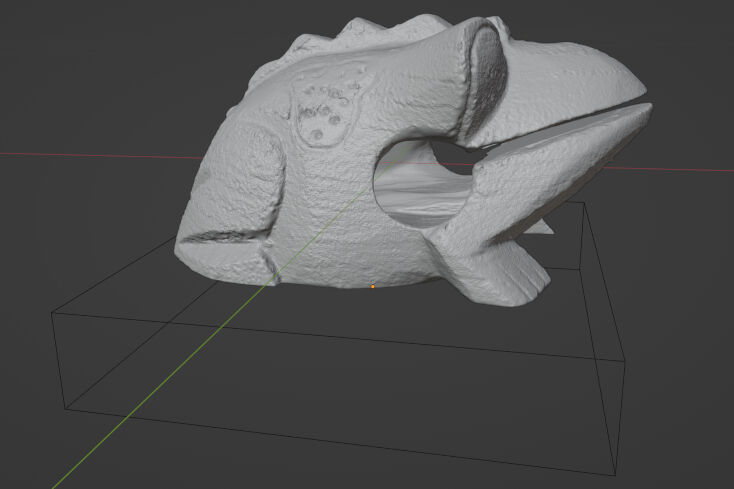
Lastly, I again checked my work by displaying the cube as a wiremodel.
As a very last step, I exported the frog's mesh as an .stl file by clicking on File > Export > STL (.stl). Then, I specified the name and the location of the file and pressed "Export STL". However, this exported not only the frog's mesh but also the meshes of both cubes. Therefore, I again search online for a solution and found a solution here. Apparently, there is an export setting to only export the selected mesh. Hence, I selected the frog's mesh an clicked on File > Export > STL (.stl). However, before clicking on "Export STL", I ticked the box saying "Selection Only" in the "Include" dropdown on the right and it did the trick!
Rendering a 3D Model
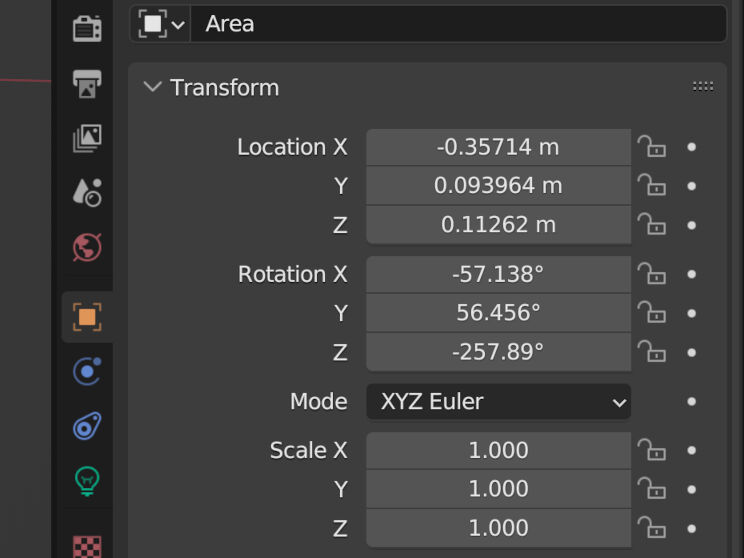
In order to render an image of the frog, I also imported the .stl file of the previously designed stick by clicking on File > Import and selecting the according file. Then, I also transformed it by scaling, moving and rotating it with pressing the according keys. With the transform parameters shown in the image, the stick was placed in the mouth of the frog.
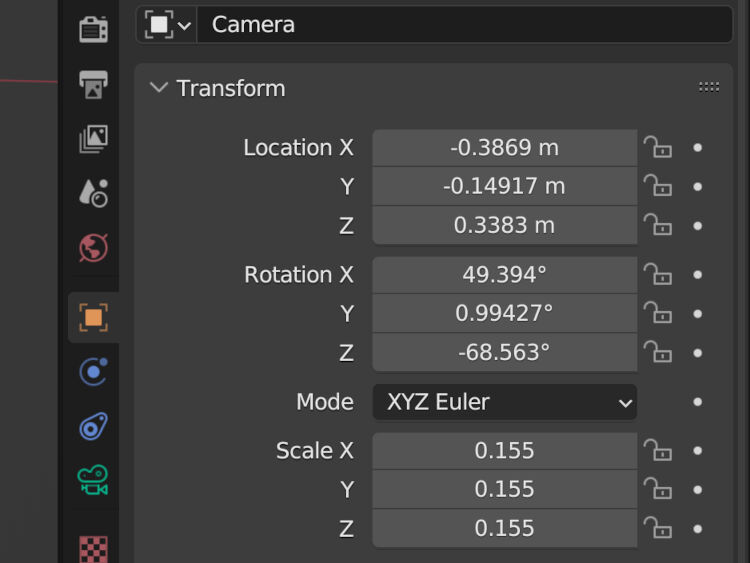
Next, I added a camera by clicking Add > Camera in the object mode and a light source by Add > Light > Area. I transformed the camera while seeing what the camera sees, i.e. toggling the camera's view by pressing 0 on the numpad. Then, I transformed it to the view I preferred.
For the light, I also changed the power as I found it relatively bright. I did this by switching to the "Data" tab on the right which has a small green light bulb as an icon. Here, I selected a power of 2 W.
To render an image with a transparent background, I went to the "Render" tab, i.e. the second from the top on the right and in "Film", I ticked the box for "Transparent".
Lastly, I pressed Render > Render Image. It opened a new window with initially nothing but a background, but after a while the rendering is finished displaying the image in the window. However, I discovered that it rendered also the objects that I made invisible, i.e. the two cubes to edit the mesh of the frog. One last time, I searched for a solution online, which I found here. In the "Scene Collection" panel where the user can see the objects, there are two symbols behind each object, namely an eye to make objects visible and invisible and a camera to include or exclude them for rendering. Hence, I excluded the cubes and repeated the render. Finally, I was happy with the result!
3D Printing
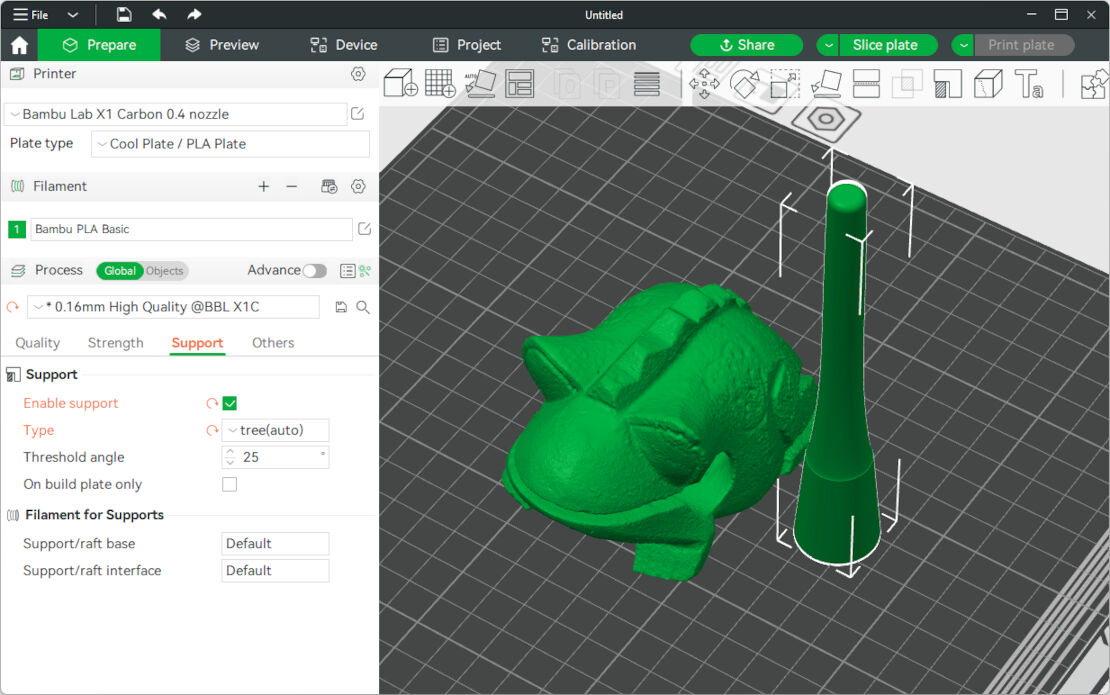
After finishing the editing of the body mesh and modelling the stick, both parts were ready to be printed. For this, I opened the slicer for my Bambu Lab X1 Carbon, namely Bambu Studio. When I characterized the design rules for this printer as shown in this section, I used the "0.16mm Optimal @BBL X1C" profile as it was my preferred compromise between resolution and time consumption. Therefore, I used this profile with its default settings for printing.
In addition to the default settings, I had to enable the support as the upper jaw of the frog would otherwise be a floating part. In total, I tried three different methods for the support structures. I started with PLA as a material not only for the print but also for the support. This however resulted in a print, where not all support structures were removable. As a second try, I used PETG for the interface between the support and the actual print. Even though, it was easily removed, removing than much material appeared really inefficient to me. Because of this and out of curiosity, I attempted a third print, where I blocked most of the support.
Support Structures from PLA
In addition to the default settings, I had to enable the support as the upper jaw of the frog would otherwise be a floating part. For this, I toggled the "Support" tab in the process settings and ticked the box for "Enable Support". As the support will also be inside of the frog's body to support the roof of the hole, I changed the type of the support to "tree" which I hoped to be easier to remove.
With these settings, I started the print as described above in the group assignment section.
After about 4.3 hours, the print was complete. I firstly took the plate of the print bed and then bend it to dismount the print. This was easily done and the print came of completely. Hence, I proceeded with the next step, removing the support structures.
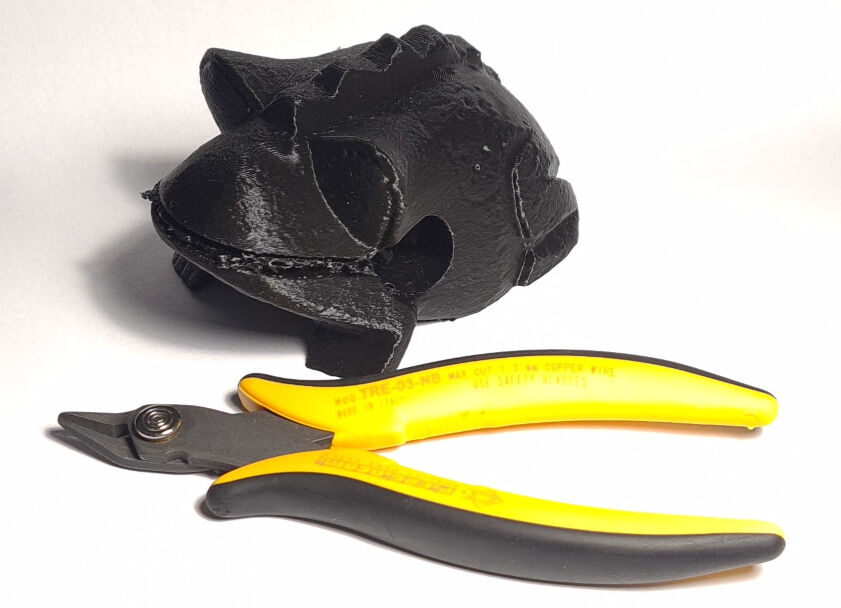
As the stick was printed vertically, it did not require any support structures. However, the frog had very many. I started by breaking the outer structures away with my hand. For the finer, outer structures, I used a flush cutter. However, even after spending several minutes on removing the structure, it was impossible for me to remove the complete support. Here, especially the support between the jaws appeared to have bonded to the jaw material.
Interfaces of Supports from PETG
Apart from the non-removeable support, I was really happy with the print. Nevertheless, it was not acceptable for me to leave the print like this and not try to improve it. From a fried of mine, I heard that there is a really nice way of printing removable support and leaving a nice surface finish for the actual print. This is done by using PETG for the interface. Here, I found a really helpful tutorial online, namely this one. As I was really excited about it, I followed the steps right away.
In the beginning, I again chose the printing profile, that I preferred. Additionally, I added PETG as a filament by clicking on the plus and selecting the according filament and the slot in the material station.
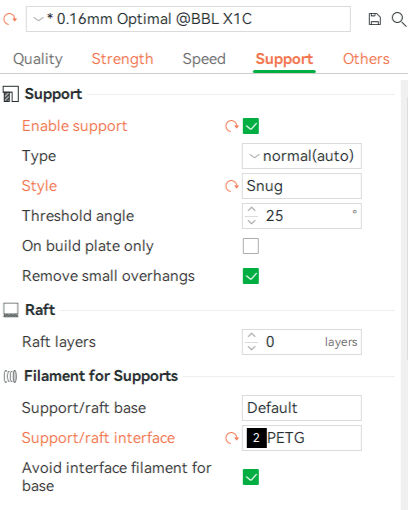
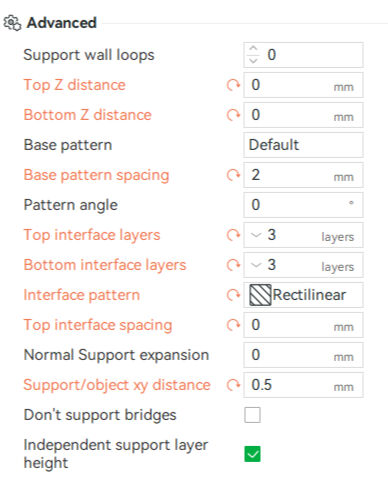
Next, I had to customize many parameters in the "Support" tab, including the advanced settings which required to enable the advanced mode. In general, these settings lead to a rectilinear pattern of the support, which fits snug to the actual print. The materials is still PLA and only the interface layers in the top and bottom, which I specified to three, are printed from PETG. Please have a look at the images for the exact parameters and their values.
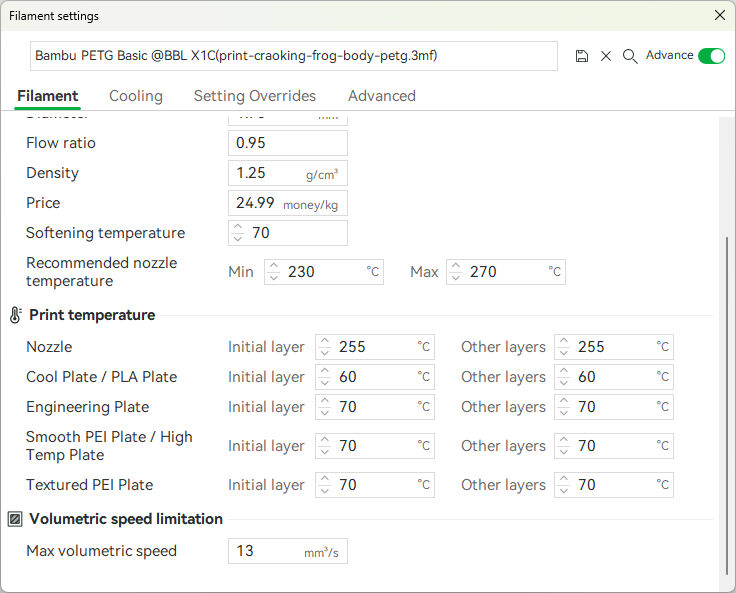
As soon as I selected PETG as the material for the interface, Bambu Studio displayed a warning that the cool plate is not made for PETG and instead I had to increase the bed temperature for it. I did this by clicking on the edit button on the right of the filament. This opened a dialog where I scrolled down to the "Print Temperature" entry. Here, I changed the temperature for the "Cool Plate/PLA Plate" to be 60° for the first and other layers. This change only affects the temperature when printing with PETG.
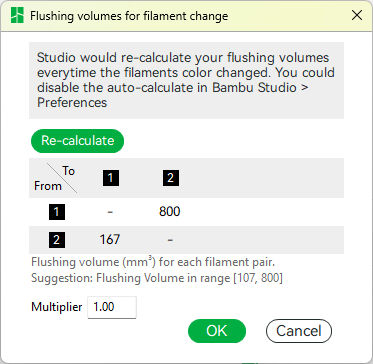
Furthermore, the flushing volume was changed. This is the volume that is purged out of the nozzle when changing the filament. In this case, the flushing volume was changed from 167 to 800 cubic millimeters when unloading PLA (filament 1) and loading PETG (filament 2). Here, I followed the steps of the tutorial and hence I did not really know why I had to change it. However, I suspected that the nozzle had to be cleaned from any residual PLA to avoid any mixing of the materials. A blend of it could decrease the ease to remove PETG from PLA.
As a last step before I started the print, I disabled the prime tower in the "Others" tab as it consumes a hugh amount of material. Then, I let the software slice the print consisting of only the frog and send it to the printer.
This print took a lot longer, in fact about 8.5 hours, potentially due to the many filament changes including heating up or cooling down the nozzle and the bed, purging filament for flushing and loading and unloading filament.
While dismounting the print from the plate by bending it, some of the outer support structures build on the plate did already disconnect. Then, while breaking away the outer support by hand, I noticed that it was incredibly easy to remove. Especially the PLA support was easily removed from the PETG interface.
I proceeded with the inner support inside of the body. As these structures cannot be grasped between the fingers, it was substantially harder to remove them. But in contrast to support solely from PLA, poking through the holes with a pen or a finger removed the majority of the material.
Lastly, to remove the support between the jaws, I used a scraper knife that easily slid between the print and the support structure.
Blocking Support with Interfaces from PETG
More out of curiosity than necessity, I made a third attempt to print the frog. I did not really like removing any support. Due to this and due to the fact, that the overhang on this printer is stable up to an angle of around 75%, I wanted to reduce the amount of support to a minimum. Here, only, the base of the upper jaw is a floating part that needs support. Other structures might be accomplished due to a stable overhang and good bridging quality.
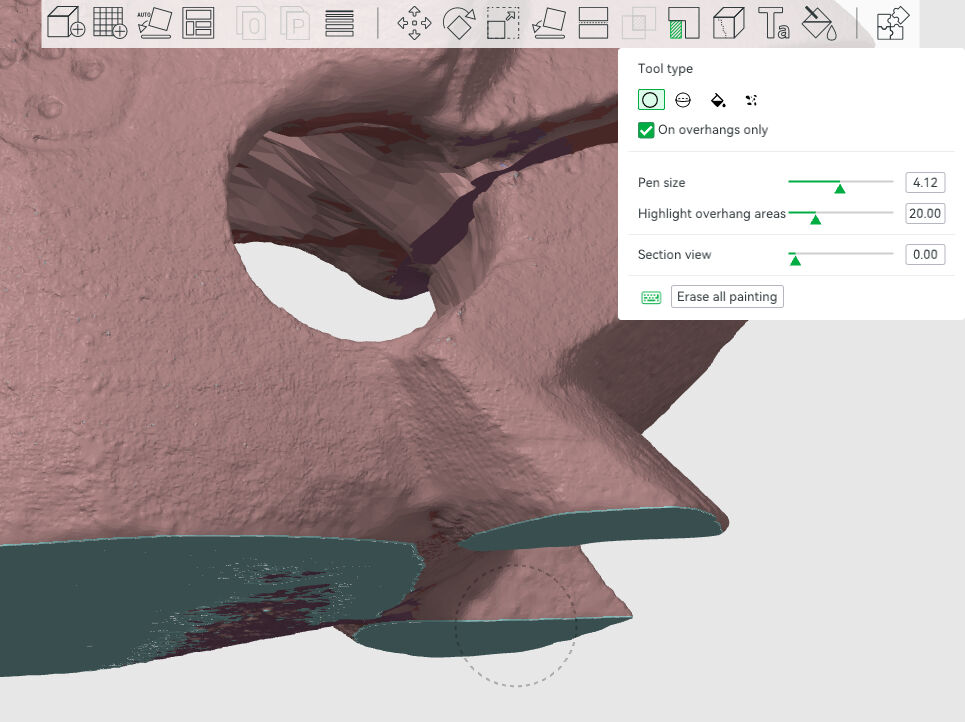
To accomplish such a support, I blocked the supports in areas where I did not want any support. This can be done in the "Prepare" tab of the slicer software. As soon as the object is selected, the tools in the top are enabled, including a tool called "Support painting". Either by clicking on it or by pressing the "L" key, a dropdown appears, where a tool, the pen size and other parameters can be adjusted.
To block support everywhere, I firstly chose the third tool "Fill" and right clicked on the model. This made the whole model sightly red meaning the support is blocked.
Next, I enabled the support only in certain areas. For this, I selected the first tool "Circle" and ticked the box for "On overhangs only". By pressing the left mouse button and dragging the mouse, the touched overhangs become purple. With this technique, I enabled supports only at the base of the upper jaw.
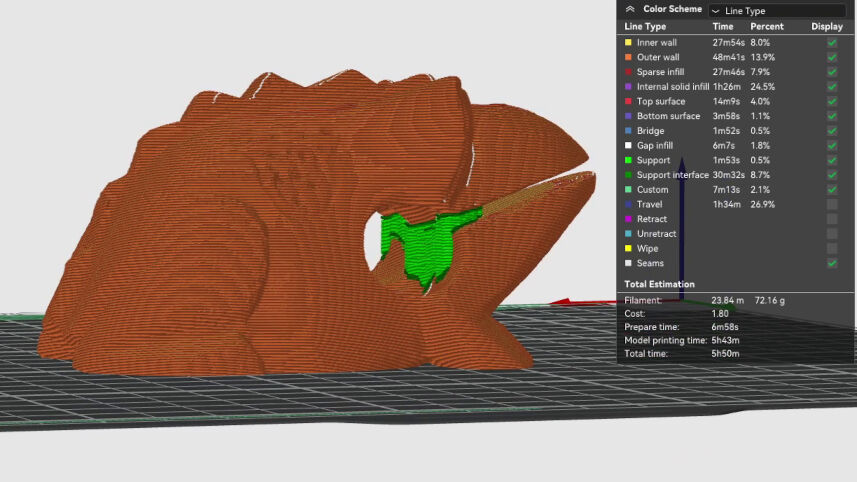
After having done the selection, I sliced the model. To check whether I enabled and disabled the supports as I intended, I went to the "Preview" tab and scrolled through the layers with the scroll bar on the right.
Additionally, the color scheme of the line types helped a lot to distinguish between the model and just the support structures. Here, the support is green and the model is orange. In this case, I had enabled and disabled the supports as I intended.
Lastly, I send the print to the printer. Compared to the previous print, this print did not take nearly as much time but "only" about 5.5 hours.
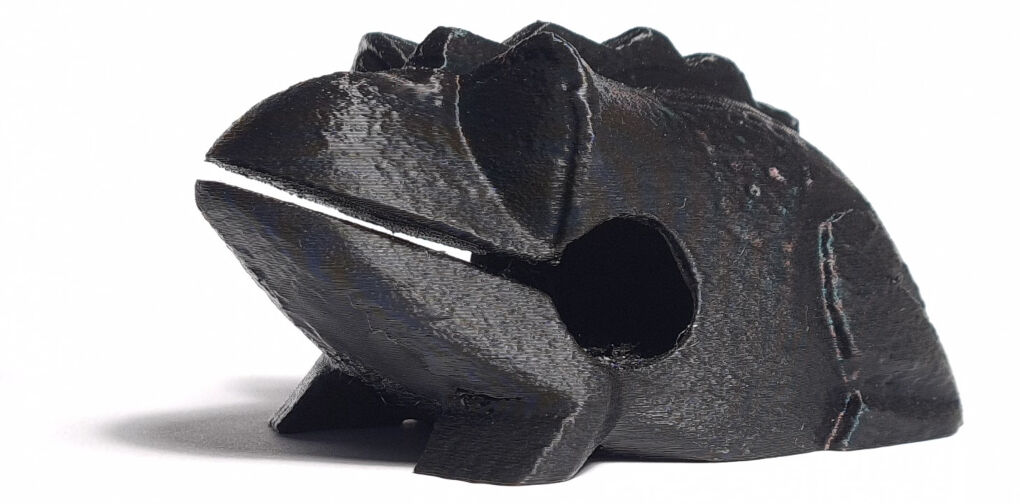
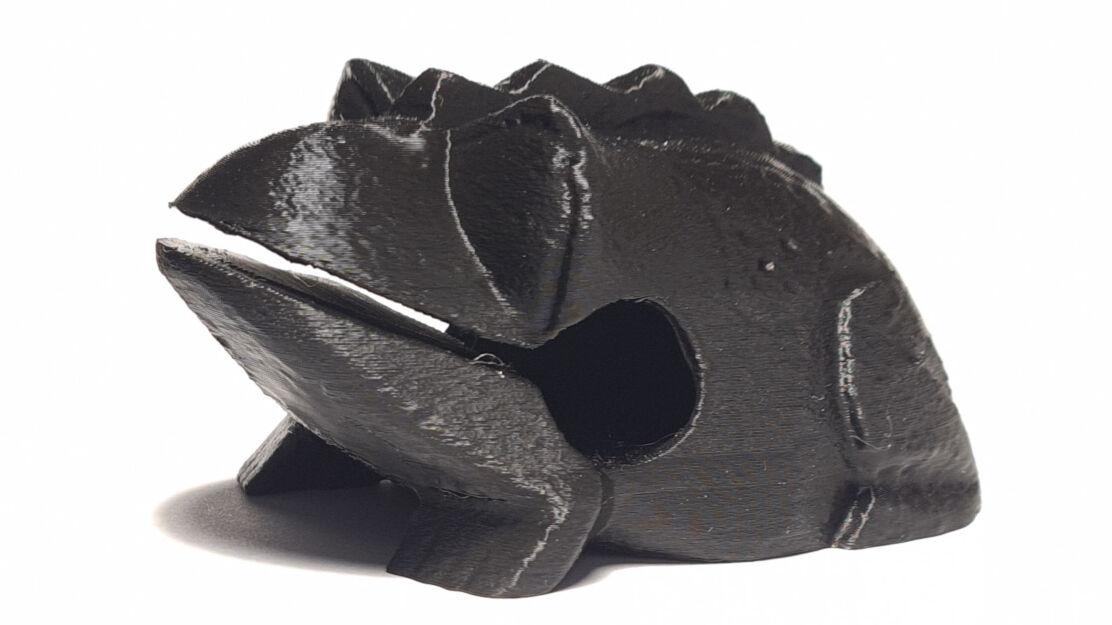
Furthermore, I was a lot happier with this print as it did not require to remove a lot of support structures. Here, I simply placed the scraper knife in the frog's mouth and applied gentle pressure onto the support. This removed the support completely in one part and I was left with the model of the frog only.
In total, I am really happy that the last print worked out as I intended. With this, a substantial amount of printing time as well as material can be saved. However, this is also due to the incredibly good printing quality. In case the overhang had not been that stable, this print would not have been possible.
Comparison of the Croaking Sound
I was really curious how the 3D printed croaking frog would sound like! I guess, you might be keen to hear it as well. Therefore, I added the audio files for you here on my website:
Croaking Sound of the Wooden Frog
Croaking Sound of the 3D Printed Frog
I am slightly disappointed with the sound of the 3D printed croaking frg as its pitch is quite high. Presumably, a higher infill percentage of the 3D print could generate a denser part and by this a lower pitch of the croaking frog.
Design Files for Download
- Croaking Frog (.zip): Contains the .stl files for the stick and the body of the croaking frog (the body as a drastically reduced/simplified mesh)
